1
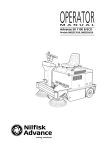
SR 1300 B/ECO
OPERATOR MANUAL
Advance MODELS 908 3013 010, 908 3301 010
FORM No. 56041481(1)00-03
INDEX
56041481
INTRODUCTION / GENERAL INFORMATION................................................................................. 1
UNPACKING ................................................................................................................................... 2
TECHNICAL DATA .......................................................................................................................... 3
DESCRIPTION OF COMMANDS AND CONTROL PANEL ............................................................... 4
PRELIMINARY OPERATIONS.......................................................................................................... 5-7
USE ................................................................................................................................................. 8-15
TURNING THE MACHINE ON.................................................................................................... 8
START/STOP OF THE GASOLINE ENGINE................................................................................. 8
USE OF THE WORKING PROGRAMS........................................................................................ 9
FURTHER PERFORMANCES OF THE MACHINE WITH GASOLINE ENGINE ............................. 15
SIDE BRUSHES ADJUSTMENT AND REPLACEMENT..................................................................... 16
MAIN BRUSH REPLACEMENT........................................................................................................ 17-18
FILTER CLEANING AND REPLACEMENT ........................................................................................ 19-20
MAINTENANCE .............................................................................................................................. 21
BATTERIES: CONTROL AND RECHARGE .................................................................................. 21
BRAKES ADJUSTMENT ............................................................................................................. 22
FRONT LAMP REPLACEMENT................................................................................................... 22
MAINTENANCE OF THE GASOLINE ENGINE............................................................................ 23-24
SUMMARY OF MAINTENANCE CONTROLS (battery version) ............................................... 25
SUMMARY OF MAINTENANCE CONTROLS (gasoline version) ............................................. 26
OPTIONAL ITEMS........................................................................................................................... 27
SAFETY FUNCTIONS AND TROUBLE-SHOOTING ......................................................................... 28
INTRODUCTION / GENERAL
INFORMATION
56041481
INTRODUCTION
This manual will help you get the most from your Sweeper Advance.
Any “left” or “right” indications are always defined with reference to the machine forward movement direction. He has the skilled
personnel, the original parts and the tools needed to meet your requirements. The machine should not be used without protection devices.
For your safety, make sure that all the safety guards are closed or mounted correctly before stating up the machine.
PARTS AND SERVICE
Repairs, when required should be performed by your Authorized Advance Service Center, who employs factory trained service personnell,
and maintains an inventory of Advance original replacement parts and accessories.
Call the Advance Dealer named below for repair parts or service.
Please specify the Model and the Serial Number when discussing your machine.
NAME PLATE
The Model Number and the Serial Number of your machine are shown on the Nameplate on the machine. This information is needed when
ordering repair parts for the machine. Use the space below to note the Model and Serial Number of your machine for future reference.
Model: SR 1300 ECO
Prod. No.: 908 3301 010
Model: SR 1300 B
Prod. No.: 908 3013 010
Serial No.: 94103496
Max axel rear: Kg 280,5/618 lb
Serial No.: XXXXXXXXX
Max axel rear: Kg 157/346 lb
Power: KW 5,8
Max axel front: kg 192,8/425 lb
Power: KW 1,75
Max axel front: kg 267/589 lb
Tot weight: Kg -
Noise level: 80,2 DBA
Tot weight: Kg -
Noise level: 69,8 DBA
Tot weight: Kg 473,3/104,3 lb
(w/o battery)
Type G&E Floor cleaning machine.
Voltage: 24 V
Tot weight: Kg 424/935 lb
(w/o battery)
Type E Floor cleaning machine.
Voltage: 24 V
LISTED Conforms to
UL STD. 558/583
9901122
LISTED Conforms to
UL STD. 583
9901122
MADE IN ITALY
MADE IN ITALY
Nilfisk-Advance, Inc.
Plymouth, MN, USA
www.nilfisk-advance.com
Nilfisk-Advance, Inc.
Plymouth, MN, USA
www.nilfisk-advance.com
GENERAL SAFETY RULES
Carefully follow the rules described below to avoid injury to the operator and damage to the machine.
Carefully read the labels on the machine, do not cover them for any reason and replace them immediately if they become worn or
damaged.
Do not place containers with liquids on the machine.
The machine storage temperature should range between -25°C and +55°C.
Humidity should range between 30 and 95%.
Do not use the machine in an explosive atmosphere.
Do not use the machine as a transport vehicle.
Do not allow the brushes to operate while the machine is stationary to avoid damaging to the floor.
In case of fire, use a powder extinguisher. Do not use water.
Do not bump into shelves or scaffolding where there is a risk of falling objects.
Adjust the operating speed to the floor adhesion.
Do not exceed the declared slope limits to avoid unstable conditions.
When the machine is parked, remove the key and engage the parking brake.
When machine operating malfunctions occur, make sure that they are not caused by a lack of routine maintenance. If not, request
assistance from the service centre.
If parts must be replaced, request ORIGINAL spare parts from a dealer and/or Authorised Retailer.
For all maintenance operations, disconnect the electric power supply to the machine.
Do not remove the guards which require the use of tools to be disassembled.
Do not wash the machine with direct or pressurised water streams, or with corrosive substances.
The machine should be inspected by a service centre every 200 hours of operation.
The machine must never be left unattended, during the scrapping phase, because of the presence of toxic-harmful materials (batteries,
oils, etc.) which are subject to standards that require disposal in special centres.
The machine will not generate damaging vibrations.
MODIFICATION AND IMPROVEMENTS
Our company constantly improves its products and reserves the right to make changes and improvements at its discretion without being
obligated to apply such benefits to the machines that were previously sold.
SAFETY
How to prevent accidents.
No accident prevention programme is effective without the complete co-operation of the person directly responsible for operating the
machine.
Most of the accidents that may occur in a company, on the job or during transfers are caused by the non-observance of the fundamental
safety rules.
A careful and cautious user is the best guarantee against accidents and is more effective than any type of prevention programme.
SAVE THESE INSTRUCTIONS!
1
UNPACKING
56041481
Please check that the following items be supplied with
the machine:
1- envelope with cables for batteries and connector for
battery-charger.
2- technical documents (Spare Parts Catalogue, Manual
for Use and Maintenance and - for the gasoline version
only - Use and Maintenance Manual of the engine).
2
TECHNICAL DATA
VERSION
56041481
SR 1300 ECO
SR 1300B
24V
24V
Engine model
Vanguard OHV
/
Nominal Power at 3600
RPM
4 Hp - 2,95 Kw
/
126 cc (7,69 cu.in)
/
Automatic
/
Drive electrical motor
750W - 315 RPM
750W - 315 RPM
Main brush electrical
motor
500W - 1600 RPM
500W - 1600 RPM
Suction electrical motor
200W - 3300 RPM
200W - 3300 RPM
Centrifugal motor fan
24V - 2800 RPM
24V - 2800 RPM
Side brush electrical
motor
90W - 120 RPM
90W - 120 RPM
Forward speed
6,5 km/h (4,03 mil/h)
6 km/h (3,7 mil/h)
Reverse speed
4,3 km/h (2,6 mil/h)
3,5 km/h (2,2 mil/h)
Voltage
Displacement
Start
Max slope
20%
20%
Main brush
Ø 300 x 800 mm
(11,8 x 31,4 in)
Ø 300 mm x 800 mm
(11,8 x 31,4 in)
Side brush
Ø 460 mm (18,11 in)
Ø 460 mm (18,11 in)
Cleaning width with 1
side brush
1012 mm (40 in)
1012 mm (40 in)
Cleaning width with 2
side brushes
1251 mm (49 in)
1251 mm (49 in)
Front wheel (nr. 1)
Ø 300 mm (12 in)
Ø 300 mm (12 in)
Rear drive wheels (nr. 2)
Ø 300 mm (12 in)
Ø 300 mm (12 in)
112 l (30 gal)
112 l (30 gal)
Dirt container capacity
2
6,5 m
70 sq.ft
6,5 m2
70 sq.ft
90W - 6000 RPM
90W - 6000 RPM
Machine length
1490 mm (58,6 in)
1490 mm (58,6 in)
Machine width
1000 mm (39 in)
1000 mm (39 in)
Panel filter
Electrical filter shaker
Machine height
Weight w/o battery
1250 mm (49 in)
1250 mm (49 in)
473,3 kg (1043 lb.)
424 kg (935 lb.)
7 l (1,8 gal)
/
0,71 l (0,15 gal)
/
Fuel tank capacity
Engine oil tank capacity
Recommended battery: 2 x 12V 105Ah @ 20 for ECO version
4 x 6V 305Ah for BATTERY version
3
DESCRIPTION OF COMMANDS AND
CONTROL PANEL
56041481
2
1
3
13
5
4
7
12
9
6
8
10
11
20
15
18
14
21
16
17
19
1- Voltmeter/hourmeter push button
2- 4 digits display
3- Button for selection/indicator of
working program P1
4- Button for selection/indicator of
working program P2
5- ON/OFF button and indicator of
suction motor
6- Knob for the speed adjustment of the
side brushes
7- Indicator of the operation of left/right
side brushes
8- ON button of filter-shaker motor
9- Emergency stop push button
4
10- ON/OFF main key switch
11- Start/Stop push button for gasoline
engine
12- Selection of forw./reverse speed, light
ON/OFF, horn
13- Steering wheel
14- Pedal for flap lifting
15- Brake pedal
16- Accelerator
17- Parking brake lever
18- Lever for left side brush command
19- Lever for right side brush command
20- Enable button for hopper lifting
21- Hopper control lever (lifting and door
opening)
PRELIMINARY OPERATIONS
The machine-both the gasoline and the battery
version-is equipped with a 24 Volt group of batteries.
Depending on the country where the machine is sold
three possibilities can occur:
1- the battery is supplied with the machine and it is set,
complete with acid solution
2- the battery is supplied with the machine and it is set,
but not complete with acid solution
3- the battery is not supplied.
The battery compartment is under the seat: lift the
compartment lid, toward the steering wheel, and verify
which one of the three possibilities is applied to your
machine.
If the batteries are installed open one of the caps of
every battery and check if they are filled with
electrolyte.
1- If the battery is filled:
1a. Check the electrolyte level in every cell and -if
necessary- fill up with distilled water.
1b. Proceed with a battery recharge according to the
MAINTENANCE paragraph and to the Battery User
Manual.
WARNING: before stating the battery recharge the
battery connector must be disconnected from the
machine.
After the recharge plug the battery connector to the
machine.
5
56041481
PRELIMINARY OPERATIONS
FRONT OF MACHINE
FRONT OF MACHINE
INSTALL BATTERIES ACCORDING
TO DIAGRAM BELOW. OBSERVE
CORRECT POLARITY AT ALL
CONNECTIONS.
WARNING
THIS IS A 36VDC SYSTEM. USE
ONLY THE CHARGER PROVIDED
WITH THE UNIT TO RECHARGE
BATTERIES.
INSTALL BATTERIES ACCORDING
TO DIAGRAM BELOW. OBSERVE
CORRECT POLARITY AT ALL
CONNECTIONS.
WARNING
THIS IS A 36VDC SYSTEM. USE
ONLY THE CHARGER PROVIDED
WITH THE UNIT TO RECHARGE
BATTERIES.
1 BATTERY
2- If the batteries are installed but not filled with acid
solution they must be filled with a solution of
sulphuric acid (density not lower than 1.270 Kg when
at 25°C) according to the instructions specified below
and in the Battery User Manual.
56041481
BATTERY
PLUG
3x2 BATTERIES
244 Ah @ 20
BATTERY FILLING UP WITH ACID SOLUTION
Warning: the battery acid is corrosive; if it comes in
contact with the skin or eyes rinse thoroughly with
water and consult a physician.
2 BATTERY
BATTERY
PLUG
BATTERY
PLUG
The batteries must be filled in a well ventilated area.
Fill every battery cell with acid; the right level is
specified in the Battery User Manual.
After one hour fill up with acid, if necessary.
Let batteries rest for a further hour; then proceed with
a recharge according to the instructions specified in the
Battery User Manual and in the MAINTENANCE
paragraph. During the recharge the battery caps must
be open.
WARNING: before starting the recharge the battery
connector must be disconnected from the machine.
After the recharge close all the cell caps and clean the
top of the battery from any acid remains.
6
BACK OF MACHINE
BACK OF MACHINE
PRELIMINARY OPERATIONS
Connect the battery connector to the machine.
3- If the machine is not equipped with batteries they
must be procured and mounted. It is recommended to
get the assistance of qualified personnel to chose and
set the batteries.
The electrical cables supplied with the machine can be
used for the connection of the batteries.
WARNING: before starting the recharge the battery
connector must be disconnected from the machine.
If the machine is equipped with a gasoline engine
(gasoline version) fill the fuel tank with unleaded
gasoline.
Check the engine oil level (see the chapter
“MAINTENANCE”).
Climb onto the machine and adjust the seat to find the
most comfortable position.
Now the machine is ready to be used.
7
56041481
USE
56041481
TURNING THE MACHINE ON
Insert the ignition key into the panel and turn it
clockwise: the display will show only zeros and after
about three seconds the battery voltage will appear.
Note: the temporary lighting of the side brush
indicators and the short sound from the reverse
speed acoustic indicator correspond to a normal
behaviour.
Wait not less than three seconds before
restarting the machine after switch Off.
Check the charge status of the batteries on the display.
Six different data/functions s can be shown on the
display.
The six functions are described in the following table.
Display
reading
Displayed datum/function
1. Voltmeter: the battery voltage is normally shown on
the display. A block function will be activated in case of
battery undervoltage: when battery voltage will be
about 20V all machine functions will stop, except
traction; in this case the display will show 0205; proceed
then with a battery recharge (see Maintenance
paragraph). A different voltage cut –off value can be
selected for wet and gel batteries respectively.
Normally
fixed.
Flashing
when 0205
appears.
2. & 3. Hourmeter: to read the machine working time - in
hours - press once the yellow display button. By pressing
the button a second time the working minutes will
appear. Just waiting ten seconds the display will show the
battery voltage again
Fixed
4. Total swept surface (yd2): the displayed value will
increase each 1000 yd2
Fixed
5. Daily swept surface (yd2): the displayed value will
increase each 10 yd2
Fixed
2
6. Productivity: sweeping rate yd /h: it depends on the
instantaneous machine working speed
Flashing
Notes:
- to pass to the next function press the yellow display
button once
- the display will return automatically to the battery
voltage from every function
- data 2 and 3 will increase just using the traction
function (accelerator pedal)
- data 4, 5 and 6 will increase only if main broom is
turning AND traction function is used
- when datum 5 is displayed you can reset it just by
keeping the yellow display button pressed 5 seconds.
- If the batteries are charged enough, now it is possible
to start the job (in battery mode).
If the machine is equipped with the gasoline engine,
proceed with the start of the engine itself.
START/STOP OF THE GASOLINE ENGINE
To start the gasoline engine press the red button
shown in the figure; to stop the engine press the same
button again.
8
USE
56041481
USE OF THE WORKING PROGRAMS
When the machine has been turned on and, eventually,
after the start of the gasoline engine, it is possible to
choose one of the two working programs P1 and P2
pressing the relevant button:
P1 is the “light cleaning program” (for internal
environment, i.e. smooth floor, moquette, small debris
etc.)
P2 is the “hard cleaning program” (for external
environment, i.e. asphalt, uneven floor, big debris etc.).
P2
P1
After having pressed the preferred button the relevant
light indicator will turn on, together with the suction
motor indicator.
The temporary activation of the main brush and suction
electrical motors will also occur; (the relevant light
indicators will flash).
Note: the working parameters of programs P1 and P2
are pre-set by the manufacturer of the machine:
if you want to change the pre-set values call the
customer service personnel of your supplier.
Lower the side brush/es pressing the top of the relevant
lever and moving it forward,
Note: on the control panel the corresponding light
indicators will turn on.
To lift the side brush/es press the top of the levers and
move them backward.
Note: the side brush/es, the main brush and the suction
fan will start automatically when the accelerator
pedal will be pressed (AUTO POWER-ON).
9
USE
56041481
It is possible to adjust the side brush/es turning speed
by means of the dedicated knob.
Select the forward speed by means of the command
lever.
Press the accelerator pedal to start the job.
Note: by releasing the accelerator pedal (or setting the
command lever to the neutral position) the
automatic switch off of all functions will occur
within 8 seconds (Auto Power Off) except the
gasoline engine; the light indicators of the
selected working program and of the suction fan
will start flashing. The automatic restart of all
functions will automatically occur as soon as the
accelerator pedal will be pushed again (Auto
Power ON). In order to enable the selection of a
different working program first disable the
previously selected one.
When it is necessary to sweep on a wet floor stop the
suction fan pressing the relevant button, in order to
prevent the damage of the paper panel filter with
water.
10
USE
56041481
In order to get an efficient cleaning function the panel
filter must always be clean.
Press the filter-shaker button, even if the machine is
working.
This operation must be repeated every 10 to 15
minutes, depending on the kind of rubbish to be swept;
before emptying the dirt container and, in any case, at
the end of the work.
During the operation of the filter-shaker the suction
fan will continue to run (no automatic stop will occur).
If you want to stop the suction fan during the filter
shaker operation - two possibilities exist:
1st- to stop the fan by pressing the dedicated ON/OFF
button.
2nd- to wait for the functions automatic power off
(after the release of the accelerator pedal)
To restart the suction fan either press the ON/OFF
button or use the accelerator pedal.
As an alternative - in order to make easier the
operator’s job - the automatic filter sheaking will occur,
every five minutes.
To collect light and bulky waste materials lift the front
flap using the left pedal (do not press the pedal down
for a long time, not to reduce the suction capability of
the machine).
The machine get an automatic breaking function when
the accelerator pedal is released; when necessary the
service brake can also be used (see the figure).
When driving reverse an intermittent acoustic signal
will be heared and all the functions will remain
enabled.
4
In the figure the functions of the command lever are
shown:
1- forward speed
2- reverse speed
3- horn
4- front light On/Off.
The machine is equipped with an emergency stop
button; by pressing this button (red light On) a sudden
stop of the machine will occur and all functions will
turn Off, the gasoline engine too.
To restart the machine turn the red button clockwise
(according to the arrow shown on the button itself).
To restart the normal operation re-select one of the
two working programs P1 or P2 and restart the
gasoline engine.
11
1
3
2
USE
56041481
A safety device is located inside the operator seat: the
drive function - either forward or reverse - is disabled as
soon as the operator will stand up or leave the seat.
At the end of the job turn off the selected working
program (P1 or P2) and switch the gasoline engine Off
pressing the button shown in the figure.
Before leaving the machine make sure that the side
brush/es be lifted, the parking brake engaged and the
master key in the Off position (counter-clockwise).
At the end of the job or whenever it is necessary empty
the rear dirt container.
WARNING: Be sure not to be near to any person and
not to cause any damage or accident.
For safety reasons, the dirt tank control lever can be
operated only if, at the same time, the right hand
presses the safety red button (see figure) and the left
one acts on the control lever.
12
USE
56041481
To lift the tank move the lever rearward as shown in
the figure.
Approach the rubbish-bin.
Release the lever that places itself centrally, push it on
the outside until the tank door is opened to allow the
discharge of the picked up material.
13
USE
56041481
After discharging, release the lever that will move to
the central position so to close the rear tank door.
Move away from the rubbish bin, then move the lever
onward, press again the red button so that the tank
comes back to the starting position (lowered).
WARNING: Don't drive the machine while the tank is
lifted, except than for the moves necessary to
approach/move away to/from the rubbish bin.
Make sure the Hopper Safety Support is in place
whenever attempting to do any maintenance work
under or near the raised hopper.
Lift the hopper to its maximum height by pressing the
red safety button and moving the JOY STICK; put the
safety device in the holding position and lower the
hopper enough to lock it
Lift the hopper (using the joy stick plus the red button)
in order to disengage the safety device; lower the
hopper to the rest (lowest) position.
14
USE
56041481
In the event that the machine must be pushed in Off
condition or without batteries turn the proper key
counter-clockwise (see the figure), in order to
disengage the electrical drive motor and disable the
self-breaking function. Turn and eventually remove the
red key that can be seen after lifting the lid of the
engine/battery compartment.
FURTHER PERFORMANCES OF THE
MACHINE WITH GASOLINE ENGINE
The machine equipped with the gasoline engine is able
to work with full performance even if the gasoline
engine is turned Off; this could occur just because the
machine run out of the fuel or when it is necessary to
work in a closed environment.
In this case the available working time will depend on
the capacity (amper.hours) of the batteries installed on
the machine; on the intensity of the selected working
program; on the charge status of the batteries.
On this machine, in order to guarantee the reliability of
the batteries, two safety features are envisaged:
1- protection against the deep discharge of the battery:
when the battery voltage drops down to about 20 Volt
the automatic stop of all function will occur - except
the traction function. When in this condition, it is
necessary to proceed with the recharge of the battery.
A different voltage cut-off value can be selected for
wet and gel batteries respectively.
2- Protection against the excessive recharge. If the
battery voltage will reach the value of about 29 Volt
the automatic stop of the gasoline engine will occur.; in
any case the machine will still be able to operate only
with batteries. The gasoline engine can be restarted
when the battery voltage will be low enough (at about
24 Volt).
15
SIDE BRUSHES ADJUSTMENT AND
REPLACEMENT
Warning: the following operations must be done with
the machine in Off condition and the master key out,
on a flat floor.
When the side brush is worn its height must be
adjusted.
Loosen the knob. Turn the adjusting disk and tighten
the knob.
To check the adjustment of the brush start it and verify
that the contact with the floor is as shown in the figure.
If necessary repeat the adjustment sequence.
When the brush is remarkably worn out, it is necessary
to replace it. Just press the two tabs inwards and
remove the brush.
Reinstall the new brush by carring out the reverse
operation; press the brush with your hands.
Note: when the brush is replaced set the adjusting
devices to their original position (corresponding to
brush new, with no wear).
16
56041481
MAIN BRUSH REPLACEMENT
Warning: the following operations must be done with
the machine in Off condition and master key out.
This machine is equipped with an automatic control of
the main brush pressure; this also means that the
position of the main brush is automatically adjusted (no
need of manual adjustment).
The complete wear of the main brush - and then the
need to replace it - is notified with code 800 on the
display.
Please meet the following procedure for the main
brush replacement.
Open the side door on the right side of the machine,
unscrewing the knob shown in the figure.
Remove the three knobs used to fix the lid of the main
brush compartment.
Remove the lid of the main brush compartment.
17
56041481
MAIN BRUSH REPLACEMENT
Remove the worn brush.
Remove the plastic adapter from the worn brush, using
a screw driver.
Fix the plastic adapter to the new brush: pay attention
to the correct angle of the brush bristles (look at the
next figure).
Fit the new brush in its compartment, paying attention
to the engagement of the plastic adapter with the hub
on the opposite side of the compartment.
Fit the lid of the main brush compartment using the
three knobs previously removed.
18
56041481
FILTER CLEANING AND REPLACEMENT
The panel filter requires a regular cleaning.
Lift the hopper just to get access to the two rubber
locks used to hold the external cover.
Remove the cover.
Disconnect the electric cable of the filter-shaker motor
and suction fan (the machine must first be turned off
and the key out).
Loosen the locking nuts on the two knobs and remove
the knobs.
Remove the support of the suction fan.
Remove the the panel filter.
Clean the filter shaking it and blowing with
compressed air - pressure not higher than 6 bar- from
the side where the metal protection net is mounted, to
prevent damage to the paper.
19
56041481
FILTER CLEANING AND REPLACEMENT
After cleaning fit the filter and the suction fan holder.
Tighten the two knobs and locking nuts and reconnect
the electric cable..
If the filter is damaged or can not be properly cleaned
replace it with a new one.
Ask to your supplier for the new spare part.
Polyester washable filters are also available.
20
56041481
MAINTENANCE
56041481
BATTERIES: CONTROL AND RECHARGE
Make a frequent check of the electrolyte level inside
every battery cell. The battery compartment is under
the operator seat; lift the lid and open the caps of all
the battery cells: when necessary fill up the cells with
distilled water.
Warning: On the version with gasoline engine the
battery level check must be done every week.
The proper electrolyte level is specified in the Manual
for use and maintenance of the battery.
After filling close all the cell caps and clean the top of
the battery from any acid remains.
Warning: the battery acid is corrosive; if it comes in
contact with the skin or eyes rinse thoroughly with
water and consult a physician.
When necessary proceed with a recharge of the battery
according to the following instructions and taking also
into account what is specified in the Battery User
Manual:
- switch the machine Off and remove the master key.
Warning: before starting the recharge the battery
connector must be disconnected from the machine.
- the recharge must be done in a well ventilated area
- open all the cell caps
- connect the battery connector to the battery charger
connector
- connect the battery charger cable to the mains (please
check that the voltage and frequency of the mains
correspond to the data of the charger)
At the end of the recharge disconnect the battery from
the charger and fit the battery connector to the
machine. Close all the cell caps and clean the top of the
battery from any acid remains.
21
MAINTENANCE
56041481
B
BRAKES ADJUSTMENT
When the pedal brake and/or the parking brake reach
a low efficiency operation some adjustments can be
done: on the rear wheels
- loosen the locking nut A
- turn adjuster B
- tighten locking nut A.
FRONT LAMP REPLACEMENT
In order to replace the front lamp:
- remove the transparent cover
- replace the lamp paying attention to the volt and
watt ratings
- fit the transparent cover.
22
A
MAINTENANCE
56041481
MAINTENANCE OF THE GASOLINE
ENGINE
First: read thoroughly the Use and Maintenance
Manual of the engine.
Here below some recommendations are pointed out.
Check the engine oil level twice per week. In order to
check the engine oil level the right side panel (grate)
must be removed, or simply slid up; save the five screws.
For possible fill up read the oil type specified in the
engine Manual.
To replace the engine oil first the right side wall of the
machine must be removed. In order to get access to the
five screws fixing the right side wall lift the hopper and
engage the hopper safety device: now you can get
access to the two rear screws. Lift the bonnet to get
access to the third screw. Open the right door of the
main brush compartment to access the forth and fifth
screws.
Warning: the engine oil must be replaced the first time
after 50 working hours; the succeeding times it must be
replaced every 100 hours.
NOTE: the engine is equipped with an oil safety device:
this device does not allow the engine start – or will
automatically stop the engine - in the event that the oil
level be too low. No monitor (LED) is provided for this
safety device.
Unscrew the oil level check rod and get access to the oil
empting hose.
Remove the cap from the engine oil emptying hose and
let the oil come out.
Note: it is suggested to remove the oil when the engine
is warm.
Dispose of the used oil in proper special containers.
Note: keep the emptying hose lifted and open during
filling.
Take a funnel and a rubber hose and pour in the new
oil from the hole of the rod for oil level check. Fit the
rod for oil level check and close the emptying hose with
its cap.
At the end of the filling sequence check the engine oil
level.
23
MAINTENANCE
56041481
Clean or replace the air filter according to the
instructions of the engine Manual or whenever it is
necessary.
In order to get access to the air filter the engine
assembly must be slid out; to slide out the engine
assembly first the right side wall of the machine must
be removed (see engine oil replacement procedure for
right side wall removal).
Then two screws must be loosened (17 mm wrench
required) to allow to slide out the engine plate/
assembly
Now the engine air filter can be reached (save two
screws).
24
SUMMARY OF MAINTENANCE
CONTROLS (battery version)
56041481
Warning: the following interventions must be done
with machine in Off condition and master
key out. All the periodic maintenance
operations must be performed by skilled
personnel or by an authorized service centre.
Note: the battery life will depend on a good periodic
maintenance (check of the level of the
electrolyte and of battery voltage). Besides it
must be taken into account that an unused
battery is submitted to a self-discharge
phenomenon. In the event that the machine is
not used for a long time (e.g. 3 or 4 weeks) it is
necessary TO RECHARGE THE BATTERY; infact
the battery voltage MUST NEVER drop down
below 20 Volt.
CONTROL
Battery liquid level and
voltage
check
Check the carbon brushes of
all electrical motors and
replace them if worn
Belt tension
Brake adjustment
Filter shaker
Nut and screw tightness
Wear of main brush and side
brushes
Panel filter cleaning
Sealing of gaskets of filter
compartment and of flaps
GREASE:
chain of the steering crown
25
UPON
DELIVERY
EVERY
30
HOURS
•
•
EVERY
50
HOURS
EVERY
100
HOURS
EVERY
400
HOURS
OR EVERY TWO WEEKS
•
•
•
•
•
•
•
•
•
•
•
•
SUMMARY OF MAINTENANCE
CONTROLS (gasoline version)
56041481
Warning: the following interventions must be done
with machine in Off condition and master
key out. All the periodic maintenance
operations must be performed by skilled
personnel or by an authorized service centre.
Every maintenance intervention on the gasoline engine
must be performed in agreement with the engine User
Manual.
Note: the battery life will depend on a good periodic
maintenance (check of the level of the
electrolyte and of battery voltage). Besides it
must be taken into account that an unused
battery is submitted to a self-discharge
phenomenon. In the event that the machine is
not used for a long time (e.g. 3 or 4 weeks) it is
necessary TO RECHARGE THE BATTERY; infact
the battery voltage MUST NEVER drop down
below 20 Volt.
UPON
DELIVERY
CONTROL
Battery liquid level and
voltage check
Engine air filter cleaning
TWO TIMES
PER WEEK
•
ONE
TIME
PER
WEEK
EVERY
50
HOURS
EVERY
50
HOURS
EVERY
100
HOURS
EVERY
400
HOURS
•
•
•
Panel filter cleaning
1st
Engine oil level check
TIME
•
•
Engine oil replacement
•
1st TIME
Engine RPM check
adjustment*
Check the carbon brushes of all
electrical motors and replace
them if worn
Belt tension
Brake adjustment
•
•
•
•
•
•
•
Filter shaker
•
Nut and screw tightness
Wear of main brush and side
brushes
Sealing of gaskets of filter
compartment and of flaps
GREASE:
chain of the steering crown
•
•
•
*3350 engine shaft RPM with no function working and battery voltage at about 24,5 Volt
26
•
OPTIONAL ITEMS
56041481
High capacity batteries for machine with gasoline
engine
High capacity batteries for machine without gasoline
engine
Battery charger
Different types of main bushes and side brushes
Polyester panel filter (it can be washed)
In order to have more detailed information for all the
optional items get in touch with your supplier of the
machine.
27
SAFETY FUNCTIONS AND TROUBLESHOOTING
56041481
The machine is equipped with many safety devices and
functions which have been described in the USE
paragraphs (both for gasoline and electrical versions).
For instance the automatic stop of all functions to avoid
the deep discharge of the battery has been mentioned;
and also the availability of a special red key for the
disengagement of the self-breaking function has been
notified: this is to be operated when the machine must
be pushed in Off condition.
TO PUSH
TO DRIVE
Besides the intervention of other safety functions is
notified by means of dedicated safety codes appearing
on the display. These safety codes are described in the
following table.
SAFETY
CODE
205
301
302
305
306
307
308
333
800
MACHINE BEHAVIOUR
Stop of all functions except
traction
SAFETY CODE 333
DESCRIPTION OF THE
MALFUNCTION
POSSIBLE INTERVENTION
- Proced with a recharge of the
battery (see maintenance)
-If the machine run on a long
ramp it could be normal: let the
machine cooling 20 minutes
Overtemperature of the drive
-Check the efficiency of the front
Stop of all functions and traction
motor
and rear brakes
-Check the rotation of the rear
drive wheels
-Turn the machine off and wait 5
seconds
The machine does not start or, in
Possible problem with traction
-Turn the machine on
the event it was working, will
control electronic circuit or fuse
-If code 302 will remain call
stop
service
-If the ambient temperature is
high let the machine cool down
20 minutes
High temperature on the
The machine functions will stop
electronic control circuits (95 °C) -If the problem will remain call
the technical service to check the
electrical motors
High temperature on the
-Make the same checks as per
Stop of all functions and traction
electronic control circuits (105 °C) code 305
-Release the accelerator pedal
The machine does not start
Wrong start sequence
before turning the key On
-Check the cable connections of
the potentiometer for traction
Damage of the cable of
control
The machine does not start
potentiometer for traction
-Check the potentiometer for
control
traction control
-Off status of the red key for the
-Turn the machine off
disabling of the self braking
function (see the picture on the -Insert the red key and turn it
The machine does not start
clockwise
top page)
-Possible trouble of motor kables -Check the drive motor cables
(short circuit or open circuit)
Display flashing
Main brush worn
-Replace the main brush
28
The battery is fully discharged
Graphic project VISUAL DIVISION Milan Italy
COD. 56041481(0)00-03
Nilfisk-Advance, Inc.
14600 21st Avenue North
Plymouth, MN, 55447-3408
www.nilfisk-advance.com
Phone:
800-989-2235
Fax:
800-989-6566
©1999 Nilfisk-Advance, Inc.
Plymouth, MN, 55447-3408
Printed in the U.S.A.