1
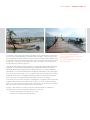
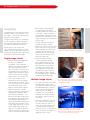
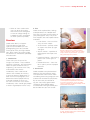
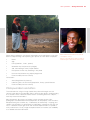
Photojournalism / Change the world
Module 9:
This module will help you understand:
• Why photography is important in telling your story
• The basics of taking a good photo
• How to manage your photos
• The ethical issues of photojournalism
Seeing is believing
We are a visual species. Scientific studies show that visual communication
even trumps verbal as the dominating sense. Our eyes help us pay
attention, remember and understand the world around us.
One reason images are great at grabbing attention is they can communicate a
story in an instant. This can be invaluable in our fast-paced world, where people
often lack time to read a news story let alone another long advocacy report.
We are also more likely to believe what we see with our own eyes than what
is merely reported to us by someone else. So although the written word can
be extremely powerful, when it is coupled with an image the impact on our
thoughts, emotions and decision-making can be magnified exponentially. Citizen
journalists who want to change the world – take note!
What makes a good photo?
Think carefully about choosing the subject of your photo according to the story you
want to tell. When it comes to advocacy and writing for change, generally people
make the best subject rather than objects or landscapes. A good photo will:
• tell a story by giving context
• show people as active rather than posed
• create a sense of connection and show eye contact
• capture emotion and expression (excitement, anger, determination etc).
If your goal is to engage people with gritty issues but to motivate them and
make people believe they can be part of the solution, then it is best to avoid
shots that show apathy and portray people as helpless victims.
© Sheikh Rajibul Islam\duckrabbit\International HIV/
AIDS Alliance
Photojournalism
Access to information on sexual and
reproductive health issues is critical in
combating the HIV epidemic
75
Change the world / Photojournalism
© Nell Freeman/International HIV/AIDS Alliance
76
How to take a good
photo
Every camera is different and you need
to study the manual and practice taking
photos to understand the functions and
how to operate your camera.
However, taking good photographs
requires a lot more skill, knowledge
and experience than simply knowing
how to operate your camera. The
best way to improve is to take lots of
photos and also spend time looking at
the work of good photographers.
Focus
When you take a picture you want the
subject to be sharp. This is done by
pushing the shutter button half-way
down and it will automatically focus on
the subject, then you press all the way
down to take the shot.
A mother in the Ivory Coast washes her
two-month old baby
As you can see from the diagram the
camera is focused on the face of the
woman (the squares indicate where
the camera is focused).
The face will be sharp and the rest of
the image will not be sharp. It is also
possible to use manual focus on more
advanced cameras. However, when
learning there is so much to remember
it is a good idea to stick to autofocus.
Depending on how you set your
camera up (refer to your user manual),
autofocus will select either the closest
point (as it has in this example) or the
centre of the frame, and it could be
that this is not the subject you want
the camera to focus on. For example,
it could be you want the boat to be in
focus and not the woman.
It is best to set your camera up so the
autofocus is set to the centre of the
frame as this gives you more control.
Then if you want the woman to be in
focus, you would:
• put her in the centre of the frame
• press the shutter half-way down
to focus
• re-frame the shot so she is at
the side (keeping the shutter
button half-way depressed)
• once you’re happy with the
composition, press the button all
the way down to take the shot .
Top tips:
• On most cameras you hold the
shutter button down half-way to
focus, then press all the way down
when you’re ready to take the shot.
• Make sure you have a firm stance
and concentrate on holding the
camera as still as possible.
• After taking a photo, check that it
is sharp and not blurry.
• If it is blurry try again. If you are
using the manual settings on your
camera you may need to make
some adjustments to allow more
light in, such as changing the
aperture size, shutter speed or ISO.
• If you are using the automatic setting
and you are holding your camera
really still but the picture is still blurry,
then think about how you can
create more light in your physical
environment. For example, make
sure your subject is positioned with
the light source directly on them,
open curtains and turn on the lights.
If you are inside and can’t get
enough light, consider going outside
if there is more light there.
• For night time and early evening
shots, you will need to allow for
slower shutter speeds. In low light
take every opportunity to steady your
arm, for example by using a wall,
windowsill or tree to lean against.
Photojournalism / Change the world
Light is very important as a photo is made by capturing light on film or the
sensor of a digital camera. Photographers speak of the golden hours which are
around sunrise and sunset, because at these times colours are at their best and
you will get the most beautiful pictures. In the middle of the day when the sun is
high in the sky it creates shadows and it can be difficult to take portraits. Photos
will lack depth and will look flat with faded colours. It is always worth taking your
photos early in the morning or at the end of the day whenever possible.
Normally the rule is to always have the sun from behind you or from the side. If
you take a photo of a subject with the sun from behind the subject, the subject will
be black and you will only see the sun. So always be aware of where the sun is in
relation to your subject. You can also deliberately take a photo directly facing the
sun for a nice sunset or when you want the subject to be just a silhouette.
© Gemma Taylor/Alliance
Light and exposure
Exposure consists of three elements:
Under exposed
1. ISO: the measure of digital camera sensor’s sensitivity to light
triangle
shutter speed
aperture
If you are using the automatic setting on your camera you don’t need to worry
too much about exposure. If you are using manual settings then it is important
to remember that a change in one of the elements will impact the others. This
means that you can never really isolate just one of the elements alone but
always need to have the others in the back of your mind.
1. ISO
In digital photography ISO measures the sensitivity of the image sensor. The
same principles apply as in film photography – the lower the number the less
sensitive your camera is to light and the finer the grain. Higher ISO settings are
generally used in darker situations to get faster shutter speeds (for example an
indoor sports event when you want to freeze the action in lower light) – however
the cost is shots which are grainier.
It’s best to shoot at the lowest ISO setting of the camera, this is usually 100. If you
go higher you will get more noise (weird pixels/grains) in your images. This is no
problem during day time but indoors or at night time this might result in moved/
blurry photos because the shutter time was too long and the camera has moved
while capturing the image. In these circumstances you can use a higher ISO
setting, such as 400. Remember, the higher you go with the ISO the chance of a
blurry picture is less but the quality will go down, especially with cheaper cameras.
2. Aperture
Aperture is the size of the opening in the lens when a picture is taken. When you
take a picture (by hitting the shutter release button of your camera) a hole opens
up that allows your camera’s image sensor to catch a glimpse of the scene you
want to capture.
© Gemma Taylor/Alliance
3. Shutter speed: the amount of time that the shutter is open
the
exposure
Correctly exposed
© Gemma Taylor/Alliance
2. Aperture: the size of the opening in the lens when a picture is taken
ISO
Over exposed
77
78
© Sarah Oughton/British Red Cross
Change the world / Photojournalism
A slower shutter speed captures the
motion of this fisherman in Bangladesh
throwing out his net
Setting the aperture changes the size of the hole; the larger it’s set the more light
gets in, the smaller the hole the less light.
Aperture is measured in ‘f-stops’ also referred to as ‘f/number’ – for example
f/2.8, f/4, f/5.6,f/8,f/22 etc. Moving from one f-stop to the next doubles or halves
the size of the opening in your lens (and the amount of light getting through).
One thing that causes a lot of new photographers confusion is that large
apertures (where lots of light gets through) are given f/stop smaller numbers and
smaller apertures (where less light gets through) have larger f-stop numbers. So
f/2.8 is in fact a much larger aperture than f/22. It seems the wrong way around
when you first hear it but you’ll get the hang of it.
f2.8
more light
f5.6
f8.0
f11
less light
3. Shutter speed
Shutter speed is the amount of time that the shutter is open, which means the
length of time the image sensor ‘sees’ the scene you’re attempting to capture.
• Shutter speed is measured in seconds – or in most cases fractions of
seconds. The bigger the denominator the faster the speed (ie 1/1000 is
much faster than 1/30).
• In most cases you’ll probably be using shutter speeds of 1/60 (which
means it is a sixtieth fraction of a second) or faster. This is because
anything slower than this is very difficult to use without getting camera
shake. Camera shake is when your camera is moving while the shutter is
open and results in blur in your photos.
• If you’re using a slow shutter speed (anything slower than 1/60) you will
need to either use a tripod or some type of image stabilisation.
© Gideon Mendel/International HIV/AIDS Alliance
Photojournalism / Change the world
79
A faster shutter speed freezes the action in
this game of tag - a game used by Sports
in Action to educate youth about HIV
• Shutter speeds available to
you on your camera will usually
double (approximately) with each
setting. As a result you’ll usually
have the options for the following
shutter speeds – 1/500, 1/250,
1/125, 1/60, 1/30, 1/15, 1/8 etc.
This ‘doubling’ is handy to keep
in mind as aperture settings also
double the amount of light that
is let in – as a result increasing
shutter speed by one stop and
decreasing aperture by one stop
should give you similar exposure.
• When considering what shutter
speed to use in an image you
should always ask yourself
whether anything in your scene
is moving and how you’d like
to capture that movement. If
there is movement in your scene
you have the choice of either
freezing the movement (so it
looks still) or letting the moving
object intentionally blur (giving it
a sense of movement).
• To freeze movement in an image
you’ll want to choose a faster
shutter speed and to let the
movement blur you’ll want to
choose a slower shutter speed. The
actual speeds you should choose
will vary depending upon the speed
of the subject in your shot and how
much you want it to be blurred.
• Motion is not always bad. There
are times when motion is good.
For example when you’re taking
a photo of a waterfall and want
to show how fast the water is
flowing, or when you’re taking
a shot of a racing car and want
to give it a feeling of speed.
In these instances choosing
a longer shutter speed will be
the way to go. However you
need to use a tripod or you
run the risk of ruining the shots
by adding camera movement
(a different type of blur than
motion blur).
• Focal length (zoom) is another
thing to consider when
choosing shutter speed. Longer
focal lengths will accentuate
the amount of camera shake
you have and so you’ll need
to choose a faster shutter
speed. The rule of thumb to
use with focal length is to
choose a shutter speed with a
denominator that is larger than
the focal length of the lens. For
example if you have a lens that
is 50mm then 1/60 is probably
okay, but if you have a 200mm
lens you’ll probably want to
shoot at around 1/250.
Top tips:
• The light source should be on the
subject (sun behind you).
• The first two hours and the last two
hours of daylight are the best time
for taking photos.
• Bright sunlight can lead to harsh
shadows and the subject squinting.
Try putting the subject in the shade
for a softer more flattering image.
• Switch off your flash, unless you
have professional equipment and
know how to use it.
• Study your camera manual and
learn how to change the ISO,
shutter speed and aperture so you
can adjust the exposure.
© Sarah Oughton/British Red Cross
Change the world / Photojournalism
© Sarah Oughton/British Red Cross
80
Composition
Diagram 1
Diagram 2
As you frame your shot, imagine this grid overlaid on what you see as you look
through your viewfinder or on the LCD display. With this grid in mind you can
identify four important points in the composition where you should consider
placing the most interesting parts of your subject. For example, when taking
photos of people you should consider positioning their eyes on one of the top
two intersections as you frame your image – see diagram one.
The second diagram shows four lines which are also useful for positioning
elements in your photo.
© Sarah Oughton/British Red Cross
The rule of thirds is an excellent guide for creating compelling compositions.
The basic principle is to imagine breaking an image down into thirds, both
horizontally and vertically, so that you have nine parts.
Top left: Young woman on an early
morning errand in Sierra Leone
Above: In Sierra Leone a mother with
a baby strapped to her back washes
clothes in the river
© Sarah Oughton
© Sarah Oughton/British Red Cross
Photojournalism / Change the world
The theory is that if you place points of interest in the intersections or along the
lines that your photo becomes more balanced and helps a viewer interact with
the image more naturally. Studies show that when viewing images people’s eyes
usually go to one of the intersection points most naturally rather than the centre
of the shot – using the rule of thirds works with this natural way of viewing an
image rather than working against it.
The rule of thirds applies equally to photos in a landscape composition (see above
opposite), as well as portrait composition (see opposite). However, for the Key
Correspondents website (and for most websites) always try to take a landscape
composition, as this works better due to the design and layout of most web pages.
The rule of thirds technique is just as important for shots of landscape as those
of people and horizons should be positioned along one of the horizontal grid
lines, which you can imagine being overlaid on the two shots above.
One of the most common mistakes in photography is forgetting to pay attention
to getting the horizon exactly horizontal. As you can see in the picture above
right, it’s an easy mistake to make. When framing your shot, always think about
the rule of thirds and always double check your horizon.
Using the rule of thirds can take a little time and practice for it to become
second nature. The most important questions to ask are:
• What are the points of interest in this shot?
• Where am I intentionally placing them?
Top left: A community affected by a
cyclone along Bangladesh’s coast in the
Bay of Bengal
Top right: A boat moored at a jetty at a
lake in Guatemala
81
Change the world / Photojournalism
Background
Backgrounds present both
opportunities and challenges to
photographers. On the one hand they
can put a subject in context and make
it stand out in a way that highlights it
wonderfully – but on the other hand
backgrounds can overwhelm subjects
and distract from them.
Strategies for dealing with distracting
backgrounds:
Checking the background before
taking the shot is vital to avoid making
mistakes in photographs. Look for
colours that don’t fit with the rest of the
image, bright patches that might distract
the eye, lines that clash, people that
don’t belong, trees or poles sprouting
out the top of people’s heads etc.
Changing your shooting angle if
you have distracting elements in the
background of a shot is probably
the first thing you should consider.
This might mean rotating around
your subject but could also include
getting down low to make the sky the
background or even getting up high
and shooting down onto your subject
to make the background the ground.
Moving your subject is a simple
technique but can make a huge
difference to the background and is
another effective strategy. Often asking
the subject to take a step to the left or
right will fix things either by putting the
distraction behind them or by putting it
out of frame.
Using aperture to blur backgrounds
is one of the most useful techniques to
learn as a way to combat distractions
in backgrounds (and foregrounds).
What you’re trying to achieve is a nice
blurred background where you can’t
really make out what’s going on. The
easiest way to do this is to use a wide
aperture. The wider your aperture
the more blurry your background will
become. Remember a wide aperture is
denoted by a low f-stop, such as f2.8.
Using focal length to blur
backgrounds is another way to help
get your backgrounds nice and blurry
and requires a lens with a long focal
length which you use to zoom in.
Placing subjects in front of open
spaces will also help to make the
background more blurry. For example
if you have the choice between
shooting your subject standing right
in front of a brick wall or standing in
front of an open field – the open field
shot will have a much more blurred
background simply because the brick
wall is just centimetres from your
subject and inside the focal range
whereas an open field stretches off
into the distance where everything will
be out of focus.
Filling your frame with your
subject is one of the most effective
ways of removing distractions from
backgrounds. Get up close and/or
use your zoom lens to tightly frame
the shot and you’ll not only remove
distractions but could end up with a
high impact shot as well.
© Sarah Oughton/British Red Cross
82
Woman standing outside her home in
Sierra Leone
83
© Gemma Taylor/Alliance
© Gemma Taylor/Alliance
Photojournalism / Change the world
Point of view
Top tips
One of the most effective ways to make your images more interesting to the eye
is to change the angle that you’re shooting from.
• Move in close: get physically close
or zoom in on your subject to
reveal interesting details, such as
a person’s freckles, wrinkles or an
arched eyebrow.
• Move your subject from the middle:
the centre of your picture is not
always the best place for your
subject. Bring your photos to life by
simply moving your subject away
from the middle of your picture.
Remember the rule of thirds.
• Lock the focus: if your subject is
not in the centre of the photo, you
need to lock the focus to create
a sharp picture. First, centre the
subject and press and hold the
shutter button halfway down.
Reposition your camera (while still
holding the shutter button) so the
subject is away from the centre and
press the shutter button all the way
down to take the picture.
• Be ready: keep your camera on
you and not packed in your bag
so it’s easy to take a shot at short
notice. Ensure that you have
enough batteries, film or memory
to last the day.
These photos of boats in Malaysia illustrate this point. Of course perceptions
about photos are subjective and the angle you choose will also depend on the
context and story you are trying to communicate.
In the first picture taken with a wide angle you get a sense of setting, scale and
landscape, but there is little indication of the human element of the story. The
second picture taken much closer up gives a completely different feeling. You
see the fishermen and you get a different sense of the scale of the fishing boats
in relation to the people and the work involved.
Not only does changing the angle you shoot from impact the feeling of size
of your subject but it also affects the light and shade and patterns. Always try
taking shots of your subject from different angles. While standard wide angle
shots can be good for context, getting in really close and finding unusual angles
can bring a ‘wow’ factor to your shot.
The variety of perspectives that you can shoot images from is only limited by
your imagination.
A photograph has the ability to convey
emotion, mood, narrative, ideas and
messages – all of which are important
elements of storytelling.
The gift of storytelling isn’t something
that just happens – good storytellers
are intentional about learning how to
tell stories and practice their craft.
Stories come in all shapes and
sizes. Some are long (novels or even
trilogies of novels) but others are short.
Thinking photographically, short stories
might be just one or two images.
Single image stories
• Most newspaper photography
fits into this category of
storytelling – one image that
attempts to capture the essence
of an accompanying written
story. They don’t have the luxury
of multiple frames to introduce,
explore and conclude so almost
always tell the story of a single
event rather than a longer one.
• Such shots need to have
something in them that grabs
the attention of a viewer. They
also will usually have visual and/
or narrative focal points that
lead the viewer into the photo.
• Short story photos are often
shots that leave the viewer of the
photograph wondering about
what they are looking at – not
because they don’t understand
it but because they intrigue and
leave people imagining what is
going on behind the image and
what other future images of the
scene might look like. In a sense
these single image stories are
often just as powerful because
of what they don’t include in the
shot as to what they do include.
• When telling a story through
a single image think about
including more than one person
in the shot – when you do this
you introduce ‘relationship’ into
a photo which will conjure up all
types of thoughts in the viewers
of your shots.
• Having said that, sometimes
carefully framing a second
person out of your shot can add
to the story you’re trying to tell.
Leaving evidence in the shot of
a second unseen person can
add questions to your viewers’
minds. Unseen elements of a
photo can add a lot.
• Also think about context
– what’s going on around
your subject? What’s in the
background? What does the
other elements of the photo
say about your subject and
what’s going on in their lives?
Of course you don’t want to
be too obvious about setting
your background up – doing so
could lead to clichéd shots.
Multiple image stories
• One of the mistakes many new
photographers make is that
they find they need to put every
possible element of a story or
scene into each photograph
that they take. This leads
to photos that can be quite
cluttered, that have too many
focal points and that confuse
the viewer.
• One way to avoid this and still
tell a story with your images is
to take a series of shots. In a
sense what you’re doing here
is a step towards shooting a
movie (a movie is a sequence of
many thousands of images run
together to tell a story).
Rachel, 30, at home in Walvis bay, Namibia.
© Gemma Taylor/International HIV/AIDS Alliance
Storytelling
© Gemma Taylor/International HIV/AIDS Alliance
Change the world / Photojournalism
As a transgender woman Rachel was rejected
by her own family at age 12. Here she is with
her neighbour’s baby.
© Gemma Taylor/International HIV/AIDS Alliance
84
She likes the attention she gets as a sex
worker. “I feel a diva, I feel like a celebrity, I
feel like Beyoncé! When Beyoncé walks into a
room everyone turns and looks at her.”
Good stories don’t just happen.
They take planning and some
type of structure. Before you start
photographing your story consider
what type of shots you might need to
tell it. Basic stories will usually include
the elements of: introduction, plot/body
and conclusion.
1. Introduction
These shots put the rest of the
images into context. They introduce
important characters, give information
about the place where the story is
happening, set the tone of the story
and introduce the themes.
Introductory shots need to lead
viewers into the body of the story.
If you think about a good novel, it’s
often the first few paragraphs that
determine whether people will buy
and read the book in full or not –
the same is true with visual stories.
Introductory shots should give people
a reason to go deeper into the story.
Good stories explore ideas, feelings
and experiences on a deeper level.
Plot shots will make up the majority of
your photographic story. They show
what happens but also explore themes
and ideas:
• Issue themes – the crux of the
story, the main subject.
• Visual themes – perhaps colors
or shapes that come up again
and again.
• Stylistic themes – repetition of
photographic techniques and
styles.
• Locational themes – reoccurring
photos from similar types of
places.
• Relational themes – shots that
focus upon a person or people
over time.
3. Conclusion
Good storytellers are quite intentional
about the way they end their stories.
Last impressions count and it’s worth
considering what lasting image you want
to leave with the viewer of your photos.
By no means do you need to tie
up your story neatly (good stories
sometimes leave people feeling
unsettled and wanting resolution) but
do consider how you want to end.
Rachel routinely tests for HIV and advises
other sex workers to do the same, as well as
using condoms to prevent HIV: “I can’t do a
risky job and ignore my health.”
© Gemma Taylor/International HIV/AIDS Alliance
Structure
2. Plot
She has established ‘Voice of Hope’, a
community-based organisation which aims
to increase sex workers’ access to health
services, and improve their knowledge of their
fundamental human rights.
© Gemma Taylor/International HIV/AIDS Alliance
• Series of shots used to tell a
story can be anything from
two or three shots arranged in
a frame or collage through to
hundreds of shots arranged in
an album (online or printed).
85
© Gemma Taylor/International HIV/AIDS Alliance
Photojournalism / Change the world
Rachel is a strong role model: “Let’s be proud
of who we are, as a sex worker, as a transwoman, but first and foremost a human being,
with dignity and integrity.”
Change the world / Photojournalism
© Sheikh Rajibul Islam\duckrabbit\International HIV/AIDS Alliance
86
Managing your photos
Editing
Novels never go to press in their original form. They generally take a lot of
reworking and editing to get them into a form that will work. The same is usually
true with photographic storytelling.
Editing happens on a number of levels and ranges from the editing of single
photos (cropping, sharpening, enhancing of colors etc through software
programmes such as Photoshop) through to the editing and presentation of the
overall series of shots.
Good photographers take a lot of photos, but they know they won’t all be
winning shots. The most important part of the editing process is being ruthless
with your selection of photos. Remember photos should grab attention and
increase the impact of a story.
Always keep two sets – one with all your images and one with your carefully
edited selection of the very best shots.
Crediting and captions
Crediting photographs is standard international practice. Crediting, and the
inclusion of the copyright symbol – © – in the credit, is especially important
on the web, because of the ease with which images can be copied. Crediting
also facilitates the subsequent identification and tracking of the image, and
acknowledges the photographer.
Captions are important because they provide additional context about the
image. Whenever possible, a caption should include the name and age of the
principal subject(s) and the country and locality where the image was taken.
If a photograph is older than the text story it accompanies, it is important to
also reference the year the image was taken. Do not repeat information that
is already evident by looking at the image: use captions to make an additional
advocacy point about your subject.
Young people aged 15-24 account for 40%
of new HIV infections globally. Over half of
Ethiopia’s population is in this age group
© Sheikh Rajibul Islam\duckrabbit\International HIV/
AIDS Alliance
© Benjamin Chesterton\duckrabbit\International HIV/AIDS Alliance
Photojournalism / Change the world
When taking a photo this is the basic information you should always try to write
down to help with filing and captioning your photos at a later date. For people:
Above left: Momina walks her six year old
son Rapira to school
•Name
Above: Youth club dancer Samson wants to
make Ethiopian culture known to the world
•Age
•
Family (brothers, sisters, parents)
•
Where do they live (country/city/region)
•
Job, volunteering or family responsibilities
•
Description of what they are doing in the photo
•
How are they linked to any project/programme
•
Photo number (from the camera)
For location:
•
Area (village/town/city/country)
•
Interesting facts on community/population, history, special features
•
Photo number (from the camera)
Photojournalism and ethics
The motivation for using an image should always be well thought out. Ask
yourself, what does the image add? Does it enhance the viewer’s understanding
of a situation? Does it allow the viewer to learn something about the subjects,
how they live or their attitudes?
Most importantly, be sure to use images in their accurate context. Your
photographs should be documentary depictions of real people, in real situations.
Misrepresenting that situation, by – inadvertently or intentionally – implying your
subjects are someone, or somewhere, or implicated in something, that they are
not, is a violation of their right to fair and accurate representation, as upheld in
many national laws. Finally, image misrepresentation can weaken your credibility
as a reliable source of information.
87
Change the world / Photojournalism
© Sarah Oughton/British Red Cross
88
The need for special protection of children and women depicted in images is
especially crucial when addressing controversial or culturally sensitive topics,
such as child labour, sexual exploitation, gender violence or discrimination,
recruitment of child soldiers, trauma, and the stigmatising impact of these and
other issues, such as HIV.
When photographing or filming a child, the child’s best interests should always
be the primary consideration. Filming or photographing a child should be a
positive experience for them and they should always be accompanied by a
parent or guardian. Informed consent (including a signed model release form)
must be obtained for all vulnerable people and children (see module three on
interviewing for further information).
It is important that images of children portray the reality of their lives but also
respect their dignity, privacy and rights. Children should never be depicted in
erotic, seductive, provocative poses or contexts (even if illustrating the trafficking
of girls, for instance).
Ensure that all children represented in images are fully dressed. Do not use
images of nude children, children that appear to be wearing no clothes, children
in transparent clothes or children with their genitals or upper body uncovered.
Children that have experienced violence, exploitation or have been otherwise
abused should not have their faces displayed or be represented in a way that
may lead to their identification. Where possible, show children being active and
resourceful and where relevant, include families, parents or guardians.
A young girl in remote village in Mali drinks
water from a small bucket during a food
crisis (2012)
Tips for photographing
children:
• Avoid looking down on children –
use low angles
• Try to get natural candid shots
when they are not posing
• Get permission from them and
their guardian – make sure that
telling their story and revealing
their identity will not bring
repercussions within
their community
Photojournalism / Change the world
© International HIV/AIDS Alliance
Rashida, a young transgender woman
from Mymenshing, Bangladesh, finds it
challenging to be accepted for who she is
in a very conservative society
While some images have to illustrate
reality and need, they shouldn’t
compromise a person’s dignity.
Images of ‘needy’, vulnerable
people, may generate support in
the short-term, but they can often
perpetuate the negative opinion
that a poor country’s problems will
never be solved. This doesn’t help
the efforts of countries that are
seeking international investment, and
a stronger voice in global decisionmaking processes.
Key Correspondents should think
about how their imagery can promote
gender equality by showing women
as equal to men, actively engaged in
their community and bringing about
change. Think about challenging visual
stereotypes of women as powerless,
passive or dependent victims.
Always ask yourself: ‘If I was this
person, would I want my story told in
this way?’
If your story focuses on a specific
individual, but they do not want to be
identified in a photo, you have to find
a different way to tell the story visually.
You could ask them if you could take
a photo from an angle that would not
reveal their identity.
However, if your subject is not
comfortable being photographed at
all, then you need to get creative and
think about the different elements in
the story. Can you photograph their
anti-retroviral medication, or their drugusing equipment? Does the story refer
to a specific clinic? Could you go there
and ask for permission to photograph
the waiting room? Is hunger a big
issue in the story? If so get a picture of
the subject’s empty bowl.
89
Change the world / Photojournalism
© Benjamin Chesterton\duckrabbit\International HIV/AIDS Alliance
90
Rapira wants to be a doctor when he’s
older so that he can treat people like his
mother who is living with HIV
Exercise
Resources:
You have one hour to take 50 photos.
This is an opportunity to experiment
and try out different techniques, such
as choosing a subject and taking
many shots from different angles,
for example:
These resources provide excellent
information to further develop your
photojournalism skills:
• climbing above it
• finding a weird angle
• lying or crouching in front of it
• putting the camera on the
ground and chancing it.
Also, remember to try:
• the rule of thirds
• blurring the background
• playing with different light
sources.
Resource Media
Seeing is believing: a guide to visual
storytelling best practices:
resource-media.org/visual-story-lab/
report/
World Pulse
This citizen journalism curriculum has
many excellent modules, including one
on multimedia storytelling:
worldpulse.com/pulsewire/
solutions/71046