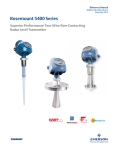
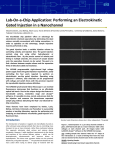
1
P/ACE MDQ User’s Guide ™ 32 Karat™ 8.0 A33115AB November 2009 Beckman Coulter, Inc. 250 S. Kraemer Blvd., Brea, CA 92821 © Copyright 2009 Beckman Coulter, Inc. Copyright, Licenses and Trademarks Copyright © Beckman Coulter, Inc., 2009. All rights reserved. No part of this publication may be reproduced, transcribed, transmitted, or translated into any language in any form by any means without the written permission of Beckman Coulter, Inc. Licenses and Trademarks Beckman Coulter® is a registered trademark of Beckman Coulter, Inc. System Gold® is a trademark of Beckman Coulter, Inc. 32 Karat™ Software is a trademark of Beckman Coulter, Inc. Microsoft® and Windows are trademarks of Microsoft Corporation. Table of Contents Section 1 Introduction to CE Overview . . . . . . . . . . . . . . . . . . . . . . . . . . . . . . . . . . . . . . . . . . . . . . . . . . . . . . . . . . . . . 1 General Description . . . . . . . . . . . . . . . . . . . . . . . . . . . . . . . . . . . . . . . . . . . . . . . . . . . . . 1 Common Modes of Electrophoresis . . . . . . . . . . . . . . . . . . . . . . . . . . . . . . . . . . . . . . . . . 1 Capillary Zone Electrophoresis (CZE) . . . . . . . . . . . . . . . . . . . . . . . . . . . . . . . . . . . . . . 1 Micellar Electrokinetic Capillary Chromatography (MEKC) . . . . . . . . . . . . . . . . . . . . . . 2 Capillary Gel Electrophoresis (CGE) . . . . . . . . . . . . . . . . . . . . . . . . . . . . . . . . . . . . . . . 2 Capillary Isoelectric Focusing (cIEF) . . . . . . . . . . . . . . . . . . . . . . . . . . . . . . . . . . . . . . . 2 Capillary Electrochromatography (CEC) . . . . . . . . . . . . . . . . . . . . . . . . . . . . . . . . . . . . 2 Section 2 System Overview Main Components . . . . . . . . . . . . . . . . . . . . . . . . . . . . . . . . . . . . . . . . . . . . . . . . . . . . . . 3 The Sample Handling System . . . . . . . . . . . . . . . . . . . . . . . . . . . . . . . . . . . . . . . . . . . . 5 The Capillary Cartridge . . . . . . . . . . . . . . . . . . . . . . . . . . . . . . . . . . . . . . . . . . . . . . . . . 7 Syringe Pump . . . . . . . . . . . . . . . . . . . . . . . . . . . . . . . . . . . . . . . . . . . . . . . . . . . . . . . . . 8 High Voltage Power Supply . . . . . . . . . . . . . . . . . . . . . . . . . . . . . . . . . . . . . . . . . . . . . . . 8 LED Indicators . . . . . . . . . . . . . . . . . . . . . . . . . . . . . . . . . . . . . . . . . . . . . . . . . . . . . . . . . 9 Cartridge and Tray Cover Interlocks . . . . . . . . . . . . . . . . . . . . . . . . . . . . . . . . . . . . . . . . 10 Opening the tray cover . . . . . . . . . . . . . . . . . . . . . . . . . . . . . . . . . . . . . . . . . . . . . . . . 10 Opening the cartridge cover . . . . . . . . . . . . . . . . . . . . . . . . . . . . . . . . . . . . . . . . . . . . 10 UV Detector Optics . . . . . . . . . . . . . . . . . . . . . . . . . . . . . . . . . . . . . . . . . . . . . . . . . . . . . 11 The Photo Diode Array (PDA) Detector . . . . . . . . . . . . . . . . . . . . . . . . . . . . . . . . . . . . . 13 Laser Induced Fluorescence Detector . . . . . . . . . . . . . . . . . . . . . . . . . . . . . . . . . . . . . . 15 The Laser Modules . . . . . . . . . . . . . . . . . . . . . . . . . . . . . . . . . . . . . . . . . . . . . . . . . . . . . 18 488 nm Laser Module . . . . . . . . . . . . . . . . . . . . . . . . . . . . . . . . . . . . . . . . . . . . . . . . . 18 635 nm Laser Module . . . . . . . . . . . . . . . . . . . . . . . . . . . . . . . . . . . . . . . . . . . . . . . . . 19 Using Other Lasers with the LIF Detector . . . . . . . . . . . . . . . . . . . . . . . . . . . . . . . . . . . . 20 Section 3 32 Karat Starting the Software . . . . . . . . . . . . . . . . . . . . . . . . . . . . . . . . . . . . . . . . . . . . . . . . . . . 21 Tool Bar . . . . . . . . . . . . . . . . . . . . . . . . . . . . . . . . . . . . . . . . . . . . . . . . . . . . . . . . . . . 22 Menu Bar . . . . . . . . . . . . . . . . . . . . . . . . . . . . . . . . . . . . . . . . . . . . . . . . . . . . . . . . . . 22 Creating and Configuring an Instrument . . . . . . . . . . . . . . . . . . . . . . . . . . . . . . . . . . . . 22 Creating a New Instrument . . . . . . . . . . . . . . . . . . . . . . . . . . . . . . . . . . . . . . . . . . . . . 22 Configuring the New Instrument . . . . . . . . . . . . . . . . . . . . . . . . . . . . . . . . . . . . . . . . . 23 Auto Configuration . . . . . . . . . . . . . . . . . . . . . . . . . . . . . . . . . . . . . . . . . . . . . . . . . . . 25 Configuration Options . . . . . . . . . . . . . . . . . . . . . . . . . . . . . . . . . . . . . . . . . . . . . . . . . 27 Instrument Options . . . . . . . . . . . . . . . . . . . . . . . . . . . . . . . . . . . . . . . . . . . . . . . . . . . 28 Manual Configuration . . . . . . . . . . . . . . . . . . . . . . . . . . . . . . . . . . . . . . . . . . . . . . . . . 29 Configuration Options . . . . . . . . . . . . . . . . . . . . . . . . . . . . . . . . . . . . . . . . . . . . . . . . . 30 Manual Configuration of the PDA and LIF Detectors . . . . . . . . . . . . . . . . . . . . . . . . . . 30 MDQ User’s Guide PN A33115AB iii Section 4 Direct Control Introduction . . . . . . . . . . . . . . . . . . . . . . . . . . . . . . . . . . . . . . . . . . . . . . . . . . . . . . . . . . 31 Direct Control Window . . . . . . . . . . . . . . . . . . . . . . . . . . . . . . . . . . . . . . . . . . . . . . . . . . 32 Exercise: Conditioning the Capillary . . . . . . . . . . . . . . . . . . . . . . . . . . . . . . . . . . . . . . . . 35 Voltage Setting Parameters . . . . . . . . . . . . . . . . . . . . . . . . . . . . . . . . . . . . . . . . . . . . 38 Section 5 Creating and Editing a Method Introduction . . . . . . . . . . . . . . . . . . . . . . . . . . . . . . . . . . . . . . . . . . . . . . . . . . . . . . . . . . 41 Creating and Editing a Method . . . . . . . . . . . . . . . . . . . . . . . . . . . . . . . . . . . . . . . . . . 41 Initial Conditions Tab . . . . . . . . . . . . . . . . . . . . . . . . . . . . . . . . . . . . . . . . . . . . . . . . . . . 42 Auxiliary Data Channels . . . . . . . . . . . . . . . . . . . . . . . . . . . . . . . . . . . . . . . . . . . . . . . 42 Mobility channels . . . . . . . . . . . . . . . . . . . . . . . . . . . . . . . . . . . . . . . . . . . . . . . . . . . . 43 Temperature . . . . . . . . . . . . . . . . . . . . . . . . . . . . . . . . . . . . . . . . . . . . . . . . . . . . . . . . 43 Peak detect parameters . . . . . . . . . . . . . . . . . . . . . . . . . . . . . . . . . . . . . . . . . . . . . . . 43 Trigger settings . . . . . . . . . . . . . . . . . . . . . . . . . . . . . . . . . . . . . . . . . . . . . . . . . . . . . 43 Inlet and Outlet trays . . . . . . . . . . . . . . . . . . . . . . . . . . . . . . . . . . . . . . . . . . . . . . . . . 43 Detector Initial Conditions . . . . . . . . . . . . . . . . . . . . . . . . . . . . . . . . . . . . . . . . . . . . . . . 44 UV Detector Initial Conditions . . . . . . . . . . . . . . . . . . . . . . . . . . . . . . . . . . . . . . . . . . . 44 Electropherogram channel . . . . . . . . . . . . . . . . . . . . . . . . . . . . . . . . . . . . . . . . . . . . . 44 Filter . . . . . . . . . . . . . . . . . . . . . . . . . . . . . . . . . . . . . . . . . . . . . . . . . . . . . . . . . . . . . . 44 Relay 1 and Relay 2 . . . . . . . . . . . . . . . . . . . . . . . . . . . . . . . . . . . . . . . . . . . . . . . . . . 45 Absorbance Signal . . . . . . . . . . . . . . . . . . . . . . . . . . . . . . . . . . . . . . . . . . . . . . . . . . . 45 PDA Detector Initial Conditions . . . . . . . . . . . . . . . . . . . . . . . . . . . . . . . . . . . . . . . . . . . 46 Electropherogram Scan Data . . . . . . . . . . . . . . . . . . . . . . . . . . . . . . . . . . . . . . . . . . . 46 Filter . . . . . . . . . . . . . . . . . . . . . . . . . . . . . . . . . . . . . . . . . . . . . . . . . . . . . . . . . . . . . . 46 Relay 1 and Relay 2 . . . . . . . . . . . . . . . . . . . . . . . . . . . . . . . . . . . . . . . . . . . . . . . . . . 46 Reference Channel . . . . . . . . . . . . . . . . . . . . . . . . . . . . . . . . . . . . . . . . . . . . . . . . . . . 46 Absorbance Signal . . . . . . . . . . . . . . . . . . . . . . . . . . . . . . . . . . . . . . . . . . . . . . . . . . . 46 Electropherogram Channel Data . . . . . . . . . . . . . . . . . . . . . . . . . . . . . . . . . . . . . . . . . 47 LIF Detector Initial Conditions . . . . . . . . . . . . . . . . . . . . . . . . . . . . . . . . . . . . . . . . . . . . 48 Electropherogram Channel 1 and 2 . . . . . . . . . . . . . . . . . . . . . . . . . . . . . . . . . . . . . . . 48 Signal . . . . . . . . . . . . . . . . . . . . . . . . . . . . . . . . . . . . . . . . . . . . . . . . . . . . . . . . . . . . . 49 Data Rate . . . . . . . . . . . . . . . . . . . . . . . . . . . . . . . . . . . . . . . . . . . . . . . . . . . . . . . . . . 49 Relay 1 and 2 . . . . . . . . . . . . . . . . . . . . . . . . . . . . . . . . . . . . . . . . . . . . . . . . . . . . . . . 49 Time Program . . . . . . . . . . . . . . . . . . . . . . . . . . . . . . . . . . . . . . . . . . . . . . . . . . . . . . . . 49 Separate Dialog . . . . . . . . . . . . . . . . . . . . . . . . . . . . . . . . . . . . . . . . . . . . . . . . . . . . . 51 Rinse Dialog . . . . . . . . . . . . . . . . . . . . . . . . . . . . . . . . . . . . . . . . . . . . . . . . . . . . . . . . 53 Inject Dialog . . . . . . . . . . . . . . . . . . . . . . . . . . . . . . . . . . . . . . . . . . . . . . . . . . . . . . . . 54 Autozero . . . . . . . . . . . . . . . . . . . . . . . . . . . . . . . . . . . . . . . . . . . . . . . . . . . . . . . . . . . 55 Stop Data . . . . . . . . . . . . . . . . . . . . . . . . . . . . . . . . . . . . . . . . . . . . . . . . . . . . . . . . . . 55 End . . . . . . . . . . . . . . . . . . . . . . . . . . . . . . . . . . . . . . . . . . . . . . . . . . . . . . . . . . . . . . . 55 Saving the Method . . . . . . . . . . . . . . . . . . . . . . . . . . . . . . . . . . . . . . . . . . . . . . . . . . . 58 iv 32 Karat 8.0 PN A33115AB Table of Contents Section 6 Running the System Single Run and Sequence Runs . . . . . . . . . . . . . . . . . . . . . . . . . . . . . . . . . . . . . . . . . . . 59 Materials needed: . . . . . . . . . . . . . . . . . . . . . . . . . . . . . . . . . . . . . . . . . . . . . . . . . . . . 59 Single Run . . . . . . . . . . . . . . . . . . . . . . . . . . . . . . . . . . . . . . . . . . . . . . . . . . . . . . . . . . . 61 Programming a Sequence . . . . . . . . . . . . . . . . . . . . . . . . . . . . . . . . . . . . . . . . . . . . . . . 63 Running the Sequence . . . . . . . . . . . . . . . . . . . . . . . . . . . . . . . . . . . . . . . . . . . . . . . . . . 69 Sequence Validation . . . . . . . . . . . . . . . . . . . . . . . . . . . . . . . . . . . . . . . . . . . . . . . . . . 70 Section 7 Integration Description . . . . . . . . . . . . . . . . . . . . . . . . . . . . . . . . . . . . . . . . . . . . . . . . . . . . . . . . . . . 71 Integrating Data . . . . . . . . . . . . . . . . . . . . . . . . . . . . . . . . . . . . . . . . . . . . . . . . . . . . . . . 72 Optimizing Integration . . . . . . . . . . . . . . . . . . . . . . . . . . . . . . . . . . . . . . . . . . . . . . . . . . 74 Integration Parameters . . . . . . . . . . . . . . . . . . . . . . . . . . . . . . . . . . . . . . . . . . . . . . . . 74 Width . . . . . . . . . . . . . . . . . . . . . . . . . . . . . . . . . . . . . . . . . . . . . . . . . . . . . . . . . . . . . 75 Threshold . . . . . . . . . . . . . . . . . . . . . . . . . . . . . . . . . . . . . . . . . . . . . . . . . . . . . . . . . . 76 Integration Results and Reports . . . . . . . . . . . . . . . . . . . . . . . . . . . . . . . . . . . . . . . . . . . 79 Section 8 Calibration Introduction . . . . . . . . . . . . . . . . . . . . . . . . . . . . . . . . . . . . . . . . . . . . . . . . . . . . . . . . . . 81 Analysis Components . . . . . . . . . . . . . . . . . . . . . . . . . . . . . . . . . . . . . . . . . . . . . . . . . . . 81 Qualitative Analysis . . . . . . . . . . . . . . . . . . . . . . . . . . . . . . . . . . . . . . . . . . . . . . . . . . . 81 Quantitative Analysis . . . . . . . . . . . . . . . . . . . . . . . . . . . . . . . . . . . . . . . . . . . . . . . . . 81 Creating a Calibration . . . . . . . . . . . . . . . . . . . . . . . . . . . . . . . . . . . . . . . . . . . . . . . . . . . 82 Developing a Calibration Method . . . . . . . . . . . . . . . . . . . . . . . . . . . . . . . . . . . . . . . . 82 Generating the Calibration Curve . . . . . . . . . . . . . . . . . . . . . . . . . . . . . . . . . . . . . . . . 85 Analyzing Unknowns . . . . . . . . . . . . . . . . . . . . . . . . . . . . . . . . . . . . . . . . . . . . . . . . . . . 88 Section 9 Qualitative Analysis Data Analysis and Reporting . . . . . . . . . . . . . . . . . . . . . . . . . . . . . . . . . . . . . . . . . . . . . 89 Section 10 Mobility Functions of Mobility . . . . . . . . . . . . . . . . . . . . . . . . . . . . . . . . . . . . . . . . . . . . . . . . . . . 93 Mobility Markers . . . . . . . . . . . . . . . . . . . . . . . . . . . . . . . . . . . . . . . . . . . . . . . . . . . . . . 94 Assigning Mobility Values . . . . . . . . . . . . . . . . . . . . . . . . . . . . . . . . . . . . . . . . . . . . . . 94 Mobility Plot . . . . . . . . . . . . . . . . . . . . . . . . . . . . . . . . . . . . . . . . . . . . . . . . . . . . . . . . 96 Demonstration: Using the Mobility Features . . . . . . . . . . . . . . . . . . . . . . . . . . . . . . . . . 97 Peak Identification by Mobility . . . . . . . . . . . . . . . . . . . . . . . . . . . . . . . . . . . . . . . . . . . 100 Section 11 Creating Reports Introduction . . . . . . . . . . . . . . . . . . . . . . . . . . . . . . . . . . . . . . . . . . . . . . . . . . . . . . . . . 101 MDQ User’s Guide PN A33115AB v Creating a Method Custom Report . . . . . . . . . . . . . . . . . . . . . . . . . . . . . . . . . . . . . . . . 102 Modifying a Report Template . . . . . . . . . . . . . . . . . . . . . . . . . . . . . . . . . . . . . . . . . . 102 Saving a Report as a Template . . . . . . . . . . . . . . . . . . . . . . . . . . . . . . . . . . . . . . . . . 105 Report Templates . . . . . . . . . . . . . . . . . . . . . . . . . . . . . . . . . . . . . . . . . . . . . . . . . . . 105 Method Custom Report Templates . . . . . . . . . . . . . . . . . . . . . . . . . . . . . . . . . . . . . . 105 Sequence Custom Report Templates . . . . . . . . . . . . . . . . . . . . . . . . . . . . . . . . . . . . 105 Appendix A 32 Karat Online Help . . . . . . . . . . . . . . . . . . . . . . . . . . . . . . . . . . . . . . . . . . . . . . . . . . . 1 Installation and Maintenance Manual . . . . . . . . . . . . . . . . . . . . . . . . . . . . . . . . . . . . . . 1 Beckman Coulter Service . . . . . . . . . . . . . . . . . . . . . . . . . . . . . . . . . . . . . . . . . . . . . . . 1 Help by e-mail . . . . . . . . . . . . . . . . . . . . . . . . . . . . . . . . . . . . . . . . . . . . . . . . . . . . . . . . 1 Other References . . . . . . . . . . . . . . . . . . . . . . . . . . . . . . . . . . . . . . . . . . . . . . . . . . . . . 1 Appendix B Introduction . . . . . . . . . . . . . . . . . . . . . . . . . . . . . . . . . . . . . . . . . . . . . . . . . . . . . . . . . 1 Ohm's Law . . . . . . . . . . . . . . . . . . . . . . . . . . . . . . . . . . . . . . . . . . . . . . . . . . . . . . . . . . 1 Corrected Migration Time . . . . . . . . . . . . . . . . . . . . . . . . . . . . . . . . . . . . . . . . . . . . . . . 1 Velocity-Corrected Area . . . . . . . . . . . . . . . . . . . . . . . . . . . . . . . . . . . . . . . . . . . . . . . . 1 Mobility . . . . . . . . . . . . . . . . . . . . . . . . . . . . . . . . . . . . . . . . . . . . . . . . . . . . . . . . . . . . 2 Appendix C Overview . . . . . . . . . . . . . . . . . . . . . . . . . . . . . . . . . . . . . . . . . . . . . . . . . . . . . . . . . . . . 1 Appendix D Overview . . . . . . . . . . . . . . . . . . . . . . . . . . . . . . . . . . . . . . . . . . . . . . . . . . . . . . . . . . . . 1 Appendix E Introduction . . . . . . . . . . . . . . . . . . . . . . . . . . . . . . . . . . . . . . . . . . . . . . . . . . . . . . . . . 1 Example 1 . . . . . . . . . . . . . . . . . . . . . . . . . . . . . . . . . . . . . . . . . . . . . . . . . . . . . . . . . . . 3 Example 2 . . . . . . . . . . . . . . . . . . . . . . . . . . . . . . . . . . . . . . . . . . . . . . . . . . . . . . . . . . . 7 Important Notes . . . . . . . . . . . . . . . . . . . . . . . . . . . . . . . . . . . . . . . . . . . . . . . . . . . . . . 9 Appendix F Overview . . . . . . . . . . . . . . . . . . . . . . . . . . . . . . . . . . . . . . . . . . . . . . . . . . . . . . . . . . . . 1 vi 32 Karat 8.0 PN A33115AB Preface Overview Preface Overview The 32 Karat™ User’s Guide is a self-paced introduction to the operation of the Beckman Coulter, Inc. P/ACE MDQ and the 32 Karat Software. It contains a brief introduction to the technique of capillary electrophoresis; an overview if the MDQ hardware; tutorials for the most frequently used software features; and an appendix of useful information. The 32 Karat User’s Guide has been designed to assist users who are new to CE or the 32 Karat Software in beginning to use both the software and the instrument. It is largely built on exercises that are designed to take you step-by-step to a point where you can begin to create your own methods, generate and analyze data, and report results. It does not attempt to cover every possible feature in the system or every aspect of capillary electrophoresis. The on-instrument activities contain specific instructions for users with ultraviolet, photodiode array, and laser induced fluorescent detector systems. Follow the instructions for the detector(s) installed on your system. The activities in this manual are progressive. Each builds on the previous ones. To get the most from this manual, work through all the activities, in order. The activities that teach data reprocessing, calibration, and reporting, are all based on data collected with an ultraviolet detector system. The steps in these procedures are very similar regardless of the detector type used, so these exercises are important for users of all detector types. Data files for the post-run exercises are installed with the 32 Karat Software. If your instrument does not have a UV detector, you can manually configure a virtual UV instrument in the software so that you can do these exercises. Additional information can be found in the 32 Karat Online Help. This can be accessed at any time while using the 32 Karat Software through the Help menu located on the menu bar, by pressing the F1 key while working within the software, or any time you see a “Help” button displayed within an application window. This manual was created by a team of technical writers, scientists, and engineers at Beckman Coulter, Inc. We value your feedback. Please let us know how we can improve future editions of this manual. Send your comments to: [email protected], and include “User’s Manual” in the subject line. Questions concerning the exercises can be sent to the same address. MDQ User’s Guide PN A33115AB vii Preface Instructions for using the Data Samples Instructions for using the Data Samples In some of the exercises in this manual you are asked to open specific data and method files. These are located in the Data Samples folder, which is a sub-directory to the 32Karat folder that was created when your software was installed. The following information is also contained in the Readme.doc file located in the Data Samples folder. IMPORTANT Make sure to read and understand the following before using the sample files. This folder contains the following files: • CE Data Sample 1.dat • CE Data Sample 2.dat • CE Data Sample 3.dat • CE Level 1.dat • CE Level 2.dat • CE Level 3.dat • CE Level 4.dat • CE Level 5.dat • CE PDA Data Sample.dat • CE Calibrate.met • CE Quantitate.met • CE Quality.met • CE ssDNA 40-60.dat Purpose of these files The Data Samples folder contains data and method files to supplement the exercises in the User’s Guide for the 32 Karat Software. The files were created solely for the purposes of this tutorial. They are intended as training tools only, and are not to be used for system validation or any other purposes. viii 32 Karat 8.0 PN A33115AB Preface Instructions for using the Data Samples Using the files These files are referred to by name in the 32 Karat User's Guide. In performing some of these exercises, you will be asked to open one or more of these files. By using these files, the images you see on the computer screen and the images in the training manual will be the same. IMPORTANT Duplicate these files before use. Processing these data files and methods in the 32 Karat Software will cause changes to the files. To keep the original files unaltered and available for later use in these exercises, please follow the steps below. 1. Open Windows Explorer. To open this utility, right-click on the Start button in the Windows toolbar and select Explore. 2. Navigate to the Data Samples folder. It is a sub-directory of the 32Karat folder. 3. In the left-hand pane of the Explorer window, click on the Data Samples folder to open it. 4. From the menu bar, select File | New | Folder. A new folder will be added to the Data Samples folder. The New Folder will be highlighted, which indicates that the name may be edited. Type a new name. The name of the individual who will be using the tutorial exercises in the User’s Guide is a good choice. 5. Select all of the data files listed above, but do not select the new folder. There are several ways to do a multiple file select. Use any one of the following: • Select the first file in the list by clicking on it. Hold down the Shift key, and click on the last file in the list. All the files between these two files will be selected. • Select a file by clicking on it. Hold down the Ctrl key, and click each individual file in the list. • Using the mouse, you can click and drag a box around the files to be selected. 6.When all the files are selected (highlighted), select Edit | Copy from the menu bar. Double click on the new folder to open it. Then select Edit | Paste from the menu bar. You have now created a copy of the sample files in a new folder. When the manual asks you to open a file, open the copy you have just created, and not the original file. WARNING DO NOT USE THE ORIGINAL FILES! Save all methods and sequences you create as part of the tutorial in this new folder. A backup set of files is included in case the originals become altered. These are stored in the file Backup Files.exe. Running this executable file will restore the original set of sample files. When running the backup files program, you may be prompted to over-write existing files. Select Yes. The contents of the Data Samples file will be replaced by this action, including any changes you have made to the original set of data and method files. MDQ User’s Guide PN A33115AB ix Preface Important Information in this Guide Important Information in this Guide The following information describes the notes and warnings used in this document. Beckman Coulter recommends that you review this information before using the MDQ System. WARNING Paragraphs marked by “WARNING” alert you of a potential hazard to your personal safety if you do not adhere to the information stated within the paragraph. CAUTION Paragraphs marked by “CAUTION” indicate that there is a potential danger of equipment damage, software program failure or that a loss of data may occur if information stated within the paragraph is not adhered to or if procedures are executed incorrectly. IMPORTANT Paragraphs marked by “IMPORTANT” contain information about a possible software program failure, draw attention to a specific software setting or point out that a loss of data may occur if information stated within the paragraph is not adhered to or if procedures are executed incorrectly. NOTE Paragraphs marked by “NOTE” contain supplemental or explanatory information concerning the current topic or procedural step. x 32 Karat 8.0 PN A33115AB Safety Information Safety Symbols Safety Information This section provides safety information and instructions for the hardware and accessories of the system. Safety Symbols The symbols displayed below and on the instrument are reminders that all safety instructions should be read and understood before attempts at installation, operation, maintenance, or repair to this instrument are made. When symbols are displayed in this manual, pay particular attention to the safety information associated with the symbol. WARNING WARNING When present, this symbol indicates that a potential hazard to your personal safety exists if information stated within the “WARNING” paragraph is not adhered to or procedures are executed incorrectly. CAUTION This icon accompanies text and/or other symbols dealing with potential damage to equipment. When present, it indicates that there is a potential danger of equipment damage, software program failure or that a loss of data may occur if information stated within the “CAUTION” paragraph is not adhered to or procedures are executed incorrectly. HIGH VOLTAGE Paragraphs marked by this symbol indicate that a potential hazard to your personal safety exists from a high voltage source. BIOHAZARD Paragraphs marked by this symbol indicate that a potential hazard to your personal safety exists from a biological source. LASER LIGHT Paragraphs marked by this symbol indicate that a potential hazard to your personal safety exists from a laser source. MDQ User’s Guide PN A33115AB xi Safety Information Safety Symbols SHARP OBJECTS Paragraphs marked by this symbol indicate that a potential hazard to your personal safety exists from unblunted corners or other appendages on the outside or inside of the equipment. HOT SURFACE Paragraphs marked by this symbol indicate that a potential hazard to your personal safety exists from heated surfaces or other appendages on the outside or inside of the equipment. PROTECTIVE EARTH OR GROUND TERMINAL This symbol identifies the location of the protective earth or ground terminal lug on the equipment. OFF POSITION OF PRINCIPAL POWER SWITCH This symbol graphically represents the equipment main power push-button switch when it is in the off position. ON POSITION OF PRINCIPAL POWER SWITCH This symbol graphically represents the equipment main power push-button switch when it is in the on position. Chemical and Biological Safety WARNING Normal operation of the system can involve the use of solvents and reagents that are toxic, flammable or biologically harmful. WARNING xii r Observe all precautionary information printed on the original solution containers. r Operate the system in the appropriate environment. r Take all necessary precautions when using pathology or toxic materials to prevent the generation of aerosols. r Observe all applicable precautionary procedures when using flammable solvents in or near the instrument. r Wear appropriate laboratory attire, for example, safety glasses, gloves, lab coat and breathing apparatus, when working with hazardous materials. r Dispose of all waste solutions in a proper manner. 32 Karat 8.0 PN A33115AB Safety Information Safety Symbols Electrical Safety To reduce risk of electrical shock, all devices employ a three-wire electrical cable and plug to connect the equipment to earth ground. r Ensure that the wall outlet receptacle is properly wired and earth grounded. r DO NOT use a three-to-two wire plug adapter. r DO NOT use a two-wire extension cord or a two-wire multiple-outlet power strip. r Disconnect power to the system before performing maintenance. r DO NOT remove any panels. Panels should be removed only by qualified service personnel. WARNING A high voltage power supply is used with this instrument. Safety interlocks disable high-voltage output while the capillary access cover is open and remove the risk of shock while performing routine instrument functions. However, removal of any panel may expose an individual to the possibility of severe electrical shock and/or mechanical injury. For this reason, any service requiring removal of a panel or otherwise overriding or disabling safety interlocks must be done by Beckman Coulter personnel only. Sharp Objects/Moving Parts Keep loose clothing and hair away from the plate area. Never attempt to physically restrict movement of the plate assembly. Laser Safety WARNING Since laser light is not accessable to the user during normal operation of the system, the overall classification of these lasers is “Class 1,” i.e. “lasers which are safe under reasonably foreseeable conditions of operation.” To prevent eye damage from potentially harmful laser light, observe all safety warnings. MDQ User’s Guide PN A33115AB xiii Safety Information Safety Symbols Waste Management and Recycling It is important to understand and follow all laws regarding the safe and proper disposal of electrical instrumentation. WARNING The symbol of a crossed-out wheeled bin on the product is required in accordance with the Waste Electrical and Electronic Equipment (WEEE) Directive of the European Union. The presence of this marking on the product indicates that the device: r was put on the European Market after August 13, 2005. A016608L.EPS r is not to be disposed via the municipal waste collection system of any member state of the European Union. For products under the requirement of WEEE directive, please contact your dealer or local Beckman Coulter office for the proper decontamination information and take-back program, which will facilitate the proper collection, treatment, recovery, recycling, and safe disposal of the device. xiv 32 Karat 8.0 PN A33115AB Introduction to CE Overview 1Introduction to CE 1.1 Overview This section describes the common modes of capillary electrophoresis and how these processes are performed by the P/ACE™ MDQ instrument using the Ultraviolet (UV), Photodiode Array (PDA) and Laser Induced Fluorescence (LIF) detectors. 1.2 General Description The P/ACE MDQ instrument separates sample components within a fused-silica capillary, using one of several modes of electrophoresis. All of these modes are generally referred to as Capillary Electrophoresis (CE). In the P/ACE MDQ, sample is injected into the capillary using either pressure, vacuum, or voltage. Under the influence of high voltage, sample components migrate differentially through the capillary. There are two basic methods for detecting samples using CE. The first is the absorbance of light. This method is utilized in UV and PDA detection. As these components pass a window in the capillary, a single wavelength UV detector or a multiwavelength photodiode array detector (PDA) measures absorbance and transmits the signal to the computer. The signal can also be transmitted to an external recorder, integrator, or data system through an analog output. The signal may be plotted graphically in the form of an electropherogram and analyzed. The second method is to induce the samples to fluorescence and measure the emitted light. This is done by Laser Induced Fluorescence (LIF). Substances in the capillary which fluoresce at the laser wavelength are detected. The LIF Detector measures and records this fluorescence, which appears as a peak on the computer screen or printed electropherogram. The P/ACE MDQ instrument may be used to separate many different kinds of samples, including peptides, proteins, nucleic acids, ions, enantiomers, and pharmaceuticals. CE has very low sample requirements relative to other analytical techniques (5 to 30 microliters, with the actual injection volume being typically between 5 and 50 nanoliters). It provides a complimentary alternative to other separations techniques such as chromatography. 1.3 Common Modes of Electrophoresis Capillary Zone Electrophoresis (CZE) When voltage is applied to an uncoated fused-silica capillary tube filled with a uniform electrolyte solution, separation of charged species occurs due to differential migration in the electrical field. This process, in which charged particles in solution migrate toward an electrode with opposite charge, is called electrophoresis. If the inner wall of the capillary is also charged, the fluid in the capillary will begin to flow toward the electrode that has the MDQ User’s Guide PN A33115AB 1 1 Introduction to CE Common Modes of Electrophoresis same charge as the capillary wall. This bulk movement of fluid is termed electroosmotic flow or EOF. Because EOF is usually of higher magnitude than electrophoresis, analytes of both positive and negative charge will ultimately be carried in the same direction, although at different rates. Electrophoresis will separate like-charged but otherwise distinct analytes from one another. In this manner, both positive and negative analyte molecules can be detected as they are swept past the detector. The direction of EOF can be changed by reversing the charge on the electrodes, or by changing the charge on the wall of the capillary by chemical means. The amount of time required for sample molecules to migrate to the detector depends on the length of the capillary, the electrophoretic mobilities of the particular sample molecules, the specific electrolyte used, the magnitude of the EOF, and the applied voltage. Molecules having different electrophoretic mobilities will be detected at different times. Other factors to be considered are the size, shape, and charges of the particles, the electrolyte concentration, the pH of the separation buffer, and the dimensions of the capillary. Micellar Electrokinetic Capillary Chromatography (MEKC) In free-zone capillary electrophoresis, neutral molecules travel as a single band. To separate these molecules, micellar additives such as sodium dodecyl sulfate (SDS) can be added to the electrolyte solution. Neutral molecules with differing affinities for the charged micelles will separate during electrophoresis under these conditions. Capillary Gel Electrophoresis (CGE) In the techniques described above, the analyte molecules are moving in a low viscosity liquid. By increasing the viscosity of the matrix to the point where the migration of molecules is physically impeded, it is possible to separate different species based on size and shape, as well as charge. A variety of gel solutions may be employed in this technique. Capillary Isoelectric Focusing (cIEF) In cIEF, a mixture of special buffers called ampholytes is used to create a pH gradient along the length of the capillary. During separation, molecules will migrate to the point in the pH gradient at which they have no net charge. At the end of the process, the various analytes are located in discrete zones in the capillary. In a separate mobilization step, the bands are moved past the detector for analysis. This technique is most often used for protein and peptide analysis. Capillary Electrochromatography (CEC) CEC uses a capillary packed with porous particles similar to those used in HPLC. Driven by EOF, analytes partition between mobile and stationary phases as they migrate down the capillary. Under some conditions, electrophoresis may also participate in the separation. CEC is primarily employed to separate small molecules such as drugs. 2 32 Karat 8.0 PN A33115AB System Overview Main Components 2System Overview 2.1 Main Components The main components of the P/ACE MDQ instrument include trays that hold vials of sample, buffer, and other solutions, an interface block, a high-voltage power supply and electrodes, a source optics module and detector, temperature control hardware, and a sample injection mechanism. Figure 2.1 P/ACE MDQ System MDQ User’s Guide PN A33115AB 3 2 System Overview Main Components Figure 2.2 P/ACE MDQ Instrument 1. Coolant Fill Ports 2. Inlet Buffer Tray 3. Inlet Sample Tray 4. High Voltage Power Supply (inside) 5. High Voltage Electrode 6. Interface Block 7. Insertion Bar 8. Source Optics Module with D2 Lamp inside 9. Capillary Cartridge 10. Detector 11. Fiber Optic Cable 12. Grounded Electrode 13. Outlet Sample Tray 14. Outlet Buffer Tray 15. Power Switch The main power switch is located on the lower right side of the front of the instrument. All connections for external system components are located on the upper left side panel of the instrument, except for AC inlet and the fuse holder. Three fans provide cooling airflow for internal system components; air is exhausted through vents at the side and rear of the instrument. Maintain proper clearances to ensure that the vents are not blocked. See the P/ACE MDQ Installation and Maintenance Manual for more information. 4 32 Karat 8.0 PN A33115AB System Overview Main Components The Sample Handling System The sample handling system holds four trays; two sample trays (inlet and outlet), and two buffer trays. The sample trays are primarily used for samples; the buffer trays hold the other solutions required for electrophoresis (e.g. buffer and rinse solutions). The trays are arranged on two parallel tracks. Under normal operating conditions, the trays on the left are referred to as the inlet trays for sample and buffer; the trays on the right are referred to as the outlet trays for sample and buffer. Each buffer tray holds either thirty-six 2 mL vials, or a large reservoir tray; the large reservoir tray has two 25 mL buffer reservoirs and holders for ten 2mL vials. Sample trays hold either forty-eight vials or a 96-well plate. Each tray is numbered from the front to the back, beginning with the number 1, and lettered from left to right, beginning with the letter A (see Figure 2.3). MDQ User’s Guide PN A33115AB 5 2 System Overview Main Components Figure 2.3 Sample Trays 1. Buffer Tray 2. 48 Vial Sample Tray 3. 96 Position Sample Tray 4. Large Reservoir Tray WARNING The P/ACE MDQ is not intended to accommodate volatile materials in 96-well plates. Volatile solvents may release hazardous or flammable vapors leading to a risk of fire or explosion. Solvent vapors may also damage the instrument. Do not use volatile solvents in 96-well plates. WARNING The 2 mL vials are pressurized during rinse and separation-with-pressure events. To reduce the risk of breakage and expelled glass particles, use only Beckman vials PN 144980, and inspect each vial for damage prior to use. Do not use any vial that appears to be cracked or damaged in any way. Wear safety glasses when opening the sample cover while the vials are pressurized. 6 32 Karat 8.0 PN A33115AB System Overview Main Components The Capillary Cartridge The CE capillary is installed in a cartridge. The cartridge design protects the capillary, provides a path for liquid coolant, simplifies installation into the instrument, and aligns the detection window in the optics. The components of the cartridge are shown in Figure 8. 901012L.AL Figure 2.4 The Capillary Cartridge MDQ User’s Guide PN A33115AB 1. Coolant tubing with capillary inside 2. Double seal - inlet 3. Detector Window and Aperture - LIF Detector 4. Detector Window and Aperture - UV and PDA Detectors 7 2 System Overview Syringe Pump The detection window is an area of the capillary where the polyimide coating has been removed to reveal the transparent fused-silica. This area of the capillary is placed in a part of the cartridge containing a plug that connects the window to the optical system. One type of plug is used for UV and PDA detectors, and a second type is used for LIF detectors. The procedures for installing a capillary in a cartridge are covered in the Installation and Maintenance Manual. In addition to the cartridge shown here, special cartridges are used with the optional External Detector Adapter (see the Installation and Maintenance Manual for information on these cartridges.) The capillary temperature is controlled with an inert liquid that circulates through the cartridge. Temperature is controlled in a range from 10°C below ambient (with a minimum of 15°C) to 60°C. Coolant flows through the cartridge via two openings in the bottom of the housing (located between the ends of the capillary.) This fluid removes the heat generated by electrophoresis. 2.2 Syringe Pump P/ACE MDQ is capable of generating pressures using an internal pump mechanism. This pump can supply 0.1 to 25 psi to perform pressure injections or low pressure mobilizations. It can also apply up to 100 psi to move fluids through the capillary. Vacuum injections can be performed from 0.1 to 5.0 psi. Pressure can be applied to both ends of the capillary simultaneously to facilitate methods such as capillary electrochromatography. 2.3 High Voltage Power Supply The high voltage power supply is capable of delivering a maximum of 30 kV with a maximum current of 300 µA. The voltage range is from 1 to 30 kV, selectable in 100 V increments. The polarity is selectable from the software. The current is selectable from 3.0 to 300 µA in 0.1 µA increments. The software allows the user to select current, voltage or power operation. During operation, the system will ramp the voltage or current up to the programmed value. Limits for voltage, current and power may also be entered to protect the capillary. For example, if the user programs a voltage setting for 30 kV but the setting for current is only 3.0 µA, the system may reach the limit set for current before reaching the voltage setting, and regulate voltage to maintain that current. 8 32 Karat 8.0 PN A33115AB System Overview LED Indicators 2.4 LED Indicators The front panel of the instrument contains LED indicators for Power, UV, and High Voltage. P/ACE MDQ PWP UV HV + HV - TM 901700L.AI Figure 2.5 LED Indicators 1. High Voltage Indicators 3. Instrument Power Indicator 2. UV Lamp On Indicator MDQ User’s Guide PN A33115AB 9 2 System Overview Cartridge and Tray Cover Interlocks 2.5 Cartridge and Tray Cover Interlocks The double-hinged doors of the P/ACE MDQ have been designed with interlock sensors that will prevent unsafe access to the interior of the instrument. The first (lower) door is called the tray cover; the second (upper) door is called the cartridge cover. Opening the tray cover • Stops any tray movement immediately. • Prevents execution of any programmed events which require tray movement. • Aborts a method when a step requiring tray movement is encountered. Opening the cartridge cover • Shuts off the high voltage if it is on. • Turns off the pump circulating the capillary coolant. • Moves the detector filter wheel to the closed position. Figure 2.6 Tray and Cartridge Covers 1. Tray Cover 10 2. Cartridge Cover 32 Karat 8.0 PN A33115AB System Overview UV Detector Optics 2.6 UV Detector Optics The UV optics includes an ultraviolet light source, selectable wavelength filters, aperture, capillary, and a single photodiode detector, as shown in Figure 2.1. The UV source is a deuterium lamp with a wavelength range of 190 to 600 nm. Two lenses focus and direct the output of the lamp through one of the wavelength-selecting filters located in a rotating wheel behind the capillary cartridge. The beam continues through the aperture in the cartridge plug and through a section of the capillary that has been treated to remove the polyimide coating (the detection window). The non-absorbed beam then continues through a fiber optic cable to a photodiode. The light signal is converted to an electrical signal, digitized, and sent to the 32 Karat workstation for processing by the software. This signal is also available as an analog output through a connection on the left side of the instrument. The design of the instrument insures that the optical system remains in alignment. No user alignments are required. There are eight positions on the UV filter wheel. UV detector systems are shipped with four standard filters: 200 nm, 214 nm, 254 nm, and 280 nm (10 nm bandwidth). These are installed in positions 2, 3, 4 and 5, respectively, of the filter wheel; position 1 is opaque and serves as a shutter for the detection system. Additional wavelengths are obtained by placing the appropriate filters in positions 6, 7, and 8; the standard filters can also be replaced, if desired. If the instrument will be used with a PDA detector, position 8 should always be left open (no filter). The filter wheel will accommodate widely available ½ inch (12.7 mm) diameter filters with wavelengths from 190 to 600 nm. MDQ User’s Guide PN A33115AB 11 2 System Overview UV Detector Optics Figure 2.7 UV Optics Layout 1. Capillary Aperture 2. Fused Silica Lenses 3. Deuterium Lamp 4. Lamp Power Supply 5. Photodiode 6. Fiber Optic Connection 7. Motor 8. 8 Position Filter Wheel 9. Filter Position (i.e. 214 nm) 10. Fiber Optic Cable 11. Fiber Optic Connector 12 12. Capillary 32 Karat 8.0 PN A33115AB System Overview The Photo Diode Array (PDA) Detector 2.7 The Photo Diode Array (PDA) Detector The Photo Diode Array detector, like the UV detector, uses the absorbance of light to detect the presence of samples as they pass through the detection window. Unlike the UV detector, the PDA detector can provide spectral analysis of samples. Spectral signatures obtained in this way can be useful in identifying unknowns. The PDA detector utilizes the same cartridge configuration as the UV detector. Please refer to the section on the UV detector for a description of the cartridge and to the 32 Karat Installation and Maintenance Manual for instructions on rebuilding the cartridge. In PDA detection, the full spectrum of light from the deuterium lamp illuminates the capillary (see Figure 7). Light that is not absorbed by samples is delivered by a fiber optic cable to a grating that breaks the light into a spectrum. This spectrum is projected onto an array of 256 photodiodes. With this arrangement, the absorbance profile of the sample can be measured. The PDA detector also allows the simultaneous measurement of light at different discrete wavelengths. By collecting spectral data over time, 3-dimensional plots of absorbance can be created. The photo diode array converts the light signal into an electrical signal. This is digitized and sent to the P/ACE MDQ computer for processing by the software. The PDA detector always uses filter wheel position #8. It is essential that no filter be in position #8 when the PDA is in use. The PDA detector is calibrated in wavelength using the discrete emission bands generated by a mercury lamp. The mercury lamp is an integral part of the detector system. Calibration is performed automatically by the software when requested by the user. MDQ User’s Guide PN A33115AB 13 2 System Overview The Photo Diode Array (PDA) Detector Figure 2.8 Dioade Aray Optics Layout 1. Capillary Aperture 2. Fused Silica Lenses 3. Deuterium 4. Lamp Power Supply 5. Concave Holographic Grating 6. 256 Element Diode Array 7. Motor 8. 8 Position Filter Wheel 9. Monochromator Entrance Slit 10. Fiber Optic Connector 11. 9 x 200 μm Fiber Array (Slit) 12. Fiber Optic Connector 13. Mercury Calibration Fibers 14. Mercury Lamp Power Supply 15. Mercury Lamp 16. Y-fiber Optic Cable 17. Filter wheel in open position 8 18. Fiber Optic Connector 19. Capillary 14 32 Karat 8.0 PN A33115AB System Overview Laser Induced Fluorescence Detector 2.8 Laser Induced Fluorescence Detector The LIF Detector consists of the LIF Detector Module, the LIF Interconnect Module, and a Laser Module. Refer to Figure for more information. A P/ACE MDQ capillary cartridge with an LIF Detector plug installed is required for use with this system. The LIF detector uses a laser light source. A 488 nm argon-ion laser and a 635 nm diode laser are available from Beckman Coulter. Other lasers can be adapted. The LIF detector can use dual lasers and dual photodetectors, making it a true dual wavelength system. Refer to the section titled "Using Other Lasers with the LIF Detector" on page 2-20 for more information. A fiber cable transmits excitation light from the laser to the capillary in the cartridge. Substances in the capillary which fluoresce at the laser wavelength are detected. The LIF Detector measures and records this fluorescence, which appears as a peak on the computer screen or printed electropherogram. The LIF Detector can also be used in the indirect mode. In this mode, a fluorescent buffer system is used to detect non-fluorescent components. See Figure 2.9 and Figure 2.10. The initial installation of the LIF Detector will be performed by a Beckman Coulter Field Service Engineer. The P/ACE MDQ can easily be converted between LIF and UV/PDA modes as detector components are modular. MDQ User’s Guide PN A33115AB 15 2 System Overview Laser Induced Fluorescence Detector Figure 2.9 P/ACE MDQ Instrument with LIF 16 1. LIF Plug 2. LIF Detector Module 3. Cartridge Cover 4. LIF Interconnect Module 5. 488 nm Laser Module 6. 635 nm Laser Module 32 Karat 8.0 PN A33115AB System Overview Laser Induced Fluorescence Detector Figure 2.10 LIF Optical System MDQ User’s Guide PN A33115AB 1. Photo-multiplier 2. Laser 1 3. Spherical Mirror 4. Laser 2 5. Capillary 6. Ball Lens 7. Beam Splitter (50/50) 8. Photo-Multiplier Tube 9. Laser Filters 10. Emission Filters 17 2 System Overview The Laser Modules 2.9 The Laser Modules The following section describes the optional 488 nm and 635 nm laser modules, in terms of how they interface with the P/ACE MDQ instrument and the LIF Detector. WARNING During normal operation of the LIF Detector, laser light is not accessible to the user. To prevent potentially harmful laser light from being emitted from the end of the fiber cable, an interlock mechanism turns off the laser if the laser fiber cable is disconnected from the interconnect module, or if the cartridge cover is opened. WARNING Always turn off the laser module and P/ACE MDQ instrument before removing any of the LIF system module(s). 488 nm Laser Module The Beckman Coulter 488 nm laser is an air-cooled Argon Ion Laser. Two indicator lights are located on the front of the 488 nm Laser Module. The green light flashes to indicate that the interlock circuit is complete and the laser is preparing to light (in approximately 40 seconds.) Once the laser is operating, the green light will stay on continuously until the laser is turned off, the cartridge cover opened, or until the fiber cable coupler is disconnected from the LIF Interconnect Module. The yellow light is a current limit indicator. A sensor in the laser module measures the amount of laser light being produced. Circuits in the laser module adjust the amount of current being drawn to maintain a stable 3mW output. The yellow indicator light will come on when the system begins to draw excessive current. This light indicates that the laser tube should be replaced.If it comes on, contact Beckman Coulter Customer Service for assistance. 900710L.AI Figure 2.11 488 nm Laser Module Back Panel 18 32 Karat 8.0 PN A33115AB System Overview The Laser Modules 635 nm Laser Module The power switch is located on the back panel of the 635 nm laser housing. However, the laser will not light up unless the P/ACE MDQ system is on, and all doors and interlocks are in place. A red light on the front panel of the 635 nm laser module indicates that the laser is on. Refer to Figure 2.9. MDQ User’s Guide PN A33115AB 19 2 System Overview Using Other Lasers with the LIF Detector 2.10 Using Other Lasers with the LIF Detector Laser units other than the Beckman Coulter Laser Modules 488 and 635 can be used with the LIF detector, as long as the guidelines below are strictly followed. • If the LIF detector was purchased without a Beckman Coulter Laser Module, an Interlock/Fiber Optic cable (PN 360671) will have been provided. The custom interlock connector plugs into the LIF Interconnect Module. The fiber optic termination of the cable is the standard SMA 905. The laser unit must be fitted with a fiber launcher which is compatible with this connector. The two electrical wires in the cable connect to the interlock switches inside the detector and instrument. These switches close when it is safe for the laser to come on. These wires must be connected to the laser’s interlock circuit. The connectors and switches in the detector are rated for low voltage (TTL level) signals. NOTE To avoid damaging the interlock connector and switches in the LIF Detector Module, do not connect interlock wires in the laser unit to a voltage greater than the rated voltage of the interlock connector and switches (5V, 0.1 A). U.S. Federal regulations require that this connection be made to limit access to laser energy when the cable is disconnected from the LIF Interconnect Module. 20 32 Karat 8.0 PN A33115AB 32 Karat Starting the Software 332 Karat 3.1 Starting the Software To start the 32 Karat Software, select Programs | 32 Karat | 32 Karat Software from the Windows Start Menu button on the Windows Tool Bar. 32 Karat Software opens to the current location / group window which lists the configured instruments. Figure 3.1 32 Karat Software Enterprise Screen (Main Menu) MDQ User’s Guide PN A33115AB 21 3 32 Karat Creating and Configuring an Instrument Tool Bar The Tool Bar appears at the top and, in some cases, the bottom of the active window. The active buttons within the Tool Bar allow for single-click access to many common commands. The following buttons are available from the opening window: • New • Cut • Copy • Paste • Delete • Properties • System Administration Mode • System Administration Wizard • Large Icons • Small Icons • List • Details • Help Menu Bar The Menu Bar contains all commands available in 32 Karat Software. The Menu Bar can be accessed by single-click or by holding down the Alt key and pressing the underlined letter. 3.2 Creating and Configuring an Instrument In this exercise you will: • create a connection to a real instrument • create a virtual instrument that can be used for offline data reprocess NOTE Additional information regarding Instrument Configuration can be found in the 32 Karat Online Help. IMPORTANT This section assumes that all hardware and interface boards have been installed. If they have not been installed, please refer to the Installation and Maintenance Manual for instructions. Creating a New Instrument Up to four P/ACE MDQ’s can be controlled from a single computer with 32 Karat Software. An unlimited number of virtual instruments can be created for offline method editing or data analysis. Use the following exercise to configure a new instrument. Select the detector type(s) appropriate to your hardware configuration. 22 1. Right-click within the right pane and select New | Instrument from the drop down menu. 2. A new instrument will be created with its icon placed in the right pane. Enter the name of the instrument (in this example we will refer to Instrument 1) in the highlighted 32 Karat 8.0 PN A33115AB 32 Karat Creating and Configuring an Instrument name field. This name will be used throughout 32 Karat Software, in the Instrument window, data reports, and the Instrument logs. Figure 3.2 32 Karat Software Enterprise Screen (Main Menu) Configuring the New Instrument Configuring the instrument is a process in which the software is prepared to control the hardware and process the data. It consists of first, identifying the P/ACE MDQ as a unique instrument and second, identifying the hardware components that are present. Each physical instrument should be represented by at least two icons. One of these will be used for control and data acquisition; the other is used for offline data reprocessing while the first is being used for acquisition. The following example will use a UV detector as a model. NOTE If there is more than one P/ACE MDQ connected to the computer, the configuration process must be repeated for each instrument. Only the instrument that is being configured may be ON during configuration. All other instruments must be turned OFF. Once all instruments are configured, they may all be turned back on. 3. MDQ User’s Guide PN A33115AB Right-click on the Instrument 1 icon and select Configure from the drop down menu. 23 3 32 Karat Creating and Configuring an Instrument 4. Select P/ACE MDQ from the Instrument type drop-down menu; input a name to identify the instrument. Figure 3.3 Instrument Configuration dialog 5. Click Configure. The P/ACE MDQ Configuration (Module Configuration) window is launched with the modules available for configuration listed in the left pane. Figure 3.4 MDQ Configuration dialog 24 32 Karat 8.0 PN A33115AB 32 Karat Creating and Configuring an Instrument Auto Configuration 32 Karat Software can automatically configure all P/ACE MDQ modules in the Instrument. The instrument must be connected to the PC and turned ON. 6. Click the Auto Configuration button at the bottom of the window and listen for tray movement within the MDQ. This indicates that the software is communicating with the instrument. The window below will appear during this process. Figure 3.5 Auto Configuration Status 7. The installed detector will appear in the configured modules window. Figure 3.6 MDQ Configuration dialog with installed UV Detector 8. MDQ User’s Guide PN A33115AB Right-click on the new icon and select Open. Verify that the instrument was properly detected and configured. 25 3 32 Karat Creating and Configuring an Instrument Figure 3.7 P/ACE MDQ Instrument configuration for UV Detector Each P/ACE MDQ connected to the computer must have a unique device ID. The default setting is 1. If multiple MDQ instruments are installed, select a unique ID (1, 2, 3 or 4) for each instrument. 9. After the device address is selected, click Set Bus Address to send this information to the instrument. The type of buffer tray and sample tray present is detected at startup. Tray type is detected each time the tray cover is opened and closed. The instrument autodetects three types of trays: 36 vial buffer trays, large reservoir buffer trays and 48 position sample trays. 96 well plates are not autodetected by the instrument and must be manually configured from this window. Tray configuration may be manually changed at any time. 10. When a 96 well plate is selected as the sample tray type, the Enable Tray Definition check box will become active. If this check box is selected, the user has the option to define the height and depth of the plates installed. This feature allows the use of deep-well and other non-standard plates. If this check box is not selected, only standard Beckman Coulter 96 well plates may be used. If a Laser Induced Fluorescence Detector has been detected, the LIF Calibration Wizard will become active. This feature is described in greater detail in the Installation and Maintenance Manual. The Filter dialog is used to define the specific filters that are installed in a UV detector. The data must be entered manually. It is important that the values entered match the installed filters exactly. If a PDA detector is installed, position 8 must be empty (no filter installed), indicated by a “0” value. 26 32 Karat 8.0 PN A33115AB 32 Karat Creating and Configuring an Instrument Pressure units may be defined in psi (pounds per square inch) or in mbar (millibars). The units selected will be used only for this instrument. Temperature control indicates the installation of a sample storage unit. If installed, the storage unit may be disabled by selecting Unavailable from the drop-down list box. 11. Click OK to return to the Instrument Configuration window. Figure 3.8 Instrument Configuration screen for the P/ACE MDQ Configuration Options Clicking the Options button will open the Configuration Option dialog. See Figure 3.9. Analysis Options Analysis options define what software functions will be available when data is reprocessed. Figure 3.9 P/ACE MDQ Instrument Configuration Options Dialog box (Analysis Options) MDQ User’s Guide PN A33115AB 27 3 32 Karat Creating and Configuring an Instrument PDA Allows the analysis of multichannel data from the Photo Diode Array detector. System Suitability Enables automatic review of results. Results outside selected ranges can trigger defined responses. Qualitative Analysis Enables the identification of peaks by migration time, relative migration time or mobility. Caesar Integration Used to detect peak start and stop. This method is useful for peaks that have abrupt transitions from baseline to peak. It is also useful when S/N (signal noise ratio) is low. Caesar Integration is the preferred method for detecting CE peaks. When un-checked, peak start and stop will be based on slope threshold. Instrument Options Use the Instrument Options function to select Standard CD (default) or CEC/LC. Figure 3.10 P/ACE MDQ Instrument Configuration Options Dialog box (Instrument Options) Standard CE The time for a peak to reach the window is called Migration Time. CEC/LC The time for a peak to reach the window is called Retention Time. 28 32 Karat 8.0 PN A33115AB 32 Karat Creating and Configuring an Instrument This selection will be reflected on electropherograms and in reports. 1. Click OK to exit and save the module configuration. 2. Click OK to return to the Opening Menu. Manual Configuration Manual Configuration of the UV Detector Manual Configuration may be used to create an instrument when the hardware is offline or in use. NOTE Many of the exercises in this manual require that a virtual UV instrument be configured. Use this procedure to create a UV instrument, regardless of the type of detector you have installed. 1. From the main 32 Karat Software screen, create a new instrument and open the configuration window as previously described in "Creating a New Instrument" on page 3-22. Name the instrument UV Detector. 2. For this exercise a UV Detector will be configured. Select the UV Detector in the left pane and click on the green arrow. The P/ACE MDQ UV Detector icon is added and must now be configured. Figure 3.11 UV Detector as configured Module 3. MDQ User’s Guide PN A33115AB Right-click on the new icon and select Open. The P/ACE MDQ Instrument Configuration dialog box is displayed. 29 3 32 Karat Creating and Configuring an Instrument Figure 3.12 Instrument Configuration dialog For information on setting the P/ACE MDQ Instrument Configuration parameters, refer to the 32 Karat Online Help. 4. Click OK to exit and save the module configuration. Configuration Options For information on configuration options, please refer to "Configuration Options" on page 3-27. Manual Configuration of the PDA and LIF Detectors Manual configuration of the PDA and LIF detectors is performed by selecting the appropriate icons in place of the UV detector. Only one internal detector is allowed per instrument. 30 32 Karat 8.0 PN A33115AB Direct Control Introduction 4Direct Control 4.1 Introduction The Direct Control screen is essentially the front panel of the instrument. It allows you to select and change operating parameters with immediate execution. Direct Control is useful in preparing for Operations, Maintenance and Troubleshooting. The Direct Control graphical interface is used to control the instrument by clicking on “hot” areas of the window. These areas either activate the associated dialog box - allowing modification of the instrument settings - or activate the task directly. Direct control displays an animation of current instrument activities and instrument status in real time. NOTE Additional information regarding Direct Control features can be found in the 32 Karat Online Help. MDQ User’s Guide PN A33115AB 31 4 Direct Control Direct Control Window 4.2 Direct Control Window To access the Direct Control window, go to the Control Menu and select Direct Control | View. Figure 4.1 Hot Spots on the Direct Control window 1. Capillary Temperature 2. Tray Up/Down 3. Label dialog 4. Tray Up/Down 5. Lamp On/Off 6. Detector dialog 7. Autozero 8. Trays to Home Position 9. Trays to Load Position 10. Injection Dialog 11. Stop Current Processes 12. Sample Storage Temperature 13. Voltage Dialog 14. Current Dialog 15. Power Dialog 16. Pressure Dialog 17. Vial Position Dialog 32 32 Karat 8.0 PN A33115AB Direct Control Direct Control Window The UV Detector is shown above. The PDA and LIF Detectors are similar. The functions are defined in Table 4.1. Table 4.1 Direct Control Functions Control Functions in Direct Control Temperature Capillary Temperature Storage Temperature Tray Motion Up/Down Vial Positon Load Home Optics Detector Control Lamp/Laser Status Autozero Power Controls Hot Spot Toggles trays up and down Hot Spot Opens dialog to move a selected vial to the end of the capillary Button Brings all trays forward for loading Button Returns all trays to their home position Hot Spot Opens a dialog appropriate for the configured detector Hot Spot Opens a dialog allowing lamp or laser(s) to be toggled on/off Button Adjusts the detector output to zero Button Opens a dialog to initiate voltage separation Current Button Opens a dialog to initiate current separation Pressure Inject Stop Capillary Information MDQ User’s Guide PN A33115AB Hot Spot Opens a dialog to set the sample storage temperature Voltage Power Other Controls Hot Spot Opens a dialog to set the coolant temperature Button Opens a dialog to initiate power separation Button Opens a dialog to initiate pressure separation; also used for capillary rinsing Button Opens a dialog to initiate injection of sample into the capillary Button Stops all instrument operations Hot Spot Opens a dialog to input capillary/cartridge ID information (used for display only) 33 4 Direct Control Direct Control Window Table 4.2 Status Display Status Display in Direct Control Status Time Remaining Tray position Cartridge Status Cover Status Text/Graphic Time remaining for current instrument process Text/Graphic Indicated the vial or well at which the capillary end is located Graphic Indicates if a cartridge is installed. Graphic Indicated if the door is open or closed Cartridge Temp Text/Graphic/Hot Spot Current coolant temperature is displayed Storage Temp Text Current storage temperature is displayed Storage Status Graphic Indicates presence of trays in the storage unit Lamp/Laser Status Graphic/Hot Spot Indicates Lamp/Laser(s) on or off Voltage Text/Graphic/Button Indicates present, target, and maximum voltage Current Text/Graphic/Button Indicates present, target, and maximum current Power Text/Graphic/Button Indicates present, target, and maximum power Pressure Text/Graphic/Button Indicated present, target and maximum pressure Pressure Type/Direction Graphic Indicates positive pressure or vacuum, and capillary end to which the pressure is applied Polarity 34 Text Indicated current instrument function and state Graphic +/- indication of electrode potential 32 Karat 8.0 PN A33115AB Direct Control Exercise: Conditioning the Capillary 4.3 Exercise: Conditioning the Capillary This exercise will use the Direct Control functions to condition a bare fused-silica (BFS) capillary. This capillary will be used for additional exercises in this manual. NOTE This procedure is intended for bare fused-silica capillaries only. Internal capillary coatings may be destroyed by this procedure. Materials needed: • 75 micrometer I.D. capillary, 60 cm total length (50 cm to the detector) installed in cartridge appropriate for detector type configured. See the Installation and Maintenance Manual for instructions on building a new cartridge or installing a capillary. • Methanol (HPLC grade) • 0.1N HCl in water • Capillary Regenerator Solution A (1M Sodium Hydroxide PN 338424) • Run Buffer A (PN 338426) • Distilled or deionized water (HPLC grade) • 2 mL vials and red caps • 36 position buffer trays 1. Prepare one vial each of Methanol, HCl, Regenerator, and Water. 2. Prepare two vials of Run Buffer A. 3. Prepare one empty vial. Vials should be filled to the shoulder as indicated in the Installation and Maintenance Manual. All vials (including the empty vial) must be capped. 4. Place the vials in the buffer trays as indicated in Table 4.3. Table 4.3 Vial Loading Positions Solution Left (Inlet) buffer tray Methanol B1 0.1 N HCl C1 Regenerator Solution A D1 Water E1 Run Buffer A A1 Empty Vial Right (outlet) buffer tray A1 B1 5. Check that the capillary cartridge and buffer trays are properly installed. See the Installation and Maintenance Manual for more information. 6. Close the doors. NOTE The graphic in Direct Control indicates the presence of the cartridge and the closed door. You should be able to hear the coolant circulating. MDQ User’s Guide PN A33115AB 35 4 Direct Control Exercise: Conditioning the Capillary 7. Click on the Pressure “hot spot” on the Direct Control screen. The dialog in Figure 4.2 will open. Figure 4.2 Pressure Settings Dialog This dialog is used to set up the conditions for a rinse or a pressure separation. It has the following options: Pressure: Input the desired pressure in psi. The valid range for positive pressure is 0.1 to 100 psi; for vacuum is 0.1 to 5 psi. Duration: Specifies how long the pressure will be applied. Direction: Designates whether the flow of fluid will be Forward (from inlet to outlet or left to right) or Reverse (from outlet to inlet or right to left). Pressure Type: Specifies whether positive pressure or vacuum will be used. This choice defines the valid pressure range. Tray Positions: Specifies which vials or wells will be located at the capillary ends during the operations. 1. To select the positions, click the Trays button to open the Tray Selection dialog (shown in Figure 4.3). 2. Click on the appropriate positions to select them. For this exercise, click B1 on the left tray and B1 on the right tray to select the Methanol and Empty vials. 3. Click OK to return to the Pressure Settings dialog box. The tray positions area should now indicate Inlet:BI:B1 and Outlet:BO:B1. 4. Type 25 in the Pressure box and 1.0 in the Duration box. Pressure direction should be Forward and Pressure Type should be Pressure. The dialog should now look like the one shown above in Figure 4.2. 36 5. Click OK. The trays will move to the designated positions and the rinse will begin automatically. 6. Observe the Direct Control screen during this process. 7. Perform additional rinse steps according to Table 4.4. 32 Karat 8.0 PN A33115AB Direct Control Exercise: Conditioning the Capillary It will only be necessary to change the parameters indicated. Figure 4.3 Tray Selection Dialog Table 4.4 Rinse Step Parameters Solution MDQ User’s Guide PN A33115AB Inlet (L) Position Outlet (R) Position Pressure Time Methanol B1 B1 25 1 Water E1 B1 25 0.5 O.1 N HCI C1 B1 20 2 Water E1 B1 20 0.5 Regenerator A D1 B1 20 2 Water E1 B1 20 0.5 Buffer A A1 B1 20 2 37 4 Direct Control Exercise: Conditioning the Capillary At the end of these steps, the capillary has been regenerated and filled with run buffer. The next step is to test the electrical conductivity of the capillary. 8. Click on the Voltage hot spot to open this dialog box. This option is used to configure a voltage separation. Figure 4.4 Voltage Settings Dialog Voltage Setting Parameters Voltage: The voltage at which the separation will be run (0.1 to 30 kV) Duration: The total time the voltage will be applied. (0.1 to 999.9 minutes) Ramp Time: The amount of time the power supply will take to reach the voltage (0.10 to 999.9 minutes). Ramp time cannot exceed the Duration time. Voltage Max: The maximum voltage the system will be allowed to reach. This must be greater than or equal to the set voltage. Current Max: Maximum current the system is allowed to reach. If this value is reached at a voltage lower than the set voltage, the set voltage will not be achieved. Maximum allowed current is 300 µA. Tray Positions: This is the same as previously described under Pressure. With Pressure: Allows the simultaneous application of pressure and voltage. When selected, additional parameters of pressure level and direction become available. Maximum pressure is 100 psi. Pressure can be applied to the inlet (Forward), outlet (Reverse), or both ends of the capillary. With vacuum: Allows the simultaneous application of vacuum and voltage. When selected, additional parameters of vacuum level and direction become available. Maximum vacuum is 5 psi. Vacuum can be applied to the inlet (Forward), or outlet (Reverse), end of the capillary, but not both. 38 32 Karat 8.0 PN A33115AB Direct Control Exercise: Conditioning the Capillary External Adapter: This box must be selected when the external adapter accessory is in use. For additional information, see the Installation and Maintenance Manual. Polarity: Determines the sign of the charge on the electrodes. The graphic will indicate the selection. For this exercise, use the Trays button and select A1 on the inlet side and A1 on the outlet side. Both ends of the capillary will be in Run Buffer A. Set the other parameters as follows: • Voltage: 30kV • Duration: 2 minutes • Ramp time: 0.5 minutes 9. Click OK. The trays will move to position the selected vials at the ends of the capillary. The voltage will begin to ramp up to 30 kV. Observe the Direct Control screen during this process, taking particular note of the Voltage, Current, and Power displays. The Current should reach between 27 and 33 mA when the Voltage is at 30 kV. At the end of two minutes the voltage will return to zero and the Status will return to idle. This completes the Direct Control exercise. It may be helpful to experiment with the other Direct Control functions before proceeding to the next section. MDQ User’s Guide PN A33115AB 39 4 Direct Control Exercise: Conditioning the Capillary 40 32 Karat 8.0 PN A33115AB Creating and Editing a Method Introduction 5Creating and Editing a Method 5.1 Introduction In the section on Direct Control the exercise on regenerating a capillary required user input at each step of the process. A method combines a series of steps into a logical process. The steps in a method are executed automatically by the instrument. This section will describe the basic steps in creating an instrument method for data analysis. There are many more features, such as data analysis and reporting, that can be incorporated into a method. Some of these are covered later in this manual. For more information, see Appendix A. Creating and Editing a Method To create or edit a method you must be in the Instrument Window. 1. To open this window, go to the 32 Karat main screen. 2. Right click on the icon you created to represent your instrument system and select Open Offline. The instrument window will open after a few seconds. When the window opens, the Instrument Wizard will appear. It is possible to open the method editing dialogs by selecting Create or Modify a Method from this dialog. 3. For now, just click OK to close the Instrument Wizard. We will write a new method to run an instrument test sample. 1. To begin, select File | Method | New from the menu bar. The name of the method in the Instrument Window title bar will change to untitled.met. 2. To access the instrument control and data acquisition sections of the method, select Method | Instrument Setup from the menu bar. A window will open that contains three or four tabs (depending on your detector type). 3. Select the tab marked “Initial Conditions” to bring it to the front. The dialog in Figure 5.2 will appear. This dialog is used to set instrument parameters at the start of a method, before the separation process begins. MDQ User’s Guide PN A33115AB 41 5 Creating and Editing a Method Initial Conditions Tab 5.2 Initial Conditions Tab In the previous section, Direct Control, the exercise on regenerating a capillary required user input at each step of the process. This section shows how to combine a series of these steps into a logical process called a Method. The steps in a method are executed automatically by the instrument. This section will describe the basic steps in creating an instrument method for data acquisition. There are many more features, such as data analysis and reporting, that can be incorporated into a method. Some of these are covered later in this manual. For more information, see Appendix C. In this exercise you will write a method to run an instrument test mixture. 1. To write a new method, select File | Method | New from the menu bar. 2. To access the instrument control and data acquisition parts of the method, select Method | Instrument Setup from the menu bar. A window will open that contains three or four tabs, depending on the detector configuration. 3. Select Initial Conditions. The dialog in Figure 5.1 will appear. Figure 5.1 Instrument Setup Dialog - Initial Conditions tab Auxiliary Data Channels The 32 Karat Software gives you the option to collect any one or all instrument parameters: voltage, current, power, and/or pressure. Select the channels you wish to record by clicking the appropriate box(es). The max kV and max µA boxes are used to set the allowable limits for these parameters. Voltage and current are interrelated by the expression V=IR. The system will limit both parameters whenever one limit is reached. For example: assume a voltage set at 30kV and a current limit set at 10 µA. With some buffer systems, a voltage of 12 kV will generate a 42 32 Karat 8.0 PN A33115AB Creating and Editing a Method Initial Conditions Tab current of 10 µA. In this case the voltage will not exceed 12 kV, as the current limit will be the determining factor. Mobility channels This topic is covered later in this manual. Temperature Sets the initial temperature of the cartridge coolant and the sample storage unit, if installed. These settings can be changed by the time program. Peak detect parameters These parameters are used to trigger specific events such as fraction collection. They are not used in peak integration or data analysis; peak integration is discussed later in this manual. Trigger settings The P/ACE MDQ can be forced to wait until certain conditions are met before beginning a run. These are selected by clicking the appropriate box. If Wait for external trigger is selected, the MDQ becomes a slave device, and will not start until an external signal is received. The two Wait for temperature options assure that the system has reached the correct operating temperature before beginning a run. These options delay only the start of the time program. Parameters set in initial conditions will occur without a wait. Inlet and Outlet trays The types of trays that will be used when a method is run must be specified here. When the method is run, this information will be compared to the tray types that are configured in the instrument. If there is a tray type mismatch, the method will not run. NOTE Additional information on these and other parameters of the Instrument Setup window can be found in the 32 Karat Online Help. MDQ User’s Guide PN A33115AB 43 5 Creating and Editing a Method Detector Initial Conditions 5.3 Detector Initial Conditions For this exercise, set conditions in the Initial Conditions tab to match Figure 5.2. NOTE The next tab will be used to set up the initial conditions for the detector. Select the option below that corresponds to the detector type in your instrument. UV Detector Initial Conditions Click on the UV Detector Initial Conditions tab. Figure 5.2 Instrument Setup dialog - UV Detector Initial Conditions tab Electropherogram channel The Acquisition Enabled box must be selected in order for data to be collected and saved. The Wavelength option allows the selection of one of the filters installed in the filter wheel. The available selections will be those set up during instrument configuration. Data rate is selectable from 0.5 to 32 Hz (data points per second). Narrow peaks require a higher data rate. Data rate interacts with the Peak width parameter, set under Filter Settings in this dialog box. Filter This filter refers to an algorithm for filtering the collected data, and does not refer to the wavelength filters. Data filtering is necessary to remove extraneous noise that might interfere with data analysis. Filter setting requires two steps: the selection of the filter type (High Sensitivity, Normal, or High Resolution) and the setting of the Peak width. High Sensitivity increases signal to noise at the expense of resolution. 44 32 Karat 8.0 PN A33115AB Creating and Editing a Method Detector Initial Conditions High Resolution increases resolution at the expense of signal to noise. Normal is a compromise setting that is suitable for most analyses. The filtering algorithm is most efficient if it has information about the number of data points that make up a peak. The optimum number of points is from 16-25. There are also options for “less than 16” and “more than 25” data points per peak. The Data rate setting in the Electropherogram channel dialog can be adjusted so that a typical peak has from 16-25 data points. The other Peak width settings should be used only if changing the Data rate is not desirable. NOTE Peak Width here is not the same as Peak Width in Data Integration. Relay 1 and Relay 2 The two relays incorporated into the P/ACE MDQ can be used to control or signal other devices. This dialog allows you to set the state of the relays at the start of the method to “Off” (open) or “On” (closed). These relays may also be controlled from the time program. See the Installation and Maintenance Manual for more information on using the relays. Absorbance Signal This parameter has two options, Direct and Indirect. Direct is used when the analytes have higher UV absorbance than does the background electrolyte. In this case, upward deflecting peaks are produced when analytes pass through the detector window. In some modes of CE, the background electrolyte has a higher absorbance than the analytes. In this type of separation, the passage of analytes creates negative peaks (valleys) in the electropherogram. By selecting Indirect, the entire electropherogram is inverted, so that these negative peaks appear as positive peaks. For this exercise, set up the UV Detector Initial Conditions dialog to match Figure 5.3. MDQ User’s Guide PN A33115AB 45 5 Creating and Editing a Method PDA Detector Initial Conditions 5.4 PDA Detector Initial Conditions Figure 5.3 Instrument Setup dialog - PDA Detector Initial Conditions tab Electropherogram Scan Data This dialog controls the parameters for the collection of 3D data. The Acquisition enabled box must be selected in order for data to be collected and saved. Data rate is selectable from 0.5 to 32 Hz (data points per second). Narrow peaks require a higher data rate. Data rate interacts with the Peak width parameter in Filter settings (below). Scan data collected at high data rates can result in very large data files. Scan range species the wavelength range over which data will be acquired (limit 190-600 nm). Filter See the UV Detector Initial Conditions section for information on this topic. Relay 1 and Relay 2 See the UV Detector Initial Conditions section for information on this topic. Reference Channel See the sources in Appendix A for information on this feature. Absorbance Signal See the UV Detector Initial Conditions for information on this topic. 46 32 Karat 8.0 PN A33115AB Creating and Editing a Method PDA Detector Initial Conditions Electropherogram Channel Data Up to three independent data channels can be collected simultaneously with the scan data. For each channel the following must be input: Acquisition enabled: Check this box to enable the collection of data in this channel. Reference channel: See the sources in Appendix A for information on this feature. Wavelength: This parameter specifies the central wavelength for the data channel. Bandwidth: This parameter specifies the width, in nanometers, of the data collection channel. Larger values will give higher signal to noise ratios than will low values. Low values will be more specific for molecular structure than will higher values. Peak detect: See the sources in Appendix A for information on this feature. For this exercise, setup the PDA Detector Initial Conditions to match Figure 5.3. MDQ User’s Guide PN A33115AB 47 5 Creating and Editing a Method LIF Detector Initial Conditions 5.5 LIF Detector Initial Conditions Figure 5.4 Instrument Setup dialog - LIF Detector Initial Conditions tab Electropherogram Channel 1 and 2 The LIF Detector is available in one and two channel versions. The programming of these channels is identical. In this exercise we will use only one channel. If your system is configured with non-Beckman Coulter, Inc. lasers, the test mixture used in this exercise may not perform as described. Acquisition enabled: Checked to enable the collection of data in this channel. Dynamic range: Specifies the upper limit of the signal range. Higher values allow for the collection or larger peaks without truncation, but at the cost of sensitivity. Lower values give greater sensitivity, but large peaks may be truncated. This value should be slightly larger than the largest peak expected. 48 32 Karat 8.0 PN A33115AB Creating and Editing a Method Time Program Signal Select Direct when separating fluorescence samples (peaks) in a non-fluorescent electrolyte background electrolyte. If a fluorescent background electrolyte is used, non-fluorescent samples may be detected. Selecting Indirect in this case will invert the signal so that negative peaks appear as positive peaks. Data Rate Specifies the rate at which data will be acquired. Both LIF data channels will have the same data rate. They cannot be specified separately. Relay 1 and 2 See the UV Detector Initial Conditions section for information on this topic. For this exercise, setup the LIF Detector Initial Conditions to match Figure 5.4. 5.6 Time Program The Time Program window is arranged like a spreadsheet. An event is entered into each line. Events will be executed in order, top to bottom. Each line in the window contains these columns: Figure 5.5 Instrument Setup dialog - Time Program tab Time: the point after time zero at which the event will occur. Event: the action that will occur (see below). Value: this will vary depending on the action selected. Duration: time the event will last. Inlet and Outlet Vial: where the capillary ends will be during the event. MDQ User’s Guide PN A33115AB 49 5 Creating and Editing a Method Time Program Summary: a system generated description of the event. Comments: a user generated annotation of the event. Time is not a required event. Events that have no time associated with them will be run in the listed order, top to bottom, and each will be finished before the next event begins. Timed events must be grouped together; a group of timed events cannot be interrupted by an untimed event. Untimed events can only occur before a group of timed events. Some events do not have a time option, others can be timed or untimed. Data acquisition begins with the first timed event (time 0.00); it ends when the method ends or when a STOP DATA event is reached. To program a line, click in the EVENT box. Click on the down arrow, to open a menu of events. Select an event to open a dialog box for that event. UV & PDA LIF Figure 5.6 Time Program Event List The following will describe only those events that are used in this exercise. For information on the other event types, see the resources in Appendix A or refer to the 32 Karat Online Help. 50 32 Karat 8.0 PN A33115AB Creating and Editing a Method Time Program Separate Dialog The separate dialog is used to control the conditions under which the separation process takes place. Every method must have at least one separation step. The step at time = 0.00 is usually a separation. Figure 5.7 Separate Dialog This dialog has the following parameters: Separation Type Electrically driven separations can be done at controlled Voltage, Current, or Power. When one of these is selected, the other two will float to a value determined by the resistance of the capillary contents. Voltage and Current cannot exceed the limits sets in the Initial Conditions window. Separations can also be programmed to use pressure or vacuum to move the fluid in bulk through the capillary. Voltage, Current, or Power can be combined with Pressure or Vacuum so that two processes are at work simultaneously. Polarity Determines the direction of the current. The charge on the electrodes is indicated by the graphic in this dialog. Values Allows for input of the set points for the Separation Type parameters. The available options will change depending on the Separation Type selected. Ramp time is only valid for electrical separations. It determines how long it will take for the Voltage, Current or Power to change from the present to the programmed level. MDQ User’s Guide PN A33115AB 51 5 Creating and Editing a Method Time Program Tray Positions Can be selected graphically by clicking on the Trays button. The type of trays shown are determined by the settings in the Initial Conditions dialog. When a method is used in a Sequence Table it may be desirable to change the vial positions after a specified number of cycles. The inlet, outlet, or both positions can be incremented automatically by selecting the appropriate boxes and inputting the desired number of cycles between changes. For more information about vial incrementing, refer to Appendix E. Figure 5.8 Tray Selection dialog Pressure Direction Specifies whether pressure or vacuum will be applied to the inlet, or outlet end of the capillary. Pressure (but not vacuum) can also be applied to both ends of the capillary at the same time. At Time Specifies that this will be a timed event at the time specified. Separation is usually a timed event. External Adapter Changes the way the instrument manages the power supply. Select this box only if the External Adapter accessory is in use. See the Installation and Maintenance Manual for more information. 52 32 Karat 8.0 PN A33115AB Creating and Editing a Method Time Program Rinse Dialog The rinse event is used to clean the capillary and to load fresh buffer or other separation media. Figure 5.9 Rinse dialog This dialog has the following parameters: Pressure Type Selects the mechanism to be used to move fluid through the capillary. Tray Positions Functions exactly as described in the Separation event. Values Specifies the magnitude of pressure to be delivered, and for how long. Pressure Direction Specifies whether pressure will be applied to the inlet or the outlet end of the capillary. At Time Functions exactly as described in the Separation event. MDQ User’s Guide PN A33115AB 53 5 Creating and Editing a Method Time Program Inject Dialog The inject event is used to deliver a precisely measured amount of sample into the capillary. This step is always untimed, and usually precedes the first separation step. Figure 5.10 Inject Dialog This dialog has the following parameters: Injection Type: Sample can be delivered to the capillary by positive pressure, vacuum or by the application of voltage (electrokinetic injection). Polarity Specifies the charge on the electrodes during a voltage injection. Pressure Direction Specifies whether pressure or vacuum will be applied to the inlet or the outlet end of the capillary. Values Specifies the magnitude of the pressure, vacuum, or voltage, and how long it will be applied. Higher values will inject more sample. Tray Positions Functions exactly as described in the Separation event. 54 32 Karat 8.0 PN A33115AB Creating and Editing a Method Time Program Sequence Table: When a method is used in a Sequence Table, certain parameters in the inject event can be overridden by values input in the Sequence. This parameter determines whether the method Inject event or the Sequence Table has priority. Multiple injection events are allowed. If multiple injections are used, only one injection event may be overridden in the sequence table or incremented. Autozero This event causes the detector output to be reset to zero. It may be timed or untimed. Figure 5.11 Autozero Dialog Stop Data Data collection starts at time = 0.00. Data collection will continue until the end of the method unless a STOP DATA event is encountered. This event can be used to avoid data collection during steps such as post-run capillary cleaning. STOP DATA is always a timed event. Figure 5.12 Stop Data dialog End End is an optional event. The method will not continue beyond an end event. It is always a timed event. Figure 5.13 End Dialog MDQ User’s Guide PN A33115AB 55 5 Creating and Editing a Method Time Program In the next part of this exercise we will create a time program to go with the initial conditions previously entered. The example method will do the following: • Perform a mini-regeneration on the capillary • Fill the capillary with buffer • Inject test mix • Separate the test mix • Perform a post-run rinse This method will use a vial tray setup similar to that used in the section on Direct Control. The vial positions are specified in the table below. Solution Left (inlet) buffer tray Test Mix C1 Regenerator Solution A D1 Water E1 Run Buffer A Right (outlet) buffer tray A1, A2 Empty vial A1 B1 1. Click on the Time Program tab to begin. The tab opens with a blank spreadsheet. 2. Click in the Event box and use the arrow. 3. From the drop down menu select Rinse. 4. Click on the Trays button. 5. Select D1 on the Inlet (left) side and B1 on the Outlet (right) side. 6. Before clicking OK, right click on one of the buffer positions you just selected. A dialog box will open that allows you to identify the contents of that position. Insert the appropriate comments from the table above and repeat for the other vials. 7. When done, click OK to return to the Rinse window. For this step, accept the default values for all other parameters. 8. Click OK to return to the Time Program spreadsheet. The key parameters have been entered into the table automatically. This rinse is an untimed step, so there is no value in the Time window. 1. In the blank line at the bottom of the table, click in Event column again and select another rinse event. This time, program a rinse with water from position BI:E1 to position BO:B1. 2. Change the rinse time to 0.5 minutes. This event will be added to the table when OK is clicked in the dialog box. 3. 56 Click in Event column again, and add a step to fill the capillary with buffer rinse from position BI:A1 to BO:B1. 32 Karat 8.0 PN A33115AB Creating and Editing a Method Time Program 4. This time, use 25 psi for 1 minute. Click OK when done. 5. Click in the Event column in the bottom row again. 6. Select Inject as the event type. 7. Select the Trays option, and program the injection from position BI:C1 to BO:A1. 8. Click OK. 9. Input 0.5 psi as the pressure and 4.0 seconds as the time. 10. Click OK. At this point in the method we are ready to separate the components in the test mix. 1. Select a new Event box, and choose Separate as the event type. 2. Use the Trays button to select positions BI:A2 and BO:A1. 3. Click OK. 4. Select a Voltage separation. 5. Set the voltage to 30 kV, ramp time to 0.2 minutes, and duration to 6 minutes. 6. This will be a timed step, so the At time button must be checked. 7. Set the time to 0.00 minutes. 8. Click OK to put this event into the table. We will be using a final rinse in this method, so we need to insert a Stop Data event. 1. Select the new Event box and choose Stop Data as the event type. 2. Enter a value of 6.00 minutes to force data collection to stop at the end of the separation step. Our last step in this process will be a rinse with water from the water vial (EI) to the empty vial (BI). 3. Program this rinse for 1 minute at 20 psi. Select At Time and use a value of 6.00 minutes. It is a good practice to Autozero the detector some time after the run starts. 1. In the new event box select Autozero. 2. Select At Time and input a value of 1.00. When this item is entered into the Time Program spreadsheet, it will automatically move to the correct time sequence. At this point your spreadsheet should look like that in Figure 5.14. MDQ User’s Guide PN A33115AB 57 5 Creating and Editing a Method Time Program Figure 5.14 Instrument Setup - Time Program The method can still be edited at this point. Items in the Time, Value, Duration, Inlet, and Outlet columns can be edited by clicking on the existing value and typing in a new value. Alternatively, clicking on the name of any existing event will open the drop down menu of event types. Select Current Event to re-open the event dialog, or select a new event to change the event type. Saving the Method IMPORTANT It is vital that you Save your Method. 1. Select File | Method | Save As from the menu bar. 2. Give the method a name with a title and date, for future reference. For example: TestMethod_061106 Click Save. The default path at installation is: C:\32Karat\Projects\Default\Methods. Your system administrator may have assigned you to a different default path. The method is now ready to run. In the next section you will run the method you just created. For now, practice writing and editing methods to explore the various parameters and how they interact. The resources in Appendix A and the 32 Karat Online Help describe the events and parameters not covered here. 58 32 Karat 8.0 PN A33115AB Running the System Single Run and Sequence Runs 6Running the System 6.1 Single Run and Sequence Runs In the last section you created an instrument method. In this exercise you will run that method in Single Run mode. In this mode, the method must be manually started by the user prior to every run. Single mode is useful in method development, where the results of one run will suggests modifications to the method or other procedures. In the second part of this section you will create a Sequence to do multiple runs. You must be “online” to run samples and acquire data. If you are not online, “(offline)” will appear in the title bar of the instrument window. Close any offline windows before proceeding. From the main 32 Karat Software screen, double click on an instrument icon to go “online”. NOTE The detector lamp or lasers must be ON prior to starting a method. The status of the lamp or lasers is available from Direct Control. The UV lamp may be started there. Lasers may be started from Direct Control if the power switch on the laser module is already ON and all safety interlocks are closed. Materials needed: • Cartridge prepared in Direct Control exercise (75 micrometer id capillary, 60 cm total length (50 cm to the detector) installed in cartridge appropriate for detector type configured. See the Installation and Maintenance Manual for instructions on building a new cartridge or installing a capillary. • Capillary Regenerator Solution A (1M Sodium Hydroxide PN 338424) • Run Buffer A (PN 338426) • Distilled or deionized water (HPLC grade) • 2 mL vials and red caps • 36 position buffer trays • For UV or PDA Detection: Test Mix B (PN 501333) • For LIF detection using a 488 nm argon-ion laser: LIF Detector Test Mix (PN 726022) MDQ User’s Guide PN A33115AB 59 6 Running the System Single Run and Sequence Runs Load the trays as follows: Left (inlet) buffer tray Test Mix* C1 Regenerator Solution A D1 Water E1 Run Buffer A1, A2 Empty Vial Right (outlet) buffer tray A1 B1 *PN 501333 for the UV or PDA Detector PN 726022 for an LIF Detector with a 488 nm laser Install the loaded trays and the capillary cartridge into the instrument as described in the Installation and Maintenance Manual. If the instrument software window is not already open, open it as described in "Starting the Software" on page 3-21. 60 32 Karat 8.0 PN A33115AB Running the System Single Run 6.2 Single Run Select Control | Single Run from the menu bar or click on the Single Run icon to open the Single Run dialog shown below. Figure 6.1 Single Run Acquisition dialog You must provide at least a: Sample ID, Method, and Data File. The Data File will be stored in the directory identified in the Data Path. Sample ID can be any text string that identifies your sample. This ID will appear on all subsequent reports. The method file can be selected by clicking on the Open icon and navigating to the desired method. For this exercise, select the method you created in the Method Editing section. Data path is selected in the same way as the selection of a method. In this case, you are selecting a directory rather than a file. The data file is most easily entered by typing a unique name in the box. The file name must be a name that does not already exist in the data directory; if the name already exists, the run will not start. The remaining items on this screen are not required to run a method. For information on those features, see the resources in Appendix A. When ready to begin, press Start. The system will examine the method to verify that it is appropriate for the instrument configuration. The method is then downloaded to the P/ACE MDQ. The instrument will first perform a brief start-up check, and then will execute the method. This is a good opportunity to become familiar with how the instrument operates. Knowledge of normal operations is essential when things go wrong. There is a possibility that your first run may not perform as expected. MDQ User’s Guide PN A33115AB 61 6 Running the System Single Run If error messages appear, or the data does not look like the example shown below, check the following: • Are the vials correctly filled with the proper fluid? • Are the vials in the positions specified by the method? • Was the correct method selected? • Was the method written for the current instrument configuration (e.g., a PDA method cannot run on a UV or LIF system)? • Is the method correct (compare to Section 5)? • Do the tray types in the method Initial Conditions match the tray types configured for the instrument? Figure 6.2 This method will be used for additional exercises. IMPORTANT Please do not continue to the next section until you have achieved a successful single run. 62 32 Karat 8.0 PN A33115AB Running the System Programming a Sequence 6.3 Programming a Sequence A Sequence is a list of methods and data files that will be used to run a batch of samples without user intervention. Sequences can be used to acquire data (run the instrument) or to batch reprocess existing data files. In this exercise, you will create a Sequence to acquire data from multiple runs of the test mix method. Later in this manual you will use a sequence to perform batch reprocessing of data. You must be “Online” for this exercise. 1. To create a new sequence, select File | Sequence | New from the Instrument window. This will open the Sequence Wizard dialog shown below. The Wizard consists of 5 screens. Not all of them will be used for every sequence, and not every feature of each screen will be used in this exercise. For information on features not covered here, see the resources in Appendix A. Figure 6.3 Sequence Wizard - Method Dialog The first screen requires that you select a method. MDQ User’s Guide PN A33115AB 2. Click on the Open and navigate to the method file created in the last section. 3. Under Data File Type select For Acquisition. Amount Values will not be used in this exercise. 4. Click Next. 63 6 Running the System Programming a Sequence Figure 6.4 Sequence Wizard - Unknowns dialog This screen is used to create the Sample ID and Data File ID. 5. Type a text string in the Sample ID field. The blue arrow to the right of the text box opens the following menu: Figure 6.5 Sample ID text options menu Selecting an item from this menu will cause a symbol to be inserted into the Sample ID filed. In the example shown, Line Number was selected. This parameter will be automatically incorporated into the Sample ID when the sequence is run. You may select any combination of these items. Data Path specifies the directory where the data files will be stored. 6. 64 Click Open, and select Data Path, then navigate to the desired folder. 32 Karat 8.0 PN A33115AB Running the System Programming a Sequence 7. Type a text string into the Data File field. The blue arrow to the right of the text box opens this menu: Figure 6.6 Data File Text options menu As described above for the Sample ID, this menu is used to insert codes that will be automatically inserted into the filename when the sequence is run. In this example, Date and Time has been selected. NOTE The Open File choice is used to reprocess existing data files, and not for data acquisition. Number of Unknown Runs in Sequence will determine how many lines there are in the Sequence Table. For this exercise, input 3. Repetitions per Run will determine how many times each line in the Sequence Table will be run. An identifier will automatically be added to the file name for each repetition when this option is used. 1. For this example, input 1. 2. Click Next. Figure 6.7 Sequence Wizard - Vials dialog MDQ User’s Guide PN A33115AB 65 6 Running the System Programming a Sequence If the method being used allows vial position override (see Appendix E), the desired starting position can be input here. If override is not allowed or if auto-incrementing has been set, any input here is ignored. A set of calibration vials can also be identified in this window. See the resources in Appendix A for more information on calibrating through the Sequence Table. Advance Direction Enters the advance direction for the sequence. When the Advance box is enabled for either or both inlet and outlet vials, the software automatically fills down vial position values in the Sample Inject Inlet/Oulet columns of the sequence table. This automatic fill down eliminates the need of the user to manually input one vial position at a time in the sequence table. If Row Major is selected as the Advance Direction, the software automatically fills down vial positions, incrementing them by rows in the same tray (e.g. A1, A2, A3, A4, A5, A6, B1, B2, B3, B4 for buffer tray configuration). If Column Major is selected as the Advance Direction, the software automatically fills down vial positions, incrementing them by columns in the same tray (e.g. A1, B1, C1, D1, E1, F1, A2, B2, C2, D2 for buffer tray configuration). • Do not confuse "Advancing" vial positions with vial incrementing operation in instrument runs. "Advancing" vial positions here refers to simplifying sequence table planning and organizing. These vial position values can be changed in the sequence table by user's discretion, and they are not saved with any method. They are saved in the sequence. For more information about vial incrementing, refer to Appendix E. Figure 6.8 Sequence Wizard - Calibration dialog 66 32 Karat 8.0 PN A33115AB Running the System Programming a Sequence In this example we will not be doing calibration. Calibration is covered in the resources listed in Appendix A. 1. Input 0 in the Number of calibration levels box, and click Next to continue. Figure 6.9 Sequence Wizard - Reports dialog This screen allows you to have reports generated automatically at the end of the sequence run. We will not generate a report in this exercise. All the other choices should be blank. 2. Click Finish. A window similar to this one will appear. Figure 6.10 Sequence Table This screen contains many more columns than can be displayed at one time. Most of this information can be edited. MDQ User’s Guide PN A33115AB 67 6 Running the System Programming a Sequence 3. Scroll left and right to review the entire screen. Not all of the columns will be used in this exercise. The important ones are described below. Run Type - Because we have not selected any summary reports, all of the runs are of the unknown type. See the resources in "Appendix A" on page 1-1 for more information. Reps tells the system how many times to run the line. 4. Click in the Reps boxes for the second line and change the Reps to 2. Line two will now execute twice, giving a total of four runs in this three line sequence. 5. Scroll to the right until the window resembles the one shown here: Figure 6.11 Sequence Table (cont’d) Sample ID is based on the Sample ID text you entered in the Wizard. The line number has been added to the Sample ID you input. 6. Click in the Sample ID box for Run #2 and change it to read Test Mix 002 Twice. Method shows the method you entered in the Sequence Wizard. To change the method, click in the Method box and click on the green icon. NOTE For this exercise, do not change the method. Filename is based on the File Name Text you entered in the Sequence Wizard. The filename still shows the Date and Time symbol <D>, because date and time are unknown until the sequence is run. 7. When you are finished editing the table, select File | Sequence | Save As from the menu bar. Use a Sequence name that has significance to you, for example: TestSequence_052006. 68 32 Karat 8.0 PN A33115AB Running the System Running the Sequence 6.4 Running the Sequence You will now run the sequence. The instrument must be prepared for operation as described under Single Run Mode earlier in this section. Verify through Direct Control that the instrument UV lamp or laser is turned on. The test sample and buffer vials must be loaded and installed. You must be “online” before proceeding. 1. Click the double green arrow button from the Instrument window toolbar. IMPORTANT This icon will not be available if you are in Offline mode. The dialog shown here will be displayed: Figure 6.12 Run Sequence dialog 2. Click on the Open icon and select the sequence you just created. The sequence name will appear in the text box. Run Range allows you to run only part of the Sequence. 3. For this exercise select All. Printing allows the system to automatically print reports when they are ready. 4. If you do not have a printer connected, leave this box unchecked. When complete, the dialog should look like the one shown in Figure 6.12, but with your sequence name in place of the one shown. 5. MDQ User’s Guide PN A33115AB Verify that the instrument is loaded and ready to run, then click Start. 69 6 Running the System Running the Sequence Sequence Validation The software will validate that the methods in the sequence are appropriate for the current instrument configuration. If any problems are detected, a message will be displayed and the sequence will not be run. Correct any problems noted and restart the sequence. After a successful sequence validation, the method in the first line will be downloaded to the P/ACE MDQ and the run will begin. Observe the operation of the instrument as a guide to future operations and troubleshooting. You may open the Direct Control window during data acquisition to view real-time information on instrument status. During the run, the data will be displayed in real-time in the instrument windows. One window will show the Absorbance (or Fluorescence) signal, and a second window will show the Current signal, as those channels were selected in the method. If you are using a PDA detector, a third window will display a contour plot of the absorbance signal. At the end of each run, the method for the next run will be downloaded afresh before the new run begins. This feature allows you to make changes to a method while a sequence is processing. The version of the method that is current at download (last saved) is the version that will run. You may also edit the Sequence Table during processing. Existing lines that have not been started may be edited or deleted, and additional lines may be added to the table. (Lines that have already completed or are currently executing can not be edited). NOTE When a sequence is built using a method that has “auto-incrementing” enabled, edits that change the auto-generated positions are not allowed. If “allow override” is not selected, relevant sequence table entries are not editable. When the sequence is complete, you will have acquired data from four runs. The two replicate runs from line two will have file names to which “rep 1” and “rep 2” have been added. It will be helpful to experiment with the Sequence Table before proceeding to the next section. Make changes, process the sequence, and observe the effects. You may wish to combine these experiments with the writing of new methods. A series of different methods can be entered into the Sequence Table. When processed, the results will demonstrate the effects of changes in parameters. For example, you might create a series of methods at different separation temperatures (e.g., 20, 22, 24, 26, 28, and 30°C) to examine the effect of that parameter on your separation. Another series of experiments might examine the effects of changing the volume injected. If your method allows override, this can be done with a single method by editing the Sample Inject Duration column in the Sequence Table. 70 32 Karat 8.0 PN A33115AB Integration Description 7Integration 7.1 Description An electropherogram is a graphical depiction of the passage of molecules through the detector window. The area under the peak is directly related to the amount of the analyte present in the sample. The process of determining this area is known as Integration. In practice, integration includes steps that determine the points at which peaks start and stop, and the shape and position of the baseline. If sample components are not fully separated from one another (resolved), it is also necessary to estimate where to divide the area of the two peaks. A very simple data set is shown in the figure below. 901023L.AI Figure 7.1 Typical Data set In this example, there are four components. Two are well resolved from the others. Two other components are only partially resolved. The four components differ in peak area. This may indicate that they are present at different levels, that they produce different responses in the detector, or both. Quantitation will be covered in the next section. This exercise will focus on peak detection and baseline construction. MDQ User’s Guide PN A33115AB 71 7 Integration Integrating Data 7.2 Integrating Data There are two required parameters for peak integration: width and threshold. More complex separations will require the use of more parameters. The test mix separations used in the previous exercises yield very simple electropherograms. In this exercise we will use examples that are installed with the software. The principles of integration are the same regardless of detector type. Configure a UV instrument for offline analysis. From the Instrument window select File | Method | New. Close the instrument setup window when it appears, as it will not be needed for this exercise. NOTE Review the instructions in the Preface on page viii before using the sample files. Work from a copy of the data files and not the originals. 1. From the Instrument window, select File | Data | Open. 2. Navigate to your copy of the Data Samples folder and select the file named CE Data Sample 1.dat. The data will open in the Instrument window. 3. Click the electropherogram window to select it, then type Ctrl-Z to zoom the data to maximum size. Only Channel A data will be used. Auxiliary data (current, voltage, power, pressure) can not be integrated. 4. Right-click on the electropherogram and select Annotations. The following dialog will appear: Figure 7.2 Trace Annotations dialog 72 32 Karat 8.0 PN A33115AB Integration Integrating Data This dialog allows the selection of items that will be displayed in the electropherogram window. 1. Select the desired items (Peak#, Area, and Migration Time) by clicking the item in the left box, then using the green arrow to move the item to the right box. 2. Verify that Baseline and Show undetected peaks are selected (checked). 3. When the dialog looks like the one above, click OK. NOTE Some items may not appear on the electropherogram display until the data is integrated. 4. From the Method menu select Integration Events. This will open the Integration Events spreadsheet. There are two items in this table by default: Width = 0.2 and Threshold = 50. Every Integration Table must contain at least one Width and one Threshold value. 5. To initially integrate the data, use only the default parameters. 6. Select Analysis | Analyze from the menu bar, or click on the Analyze. The integration process takes a few seconds; larger data files, and files with more peaks, will take more time to process. During integration the Analyze button will turn into a “Stop” button. Clicking the Stop button will abort the analysis. When integration is complete, approximately 26 peaks will appear. Above or below each peak the peak number, area, and migration time will be displayed. The default parameters will have identified major peaks, but also captured a number of baseline artifacts that are not of interest. To zoom in on the baseline to view integration results in detail, you can use the mouse to “rubber box” the display. Click and hold anywhere in the image. Drag the mouse to highlight the desired area. When the mouse button is released, the selected area will fill the window. Use Ctrl-Z to zoom out. Examining the area between 3.0 and 3.4 minutes will demonstrate that even negative peaks (valleys) are being detected. MDQ User’s Guide PN A33115AB 73 7 Integration Optimizing Integration 7.3 Optimizing Integration 1. By selecting Window | Tile Horizontally the electropherogram and the Integration events table can be displayed together. 2. Resize the windows as desired by clicking and dragging a window's edge with the mouse. 3. Click in the electropherogram window, then use Ctrl-Z to zoom out, if necessary. 4. Click in the Value column of the Threshold event in the Integration Events Table. 5. Enter the number 100. 6. Analyze the data again. This time there should be about 10 peaks visible. Close examination will reveal that these are most likely real peaks, and not baseline artifacts, although some of them are quite small. Examine the area between 14 and 15 minutes, for example. Threshold determines how high a peak must rise above the background noise before it is recognized as a peak by the integration software. Increasing the value of Threshold removes background artifacts. If taken to extremes, it can also remove real data. 7. Set the Threshold value to 1000 and analyze the data again. You should observe that the minor peaks are no longer integrated, and the baseline below the large peaks has shifted dramatically. 8. Before examining the effects of the Width setting, restore the Threshold value to 100. 9. Click Analyze again. 10. Zoom in on the base of the major peaks. 11. Change the Width value to 0.1 and Analyze. The tail of the second major peak should now be split off as a separate area. 12. Change the Width to 0.5 and analyze. The tail is again cut off, but in a different place that it was with the smaller value for the window. The question will inevitably arise, “which is the correct integration?” The answer is, it depends. You, the analyst, must use your knowledge and judgement to determine the correctness of the integration results. In this example, the peak tailing is a separation artifact, and the area of the tails should be included in the area of the peak. To obtain this result, with THIS data file, a Width of 0.2 and a Threshold of 100 seem to be appropriate. Integration Parameters There are many other integration parameters besides the required Width and Threshold that can be used to generate an integration result that properly reflects the components of the sample. These are discussed at length in the resources listed in Appendix A. In the next part of this exercise, we will use some of these additional parameters to aid in the integration of a somewhat more complex data file. To begin, return the Width value to 0.2 and the Threshold value to 50 (the default values). Open the data file CE Data Sample 2.dat. Use Ctrl-Z, if necessary, to view the full file. This data file differs from the previous example in several ways. There are multiple major peaks, distributed throughout the run. There is a long stretch, from about 12 to 21 minutes, where there are many features that may be peaks, or may be artifacts. Close examination of the peak between 24 and 25 minutes will reveal that it is, in fact, at least three separate peaks 74 32 Karat 8.0 PN A33115AB Integration Optimizing Integration that are not fully resolved. The major peaks are also taller and wider than the peaks in the previous example. After examining this file, zoom out (Ctrl-Z), and analyze with the default Width and Threshold values. A large number of peaks will be identified. The big peak at the end of the run is not included. The analysis appears to end at around 28 minutes. Zoom in on the area around 27 to 28 minutes. Many peaks which appear to be quite small have been identified and the last peak is number 150. There is a limit of 150 peaks built into the software, which accounts for the end of the data being ignored. Not all 150 components are of interest. Some parameters need to be changed to reduce the number that are identified. In this part of the exercise, graphical programming will be performed to build the integration table. Width 1. Zoom out to full size, then zoom in on the first major peak (around 9.5 minutes). This peak is nearly 0.5 minutes wide at the base, and it is significantly wider than the surrounding smaller peaks. 2. Right click on the electropherogram and select Graphical Programming. A new menu of integration parameters will appear. 3. Select Width. A message will appear in the Status bar at the bottom of the instrument window which states Click on the start of the Peak. 4. Place the mouse pointer at a point near the left edge of the major peak along the baseline and click. You will be prompted to click on the End of the peak. After the Start and End of the peak have been entered, the following Width dialog box will appear. Your values may differ slightly from those shown, depending on exactly where you clicked. Figure 7.3 Determining Width of Peak There are several options available in this dialog. Start and Stop times refer to the points where you clicked. For the Width parameter, the value is the difference in these two time points (the width of the peak). There is an option to add this parameter to the Integration Events table or to the Manual Integration Fixes table. These two choices differ in one critical way. Items added into the Integration Events table become part of the method; they will affect MDQ User’s Guide PN A33115AB 75 7 Integration Optimizing Integration any data file that is integrated with that method. The Manual Integration Fixes table becomes part of the data file; items here will affect the integration of only the single data file to which they are attached. In this exercise, we will work only with the Integration Events table. Manual fixes are discussed in the resources in Appendix A. The Add to Table option will add the event into the Integration Events table. Analyze Now will add the event to the table, but it will also cause the integration to be redone with the new parameter in place. For now, click Add to Table. The new Width item will now be visible in the Integration Events table. This item will only be in effect for the interval between the Start Time and Stop Time. We would like this event to be in effect for the entire data set. To have a parameter active over the entire run, set both Start Time and Stop time = 0. Change the Start and Stop times of the new width value to = 0. For purposes of consistency with this manual, change the Value of the new Width event to 0.5 (your value should already be very close to this point). Now we have a problem. There are two Width statements with different values, both of which are declared for the entire run. We could delete the old Width statement, but the software offers an easier alternative. At the left of each line is a box with a red check-mark. Click on the red mark on line one to de-select it. This line will be ignored as long as it is unchecked. Your Integration Events Table should look like this one: Figure 7.4 Integration Events Table Threshold 1. Zoom out and click Analyze. You will see a small change in the integration. Obviously, changing the Width alone is not sufficient to integrate this data set. We are still finding too many of the very small peaks that are of no interest. 2. Right click on the electropherogram, select Graphical Programming, and then Threshold. 3. Following the prompts in the status bar, click near the start of the electropherogram (time 0.0), and at around 8.0 minutes. 4. When the dialog box appears, click Analyze Now. The new threshold value, which should be around 850, will have removed many of the small peaks in the 0-8 minute time range. The new threshold value will also have been added to the Integration Events table. 76 5. As with the Width parameter, change the start and stop times of the new Threshold event to 0, and deselect the old Threshold parameter. 6. Again for consistency, adjust the new Threshold value to exactly 850. 32 Karat 8.0 PN A33115AB Integration Optimizing Integration 7. Analyze the sample. You will observe that the change in threshold has had dramatic effects. Almost all of the small peaks have dropped out of the integration results. The peaks near the end of the electropherogram have been found. But we now have a problem with the cluster of peaks between 24 and 26 minutes. 8. Zoom into this area, and observe that the baseline starts about halfway up the start of the peak. This demonstrates the fact that global parameters do not always work for every peak in the data set. We need to add new lines that affect only the region of the clustered peak. Integrating a Peak Cluster Recall that with the original Width and Threshold values (0.2 and 50, respectively) this cluster was integrated nicely. Perhaps one or both of those values, applied to the region around the cluster, will achieve the desired results. 1. While still zoomed in, select Width from the Graphical Programming menu. 2. As prompted, click at about 24 and 25 minutes. In this case, we are using the graphical function here to define Start and Stop times rather than to define Width. 3. In the dialog box that appears, change the Value to 0.2. 4. Click Analyze Now. The cluster should appear similar to the one shown here: Figure 7.5 Well integrated peak cluster MDQ User’s Guide PN A33115AB 77 7 Integration Optimizing Integration This cluster is well integrated. Even the shoulder on the leading edge of the cluster has been detected. Use Ctrl-Z to zoom out. There are now two Width values in the Integration Events Table. One is global, the other (the new one) is only in effect over the time range specified in the event. Integration Off This integration is nearly done, but there is still a problem at the end of the electropherogram. At the end of the run is a baseline shift that is being recognized as a peak. 1. Zoom into the area from about 34 minutes to the end of the run. We can see that there is really nothing of interest beyond the peak at 35.2 minutes. 2. To turn off integration, select Integration Off from the Graphical Programming menu (while still zoomed in). 3. Click at about 35.8 minutes and at the end of the electropherogram, then click Analyze Now. The peaks in the specified area will disappear from the integration results, and the Integration Off item will be added to the table. Like the Width value we used to resolve the peak cluster, the Integration Off function is only active over a specific period of time. All of the integration functions except for Shoulder Sensitivity can be used globally or locally. For example, you could use another Integration Off event from Start Time=10 to Stop Time=20 to eliminate the remaining small peaks. For now, the integration appears to be acceptable. The Integration Events table should resemble the one below. The Start and Stop times may differ slightly, depending on where you clicked. Figure 7.6 Integration Events table 4. Delete lines one and two, since they are unused. Leaving them in and unchecked does no harm. 5. Save the method, or all previous efforts will be lost. 6. Select File | Method | Save As. 7. Save the method as Integration Exercise.met. NOTE You may see a warning that the Separation Time of the method is 0.0. Select Yes to continue with the save. This message appears because, in this exercise, nothing was added to the Instrument Setup window of this method, and this omission has been detected by the Auto-Validation function of the software. In actual practice, Integration Events would be added to the method used to acquire the data. 78 32 Karat 8.0 PN A33115AB Integration Integration Results and Reports 7.4 Integration Results and Reports The results of your integration efforts go beyond some labels on the electropherogram. These results may be used to generate reports and to identify and quantitate unknowns. These topics are covered in later sections of this manual. For now, use a pre-defined report to capture the current results. From the menu bar select Reports | View | Area%. A report will appear on the screen showing the Integration results in tabular form. If a hard-copy of this report is desired (and if a printer connected to your system), right click on the report and select Print. MDQ User’s Guide PN A33115AB 79 7 Integration Integration Results and Reports 80 32 Karat 8.0 PN A33115AB Calibration Introduction 8Calibration 8.1 Introduction The previous exercise demonstrated how the 32 Karat Software can be used to determine peak parameters such as migration time, area, and height. This information is of limited utility unless it can be translated into terms that are descriptive of the components in the sample. There are two basic questions that may be asked: “What is this component?” and “How much is present in the sample?” 8.2 Analysis Components Qualitative Analysis The first question, “What is this component?” refers to QUALITATIVE analysis. It can be answered in two different ways. First, if a known substance is used as a standard, the migration time or mobility of the resulting peak (possibly combined with other information such as a PDA absorbance spectrum), can be taken as evidence that a peak in an unknown sample represents that known substance. Second, if the migration time or mobility varies in some linear way with a molecular property, such as molecular weight or number of base pairs, a standard curve can be created that can be used to determine the defined quality (such as molecular weight) based on a series of standards. In this method, the unknown need not be present in the standard mixture. Quantitative Analysis This exercise will deal with the second question, “How much is present in this sample,” which is a question for QUANTITATIVE analysis. In quantitative analysis, we run a series of runs with differing concentrations of a known substance or substances. For each concentration of each component we determine a detector response. By generating a graph of detector response versus concentration, it is possible to determine the concentration of the components in an unknown. The 32 Karat Software simplifies this task. It contains tools for collecting the data from calibration runs, generating appropriate curve fits, and using the curve fit data to analyze unknowns. This exercise will also introduce you to using a sequence for post-run data reprocessing. We will use an External Standard calibration; in this method, data from standards and unknowns are acquired in separate runs. MDQ User’s Guide PN A33115AB 81 8 Calibration Creating a Calibration 8.3 Creating a Calibration Included in the Data Samples directory are five files named: CE Level 1.dat, CE Level 2.dat, CE Level 3.dat, CE Level 4.dat, and CE Level 5.dat. These data files are the results of runs of the same two components at five different concentrations as indicated in the table below. Component (units/mL) Filename Alpha Beta CE Level 1.dat 1.0 4.0 CE Level 2.dat 2.0 4.5 CE Level 3.dat 3.0 5.0 CE Level 4.dat 4.0 5.5 CE Level 5.dat 5.0 6.0 The first step in the analysis is to identify the expected migration times of the two peaks. To do this, open an instrument window (continue to use the offline UV instrument from the previous exercise). 1. Select File | Data | Open and navigate to the Data Samples directory. 2. Open your copy of the file CE Level 3.dat. Two channels of data are present: Channel A (UV 214nm) and Channel C (current). You may minimize the Channel C window, as it will not be used in this exercise. Channel A is the electropherogram from the analysis of the middle concentration of the calibrators. The smaller of the two peaks between 3.5 and 4.5 minutes is Alpha, and the larger of the two is Beta (previously determined in runs of the individual components). Developing a Calibration Method We will build a new method to calibrate our data set. 1. Select File | Method | Open. 2. Navigate to your copy of the Data Samples directory and open the method CE Calibrate.met. 3. Select Analyze to integrate the data set. (The integration parameters have already been optimized for you.) The two large peaks will be well integrated with the default parameters. 82 4. Right click on the electropherogram and select Graphical Programming, then select Define Peaks. 5. Click in the electropherogram to bracket the large peaks (approximately 3.7 and 4.2 minutes). 32 Karat 8.0 PN A33115AB Calibration Creating a Calibration The following dialog will appear: NOTE Your time values may differ slightly from those shown. Figure 8.1 Define Peaks dialog The Define Peaks functions allows you to place any peaks in the specified window into the method's Peaks/Groups table. Only peaks that have been identified during Analysis can be entered into a method. Start and Stop times define the part of the electropherogram that contains the peaks we wish to add. Migration time window allows us to specify how much variability in migration time is allowed before a peak is no longer considered to be the component of interest. This can be defined as either a percentage of the defined time, or as an absolute time interval. We can add all the peaks in the window to an existing table (if any). If we chose to Replace existing peaks, any currently defined peaks that fall within the newly defined time windows will be deleted. For this exercise, accept the defaults. 1. From the menu bar select Method | Peaks / Groups. A table will open listing the two peaks just added. As these peaks have not yet been named, the system will create a name based on the migration time. 2. Click in the Name column and change the name in line 1 to Alpha and the name in line 2 to Beta. 3. Use the scroll bar at the bottom of the window to review the column headings in this table. We will only use some of these columns in this exercise. See the resources in Appendix A for more information. MDQ User’s Guide PN A33115AB 83 8 Calibration Creating a Calibration The items that can be changed here include: • The defined migration time and allowed window for a component • The data channel to be used (for multichannel detector types) • The type of curve fit to be used for the calibration data set • Up to 10 calibration levels We must input the concentration values from the table above. 4. Scroll right until the columns headed Level 1 through Level 5 are visible. 5. Input the “known” values for Alpha and Beta. Level 1 is the lowest value, Level 5 is the highest. For now, we will accept the defaults for the other columns. When all the values have been entered, the table should look like Figure 8.2. Figure 8.2 Peak/Group Tables 6. Save your method. 7. Right click on the electropherogram and select Annotations. 8. Select parameters so that only Name and ESTD concentration are in the Show box. 9. Click OK. 10. Analyze the sample again. The name of the peak will appear on the electropherogram. ESTD concentration will be 0.000, because we have not yet completed the calibration process. At this point we have only used one of the calibration samples to define our peaks. We will use all five calibrators to generate the standard curves for Alpha and Beta. 84 32 Karat 8.0 PN A33115AB Calibration Creating a Calibration Generating the Calibration Curve To generate the curves, we will reprocess the data through a Sequence. In an earlier exercise, we used a Sequence to perform multiple runs. Sequences can also be used to do batch reprocessing of data. 1. Select File | Sequence | Sequence Wizard to open the sequence wizard. 2. Click on the File icon and select CE Calibrate.met (the file we have been editing). 3. For Data File Type, select From existing data files. 4. Click Next. The next dialog allows us to select multiple data files. 5. Click on the File icon. This will open a dialog that allows the opening of multiple files at one time. 6. Navigate to the Data Samples folder. 7. Locate the file CE Level 1.dat. 8. Double click on the file name. When you double click, the file name is added to the list at the bottom of the dialog. Repeat for CE Level 2, CE Level 3, CE Level 4, and CE Level 5, so that all five files appear in the list. 9. Click Open when done. 10. Verify that the five files are listed in the window, then click Finish. This will open a Sequence table with the method and the five data files listed. 11. Scroll right to the Filename column. The five files should be listed in order. 12. Scroll back left to the Level column. Change the level in line 1 from 0 to 1. 13. Use the down arrow to move to the same column in line 2, and change the 0 to 2. The Level entered in this column of the sequence table corresponds to the Level column in the Peak \ Group table. 14. Continue down the column changing the remaining zeros to 3, 4, and 5, respectively. As you change the level to a non-zero value, the sample type automatically changes to Calibration. 15. Click in the Run Type column of line 1. The dialog shown in Figure 8.3 will open. The items here are the available run types. 16. Click on Clear All Calibration and click OK. The run type for line one will change to CAL CCA. Selecting this type will cause any previous calibrations of this data set to be cleared before the new calibration is performed. MDQ User’s Guide PN A33115AB 85 8 Calibration Creating a Calibration Figure 8.3 Sample Run Types dialog 17. Save the sequence with the name CE Calibrate.seq. The right and left sides of the window should look like Figure 8.4. Figure 8.4 Sequence Table 86 32 Karat 8.0 PN A33115AB Calibration Creating a Calibration We are now ready to Process the sequence and generate the calibration. 1. Select Process from the Sequence menu. The dialog in Figure 8.5 will appear. 2. Run range must be All. 3. Processing mode must be set to Reintegrate. 4. Click Start. The processing will require a few seconds to complete. As each data file is analyzed, the status column in the Sequence table will change to Complete. Figure 8.5 Process Sequence dialog 5. From the menu bar select Method | Review Calibration. A window will open showing the results of the calibration for the first component (Alpha). The data looks reasonable, but the line fit could be better. 6. Select Beta in the upper right corner of the window. The curve fit here is certainly not acceptable. The lower right corner of the window indicates that this fit has been made point-to-point. Perhaps another type fit would be better. 7. Re-open the Peaks / Groups table. 8. Scroll left to the column headed Fit Type. 9. For line one (Alpha) select Quadratic. 10. For line 2 (Beta) select Linear. 11. In line one, select the box in the Zero column to force the line through the origin. 12. Do not click Zero in line 2. 13. Save the method and look at the calibration results again. MDQ User’s Guide PN A33115AB 87 8 Calibration Analyzing Unknowns This time the curve fit should be better for both Alpha and Beta. In practice, you would select and vary the curve fit parameters to determine the most appropriate fit for your data set. Saving the method will save the calibration. It is not necessary to reprocess the sequence. 8.4 Analyzing Unknowns Creating a standard curve is only useful if it can be used to determine the amount of material in an unknown. Unknowns can be added to the sequence table after calibration lines. When processed, the unknown peaks will be compared to the standard curve and the values calculated. 1. Open the Sequence Window. 2. In line 6, click in the Method column and select CE Calibrate.met (the method we have been using). 3. Under Filename, select Unknown1.dat. 4. Save the sequence. 5. Instead of reprocessing the entire sequence, click on the Range button in the Process Sequence dialog (Figure 8.5) and enter 6 as the line to be run. 6. Click Start. To see the results of this analysis, you can display the electropherogram for Unknown1.dat, or you can view a report. To use a default report, select Reports | View | External Standard from the menu bar. To print this report to your system's default printer, right click in the report window and select Print. See "Creating a Method Custom Report" on page 11-102 for more information. This exercise has covered only the basics of quantitative analysis. For more detail and more options, refer to the resources in Appendix A. 88 32 Karat 8.0 PN A33115AB Qualitative Analysis Data Analysis and Reporting 9Qualitative Analysis 9.1 Data Analysis and Reporting In some modes of CE separation, the order of migration is determined by a molecular quality. The most common applications that utilize this approach are separation of proteins by molecular weight and the separation of nucleic acids by number of base pairs. The 32 Karat Software allows you to construct a standard curve based on parameters such as these. In the case of DNA, for example, a series of fragments of known length are separated in a gel-filled capillary. A plot of migration time versus chain length is constructed, and this plot is used to determine the length of an unknown fragment. In this exercise we will create a standard curve based on the base number of single stranded DNA. A sample of ssDNA is injected into a capillary containing a polymer network. Smaller molecules can negotiate through the polymer strands more easily than can larger fragments, resulting in a separation based on DNA chain length. The migration time of peaks of known lengths of ssDNA is used to create a standard curve that can be used to estimate the length of an unknown fragment, Figure 9.1 Electropherogram of Single-stranded DNA MDQ User’s Guide PN A33115AB 89 9 Qualitative Analysis Data Analysis and Reporting 1. Open an offline instrument configured for a UV detector. 2. From the Data Samples directory, open the data file ssDNA 40-60.dat and the method CE Quality.met. The data file represents the separation of a mixture of poly-A oligonucleotides ranging from 40 to 60 bases in length. The method contains an Integration Events table that will successfully integrate these peaks, and a Peaks \ Groups table that will name the peaks with the number of bases they represent. 3. Analyze the data. 4. Right click on the electropherogram and select Annotations. 5. Add Name to the list of annotations to display, then click OK. Next, we must enter the base numbers (Y) and the migration times (X) into the method. From the Method menu select Qualitative analysis to open the dialog shown below. Figure 9.2 Quantitative Analysis dialog We can select the type of data we want for the X-axis. In this exercise, we are using migration time, but we might also use another parameter such as Mobility. We can select either a linear or a logarithmic scale for this axis. Minimum and Maximum refer to the X-axis limits over which we will allow the interpretation of qualitative data. This limits how far beyond the ends of the data set we are willing to extrapolate to find the quality of an unknown. For the Y-axis, we can use any name we choose. Because our quality is the number of bases comprising the oligonucleotide, enter Bases. A Linear Y-axis scale will be appropriate for our data. 90 32 Karat 8.0 PN A33115AB Qualitative Analysis Data Analysis and Reporting There is a two column spreadsheet in this dialog box (Figure 9.2). The Left column contains data for the Y-axis. The heading of this column will contain the text entered for the Y-axis label, in this case “Bases”. The Right column contains data for the X-axis. The heading is that selected for the X-axis. In this case we are using Migration Time. 1. You must manually enter the X and Y values into the spreadsheet. One way to obtain this data in tabular form is to open an Area % report by selecting Reports | View | Area % from the menu bar. This may be printed if you have a printer connected to the system, or the report can be displayed as a window alongside the Qualitative Analysis window. 2. For each peak, enter the base number (from 40-60) and the corresponding migration time. As you enter the data, it will be graphically displayed in the lower right corner of the dialog box. 3. When all the data has been entered, select Fit Type to determine the best curve fit to the data set. In this example, the highest “Goodness of Fit” values is obtained using a Cubic fit. 4. When done, do a Save As; rename the method Quality 1.met. 5. Analyze the data file again. 6. Right click on the electropherogram and select Annotations. 7. Add Quality to the right column (“Name” should already be present). 8. Click on the word Quality to highlight it, then set the number of decimals to 2. 9. Click OK. The electropherogram will now display the assigned base number (as Name) and the base number calculated using the standard curve (as Quality). The base number is an integer; the small discrepancy between the assigned value and the calculated value is due to the fact that our goodness of fit was not perfect. This method can now be used to estimate the size of an oligonucleotide of unknown length. To do this, the unknown would be analyzed by the same method used to analyze these standards, and the data analyzed with this method. MDQ User’s Guide PN A33115AB 91 9 Qualitative Analysis Data Analysis and Reporting 92 32 Karat 8.0 PN A33115AB Mobility Functions of Mobility 10Mobility 10.1 Functions of Mobility Mobility is a parameter that quantifies how a charged particle migrates in an electrical field. The equations for calculating mobility are defined in Appendix B. Stated briefly, a component with a higher mobility will move more rapidly through the separation medium than will a component with a lower mobility. Because particles may be attracted to either the cathode or the anode, mobility has a vector component — it may be positive or negative. Mobility toward the cathode (negatively charged electrode) is defined as positive, and mobility toward the anode (positively charged electrode) is defined as negative. Mobility is not a constant like molecular weight, as it can change depending on the separation conditions employed. As an example, consider the amino acid glycine. At alkaline pH, this molecule has a net negative charge (NH2-CH2-COO-) and a negative mobility. At acidic pH, it has a net positive charge (NH3+-CH2-COOH) and a positive mobility. Near pH=7, it has no net charge (NH3+-CH2-COO-) and a mobility of zero. In practice, mobility is defined for a given molecule under a given set of conditions. Variations in separation conditions that affect all species equally (such as variations in electroosmotic flow or the voltage delivered by the power supply), and variations that have similar effects on closely related groups of compounds (such as the effect of small pH changes on a series of basic drugs) can be accounted for by including in the analytical run a standard of defined mobility. There are two different mobility values to consider: electrophoretic mobility (µ), which represents the movement of the molecules in the electrical field, and apparent mobility (µapp), which is the algebraic sum of the electrophoretic mobility and any other forces which drive the sample through the capillary. The most common additional force is electroosmotic flow (EOF, sometimes referred to as µeof), although other factors such as pressure-assisted migration could also be considered here. In this discussion, we will limit apparent mobility to the sum of electrophoretic mobility and EOF: = app – eof The 32 Karat Software has the capability to use mobility as an alternate to migration time for peak identification. Used in this way, mobility increases the robustness of a capillary electrophoretic method by correcting for small changes that may be present from run to run. The software is also capable of displaying electropherograms with the X-axis scaled in terms of mobility rather than time. In this exercise, you will review these features of the software. MDQ User’s Guide PN A33115AB 93 10 Mobility Mobility Markers 10.2 Mobility Markers Every run that will incorporate mobility calculations must include a mobility marker. This is a component for which the mobility has been defined under a given set of run conditions. Reproducing these run conditions in subsequent runs is critical in using mobility as a parameter for peak identification. Buffer factors, such as ionic strength and pH, are especially important. See the resources in Appendix A for more information on this topic. Assigning Mobility Values Assigning a mobility value to the mobility marker involves a series of steps. NOTE The following assumes that the method development work to create an effective separation technique for the samples to be analyzed has already been developed. 1. Create a sample containing the proposed marker and an EOF marker. The sample matrix should be a close approximation of the unknown samples to be analyzed. The EOF marker is a small, uncharged molecule that can be detected at low concentration. It is used to calculate the contribution of electroosmotic flow (µeof) to the apparent peak mobility. If running under conditions where EOF is minimal (such as a neutral coated capillary) the EOF marker can be omitted, as µeof is approximately equal to zero under these conditions. Standards for other peaks expected in the unknowns should be included in this run. Figure 10.1 Advanced Method Options dialog 94 32 Karat 8.0 PN A33115AB Mobility Mobility Markers 2. Run the separation, and integrate the results. 3. Adjust all integration parameters to their final form. 4. Add the mobility marker peak and the EOF marker peak (if used) to the Peaks / Groups table. The method must contain the correct dimensions for the capillary length. These are entered in the Capillary/Performance tab of the Advance Methods Options window (accessible from the Method menu). The capillary length and length to the detector are required. 5. Annotate the electropherogram with Apparent Mobility and Mobility. 6. Analyze the data again. The Apparent Mobility and Mobility values will be displayed. At this point, the mobility values should all be zero. 7. Calculate the electrophoretic mobility of the mobility marker according to the following: = app – eof where µapp is the apparent mobility of the reference peak and µeof is the apparent mobility of the EOF marker. 8. Scroll right in the Peaks / Groups table to the Mobility column. 9. In the row containing the mobility marker, enter the value of µ determined in step 4. 10. Select the in the Mobility Marker option column of that same row. 11. Save the method. 12. Analyze the sample again, and examine the electropherogram. The mobility value of the marker should now be non-zero, as should the mobility values for all other peaks in the electropherogram except the EOF marker. The EOF marker should have a value very close to zero (variation from zero at this stage is the result of rounding errors). If the results are acceptable, the method can now be edited to allow the generation of an electropherogram with mobility as the X-axis in place of time. This option is selected in the Initial Conditions tab of the Instrument Setup window: MDQ User’s Guide PN A33115AB 95 10 Mobility Mobility Markers Figure 10.2 Mobility Options in the Instrument Setup dialog Mobility Plot Selecting Mobility (or Apparent Mobility) will cause the creation of an additional plot after data analysis. This plot will show the electropherogram re-scaled so that the X-axis is displayed in terms of Mobility (or Apparent Mobility) rather than time. The Plot trace after voltage ramp option should be selected unless peaks are detected during the voltage ramp-up phase of the separation. Deselecting this option may result in the voltage ramp interval being over-emphasized in the resulting mobility plot. NOTE Mobility channels cannot be generated for data files that were created with this option turned off. It must be ON during data acquisition. When using this option, there must be at least one Mobility Marker identified in the Peaks/Groups table of the method. 13. After selecting the appropriate mobility channel options, save the method. 14. Run the sample again. At the end of the run the mobility trace will be generated. 96 32 Karat 8.0 PN A33115AB Mobility Demonstration: Using the Mobility Features 10.3 Demonstration: Using the Mobility Features NOTE The following is not intended to be a hands-on exercise, but rather a step-by-step example of the process described above. If you wish, you can attempt to reproduce these results on your instrument. This example utilizes a UV detector and Beckman Coulter Test Mix B (PN 501333). We have previously determined the optimum conditions for the separation of a mixture of two components, ALPHA and BETA (see the exercises earlier in this manual). ALPHA has been chosen as our mobility marker. Our method has considerable EOF, so we will need to use an EOF marker. We have chosen to use Ethanol; it is readily soluble in our sample, creates a detectable peak, and does not interfere with our analysis (all previously determined -- in practice, this must be shown by experiment). A final concentration of 5% Ethanol has been chosen. The sample is prepared and run. After step 6 (above) the resulting electropherogram looks like this: MDQ User’s Guide PN A33115AB 97 10 Mobility Demonstration: Using the Mobility Features Our ethanol marker gives a small, negative peak, but it is properly detected by the software. The values obtained are listed in the table below: Peak Name Apparent Mobility Mobility EOF 0.00060227 0.00000000 ALPHA (marker) 0.00034763 0.00000000 BETA 0.00032093 0.00000000 As expected, the faster moving EOF marker has the higher apparent mobility. The units of mobility are cm2V-1sec-1 We can calculate the Electrophoretic Mobility of ALPHA according to = app – eof substituting yields µ = 0.00034763 - 0.00060227 = -0.00025464, the mobility of ALPHA under these separation conditions. The mobility value is a negative number, indicating that ALPHA's electrophoretic migration is toward the anode, and is opposite the direction of the electroosmotic flow. NOTE In practice, the above run should be repeated several times to verify that the system is giving consistent results before defining the mobility value for the mobility marker. We now re-open the Peaks / Groups table and insert the value of the mobility marker as described in steps 9 and 10. The table now looks like this. We save the method and analyze the data file again. The results are now: Peak Name 98 Apparent Mobility Mobility EOF 0.00060227 -0.00000000 ALPHA (marker) 0.00034763 -0.00025464 BETA 0.00032093 -0.00028134 32 Karat 8.0 PN A33115AB Mobility Demonstration: Using the Mobility Features The electrophoretic mobility of the EOF marker is close to zero, as expected. The mobility of ALPHA is the value we defined it to be. The mobility of BETA has now been calculated relative to the mobility of ALPHA. We can now set up to collect data for a mobility plot, if we wish. 1. Open the Instrument Setup window and click on the Initial Conditions tab. 2. Select Mobility (see the figure above). After saving the method and running the sample again, we have two electropherograms. One is the UV electropherogram, which looks very similar to the run we used to measure the mobility of the marker. The second appears VERY different, as shown here. The order of the peaks has been reversed, because the latest eluting peaks have the most negative mobility. The relative spacing between the peaks has also changed. MDQ User’s Guide PN A33115AB 99 10 Mobility Peak Identification by Mobility 10.4 Peak Identification by Mobility In the exercise on mobility, we used migration time and a migration time window to establish the identity of peaks in a data file. In the same fashion, we can use mobility and a mobility window to identify peaks, based on the mobilities of standards. The choice of migration time or mobility applies to the entire electropherogram; it is not possible to use time for some peaks and mobility for others. 1. The option to use mobility for peak identification must be selected on the Options tab of the Method Properties window (under the Method menu). 2. Select Mobility based and click OK. 3. Next, peaks are added to the Peaks / Groups table (if not already present). This is most easily performed by using the Add Peaks function from the Graphical Programming menu as described earlier in the section on Integration. 4. Open the Peaks / Groups table and scroll to the Mobility columns. The assignment of the mobility of a mobility marker has already been described. To identify other peaks by mobility, it is necessary to manually input their mobility value and window. For the peak BETA in our example, the mobility value was determined to be -0.00028134, so this value is entered into the table for the line defining BETA. The default Mobility Window is zero, which means that the peak would only be detected if it had exactly the same mobility value as that defined. Some variation can be expected. The appropriate value will be determined by trial and error. A window of 5-10% is a good starting point. For BETA, a 5% window would be 0.00001407; the window is always an unsigned number (not positive or negative). At this point our Peaks / Groups table looks like this: When we click on Analyze, the peak identification will be by mobility. To verify this, change the Mobility entry for BETA to some other value like -0.00025227 and Analyze again. Because the mobility of the peak is now outside the window, it will be integrated, but not associated with the ID “BETA”. 100 32 Karat 8.0 PN A33115AB Creating Reports Introduction 11Creating Reports 11.1 Introduction The ultimate purpose of operating a CE or any other instrument system is to answer a question. This answer is only useful if it can be communicated. The 32 Karat Software includes a powerful suite of utilities for creating printed reports. It also allows you to export data and results to other software packages. Full integration into the Windows operating system environment allows you to copy and paste electropherograms and other information from 32 Karat Software directly into a wide variety of other software packages, such as word processors. This section of the manual will describe how to use the built-in report generating features of the software. For information on other ways of moving data to other applications, see the resources listed in Appendix A. In other sections of this manual, you have been introduced to some of the default reporting options. Here you will learn how to customize a default report to include the information you want to present. We will continue to use a UV instrument as a prototype. LIF reports are essentially identical to UV reports. PDA data can be reported in the same formats as UV data; additionally, other PDA specific report types are available such as PDA Spectrum Library reports. The most simple approach to reporting is to use pre-defined reports. These were used in earlier sections of this manual. From the menu bar, select Reports | View to display the menu shown below which lists the default set of pre-defined reports. Figure 11.1 Reports | View selection In this exercise we will use the data file and method from the exercise on Qualitative Analysis. A review of the reports menu will show that there is no default report for qualitative data, so one will have to be created. We will create a Method Custom Report, (which will become part of the method). We will also save the report as a standard template that will be added to the reports list. MDQ User’s Guide PN A33115AB 101 1 Creating Reports Creating a Method Custom Report 11.2 Creating a Method Custom Report 1. Open your Virtual UV instrument from the main 32 Karat window. 2. From your working folder, open the file CE Data Sample 3.dat and the method CE Quality.met. Use the copies of the data and the method that were used during the exercise on Qualitative Analysis. We will be creating a report based on the analysis results generated during that activity. 3. From the Method menu, select Custom Report. A blank window will open. (If a method custom report has previously been developed with the method you are using, it will automatically open at this point.) Modifying a Report Template Rather than developing a report from nothing, we will modify an existing report template to simplify this task. A report template is a pre-defined set of instructions for the creation of a report. A number of templates are contained in the software. You can add templates by creating a new one or editing an existing one and saving it under a new name. We will use the Area% template as the basis for our Qualitative Analysis report. From the file menu select Report Template | Open and select Area%.srp. The template will open with the results from the open data file displayed. The indications that we are looking at a template and not at a report are that the header information is highlighted, the table has a broken border, and the ruler is visible. As a first step, we will change the title of the report. The report editor works very much like a word processor. 1. Using the mouse, highlight the heading “Area % Report.” 2. Type Qualitative Analysis Report. 3. Highlight the new title, and select Bold and Italic from the toolbar. The information below the title that is highlighted in gray represent fields. Fields allow you to insert blocks of information without tedious code writing. Fields and text may be used together; in this template, each field is preceded by a text descriptor. These fields may be easily repositioned. 102 4. Click after the Acquired field, and press the Delete key. This will move the Print Time field to the same line as the Acquired field. 5. Press the Tab key twice to place space between the two fields. 6. Click in the blank line below these two fields and type User ID:, then press the Tab key. 7. Right click and select Insert Field, then User Name. A new field will appear with the current User Name (the default name “System” will appear if no user name has been defined). 8. Use the keyboard just as you would a word processor to align the field and the text in the desired manner. 32 Karat 8.0 PN A33115AB Creating Reports Creating a Method Custom Report Below the header information is a graph displaying the electropherogram. By default, the graph is scaled to show the full range of data. In the case of CE Data Sample 3, the area of interest is only at the right end of the electropherogram. As the next step, we will adjust the electropherogram display so that the peak region is more easily seen. 9. Double click on the graph to display the Graph Properties box. Figure 11.2 Data Graph Properties The Trace Setup tab is where we select the data to be displayed. We can select the Current Data (the file currently open in the Instrument window) or a data file (or files) stored on the computer. For example, we may want to display the results from analysis of a standard along with results from an unknown. We can display multiple channels from a common data file by selecting the same Data Source, but selecting different channels in the Trace column. For example, the UV and electrical Current traces could be displayed simultaneously. The X and Y offset and scale features can be used to position the traces so that the pertinent details are visible. These features are described in the resources listed in Appendix A. Units is a label which can be adjusted to match the data displayed. For an LIF detector, this could be changed to Fluorescence by selecting in the Units option and entering the desired text. MDQ User’s Guide PN A33115AB 103 1 Creating Reports Creating a Method Custom Report 10. Click on the Annotations button. 11. Because this will be a Qualitative report, remove any existing annotations from the right side panel. 12. Add Quality, and set the number of decimal places to zero. 13. Click OK to return to the main dialog. Now we can change the X-axis so that the peak area fills the graph window. 14. Click on the Axis Setup tab. 15. With X-axis selected, click on Use this range. 16. Enter a minimum of 24 and a maximum of 30 to bracket the 24-30 minute time interval. 17. When done click OK. The part of the electropherogram containing the 21 peaks should fill the graph, and each peak should be properly labeled with the Quality value. The graph can now be resized by dragging the handles on the right and bottom edges of the image. Moving the graph requires that it be treated as a text object. 18. To center it on the page, single click the graph to select it (a narrow dotted border will appear) and use the centering icon from the toolbar. Space can be added above and below the graph by inserting blank lines with the Enter key. Additional charts can be inserted by right clicking on an empty line and selecting Insert Graph. You might, for example, want a second graph showing the full time range of the data set. The new graph is then formatted as described above. Below the graph is a table with a variety of peak parameters. Some of these we will keep, others we will change for our new report. 1. Right click on the column header Area% and choose Change Parameter. 2. Select Quality as the new parameter, and change Decimals to one. 3. In the Column Header field, type Bases. 4. Click OK. 5. We now have a column that contains the number of bases that the software has calculated for each peak. 6. Right click in the table and select Report Properties. 7. We are not interested in Height or Height %, so remove them from the right-side box using the red arrow. 8. Click OK. Our table is now too wide for the remaining three columns. By clicking on the vertical dividers between columns, we can drag the column widths to whatever we desire. At any point during editing, we can click on the Print Preview icon to see how the report will look on our default printer. Save the method. The new report is now part of the Quality method, and will be available whenever the method is used by selecting Method Custom Report. 104 32 Karat 8.0 PN A33115AB Creating Reports Creating a Method Custom Report Saving a Report as a Template In order to use the report in another method, we can save the it as a template. 1. From the File menu, select Report Template | Save As. 2. Type Quality as the filename and click. By default, the template will be saved with the extension *.rep. 3. Select File | New Method. 4. Open Method Custom Report by selecting it from the Method menu (if not already open). The report will be blank, because a new method has no defined Custom Report. 5. From the File menu, select Report Template | Open, and open the Quality.rep template that you created. When the new method is saved, it will contain the Quality.rep as the default Method Custom Report. The Custom Report saved in a method can be edited and changed at any time. Saving a Report as a Default Report We can also save this report as one of the default reports in the Reports menu. 1. Again select Report Templates | Save As from the File menu. 2. This time save the template with the name Quality.srp. 3. Click Save. By saving with the *.srp extension, you have created a new default template. The next time an instrument window is opened, the new report type will be available from the Reports menu. This is a handy way to handle reports that are used frequently. Report Templates Custom reports are templates for displaying and printing data and objects. 32 Karat Software comes with a suite of standard report templates for a variety of report types. These can be used as-is or can be modified using the Method Custom Report or Sequence Custom Report editor and saved as new templates. Method Custom Report Templates A method custom report template is created and saved as part of a method, but it can also be saved as a template file that can be opened from within another method and used or edited. Sequence Custom Report Templates Sequence custom report templates are used for reporting data generated during batch sequence operations. For example, certain Run Types require a report template for reporting the data. When you designate a run as a Begin Summary run, for example, you will be required to designate a template name for the summary report. MDQ User’s Guide PN A33115AB 105 1 Creating Reports Creating a Method Custom Report Other run types requiring templates include Suitability, QC Check Standards, Duplicates, and Sequence Vial Report. Refer to Appendix F for information about Sequence Vial Reports. Sequence Custom Report templates are created and edited using the Sequence Custom Report editor. Standard Report Templates Standard templates for many report types are provided with 32 Karat Software, however you may wish to create your own or edit the templates provided. Standard report templates (Area %, External Standard, Internal Standard, and Normalization) are located in the c:\32Karat program directory and have the .SRP extension. You can create new standard report templates by saving your report template using the .SRP extension. Examples of the standard reports can be found in the Standard Reports section. Sequence Reports Sequence reports are only created and saved using the Sequence Custom Report editor. Unlike method custom reports, sequence custom report templates are not saved as part of the sequence file, and therefore must be saved as a template file if you want to use a sequence report template to generate a report. The following standard sequence report templates are provided with 32 Karat Software: • Calibration • Summary • Duplicate • QCCheckStd • Spike • SysSuit They are located in the 32 Karat Software /Sequence directory and have the .BRP extension. 106 32 Karat 8.0 PN A33115AB Appendix A Additional Resources AAppendix A A.1 Additional Resources 32 Karat Online Help The Online Help is your primary software reference for the 32 Karat Software. It describes all of the features used in this manual. In addition, it describes all of the advanced features which are not covered here. To access the Help, select Help | Contents from the instrument window menu bar. Context-sensitive help is available by selecting the Help button located in dialog boxes, or by pressing the F1 key. Installation and Maintenance Manual The first place to look for answers to questions on hardware and maintenance is the Installation and Maintenance Manual. This document includes detailed descriptions of routine operations, such as rebuilding a capillary cartridge, and of non-routine operations such as minor repairs. A printed copy of this manual is shipped with the instrument. An electronic copy is available on the Manuals CD-ROM shipped with the 32 Karat Software. Beckman Coulter Service If you have determined that a problem exists with the instrument that can not be fixed by following the procedures in the Installation and Maintenance Manual, contact your local Beckman Coulter, Inc. Service Representative. There may be a charge for this service. Help by e-mail A special mailbox has been created for users of 32 Karat Software. Send your questions and comments to [email protected]. A team of specialists will review your message and contact you. Messages received outside of regular business hours (Monday through Friday, 8 a.m. to 5 p.m. Pacific time) will be reviewed the next business day. Other References There are many publications dealing with applications of capillary electrophoresis, methodology, routine operations, and related techniques. Your local research library is the best place to begin. Beckman Coulter web site. http://www.beckmancoulter.com/ - The online source for the latest information on CE from Beckman Coulter. P/ACE Setter Newsletter - A quarterly newsletter for scientists employing capillary electrophoresis. P/ACE Setter features tips and techniques and product updates. Each issue features a specific application for CE. Free subscriptions are available through the Beckman Coulter web site, or contact your local Beckman Coulter representative. Your Local Beckman Coulter Representative - The best source for product information. Contact your representative for information on the latest products, or to place an order. Software Validation Pack PN A33115AB A-1 A Appendix A Additional Resources A-2 32 Karat 8.0 PN A33115AB Appendix B CE Calculations BAppendix B B.1 CE Calculations Introduction Processing of electrophoretic data is similar to the processing of chromatographic data, but there are some differences. Some “CE Specific” calculations are built into the 32 Karat Software. This appendix describes those, along with some other useful calculations. Ohm's Law V = IR The most important relationship to know in capillary electrophoresis is Ohm's law. This simple relationship defines the interaction between Voltage (V), Current (I), and Resistance (R). For example, if Voltage is held constant, change in Current must be due to a change in Resistance. Information of this type is invaluable in developing and troubleshooting CE methods. Corrected Migration Time t'ref tcorr = t tref t = migration time of peak of interact tref = actual migration time of reference peak tref = expected migration time of reference peak (from peak id table) ( ) Velocity-Corrected Area Acor LdA = vA = t r v = velocity Ld = capillary length to detector t = migration time A = uncorrected peak area In CE, early peaks migrate through the detector window faster than do later peaks. This creates a peak area bias, which is eliminated by using velocity-corrected peak area. MDQ User’s Guide PN A33115AB B-1 B Appendix B CE Calculations Mobility Mobility is calculated as the apparent mobility minus the contribution of electroosmotic flow. µ = µapp – µeof Once the mobility of a reference analyte has been determined, the mobility of related analytes can be calculated. µ = LdLt ( 1 Vt 1 – Vref tre f ) + µref V = average applied voltage up to the migration time of the peak of interest Ld = capillary length to detector Lt = total capillary length tref = migration time of reference peak in the current run µref = defined mobility for the reference peak Vref = average applied voltage up to migration time of reference peak t = migration time of the peak of interest Apparent Mobility is the sum of true mobility and the mobility caused by the electroosmotic flow. Apparent mobility can be calculated directly for any peak. The apparent mobility of a neutral marker (one that has a true mobility of zero) is called µeof, the electroosmotic mobility. v LdLt µap = = E Vt p Ld Lt V t v = = = = = (apparent mobility) capillary length to detector capillary total length average voltage up to migration time of peak migration time of the peak velocity Mobility calculations depend on an accurate measurement of the average applied voltage up to the point that the component passes the detector. The output from the P/ACE MDQ voltage monitor is used to calculate average applied voltage as follows: n Vi µap = p n Vi B-2 i=1 n = data point number at peak migration time = voltage value at data point i 32 Karat 8.0 PN A33115AB Appendix C Understanding PDA Data CAppendix C C.1 Understanding PDA Data Overview Most of the exercises in the manual have used example data from an ultraviolet detector system. LIF data files appear nearly the same as UV data files. From the point of view of data analysis, the Y-axis scale is the primary difference between UV data and LIF data. PDA data consists of multiple components. These are: Channel data: each channel is equivalent to a UV trace. Up to three channels can be collected simultaneously. 3D spectral data: the three axes of this data set are time, wavelength, and absorbance. Multi-Electropherogram data: similar to channel data, this is a trace of absorbance versus time extracted from the 3D spectral data. There are no limits to the number of data sets that can be created. Channel data and multi-electropherogram data are processed in the same manner as UV data; all the procedures described in this manual apply. The remainder of this appendix will describe some of the features of PDA data. If you wish to re-create these displays on your computer screen, you will need to open an instrument configured for a PDA detector (offline mode is satisfactory). From a copy of the Data Samples directory, open the data file CE PDA Data Sample.dat. In the figures in this manual, the background color of the windows have been changed from the default color scheme to facilitate printing. The multiple components of the PDA data set are available by choosing View | PDA View from the menu bar. MDQ User’s Guide PN A33115AB C-1 C Appendix C Mixed View Each item in the menu represents a different way of presenting the data on the screen. Only one of these selections may be made at one time. C.2 Mixed View This option is shown below. This image illustrates several of the other options as well. This window shows four different views of the same data set. The sample is the same mixture of Alpha and Beta that has been used throughout this manual. This window is divided into four panes. By clicking and dragging the bars that separate the panes, the relative areas assigned to each pane can be changed. The views available here are: Left C.3 Upper Contour Plot Lower Electropherogram Right Spectrum 3D Plot Contour Plot The Contour plot is an overhead view of a three dimensional data set. The X and Y axes are Time and Wavelength, respectively. Absorbance at any given wavelength and at any given time is indicated by color or by a shade of gray. This plot can be “zoomed” by using the mouse to “rubber box” the desired area. Right click and select Full Unzoom to restore the view. C.4 Spectrum The spectrum detected at a specified point in time. This is selected by moving the horizontal slider in the Contour or Electropherogram plots to the desired time point. It represents a slice C-2 32 Karat 8.0 PN A33115AB Appendix C Electropherogram through the 3D data. This plot can be “zoomed” by using the mouse to “rubber box” the desired area. Right-click and select Full Unzoom to restore the view. C.5 Electropherogram The electropherogram at a specified wavelength. This is selected by moving the vertical slider in the Contour plot or the horizontal slider in the Spectrum view to the desired wavelength. It represents a slice through the 3D data in a direction that is perpendicular to the Spectrum view. This plot can be “zoomed” by using the mouse to “rubber box” the desired area. Right-click and select Full Unzoom to restore the view. C.6 3D Plot A three-dimensional representation of the data. The presentation of this window is not tied to the Contour view. To adjust the display, right click on the 3D plot and select properties to open the 3D Data Graph Properties window. The plot can be displayed as a one-color surface or color can be used to specify absorbance ranges. Colors are user selectable. The image can be rotated around the X and Y axes by selecting the command from the right click menu and manipulating the 3D plot with your mouse or by typing in Elevation and Rotation parameters within the 3D Data Graph Properties window. Zooming is accomplished by setting limits of time, wavelength, and absorbance. The Apply button causes the changes to be made to the 3D plot without closing the properties window. This allows you to test changes without having to close and re-open the dialog. 3D and Contour Plot shows only these two plots in a two-pane window. The individual 3D, Contour, Electropherogram, and Spectrum plots display the individual pane as a full window. The limits of the Electropherogram and Spectrum plots are those set on the Contour window, even if the Contour window is not being displayed. The remaining choices in the PDA View menu are not related to these four items. The Max Plot view is an electropherogram that does not represent a particular wavelength. It is built by taking the maximum absorbance across the wavelength scan range at each point in time. This plot is useful for finding peaks that might otherwise go undetected. This data may be analyzed and the results reported. MDQ User’s Guide PN A33115AB C-3 C Appendix C 3D Plot The Multi-Electropherogram view is only available if multi-electropherograms are defined in the Instrument Setup component of the method. Like the Max Plot, these traces are synthesized from the 3D data set. To set up these channels, open the PDA Options window from the Method menu and select the Multi-Electropherogram tab. Three items must be specified for each channel. The channel can be checked On or Off. Channels which are Off will not be displayed and cannot be analyzed. Wavelength refers to the central wavelength of the data to be incorporated into the multi-electropherogram channel. Bandwidth specifies how many adjacent wavelength bands will be combined to form the new data set. These bands are weighted, with bands more distant from the central wavelength contributing less to the final result than do bands closer to the midpoint. Using too narrow a bandwidth will result in a noisy data file. Using too wide a bandwidth will cause a loss of spectral sensitivity in the data set. These data may be analyzed and the results reported. If many multi-electropherogram channels have been defined, each will occupy a small area of the display. The frame around each channel can be moved by clicking and dragging with the mouse. Channels can also be temporarily disabled by unchecking them in the Multi-Electropherogram tab of the PDA Options window. Ratio opens a three pane window. Two windows will display the electropherograms at specified wavelength. The third displays an electropherogram that is the arithmetic ratio of the two (Abs#1/Abs#2, on a point by point basis). The parameters for this window are set on the X:Y tab of the PDA Options window (available from the Method menu). When PDA data is selected, the drop-down box in the tool bar will contain a list of the available data channels. Before data can be integrated or analyzed, the desired channel must be selected from this list. Each data channel will have a unique Peaks \ Groups table and Integration Events table, that will be available from the Method menu only when the data channel has been selected. More information about using PDA data is available in the resources listed in Appendix A. C-4 32 Karat 8.0 PN A33115AB Appendix D System Administration DAppendix D D.1 System Administration Overview The System Administration functions include adding and configuring instruments, which has already been discussed in this manual. It also includes features for defining users and projects. Projects definitions include: defining default folders in which data and methods will be stored; specifying what instrument(s) can be used for a project; defining which users can work on a project, and what privilege level each user will have. These administrative functions are handled through software “wizards,” which are pre-defined step-by-step processes. It is NOT necessary to implement this function in order to use the system. System Administration is managed from the main 32 Karat Software Screen. 1. From the Tools menu select Options. 2. Click on the Enterprise tab. 3. Clicking on Enable user login and project management will activate the system administration function. The effects will be seen the next time the program is started. WARNING If the System Administration function is activated, a System Administrator must be defined immediately. If no System Administrator has been defined, there will be no user with the privilege to disable the System Administration function, should that be necessary. Depending on the privilege levels assigned to users, not having a System Administrator may make some or all software features inaccessible. When the Enable option is selected, the User list becomes available. Clicking on Add user opens a dialog in which the user's name and password are entered. A password is not required. If a password is used, it must be recorded elsewhere, as there is no feature in the software for generating a list of user passwords. When all the names are entered (or at least the name of the administrator), user privileges must be assigned. New users do not have any privileges until privileges are assigned. IMPORTANT A user with no privileges cannot use the software! Click OK to close the Options dialog. From the Tools menu select System Administration Wizard. The wizard will only be available if System Administration Mode has been selected (checked). A screen will open with three options for: Users, Instruments, and Projects. If there are secondary administrators, they may be given access only to some of these wizards. The Users Wizard allows the assignment of privileges. Follow the wizard step-by-step. Each user can be given access to specific areas of the software and to specific instruments. Selection will depend on the functions of the individual and the degree of security required in the operation of your instrument systems. For example, regulated quality control laboratories MDQ User’s Guide PN A33115AB D-1 D Appendix D System Administration generally implement tighter controls over instrument and data access than do laboratories engaged in basic research. The Instrument Wizard allows the administrator to assign users to specific instruments, but not to assign specific privileges on those instruments. The Project Wizard allows the administrator to create projects. A project is a combination of users, instruments, and folders. Projects are most valuable when instrument systems are used by multiple operators or groups who do not need access to one another's methods and data. Creating a project allows the operations on the instrument to be compartmentalized. The software is shipped with one project, which is called Default. This is a special project, in that it cannot be protected. It should not be used for methods and data that are not intended to be shared. For more information on System Administration, see the resources in the System Administrator’s Guide (PN A34392). D-2 32 Karat 8.0 PN A33115AB Appendix E Vial Incrementing EAppendix E E.1 Vial Incrementing Introduction Vial incrementing is an automation process in which the inlet or outlet vials may be programmed to advance after a pre-determined number of cycles. This behavior of shifting to adjacent vial positions occurs after the instrument executes a certain number of cycles of a method. Vial incrementing eliminates the need to devise new methods whenever different vial positions are desired during the course of a set of instrument runs. Therefore, one method can be used to allow the instrument system to change to and utilize new vial positions automatically in those runs. Users may incorporate vial incrementing in their applications as a powerful tool. For example, vial incrementing may be used to perform efficient separation of biological or chemical compounds without constantly replacing or replenishing separation media solutions during instrument system runs. Vial incrementing is controlled by the software's method and sequence. Incrementing for either or both of the inlet/outlet vials may be selected under the Tray Positions dialog for each of the following events in the method time program: Rinse, Inject, Separate, Wait. Cycles are the number of repeats of a method before vial incrementing occurs. So, selecting Increment Every 2 Cycles will cause the instrument system to run the method two times before changing vial positions for the specified time program event (e.g. rinse, separate). On the other hand, selecting Increment Every 5 Cycles will cause the instrument to run the method five times before changing vial positions for the specified time program event. The Inject event, unlike Rinse, Separate, and Wait, can be programmed through both the method or sequence table. Inject event has the option of allowing the user to introduce samples from the vial positions stated in the method time program or in the sequence table. Vial incrementing is enabled if user chooses to inject from method. If the user chooses to inject from the sequence table, vial incrementing is disabled (giving sequence table priority with the indicated "Allow Override" enabled box). MDQ User’s Guide PN A33115AB E-1 E Appendix E Vial Incrementing After vial incrementing has been set up in the method, the method can be executed as a single method run using Single Run command. Or, the method can be incorporated into the sequence table for running a sequence using Sequence Run command. The user can direct the instrument to execute multiple cycles of one or more methods throughout a set of runs. The execution of multiple cycles for the instrument system is called "repetitions." Although the terms are similar, do not confuse "repetitions" with "cycles." The "cycles" term is used in SETTING UP vial incrementing through themethod. The "repetitions" term is used to describe the EXECUTING of those "cycles." For instance, a repetition of 5 for a single method will mean the instrument will execute 5 cycles of the same method. A set of repetitions makes up a run. A set of runs makes up a sequence. E-2 32 Karat 8.0 PN A33115AB Appendix E Examples of Use When Single Run (running a single method) is selected, the "repetitions" term is used. "Runs" and "repetitions" terms are used in the sequence table and Sequence Wizard. In summary, the method drives the vial incrementing. And, the sequence table plans and organizes the vial incrementing activities for the user. E.2 Examples of Use The following examples illustrate how vial incrementing works: Example 1 Method Time Program B: In Method Time Program B, the following lines explain the incrementing scheme: 1. Rinse 1: Increment inlet and outlet vials after every cycle of method. 2. Rinse 2: Increment inlet and outlet vials after every cycle of method. 3. Injection of sample from method: Increment inlet and outlet vials after every cycle of method. 4. Wait: Increment inlet and outlet vials after every cycle of method. 5. Separate: Increment inlet and outlet vials after every cycle of method. After setting up Method Time Program B, the user generates the following sequence table (Sequence Table B1) with only 4 repetitions of the method B on a single run line: MDQ User’s Guide PN A33115AB E-3 E Appendix E Examples of Use The results of instrument sequence run of Sequence Table E1 are as follows: Table E.1 Sequence Table - Run Results Actual Vials Used-Inlet Actual Vials Used-Outlet Rinse 1 BI:A1 BO:A1 1 Rinse 2 BI:B1 BO:A1 1 1 Inject SI:A1 BO:A1 1 1 Wait BI:C1 BO:C1 1 1 Separate BI:C1 BO:C1 1 2 Rinse 1 BI:A2 BO:A2 1 2 Rinse 2 BI:B2 BO:A2 1 2 Inject SI:A2 BO:A2 1 2 Wait BI:C2 BO:C2 1 2 Separate BI:C2 BO:C2 1 3 Rinse 1 BI:A3 BO:A3 1 3 Rinse 2 BI:B3 BO:A3 1 3 Inject SI:A3 BO:A3 1 3 Wait BI:C3 BO:C3 1 3 Separate BI:C3 BO:C3 1 4 Rinse 1 BI:A4 BO:A4 1 4 Rinse 2 BI:B4 BO:A4 1 4 Inject SI:A4 BO:A4 1 4 Wait BI:C4 BO:C4 1 4 Separate BI:C4 BO:C4 Run # Repetition # 1 1 1 Event As one can see from the Sequence Table run results above, when a method time program event calls for incrementing every one cycle of method, the vial positions are shifted by one vial after each repetition is run (e.g. from BI:A1 to BI:A2, from BI:A2 to BI:A3, and so on for Rinse 1 event). Remember, one vial position is incremented in the same column to the adjacent vial position of the next row. Incrementing is also done from the vial position of the highest row of one column to the lowest row of the next column. For example, A1, A2, A3, A4, A5, A6, B1, B2, etc. E-4 32 Karat 8.0 PN A33115AB Appendix E Examples of Use Alternatively, the user can generate the same Sequence Table B1 run results by doing a Single Run of method B, using 4 repetitions: The user then generates another sequence table (Sequence Table B2) with 4 separate runs, each run consisting of only one repetition of the same method B: MDQ User’s Guide PN A33115AB E-5 E Appendix E Examples of Use The results of instrument sequence run of Sequence Table E2 are as follows: Table E.2 Sequence Table - Run Results Actual Vials Used For Inlet Actual Vials Used for Outlet Rinse 1 BI:A1 BO:A1 1 Rinse 2 BI:B1 BO:A1 1 1 Inject SI:A1 BO:A1 1 1 Wait BI:C1 BO:C1 1 1 Separate BI:C1 BO:C1 2 1 Rinse 1 BI:A2 BO:A2 2 1 Rinse 2 BI:B2 BO:A2 2 1 Inject SI:A2 BO:A2 2 1 Wait BI:C2 BO:C2 2 1 Separate BI:C2 BO:C2 3 1 Rinse 1 BI:A3 BO:A3 3 1 Rinse 2 BI:B3 BO:A3 3 1 Inject SI:A3 BO:A3 3 1 Wait BI:C3 BO:C3 3 1 Separate BI:C3 BO:C3 4 1 Rinse 1 BI:A4 BO:A4 4 1 Rinse 2 BI:B4 BO:A4 4 1 Inject SI:A4 BO:A4 4 1 Wait BI:C4 BO:C4 4 1 Separate BI:C4 BO:C4 Run # Repetition # 1 1 1 Event From Sequence Table E2 run results, one can see that those results are identical to results from Sequence Table E1 run. Therefore, one can conclude that, no matter how the sequence table is organized (multiple repetitions of one method in one run or separate runs, each run consisting of one repetition of same method), the vial incrementing results are the same. E-6 32 Karat 8.0 PN A33115AB Appendix E Examples of Use Example 2 Vial incrementing also works when there are different methods interspersed with one another in sequence table. Consider 2 methods, methods A and B, that alternate in the sequence table. Method Time Program A: In Method Time Program A, line 1 indicates a separation step that increments inlet and outlet vials, applied after every second cycle of method. By combining Method Time Program A and Method Time Program B (from Example 1), the user can generate the following sequence table (Sequence Table AB) to run: The results of instrument sequence run of Sequence Table AB are shown below. For simplicity, only the separation event is considered. MDQ User’s Guide PN A33115AB E-7 E Appendix E Examples of Use Table E.3 Sequence Table AB Method Used Actual Vials Used-Inlet Actual Vials Used-Outlet Separate BI:D1 BO:D1 1 B Separate BI:C1 BO:C1 1 1 A Separate BI:D1 BO:D1 2 4 1 B Separate BI:C2 BO:C2 2 5 1 A Separate BI:D2 BO:D2 3 6 1 B Separate BI:C3 BO:C3 3 7 1 A Separate BI:D2 BO:D2 4 8 1 B Separate BI:C4 BO:C4 4 Run # Repetition # 1 1 A 2 1 3 Event Cycle # Used Sequence Table AB run results show that vial incrementing is followed through for each method even when there are other methods interspersed in between within the sequence table. In cases where not all of the sequence table run lines are to be executed by the user, vial incrementing follows the number of method cycles executed when the sequence is run. The Run Range dialog of the Sequence Run command gives the user the choice to run some sequence table run lines: In the above run range of run lines 5-7, 2-4, 1, 8 from Sequence Table AB, the sequence run of Sequence Table AB will start on run line 5, continue on to 7, go back to 2 and continue on to 4, go back to 1, and finally end on run line 8. E-8 32 Karat 8.0 PN A33115AB Appendix E Examples of Use The results of this instrument sequence run Range of Sequence Table AB are shown below. The results are obtained sequentially in the order that are given here. Again, for simplicity, only the separation event is considered. Method Used Actual Vials Used-Inlet Actual Vials Used-Outlet Separate BI:D1 BO:D1 1 B Separate BI:C1 BO:C1 1 1 A Separate BI:D1 BO:D1 2 2 1 B Separate BI:C2 BO:C2 2 3 1 A Separate BI:D2 BO:D2 3 4 1 B Separate BI:C3 BO:C3 3 1 1 A Separate BI:D2 BO:D2 4 8 1 B Separate BI:C4 BO:C4 4 Run # Repetition # 5 1 A 6 1 7 Event Cycle # Used From the above instrument run results of the selected run range, the user can see that vial incrementing resets itself when the sequence run is initiated on run line 5 of Sequence Table AB. The vial positions used in the results of the selected run range are the same as those of the sequence run when all lines of the sequence table are executed sequentially from run line 1 to 8 (see Example 2). However, the selected run range now yields that each run line number being executed by instrument corresponds to a different set of vial positions from those in the previous sequence run (see Example 2). Important Notes When there is an Injection event in the method, and the user chooses to inject from the method, vial incrementing is enabled. The vial positions for the incrementing in the run range are dictated in the same fashion as the Separate event above. However, if the user chooses to inject from the sequence table (enabling Allow Override option in method time program), vial incrementing is disabled. That being the case, the instrument runs will execute and utilize the vial position values inputted by the user in the Sample Inject Inlet/Outlet columns of the sequence table with each run line having specific injection vials. MDQ User’s Guide PN A33115AB E-9 E Appendix E Summary E.3 Summary The examples show that the method drives the vial incrementing, and the sequence table plans and organizes the incrementing for the user. Vial Incrementing in Runs Submitted to Instrument Run Queue: Vial incrementing is reset whenever the user adds new runs (single or sequence) to the run queue. In single runs of one method, the vial positions will be incremented within the repetitions of each individual single run. The incrementing will not be carried over to the next single run of the same method submitted to the run queue. In sequence runs, the vial positions will be incremented within each individual sequence runs. The incrementing will not be carried over to the next sequence run of the same sequence submitted to the run queue. The following examples illustrate: In the first example of run queue that includes single runs of Method Time Program B, the first, second, and third single runs are independent of each other. Vial incrementing is not carried over from the first single run to the second and third single runs. In the second example of run queue that includes sequence runs of Sequence Table B1, the first, second, and third sequence runs are independent of each other. Vial incrementing is not carried over from the first sequence run to the second and third sequence runs. E-10 32 Karat 8.0 PN A33115AB Appendix F Sequence Vial Report FAppendix F F.1 Sequence Vial Report Overview Sequence Vial Report is a pre-defined sequence summary report that shows which vials are used by the instrument system for the method time program events of rinse, separate, and inject. The Sequence Vial Report is a description of the pre-run or post-run of the sequence. There are two forms of the report: Sequence Vial Increment Preview and Sequence Vial Report - Confirmed. Both forms of the report can be viewed and printed. F.2 Sequence Vial Increment Preview Sequence Vial Increment Preview report is a preview of which vials the instrument system will utilize based on what methods and other information are provided in the sequence table. This Preview report can be viewed automatically before executing any sequence runs by selecting Sequence Vials Preview from the Sequence menu: An example of the Sequence Vial Increment Preview report follows: MDQ User’s Guide PN A33115AB F-1 F Appendix F Sequence Vial Increment Preview At the top right-hand corner or the report, the report is labeled as Sequence Vial Report Projected to indicate that this report is Sequence Vial Increment Preview. The Sequence Vial Increment Preview report reveals the cycles (Cycle # column) of each method to be run as well as the repetitions (Rep # column) from the sequence table to be executed in the run. The Filename column is left blank by default as this report is only a preview of a sequence run. The Inject In/Out columns contain the same inlet/outlet user-inputted vial position values as those under the Sample Inject Inlet/Outlet columns in the sequence table. These values are used when the user chooses to inject from the sequence table. The Inject Time column contains the same injection duration time values in seconds as those in the sequence table under Sample Inject Duration column. These values are used when the user chooses to inject from the sequence table. The Inject In/Out and Inject Time columns will contain values from the Inject time program in the method by default if the user does not input values in the Sample Inject Inlet/Outlet and Sample Inject Duration columns of sequence table. This is the case for users who choose to inject from the sequence table. However, the sequence will not run since no values are entered in the Sample Inject Inlet/Outlet and Sample Inject Duration columns of sequence table. The Other Inject In/Out columns contain the inlet/outlet vial positions for the injection event when the user chooses to inject from the method (these values do not appear in the sequence table). The Rinse Vials In/Out columns and the Separate Vials In/Out columns contain the inlet/outlet vial positions for the rinse and separation events programmed in the method (these values do not appear in the sequence table). All the vial position values presented in the report except the Inject In/Out columns correspond to each method's time program, including incremented vials to be used in the sequence run if vial incrementing is enabled in the method. Any possible tray collision ("vial collision") between the inlet tray and the outlet tray due to invalid vial combinations between the inlet vials and the outlet vials is indicated by a red asterisk mark next to the specific vial position in the report as illustrated below: F-2 32 Karat 8.0 PN A33115AB Appendix F Sequence Vial Report-Confirmed Important Note: Users are not aware of possible "vial collisions" after the sequence table is set up with one or more methods included. The instrument system will encounter these invalid vial combinations that lead to "vial collisions" when the sequence is run. In the course of a sequence run, the instrument system detects for invalid vial combinations and aborts execution of any method's repetitions that can lead to those collisions. Other repetitions of the same method that have valid vial combinations are successfully executed by the instrument system. It is the recommended that the user view the Sequence Vial Increment Preview report before running any sequence. F.3 Sequence Vial Report-Confirmed The Sequence Vial Report - Confirmed is a sequence summary report that is generated after running a sequence. It is a confirmation report of the specific vials that have been successfully utilized by the instrument system in the sequence run. This report is identical to the Sequence Vial Increment Preview report except the following: 1) Filenames for the sequence run are now included in the Filename column, and 2) Only the vial combinations that have been successfully used in the course of the sequence run by the instrument system are shown. MDQ User’s Guide PN A33115AB F-3 F Appendix F Sequence Vial Report-Confirmed To generate the Sequence Vial Report - Confirmed, the user must change the Run Type of any set of sequence table run lines to be executed from Unknown to Summary. The following steps may be helpful: 1. Begin by clicking on the blue arrow in the Run Type box of an initial sequence table run line where the sequence run will start (it does not have to be run number 1). The Sample Run Type(s) dialog window will open. 2. Select Begin Summary as the run type. IMPORTANT Do not select Vial Summary as the run type. This run type is not used to generate the Sequence Vial Report - Confirmed. F-4 3. Click on the folder icon in the Run Type Parameters region to open up a report template. 4. Select Sequence Vial Summary CE.brp as the report template and click Open. The report template name should be in the Report Template field after opening. 5. Click OK to close the Sample Run Type(s) dialog window and return to the sequence table. 32 Karat 8.0 PN A33115AB Appendix F Sequence Vial Report-Confirmed 6. MDQ User’s Guide PN A33115AB The sequence table should reveal a run type of Summary Begin for the initial sequence run line where the sequence run will start. F-5 F Appendix F Sequence Vial Report-Confirmed 7. For subsequent sequence run lines that are to be executed (middle of sequence run), repeat step 1 on those lines, but select Summary Run as the run type. There is no need to open any report template. 8. Click OK to return to sequence table. 9. Sequence table should reveal Summary Run as the run type for the subsequent sequence run lines (middle of sequence run). 10. For the last sequence run line to be executed (end of sequence run), repeat step 1, but select End Summary as the run type. There is no need to open any report template. F-6 32 Karat 8.0 PN A33115AB Appendix F Sequence Vial Report-Confirmed 11. Click OK to return to sequence table. 12. Sequence table should reveal Summary End as the run type for the last sequence run line to be executed (end of sequence run). For users who want to generate the Sequence Vial Report - Confirmed for any single sequence table run line that consists of one or more repetitions to be executed, the process is similar: 13. Begin by clicking on the blue arrow in the Run Type box of an initial sequence table run line where the sequence run will start (it does not have to be run number 1). The Sample Run Type(s) dialog window will open. 14. Select Begin Summary as the run type. MDQ User’s Guide PN A33115AB F-7 F Appendix F Sequence Vial Report-Confirmed IMPORTANT Do not select Vial Summary as the run type. This run type is not used to generate the Sequence Vial Report - Confirmed. 15. Click on the folder icon in the Run Type Parameters region to open up a report template. F-8 32 Karat 8.0 PN A33115AB Appendix F Sequence Vial Report-Confirmed 16. Select Sequence Vial Summary CE.brp as the report template and click Open. The report template name should be in the Report Template field after opening. Do not close the Sample Run Type(s) dialog window yet. 17. Select End Summary as the run type in the Sample Run Type(s) dialog window. There is no need to open any report template for End Summary. There should now be two run types selected: Begin Summary and End Summary. 18. Highlight Begin Summary to assure the correct report template has been opened. 19. Click OK to close the Sample Run Type(s) dialog window and return to sequence table. MDQ User’s Guide PN A33115AB F-9 F Appendix F Sequence Vial Report-Confirmed Sequence table should reveal SMB SME (notations that refer to Summary Begin and Summary End) as the run type for the single sequence table run line that consists of one or more repetitions to be executed. The user can repeat steps 1 through 3 for the other sequence table run lines if Sequence Vial Report - Confirmed is desired for each of the other lines. Sequence table run lines that have Unknown or other run types will not generate the Sequence Vial Report - Confirmed. After the user has changed the Run Type of any set of sequence table run lines to be executed from Unknown to Summary, the user can begin the sequence run to allow the software to collect data for the Sequence Vial Report - Confirmed. A "Complete" message in the Status column of the sequence table will confirm the end of the sequence run. After the sequence run is completed or is terminated, the user can activate the Sequence Vial Report - Confirmed by selecting Sequence Custom Report under View from the Reports menu: The View Sequence Reports dialog window will pop up. The listings under Report Type column are the Sequence Vial Reports - Confirmed for each of the sequence table run lines. They are labeled as Sequence Summary reports in the dialog window. The report template used are indicated in the last column. The numbers under Sequence Records column are the sequence table run line numbers from which the Sequence Vial Reports - Confirmed originate. The number of repeats or iterations (e.g. 3,3 or 4,4,4) of the sequence table run lines under Sequence Records reveals the number of repetitions that have been successfully executed by the instrument system for those run lines. F-10 32 Karat 8.0 PN A33115AB Appendix F Sequence Vial Report-Confirmed For instance, run line 4 from sequence run of Sequence Table A above has successfully generated a Sequence Vial Report - Confirmed for all three repetitions. The user can highlight any of the listed Sequence Vial Reports - Confirmed and click View to open it. The following example is the Sequence Vial Report - Confirmed for run line 4 of Sequence Table A above: To print any Sequence Vial Report - Confirmed, right-click on the report, and then select Print. MDQ User’s Guide PN A33115AB F-11 F Appendix F Sequence Vial Report-Confirmed Alternatively, one can select Sequence Custom Report under Print from the Reports menu: The Print Sequence Report dialog window pops up, and it looks exactly the same as the View Sequence Report dialog window. The user can select the desired Sequence Vial Report Confirmed and click Print to print it. F-12 32 Karat 8.0 PN A33115AB