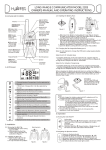
1
TSQ 8000 Hardware Manual 1R120505-0003 Revsion B October 2012 © 2012 Thermo Fisher Scientific Inc. All rights reserved. Xcalibur™, TSQ 8000, TRACE 1300, TRACE 1310, and TriPlus RSH are trademarks and/or product names of Thermo Fisher Scientific. The following are registered trademarks in the United States and other countries: Microsoft, Excel, and Windows are registered trademarks of Microsoft Corporation in the United States and other countries. Adobe is a registered trademark of Adobe Systems Incorporated in the United States and/or other countries. Septum BTO is a registered trademark of Chromatography Research Supplies, Inc. TORX is a registered trademark of Camcar LLC of Acument Global Technologies. Siltite is a registered trademark of SGE Analytical Science in the United States. ETP is an SGE product. All other trademarks are the property of Thermo Fisher Scientific and its subsidiaries. Thermo Fisher Scientific Inc. provides this document to its customers with a product purchase to use in the product operation. This document is copyright protected and any reproduction of the whole or any part of this document is strictly prohibited, except with the written authorization of Thermo Fisher Scientific Inc. The contents of this document are subject to change without notice. All technical information in this document is for reference purposes only. System configurations and specifications in this document supersede all previous information received by the purchaser. Thermo Fisher Scientific Inc. makes no representations that this document is complete, accurate or errorfree and assumes no responsibility and will not be liable for any errors, omissions, damage or loss that might result from any use of this document, even if the information in the document is followed properly. This document is not part of any sales contract between Thermo Fisher Scientific Inc. and a purchaser. This document shall in no way govern or modify any Terms and Conditions of Sale, which Terms and Conditions of Sale shall govern all conflicting information between the two documents. Release history: Revision A, May 2012; Revision B, October 2012 Software version: Thermo Foundation 2.0 SP1; Thermo Xcalibur 2.2 SP1 For Research Use Only. Not for use in diagnostic procedures. C Contents Preface . . . . . . . . . . . . . . . . . . . . . . . . . . . . . . . . . . . . . . . . . . . . . . . . . . . . . . . . . . . . .xiii About Your System. . . . . . . . . . . . . . . . . . . . . . . . . . . . . . . . . . . . . . . . . . . . . .xiii Related Documentation . . . . . . . . . . . . . . . . . . . . . . . . . . . . . . . . . . . . . . . . . .xiv System Requirements . . . . . . . . . . . . . . . . . . . . . . . . . . . . . . . . . . . . . . . . . . . . xv Safety and Special Notices . . . . . . . . . . . . . . . . . . . . . . . . . . . . . . . . . . . . . . . . xv Special Notices . . . . . . . . . . . . . . . . . . . . . . . . . . . . . . . . . . . . . . . . . . . . . . . xv Safety Symbols and Signal Words . . . . . . . . . . . . . . . . . . . . . . . . . . . . . . . . . xv Hydrogen Safety Precautions . . . . . . . . . . . . . . . . . . . . . . . . . . . . . . . . . . . . . xvii Using Hydrogen with TSQ 8000 . . . . . . . . . . . . . . . . . . . . . . . . . . . . . . . .xviii Hydrogen Connection Guidelines . . . . . . . . . . . . . . . . . . . . . . . . . . . . . . . . .xix Purchasing Hydrogen . . . . . . . . . . . . . . . . . . . . . . . . . . . . . . . . . . . . . . . . . . xx Properly Storing Hydrogen . . . . . . . . . . . . . . . . . . . . . . . . . . . . . . . . . . . . . .xxi Hydrogen Safety Codes, Standards and References . . . . . . . . . . . . . . . . . . .xxiii Hazardous Substances Precautions . . . . . . . . . . . . . . . . . . . . . . . . . . . . . . . . . xxiv Biological Hazard Warning Note. . . . . . . . . . . . . . . . . . . . . . . . . . . . . . . . . xxiv Venting Toxic Gases . . . . . . . . . . . . . . . . . . . . . . . . . . . . . . . . . . . . . . . . . . xxv Contacting Us . . . . . . . . . . . . . . . . . . . . . . . . . . . . . . . . . . . . . . . . . . . . . . . . xxv Chapter 1 Thermo Scientific Performing Routine Maintenance . . . . . . . . . . . . . . . . . . . . . . . . . . . . . . . . . . . . . . . .1 Maintenance Supplies and Tools . . . . . . . . . . . . . . . . . . . . . . . . . . . . . . . . . . . . . 3 Configuring the TSQ 8000 System . . . . . . . . . . . . . . . . . . . . . . . . . . . . . . . . . . . 4 Powering On the TSQ 8000 System . . . . . . . . . . . . . . . . . . . . . . . . . . . . . . . . . . 7 Powering Off the TSQ 8000 System . . . . . . . . . . . . . . . . . . . . . . . . . . . . . . . . . 10 Replacing a Column . . . . . . . . . . . . . . . . . . . . . . . . . . . . . . . . . . . . . . . . . . . . . 12 Maintaining the Foreline Pump. . . . . . . . . . . . . . . . . . . . . . . . . . . . . . . . . . . . . 20 Checking the Oil in the Foreline Pump. . . . . . . . . . . . . . . . . . . . . . . . . . . . . 21 Adding Oil to the Foreline Pump . . . . . . . . . . . . . . . . . . . . . . . . . . . . . . . . . 21 Purging Gas from the Oil in the Foreline Pump . . . . . . . . . . . . . . . . . . . . . . 23 Changing the Oil in a Foreline Pump . . . . . . . . . . . . . . . . . . . . . . . . . . . . . . 23 Removing the Ion Source Cartridge for Cleaning . . . . . . . . . . . . . . . . . . . . . . . 27 Removing the Ion Source Cartridge. . . . . . . . . . . . . . . . . . . . . . . . . . . . . . . . 28 Disassembling the Ion Source Cartridge . . . . . . . . . . . . . . . . . . . . . . . . . . . . 39 Reassembling the Ion Source Cartridge . . . . . . . . . . . . . . . . . . . . . . . . . . . . . 40 Reinserting the Ion Source Cartridge. . . . . . . . . . . . . . . . . . . . . . . . . . . . . . . 44 Maintaining the Calibration Gas Module . . . . . . . . . . . . . . . . . . . . . . . . . . . . . 51 Refilling the Calibrant Reservoir . . . . . . . . . . . . . . . . . . . . . . . . . . . . . . . . . . 52 TSQ 8000 Hardware Manual iii Contents Replacing a Dual Filament . . . . . . . . . . . . . . . . . . . . . . . . . . . . . . . . . . . . . . . . 54 Replacing the Electron Multiplier . . . . . . . . . . . . . . . . . . . . . . . . . . . . . . . . . . . 61 Cleaning Durable Components . . . . . . . . . . . . . . . . . . . . . . . . . . . . . . . . . . . . . 68 Cleaning Delicate Components. . . . . . . . . . . . . . . . . . . . . . . . . . . . . . . . . . . . . 72 Cleaning the Filters . . . . . . . . . . . . . . . . . . . . . . . . . . . . . . . . . . . . . . . . . . . . . . 74 Chapter 2 iv TSQ 8000 Hardware Manual Troubleshooting. . . . . . . . . . . . . . . . . . . . . . . . . . . . . . . . . . . . . . . . . . . . . . . . . . . . . . .77 Using Diagnostics . . . . . . . . . . . . . . . . . . . . . . . . . . . . . . . . . . . . . . . . . . . . . . . 78 Running a Diagnostic Tune . . . . . . . . . . . . . . . . . . . . . . . . . . . . . . . . . . . . . 81 Investigating Communication Issues . . . . . . . . . . . . . . . . . . . . . . . . . . . . . . . . . 84 Software is not communicating with the TSQ 8000 system. . . . . . . . . . . . . . 84 Cannot download methods to the TSQ 8000 system. . . . . . . . . . . . . . . . . . . 84 GC does not start or is not ready. . . . . . . . . . . . . . . . . . . . . . . . . . . . . . . . . . 84 Sample data are not acquired. . . . . . . . . . . . . . . . . . . . . . . . . . . . . . . . . . . . . 86 GC is not communicating with the PC. . . . . . . . . . . . . . . . . . . . . . . . . . . . . 86 Autosampler is not communicating with the PC. . . . . . . . . . . . . . . . . . . . . . 86 Investigating Contamination Issues . . . . . . . . . . . . . . . . . . . . . . . . . . . . . . . . . . 87 Chemical noise is at m/z 429, 355, 281. . . . . . . . . . . . . . . . . . . . . . . . . . . . . 87 Chemical noise is at m/z 207, 429, 355, 281. . . . . . . . . . . . . . . . . . . . . . . . . 87 Chemical noise is at m/z 149, 167, 279. . . . . . . . . . . . . . . . . . . . . . . . . . . . . 87 Chemical noise is at m/z 43, 57, 71, 85, 99, etc. . . . . . . . . . . . . . . . . . . . . . . 88 Spectra is showing solvent contamination.. . . . . . . . . . . . . . . . . . . . . . . . . . . 88 Investigating Filament and Lens Control Issues . . . . . . . . . . . . . . . . . . . . . . . . . 89 Filament has burned out.. . . . . . . . . . . . . . . . . . . . . . . . . . . . . . . . . . . . . . . . 89 Filament does not last long. . . . . . . . . . . . . . . . . . . . . . . . . . . . . . . . . . . . . . . 89 Diagnostics indicate there is a problem with lens voltages.. . . . . . . . . . . . . . . 89 Investigating Temperature Issues . . . . . . . . . . . . . . . . . . . . . . . . . . . . . . . . . . . . 90 Lens/source heater will not heat. . . . . . . . . . . . . . . . . . . . . . . . . . . . . . . . . . . 90 Lens/source heater overheats.. . . . . . . . . . . . . . . . . . . . . . . . . . . . . . . . . . . . . 90 Transfer line will not heat.. . . . . . . . . . . . . . . . . . . . . . . . . . . . . . . . . . . . . . . 91 Transfer line overheats. . . . . . . . . . . . . . . . . . . . . . . . . . . . . . . . . . . . . . . . . . 91 Investigating Vacuum Issues . . . . . . . . . . . . . . . . . . . . . . . . . . . . . . . . . . . . . . . 92 An air leak has been detected. . . . . . . . . . . . . . . . . . . . . . . . . . . . . . . . . . . . . 92 Foreline pump will not power-on. . . . . . . . . . . . . . . . . . . . . . . . . . . . . . . . . . 92 Foreline pump powers on, but the system will not pump down. . . . . . . . . . . 92 Turbomolecular pump will not power-on.. . . . . . . . . . . . . . . . . . . . . . . . . . . 93 Turbomolecular pump shuts off while in use. . . . . . . . . . . . . . . . . . . . . . . . . 93 Investigating Power Supply Issues . . . . . . . . . . . . . . . . . . . . . . . . . . . . . . . . . . . 94 TSQ 8000 system will not power-on. . . . . . . . . . . . . . . . . . . . . . . . . . . . . . . 94 TSQ 8000 system powers on temporarily and trips the circuit breaker. . . . . . 94 ±RF DC supply is outside the acceptable range. . . . . . . . . . . . . . . . . . . . . . . 94 Investigating RF/DC Issues . . . . . . . . . . . . . . . . . . . . . . . . . . . . . . . . . . . . . . . . 95 RF dip is incorrect. . . . . . . . . . . . . . . . . . . . . . . . . . . . . . . . . . . . . . . . . . . . . 95 RF/DC System Check diagnostic fails. . . . . . . . . . . . . . . . . . . . . . . . . . . . . . 95 Thermo Scientific Contents Investigating Sensitivity Issues . . . . . . . . . . . . . . . . . . . . . . . . . . . . . . . . . . . . . . 96 Poor sensitivity or sudden loss in sensitivity. . . . . . . . . . . . . . . . . . . . . . . . . . 96 Poor high mass response. . . . . . . . . . . . . . . . . . . . . . . . . . . . . . . . . . . . . . . . . 96 Poor sensitivity in CI mode. . . . . . . . . . . . . . . . . . . . . . . . . . . . . . . . . . . . . . 97 Investigating Stability Issues . . . . . . . . . . . . . . . . . . . . . . . . . . . . . . . . . . . . . . . 98 Mass assignment is unstable. . . . . . . . . . . . . . . . . . . . . . . . . . . . . . . . . . . . . . 98 Signal response is unstable or shows unexpected drop-out. . . . . . . . . . . . . . . 98 Investigating Tuning Issues . . . . . . . . . . . . . . . . . . . . . . . . . . . . . . . . . . . . . . . . 99 Tune is interrupted.. . . . . . . . . . . . . . . . . . . . . . . . . . . . . . . . . . . . . . . . . . . . 99 Cannot find calibration gas peaks. . . . . . . . . . . . . . . . . . . . . . . . . . . . . . . . . . 99 Cannot perform detector gain calibration. . . . . . . . . . . . . . . . . . . . . . . . . . . . 99 Cannot calibrate resolution.. . . . . . . . . . . . . . . . . . . . . . . . . . . . . . . . . . . . . . 99 Cannot perform mass calibration. . . . . . . . . . . . . . . . . . . . . . . . . . . . . . . . . 100 An air leak has been detected. . . . . . . . . . . . . . . . . . . . . . . . . . . . . . . . . . . . 100 TSQ 8000 Tune reports an error while saving a Tune file. . . . . . . . . . . . . . . 100 Contacting Technical Support. . . . . . . . . . . . . . . . . . . . . . . . . . . . . . . . . . . . . 101 Chapter 3 Thermo Scientific Advanced Troubleshooting . . . . . . . . . . . . . . . . . . . . . . . . . . . . . . . . . . . . . . . . . . . .103 Replacing Components of the Analyzer . . . . . . . . . . . . . . . . . . . . . . . . . . . . . . 104 Analyzer Tray . . . . . . . . . . . . . . . . . . . . . . . . . . . . . . . . . . . . . . . . . . . . . . . 105 Ion Guide . . . . . . . . . . . . . . . . . . . . . . . . . . . . . . . . . . . . . . . . . . . . . . . . . . 119 Q1 Entrance Lens and Q1 Entrance Lens Endcap. . . . . . . . . . . . . . . . . . . . 124 Ion Guide Wire Set . . . . . . . . . . . . . . . . . . . . . . . . . . . . . . . . . . . . . . . . . . . 129 Q1 Quad, Q3 Quad, and Collision Cell Assemblies . . . . . . . . . . . . . . . . . . 130 Quad 1 and Quad 3 Wire Sets. . . . . . . . . . . . . . . . . . . . . . . . . . . . . . . . . . . 134 Q3 Exit Lens Assembly . . . . . . . . . . . . . . . . . . . . . . . . . . . . . . . . . . . . . . . . 137 Replacing Components of the Ion Source . . . . . . . . . . . . . . . . . . . . . . . . . . . . 139 Source Heater Block, Lens Heater Block, and Lens/Source Heater . . . . . . . 140 Source-Repeller Thumbscrews. . . . . . . . . . . . . . . . . . . . . . . . . . . . . . . . . . . 150 Thumbscrew-Repeller Spacers . . . . . . . . . . . . . . . . . . . . . . . . . . . . . . . . . . . 152 Insulating Spacers . . . . . . . . . . . . . . . . . . . . . . . . . . . . . . . . . . . . . . . . . . . . 154 Repeller Plate. . . . . . . . . . . . . . . . . . . . . . . . . . . . . . . . . . . . . . . . . . . . . . . . 157 Lens Heater Block Grounding Strap . . . . . . . . . . . . . . . . . . . . . . . . . . . . . . 160 Lens Plate and Springs. . . . . . . . . . . . . . . . . . . . . . . . . . . . . . . . . . . . . . . . . 161 Source to Ion Guide Spacer . . . . . . . . . . . . . . . . . . . . . . . . . . . . . . . . . . . . . 163 Ion Source Cartridge . . . . . . . . . . . . . . . . . . . . . . . . . . . . . . . . . . . . . . . . . . 168 Reinserting the Ion Source Cartridge. . . . . . . . . . . . . . . . . . . . . . . . . . . . . . 185 Replacing Components of the Source Exchange Tool . . . . . . . . . . . . . . . . . . . 192 Replacing Components of the Vacuum Interlock . . . . . . . . . . . . . . . . . . . . . . 196 TSQ 8000 Hardware Manual v Contents Replacing Components of the Manifold . . . . . . . . . . . . . . . . . . . . . . . . . . . . . 210 Manifold Door Hinge . . . . . . . . . . . . . . . . . . . . . . . . . . . . . . . . . . . . . . . . . 211 Front Manifold Plate . . . . . . . . . . . . . . . . . . . . . . . . . . . . . . . . . . . . . . . . . . 217 Back Manifold Plate . . . . . . . . . . . . . . . . . . . . . . . . . . . . . . . . . . . . . . . . . . 227 Tray Alignment Pins, Magnet Yoke, Manifold O-Ring, and Source Magnets . . . . . . . . . . . . . . . . . . . . . . . . . . . . . . . . . . . . . . . . . . . . . . . . . . 230 Vent Valve Knob and O-Ring . . . . . . . . . . . . . . . . . . . . . . . . . . . . . . . . . . . 232 Delivery Tubes . . . . . . . . . . . . . . . . . . . . . . . . . . . . . . . . . . . . . . . . . . . . . . 233 Replacing Components of the Electron Multiplier . . . . . . . . . . . . . . . . . . . . . 235 Electron Multiplier Plate . . . . . . . . . . . . . . . . . . . . . . . . . . . . . . . . . . . . . . . 236 Large Feedthroughs . . . . . . . . . . . . . . . . . . . . . . . . . . . . . . . . . . . . . . . . . . . 241 Anode Feedthrough. . . . . . . . . . . . . . . . . . . . . . . . . . . . . . . . . . . . . . . . . . . 243 Reinstalling the TSQ 8000 System Software . . . . . . . . . . . . . . . . . . . . . . . . . . 246 Updating the Firmware on the Instrument . . . . . . . . . . . . . . . . . . . . . . . . . 246 Upgrading Software on the Computer. . . . . . . . . . . . . . . . . . . . . . . . . . . . . 247 System Requirements . . . . . . . . . . . . . . . . . . . . . . . . . . . . . . . . . . . . . . . . . 248 Installing the Software Set . . . . . . . . . . . . . . . . . . . . . . . . . . . . . . . . . . . . . . 249 Replacing the Covers of the TSQ 8000 Instrument. . . . . . . . . . . . . . . . . . . . . 252 Top Cover Panel . . . . . . . . . . . . . . . . . . . . . . . . . . . . . . . . . . . . . . . . . . . . . 253 Left Hand Front Panel and Left Hand Sub Panel . . . . . . . . . . . . . . . . . . . . 254 Right Side Panel . . . . . . . . . . . . . . . . . . . . . . . . . . . . . . . . . . . . . . . . . . . . . 256 Top Manifold Cover . . . . . . . . . . . . . . . . . . . . . . . . . . . . . . . . . . . . . . . . . . 257 Replacing the Chassis Feet. . . . . . . . . . . . . . . . . . . . . . . . . . . . . . . . . . . . . . 258 Replacing Components of the Front Door . . . . . . . . . . . . . . . . . . . . . . . . . . . 260 Front Door Hinges and Supports . . . . . . . . . . . . . . . . . . . . . . . . . . . . . . . . 261 Front Door Latch . . . . . . . . . . . . . . . . . . . . . . . . . . . . . . . . . . . . . . . . . . . . 263 Replacing the Boards in the TSQ 8000 Instrument. . . . . . . . . . . . . . . . . . . . . 265 Front and Rear RF Boards and Front and Rear Rod Driver Boards . . . . . . . 266 RF Board/Rod Driver Board Kits . . . . . . . . . . . . . . . . . . . . . . . . . . . . . . . . 272 4- Pin Feedthrough . . . . . . . . . . . . . . . . . . . . . . . . . . . . . . . . . . . . . . . . . . . 275 Lens Driver Board . . . . . . . . . . . . . . . . . . . . . . . . . . . . . . . . . . . . . . . . . . . . 280 20-Pin Feedthrough . . . . . . . . . . . . . . . . . . . . . . . . . . . . . . . . . . . . . . . . . . 284 PC Communication Board, Controller Interface Board, and Support Bracket. . . . . . . . . . . . . . . . . . . . . . . . . . . . . . . . . . . . . . . . . . . . . . . . . . . 292 Distribution Board . . . . . . . . . . . . . . . . . . . . . . . . . . . . . . . . . . . . . . . . . . . 298 Source Interface Board and Heat Shield . . . . . . . . . . . . . . . . . . . . . . . . . . . 312 Electrometer Board Cable . . . . . . . . . . . . . . . . . . . . . . . . . . . . . . . . . . . . . . 314 Electrometer Board and Shield . . . . . . . . . . . . . . . . . . . . . . . . . . . . . . . . . . 316 Replacing the Power Supplies . . . . . . . . . . . . . . . . . . . . . . . . . . . . . . . . . . . . . 318 Power Module . . . . . . . . . . . . . . . . . . . . . . . . . . . . . . . . . . . . . . . . . . . . . . . 319 Dynode and Multiplier Power Supply . . . . . . . . . . . . . . . . . . . . . . . . . . . . . 323 vi TSQ 8000 Hardware Manual Thermo Scientific Contents Replacing the Calibration Gas Components . . . . . . . . . . . . . . . . . . . . . . . . . . 328 Calibration Gas Module . . . . . . . . . . . . . . . . . . . . . . . . . . . . . . . . . . . . . . . 329 Calibrant Reservoir Kit . . . . . . . . . . . . . . . . . . . . . . . . . . . . . . . . . . . . . . . . 337 Gas Mixing Chamber . . . . . . . . . . . . . . . . . . . . . . . . . . . . . . . . . . . . . . . . . 339 Transfer Line . . . . . . . . . . . . . . . . . . . . . . . . . . . . . . . . . . . . . . . . . . . . . . . . 340 Replacing the Collision Gas Components . . . . . . . . . . . . . . . . . . . . . . . . . . . . 344 Replacing Fans and Filters . . . . . . . . . . . . . . . . . . . . . . . . . . . . . . . . . . . . . . . . 352 Front Wire Mesh Filter . . . . . . . . . . . . . . . . . . . . . . . . . . . . . . . . . . . . . . . . 354 Left Rear Wire Mesh Filter . . . . . . . . . . . . . . . . . . . . . . . . . . . . . . . . . . . . . 355 Chassis Cooling Fan and Fan Plenum . . . . . . . . . . . . . . . . . . . . . . . . . . . . . 356 Air Deflector . . . . . . . . . . . . . . . . . . . . . . . . . . . . . . . . . . . . . . . . . . . . . . . . 362 Turbo Cooling Fan and Turbo Cooling Fan Filter . . . . . . . . . . . . . . . . . . . 364 Replacing the Turbomolecular Pump . . . . . . . . . . . . . . . . . . . . . . . . . . . . . . . 372 Convectron Gauge and Foreline Adapter with Hose . . . . . . . . . . . . . . . . . . . . 378 Chapter 4 Thermo Scientific Upgrade Equipment. . . . . . . . . . . . . . . . . . . . . . . . . . . . . . . . . . . . . . . . . . . . . . . . . . .381 Dust Filter. . . . . . . . . . . . . . . . . . . . . . . . . . . . . . . . . . . . . . . . . . . . . . . . . . . . 382 CI Reagent Gas Flow Module . . . . . . . . . . . . . . . . . . . . . . . . . . . . . . . . . . . . . 383 CI Ion Volume . . . . . . . . . . . . . . . . . . . . . . . . . . . . . . . . . . . . . . . . . . . . . . . . 391 EI/CI Ion Volume. . . . . . . . . . . . . . . . . . . . . . . . . . . . . . . . . . . . . . . . . . . . . . 392 Ion Gauge and Tube Shield. . . . . . . . . . . . . . . . . . . . . . . . . . . . . . . . . . . . . . . 393 Probe Controller . . . . . . . . . . . . . . . . . . . . . . . . . . . . . . . . . . . . . . . . . . . . . . . 396 TSQ 8000 Hardware Manual vii Declaration Manufacturer: Thermo Fisher Scientific Thermo Fisher Scientific is the manufacturer of the instrument described in this manual and, as such, is responsible for the instrument safety, reliability and performance only if: • installation • re-calibration • changes and repairs have been carried out by authorized personnel and if: • the local installation complies with local law regulations • the instrument is used according to the instructions provided and if its operation is only entrusted to qualified trained personnel Thermo Fisher Scientific is not liable for any damages derived from the non-compliance with the aforementioned recommendations. Regulatory Compliance Thermo Fisher Scientific performs complete testing and evaluation of its products to ensure full compliance with applicable domestic and international regulations. When the system is delivered to you, it meets all pertinent electromagnetic compatibility (EMC) and safety standards as described in the next section or sections by product name. Changes that you make to your system may void compliance with one or more of these EMC and safety standards. Changes to your system include replacing a part or adding components, options, or peripherals not specifically authorized and qualified by Thermo Fisher Scientific. To ensure continued compliance with EMC and safety standards, replacement parts and additional components, options, and peripherals must be ordered from Thermo Fisher Scientific or one of its authorized representatives. EMC Directive 89/336/EEC EMC compliance has been evaluated by Professional Testing. • ITQ and Ion Trap Series standards: EMC EN 61326-1:2006. Safety IEC 61010-1:2001, IEC 61010-2-081:2001 • Direct Probe Controller (DPC) standards: EMC EN 61326-1:2006. Safety IEC 61010-1:2001, IEC 61010-2-081:2001 • ISQ standards: EMC EN 61326-1:2006. Safety IEC 61010-1:2001, IEC 61010-2-081:2001 • TSQ 8000 standards: EMC EN 61326-1:2006. Safety IEC 61010-1:2001, IEC 61010-2-081:2001 Low Voltage Safety Compliance This device complies with Low Voltage Directive 2006/95/EC and harmonized standard EN 61010-1:2001. FCC Compliance Statement THIS DEVICE COMPLIES WITH PART 15 OF THE FCC RULES. OPERATION IS SUBJECT TO THE FOLLOWING TWO CONDITIONS: (1) THIS DEVICE MAY NOT CAUSE HARMFUL INTERFERENCE, AND (2) THIS DEVICE MUST ACCEPT ANY INTERFERENCE RECEIVED, INCLUDING INTERFERENCE THAT MAY CAUSE UNDESIRED OPERATION. CAUTION Read and understand the various precautionary notes, signs, and symbols contained inside this manual pertaining to the safe use and operation of this product before using the device. Notice on Lifting and Handling of Thermo Scientific Instruments For your safety, and in compliance with international regulations, the physical handling of this Thermo Fisher Scientific instrument requires a team effort to lift and/or move the instrument. This instrument is too heavy and/or bulky for one person alone to handle safely. Notice on the Proper Use of Thermo Scientific Instruments In compliance with international regulations: Use of this instrument in a manner not specified by Thermo Fisher Scientific could impair any protection provided by the instrument. Notice on the Susceptibility to Electromagnetic Transmissions Your instrument is designed to work in a controlled electromagnetic environment. Do not use radio frequency transmitters, such as mobile phones, in close proximity to the instrument. For manufacturing location, see the label on the instrument. WEEE Compliance This product is required to comply with the European Union’s Waste Electrical & Electronic Equipment (WEEE) Directive 2002/96/EC. It is marked with the following symbol: Thermo Fisher Scientific has contracted with one or more recycling or disposal companies in each European Union (EU) Member State, and these companies should dispose of or recycle this product. See www.thermoscientific.com/ rohsweee for further information on Thermo Fisher Scientific’s compliance with these Directives and the recyclers in your country. WEEE Konformität Dieses Produkt muss die EU Waste Electrical & Electronic Equipment (WEEE) Richtlinie 2002/96/EC erfüllen. Das Produkt ist durch folgendes Symbol gekennzeichnet: Thermo Fisher Scientific hat Vereinbarungen mit Verwertungs-/Entsorgungsfirmen in allen EU-Mitgliedsstaaten getroffen, damit dieses Produkt durch diese Firmen wiederverwertet oder entsorgt werden kann. Mehr Information über die Einhaltung dieser Anweisungen durch Thermo Fisher Scientific, über die Verwerter, und weitere Hinweise, die nützlich sind, um die Produkte zu identifizieren, die unter diese RoHS Anweisung fallen, finden sie unter www.thermoscientific.com/rohsweee. Conformité DEEE Ce produit doit être conforme à la directive européenne (2002/96/EC) des Déchets d'Equipements Electriques et Electroniques (DEEE). Il est marqué par le symbole suivant: Thermo Fisher Scientific s'est associé avec une ou plusieurs compagnies de recyclage dans chaque état membre de l’union européenne et ce produit devrait être collecté ou recyclé par celles-ci. Davantage d'informations sur la conformité de Thermo Fisher Scientific à ces directives, les recycleurs dans votre pays et les informations sur les produits Thermo Fisher Scientific qui peuvent aider la détection des substances sujettes à la directive RoHS sont disponibles sur www.thermoscientific.com/rohsweee. P Preface This guide contains detailed information about maintaining and troubleshooting the Thermo Scientific TSQ 8000™ triple-quadrupole GC-MS system. Contents • About Your System • Related Documentation • System Requirements • Safety and Special Notices • Hydrogen Safety Precautions • Hazardous Substances Precautions • Contacting Us About Your System Thermo Scientific systems provide the highest caliber gas chromatography/mass spectrometry (GC/MS) instrumentation available on today’s market. GC/MS represents a combination of two powerful analytical techniques: GC, which acts as a separation technique, and MS, which acts as a detection technique. Complex mixtures of individual compounds can be injected into the GC, either manually or by an autosampler and then separated for presentation to the MS. The MS will generate a mass spectrum of the GC eluate and its components. The mass spectrum can then be used for qualitative identification as well as accurate and precise quantification of the individual compounds present in the sample. A triple-quadrupole GC/MS/MS system provides the extra selectivity required for trace analysis of compounds in complex matrices. Thermo Scientific TSQ 8000 Hardware Manual xiii Preface WARNING Thermo Scientific systems operate safely and reliably under carefully controlled environmental conditions. If the equipment is used in a manner not specified by the manufacturer, the protections provided by the equipment might be impaired. If you maintain a system outside the specifications listed in this guide, failures of many types, including personal injury or death, might occur. The repair of instrument failures caused by operation in a manner not specified by the manufacturer is specifically excluded from the standard warranty and service contract coverage. Related Documentation The TSQ 8000 system includes Help and these manuals as PDF files: • TSQ 8000 Preinstallation Guide, PN 1R120505-0001 • TSQ 8000 User Guide, PN 1R120505-0002 • TSQ 8000 Hardware Manual, PN 1R120505-0003 • TSQ 8000 Spare Parts Guide, PN 1R120505-0004 • TSQ 8000 AutoSRM User Guide, PN 1R120505-0005 • ISQ and TSQ 8000 Direct Probe System User Guide, PN 1R120505-0006 To view product manuals Go to Start > All Programs > Thermo Instruments> Manuals > TSQ 8000. To open Help • From the TSQ 8000 window, choose Help > TSQ 8000 Help. • If available for a specific window or dialog box, click Help or press the F1 key for information about setting parameters. For more information, visit www.thermoscientific.com. xiv TSQ 8000 Hardware Manual Thermo Scientific Preface System Requirements Your TSQ 8000 data system must meet these minimum requirements. System Requirements Hardware • • • • • 2.4 GHz processor with 4 GB RAM DVD/CD-ROM drive Resolution display 1280 × 1024 (XGA) 250 GB hard drive NTFS format Software • • • • • Microsoft™ Windows™ 7 SP1 Operating System (32-bit) Microsoft Office™ 2010 Thermo Foundation 2.0 SP1 (Thermo Scientific software) Xcalibur™ 2.2 SP1 TraceFinder™ 2.0 SP1* * Your system will function without TraceFinder, but earlier versions of TraceFinder will not work with the Thermo Scientific software required for this instrument. Safety and Special Notices Make sure you follow the precautionary statements presented in this guide. The safety and other special notices appear in boxes. Special Notices Special notices include the following: IMPORTANT Highlights information necessary to prevent damage to software, loss of data, or invalid test results; or might contain information that is critical for optimal performance of the system. Note Highlights information of general interest. Tip Highlights helpful information that can make a task easier. Safety Symbols and Signal Words All safety symbols are followed by WARNING or CAUTION, which indicates the degree of risk for personal injury, instrument damage, or both. Cautions and warnings are following by a descriptor. A WARNING is intended to prevent improper actions that could cause personal injury. A CAUTION is intended to prevent improper actions that might cause personal injury Thermo Scientific TSQ 8000 Hardware Manual xv Preface or instrument damage. You can find the following safety symbols on your instrument or in this guide. BIOHAZARD: Indicates that a biohazard will, could, or might occur. BURN HAZARD: Alerts you to the presence of a hot surface that could or might cause burn injuries. ELECTRICAL SHOCK HAZARD: Indicates that an electrical shock could or might occur. FIRE HAZARD: Indicates a risk of fire or flammability could or might occur. FLAMMABLE GAS HAZARD: Alerts you to gases that are compressed, liquefied or dissolved under pressure and can ignite on contact with an ignition source. This symbol indicates this risk could or might cause physical injury. GLOVES REQUIRED: Indicates that you must wear gloves when performing a task or physical injury could or might occur. HAND AND CHEMICAL HAZARD: Indicates that chemical damage or physical injury could or might occur. INSTRUMENT DAMAGE: Indicates that damage to the instrument or component might occur. This damage might not be covered under the standard warranty. LIFTING HAZARD: Indicates that a physical injury could or might occur if two or more people do not lift an object. MATERIAL AND EYE HAZARD: Indicates that eye damage could or might occur. RADIOACTIVE HAZARD: Indicates that exposure to radioactive material could or might occur. xvi TSQ 8000 Hardware Manual Thermo Scientific Preface READ MANUAL: Alerts you to carefully read your instrument’s documentation to ensure your safety and the instrument’s operational ability. Failing to carefully read the documentation could or might put you at risk for a physical injury. TOXIC SUBSTANCES HAZARD: Indicates that exposure to a toxic substance could occur and that exposure could or might cause personal injury or death. For the prevention of personal injury, this general warning symbol precedes the WARNING safety alert word and meets the ISO 3864-2 standard . In the vocabulary of ANSI Z535 signs, this symbol indicates a possible personal injury hazard exists if the instrument is improperly used or if unsafe actions occur. This symbol and another appropriate safety symbol alerts you to an imminent or potential hazard that could cause personal injury. Hydrogen Safety Precautions Hydrogen is a colorless, odorless, highly flammable gas with the molecular formula H2 and an atomic weight of 1.00794, making it the lightest element. Hydrogen gas presents a hazard as it is combustible over a wide range of concentrations: at ambient temperature and pressure, this ranges from about 4% to 74.2% by volume. Hydrogen has a flash point of - 423 °F (- 253 °C) and an auto-ignition temperature of 1,040 °F (560 °C). It has a very low ignition energy and the highest burning velocity of any gas. If hydrogen is allowed to expand rapidly from high pressure, it can self-ignite. Hydrogen burns with a flame that can be invisible in bright light. WARNING - FIRE HAZARD: The use of hydrogen as a carrier gas is dangerous. Hydrogen is potentially explosive and must be used with extreme care. Any use of hydrogen gas must be reviewed by appropriate health and safety staff and all installations of hydrogen systems must be performed to applicable codes and standards. Thermo Fisher Scientific assumes no liability for the improper use of hydrogen as a carrier gas. Before you begin using hydrogen, you should conduct a risk assessment based on the quantity of hydrogen to be used and the conditions of your laboratory. You should ask yourself: “What hydrogen hazards associated with this project are most likely to occur?” “What hydrogen hazards associated with this project have the potential to result in the worst consequences?” • Try to reduce or eliminate the higher risks by using the proper ventilation to remove hydrogen gas before an ignitable concentration can accumulate. You should also consider purging the hydrogen to further reduce hazards and ensure anyone who will be working with hydrogen has basic hydrogen safety training. Thermo Scientific TSQ 8000 Hardware Manual xvii Preface • As with laboratory safety in general, be sure to wear safety glasses, laboratory coats, gloves, etc. Typically there are no specific requirements for gaseous hydrogen, other than eye protection when working with a compressed gas. If working with liquid (cryogenic) hydrogen, insulated gloves and protective shoes should be worn in addition to eye protection. • You should post “No Smoking” and “No Open Flames” signs to identify hydrogen sources and cylinders. Maintain, inspect and leak-test all hydrogen sources regularly. • All hydrogen shutoff valves should be clearly marked and permanent hydrogen piping should be labeled as such at the supply or discharge point and at regular intervals along its length. Where hydrogen gas piping passes through a wall, the piping should be labeled on both sides of the wall. • There should also be contingency plans in place should an incident occur. • The site emergency response team, as well as the local fire department, should know the location of all hydrogen storage tanks. Using Hydrogen with TSQ 8000 To use hydrogen with the TSQ 8000, you must always shut off the GC carrier gas before venting or turning off the TSQ 8000. There are three hydrogen safety screws on the TSQ 8000 that must be in place. These are attached to your instrument at the factory. Figure 1. Hydrogen Safety Screws on the TSQ 8000 Left Top Cover Screw Right Top Cover Screw Front Panel Screw xviii TSQ 8000 Hardware Manual Thermo Scientific Preface Before powering on the TSQ 8000 system, ensure that: • All the covers and panels of the TSQ 8000 system are firmly attached. • The vent valve is tightly closed if you vented the system. • All fittings, ferrules, and o-rings are sealed. Hydrogen Connection Guidelines Use the following guidelines to safely connect hydrogen to your system: • Piping—Hydrogen must be delivered to equipment using appropriate piping and be done in such a way as to pose essentially no hazard to end-users. Piping systems for the delivery of hydrogen should be designed and installed by a person qualified by specific training and experience with hydrogen piping systems. Stainless steel is usually recommended because it is a safe, cost-effective material. Piping of black iron or copper must not be used, as the pipe can become brittle with age. Elastomeric/plastic tubing of various plastics and polymers should not be used, unless the tubing is approved for use with hydrogen. If elastomeric/plastic tubing is used for hydrogen gas delivery, the tubing should be tested for hydrogen permeability to minimize leakage. The hydrogen piping system must be flexible enough to endure routine thermal expansion and contraction. The system should also include considerations for the most severe condition of temperature and pressure expected during service. Piping and supports must be able to withstand static loading introduced by such things as ice and snow; and dynamic loading from high wind and earthquake. Caution should be used if burying hydrogen piping. Proper controls should be used to protect against damage and corrosion, and also to prevent Hydrogen from entering a building if there is any leakage. • Fittings—All fittings must be of the proper type approved or designed for use with hydrogen gas. Use as few fittings as possible to minimize the potential for leaks. After installation, ensure that leak testing is carried out prior to system use, and on a regular basis. There must be no PTFE tape or other things like plumber's putty used to enhance a seal, as this actually is a detriment to a good seal. Ideally the best installation would use stainless steel tubing with appropriate gas-tight fittings. Welding is usually preferred for joints in hydrogen piping systems since welding provides a better connection and reduces the potential for leaks compared to mechanical fittings. Soft solder joints are not permitted for hydrogen systems (due to the low melting point of soft solder and its potential for brittle failure at cryogenic temperatures). Brazed joints are permitted, but such joints should be protected against the possibility of external fire. Thermo Scientific TSQ 8000 Hardware Manual xix Preface Tubing connections should be clamped to barbed or press-fit type connections. Hose clamps or jubilee clamps must not be used. • Valves—All valves must be suitable for hydrogen service and for the specific operating conditions. Valves, including regulators, must not be used for hydrogen, unless they are designed and identified for such a use. Ball valves are often chosen because of their superior leak tightness through the valve seat. Pneumatic operators are usually chosen for remotely operated valves so that potential ignition sources (electricity) are remote from the valve. Manual shutoff valves should be provided near each point of use, within immediate reach. If a hydrogen cylinder or hydrogen generation system is located within immediate reach, a separate point-of-use shutoff valve is usually not necessary. Line regulators that have their source away from the point of use should have a manual shutoff valve near the point of use. An emergency gas shutoff device in an accessible location outside the use area should be provided in addition to the manual point-of-use valve in each educational and instructional laboratory space that has a piped gas supply system. If necessary, the piping system should have uninterruptible pressure relief. The pressure relief system should be designed to provide a discharge rate sufficient to avoid further pressure increase and should vent to a safe location outside or to a ventilation system exhaust. Purchasing Hydrogen Use the following guidelines when purchasing hydrogen: • Hydrogen Generator—Because it minimizes the amount of hydrogen present and reduces the degree of hazard, a hydrogen generator (also called an electrolyzer) is the safest way to purchase hydrogen in the quantity used in GC/MS. However, to minimize the degree of hazard, the hydrogen generator must only be operated in a non-explosive environment because hydrogen buildup can be ignitable. This means that your ventilation system for the room or lab hood must maintain an air exchange rate that is at least two orders of magnitude greater than the maximum hydrogen production rate of the hydrogen generator. Be sure to follow the manufacturers' directions about proper use and maintenance of the regulator. To prevent the possibility of releasing hydrogen, the hydrogen generator should be set to shut down if: − There is a loss of flow to the ventilation system − A hydrogen detector alarms at 25% of the lower flammable limit of hydrogen in air. The oxygen exhausted by the electrolyzer should be vented to the outside as well. xx TSQ 8000 Hardware Manual Thermo Scientific Preface • Hydrogen Cylinder—Hydrogen can be delivered in standard laboratory gas bottles or cylinders. These cylinders have a limited amount of hydrogen in them and are a safe way to transport and store hydrogen. However, compressed hydrogen gas cylinders, like all compressed gas cylinders, must be secured in an upright position, ideally with a non-combustible chain or cable. If the cylinder falls over, the valve can be knocked off and the pressurized cylinder can take off like a rocket, which leads to the release of hydrogen and possibly an explosion, severe injury, or death. Never crack a hydrogen cylinder valve to remove dust or dirt from fittings prior to attaching a regulator, as there is a risk of self-ignition. Properly Storing Hydrogen Storing and handling compressed hydrogen gas and cryogenic liquid hydrogen present potential health and safety hazards. Using proper storage and handling techniques is essential to maintaining a safe work environment. Use the following guidelines when storing hydrogen: • Store spare hydrogen gas cylinders outside and away from doors, windows, building air intake vents, structures, and vehicle routes. This precaution applies when the hydrogen is or is not in use. Indoor storage of spare hydrogen cylinders has special requirements, which is beyond the scope of this document. Documentation for each vessel should include a description of the vessel, a list of available drawings or other documents, the most recent inspection results, and the responsible person's name. • Prevent spare cylinders from toppling by wrapping them with chains. The chains should also be protected against corrosion and excessive heat. • Separate spare hydrogen cylinders from oxidizing gases (such as oxygen) with a 5 ft (1.5 m) tall fire barrier with a half-hour fire rating or place the cylinders at least 20 ft (6 m) apart. • When moving hydrogen cylinders: − Remove the regulator and replace the cylinder valve cap before moving. − Move cylinders on cylinder carts or with other appropriate transport devices. − Never roll or drop a cylinder and never lift a cylinder by its protective cap. • Bulk hydrogen systems include either gaseous or liquid hydrogen in fixed installations; in some gas systems a semi-permanent trailer (tube trailer) can be used. Storage vessels for compressed hydrogen gas or liquid hydrogen should be designed, constructed, tested, and maintained in accordance with applicable codes and standards. Bulk hydrogen systems represent a level of complexity again which is beyond the scope of this document; however some general guidelines are provided. Thermo Scientific TSQ 8000 Hardware Manual xxi Preface • The bulk hydrogen storage system should not be located beneath electric power lines, close to other flammable gases/liquids, or close to public areas. It should be readily accessible to authorized personnel and delivery equipment, but protected from physical damage or tampering. • As liquid hydrogen systems also have a cryogenic hazard, additional safety considerations for the use of cryogenic liquids might be necessary. xxii TSQ 8000 Hardware Manual Thermo Scientific Preface Hydrogen Safety Codes, Standards and References The following list of safety codes, standards and references is in no way an exhaustive list. In fact, there might be federal, state or local codes that apply to your specific location. Check with all appropriate agencies with jurisdiction before installing or using a hydrogen system. • Air Products Safetygram #4 Gaseous Hydrogen • ANSI/AIAA standard for hydrogen safety guidelines is AIAA G-095-2004, Guide to Safety of Hydrogen and Hydrogen Systems • ASME B31.1, Power Piping Code • ASME B31.3, Process Piping Code • ASME B31.8, Gas Transmission and Distribution Systems • BCGA Code Of Practice CP4 Industrial Gas Cylinder Manifolds and Gas Distribution Pipework • BCGA Code Of Practice CP33 The Bulk Storage of Gaseous Hydrogen at Users' Premises • CGA G-5, Hydrogen • CGA G-5.4, Standard for Hydrogen Piping Systems at Consumer Locations • CGA G-5.5, Hydrogen Vent Systems • CGA G-5.6, Hydrogen Pipeline Systems • CGA G-5.8, High Pressure Hydrogen Piping Systems at Consumer Locations. • FM Global Property Loss Prevention Data Sheets 7-50: Compressed Gases in Cylinders • FM Global Property Loss Prevention Data Sheets 7-91: Hydrogen • IGC Doc 121/04/E, Hydrogen Transportation Pipelines System Design Features • NASA • NSS 1740.16 Safety Standard For Hydrogen And Hydrogen Systems Guidelines for Hydrogen System Design, Materials Selection, Operations, Storage, and Transportation • NFPA 52, Vehicular Fuel Systems Code • NFPA 55, Standard for the Storage, Use, and Handling of Compressed Gases and Cryogenic Fluids in Portable and Stationary Containers, Cylinders, and Tanks, 2005 Edition • NFPA 68, Standard on Explosion Protection by Deflagration Venting • NFPA 70, National Electrical Code Thermo Scientific TSQ 8000 Hardware Manual xxiii Preface • NFPA 497, Recommended Practice for the Classification of Flammable Liquids, Gases, or Vapors and of Hazardous (Classified) Locations for Electrical Installations in Chemical Process Areas • NFPA 13, Standard for the Installation of Sprinkler Systems • NFPA 45, Standard on Fire Protection for Laboratories Using Chemicals • NFPA 55, Standard for the Storage, Use, and Handling of Compressed Gases and Cryogenic Fluids in Portable and Stationary Containers, Cylinders, and Tanks • NFPA 68, 2007 Standard on Explosion Protection by Deflagration Venting • NFPA 69, Standard on Explosion Prevention Systems • NFPA 91, Standard for Exhaust Systems for Air Conveying of Vapors • NFPA 255, Standard Method of Test of Surface Burning Characteristics of Building Materials • OSHA 29CFR1910.103 1910.103 Hydrogen Hazardous Substances Precautions WARNING Before using hazardous substances (toxic, harmful, and so on), please read the hazard indications and information reported in the applicable Material Safety Data Sheet (MSDS). Use personal protective equipment according to the safety requirements. Biological Hazard Warning Note In laboratories where samples with potential biological hazards are handled, the user must label any equipment or parts which might become contaminated with biohazardous material. The appropriate warning labels are included with the shipment of the instrument. It is the user’s responsibility to label the relevant parts of the equipment. When working with biohazardous materials, you are responsible for fulfilling the following mandatory requirements: • Providing instructions on how to safely handle biohazardous material. • Training operators must to be aware of potential hazards. xxiv TSQ 8000 Hardware Manual Thermo Scientific Preface • Providing personal protective equipment. • Providing instructions for what to do if operators are exposed to aerosols or vapors during normal operation (within the intended use of the equipment) or in case of single fault situations such as a broken vial. The protective measures must consider potential contact with the skin, mouth, nose (respiratory organs), and eyes. • Providing instructions for decontamination and safe disposal of relevant parts. WARNING The user or operator is responsible for the safe handling of hazardous chemicals or biological compounds including (but not limited to) bacterial or viral samples and the associated waste, according to international and local regulations. Venting Toxic Gases When analyzing toxic compounds, be aware that during the normal operation of the GC some of the sample might be vented outside the instrument through the split and purge flow vents; therefore, be sure to vent the exhaust gases to a fume hood. Consult local environmental and safety regulations for instructions in exhausting fumes from your system. Contacting Us There are several ways to contact Thermo Fisher Scientific for the information you need. To find out more about our products Go to www.thermo.com/ms for information about our products. To get local contact information for sales or service Go to www.thermoscientific.com/wps/portal/ts/contactus. To suggest changes to documentation or to Help • Fill out a reader survey online at www.surveymonkey.com/s/PQM6P62. • Send an e-mail message to the Technical Publications Editor at [email protected]. Thermo Scientific TSQ 8000 Hardware Manual xxv 1 Performing Routine Maintenance This chapter describes how to perform routine maintenance on the TSQ 8000 system. Keeping your system in good working condition increases laboratory productivity and helps you get the most out of the instrument. Contents • Maintenance Supplies and Tools • Configuring the TSQ 8000 System • Powering On the TSQ 8000 System • Powering Off the TSQ 8000 System • Replacing a Column • Maintaining the Foreline Pump • Removing the Ion Source Cartridge for Cleaning • Maintaining the Calibration Gas Module • Replacing a Dual Filament • Replacing the Electron Multiplier • Cleaning Durable Components • Cleaning Delicate Components • Cleaning the Filters Thermo Scientific TSQ 8000 Hardware Manual 1 1 Performing Routine Maintenance There are only a few components on your TSQ 8000 system that require routine maintenance, depending on the quantity and types of samples you are running. A frequently used instrument will, of course, require more maintenance than an instrument that is rarely used. Note For routine maintenance information about your GC or autosampler, refer to the appropriate product documentation. • Column—You may need to replace the column when your performance degrades and troubleshooting indicates that the column needs maintenance. That may mean that end of the column needs to be trimmed or the column needs to be replaced. • Ion source cartridge—The ion cartridge needs to be cleaned when it gets dirty. • Filament—The filament needs to be replaced when it wears out from use. • Calibration gas reservoir—The calibration gas reservoir needs to be refilled when it gets empty. Typically, it will need to be refilled every year or two. • Electron multiplier—The electron multiplier needs to be replaced when the detector gain tune sets the electron multiplier to a voltage higher than 2000 V. This component can not be cleaned. • Foreline pump—The foreline (rough) pump needs an oil change periodically, as indicated in the pump’s documentation. The foreline pump must be replaced if it seizes up. There are many more components of the TSQ 8000 system that do not require routine maintenance, but may need to be replaced if there is a problem with the instrument. To replace components not listed in this chapter, refer to Chapter 3: Advanced Troubleshooting. Tip You can set up Xcalibur to remind you when some of these components need to be serviced. See the TSQ 8000 User Manual for information. 2 TSQ 8000 Hardware Manual Thermo Scientific 1 Performing Routine Maintenance Maintenance Supplies and Tools Maintenance Supplies and Tools To perform routine maintenance on the TSQ 8000 instrument, you will need the supplies and tools listed in the following table. The supplies in the TSQ 8000 Toolkit are included in the toolkit shipped with your instrument. Item Included in the TSQ 8000 Toolkit Cloth or paper, lint-free Column measuring tool Source exchange tool Forceps Not Included in the TSQ 8000 Toolkit Gas, clean and dry Gloves, clean, lint-free Protective eye wear Torx® T10 screwdriver Torx® T20 screwdriver Torx® T30 screwdriver Wrenches, open-ended, 1/4-in., 5/16-in., 3/8 in., 7/16-in. Note The tools in the TSQ 8000 Toolkit are shipped in a black plastic case with the instrument. Each tool in the kit can be ordered separately or you can order an additional toolkit. See the TSQ 8000 Spare Parts Manual for ordering information. IMPORTANT Many nitrile and latex gloves not certified for clean room use contain silicone mold releasing agents that will contaminate the instrument. For this reason, clean room gloves are strongly recommended. We recommend Cardinal Health CP100 Nitrile Cleanroom Gloves. See the TSQ 8000 Spare Parts Guide for ordering information In addition to the TSQ 8000 Toolkit, you can also purchase a TSQ 8000 Screw Kit, which includes extra screws, nuts, and standoffs. Refer to the TSQ 8000 Spare Parts Manual for ordering information. Thermo Scientific TSQ 8000 Hardware Manual 3 1 Performing Routine Maintenance Configuring the TSQ 8000 System Configuring the TSQ 8000 System When you receive your TSQ 8000 system, a Field Service Engineer will configure the system for you. However, if you need to reconfigure your system, follow these steps: 1. Place the TSQ 8000 instrument, GC, computer, monitor, and keyboard on a work table and the foreline pump on the floor underneath. Note If you are using CI, connect the reagent gas tubing to one of the Reagent Gas Connectors on the TSQ 8000 instrument. Figure 1. Configuring the TSQ 8000System System Mech Pump Connection Reagent Gas (A & B) Connectors Power Switch Optional Mech Pump Connection AC Input Connector Collision Gas Intake Accessory Start Connector GC Start Connector Data System Connector 4 TSQ 8000 Hardware Manual Thermo Scientific 1 Performing Routine Maintenance Configuring the TSQ 8000 System Note Leave at least 46 cm (18 in.) of free space on the left side of the instrument to provide easy access to the power switch and other appliance inlets. 2. Connect all the cables to the computer, keyboard, mouse, monitor, and printer (if applicable). 3. Connect the handshaking cable to the GC and to the TSQ 8000 instrument’s GC Start connector. 4. Connect the computer and monitor electrical cables to the wall outlet. 5. Connect the GC communication cable to the COM1 or LAN port on the back of the computer. 6. Connect the Ethernet cable to the Data System connector on the TSQ 8000 instrument and to the bottom Ethernet port on the back of the computer. Note If you are using a probe controller, connect the probe controller cable to the Accessory Start connector on the left hand sub panel of the TSQ 8000 instrument. 7. Power-on the computer, monitor, and printer. 8. Set the time, date, and passwords. 9. Install print drivers and test the printer. 10. Connect the foreline vacuum hose to the foreline pump input using the o-ring screen seal and clamp. CAUTION - INSTRUMENT DAMAGE: Be sure to connect the foreline vacuum hose to the foreline pump inlet on the roughing pump. If you attach the hose to the wrong inlet on the roughing pump, pump oil will flood the manifold. 11. Connect the exit of the foreline pump to a suitable exhaust or oil mist filter. 12. Connect the foreline pump’s power cable to the pump and to the System Mech Pump connector on the TSQ 8000 instrument. CAUTION - INSTRUMENT DAMAGE: Make sure the voltage on the pump matches the AC voltage that is powering the TSQ 8000 system. 13. Turn the foreline pump power switch to the On position. The foreline pump will not power on until the TSQ 8000 instrument is powered on. 14. Connect the GC electrical cable to the wall outlet. 15. Power-on the GC. 16. Perform a leak check on the GC. Thermo Scientific TSQ 8000 Hardware Manual 5 1 Performing Routine Maintenance Configuring the TSQ 8000 System 17. Install and condition the column, as described in Replacing a Column. Note Condition the column before installing it on the mass spectrometer. 18. Make sure the TSQ 8000 instrument’s power switch is in the Off (down) position. 19. Connect the TSQ 8000 instrument’s electrical cable to the AC Input connector on the mass spectrometer and to the wall outlet. 20. Follow the instructions in Powering On the TSQ 8000 System to power on the instrument. 6 TSQ 8000 Hardware Manual Thermo Scientific 1 Performing Routine Maintenance Powering On the TSQ 8000 System Powering On the TSQ 8000 System To power-on the TSQ 8000 system: 1. Install the GC column if you have not already done so (see Replacing a Column). 2. Be sure the GC is powered on and there is carrier gas flowing through the column into the TSQ 8000 system. CAUTION - INSTRUMENT DAMAGE: If you power-on the mass spectrometer without column flow, air is drawn through the column, which could damage the instrument. This large air leak may also require that you clean the ion source. 3. Open the front door of the instrument and tighten the vent valve knob. Then close the front door of the instrument. 4. Reach over to the left side of the instrument and pull up on the power switch to power-on the TSQ 8000 mass spectrometer. Figure 2. Powering On the TSQ 8000 System Power Switch Vent Valve Knob Thermo Scientific TSQ 8000 Hardware Manual 7 1 Performing Routine Maintenance Powering On the TSQ 8000 System 5. Check the lights on the front of the instrument to make sure it is ready for use. Figure 3. Using the Lights on the TSQ 8000 Instrument Vacuum Power Busy Heaters • Power—If the Power light is a solid green, the instrument is powered on. When the light is not lit, the instrument is not powered on. • Vacuum—After the instrument is powered on, it can take up to 10 minutes to achieve proper vacuum. During this initial power-up, the vacuum light will slowly blink orange. If the vacuum light begins blinking orange quickly, you have a large leak that is preventing the instrument from achieving vacuum. If this occurs, turn the power off, find and fix the leak, and power-on the instrument. The Vacuum light also blinks orange quickly when the vacuum pumps are turned off and the system is safe to vent, during instrument shut down, or if the foreline pump has failed. When the Vacuum light is a solid green, the instrument is under high vacuum. Tip The mostly likely causes of not achieving vacuum are the vent valve needs to be closed, the column nut needs to be tightened, or the column was not installed correctly. • Heaters—To check the temperature, look at the Heaters light on the front door. When the Heaters light is a solid green, the instrument is at temperature. If it is blinking orange, the ion source and/or transfer line are not at temperature. If the light is not lit, the heaters are not turned on. Note Until the Vacuum light is a solid green (high vacuum is achieved), the heaters will not power on, and the Heaters light will not be lit. The heaters will turn on for about 30 seconds on initial power-up. If the Vacuum light is not a solid green at that time, the heaters will turn off until the Vacuum light is green. 8 TSQ 8000 Hardware Manual Thermo Scientific 1 Performing Routine Maintenance Powering On the TSQ 8000 System • Busy—If the Busy light is a solid blue, the instrument is actively scanning. When the light is not lit, the instrument is not scanning. The Busy light is also lit when establishing communication with the computer or when the filament or electron multiplier is on. 6. Open the TSQ 8000 Dashboard by clicking on the desktop icon. 7. Check the status of the vacuum on the TSQ 8000 Dashboard. Within 10 minutes of powering on the instrument, the vacuum should read OK. 8. Check the heater status on the TSQ 8000 Dashboard. If the ion source is not set to the desired temperature, click the Instrument Control button and change the temperature.The temperature set point will change when the send button is pressed. Figure 4. Checking the Status of TSQ 8000 System 9. Allow the TSQ 8000 system to stabilize for at least 4 hours before tuning the instrument or running samples. Note You can run the instrument without stabilizing it, but you may have changes in the masses and intensities as the system equilibrates at the final temperature. Thermo Scientific TSQ 8000 Hardware Manual 9 1 Performing Routine Maintenance Powering Off the TSQ 8000 System Powering Off the TSQ 8000 System To power-off the TSQ 8000 system: Note If you are running samples, stop the acquisition before powering off the system. 1. Cool down the GC. If you do not plan to replace the column or perform maintenance on the GC, you do not have to lower the injector temperature. Note If you are using hydrogen as a carrier gas, you must cool down and shut off the GC to prevent the buildup of hydrogen in the vacuum manifold. 2. Open the TSQ 8000 Dashboard and click the Shut Down button. 3. Click the Yes button to continue the shutdown process. The heaters and turbomolecular pump power off. Once the turbomolecular pump reaches 50% rpm, the foreline pump powers off, and you may vent the system. 4. When the TSQ 8000 system’s temperatures and pumps are ready for shutdown, the vacuum light on the front of the instrument will start blinking rapidly. 5. Reach over to the left side of the instrument and push down on the power switch to power-off the TSQ 8000 mass spectrometer. Figure 5. Powering Off the TSQ 8000 System Vacuum Interlock Shield Power Switch Vent Valve Knob 6. Open the front door of the instrument. 10 TSQ 8000 Hardware Manual Thermo Scientific 1 Performing Routine Maintenance Powering Off the TSQ 8000 System 7. Look behind the right side of the vacuum interlock shield and twist the vent valve knob one and a half times in a counter-clockwise direction to open the vent. Wait five minutes for venting to complete. IMPORTANT The process ends here if you are planning to perform system maintenance on the TSQ 8000 mass spectrometer alone (for example, to replace the filament). You don’t need to turn off the GC, data system, and autosampler. 8. Power-off all the remaining instruments. Refer to their user documentation for specific instructions. CAUTION If you need to work inside the TSQ 8000 instrument, disconnect it from the electrical outlet. Be sure to reconnect it to the AC Input connector on the back of the instrument after finishing your work and closing the instrument. Figure 6. Connecting the TSQ 8000 Instrument to the Electrical Power Power Switch AC Input Connector Thermo Scientific TSQ 8000 Hardware Manual 11 1 Performing Routine Maintenance Replacing a Column Replacing a Column To replace a column: Note If you are running samples, stop the acquisition before powering off the system. 1. Cool down the GC oven and injector. See the GC documentation for information. 2. Open the TSQ 8000 Dashboard and click Shut Down. During the shutdown procedure the vacuum and heaters lights will remain off. Once the procedure is complete and the instrument is ready to be powered off, the power light will turn orange and start blinking rapidly. At this point it is safe to power off the TSQ 8000 system. 3. On the left side of the instrument, push down on the power switch to power-off the TSQ 8000 system. Figure 7. Powering Off the TSQ 8000 System Vacuum Interlock Shield Power Switch Vent Valve Knob 4. Open the front door of the instrument. 5. Look behind the right side of the vacuum interlock shield and twist the vent valve knob one and a half times in a counterclockwise direction to open the vent. 6. Remove the current column: a. Make sure the heated zones of the GC are cooled down. Refer to the GC documentation for instructions. 12 TSQ 8000 Hardware Manual Thermo Scientific 1 Performing Routine Maintenance Replacing a Column b. Turn off the carrier gas and if used, the detector gas. See the GC documentation for information about using detector gases. c. Open the front door of the GC. WARNING BURN HAZARD: The injector, oven, and transfer line may be hot. Allow them to cool to room temperature before touching them. d. Unscrew the transfer line nut and remove the column from the transfer line. e. Unscrew the injector and detector nuts and remove the column. f. Remove the column from the column rack and from the GC. 7. Connect the new column to the injector inside the GC. Note Wear clean, lint- and powder-free gloves when you handle the column and injector ferrule. a. Unwind the column enough to easily connect its ends to the injector and detector. b. Wipe about 100 mm (4 in.) of the column with a tissue soaked in methanol. c. Insert the column through the injector retaining nut and ferrule (larger end up). If the M4 retaining nut is used, slide it on the column through the side cut. Wipe the column again with a tissue soaked in methanol. Tip Slide a notched septum on the column before the injector retaining nut to make it easier to measure the proper distance between the nut and end of the column. d. Use a scoring wafer to score and break the column about 1 cm (0.4 in.) from the end. Use a magnifying glass to check for an even, flat cut. Repeat if necessary. e. Insert a notched septum on the column to hold the retaining nut at this position. Thread the retaining nut into the injector but do not tighten. f. Ensure that the end of the column is the proper distance (splitless = 5 mm, split = 10 mm, PTV and PTVBKF = 30 mm) from the back of the injector nut. g. Adjust the column position so that the septum contacts the bottom of the retaining nut. Use your fingers to tighten the retaining nut until it starts to grip the column. h. Tighten the column nut finger-tight until it starts to grip the column plus a quarter turn. i. Remove the notched septum from the column. 8. Set up the GC parameters: a. Set the oven and injector temperature to 50 °C (122 °F). b. Set the carrier gas flow to 1.0 mL/min. Thermo Scientific TSQ 8000 Hardware Manual 13 1 Performing Routine Maintenance Replacing a Column c. Turn off vacuum compensation, which is located on the Carrier menu of the GC. d. Use the column flowmeter connector to verify that there is flow through the column. If you do not have a flowmeter, dip the column outlet in a small vial of methanol. Bubbles indicate there is flow through the column. If there is no flow, check that the carrier gas is on, the GC inlet is pressurized, and the column is not plugged. If there is still no flow, consult the GC documentation or contact Technical Support. e. Allow the column to purge for at least 10 minutes. If you used methanol to detect column flow, remove column from methanol during purge time. f. Insert the column into the fitting of the column flowmeter connector that blocks the column flow. 9. Perform a column leak check: a. On the TRACE 1310, select the Leak Check icon in the Maintenance menu. Otherwise, perform the leak check through the Chromatography Data System. Refer to the TRACE 1300 and TRACE 1310 Series GC User Guide for instructions. b. Start the leak check. The split and purge valves of the selected channel are automatically closed, and the channel is pressurized with carrier gas to the leak check setpoint. The system monitors the pressure for one minute. If the pressure does not drop more than the maximum allowed sensitivity value, then the leak check will pass. If the leak check does not pass, use the leak detector to find and fix any leaks. Tip Leaks can be caused by not tightening the fitting on the column flowmeter connector. Check the fitting before looking for the leak elsewhere. CAUTION INSTRUMENT DAMAGE: Do not allow the column flowmeter connector to exceed 80 °C (176 °F). Otherwise, it will melt and damage the instrument. c. Repeat the leak check until no leaks are indicated. 10. Calibrate the carrier gas flow (column evaluation): a. Carefully push the capillary column end into the flowmeter section of the column flowmeter connector. 14 TSQ 8000 Hardware Manual Thermo Scientific 1 Figure 8. Performing Routine Maintenance Replacing a Column Column Flowmeter Connector A B C To flowmeter b. Connect the flowmeter to the dedicated fitting on the column flowmeter connector. c. If you have a TRACE 1310, select the Back or Front Column icon in the Configuration menu. Otherwise, perform the column evaluation through the Chromatography Data System. See the TRACE 1300 and TRACE 1310 User Guide for instructions. d. Select Column and input the column’s physical characteristics. e. If a pre-/post column is present, set the length and nominal internal diameter of the pre-/post column in the same valid ranges for the column. The following two lines are added to the menu. Note For the most reproducible results, you should conduct a more detailed column evaluation. However, the following steps, while recommended, are not required. f. Start the column evaluation. According to the physical characteristics of the column, the system calculates and displays the relevant column K-factor. At the end of the routine, a message will indicate that the evaluation was successful. g. Expect a K-factor of approximately 0.7 – 0.9 for a 15 m, 0.25 mm i.d. column (1.3 – 2.0 for a 30 m, 0.25 mm i.d. column). If the column does not report a K-factor within this range or within 0.1 units of the previous stored value, check for a leak or broken column using the leak detector. The K-factor is a measured resistance for the column. A K-factor that is too low may indicate a leak in the system, while a K-factor that is too high may indicate a blockage. Fix any issues found and rerun column evaluation until an appropriate K-factor is achieved.e a leak in the system, while a K-factor that is too high might indicate a blockage. Thermo Scientific TSQ 8000 Hardware Manual 15 1 Performing Routine Maintenance Replacing a Column 11. Disconnect the column flowmeter: a. Disconnect the column from the column flowmeter connector. b. Remove the clear plastic component, including its fittings, from the oven and set them aside. c. Close the GC door. 12. Condition the column before inserting it into the TSQ 8000 system. Column conditioning consists of passing a carrier gas flow through the column heated to a programmed temperature as described in the column manufacturer’s instructions. a. If there are no conditioning instructions, perform the column conditioning by setting a final temperature 10 °C–20 °C below the column’s recommended maximum temperature. CAUTION INSTRUMENT DAMAGE: The material released from the column (column bleed) during conditioning may contaminate the ion source if the column is inserted into the transfer line during the high-temperature stage of conditioning. WARNING FIRE HAZARD: Do not use hydrogen as the carrier gas for conditioning your column. It could vent into the oven and present an explosion hazard. b. Run the slow temperature program that is recommended by the manufacturer. A typical program would hold the column at 40 °C (104 °F) for 15 minutes, and then ramp at 10 °C/min (50 °F/min) up to 10–20 °C below the maximum allowed column temperature. Hold the column at this temperature for two hours. CAUTION INSTRUMENT DAMAGE: Never exceed the column manufacturer’s maximum operating temperature. 13. Connect the column to the transfer line: a. Lower the oven temperature and allow it to cool. b. If the TSQ 8000 system is running, shut down and vent it. See the TSQ 8000 Hardware Manual for instructions. CAUTION BURN HAZARD: The injector, detectors, oven, and transfer line may be hot. Allow them to cool before touching them. 16 TSQ 8000 Hardware Manual Thermo Scientific 1 Performing Routine Maintenance Replacing a Column c. Unwind about one turn of the column from the column outlet end. Note Wear clean, lint- and powder-free gloves when you handle the column and transfer line ferrule. d. Wipe approximately 300 mm (12 in.) of the column with a tissue soaked in methanol. e. Lay the column on the oven floor. It is a flat surface and will improve handling. f. Choose an appropriate ferrule for the outer diameter of your column. Note If the maximum oven temperature in your method is ≥ 290 °C (554 °F), Thermo Fisher Scientific recommends using a Siltite™ ferrule. By cycling the oven at and above this temperature, expansion and contraction of the graphite/vespel material can cause leaks in the transfer line. g. Insert the column through the transfer line nut and ferrule, using the tapered end of the ferrule. Wipe the column again with a tissue soaked in methanol. Figure 9. Transfer Line Nut and Siltite Ferrule Orientation Transfer Line Nut Siltite Ferrule h. Insert the column into the measuring tool, which is in the TSQ 8000 Toolkit (See Figure 10), so that it is even with the lines at the end of the column. Figure 11 indicates proper positioning of the column in the tool for accurate measuring. i. Use a scoring wafer to score and break the column. Use a magnifying glass to check for an even, flat cut. Repeat if necessary. j. Use a 5/16 in. wrench to hold the column measuring tool steady. k. Using your fingers or a 1/4” wrench, tighten the transfer line nut until the column is held in place lightly. l. Thermo Scientific Using your fingers or a 1/4 in. wrench, tighten the transfer line nut until the column is held in place lightly. TSQ 8000 Hardware Manual 17 1 Performing Routine Maintenance Replacing a Column Figure 10. Column Measuring Tool Figure 11. Breaking the Column End of Column Goes Here m. Line up the outlet of the column with the arrows on the end of the column measuring tool. n. While holding the column measuring tool steady, tighten the transfer line nut with a 1/4” wrench until the column stops moving in the ferrule. o. Loosen the transfer line nut from the column measuring tool. Remove the column, transfer line nut and ferrule from the column measuring tool, making sure the ferrule does not move from its tightened position in the column. Placing a septum with a cut in it on the column behind the nut will help keep the ferrule in place. p. Insert the column into the transfer line. q. Tighten the nut finger tight plus a quarter turn. Note If you are using a Siltite ferrule, follow the instructions that come with Siltite ferrules. If you are using a graphite/vespel ferrule, they require conditioning to ensure a leak-tight seal. See the TSQ 8000 Spare Parts Guide for information about ordering these ferrules. r. Condition the graphite/vespel ferrule: i. Raise the oven temperature to the maximum temperature you will operate the GC. ii. Wait 10 minutes. iii. Lower the oven temperature to 40 °C (104 °F) and allow it to cool before continuing. WARNING BURN HAZARD: The oven may be hot. Allow it to cool to room temperature before opening it. The injector will still be hot, so do not touch it. iv. Retighten the transfer line nut. 18 TSQ 8000 Hardware Manual Thermo Scientific 1 v. Performing Routine Maintenance Replacing a Column View air water spectra and look for evidence of leaks with a large m/z 28 signal. If you observe a leak, stop scanning and gently tighten the nut in small increments until no leaks appear when scanning. 14. Close the front door of the GC. 15. Restore working conditions. a. Raise the oven temperature to the initial temperature that you will use. b. Turn on vacuum compensation on the GC. c. Power on the TSQ 8000 instrument. See Powering On the TSQ 8000 System for instructions. Thermo Scientific TSQ 8000 Hardware Manual 19 1 Performing Routine Maintenance Maintaining the Foreline Pump Maintaining the Foreline Pump The foreline (roughing) pump is usually located on the floor behind the TSQ 8000 instrument and occasionally requires maintenance. It establishes the vacuum needed to run the turbomolecular pump inside the instrument. Typically, the foreline pump oil needs to be replaced every four months. However, depending on your sample type and frequency of use, your maintenance interval will be different. Refer to the foreline pump documentation for information. The foreline pump connects to the turbomolecular pump with a piece of 0.75 in. i.d. tubing. The pump’s power cable connects to the System Mech Pump connector near the back of the TSQ 8000 instrument. CAUTION - INSTRUMENT DAMAGE: The foreline pump must be set to the line voltage used at your location. Always plug the foreline pump power cable into the System Mech Pump connector on the rear of the TSQ 8000 instrument and never into a wall outlet. This prevents the foreline pump from operating when the instrument is powered off. Figure 12. Connecting the TSQ 8000 System to the Foreline Pump Optional Mech Pump Connection System Mech Pump Connection 20 TSQ 8000 Hardware Manual Thermo Scientific 1 Performing Routine Maintenance Maintaining the Foreline Pump Checking the Oil in the Foreline Pump To check the oil level of the foreline pump: 1. Ensure the pump is on a level surface. 2. Look in the oil-level sight-glass to see if the oil level is between the MIN and MAX marks. 3. If the oil level is below the MIN mark, add oil, as described in Adding Oil to the Foreline Pump. 4. Look for oil that is clear or light orange in color. a. If the oil is cloudy or discolored, purge the oil to decontaminate dissolved solvents, as described in Purging Gas from the Oil in the Foreline Pump. b. If the pump oil is still discolored, change it, as described in Changing the Oil in a Foreline Pump. Adding Oil to the Foreline Pump To add oil to the foreline pump:. Note If you are running samples, stop the acquisition before powering off the system. WARNING - BURN HAZARD: The injector, oven, and transfer line may be hot. Allow them to cool to room temperature before touching them. WARNING - BURN HAZARD: If you are using hydrogen as a carrier gas, you must cool down and shut off the GC to prevent the buildup of hydrogen in the vacuum manifold. 1. Click the Shut Down button on the TSQ 8000 Dashboard. 2. Click the Yes button to continue the shutdown process. The heaters and turbomolecular pump power off. Once the turbomolecular pump reaches 50% rpm, the foreline pump powers off, and you may vent the system. At this point, the vacuum light blinks orange rapidly, and the system is ready to shut down. Thermo Scientific TSQ 8000 Hardware Manual 21 1 Performing Routine Maintenance Maintaining the Foreline Pump 3. Reach over to the left side of the instrument and push down on the power switch to power-off the TSQ 8000 system. Figure 13. Powering Off the TSQ 8000 System Vacuum Interlock Shield Power Switch Vent Valve Knob 4. Open the front door of the instrument. 5. Look behind the right side of the vacuum interlock shield and twist the vent valve knob one and a half times in a clockwise direction to open the vent. 6. Allow the system to vent for five minutes. 7. Unplug the optional mechanical pump (if used) to avoid accidentally turning on the system. 8. Disconnect the foreline pump power cable from the System Mech Pump connector on the back of the instrument. 9. Remove one of the oil filler plugs from the foreline pump. Note The pump oil level must be between the MIN and MAX marks on the oil-level sight-glass for the pump to operate properly. 10. Add fresh oil to the reservoir until the oil is halfway between the MIN and MAX level marks. CAUTION - INSTRUMENT DAMAGE: Use only factory-approved foreline pump oil to avoid damaging the instrument or causing a fire. 22 TSQ 8000 Hardware Manual Thermo Scientific 1 Performing Routine Maintenance Maintaining the Foreline Pump 11. If the oil level goes above the MAX level mark, remove the drain plug and drain the excess oil into a suitable container. 12. Reattach the oil filler plug. 13. Twist the vent valve one and a half times in a clockwise direction. 14. Close the front door of the instrument. 15. Reconnect the foreline pump power cable to the System Mech Pump connector on the back of the instrument. 16. Reconnect the optional mechanical pump to the instrument. 17. Power-on the TSQ 8000 system. 18. Purge the foreline pump for 10 minutes using the gas ballast to remove excess gases from the new oil. Purging Gas from the Oil in the Foreline Pump Purging (or decontaminating) the oil in the foreline pump removes dissolved gases and low-boiling-point liquids from the oil. Purge the oil if it is cloudy or discolored. You can purge the oil without interrupting system operation. Set the gas-ballast control to the closed position (0 means closed) to purge the oil. CAUTION - INSTRUMENT DAMAGE: Properly vent the foreline pump exhaust. While the gas is being purged, more oil vapor is being generated. If you leave the purge open for an excessive amount of time, the pump oil will turn into mist, which could damage the pump. Never purge your pump for more than 10 minutes at a time. Changing the Oil in a Foreline Pump You should change the foreline pump oil every four months or after 3,000 hours of operation. If you use ammonia as a chemical ionization reagent gas, change the oil every month. Ammonia is highly corrosive and quickly damages the seals in the foreline pump. Note For best results, change the oil while the foreline pump is still warm. Be careful, as the oil can be very hot if the pump has been used recently. To change the oil in the foreline pump:. Note If you are running samples, stop the acquisition before powering off the system. WARNING - BURN HAZARD: The injector, oven, and transfer line may be hot. Allow them to cool to room temperature before touching them. Thermo Scientific TSQ 8000 Hardware Manual 23 1 Performing Routine Maintenance Maintaining the Foreline Pump WARNING If you are using hydrogen as a carrier gas, you must cool down and shut off the GC to prevent the buildup of hydrogen in the vacuum manifold 1. Click the Shut Down button on the TSQ 8000 Dashboard. 2. Click the Yes button to continue the shutdown process.The heaters and turbomolecular pump power off. Once the turbomolecular pump reaches 50% rpm, the foreline pump powers off, and you may vent the system. At this point, the vacuum light blinks orange rapidly, and the system is ready to shut down. 3. Reach over to the left side of the instrument and push down on the power switch to power-off the TSQ 8000 system. Figure 14. Powering Off the TSQ 8000 System Vacuum Interlock Shield Vent Valve Knob Power Switch 4. Open the front door of the instrument. 5. Look behind the right side of the vacuum interlock shield and twist the vent valve knob one and a half times in a clockwise direction to open the vent. 6. Allow the system to vent for five minutes. 7. Unplug the optional mechanical pump (if used) to avoid accidentally turning on the system. 8. Disconnect the foreline pump power cable from the System Mech Pump connector on the back of the instrument. 24 TSQ 8000 Hardware Manual Thermo Scientific 1 Performing Routine Maintenance Maintaining the Foreline Pump 9. Disconnect the foreline vacuum hose from the foreline pump. 10. Place the foreline pump on a bench. WARNING - LIFTING HAZARD: Use a proper lifting technique with the foreline pump because it weighs approximately 22 kg (50 lbs). 11. Drain the old oil. WARNING HAND, CHEMICAL, AND EYE HAZARD Wear impermeable laboratory gloves and eye protection when changing oil. a. Remove one of the oil filler plugs. b. Remove the drain plug and allow the oil to drain into a suitable container. c. Dispose of the spent oil according to local environmental regulations. d. Replace the drain plug. 12. Add fresh oil to the reservoir until the oil is halfway between the MIN and MAX level marks. CAUTION - INSTRUMENT DAMAGE: Use only factory-approved foreline pump oil to avoid damaging the instrument or causing a fire. 13. If the oil level goes above the MAX level mark, remove the drain plug and drain the excess oil into a suitable container. 14. Reattach the oil filler plug. 15. Reattach the oil filler plug. 16. Place the foreline pump on the floor. 17. Reconnect the foreline vacuum hose. 18. Reconnect the foreline pump power cable into the System Mech Pump connector on the back of the TSQ 8000 instrument. 19. Reconnect the optional mechanical pump to the instrument. 20. Twist the vent valve one and a half times in a clockwise direction or until the o-ring is fully engaged. 21. Close the front door of the instrument. 22. Power-on the TSQ 8000 system. Thermo Scientific TSQ 8000 Hardware Manual 25 1 Performing Routine Maintenance Maintaining the Foreline Pump 23. Purge the foreline pump for 10 minutes by using the gas ballast to remove excess gases from the new oil. See Purging Gas from the Oil in the Foreline Pump for more information. 26 TSQ 8000 Hardware Manual Thermo Scientific 1 Performing Routine Maintenance Removing the Ion Source Cartridge for Cleaning Removing the Ion Source Cartridge for Cleaning The ion source should be removed and cleaned according to your laboratory’s schedule. Also clean it if you notice deterioration in the performance of your instrument. The frequency of cleaning is determined by the number of samples you run, as well as the types of samples you run. Since the ion source is the component closest to the sample, it needs to be cleaned more often. The goal of cleaning the ion source cartridge is to remove any contamination from its surfaces, which restores its electrostatic properties and reduces active sites that may hold on to the GC effluent. You can clean the ion source cartridge using abrasive, sonic, or electropolishing methods, but we recommend using abrasives. To clean the ion source you will need the following items: • Source removal tool • Tweezers • Source holder • Clean work surface • Gloves Note Many nitrile and latex gloves not certified for clean room use contain silicone mold releasing agents that will contaminate the instrument. For this reason, clean room gloves are strongly recommended when handling the ion source. We recommend Cardinal Health CP100 Nitrile Cleanroom Gloves. See the TSQ 8000 Spare Parts Guide for ordering information. The following instructions will tell you how to clean the ion source cartridge using abrasives, ultrasonication, and electropolishing. Thermo Scientific TSQ 8000 Hardware Manual 27 1 Performing Routine Maintenance Removing the Ion Source Cartridge for Cleaning Removing the Ion Source Cartridge 1. Twist off the round vacuum interlock knob located on the interior front panel and set it aside. There is a vacuum feedthrough with a ball valve that allows access to the ion source without venting the instrument. Figure 15. Removing the Vacuum Interlock Knob Vacuum Interlock Knob Tip To prevent leaks through the vacuum interlock, we recommend that you leave the vacuum interlock knob attached to the instrument, except when you are removing or inserting the ion source cartridge. After you reattach the knob, press the Evacuate button to remove any air inside the vacuum interlock. 28 TSQ 8000 Hardware Manual Thermo Scientific 1 Performing Routine Maintenance Removing the Ion Source Cartridge for Cleaning 2. Get the source exchange tool that shipped with your instrument. It is used to remove and insert the ion source cartridge through the vacuum interlock. The tool has a large black handle on one end and a stainless steel barrel at the other. On the black handle is a diagram describing how to insert and remove the ion source cartridge from the instrument using the tool. The stainless steel barrel is cut with a track and the black handle moves up and over the track, depending on whether you are removing or installing an ion source cartridge. Figure 16. Components of the Source Exchange Tool Alignment Groove Left Track of Barrel Handle Usage Diagram Right Track of Barrel 3. Grasp the handle of the source exchange tool in one hand and use your other hand to pull the metal barrel out and away from the handle so that tool is fully extended. 4. Attach the source exchange tool to the front of the instrument. Thermo Scientific TSQ 8000 Hardware Manual 29 1 Performing Routine Maintenance Removing the Ion Source Cartridge for Cleaning a. With your hand around the stainless steel barrel, twist the tool until the alignment groove at the end of the barrel aligns with the left screw around the slot vacated by the vacuum interlock knob. Figure 17. Inserting the Ion Volume Tool Alignment Groove b. Twist and push the stainless steel barrel to the right until it clicks into place under the screw at the top of the slot. Figure 18. Twisting the Tool Into Place Alignment Groove 30 TSQ 8000 Hardware Manual Thermo Scientific 1 Performing Routine Maintenance Removing the Ion Source Cartridge for Cleaning 5. Evacuate the VPI. a. Confirm that the source removal tool is properly engaged in the VPI. b. Press the blue Evacuate button on the front of the instrument. c. The Evacuate light will begin to flash green and should continue to flash green for approximately 20 seconds. d. If the pressure has returned to an acceptable value after the 20-30 second wait, the evacuate light will turn off and the Ready to Open light will be solid green. At that point, the air has been evacuated from the ball valve and it is safe to open the vacuum interlock valve. Note If the evacuate light flashes for only a short time then returns to a solid light without the Ready to Open light turning green, there is a leak in the VPI seal. The source removal tool connection should be checked or field service contacted. Figure 19. Evacuating the Instrument Vacuum Interlock Handle Evacuate Button 6. Twist, then loosen the top part of the vacuum interlock handle to allow the entire handle to swing up and down. This handle controls the interior ball valve, which seals the vacuum chamber. Thermo Scientific TSQ 8000 Hardware Manual 31 1 Performing Routine Maintenance Removing the Ion Source Cartridge for Cleaning 7. Swing the handle down and then twist the top of it in the opposite direction to lock it into place. Note Be sure the source exchange tool handle is locked securely before proceeding to the next step (opening the interior ball valve). The locking function is designed to prevent the source exchange tool from being sucked into the manifold when the ball valve is opened. Figure 20. Pulling Down the Vacuum Interlock Handle 8. Lift the handle up to open the interior ball valve. Note If more than 60 seconds have passed since the Ready to Open indicator light has come on, it will turn off. You should press the Evacuate button and wait until the Ready to Open light is lit again before opening the valve. Do not open the valve if the Ready to Open light is not on. This may indicate a leak in the valve region. When a leak is detected during the evacuate sequence, the amber evacuate LED will flash on and off. CAUTION - INSTRUMENT DAMAGE: Make sure the vacuum interlock handle is all the way up. Otherwise if you insert the tool with the handle down, you can damage the instrument. 32 TSQ 8000 Hardware Manual Thermo Scientific 1 Performing Routine Maintenance Removing the Ion Source Cartridge for Cleaning 9. Slowly push the ion cartridge tool into the instrument. Because you are removing the ion volume in this step, you will go down the right side of the metal track on the barrel. Figure 21. Pushing the Tool into the Instrument 10. Once the tool is all the way in (when the groove at the end of the barrel is covered by the black handle) twist the handle to the left to engage the ion source cartridge and move it onto the end of the barrel. You are essentially disconnecting the ion source cartridge from the ion source block and moving it onto the tool. 11. Pull the tool toward you and down the left side of the metal track on the barrel. As you keep pulling it toward you, more and more of the barrel will be exposed. You may Thermo Scientific TSQ 8000 Hardware Manual 33 1 Performing Routine Maintenance Removing the Ion Source Cartridge for Cleaning encounter resistance while removing the source. To release the source from the spring contacts make small repeated rotations of the handle to the left and right quickly. Figure 22. Pulling the Tool Down the Left Track 12. Once you reach the end of the track (when the back line at the end of the barrel is uncovered by the black handle), twist the handle to the left to lock it into place. Figure 23. Locking the Tool in Place Note: Tool Rotated Left 34 TSQ 8000 Hardware Manual Thermo Scientific 1 Performing Routine Maintenance Removing the Ion Source Cartridge for Cleaning 13. Pull the vacuum interlock handle down to close the interior ball valve. Figure 24. Pulling Down the Vacuum Interlock Handle 14. Twist the end of the vacuum interlock handle and flip the swing handle up so that it rests next to the vacuum interlock knob location. Then twist the end again to hold it in place. 15. Replace the plug in the VPI to prevent accidental venting and excessive leaks. CAUTION - INSTRUMENT DAMAGE: Do not move the main interlock handle when you move the swing handle to the up position or you will open the interior ball valve, which might cause you to lose vacuum and possibly damage the instrument. 16. Remove the tool from the instrument. Thermo Scientific TSQ 8000 Hardware Manual 35 1 Performing Routine Maintenance Removing the Ion Source Cartridge for Cleaning Figure 25. Removing the Tool from the Instrument 36 TSQ 8000 Hardware Manual Thermo Scientific 1 Performing Routine Maintenance Removing the Ion Source Cartridge for Cleaning 17. Let the ion source cartridge cool. 18. Hold the handle of the source exchange tool with one hand and use the other hand to pull the barrel toward you and into the handle. Figure 26. Exposing the Ion Source Cartridge Ion Source Cartridge 19. Invert the source exchange tool so that the barrel is pointed toward the floor. Figure 27. Inverting the Tool Ion Source Cartridge Thermo Scientific TSQ 8000 Hardware Manual 37 1 Performing Routine Maintenance Removing the Ion Source Cartridge for Cleaning 20. Slide the source holder, which is in the TSQ 8000 Toolkit, onto the end of the ion source cartridge. The opening of the source holder is designed to accommodate the handles of the ion volume. Figure 28. Attaching the Source Holder Wing of Ion Volume Filament Hole Flat surface lines up with Filament Hole Source Holder Ion Volume Handles Fit Here 21. Twist the holder to disengage the ion source cartridge from the tool. Note The repeller locking nut is now loose on the repeller spring. Be careful not to tip the source or the components will fall out. 22. Set the ion source cartridge and holder on a clean surface. Figure 29. Removing the Ion Source Cartridge 38 TSQ 8000 Hardware Manual Thermo Scientific 1 Performing Routine Maintenance Removing the Ion Source Cartridge for Cleaning WARNING - BURN HAZARD: The ion source cartridge may be hot, so use caution. 23. Let the ion source cartridge cool down before removing it from the source holder. Disassembling the Ion Source Cartridge 1. Disassemble the ion source cartridge by removing the locking ring first, then the repeller spring, then the nut, insulator, and repeller (which comes out in one piece), ion volume, lens 1, lens 2, and lens 3/RF lens. IMPORTANT Many nitrile and latex gloves not certified for clean room use contain silicone mold releasing agents that will contaminate the instrument. For this reason, clean room gloves are strongly recommended when handling the ion source cartridge. We recommend Cardinal Health CP100 Nitrile Cleanroom Gloves. See the TSQ 8000 Spare Parts Guide for ordering information. Figure 30. Ion Source Cartridge Components Lens 2 Ion Volume Ion Volume-Repeller Insulator Repeller Spring Ion Cartridge Sleeve Lens 3/RF Lens Lens 1 Ion Volume Locking Ring Repeller Repeller Nut 2. Set the components on a clean work surface. 3. Separate the repeller nut, ion volume-repeller insulator, and repeller. 4. Clean the ion source cartridge as instructed in Cleaning Durable Components. Thermo Scientific TSQ 8000 Hardware Manual 39 1 Performing Routine Maintenance Removing the Ion Source Cartridge for Cleaning Reassembling the Ion Source Cartridge 1. Place the ion volume-repeller insulator on the repeller and hold it in place with the repeller nut. Set it aside for now. 2. Insert the ion cartridge sleeve into the source holder. Figure 31. Inserting the Sleeve into the Source Holder 3. Align the long tooth of lens 3/RF lens with the notch on the bottom of the sleeve and drop the lens into the sleeve. Figure 32. Inserting Lens 3/RF Lens into the Source Sleeve Long Tooth on Lens 3/RF Lens Tooth Fits Here 40 TSQ 8000 Hardware Manual Thermo Scientific 1 Performing Routine Maintenance Removing the Ion Source Cartridge for Cleaning 4. Place lens 2 on top of lens 3/RF lens with the small hole facing down. It should fit snugly and sit evenly on top of lens 3/RF lens. Figure 33. Inserting Lens 2 into the Source Sleeve Small Hole of Lens 2 5. With the longer teeth of lens 1 facing down toward lens 2, align the larger metal section of lens 1 with the sleeve window and let it fall into place. Figure 34. Inserting Lens 1 into the Source Sleeve Larger Metal Section Longer Teeth of Lens 1 Sleeve Window Thermo Scientific TSQ 8000 Hardware Manual 41 1 Performing Routine Maintenance Removing the Ion Source Cartridge for Cleaning 6. Insert the ion volume with the handles fitting into the notches of the sleeve. Make sure the ion volume is firmly seated into the gap on lens 1. You may need to rotate lens 1 slightly to make the ion volume fit correctly. Figure 35. Inserting the Ion Volume into the Source Sleeve Handles Fit Here Ion Volume Handles Lens 1 Gap Note The ion volume handles are different sizes and will only fit into the sleeve one way. 7. Tighten the repeller nut. 42 TSQ 8000 Hardware Manual Thermo Scientific 1 Performing Routine Maintenance Removing the Ion Source Cartridge for Cleaning 8. Insert the large flat end of the repeller so that it rests on top of the ion volume. Figure 36. Inserting the Repeller into the Source Sleeve Large Flat End of Repeller 9. Slide the repeller spring onto the repeller. Figure 37. Inserting the Repeller Spring into the Sleeve Repeller Spring Thermo Scientific TSQ 8000 Hardware Manual 43 1 Performing Routine Maintenance Removing the Ion Source Cartridge for Cleaning 10. Place the locking ring on top of the repeller spring so that the repeller protrudes through the center hole on the locking ring. The hooks on the sleeve fit between the larger gaps on the locking ring. Note Do not twist and lock the locking ring on the sleeve at this time. Figure 38. Inserting the Locking Ring into the Sleeve Larger Gaps on Locking Ring Hooks on Sleeve Reinserting the Ion Source Cartridge IMPORTANT When inserting a cold ion source cartridge such as after cleaning or when switching between EI and CI modes, the ion source and lens stack will expand as the source cartridge heats, often pushing the ion volume and lenses away from the rear of the instrument where they are firmly held by the RF Lens spring contacts. To avoid intermittent electrical contacts to the lenses, you should insert the ion source cartridge, wait 30 minutes for it to get to temperature, then remove and reinsert it. 1. Hold the source holder and ion source cartridge in one hand and use the other hand to hold the ion cartridge tool so that the barrel is facing toward the floor. The diagram on the tool should be facing you. IMPORTANT If you try to attach the ion source cartridge to the tool by inverting it, the components will likely fall, so make sure you are working over a table. Otherwise, you may have to stop and clean the components again. 44 TSQ 8000 Hardware Manual Thermo Scientific 1 Performing Routine Maintenance Removing the Ion Source Cartridge for Cleaning 2. Look for a small vertical 1/8 in. line engraved on the end of the barrel. This line always matches up with the picture on the handle. There is a similar engraved line on the sleeve of the ion source cartridge. This line matches up with the filament. Figure 39. Aligning the Tool with the Ion Source Cartridge Engraved Line on Barrel Engraved Line on Sleeve 3. Position the engraved line on the tool with the open end of the hook on the sleeve. There is a pin the source exchange tool that will latch under the hook. 4. Push the ion source cartridge up into the barrel of the tool and twist it until the engraved lines are aligned. The ion source cartridge should easily slide into place with very little force. CAUTION - INSTRUMENT DAMAGE: If you push the ion source cartridge into the barrel and it will not slide easily into position, make sure the components are assembled correctly and have not slid out of place inside the sleeve. Using too much force when inserting the ion source cartridge into the barrel can cause damage. Thermo Scientific TSQ 8000 Hardware Manual 45 1 Performing Routine Maintenance Removing the Ion Source Cartridge for Cleaning Figure 40. Reattaching the Ion Source Cartridge to the Tool Note The ion volume and lenses have keying features to assure the lens spring contacts will align with the metal parts of the lenses. 5. Gently pull the source holder away from the ion source cartridge. Figure 41. Removing the Source Holder Tip When the source exchange tool is inverted, the source should stay attached. If this does not happen, the source will not insert correctly into the instrument. 46 TSQ 8000 Hardware Manual Thermo Scientific 1 Performing Routine Maintenance Removing the Ion Source Cartridge for Cleaning 6. Turn the source exchange tool around so that the ion source cartridge is furthest away from you. 7. Firmly grasp the black handle of the ion cartridge tool in one hand and use your other hand to pull the metal barrel out and away from the handle so that tool is fully extended.The ion source cartridge is now hidden inside the barrel. 8. When the barrel can go no further, twist the handle to the left to lock it into position. 9. Insert the barrel end of the ion cartridge tool into the vacuum interlock and twist it to the right to lock it into position. Be sure the black handle remains in the locked position. Figure 42. Evacuating the Instrument Evacuate Button Thermo Scientific TSQ 8000 Hardware Manual 47 1 Performing Routine Maintenance Removing the Ion Source Cartridge for Cleaning 10. Evacuate the VPI. a. Confirm that the source removal tool is properly engaged in the VPI. b. Press the blue Evacuate button on the front of the instrument. c. The Evacuate light will begin to flash green, and should continue to flash green for approximately 20 seconds. d. If the pressure has returned to an acceptable value after the 20-30 second wait, the evacuate light will turn off and the Ready to Open light will be solid green. At that point, the air has been evacuated from the instrument and it is safe to open the vacuum interlock valve. 11. Pull the vacuum interlock handle up when the Ready to Open light is a solid green. 12. Twist the handle of the tool slightly to the left until it is feels like it is lodged into the left-most track. IMPORTANT Make sure you take the correct track on the tool or the ion volume will disassemble inside the instrument. If that happens, the tool will get stuck and you will have to shut down, vent the TSQ 8000 instrument, and manually remove the source cartridge through the top of the instrument. Figure 43. Pushing the Tool into the Instrument 13. Push the handle toward the instrument until the end of the handle aligns with the engraved line at the end of the barrel. When you reach this line, the tool is all the way in and the ion source cartridge has been placed back onto the ion source block. You may notice slight resistance when the handle is approximately 2 cm from the engraved line. This is normal. Do not force the cartridge into the instrument. To release the source from the spring contacts make small repeated rotations of the handle to the left and right quickly. Gently apply pressure to the back of the handle. 48 TSQ 8000 Hardware Manual Thermo Scientific 1 Performing Routine Maintenance Removing the Ion Source Cartridge for Cleaning . Note Do not push down on the handle of the source exchange tool while inserting the ion source cartridge. This could result in opening an air leak that may cause your instrument to shut itself down to protect the vacuum pumps. CAUTION - INSTRUMENT DAMAGE: Make sure the vacuum interlock handle is all the way up. Otherwise if you insert the tool with the handle down, you can damage the instrument. 14. Twist the handle of the source exchange tool to the right and pull it back toward you and down the right side of the barrel’s metal track until the line at the end of the track appears. Figure 44. Pulling the Tool Down the Right Track Thermo Scientific TSQ 8000 Hardware Manual 49 1 Performing Routine Maintenance Removing the Ion Source Cartridge for Cleaning 15. Pull the vacuum interlock handle down to close the interior ball valve. Figure 45. Pulling Down the Vacuum Interlock Handle 16. Twist the end of the vacuum interlock handle and flip the swing handle up so that it rests next to the vacuum interlock knob location. Then twist the end again to hold it in place. CAUTION - INSTRUMENT DAMAGE: Do not move the main interlock handle when you move the swing handle to the up position or you will open the interior ball valve, which might cause you to lose vacuum and possibly damage the instrument. 17. Remove the tool from the instrument. 18. Reattach the vacuum interlock knob. Tip To prevent leaks in the vacuum interlock, we recommend that you leave the vacuum interlock knob attached to the instrument, except when you are removing or inserting the ion source cartridge. After you reattach the knob, press the Evacuate button will also eliminate any air inside the vacuum interlock. 19. For optimal performance, wait at least 30 minutes for the ion source to heat up to the same temperature as the inside of the instrument. Otherwise, the masses or intensities may drift during operation. 50 TSQ 8000 Hardware Manual Thermo Scientific 1 Performing Routine Maintenance Maintaining the Calibration Gas Module Maintaining the Calibration Gas Module The calibration gas module on the TSQ 8000 mass spectrometer is very easy to maintain. It is inside the front door of the instrument, and you only refill the calibration gas reservoir every one to two years. The calibration compound is a liquid whose vapor is introduced into the ion source by the calibration gas module and the associated tubing. When the calibration compound is ionized, it produces a rich spectrum of ions that are well distributed across the mass range of the instrument and which are used for tuning and calibrating the mass spectrometer. The TSQ 8000 mass spectrometer uses FC 43, which contains perfluorotributylamine (PFTBA) as its calibration compound. Note See the TSQ 8000 Spare Parts Guide for information about ordering calibration gas components. Thermo Scientific TSQ 8000 Hardware Manual 51 1 Performing Routine Maintenance Maintaining the Calibration Gas Module Refilling the Calibrant Reservoir To refill the calibrant reservoir: Note It is not necessary to vent the instrument to perform this operation 1. Open the front door of the TSQ 8000 instrument. 2. Twist the calibrant reservoir cover counter-clockwise and remove it from the calibration gas controller. Figure 46. Removing the Calibrant Reservoir Cover Calibration Gas Controller Calibrant Reservoir Cover 3. Fill a syringe with 200 μL of the FC 43 calibration compound, which contains perfluorotributylamine (PFTBA), and insert it into the calibrant reservoir. Figure 47. Removing the Calibrant Reservoir from the Cover Calibrant Reservoir Calibrant Reservoir Cover 52 TSQ 8000 Hardware Manual Thermo Scientific 1 Performing Routine Maintenance Maintaining the Calibration Gas Module 4. Inject the FC 43. If you see liquid pooled on top of the white frit, remove the excess liquid according to local environmental regulations. CAUTION - INSTRUMENT DAMAGE: Adding more than 300 μL of calibration compound can damage the calibration gas controller. Be sure liquid does not get into the controller when you reattach the reservoir. 5. Reattach the cover to the calibration gas controller. 6. Close the front door of the instrument. Thermo Scientific TSQ 8000 Hardware Manual 53 1 Performing Routine Maintenance Replacing a Dual Filament Replacing a Dual Filament The number of ions produced in the ion source is proportional to the filament emission current. If the measured emission current is substantially less than the set emission current value, or if the measured emission current is decreasing, you may need to replace the dual filament because it has failed or is failing. Also, if one of the filaments has burned out, it may be time to replace it. Note See the TSQ 8000 Spare Parts Guide for information about ordering a new filament. You can increase the life of your dual filament by: • Setting the solvent delay so that the analyzer will not turn on while the solvent peak is eluting. • Not overriding the solvent delay at the beginning of a run. • Selecting a lower emission current. Note Click the Instrument Control button in the Xcalibur Status panel to switch between filaments A and B. To replace the dual filament: 1. Open the TSQ 8000 Dashboard and click the Shut Down button. WARNING - BURN HAZARD: The injector, oven, and transfer line may be hot. Allow them to cool to room temperature before touching them. WARNING If you are using hydrogen as a carrier gas, you must cool down and shut off the GC to prevent the buildup of hydrogen in the vacuum manifold. 2. Click the Yes button to continue the shutdown process. The heaters and turbomolecular pump power off. Once the turbomolecular pump reaches 50% rpm, the foreline pump powers off, and you may vent the system. 3. When the TSQ 8000 system’s temperatures and pumps are ready for shutdown, the vacuum light on the front of the instrument will start blinking rapidly. 54 TSQ 8000 Hardware Manual Thermo Scientific 1 Performing Routine Maintenance Replacing a Dual Filament 4. Reach over to the left side of the instrument and push down on the power switch to power-off the TSQ 8000 system. Figure 48. Powering Off and Venting the TSQ 8000 System Power Switch Top Cover Panel Screw Vacuum Interlock Shield Vacuum Interlock Handle Vent Valve Knob 5. Open the front door of the instrument. 6. Look behind the right side of the vacuum interlock shield and twist the vent valve knob one and a half times in a clockwise direction to open the vent. 7. Wait five minutes for the system to vent. 8. Use a T20 Torxhead screwdriver to loosen the top cover panel from the interior front panel. Note There are also two hydrogen safety screws in the top cover that are installed at top left and right. They must be removed before the top cover can be moved. The screw on the top right might be blocked by the GC, and you might have to move the GC out of the way. 9. Slide the top cover panel toward the back of the instrument and lift it off. Thermo Scientific TSQ 8000 Hardware Manual 55 1 Performing Routine Maintenance Replacing a Dual Filament 10. Use a T20 Torxhead screwdriver to remove the four screws around the manifold door. Figure 49. Opening the Manifold Door Screws 11. Pull the manifold door out to open. Once the alignment pins are clear of the thumbscrews, swing the manifold door open. 56 TSQ 8000 Hardware Manual Thermo Scientific 1 Performing Routine Maintenance Replacing a Dual Filament 12. Remove the small glass manifold cover from the top of the instrument. Figure 50. Removing the Small Glass Manifold Cover Small Glass Manifold Cover CAUTION - INSTRUMENT DAMAGE: Many nitrile and latex gloves not certified for clean room use contain silicone mold releasing agents that will contaminate the instrument. For this reason, clean room gloves are strongly recommended when touching components inside the vacuum manifold. We recommend Cardinal Health CP100 Nitrile Cleanroom Gloves. See the TSQ 8000 Spare Parts Guide for ordering information. 13. Look through the top of the instrument and use a clean T10 Torxhead screwdriver to loosen the screw holding the filament retaining clip in place. Then rotate the clip away from the filament. Thermo Scientific TSQ 8000 Hardware Manual 57 1 Performing Routine Maintenance Replacing a Dual Filament Figure 51. Disconnecting the Filament Source Interface Board Filament Filament Retaining Spring Screw 14. Disconnect the filament board and wires from the source interface board. Figure 52. Disconnecting the Filament Board and Wires Filament Board and Wires 58 TSQ 8000 Hardware Manual Thermo Scientific 1 Performing Routine Maintenance Replacing a Dual Filament 15. Remove the filament. 16. Insert the replacement filament into its slot, rotate the spring into position, and slightly tighten the screw holding the filament retaining clip in place. 17. Bend the filament wires so they do not touch any metal component. You may want the old filament as a model. 18. Attach the connector of the replacement filament to the source interface board. Figure 53. Replacing the Filament Source Interface Board Filament Filament Retaining Spring Screw 19. Return the glass manifold cover to the top of the instrument. 20. Swing the manifold door so that it is parallel to the opening. Guide the alignment pins into the thumbscrews. Note The manifold door will not swing closed. There will be a 1 cm gap. You must push the door to close it completely. Do not apply excess force to the thumbscrews or components may be damaged. Note Once the manifold door is closed, ensure the filament wires do not contact the metal surface of the door. Thermo Scientific TSQ 8000 Hardware Manual 59 1 Performing Routine Maintenance Replacing a Dual Filament 21. Use a T20 Torxhead screwdriver to replace the four screws around the manifold door. Reattach the top cover panel and tighten the screw holding it in place. Figure 54. Closing the Manifold Door Screws Note If you are using hydrogen as a carrier gas, reinstall the two hydrogen safety screws. 22. Close the front door of the instrument. If you are using hydrogen as a carrier gas, fasten the hydrogen safety screw on the front door. 23. Twist the vent valve one and a half times in a clockwise direction to close it. 24. Reach over to the left side of the instrument and pull up on the power switch to power-on the TSQ 8000 system. 60 TSQ 8000 Hardware Manual Thermo Scientific 1 Performing Routine Maintenance Replacing the Electron Multiplier Replacing the Electron Multiplier The lifetime of the electron multiplier is directly related to the current that flows through it and the amount of contamination or condensation it receives. The electron multiplier will last longer if you: • Maintain the best possible vacuum. • After pumping down, allow the instrument enough time to equilibrate before you start running samples again. • Monitor the GC/MS for background contamination and immediately repair leaks. • Keep tuning and detector calibration to a minimum. To replace the electron multiplier: Note To order a new electron multiplier, refer to the TSQ 8000 Spare Parts Guide. 1. If you are using hydrogen, cool down the injector to prepare the GC for powering off. See the GC documentation for information. After the heated zones are cooled down, power-off the GC if you are using hydrogen. WARNING - BURN HAZARD: The injector, oven, and transfer line may be hot. Allow them to cool to room temperature before touching them. WARNING - FIRE HAZARD: If you are using hydrogen as a carrier gas, you must cool down and shut off the GC to prevent the buildup of hydrogen in the vacuum manifold. See the “Hydrogen Safety Precautions” on page xvii of the Preface for more information. 2. Shut down the TSQ 8000 system using the software. See the TSQ 8000 User Guide for more information. 3. Click the Yes button to continue the shutdown process. The heaters and the turbomolecular pump power off. Then the foreline pump powers off. 4. Reach around the left side of the instrument and push down on the power switch to power-off the instrument. 5. If you are using hydrogen, unscrew the hydrogen safety screw on the front door. Thermo Scientific TSQ 8000 Hardware Manual 61 1 Performing Routine Maintenance Replacing the Electron Multiplier . Figure 55. Powering Off the TSQ 8000 Instrument Top Cover Panel Screw Hydrogen Safety Screws Vacuum Interlock Shield Vent Valve Knob Power Switch Hydrogen Safety Screws 6. Open the front door of the instrument. 7. Look behind the right side of the vacuum interlock shield and twist the vent valve knob one and a half times in a counter-clockwise direction to open the vent. 8. Wait five minutes for the TSQ 8000 instrument to vent. CAUTION - INSTRUMENT DAMAGE Do not proceed until the instrument is vented or pieces of the column or ferrule might blow into the instrument. To ensure that the instrument is vented, check how much the glass cover compresses the top cover o-ring in the manifold. Once the o-ring surface touching the glass is about 1 mm, it is safe to open the instrument and remove the column. 9. Open the front door of the GC and loosen the transfer line nut. Then pull the column back (into the oven) about 5 cm to ensure the column is no longer in the ion source. 10. Use a T20 Torxhead screwdriver to loosen the top cover panel. 11. If you are using hydrogen, remove the remaining hydrogen safety screws. Note You might have to move the GC to access the right hydrogen safety screw. 62 TSQ 8000 Hardware Manual Thermo Scientific 1 Performing Routine Maintenance Replacing the Electron Multiplier 12. Disconnect the electrometer board cable and large feedthrough cables labeled Dynode and Electron Multiplier. Figure 56. Disconnecting the Electron Multiplier Cables Electrometer Board Cable Dynode Electron Multiplier Electron Multiplier Plate 13. Use a T20 Torxhead screwdriver to remove the four screws at each corner of the electron multiplier plate. CAUTION - ELECTRICAL HAZARD Avoid dropping screws between chassis and side cover or board. If you drop a screw, find it before powering the instrument on again. Thermo Scientific TSQ 8000 Hardware Manual 63 1 Performing Routine Maintenance Replacing the Electron Multiplier Figure 57. Disconnecting the Electron Multiplier Plate Electron Multiplier Plate Screws 14. Lift the electron multiplier plate out of the vacuum manifold. 64 TSQ 8000 Hardware Manual Thermo Scientific 1 Performing Routine Maintenance Replacing the Electron Multiplier 15. Flip the electron multiplier and plate over so that the plate is resting on the worktable. Figure 58. Replacing the Electron Multiplier Top Spring Tab Gold Connector Stainless Steel Wire Electron Multiplier Bottom Spring Tab 16. Remove the stainless steel wire that from the gold connector on the electron multiplier and move it out of the way. 17. Lift up on the spring tab at the top of the electron multiplier and remove the electron multiplier. 18. Insert the new electron multiplier through the bottom tab first and then slide it into the spring tab at the top until it clicks into place. CAUTION - INSTRUMENT DAMAGE: Many nitrile and latex gloves not certified for clean room use contain silicone mold releasing agents that will contaminate the instrument. For this reason, clean room gloves are strongly recommended when touching components inside the vacuum manifold. We recommend Cardinal Health CP100 Nitrile Cleanroom Gloves. See the TSQ 8000 Spare Parts Guide for ordering information 19. Make sure the electron multiplier fits snugly. 20. Reconnect the stainless steel wire to the gold connector. 21. Inspect the o-ring between the manifold and detector assembly for debris. If the o-ring is dirty, clean or replace it. 22. Flip the electron multiplier and plate over and insert them into the instrument. Thermo Scientific TSQ 8000 Hardware Manual 65 1 Performing Routine Maintenance Replacing the Electron Multiplier 23. Put the electron multiplier plate back into place and reattach the four screws. Tighten them in this order: screw 1, screw 2, screw 3, screw 4. See Figure 59 for clarification. Figure 59. Reattaching the Electron Multiplier Plate Screw 1 Screw 3 Screw 4 Screw 2 24. Reconnect the electrometer board cable and large feedthrough cables. CAUTION - INSTRUMENT DAMAGE: Do not mix up the cables or you will damage the power supply. Match the label on the cable to the label on the electron multiplier plate. Figure 60. Reconnecting the Electron Multiplier Cables Electrometer Board Cable Large Feedthrough Cables Electrometer Shield Electron Multiplier Plate 25. Reattach the top cover panel and tighten the screw holding the top cover panel in place. 66 TSQ 8000 Hardware Manual Thermo Scientific 1 Performing Routine Maintenance Replacing the Electron Multiplier 26. Close the front door of the instrument. 27. Twist the vent valve clockwise to close the valve. Be careful not to pinch the o-ring. 28. Reinsert the column to the proper length and tighten the transfer line nut. See “Replacing a Column” on page 12 for more information. 29. If you are using hydrogen, replace the front panel screw. 30. Replace the ion source cartridge. See “Reinserting the Ion Source Cartridge” on page 44 for more information. 31. Replace all hydrogen safety screws. 32. Power-on the TSQ 8000 mass spectrometer. 33. If the GC is powered off, power it on and make sure vacuum compensation is on for the carrier gas flowing into the mass spectrometer. WARNING - FIRE HAZARD: If you are using hydrogen, do NOT reach over the top of the instrument to power it on. Instead, reach around the left side or go to the back of the instrument and flip up the power switch. 34. Open TSQ 8000 Auto Tune on the TSQ 8000 Dashboard. 35. Run any tune that sets the gain of the electron multiplier to 3 x 10⁵. Thermo Scientific TSQ 8000 Hardware Manual 67 1 Performing Routine Maintenance Cleaning Durable Components Cleaning Durable Components IMPORTANT If there is any doubt about a compatibility of decontamination of cleaning agents with parts of the equipment or material contained in it, the responsible party must contact Thermo Fisher Scientific product support personnel. You can ONLY clean the following durable components inside the vacuum manifold: • Repeller • Ion volume • Lens 1 • Lens 2 • Lens 3/RF lens • Ion cartridge sleeve • Heat shield for the source interface board • Screws Note You only need to clean the repeller, ion volume and all the lenses (except for the quad entrance lens) the most frequently. Cleaning the other components are not part of the expected maintenance. To clean durable components of the TSQ 8000 instrument, you will need the following cleaning supplies: • Acetone, reagent grade (or other suitable polar solvent) • Aluminum oxide abrasive powder, number 600 • Applicators, cotton-tipped • Beaker • Deionized water • Detergent (Alconox, Micro, or equivalent) • Dremel rotary tool or equivalent (recommended) • Forceps • Gas, clean and dry (Nitrogen, Helium or equivalent) • Gloves, clean, lint- and powder-free, latex or nitrile • Glycerol, reagent grade • Toothbrush • Cotton swab with wood handle • Razor blade • Ultrasonic cleaner WARNING - MATERIAL AND EYE HAZARD: Wear impermeable laboratory gloves and eye protection when cleaning components. 68 TSQ 8000 Hardware Manual Thermo Scientific 1 Performing Routine Maintenance Cleaning Durable Components To clean the durable components: 1. Remove contaminants from all the components you are cleaning. a. Use a slurry of #600 aluminum oxide in glycerol on a cotton-tipped applicator to clean each component. Contamination can be indicated by a dark or discolored area, but it is often invisible. The heaviest contamination is usually found around the apertures, such as the electron entrance hole of the ion volume. Note Clean only the metal pieces of the repeller, lens 1 and lens 3/RF lens with aluminum oxide. b. Clean each component thoroughly, even if no contamination is visible. To clean components faster, use a Dremel® tool and polishing swab at its lowest speed. WARNING - ELECTRICAL SHOCK HAZARD: Exposing the Dremel tool to standing water may cause an electrical shock. WARNING - FIRE HAZARD: Using the Dremel tool near flammable vapors may cause a fire. c. Clean the crevices of a component using a non-metal tool. It is very important to make sure you remove all of the debris or discoloration found in small edges of each component, in particular the ion volume. Otherwise, the debris or discoloration might affect the quality of your data. d. If you are cleaning the CI ion volume, use a razor blade to sharpen the wooden end of a wooden cotton swab to a 45° angle. e. Twist the sharpened end of the swab into the electron entrance hole on the CI ion volume to clean out debris. You may need to use several swabs before the electron entrance hole is clear of debris. Figure 61. Cleaning the CI Ion Volume Electron Entrance Hole Thermo Scientific TSQ 8000 Hardware Manual 69 1 Performing Routine Maintenance Cleaning Durable Components Tip Clean the CI ion volume under a microscope to verify that you removed all debris. f. If you notice any scratches on the components, you may need to replace the component. Scratches can affect the performance of your instrument. 2. Rinse the components with clean tap water. Use a toothbrush under a stream of water to remove the aluminum oxide slurry. Do not let the slurry dry on the components because it is difficult to remove. If the components still look dirty, repeat step 1. 3. Sonicate the components in warm detergent. a. Use forceps to place the components in a beaker of warm detergent. b. Place the beaker and its contents in an ultrasonic bath for five minutes. c. Rinse the components with tap water to remove the detergent. 4. Sonicate the components in deionized water. a. Use forceps to place the components in a beaker of deionized water. b. Place the beaker and its contents in an ultrasonic bath for five minutes. If water is cloudy after sonicating, replace the water with fresh water, and put the beaker and contents in a ultrasonic bath again for five minutes. Repeat until the water is clear. 5. Use forceps to immediately transfer the components to a clean beaker of acetone. 70 TSQ 8000 Hardware Manual Thermo Scientific 1 Performing Routine Maintenance Cleaning Durable Components 6. Sonicate the components in acetone. WARNING - FIRE HAZARD: Acetone is flammable and volatile, so make sure the ultrasonic bath is properly ventilated to prevent the buildup of vapors. a. Place the beaker and its contents in an ultrasonic bath for one minute. b. Use forceps to transfer the components to a beaker of fresh acetone. c. Place the beaker and its contents in an ultrasonic bath for one minute. 7. Wearing gloves, blow clean, dry gas on the components to remove the acetone. Note Acetone should not be allowed to dry on the part. It will leave a residue that may affect instrument performance. Thermo Scientific TSQ 8000 Hardware Manual 71 1 Performing Routine Maintenance Cleaning Delicate Components Cleaning Delicate Components IMPORTANT If there is any doubt about a compatibility of decontamination of cleaning agents with parts of the equipment or material contained in it, the responsible party must contact Thermo Fisher Scientific product support personnel You can ONLY clean the following delicate components inside the vacuum manifold: • Source-to-ion guide spacers • Thumbscrew-repeller spacers • Insulating spacers • Lens heater block and grounding strap • Repeller plate • Lens plate and springs • Repeller insulator • Repeller nut • Repeller spring • Dynode, electron multiplier and anode feedthroughs (except the o-rings) • 20-pin feedthrough (except the o-ring) • 4-pin feedthrough (except the o-ring) • Filament retaining spring • Ion guide-quadrupole stabilizer • Ion guide and quadrupole wires • Quadrupole rod endcaps • Inner ball seal • Sealing ball • Tray alignment pins • Vent valve knob (except o-ring) • Source magnets • Top (glass) manifold cover Note Cleaning these components is not part of the expected maintenance. To clean delicate components of the TSQ 8000 instrument, you will need the following cleaning supplies: • Applicators, cotton-tipped • Deionized water • Detergent (Alconox, Micro, or equivalent) • Gas, clean and dry (Nitrogen, Helium or equivalent) • Gloves, clean, lint- and powder-free, latex or nitrile • Methanol, reagent grade (or other suitable polar solvent, such as Ethanol) CAUTION - INSTRUMENT DAMAGE: Do NOT use acetone to clean plastic components or it will damage them. Also, this procedure should not be used on any component outside the vacuum manifold. 72 TSQ 8000 Hardware Manual Thermo Scientific 1 Performing Routine Maintenance Cleaning Delicate Components 1. Scrub all of the components with a warm detergent solution. WARNING - MATERIAL AND EYE HAZARD: Wear impermeable laboratory gloves and eye protection when cleaning components. a. Scrub the components with a toothbrush or clean applicator. Do not soak or sonicate the components in detergent. b. Using forceps, rinse the components thoroughly with tap water to remove the detergent. 2. Rinse the components in deionized water. Using forceps, dip the components in a beaker of deionized water. Change the water if it becomes cloudy. Do not soak or sonicate the components. 3. Rinse the components with methanol. Using forceps, dip the components in a beaker of methanol. Change the methanol if it becomes cloudy. Do not soak or sonicate the components. 4. While still wearing gloves, use clean, dry gas to blow the methanol off the components. Thermo Scientific TSQ 8000 Hardware Manual 73 1 Performing Routine Maintenance Cleaning the Filters Cleaning the Filters To clean the filters and fan filter on the TSQ 8000 instrument: Note If your filters wear out or get damaged, refer to the TSQ 8000 Spare Parts Guide for information about ordering new ones. 1. Open the front door of the instrument. 2. If your instrument has an optional dust filter, use a T20 Torxhead screwdriver to remove the two M4 screws holding the dust filter frame to the front interior panel. 3. Use a T20 Torxhead screwdriver to remove the six M3 screws holding the EMI filter to the front interior panel. Figure 62. Cleaning the Filters Filters Turbo Cooling Fan Filter 74 TSQ 8000 Hardware Manual Thermo Scientific 1 Performing Routine Maintenance Cleaning the Filters Figure 63. Removing the Left Rear Wire Mesh Filter Screws 4. Use a T10 Torxhead screwdriver to remove the four screws holding the left rear wire mesh filter to the left hand sub panel. 5. If you have an optional dust filter, use a T10 Torxhead screwdriver to remove the two screws holding the filter to the interior front panel. 6. Remove the six screws holding the front wire mesh filter to the frame. 7. Remove the filters. 8. Remove the turbo cooling fan filter cover with a small flat-heat screwdriver. 9. Remove the turbo cooling fan filter. 10. Wash the filters in soap and water. 11. Let the filters dry. 12. Reattach the filters. 13. Replace the turbo cooling fan filter cover. 14. Close the front door of the instrument. Thermo Scientific TSQ 8000 Hardware Manual 75 2 Troubleshooting In this section, we describe the symptom and remedy for each known issue with the TSQ 8000 mass spectrometer. All of these issues are related to hardware, but your instrument or software will alert you to them. For issues that you discover while reviewing your data, see the Troubleshooting section of the TSQ 8000 User Guide. Contents • Using Diagnostics • Investigating Communication Issues • Investigating Contamination Issues • Investigating Filament and Lens Control Issues • Investigating Temperature Issues • Investigating Vacuum Issues • Investigating Power Supply Issues • Investigating RF/DC Issues • Investigating Sensitivity Issues • Investigating Stability Issues • Investigating Tuning Issues • Contacting Technical Support Thermo Scientific TSQ 8000 Hardware Manual 77 2 Troubleshooting Using Diagnostics Using Diagnostics If your TSQ 8000 system is running poorly or suspiciously, you can run software diagnostics to detect the problem and find a solution. Diagnostics tests electronic circuits and reports whether the circuits pass or fail. However, problems in sensitivity due to misalignment, dirty components, or improper tuning are not detected by the software. Creating a Diagnostic Tune File To create a diagnostic tune file: 15. Click Tune Types on the TSQ 8000 Dashboard. 78 TSQ 8000 Hardware Manual Thermo Scientific 2 Troubleshooting Using Diagnostics 16. Select an existing tune type and click the Copy button. Figure 64. Copying a Tune Type 17. Name your diagnostic tune type. Figure 65. Naming Your Diagnostic Tune Type 18. Select the Diagnostics Only option in the Type field. Thermo Scientific TSQ 8000 Hardware Manual 79 2 Troubleshooting Using Diagnostics 19. Click the Diagnostics tab and select the types of diagnostics you would like to perform on your instrument. Figure 66. Selecting Types of Diagnostics 20. Click Save. 80 TSQ 8000 Hardware Manual Thermo Scientific 2 Troubleshooting Using Diagnostics Running a Diagnostic Tune To run a diagnostic tune: 1. Click Auto Tune on the TSQ 8000 Dashboard to run diagnostics. Figure 67. Running an Automatic Tune Thermo Scientific TSQ 8000 Hardware Manual 81 2 Troubleshooting Using Diagnostics 2. Select the diagnostics tune type you created and click Start. Figure 68. Running Diagnostics 3. Click View Tune Report on the TSQ 8000 Dashboard to view the diagnostic results. 4. Click the Report Options button in the upper right corner of the window. 82 TSQ 8000 Hardware Manual Thermo Scientific 2 Troubleshooting Using Diagnostics 5. Select Diagnostics in the Optional Reports area of the window. Thermo Scientific TSQ 8000 Hardware Manual 83 2 Troubleshooting Investigating Communication Issues Investigating Communication Issues When you run Communications Check diagnostics on the TSQ 8000 system, the Xcalibur software verifies the instrument is communicating with the computer at the proper speed for fast scanning. Your instrument or software may indicate the following issues. Note If the possible remedies do not correct the issue please contact Thermo Fisher Scientific technical support. See Contacting Us for contact information. WARNING - ELECTRICAL SHOCK HAZARD: When troubleshooting any issue that requires removing a cover on the TSQ 8000 mass spectrometer, you should power-off and vent the instrument to avoid harming yourself. Software is not communicating with the TSQ 8000 system. Possible Remedies If the TSQ 8000 system and PC are not communicating, press the Reset button, which is found on the interior front panel inside the front door. You can also power-off the TSQ 8000 system and power it back on again. Make sure the Ethernet cable is properly connected to the TSQ 8000 instrument. Confirm the TCP/IP configuration on the computer matches the TSQ 8000 system’s. Reboot the computer. Cannot download methods to the TSQ 8000 system. Possible Remedy Verify that your instruments are properly configured in the Instrument Configuration utility. GC does not start or is not ready. Possible Remedies Open the Instrument Configuration utility and verify the GC methods and configuration. Make sure the Remote Start cable is properly connected to the Generic/HS port on the GC and to the GC Start port on the TSQ 8000 system. 84 TSQ 8000 Hardware Manual Thermo Scientific 2 Troubleshooting Investigating Communication Issues Possible Remedies Make sure the Remote Start cable is properly connected to the Autosampler signals port on the GC and the GC port on the autosampler controller. Confirm the GC handshaking parameter is set properly: Go to the Handshaking menu. On a TRACE 1300 GC: • Launch the Chromatography Data System. • In the relevant Configuration page, set the Inhibit Ready parameter. The default setting is When High. If your GC will still not become ready, try setting the parameter to <When Low> or <Do Not Inhibit>. On a TRACE 1310 GC touchscreen: • Select the Instrument Configuration icon to access the Configuration menu. • In the Configuration menu, select the Handshake icon to open the relevant submenu. • Set the Inhibit Ready parameter. The default setting is When High. If your GC will still not become ready, try setting the parameter to <When Low> or <Do Not Inhibit>. On a TRACE GC Ultra: • Press <CONFIG> to access the Configure menu options. • Press the down arrow key until Handshaking displays, then press <ENTER> to access the Config Handshaking menu options. • Press the down arrow key until Inhibit ready in displays, then press <ENTER> to access the Inhibit Ready menu options. • Set the Inhibit Ready parameter. The default setting is When High. If your GC will still not become ready, try setting the parameter to <When Low> or <Do Not Inhibit>. On a FOCUS GC, use the Keypad button in Xcalibur. • Press the Home button. • Scroll down to the <others> option and press <ENTER>. • Scroll down to <Configuration> and press <ENTER>. Thermo Scientific TSQ 8000 Hardware Manual 85 2 Troubleshooting Investigating Communication Issues Sample data are not acquired. Possible Remedies Make sure the autosampler methods and configuration include starting up and injecting a sample. You should also make sure the sample has been injected. Heated zone setpoint is not attained. See Investigating Temperature Issues for troubleshooting. Verify that the TSQ 8000 system’s start mode is set properly. Make sure the Remote Start cable is properly connected to the GC. Make sure the End Run Time is set properly in the TSQ 8000 Instrument Setup file. Add more disk space to the computer by backing up and removing files. GC is not communicating with the PC. Possible Remedies Make sure the GC is powered on. Open the Instrument Configuration utility and make sure the GC is properly configured. Make sure the cable between the computer and the GC is properly connected. Verify the TCP/IP port is properly configured on the computer. Power-off the GC and power it back on again. Autosampler is not communicating with the PC. Possible Remedies Make sure the autosampler is powered on. Open the Instrument Configuration utility and make sure the autosampler is properly configured. Make sure the cable between the PC and autosampler is properly connected. 86 TSQ 8000 Hardware Manual Thermo Scientific 2 Troubleshooting Investigating Contamination Issues Investigating Contamination Issues Some chemical noise is common and difficult to eliminate completely. Chemical noise is sometimes caused by: • Septum bleed after a series of injections. • Vial sample bleed, which occurs if more than one injection is made from a sample vial. • Siloxane peaks that appear in the chromatogram at regular intervals from focusing at the head of the column or in the injector. Other possible contamination sources include hydrocarbon contamination of the carrier gas, foreline pump, or cleaning solvents. To minimize chemical noise, always wear clean, lint- and powder-free gloves when performing maintenance on components that go inside the vacuum chamber and always use clean carrier gas, filters, and liners. WARNING - ELECTRICAL SHOCK HAZARD: When troubleshooting any issue that requires removing a cover on the TSQ 8000 mass spectrometer, you should power-off and vent the instrument to avoid harming yourself. Chemical noise is at m/z 429, 355, 281. Possible Remedies Condition the column. It is best to condition the column outside of the TSQ 8000 mass spectrometer so the contaminants can escape into the air instead of the instrument. Make sure the column has not been damaged as a result of exposure to oxygen. Find the source of the oxygen in the carrier gas or air leak, and then recondition or replace the column. Check the column and see if it has broken off in the ion volume. If necessary, remove the broken pieces. Chemical noise is at m/z 207, 429, 355, 281. Possible Remedies If the baseline contains these masses, the septum is worn out or damaged and you should replace it. You should also check the injection port liner for pieces of septa and replace the liner if necessary. If chromatographic peaks contain these masses, check the vial septa or use solvent to wash the vials. Chemical noise is at m/z 149, 167, 279. Possible Remedy If these masses are visible in your data, it is likely that phthalates have contaminated your system. Isolate the source of the phthalates, such as vial lids or plastic solvent containers, and either clean them or replace them. Thermo Scientific TSQ 8000 Hardware Manual 87 2 Troubleshooting Investigating Contamination Issues Chemical noise is at m/z 43, 57, 71, 85, 99, etc. Possible Remedies If these masses are visible in your data, it is likely that your carrier gas tubing is contaminated. Isolate the source of hydrocarbon contamination and remove it. Replace the carrier gas tubing or filters, if necessary. Heat the ion source to at least 25 °C above your normal operating temperature and heat the transfer line to the maximum temperature allowed by your column. Hold this temperature for 4-6 hours, then cool the system back to your normal temperature. If necessary, repeat this process. Spectra is showing solvent contamination. Possible Remedies You may have components that are contaminated by cleaning solvents. Remove any recently cleaned component, bake it in the GC oven, let them cool, and then blow them dry with a clean, oil-free gas stream. You may have a leak that is allowing solvent vapors to get into the TSQ 8000 instrument. Use a spray gas, such as Tetrafluoethane, to check for leaks and then fix them. See Investigating Vacuum Issues for details. Optimize the GC method to separate the solvent peak from the area of interest in the chromatogram. The following compounds may have been introduced during sample injection, a cleaning or autosampler rinsing solvent. The following commonly used solvents have ions at the listed m/z: • Acetone (m/z 43, 58, 59) • Hexane (m/z 41, 43, 56, 57, 58, 85, 86) • Methylene chloride (m/z 84/83) • Toluene (m/z 91, 92) • Trichloroethane (m/z 151, 153) • Xylene (m/z 105, 106) 88 TSQ 8000 Hardware Manual Thermo Scientific 2 Troubleshooting Investigating Filament and Lens Control Issues Investigating Filament and Lens Control Issues Filament Check diagnostics can test the filament and lenses of the TSQ 8000 mass spectrometer. Handle the lenses with care. Damaged lenses may cause short circuits, which may damage the lens drivers. WARNING - ELECTRICAL SHOCK HAZARD: When troubleshooting any issue that requires removing a cover on the TSQ 8000 mass spectrometer, you should power-off and vent the instrument to avoid harming yourself. Filament has burned out. Possible Remedies Run a Filament Check diagnostic to narrow down the source of the problem. Then replace the filament, as described in Replacing a Dual Filament. Make sure the filament wires are still connected to the source interface board. See Replacing a Dual Filament for details. Make sure the lens driver board is connected to its bracket. See Lens Driver Board for details. Filament does not last long. Possible Remedies Run a Leak Check diagnostic to check the system for air leaks and then address them. Use the Tetrafluoethane gas to find the leak. Reduce the emission current in Xcalibur. Increase the time for your first scan until after the solvent peak has passed. Diagnostics indicate there is a problem with lens voltages. Possible Remedies Make sure the lens driver board is attached to the bracket. If the board isn’t fully connected to the 20-pin feedthrough, you may get odd results. See Lens Driver Board for details. Make sure the lenses are properly aligned in the ion cartridge sleeve. Ensure that lens wires are not resting on metal surfaces. Check the source interface board to make sure the filament wires are fully connected. See Source Interface Board and Heat Shield for details. Thermo Scientific TSQ 8000 Hardware Manual 89 2 Troubleshooting Investigating Temperature Issues Investigating Temperature Issues The ion source and transfer line are heated zones in the TSQ 8000 instrument. The lens/source heater is controlled by the TSQ 8000 mass spectrometer and the transfer line heater is controlled by the GC. Often, a temperature issue is the result of downloading a method to the TSQ 8000 system that has a different setpoint from the current setting, which causes a delay while the heated zone adjusts the temperature. Component failures are rare, but are usually caused by open circuits in the heater cartridges or damaged temperature sensors. When you run Temperature Check diagnostics on the TSQ 8000 system, the Xcalibur software checks the temperature readbacks from the heaters and internal temperature devices. Your instrument or software may indicate the following types of issues. WARNING - ELECTRICAL SHOCK HAZARD: When troubleshooting any issue that requires removing a cover on the TSQ 8000 mass spectrometer, you should power-off and vent the instrument to avoid harming yourself. Lens/source heater will not heat. Possible Remedies Make sure the TSQ 8000 system and computer are properly connected. Check the vacuum status as the heaters will not turn on until vacuum status reads OK. Run Power Supply Check diagnostics to make sure the +24 V supply is working. If necessary, replace the power supply. See Replacing the Power Supplies for details. Check the resistance on the 20-pin feedthrough. Remove the analyzer tray and measure the electrical resistance of the lens heater and the source heater. See Source Heater Block, Lens Heater Block, and Lens/Source Heater for details. The resistance should be approximately 24 ohms. You could also measure the resistance of the temperature sensors, which should be resistant at 50-300 ohms. Lens/source heater overheats. Possible Remedies Make sure the wire insulation is not frayed, the wire is connected to the source interface board, and the wire is not in contact with any metal surface along its length. Remove the analyzer tray and measure the electrical resistance of the lens heater and the source heater. The resistance should be approximately 24 ohms. You could also measure the resistance of the temperature sensors, which should be resistant at 50-300 ohms. Make sure the leads to the heaters and sensors are not electrically shorted to the tray. 90 TSQ 8000 Hardware Manual Thermo Scientific 2 Troubleshooting Investigating Temperature Issues Transfer line will not heat. Possible Remedies Check the vacuum status. Remove the right side panel and disconnect the 4-pin connector to the transfer line. Then make sure the resistance of the heater circuit is approximately 6 ohms and the resistance of the heater sensor is 50 to 300 ohms. If necessary, replace the transfer line. Transfer line overheats. Possible Remedies Make sure the wire insulation is not frayed, the wire is connected to the source interface board, and the wire is not in contact with any metal surface along its length. Remove the right side panel and disconnect the 4-pin connector to the transfer line. Then make sure the resistance of the heater circuit is approximately 6 ohms and the resistance of the heater sensor is 50 to 300 ohms. If necessary, replace the transfer line. See Source Heater Block, Lens Heater Block, and Lens/Source Heater for details. Make sure the leads to the heaters and sensors are not electrically shorted to the tray. Thermo Scientific TSQ 8000 Hardware Manual 91 2 Troubleshooting Investigating Vacuum Issues Investigating Vacuum Issues When you run Vacuum System Check diagnostics on the TSQ 8000 mass spectrometer, the Xcalibur software checks the vacuum system. Vacuum issues may also be found when you run Leak Check diagnostics. Your instrument or software may indicate the following types of issues. WARNING - ELECTRICAL SHOCK HAZARD: When troubleshooting any issue that requires removing a cover on the TSQ 8000 mass spectrometer, you should power-off and vent the instrument to avoid harming yourself. An air leak has been detected. Possible Remedies Spray gas around the vacuum manifold and look for characteristic ions in full-scan EI mode. Correct any problems. Some of the most common ways to address leaks are: • Tighten the transfer line nut or union. • Tighten the vent valve knob. • Make sure there is clean helium flow from the GC. • Evacuate the region between the vacuum interlock knob and sealing ball by pressing the Evacuate button. • Check the transfer line or inlet ferrules. Replace them if they are broken. See Transfer Line for details. • Clean dust or debris from the top cover O-ring. If you do not find a leak, turn on the TSQ 8000 system in full-scan mode. Click Custom Spectrum on the TSQ 8000 Dashboard. Set the Scan Type to Full Scan and Start/End mass to cover the characteristic ions for the compressed gas you are using. Most compressed gases have ions between m/z 35 and 100. While you are reviewing the ions, spray the gas around the components in the bulleted list above. When you see the characteristic ions in the real-time viewer, the component you just sprayed has a leak and needs to be addressed. Foreline pump will not power-on. Possible Remedies If the Vacuum light on the front of the instrument is flashing amber quickly, the system took too long to reach vacuum and shut off. You must restart the TSQ 8000 system to enable the foreline pump to power-on. Make sure the foreline pump switch is in the On position. Make sure the cable from the foreline pump to the TSQ 8000 instrument is properly attached to the SYSTEM MECH PUMP connector near the back of the instrument. Configure the foreline pump for the proper line voltage. Make sure the TSQ 8000 instrument is properly connected to an electrical outlet and is powered on. Foreline pump powers on, but the system will not pump down. Possible Remedies Tighten the vent valve knob. Check the vacuum connection of the last component you performed maintenance on and make sure it is sealed properly. 92 TSQ 8000 Hardware Manual Thermo Scientific 2 Troubleshooting Investigating Vacuum Issues Possible Remedies Tighten the clamps and connectors on the foreline hose. Replace the foreline hose if it is damaged. Check the level of the foreline pump oil and, if necessary, add more oil. See Adding Oil to the Foreline Pump for details. Turbomolecular pump will not power-on. Possible Remedy Check the foreline pump and plumbing for leaks to ensure the fore pressure is low enough for use. You can check the foreline pressure readback on the dashboard to confirm the foreline pressure falls to less than 200 mTorr. Turbomolecular pump shuts off while in use. Possible Remedies Run Leak Check diagnostics to look for leaks and address them. Excessive gas flow may cause the pump to overheat. Ensure the temperature of the lab environment is 15-35 °C. Make sure the combined flow of carrier gas and CI reagent gas to the TSQ 8000 is less than 10 mL/min. Thermo Scientific TSQ 8000 Hardware Manual 93 2 Troubleshooting Investigating Power Supply Issues Investigating Power Supply Issues When you run Power Supply Check diagnostics on the TSQ 8000 mass spectrometer, the Xcalibur software verifies that all power supply voltages are within the acceptable ranges. Your instrument or software may indicate the following types of issues. WARNING - ELECTRICAL SHOCK HAZARD: When troubleshooting any issue that requires removing a cover on the TSQ 8000 mass spectrometer, you should power-off and vent the instrument to avoid harming yourself. TSQ 8000 system will not power-on. Possible Remedies Make sure the TSQ 8000 instrument’s power cable is properly connected to the instrument and electrical outlet. Verify that the electrical outlet is functioning properly. Replace the TSQ 8000 instrument’s power supply system. See Replacing the Power Supplies for details. TSQ 8000 system powers on temporarily and trips the circuit breaker. Possible Remedies Make sure the instrument’s power cable is not damaged. Check the foreline pump voltage setting and replace the pump, if necessary. Replace the TSQ 8000 instrument’s power supply system. See Replacing the Power Supplies for details. ±RF DC supply is outside the acceptable range. Possible Remedies Make sure the Rod Driver board is properly connected and use Xcalibur Power Status to ensure the readback reports +48 V DC is present. 94 TSQ 8000 Hardware Manual Thermo Scientific 2 Troubleshooting Investigating RF/DC Issues Investigating RF/DC Issues When you run RF/DC System Check diagnostics on the TSQ 8000 system, the Xcalibur software checks the RF/DC system of the instrument. Your instrument or software may indicate the following types of issues. WARNING - ELECTRICAL SHOCK HAZARD: When troubleshooting any issue that requires removing a cover on the TSQ 8000 mass spectrometer, you should power-off and vent the instrument to avoid harming yourself. RF dip is incorrect. Possible Remedy Make sure the RF board is properly connected and use Xcalibur Power Status to ensure the readback reports +48 V DC is present. If +48 V DC is not present, contact Technical Support. RF/DC System Check diagnostic fails. Possible Remedies Use TSQ 8000 Tune to tune the RF system. If the RF system will not tune, contact Technical Support. Make sure the rod driver board is properly installed and undamaged. Replace it, if necessary. See Front and Rear RF Boards and Front and Rear Rod Driver Boards for details. Thermo Scientific TSQ 8000 Hardware Manual 95 2 Troubleshooting Investigating Sensitivity Issues Investigating Sensitivity Issues When you run Detector Check diagnostics on the TSQ 8000 system, the Xcalibur software checks for noise on the electrometer, multiplier, dynode and RF board. Sensitivity issues are usually the result of an air leak, dirty components, or contamination. Sometimes sensitivity issues can be caused by simple to fix problems such as the carrier gas tank running out or a sample not being injected into the GC. Before troubleshooting for sensitivity issues, look for the simple problems. If the problem is more complex, then check for air leaks or dirty components. You can prevent these types of problems by properly cleaning and maintaining your GC/MS system. It is normal to see a decrease in sensitivity in the first few injections on a clean system. Before troubleshooting for sensitivity issues, look for simple solutions, such as fixing a clogged autosampler syringe or raising the level of your sample. You can always prevent sensitivity issues from occurring by keeping your GC/MS system clean and free of contamination. WARNING - ELECTRICAL SHOCK HAZARD: When troubleshooting any issue that requires removing a cover on the TSQ 8000 mass spectrometer, you should power-off and vent the instrument to avoid harming yourself. Poor sensitivity or sudden loss in sensitivity. Possible Remedies Tune the system. Check the system for air leaks and address them. Make sure the ion volume is properly positioned. See Reinserting the Ion Source Cartridge for details. If you recently performed maintenance on your ion source, remove the ion source, verify that it is assembled correctly, and reinsert it into the TSQ 8000. Make sure the GC column does not extend into the ion source. Use the column measuring tool to ensure the column is the correct length. Make sure the GC column did not break inside the ion source. If necessary, remove the pieces from the ion source. Clean or replace the GC injection port liner to remove possible contamination, trim the injector end of the column, or replace the septum. Make sure the source magnets are positioned so that their south poles are facing up. Reposition them, if necessary. Clean the ion source and lenses. See Cleaning Durable Components for details. Make sure the right type of ion volume is installed. EI and CI require different ion volumes and cannot be used interchangeably. Check the electron multiplier gain and make sure it is not too low. Retune the detector gain. Replace the electron multiplier, if necessary. See Replacing the Electron Multiplier for details. Poor high mass response. Possible Remedies Run a resolution tune to make sure the resolution is set correctly. Clean the ion volume and lenses. See Cleaning Durable Components for details. 96 TSQ 8000 Hardware Manual Thermo Scientific 2 Troubleshooting Investigating Sensitivity Issues Possible Remedies Reduce the ion source temperature to reduce the amount of thermal decomposition and fragmentation of your analyte. Check the system for air leaks and address them. See Investigating Vacuum Issues for details. Poor sensitivity in CI mode. Possible Remedies Make sure a CI ion volume is installed. Make sure the electron entrance hole on the CI ion volume is clean. Use a sharpened wooden dowel to clean the hole. See Cleaning Durable Components for more information. Remove the ion volume and check if the ion burn is centered around the small electron entrance hole. Be sure the filament is properly inserted into the connector. Carefully bend the filament wire to better align it with the ion volume. While running the instrument, you can push on the ion volume with the source exchange tool. Be sure to monitor the pressure to ensure that you get a good seal around the tool. Otherwise, you may damage the filament. An increase in signal for the calibration gas as you push on the ion volume usually indicates that the filament is not aligned properly. Thermo Scientific TSQ 8000 Hardware Manual 97 2 Troubleshooting Investigating Stability Issues Investigating Stability Issues Stability issues occur when the instrument is not consistently precise and when accurate results are not reproducible. In addition, sample preparation, spiking errors, sample injection errors, and lack of routine maintenance on the instrument may cause false stability symptoms. Before troubleshooting for stability issues, try simple solutions first, such as cleaning the ion volume and lenses or running a leak check diagnostic. Usually, a hardware fault that affects stability will show different symptoms than those attributed to stability. WARNING - ELECTRICAL SHOCK HAZARD: When troubleshooting any issue that requires removing a cover on the TSQ 8000 mass spectrometer, you should power-off and vent the instrument to avoid harming yourself. Mass assignment is unstable. Possible Remedies Wait at least 30 minutes after the system has reached vacuum before running a mass calibration. If the system was recently pumped down, the internal components may not be at temperature yet. Wait at least four hours after the system reaches temperature before running a mass calibration. If you started with a cold system, it can it can take 30 minutes after the system has achieved vacuum for it to reach temperature. Signal response is unstable or shows unexpected drop-out. Possible Remedies There is a problem with the filament or lens control. See Investigating Filament and Lens Control Issues for details. Check the system for leaks and address them. See Investigating Vacuum Issues for details. There is a contamination problem. See Investigating Contamination Issues for details. There is a problem with the electrical connection to the ion source cartridge. This most often occurs when swapping the ion source cartridge, such as from EI to CI, or after cleaning the ion source cartridge. See Reinserting the Ion Source Cartridge for details. 98 TSQ 8000 Hardware Manual Thermo Scientific 2 Troubleshooting Investigating Tuning Issues Investigating Tuning Issues In most cases, you will be alerted of a tuning issue when your automatic tune fails. In fact, your tune report may even indicate what is causing the issue. WARNING - ELECTRICAL SHOCK HAZARD: When troubleshooting any issue that requires removing a cover on the TSQ 8000 mass spectrometer, you should power-off and vent the instrument to avoid harming yourself. Tune is interrupted. Possible Remedy Make sure the computer is not set to go into Standby mode while you are acquiring data for your tune. Otherwise, it may interrupt your tune. Cannot find calibration gas peaks. Possible Remedies Run an initial tune. Check the calibrant reservoir and add 50 μL (max) of FC 43, if necessary. See Maintaining the Calibration Gas Module for details. Make sure the ion volume and lenses are properly installed and clean. Make sure the stainless steel tubing inside the manifold is connected to the mixing chamber. Cannot perform detector gain calibration. Possible Remedies Make sure you have an ion signal. The gain tune uses ions, so the system must have a signal to start. Replace the electron multiplier if the voltage required to generate 3 x 10⁵ gain on your electron multiplier is >2200 V. See Replacing Components of the Electron Multiplier for details. Replace the electrometer board. See Electrometer Board and Shield for details. Cannot calibrate resolution. Possible Remedies Allow contaminants to pump away so they do not interfere with m/z 100 or m/z 502. Run a full automatic tune if calibration gas ions (m/z 69, 131, 264) are present, but more than ±12.5% or ±20 u off (whichever is smaller). Thermo Scientific TSQ 8000 Hardware Manual 99 2 Troubleshooting Investigating Tuning Issues Cannot perform mass calibration. Possible Remedies Allow contaminants to pump away so they do not interfere with calibration gas ions. Calibrate by running an automatic tune. An air leak has been detected. Possible Remedies Check the system for air leaks and address them. TSQ 8000 Tune reports an error while saving a Tune file. Possible Remedies Check that there is sufficient space on the hard drive to save a new Tune file. If there is not enough space to save a new Tune file, copy old Tune files to another location and delete them from the hard drive. 100 TSQ 8000 Hardware Manual Thermo Scientific 2 Troubleshooting Contacting Technical Support Contacting Technical Support If the information in this section does not help solve your problem, you can contact Technical Support. Be sure to reference the model number and serial number of your instrument when contacting them. Every TSQ 8000 system ships with a label inside the front door that lists the model number and serial number. Figure 69. Identifying Your TSQ 8000 Instrument Model Number and Serial Number See “Contacting Us” on page xxv for information about contacting Thermo Fisher Scientific Technical Support personnel. Thermo Scientific TSQ 8000 Hardware Manual 101 3 Advanced Troubleshooting This chapter describes the TSQ 8000 system’s components that do not require routine maintenance, but troubleshooting may indicate they need to be replaced. Contents • Replacing Components of the Analyzer • Replacing Components of the Ion Source • Replacing Components of the Vacuum Interlock • Replacing Components of the Manifold • Replacing Components of the Electron Multiplier • Reinstalling the TSQ 8000 System Software • Replacing the Covers of the TSQ 8000 Instrument • Replacing Components of the Front Door • Replacing the Boards in the TSQ 8000 Instrument • Replacing the Power Supplies • Replacing the Calibration Gas Components • Replacing Fans and Filters Thermo Scientific TSQ 8000 Hardware Manual 103 3 Advanced Troubleshooting Replacing Components of the Analyzer Replacing Components of the Analyzer All of the components of the analyzer are on a removable tray. The main components are the ion source, ion guide, the Q1 quad assembly, the Q3 quad assembly, and the collision cell assembly. Figure 70. Replaceable Components of the Analyzer Tray Quadrupole 3 Quadrupole 1 Ion Guide Ion Source 104 TSQ 8000 Hardware Manual Analyzer Tray Collision Cell Assembly Thermo Scientific 3 Advanced Troubleshooting Replacing Components of the Analyzer Analyzer Tray This section discusses how to remove and replace the analyzer tray. This part is unlikely to fail, but you must follow these steps any time you remove the analyzer tray from the TSQ 8000 system to service or replace other components. WARNING - INSTRUMENT DAMAGE Thermo Fisher Scientific strongly recommends that only trained Thermo Fisher Scientific Field Service Engineers remove the analyzer tray and service its components. Note See the TSQ 8000 Spare Parts Guide for information about ordering this component. Shutting Down the TSQ 8000 System To shut down the TSQ 8000 system 1. Remove the ion source cartridge according to “Ion Source Cartridge” on page 168. 2. Cool down the GC oven. 3. If you are using hydrogen, cool down the injector to prepare the GC for powering off. See the GC documentation for information. After the heated zones are cooled down, power-off the GC if you are using hydrogen. WARNING - BURN HAZARD: The injector, oven, and transfer line may be hot. Allow them to cool to room temperature before touching them. WARNING - FIRE HAZARD: If you are using hydrogen as a carrier gas, you must cool down and shut off the GC to prevent the buildup of hydrogen in the vacuum manifold. See the “Hydrogen Safety Precautions” on page xvii of the Preface for more information. 4. Shut down the TSQ 8000 system using the software. See the TSQ 8000 User Guide for more information. 5. Click the Yes button to continue the shutdown process. The heaters and the turbomolecular pump power off. Then the foreline pump powers off. 6. Reach around the left side of the instrument and push down on the power switch to power-off the instrument. 7. If you are using hydrogen, unscrew the hydrogen safety screw on the front door. Thermo Scientific TSQ 8000 Hardware Manual 105 3 Advanced Troubleshooting Replacing Components of the Analyzer . Figure 71. Powering Off the TSQ 8000 Instrument Top Cover Panel Screw Hydrogen Safety Screw Vacuum Interlock Shield Vent Valve Knob Power Switch Hydrogen Safety Screws 8. Open the front door of the instrument. 9. Look behind the right side of the vacuum interlock shield and twist the vent valve knob one and a half times in a counter-clockwise direction to open the vent. 10. Wait five minutes for the TSQ 8000 instrument to vent. CAUTION - INSTRUMENT DAMAGE Do not proceed until the instrument is vented or pieces of the column or ferrule might blow into the instrument. To ensure that the instrument is vented, check how much the glass cover compresses the top cover o-ring in the manifold. Once the o-ring surface touching the glass is about 1 mm, it is safe to open the instrument and remove the column. 11. Open the front door of the GC and loosen the transfer line nut. Then pull the column back (into the oven) about 5 cm to ensure the column is no longer in the ion source. 12. Use a T20 Torxhead screwdriver to loosen the top cover panel. 13. If you are using hydrogen, remove the remaining hydrogen safety screws. Note You might have to move the GC to access the right hydrogen safety screw. 106 TSQ 8000 Hardware Manual Thermo Scientific 3 Advanced Troubleshooting Replacing Components of the Analyzer Removing the Analyzer Tray from the TSQ 8000 Instrument To remove the analyzer tray from the TSQ instrument 1. Slide the top cover panel toward the back of the instrument and lift it off. 2. Disconnect the electrometer board cable Figure 72. Disconnecting the Electrometer Board Cable Electrometer Board Cable 3. Remove the small and large glass manifold cover. 4. Set the glass covers on a surface where they will not be scratched or contaminated. Protect the glass and any other manifold components from dust accumulation. Wear cleanroom gloves when touching the glass. See the TSQ 8000 Spare Parts Guide for information about ordering cleanroom gloves. Thermo Scientific TSQ 8000 Hardware Manual 107 3 Advanced Troubleshooting Replacing Components of the Analyzer Figure 73. Removing the Small and Large Glass Manifold Covers Large Glass Manifold Cover Small Glass Manifold Cover 5. Disconnect the four wires that go to the ion guide and quadrupole 1. These wires are attached to the front 4-pin feedthrough in the vacuum manifold. Figure 74. Disconnecting the Ion Guide Connector Wires and the Quad 1 Connector Wires Front 4-pin Connector Quad 1 Wires Ion Guide Wires 6. Disconnect the four wires that go to the collision cell and quadrupole 3. These wires are attached to the rear 4-pin feedthrough in the vacuum manifold. 108 TSQ 8000 Hardware Manual Thermo Scientific 3 Advanced Troubleshooting Replacing Components of the Analyzer Figure 75. Disconnecting the Quad 3 Connector Wires and the Collision Cell Connector Wires Quad 3 Wires Rear 4-pin Connector Collision Cell Connector Wires Collision Gas Tube 7. Remove the collision gas tube from the collision cell. Note Pull straight back from the collision cell to prevent damage to the collision gas tube. 8. Use a T20 Torxhead screwdriver to remove the four screws around the manifold door. Note Remove the screws completely so that they do not scratch the manifold when you close the door. Figure 76. Opening the Manifold Door Screws 9. Open the manifold door and slide the filament board and wires off the pins on the source interface board Thermo Scientific TSQ 8000 Hardware Manual 109 3 Advanced Troubleshooting Replacing Components of the Analyzer Figure 77. Disconnecting the Analyzer Tray from the Instrument Left Screw Filament Board and Wires Source Interface Board Heat Shield Calibration and Reagent Gas Tubes Right Screw Note Keep all manifold parts you remove covered on a clean work surface so they will not accumulate dust. 10. Disconnect the filament board and wires from the source interface board. 11. Remove the bottom left screw holding the metal heat shield to the manifold. 12. Remove the heat shield and wedge it between the source interface board and the wall of the manifold to disconnect the board from the 20-pin feedthrough. 13. Remove the bottom right screw holding the tray to the manifold. 14. Detach the reagent gas and calibration gas tubes from the gas mixing chamber and remove from the manifold. 15. Move the large tab on the analyzer tray to the left, moving the ion source away from the transfer line, and then carefully pull the tray toward you through the manifold door. CAUTION - INSTRUMENT DAMAGE Do not scratch any of the sealing surfaces. Be especially careful when the source interface board reaches the o-ring surface. 110 TSQ 8000 Hardware Manual Thermo Scientific 3 Advanced Troubleshooting Replacing Components of the Analyzer Figure 78. Sliding the Analyzer Tray Out of the Instrument Sealing Surfaces Analyzer Tray Tab 16. Set the tray on a clean work surface. Removing the Analyzer Tray Components To remove the analyzer tray components from the tray 1. Turn the analyzer tray to access the bottom and disconnect the three lens wires attached to the lenses between the quadrupoles. Figure 79. Finding the Lens Wires between the Quadrupoles Lens Wires CAUTION INSTRUMENT DAMAGE Quadrupole surface quality is critical for instrument performance. Take extreme care in handling the quadrupole components. 2. Remove the screws on the Q3 exit endcap holding it to the tray. 3. Remove the Q3 quad assembly and Q3 exit lens assembly from the tray. 4. Detach the Q3 exit lens assembly from the Q3 quad assembly. 5. Set the Q3 quad assembly and Q3 exit lens assembly on a clean work surface. Thermo Scientific TSQ 8000 Hardware Manual 111 3 Advanced Troubleshooting Replacing Components of the Analyzer Figure 80. Removing the Q3 Quad Assembly from the Analyzer Tray Q3 Exit Lens Assembly Q3 Quad Assembly Collision Cell Assembly Screws 6. Remove the four screws holding the collision cell to the tray. 7. Remove the collision cell assembly and Q1 quad assembly from the analyzer tray. 8. Set the collision cell assembly on a clean work surface. Disconnect the Q1 entrance lens wire from the source interface board. Figure 81. Removing the Collision Cell and Q1 Quad Assembly from the Analyzer Tray Q1 Quad Assembly Collision Cell Assembly Q1 Entrance Lens Endcap Screws 112 TSQ 8000 Hardware Manual Thermo Scientific 3 Advanced Troubleshooting Replacing Components of the Analyzer Figure 82. Removing the Analyzer Tray Screws Q3 Entrance Endcap Screw Ion Guide Screws Q3 Exit Endcap Screw Q1 Exit Endcap Screw 9. Remove the Q1 entrance lens wire from the source interface board. 10. Remove the ion guide assembly screws. 11. Remove the ion guide assembly. 12. Use a T10 Torxhead screwdriver to remove the lens heater block grounding strap from the analyzer tray. 13. Remove the Q1 exit, Q3 entrance, and Q1 exit lens wires from the analyzer tray. See Figure 79. 14. Use a T20 Torxhead screwdriver to remove the two screws attaching the source block to the analyzer tray. IMPORTANT fragile. Be careful not to drop the MACOR ceramic plate. See Figure 83. It is Figure 83. Removing the Ion Source from the Analyzer Tray MACOR Ceramic Plate Screws 15. Remove the source block from the analyzer tray and set it aside. Thermo Scientific TSQ 8000 Hardware Manual 113 3 Advanced Troubleshooting Replacing Components of the Analyzer 16. Replace the analyzer tray with a new one if needed. Reattaching the Analyzer Tray Components To reattach the analyzer tray components to the tray 1. Reattach the source and lens heater block to the analyzer tray with the two screws. 2. Reattach the screw holding the lens heater block grounding strap to the analyzer tray. Note Make sure the Q1 entrance lens sits flush and centered in the Q1 entrance lens endcap. 3. Slide the ion guide and endcap back into the analyzer tray. Figure 84. Rejoining the Ion Guide to the Quadrupole Ion Guide Q1 Quad Assembly 4. Reattach the four screws but do not tighten. 5. Insert the Q1 quad assembly and the collision cell assembly onto the analyzer tray. 6. Hold the collision cell assembly and the Q1 quad assembly in the tray and make sure the Q1 quad assembly and the ion guide are correctly positioned before tightening the screws on the Q1 entrance lens endcap . CAUTION - INSTRUMENT DAMAGE Do not overtighten the endcap screws. If torque exceeds 1.5 N•m, thread damage will occur. IMPORTANT For optimal performance, the quadrupole ceramics must fit straight and securely in the endcap and be aligned so that the collision cell is level with the tray. Slightly tighten each screw several times going from one to another until all are securely tightened. 114 TSQ 8000 Hardware Manual Thermo Scientific 3 Advanced Troubleshooting Replacing Components of the Analyzer Figure 85. Reattaching Quadrupole 1, the Ion Guide , and the Collision Cell Assembly to the Analyzer Tray Q1 Quad Assembly Collision Cell Assembly Q1 Entrance Lens Endcap Screws Tip You will get better signal if you gently push the quadrupole rod endcaps toward one another while tightening the screws. 7. Reattach the Q3 exit lens assembly and the Q3 quad assembly to the analyzer tray. Ensure that quadrupole 3 and the collision cell assembly are correctly positioned before tightening screws. 8. Reattach the two screws on each side of the quadrupole rod endcaps. Tip The endcaps have cutouts that you should use to check to be sure the ceramics are aligned properly before attaching the two screws. Figure 86. Replacing the Collision Cell and Quadrupole 3 in the Analyzer Tray Q3 Quad Assembly Q3 Exit Lens Assembly Collision Cell Assembly Screws 9. Reconnect the three lens wires attached to the lenses between the quadrupoles. 10. Reconnect the Q1 entrance and Q1 exit lens assemblies. Thermo Scientific TSQ 8000 Hardware Manual 115 3 Advanced Troubleshooting Replacing Components of the Analyzer 11. Reconnect the Q1 entrance lens wire to the source interface board. Replacing the Analyzer Tray in the TSQ 8000 Instrument To replace the analyzer tray in the TSQ 8000 instrument 1. Slide the analyzer tray back into the instrument. Note The analyzer tray will mount on one alignment pin in the back and the transfer line on the right. The mixing chamber will rest on the transfer line when installed. Figure 87. Sliding the Analyzer Tray Back into the Instrument Sealing Surfaces Analyzer Tray Tab CAUTION INSTRUMENT DAMAGE Do not scratch any of the sealing surfaces. Be especially careful when the source interface board reaches the o-ring surface. 2. Reattach the transfer line and both gas tubes to the gas mixing chamber. 3. Reattach the bottom right screw holding the tray to the manifold. 116 TSQ 8000 Hardware Manual Thermo Scientific 3 Advanced Troubleshooting Replacing Components of the Analyzer Figure 88. Reconnecting the Analyzer Tray to the Instrument Left Screw Filament Board and Wires Source Interface Board Heat Shield Calibration and Reagent Gas Tubes Right Screw Note The dimensions of the transfer line and ion source allow a 0.5 mm gap between the mixing chamber and the transfer line. The mixing chamber does not need to bottom out on the transfer line. 4. Reattach the source interface board to the wall of the chassis. 5. Slide the heat shield back into its slot and reattach the bottom left screw. The heat shield should be flush with the manifold side wall. 6. Reattach the filament board and wires. 7. Check all wires to ensure that none contact any metal surface and that there is sufficient space left below the source block for the magnet yoke. CAUTION Although the wires are insulated with glass braid, they may short through the insulation if they touch a metal surface. 8. Close the manifold door and reattach the four screws. 9. Reconnect the four wires that connect the rear 4-pin feedthrough to quadrupole 3 and the collision cell assembly. See Figure 75 on page 109. Thermo Scientific TSQ 8000 Hardware Manual 117 3 Advanced Troubleshooting Replacing Components of the Analyzer 10. Reconnect the four wires that connect the front 4-pin feedthrough to quadrupole 1 and the ion guide. See Figure 74 on page 108. 11. Reconnect the collision gas tube. See Figure 74 on page 108. 12. Put the glass manifold covers back into place. Be sure to blow off all dust from the covers and o-ring first. 13. Reconnect the electrometer board cable. 14. Reattach the top cover and tighten the top cover panel screw. Restarting the System To restart your system 1. Close the front door of the instrument. 2. Twist the vent valve clockwise to close the valve. Be careful not to pinch the o-ring. 3. Reinsert the column to the proper length and tighten the transfer line nut. See “Replacing a Column” on page 12 for more information. 4. If you are using hydrogen, replace the front panel screw. 5. Replace the ion source cartridge. See “Reinserting the Ion Source Cartridge” on page 185 for more information. 6. Replace all hydrogen safety screws if you are using hydrogen. 7. Power-on the TSQ 8000 mass spectrometer. 8. If the GC is powered off, power it on and make sure vacuum compensation is on for the carrier gas flowing into the mass spectrometer. WARNING - FIRE HAZARD: If you are using hydrogen, do NOT reach over the top of the instrument to power it on. Instead, reach around the left side or go to the back of the instrument and flip up the power switch. 118 TSQ 8000 Hardware Manual Thermo Scientific 3 Advanced Troubleshooting Replacing Components of the Analyzer Ion Guide To replace the ion guide: Note See the TSQ 8000 Spare Parts Guide for information about ordering this component. 1. Shut down your system by following the steps in “Shutting Down the TSQ 8000 System” on page 105. 2. Remove the analyzer tray from the instrument by following the instructions in “Removing the Analyzer Tray from the TSQ 8000 Instrument” on page 107. 1. Turn the analyzer tray to access the bottom and disconnect the three lens wires attached to the lenses between the quadrupoles. Figure 89. Finding the Lens Wires between the Quadrupoles Lens Wires CAUTION INSTRUMENT DAMAGE Quadrupole surface quality is critical for instrument performance. Take extreme care in handling the quadrupole components. 2. Remove the screws holding the Q3 exit lens endcap to the tray. 3. Remove Q3 and the Q3 exit lens endcap. 4. Remove the screws holding the collision cell to the tray. 5. Remove the collision cell and Q1. Figure 90. Removing the Analyzer Tray Screws Q3 Entrance Endcap Screw Ion Guide Screws Q1 Exit Endcap Screw Thermo Scientific Q3 Exit Endcap Screw TSQ 8000 Hardware Manual 119 3 Advanced Troubleshooting Replacing Components of the Analyzer Figure 91. Removing the Collision Cell and Quadrupole 3 from the Analyzer Tray Q3 Quad Assembly Q3 Exit Lens Assembly Collision Cell Assembly Screws 6. Disconnect the Q1 entrance lens wire from the source interface board. 7. Remove the two screws on each side of the Q1 entrance endcap. Figure 92. Removing Screws from the Quadrupole Rod Endcaps Collision Cell Assembly Q1 Entrance Lens and Endcap Screws 8. Remove the Q1 entrance lens endcap and ion guide from the tray. 120 TSQ 8000 Hardware Manual Thermo Scientific 3 Advanced Troubleshooting Replacing Components of the Analyzer 9. Look inside the endcap and use a T10 Torxhead screwdriver to remove the two screws holding the ion guide to the Q1 entrance lens endcap and Q1 entrance lens. Figure 93. Finding the Quad Entrance Lens Q1 Entrance Lens Endcap Q1 Entrance Lens Screws Ion Guide Wire 10. Rotate the ion clamp until the ion guide can be separated from the endcap 11. Pull the ion guide clamp away from the ion guide . 12. Place the ion guide clamp over the new ion guide. Figure 94. Replacing the Ion Guide 13. Insert the new ion guide into the Q1 entrance lens endcap. 14. Rotate the clamp until the ion guide is locked in place. Make sure the ion guide is aligned parallel to the flat on the endcap. 15. Tighten the two T10 screws inside the endcap. Note Make sure the Q1 entrance lens sits flush and centered in the Q1 entrance lens endcap. Thermo Scientific TSQ 8000 Hardware Manual 121 3 Advanced Troubleshooting Replacing Components of the Analyzer 16. Slide the ion guide and endcap back into the analyzer tray. Figure 95. Rejoining the Ion Guide to the Quadrupole Ion Guide Quadrupole 1 17. Reattach the four screws but do not tighten. 18. Insert Q1 and the collision cell assembly onto the analyzer tray. 19. Hold the collision cell and Q1 in the tray and make sure the quad and ion guide are correctly positioned before tightening the screws on the Q1 entrance lens endcap . CAUTION - INSTRUMENT DAMAGE Do not overtighten the endcap screws. If torque exceeds 1.5 N•m, thread damage will occur. IMPORTANT For optimal performance, the quadrupole ceramics must fit straight and securely in the endcap and be aligned so that the collision cell is level with the tray. Slightly tighten each screw several times going from one to another until all are securely tightened. Figure 96. Reattaching Quadrupole 1, the Ion Guide , and the Collision Cell Assembly to the Analyzer Tray Quadrupole 1 Collision Cell Assembly Q1 Entrance Lens Endcap Screws 122 TSQ 8000 Hardware Manual Thermo Scientific 3 Advanced Troubleshooting Replacing Components of the Analyzer Tip You will get better signal if you gently push the quadrupole rod endcaps toward one another while tightening the screws. 20. Reattach the Q3 exit lens assembly and Q3 to the analyzer tray. Ensure that quadrupole 3 and the collision cell assembly are correctly positioned before tightening screws. 21. Reattach the two screws on each side of the quadrupole rod endcaps. Tip The endcaps have cutouts that you should use to check to be sure the ceramics are aligned properly before attaching the two screws. Figure 97. Replacing the Collision Cell and Quadrupole 3 in the Analyzer Tray Q3 Exit Lens Assembly Q3 Quad Assembly Collision Cell Assembly Screws 22. Reconnect the three lens wires attached to the lenses between the quadrupoles. 23. Reconnect the Q1 entrance lens wire to the source interface board. 24. Once the components are correctly attached to the analyzer tray, follow the instructions in “Replacing the Analyzer Tray in the TSQ 8000 Instrument” on page 116 to replace the tray in the TSQ instrument. 25. Restart your system by following the instructions in “Restarting the System” on page 118. Thermo Scientific TSQ 8000 Hardware Manual 123 3 Advanced Troubleshooting Replacing Components of the Analyzer Q1 Entrance Lens and Q1 Entrance Lens Endcap To replace the Q1 entrance lens and Q1 entrance lens endcap Note See the TSQ 8000 Spare Parts Guide for information about ordering this component. 1. Shut down your system by following the steps in “Shutting Down the TSQ 8000 System” on page 105. 2. Remove the analyzer tray from the instrument by following the instructions in “Removing the Analyzer Tray from the TSQ 8000 Instrument” on page 107. 3. Turn the analyzer tray to access the bottom and disconnect the three lens wires attached to the lenses between the quadrupoles. Figure 98. Finding the Lens Wires between the Quadrupoles Lens Wires CAUTION INSTRUMENT DAMAGE Quadrupole surface quality is critical for instrument performance. Take extreme care in handling the quadrupole components. 4. Remove the screws holding the Q3 exit lens endcap to the tray. 5. Remove Q3 and the Q3 exit lens endcap. 6. Remove the screws holding the collision cell to the tray. 7. Remove the collision cell and Q1. Figure 99. Removing the Analyzer Tray Screws Q3 Entrance Endcap Screw Ion Guide Screws Q1 Exit Endcap Screw 124 TSQ 8000 Hardware Manual Q3 Exit Endcap Screw Thermo Scientific 3 Advanced Troubleshooting Replacing Components of the Analyzer Figure 100. Removing the Collision Cell and Quadrupole 3 from the Analyzer Tray Q3 Exit Lens Assembly Q3 Quad Assembly Collision Cell Assembly Screws 8. Disconnect the Q1 entrance lens wire from the source interface board. 9. Remove the two screws on each side of the Q1 entrance endcap. Figure 101. Removing Screws from the Quadrupole Rod Endcaps Collision Cell Assembly Q1 Entrance Lens and Endcap Screws 10. Remove the Q1 entrance lens endcap and ion guide from the tray. Thermo Scientific TSQ 8000 Hardware Manual 125 3 Advanced Troubleshooting Replacing Components of the Analyzer 11. Look inside the endcap and use a T10 Torxhead screwdriver to remove the two screws holding the ion guide to the Q1 entrance lens endcap and Q1 entrance lens. Figure 102. Replacing the Quad Entrance Lens Q1 Entrance Lens Endcap Q1 Entrance Lens Screws Q1 Entrance Lens Wire Ion Guide Wire 12. Remove and replace the Q1 entrance lens and ion guide into the new Q1 entrance lens endcap. Note Make sure the Q1 entrance lens sits flush and centered in the Q1 entrance lens endcap. 13. Remove and replace the Q1 entrance lens and ion guide into the new Q1 entrance lens endcap. Note Make sure the Q1 entrance lens sits flush and centered in the Q1 entrance lens endcap. 14. Slide the ion guide and endcap back into the analyzer tray. Figure 103. Rejoining the Ion Guide to the Quadrupole Ion Guide Quadrupole 1 15. Reattach the four screws but do not tighten. 16. Insert Q1 and the collision cell assembly onto the analyzer tray. 17. Hold the collision cell and Q1 in the tray and make sure the quad and ion guide are correctly positioned before tightening the screws on the Q1 entrance lens endcap 126 TSQ 8000 Hardware Manual Thermo Scientific 3 Advanced Troubleshooting Replacing Components of the Analyzer . CAUTION - INSTRUMENT DAMAGE Do not overtighten the endcap screws. If torque exceeds 1.5 N•m, thread damage will occur. IMPORTANT For optimal performance, the quadrupole ceramics must fit straight and securely in the endcap and be aligned so that the collision cell is level with the tray. Slightly tighten each screw several times going from one to another until all are securely tightened. Figure 104. Reattaching Quadrupole 1, the Ion Guide , and the Collision Cell Assembly to the Analyzer Tray Quadrupole 1 Collision Cell Assembly Q1 Entrance Lens Endcap Screws Tip You will get better signal if you gently push the quadrupole rod endcaps toward one another while tightening the screws. 18. Reattach the Q3 exit lens assembly and Q3 to the analyzer tray. Ensure that quadrupole 3 and the collision cell assembly are correctly positioned before tightening screws. 19. Reattach the two screws on each side of the quadrupole rod endcaps. Tip The endcaps have cutouts that you should use to check to be sure the ceramics are aligned properly before attaching the two screws. Thermo Scientific TSQ 8000 Hardware Manual 127 3 Advanced Troubleshooting Replacing Components of the Analyzer Figure 105. Replacing the Collision Cell and Quadrupole 3 in the Analyzer Tray Q3 Quad Assembly Q3 Exit Lens Assembly Collision Cell Assembly Screws 20. Reconnect the three lens wires attached to the lenses between the quadrupoles. 21. Reconnect the Q1 entrance lens wire to the source interface board. 22. Once the components are correctly attached to the analyzer tray, follow the instructions in “Replacing the Analyzer Tray in the TSQ 8000 Instrument” on page 116 to replace the tray in the TSQ instrument. 23. Restart your system by following the instructions in “Restarting the System” on page 118. 128 TSQ 8000 Hardware Manual Thermo Scientific 3 Advanced Troubleshooting Replacing Components of the Analyzer Ion Guide Wire Set To replace the ion guide wires Note See the TSQ 8000 Spare Parts Guide for information about ordering these components. 1. Shut down your system by following the steps in “Shutting Down the TSQ 8000 System” on page 105. 2. Remove the analyzer tray from the instrument by following the instructions in “Removing the Analyzer Tray from the TSQ 8000 Instrument” on page 107. 3. Use a T10 Torxhead screwdriver to remove the screw connecting the ion guide wire to the top of the ion guide. Figure 106. Replacing the Ion Guide Wires Ion Guide Wires Nut Screw 4. Use a wrench to remove the nut connecting the other ion guide wire to the side of the ion guide. 5. Attach new ion guide wires and reattach the nuts and screw. 6. Follow the instructions in “Replacing the Analyzer Tray in the TSQ 8000 Instrument” on page 116 to replace the tray into the instrument. 7. Restart your system by following the instructions in “Restarting the System” on page 118. Thermo Scientific TSQ 8000 Hardware Manual 129 3 Advanced Troubleshooting Replacing Components of the Analyzer Q1 Quad, Q3 Quad, and Collision Cell Assemblies To replace Q1 quad assembly, the Q3 quad assembly, or the collision cell assembly Note See the TSQ 8000 Spare Parts Guide for information about ordering this component. 1. Shut down your system by following the steps in “Shutting Down the TSQ 8000 System” on page 105. 2. Remove the analyzer tray from the instrument by following the instructions in “Removing the Analyzer Tray from the TSQ 8000 Instrument” on page 107. 3. Turn the analyzer tray to access the bottom and disconnect the three lens wires attached to the lenses between the quadrupoles. Figure 107. Finding the Lens Wires between the Quadrupoles Lens Wires CAUTION INSTRUMENT DAMAGE Quadrupole surface quality is critical for instrument performance. Take extreme care in handling the quadrupole components. 4. Remove the screws on the Q3 exit endcap holding it to the tray. 5. Remove the Q3 quad assembly and Q3 exit lens assembly from the tray. 6. If needed, replace Q3. Note If you only need to replace quadrupole 3, you may skip to step 14. 7. Remove the four screws that hold the collision cell assembly to the analyzer tray. 8. Remove the collision cell assembly and the Q1 quad assembly and the tray. 130 TSQ 8000 Hardware Manual Thermo Scientific 3 Advanced Troubleshooting Replacing Components of the Analyzer Figure 108. Removing the Collision Cell and Quadrupole 3 from the Analyzer Tray Q3 Exit Lens Assembly Q3 Quad Assembly Collision Cell Assembly Screws 9. Replace the collision cell assembly if needed. Note If you do not need to replace quadrupole 1, go to step 14. Figure 109. Removing Screws from the Quadrupole Rod Endcaps Quadrupole 1 Collision Cell Assembly Q1 Entrance Lens and Endcap 10. Slide the Q1 quad assembly away from the Q1 entrance lens and endcap. 11. Replace Q1 if necessary. 12. Slide Q1 back into the Q1 entrance lens endcap. 13. Slide the collision cell assembly onto the analyzer tray. Hold the collision cell and Q1 in the tray and make sure Q1 and the collision cell are correctly positioned before tightening the screws on the Q1 exit endcap Thermo Scientific TSQ 8000 Hardware Manual 131 3 Advanced Troubleshooting Replacing Components of the Analyzer . CAUTION - INSTRUMENT DAMAGE Do not overtighten the endcap screws. If torque exceeds 1.5 N•m, thread damage will occur. IMPORTANT For optimal performance, the quadrupole must fit straight and securely in the endcap and be aligned so that the collision cell is level with the tray. Slightly tighten each screw several times going from one to another until all are securely tightened. Figure 110. Reattaching Quadrupole 1 and the Collision Cell Assembly to the Analyzer Tray Quadrupole 1 Collision Cell Assembly Q1 Entrance Lens Endcap Screws Tip You will get better signal if you gently push the quadrupole rod endcaps toward one another while tightening the screws. 14. Reattach the Q3 exit lens assembly and the Q3 quad assembly to the analyzer tray. Ensure that quadrupole 3 and the collision cell assembly are correctly positioned before tightening screws. 15. Reattach the two screws on each side of the quadrupole rod endcaps. Tip Look through the endcaps to be sure the quadrupole ceramics are aligned properly. 132 TSQ 8000 Hardware Manual Thermo Scientific 3 Advanced Troubleshooting Replacing Components of the Analyzer Figure 111. Replacing the Collision Cell and Quadrupole 3 in the Analyzer Tray Q3 Quad Assembly Q3 Exit Lens Assembly Collision Cell Assembly Screws 16. Replace the analyzer tray into the instrument by following the instructions in “Replacing the Analyzer Tray in the TSQ 8000 Instrument” on page 116. 17. Restart your system by following the instructions in “Restarting the System” on page 118. Thermo Scientific TSQ 8000 Hardware Manual 133 3 Advanced Troubleshooting Replacing Components of the Analyzer Quad 1 and Quad 3 Wire Sets To replace the quad 1 or quad 3 wire sets Note See the TSQ 8000 Spare Parts Guide for information about ordering this component. 1. Shut down your system by following the steps in “Shutting Down the TSQ 8000 System” on page 105. 2. Remove the analyzer tray from the instrument by following the instructions in “Removing the Analyzer Tray from the TSQ 8000 Instrument” on page 107. 3. For both quad assemblies, use a T10 Torxhead screwdriver to remove the four screws around the rods. These screws hold the wires in place. If the screws won’t come off the rods, you must replace the whole quad assembly. 4. Use on the screws provided. These screws are made from a special material designed not fuse with the quadrupole rods. Figure 112. Replacing the Q1 Quad Assembly Wires Screws Screws 134 TSQ 8000 Hardware Manual Thermo Scientific 3 Advanced Troubleshooting Replacing Components of the Analyzer Figure 113. Replacing the Q3 Quad Assembly Wires Screws Screws 5. Attach new wires to each side of the rods. Ensure that the copper washers are on either side of the wires. CAUTION - INSTRUMENT DAMAGE Be careful when removing and inserting the screws on the metal quadrupole rod endcaps. The screws are susceptible to falling between the rods. Figure 114. Attaching the Screws and Washers Correctly Copper Washers Screw Quad Assembly Wire Thermo Scientific TSQ 8000 Hardware Manual 135 3 Advanced Troubleshooting Replacing Components of the Analyzer Figure 115. Correct Orientation of Screws and Wires to the Quad Assemblies and Tray 6. Replace the analyzer tray into the instrument by following the instructions in “Replacing the Analyzer Tray in the TSQ 8000 Instrument” on page 116. 7. Restart your system by following the instructions in “Restarting the System” on page 118. 136 TSQ 8000 Hardware Manual Thermo Scientific 3 Advanced Troubleshooting Replacing Components of the Analyzer Q3 Exit Lens Assembly To replace the Q3 exit lens assembly Note See the TSQ 8000 Spare Parts Guide for information about ordering this component. 1. Shut down your system by following the steps in “Shutting Down the TSQ 8000 System” on page 105. 2. Remove the analyzer tray from the instrument by following the instructions in “Removing the Analyzer Tray from the TSQ 8000 Instrument” on page 107. 3. Turn the tray to access the bottom and remove the wire to the Q3 exit lens. 4. Remove the two screws on each side of the Q3 exit lens assembly and slide it off the back of the tray while holding the Q3 quad assembly in place. Figure 116. Removing the Q3 Exit Lens Assembly from the Analyzer Tray Q3 Exit Lens Assembly Q3 Quad Assembly Collision Cell Assembly Screws 5. Attach a new Q3 exit lens assembly and reattach the two screws. Tip You will get better signal if you gently push the Q3 exit lens assembly forward while tightening the screws. 6. Reattach the two screws on each side of the quadrupole rod endcaps. Tip Look through the endcaps to be sure the screws are aligned properly. Thermo Scientific TSQ 8000 Hardware Manual 137 3 Advanced Troubleshooting Replacing Components of the Analyzer Figure 117. Replacing the Collision Cell and Quadrupole 3 in the Analyzer Tray Q3 Quad Assembly Q3 Exit Lens Assembly Collision Cell Assembly Screws 7. Reattach the wire to the Q3 exit lens. 8. Replace the analyzer tray into the instrument by following the instructions in “Replacing the Analyzer Tray in the TSQ 8000 Instrument” on page 116. 9. Restart your system by following the instructions in “Restarting the System” on page 118. 138 TSQ 8000 Hardware Manual Thermo Scientific 3 Advanced Troubleshooting Replacing Components of the Ion Source Replacing Components of the Ion Source If the components of your ion source get damaged, you can use the illustration below to visually locate a component and then follow the process to replace it. If you just need to clean the ion source cartridge, see Cleaning the Ion Source Cartridge. Note See the TSQ 8000 Spare Parts Guide for information about ordering these components. Figure 118. Replaceable Components of the Ion Source Lens/Source Heaters Repeller Nut Repeller Plate Source Heater Block Lens Heater Block Source to Ion Guide Spacer Lens 1 Lens 2 Ion Volume Ion Volume Locking Ring Source-Repeller Thumbscrews Ion Cartridge Sleeve Repeller Lens 3/RF Lens Ion Volume-Repeller Insulator Repeller Spring Lens Plate and Springs Lens Heater Block Grounding Strap Thumbscrew-Repeller Spacers Insulating Spacers NOTE: You can also replace the entire ion source cartridge, which consists of the locking ring, spring, nut, repeller, lenses, and sleeve. See Ion Source Cartridge for details. Thermo Scientific TSQ 8000 Hardware Manual 139 3 Advanced Troubleshooting Replacing Components of the Ion Source Source Heater Block, Lens Heater Block, and Lens/Source Heater To replace the source heater block, lens heater block, or lens/source heater Note See the TSQ 8000 Spare Parts Guide for information about ordering these components. WARNING - INSTRUMENT DAMAGE Thermo Fisher Scientific strongly recommends that only trained Thermo Fisher Scientific Field Service Engineers remove and service these components. 1. Shut down your system by following the steps in “Shutting Down the TSQ 8000 System” on page 105. 2. Remove the analyzer tray from the instrument by following the instructions in “Removing the Analyzer Tray from the TSQ 8000 Instrument” on page 107. 3. Disconnect the Q1 entrance lens, Q2 entrance lens, Q3 entrance lens, and Q3 exit lens wires from the source interface board using a flat-tipped screwdriver. Figure 119. Locating Wires on the Source Interface Board 140 TSQ 8000 Hardware Manual Thermo Scientific 3 Advanced Troubleshooting Replacing Components of the Ion Source 4. Use a T10 Torxhead screwdriver to disconnect the lens heater block grounding strap from the lens heater block, but leave it attached to the tray. Figure 120. Disconnecting the Lens Heater Block Grounding Strap Lens Heater Block Lens Heater Grounding Strap Screw 5. Using a T10 Torxhead remove the screw holding the filament clip in place. 6. Remove both pieces of the filament clip. 7. Lift the filament out of the block. 8. Using a T10 Torxhead to remove the two screws on the mixing chamber and pull the chamber off. 9. Twist and remove the two source-repeller thumbscrews. Figure 121. Removing the Source-Repeller Thumbscrews Source-Repeller Thumbscrews Thermo Scientific TSQ 8000 Hardware Manual 141 3 Advanced Troubleshooting Replacing Components of the Ion Source 10. Remove the thumbscrew-repeller spacers and set them aside. Figure 122. Removing the Thumbscrew-Repeller Spacers Thumbscrew-Repeller Spacers 11. Pull away the repeller plate and remove the insulating spacers. Figure 123. Removing the Repeller Plate and Insulating Spacers Gas Mixing Chamber Repeller Plate Insulating Spacers under Thumbscrew Repeller Spacers Screws 142 TSQ 8000 Hardware Manual Thermo Scientific 3 Advanced Troubleshooting Replacing Components of the Ion Source 12. Use a T20 Torxhead screwdriver to remove the two screws on the back of the source heater block. Figure 124. Disconnecting the Ion Source to the Analyzer Tray Screws Note Some of the pieces may become slack as you loosen the screws. Do not let them fall. 13. Slide the source interface board and the source block out from under the tray without damaging or disconnecting the wires. CAUTION - INSTRUMENT DAMAGE The leans/source heater may be fused to the source block and difficult to remove. To avoid damage, separate the block from the tray before removing the lens/source heater. Figure 125. Removing the Ion Source from the Analyzer Tray Ion Source Block Wires Thermo Scientific TSQ 8000 Hardware Manual 143 3 Advanced Troubleshooting Replacing Components of the Ion Source 14. Use a T20 Torxhead screwdriver to remove the two screws connecting the lens/source heater to the source heater block. Replace the lens/source heater if necessary. Figure 126. Disconnecting the Lens/Source Heater Lens/Source Heater Screws and Cone Washers 15. Remove and replace the source heater block if necessary. Figure 127. Replacing the Source Heater Block Source Heater Block 144 TSQ 8000 Hardware Manual Thermo Scientific 3 Advanced Troubleshooting Replacing Components of the Ion Source 16. If you need to replace the lens heater block, remove the screw holding the lens plate and springs to the lens heater block. Figure 128. Replacing the Lens Heater Block Lens Heater Block Lens Plate and Spring Screw 17. Remove and replace the lens heater block. 18. Attach the lens plate and springs to the lens heater block. 19. Attach the source heater block. 20. Reattach the lens/source heater to the new source heater block and set them next to the rest of the ion source. Figure 129. Reattaching the Lens/Source Heater Lens/Source Heater Screws and Washers Thermo Scientific TSQ 8000 Hardware Manual 145 3 Advanced Troubleshooting Replacing Components of the Ion Source IMPORTANT When assembling the source and optics block, take extra care to ensure the blocks are centered properly and that the ion source cartridge provided with the instrument can easily slide in and out of the assembly. 21. Slide the source interface board and source block onto the tray without damaging or disconnecting the wires. Figure 130. Sliding the Source Block onto the Analyzer Tray Source Interface Board Source Heater Block Wires 22. Reattach the two screws to the back of the ion source. Figure 131. Reconnecting the Source Block to the Analyzer Tray Screws 146 TSQ 8000 Hardware Manual Thermo Scientific 3 Advanced Troubleshooting Replacing Components of the Ion Source 23. Reattach the gas mixing chamber to the ion source block. Figure 132. Reattaching the Gas Mixing Chamber Gas Mixing Chamber Repeller Plate Insulating Spacers Screws 24. Reattach the repeller plate and insulating spacers. 25. Insert the thumbscrew-repeller spacers into a groove in the thumbscrew. Thermo Scientific TSQ 8000 Hardware Manual 147 3 Advanced Troubleshooting Replacing Components of the Ion Source 26. Attach the source-repeller thumbscrews to the endcaps and twist them back on. When you are tightening the thumbscrews, make sure the spacers stay in the groove or you could crush them. Figure 133. Reattaching the Source-Repeller Thumbscrews Source-Repeller Thumbscrews 27. Reconnect the lens heater block grounding strap to the lens heater block Figure 134. Reconnecting the Lens Heater Block Grounding Strap Lens Heater Block Lens Heater Grounding Strap Screw 28. Reconnect the Q1 entrance lens, Q2 entrance lens, and Q3 exit lens wires to the source interface board using a flat-tipped screwdriver. 148 TSQ 8000 Hardware Manual Thermo Scientific 3 Advanced Troubleshooting Replacing Components of the Ion Source Figure 135. Locating Wires on the Source Interface Board 29. Replace the analyzer tray into the instrument by following the instructions in “Replacing the Analyzer Tray in the TSQ 8000 Instrument” on page 116. 30. Restart your system by following the instructions in “Restarting the System” on page 118. Thermo Scientific TSQ 8000 Hardware Manual 149 3 Advanced Troubleshooting Replacing Components of the Ion Source Source-Repeller Thumbscrews To replace the source-repeller thumbscrews: Note See the TSQ 8000 Spare Parts Guide for information about ordering this component. 1. Shut down your system by following the steps in “Shutting Down the TSQ 8000 System” on page 105. 2. Use a T20 Torxhead screwdriver to remove the four screws around the manifold door. Note Remove the screws completely so that they do not scratch the manifold when you close the door. 3. Open the manifold door. Figure 136. Opening the Manifold Door Screws 4. Twist off each source-repeller thumbscrew one at a time to prevent the repeller plate from falling out. 150 TSQ 8000 Hardware Manual Thermo Scientific 3 Advanced Troubleshooting Replacing Components of the Ion Source 5. Extract the thumbscrew-repeller spacers and transfer to new thumbscrews. Figure 137. Replacing the Source-Repeller Thumbscrews Source-Repeller Thumbscrews 6. Attach new source-repeller thumbscrews to the ion source. 7. Reattach the manifold door and the four screws. 8. Restart your system by following the instructions in “Restarting the System” on page 118. Thermo Scientific TSQ 8000 Hardware Manual 151 3 Advanced Troubleshooting Replacing Components of the Ion Source Thumbscrew-Repeller Spacers To replace the thumbscrew-repeller spacers Note See the TSQ 8000 Spare Parts Guide for information about ordering this component. 1. Shut down your system by following the steps in “Shutting Down the TSQ 8000 System” on page 105. 2. Use a T20 Torxhead screwdriver to remove the four screws around the manifold door. Note Remove the screws completely so that they do not scratch the manifold when you close the door. 3. Open the manifold door. Figure 138. Opening the Manifold Door Screws 152 TSQ 8000 Hardware Manual Thermo Scientific 3 Advanced Troubleshooting Replacing Components of the Ion Source 4. Twist off each source-repeller thumbscrew one at a time to prevent the repeller plate from falling out. Figure 139. Replacing the Source-Repeller Thumbscrews Source-Repeller Thumbscrews 5. Remove the thumbscrew-repeller spacers from the thumbscrews and replace them. Figure 140. Replacing the Thumbscrew-Repeller Spacers Thumbscrew-Repeller Spacers Note When reattaching the spacers, make sure they fit into the grooves on the thumbscrews. Also, do not over-tighten the thumbscrews or it may crack the spacers. 6. Reattach the source-repeller thumbscrews to the spacers. 7. Reattach the manifold door and the four screws. 8. Restart your system by following the instructions in “Restarting the System” on page 118. Thermo Scientific TSQ 8000 Hardware Manual 153 3 Advanced Troubleshooting Replacing Components of the Ion Source Insulating Spacers To replace the insulating spacers Note See the TSQ 8000 Spare Parts Guide for information about ordering this component. 1. Shut down your system by following the steps in “Shutting Down the TSQ 8000 System” on page 105. 2. Slide the top cover panel toward the back of the instrument and lift it off. 3. Use a T20 Torxhead screwdriver to remove the four screws around the manifold door. Note Remove the screws completely so that they do not scratch the manifold when you close the door. 4. Open the manifold door. Figure 141. Opening the Manifold Door Screws 154 TSQ 8000 Hardware Manual Thermo Scientific 3 Advanced Troubleshooting Replacing Components of the Ion Source Figure 142. Replacing the Source-Repeller Thumbscrews Source-Repeller Thumbscrews 5. Remove the thumbscrew-repeller spacers from the thumbscrews. Figure 143. Replacing the Thumbscrew-Repeller Spacers Thumbscrew-Repeller Spacers 6. Move the locking ring out of the way. Thermo Scientific TSQ 8000 Hardware Manual 155 3 Advanced Troubleshooting Replacing Components of the Ion Source 7. Remove and replace the insulating spacers. Figure 144. Replacing the Insulating Spacers Insulating Spacers 8. Move the locking ring back into place. 9. Reattach the thumbscrew-repeller spacers. Note When reattaching the spacers, make sure they fit into the grooves on the thumbscrews. Also, do not over-tighten the thumbscrews or it may crack the spacers. 10. Reattach the source-repeller thumbscrews to the spacers. 11. Reattach the manifold door and the four screws. 12. Reattach the top cover and tighten the top cover panel screw. 13. Restart your system by following the instructions in “Restarting the System” on page 118. 156 TSQ 8000 Hardware Manual Thermo Scientific 3 Advanced Troubleshooting Replacing Components of the Ion Source Repeller Plate To replace the repeller plate: Note See the TSQ 8000 Spare Parts Guide for information about ordering this component. 1. Shut down your system by following the steps in “Shutting Down the TSQ 8000 System” on page 105. 2. Slide the top cover panel toward the back of the instrument and lift it off. 3. Use a T20 Torxhead screwdriver to remove the four screws around the manifold door. Note Remove the screws completely so that they do not scratch the manifold when you close the door. 4. Open the manifold door. Figure 145. Opening the Manifold Door Screws Thermo Scientific TSQ 8000 Hardware Manual 157 3 Advanced Troubleshooting Replacing Components of the Ion Source 5. Twist off each source-repeller thumbscrew. Figure 146. Replacing the Source-Repeller Thumbscrews Source-Repeller Thumbscrews 6. Remove the thumbscrew-repeller spacers from the thumbscrews. Figure 147. Replacing the Thumbscrew-Repeller Spacers Thumbscrew-Repeller Spacers 7. Move the locking ring out of the way. 158 TSQ 8000 Hardware Manual Thermo Scientific 3 Advanced Troubleshooting Replacing Components of the Ion Source 8. Remove repeller plate Figure 148. Replacing the Thumbscrew-Repeller Spacers Repeller Plate Repeller Plate Wire 9. Disconnect the repeller plate wire from the source interface board. 10. Connect the new repeller plate wire to the source interface board. Do not trap any insulation in the source interface board connector. 11. Attach the new repeller plate. 12. Reattach the insulating spacers. 13. Reattach the source-repeller thumbscrews. 14. Reattach the manifold door and the four screws. 15. Reattach the top cover and tighten the screw. 16. Restart your system by following the instructions in “Restarting the System” on page 118. Thermo Scientific TSQ 8000 Hardware Manual 159 3 Advanced Troubleshooting Replacing Components of the Ion Source Lens Heater Block Grounding Strap To replace the lens heater block grounding strap: Note See the TSQ 8000 Spare Parts Guide for information about ordering this component. 1. Shut down your system by following the steps in “Shutting Down the TSQ 8000 System” on page 105. 2. Remove the analyzer tray from the instrument by following the instructions in “Removing the Analyzer Tray from the TSQ 8000 Instrument” on page 107. 3. Use a T10 Torxhead screwdriver to disconnect the lens heater block grounding strap from the lens heater block. Figure 149. Disconnecting the Lens Heater Block Grounding Strap Lens Heater Block Lens Heater Grounding Strap Screw 4. Attach a new lens heater block grounding strap and reattach the screws. 5. Once the components are correctly reattached, follow the instructions in “Replacing the Analyzer Tray in the TSQ 8000 Instrument” on page 116 to replace the tray in the TSQ instrument. 6. Restart your system by following the instructions in “Restarting the System” on page 118. 160 TSQ 8000 Hardware Manual Thermo Scientific 3 Advanced Troubleshooting Replacing Components of the Ion Source Lens Plate and Springs To replace the lens plate and springs Note See the TSQ 8000 Spare Parts Guide for information about ordering these components. 1. Shut down your system by following the steps in “Shutting Down the TSQ 8000 System” on page 105. 2. Remove the analyzer tray from the instrument by following the instructions in “Removing the Analyzer Tray from the TSQ 8000 Instrument” on page 107. 3. Use a T10 Torxhead screwdriver to disconnect the lens plate and springs from the lens heater block. Figure 150. Disconnecting the Lens Heater Block Grounding Strap Lens Heater Block Lens Plate and Springs Screw 4. Disconnect the lens 1, lens 2, and lens 3 wires from the source interface board using a flat-tipped screwdriver. Thermo Scientific TSQ 8000 Hardware Manual 161 3 Advanced Troubleshooting Replacing Components of the Ion Source Figure 151. Locating Wires on the Source Interface Board 5. Attach a new lens plate and springs to the lens heater block and reattach the screws. 6. Reattach the lens 1, lens 2, and lens 3 wires from the source interface board using a flat-tipped screwdriver. 7. Once the components are correctly reattached, follow the instructions in “Replacing the Analyzer Tray in the TSQ 8000 Instrument” on page 116 to replace the tray in the TSQ instrument. 8. Restart your system by following the instructions in “Restarting the System” on page 118. 162 TSQ 8000 Hardware Manual Thermo Scientific 3 Advanced Troubleshooting Replacing Components of the Ion Source Source to Ion Guide Spacer To replace the source to ion guide spacer: Note See the TSQ 8000 Spare Parts Guide for information about ordering this component. WARNING - INSTRUMENT DAMAGE Thermo Fisher Scientific strongly recommends that only trained Thermo Fisher Scientific Field Service Engineers remove and service this component. 1. Shut down your system by following the steps in “Shutting Down the TSQ 8000 System” on page 105. 2. Remove the analyzer tray from the instrument by following the instructions in “Removing the Analyzer Tray from the TSQ 8000 Instrument” on page 107. 3. Disconnect the Q1 entrance lens, Q1 exit lens, Q3 entrance lens, and Q3 exit lens from the source interface board using a flat-tipped screwdriver. Figure 152. Locating Wires on the Source Interface Board Thermo Scientific TSQ 8000 Hardware Manual 163 3 Advanced Troubleshooting Replacing Components of the Ion Source 4. Use a T10 Torxhead screwdriver to disconnect the lens heater block grounding strap from the lens heater block, but leave it attached to the tray. Figure 153. Disconnecting the Lens Heater Block Grounding Strap Lens Heater Block Lens Heater Grounding Strap Screw 5. Use a T20 Torxhead screwdriver to remove the two screws on the back of source block. Figure 154. Disconnecting the Source Block to the Analyzer Tray Screws Note Some of the pieces may become slack as you loosen the screws. Do not let them fall. 164 TSQ 8000 Hardware Manual Thermo Scientific 3 Advanced Troubleshooting Replacing Components of the Ion Source 6. Slide the source interface board and the source block out from under the tray without damaging or disconnecting the wires. Figure 155. Removing the Ion Source from the Analyzer Tray Source Interface Board Source Block Wires 7. Remove and replace the source to ion guide spacer. Figure 156. Replacing the Source to Ion Guide Spacer Source to Ion Guide Spacer Thermo Scientific TSQ 8000 Hardware Manual 165 3 Advanced Troubleshooting Replacing Components of the Ion Source 8. Slide the source interface board and source block onto the tray without damaging or disconnecting the wires. Figure 157. Sliding the Ion Source Block onto the Analyzer Tray Source Interface Board Source Block Wires 9. Reattach the two screws to the back of the source block. Figure 158. Reconnecting the Ion Source to the Analyzer Tray Screws IMPORTANT When assembling the source and optics block, take extra care to ensure the blocks are centered properly and that the ion source cartridge provided with the instrument can easily slide in and out of the assembly. 166 TSQ 8000 Hardware Manual Thermo Scientific 3 Advanced Troubleshooting Replacing Components of the Ion Source 10. Reconnect the lens heater block grounding strap to the lens heater block Figure 159. Reconnecting the Lens Heater Block Grounding Strap Lens Heater Block Lens Heater Grounding Strap Screw 11. Reconnect the Q1 entrance lens, Q1 exit lens, Q3 entrance lens, and Q3 exit lens to the source interface board using a flat-tipped screwdriver. 12. Once the components are correctly reattached, follow the instructions in “Replacing the Analyzer Tray in the TSQ 8000 Instrument” on page 116 to replace the tray in the TSQ instrument. 13. Restart your system by following the instructions in “Restarting the System” on page 118. Thermo Scientific TSQ 8000 Hardware Manual 167 3 Advanced Troubleshooting Replacing Components of the Ion Source Ion Source Cartridge If the components of your ion source cartridge get damaged, you can use the illustration below to visually locate a component and then follow the process to replace it. Note See the TSQ 8000 Spare Parts Guide for information about ordering this component. Figure 160. Replaceable Components of the Ion Source Cartridge Lens 2 EI Ion Volume Ion Cartridge Sleeve Lens 3/RF Lens Repeller Repeller Spring Lens 1 Ion Volume Locking Ring Ion Volume-Repeller Insulator Repeller Nut 168 TSQ 8000 Hardware Manual Thermo Scientific 3 Advanced Troubleshooting Replacing Components of the Ion Source 1. Twist off the round vacuum interlock knob located on the interior front panel and set it aside. There is a vacuum feedthrough with a ball valve that allows access to the ion source without venting the instrument. Figure 161. Removing the Vacuum Interlock Knob Vacuum Interlock Knob Tip To prevent leaks through the vacuum interlock, we recommend that you leave the vacuum interlock knob attached to the instrument, except when you are removing or inserting the ion source cartridge. After you reattach the knob, press the Evacuate button to remove any air inside the vacuum interlock. Thermo Scientific TSQ 8000 Hardware Manual 169 3 Advanced Troubleshooting Replacing Components of the Ion Source 2. Get the source exchange tool that shipped with your instrument. It is used to remove and insert the ion source cartridge through the vacuum interlock. The tool has a large black handle on one end and a stainless steel barrel at the other. On the black handle is a diagram describing how to insert and remove the ion source cartridge from the instrument using the tool. The stainless steel barrel is cut with a track and the black handle moves up and over the track, depending on whether you are removing or installing an ion source cartridge. Figure 162. Components of the Source Exchange Tool Alignment Groove Left Track of Barrel Handle Usage Diagram Right Track of Barrel 3. Grasp the handle of the source exchange tool in one hand and use your other hand to pull the metal barrel out and away from the handle so that tool is fully extended. 4. Attach the source exchange tool to the front of the instrument. 170 TSQ 8000 Hardware Manual Thermo Scientific 3 Advanced Troubleshooting Replacing Components of the Ion Source a. With your hand around the stainless steel barrel, twist the tool until the alignment groove at the end of the barrel aligns with the left screw around the slot vacated by the vacuum interlock knob. Figure 163. Inserting the Ion Volume Tool b. Twist and push the stainless steel barrel to the right until it clicks into place under the screw at the top of the slot. Figure 164. Twisting the Tool Into Place Thermo Scientific TSQ 8000 Hardware Manual 171 3 Advanced Troubleshooting Replacing Components of the Ion Source 5. Evacuate the VPI. a. Confirm that the source removal tool is properly engaged in the VPI. b. Press the blue Evacuate button on the front of the instrument. c. The Evacuate light will begin to flash green and should continue to flash green for approximately 20 seconds. d. If the pressure has returned to an acceptable value after the 20-30 second wait, the evacuate light will turn off and the Ready to Open light will be solid green. At that point, the air has been evacuated from the ball valve and it is safe to open the vacuum interlock valve. Note If the evacuate light flashes for only a short time then returns to a solid light without the Ready to Open light turning green, there is a leak in the VPI seal. The source removal tool connection should be checked or field service contacted. Figure 165. Evacuating the Instrument Vacuum Interlock Handle Evacuate Button 6. Twist, then loosen the top part of the vacuum interlock handle to allow the entire handle to swing up and down. This handle controls the interior ball valve, which seals the vacuum chamber. 172 TSQ 8000 Hardware Manual Thermo Scientific 3 Advanced Troubleshooting Replacing Components of the Ion Source 7. Swing the handle down and then twist the top of it in the opposite direction to lock it into place. Note Be sure the source exchange tool handle is locked securely before proceeding to the next step (opening the interior ball valve). The locking function is designed to prevent the source exchange tool from being sucked into the manifold when the ball valve is opened. Figure 166. Pulling Down the Vacuum Interlock Handle 8. Lift the handle up to open the interior ball valve. Note If more than 60 seconds have passed since the Ready to Open indicator light has come on, it will turn off. You should press the Evacuate button and wait until the Ready to Open light is lit again before opening the valve. Do not open the valve if the Ready to Open light is not on. This may indicate a leak in the valve region. When a leak is detected during the evacuate sequence, the amber evacuate LED will flash on and off. CAUTION - INSTRUMENT DAMAGE: Make sure the vacuum interlock handle is all the way up. Otherwise if you insert the tool with the handle down, you can damage the instrument. Thermo Scientific TSQ 8000 Hardware Manual 173 3 Advanced Troubleshooting Replacing Components of the Ion Source 9. Slowly push the ion cartridge tool into the instrument. Because you are removing the ion volume in this step, you will go down the right side of the metal track on the barrel. Figure 167. Pushing the Tool into the Instrument 10. Once the tool is all the way in (when the groove at the end of the barrel is covered by the black handle) twist the handle to the left to engage the ion source cartridge and move it onto the end of the barrel. You are essentially disconnecting the ion source cartridge from the ion source block and moving it onto the tool. 11. Pull the tool toward you and down the left side of the metal track on the barrel. As you keep pulling it toward you, more and more of the barrel will be exposed. You may 174 TSQ 8000 Hardware Manual Thermo Scientific 3 Advanced Troubleshooting Replacing Components of the Ion Source encounter resistance while removing the source. To release the source from the spring contacts make small repeated rotations of the handle to the left and right quickly. Figure 168. Pulling the Tool Down the Left Track 12. Once you reach the end of the track (when the back line at the end of the barrel is uncovered by the black handle), twist the handle to the left to lock it into place. Figure 169. Locking the Tool in Place Note: Tool Rotated Left Thermo Scientific TSQ 8000 Hardware Manual 175 3 Advanced Troubleshooting Replacing Components of the Ion Source 13. Pull the vacuum interlock handle down to close the interior ball valve. Figure 170. Pulling Down the Vacuum Interlock Handle 14. Twist the end of the vacuum interlock handle and flip the swing handle up so that it rests next to the vacuum interlock knob location. Then twist the end again to hold it in place. 15. Replace the plug in the VPI to prevent accidental venting and excessive leaks. CAUTION - INSTRUMENT DAMAGE: Do not move the main interlock handle when you move the swing handle to the up position or you will open the interior ball valve, which might cause you to lose vacuum and possibly damage the instrument. 16. Remove the tool from the instrument. 176 TSQ 8000 Hardware Manual Thermo Scientific 3 Advanced Troubleshooting Replacing Components of the Ion Source Figure 171. Removing the Tool from the Instrument Thermo Scientific TSQ 8000 Hardware Manual 177 3 Advanced Troubleshooting Replacing Components of the Ion Source 17. Let the ion source cartridge cool. 18. Hold the handle of the source exchange tool with one hand and use the other hand to pull the barrel toward you and into the handle. Figure 172. Exposing the Ion Source Cartridge Ion Source Cartridge 19. Invert the source exchange tool so that the barrel is pointed toward the floor. Figure 173. Inverting the Tool Ion Source Cartridge 178 TSQ 8000 Hardware Manual Thermo Scientific 3 Advanced Troubleshooting Replacing Components of the Ion Source 20. Slide the source holder, which is in the TSQ 8000 Toolkit, onto the end of the ion source cartridge. The opening of the source holder is designed to accommodate the handles of the ion volume. Figure 174. Attaching the Source Holder Wing of Ion Volume Filament Hole Flat surface lines up with Filament Hole Source Holder Ion Volume Handles Fit Here 21. Twist the holder to disengage the ion source cartridge from the tool. Note The repeller locking nut is now loose on the repeller spring. Be careful not to tip the source or the components will fall out. 22. Set the ion source cartridge and holder on a clean surface. Figure 175. Removing the Ion Source Cartridge Thermo Scientific TSQ 8000 Hardware Manual 179 3 Advanced Troubleshooting Replacing Components of the Ion Source WARNING - BURN HAZARD: The ion source cartridge may be hot, so use caution. 23. Let the ion source cartridge cool down before removing it from the source holder. 24. Disassemble the ion source cartridge by removing the locking ring first, then the repeller spring, then the nut, insulator, and repeller (which comes out in one piece), ion volume, lens 1, lens 2, and lens 3/RF lens. IMPORTANT Many nitrile and latex gloves not certified for clean room use contain silicone mold releasing agents that will contaminate the instrument. For this reason, clean room gloves are strongly recommended when handling the ion source cartridge. We recommend Cardinal Health CP100 Nitrile Cleanroom Gloves. See the TSQ 8000 Spare Parts Guide for ordering information. Figure 176. Ion Source Cartridge Components Lens 2 Ion Volume Ion Volume-Repeller Insulator Repeller Spring Ion Cartridge Sleeve Lens 3/RF Lens Lens 1 Ion Volume Locking Ring Repeller Repeller Nut 25. Set the components on a clean work surface. 26. Replace the ion source cartridge or any individual component. 27. Reassemble the ion source cartridge. 1. Place the ion volume-repeller insulator on the repeller and hold it in place with the repeller nut. Set it aside for now. 180 TSQ 8000 Hardware Manual Thermo Scientific 3 Advanced Troubleshooting Replacing Components of the Ion Source 2. Insert the ion cartridge sleeve into the source holder. Figure 177. Inserting the Sleeve into the Source Holder 3. Align the long tooth of lens 3/RF lens with the notch on the bottom of the sleeve and drop the lens into the sleeve. Figure 178. Inserting Lens 3/RF Lens into the Source Sleeve Long Tooth on Lens 3/RF Lens Tooth Fits Here Thermo Scientific TSQ 8000 Hardware Manual 181 3 Advanced Troubleshooting Replacing Components of the Ion Source 4. Place lens 2 on top of lens 3/RF lens with the small hole facing down. It should fit snugly and sit evenly on top of lens 3/RF lens. Figure 179. Inserting Lens 2 into the Source Sleeve Small Hole of Lens 2 5. With the longer teeth of lens 1 facing down toward lens 2, align the larger metal section of lens 1 with the sleeve window and let it fall into place. Figure 180. Inserting Lens 1 into the Source Sleeve Larger Metal Section Longer Teeth of Lens 1 Sleeve Window 182 TSQ 8000 Hardware Manual Thermo Scientific 3 Advanced Troubleshooting Replacing Components of the Ion Source 6. Insert the ion volume with the handles fitting into the notches of the sleeve. Make sure the ion volume is firmly seated into the gap on lens 1. You may need to rotate lens 1 slightly to make the ion volume fit correctly. Figure 181. Inserting the Ion Volume into the Source Sleeve Handles Fit Here Ion Volume Handles Lens 1 Gap Note The ion volume handles are different sizes and will only fit into the sleeve one way. 7. Insert the ion volume repeller insulator onto the repeller. 8. Tighten the repeller nut. Thermo Scientific TSQ 8000 Hardware Manual 183 3 Advanced Troubleshooting Replacing Components of the Ion Source 9. Insert the large flat end of the repeller so that it rests on top of the ion volume. Figure 182. Inserting the Repeller into the Source Sleeve Large Flat End of Repeller 10. Slide the repeller spring onto the repeller. Figure 183. Inserting the Repeller Spring into the Sleeve Repeller Spring 184 TSQ 8000 Hardware Manual Thermo Scientific 3 Advanced Troubleshooting Replacing Components of the Ion Source 11. Place the locking ring on top of the repeller spring so that the repeller protrudes through the center hole on the locking ring. The hooks on the sleeve fit between the larger gaps on the locking ring. Note Do not twist and lock the locking ring on the sleeve at this time. Figure 184. Inserting the Locking Ring into the Sleeve Larger Gaps on Locking Ring Hooks on Sleeve Reinserting the Ion Source Cartridge IMPORTANT When inserting a cold ion source cartridge such as after cleaning or when switching between EI and CI modes, the ion source and lens stack will expand as the source cartridge heats, often pushing the ion volume and lenses away from the rear of the instrument where they are firmly held by the RF Lens spring contacts. To avoid intermittent electrical contacts to the lenses, you should insert the ion source cartridge, wait 30 minutes for it to get to temperature, then remove and reinsert it. 1. Hold the source holder and ion source cartridge in one hand and use the other hand to hold the ion cartridge tool so that the barrel is facing toward the floor. The diagram on the tool should be facing you. IMPORTANT If you try to attach the ion source cartridge to the tool by inverting it, the components will likely fall, so make sure you are working over a table. Otherwise, you may have to stop and clean the components again. Thermo Scientific TSQ 8000 Hardware Manual 185 3 Advanced Troubleshooting Replacing Components of the Ion Source 2. Look for a small vertical 1/8 in. line engraved on the end of the barrel. This line always matches up with the picture on the handle. There is a similar engraved line on the sleeve of the ion source cartridge. This line matches up with the filament. Figure 185. Aligning the Tool with the Ion Source Cartridge Engraved Line on Barrel Engraved Line on Sleeve 3. Position the engraved line on the tool with the open end of the hook on the sleeve. There is a pin the source exchange tool that will latch under the hook. 4. Push the ion source cartridge up into the barrel of the tool and twist it until the engraved lines are aligned. The ion source cartridge should easily slide into place with very little force. CAUTION - INSTRUMENT DAMAGE: If you push the ion source cartridge into the barrel and it will not slide easily into position, make sure the components are assembled correctly and have not slid out of place inside the sleeve. Using too much force when inserting the ion source cartridge into the barrel can cause damage. 186 TSQ 8000 Hardware Manual Thermo Scientific 3 Advanced Troubleshooting Replacing Components of the Ion Source Figure 186. Reattaching the Ion Source Cartridge to the Tool Note The ion volume and lenses have keying features to assure the lens spring contacts will align with the metal parts of the lenses. 5. Gently pull the source holder away from the ion source cartridge. Figure 187. Removing the Source Holder Tip When the source exchange tool is inverted, the source should stay attached. If this does not happen, the source will not insert correctly into the instrument. Thermo Scientific TSQ 8000 Hardware Manual 187 3 Advanced Troubleshooting Replacing Components of the Ion Source 6. Turn the source exchange tool around so that the ion source cartridge is furthest away from you. 7. Firmly grasp the black handle of the ion cartridge tool in one hand and use your other hand to pull the metal barrel out and away from the handle so that tool is fully extended.The ion source cartridge is now hidden inside the barrel. 8. When the barrel can go no further, twist the handle to the left to lock it into position. 9. Insert the barrel end of the ion cartridge tool into the vacuum interlock and twist it to the right to lock it into position. Be sure the black handle remains in the locked position. Figure 188. Evacuating the Instrument Evacuate Button 188 TSQ 8000 Hardware Manual Thermo Scientific 3 Advanced Troubleshooting Replacing Components of the Ion Source 10. Evacuate the VPI. a. Confirm that the source removal tool is properly engaged in the VPI. b. Press the blue Evacuate button on the front of the instrument. c. The Evacuate light will begin to flash green, and should continue to flash green for approximately 20 seconds. d. If the pressure has returned to an acceptable value after the 20-30 second wait, the evacuate light will turn off and the Ready to Open light will solid green. At that point, the air has been evacuated from the instrument and it is safe to open the vacuum interlock valve. 11. Pull the vacuum interlock handle up when the Ready to Open light is a solid green. 12. Twist the handle of the tool slightly to the left until it is feels like it is lodged into the left-most track. IMPORTANT Make sure you take the correct track on the tool or the ion volume will disassemble inside the instrument. If that happens, the tool will get stuck and you will have to shut down, vent the TSQ 8000 instrument, and manually remove the source cartridge through the top of the instrument. Figure 189. Pushing the Tool into the Instrument 13. Push the handle toward the instrument until the end of the handle aligns with the engraved line at the end of the barrel. When you reach this line, the tool is all the way in and the ion source cartridge has been placed back onto the ion source block. You may notice slight resistance when the handle is approximately 2 cm from the engraved line. This is normal. Do not force the cartridge into the instrument. To release the source from the spring contacts make small repeated rotations of the handle to the left and right quickly. Gently apply pressure to the back of the handle. Thermo Scientific TSQ 8000 Hardware Manual 189 3 Advanced Troubleshooting Replacing Components of the Ion Source . Note Do not push down on the handle of the source exchange tool while inserting the ion source cartridge. This could result in opening an air leak that may cause your instrument to shut itself down to protect the vacuum pumps. CAUTION - INSTRUMENT DAMAGE: Make sure the vacuum interlock handle is all the way up. Otherwise if you insert the tool with the handle down, you can damage the instrument. 14. Twist the handle of the source exchange tool to the right and pull it back toward you and down the right side of the barrel’s metal track until the line at the end of the track appears. Figure 190. Pulling the Tool Down the Right Track 190 TSQ 8000 Hardware Manual Thermo Scientific 3 Advanced Troubleshooting Replacing Components of the Ion Source 15. Pull the vacuum interlock handle down to close the interior ball valve. Figure 191. Pulling Down the Vacuum Interlock Handle 16. Twist the end of the vacuum interlock handle and flip the swing handle up so that it rests next to the vacuum interlock knob location. Then twist the end again to hold it in place. CAUTION - INSTRUMENT DAMAGE: Do not move the main interlock handle when you move the swing handle to the up position or you will open the interior ball valve, which might cause you to lose vacuum and possibly damage the instrument. 17. Remove the tool from the instrument. 18. Reattach the vacuum interlock knob. Tip To prevent leaks in the vacuum interlock, we recommend that you leave the vacuum interlock knob attached to the instrument, except when you are removing or inserting the ion source cartridge. After you reattach the knob, press the Evacuate button will also eliminate any air inside the vacuum interlock. 19. For optimal performance, wait at least 30 minutes for the ion source to heat up to the same temperature as the inside of the instrument. Otherwise, the masses or intensities may drift during operation Thermo Scientific TSQ 8000 Hardware Manual 191 3 Advanced Troubleshooting Replacing Components of the Source Exchange Tool Replacing Components of the Source Exchange Tool If the components of your source exchange tool get worn or damaged, you can use the illustration below to visually locate a component and then follow the process to replace it. Note See the TSQ 8000 Spare Parts Guide for information about ordering this component. Figure 192. Replaceable Components of the Source Exchange Tool Seal Clip Bushing 192 TSQ 8000 Hardware Manual Thermo Scientific 3 Advanced Troubleshooting Replacing Components of the Source Exchange Tool To replace the components of the source exchange tool: 1. Use a T20 Torxhead screwdriver to remove the three screws at the end of the black handle. Figure 193. Removing Source Exchange Tool Screws Screws Set Screw 2. Loosen the set screw at the other end of the black handle. 3. Slide the black handle toward the other end of the tool. 4. Use a T10 Torxhead screwdriver to remove the set screw holding the endcap onto the interior shaft. 5. Remove the endcap. Figure 194. Removing the Endcap Endcap Set Screw 6. Slide the handle off the rest of the tool. Set it aside. 7. Remove the interior shaft from the barrel. Figure 195. Removing the Interior Shaft Interior Shaft Barrel Thermo Scientific TSQ 8000 Hardware Manual 193 3 Advanced Troubleshooting Replacing Components of the Source Exchange Tool 8. Use a small flat-head screwdriver to pry the metal clip out of the bottom of the barrel. Note The clip could spring out when you remove it. Be sure to cup your hand over it as it falls or you could easily lose it. Figure 196. Replacing the Source Exchange Tool Seal, Clip and Bushing Bushing Clip Barrel Seal 9. Tilt the barrel and the bushing will fall out into your hand. If you are not replacing the seal, skip steps 10-12. 10. Push the interior shaft back down in to the barrel until the seal falls out through the other end of the barrel. As the seal comes out of the barrel, make a note of its orientation, so you will know how to put it back in. Replace the seal, if necessary. 11. Insert the flared end of the seal into the end of the barrel. Figure 197. Inserting the Seal Flared End of Seal Bushing Barrel 194 TSQ 8000 Hardware Manual Thermo Scientific 3 Advanced Troubleshooting Replacing Components of the Source Exchange Tool 12. Use the bushing to push the seal back into the barrel until the bushing is back in place. 13. Remove the bushing and replace it, if necessary. 14. Reattach the metal clip into the bottom of the barrel. 15. Insert the interior shaft into the barrel. Figure 198. Reinserting the Interior Shaft Interior Shaft 16. Slide the handle onto the tool. 17. Attach the endcap and reattach the screw holding it to the interior shaft. Figure 199. Reattaching the Endcap Endcap 18. Slide the handle onto the endcap. Figure 200. Reattaching the Source Exchange Tool Screws Screws Set Screw 19. Attach the three screws on the end of the handle. 20. Tighten the set screw. Note The purpose of the set screw is to keep the components together. Don’t overtighten it or the handle will be hard to slide up and down the barrel. Thermo Scientific TSQ 8000 Hardware Manual 195 3 Advanced Troubleshooting Replacing Components of the Vacuum Interlock Replacing Components of the Vacuum Interlock If the components of your vacuum interlock get damaged, you can use the illustration below to visually locate a component and then follow the process to replace it. Note See the TSQ 8000 Spare Parts Guide for information about ordering these components. Figure 201. Replaceable Components of the Vacuum Interlock Vacuum Interlock Knob (Metal valve body is shown for illustration purposes only. It is not available for purchase.) Valve Axle Spring O-Ring Axle Seal Clip Axle Bearing O-Ring Inner Ball Seal Sealing Ball Outer Ball Seal To replace the components of the vacuum interlock 1. Shut down your system by following the steps in “Shutting Down the TSQ 8000 System” on page 105. 196 TSQ 8000 Hardware Manual Thermo Scientific 3 Advanced Troubleshooting Replacing Components of the Vacuum Interlock Note You do not have to remove the ion source cartridge or the column. However, you must vent the instrument. 2. Use a T20 Torxhead screwdriver to loosen the top cover panel. 3. Remove the vacuum interlock knob and use a T20 Torxhead screwdriver to remove the five screws around the knob. Replace the knob and screws, if necessary. Note As you remove the screws around the vacuum interlock knob, watch for a small spring and safety interlock (location shown below) that will fall out as your remove the knob. Be sure to catch them and set them aside. Replace the spring and safety interlock, if necessary. Figure 202. Removing the Vacuum Interlock Knob Screws Spring and safety interlock are behind this screw Thermo Scientific TSQ 8000 Hardware Manual 197 3 Advanced Troubleshooting Replacing Components of the Vacuum Interlock 4. Disconnect the vacuum interlock cable from the connector. Figure 203. Disconnecting the Vacuum Interlock Cable Vacuum Interlock Cable Connector 5. Unscrew and then lower the vacuum interlock handle. 6. Pinch together the two springs on the left side the vacuum interlock shield and remove it. Figure 204. Removing the Vacuum Interlock Shield Vacuum Interlock Handle Springs Lower the Vacuum Interlock Handle 198 TSQ 8000 Hardware Manual Thermo Scientific 3 Advanced Troubleshooting Replacing Components of the Vacuum Interlock 7. Lower the handle and lift the vacuum interlock shield off the instrument. The notch at the bottom of the track will go around the handle. Figure 205. Detaching the Manifold Door Screws Lower the Vacuum Interlock Handle 8. Use a T20 Torxhead screwdriver to remove the four screws found in the four corners of the manifold door. 9. Use a flathead screwdriver to disconnect the foreline hose at the 90° hose connector. Thermo Scientific TSQ 8000 Hardware Manual 199 3 Advanced Troubleshooting Replacing Components of the Vacuum Interlock 10. Set the manifold door right side up on a clean work surface and remove the two screws holding the black pillow block in place. Figure 206. Removing the Clamp Foreline Hose Black Pillow Block Screws 11. Remove the three screws holding the metal valve body to the front manifold plate. Figure 207. Removing the Vacuum Interlock Handle Front Manifold Plate Screws 200 TSQ 8000 Hardware Manual Thermo Scientific 3 Advanced Troubleshooting Replacing Components of the Vacuum Interlock 12. Detach the metal valve body and its components from the front manifold plate. Figure 208. Detaching the Metal Valve Body from the Front Manifold Plate Vacuum Interlock Handle Shaft Valve Axle Screws Pillow Block 13. Slide the pillow block off the end of the valve axle. 14. Remove the two screws from the shaft of the vacuum interlock handle. Set the screws and handle aside. 15. Flip the metal valve body over on the work space. Figure 209. Locating the Inner Ball Seal and Valve Axle Inner Ball Seal O-Ring Valve Axle 16. Remove the inner ball seal from the metal valve body. Replace the inner ball seal, if necessary. Tip It may be easier to remove the sealing ball if you push on it from the front, but be careful not to scratch the ball. Thermo Scientific TSQ 8000 Hardware Manual 201 3 Advanced Troubleshooting Replacing Components of the Vacuum Interlock 17. Remove the o-ring and replace it, if necessary. 18. Flip the block over in your hand so that sealing ball and outer ball seal will fall out. Set them aside or replace them, if necessary. CAUTION - INSTRUMENT DAMAGE: The sealing ball must not be scratched, so be very careful when handling it and keep it on a clean, lint-free surface. Figure 210. Replacing the Sealing Ball and Outer Ball Seal Sealing Ball Outer Ball Seal 19. Pry the thin metal clip out of the groove. It holds all of the other components inside the metal valve body. Figure 211. Replacing the Metal Clip Clip 202 TSQ 8000 Hardware Manual Thermo Scientific 3 Advanced Troubleshooting Replacing Components of the Vacuum Interlock 20. Remove the axle bearing from the metal valve body. Replace the axle bearing, if necessary. Figure 212. Replacing the Axle Bearing Clip Axle Bearing Safety Interlock 21. Pull the valve axle out of the side of the metal valve body. Replace the valve axle, if necessary. 22. Remove the axle seal from the metal valve body. Replace the axle seal on the valve axle if necessary. Figure 213. Replacing the Axle Seal Axle Seal Thermo Scientific TSQ 8000 Hardware Manual 203 3 Advanced Troubleshooting Replacing Components of the Vacuum Interlock 23. Insert the valve axle into the metal valve body. Figure 214. Reinserting the Valve Axle and Inner Ball Seal Inner Ball Seal Valve Axle 24. Reinsert the axle bearing into the metal valve body. 25. Press and twist the thin metal clip into the top groove. Figure 215. Reinserting the Clip Clip 204 TSQ 8000 Hardware Manual Thermo Scientific 3 Advanced Troubleshooting Replacing Components of the Vacuum Interlock 26. Insert the outer ball seal and then the sealing ball into the metal valve body. Figure 216. Reinserting the Outer Ball Seal and Sealing Ball Sealing Ball Outer Ball Seal O-Ring Note The sealing ball should slide easily into the interlock. The groove in the ball should interact with the axle and the small hole on the ball will face away from the vacuum manifold. 27. Insert the o-ring into the metal valve body. 28. Insert the inner ball seal into the metal valve body. 29. Reattach the small spring and safety interlock to the metal valve body. Figure 217. Reattaching the Spring and Safety Interlock to the Metal Valve Body Safety Interlock Spring Thermo Scientific TSQ 8000 Hardware Manual 205 3 Advanced Troubleshooting Replacing Components of the Vacuum Interlock 30. Reattach the two screws connecting the shaft of the vacuum interlock handle to the metal valve body. Note You need to fully close the sealing ball with the valve axle before you put the handle back on. Place the handle in the fully down position when you clamp it to the valve axle. Figure 218. Reattaching the Metal Valve Body from the Front Manifold Plate Vacuum Interlock Handle Shaft Valve Axle Screws Pillow Block 31. Slide the black pillow block over and onto the end of the valve axle. 206 TSQ 8000 Hardware Manual Thermo Scientific 3 Advanced Troubleshooting Replacing Components of the Vacuum Interlock 32. Reattach the three screws holding the metal valve body to the front manifold plate. Figure 219. Reattaching the Metal Valve Body to the Front Manifold Plate Front Manifold Plate Screws 33. Reattach the two screws connecting the black pillow block to the manifold door. Figure 220. Reattaching the Clamp Black Pillow Block Screws CAUTION - INSTRUMENT DAMAGE: If the vacuum interlock handle is not fully down and the ball valve is not fully closed, then the ball valve may not be able to completely open during use and it could damage the ball valve and probes. Confirm the ball is fully opened and closed as the handle is moved up and down. Thermo Scientific TSQ 8000 Hardware Manual 207 3 Advanced Troubleshooting Replacing Components of the Vacuum Interlock 34. Reattach the manifold door and the four screws. Figure 221. Reattaching the Manifold Door Screws 35. Hold the spring and safety interlock in place as you attach the vacuum interlock shield and screws. 36. Reattach the vacuum interlock knob. 208 TSQ 8000 Hardware Manual Thermo Scientific 3 Advanced Troubleshooting Replacing Components of the Vacuum Interlock 37. Reconnect the vacuum interlock cable from the connector. Figure 222. Reconnecting the Vacuum Interlock Cable Vacuum Interlock Cable Connector 38. Restart your system by following the instructions in “Restarting the System” on page 118. Thermo Scientific TSQ 8000 Hardware Manual 209 3 Advanced Troubleshooting Replacing Components of the Manifold Replacing Components of the Manifold If the components of your manifold get damaged, you can use the illustration below to visually locate a component and then follow the process to replace it. Note See the TSQ 8000 Spare Parts Guide for information about ordering these components. . Figure 223. Replaceable Components of the Manifold Manifold O-Ring Back Plate Front Tray Alignment Pins Manifold Door Hinge Vent Valve Knob and O-Ring Back Tray Alignment Pin Source Magnets Front Plate 210 TSQ 8000 Hardware Manual Manifold O-Ring Bracket Thermo Scientific 3 Advanced Troubleshooting Replacing Components of the Manifold Manifold Door Hinge To replace the manifold door hinge: Note See the TSQ 8000 Spare Parts Guide for information about ordering this component. 1. Shut down your system by following the steps in “Shutting Down the TSQ 8000 System” on page 105. Note You do not have to remove the ion source cartridge or the column. 2. Slide the top cover panel toward the back of the instrument and lift it off. 3. Remove the four screws on the left hand front panel and remove the panel. One is located at the bottom left side of the front of the instrument. Figure 224. Locating the Left Hand Front Panel Screws Nuts Screw Located on Front of Instrument Thermo Scientific TSQ 8000 Hardware Manual 211 3 Advanced Troubleshooting Replacing Components of the Manifold 4. The lens driver board is the first board standing on end in the center of the instrument. Figure 225. Locating the Lens Driver Board Bracket 212 TSQ 8000 Hardware Manual Lens Driver Board Thermo Scientific 3 Advanced Troubleshooting Replacing Components of the Manifold 5. Look through the left side of the instrument and use a T20 Torxhead screwdriver to loosen the screw holding the board to the chassis. Tip The bracket has a white diagram describing the location of this screw. It is approximately two inches from the top of the board directly under the white label. Figure 226. Removing the Lens Driver Board Lens Driver Board Screw 6. Use your fingers to carefully pull the bracket of the board away from the chassis and toward the left side of the instrument, until the 20 pin connector clears the feedthrough. 7. Pinch together the two springs on the left side the vacuum interlock shield to free the hinge from the vacuum interlock shield. Figure 227. Freeing the Hinge from the Vacuum Interlock Shield Springs Thermo Scientific TSQ 8000 Hardware Manual 213 3 Advanced Troubleshooting Replacing Components of the Manifold 8. Look through the left side of the instrument and use a T20 Torxhead screwdriver to remove the three screws connecting the hinge to the chassis. Figure 228. Replacing the Manifold Door Hinge Screws 214 TSQ 8000 Hardware Manual Thermo Scientific 3 Advanced Troubleshooting Replacing Components of the Manifold 9. Replace the manifold door hinge and reattach the screws. 10. From the front of the instrument, reattach the hinge spring to the vacuum interlock shield. 11. Align the connector on the bottom of the lens driver board with the connectors on the distribution board beneath it. It will click into place when its in the right position. Figure 229. Reinstalling the Lens Driver Board Connector Thermo Scientific TSQ 8000 Hardware Manual 215 3 Advanced Troubleshooting Replacing Components of the Manifold 12. Look through the left side of the instrument and use a T20 Torxhead screwdriver to tighten the screw holding the lens driver board in place on the chassis. Tip The bracket has a white diagram describing the location of this screw. It is approximately two inches from the top of the board directly under the white label. Figure 230. Replacing the Lens Driver Board Lens Driver Board Screw 13. Replace the left hand front panel and tighten the two screws. 14. Restart your system by following the instructions in “Restarting the System” on page 118. 216 TSQ 8000 Hardware Manual Thermo Scientific 3 Advanced Troubleshooting Replacing Components of the Manifold Front Manifold Plate To replace the front manifold plate: Note See the TSQ 8000 Spare Parts Guide for information about ordering this component. 1. Shut down your system by following the steps in “Shutting Down the TSQ 8000 System” on page 105. Note You do not have to remove the ion source cartridge or the column. 2. Remove the vacuum interlock knob and use a T10 Torxhead screwdriver to remove the five screws around the knob. Replace the knob and screws, if necessary. Note As you remove the screws around the vacuum interlock knob, watch for a small spring and safety interlock (location shown below) that will fall out as your remove the knob. Be sure to catch them and set them aside. Replace the spring and safety interlock, if necessary. Figure 231. Removing the Vacuum Interlock Knob Screws Spring and safety interlock are behind this screw Thermo Scientific TSQ 8000 Hardware Manual 217 3 Advanced Troubleshooting Replacing Components of the Manifold 3. Disconnect the vacuum interlock cable from the connector. Figure 232. Disconnecting the Vacuum Interlock Cable Vacuum Interlock Cable Connector 4. Pinch together the two springs on the left side the vacuum interlock shield and remove it. Figure 233. Removing the Vacuum Interlock Shield Springs Ball Valve Handle 5. Lift the vacuum interlock shield off the instrument. The notch at the bottom of the track will go around the handle. Be sure to straighten the ball valve handle prior to removing the VPI shield. 218 TSQ 8000 Hardware Manual Thermo Scientific 3 Advanced Troubleshooting Replacing Components of the Manifold 6. Use a T20 Torxhead screwdriver to remove the four screws found in the four corners of the manifold door. 7. Use a flat head screwdriver to remove the VPI pump tube. Figure 234. Detaching the Manifold Door VPI Pump Tube Screws Thermo Scientific TSQ 8000 Hardware Manual 219 3 Advanced Troubleshooting Replacing Components of the Manifold 8. Set the manifold door right side up on a clean work surface and remove the two screws holding the black clamp in place. Figure 235. Removing the Clamp Black Clamp Screws 9. Remove the three screws holding the metal block to the front manifold plate. Figure 236. Removing the Vacuum Interlock Handle Front Manifold Plate Note: Tube not attached Screws 10. Set the vacuum interlock and all of its components aside. 220 TSQ 8000 Hardware Manual Thermo Scientific 3 Advanced Troubleshooting Replacing Components of the Manifold 11. Twist the vent valve knob to remove it and the vent valve o-ring. Figure 237. Removing the Vent Valve Knob and O-Ring Vent Valve O-ring Vent Valve Knob 12. Flip the manifold door over and remove the manifold o-ring. Figure 238. Removing the Manifold O-Ring Manifold O-ring 13. Twist and remove the tray alignment pins that hold the magnet yoke to the back of the manifold door. The magnet yoke will pull free of the door, releasing the alignment collar. Figure 239. Removing the Tray Alignment Pins and Bracket Magnet Yoke Tray Alignment Pins Thermo Scientific TSQ 8000 Hardware Manual 221 3 Advanced Troubleshooting Replacing Components of the Manifold 14. Replace the front manifold plate. Figure 240. Replacing the Front Manifold Plate 15. Reattach the front plate o-ring. Figure 241. Reattaching the Front Plate O-Ring Manifold O-ring 16. Reattach the magnet yoke, alignment collar, and tray alignment pins. Figure 242. Re the Tray Alignment Pins and Bracket Magnet Yoke Tray Alignment Pins 222 TSQ 8000 Hardware Manual Thermo Scientific 3 Advanced Troubleshooting Replacing Components of the Manifold 17. Flip door over and insert and tighten the vent valve knob and o-ring into the front manifold plate. Figure 243. Reattaching the Vent Valve Knob and O-Ring Vent Valve O-ring Vent Valve Knob 18. Reattach the three screws and metal block to the front manifold plate. Figure 244. Reattaching the Metal Block Note: Tube not attached Screws Thermo Scientific TSQ 8000 Hardware Manual 223 3 Advanced Troubleshooting Replacing Components of the Manifold 19. Reattach the two screws and black clamp to the front manifold plate Figure 245. Reattaching the Clamp Clamp Screws 20. Pinch the springs together and reattach the vacuum interlock shield to the hinge. Figure 246. Removing the Vacuum Interlock Shield Springs 224 TSQ 8000 Hardware Manual Ball Valve Handle Thermo Scientific 3 Advanced Troubleshooting Replacing Components of the Manifold 21. Hold the spring and safety interlock in place as you attach the vacuum interlock shield and screws. Figure 247. Reattaching the Vacuum Interlock Shield Screws Vacuum Interlock Shield 22. Reconnect the vacuum interlock cable and tubing Figure 248. Reattaching the Vacuum Interlock Cable and Vacuum Interlock Knob Vacuum Interlock Knob Vacuum Interlock Cable Connector Thermo Scientific TSQ 8000 Hardware Manual 225 3 Advanced Troubleshooting Replacing Components of the Manifold 23. Reattach the vacuum interlock knob. 24. Restart your system by following the instructions in “Restarting the System” on page 118. 226 TSQ 8000 Hardware Manual Thermo Scientific 3 Advanced Troubleshooting Replacing Components of the Manifold Back Manifold Plate To replace the back manifold plate: Note See the TSQ 8000 Spare Parts Guide for information about ordering this component. 1. Shut down your system by following the steps in “Shutting Down the TSQ 8000 System” on page 105. Note You do not have to remove the ion source cartridge. 2. Pull the column fully out of the transfer line and move the instrument away from the GC. 3. Slide the top cover panel toward the back of the instrument and lift it off. 4. Use a T20 Torxhead screwdriver to remove the screw at each corner of the right side panel. Figure 249. Removing the Right Side Panel Screws Right Side Panel Screws Thermo Scientific TSQ 8000 Hardware Manual 227 3 Advanced Troubleshooting Replacing Components of the Manifold 5. Pull the right side panel away from the chassis. 6. Remove the analyzer tray from the instrument by following the instructions in “Removing the Analyzer Tray from the TSQ 8000 Instrument” on page 107. 7. Disconnect the power cable from the left side of the TSQ 8000 instrument. Figure 250. Disconnecting the Power Cables Power Cable Connector 8. Use a T20 Torxhead screwdriver to remove the two screws holding the power supply system to the top of the back panel. 9. Grasp the power supply system and lift it out of the instrument. It fits snug, so you may have to shake it as you lift it out. 10. Use a T20 Torxhead screwdriver to remove the four screws holding the back manifold plate onto the instrument. 228 TSQ 8000 Hardware Manual Thermo Scientific 3 Advanced Troubleshooting Replacing Components of the Manifold 11. Remove the tray alignment pin and manifold o-ring and put them on the new back manifold plate. Replace the pin and o-ring, if necessary. Figure 251. Replacing the Back Manifold Plate Manifold O-Ring Back Manifold Plate Alignment Pin 12. Reattach the back manifold plate to the instrument. The back manifold plate must be reinstalled with the pin at the bottom. 13. Slide the power supply back into the instrument. Note Make sure the electrometer board cable is not in the way when you reinstall the power supply. 14. Reattach the two screws holding the power supply to the instrument. 15. Reconnect the power cables on the left hand sub panel of the TSQ 8000 instrument. 16. Replace the analyzer tray into the instrument by following the instructions in “Replacing the Analyzer Tray in the TSQ 8000 Instrument” on page 116. 17. Reattach the right side panel and top cover panel and tighten the screws. 18. Reattach the GC oven and transfer line. 19. Restart your system by following the instructions in “Restarting the System” on page 118. Thermo Scientific TSQ 8000 Hardware Manual 229 3 Advanced Troubleshooting Replacing Components of the Manifold Tray Alignment Pins, Magnet Yoke, Manifold O-Ring, and Source Magnets To replace the tray alignment pins, magnet yoke, manifold o-ring, or source magnets on the manifold door Note For information about replacing the tray alignment pin on the back manifold plate, see Back Manifold Plate. 1. Shut down your system by following the steps in “Shutting Down the TSQ 8000 System” on page 105. You do not have to remove the ion source cartridge or the column. If you are using hydrogen as a carrier gas, power off the GC. 2. Use a T20 Torxhead screwdriver to remove the four screws around the manifold door. Figure 252. Opening the Manifold Door Screws 230 TSQ 8000 Hardware Manual Thermo Scientific 3 Advanced Troubleshooting Replacing Components of the Manifold 3. Open the manifold door and replace the tray alignment pins, magnet yoke, source magnets, or manifold o-ring as needed on the back of the door, Figure 253. Replacing the Tray Alignment Pins, Bracket, Manifold O-ring, and Source Magnets Manifold O-ring Magnet Yoke Tray Alignment Pins Source Magnets 4. Close the manifold door and reattach the four screws. 5. Restart your system by following the instructions in “Restarting the System” on page 118. Thermo Scientific TSQ 8000 Hardware Manual 231 3 Advanced Troubleshooting Replacing Components of the Manifold Vent Valve Knob and O-Ring To replace the vent valve knob and o-ring Note See the TSQ 8000 Spare Parts Guide for information about ordering these components. 1. Shut down your system by following the steps in “Shutting Down the TSQ 8000 System” on page 105. You do not have to remove the ion source cartridge or column. If you are using hydrogen as a carrier gas, power off the GC. . Figure 254. Powering Off the TSQ 8000 Instrument Top Cover Panel Screw Vacuum Interlock Shield Vent Valve Knob Power Switch Hydrogen Safety Screws 2. Remove and replace the vent valve knob and o-ring. Be careful not to pinch the o-ring during installation. 3. Restart your system by following the instructions in “Restarting the System” on page 118. 232 TSQ 8000 Hardware Manual Thermo Scientific 3 Advanced Troubleshooting Replacing Components of the Manifold Delivery Tubes To replace the delivery tubes Note See the TSQ 8000 Spare Parts Guide for information about ordering this component. 1. Shut down your system by following the steps in “Shutting Down the TSQ 8000 System” on page 105. You do not have to remove the ion source cartridge or the column. If you are using hydrogen as carrier gas, power off the GC. 2. Slide the top cover panel toward the back of the instrument and lift it off. 3. Use a T20 Torxhead screwdriver to remove the four screws around the manifold door. Figure 255. Opening the Manifold Door Screws Thermo Scientific TSQ 8000 Hardware Manual 233 3 Advanced Troubleshooting Replacing Components of the Manifold 4. Open the manifold door and replace the delivery tubes. Figure 256. Replacing the Delivery Tube Delivery Tubes 5. Close the manifold door and reattach the four screws. 6. Restart your system by following the instructions in “Restarting the System” on page 118. 234 TSQ 8000 Hardware Manual Thermo Scientific 3 Advanced Troubleshooting Replacing Components of the Electron Multiplier Replacing Components of the Electron Multiplier If the components of your electron multiplier get damaged, you can use the illustration below to visually locate a component and then follow the process to replace it. Note See the TSQ 8000 Spare Parts Guide for information about ordering this component. Figure 257. Replaceable Components of the Electron Multiplier Electron Multiplier Plate Large Feedthroughs Anode Feedthrough O-Rings Electron Multiplier For information about replacing the electron multiplier, see Replacing the Electron Multiplier. The electron multiplier is replaced more frequently than the other components, so it is described in Chapter 2: Performing Routine Maintenance. Thermo Scientific TSQ 8000 Hardware Manual 235 3 Advanced Troubleshooting Replacing Components of the Electron Multiplier Electron Multiplier Plate To replace the electron multiplier plate: Note See the TSQ 8000 Spare Parts Guide for information about ordering this component. 1. Shut down your system by following the steps in “Shutting Down the TSQ 8000 System” on page 105. Note You do not have to remove the ion source cartridge or the column. However, you must vent the instrument. 2. Slide the top cover panel toward the back of the instrument and lift it off. 3. Disconnect the electrometer board cable and large feedthrough cables labeled Dynode and Electron Multiplier. Figure 258. Disconnecting the Electron Multiplier Cables Electrometer Board Cable Dynode Electron Multiplier Electron Multiplier Plate 4. Remove the two screws holding the electrometer shield to the electron multiplier plate. 236 TSQ 8000 Hardware Manual Thermo Scientific 3 Advanced Troubleshooting Replacing Components of the Electron Multiplier Figure 259. Removing the Electrometer Shield Screws 5. Remove the four screws holding the electrometer board to the electron multiplier plate. CAUTION - ELECTRICAL HAZARD Avoid dropping screws between chassis and side cover or board. If you drop a screw, find it before powering the instrument on again. Figure 260. Removing the Electrometer Board Screws Electron Multiplier Plate Thermo Scientific TSQ 8000 Hardware Manual 237 3 Advanced Troubleshooting Replacing Components of the Electron Multiplier 6. Use a T10 Torxhead screwdriver to remove the anode feedthrough, two screws, standoff. and o-ring. Set them aside on a clean work surface. Figure 261. Removing the Anode Feedthrough Standoff Anode Feedthrough and O-ring Screws 7. Use a T20 Torxhead screwdriver to remove the large feedthroughs, screws, and o-rings. Set them aside on a clean work surface. 8. Use a T20 Torxhead screwdriver to remove the four screws at each corner of the electron multiplier plate. Figure 262. Disconnecting the Electron Multiplier Plate Electron Multiplier Plate Screws 238 TSQ 8000 Hardware Manual Thermo Scientific 3 Advanced Troubleshooting Replacing Components of the Electron Multiplier 9. Flip the electron multiplier and plate over so that the plate is resting on the worktable. Figure 263. Resting the Electron Multiplier Plate on the Worktable Electron Multiplier Plate 10. Remove the two screws connecting the electron multiplier to the plate and attach the electron multiplier to a new plate. Figure 264. Replacing the Electron Multiplier Plate Screws 11. Reattach the large feedthroughs, screws, and o-rings 12. Reattach the anode feedthrough, two screws, standoff. and o-ring 13. Move the wires into the large feedthroughs. 14. Put the electron multiplier plate back into place on the manifold and reattach the four screws. Reattach the electrometer board and the four screws. 15. Reattach the electrometer shield and the two screws Thermo Scientific TSQ 8000 Hardware Manual 239 3 Advanced Troubleshooting Replacing Components of the Electron Multiplier 16. Reconnect the electrometer board cable and large feedthrough cables. CAUTION - INSTRUMENT DAMAGE: Do not mix up the cables or you will damage the power supply. 17. Reattach the top cover panel and tighten the screw. 18. Restart your system by following the instructions in “Restarting the System” on page 118. 240 TSQ 8000 Hardware Manual Thermo Scientific 3 Advanced Troubleshooting Replacing Components of the Electron Multiplier Large Feedthroughs To replace the large feedthroughs, o-rings, and screws: Note See the TSQ 8000 Spare Parts Guide for information about ordering these components. 1. Shut down your system by following the steps in “Shutting Down the TSQ 8000 System” on page 105. Note You do not have to remove the ion source cartridge or the column. However, you must vent the instrument. 2. Slide the top cover panel toward the back of the instrument and lift it off. 3. Disconnect the electrometer board cable and large feedthrough cables labeled Dynode and Electron Multiplier. Figure 265. Disconnecting the Electron Multiplier Cables Electrometer Board Cable Dynode Electron Multiplier Electron Multiplier Plate 4. Use a T20 Torxhead screwdriver to remove the screws around the large feedthroughs. 5. Replace the large feedthroughs, o-rings and screws. 6. Use a T20 Torxhead screwdriver to remove the four screws at each corner of the electron multiplier plate. CAUTION - ELECTRICAL HAZARD Avoid dropping screws between chassis and side cover or board. If you drop a screw, find it before powering the instrument on again. Thermo Scientific TSQ 8000 Hardware Manual 241 3 Advanced Troubleshooting Replacing Components of the Electron Multiplier Figure 266. Disconnecting the Electron Multiplier Plate Electron Multiplier Plate Screws 7. Flip the plate over and attach the wire to the large feedthrough. 8. Use a T20 Torxhead screwdriver to reattach the four screws at each corner of the electron multiplier plate 9. Reconnect the large feedthrough cables. 10. Reattach the top cover panel and tighten the screw. 11. Restart your system by following the instructions in “Restarting the System” on page 118. 242 TSQ 8000 Hardware Manual Thermo Scientific 3 Advanced Troubleshooting Replacing Components of the Electron Multiplier Anode Feedthrough To replace the anode feedthrough, o-ring, four screws, and a standoff: Note See the TSQ 8000 Spare Parts Guide for information about ordering this component. 1. Shut down your system by following the steps in “Shutting Down the TSQ 8000 System” on page 105. Note You do not have to remove the ion source cartridge or the column. However, you must vent the instrument. 2. Slide the top cover panel toward the back of the instrument and lift it off. 3. Disconnect the electrometer board cable and large feedthrough cables labeled Dynode and Electron Multiplier. Figure 267. Disconnecting the Electron Multiplier Cables Electrometer Board Cable Dynode Electron Multiplier Electron Multiplier Plate 4. Lift the electrometer shield off the instrument and set it aside. Thermo Scientific TSQ 8000 Hardware Manual 243 3 Advanced Troubleshooting Replacing Components of the Electron Multiplier 5. Use a T10 Torxhead screwdriver to remove the four screws holding the electrometer board in place. Figure 268. Removing the Electrometer Board Screws 6. Remove the electrometer board to reveal the anode feedthrough. Figure 269. Removing the Anode Feedthrough, O-ring, Standoff and Screws Anode Feedthrough and O-ring Standoff Screws 244 TSQ 8000 Hardware Manual Thermo Scientific 3 Advanced Troubleshooting Replacing Components of the Electron Multiplier 7. Use a T10 Torxhead screwdriver to remove the two screws and 5.5 mm nut driver to remove the standoff located on the outer rim of the anode feedthrough, but leave the center pin of the standoff intact. The standoff serves as the ground for the electrometer board. The center pin is the signal path for the electrons generated in the electron multiplier going into the electrometer. 8. Remove and replace the anode feedthrough, o-ring, standoff and screws. 9. Insert one screw and tighten it until it is snug. Then insert and tighten the other screw. Once both screws fit snugly, retighten them. Note Be sure to attach the standoff at the location shown in the above figure. 10. Reattach the electrometer board and the four screws that hold it in place. 11. Reattach the electrometer shield and the four screws. 12. Reconnect the electrometer board cable and large feedthrough cables. 13. Restart your system by following the instructions in “Restarting the System” on page 118. Thermo Scientific TSQ 8000 Hardware Manual 245 3 Advanced Troubleshooting Reinstalling the TSQ 8000 System Software Reinstalling the TSQ 8000 System Software Your TSQ 8000 system has software on the instrument, as well as on the computer that was shipped with it. This section describes how to upgrade both of them. Updating the Firmware on the Instrument To update the firmware on the TSQ 8000 system: 1. Open the TSQ 8000 Manual Tune utility. Open the TSQ 8000 Dashboard. Right-click in a free space within the dashboard. Select Configure a Custom Button. The folder path to Manual Tune is C: Program Files/Thermo/TSQ8000. There will be an icon for the TSQ 8000 Manual Tune. This will add the button to the dashboard. 2. Click Firmware in the top menu. A drop down box opens. 3. Select Update PC Communication Board Firmware. 4. Browse to the updated firmware file. Once the firmware is selected, a dialog box will indicate that the firmware is being updated. 5. Once the firmware is updated, open the front door of the instrument and use a small screwdriver to press the Reset button on the interior front panel. This button allows the TSQ 8000 instrument to start using the new firmware and reestablish communication with the computer. Note Pushing the button for more than five seconds causes the system to load the default firmware. You do not want to do this unless the updated version of the firmware fails. 246 TSQ 8000 Hardware Manual Thermo Scientific 3 Advanced Troubleshooting Reinstalling the TSQ 8000 System Software Figure 270. Resetting the System Reset Button Upgrading Software on the Computer IMPORTANT These instructions refer to Thermo Foundation 2.0 SP1 and Xcalibur 2.2 SP1. Check the latest Thermo Scientific software CD for the latest versions of Thermo Foundation and Xcalibur. If the CD contains later versions, follow the steps in the installation help document on the CD to update your software. To use Thermo Foundation 2.0 SP1 and Xcalibur 2.2 SP1 on Thermo Scientific GC-MS systems, you must have Xcalibur 2.2 SP1 Core Components for GC-MS installed on your computer. This section describes how to reinstall the Foundation 2.0 SP1 and Xcalibur 2.2 SP1 core components, which are needed to run Foundation 2.0 SP1 and Xcalibur 2.2 SP1 on the TSQ 8000 system. Note There is an electronic version of this installation help document available on the Xcalibur 2.1 Core Components for GC-MS CD. To view this document, select Browse CD and open the Installation Help.pdf. Note Before you can load Xcalibur 2.2 Core Components for GC-MS, you must have administrative privileges on the computer being loaded with the new software. Thermo Scientific TSQ 8000 Hardware Manual 247 3 Advanced Troubleshooting Reinstalling the TSQ 8000 System Software System Requirements The following system requirements apply to the Xcalibur 2.2 SP1 and Foundation 2.0 SP1 core components. Layered applications may have different, higher requirements. Please refer to the applicable documentation and ensure that your PC meets the requirements before proceeding. Your TSQ 8000 data system must meet these minimum requirements. System Hardware Requirements • 2.4 GHz processor with 4 GB RAM • DVD/CD-ROM drive • Resolution display 1280 × 1024 (XGA) • 250 GB hard drive • NTFS format Software • Microsoft™ Windows™ 7 SP1 Operating System (32-bit) • Microsoft Office™ 2010 • Thermo Foundation 2.0 SP1 • Xcalibur™ 2.2 SP1 • TraceFinder™ 2.1a a 248 Your system will function without TraceFinder, but earlier versions of TraceFinder will not work with the Thermo Scientific software required for this instrument. TSQ 8000 Hardware Manual Thermo Scientific 3 Advanced Troubleshooting Reinstalling the TSQ 8000 System Software Installing the Software Set To install the system software set: Note Check the latest Xcalibur Core Components for GC-MS CD for the most recent version of these installation instructions. To view the installation help document, select Browse CD and open the TSQ 8000 Installation Help pdf. 1. Insert the Xcalibur 2.2 SP1 Core Components for GC-MS CD into the CD/DVD-ROM drive of your computer. If Auto-Play is enabled, the Xcalibur 2.2 SP1 Setup window will come up automatically after the CD is inserted. If the Xinstall menu does not automatically appear, navigate to your CD drive and double-click on it. This should start the Xcalibur 2.2 SP1 setup window. Figure 271. Xcalibur 2.2 SP1 Setup Page 2. The Xcalibur 2.2 SP1 Setup features a series of buttons that should be followed in order from top down. This ensures that the components are added in the correct order. 3. Install Adobe Reader. Installing Adobe Reader ensures that you will be able to open and reference the User Documentation that is supplied with your software. Click Run to install Adobe Reader. 4. Install Adobe Flash Player 10.0. Installing the Flash Player ensures that the advanced features of the Xcalibur Help System are viewable. 5. Click the .NET 3.5 SP1 button to install the Microsoft .NET 3.5 SP1 Framework. The .NET Framework is required for the correct operation of core components, drivers, and layered applications. Click Run to run the .NET installation program. The .NET Framework installation will proceed through a series of windows that require you input. Thermo Scientific TSQ 8000 Hardware Manual 249 3 Advanced Troubleshooting Reinstalling the TSQ 8000 System Software You must accept the Microsoft End User License Agreement (EULA) in order to install the .NET Framework. Note During the .NET installation, you will receive a message that indicates that the download from the web is complete and that you can disconnect from the Internet. Disregard this message and allow the installation to proceed. The .NET installation may also appear to stall. These are normal parts of the .NET installation process. 6. Foundation 2.0 SP1 — Click the Foundation 2.0 SP1 button to install Foundation. The installation proceeds through a series of windows. In order to install Foundation 2.0 SP1, you must accept the terms of the End User License Agreement (EULA). Enter your user name and company information. If you need to change the installation location, select the custom location; otherwise, proceed with the installation steps. 7. The installation of Foundation 2.0 SP1 will complete with the automatic generation of an IQ/OQ report. View this report as needed. 8. Remove the Xcalibur 2.2 SP1 Core Components CD from the CD drive and restart your computer after the Foundation installation. 9. Reinsert the Xcalibur 2.2 SP1 Core Components CD after the computer has restarted. Follow the steps listed in Step 1 if the Xcalibur 2.2 SP1 Setup window does not automatically appear. 10. You can now install Xcalibur 2.2 SP1 by clicking on the Xcalibur 2.2 SP1 button. The installation proceeds through a series of windows that require your input. To install Xcalibur 2.2 SP1, you must accept the terms of the End User License Agreement (EULA). Enter your user name and company information. If you need to change the installation location of Xcalibur 2.2 SP1from the default, select the Custom installation. If not, proceed with the installation. Note The standard Xcalibur 2.2 SP1 installation automatically installs the XDK Developers Tool Kit. If your laboratory's protocols prohibit this type of installation, select the Custom option and remove the XDK option from the list of items to be installed. Proceed with the installation steps 11.The installation of Xcalibur 2.2 SP1 will complete with the automatic generation of an IQ/OQ report. You will not need to restart the PC after the Xcalibur 2.2 SP1 installation. 12.Click on the NIST Browser button to install the NIST MS Browser. This functionality is required to allow automatic searching of libraries from Xcalibur or layered applications. Install the NIST Browser according to the installation instructions. The NIST installer will automatically create the required folders for the browser and demo libraries. For best operation, do not change the default NIST Browser installation locations. 13.This completes the Xcalibur Core Components installation for GC-MS. To install the GC and MS drivers that are needed for instrument operation, refer to the installation instructions that are provided with those discs. 250 TSQ 8000 Hardware Manual Thermo Scientific 3 Advanced Troubleshooting Reinstalling the TSQ 8000 System Software Note The Xcalibur 2.2 SP1 Core Components for GC-MS disc also includes the validation certificate for the Xcalibur core, the release notes for Foundation and Xcalibur and folders containing the manuals for these products. This content can be explored from the Xcalibur 2.2 SP1 Setup window using the Browse CD and Validation Certificate buttons. 14.Click Exit to leave the Xcalibur 2.2 SP1 Setup window. Thermo Scientific TSQ 8000 Hardware Manual 251 3 Advanced Troubleshooting Replacing the Covers of the TSQ 8000 Instrument Replacing the Covers of the TSQ 8000 Instrument If the covers of your instrument get damaged, you can use the illustration below to visually locate a component and then follow the process to replace it. Figure 272. Replaceable Covers of the TSQ 8000 Instrument Top Cover Panel and Screws Left Hand Front and Sub Panels and Screws 252 TSQ 8000 Hardware Manual Right Side Panel and Screws Thermo Scientific 3 Advanced Troubleshooting Replacing the Covers of the TSQ 8000 Instrument Top Cover Panel To replace the top cover panel of the TSQ 8000 instrument Note See the TSQ 8000 Spare Parts Guide for information about ordering this component. 1. Shut down your system by following the steps in “Shutting Down the TSQ 8000 System” on page 105. You do not have to remove the ion source cartridge or column or vent the system. If you are using hydrogen as a carrier gas, power off the GC. 2. Slide the top cover panel toward the back of the instrument and lift it off. Figure 273. Replacing the Top Cover Panel Top Cover Panel Top Cover Panel Screw 3. Replace the top cover panel and tighten the screw holding it in place. 4. Restart your system by following the instructions in “Restarting the System” on page 118. Thermo Scientific TSQ 8000 Hardware Manual 253 3 Advanced Troubleshooting Replacing the Covers of the TSQ 8000 Instrument Left Hand Front Panel and Left Hand Sub Panel To replace the left hand front panel and the left hand sub panel of the TSQ 8000 instrument Note See the TSQ 8000 Spare Parts Guide for information about ordering this component. 1. Shut down your system by following the steps in “Shutting Down the TSQ 8000 System” on page 105. You do not have to remove the ion source cartridge or column or vent the system. If you are using hydrogen as a carrier gas, power off the GC. 2. Remove the four screws on the left hand front panel. One is located on the bottom left of the interior front panel of the instrument. Figure 274. Locating the Left Hand Front Panel Screws Screws Screw on Front of Instrument 3. To replace the left hand sub panel, disconnect the inputs as shown in Figure 275. 254 TSQ 8000 Hardware Manual Thermo Scientific 3 Advanced Troubleshooting Replacing the Covers of the TSQ 8000 Instrument Figure 275. finding the Inputs and Screws on the Left Hand Sub Panel System Mech Pump Connection Screw Reagent Gas Connectors Optional Mech Pump Connection AC Input Connector Collision Gas Intake Accessory Start Connector GC Start Connector Screw Data System Connector Screw 4. Remove the three screws on the left hand sub panel. 5. Replace the left hand sub panel and tighten the three screws holding it in place. 6. Replace the inputs. 7. Replace the left hand front panel and tighten the four screws holding it in place. 8. Restart your system by following the instructions in “Restarting the System” on page 118. Thermo Scientific TSQ 8000 Hardware Manual 255 3 Advanced Troubleshooting Replacing the Covers of the TSQ 8000 Instrument Right Side Panel To replace the right side panel of the TSQ 8000 instrument Note See the TSQ 8000 Spare Parts Guide for information about ordering this component. 1. Shut down your system by following the steps in “Shutting Down the TSQ 8000 System” on page 105. Note You do not have to remove the ion source cartridge. However, you must vent the instrument and remove the column. 2. Remove the column from the transfer line completely. 3. Slide the top cover panel toward the back of the instrument and lift it off. 4. Use a T20 Torxhead screwdriver to remove the screw at each corner of the right side panel. Figure 276. Removing the Right Side Panel Screws Right Side Panel Screws 5. Replace the right side panel and tighten the screws. 6. Replace the top cover panel and tighten the screw holding it in place. 7. Reinsert the column to the proper length and tighten the transfer line nut. See “Replacing a Column” on page 12 for more information. 8. Restart your system by following the instructions in “Restarting the System” on page 118. 256 TSQ 8000 Hardware Manual Thermo Scientific 3 Advanced Troubleshooting Replacing the Covers of the TSQ 8000 Instrument Top Manifold Cover To replace the top manifold cover Note See the TSQ 8000 Spare Parts Guide for information about ordering this component. 1. Shut down your system by following the steps in “Shutting Down the TSQ 8000 System” on page 105. You do not have to remove the ion source cartridge or column. However, you must vent the instrument. If you are using hydrogen as a carrier gas, power off the GC. 2. Slide the top cover panel toward the back of the instrument and lift it off. 3. Remove and replace the large or small glass manifold covers as needed on the top of the instrument. Figure 277. Replacing the Small and Large Glass Manifold Covers Small Glass Manifold Cover Large Glass Manifold Cover 4. Replace the top cover panel and tighten the screw holding it in place. 5. Restart your system by following the instructions in “Restarting the System” on page 118. Thermo Scientific TSQ 8000 Hardware Manual 257 3 Advanced Troubleshooting Replacing the Covers of the TSQ 8000 Instrument Replacing the Chassis Feet To replace the chassis feet on the bottom of the TSQ 8000 instrument Note See the TSQ 8000 Spare Parts Guide for information about ordering this component. 1. Shut down your system by following the steps in “Shutting Down the TSQ 8000 System” on page 105. 2. Remove the analyzer tray from the instrument by following the instructions in “Removing the Analyzer Tray from the TSQ 8000 Instrument” on page 107. 3. Follow the instructions in the section, “Distribution Board” on page 298 to remove the components required to safely replace the chassis feet. 4. Remove the small and large glass covers in the manifold. 5. Carefully tip the TSQ 8000 instrument and rest it on its left side. 6. Use a T20 Torxhead screwdriver to remove the screws holding any damaged feet to the bottom of the instrument. Figure 278. Removing the Feet on the Bottom of the TSQ 8000 Instrument Feet 7. Attach the new chassis feet. 8. Set the instrument upright. 9. Replace the large and small glass manifold covers. 10. Follow the instructions in the section, “Distribution Board” on page 298 to replace the components you removed. 258 TSQ 8000 Hardware Manual Thermo Scientific 3 Advanced Troubleshooting Replacing the Covers of the TSQ 8000 Instrument 11. Replace the analyzer tray into the instrument by following the instructions in “Replacing the Analyzer Tray in the TSQ 8000 Instrument” on page 116. 12. Restart your system by following the instructions in “Restarting the System” on page 118. Thermo Scientific TSQ 8000 Hardware Manual 259 3 Advanced Troubleshooting Replacing Components of the Front Door Replacing Components of the Front Door If the front door of your TSQ 8000 instrument gets damaged, you can use the illustration below to visually locate a replaceable component and then follow the process to replace it. Note See the TSQ 8000 Spare Parts Guide for information about ordering this component. Figure 279. Replaceable Components of the Front Door Front Door Hinge Support Front Door Latch Front Door Hinge Front Door Latch 260 TSQ 8000 Hardware Manual Front Door Hinge Support Thermo Scientific 3 Advanced Troubleshooting Replacing Components of the Front Door Front Door Hinges and Supports To replace the hinges and supports that connect the front door to the chassis Note See the TSQ 8000 Spare Parts Guide for information about ordering this component. 1. Shut down your system by following the steps in “Shutting Down the TSQ 8000 System” on page 105. You do not have to remove the ion source cartridge or column or vent the instrument. If you are using hydrogen as a carrier gas, power off the GC. 2. Use a T20 Torxhead screwdriver to remove the four screws securing the left hand front panel to the chassis. One of the screws is located on the interior front panel of the instrument. Figure 280. Locating the Left Hand Front Panel Screws Screws Left Hand Front Panel Screw on Front of Instrument 3. Lift the left hand front panel off the instrument. Thermo Scientific TSQ 8000 Hardware Manual 261 3 Advanced Troubleshooting Replacing Components of the Front Door 4. On the front interior panel, use a T20 Torxhead screwdriver to remove the hinge support bracket screw. Figure 281. Replacing the Hinges on the Front Door Hinge Screws Hinge Support Bracket Screw 5. Use a T10 Torxhead screwdriver to remove the all four screws connecting each hinge to the front door and interior front panel. 6. Attach new hinges and supports, as well as the hinge support bracket screw. Figure 282. Replacing the Hinge Supports Hinge Support Note Replace one hinge at a time to prevent the door from falling. 7. Reattach the left hand front and top cover panels and tighten the screws. 8. Restart your system by following the instructions in “Restarting the System” on page 118. 262 TSQ 8000 Hardware Manual Thermo Scientific 3 Advanced Troubleshooting Replacing Components of the Front Door Front Door Latch To replace the latch on the front door Note See the TSQ 8000 Spare Parts Guide for information about ordering this component. There are two major parts to front door latch. One is located on the front door, and one is on the chassis. If you only need to replace the part on the front door, simply open the door and follow the instructions below. 1. Use a T10 Torxhead screwdriver to remove the two screws holding the latch onto the front door. Figure 283. Removing the Latch from the Front Door Latch Screws 2. Replace the latch and close the front door of the instrument. 3. To replace the latch on the chassis, shut down your system by following the steps in “Shutting Down the TSQ 8000 System” on page 105. 4. Slide the top cover panel off the instrument. 5. Open the front door of the GC and disconnect the column and transfer line nut. 6. Move the TSQ 8000 instrument away from the GC so you can access the transfer line on the right side. WARNING - BURN HAZARD: The transfer line may be hot, so be careful. Thermo Scientific TSQ 8000 Hardware Manual 263 3 Advanced Troubleshooting Replacing Components of the Front Door 7. Use a T20 Torxhead screwdriver to remove the five screws on the right side panel. Figure 284. Removing the Right Side Panel Screws Right Side Panel Screws 8. Slide the right side panel to the right of the instrument and lift it off. 9. Use a 5.5 mm open head wrench to hold the M-3 lock washers and remove the two M3 flathead screws suing a T10 Torxhead screwdriver. Figure 285. Removing the Latch from the Chassis Screws 10. Attach a new latch to the chassis. 11. Reattach the right side and top cover panels and tighten the screws. 12. Reattach the GC to the transfer line. 13. Restart your system by following the instructions in “Restarting the System” on page 118. 264 TSQ 8000 Hardware Manual Thermo Scientific 3 Advanced Troubleshooting Replacing the Boards in the TSQ 8000 Instrument Replacing the Boards in the TSQ 8000 Instrument If the boards in your TSQ 8000 instrument get damaged, you can use the illustration below to visually locate a board and then follow the process to replace it. Figure 286. Replaceable Board Components of the TSQ 8000 System PC Communication Board Lens Driver Board Front RF Board/Front Rod Driver Board Controller Interface Board Rear RF Board/Rear Rod Driver Board Distribution Board WARNING ELECTRICAL SHOCK HAZARD: For safety reasons, the fuses on the lens driver board can only be replaced by Field Service Engineers. Thermo Scientific TSQ 8000 Hardware Manual 265 3 Advanced Troubleshooting Replacing the Boards in the TSQ 8000 Instrument Front and Rear RF Boards and Front and Rear Rod Driver Boards To replace the front and rear radio frequency (RF) boards and front and rear rod drive boards. Note See the TSQ 8000 Spare Parts Guide for information about ordering an RF board. This board must be replaced by a Field Service Engineer, so when you place an order for a new board, schedule the Field Service Engineer as well. 1. Shut down your system by following the steps in “Shutting Down the TSQ 8000 System” on page 105. Note You do not have to remove the ion source cartridge or column or vent the system. If you are using hydrogen as a carrier gas, power off the GC. 2. Slide the top cover panel toward the back of the instrument and lift it off. Note The steps to remove and replace the front and rear RF boards are the same. Refer to the images for the proper location of each board. 3. The front RF board is the second board standing on end toward the center of the instrument. The rear RF board is the third board standing on end toward the center of the TSQ 8000 instrument. Use a T20 Torxhead screwdriver to remove the screw holding the board and bracket to the chassis. CAUTION - INSTRUMENT DAMAGE Do not touch the components of the boards. Hold the boards by the sheet metal bracket. 266 TSQ 8000 Hardware Manual Thermo Scientific 3 Advanced Troubleshooting Replacing the Boards in the TSQ 8000 Instrument Figure 287. Locating the RF Boards and Brackets . Rear RF Board Front RF Board Brackets 4. To remove the front RF board, use your fingers to pry the brackets of the board away from the chassis and toward the left side of the instrument. 5. Lift the board out of the instrument. Thermo Scientific TSQ 8000 Hardware Manual 267 3 Advanced Troubleshooting Replacing the Boards in the TSQ 8000 Instrument Figure 288. Removing the RF Board from the Instrument 6. Use a T10 Torxhead screwdriver to remove the three screws at each corner of the rod driver board. Be careful not to drop the parts under the metal cover. 268 TSQ 8000 Hardware Manual Thermo Scientific 3 Advanced Troubleshooting Replacing the Boards in the TSQ 8000 Instrument 7. Use a 2.5 mm nut driver to remove the standoffs on the rod driver board. Figure 289. Disconnecting the Rod Driver Board from the RF Board Screws Standoffs Rod Driver Board 8. Incrementally, remove the 40-pin connector on the rod driver board from the front RF board. and the 7-pin connector on the rod driver board away from the front RF board. Figure 290. Disconnecting the Rod Driver Board 40-Pin Connector 40-Pin Connector Thermo Scientific TSQ 8000 Hardware Manual 269 3 Advanced Troubleshooting Replacing the Boards in the TSQ 8000 Instrument Figure 291. Disconnecting the Rod Driver Board 7-Pin Connector 7-Pin Connector Note Be careful not to bend the connector on the rod driver board on the pins on the RF board. 9. Replace the rod driver board if necessary. Check the pin connections for accuracy when you connect the board. Figure 292. Replacing the Rod Driver Board 10. Attach the rod driver board to the new RF board. 11. Reattach the rod drive board’s 40-pin and 7-pin connectors to the RF board. 12. Reattach the three screws and two standoffs. 270 TSQ 8000 Hardware Manual Thermo Scientific 3 Advanced Troubleshooting Replacing the Boards in the TSQ 8000 Instrument 13. Insert a new RF board by aligning the connectors on the bottom of the board with the connectors on the distribution board beneath it. It will drop into the slot when it is in the right position. Figure 293. Reinstalling the RF Boards Rear RF Board Connectors Front RF Board Connectors 14. Push the board down into the connectors. 15. Gently push the RF board toward the instrument, carefully aligning the board over the feedthrough pins, until it stops. 16. Reattach the screw holding the RF board to the bracket. Note This screw is required for good ground contact. 17. Reattach the top cover panel and tighten the screw holding it in place. 18. Restart your system by following the instructions in “Restarting the System” on page 118. Note The new RF board will have a slightly different performance than your current board. It will need to be adjusted by a Field Service Engineer because the adjustments must be made while the system is running. Thermo Scientific TSQ 8000 Hardware Manual 271 3 Advanced Troubleshooting Replacing the Boards in the TSQ 8000 Instrument RF Board/Rod Driver Board Kits To replace the RF board/rod driver board kit Note See the TSQ 8000 Spare Parts Guide for information about ordering an RF board/rod driver board kit. This kit must be replaced by a Field Service Engineer, so when you place an order for the kit, schedule the Field Service Engineer as well. 1. Shut down your system by following the steps in “Shutting Down the TSQ 8000 System” on page 105. Note You do not have to remove the ion source cartridge or column or vent the system. If you are using hydrogen as a carrier gas, power off the GC. 2. Slide the top cover panel toward the back of the instrument and lift it off. Note The TSQ 8000 system contains a front and a rear RF board/rod driver kit. The steps are the same to replace each kit, except for the location. 3. The front RF board is the second board standing on end toward the center of the instrument. The rear RF board is the second board standing on end toward the center of the TSQ 8000 instrument. Use a T20 Torxhead screwdriver to remove the screw holding the board and bracket to the chassis. CAUTION - INSTRUMENT DAMAGE Do not touch the components of the boards. Hold the boards by the sheet metal bracket. 272 TSQ 8000 Hardware Manual Thermo Scientific 3 Advanced Troubleshooting Replacing the Boards in the TSQ 8000 Instrument Figure 294. Locating the RF Boards and Brackets . Rear RF Board Front RF Board Brackets 4. Use your fingers to pry the bracket of the board away from the chassis and toward the left side of the instrument. 5. Lift the RF board out of the instrument. The rod driver board is attached to it. Figure 295. Replacing the RF Board/Rod Driver Board Kits Thermo Scientific TSQ 8000 Hardware Manual 273 3 Advanced Troubleshooting Replacing the Boards in the TSQ 8000 Instrument 6. Insert a new RF board/rod driver board kit by aligning the connectors on the bottom of the board with the connectors on the distribution board beneath it. It will drop into the slot when it is in the right position. Figure 296. Reinstalling the RF Board/Rod Driver Board Kits Rear RF Board Connectors Front RF Board Connectors 7. Push the board down into the connectors. 8. Gently push the board toward the instrument, carefully aligning the board over the feedthrough pins, until it stops. 9. Reattach the screw holding the RF board to the bracket. Note This screws is required for good ground contact. 10. Reattach the top cover panel and tighten the screw holding it in place. 11. Restart your system by following the instructions in “Restarting the System” on page 118. Note The new RF board/rod driver board kit will have a slightly different performance than your current board. It will need to be adjusted by a Field Service Engineer because the adjustments must be made while the system is running. 274 TSQ 8000 Hardware Manual Thermo Scientific 3 Advanced Troubleshooting Replacing the Boards in the TSQ 8000 Instrument 4- Pin Feedthrough To replace the 4-pin feedthrough: Note See the TSQ 8000 Spare Parts Guide for information about ordering these components. 1. Shut down your system by following the steps in “Shutting Down the TSQ 8000 System” on page 105. Note You do not have to remove the ion source cartridge or the column. However, you must vent the instrument. 2. Slide the left hand front and top cover panels toward the back of the instrument and lift them off. 3. Disconnect the electrometer board cable Figure 297. Disconnecting the Electrometer Board Cable Electrometer Board Cable 4. Disconnect the four wires from the front 4-pin feedthrough if you need to change it. Note Each wire must be reattached to the same connector later in this process, so make a note of their placement. Thermo Scientific TSQ 8000 Hardware Manual 275 3 Advanced Troubleshooting Replacing the Boards in the TSQ 8000 Instrument Figure 298. Disconnecting the Front 4-pin Connector Wires Front 4-pin Connector Quad 1 Wires Ion Guide Wires 5. Disconnect the four wires that go to the rear 4-pin feedthrough if you need to change it. Figure 299. Disconnecting the Rear 4-pin Connector Wires Rear 4-pin Connector Quad 3 Wires Collision Cell Connector Wires Collision Gas Tube 6. Remove the RF board attached to the feedthrough you wish to change. The front RF board is the second board standing on end toward the center of the TSQ 8000 instrument. The rear RF board is the second board standing on end toward the center of the instrument. Use a T20 Torxhead screwdriver to remove the screw holding the board to the top of the chassis. CAUTION - INSTRUMENT DAMAGE Do not touch the components of the boards. Hold the boards by the sheet metal bracket. 276 TSQ 8000 Hardware Manual Thermo Scientific 3 Advanced Troubleshooting Replacing the Boards in the TSQ 8000 Instrument Figure 300. Locating the RF Boards and Brackets . Rear RF Board Front RF Board Brackets 7. Use your fingers to pry the bracket of the board away from the chassis and toward the left side of the instrument. 8. Lift the board out of the instrument. 9. Remove the large glass manifold cover. 10. Set the glass cover on a surface where it will not be scratched or contaminated. Protect the glass and any other manifold components from dust accumulation. Wear cleanroom gloves when touching the glass. See the TSQ 8000 Spare Parts Guide for information about ordering cleanroom gloves. Thermo Scientific TSQ 8000 Hardware Manual 277 3 Advanced Troubleshooting Replacing the Boards in the TSQ 8000 Instrument Figure 301. Removing the Large Glass Manifold Covers Large Glass Manifold Cover CAUTION - ELECTRICAL HAZARD Avoid dropping screws between chassis and side cover or board. If you drop a screw, find it before powering the instrument on again. 11. Look into the instrument from the left side and use a T20 Torxhead screwdriver to remove the three screws around the 4-pin feedthrough. Figure 302. Removing the 4-pin Feedthroughs Screws 278 TSQ 8000 Hardware Manual Thermo Scientific 3 Advanced Troubleshooting Replacing the Boards in the TSQ 8000 Instrument 12. Remove and replace the 4-pin feedthrough. You can also remove and replace the o-ring, if necessary. 13. Reattach the 4-pin feedthrough to the chassis. 14. Replace the large glass manifold cover. 15. Reinsert the RF board by aligning the connectors on the bottom of the board with the connectors on the distribution board beneath it. It will drop into the slot when it is in the right position. 16. Push the board down into the connectors. 17. Gently push the board toward the instrument, carefully aligning the board over the feedthrough pins, until it stops. 18. Reattach the screw holding the RF board to the bracket. Note This screws is required for good ground contact. 19. Reconnect the wires to the 4-pin connector. CAUTION - INSTRUMENT DAMAGE: Make sure you reattach these wires to the same connectors they were attached to before. 20. Reconnect the electrometer board cables. 21. Reattach the top cover and left hand front panels and tighten the screws. 22. Restart your system by following the instructions in “Restarting the System” on page 118. Tip Once your system is under vacuum and stable, check your RF tune. The new feedthrough may have slightly different RF characteristics that may shift the RF that is best for your system. Thermo Scientific TSQ 8000 Hardware Manual 279 3 Advanced Troubleshooting Replacing the Boards in the TSQ 8000 Instrument Lens Driver Board To replace the lens driver board Note See the TSQ 8000 Spare Parts Guide for information about ordering this component. 1. Shut down your system by following the steps in “Shutting Down the TSQ 8000 System” on page 105. You do not have to remove the ion source cartridge or the column. 2. Slide the top cover panel toward the back of the instrument and it them off. 3. Use a T20 Torxhead screwdriver to remove the four screws securing the left hand front panel to the chassis. One of the screws is located on the interior front panel of the instrument. Figure 303. Locating the Left Hand Front Panel Screws Screws Left Hand Front Panel Screw on Front of Instrument 4. Lift the left hand front panel off the instrument. 280 TSQ 8000 Hardware Manual Thermo Scientific 3 Advanced Troubleshooting Replacing the Boards in the TSQ 8000 Instrument 5. The lens driver board is the first board standing on end in the center of the instrument. Figure 304. Locating the Lens Driver Board Bracket Lens Driver Board CAUTION - INSTRUMENT DAMAGE Do not touch the components of the boards. Hold the boards by the sheet metal bracket. Thermo Scientific TSQ 8000 Hardware Manual 281 3 Advanced Troubleshooting Replacing the Boards in the TSQ 8000 Instrument 6. Look through the left side of the instrument and use a T20 Torxhead screwdriver to loosen the screw holding the board to the chassis. Tip The bracket has a white diagram describing the location of this screw. It is approximately two inches from the top of the board directly under the white label. Figure 305. Removing the Lens Driver Board Lens Driver Board Screw 7. Loosening the screw will separate the board from the instrument. The screw is captured, so do not attempt to completely remove the screw from the board and bracket. 8. Lift the lens driver board out of the instrument. Be careful as space is limited. 282 TSQ 8000 Hardware Manual Thermo Scientific 3 Advanced Troubleshooting Replacing the Boards in the TSQ 8000 Instrument 9. Insert a new lens driver board by aligning the connector on the bottom of the board with the connectors on the distribution board beneath it. It will drop into the slot when it is in the right position. Figure 306. Reinstalling the Lens Driver Board Connector for Lens Driver Board 10. Push the board down into the connector. 11. Look through the left side of the instrument and use a T20 Torxhead screwdriver to tighten the screw holding the lens driver board in place on the chassis. 12. Reattach the top cover and left side panels and tighten the screws. 13. Restart your system by following the instructions in “Restarting the System” on page 118. Thermo Scientific TSQ 8000 Hardware Manual 283 3 Advanced Troubleshooting Replacing the Boards in the TSQ 8000 Instrument 20-Pin Feedthrough To replace the 20-pin feedthrough: Note See the TSQ 8000 Spare Parts Guide for information about ordering this component. 1. Shut down your system by following the steps in “Shutting Down the TSQ 8000 System” on page 105. Note You do not have to remove the ion source cartridge or the column. However, you must vent the instrument. 2. Slide the top cover panel toward the back of the instrument and lift it off. 3. Use a T20 Torxhead screwdriver to remove the four screws securing the left hand front panel to the chassis. One of the screws is located on the interior front panel of the instrument. Figure 307. Locating the Left Hand Front Panel Screws Screws Left Hand Front Panel Screw on Front of Instrument 4. Lift the left hand front panel off the instrument. 5. The lens driver board is the first board standing on end in the center of the instrument . CAUTION - INSTRUMENT DAMAGE Do not touch the components of the boards. Hold the boards by the sheet metal bracket. 284 TSQ 8000 Hardware Manual Thermo Scientific 3 Advanced Troubleshooting Replacing the Boards in the TSQ 8000 Instrument Figure 308. Locating the Lens Driver Board Bracket Lens Driver Board 6. Look through the left side of the instrument and use a T20 Torxhead screwdriver to loosen the screw holding the board to the chassis. Loosening the screw will separate the board from the instrument. The screw is captured, so do not attempt to completely remove the screw from the board and bracket. Tip The bracket has a white diagram describing the location of this screw. It is approximately two inches from the top of the board directly under the white label. Thermo Scientific TSQ 8000 Hardware Manual 285 3 Advanced Troubleshooting Replacing the Boards in the TSQ 8000 Instrument Figure 309. Removing the Lens Driver Board Lens Driver Board Screw 7. Use your fingers to pry the bracket of the board away from the chassis and toward the left side of the instrument. 8. Remove the top manifold cover (glass) out of the top of the instrument and set it aside. 9. Open the front door of the TSQ 8000 instrument. 10. Use a T20 Torxhead screwdriver to remove the four screws around the manifold door. Note Remove the screws completely so that they do not scratch the manifold when you close the door. 286 TSQ 8000 Hardware Manual Thermo Scientific 3 Advanced Troubleshooting Replacing the Boards in the TSQ 8000 Instrument Figure 310. Opening the Manifold Door Screws 11. Open the manifold door and slide the filament board and wires off the pins on the source interface board. Figure 311. Disconnecting the Filament Wires Filament Filament Wires 12. Remove the bottom left screw holding the metal heat shield to the manifold. Thermo Scientific TSQ 8000 Hardware Manual 287 3 Advanced Troubleshooting Replacing the Boards in the TSQ 8000 Instrument Figure 312. Removing the Heat Shield Left Screw Filament Board and Wires Source Interface Board Heat Shield Note Keep all manifold parts you remove covered on a clean work surface so they will not accumulate dust. 288 TSQ 8000 Hardware Manual Thermo Scientific 3 Advanced Troubleshooting Replacing the Boards in the TSQ 8000 Instrument 13. Look through the top of the instrument and use the heat shield to pry the source interface board off of the 20-pin feedthrough. Figure 313. Detaching the Source Interface Board From the 20-Pin Feedthrough 20-Pin Feedthrough 20-Pin Feedthrough Pins in Source Interface Board 14. From the left side of the instrument, use a T20 Torxhead screwdriver to remove the three screws around the 20-pin feedthrough. Figure 314. Removing the 20-Pin Feedthrough 20-Pin Feedthrough Screws Thermo Scientific TSQ 8000 Hardware Manual 289 3 Advanced Troubleshooting Replacing the Boards in the TSQ 8000 Instrument 15. Remove and replace the 20-pin feedthrough. If necessary, replace the o-ring and make sure it is properly aligned and free of dust. Figure 315. Replacing the 20-Pin Feedthrough O-ring 16. From the left side of the instrument, reattach the three screws around the 20-pin feedthrough. Tighten the screws uniformly. Figure 316. Reattaching the 20-Pin Feedthrough 20-Pin Feedthrough Screws 17. Look through the top of the instrument and align the pins on the 20-pin feedthrough with the holes in the source interface board to connect them together. 290 TSQ 8000 Hardware Manual Thermo Scientific 3 Advanced Troubleshooting Replacing the Boards in the TSQ 8000 Instrument 18. Slide the heat shield into its slot and reattach the screw holding it in place. 19. Reattach the filament board to the source interface board. 20. Close the manifold door and reattach the four screws. 21. Reinsert the lens driver board by aligning the connector on the bottom of the board with the connectors on the distribution board beneath it. It will drop into the slot when it is in the right position. Figure 317. Reinstalling the Lens Driver Board Connector for Lens Driver Board 22. Push the board down into the connector. 23. Look through the left side of the instrument and tighten the screw that holds the lens driver board in place on the chassis. 24. Reattach the top cover panel and tighten the screw. 25. Restart your system by following the instructions in “Restarting the System” on page 118. Thermo Scientific TSQ 8000 Hardware Manual 291 3 Advanced Troubleshooting Replacing the Boards in the TSQ 8000 Instrument PC Communication Board, Controller Interface Board, and Support Bracket To replace the PC communication board, controller interface board, or support bracket Note See the TSQ 8000 Spare Parts Guide for information about ordering these components. 1. Shut down your system by following the steps in “Shutting Down the TSQ 8000 System” on page 105. Note You do not have to remove the ion source cartridge or the column or vent the instrument. 2. Slide the top cover panel off the instrument. 3. Use a T20 Torxhead screwdriver to remove the four screws securing the left hand front panel to the chassis. One of the screws is located on the interior front panel of the instrument. Figure 318. Locating the Left Hand Front Panel Screws Screws Left Hand Front Panel Screw on Front of Instrument 4. Lift the left hand front panel off the instrument. CAUTION - INSTRUMENT DAMAGE Do not touch the components of the boards. Hold the boards by the sheet metal bracket. 292 TSQ 8000 Hardware Manual Thermo Scientific 3 Advanced Troubleshooting Replacing the Boards in the TSQ 8000 Instrument 5. Locate the PC communication board, which is attached to the controller interface board. Note Although the PC communication board is attached to the controller interface board, they are sold separately. See the TSQ 8000 Spare Parts Guide for ordering information. . Figure 319. Locating the Ethernet Cable Connector on the PC Communication Board Ethernet Cable Connector 6. Disconnect the ethernet cable from the PC communication board. 7. Use a T20 Torxhead screwdriver to loosen the two M4 screws holding the controller interface board support bracket to the bottom of the instrument. Thermo Scientific TSQ 8000 Hardware Manual 293 3 Advanced Troubleshooting Replacing the Boards in the TSQ 8000 Instrument 8. Remove the controller interface board and PC communication board from the instrument. Figure 320. Removing the Controller Interface Board Support Bracket Controller Interface Board Support Bracket Screws PC Communication Board 9. If you need to replace the support bracket, use a T10 Torxhead screwdriver to remove the seven M3 screws securing the controller interface board to the support bracket. 10. Replace the bracket and reattach it to the controller interface board. 294 TSQ 8000 Hardware Manual Thermo Scientific 3 Advanced Troubleshooting Replacing the Boards in the TSQ 8000 Instrument Figure 321. Removing the Support Bracket Screws Screws Thermo Scientific TSQ 8000 Hardware Manual 295 3 Advanced Troubleshooting Replacing the Boards in the TSQ 8000 Instrument 11. Incrementally, and very carefully, disconnect the PC communication board from the controller interface board by separating the two connectors. Inspect the pins to be certain they are not bent. CAUTION - INSTRUMENT DAMAGE: Be careful not to exert too much pressure when separating these boards. Flexing the boards will cause damage. Figure 322. Replacing the PC Communication Board and Controller Interface Board Controller Interface Board Ethernet Cable Connector PC Communication Board Connectors 12. Reattach the existing or new PC communication board to the existing or new controller interface board. Be careful not to bend the pins. 13. Inspect the boards from multiple angles to ensure all pins are inserted into the connectors. It is possible to shift the board and miss a row of pins when you plug the boards together. 14. Reconnect the Ethernet cable to the controller interface board. 296 TSQ 8000 Hardware Manual Thermo Scientific 3 Advanced Troubleshooting Replacing the Boards in the TSQ 8000 Instrument 15. Insert the new controller interface board by aligning the two connectors on the bottom of the board to the connectors on the distribution board beneath it. It will drop into the slot when it is in the right position. Figure 323. Reinstalling the Controller Interface Board Controller Interface Board Connectors 16. Push the board down into the connectors. 17. Use a T20 Torxhead screwdriver to secure the two M4 screws on the controller interface board support bracket to the chassis. 18. Reattach the top cover and left hand front panels and tighten the screws. 19. Restart your system by following the instructions in “Restarting the System” on page 118. Thermo Scientific TSQ 8000 Hardware Manual 297 3 Advanced Troubleshooting Replacing the Boards in the TSQ 8000 Instrument Distribution Board The distribution board lies on the bottom of the TSQ 8000 instrument chassis. To replace the distribution board Note See the TSQ 8000 Spare Parts Guide for information about ordering this component. 1. Shut down your system by following the steps in “Shutting Down the TSQ 8000 System” on page 105. Note You do not have to remove the ion source cartridge or the column. If you are using hydrogen as a carrier gas, power off the GC. 2. Slide the top cover panel toward the back of the instrument and lift it off. 3. Use a T20 Torxhead screwdriver to remove the four screws securing the left hand front panel to the chassis. One of the screws is located on the interior front panel of the instrument. Figure 324. Locating the Left Hand Front Panel Screws Screws Left Hand Front Panel Screw on Front of Instrument 4. Lift the left hand front panel off the instrument. CAUTION - INSTRUMENT DAMAGE Do not touch the components of the boards. Hold the boards by the sheet metal bracket. 298 TSQ 8000 Hardware Manual Thermo Scientific 3 Advanced Troubleshooting Replacing the Boards in the TSQ 8000 Instrument 5. Locate the PC communication board, which is attached to the controller interface board. Note Although the PC communication board is attached to the controller interface board, they are sold separately. See the TSQ 8000 Spare Parts Guide for ordering information. . Figure 325. Locating the Ethernet Cable Connector on the PC Communication Board Ethernet Cable Connector 6. Disconnect the ethernet cable from the PC communication board. 7. Use a T20 Torxhead screwdriver to loosen the two M4 screws holding the controller interface board support bracket to the bottom of the instrument. Thermo Scientific TSQ 8000 Hardware Manual 299 3 Advanced Troubleshooting Replacing the Boards in the TSQ 8000 Instrument 8. Remove the controller interface board and PC communication board from the instrument. Figure 326. Removing the Controller Interface Board Support Bracket Controller Interface Board Support Bracket Screws PC Communication Board 9. Remove the six screws holding the fan plenum to the chassis. Two are on the left side of the instrument, and four are attached to the interior front panel. 10. Disconnect the fan from the distribution board. 11. Remove the entire fan plenum assembly including the fan and air deflector from the instrument. 300 TSQ 8000 Hardware Manual Thermo Scientific 3 Advanced Troubleshooting Replacing the Boards in the TSQ 8000 Instrument Figure 327. Removing the Chassis Cooling Fan and Pan Plenum Fan Plenum Air Deflector Left Side Screws Front Screws 12. Disconnect the fan from the distribution board on the bottom of the instrument. Thermo Scientific TSQ 8000 Hardware Manual 301 3 Advanced Troubleshooting Replacing the Boards in the TSQ 8000 Instrument 13. The lens driver board is the first board standing on end in the center of the instrument. Figure 328. Locating the Lens Driver Board Bracket 302 TSQ 8000 Hardware Manual Lens Driver Board Thermo Scientific 3 Advanced Troubleshooting Replacing the Boards in the TSQ 8000 Instrument 14. Look through the left side of the instrument and use a T20 Torxhead screwdriver to loosen the screw holding the board to the chassis. Tip The bracket has a white diagram describing the location of this screw. It is approximately two inches from the top of the board directly under the white label. Figure 329. Removing the Lens Driver Board Lens Driver Board Screw 15. Loosening the screw will separate the board from the instrument. The screw is captured, so do not attempt to completely remove the screw from the board and bracket. 16. Lift the lens driver board out of the instrument. Be careful as space is limited. Note The steps to remove and replace the front and rear RF board/rod driver kits s are the same. Refer to the images for the proper location of each board. 17. The front RF board is the second board standing on end toward the center of the instrument. The rear RF board is the third board standing on end toward the center of Thermo Scientific TSQ 8000 Hardware Manual 303 3 Advanced Troubleshooting Replacing the Boards in the TSQ 8000 Instrument the TSQ 8000 instrument. Use a T20 Torxhead screwdriver to remove the screws holding the board and brackets to the chassis. Figure 330. Locating the RF Boards and Brackets . Rear RF Board Front RF Board Screws Brackets 18. To remove the front RF board, use your fingers to pry the brackets of the board away from the chassis and toward the left side of the instrument. 19. Lift the board out of the instrument. 304 TSQ 8000 Hardware Manual Thermo Scientific 3 Advanced Troubleshooting Replacing the Boards in the TSQ 8000 Instrument Figure 331. Removing the Front RF Board from the TSQ 8000 Instrument 20. To remove the rear RF board, use your fingers to pry the brackets of the board away from the chassis and toward the left side of the instrument. 21. Lift the board out of the instrument. 22. Disconnect the electrometer board cable and large feedthrough cables labeled Dynode and Electron Multiplier. Figure 332. Disconnecting the Electron Multiplier Cables Electrometer Board Cable Dynode Electron Multiplier Electron Multiplier Plate 23. Disconnect the power connections from the TSQ 8000 instrument. Thermo Scientific TSQ 8000 Hardware Manual 305 3 Advanced Troubleshooting Replacing the Boards in the TSQ 8000 Instrument 24. Use a T20 Torxhead screwdriver to remove the two screws holding the power module to the instrument. Figure 333. Removing the Power Module Screws Screws 25. Pull the power supply out of the top of the instrument. 26. Remove the screw that connects the dynode/multiplier power supply to the bottom of the chassis. 306 TSQ 8000 Hardware Manual Thermo Scientific 3 Advanced Troubleshooting Replacing the Boards in the TSQ 8000 Instrument Figure 334. Removing the Dynode/Multiplier Power Supply Dynode/Multiplier Power Supply Bottom Screw 27. Disconnect the 1/16 in. collision gas tubing from the bulkhead compression fitting located on the left hand sub panel. Thermo Scientific TSQ 8000 Hardware Manual 307 3 Advanced Troubleshooting Replacing the Boards in the TSQ 8000 Instrument Figure 335. Disconnecting the Cable to the Bulkhead Fitting Bulkhead Fitting Collision Gas Module Tubing 28. Disconnect the collision gas module cable from the distribution board. 29. If you are using CI, follow the instructions in the CI Reagent Gas Flow Module section to remove the CI reagent gas flow module. 30. Now that all of the components have been removed from the distribution board, you can see that it lies flat on the bottom of the chassis. 308 TSQ 8000 Hardware Manual Thermo Scientific 3 Advanced Troubleshooting Replacing the Boards in the TSQ 8000 Instrument Figure 336. Disconnecting the Distribution Board Distribution Board Cables 31. Disconnect all the cables from the distribution board. Also remove the cable that enters the chassis from the back panel. 32. Remove the two flex cables that attach to the inlays on the front door. 33. Remove all 19 T10 Torxhead screws that connect the distribution board to the bottom of the chassis. 34. Tilt the distribution board to one side and lift it out of the instrument. 35. Insert a new distribution board into the instrument and reattach the screws. 36. Reconnect the 1/16 in. collision gas tubing from the bulkhead compression fitting located on the left hand sub panel. 37. Follow the steps in the CI Reagent Gas Flow Module section to reattach the CI reagent gas module and reconnect the inputs. 38. Reconnect all the cables. 39. Reattach the dynode/multiplier power supply to the back the chassis by reattaching the screw. 40. Slide the main power supply back down into its slot. 41. Reattach the two screws holding the power supply to the instrument. 42. Reattach the power connectors to the inputs on the left hand sub panel. Thermo Scientific TSQ 8000 Hardware Manual 309 3 Advanced Troubleshooting Replacing the Boards in the TSQ 8000 Instrument 43. Reconnect the large feedthrough cables on the electron multiplier plate. 44. Reattach the RF boards by aligning the connectors on the bottom of the board with the connectors on the distribution board beneath it. The boards will drop into their slots when they are in the right position. 45. Gently push the RF board into the instrument, carefully aligning the board over the feedthrough pins, until it stops. 46. Reattach the screw holding the RF board to the bracket. 47. Reinstall the lens driver board by aligning the connector on the bottom of the board with the connectors on the distribution board beneath it. It will click into place when its in the right position. Figure 337. Reinstalling the Lens Driver Board Connector for Lens Driver Board 48. Look through the left side of the instrument and use a T20 Torxhead screwdriver to tighten the screw holding the lens driver board in place on the chassis.Reattach the controller interface board by aligning the connectors on the bottom of the board with the 310 TSQ 8000 Hardware Manual Thermo Scientific 3 Advanced Troubleshooting Replacing the Boards in the TSQ 8000 Instrument connectors on the distribution board beneath it. It will click into place when its in the right position. Figure 338. Reinstalling the Controller Interface Board Connectors Figure 339. Reinstalling the Controller Interface Board Controller Interface Board Connectors 49. Reattach the support bracket. 50. Reattach the fan plenum and the front interior panel and tighten the screws. 51. Reattach the top cover and left hand front panels and tighten the screws. 52. Restart your system by following the instructions in “Restarting the System” on page 118. Thermo Scientific TSQ 8000 Hardware Manual 311 3 Advanced Troubleshooting Replacing the Boards in the TSQ 8000 Instrument Source Interface Board and Heat Shield To replace the source interface board and heat shield Note See the TSQ 8000 Spare Parts Guide for information about ordering these components. 1. Shut down your system by following the steps in “Shutting Down the TSQ 8000 System” on page 105. 2. If you are only replacing the heat shield, you do not need to remove the analyzer tray. Disconnect the filament board and wires from the source interface board and the left screw to remove the heat shield. Figure 340. Replacing the Heat Shield Left Screw Filament Board and Wires Source Interface Board Heat Shield Note Keep all manifold parts you remove covered on a clean work surface so they will not accumulate dust. 3. Replace the heat shield. 4. Reconnect the filament board and wires to the source interface board. 5. If you are replacing the source interface board, remove the analyzer tray from the instrument by following the instructions in “Removing the Analyzer Tray from the TSQ 8000 Instrument” on page 107. 312 TSQ 8000 Hardware Manual Thermo Scientific 3 Advanced Troubleshooting Replacing the Boards in the TSQ 8000 Instrument 6. Hold the new source interface board next to the old board. 7. As you remove each of the wires from the old board, connect them to the same connectors on the new board. Figure 341. Reconnecting the Source Interface Board Wires 8. Once the components are correctly attached to the analyzer tray, follow the instructions in “Replacing the Analyzer Tray in the TSQ 8000 Instrument” on page 116 to replace the tray in the TSQ instrument. 9. Restart your system by following the instructions in “Restarting the System” on page 118. Thermo Scientific TSQ 8000 Hardware Manual 313 3 Advanced Troubleshooting Replacing the Boards in the TSQ 8000 Instrument Electrometer Board Cable To replace the electrometer board (15-pin male/female RS-232) cable Note See the TSQ 8000 Spare Parts Guide for information about ordering this component. 1. Shut down your system by following the steps in “Shutting Down the TSQ 8000 System” on page 105. You do not have to remove the ion source cartridge or the column or vent the instrument. If you are using hydrogen as a carrier gas, power off the GC. 2. Slide the top cover panel toward the back of the instrument and lift it off. 3. Disconnect the electrometer board cable Figure 342. Disconnecting the Electrometer Board Cable Electrometer Board Cable 4. Remove all power connections from the TSQ 8000 instrument. 314 TSQ 8000 Hardware Manual Thermo Scientific 3 Advanced Troubleshooting Replacing the Boards in the TSQ 8000 Instrument 5. Use a T20 Torxhead screwdriver to remove the two screws holding the power module to the instrument. Figure 343. Removing the Power Module Screws Screws 6. Pull the power supply out of the top of the instrument. 7. Disconnect the electrometer board cable from the electrometer board and the distribution board. 8. Replace the electrometer board cable and reattach it to the boards. 9. Reinstall the power module by aligning its connector with the connector on the distribution board beneath it. It will drop into place when its in the right position. 10. Reattach the top cover panel and tighten the screw. 11. Reattach the power connections. 12. Restart your system by following the instructions in “Restarting the System” on page 118. Thermo Scientific TSQ 8000 Hardware Manual 315 3 Advanced Troubleshooting Replacing the Boards in the TSQ 8000 Instrument Electrometer Board and Shield To replace the electrometer board and shield Note See the TSQ 8000 Spare Parts Guide for information about ordering these components. 1. Shut down your system by following the steps in “Shutting Down the TSQ 8000 System” on page 105. Note You do not have to remove the ion source cartridge or the column or vent the instrument. If you are using hydrogen as a carrier gas, power off the GC. 2. Slide the top cover panel toward the back of the instrument and lift it off. 3. Disconnect the electrometer board cable. Figure 344. Disconnecting the Electron Multiplier Cables Electrometer Board Cable Screws Electrometer Shield Electron Multiplier Plate 4. Use a T10 Torxhead screwdriver to remove the two screws holding the electrometer shield in place. 5. Lift off the electrometer shield and replace it if necessary. 316 TSQ 8000 Hardware Manual Thermo Scientific 3 Advanced Troubleshooting Replacing the Boards in the TSQ 8000 Instrument 6. Remove the four screws holding the electrometer board in place Figure 345. Replacing the Electrometer Board Screws 7. Remove and replace the electrometer board if necessary. 8. Reattach the screws that hold the electrometer board in place. 9. Reattach the electrometer shield and screws. Tip To prevent the screws from falling down into the instrument, place them on the shield before you reattach it to the chassis. 10. Reconnect the electrometer board cable. 11. Reattach the top cover panel and tighten the screw holding it in place. 12. Restart your system by following the instructions in “Restarting the System” on page 118. Thermo Scientific TSQ 8000 Hardware Manual 317 3 Advanced Troubleshooting Replacing the Power Supplies Replacing the Power Supplies If the power supplies in your TSQ 8000 instrument get damaged, you can use the illustration below to visually locate a power supply and then follow the process to replace it. Figure 346. Replaceable Power Supply Components Power Module Dynode/Multiplier Power Supply 318 TSQ 8000 Hardware Manual Thermo Scientific 3 Advanced Troubleshooting Replacing the Power Supplies Power Module To replace the power module Note See the TSQ 8000 Spare Parts Guide for information about ordering this component. 1. Shut down your system by following the steps in “Shutting Down the TSQ 8000 System” on page 105. Note You do not have to remove the ion source cartridge or the column or vent the instrument. If you are using hydrogen as a carrier gas, power off the GC. 2. Slide the top cover panel toward the back of the instrument and lift it off. 3. Disconnect the power cables from the side of the instrument. Thermo Scientific TSQ 8000 Hardware Manual 319 3 Advanced Troubleshooting Replacing the Power Supplies Figure 347. Locating the TSQ 8000System Power Cables System Mech Pump Connection Optional Mech Pump Connection AC Input Connector 320 TSQ 8000 Hardware Manual Thermo Scientific 3 Advanced Troubleshooting Replacing the Power Supplies 4. Use a T20 Torxhead screwdriver to remove the two screws holding the power supply system to the top of the back panel. Figure 348. Removing the Power Module Screws Screws 5. Make sure the electrometer board cable is not in the way when you remove the power module. 6. Grasp the power supply system and lift it out of the instrument. It fits snugly, so you may have to gently shake it as you lift it out. 7. Reinstall the power module by aligning its connector with the connector on the distribution board beneath it. It will drop into the connector when it is in the right position. 8. Make sure the new module is flush against the top of the chassis and the screw holes line up. 9. Reattach the two screws holding the power module to the instrument. Thermo Scientific TSQ 8000 Hardware Manual 321 3 Advanced Troubleshooting Replacing the Power Supplies 10. Reconnect the power cables on the left side of the instrument. Make sure you attach the cables properly. The foreline pump connects to the System Mech Pump connector on the left of the instrument. 11. Reattach the top cover panel and tighten the screw holding it in place. Reattach the hydrogen safety screws if you are using hydrogen. 12. Restart your system by following the instructions in “Restarting the System” on page 118. 322 TSQ 8000 Hardware Manual Thermo Scientific 3 Advanced Troubleshooting Replacing the Power Supplies Dynode and Multiplier Power Supply To replace the dynode and multiplier power supply Note See the TSQ 8000 Spare Parts Guide for information about ordering this component. 1. Shut down your system by following the steps in “Shutting Down the TSQ 8000 System” on page 105. Note You do not have to remove the ion source cartridge or column or vent the instrument. If you are using hydrogen as a carrier gas, power off the GC. 2. Slide the top cover panel toward the back of the instrument and lift it off. 3. Remove all power connections from the TSQ 8000 instrument. Thermo Scientific TSQ 8000 Hardware Manual 323 3 Advanced Troubleshooting Replacing the Power Supplies 4. Use a T20 Torxhead screwdriver to remove the two screws holding the power supply system to the top of the back panel. Figure 349. Removing the Power Module Screws Screws 5. Make sure the electrometer board cable is not in the way when you remove the power module. 6. Grasp the power supply system and lift it out of the instrument. It fits snugly, so you may have to gently shake it as you lift it out. 324 TSQ 8000 Hardware Manual Thermo Scientific 3 Advanced Troubleshooting Replacing the Power Supplies 7. Disconnect the large feedthrough cables labeled Dynode and Electron Multiplier. Figure 350. Disconnecting the Electron Multiplier Cables Electrometer Board Cable Dynode Electron Multiplier Electron Multiplier Plate 8. Disconnect the cables from the clips attached to the chassis. Thermo Scientific TSQ 8000 Hardware Manual 325 3 Advanced Troubleshooting Replacing the Power Supplies 9. Use a T20 Torxhead screwdriver to remove the screw connecting the dynode/multiplier power supply to bottom of the chassis. Figure 351. Removing the Controller Interface Board Support Bracket Dynode/Multiplier Power Supply Screw 10. Pull the dynode power supply straight up and away from the distribution board on the bottom of the chassis. 11. Replace the dynode/multiplier power supply and install it by aligning its connector with the connector on the distribution board beneath it. It will drop into place when it is in the right position. Note A new dynode/multiplier power supply may have a right angle bracket attached to the top of the supply. Remove this bracket before placing the supply into the TSQ 8000 instrument. 326 TSQ 8000 Hardware Manual Thermo Scientific 3 Advanced Troubleshooting Replacing the Power Supplies Figure 352. Replacing the Dynode/Multiplier Power Supply Connector 12. Reattach the screw holding the dynode and multiplier power supply in place. 13. Connect the cables to the clips attached to the chassis 14. Connect the large feedthrough cables. 15. Replace the main power supply. 16. Reattach the top cover panel and tighten the screw. 17. Restart your system by following the instructions in “Restarting the System” on page 118. Thermo Scientific TSQ 8000 Hardware Manual 327 3 Advanced Troubleshooting Replacing the Calibration Gas Components Replacing the Calibration Gas Components If the calibration gas components of your TSQ 8000 instrument get damaged, you can use the illustration below to visually locate a component and then follow the process to replace it. Figure 353. Replaceable Calibration Gas Components Calibration Gas Line Gas Mixing Chamber Calibration Gas Controller Transfer Line Calibrant Reservoir Kit 328 TSQ 8000 Hardware Manual Thermo Scientific 3 Advanced Troubleshooting Replacing the Calibration Gas Components Calibration Gas Module The EI calibration gas module requires little maintenance, except to refill the calibrant in the reservoir. Your calibration gas controller may need to be replaced if you add too much calibrant and you contaminate the system. The process is the same for replacing a single- or dual-flow calibration gas module. To replace the EI calibration gas module Note See the TSQ 8000 Spare Parts Guide for information about ordering this component. 1. Shut down your system by following the steps in “Shutting Down the TSQ 8000 System” on page 105. Note You do not have to remove the ion source cartridge or column. 2. Slide the top cover panel toward the back of the instrument and lift it off. 3. Use a T20 Torxhead screwdriver to remove the four screws securing the left hand front panel to the chassis. One of the screws is located on the interior front panel of the instrument. Figure 354. Locating the Left Hand Front Panel Screws Screws Left Hand Front Panel Screw on Front of Instrument 4. Lift the left hand front panel off the instrument. Thermo Scientific TSQ 8000 Hardware Manual 329 3 Advanced Troubleshooting Replacing the Calibration Gas Components 5. Use a T20 Torxhead screwdriver to loosen the two screws holding the support bracket to the bottom of the instrument. Figure 355. Removing the Controller Interface Board Support Bracket Controller Interface Board Support Bracket 6. Disconnect the ethernet cable from the PC communication board. Figure 356. Disconnecting the Ethernet Cable from the PC Communication Board Controller Interface Board Ethernet Cable Connector PC Communication Board Connectors 330 TSQ 8000 Hardware Manual Thermo Scientific 3 Advanced Troubleshooting Replacing the Calibration Gas Components 7. Remove the controller interface board from the instrument. 8. Look through the top of the instrument and locate both RF boards. The front RF board is the second board standing on end toward the center of the instrument. The rear RF board is the third board standing on end toward the center of the TSQ 8000 instrument. Use a T20 Torxhead screwdriver to remove the screw holding the board and bracket to the chassis. Figure 357. Locating the RF Boards and Brackets . Rear RF Board Front RF Board Brackets 9. Use your fingers to pry the bracket of the board away from the chassis and toward the left side of the instrument. Lift the RF boards out of the instrument and set them aside. Thermo Scientific TSQ 8000 Hardware Manual 331 3 Advanced Troubleshooting Replacing the Calibration Gas Components 10. Look through the left side of the instrument and use a T20 Torxhead screwdriver to loosen the screw holding the lens driver board to the chassis. Tip The bracket has a white diagram describing the location of this screw. It is approximately two inches from the top of the board directly under the white label. Figure 358. Removing the Lens Driver Board Lens Driver Board Screw 11. Loosening the screw will separate the board from the instrument. The screw is captured, so do not attempt to completely remove it from the board and bracket. 12. Lift the lens driver board out of the instrument. Be careful as space is limited. CAUTION - INSTRUMENT DAMAGE Limit handling of the boards as much as possible. Do not touch any board components. Hold the board by the sheet metal bracket only. 332 TSQ 8000 Hardware Manual Thermo Scientific 3 Advanced Troubleshooting Replacing the Calibration Gas Components 13. Reach through the left side of the instrument and disconnect the vacuum line tubing that goes from the foreline connector to the calibration gas module. 14. Pull the tubing out through the access hole in the interior front panel. Figure 359. Disconnecting the Calibration Gas Controller Calibration Gas Module Foreline Pump Tubing Access P1 and P2 Electrical Wires Note If you are using CI, you will have P1 and P2 electrical wires. 15. Disconnect the P1 and P2 electrical wires from the front of the calibration gas controller. Note If you have a single-level calibration gas controller, your instrument only has a P1 connector. 16. Use a 5/16 in. wrench to disconnect the stainless steel tubing. 17. Use a T20 Torxhead screwdriver to remove the two screws holding the module to the interior front panel. The tubing will come off with it. 18. Remove the calibration gas module from the front panel and attach a new one. Thermo Scientific TSQ 8000 Hardware Manual 333 3 Advanced Troubleshooting Replacing the Calibration Gas Components Note The calibrant reservoir on the new calibration gas module is not filled with calibrant. Fill the new calibrant reservoir by following the instructions in “Refilling the Calibrant Reservoir” on page 52. 19. Reattach the two screws that connect the new calibration gas module to the interior front panel. 20. Reconnect the vacuum line tubing that goes from the foreline connector to the calibration gas module. 21. Reconnect the P1 and P2 electrical wires to the front of the calibration gas controller. 22. Reinstall the RF board by aligning the connectors on the bottom of the board with the connectors on the distribution board beneath it. It will drop into the slot when it is in the right position. Figure 360. Reinstalling the RF Boards Rear RF Board Connectors Front RF Board Connectors 23. Push the board down into the connectors. 24. Gently push the RF board toward the instrument, carefully aligning the board over the feedthrough pins, until it stops. 25. Reattach the screw holding the RF board to the bracket. Note This screw is required for good ground contact. 334 TSQ 8000 Hardware Manual Thermo Scientific 3 Advanced Troubleshooting Replacing the Calibration Gas Components 26. Reinstall the lens driver board by aligning the connector on the bottom of the board with the connectors on the distribution board beneath it. It will drop into the slot when it is in the right position. Figure 361. Reinstalling the Lens Driver Board Connector for Lens Driver Board 27. Push the board down into the connectors. 28. Look through the left side of the instrument and use a T20 Torxhead screwdriver to reattach the screw holding the lens driver board in place on the chassis. Thermo Scientific TSQ 8000 Hardware Manual 335 3 Advanced Troubleshooting Replacing the Calibration Gas Components 29. Reinstall the controller interface board by aligning the two connectors on the bottom of the board to the connectors on the distribution board beneath it. It will drop into the slot when it is in the right position. Figure 362. Reinstalling the Controller Interface Board Controller Interface Board Connectors 30. Push the board down into the connectors 31. Tighten the screws attached to the support bracket. 32. Reconnect the Ethernet cable to the controller interface board. 33. Reattach the top cover and left hand front panels and tighten the screws. If you are using hydrogen, reattach the hydrogen safety screws. 34. Restart your system by following the instructions in “Restarting the System” on page 118. 336 TSQ 8000 Hardware Manual Thermo Scientific 3 Advanced Troubleshooting Replacing the Calibration Gas Components Calibrant Reservoir Kit To replace the calibrant reservoir kit, which consists of the calibrant reservoir and its cover Note See the TSQ 8000 Spare Parts Guide for information about ordering these components. If you just need to refill the calibrant reservoir and not replace it, see Refilling the Calibrant Reservoir. 1. Shut down your system by following the steps in “Shutting Down the TSQ 8000 System” on page 105. Note You do not have to remove the ion source cartridge or column or vent the instrument. If you are using hydrogen as a carrier gas, power off the GC. 2. Unscrew the hydrogen safety screw. 3. Open the front door of the TSQ 8000 instrument. 4. Twist the calibrant reservoir cover counter-clockwise and remove it from the calibration gas module. Figure 363. Removing the Calibrant Reservoir Cover Calibration Gas Module Calibrant Reservoir Cover Thermo Scientific TSQ 8000 Hardware Manual 337 3 Advanced Troubleshooting Replacing the Calibration Gas Components 5. Attach a new calibrant reservoir to the calibration gas module. Figure 364. Replacing the Calibrant Reservoir and Cover Calibrant Reservoir Calibrant Reservoir Cover 6. Fill the calibrant reservoir of the new module by following the instructions in “Refilling the Calibrant Reservoir” on page 52. 7. Reattach the calibrant reservoir cover. 8. Close the front door of the instrument. 9. If you are using hydrogen as a carrier gas, attach the hydrogen safety screws and restart your GC by following the instructions in “Restarting the System” on page 118. 338 TSQ 8000 Hardware Manual Thermo Scientific 3 Advanced Troubleshooting Replacing the Calibration Gas Components Gas Mixing Chamber To replace the gas mixing chamber Note See the TSQ 8000 Spare Parts Guide for information about ordering this component. 1. Shut down your system by following the steps in “Shutting Down the TSQ 8000 System” on page 105. 1. Remove the analyzer tray from the instrument by following the instructions in “Removing the Analyzer Tray from the TSQ 8000 Instrument” on page 107. 2. Use a T10 Torxhead screwdriver to remove the two screws holding the gas mixing chamber to the ion source block. Source 3. Replace the gas mixing chamber. Interface Board 4. Replace the two screws holding the gas mixing chamber to the ion source block. Wires Figure 365. Replacing the Gas Mixing Chamber Gas Mixing Chamber Screws 5. Follow the instructions in “Replacing the Analyzer Tray in the TSQ 8000 Instrument” on page 116 to replace the tray in the TSQ instrument. 6. Restart your system by following the instructions in “Restarting the System” on page 118. Thermo Scientific TSQ 8000 Hardware Manual 339 3 Advanced Troubleshooting Replacing the Calibration Gas Components Transfer Line To replace the transfer line and ferrule IMPORTANT Be sure to install the transfer line correctly or the ion source will not align correctly. Note See the TSQ 8000 Spare Parts Guide for information about ordering these components. 1. Shut down your system by following the steps in “Shutting Down the TSQ 8000 System” on page 105. 2. Open the front door of the GC and disconnect the column and transfer line nut. 3. Move the TSQ 8000 instrument away from the GC so you can access the transfer line on the right side. WARNING - BURN HAZARD: The transfer line may be hot, so be careful. 4. Use a T20 Torxhead screwdriver to remove the five screws on the right side panel. Figure 366. Removing the Right Side Panel Screws Right Side Panel Screws 5. Slide the right side panel to the right of the instrument and lift it off. 6. Use a T20 Torxhead screwdriver to remove the four screws around the manifold door. Note Remove the screws completely so that they do not scratch the manifold when you close the door. 340 TSQ 8000 Hardware Manual Thermo Scientific 3 Advanced Troubleshooting Replacing the Calibration Gas Components Figure 367. Opening the Manifold Door Screws 7. Open the manifold door. 8. Disconnect the calibration and reagent gas tubes from the gas mixing chamber. 9. Remove the screw on the lower right side that is holding the analyzer tray to the manifold. Figure 368. Disconnecting the Analyzer Tray from the Instrument Gas Mixing Chamber Calibration and Reagent Gas Tubes Right Screw Thermo Scientific TSQ 8000 Hardware Manual 341 3 Advanced Troubleshooting Replacing the Calibration Gas Components Note Keep all manifold parts you remove covered on a clean work surface so they will not accumulate dust. 10. Slide the analyzer tray to the left. 11. Use a 5/16 in. wrench to disconnect the stainless steel tubing from the two fittings on each side of the transfer line. Note If you are using CI gas, there are two tubes connected. If you are using an EI system, there is one tube and one blanking ferrule connected. Figure 369. Disconnecting the Transfer Line Tubing Tubing Fittings 12. Disconnect the electrical cable from the connector. Figure 370. Disconnecting the Transfer Line Electrical Cable Screws Cable Connector 13. Use a T20 screwdriver to remove the two screws holding the transfer line to the chassis. 14. Pull the transfer line straight away from the instrument so you do not damage it. Make sure the o-ring is removed as well. Replace the o-ring, if necessary. 342 TSQ 8000 Hardware Manual Thermo Scientific 3 Advanced Troubleshooting Replacing the Calibration Gas Components 15. Attach a new transfer line. Note The reagent gas and calibration gas tubes in the manifold conduct gas to the mixing chamber. Make sure these two tubes are attached to the transfer line and mixing chamber before proceeding. CAUTION - INSTRUMENT DAMAGE The electrical wires fit in a groove in the transfer line. Do not pinch these wires between the sheet metal and edges of the groove when tightening the screws to mount the transfer line to prevent electrical shorts. 16. Reattach the two screws holding the transfer line to the chassis. Position the analyzer tray back on the transfer line. 17. Tighten the screw holding the analyzer tray to the transfer line. Note Check the alignment of the transfer line. If it is not seated properly, adjust its position. Tip At this point, check that the ion source cartridge insertion and removal is smooth. If it is not, adjust the position of the transfer line. 18. Reconnect the electrical cable to the connector. 19. Reconnect the two compression nuts to the fittings on each side of the transfer line. 20. Close the front door of the manifold and reattach the four screws. 21. Slide the right side panel back onto the instrument and reattach the screws. 22. Reposition the TSQ 8000 instrument closer to the GC. 23. Reinsert the column to the proper length and tighten the transfer line nut. See “Replacing a Column” on page 12 for more information. 24. Restart your system by following the instructions in “Restarting the System” on page 118. Thermo Scientific TSQ 8000 Hardware Manual 343 3 Advanced Troubleshooting Replacing the Collision Gas Components Replacing the Collision Gas Components The collision gas components you can order and replace in the TSQ 800 system are the collision gas module, the collision gas tubing, the tee that connects the collision gas tubing to the foreline adapter, and the foreline adapter itself. To replace the collision gas module, collision gas tubing, tee, and foreline adapter Note See the TSQ 8000 Spare Parts Guide for information about ordering these components. 1. Shut down your system by following the steps in “Shutting Down the TSQ 8000 System” on page 105. 2. Slide the top cover panel off the instrument. 3. Slide the top cover panel toward the back of the instrument and lift it off. 4. Use a T20 Torxhead screwdriver to remove the four screws securing the left hand front panel to the chassis. One of the screws is located on the interior front panel of the instrument. Figure 371. Locating the Left Hand Front Panel Screws Screws Left Hand Front Panel Screw on Front of Instrument 5. Lift the left hand front panel off the instrument. 6. Open the front door of the GC and disconnect the column and transfer line nut. 344 TSQ 8000 Hardware Manual Thermo Scientific 3 Advanced Troubleshooting Replacing the Collision Gas Components 7. Move the TSQ 8000 instrument away from the GC so you can access the transfer line on the right side. WARNING - BURN HAZARD: The transfer line may be hot, so be careful. 8. Use a T20 Torxhead screwdriver to remove the five screws on the right side panel. Figure 372. Removing the Right Side Panel Screws Right Side Panel Screws 9. Slide the right side panel to the right of the instrument and lift it off. 10. Remove the rear RF board. The rear RF board is the third board standing on end toward the center of the TSQ 8000 instrument. Use a T20 Torxhead screwdriver to remove the screw holding the board and bracket to the chassis. CAUTION - INSTRUMENT DAMAGE Do not touch the components of the boards. Hold the boards by the sheet metal bracket. Thermo Scientific TSQ 8000 Hardware Manual 345 3 Advanced Troubleshooting Replacing the Collision Gas Components Figure 373. Locating the RF Boards and Brackets . Rear RF Board Large Glass Manifold Cover Brackets 11. To remove the rear RF board, use your fingers to pry the brackets of the board away from the chassis and toward the left side of the instrument. 12. Lift the board out of the TSQ 8000 instrument. 346 TSQ 8000 Hardware Manual Thermo Scientific 3 Advanced Troubleshooting Replacing the Collision Gas Components 13. Use a T20 Torxhead screwdriver to loosen the two screws holding the support bracket to the bottom of the instrument. Figure 374. Removing the Controller Interface Board Support Bracket Controller Interface Board Support Bracket 14. Remove the controller interface board and PC communication board from the instrument. The boards are attached together. 15. Disconnect the Ethernet cable from the PC communication board. Thermo Scientific TSQ 8000 Hardware Manual 347 3 Advanced Troubleshooting Replacing the Collision Gas Components Figure 375. Disconnecting the Controller Interface Board Ethernet Cable PC Communication Board Controller Interface Board 16. Disconnect the tubing from the tee connecting the collision gas module to the foreline adapter. The tubing is connected at the tee with a compression fitting. Figure 376. Identifying the Tubes on the Collision Gas Module Tubing to Bulkhead Fitting on Chassis Compression Fitting Tubing to Collision Cell through Manifold Tubing to Tee Connected to Foreline Adapter 17. If you need to replace the tee, unscrew it from the foreline adapter and replace it. You may also replace the foreline adapter if necessary. 18. Disconnect the collision gas tubing from the module. The tubing is secured to the module using a compression fitting. 348 TSQ 8000 Hardware Manual Thermo Scientific 3 Advanced Troubleshooting Replacing the Collision Gas Components Figure 377. Locating the Collision Gas Module Foreline Adapter Tubing to Collision Cell Collision Gas Module 19. Remove the large glass manifold cover. Note You may skip this step if you are not removing the collision gas tubing from the collision cell. 20. If you are replacing the collision gas module and do not need to replace the tubing to the collision cell, you may leave the tubing attached to the manifold and collision cell and remove the tubing from the collision gas module only. If you are replacing the tubing to the collision cell, disconnect the collision gas tubing from the collision cell and from the compression fitting on the manifold. Figure 378. Disconnecting the Tubing from the Collision Cell Collision Gas Tubing Thermo Scientific TSQ 8000 Hardware Manual 349 3 Advanced Troubleshooting Replacing the Collision Gas Components 21. Pull the tubing out of the manifold. Replace if necessary. 22. Disconnect the collision gas module cable from the distribution board. Figure 379. Disconnecting the Collision Gas Module Cable from the Distribution Board Collision Gas Module Cable Connection 23. Disconnect the 1/16 in. tubing from the bulkhead compression fitting located on the left hand sub panel. Figure 380. Disconnecting the Cable to the Bulkhead Fitting Bulkhead Fitting Collision Gas Module Tubing 24. Use a T20 Torxhead screwdriver to remove the two screws on the collision gas module. 25. Remove the collision gas module and replace if necessary. 350 TSQ 8000 Hardware Manual Thermo Scientific 3 Advanced Troubleshooting Replacing the Collision Gas Components 26. Reconnect the collision gas module to the instrument with the two screws. 27. Reconnect the 1/16 in. tubing to the bulkhead fitting through the a graphite Vespel ferrule. 28. Reconnect the collision gas tubing to the collision gas module at the compression fitting. 29. If you removed it from the manifold, replace the collision gas tubing through the compression fitting in the manifold. 30. Reconnect the collision gas tubing to the collision cell. 31. Replace the large glass manifold cover. 32. Reconnect the collision gas module cable to the distribution board. 33. Reconnect the tubing to the tee connected to the foreline adapter. 34. Replace the controller interface board and PC communication board and reconnect the Ethernet cable. 35. Replace the rear RF board. 36. Replace the top, left hand front, and right side panels and secure with screws. 37. Move the TSQ 8000 next to the GC. 38. Restart your system by following the instructions in “Restarting the System” on page 118. Thermo Scientific TSQ 8000 Hardware Manual 351 3 Advanced Troubleshooting Replacing Fans and Filters Replacing Fans and Filters To efficiently cool the TSQ 8000 instrument while it is being used, air must be allowed to flow in through the front of the instrument and out the back. The instrument is equipped with a fan that keeps the air flowing and filters that minimize the amount of dust that enters the system. Dust can cause problems by insulating electronic components, which can lead to overheating. To keep the instrument as cool as possible, we require that you keep all the covers of the instrument attached while it is in use. If the fan or filters in your TSQ 8000 instrument get damaged, use the illustrations below to visually locate a component and then follow the process to replace it. If your filters are dirty, but do not need to be replaced, see Cleaning the Filters. Figure 381. Replaceable Fan and Filter Components of the TSQ 8000 System Chassis Cooling Fan Front Wire Mesh Filter 352 TSQ 8000 Hardware Manual Turbo Cooling Fan Filter Thermo Scientific 3 Advanced Troubleshooting Replacing Fans and Filters Fan Plenum Left Rear Wire Mesh Filter Air Deflector Turbo Cooling Fan Thermo Scientific TSQ 8000 Hardware Manual 353 3 Advanced Troubleshooting Replacing Fans and Filters Front Wire Mesh Filter To replace the front wire mesh filter Note If needed, you can order an additional dust filter. See the TSQ 8000 Spare Parts Guide for ordering information. 1. Shut down your system by following the steps in “Shutting Down the TSQ 8000 System” on page 105. Note You do not have to remove the ion source cartridge or column or vent the instrument. If you are using hydrogen as a carrier gas, power off the GC. 2. Use a T10 Torxhead screwdriver to remove the six screws holding the front wire mesh filter to the interior front panel. 3. Remove and replace the front wire mesh filter. 4. Reattach the six screws holding the front wire mesh filter to the interior front panel. Figure 382. Replacing the Front Wire Mesh Filter Screws 5. Restart your system by following the instructions in “Restarting the System” on page 118. 354 TSQ 8000 Hardware Manual Thermo Scientific 3 Advanced Troubleshooting Replacing Fans and Filters Left Rear Wire Mesh Filter To replace the left rear wire mesh filter Note See the TSQ 8000 Spare Parts Guide for ordering information. 1. Shut down your system by following the steps in “Shutting Down the TSQ 8000 System” on page 105. Note You do not have to remove the ion source cartridge or column or vent the instrument. If you are using hydrogen as a carrier gas, power off the GC. 2. Use a T10 Torxhead screwdriver to remove the four screws holding the left rear wire mesh filter to the left hand sub panel. Figure 383. Replacing the Left Rear Wire Mesh Filter Screws 3. Remove and replace the left rear wire mesh filter. 4. Reattach the four screws holding the left rear wire mesh filter to the left hand sub panel. 5. Restart your system by following the instructions in “Restarting the System” on page 118. Thermo Scientific TSQ 8000 Hardware Manual 355 3 Advanced Troubleshooting Replacing Fans and Filters Chassis Cooling Fan and Fan Plenum To replace the chassis cooling fan and fan plenum Note See the TSQ 8000 Spare Parts Guide for information about ordering this component. 1. Shut down your system by following the steps in “Shutting Down the TSQ 8000 System” on page 105. Note You do not have to remove the ion source cartridge or column or vent the instrument. If you are using hydrogen as a carrier gas, power off the GC. 2. Use a T20 Torxhead screwdriver to loosen the top cover panel screw from the front panel. If you are using hydrogen you must also remove the hydrogen safety screws. Slide the top cover panel toward the back of the instrument and lift it off. 3. Remove the four screws securing the left hand front panel to the chassis. One of the screws is located on the interior front panel of the instrument. Figure 384. Locating the Left Hand Front Panel Screws Screws Left Hand Front Panel Screw on Front of Instrument 4. Lift the left hand front panel off the instrument. 356 TSQ 8000 Hardware Manual Thermo Scientific 3 Advanced Troubleshooting Replacing Fans and Filters 5. The lens driver board is the first board standing on end in the center of the instrument Figure 385. Locating the Lens Driver Board Bracket Lens Driver Board 6. Look through the left side of the instrument and use a T20 Torxhead screwdriver to loosen the screw holding the board to the chassis. Tip The bracket has a white diagram describing the location of this screw. It is approximately two inches from the top of the board directly under the white label. Thermo Scientific TSQ 8000 Hardware Manual 357 3 Advanced Troubleshooting Replacing Fans and Filters Figure 386. Removing the Lens Driver Board Lens Driver Board Screw 7. Loosening the screw will separate the board from the instrument. The screw is captured, so do not attempt to completely remove it from the board and bracket. 8. Lift the lens driver board out of the instrument. Be careful as space is limited. CAUTION - INSTRUMENT DAMAGE Limit handling of the boards as much as possible. Do not touch any board components. Hold the board by the sheet metal bracket only. 358 TSQ 8000 Hardware Manual Thermo Scientific 3 Advanced Troubleshooting Replacing Fans and Filters Figure 387. Removing the Chassis Cooling Fan and Pan Plenum Fan Plenum Air Deflector Left Side Screws Front Screws 9. Remove the six screws holding the fan plenum to the chassis. Two are on the left side of the instrument, and four are attached to the interior front panel. Thermo Scientific TSQ 8000 Hardware Manual 359 3 Advanced Troubleshooting Replacing Fans and Filters 10. Disconnect the fan from the distribution board on the bottom of the instrument. 11. Remove the entire fan plenum assembly including the fan and air deflector out of the instrument. 12. Remove the four nylon rivets holding the chassis cooling fan to the fan plenum. Figure 388. Locating the Nylon Rivets on the Chassis Cooling Fan Nylon Rivets 13. Remove and replace the chassis cooling fan or the fan plenum as necessary. 14. Transfer the air deflector to the new fan using two nylon rivets. 15. Reattach the two screws connecting the chassis cooling fan to the air deflector. 16. Reattach the four nylon rivets holding the chassis cooling fan to the fan plenum. 17. Connect the fan to the distribution board. 18. Reattach the six screws connecting the fan plenum to the chassis. 19. Replace the lens driver board by aligning the connector on the bottom of the board with the connectors on the distribution board beneath it. It will drop into the slot when it is in the right position. 20. Push the lens driver board down into the connector. 360 TSQ 8000 Hardware Manual Thermo Scientific 3 Advanced Troubleshooting Replacing Fans and Filters Figure 389. Reinstalling the Lens Driver Board Connector for Lens Driver Board 21. Look through the left side of the instrument and use a T20 Torxhead screwdriver to tighten the screw holding the lens driver board in place on the chassis. 22. Reattach the left hand front panel and tighten the four screws holding it in place. 23. Reattach the top cover panel and tighten the screw holding it in place. 24. Restart your system by following the instructions in “Restarting the System” on page 118. Thermo Scientific TSQ 8000 Hardware Manual 361 3 Advanced Troubleshooting Replacing Fans and Filters Air Deflector To replace the air deflector Note See the TSQ 8000 Spare Parts Guide for ordering information. 1. Shut down your system by following the steps in “Shutting Down the TSQ 8000 System” on page 105. You do not need to remove the ion source cartridge or column or vent the instrument. If you are using hydrogen as a carrier gas, power off the GC. 2. Slide the top cover panel toward the back of the instrument and lift it off. 3. Use a T20 Torxhead screwdriver to remove the four screws securing the left hand front panel to the chassis. One of the screws is located on the interior front panel of the instrument. Figure 390. Locating the Left Hand Front Panel Screws Screws Left Hand Front Panel Screw on Front of Instrument 4. Lift the left hand front panel off the instrument. 5. Remove the two rivets holding the air deflector to the chassis cooling fan. 362 TSQ 8000 Hardware Manual Thermo Scientific 3 Advanced Troubleshooting Replacing Fans and Filters Figure 391. Replacing the Air Deflector Controller Interface Board Air Deflector Chassis Cooling Fan 6. Lift the air deflector carefully out of the instrument and replace it. 7. Carefully replace the air deflector so that it is positioned correctly behind the controller interface board. 8. Reattach the two rivets holding the air deflector to the chassis cooling fan. 9. Reattach the four screws securing the left hand front panel to the chassis. 10. Restart your system by following the instructions in “Restarting the System” on page 118. Thermo Scientific TSQ 8000 Hardware Manual 363 3 Advanced Troubleshooting Replacing Fans and Filters Turbo Cooling Fan and Turbo Cooling Fan Filter To replace the turbo cooling fan and turbo cooling fan filter Note See the TSQ 8000 Spare Parts Guide for ordering information. 1. Shut down your system by following the steps in “Shutting Down the TSQ 8000 System” on page 105. You do not need to remove the ion source cartridge. 2. Slide the top cover panel toward the back of the instrument and lift it off. 3. Move the GC away from the TSQ 8000 instrument. 4. Use a T20 Torxhead screwdriver to remove the five screws on the right side panel. Figure 392. Removing the Right Side Panel Screws Right Side Panel Screws 5. Lift the right side panel off the instrument. 6. Use a T20 Torxhead screwdriver to remove the four screws securing the left hand front panel to the chassis. One of the screws is located on the interior front panel of the instrument. 364 TSQ 8000 Hardware Manual Thermo Scientific 3 Advanced Troubleshooting Replacing Fans and Filters Figure 393. Locating the Left Hand Front Panel Screws Screws Left Hand Front Panel Screw on Front of Instrument 7. Lift the left hand front panel off the instrument. 8. The lens driver board is the first board standing on end in the center of the instrument. Figure 394. Locating the Lens Driver Board Bracket Thermo Scientific Lens Driver Board TSQ 8000 Hardware Manual 365 3 Advanced Troubleshooting Replacing Fans and Filters 9. Look through the left side of the instrument and use a T20 Torxhead screwdriver to loosen the screw holding the board to the chassis. Tip The bracket has a white diagram describing the location of this screw. It is approximately two inches from the top of the board directly under the white label. Figure 395. Removing the Lens Driver Board Lens Driver Board Screw 10. Loosening the screw will separate the board from the instrument. The screw is captured, so do not attempt to completely remove it from the board and bracket. 11. Lift the lens driver board out of the instrument. Be careful as space is limited. CAUTION - INSTRUMENT DAMAGE Limit handling of the boards as much as possible. Do not touch any board components. Hold the board by the sheet metal bracket only. 366 TSQ 8000 Hardware Manual Thermo Scientific 3 Advanced Troubleshooting Replacing Fans and Filters Figure 396. Locating the Screws Connecting the Fan Plenum to the Instrument Fan Plenum Air Deflector Left Side Screws Electrical Cable Front Screws 12. Remove the six screws holding the fan plenum to the chassis. Two are on the left side of the instrument, and four are attached to the interior front panel. Thermo Scientific TSQ 8000 Hardware Manual 367 3 Advanced Troubleshooting Replacing Fans and Filters 13. Disconnect the fan from the distribution board on the bottom of the instrument. 14. Lift the fan plenum and chassis cooling fan out of the instrument. Figure 397. Removing the Fan Plenum and Chassis Cooling Fan 15. Disconnect the cable to the turbo cooling fan from the distribution board. 16. Remove the two corner M3 flat head screws from the turbo cooling fan and replace the fan. 17. If you need to replace the turbo cooling fan filter, use a T10 Torxhead screwdriver to remove the four screws holding the turbo cooling fan filter to the interior front panel. 18. Remove and replace the turbo cooling fan filter. 368 TSQ 8000 Hardware Manual Thermo Scientific 3 Advanced Troubleshooting Replacing Fans and Filters Figure 398. Replacing the Turbo Cooling Fan Filter Screws 19. Reattach the two screws holding the turbo cooling fan filter to the interior front panel. Thermo Scientific TSQ 8000 Hardware Manual 369 3 Advanced Troubleshooting Replacing Fans and Filters Figure 399. Replacing the Turbo Cooling Fan Turbo Cooling Fan 20. Reconnect the turbo cooling fan cable to the distribution board. 21. Replace the fan plenum, chassis cooling fan, and air deflector assembly into the instrument. 22. Reattach the six screws securing the fan plenum to the chassis. 23. Reconnect the cable on the chassis cooling fan to the distribution board. 24. Replace the lens driver board by aligning the connector on the bottom of the board with the connectors on the distribution board beneath it. It will drop into the slot when it is in the right position. 25. Push the lens driver board down into the connector. 370 TSQ 8000 Hardware Manual Thermo Scientific 3 Advanced Troubleshooting Replacing Fans and Filters Figure 400. Reinstalling the Lens Driver Board Connector for Lens Driver Board 26. Look through the left side of the instrument and use a T20 Torxhead screwdriver to tighten the screw holding the lens driver board in place on the chassis. 27. Replace the right side panel and reattach the four screws. 28. Replace the left hand front panel and reattach the four screws. 29. Replace the top cover panel and reattach the top cover panel screw. 30. Reattach the GC. 31. Restart your system by following the instructions in “Restarting the System” on page 118. Thermo Scientific TSQ 8000 Hardware Manual 371 3 Advanced Troubleshooting Replacing the Turbomolecular Pump Replacing the Turbomolecular Pump The turbomolecular pump is a multi-stage axial-flow turbine in which high speed rotating blades provide compression by increasing the probability of gas molecules moving in the pumping direction. The turbomolecular pump is optimized for molecular flow conditions and requires the use of a rough pump to exhaust to atmosphere. To install or replace the turbomolecular pump Note See the TSQ 8000 Spare Parts Guide for ordering information. 1. Shut down your system by following the steps in “Shutting Down the TSQ 8000 System” on page 105. You do not have to remove the ion source cartridge. 2. Use a T20 Torxhead screwdriver to loosen the top cover panel screw from the front panel. If you are using hydrogen you must also remove the hydrogen safety screws. Slide the top cover panel toward the back of the instrument and lift it off. 3. Use a T20 Torxhead screwdriver to remove the five screws on the right side panel. Figure 401. Removing the Right Side Panel Screws Right Side Panel Screws 4. Make sure the electrometer board cable is not in the way when you remove the power module. 5. Disconnect the power cables from the side of the TSQ 8000 instrument. 372 TSQ 8000 Hardware Manual Thermo Scientific 3 Advanced Troubleshooting Replacing the Turbomolecular Pump Figure 402. Locating the TSQ 8000System Power Cables System Mech Pump Connection Optional Mech Pump Connection AC Input Connector Thermo Scientific TSQ 8000 Hardware Manual 373 6. Use a T20 Torxhead screwdriver to remove the two screws holding the power supply system to the top of the back panel. Figure 403. Removing the Power Module Screws Screws 7. Grasp the power supply system and lift it out of the instrument. It fits snugly, so you may have to gently shake it as you lift it out. 3 Advanced Troubleshooting Replacing the Turbomolecular Pump 8. Disconnect the turbo pump cable from the distribution board. Figure 404. Disconnecting the Turbo Pump Cable from the Distribution Board Turbo Pump Cable Connector 9. Remove the N25 connector that connects the foreline adapter to the turbomolecular pump. 10. Pull the adapter away from the turbomolecular pump. 11. Use a 13mm wrench to loosen the four clamps at the top of the turbomolecular pump. 12. Remove the two clamps that hold the turbomolecular pump to the manifold on the transfer line side. Thermo Scientific TSQ 8000 Hardware Manual 375 3 Advanced Troubleshooting Replacing the Turbomolecular Pump Figure 405. Removing the Turbomolecular Pump Clamps N25 Connector 13. Lift the turbomolecular pump away from the remaining clamps. 14. Remove the turbomolecular pump from the chassis. You may have to tilt the turbo pump to get it out of the chassis. 15. Insert a new turbomolecular pump into the chassis. Note There is a centering ring with an o-ring seal that must be correctly placed between the pump and the vacuum manifold. 376 TSQ 8000 Hardware Manual Thermo Scientific 3 Advanced Troubleshooting Replacing the Turbomolecular Pump Figure 406. Installing the Turbomolecular Pump 16. Lift the turbomolecular pump up and onto the support clamps. Note You may need assistance to lift the pump up and onto the clamps. The turbo pump is large, heavy and awkward to hold with one hand while you are tightening the clamps with a wrench. If you remove the left hand front panel, control board, lens driver board, and RF board, it is easier for the other person to hold the pump as you tighten the clamps. 17. Reattach the remaining clamps. 18. Tighten all the bolts holding the turbomolecular pump to the chassis. 19. Attach the adapter to the turbo pump and clamp it in place. 20. Reconnect the turbomolecular pump cable to the distribution board. 21. Reinstall the power module by aligning its connector with the connector on the distribution board beneath it. Make sure it is flush against the top of the chassis and the screw holes line up. It will click into place when its in the right position. 22. Reattach the two screws holding the power module to the instrument. 23. Reconnect the power cables on the left side of the instrument. Make sure you attach the cables properly. The foreline pump connects to the System Mech Pump connector on the left hand sub panel of the instrument. 24. Replace the right side panel and tighten the five screws. 25. Replace the top cover panel and tighten the screw. 26. Reattach the GC. 27. Restart your system by following the instructions in “Restarting the System” on page 118. Thermo Scientific TSQ 8000 Hardware Manual 377 3 Advanced Troubleshooting Convectron Gauge and Foreline Adapter with Hose Convectron Gauge and Foreline Adapter with Hose A convectron gauge measures and controls the pressure in the foreline that is connected to the turbomolecular pump and rough pump. If the foreline pressure gets too high, convectron gauge decreases the power going to the turbomolecular pump. The convectron gauge and foreline adapter are connected to the foreline hose, which is connected to the turbomolecular pump. To replace a convectron gauge and foreline adapter with hose Note See the TSQ 8000 Spare Parts Guide for ordering information. 1. Shut down your system by following the steps in “Shutting Down the TSQ 8000 System” on page 105. You do not have to remove the ion source cartridge. 2. Slide the top cover panel toward the back of the instrument and lift it off. 3. Use a T20 Torxhead screwdriver to remove the four screws securing the left hand front panel to the chassis. One of the screws is located on the interior front panel of the instrument. Figure 407. Locating the Left Hand Front Panel Screws Screws Left Hand Front Panel Screw on Front of Instrument 4. Lift the left hand front panel off the instrument. 5. Move the GC away from the TSQ 8000 instrument. 378 TSQ 8000 Hardware Manual Thermo Scientific 3 Advanced Troubleshooting Convectron Gauge and Foreline Adapter with Hose 6. Use a T20 Torxhead screwdriver to remove the five screws on the right side panel. Figure 408. Removing the Right Side Panel Screws Right Side Panel Screws 7. Disconnect the vacuum hose from the adapter on the foreline pump. 8. Remove the rough pump clamp on the turbomolecular pump and the adapter. Thermo Scientific TSQ 8000 Hardware Manual 379 3 Advanced Troubleshooting Convectron Gauge and Foreline Adapter with Hose 9. Insert and twist the convectron gauge into the threaded hole on the foreline adapter. Note Before you insert the convectron gauge in the hole, wrap Teflon tape around the part to be inserted. The tape prevents vacuum leaks. Figure 409. Installing the Foreline Adapter to the Convectron Gauge Convectron Gauge Tape Foreline Adapter 10. Attach the foreline hose on the adapter. 11. Use the rough pump clamp to attach the adapter to the turbo pump. 12. Attach the cable to the distribution board and convectron gauge. 13. Reattach the right side panel and the screws holding it in place. 14. Replace the top cover panel and tighten the screw. 15. Reattach the GC. 16. Restart your system by following the instructions in “Restarting the System” on page 118. 380 TSQ 8000 Hardware Manual Thermo Scientific 4 Upgrade Equipment This chapter describes how to install the upgrade equipment that is available for the TSQ 8000 mass spectrometer. See the TSQ 8000 Spare Parts Manual for information about ordering the equipment in this chapter. Contents • Dust Filter • CI Reagent Gas Flow Module • CI Ion Volume • EI/CI Ion Volume • Ion Gauge and Tube Shield • Probe Controller Thermo Scientific TSQ 8000 Hardware Manual 381 4 Upgrade Equipment Dust Filter Dust Filter An optional dust filter is available for the TSQ 8000 system. It helps prevent dust from accumulating on the electrical components and damaging your system. If you have a particularly dusty environment, the dust filter will help your instrument operate at a cooler temperature for a longer period of time. 1. Unless you are using hydrogen as a carrier gas, you do not have to shut down the GC, simply open the front door of the TSQ 8000 instrument. 2. If you are using hydrogen, shut down your system by following the steps in “Shutting Down the TSQ 8000 System” on page 105. You do not need to remove the ion source cartridge or column or vent the instrument. 3. Remove the two screws holding the dust filter to the interior front panel. 4. Remove and replace the dust filter. 5. Reattach the two screws holding the dust filter to the interior front panel. Figure 410. Replacing the Dust Filter Dust Filter Screws Dust Filter 6. If necessary, restart your system by following the instructions in “Restarting the System” on page 118. 382 TSQ 8000 Hardware Manual Thermo Scientific 4 Upgrade Equipment CI Reagent Gas Flow Module CI Reagent Gas Flow Module The CI reagent gas flow module controls the flow of CI reagent gas into the ion source and is located at the back left of the TSQ 8000 instrument. The module uses electronic pressure control to precisely set the flow of reagent gas. The flow is programmed using the instrument control software, which allows you to accurately reproduce flows. To install a new CI reagent gas flow module: 1. Shut down your system by following the steps in “Shutting Down the TSQ 8000 System” on page 105. 2. Use a T20 Torxhead screwdriver to loosen the top cover panel. 3. Slide the top cover panel toward the back of the instrument and lift it off. 4. Remove the four screws securing the left hand front panel to the chassis. One of the screws is located on the interior front panel of the instrument. Figure 411. Locating the Left Hand Front Panel Screws Screws Left Hand Front Panel Screw on Front of Instrument 5. Lift the left hand front panel off the instrument. 6. Disconnect the power connections from the left hand sub panel. Thermo Scientific TSQ 8000 Hardware Manual 383 4 Upgrade Equipment CI Reagent Gas Flow Module Figure 412. Locating Components on the Left Hand Sub Panel Left Hand Sub Panel System Mech Pump Connection Screw Reagent Gas (A & B) Connectors Power Switch Optional Mech Pump Connection AC Input Connector Screw Screw 384 TSQ 8000 Hardware Manual Thermo Scientific 4 Upgrade Equipment CI Reagent Gas Flow Module 7. Use a T20 Torxhead screwdriver to remove the two screws holding the power supply system to the top of the back panel. Figure 413. Removing the Power Module Screws Screws 8. Grasp the power supply system and lift it out of the instrument. It fits snugly, so you may have to gently shake it as you lift it out. 9. Disconnect the CI reagent gas supply tubes from the CI reagent gas flow module. 10. Remove the three screws holding the left hand sub panel to the chassis and pull the panel away to expose the screws that hold the CI reagent gas flow module to the chassis. Thermo Scientific TSQ 8000 Hardware Manual 385 4 Upgrade Equipment CI Reagent Gas Flow Module 11. Use a T20 Torxhead screwdriver to remove the two screws holding the support bracket to the bottom of the instrument. Figure 414. Removing the Controller Interface Board Support Bracket Support Bracket Screws 12. Disconnect the ethernet cable from the PC communication board. 13. Remove the controller interface board and PC communication board from the instrument. The two boards are connected. Do not separate them. 386 TSQ 8000 Hardware Manual Thermo Scientific 4 Upgrade Equipment CI Reagent Gas Flow Module Figure 415. Removing the Controller Interface Board and PC Communication Board PC Communication Board Controller Interface Board Ethernet Cable 14. Remove the foreline gas tube from the CI reagent gas flow module. 15. Remove the 1/16 in. stainless steel tubing on the output connector of the CI reagent gas flow module. 16. Use a T20 Torxhead screwdriver to detach the two screws holding the CI reagent gas flow module to the chassis Figure 416. Installing the CI Reagent Gas Flow Module Screws CI Reagent Gas Flow Module CI Output Connector Thermo Scientific Foreline Gas Tube TSQ 8000 Hardware Manual 387 4 Upgrade Equipment CI Reagent Gas Flow Module 17. Position the new CI reagent gas flow module on the interior side of the back panel. 18. Use a T20 Torxhead screwdriver to attach the two screws holding the CI reagent gas flow module to the instrument. 19. Use a 1/8 to 1/16 in. reducing ferrule to attach the 1/16 in. stainless steel tubing to the output connector of the CI reagent gas flow module. 20. Reconnect the foreline gas tube tot he CI reagent gas flow module. 21. Attach one of the CI tubes to the transfer line if needed. Figure 417. Attaching a CI Tube to the Transfer Line CI Tube Transfer Line Tubing Connector 22. Look through the top of the instrument and confirm that the CI tube is attached to the mixing chamber and manifold wall. 388 TSQ 8000 Hardware Manual Thermo Scientific 4 Upgrade Equipment CI Reagent Gas Flow Module Figure 418. Attaching a CI Tube to the Mixing Chamber and Manifold Wall Small Glass Manifold Cover CI Tube Gas Mixing Chamber Manifold Wall 23. Attach the CI reagent gas controller cable to the distribution board. Figure 419. Attaching the CI Reagent Gas Cable to Distribution Board CI Reagent Gas Flow Module Connector 24. Reinstall the power module. Push down on the module and make sure it is flush against the top of the chassis and the screw holes line up. 25. Reattach the two screws holding the power module to the instrument. 26. Reattach the controller interface board, the PC communication board, and the support bracket. Thermo Scientific TSQ 8000 Hardware Manual 389 4 Upgrade Equipment CI Reagent Gas Flow Module 27. Connect the Ethernet cable to the PC communication board. 28. Secure the left hand sub panel to the chassis with the three screws. 29. Plug in the power connections. 30. Plumb the reagent gas from your gas supply to either port on your CI gas controller. WARNING - FIRE HAZARD: Some CI gases, such as methane and isobutane, are flammable. Make sure these gases are properly exhausted and all gas fittings on the system are leak-free. Consult your local Environmental and Safety Regulations for information about how to properly exhaust fumes from your laboratory. WARNING - TOXIC SUBSTANCES HAZARD: Some CI gases, such as ammonia, are toxic. Make sure these gases are properly exhausted and all gas fittings on the system are leak-free. Consult your local Environmental and Safety Regulations for information about how to properly exhaust fumes from your laboratory. CAUTION - INSTRUMENT DAMAGE: Do not exceed 240 kPa (35 psig) or you could damage the CI reagent gas flow module. 31. Turn on the reagent gas at the gas supply. 32. Check for leaks at each reagent gas fitting. 33. Reattach the left hand front panel and top cover panel and tighten the screws. 34. Reattach the top cover panel and left side panel and tighten the screws. 35. Restart your system by following the instructions in “Restarting the System” on page 118. Note Purge air fro the CI reagent gas supply tubing overnight before using your TSQ 8000 instrument to acquire data. 390 TSQ 8000 Hardware Manual Thermo Scientific 4 Upgrade Equipment CI Ion Volume CI Ion Volume The CI ion volume has a smaller electron entrance hole than the EI ion volume. To replace the EI ion volume with a CI ion volume, follow the steps in the Ion Source Cartridge section of this manual. IMPORTANT Always wear clean, lint-free gloves when handling the ion source cartridge. Figure 420. Ion Source Cartridge Components Lens 2 Ion Volume-Repeller Insulator Ion Volume Locking Ring Ion Volume Repeller Spring Ion Cartridge Sleeve Lens 1 Lens 3/RF Lens Repeller Repeller Nut Figure 421. Ion Volumes Available for the TSQ 8000 Mass Spectrometer EI Ion Volume Thermo Scientific CI Ion Volume EI/CI Ion Volume TSQ 8000 Hardware Manual 391 4 Upgrade Equipment EI/CI Ion Volume EI/CI Ion Volume If you want to acquire data in both EI and CI modes, the EI/CI Ion volume allows you to do this. The performance will be lower with the combined ion volume than with the dedicated EI or CI ion volumes, in EI and positive CI modes. Tune the instrument with the dedicated ion volumes before using the combined ion volume. In some cases, negative CI performance is enhanced with the combined EI/CI ion volume and tuning is possible in negative CI mode. The EI/CI ion volume has two small electron holes. To install a combination EI/CI ion volume, follow the steps in the Ion Source Cartridge section of this manual. IMPORTANT Always wear clean, lint-free gloves when handling the ion source cartridge. Figure 422. EI/CI Ion Source Cartridge Components Lens 2 Ion Volume-Repeller Insulator Ion Volume Locking Ring Ion Volume Repeller Spring Ion Cartridge Sleeve Lens 1 Lens 3/RF Lens Repeller Repeller Nut Figure 423. Ion Volumes Available for the TSQ 8000 Mass Spectrometer EI Ion Volume 392 TSQ 8000 Hardware Manual CI Ion Volume EI/CI Ion Volume Thermo Scientific 4 Upgrade Equipment Ion Gauge and Tube Shield Ion Gauge and Tube Shield An ion gauge measures the pressure inside the vacuum manifold and produces energetic electrons to ionize molecules. Positive ions formed in the ion gauge are attracted to a collector. If you have an ion gauge, it must be powered on and the pressure must be less than 1x10⁻³ Torr to turn on the filament, electron multiplier, or conversion dynode. This pressure setting protects these components from being damaged. To install an ion gauge and tube shield 1. Shut down your system by following the steps in “Shutting Down the TSQ 8000 System” on page 105. 2. Slide the top cover panel toward the back of the instrument and lift it off. 3. Move the GC away from the TSQ 8000 instrument. 4. Use a T20 Torxhead screwdriver to remove the five screws on the right side panel. Figure 424. Removing the Right Side Panel Screws Right Side Panel Screws 5. Lift the right side panel off the instrument. 6. Attach the ion gauge shield and tube to the board, as shown in the figure below. Note The metal tube can be placed on the board in two different ways. Only one of the orientations will allow the tube to attach correctly to the manifold. Thermo Scientific TSQ 8000 Hardware Manual 393 4 Upgrade Equipment Ion Gauge and Tube Shield Figure 425. Assembling the Ion Gauge Screws (3) Board Tube O-Ring Shield 7. Use a T10 Torxhead screwdriver to attach the screws holding the metal ion gauge shield to the board. 8. Attach the glass ion gauge tube to the shield so the open end is facing away from the board. There is only one way to fit the tube’s electrical connectors onto the board. Tip Insert the tube until there is good electrical contact and ample room on the open end for the o-ring to fit securely. This will prevent the o-ring from sliding off when the assembly is being put on the manifold. 9. Attach the 14-pin cable to the distribution board and ion gauge board. Figure 426. Connecting the Ion Gauge Cable to the Distribution Board Ion Gauge Cable Connector 10. Remove the plug on the bottom of the manifold. 394 TSQ 8000 Hardware Manual Thermo Scientific 4 Upgrade Equipment Ion Gauge and Tube Shield 11. Place the o-ring from the plug on top of the tube. Figure 427. Attaching the O-Ring to the Ion Gauge Tube Tube O-Ring 12. Use a T20 Torxhead screwdriver to attach the ion gauge to the instrument. Figure 428. Installing the Ion Gauge 13. Replace the right side panel and attach the screws holding it in place. 14. Reattach the top cover panel and tighten the screw holding the top cover panel in place. 15. Restart your system by following the instructions in “Restarting the System” on page 118. Thermo Scientific TSQ 8000 Hardware Manual 395 4 Upgrade Equipment Probe Controller Probe Controller The direct probe controller regulates the temperature of the direct sample probes used to vaporize solid or liquid samples into the ion source. For details about using a probe controller, see the ISQ and TSQ 8000 Direct Probe System User Guide (PN 1R120505-0006). There are two types of probes: • The Direct Insertion Probe (DIP) uses a heated sample cup to introduce sample into the ion source. • The Direct Exposure Probe (DEP) uses a heated wire filament to introduce sample into the ion source. To install a DIP or DEP 1. Place the direct probe controller on top of or near the TSQ 8000 instrument. 2. Connect the 9-pin cable to the direct probe controller and to the Accessory Start connector on the left hand sub panel of the instrument. 3. Connect the direct probe controller to the electrical outlet. 4. Connect the DIP or DEP to the direct probe controller with the large gray cable. If you are using a DIP, connect a suitable supply gas to the compression connector on the direct probe controller. Note Before using the direct sample probes, you must remove the ion source from the instrument and replace the repeller with the repeller supplied in the probe kit. The new repeller has a hole in the center. Then replace the ion source into the instrument and allow it time to thermally equilibrate. See the ISQ and TSQ 8000 Direct Probe System User Guide for more details. 396 TSQ 8000 Hardware Manual Thermo Scientific I Index Numerics electrometer board cable, 314 heat shield, 312 lens driver board, 280 PC communication board, 292 RF board, 266 RF board/rod driver board kit, 272 source interface board, 312 20-pin feedthrough kit illustration, 289 installing, 284 4-pin feedthrough installing, 275 A C air leaks, troubleshooting, 92 analyzer components about, 104 illustration, 104 replacing analyzer tray, 105 ion guide wires, 129 ion guide, 119 ion guide-quadrupole stabilizer, 124 quadrupole rod endcap (metal), 137 quadrupole wires, 134 quadrupole, 130 replacing, 104 analyzer tray replacing, 105 analyzer tray (complete) illustration, 104 anode feedthrough replacing, 243 axle bearing, replacing, 203 axle seal, replacing, 203 B back manifold plate installing, 227 boards replacing 265 20-pin feedthrough kit, 284 4-pin feedthrough, 275 electrometer board and shield, 316 Thermo Scientific calibrant reservoir and cover illustration, 338 refilling, 52 calibrant reservoir kit replacing, 337 calibrant, refilling, 52 calibration gas components illustration, 328 replacing 328 calibrant reservoir kit, 337 calibration gas controller, 329 calibration gas controller maintaining 51 refilling calibrant reservoir, 52 replacing, 329 chassis feet illustration, 258 replacing, 258 chemical noise, troubleshooting, 87 CI ion volume installing, 391 CI reagent gas flow module installing, 383 cleaning delicate components, 72 drying delicate components, 73 drying durable components, 71 durable components, 68 filters, 74 TSQ 8000 Hardware Manual 397 Index: C ion source cartridge, 27 sonicating durable components, 70 supplies, 68 clip in vacuum interlock, replacing, 202 collision gas components replacing, 344 column leak checking, 14 temperature, 16 columns choosing, 2 replacing, 12 when to replace, 2 communication issues, investigating, 84 Communications Check diagnostics, about, 84 compliance FCC x regulatory ix WEEE xi components analyzer 104 analyzer tray, 105 ion guide wire set, 129 ion guide, 119 ion guide-quadrupole stabilizer, 124 quadrupole rod endcap (metal), 137 quadrupole wire set, 134 quadrupole, 130 boards 265 4-pin feedthrough, 275 distribution board, 298 electrometer board and shield, 316 electrometer board cable, 314 heat shield, 314 lens driver board, 280 PC communication board, 292 RF board, 266 RF board/rod driver board kit, 272 source interface board, 312 calibration gas 328 calibrant reservoir kit, 337 gas mixing chamber, 339 transfer line, 340 chassis cooling fan, 356 covers 252 chassis feet, 258 left side panel, 254 right side panel, 256 top cover panel, 253 398 TSQ 8000 Hardware Manual top manifold cover, 257 electron multiplier 235 anode feedthrough, 243 electron multiplier plate, 236 large feedthroughs, 241 front door 260 hinges and supports, 261 latch, 263 ion source 139 insulating spacers, 154 ion source block, 140 ion source cartridge, 168 lens heater block grounding strap, 160 lens plate and springs, 161 repeller plate, 157 source to ion guide spacer, 163 source-repeller thumbscrews, 150 thumbscrew-repeller spacers, 152 manifold 210 back manifold plate, 227 delivery tube, 233 door hinge, 211 front manifold plate, 217 tray alignment pins, 230 vent valve knob and o-ring, 232 power supplies 318 dynode and multiplier power supply, 323 power supply system, 319 source exchange tool, 192 vacuum interlock 196 inner ball seal, 201 o-ring, 202 outer ball seal, 202 sealing ball, 202 spring, 197, 217 valve axle, 203 connecting AC Input, 11 System or Optional Mech Pump, 20 contaminants, removing, 69 contamination issues, investigating, 87 control board replacing, 312 convectron gauge and foreline adapter with hose illustration, 380 installing, 378 cover components Thermo Scientific Index: D illustration, 252 replacing chassis feet, 258 left side panel, 254 right side panel, 256 top cover panel, 253 top manifold cover, 257 covers replacing 252 anode feedthrough, 243 electron multiplier plate, 236 large feedthroughs, 241 electron multiplier plate, illustration, 239 EMC compliance ix Evacuate light/button, 31, 48, 172, 189 extended capacity turbomolecular pump illustration, 377 installing, 372 F D delivery tube replacing, 233 Detector Check diagnostics, about, 96 diagnostic tune running, 81 diagnostic tune file creating, 78 diagnostics 78 Communications Check, 84 Detector Check, 96 Power Supply Check, 94 RF/DC System Check, 95 Temperature Check, 90 Vacuum System Check, 92 Direct Exposure Probe (DEP), 396 Direct Insert Probe (DIP) controller, 396 distribution board replacing, 298 documentation survey xxv dynode and multiplier power supply replacing, 323 E EI/CI ion volume installing, 392 electromagnetic compatibility x electrometer board and shield replacing, 316 electron multiplier illustration, 65 when to replace, 2 electron multiplier (complete) preserving, 61 replacing, 61 electron multiplier components illustration, 235 replacing 235 Thermo Scientific fan (cooling) replacing, 356 FC 43 51 about, 51 refilling, 52 FCC compliance x feedthroughs 20-pin, 284 4-pin, 275 anode, 243 large, 241 feet, bottom of instrument, replacing, 258 filament increasing life of, 54 replacing, 54 switching, 54 troubleshooting, 89 when to replace, 2, 54 filament and lens control issues, investigating, 89 filament check diagnostics, about, 89 filters chassis cooling fan, replacing, 356 cleaning, 74 intake filters and RF shields, replacing, 354–355, 362, 364 replacing 352 foreline adapter with hose and convectron gauge, installing, 378 foreline pump 20 adding oil, 21 assembling, 25 checking oil, 21 connecting, 20 purging gas from the oil, 23 troubleshooting, 92 when to replace, 2 foreline vacuum hose, connecting, 25 front door components TSQ 8000 Hardware Manual 399 Index: G 260 hinges and supports, replacing, 261 illustration, 260 latch, replacing, 263 front door components, replacing, 260 front door hinges and supports, replacing, 261 front door latch, replacing, 263 front manifold plate installing, 217 front manifold plate kit component illustrations, ??–223 G gas mixing chamber, replacing, 339 GC driver software, 247 powering off, 11 139 insulating spacers, 154 ion source block, 140 ion source cartridge, 168 lens heater block grounding strap, 160 lens plate and springs, 161 repeller plate, 157 source to ion guide spacer, 163 source-repeller thumbscrews, 150 thumbscrew-repeller spacers, 152 ion volume (CI), 391 ion volume (EI/CI), 392 L H heat shield, replacing, 312 hinges front door, 261 manifold door, 211 I injecting FC 43, 53 inner ball seal, replacing, 201 insulating spacers illustration, 156 replacing, 154 ion cartridge tool components, 29, 170 ion gauge and tube shield illustration, 394 installing, 393 ion guide replacing, 119 wires, replacing, 129 ion guide (illustration), 121 ion guide-quadrupole stabilizer, replacing, 124 ion source block illustration, 144 replacing, 140 ion source cartridge assembling, 39 cleaning, 27 illustration (exploded view), 168 inserting onto the tool, 45, 186 replacing, 168 400 when to replace, 2 ion source components about, 139 illustration, 139 replacing TSQ 8000 Hardware Manual large feedthroughs replacing, 241 latch on front door, replacing, 263 leaks, checking for, 14 left side panel replacing, 254 lens control issues, investigating, 89 lens driver board illustration, 281, 285, 302, 357, 365 replacing, 280 lens heater block illustration, 145 lens heater block grounding strap replacing, 160 lens plate and springs replacing, 161 lens voltages, troubleshooting, 89 lens/source heater troubleshooting, 90 lights Busy, 9 Evacuate, 31, 172 Heaters, 8 Power, 8 Vacuum, 8 M maintenance cleaning the filters, 74 cleaning the ion source cartridge, 27 maintaining the foreline pump, 20 refilling the calibration gas reservoir, 51 Thermo Scientific Index: N replacing a column, 12 replacing a filament, 54 replacing the electron multiplier, 61 tools, 3 manifold components illustration, 210 replacing 210 back manifold plate, 227 delivery tube, 233 door hinge, 211 front manifold plate, 217 tray alignment pins, 230 vent valve knob and o-ring, 232 manifold cover (glass), replacing, 257 manifold delivery tube, replacing, 233 manifold door hinge illustration, 214 replacing, 211 model number, location, 101 N noise, checking for, 96 O oil (foreline pump) adding, 21 changing, 23 checking, 21 purging gas, 23 o-rings vacuum interlock, 202 outer ball seal, replacing, 202 P PC communication board illustration, 296, 330 replacing, 292 pins, tray alignment, 230 Power 8 power supplies replacing 318 dynode and multiplier power supply, 323 power supply system, 319 Power Supply Check diagnostics, about, 94 power supply issues, investigating, 94 powering off the TSQ 8000, 10 powering on the TSQ 8000, 7 probe controllers Thermo Scientific installing, 396 pumps foreline (roughing), 20 Q quadrupole rod endcap (metal), replacing, 137 quadrupole wires, replacing, 134 quadrupole, replacing, 130 R refilling, calibrant, 337 regulatory compliance ix repeller plate replacing, 157 replacing analyzer components 104 analyzer tray, 105 ion guide wire set, 129 ion guide, 119 ion guide-quadrupole stabilizer, 124 quadrupole rod endcap (metal), 137 quadrupole wire set, 134 quadrupole, 130 boards 265 20-pin feedthrough kit, 284 4-pin feedthrough, 275 electrometer board and shield, 316 electrometer board cable, 314 heat shield, 312 lens driver board, 280 PC communication board, 292 RF board, 266 RF board/rod driver board kit, 272 source interface board, 314 calibration gas components 328 calibrant reservoir kit, 337 gas mixing chamber, 339 transfer line, 340 chassis cooling fan, 356 collision gas components, 344 covers 252 chassis feet, 258 left side panel, 254 right side panel, 256 top cover panel, 253 top manifold cover, 257 electron multiplier electron multiplier (complete), 61 TSQ 8000 Hardware Manual 401 Index: S electron multiplier components calibration gas controller refilling calibrant reservoir, 52 cleaning delicate components, 72 cleaning stainless steel components, 68 cleaning the filters, 74 cleaning the ion source cartridge, 27 foreline pump 235 anode feedthrough, 243 electron multiplier plate, 236 large feedthroughs, 241 front door components 260 hinges and supports, 261 latch, 263 ion source components 20 adding oil, 21 changing the oil, 23 checking oil, 21 purging gas from the oil, 23 powering off the TSQ 8000, 10 replacing a column, 12 replacing a dual filament, 54 replacing electron multiplier, 61 tools and supplies, 3 venting, 11 139 insulating spacers, 154 ion source block, 140 ion source cartridge, 168 lens heater block grounding strap, 160 lens plate and springs, 161 repeller plate, 157 source to ion guide spacer, 163 thumbscrew-repeller spacers, 152 manifold components 210 back manifold plate, 227 delivery tube, 233 door hinge, 211 front manifold plate, 217 tray alignment pins, 230 vent valve knob and o-ring, 232 power supplies 318 dynode and multiplier power supply, 323 power supply system, 319 source exchange tool components, 192 vacuum interlock components 196 axle bearing, 203 axle seal, 203 inner ball seal, 201 o-ring, 202 outer ball seal, 202 sealing ball, 202 spring, 197, 217 valve axle, 203 RF board replacing, 266 RF board/rod driver board kit illustration, 273 replacing, 272 RF shields and intake filters, replacing, 354–355, 362, 364 RF/DC issues, investigating, 95 RF/DC System Check diagnostics, about, 95 right side panel replacing, 256 routine maintenance 402 TSQ 8000 Hardware Manual S safety standards ix sealing ball, replacing, 202 sensitivity issues, investigating, 96 serial number, location, 101 software, installing, 246 source exchange tool replaceable components, 192 source holder, using, 38, 179 source interface board replacing, 312 source to ion guide spacer illustration, 165 replacing, 163 source-repeller thumbscrews illustration, 151, 153, 155, 158 replacing, 150 spring in vacuum interlock, replacing, 197, 217 stability issues, investigating, 98 survey link xxv system requirements, 248 T Temperature Check diagnostics, about, 90 temperature issues, investigating, 90 temperature, checking, 8 Thermo Foundation, installing, 247 thumbscrew-repeller spacers illustration, 153, 155, 158–159 replacing, 152 tools needed for maintenance, 3 top cover panel Thermo Scientific Index: U illustration, 253 replacing, 253 top manifold cover illustration, 257 replacing, 257 transfer line disconnecting, 342 replacing, 340 troubleshooting, 91 tray (analyzer), about, 104 tray alignment pins illustration, 231, 234 replacing, 230 troubleshooting 77 communication issues, 84 contamination issues, 87 filament and lens control issues, 89 power supply issues, 94 RF/DC issues, 95 sensitivity issues, 96 stability issues, 98 temperature issues, 90 tuning issues, 99 using diagnostics, 78 vacuum issues, 92 TSQ 8000 configuring, 4, 255, 320, 373, 384 filters, 74, 352 foreline pump, 20 lights on front panel, 8 model and serial number, 101 power supplies, 318 powering off, 10 powering on, 7 replacing a column, 12 software, 246 toolkit, 3 venting, 11 tune, diagnostic creating, 78 running, 81 tuning issues, investigating, 99 turbomolecular pumps extended capacity, 372 troubleshooting, 93 dust filters, 382 EI/CI ion volume, 392 ion gauge and tube shield, 393 probe controllers, 396 V vacuum interlock components illustration, 196 replacing axle bearing, 203 axle seal, 203 clip, 202 inner ball seal, 201 o-ring, 202 outer ball seal, 202 sealing ball, 202 spring, 197, 217 valve axle, 203 replacing, 196 vacuum interlock handle, purpose of, 31, 172 vacuum interlock shield, removing, 198, 213, 218, 224 vacuum issues, investigating, 92 Vacuum System Check diagnostics, about, 92 vacuum, achieving, 8 valve axle, replacing, 203 vent valve knob and o-ring, replacing, 232 venting the TSQ 8000, 11 W WEEE compliance xi U upgrade equipment CI ion volume, 391 CI reagent gas flow module, 383 convectron gauge and foreline adapter with hose, 378 Thermo Scientific TSQ 8000 Hardware Manual 403