Download Omnia.7 Quick Start Guide V3.14.51 2-13-15.pages
Transcript
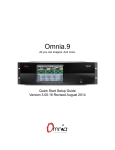
Omnia.7
Quick Start Setup Guide
Version 3.14.51 February 13th, 2015
ATTENTION!
This quick start guide is intended to aid with basic deployment of the unit.
For detailed product and operational information,
please see the full manual at http://telosalliance.com/omnia/omnia7.
For a printed copy, please contact Omnia Support.
Also, please check http://telosalliance.com/omnia/omnia7 periodically
to access your product’s latest software version information
and to download updates when available.
IMPORTANT SAFETY INFORMATION
ABOUT YOUR NEW PRODUCT.
We’ll say it again in a few paragraphs, but we’re saying it here too because it really is
important: The Telos Alliance strongly suggests that you use independent
Uninterruptible Power Supplies (UPS’s) with power line filtering to feed both Omnia.7
power supplies in an effort to prevent damage from electrical storms or power surges.
Your Product Warranty (found at the end of this guide and in the User Manual) does not
cover lightning damage!
More information about lightning protection can be found on the Telos Alliance website
at http://blogs.telosalliance.com/tech/surge-surpression-pointers.
2
Quick Start Setup Guide
We know that you're probably in a hurry to get your new Omnia.7 installed and on the air. If you have
technical expertise and previous knowledge of audio processor fundamentals, this Quick Start Setup
Guide will get you up and running as quickly as possible.
It is important to remember that because some features in Omnia.7 are optional, not everything
referenced in this guide or in the full product manual may be available in your particular unit. Therefore,
some screenshots may differ slightly in appearance.
While Omnia.7 is a svelte 2RU product, we still suggest having an assistant on hand when racking it up to
help balance the unit during installation. We don’t want to see your new processor accidentally land on
the floor nor do we want to live with the guilt of knowing you spent time in the chiropractor’s office
because of something we built. (If you’re going to end up there, make it because of something more fun
than racking up gear). We also strongly recommend using all 4 rack screws for the best support. Finally,
although the unit is fan cooled, leaving an empty rack space directly above and below the unit is still good
practice for both Omnia.7 and the equipment directly above and below it.
Physical Installation and Initial Configuration
Connect AC power to both of the internal power supplies. There is no power switch.
It is always possible for a supply to fail and so having redundant supplies does help protect you against
losing power altogether in that event, but in reality, it is far more likely that the unit will lose power
because of an interruption to the circuit feeding the unit. Therefore, good engineering practice dictates
that each supply should be fed from a different source. At minimum, we recommend that both sources
should be a good quality UPS with adequate surge protection. In an ideal world (where everyone gets
along and you got to build the plant of your dreams from scratch with an unlimited budget) each would be
fed from a completely different circuit for maximum redundancy.
Next, connect the audio inputs as appropriate for your installation. Omnia.7 accepts balanced
professional line-level analog audio via its Left and Right Analog Inputs and AES/EBU digital audio on
standard XLR connectors via its AES inputs.
3
• Note: A important word about AES reference and sample rates!
Omnia.7 offers several clock sync/reference options:
The main AES XLR inputs can accept audio with a reference of either 44.1kHz (for HD Radio) or
48kHz (for DAB). To set the sample rate, navigate to the System > System Configuration >
Sample Rate menu and set the unit’s sample rate to match that of the incoming signal and the
Sync Reference control to “Main Input”. If the incoming AES audio has a different sample rate between 32kHz and 96kHz, it can be up- or
down-sampled to either 44.1 or 48kHz by setting the Sync Reference control to “Reference Input.”
The unit’s sample rate must be selected in the Sample Rate menu.
Finally, a dedicated external reference input is provided on the rear panel via a BNC connector
should it be necessary to sync to a clock that is not present on the incoming AES audio (such as an
HD exporter at the transmitter site). Set the Sync Reference to “Reference Input”. The unit’s
sample rate must be selected in the Sample Rate menu. A BNC-to-XLR cable or adapter (Pin 2
hot, Pin 3 shield) may be used for short runs without concern. For longer runs, a transformer should
be used as needed.
Select the Input Audio Source
Next, navigate to the System > I/O Options > Input menu and select the proper source (analog or AES
digital) for the primary and/or backup inputs. Only the primary input is required. If a backup source is
provided, it can be used as a failover source in the event of a loss of audio on the primary input.
Configure Output Routing
Connect the audio outputs as appropriate for your installation. Omnia.7 supports balanced professional
line-level analog audio via its Left and Right Analog Outputs and AES/EBU digital output on standard XLR
connectors via the AES output. There are also two composite MPX outputs to feed a main/backup
composite STL or transmitter.
If you are using the Analog or AES outputs, navigate to the System > I/O Options > Main Outputs
menu, select the appropriate output source for your particular installation, and adjust the output levels as
needed.
• Note: FM De-emphasized L/R is the least-recommended output option, especially for analog.
Although is it possible in theory to have excellent peak modulation control even with external preemphasis, in practice not every stereo generator does pre-emphasis correctly. Certain stereo
generators use phase-linear pre-emphasis in DSP, which is incorrect and causes roughly 20%
overshoot (2dB loudness loss) when used with any audio processor.
If you using the composite outputs, navigate to the System > I/O Options > FM Options menu to set the
pre-emphasis, pilot injection, audio bandwidth, and single/dual sideband preference. Select the proper
output source for each composite output and adjust the output level to achieve the desired modulation
level.
Omnia.7 is set up by default to provide a pre-emphasized MPX signal from the FM processing core. If you
must use an external stereo generator, some additional configuration is required.
4
• Note: Feeding the transmitter with L/R pre-emphasized output instead of the MPX output has
several inherent performance disadvantages, including the loss of peaks beyond 91% (leaving
room for the 19kHz pilot tone, as we will not know its phase) - a capability unique to the MPX
clipper. The (optional) internal RDS encoder also becomes unavailable, though the L/R clipper does
employ psychoacoustic distortion masking.
5
Adjust FM Diversity Delay (If equipped with HD option)
The FM diversity delay can be set by going to the System > I/O Options > Diversity Delay menu.
Adjust Input Audio
From the Home menu, navigate to the System > I/O Options > Source Adjustment menu. Use the
Input Gain sliders to set the input levels. When driving the input with typical program material at normal
operating levels, adjust the input gain while watching the Input meters in the Processing display window
so that average levels keep the meters in the green. If the meters flash red, the input is being overdriven
and levels to the Omnia.7 must be reduced. If necessary, it is also possible to invert the polarity of either
or both channels with the Invert control. The Mode control allows several different channel configuration
options. A static left/right channel balance offset can also be dialed in.
Choose a Preset
Return to the Home Menu, then navigate to the FM > Processing > Processing menu. Select Load
Preset to choose one of the factory presets. "Rustonium 5B" is the default preset and provides a wellbalanced sound with competitive loudness, suitable for nearly any format. However, we suggest you
audition all of the factory presets to get a feel for each of them.
• Note: Omnia.7 contains a relay-bypass feature that allows unprocessed audio to pass directly
through the unit to prevent complete loss of audio (dead air) any time the software is not active.
This includes when the unit loses power, is in the start-up process, or must re-initialize its software
after applying certain user-initiated configuration changes.
Normally this is not an issue. However, in certain situations - for example, if you have a CD player
connected to the analog inputs and an amplifier or speakers connected to the analog outputs - this
means the input and output will be directly connected with no attenuation whatsoever, resulting in
fried speakers (or eardrums) or an eviction notice following complaints from irritable neighbors. When engaged, the bypass relays hardwire the the analog inputs to the analog outputs, and the
AES digital inputs to the AES digital outputs. 6
General Processing Advice
Know Your Goals
The first step to successful processing – and this applies to ANY processor, not just Omnia.7 - is defining
your goals. Whatever those goals are, Omnia.7 is capable of getting you there.
You may wish to maintain as much quality as possible while increasing loudness somewhat over your
existing processor. You might want to create very consistent source-to-source spectral balance and
develop a “signature sound” for your station. You may find yourself in a situation where you need to stay
competitively loud on the dial at the expense of the best possible sound. Or you may have the luxury of
aiming for a more open, cleaner sound that will draw and keep listeners for longer periods of time without
having to worry about all-out loudness.
In any case, it is best to start with a goal in mind and work toward it carefully and deliberately.
Don’t Touch That Dial! (too much)
One big temptation when installing a new processor is to play with every available control, and there’s
really no better way to find out what each control does. But that sort of experimentation and exploration is
probably best done “on the bench” before you put your new acquisition on the air. That way, you’re free to
tweak away without having to worry about jeopardizing your on-air sound or being unnecessarily timid
about making adjustments because you don’t know what affect they will have.
Another suggestion for getting to know your way around Omnia.7 is to find a factory preset that you like
and then go exploring in the various menus to see how that sound was achieved. For example, let’s say
you find a preset with a smooth, open sound which matches your general processing goal. As you
explore, you might find some controls set as you would expect to deliver that sound, but you may also
find some unexpected settings that make more creative use of Omnia.7’s controls. There is much to be
learned by studying.
By default, each preset loads up in “Basic” mode to keep things simple. Despite the name, this mode is
still very powerful and may provide all the controls you need to achieve your desired sound and loudness.
It is always possible to go back and forth freely between “Basic,” “Intermediate”, and “Advanced” modes
even after making changes in one mode or another. You can switch between modes in the About Preset
menu.
Once you are comfortable with navigating through Omnia.7’s various menus and have a good
understanding of how its controls operate, you’re ready to take it for a test drive on the air.
Choosing a Preset
Regardless of whether you end up using a supplied preset “as-is” or make adjustments to customize your
sound, you must start with one of the factory presets. We recommend you find one that most closely
matches your goals and then make any modifications from there as needed.
Most processors use radio format names to try and define their sound but then go on to explain there’s no
reason a rock station shouldn’t try out the “Country” preset – which is very true. As befitting its lineage to
our Omnia.9 processor, Omnia.7 takes a deliberately different approach and most of its presets don’t give
you any hint as to who should use them (or how) in the hopes that you’ll “step out of your box” a bit and
explore.
7
If your Country station sounds great on the air with settings that might mimic an “Urban” preset - with a
slamming low end and a nice open mid-range – the last thing we want to do is make you second guess
yourself because the preset name doesn’t match.
You may find some of your favorite Omnia.9 factory presets here, but specially tweaked to give you as
close a sound as possible on your Omnia.7.
Making and Saving Changes
Human nature is fickle; the human ear adapts and tires quickly; and Omnia.7 gives you lots of control.
With those things in mind, here are some recommended “Do’s” and “Don’ts” when making and saving
changes to presets:
• DO resist the temptation to constantly fiddle with every control right after you put Omnia.7 on the
air.
• DON’T make hasty, radical changes.
• DON’T make adjustments to too many parameters at once – that makes it difficult to determine
which of the adjustments is actually responsible for the changes (for better or worse) you’re hearing
on the air.
• DO look to the Band Mix and Parametric EQ sections first to achieve the spectral balance (aka
“signature sound”) that you’re looking for. These are powerful adjustments, and a little EQ can go a
long way. This is generally “safer” than making adjustments to the target, attack, and release rate
controls as it is sometimes difficult to know how the different compression stages interact with one
another on all material.
• DO take breaks when adjusting your processing. Ears tire quickly, and if you stay at it too long,
you’re almost sure to make changes influenced by fatigue.
• DON’T turn your monitor speakers up too loud when making adjustments. High listening levels
cause ears to tire even more quickly and mask both gain riding artifacts and distortion. Most
listeners play the radio in the background, and problems tend to be more audible at comfortable
listening levels.
• DO make small adjustments, particularly to critical controls like Clipper and Limiter thresholds.
• DO take the time to calibrate a set of high-quality reference monitors (a process described in detail
in the full manual) so that any changes you make aren’t skewed by colorations of the speakers or
room.
• DON’T rush the process. Use the “sleep-on-it” method when you’ve reached a point where you are
mostly satisfied with the sound, and then re-evaluate it the next day. If it still sounds good, STOP. If
it doesn’t, make a few adjustments and walk away for another day.
• DO use the “Save As” method of naming and saving your custom presets rather than over-writing
them. This will allow you to return to any point in your adjustments if you get too far “off track” and
keep you from having to remember (or guess) what changes you’ve made along the way.
Customers sometimes ask if they can make their own custom presets “from scratch.” All custom presets
start life as a factory preset, but the most straightforward, neutral-sounding factory preset is “Reference
Settings,” and as such, it provides the closest thing to a “blank canvas” possible for building your own
preset from the ground up.
8
Troubleshooting FAQ
In a perfect world, you will have read and followed the set up procedures in the handy Quick Start Setup
Guide, all of the ins and outs pair up nicely, you found a preset or adjusted the audio to your liking, and
you can enjoy a nice, relaxing lunch confident that your station sounds better than ever.
But every now and again, there are surprises or something doesn’t go quite as you expected the first time
around (this IS radio, after all) so we’ve assembled some frequently asked questions (and, as a bonus,
some answers!) to the most common unexpected issues based upon conversations with many new users
and the experience of our Omnia support team.
The unit is totally dead. What should I check first?
Let’s start with the catastrophically bad first and get it out of the way: The unit won’t power up at all.
Double-check that the unit is receiving AC line power to BOTH AC power connectors and the outlets into
which they are plugged are live and working. Make sure all connections are secure at both ends of both
cords.
If all checks out so far, look at the front panel screen - is they any light on the display at all? If not, or if the
screen appears scrambled, it may indicate a power supply problem. If you wish to examine the power
supplies, be aware that they are of the switching type, and therefore require a load in order to start up and
operate properly, and voltage measured when the supplies are not connected to the Omnia.7’s circuitry
may not be correct.
The unit boots up normally, but there is no audio output. What should I
check?
First, verify that there is audio appearing on both the input, output, and processing meters. If the metering
looks normal, check to see if there is audio in the front panel headphone jack. If audio is present in the
headphones, make sure your output connections are good.
If there is no metering activity, go to Home > System> I/O Options > Input and verify your input source
is properly set. You should also verify there is audio present on the cable(s) feeding audio into Omnia.7.
I have my Omnia.7 in a quiet studio and it seems noisy.
Omnia.7 is a fan-cooled device, and so fan noise is normal. The unit was designed to be installed in a
typical rack room or transmitter site where noise is not an issue.
I have set the unit up on my network, but I cannot “ping” it. Why?
This is normal, as network security for Omnia.7 is accomplished via a whitelist that is initially set up from
the front panel.
Navigate to Home > System > System Config > HTTP Access and add the IP address/addresses of
computers that need to access Omnia.7’s HTTP server on Port 7380. Begin adding your IP addresses to
the whitelist in the “IP 2” box, as “IP 1” is for use by the front panel.
The HTTP server can be used to download the remote client software from the unit and for advanced
scripting functions. Once downloaded, the remote client software itself does not require additional security
access.
9
The diversity delay is turned off, but there is still a full second of delay
through the unit. Can this be reduced?
No. The one second of delay is normal and integral to the the processing algorithms. In applications
where analog FM and HD are broadcast, this should not be an issue as the analog audio must be
delayed to match the digital audio.
A dedicated low-latency Studio processing core is provided for talent monitoring. This can be used if
Omnia.7 is located at the studio, or if a suitable low-delay return path is available from the transmitter site.
Otherwise, we suggest using an older processor you may have available (or an Omnia.ONE Studio Pro)
to drive talent headphones.
I want to use the AES/EBU digital output to feed my linear digital STL at the
studio. How do I activate this function?
Simply navigate to Home > System > I/O Options > Main Outputs and set the AES/EBU output to “FM
Pre-emph L/R”.
I found a preset I like, but I need more loudness.
Some of the factory presets are “custom built for speed” right out of the box, and are already extracting as
much loudness as possible from Omnia.7 without crossing the line where tighter dynamics and more
clipping would simply degrade the audio.
However, most presets have been created for a particular spectral mix or texture and have plenty of
“room to grow” in terms of loudness without compromising overall quality. If you find you like one of these
presets but just need more loudness, navigate to Home > FM > Processing > Clipper and advance the
final clipper drive. Notice that it is possible to make 0.25dB adjustments; this is an indication that small
adjustments are warranted here. We suggest advancing clipper drive no more than 0.50dB at a time as
you try to achieve more loudness.
I found a preset I like, but I wish it were more open-sounding.
See above, but in reverse! The clipper drive, more than any other single control, will have the greatest
impact on the tradeoff between a more dynamic and open sound and all-out loudness. Reduce the clipper
drive in small increments; we recommend 0.50dB at a time so that your station doesn’t become too quiet
in your quest for openness.
10
Obtaining Service
Before contacting Omnia Customer Support, please have the serial number of the unit (located on a small
barcode sticker on the rear panel) and a description of the symptoms/problems ready for the technician.
All units being returned for service MUST have a Return Authorization Number (RA) assigned to them
first.
Units shipped without an RA number will experience delays in service. Be sure to write the RA
prominently on the box on or near the shipping label.
Whenever possible, return Omnia.7 in its original shipping carton with original packing materials. This will
provide the best protection possible during shipping. Remember, damaged caused by improper
packaging is not covered under warranty.
Our shipping address is:
Telos Alliance
1241 Superior Avenue East
Cleveland, Ohio 44114 USA
ATTN: (RA Number obtained from Omnia Customer Service)
Support via the Web
The Omnia website (http://telosalliance.com/omnia) has a wide variety of information that may be useful
for product support, applications information, software updates, and user manuals.
Factory Support via Phone and E-mail
Customer support personnel in the Cleveland, Ohio, USA office are available by phone or e-mail Monday
through Friday 9:00am to 5:00pm Eastern Time by calling +1-216-241-7225 or sending an e-mail to
“[email protected]”.
After Hours Support
After hours support is available 24/7 by telephone by calling +1.216.622.0247 or by sending an e-mail to
“[email protected]”.
If you are outside the United States and non-English speaking, please contact the dealer from whom you
purchased your Omnia.7 first.
11
Telos Alliance Limited Warranty
This Warranty covers “the Products,” which are defined as the various audio equipment, parts, software
and accessories manufactured, sold and/or distributed by or on behalf of TLS Corp. and its affiliated
companies, collectively doing business as The Telos Alliance (hereinafter “Telos”).
With the exception of software-only items, the Products are warranted to be free from defects in material
and workmanship for a period of five (5) years from the date of receipt of such Product by the end-user
(such date of receipt the “Receipt Date”). Software-only items are warranted to be free from defects in
material and workmanship for a period of 90 days from the Receipt Date. Telos will repair or replace (in
its discretion) defective Products returned to Telos within the warranty period, subject to the provisions
and limitations set forth herein.
This warranty will be void if the Product: (i) has been subjected, directly or indirectly, to Acts of God,
including (without limitation) lightning strikes or resultant power surges; (ii) has been improperly installed
or misused, including (without limitation) the failure to use telephone and power line surge protection
devices; (iii) has been damaged by accident or neglect. As with all sensitive electronic equipment, to help
prevent damage and or loss of data, we strongly recommend the use of an uninterruptible power supply
(UPS) with all of our Products. Telos products are to be used with registered protective interface devices
which satisfy regulatory requirements in their country of use.
This Warranty is void if the associated equipment was purchased or otherwise obtained through sales
channels not authorized by Telos.
EXCEPT FOR THE ABOVE-STATED EXPRESS WARRANTY, TELOS MAKES NO WARRANTIES,
EXPRESS OR IMPLIED (INCLUDING IMPLIED WARRANTIES OF MERCHANTABILITY AND FITNESS
FOR A PARTICULAR PURPOSE).
In no event will Telos, its directors, officers, employees, agents, owners, consultants or advisors (its
“Affiliates”), or authorized dealers or their respective Affiliates, be liable for incidental or consequential
damages, or for loss, damage, or expense directly or indirectly arising from the use of any Product or the
inability to use any Product either separately or in combination with other equipment or materials, or from
any other cause.
In order to invoke this Warranty, the Product must be registered via Telos’ website (found at: http://
telosalliance.com/legal/warranty) at time of receipt by end-user and notice of a warranty claim must be
received by Telos within the above stated warranty period and warranty coverage must be authorized by
Telos. Contact may be made via email: [email protected] or via telephone: (+1) 216-241-7225.
If Telos authorizes the performance of warranty service, the defective Product must be delivered to: Telos,
1241 Superior Avenue, Cleveland, Ohio 44114 or other company repair center as may be specified by
Telos at the time of claim.
Shipping Costs and Warranty Service:
If the date the customer’s notice of warranty claim is received by Telos (such date the “Warranty Claim
Notice Date”) is within the first 90 days following the Receipt Date, Telos will pay the costs of shipping
such warranted Product to and from the end user’s location, and the cost of repair or replacement of such
warranted Product.
If the Warranty Claim Notice Date occurs after the first 90 days following the Receipt Date and before the
end of the second (2nd) year, the customer will pay the freight to return the warranted Product to Telos.
Telos will then, at its sole discretion, repair or replace the warranted Product and return it to the end user
at Telos’ expense. If the Warranty Claim Notice Date occurs between the end of the second (2nd) year following the Receipt
Date and the completion of the fifth (5th) year, the customer will pay the costs of shipping such warranted
Product to and from the end user’s location. Telos will then, in its sole discretion, repair or replace the
warranted Product at Telos’ expense. Telos also reserves the right, if it is not economically justifiable to
repair the warranted Product, to offer a replacement product of comparable performance and condition
direct to the customer at a discounted price, accepting the failed warranted Product as a trade-in.
The end user will in all cases be responsible for all duties and taxes associated with the shipment, return
and servicing of the warranted Product.
No distributor, dealer, or reseller of Telos products is authorized under any circumstances to extend,
expand or otherwise modify in any way the warranty provided by Telos, and any attempt to do so is null
and void and shall not be effective as against Telos or its Affiliates.
Out of warranty units returned to the factory for repair may be subject to a $500 evaluation fee, which fee
must be prepaid prior to shipping the unit to Telos. If no repairs are required, the $500 fee will be retained
by Telos as an evaluation charge. If repairs are required, the $500 fee will be applied to the total cost of
the repair.
Omnia Audio • 1241 Superior Ave. • Cleveland, Ohio, 44114, USA • +1.216.241.7225 • TelosAlliance.com


