1
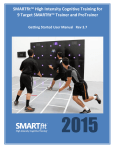
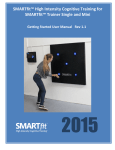
SMART Multisensory Fitness Training One Station Portable Set-up Manual Revision 1.2 2014 Unlike other fitness equipment which may require additional insurance, SMART ProTrainer and SMART Trainer have been approved by the Fitness Insurance Industry for use under general liability insurance. Please check with your insurer to confirm insurance laws in your state. PARTICIPANTS SHOULD CONSULT A DOCTOR BEFORE STARTING ANY EXERCISE PROGRAM. The content of this workout program is made available with the understanding that Multisensory Fitness, Inc. disclaims all responsibility for any injury incurred as a consequence of engaging in this program without first consulting a physician or otherwise qualified health care professional. Thank You. Enjoy your new SMART system! Multisensory Fitness, Inc. www.multisensoryfitness.com © 2014 Multisensory Fitness, Inc. • www.multisensoryfitness.com 2 Table of Contents Chapter 1 ................................................................................................................................................................... 4 Introduction .......................................................................................................................................... 4 Contents of Boxes ................................................................................................................................. 4 Required ................................................................................................................................................ 4 Adding Filler for first time use only ....................................................................................................... 5 Chapter 2 .................................................................................................................................................................. 6 SMART Portable 1 Assembly Instructions ................................................................................................. 6 Unpack your SMART Portable 1 System ............................................................................................... 6 Set-up the Station ................................................................................................................................. 7 Fill Systems with Pine Pellet.................................................................................................................. 8 Set-up the Master Control Box (MCB) .................................................................................................. 9 Connect Station by Plugging the 8 pin connector from the station into the power interconnect board ................................................................................................................................................... 11 Verify that System Powers Up Correctly ............................................................................................. 12 Moving the system to a new location ................................................................................................. 13 © 2014 Multisensory Fitness, Inc. • www.multisensoryfitness.com 3 Chapter 1 Introduction Welcome. Please read through this manual before starting your installation as it will give you a complete idea of the scope of the installation and ensure things are done in their proper order. Should you have any questions please call our customer service line on: 1-800-900-8542 x 116. We will be happy to assist you in every way. Contents of Boxes Prior to opening any boxes, please inspect the outside of the box for any damage that may have been done during shipping. If the boxes are damaged in any way, please take a photograph of the damage as well as one of the whole delivery and email it with a copy of your delivery note, to: [email protected]. After opening the boxes please check for the following contents: 1 box at 99.5 x 51.5 x 6.5" weighing 155 lbs. 1 box at 30x20x18" weighing 40 lbs. Station #1 o 4’ x 8’ Training Station with pre-installed portable stand o 1 large protective bag for protecting the station when in transit One Master Control Box o Master Control Box o Electrical 10’ power cord o 2 Remote controls o Square drive screwdriver Pair of speakers with brackets. Blue funnel Filler plug tool Ball kit containing balls, noodles, bean bags, etc. Required #1 flat head screwdriver 5 x 35lb Sand bags (Can be ordered from Customer Service) © 2014 Multisensory Fitness, Inc. • www.multisensoryfitness.com 4 Adding Filler for first time use only Ladder if filling the station Rubber mallet for tapping down filler material Padded dolly for moving the system once filled. 100lbs (3 bags) of Pine Pellets or equivalent as filler for the station to provide stability during ball play. Once filled, keep the filler in the system and move it in the bag provided. Should you require greater stability and rebound from the station, we recommend filling the system with 250lbs of dry sand. However, that will impact the ease of moving the system with a net weight of 350lbs. Set up time 15 minutes if not filling the station. 1 hour if filling the station. One or 2 adults For operating instructions, refer to the following web sites: http://multisensoryfitness.com/resources/smart-programming-manuals/ http://www.youtube.com/MultisensoryFitness © 2014 Multisensory Fitness, Inc. • www.multisensoryfitness.com 5 Chapter 2 SMART Portable 1 Assembly Instructions Unpack your SMART Portable 1 System 1. Lay out the station on floor face down in the blanket bag it was shipped in. Use this bag to transport the station at all times. 2. Remove the station from the bag. 3. Be sure to protect the face of the system at all times. 4. Stand the system upright. © 2014 Multisensory Fitness, Inc. • www.multisensoryfitness.com 6 Set-up the Station 1 Using a flat-head screw driver to unlatch the clips, open the two side brackets so that the station is selfstanding. 2 The side brackets will rotate out and 90 degrees to support the station in a vertical position. 3 Push the pins on the top and bottom bracket of side frame to rotate them a full 90 degrees and lock into position. (It is helpful to have 2nd person). 4 Remove the U‐stabilizer from the back of the station and clip it into the side frames to form a secure base on the floor that supports the station. Use the flat head screwdriver to unlatch the clips that hold it in place. 5 The station is now self-standing. 1 To carry the system to where it is needed for play, stand behind it and lift it by the two target cups on the back. The systems weighs 102lbs. © 2014 Multisensory Fitness, Inc. • www.multisensoryfitness.com 7 2 Place sand bags on bottom Ustabilizer pipe to stabilize station so it will not tip over. Minimum 100lbs is recommended. Fill Systems with Pine Pellet 1. Using the square Filler Plug Tool, open the three caps on the back on the station. 2. Insert the funnel into the first opening. 3. Standing on a ladder, pour the pine pellets into the system until it is filled to the top. 4. Repeat at the top two openings. 5. Shake the system to ensure the pellets settle as much as possible. 6. Close the caps tightly using the Filler Plug Tool. © 2014 Multisensory Fitness, Inc. • www.multisensoryfitness.com 8 Set-up the Master Control Box (MCB) 1. Remove the 7’ pipe from the back of the station and secure it through 2 of the couplers on the station. 2. Hang the Master Control Box (MCB) onto the horizontal pipe by clipping it on to the horizontal pipe the side of the station. 3. Clip both speakers on the pipe. (One on each side of the Master Control Box) 4. Using you flat head screwdriver, open the MCB face. © 2014 Multisensory Fitness, Inc. • www.multisensoryfitness.com 9 5. Reach in to access the speaker wires. 6. Pull both white speaker cables through rear holes of RDB 7. Plug cables into speakers. 8. Unwind the panel cable from the station. © 2014 Multisensory Fitness, Inc. • www.multisensoryfitness.com 10 Feed the cable from the station over the horizontal pole. Push it through the hole in the back of the Master control box. Connect Station by Plugging the 8 pin connector from the station into the power interconnect board 1. 2. 3. 4. 5. 6. Connect station to the power interconnect inside the Master Control Box. The power interconnect has six (6) 8pin connector terminals. Each 8-pin terminal goes to a display board or a power source. The station should be connected to the 8-pin connector that is labeled # 1. Power interconnect space #5 is for connecting the display board located in the cover of the master control box. Power interconnect space #6 connects to the 12VDC power supply. Remove the Remote Controls from the Master Control. © 2014 Multisensory Fitness, Inc. • www.multisensoryfitness.com 11 7. Close the Master control Box and use the flat screwdriver to turn the latches Verify that System Powers Up Correctly 1. Plug in one side of your power cable into the right side of the Master Control Box and the other side into the 110V outlet. 2. Power up the system by at the power switch that is located next to socket where you just installed the power cable. 3. The system will run a powering up program and you will know all is well when the system welcomes you to SMART. © 2014 Multisensory Fitness, Inc. • www.multisensoryfitness.com 12 4. Verify all speakers are producing sounds. 5. Windup cables around pipes for a clean finish look. 6. Test system to make sure everything is functional. 7. Refer to your system user manual to learn how to select games, set user preferences and play. Moving the system to a new location Disconnect all electrical connections and roll up wires and cable and return them to their original locations. Remove the MCB and the speakers and place them back in the box or on a Dolly. Remove the horizontal pole and place it in its clips on the back of the station. © 2014 Multisensory Fitness, Inc. • www.multisensoryfitness.com 13 With a second person stabilizing the system, remove the sand bags. Remove the U-stabilizer and place it back on its clips in the back of the station. Push in the lock buttons on the frames and fold them back into their parked position. Place the system back in its protective bag. Flip the system on its side, using two people, lift it onto the dolly Have one person on each end roll it to its next location. Load the sand bags and the box onto the second dolly © 2014 Multisensory Fitness, Inc. • www.multisensoryfitness.com 14