1
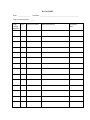
RECORDING AND ANALYSIS OF BIRD
VOCALIZATIONS
Sylvia L. Halkin
Department of Biological Sciences
Central Connecticut State University
New Britain, CT 06050
INTRODUCTION
Recording birds provides a permanent record of their songs and calls and allows
comparisons over time and between species and individuals. Computer-assisted sound
analysis reveals details of song and call structure and sonagrams provide a powerful tool
to help visually-oriented humans train ourselves to discriminate sounds by ear. These
labs provide hands-on experience with the recording and analysis techniques that are used
to explore the diversity and functions of sounds made by birds. See the Appendix: Guide
to Vocalizations of Common Maine Birds by Herb Wilson for descriptions of
vocalizations of 51 species common to Maine. The appendix also contains a list of
sources of commercial recordings. Sound files made from these recordings in AIFF,
SoundEdit, Binary, Canary, MATLAB, or Text format can be opened in Canary for use
as a tool in learning the vocalizations of local species.
The chapter on vocalizations in your textbook, and references given there, are
good places to start reading about this topic. Pages 14 and 15 in Robbins et al. (1983)
also have useful information. Recordings and playback experiments are used by
biologists to help determine what information is conveyed by vocalizations (e.g.,
individual, gender, and/or species identity, territorial or breeding status, and specific
behavioral messages about territory defense, feeding the young, or responding to
predators). For reviews of many kinds of studies of bird vocalizations, including
comments on appropriate experimental playback methodology, see Catchpole and Slater
(1995), and Kroodsma and Miller (1982, 1996). The former book assumes only a general
biological background and some familiarity with ornithology or animal behavior; the
latter edited volumes are essential compilations for researchers in the field of avian
vocalizations, with some chapters that are broadly accessible and others that require
considerable background knowledge. Additional useful information on methods in this
field can be found in Hopp et al. (1998).
LEARNING OBJECTIVES
The student will:
• learn techniques for recording bird vocalizations
• learn how to perform computer-assisted sound analyses, including how to
interpret and make measurements from displays of frequency vs. time
(sonagrams) and amplitude vs. time (oscillograms)
•
make comparisons of vocalizations that provide a window into individual and
between-species variation in styles of vocalizing
MATERIALS
For each group of 2-5 students (2 is probably the optimal group size, but limited
equipment will may prevent this):
1 microphone
1 windscreen for microphone
1 portable cassette tape recorder or R-DAT recorder
1 pair headphones for listening to tape recorder during recording, and for listening to
computer
during sound analysis (check jacks on tape recorder and computer to
determine whether
you need an adapter to use headphones with both of these)
Batteries for microphone and recorder
1 cassette or R-DAT recording tape
1 clipboard with data sheets
Canary software installed on a Power Macintosh or any Macintosh equipped with
a 68020 or more recent (faster) processor, a math co-processor, and at least 2.5
megabytes of RAM that can be devoted entirely to this program. A version of Canary
also exists for Macintosh 680x0 computers without math co-processors. For computers
without a built-in sound input port, a separate digitizing device such as MacRecorder is
also required. Canary requires System 7 or more recent software. Sound analysis will
take less time on computers with faster processors, and longer segments of sound can be
analyzed, and more sound files opened simultaneously, on computers with more RAM.
Cable with jacks for input of recorded sound from tape recorder headphone jack
or line output jack (see below) to computer sound input port.
To print sonagrams : Apple-compatible laser printer that can print 600 dpi, with at least
100 shades of gray in gray scale images. All new Apple laser printers have this
capability, but many old ones do not. The same printer can be used by the whole class.
(Also be sure you are dressed appropriately for recording birds outside, on the day that
you do this.)
Portable recording equipment varies widely in price, capabilities, and durability.
If all you want to do is be able to verify that different species differ from one another in
their vocalizations, and to distinguish among different songs in species that have song
repertoires, an inexpensive recording package (under $100) will probably be adequate; all
components are likely to be available from Radio Shack or a comparable supplier. You
are apt to lose out on your ability to detect some of the higher frequencies in bird song
and very low frequencies used in calls of some species, and the relative amplitude of
different frequencies may be distorted. You will not be able to record birds vocalizing
very quietly or at some distances at which you can clearly hear them. Your equipment
may also not be very durable, but if usage is light and replacement cost is low, this may
not present a problem to you. It is a good idea to order one recording "package" and
make sure that it can do the job you need, before ordering multiple sets. Be sure that
your microphone, tape recorder, and headphones have compatible connectors (there is
considerable variety among "standard" connectors!), and that you can also connect your
tape recorder to your computer.
For a discussion of recording equipment specifications, see the Internet web page
of the Cornell Laboratory of Ornithology's Library of Natural Sounds (LNS); the address
is http://birds.cornell.edu/lns/Equipment/equipment.htm. Minimal requirements are a
directional microphone with a windscreen, and a cassette tape recorder with a tape
counter so you can keep track of where different sounds are recorded on the tape.
Beyond this, things to look for include a relatively flat frequency response from about 1
kHz up to at least 8-10 kHz in both the microphone and tape recorder. It is also useful for
the tape recorder to have manual record volume control, preferably with a meter to show
recording amplitude (automatic record level control will distort relative amplitudes in the
sounds you are recording). Since many bird sounds are shorter in duration than the
response time of many meters, if you are close to a loudly vocalizing bird, be sure to
listen to your tape to check that you are not recording the sounds so loudly that they are
distorted (some tape recorders also have "peak" indicators with nearly instantaneous
response times, to indicate when you are recording sounds too loudly). High-end
microphones may be either of the "shotgun" design, or designed to be used with a
parabolic reflector. See the LNS web page for a discussion of the pros and cons of these
two designs. If you are using a parabolic reflector, note that a large diameter is required
to amplify low-frequency sounds.
For a "quick and dirty" approximation of your frequency requirements, look up
sonagrams for the species you wish to record in the Golden field guide to Birds of North
America (Robbins et al. 1983); vocalizations of some species extend below 1 kHz or above
10 KHz. More sonagrams and references to research articles on vocalizations can be found
in the Birds of North America species accounts published by The Birds of North America,
Inc., Philadelphia, PA.
For research (including playback experiments) and for archiving avian vocalizations,
far higher quality equipment is required to accurately represent and reproduce the sounds that
birds make. The least expensive recording packages recommended by LNS cost around $900
in 2001. Their recommended supplier of high-end recording equipment is Maurice Stith
Recording Services, 59 Autumn Ridge Circle, Ithaca NY 14850, phone: 607-277-5920,
FAX: 607-277-5942, e-mail: [email protected], Internet website:
http://www.stithrecording.com. Greg Budney, the curator of the LNS, is also happy to give
advice on tailoring recording systems to specific needs (phone: 607-254-2404, e-mail:
[email protected]). However, due to rapid turnover of models, neither of these
sources will be familiar with, or willing to provide any but the most limited advice about
low-end recording equipment. Saul Mineroff Electronics, 574 Meacham Ave., Elmont, NY
11003, phone : 516-775-1370, FAX: 516-775-1371, e-mail [email protected], Internet
website: http://mineroff.com/nature, supplies some recording packages in the $200 price
range, including a shotgun microphone that has worked well for general ornithology
laboratory use, the Audio Technica ATR 55 (they also sell this microphone separately for
about $85). Parabolic reflectors manufactured as satellite receiving antennas can be used
with appropriate microphones to record birds, if you can construct a microphone mount; see
the LNS website for more information; their recommended supplier of these parabolic
reflectors is The Antenna Center, 505 Oak Street, Calumet, MI 49913, phone: 906-337-5062,
FAX: 906-337-5030.
Canary 1.2.4 software is available for $250 plus shipping and handling from:
Bioacoustics Research Program
Cornell Laboratory of Ornithology
159 Sapsucker Woods Rd.
Ithaca, NY 14850
phone: 607-254-2408; FAX: 607-254-2415; e-mail: [email protected]
The software comes with a comprehensive manual (Charif et al., 1995) that
explains how to use its multiple capabilities (many of which are not covered in this lab),
and also includes an appendix with an introduction to the physics of sound analysis. Any
software updates are made available to Canary users at minimal cost. Check the Internet
website: http://birds.cornell.edu/brp/CanaryInfo.html
for further information about Canary, and the website:
http://birds.cornell.edu/brp/SoundSoftware.html
for information about additional sound analysis software, including Raven, the successor
planned for Canary (predicted first release with partial functionality in 2002). Check
with Bioacoustics Research Program personnel about agreements for installing Canary on
multiple computers for class use. Information from the Canary manual was critical to
writing the sound analysis portion of this lab. Russ Charif's and David Spector's reviews
of the lab and helpful suggestions are gratefully acknowledged.
A website with information about sound analysis software for both Macintosh and
PC computers, including some free "shareware", is:
http://www.cisab.indiana.edu/CSASAB.
PROCEDURE
Making the Recordings (Lab 1)
Install the batteries, connect the microphone and headphones, and insert the tape
in the tape recorder. Familiarize yourself with the operation of the tape recorder and
microphone. You may need to turn off the tape recorder speaker to avoid feedback (a
loud screech) during recording. Do not use Dolby or other noise reduction systems, as
these can distort recordings of bird sounds in various ways. It is a good idea to make a
test recording while you are still inside (just speak into the microphone), to make sure
everything is connected properly. Then go out and find birds to record.
Some hints for making good recordings:
1) Set the record level so that the loudest sounds you are recording register just into the
red region of the VU meter; if your tape recorder has a "peak" indicator, the record level
should be set as high as possible without causing it to light up.
2) Sight down the stem of the microphone so that the head is pointing directly at the bird
(or, if you are using a parabolic reflector, directly away from the bird).
3) Try to record with as few obstacles as possible between you and the bird: intervening
vegetation can cause reverberations that distort the sound.
4) You will get better recordings on days with little or no wind. Try to keep any wind
from blowing directly on the microphone head. Since wind speed drops off sharply very
close to the ground, kneeling to hold the microphone as close to the ground as possible
(and then pointing it at an angle up toward the bird) will help reduce wind noise if the
wind is blowing. If you are using a parabolic reflector, you can use it as a shield, holding
it so that the wind is deflected by the convex side. You can use your body or vegetation
to shield a shotgun microphone from the wind. Windscreens help to reduce wind noise,
but also may reduce recording amplitude.
5) At least periodically listen through headphones while you are recording. This will
allow you to catch and correct any problems quickly, including helping you to move the
microphone so it is pointing directly at the bird you are trying to record. Some people
cover only one ear with a headphone earpiece, and use the other ear to listen for other
birds that are vocalizing at the same time as the one they are recording. Also play back a
portion of your tape itself, early on, to check what you have actually been recording.
6) If the bird that you are recording stops vocalizing, or you lose sight of it but think that
it is still near by, playing the tape of it that you have just recorded may well get it to
reappear/start vocalizing again. It will probably react as though your speaker is a rival in
its territory, so its vocalizations and behavior may well be different from before your
"playback".
Take turns making recordings so that every student in your group gets to record. Speak
into the microphone to record the date and location at the start of the tape, and also every
time either of these changes. Each time you record a new bird, record on the tape the
time of day, species (or descriptive characteristics, if you are unsure of the species), and
recordist's name. Also keep track of your recordings on a data sheet (see end of lab); a
student who is not recording should help the recordist fill out the data sheet. If your class
has multiple tape recorders, it is a good idea to number each of them; if there is any
variation in speed, etc., playing the tape on the recorder on which it was recorded will
provide the most accurate sound reproduction.
Sound Analysis (Lab 2)
Follow directions provided with Canary to install this software on computers. The
following instructions assume that Canary has been installed into a labeled folder, and
that the computer and monitor are turned on, with the folder visible on the computer
desktop. These instructions are written for Canary 1.2.4, the most up-to-date version
available in late 2000. See Appendices A and B in the Canary User's Manual for far
more information on the physics of sound and the mechanics of digital sound analysis
than is provided below. If at any point you are confused, run into a problem in following
these instructions, want to share something neat, etc., please do not hesitate to call over
the instructor(s).
1. Retrieve your tape recorder and tape and use the cable provided to connect your tape
recorder to the sound input port on your computer. You may find it helpful to plug the
output line into the headphone jack of your tape recorder, rather than the line output jack,
because this configuration may allow you to adjust the volume with the playback volume
control knob (but see note in step 6). If you are using a separate digitizing device, follow
its directions to connect it to your tape recorder and the computer.
2. Find on your data sheet the exact counter numbers for the recording you want to
sonagram. You will only be able to make a sonagram that is a few seconds long. Try
playing the sound that you want, at a volume that seems reasonably loud without picking
up too much background noise.
3. Double-click on the "Canary 1.2.4" folder.
4. Double-click on the symbol with "Canary 1.2.4" beside or below it.
5. Click "Cancel" in the box you see next.
6. Select "Record" from the "Process" menu. (Menu names appear at the top of the
screen; to select a choice from a menu, move the mouse pointer to the menu name, and
hold down the mouse button, which will cause the list of commands in that menu to
appear. Drag the pointer down to the choice you want and then release the mouse
button.) A "Sound Acquisition/Recording" box will appear. Check to see that the sample
rate is about 22000 Hz (hold the mouse button down over the box to check on the
possibilities; the sample rate closest to 22000 is appropriate for most bird sounds). Use a
sample size of 16 bits (or 8 bits, if your computer will not allow 16 bits) and an input
speed of 1.0x. If the "Options" button is available, use it to bring up a box that allows
you to specify the sound source (choose "external audio" or "line in" or, if your computer
has been set up in a way that doesn't give these options, ask your instructor for help in
choosing an option that allows you to input sound with a cable from your tape recorder);
also click on the "Playthrough" box so that you will be able to hear sounds as you play
them in. These adjustments will probably only need to be made once, at the start of your
session, and the "Playthrough" option will not work on all computers. If the
"Playthrough" option does not work on your computer, and you would like to be able to
hear the sound as you play it in (a useful thing to be able to do!), then you cannot use the
headphone jack for sound input into the computer (see step 1); instead, use it for
headphones to hear the sound, or leave it open and your tape recorder will play the sound
through its own speaker. Turn off the Automatic Gain and Track 2 options, by clicking
on their checkboxes. Then play your sound. Adjust the position of the little rectangular
slider in the "Gain" bar (by clicking on it and holding down the mouse button as you drag
the slider) so that the loudest part of the vocalization you are analyzing is in the red
region (8-10) of the "Track 1" sound bar. If you are putting sound into the computer
through the headphone jack on your tape recorder, you can also adjust the tape recorder
playback volume to get your recording into the proper region of the sound bar. Then you
are ready to input your sound into Canary.
7. Rewind (again) to one counter number before the start of your sound, click on
"Record" on the computer screen, and press the "Play" lever on your tape recorder.
When your sound is done playing, click on "Pause" (which has appeared where the box
formerly said "Record"), and then click on "Done" below that. Then stop the tape
recorder. The computer will take a few seconds and then produce a plot of amplitude vs.
time (an oscillogram), called "Untitled" followed by some number. Relative sound
amplitude (perceived as loudness) is shown by amount of deflection from the center "0"
line: louder sounds show greater deflection than quieter ones.
8. If you click on the bird on the control panel below your oscillogram, you can hear the
sound that you just input. If many people are working on different sounds in the same
room, you will probably want to plug headphones into your computer so that you are the
only one hearing its sound output. The moving scroll bar shows the place on the plot that
you are hearing. Observe how amplitude varies over the course of your sound.
If the amplitude of your recorded sound is very low, you may want to increase it by
selecting "Amplify" from the Edit menu, and then choosing an amplification factor.
Make sure that the amplified sound remains well within the top and bottom edges of the
window; overamplification will cause distortion. You will notice that background noise
is also amplified.
If your sound is more than a few seconds long, or you just want a small part of it, use the
mouse to select the part that you want (move the mouse pointer to the start of the part that
you want, and then hold down the mouse button and drag the mouse to the end of the part
that you want; when you release the button, the selected part will be highlighted). You
can copy the selected sound, create a new window, and then paste the sound into the new
window. The Copy and Paste commands are in the Edit menu, and the New (i.e., new
window) command is in the File menu. If you just want to get rid of a part of a sound,
you can select it and then press Delete. If you don't want to use any of what you have
just recorded, you can re-record your sound. Do this by first clicking in the box in the
upper left corner of your "Untitled" window, then clicking on "No" when the computer
asks if you want to save changes, and then returning to step 6.
9. Once you have an oscillogram of a sound that you would like to analyze further, you
can click on the box in the upper right of the window, to make it fill the screen. You can
drag the control panel out of the way by holding down the mouse button on the spotted
area at the top of the panel, and moving the mouse. You can stretch or collapse your
sound vertically or horizontally by clicking on the hands provided on the control panel
bar (repeated clicks cause greater and greater degrees of stretching or compression; each
click causes the scale to change by a factor of 2). You can change the speed at which
your sound is played by moving the "Rate" slider (return to 1.0 by holding down the
"option" key on the keyboard while clicking on the slider). When you come up with the
scale you want (one that shows your sound in a reasonable amount of detail, but so that it
still fits on the screen), click on "SPG". A worksheet will appear whose settings should
be as follows: Frame Length and FFT Size of 256 points (Filter Bandwidth and Grid
Resolution Frequency will automatically be set along with these), Overlap of 50% (Grid
Resolution Time is automatically set along with Overlap), Hamming Window, -80 dB
clipping level, Boxy display style, and Logarithmic Amplitude. Once these are set, click
on "OK" at the bottom of the worksheet. (Choosing other settings to use in this
worksheet is beyond the scope of this lab; see the Canary manual if you'd like to know
more about this.)
10. The computer will again take a few seconds, and then you will have a frequency vs.
time plot (sonagram) above and corresponding to your oscillogram. Frequency is
perceived as pitch; in the sonagram, higher-pitched sounds are located higher on the yaxis than lower-pitched sounds. The sonagram uses a gray scale to indicate relative
amplitude: louder sounds are shown darker than quieter ones. Click on the bird again to
see the sound displayed in both plots as you hear it, and again watch the scroll bar to see
where you are. If your sonagram did not take too long to draw, select "Make
Spectrogram" from the Panel menu, change the worksheet Overlap setting to 75%, and
click "OK" to make a sonagram that will take longer to draw but will have finer
resolution. Note: if for any reason you edit your sound by deleting parts, you will also
need to re-make the sonagram, using the "Make Spectrogram" option from the Panel
menu.
If your sound has repeated elements, check to see how faithfully they are repeated, both
with respect to frequency and with respect to amplitude. Select the "Measurement Panel"
option from the Windows menu to obtain measurements for the location of the mouse
pointer, or for a selected region of either the sonagram or the oscillogram; a horizontally
striped thin vertical bar along the left edge will indicate the plot to which the
measurements refer. Are pauses between elements uniform in length? Can you
hypothesize any rules for structure of vocalizations in your species? (See the Canary
manual if you would like information about making different measurements with and
recording data from the measurement panels.)
Low-end recording equipment or equipment that is used incorrectly, background and tape
recorder noise, obstacles between the recorder and the bird, and recording at too high a
volume setting can all produce artifacts on sonagrams that you should watch for. Noise is
often at lower pitch than bird vocalizations, and may appear as a band along the base of
the sonagram. Noise may also appear as scattered background dots throughout the
sonagram, and a high-pitched hum would be represented as a band running through the
sonagram. Reverberation produced by sound bouncing off of obstacles will appear as a
trailing, gradually fading tail at the end of each individual reverberating sound. A
second, inverted, lighter-colored sonagram above the actual signal frequency can be
produced by an inadequate sampling rate (see the discussion of aliasing in Appendix A of
the Canary manual), and badly adjusted equipment can produce spurious traces above or
below the actual signal frequency. Finally, signals recorded at too high a volume often
have a series of spurious harmonic traces above them: harmonic traces are produced at
whole-number multiples of the fundamental frequency. However, some birds actually
produce harmonically complex sounds, so not all harmonics can be rejected as artifacts.
11. Select "Page Setup..." from the File menu, and click on the box that allows you to
print the page so that it is wider than it is long, which will allow the plots to use as much
of the paper as possible; then click "OK". Select "Print" from the File menu, and click
"Print" in the box that appears. Then go and get your printout from the printer. Use the
"Save Window As" command from the File menu to give your plots your name and save
them.
12. Click once on the box in the upper left corner of your sound window to close it, and
let someone else in your group start with step 6.
13. When everyone in your group has plotted one vocalization, compare your
sonagrams; you may also want to make comparisons with members of other groups.
Individuals of most species have repertoires of different vocalizations: if two people
have recorded the same individual bird, have they recorded different renditions of the
same, or different, elements of the vocal repertoire? If the same, how similar are they?
Do recordings of different individuals from the same species differ more, or less, than
recordings of the same individual? Consistent variations among individuals may be used
by both birds and people for individual identification. In longer recordings of species
with song repertoires, are songs repeated before a bird switches to a new song, or is each
song different than the preceding one? If songs are repeated, is there a pattern to the
number of repetitions? Are songs separated by silent pauses of consistent length, or of
length related to the duration of the preceding song? This sort of variation in repertoire
use helps to distinguish species from one another, and also can be used within a species
to signal differences in context and motivation. If you have recorded a species that
imitates vocalizations of other species (e.g., a mockingbird), you may be able to compare
the vocalizations of the model (or at least sonagrams of them in a field guide) to the
renditions of the mimic. Your instructor may direct you to hand in a written paragraph
on one or more of these comparisons, or on the questions posed in the second paragraph
of step 10. You may also wish to experiment with recording your own voice (this can be
done directly if your computer is equipped with a microphone and you select it as the
input source), etc. Do this at a volume that does not disturb the other groups.
14. When it is time to go, close any open sound windows, and select "Quit" from the File
menu. Then select "Shut Down" from the Special menu, and turn off the computer and
monitor by pushing the same buttons you pushed to turn them on.
Hand in at end of lab: One printout of a high-quality sonagram and corresponding
oscillogram labeled with your name, the tape recorder on which it was recorded, tape
counter numbers, and the species of bird (ask for help in identification, if you are not sure
of the species). A paragraph on comparisons within or between recordings may also be
required (see 13, above).
REFERENCES
Birds of North America species accounts, The Birds of North America, Inc.,
Philadelphia, PA.
Catchpole, C. K. and P. J. B. Slater. 1995. Bird Song: Biological Themes and
Variations. Cambridge University Press, Cambridge, England.
Charif, R. A., S. Mitchell, and C.W. Clark. 1995. Canary 1.2 User's Manual. Cornell
Laboratory of Ornithology, Ithaca, NY.
Hopp, S. L., M. J. Owren, and C. S. Evans (Eds.). 1998. Animal Acoustic
Communication: Sound Analysis and Research Methods. Springer-Verlag,
Berlin and NY.
Kroodsma, D. E. and E. H. Miller (Eds.). 1982. Acoustic Communication in Birds. 2
vols. Academic Press, NY.
Kroodsma, D. E. and E. H. Miller (Eds.). 1996. Ecology and Evolution of Acoustic
Communication in Birds. Cornell University Press, Ithaca, NY.
Robbins, C. S., B. Bruun, H. S. Zim, and A. Singer. 1983. Birds of North America,
revised edition. Golden Press, NY.
DATA SHEET
Date: ______________
Location: ____________________________________________
Tape recorder number: _____
Tape
Time
counter
numbers
000-
Species recorded
Notes on behavior
Recordist's
name
APPENDIX: GUIDE TO VOCALIZATIONS OF COMMON MAINE BIRDS
Herb Wilson
Department of Biology
Colby College
Waterville, ME 04901
I give these descriptions of common northeastern birds to my students to help
them learn auditory identification of these 51 species. Excellent recordings of these birds
can be found on commercial CD’s and tapes, including the Birding by Ear series by
Walton and Lawton, the Stokes Guide to Eastern Birds (mostly recorded by Lang Elliott,
and additional recordings of Lang Elliott. The Stokes guide is particularly useful because
each species has a separate track on the CD, facilitating rapid playing of the vocalization.
Common Loon
The calls of this species include tremolos and yodels.
Killdeer
The typical call is a repeated kill-deer, kill-deer, kill-deer. Sometimes, only the
single note phrase dee is given, usually repeated.
American Woodcock
This bird gives a dry nasal peent while sitting on the ground, before taking off
into the air
for a courtship display. Air rushing past modified primaries causes a
whirring trill as the male performs a flight display.
Broad-winged Hawk
This hawk gives a two-syllable, shrill, long whistle: pee-teeeeeee.
Red-tailed Hawk
This hawk gives a descending scream, krrrrrreeeeeee which is usually one
downslurred syllable.
Osprey
The primary vocalization is a series of short, penetrating whistles: kyew kyew
kyew kyew.
Ruffed Grouse
This "vocalization" is called drumming and is produced by the beating of the
wings. The male stands on a display log and beats its wings at an accelerating rate,
producing the sound.
Mourning Dove
This species gives a plaintive, five-note song which can be rendered as ooh-ah
hoo hoo
hoo with the last three notes on the same pitch.
Belted Kingfisher
The call is a dry rattle, usually given in flight.
Northern Flicker
The usual call is a loud, repetitious wick-wick-wick-wick with each note usually
on the same pitch. Also, a piercing clee-ur call.
Hairy Woodpecker
This bird gives a whinny that is low and even-pitched. The characteristic call
note is a
loud, sharp peek.
Downy Woodpecker
This bird gives a whinny that is slurred down at the end. The characteristic call
note is a
soft pick, much less sharp than the peek of the Hairy Woodpecker.
Yellow-bellied Sapsucker
The typical call is a nasal cat-like churr or mew. The drumming is distinctive
with two
or three rapid beats followed by an irregular series of double and triple
beats, all within
four seconds.
Eastern Phoebe
This bird says its name, fee-bee.
Blue Jay
The most familiar call is a piercing jay jay jay. The bird also gives a vocalization
that
brings to mind the squeak of a pump handle as well as a three-note call, kwe-dadle.
American Crow
The most common vocalization is a loud caw, caw, caw. This bird makes a range
of
other sounds.
Common Raven
Members of this species have a hoarse and low-pitched voice. Typical calls are
croaks.
Black-capped Chickadee
This species has a highly varied repertoire. The most common vocalization is the
chick- a-dee-dee-dee call where the dee may be repeated many times. The song is a two(fee- bee) or three-note whistle (fee-bee-ee).
Tufted Titmouse
The song is a series of identical two-noted phrases repeated two to ten times.
Often rendered as peter-peter-peter-peter-peter or chiva-chiva-chiva. One variant on
the song
is a series of downward slurred here notes. Also gives distinctive nasal
scolding calls.
White-breasted Nuthatch
This bird's call is a nasal ank, ank which may be given repeatedly. The song is a
repetition of a single nasal note, whi-whi-whi-whi-whi- . . .
Red-breasted Nuthatch
This bird’s normal vocalization sounds like the nasal note given from a toy horn.
The notes are usually given in a series.
House Wren
The rollicking song of this bird begins with two or three rather deliberate notes
and then
leads into a happy, bubbling chatter that often descends at the end. Harsh
scolding notes are often heard.
Winter Wren
One of the virtuosos of the Maine Woods, the Winter Wren gives an amazingly
long song
of tinkling trills and tumbling warbles. The song usually ends on a trill.
The call note is
a loud chimp, usually given in pairs: chimp-chimp, chimp-chimp.
Ruby-crowned Kinglet
The song is a surprisingly loud and long tee tee tee, tew tew tew, teedadee
teedadee
teedadee. The call note is a husky je-dit.
Eastern Bluebird
The song is a soft warble with whistles and occasional chattery notes. These birds
have a characteristic call note, chur-lee often given in flight.
Wood Thrush
The song consists of a flute-like ee-o-lay (sometimes additional flute-like notes
are
present) followed by a fluttering trill.
Hermit Thrush
The song begins with a low, introductory note and continues with a series of flutelike
tremolo notes. The song has a glass-like quality.
American Robin
The song sounds joyful, consisting of a string of two- and three-note phrases (e.g.,
cheerily-cheerup-cheerily-cheerup). Other characteristic vocalizations include a
whinny,
cluck notes and a rapid tut-tut-tut phrase.
Gray Catbird
with
The song of this species is a disjointed string of harsh, squeaky and nasal phrases
occasional sweet notes. The species is named for its distinctive cat-like call note:
meeoow. Other calls include a loud kwut and a series of harsh tch-tch-tch calls.
Cedar Waxwing.
The song consists of repeated, high pitched whistles (zeee-zeee-zeee-zeee-zeee).
Solitary Vireo
The song of this species has a sing-song quality. The song is a series of short,
sweet phrases with long pauses between phrases. Most of the phrases are slurred.
Northern Parula
The song is a buzzy song that winds upward and ends abruptly on a lower note:
zee-zeezee-zee-zeeup.
Black-throated Green Warbler
Two songs are commonly given. One is a husky zee zee zee zoo zee. The other
can be written as zoo zee zoo zoo zee.
Black-and-white Warbler
This bird’s song has been likened to a squeaky wheel. It can be written as weesee weesee wee-see wee-see wee-see. It is not a very loud song but carries well.
Ovenbird
The song is a crescendo of two-noted phrases, with the emphasis on the second
note in each phrase. It sounds like tea-CHER, tea-CHER, tea-CHER, tea-CHER with
every phrase louder than the preceding one.
Common Yellowthroat
This species has a variable song but the most common one is a series of phrases
which can be remembered as witchity-witchity-witchity. The phrases are all connected,
giving the song a rolling quality.
Northern Cardinal
Several songs may be given by either a male or a female. The most common
songs are
whistled phrases introduced by either a cheer (downslurred) or a wheet
(upslurred). They
also have characteristic purty-purty-purty phrases which may be
followed by repeated whistles.
Chipping Sparrow
The song is a dry, non-musical trill given on a single pitch. This song can be
confused
with the more musical, slower trill of the Dark-eyed Junco below.
Field Sparrow
The song is an accelerating whistle ending in a trill, sounding like ping-pong ball
dropped onto a hard surface.
Savannah Sparrow
The song consists of several chip notes followed by two buzzy trills, given on
different
pitches.
Song Sparrow
This species has a tremendously varied song which usually begins with three clear
introductory notes (sometimes only two) followed by a complex series of notes
and trills.
Identification hinges on hearing the introductory notes.
Dark-eyed Junco
The song is a trill with a sweet, musical quality. Sometimes the trill is bell-like, at
other times burry.
White-throated Sparrow
The song may be represented as Poor Sam Peabody, Peabody, Peabody.
Common Grackle
This bird's song consists of distinctly nonmusical, harsh notes and mechanical
squeaks.
Red-winged Blackbird
The characteristic song is kon-ka-ree with the last syllable being a drawn-out trill.
This bird also gives a recognizable chuck note and a whistled, down-slurred tseer.
Eastern Meadowlark
The typical song is a four-noted whistle which is sometimes written as song-ofthe-earth
with the first two notes being rather short. Birds of this species also have
a distinctive harsh call note that is downslurred. A chattering call is often given as
well.
Brown-headed Cowbird
The song consists of a high-pitched bubble-bubble-zee. The song has a distinctive
liquid sound.
House Finch
This species gives a long, relatively high-pitched warble with a burry quality to
some of
the notes. Listen for the harsh, slurred zree notes.
Purple Finch
This bird sings a lively warble with none of the harsh zree notes characteristic of
the song
of the House Finch. The song either ends abruptly or with a short,
descending trill.
American Goldfinch
The song is a jumbled, sweet twitter. A distinctive call, given in flight between
wingbeats, is per-chik-o-ree or po-ta-to-chip. A short, whiny note is also
distinctive.
House Sparrow
This bird gives a series of dry, non-musical chirps.
SUGGESTIONS FOR INSTRUCTORS
Although some of the species included in the Appendix are widespread, teachers outside
Maine will want to modify this list to include appropriate species for their areas. You are
welcome to include descriptions from the Appendix in any modified list you create, but
please do credit Herb Wilson with having written descriptions that you use from the
Appendix (it is fine just to note that he contributed “some of the descriptions” in a
modified list that you create).