1
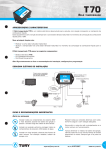
file nr: 235
RPM 2001
RPM 2001 MINI
RPM 2005
RPM 2006
RPM 2007
RPM AVIO
GPT ENGINEERING
VIA CADORE 19
20038 SEREGNO (MONZA/BRIANZA) ITALY
PHONES:
+390362231023 FAX:+390362239002
[email protected] - www.gpt.it
The POWER RPM digitali s a small and powerfull tool that gives the driver information useful to
evacuate driving performance and the tuning of yr vehicle, the POWER RPM in accord with several
versione, will display RPM engine, water temperature in C° or F°, with custom set up, for 2 or 4
strokes, from 1 to 24 cylinders, maximum RPM, recall set up limit rpm, led laser flashing for limit
rpm and alarm temperature, count down battery, power supply by one internal battery (PC version)
or 12 volts, battery life 100 hrs.
Three differets way sto signal acquisitions, from spark plug wire, from negative coil or from electrical manage injection system called EFI. Digital watch when device turned off.
Fitting instruction:
Code version: RPM 2001 / RPM 2003 only rpm
Version with battery on board, fit the rpm wire the little alligator directly on the spark plug wire, if
there is present an insulated cable or special spark plug caps, make two or three round of the cable
bifore to fit the clip. In 12 volts power supply the green wire is the positive + and the white wire is
the negative – to ground, the yellow is the + for the backlight.
In case you have to fit the rpm cable into negative coil, take off the alligator and fit the cable. Is possibile cut the rpm cable without problem. Do not pair the tachometer wire with power supply one!
Code version: RPM 2002 / RPM 2004 only rpm
Version with battery on board, with EFI acquisition signal. Connect the red cable (efi WIRE) directly
to exit of central manage system EFI, and the white cable to ground, please see yr user manual of
yr vehicle to find the correct wires in output. In the back lite version you’ll find three wires, white –
negative to ground, green + to 12 volts and yellow + 12v for the light.
Code version: RPM 2005 / RPM 2006 / RPM 2007 / RPM 2010 with temperature
Version with battery on board, there are present two wires, one for the rpm (as usual with alligator)
and another one for the water probe, connect the fastom red wire directly to probe and the other
white wire on ground, directly to the T aluminium adaptor, you must connect the positive wire on
probe and the negative wire directly on adapter. If you use some plastic tie wraps, don’t tighen them
too much and rem mber not top air tachometer wire with the temperature one!!!
Code version: RPM 2008 / RPM 2009 with temperature
Connect the power supply 12v, green wire (+) positive and white wire (-) negative to ground and
the yellow + for the backlight (Power 12v) after connect the temperature wire (Temp) with the red
wire positive directly to probe and the white wire negative to ground on chassis. Now connect the
rpm wire directly to manage system EFI (see version 2002 and 2004) see the user manual of vehicle
manufacturer where is the output signal and connect the red wire positive while the white wire to
ground. If you use some plastic tie wraps, don’t tighen them too much and remember not top air
the tachometer wire the temperature one!!!
In the drawing are presents four buttons called P1,P2,P3,P4.
Digital watch
The first operation is to set the digital watch, i twill display hours, minutes and seconds in 24h format.
To set the time,
push P2 without release it and push P3, at this time hours flashing set the correct time with P4, the
same for minutes and second (P3>P4), after selected the minutes and seconds release P2 and the
set up is finish.
If you don’t want to display the watch, push P3 and P1 to restore the watch push again P3 and P1.
Tachometer
Turn on the device with P1 (push for half second) now push P2 (for two seconds) to enter in set up
menu, at this point
will appear:
T 2 (2 or 4 strokes menu) to select use P3 and P4, after push P2
P 1 (nr of cilinders menu) to select use P3 and P4, after push P2
H 2900(rpm limit set up) to select use P3 and P4, after push P2
ST 50 (rpm’s engine reading per minute, select with P3 and P4 (suggest to select 100), after push P2
version with water temperature, push again P2 and:
° C (select F° or C° menu) with P3 or P4, after push P2
C 80 (alarm water temperature) select the alarm temp with P3 or P4, now the set up is complete, turn
off the device tostore all the parameters selcted.
Features
Turn/on/off: push P1 for half second, the version 12 volts 12 volts the turn on is automatically when
arrive power.
Engine hours: push P1 without release it and will appear the time.
Max rpm reached: push P4.
Liquid cooling temperature: push P3 to return to rpm push P4.
Rev. Limited: when you arrive to rev limited the red led flashing.
Alarm liquid cooling: in accord with set up the red flashing.
IMPORTANT NOTES AND SUGGESTIONS:
the battery life is around 100 hrs, the model to replace is 3v lithium CR 2430, when you replace it,
the + pole must be to the up.
Do not pair rpm wire with others wires, the rpm cable must be alone!!!
With the acquisition signal from spark plug wire, take note if you have the wire and the spark plug
insulated, because in this case you must around the wire two or three time on the spark plug wire, as
the wave with the insulated cables are too low. The power rpm, can stand the exposure to the dust
and the bad weather.