1
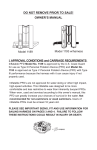
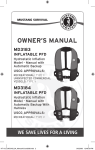
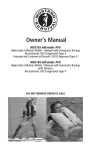
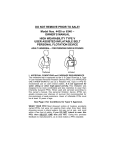
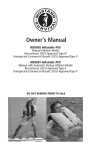
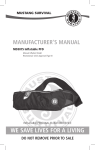
DO NOT REMOVE PRIOR TO SALE!
OWNER’S MANUAL
Model 1439
Model 1443 & 33A43-H13
w/harness
I. APPROVAL CONDITIONS and CARRIAGE REQUIREMENTS
The above models are approved by the U.S. Coast Guard as Special
Use Type V PFDs because the inflator on these products function in a
manual or automatic mode. When armed to function in an automatic
mode, these PFDs meet Type II PFD performance requirements since
they will automatically inflate when submerged in the water. When
armed in a manual only mode these PFDs meet Type III PFD
performance requirements since you must pull the “Jerk to Inflate” tab to
inflate the PFD. See Pages 9 and 10 for rearming instructions. The user
must be aware of which mode the PFD is in. In addition, Model 1443
and 33A43-H13 are approved as a Special Use Type V PFD because it
has an integrated harness that can cause injury (or death) if not used
properly. See harness instructions on Pages 3 and 4. When fully inflated,
both models will provide Type II in-water performance that will turn the
wearer from a face down to a face up position and provide support
suitable for offshore conditions.
Inflatable PFD’s are not approved for water skiing or other high impact,
high-speed activities. This inflatable was designed to be more
comfortable and less restrictive to wear than inherently buoyant PFDs.
When worn, used and serviced according to this owner’s manual, this
PFD can greatly increase your chances of survival in the water. Not
recommended for non-swimmers or weak swimmers. Users of
inflatable PFDs must be at least 16 years old.
MECHANISM PARTS LIST
2
SPECIFICATIONS
Chest Size: 30 - 52 inches (76 - 132 cm)
Weight Range: More than 90 pounds (40 kg)
Minimum Height: For Harness Models ONLY - 5 feet 5 inches (165cm)
Age Range: 16 years of age and older
Buoyancy (minimum): 33.7 Pounds (150 Newtons) when fully inflated
Inflation System:
Manual/Automatic Inflation Mechanism (located on your right side)
Oral Tube (located on your left side)
Pull Tab (located on your right side)
used to manually activate the inflation mechanism and inflate the PFD.
CO2 Cylinder: 33 gram, with cylinder seal indicator.
USE REARMING KIT #0924
Indicators:
For the PFD to be fully armed, a cylinder must be inserted into the
mechanism and the cylinder seal indicator must be Green.
HARNESS USE INSTRUCTIONS
FAILURE TO FOLLOW THESE INSTRUCTIONS COULD RESULT IN
INJURY OR DEATH.
• ALERT! Under no circumstances should the sailing harness be used in
any climbing task or related activity. Failure to comply with this
restriction in use may result in death or injury.
• Always adjust harness snugly around your body. Failure to adjust
properly may increase chance of injury.
• Only use a tether that is less than 6.5 feet (2 meters) long.
• This harness is not suitable for fall arrest.
• Refer to page 7 for donning information.
Always use both D-Rings
for securing to a quick release
under load tether
(see illustration).
3
HARNESS FIT AND SIZING INFORMATION
Sailing Harnesses are designed to be worn at the chest area to ensure
the least injury potential, should the wearer be subject to sudden high
shock loads.
Fit - This harness is to be used by wearers 5 feet 5 inches (165 cm) and
taller. This restriction is intended to locate the bottom of the harness belt
at least 2 inches (5 cm) above the bottom of the rib cage or higher.
Please verify that you can achieve this fit with the PFD adjusted
comfortably snug. DO NOT USE AS A SAILING HARNESS IF THE
HARNESS WEBBING DROPS BELOW THE RIB CAGE.
Sizing - This PFD fits chest size range of 30 to 52 inches (76-132 cm), for
wearers over 90 pounds (40 kg) and height restriction as stated above.
ADDITIONAL HARNESS INFORMATION
• This harness was designed and tested to meet the requirements for
OFFSHORE RACING COUNCIL (ORC) requirements for Sailing
Harnesses.
• USCG approval does not apply to the sailing harness.
• It is strongly recommended that first time users of Sailing Harnesses
receive instruction from a reputable dealer, sailing school, or otherwise
experienced harness sailor.
• Always wear over all other clothing to allow for chamber expansion
during inflation.
• Harness that is attached to an anchored tether could over power
flotation and take wearer down with the boat if not used with quick
release under load hardware.
II. MANDATORY CARRIAGE REQUIREMENTS
Federal Regulations in 33 CFR 1756-1993 require you to carry Coast
Guard approved personal flotation devices (PFDs) legibly marked with
the Coast Guard approval number, which are in good and serviceable
condition and are the correct size for each person on board. To be
considered serviceable, this PFD shall not exhibit deterioration that
could diminish its performance such as broken or deformed hardware,
detached webbing, rotted structural components, air leaks or
nonfunctional oral inflation tube. Unless worn inflated, this PFD must
also be properly armed in either the “Manual Only” or “Automatic
4
Backup” mode. When armed in the “Manual Only” mode, the PFD will
have a cylinder with a Green cylinder seal indicator installed in the
mechanism, and a “Manual Only” tab installed in the pill drawer. When
armed in the “Automatic Backup” mode, the PFD will have a cylinder
with a Green cylinder seal indicator installed in the mechanism, and a
pill cage assembly installed in the pill drawer. See Pages 9 and 10 for
instructions.
III. INSTRUCTIONS FOR USE
PRE-DONNING INSTRUCTIONS
CHECK THE FOLLOWING BEFORE EACH USE OR OUTING:
1. INSPECT PFD FOR DAMAGE
2. BE SURE A CYLINDER IS INSERTED INTO THE MECHANISM AND
CYLINDER SEAL INDICATOR IS GREEN.”
3. CHECK TO BE SURE THERE IS A MANUAL OVERRIDE TAB
STOWED IN THE ACCESSORY POCKET. A SPARE CO2
CYLINDER MAY ALSO BE PROVIDED.
READ BELOW FOR MORE DETAILED INFORMATION!
1. Inspecting Your PFD For Damage
Make sure that the PFD is free from rips, tears or punctures. This
type of damage on the outside covering indicates that the Inflatable
Chamber may have been exposed to potentially damaging elements.
If these defects expose the yellow inflatable chamber material,
discontinue use of the PFD until you have the PFD inspected by an
authorized repair facility. If these defects are noticed but the yellow
inflatable chamber material is not exposed, the Inflatable Chamber
should be checked for leaks. The Inflatable Chamber should also be
checked for leaks at the beginning of each season and at least every
two months during the boating season. The leak test procedure is
described under USER'S INSPECTION. (Refer to Pages 14 and 15.)
2. How to Inspect the Mechanism
The mechanism is located on your right side under the protective
cover. Before inspecting the mechanism remove the CO2 cylinder to
prevent unnecessary discharge.
5
Be sure the cocking lever is in a locked position. The CO2 cylinder
contains the gas charge that will inflate your PFD when the inflation
mechanism is fired either automatically or manually. You must verify
that the CO2 cylinder installed is of the correct size specification and
has not been previously fired.
Check the pill cage assembly to be sure that the pill is not cracked or
otherwise damaged. To do this, first remove the CO2 cylinder, lift the
cocking lever and remove the pill cage. If the pill in the pill cage
assembly is cracked or damaged, replace with a new pill cage
assembly, as shown in rearming instructions on Page 9 or 10.
Be sure that a cylinder is inserted into the mechanism and that the
cylinder seal indicator shows Green. If the indicator shows Red, replace
with a new cylinder following the rearming instructions on Page 9 or 10.
If a new pill cage assembly is not available, replace with the Manual
Override Tab that is stowed in the accessory pocket. REMEMBER: Your
PFD is now on a Manual Mode and will not inflate automatically and
it is your responsibility to let any other users know this.
Additional Notes on CO2 Cylinders:
• FAILURE to properly rearm the inflation mechanism prior to installing
the CO2 Cylinder will result in premature activation of the cylinder.
• CO2 Cylinders are only good for one (1) inflation and cannot be
recharged.
• CO2 Cylinders are made with a protective coating that may wear off
after a period of use or exposure to the environment. When this
coating is worn off, the CO2 Cylinder may start to show some signs of
rusting. If this occurs, replace the CO2 Cylinder.
• If a gram scale (such as a postal scale) is available, it is recommended
to weigh the cylinder to verify that it meets the minimum weight
imprinted on the cylinder.
6
DONNING INSTRUCTIONS
STEP 1
Wear like a jacket, inserting arms between
straps and fabric.
STEP 2
Close front buckle. Manual pull lanyard should
be visible on your lower right side.
STEP 3
Adjust belt through slide located on right side
until a comfortably snug fit is obtained. For
Harness Models be sure that the bottom of the
harness belt is at least 2 inches (5 cm) above
the lowest rib. Adjust belt keeper to reduce
slack in webbing.
After donning, locate the Jerk To Inflate tab for the mechanism. It
should protrude from the PFD as shown on the pictogram. Make sure
that you are comfortable locating the Jerk To Inflate tab with either
hand. Should an emergency develop, be prepared to use it! Always
wear your PFD over, not under clothing.
Caution: bulky clothing may affect the ability of this PFD to turn the
wearer to a face-up position in the water.
Practice closing hardware and adjusting straps before use or prior to inwater testing.
INFLATED DONNING INSTRUCTIONS
Inflatable PFDs can be very difficult to don when fully inflated. Deflate
through the Oral Tube until enough gas has escaped to don. See
DEFLATION INSTRUCTIONS on Page 11. Don as described above and
re-inflate orally as described on Page 8.
7
INFLATION INSTRUCTIONS
See Pages 17-20 for additional information on testing and inflating your
PFD.
1. Manual Inflation - To inflate, grasp the Jerk to Inflate tab and pull
sharply downward.
2. Automatic Inflation - The automatic Inflation Mechanism will
activate when the device is totally immersed in water. Depending
upon temperature, the device will obtain full buoyancy within 5 to 10
seconds. It is recommended that the user regard the automatic
system as a backup and always be prepared to pull the Jerk to
Inflate tab upon immersion.
3. Oral Inflation - The Oral Tube is located on the wearer's left side.
Grasp the Oral Tube and bring to mouth. Blow air through the Oral
Tube until the Inflatable Chamber is firm. If the chamber becomes
soft due to CO2 permeance, Oral Inflation will be necessary to
maintain full buoyancy. Whenever you orally inflate the PFD it
would be a good practice to remove the CO2 cylinder prior to
inflating. If you plan on going into the water after oral inflation, also
remove the pill cage so it may be reused when rearming the PFD.
4. Cold Inflation - Oral Inflation may be required in addition to manual
or automatic inflation if chamber is not firm due to cold temperatures
at or below 40° F (4° C). Inflation time using CO2 gas will be longer
at these temperatures. Activation of automatic system may also be
slower. Always be prepared to use the manual inflation system!
See FREEZING TEMPERATURES on Page 13.
5. Other Inflation Precautions
• Caution: Do not fully inflate orally then manually or automatically
inflate with the CO2 cylinder. Repeated CO2 inflation after oral inflation
will damage the PFD to the point that it will not hold air or float.
• When armed in automatic mode, never orally inflate out of the water
and then go into the water because the CO2 system will automatically
inflate, which could damage the PFD.
• Never inflate this PFD with a Pump or Air-Compressor.
• Permeation loss is greater when the device is inflated with CO2 than
with air, and earlier replenishment by means of the oral inflation
system will be necessary after several hours.
8
9
10
DEFLATION INSTRUCTIONS
Depress Oral Valve (located inside end of Oral Tube) using either the
protective cap or tab provided by inserting into the end of Oral Tube,
see drawing. Gently compress air out of the inflatable chamber while
depressing the Oral Valve.
DO NOT TWIST OR WRING INFLATABLE CHAMBER TO DEFLATE.
If for any reason the Oral Valve remains open, depress it several times.
If it does not release, discontinue use of this PFD and take it to a certified
repair station. (See Page 16 for repair station locations/information.) In
an emergency situation, hold thumb over the valve if it will not close, or
fold the oral tube in half and squeeze together. Refer to page 12 for
Repacking Instructions.
11
REPACKING INSTRUCTIONS
Always deflate the PFD and rearm the Inflation Mechanism - follow
REARMING Instructions prior to REPACKING!
1. Lay device out flat with the yellow
inflatable chamber up.
Fold right inside edge over as shown,
exposing Velcro® strip.
2. Fold right outside edge over, securing
Velcro® strips.
Fold left inside edge over, exposing
Velcro® strip.
3. Fold left outside edge over, securing
Velcro® strips.
Fold right topside over, exposing Velcro®
strip.
Position Jerk to Inflate Tab below bottom
of clear window pocket.
Fold left topside over, securing Velcro®
strips.
4.Snap back strap to shell. Secure Velcro®
strap extensions. Examine all straps, belt
keepers, adjustment slides and buckles to
assure that they are free from twists.
Check to see that the Jerk to Inflate Tab
is hanging free and the green indicator is
clearly visible through the plastic window.
12
FREEZING TEMPERATURES
Never use in below freezing temperatures, unless worn partially inflated.
At or below 40° F (4° C) automatic activation and inflation time with CO2
gas will be longer. Wearing a partially inflated PFD in these conditions
will provide some initial buoyancy while the PFD fully inflates.
Caution: Do not fully inflate orally and then inflate with the CO2 cylinder.
Repeated CO2 inflation after oral inflation will damage the PFD to the
point that it will not hold air or float.
OTHER USE GUIDELINES
1. Always wear your PFD when underway unless you are inside a cabin.
2. If you need to jump from any height always fold arms over your chest
to keep the PFD in place when entering the water.
3. Avoid all unnecessary activities that will be abrasive to the device.
4. Use extreme caution around sharp objects.
5. Avoid unnecessary exposure to the sunlight. See GENERAL
PRODUCT LIFE EXPECTANCY on Page 14.
6. CO2 gas from the cylinder will permeate through the chamber fabric
over time. If you are in the water for a long time, it may be necessary
to top off the inflatable orally, by blowing air in through the oral tube.
7. Inflatable PFDs are not designed for activities in which the wearer
expects to encounter impact with the water at a high speed such as
water skiing, riding personal watercraft, etc.
8. Inflatable PFDs are not designed for white water activities.
9. For Inflatable PFDs that have a manual-auto inflator, dropping the
PFD into the water or exposing the inflation system to unnecessary
water spray, will result in an inadvertent inflation.
IV. IS YOUR PFD IN GOOD AND SERVICEABLE CONDITION?
Check your PFD between outings to be sure that it is properly armed;
that it is free of rips, tears or holes; that all seams are securely sewn;
and that the fabric, straps and hardware are still strong. Inspect the
inflatable portion of the PFD in accordance with Care and Maintenance
Instructions.
13
V. CARE AND MAINTENANCE INSTRUCTIONS
GENERAL PRODUCT LIFE EXPECTANCY
The reliability and service life of this PFD depends greatly upon how it is
used and cared for. Avoid storing PFD in direct sunlight. Sunlight contains
ultraviolet radiation that weakens synthetic materials. Prolonged
exposures to high temperatures and high humidity may shorten service
life of this PFD. While it is known that these elements degrade the
materials, every use environment is unique so there is no sure way to
estimate how long the PFD will last. It is for this reason that you must
follow the care and cleaning instructions and perform the maintenance
and service checks. This will assure that the PFD remains functional and
will maximize the useful life of this PFD. Failure to follow these instructions
rigorously could result in a non-functioning PFD causing injury or death.
USER'S INSPECTION
The users should perform the following checks before each season, or
before a long journey, or before each outing, as recommended below:
1. Physical Inspection of Cover and Straps - Examine outer shell
fabric, seams, webbing attachments, buckles, slides, etc. Fabric
fading can indicate a loss of strength. Check for strength by pulling
seams and attachments snugly. If device shows any signs of damage,
return to a certified Stearns Repair Facility or replace the entire
device. This inspection should be performed each outing.
2. Oral Inflation Leak Test - This test should be performed every two
months and at the start of each season. Inflate buoyancy chamber
using the oral inflation valve and leave to rest for 16 hours. When
buoyancy chamber remains firm and full of air, there is no leakage
and chamber is operational. If the chamber deflates during this leak
test, immediately bring to a certified Stearns Repair Facility for repair.
The device is no longer in operational condition.
3. Automatic Inflation System - This test should be performed during
years when the PFD is not inspected by a certified Stearns Repair
Facility, and will expend your CO2 cylinder and pill. So make sure you
have a rearm kit before conducting this test. With device packed as
normal, immerse the device into a tub of water and see if it inflates.
DRY, REARM and REPACK as shown on Pages 9, 10 and 12.
14
User's Inspection (Cont.)
4. Function Test of Oral Valve - With the PFD inflated, remove the dust
protection cap, and test the valve by pushing it down using the tab
provided on the cap (refer to Page 11). The valve should depress
easily, and when released it should automatically return to the closed
position and reseal.
REARMING KIT(S)
Use Rearming Kit No. 0924. See Rearming Instructions on Pages 9 and
10.
CARE AND CLEANING INSTRUCTIONS
Drying - If the device is wet, place on a coat hanger to allow thorough
drying. Do not place in direct sunlight to dry. Do not use any heat source
or place on radiator.
Cleaning - Damp wipe only with mild detergent recommended for
synthetic fabrics. Remove grease and oil immediately. After every use,
and before rinsing, first remove CO2 cylinder and pill cage assembly
and rinse well with fresh water. Read instructions provided on the
device.
•
•
•
•
•
DO
DO
DO
DO
DO
NOT
NOT
NOT
NOT
NOT
MACHINE WASH
MACHINE DRY
DRY CLEAN
USE SOLVENT BASED CLEANERS
BLEACH
15
STORAGE
• Store your pill cage (water sensing element) in a ventilated package,
do not store in a sealed container.
• Store in clean, cool, dry area.
• Do not store pill cage assemblies in high humidity or high temperatures
(over 100°F) for an extended time.
• Do not store pill cage assemblies for more than 18 months before use.
REPAIR
If you have any question about the condition or integrity of this product
call 1-800-STEARNS (1-800-783-2767). A damaged device must be
repaired by certified Stearns Repair Facility or discarded.
SERVICING
Stearns strongly recommends that this device be inspected at least
every 24 months by a certified Stearns Repair Facility or STEARNS Inc.
Call 1-800-STEARNS (1-800-783-2767) for your nearest authorized
Stearns Repair Facility.
VI. WHY ARE PFDS REQUIRED SAFETY EQUIPMENT?
Drownings are the leading cause of fatalities involving recreational
boating. A PFD provides flotation to help keep your head above water,
help you to stay face up in the water, and increase your chances for
survival and rescue. Most adults only need an extra 7 to 12 pounds (31
to 53 Newtons) of flotation to keep their heads above water. The proper
size PFD will properly support the weight of the wearer. Since this
inflatable PFD does not have inherent buoyancy, it provides flotation
only when inflated. Familiarize yourself with the use of this PFD so that
you will know what to do in an emergency.
16
VII. HOW AND WHY TO TEST YOUR PFD?
Inflate your PFD and try it out in the water to:
• Make sure it floats you:
- Comfortably (When worn properly)
- Adequately for expected wave conditions
(Body shapes/densities affect performance)
• Make sure it works:
- A flow of bubbles should not appear
(See Section V on Pages 14 and 15 for leak tests)
- It should inflate quick and easily
• Learn how it works by:
- Activating the CO2 inflation system
- Rearming the CO2 inflation system
- Using the Oral inflator tube
The U.S. Coast Guard recommends that you purchase two automatic
rearming kits; one to be used immediately in testing the automatic
inflation system (see HOW DO YOU TEST YOUR PFD USING THE
AUTOMATIC INFLATOR?) and the other to carry on board as a spare.
Since you should replace the pill cage assembly each year, the U.S.
Coast Guard recommends you test the automatic inflation system in-thewater at the beginning of each boating season. By doing this, you
demonstrate that the automatic inflation system is still working properly
and reduce the likelihood of premature inflation and its associated
dangers. The only check of the manual inflation system (with CO2
cylinder with the green indicator tab removed, and with either the pill
cage or the manual only tab installed) would be to determine that the
lever arm and piercing shaft move freely when moving the lever
(attached to the pull tab) several times down and up.
17
HOW DO YOU TEST YOUR PFD
USING THE AUTOMATIC INFLATOR?
1. To test your inflatable PFD, you will need:
• Your fully armed PFD, and
• Rearming kit approved for your PFD. (This kit contains a
CO2 cylinder and pill cage assembly that you will need to use
following this test.)
2. Put on the PFD.
3. Get into shallow water, just deep enough that you can stand with your
head above the surface. Once the automatic inflator is under water
the PFD should automatically, fully inflate within 10 seconds.
4. See if the PFD will float you on your back or just slightly back of
vertical. In a relaxed floating position, verify that your mouth is well
above the water's surface. Note the effect of where you hold your
legs on how you float.
5. Get out of the water and remove the PFD. Remove the used CO2
cylinder and the used pill cage assembly from the PFD inflator.
Deflate the PFD using the oral inflator.
6. Let the PFD dry thoroughly. REARM and REPACK (refer to Pages
9, 10 and 12) the PFD in accordance with the manufacturer's
instructions!
18
HOW DO YOU TEST YOUR PFD USING THE
MANUAL INFLATOR?
1. To test your inflatable PFD, you will need:
• Your fully armed PFD, with the manual override tab in place, and
• Rearming kit approved for your PFD. (This kit contains a CO2
cylinder and pill cage assembly that you will need to use
following this test.)
2. Put on the PFD.
3. Actuate the inflation system by jerking firmly downward on the pull
tab. The PFD should fully inflate within 5 seconds.
4. Get into shallow water, just deep enough that you can stand with your
head above the surface.
5. See if the PFD will float you on your back or just slightly back of
vertical. In a relaxed floating position, verify that your mouth is well
above the water's surface. Note the effect of where you hold your
legs on how you float.
6. Get out of the water and remove the PFD. Remove the used CO2
from the PFD inflator. Completely deflate the PFD using the oral
inflator.
7. Let the PFD dry thoroughly. REARM in a manual only or automatic
mode and REPACK the PFD in accordance with the manufacturer's
instructions (refer to Pages 9, 10 and 12)!
19
HOW DO YOU TEST YOUR PFD
USING THE ORAL INFLATOR?
1. To test your inflatable PFD, you will not need any spare parts or
rearming kits.
2. Remove the CO2 cylinder and pill cage (if installed) assembly, to
prevent inadvertent activation of the automatic inflation system, which
could potentially damage the PFD. If the PFD was armed in the
manual only mode, the "Manual Only" tab does not have to be
removed.
3. Put on the PFD.
4. Get into shallow water, just deep enough that you can stand with your
head above the surface.
5. If you are a weak swimmer or non-swimmer, inflate the PFD partially
so that you are supported well enough to be able to complete inflation
without touching bottom, either orally or manually. Note this level of
inflation because it is the minimum needed for you to safely use this
inflatable PFD.
6. Fully inflate the PFD using the oral inflator.
7. See if the PFD will float you on your back or just slightly back of
vertical. In a relaxed floating position, verify that your mouth is well
above the water's surface. Note the effect of where you hold your
legs on how you float.
8. Get out of the water and remove the PFD. Completely deflate the
PFD using the oral inflator.
9. Let the PFD dry thoroughly. REARM and REPACK the PFD in
accordance with the manufacturer's instructions! Refer to Pages 9,
10 and 12.
20
VIII. WEAR YOUR PFD
In approximately 80 percent of all boating fatalities, the victims were not
wearing a PFD. Most fatal accidents happen on calm sunny days. This
inflatable PFD is much more comfortable to wear than other PFD types.
Get into the habit of wearing this PFD. Non-swimmers and children
especially should wear a hybrid or non-inflatable PFD at all times when
on or near the water.
IX. HYPOTHERMIA
Prolonged exposure to cold water causes a condition known as
hypothermia - a substantial loss of body heat, which leads to exhaustion
and unconsciousness. Most drowning victims first suffer from
hypothermia. The following chart shows the effects of hypothermia:
PFDs can increase survival time because they allow you to float without
using energy treading water and because of their insulating properties.
Naturally, the warmer the water, the less insulation you will require.
When operating in cold waters [below 60°F (15.6°C)] you should
consider using a coat or jacket style PFD or a Type V Thermal
Protective PFD as they cover more of the body than the vest or belt
style PFDs.
21
Some Points to Remember
About Hypothermia Protection:
1. Always wear your PFD. Even if you become incapacitated due to
hypothermia, the PFD will keep you afloat and greatly improve your
chances of rescue.
2. Do not attempt to swim unless it is to reach a nearby craft,
fellow survivor, or a floating object on which you can lean or climb.
Swimming increases the rate of body heat loss. In cold water, drownproofing methods that require putting your head in the water are not
recommended. Keep your head out of the water. This will greatly
lessen heat loss and increase your survival time.
3. Use the standard H.E.L.P. position when wearing an inflatable PFD.
Wrap your arms around your torso, under the PFD, and draw your
legs up to a seated position. Doing so will help you conserve body
heat.
4. Keep a positive attitude about your
survival and rescue. This will improve
your chances of extending your
survival time until rescued. Your willto-live does make a difference!
5. If there is more than one person in
the water, huddling is recommended
while waiting to be rescued. This
action tends to reduce the rate of
heat loss and thus increase the
survival time.
22
X. EACH OF THESE DEVICES IS
INTENDED TO HELP YOU SAVE YOUR OWN LIFE
For your PFD to function properly follow these suggestions to verify that it
fits, floats, and remains in good condition.
1. Check the status of the inflator and make sure that the status indicator
is green. Check before each outing.
2. Get in the habit of rearming the inflation mechanism right after each
CO2 inflation.
3. This PFD requires rearming with a new cylinder, and pill cage
assembly after each CO2 inflation. Always have rearming kits to
service your inflatable PFDs.
4. Try your wearable PFD on and adjust it until it fits comfortably in and
out of the water.
5. Mark your PFD with your name if you are the only wearer.
6. Do not alter your PFD. If it doesn't fit properly, get one that does. An
altered device is no longer Coast Guard approved.
7. Your PFD is not intended for use as a fender or kneeling pad.
8. If your PFD is wet, allow it to dry thoroughly before storing it. Store it
in a well-ventilated area.
9. Do not dry your PFD in front of a radiator or other source of direct
heat.
XI. ADDITIONAL INFORMATION
If you need more information about PFDs and safe recreational boating,
contact your state boating authority, U.S. Coast Guard Auxiliary, U.S.
Power Squadron, Red Cross, or your nearest unit of the U.S. Coast
Guard; or call the Coast Guard Customer Information Line at
1-800-368-5647 or the Free Boating Course number 1-800-336-BOAT
(in VA, 1-800-245-BOAT) or see the USCG Boating Web Page at
www.uscgboating.org.
23
DO NOT ATTACH PFD'S TO YOUR BOAT
Each PFD has straps, hooks, buckles, or other means for securing the
device in place on the wearer. Some PFDs also incorporate decorative
dee rings or tabs. Such items are not to be used to attach the device to
the boat. Attaching the device to the boat will not permit it to perform as
intended.
The exception is when a Safety Harness (Harness Models stated on
Front Cover) are worn with a tether of less than than 6.5 feet (2 m)
having a quick release under load hardware. Refer to Page 3 for
harness use instructions.
CO2 PERMEATION LOSS
CO2 gas will permeate the chamber fabric over time. Oral Inflation may
be necessary to maintain full buoyancy.
BUDDY LINE INFORMATION
Buddy lines, when provided, are to be used by people adrift in the water,
to attach themselves to one another and aid in staying together. Buddy
lines are not designed for lifting.
IF YOU HAVE ANY QUESTIONS ABOUT THE INITIAL ARMING,
REARMING, REPACKING, OR NEAREST AUTHORIZED STEARNS
REPAIR FACILITY CALL
1-800-STEARNS (1-800-783-2767).
PRODUCT REGISTRATION:
PLEASE MAIL REGISTRATION CARD OR CALL
1-800-STEARNS (1-800-783-2767)
IN ORDER TO RECEIVE IMPORTANT UPDATES
ON THIS PFD.