1
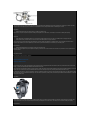
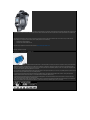
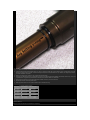
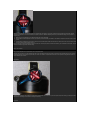
FORK- 2014 32 FLOAT 27.5
Travel
•
3.9 in./100 mm
•
4.7 in./120 mm
•
5.1 in./130 mm
•
5.5 in./140 mm
•
5.9 in./150 mm
Features/Adjustments
Factory FIT iCD; 100; Kashima coated upper tubes, 1-1/8” straight or 1.5” tapered steerer, Electronic Climb/Descend mode, rebound, air spring pressure.
Factory FIT CTD w/Adj; 100, 120, 130, 140, 150; Kashima coated or anodized upper tubes, 1-1/8” straight or 1.5” tapered steerer, lever actuated Climb/Trail/
Descend (3 position), Trail adjust range (1, 2, 3), rebound, air spring pressure.
Factory FIT CTD Remote; 100, 120, 130, 140, 150; Kashima coated or anodized upper tubes, 1-1/8” straight or 1.5” tapered steerer, remote actuated Climb/Trail/
Descend (3 position), rebound, air spring pressure.
Factory FIT Terralogic®; 100, 120; Kashima Coated upper tubes, 1.5" tapered steerer, Terralogic threshold, rebound, air spring pressure.
Performance FIT CTD; 100, 120, 130, 140, 150; Anodized upper tubes, 1-1/8” straight, 1.5” tapered, or 1.25"-1.5" tapered steerer, lever actuated Climb/Trail/
Descend (3 position), rebound, air spring pressure.
Evolution CTD; 100, 120, 130, 140, 150; Anodized upper tubes, 1-1/8” straight, 1.5” tapered, or 1.25"-1.5" tapered steerer, lever actuated Climb/Trail/Descend (3
position), rebound, air spring pressure.
Evolution CTD Remote; 100, 120, 130, 140, 150; Anodized upper tubes, 1-1/8” straight or 1.5” tapered steerer, remote actuated Climb/Trail/Descend (3 position),
rebound, air spring pressure.
Lower leg
•
15QR thru axle system, post style disc brake mounting
•
9 mm open dropout, post style disc brake mounting
Spring
Air
Riding style
XC, Trail, AM
Sections
•
Before You Ride (11 steps)
•
Setting Fork Air Pressure
•
Adjusting Rebound
•
Climb, Trail, Descend
•
Adjusting Trail Mode
•
Using the CTD Remote
•
Using the iCD System
•
Adjusting Terralogic® Threshold
Before You Ride
Make sure that your fork is ready to ride
1.
Check that quick-release levers are properly adjusted and tightened.
2.
Inspect the entire exterior of your fork. The fork should not be used if any of the exterior parts appear to be damaged. Contact your local dealer or FOX for
further inspection and repair.
3.
Check your headset adjustment. If loose, adjust it accordingly to your bicycle manufacturer's recommendations.
4.
Check that all brake cables or hoses are properly fastened.
5.
Test the proper operation of your front and rear brakes on level ground.
6.
Before every race or ride, clean the outside of your fork with only mild soap and water, and wipe dry with a soft dry rag. Do not spray water directly into the
seal/upper tube junction. Do not use a high pressure washer on your fork.
Setting Fork Air Pressure
32 FLOAT maximum air pressure is 125psi
Generally, sag should be set to 15 – 20% of total fork travel
1.
Unscrew the blue air cap on top of the left fork leg counter-clockwise to expose the schrader valve.
2.
Attach a FOX High Pressure Pump to the schrader valve.
3.
Pump your fork to the appropriate pressure as listed in the 'Suggested starting points for setting sag' table below, then remove the pump.
4.
Using your forks sag setting o-ring on the left upper tube (or temporarily install a zip tie to the upper tube), slide the o-ring (or zip tie) down against the fork
dust wiper.
5.
Rotate the CTD lever to the Descend mode (the riders 1 o'clock position).
◦
If you have a Remote CTD fork, click the black release lever once to set the fork to Descend mode.
◦
If you have a Terralogic® fork, turn the blue Terralogic® threshold adjust knob fully counter-clockwise.
6.
Dressed to ride (including a filled hydration pack, if you use one), position your bike next to a wall or table to support yourself. Mount your bicycle.
Assume your riding position for at least 10 seconds, allowing the suspension to fully settle. Make sure you distribute your weight evenly between the
saddle, handlebars and pedals.
7.
While in your riding position, slide the o-ring (or zip tie) down against the fork dust wiper.
8.
Dismount your bike without bouncing, to avoid further moving the o-ring or zip tie. Measure the distance between the dust wiper and the o-ring or zip tie.
This is your sag measurement. Suggested sag measurements are listed in the table below.
9.
Add or remove air pressure until your sag measurement is between 15-20% of your forks total travel.
10. Repeat steps 2-8 and recheck sag measurement.
11. When sag measurement is correct, screw the blue air cap on clockwise until snug.
Rider Weight lbs/kgs
Suggested Starting Points for Setting Sag
100mm
120mm
130mm
140mm
150mm
≤125
≤57
55psi
50psi
60psi
55psi
50psi
125 - 135
57 - 61
55psi
50psi
65psi
60psi
55psi
135 - 145
61 - 66
60psi
55psi
75psi
65psi
60psi
145 - 155
66 - 70
70psi
65psi
80psi
75psi
70psi
155 - 170
70 - 77
80psi
75psi
85psi
80psi
75psi
170 - 185
77 - 84
85psi
80psi
90psi
85psi
80psi
185 - 200
84 - 91
90psi
85psi
100psi
90psi
90psi
200 - 215
91 - 98
95psi
95psi
110psi
100psi
100psi
215 - 230
98 - 104
100psi
100psi
120psi
110psi
110psi
230 - ≥250
104 - ≥113
110psi
110psi
120psi
120psi
120psi
Travel
3.9 in./100mm
4.7 in./120mm
5.1 in./130mm
5.5 in./140mm
5.9 in./150mm
Suggested Sag Measurements
15% sag (Firm)
20% sag (Plush)
.58 in./15mm
.78 in./20mm
.70 in./18mm
.94 in./24mm
.76 in./20mm
1 in./26mm
.82 in./21mm
1.1 in./28mm
.88 in./22mm
1.2 in./30mm
Adjusting Rebound
Rebound controls how fast the fork extends after compressing
The red rebound adjuster is located at the bottom of the right fork leg (the rebound knob on Terralogic forks is located at right topcap). Rebound controls the rate of
speed at which the fork extends after compressing. Turning the knob clockwise (in) slows down rebound; turning the knob counter-clockwise (out) speeds up
rebound. Rebound damping should only be set after first setting your air pressure by measuring sag.
1.
Make sure your CTD fork is in Descend mode (fully counter-clockwise). If you have a Terralogic fork, turn the blue Terralogic threshold adjust knob fully
counter-clockwise.
2.
Starting with the rebound adjuster fully open (counter-clockwise) push on the fork to compress it and feel its return speed.
3.
Increase rebound damping by turning the red rebound knob in clockwise until when tested, the fork returns quickly but does not top out.
Top out is felt when a fork fully extends too quickly and comes to an abrupt stop when it reaches full extension (you will hear/feel a small noise). Top out should be
avoided through proper rebound setting.
Climb, Trail, Descend
Easy on-the-fly adjustments for unprecedented control and performance
The blue CTD lever lets you to switch between the Climb, Trail, and Descend modes. Each mode is optimized for each specific type of terrain, providing
exceptional performance and riding enjoyment with your fork. CTD allows for complete rider control as one can experiment using different modes on various
different types of terrain.
Climb Mode:
Rotate the blue CTD lever fully clockwise to set the fork in Climb mode. Climb mode is a very firm low-speed compression setting (not designed to be a solid
lockout). This setting is most useful for climbing and sprinting.
Trail Mode:
Rotate the blue CTD lever to the middle setting to set the fork in Trail mode. Trail mode offers less compression damping than Climb mode. Use this setting when
pedaling on undulating terrain, and for preventing excessive travel in technical riding situations (such as low-speed drops). Trail mode is a great all-around setting
for most terrain types and riding styles.
Descend Mode:
Rotate the blue CTD lever fully counter-clockwise to set the fork to Descend mode. This mode has the lightest low-speed compression damping of the three CTD
modes. Descend mode offers the most plush ride to ensure optimal traction over varied terrain.
Adjusting Trail Mode
FIT CTD w/Trail Adjust models allow for added fine tuning
Factory CTD w/Trail Adjust model forks feature a three-position Trail Adjust control that regulates low-speed compression damping only in Trail mode. For firmer
low-speed compression in Trail mode, turn the black Trail Adjust knob clockwise. For lighter low-speed compression, turn the Trail Adjust knob counter-clockwise.
Trail adjustments (soft, medium, firm) only function in Trail mode.
Using the CTD Remote
Easy on-the-fly adjustments for unprecedented control and performance
The CTD Remote lets you to switch between the Climb, Trail, and Descend modes while riding. Each mode is optimized for a specific type of terrain, providing
best performance and riding enjoyment. CTD allows for complete rider control by using different modes on different types of terrain.
Climb Mode:
•
Push the silver lever down to its lowest position to set the fork in Climb mode.
Climb mode is a very firm low-speed compression setting (not designed to be a solid lockout). This setting is most useful for climbing and sprinting.
Trail Mode:
•
From Climb mode, push the black release lever once and then push the silver lever down one click to the middle position to engage Trail mode.
•
From Descend mode, push the silver lever down one click to the middle position to engage Trail mode.
Trail mode offers less compression damping than Climb mode. Use this setting when pedaling on undulating terrain, and for preventing excessive travel in
technical riding situations (such as low-speed drops). Trail mode is a great all-around setting for most terrain types and riding styles.
Descend Mode:
•
Push the black release lever in any setting to set the fork to Descend mode.
Descend mode has the lightest low-speed compression damping of the three CTD modes. Descend mode offers the most plush ride to ensure optimal traction
over varied terrain.
Using the iCD System
Fast activation and almost effortless operation
iCD Pre-Installation Guide Download »
iCD Owner's Guide Download »
FLOAT iCD elevates cross country and trail riding to the next level. FLOAT iCD integrates an electronic actuated system into proven FOX FLOAT fork and shock
designs, to quickly and optimally adjust between Climb and Descend modes.
This system offers fast activation and almost eff ortless operation. FLOAT iCD shares features with the Shimano E-Tube electronic shifting technology. FLOAT iCD
uses Power-Line-Communication (PLC) that facilitates data and power flow through a single wire, permitting minimal wiring and ease of setup.
By default, the switch has a two position configuration, the same configuration as that most commonly used by FOX world class racers. For a full suspension setup,
both fork and rear shock are actuated simultaneously. The switch can be operated by rotating it with your thumb using the thumb actuation indentation, or with the
index finger actuation lever.
Climb Mode:
Rotating the switch down actuates climb mode for a right-mounted switch; if you have the switch mounted on the left side, rotating the switch up actuates climb
mode. Climb mode is a very firm low-speed compression setting (not designed to be a solid lockout). This setting is most useful for climbing and sprinting.
Descend Mode:
Rotating the switch up actuates descend mode; if you have the switch mounted on the left side, rotating the switch down actuates descend mode. Descend mode
has the lightest low-speed compression damping of the two iCD modes. Descend mode offers the most plush ride to ensure optimal traction over varied terrain.
The Optional PC linkage device can be used to connect a PC to the bicycle (system or unit), and an E-tube Project* can be used to carry out tasks such as,
problem diagnosis of single units and the whole system, updating firmware*, and customizing.
•
* E-tube Project: the PC application
•
* Firmware: the software inside each unit
The E-tube project application download can be found here: http://e-tubeproject.shimano.com
Adjusting Terralogic® Threshold
Set the firmness of your platform on Terralogic forks
The Terralogic damper contains a weighted inertia valve (Brassmass™), that freely slides on a shaft to open and close compression oil flow ports in the damper.
The Brassmass assembly automatically responds to the impact of trail bumps or depressions, opening the compression oil flow ports and allowing the flow of
damping oil. The Brassmass assembly does not respond to input from above (rider input such as pedaling, sprinting, G-outs, etc), keeping the compression flow
ports closed and maintaining the pedaling platform or fork lockout.
The 15-position blue Terralogic threshold adjust knob located on the bottom of the right fork leg allows you to fine-tune your pedaling platform anywhere between
lockout-firm and fully open plush damping (or zero pedaling platform).
To make pushing through the fork travel harder and increase the pedaling platform, turn the blue threshold adjust knob clockwise. Turning the adjust knob
completely clockwise makes the fork feel locked out—until the Brassmass is activated by hitting a bump.
To make pushing through the fork travel easier and decrease the pedaling platform, turn the threshold adjust knob counter-clockwise. Turning the knob fully
counter-clockwise bypasses the Brassmass assembly entirely.
As no two riders are the same (weight, strength, riding style, terrain choices, or simply personal preference with riding feel), FOX encourages you to spend time
exploring the possibilities with Terralogic threshold adjustment, to discover the "sweet spot" that feels right to you on your terrain.
SHOCK- 2014 FLOAT CTD
Travel
5.50 x 1.00
6.00 x 1.25
6.50 x 1.50
7.25 x 1.75
7.50 x 2.00
7.875 x 2.00
7.875 x 2.25
8.50 x 2.50
Features/Adjustments
Factory FLOAT CTD w/Adj BV; Kashima Coated or anodized air sleeve and body, lever actuated Climb/Trail/Descend (3 position), Trail adjust range (1, 2,
3), rebound, air spring pressure.
Factory FLOAT CTD Remote BV; Kashima Coated or anodized air sleeve body, remote actuated Climb/Trail/Descend (3 position), rebound, air spring
pressure.
Performance FLOAT CTD BV; Anodized air sleeve and body, lever actuated Climb/Trail/Descend (3 position), rebound, air spring pressure.
Evolution FLOAT CTD Remote; Anodized air sleeve and body, remote actuated Climb/Trail/Descend (3 position), rebound, air spring pressure.
Evolution FLOAT CTD; Anodized air sleeve and body, lever actuated Climb/Trail/Descend (3 position), rebound, air spring pressure.
Spring
Air
Riding style
XC, Trail
Sections
•
Installing Your Shock
•
Before You Ride
•
Setting Shock Air Pressure
•
Adjusting Rebound
•
Climb, Trail, Descend
•
Adjusting Trail Mode
•
Using the CTD Remote
•
Service Intervals
Installing Your Shock
Check for clearance before riding.
If you are installing your shock on a bike for which the shock was not original equipement, follow the steps below to ensure proper clearance before
riding.
1.
Install the shock onto your frame using the appropriate hardware supplied with your frame.
2.
Remove the air cap and let all air out of the main air chamber.
3.
Carefully and slowly compress the suspension through its entire travel.
4.
Check that no part of your shock contacts any portion of your frame or linkage as it cycles through its travel.
5.
Pressurize your main air chamber to between 50-300psi to prepare to set sag as described in the "Setting Shock Air Pressure" section below.
Before You Ride
Make sure that your shock is ready to ride
1.
Clean the outside of your shock with mild soap and water and wipe dry with a soft rag.
◦
Do not use any solvents or de-greasers as these products can damage the shock's exterior finish.
◦
Do not use a high pressure washer or spray water directly at the seal/shock body junction.
2.
Inspect the exterior of your shock. The shock should not be used if any of the exterior parts appear to be damaged
3.
Make sure that your quick-release levers (or thru-axles) are properly adjusted and tightened.
4.
Check your headset adjustment. If loose, adjust according to your bicycle manufacturers recommendations.
5.
Check that all brake cables or hoses are properly fastened.
6.
Test the proper operation of your front and rear brakes on lever ground.
◦
Contact your local FOX dealer or FOX directly for further inspection or repair.
Setting Shock Air Pressure
FLOAT CTD shocks have a maximum pressure of 300psi
Sag should be set to 15 – 20% of total shock travel
1.
Unscrew the black air cap to expose the schrader valve.
2.
Slide your shocks sag setting o-ring up against the shock dust wiper.
3.
Rotate the CTD lever to the Descend mode (fully counter-clockwise).
4.
Dressed to ride (including a filled hydration pack, if you use one), position your bike next to a wall or table to support yourself. Mount your bicycle.
Assume your riding position for at least 10 seconds, allowing the suspension to fully settle. Make sure you distribute your weight evenly between
the saddle, handlebars and pedals.
5.
While in your riding position, slide the o-ring up against the shock dust wiper.
6.
Dismount your bike without bouncing, to avoid further moving the o-ring. Measure the distance between the dust wiper and the o-ring. This is your
sag measurement. Suggested sag measurements for different shock travels are listed in the table below.
7.
Add or remove air pressure until your sag measurement is between 15-20% of your shocks total travel.
8.
Repear steps 2-6 and recheck sag measurement.
9.
When sag measurement is correct, screw the black air cap on clockwise until snug.
◦
If you have a FLOAT CTD Remote shock, click the black release lever once to set the shock to Descend mode.
Shock Travel
1.00 in./25mm
Suggested Sag Measurements
15% Sag (Firm)
20% Sag (Plush)
0.15 in./3.7mm
0.20 in./5.0mm
1.25 in./32mm
0.19 in./4.8mm
0.25 in./6.4mm
1.50 in./38mm
0.23 in./5.7mm
0.30 in./7.6mm
1.75 in./44mm
0.27 in./6.6mm
0.35 in./8.8mm
2.00 in./51mm
0.30 in./7.6mm
0.40 in./10.2mm
2.25 in./57mm
0.34 in./8.5mm
0.45 in./11.4mm
2.50 in./64mm
0.40 in./9.6mm
0.50 in./12.8mm
Adjusting Rebound
Rebound controls how fast the shock extends after compressing
Rebound controls the rate of speed at which the shock extends after compressing. Turning the red rebound knob clockwise (in) slows down rebound,
turning the red rebound knob counter-clockwise (out) speeds up rebound. Rebound damping should only be set after first setting your air pressure by
measuring sag.
1.
Make sure your CTD adjuster is set in Descend mode (fully counter-clockwise).
2.
Starting with the rebound adjuster in the fully open position (counter-clockwise) push down on the saddle to compress the shock and feel its return
speed.
3.
Increase rebound damping by turning the red rebound knob clockwise (when viewed from the end of the shock with the air valve) until when tested,
the shock returns quickly but does not top out.
Top out is felt when a shock fully extends too quickly and comes to an abrupt stop when it reaches full extension (you will hear/feel a small noise). Top out
should be avoided through proper rebound setting.
Climb, Trail, Descend
Easy on-the-fly adjustments for unprecedented control and performance
The blue CTD lever lets you to switch between the Climb, Trail, and Descend modes. Each mode is optimized for each specific type of terrain, providing
exceptional performance and riding enjoyment with your shock. CTD allows for complete rider control as one can experiment using different modes on
various different types of terrain.
Climb Mode:
Rotate the blue CTD lever fully clockwise to set the shock in Climb mode. Climb mode is a very firm low-speed compression setting (not designed to be a
solid lockout). This setting is most useful for climbing and sprinting.
Trail Mode:
Rotate the blue CTD lever to the middle setting to set the shock in Trail mode. Trail mode offers less compression damping than Climb mode. Use this
setting when pedaling on undulating terrain, and for preventing excessive travel in technical riding situations (such as low-speed drops). Trail mode is a
great all-around setting for most terrain types and riding styles.
Descend Mode:
Rotate the blue CTD lever fully counter-clockwise to set the shock to Descend mode. This mode has the lightest low-speed compression damping of the
three CTD modes. Descend mode offers the most plush ride to ensure optimal traction over varied terrain.
Adjusting Trail Mode
FLOAT CTD w/Adj models allow for added fine tuning
FLOAT CTD w/Adj model shocks feature a three-position Trail Adjust control that regulates low-speed compression damping only in Trail mode. 1 is the
softest setting, 2 is the medium setting, and 3 is the firmest setting. To adjust Trail mode, first gently pull out on the black Trail adjust knob and turn it, lining
up the arrow with your desired Trail mode setting number.
Trail adjustments (1, 2, 3) only function in Trail mode.
Using the CTD Remote
Easy on-the-fly adjustments for unprecedented control and performance
The CTD Remote lets you to switch between the Climb, Trail, and Descend modes while riding. Each mode is optimized for a specific type of terrain,
providing best performance and riding enjoyment. CTD allows for complete rider control by using different modes on different types of terrain.
Climb Mode:
•
Push the silver lever down to its lowest position to set the fork in Climb mode.
Climb mode is a very firm low-speed compression setting (not designed to be a solid lockout). This setting is most useful for climbing and sprinting.
Trail Mode:
•
From Climb mode, push the black release lever once and then push the silver lever down one click to the middle position to engage Trail mode.
•
From Descend mode, push the silver lever down one click to the middle position to engage Trail mode.
Trail mode offers less compression damping than Climb mode. Use this setting when pedaling on undulating terrain, and for preventing excessive travel
in technical riding situations (such as low-speed drops). Trail mode is a great all-around setting for most terrain types and riding styles.
Descend Mode:
•
Push the black release lever in any setting to set the fork to Descend mode.
Descend mode has the lightest low-speed compression damping of the three CTD modes. Descend mode offers the most plush ride to ensure optimal
traction over varied terrain.
Service Intervals