1
Job Director
User Manual
Océ-Technologies B.V.
This manual covers Job Director software version 3.2.
Trademarks
HP-GL, HP-GL/2, HP-RTL are trademarks of Hewlett-Packard Company.
Microsoft and MS are registered trademarks of Microsoft Corporation.
Windows is a trademark of Microsoft Corporation.
CalComp is a trademark of California Computer Products Inc.
Intel and Pentium are registered trademarks of Intel Corporation.
Adaptec is a registered trademark of Adaptec, Inc.
Novell is a trademark of Novell Inc.
TIFF is a trademark of Aldus Corporation.
CALS is a military standard.
Copyright
Océ-Technologies B.V. Venlo, The Netherlands © 1998
All rights reserved. No part of this work may be reproduced, copied, adapted,
or transmitted in any form or by any means without written permission from
Océ.
Océ-Technologies B.V. makes no representation or warranties with respect to
the contents hereof and specifically disclaims any implied warranties of
merchantability or fitness for any particular purpose.
Further, Océ-Technologies B.V. reserves the right to revise this publication and
to make changes from time to time in the content hereof without obligation to
notify any person of such revision or changes.
Code number 7056115
Edition 5.0
GB
Contents
Chapter 1
Introduction
This manual has been written for ... 8
The concept 9
Océ scanning and printing applications 9
Job tickets, matrix tickets and check plots 13
Using this manual 15
Related documentation 15
Chapter 2
Getting Started
Installation 18
Starting Océ Job Director 20
Preparations 21
Setting the interface language 21
Specifying the Repro Station print queue 21
Specifying the default user, account and job name 22
Specifying units of measurement in menus and dialog boxes 23
Defining paper sizes in menus 24
Specifying file types in menus 26
How to print a simple job 27
Quitting Océ Job Director 32
Using Help 33
Chapter 3
Printing sets of files
Job Tickets 36
Opening a new job ticket 39
Saving a job ticket 40
Closing a job ticket 42
Opening an existing job ticket 43
Deleting a job ticket 43
File handling 45
Adding files to a job ticket 45
Rearranging files in a job ticket 48
Deleting files from your job ticket 49
Contents
3
About print settings 50
Print settings per file 53
File type and its special settings 53
Pen settings 56
Size, zoom, and media 61
Shifting 67
Edge correction 69
Rotation and mirror 71
Stamp 73
Finishing 81
Print settings per job 84
Copies, sorting, and banner page 84
User information 87
Distribution notes 88
Operator notes 89
Printing 91
Sending jobs to Repro Station 91
Getting status from Repro Station 91
Chapter 4
Printing matrix jobs
Matrix Tickets 94
Opening a new matrix ticket 94
Saving a matrix ticket 95
Closing a matrix ticket 96
Opening an existing matrix ticket 98
Deleting a matrix ticket 98
File handling 100
Adding files to a matrix ticket 100
Rearranging files in a matrix ticket 104
Deleting files from a matrix ticket 105
Program handling 106
Adding programs to a matrix ticket 106
Applying files to a program 107
Rearranging programs in a matrix ticket 112
Deleting programs from a matrix ticket 113
About print settings 114
Print settings per file 115
File type and its specific settings 117
Pen settings 119
Rotation and mirror 125
Print settings per program 128
Size, zoom, and media 129
4
Océ Job Director User Manual
Shifting 134
Edge correction 136
Stamp 137
Copies, sorting, and banner page 139
Finishing 142
Distribution notes 144
Print settings per job 146
User information 146
Operator notes 146
Printing 148
Chapter 5
Customizing Job Director
Job Director Configurer 150
Job Director defaults 153
Specifying defaults, starting from the Defaults menu 153
Specifying defaults, starting from a matrix or job ticket window 154
Loading defaults 157
Defining default folding 158
Using template job tickets 161
Using tools 164
Appendix A
Overview and tables
Zoom factors 172
Appendix B
Miscellaneous
Notation conventions 174
Reader’s comment sheet 175
Addresses of local Océ organisations 177
Index 179
Contents
5
6
Océ Job Director User Manual
Job Director
User Manual
Chapter 1
Introduction
The concept of print jobs and the interaction between Job
Director and Repro Station.
7
This manual has been written for ...
This manual has been written for PC users of the Job Director application for
Microsoft Windows. Knowledge of Microsoft Windows basics is presumed.
8
Océ Job Director User Manual
The concept
An Océ large format print system will primarily be used in central
reproduction environments. Remote control, speed and integrated finishing
capabilities make the Océ printer the ideal solution in these environments.
Files that are sent to the printer will be printed, sorted and folded on request.
This results in greatly improved productivity over traditional printing and
copying.
Combined with a special software application, the Océ print system allows you
to productively scan paper drawings and convert them to digital files.
Prints, hard copy drawings and print files are not the only form of information
entering repro departments. Equally important is information regarding:
■
■
■
how copies should be produced,
how sets should be printed ready for distribution,
how prints are to be distributed.
This type of additional information is traditionally communicated via
telephone, fax, or internal electronic mail. Rather than improving just part of
the reproduction process, the Océ scanning and printing applications include
all these information aspects.
Océ scanning and printing applications
The Océ scanning and printing applications support the digitalisation of
engineering drawings, and/or the high-volume reproduction of digital
engineering drawings. These applications are supplied by four software
modules:
■
■
■
■
■
Job Director (described in this manual)
Repro Station
Scan Station
View Station
Machine Monitor
Job Director Job Director is a Microsoft Windows application which runs on
PCs, ideally in a network. It allows users to create, edit and send reproduction
requests - jobtickets or matrix tickets - from any PC to Repro Station.
Introduction
9
This manual describes Job Director in more detail.
Repro Station Repro Station is a Microsoft Windows application which
controls printing on the Océ printer. All print jobs go through Repro Station
where they are queued, logged and managed. Repro Station supports the
following functions:
■ accept plain print files, print files with Océ header information and digital
reproduction requests (job tickets),
■ provide queuing and other system management functions to the operator of
the printer,
■ control the Océ printer to produce complete sets of documents: sorted, folded
and deposited in one of the output devices of the printer, ready for
distribution.
Apart from job requests initiated by Job Director, Repro Station also accepts
print jobs and check plots from other sources, like printer drivers or document
management systems. Job tickets must comply with the job ticket format
specification as described in the ‘Océ Job Ticket Interface Programmer's
Manual’.
For more information, see the Océ Repro Station User Manual.
Scan Station Scan Station is a Microsoft Windows application which allows
you to control the scanning (also called upload) process. You can specify
settings like resolution and file format. You also specify where the resulting
files must be stored, which can be a network disk. When a file has been
received by Scan Station you may view it on the PC's screen to check the
quality of the scan.
For more information, see the Océ Scan Station User Manual.
View Station View Station is a built-in viewer that allows you to view scans
made with Scan Station on the Scan Station screen.
For more information, see the Océ View Station User Manual.
Machine Monitor Machine Monitor is in fact part of the Repro Station and/or
Scan Station concept. Repro Station and Scan station can send scan jobs to the
printer via Machine Monitor. If both Repro Station and Scan Station want to
send a job, Machine Monitor decides which job comes first, and which job has
to wait.
10
Océ Job Director User Manual
If the printer supports back channel communication, Machine Monitor can
also collect information from the printer, and send this information to Repro
Station or Scan Station. In this way the following information can be collected:
■ Status information
■ Printer settings, e.g. engine configuration, printer stamps
■ Other printer information, e.g. printer in error
■ Rolls and media information
■ Job information (statistics)
For more information, see the Océ Machine Monitor User Manual.
The illustration on the next page gives you a complete overview of the Océ
scanning and printing concept.
Introduction
11
.
Floppy disk
Job
Director
A
Job
Ticket
Network
Hard disk
Job
Director
B
Job
Director
C
check plots
print files
jobs
Repro Station
queue
scanned
files
Repro
Station
Scan
Station
Ready
queue
Scan
Ticket
Machine
Monitor
Job
database
Scanner
Printer
[1] Océ scanning and printing concept
12
Océ Job Director User Manual
Job tickets, matrix tickets and check plots
Three basic concepts used throughout this manual are:
■
■
■
check plot
job ticket
matrix ticket
Check plot A check plot is a print file that has been copied directly to the
Repro Station queue, without information on how this file should be processed
and printed. Check plots can thus be considered ‘naked’ or plain print jobs.
However, some check plots may contain a Remote Control Format (RCF)
header, e.g. print files generated using an Océ printer driver. This header
contains some information on how the file should be printed.
Job ticket A job ticket is basically a text document which contains all the
information required for processing the job:
■
■
■
the print files that are to be reproduced and the settings for each print:
scaling, rotation, media size and type
job information: number of sets, folding and sorting requirements,
distribution information and notes for the operator
information about the sender and the project.
In other words, job tickets can be seen as ‘labels’ which mention two types of
information:
■
■
the set of files which has to be processed and printed as one job
how these files have to be processed.
job
job ticket
3152
ies
op s
5 c file r
int ese este d
r
P f th ly ad
o n po nd ent te
o m a urr
da
fil e c and
th e
tim
plain print
files
[2] Job tickets label print files as one single job and tell the printer how to process these files.
Introduction
13
Matrix tickets Matrix tickets are in fact sets of job tickets. It may happen that
the same set of files has to be printed with different settings for different
recipients. Rather than creating a job ticket for each individual recipient, you
may want to use a matrix ticket, allowing the print settings for each recipient
to be defined in one ticket.
A matrix is a rectangular array of rows and columns. The rows represent the
print files in the job; the columns represent the recipients. A matrix program is
a set of print settings which is used for one particular recipient.
ies
op d C
5 c an r
int A ste
Pr f file olye add
o n p and ent ate
o lm urr d d
fi e c an
th me
ti
ies
op n
5c so
int file er
Pr f all pap and
o lain d
p tate red
ro irro
m
ies
op
5 c file ter
s
int
Pr f this olye
o np
o lm
fi
y
op
1c
ies
int A
Pr f file B on ranc
o nd pa
a ans
tr
A
3153
B
C
[3] Matrix ticket: sets of files to be printed using different settings for different recipients.
Repro Station seamlessly fits in with existing document management systems,
since it also accepts job tickets and check plots which are created by other,
non-Océ applications. Such job tickets must comply with the job ticket format
specification as described in the Océ Job Ticket Interface Programmer’s
Manual.
14
Océ Job Director User Manual
Using this manual
This manual explains:
■
■
■
■
how to install Job Director and how to send a simple print job to Repro
Station (refer to chapter 2, ‘Getting Started’ on page 17),
how to print files, using a job ticket (refer to chapter 3, ‘Printing sets of files’
on page 35),
how to print files, using a matrix ticket (refer to chapter 4, ‘Printing matrix
jobs’ on page 93),
how to customise Job Director (refer to chapter 5, ‘Customizing Job
Director’ on page 149).
For a brief introduction, read Chapter 1 and 2 only.
Related documentation
Océ 9800 Copier Printer User Manual
Océ 9800 Printer User Manual
Océ 9700 Copier Printer User Manual
Océ 9700 Printer User Manual
Océ Repro Station User Manual
Océ Scan Station User Manual
Océ View Station User Manual
Océ Machine Monitor User Manual
Océ Job Ticket Interface Programmer’s Manual
Océ Remote Control Format Reference Manual
Introduction
15
16
Océ Job Director User Manual
Job Director
User Manual
Chapter 2
Getting Started
How to install the software on your Windows PC. What
preparations you need to take before you can submit a job
ticket and a simple example showing you how to print a file.
17
Installation
To get Job Director up and running you need:
■ a PC with Pentium 100 MHz Intel processor, running Windows 95 or
Windows NT 3.51/4.0 for the 32-bit application or Windows 3.1/3.11 for the
16-bit application.
■ internal memory of 16 MByte (for Windows 95 and Windows NT3.51/4.0).
■ a dongle for Océ View Station, used by Job Director (the dongle is delivered
with Océ View Station).
■ a TCP-IP network (needed for remote connections).
■ sufficient disk space to save the files.
■ a copy of the Repro Station application on a PC that is linked to the printer.
Repro Station and Job Director must have access to a common directory.
Note: Job Director and Repro Station can be installed and running on the
same PC.
■ to install Job Director as described in this section
■ to start the program as is described in ‘Starting Océ Job Director’ on page 20
■ to specify the Repro Station queue as described in ‘Specifying the Repro
Station print queue’ on page 21
■ to define your user and account name as described in ‘Specifying the default
user, account and job name’ on page 22.
During installation of Job Director several files will be copied to the hard disk
of your PC. The installation program prompts you to create the destination
directory in which the files are copied.
When installing Job Director, you can press the Help button for more
information about the steps. To return to a previous step, click Back.
Note: Install Océ View Station before installing Job Director.
Machine Monitor Note that during the installation of Job Director you are
asked whether also Machine Monitor must be installed on your PC. This
depends on your configuration:
■
18
It is possible to run Job Director and Machine Monitor on different PC’s.
Machine Monitor must always run on the PC that is directly coupled to the
printer with a SCSI connection. Job Director may run on a different PC, and
remotely couple to Machine Monitor via a network. In that case select not to
install Machine Monitor as well. Machine Monitor must be installed
Océ Job Director User Manual
■
▼
separately on the other PC (see the ‘Océ Machine Monitor User Manual’ for
more information).
In the recommended configuration, Job Director and Machine monitor run
on the same PC. This PC is directly coupled to the printer with a SCSI
connection. In that case select Machine Monitor to be installed as well. Make
sure to install the SCSI connection to the printer first:
Installing the SCSI connection
1 Install the Adaptec SCSI board on the PC.
2 Install the EZ-SCSI software.
3 Connect the Océ 9700/9800 and make sure that it is recognized as ‘Tandberg
TDC 3600’.
▼
Installing Job Director software
1 Insert the CD ROM into the CD ROM drive.
2 Now follow the instructions in the CD ROM’s booklet.
Getting Started
19
Starting Océ Job Director
You can start Job Director in several ways just like any other Windows
application. The easiest way is to locate the Job Director icon and double-click
it. Other ways are mentioned in the procedure below. Quitting Océ Job
Director is explained in ‘Quitting Océ Job Director’ on page 32.
▼
Starting Océ Job Director
1 Start Microsoft Windows.
2 Locate the Job Director icon and double-click it.
The Job Director application window will be displayed as shown in the
illustration below:
3013-144
[4] Job Director application Window
Alternatively, you can select Job Director from the Start menu (Windows 95/
NT4.0) or from the Program Manager (Windows 3.x/NT 3.51).
Note: The first time you start Job Director, it creates an initialisation file
named ocejd.ini in the Windows directory. The contents of this file will be
updated if you change the default settings.
20
Océ Job Director User Manual
Preparations
You have to adapt Job Director to your specific environment preparatory to
using the application. The necessary steps to take are the following:
■
■
■
setting the interface language, i.e. the language in which the menus, dialog
boxes and online help will be displayed
specifying the directory which serves as Repro Station queue. Job Director
will copy job and matrix tickets to this directory when you choose the Send
button in the ticket window.
specifying default user and account name, paper sizes and file types in menus
and dialogs.
Note: The following settings will change the contents of the ‘ocejd.ini’ file.
Setting the interface language
You can set the language of Job Director menus, dialog boxes and online help
as follows:
▼
Specifying the language in Job Director windows
1 From the Configure menu, choose ‘Language’.
The following window appears:
3014-144
[5] Language window
2 Open the drop-down list box and select the appropriate language.
3 Click the ‘OK’ button.
The working language of Job Director will be changed.
Specifying the Repro Station print queue
Before you can send jobs to Repro Station you must specify the Repro Station
queue, which has been defined by the Repro Station operator. The Repro
Getting Started
21
Station queue is a directory where jobs and check plots arrive that have to be
printed.
Both Job Director and Repro Station must have read and write access in this
directory. You specify this queue by specifying its corresponding directory.
Note: If you don’t specify the Repro Station queue, you cannot submit print jobs
to Océ Repro Station.
▼
Specifying the Repro Station queue
1 From the Configure menu, choose Repro Station queue.
The Repro Station queue dialog box appears:
3015-144
[6] Specifying the Repro Station queue
2 In the text box, type the full path name of the directory of the Repro Station
queue.
If in doubt, ask the Repro Station station operator which directory is currently
defined as Repro Station queue.
If you don’t know the directory’s full path name, choose the Browse button to
display a list of directories. Select the appropriate directory from the list, and
then choose the OK button.
3 Click the OK button.
Specifying the default user, account and job name
The user name is used to identify the person that submitted the print job. User
names and job names appear in the Repro Station queue. An account name
could be the name of a department, e.g. Engineering systems.
The default user, account and job name will apply to all new job and matrix
tickets. They can easily be changed (overruled) for specific print jobs.
Repro Station and Machine Monitor will look up the specified user and
account name of a job in a predefined list. This list is used for the following
purposes:
22
Océ Job Director User Manual
■
■
■
▼
Statistics
In the list a number is assigned to each user and account. This number is used
for statistical purposes (job logging) by Machine Monitor.
Print permission
In Repro Station you can restrict printing. If this option is selected, only users
and/or accounts that are defined in the list are allowed to send jobs to the
printer.
Bin selection High Capacity Stacker
If your printer is equipped with a High Capacity Stacker, you can use the list
to define which output bin should be used for a specified user and/or account.
In Repro Station you can define if this specified bin is to be used.
Defining the default user, account and job name
1 From the Defaults menu, choose User and account...
The Default user, account and job name dialog box appears.
3016-144
[7] Default user, account and job name dialog box
2 Type the default name of the user and/or the account in the respective text
boxes.
3 If required, enter the default job name in the corresponding text box.
The job name will be displayed in the ID column of the Repro Station queue.
4 Click the OK button.
Specifying units of measurement in menus and dialog boxes
Some menus and dialog boxes display a unit of measurement for the values
you entered. The default units of measurement appear after these values. You
can select either mm or inches as default unit of measurement.
▼
Specifying the default unit of measurement
1 From the Configure menu, choose Units...
Getting Started
23
The following dialog box appears:
3017-144
[8] Units dialog box
2 Select mm or inches.
3 Click the OK button.
The menus and dialog boxes will now display the selected default unit of
measurement, e.g.:
3018-144
unit of measurement
[9] Example of a dialog box displaying units of measurement
Defining paper sizes in menus
The range and order of paper sizes that will appear in your menus can be
specified. The Océ printer uses either European or American paper sizes:
■
■
For the European machine, you can select from the formats A0, A1, A2, A3,
A4, 707 mm, 700 mm, 500 mm and 36".
American printers allow paper size in the 8.5" range (8.5", 11", 17", 22", 34")
and/or in the 9" range (9", 12", 18", 24", 36") and 30".
Check your paper size configuration on the printer first and follow the
procedure below.
24
Océ Job Director User Manual
▼
Specifying the paper sizes
1 From the Configure menu, choose Paper sizes...
The following dialog box appears:
3019-144
[10] Paper sizes dialog box
2 Select the Paper sizes which you do not need and click
to move them
to the Not selected list.
3 Use the
and
buttons to specify the order in which you want to see
the paper sizes in the Selected list displayed in menus and drop-down list
boxes.
For example, if you place A1 on top of the Selected list, it will also appear as
the first option in the Paper size drop-down list box of a job ticket window:
3020-144
3021-144
[11] The paper size placed on top of the Selected list in the Paper sizes dialog box appears as
the first option in drop-down list boxes.
4 Click the OK button.
Getting Started
25
Specifying file types in menus
Only the file types you select here, will appear in the list of file types you can
choose from in the appropriate dialog boxes and menus. In this way you can
modify the user interface, to show only those file types that are actually used.
If you are sure that you will never get HP-GL/2 files, for example, you can use
this function to remove HP-GL/2 format from the list of available file types.
Note: This setting is used for Job Director dialog boxes and menus. For Repro
Station dialog boxes and menus, you must specify the same settings in Repro
Station.
▼
Specifying file types
1 From the Configure menu, choose File types...
The following dialog box appears:
3022-144
[12] File types dialog box
2 Select the File types which you do not need in the Selected list and
click
to remove them.
3 Select one or more files in the Selected list and use the
and
buttons
to specify the order in which you want to see the file types displayed in menus
and drop-down list boxes.
4 Click the OK button.
26
Océ Job Director User Manual
How to print a simple job
When the print queue and the paper sizes to be used have been specified, you
can print a simple job. All you have to do is the following:
■
■
■
■
open a new job ticket
add a file to the job ticket
specify your print settings
click the Send button.
The file and its printer-specific instructions will be sent to Repro Station.
1 Choose New from the File menu or click the
button on the QuickAccess
bar.
A new, untitled job ticket window appears.
3024-144
[13] New job ticket window
2 Click the Add button in the Files area.
Getting Started
27
The ‘Add files to job ticket’ dialog box appears:
3025-144
[14] The Add files to job ticket window
3 Select the drive and directory of the print files.
4 Select one or more files from the File Name list, or type their names in the text
box:
■ You select on file by clicking it.
■ To select two or more files in sequence, click the first file and then press and
hold down SHIFT while you click the last file of the range.
■ To select two or more files out of sequence, press and hold down CTRL
while you click each file.
■ To cancel a selection, press and hold down CTRL while you click the file.
5 Click the OK button.
Note: You can also use the Windows Explorer (File manager) and drag the
file(s) to the job ticket. See ‘Adding files to your job ticket using Windows
Explorer (File manager)’ on page 47.
28
Océ Job Director User Manual
6 In the Files area, select one or more files.
3026-144
[15] Selecting files in the Files area
7 Specify the file type.
If in doubt, select “Automatic”.
3027-144
[16] Specifying the file type of the selected files.
Note: The file type of ASCII files must be specified. Don’t specify file type
“Automatic” for ASCII files.
Getting Started
29
8 You can specify the paper size and zoom factor in one of the following ways:
■
You can select ‘Auto’ for both Paper size and Zoom. The automatic size and
zoom table will be used (see page 64).
3028-144
[17] ‘Auto’ paper size and ‘Auto’ zoom
■
If you want to print the file to a special paper size, select the paper size from
the drop-down list box and select the Auto zoom check box.
3029-144
[18] Paper size selected and ‘Auto’ zoom
■
If you want to print on the original paper size, select the Auto paper size
check box and set Zoom to 100%.
3030-144
[19] ‘Auto’ paper size and 100 % zoom
Finally, you can select a special paper size from the drop-down list box and
set Zoom to 100%.
9 If you want your printed copy to be folded, select the folding box.
■
[20] Folding the printed copy
10 Specify the number of copies.
11 Click the Send button.
3032-144
[21] Sending jobs to Repro Station
The job ticket information and the print file(s) will be copied to the Repro
Station queue. This queue is displayed by Repro Station which is running on a
PC connected to the Océ printer. Alternatively, the application can have a
30
Océ Job Director User Manual
remote connection with Machine Monitor, which is running directly on a PC
connected to the Océ printer. The print room operator uses Repro Station to
print the job on the Océ printer.
Getting Started
31
Quitting Océ Job Director
Quit Job Director when you have sent all your tickets to Repro Station and
saved all the necessary changes.
▼
Quitting Océ Job Director
1 If necessary, save the open job tickets.
Choose Save or Save as from the File menu or click the
QuickAccess bar.
button on the
Attention: All changes made in a ticket will be lost if you close the ticket
without saving it first. See also ‘Saving a job ticket’ on page 40 and
‘Saving a matrix ticket’ on page 95.
2 Choose Exit from the File menu.
32
Océ Job Director User Manual
Using Help
Online help for Job Director Job Director is a quick and convenient way to
look up information about a task you are performing, a feature you would like
to know more about, or a command you want to use.
Help is available whenever you see a Help command button, or help as an item
on the menu.
When you select help from the menu, the first page of Océ Job Director Help
appears.
▼
Using the Help menu
1 From the Help menu, choose Contents.
The Job Director Help screen appears.
You can also press F1 at any time for help information.
Getting Started
33
34
Océ Job Director User Manual
Job Director
User Manual
Chapter 3
Printing sets of files
How to submit sets of files to Repro Station. Detailed
information about file and job settings.
35
Job Tickets
Using Job Director, you can select a number of files, define print settings, and
send the information to Repro Station. The information consists of job ticket
information and print files. You can do this all with the job ticket editor. The
job ticket window can be divided into three areas as shown in the illustration
below.
3035-144
Files area
Settings area
Sending to repro area
[22] Job Ticket window layout
Files area You use the Files area to specify the files which you want to print
and their file type. Here you determine the order in which the files will be
processed and printed. The prints of the first file of a set will be on top after
printing the entire set (this may imply that it is printed as last file). In example
above, the printed copy of the file scr23l.txt will be on top of the set.
Settings area You use the Settings area, located in the middle of the job ticket,
to define your output settings. You can specify per file or per group of files:
■
■
■
36
the paper size
the zoom factor
folded or unfolded output.
Océ Job Director User Manual
The Extra settings
button can be pressed to unfold or expand the
ticket window. You can then specify your print settings in two ways:
■
You can either select a print setting from the drop-down list box in the
top-right corner of the ticket window ...
3037-144
[23] Print settings presented in a drop-down list box on the right-hand side of the ticket window.
Printing sets of files
37
■
... or you can choose one of the buttons on the QuickAccess bar, which is
located below the menu bar of the Job Director application window.
3038-144
QuickAccess bar
[24] Print settings presented in a QuickAccess bar, located below the menu bar.
Sending to repro area Use the Sending to repro area to specify the required
number of copies and finally send the ticket to Repro Station.
The desktop is your work space. You can open several job tickets at the same
time and reduce them to icons on your desktop.
To print files, you first need to open a job ticket. Then select one or more files
in the ticket and define its print settings. Finally, you have to send the job
ticket, which consists of control information and the print file(s), to Repro
Station. The use of Repro Station is described in the Océ Repro Station User
Manual.
The job ticket can contain the following specifications for the Océ printer:
■ how many copies or sets to print
■ how to fold and sort your output (if a folder is installed)
■ a digital note for the operator
38
Océ Job Director User Manual
■
■
distribution information for the operator (what to do with the printed copies)
the files which have to be printed.
The print settings which you can specify for each file in the ticket are, e.g.:
auto zoom or a zoom factor (in percentages),
■ auto paper or a paper size (A0-A4, or E-A),
■ copy material type (paper, transparent, polyester film),
■ file format (language).
■
If, for example, your job should be printed on special material for which the
operator has to change rolls, the job can be put automatically on hold by the
operator of Repro Station until the required media type has been loaded.
Or, if you do not know the file type of a print file, you can select the ‘automatic’
file type option. The file’s content will be analysed and its file type will be
determined. If the file type is supported by the Océ printer, the file will be
printed.
Opening a new job ticket
Job tickets are labels for print files. These labels can be read and processed by
Repro Station and, subsequently, the printer engine. In the job ticket you can
specify the files which are part of this job and the parameters which apply to a
file or a set of files. Follow the procedure below to create a job ticket.
Printing sets of files
39
▼
Opening a new job ticket
Choose New from the File menu or click the
bar.
button on the QuickAccess
An empty, untitled job ticket will be displayed.
3024-144
[25] Empty, untitled job ticket.
The name of the job will be the name of the first file you specify in the Files
area. Specifying another job name is described in ‘Specifying user
information’ on page 87. The job name will be used in the main window of
Repro Station.
Saving a job ticket
When you have specified all the necessary information, you can save the job
ticket for future use. To save the current job ticket using a name of your choice,
choose the Save as option from the File menu.
40
Océ Job Director User Manual
If you do not specify an extension, the system will add ‘.jt’ to the name you
specified.
3039-144
[26] Job ticket contains an unresolved reference to a print file.
▼
Saving the job ticket
1 Choose Save or Save as from the File menu or click the
button on the
QuickAccess bar.
The first time you save a new job ticket using Save, the ‘Save job ticket as’
window appears.
3040-144
[27] Saving a job ticket.
2 Select a drive and directory.
3 Type the file name you want to give to this job in the File Name text box.
Note: If you do not specify an extension, ‘.jt’ will be added automatically.
4 Click the OK button.
The job ticket will be saved. The job ticket window title will change into the
name which you have just specified.
Printing sets of files
41
Closing a job ticket
Attention: When you close a job ticket, the changes you made will not be
saved automatically. Furthermore, Job Director will not prompt you to
save changes. Therefore, make sure that you save the job ticket first before
closing it.
▼
Closing a job ticket
You can close a job ticket in either one of the following ways:
■ Choose Close from the File menu.
or
■ Choose Close from the job ticket Control menu.
Control-menu box
3041-144
Control menu
[28] Job ticket Control menu and Control-menu box.
or
■ Double-click the job ticket Control-menu box.
or
■ Click the upper right
button (only on Windows 95 and Windows NT 4.0)
or
■ Select the job ticket window and press CTRL-F4.
42
Océ Job Director User Manual
Opening an existing job ticket
You can use the Open command in the File menu to open a job ticket that has
been saved before.
▼
Opening a job ticket
1 Choose Open from the File menu.
The following window appears:
3042-144
[29] Open an existing job ticket
2 In the Directories area, select the drive and directory of the job ticket file.
3 Select a file from the File Name list, or type its name in the text box.
4 Click the OK button.
A job or a matrix ticket window will be displayed, depending on the ticket
type.
Deleting a job ticket
Use the Windows Explorer (File Manager) to delete job tickets.
▼
Deleting a job ticket
1 Start Windows Explorer (File Manager).
2 Select the directory where the job ticket file is located.
3 Select the job ticket file you want to remove.
4 Choose Delete from the File menu or press the Delete key.
Printing sets of files
43
5 Choose the OK button.
A message appears, asking you for your confirmation to delete the job ticket
file.
3043-144
[30] Confirm delete.
6 Choose Yes.
The job ticket is removed from your file system.
44
Océ Job Director User Manual
File handling
Print jobs for Job Director can consist of one or more files. This section
explains how to add or remove files from a job ticket and how to rearrange the
order of files.
Files that belong together and have to be printed in subsequent order have to
be specified in the desired print order in the job ticket.
After opening a job ticket, you can use one of the following procedures to
handle files.
Adding files to a job ticket
You can add files to a job ticket in two ways:
using the Add button
or
■ using Windows Explorer (File manager).
■
The files you add must be print or plot files, saved in a data format which is
supported by the Océ printer. You can also use a data format that can be
processed by a convertor on Repro Station.
Adding a file means that a reference to that file is stored in the job. If you press
the Send button, the job ticket information and the corresponding plot file(s)
will be copied to the Repro Station queue.
Note: Job Director defaults apply to new files. You may need to change file
settings.
Printing sets of files
45
▼
Adding files to your job ticket using the Add button
1 In the Files area, click the Add button.
3021-144
Add button
[31] The Add button in the Files area.
The ‘Add files to job ticket’ dialog box appears:
3044-144
[32] The Add files to job ticket window
2 In the Directories area, select the drive and directory of the print files which
you want to add.
3 Select one or more files from the File Name list or type their names in the text
box:
■ You select one file by clicking it.
■ To select two or more files in sequence, click the first file and then press and
hold down SHIFT while you click the last file of the range.
46
Océ Job Director User Manual
■
■
To select two or more files out of sequence, press and hold down CTRL
while you click each file.
To cancel a selection, press and hold down CTRL while you click the file.
4 Choose the OK button.
The selected files appear in the Files list box of the job ticket window.
▼
Adding files to your job ticket using Windows Explorer (File manager)
1 Start Windows Explorer (File Manager).
2 In Windows Explorer (File Manager), open the directory where the print files
are stored.
3 Reduce the size of the Windows Explorer (File Manager) and Job Director
windows and arrange both application windows side by side on your screen.
3045-144
[33] Windows Explorer and Job Director arranged side by side.
4 Select one or more files in Windows Explorer (File Manager).
Printing sets of files
47
5 Hold down the mouse button, drag the selected file(s) to the open job ticket in
Job Director and release the mouse button to drop the file(s) in the job ticket
window.
3046-144
[34] Adding files to a job ticket using drag-and-drop editing.
The files will be added to the job ticket and appear in the Files list box of the
job ticket window.
Rearranging files in a job ticket
Rearranging files in a job ticket changes their print order.
▼
Rearranging files in a job ticket
1 In the Files list box, select the file(s) which you want to move up or down.
2 Click the
arrow to have the file(s) printed earlier or the
arrow to have
the file(s) printed later.
48
Océ Job Director User Manual
Deleting files from your job ticket
▼
Deleting files from the ticket
1 In the Files list box, select the file(s) which you want to delete.
2 Click the Delete button.
The ‘Delete file(s)’ window appears:
3047-144
[35] Delete file(s) window
3 Click Yes to delete the file(s) from your job ticket.
4 The selected files are removed from the Files list box.
Printing sets of files
49
About print settings
In a job ticket, there are two categories of print settings:
■
■
settings per file:
these settings can be specified for each file of a job individually
settings per job:
these settings can only be specified for all files in a job
For simple print jobs, you can specify the print settings in the main job ticket
window, as described in ‘How to print a simple job’ on page 27. In this way,
you can specify the following print settings:
Settings per file
File type
Paper size
Zoom factor
Folding: on/off
Settings per job
Number of copies
[36] Print settings
For more advanced print jobs, you can specify the following extra print
settings:
Settings per file
File type and its special settings
Pen settings
Size, zoom and media
Shifting
Edge correction
Rotation and mirror
Stamp
Finishing
Settings per job
Copies, sorting and banner page
User Information
Distribution notes
Operator notes
[37] Extra print settings
For a detailed description of each setting, see one of the following sections:
■
■
‘Print settings per file’ on page 53
‘Print settings per job’ on page 84
The following procedure can be used to get access to the extra print settings:
50
Océ Job Director User Manual
▼
Getting access to the extra print settings
1 In a job ticket, choose the Extra settings
button.
3048-144
[38] Selected files in the main job ticket window.
The job ticket window unfolds and displays the extra settings.
Printing sets of files
51
2 Select a print setting from the drop-down list box in the ticket window or
choose either one of the buttons on the QuickAccess bar.
3049-144
QuickAccess
bar
print settings
drop-down list
box
[39] Selecting one of the print settings, using the drop-down list box or the QuickAccess bar.
The corresponding print setting options appear on the right-hand side of the job
ticket window.
52
Océ Job Director User Manual
Print settings per file
This section describes those print settings, that can be specified for each file of
a job individually. After opening the ‘Extra settings’ in a job ticket (see
‘Getting access to the extra print settings’ on page 51) you can use the
following procedures to define print settings per file.
File type and its special settings
The Océ printer accepts files in a number of data formats (also called file types,
or languages). No common rules exist to identify the file type of plot files.
Sometimes, the file type is indicated by the filename extension:
■
■
■
■
'.plt' or '.hpg' is often used for HP-GL(/2) files.
TIFF files are identified by the '.tif' extension.
CALS files use '.cal', '.gp4', or '.cls'.
CalComp plots sometimes use '.cal', '.906', '.plt'.
You can only be sure of the data format of a file if you know the set-up of the
application that generated the file. Therefore, agree on a standard notation
within your company to identify the various file types. If you are sure about the
data format of a file, specify it in the file type box. If not, select file type
'automatic' to instruct the printer to find out what type of file it is. Automatic
Language Sensing will be switched on.
Note: The file type of ASCII files must be specified. Don’t specify file type
“Automatic” for ASCII files.
The table below lists all special settings you can specify for each file type:
file type
HP-GL
parameter and options
Plot origin
[upper left, upper right, centre,
lower left, lower right]
Plotter type
[HP-7440, HP-7475A,
HP-7550A, HP-7570A,
HP-7580A, HP-7580B,
HP-7585B, HP-7586B,
HP-7595A, HP-7596A,
HP-7600, DesignJet]
explanation
The location of the reference point
for all coordinates of the plot.
The plotter type for which the file
was generated.
[40] File type settings
Printing sets of files
53
file type
parameter and options
Merge Control
[merge, overlay]
HP-GL/2
Plot origin
[upper left, upper right, centre,
lower left, lower right]
Plotter type
[[HP-7595A, HP-7596A,
HP-7600, DesignJet]
Pen 0 is end of file
[yes/no]
Merge Control
[merge, overlay]
ASCII
End of line
Line overflow
Font size
[8 / 10 / 12]
Orientation
[landscape, portrait]
Margins
[top / bottom / left / right margin]
[40] File type settings
54
Océ Job Director User Manual
explanation
Merge Control determines what
happens when two or more colors
intersect on a plot, at the crossing
of vectors or filled polygons.
The location of the reference point
for all coordinates of the plot.
The plotter type for which the file
was generated.
Merge Control determines what
happens when two or more colors
intersect on a plot, at the crossing
of vectors or filled polygons.
Specifies which character or combination of characters has to be interpreted as line termination
This parameter determines whether a line that extends beyond the
right margin is wrapped into the
next line, or truncated
Character height. 1 point is 1/72
inch
file type
CalComp
parameter and options
Plot origin
Steps/inch
Checksum
[on, off]
Double sync
[on, off]
Sync code
[0-63]
End of message
[0-31]
Merge Control
[merge, overlay]
TIFF
CALS
-
explanation
The location of the reference point
for all coordinates of the plot.
Resolution of the output.
Whether a single synchronisation
character is used (off), or a double
synchronisation character (on)
Which character is used for synchronisation.
Specifies which character terminates the image.
Merge Control determines what
happens when two or more colors
intersect on a plot, at the crossing
of vectors or filled polygons.
-
[40] File type settings
▼
Specifying the file type and its special settings
The example below shows how to modify HP-GL settings. You can specify the
other available file types in a similar way.
1 Select one or more files in the Files list box.
2 Select a file type from the File type list box, e.g. HP-GL.
3 Choose File type from the drop-down list box in the job ticket window or click
the
button on the QuickAccess bar.
The File type options appear on the right-hand side of the job ticket window.
Printing sets of files
55
Note: The file type options are different for each file type. In figure 41 the
file type options of HP-GL are shown.
3051-144
[41] Specifying a file type.
4 Specify the special print settings for this file type (see table 40 on page 53).
Pen settings
Océ printer pen settings can be defined at three levels:
■
■
■
Printer level: You use the current default pen settings as they are defined in
the printer.
File level: You adopt the pen settings of the plot file (for HP-GL/2 and
CalComp only).
User level: You overrule the pen settings of printer or file by specifying pen
settings yourself.
By specifying the pen settings to use, you determine the level at which
(printer/file/user) pen settings will be adopted.
You can assign a pen width and a pen pattern to pen numbers for the plot data
formats HP-GL, HP-GL/2 and CalComp.
56
Océ Job Director User Manual
The pen width can be defined:
■
■
from 0.12 to 16.25 mm in increments of 0.01
or
from 0.0025 to 0.6390 in inches, in steps of 0.0001.
Note: If you specify pen width 0, the printer default pen width will be assumed.
If you are not sure what pen numbers are used, consult the documentation of
the application that generated the files.
▼
Defining the pen settings
1 Select one or more files in the Files list box.
2 Choose Pen settings from the drop-down list box in the job ticket window or
click the
button on the QuickAccess bar.
The Pen options appear on the right-hand side of the job ticket window.
3053-144
[42] Specifying pens settings.
Printing sets of files
57
3 Select either one of the following options:
3054-144
[43] Defining pen options at three levels: printer, file or custom.
■
■
■
If you selected ‘As on printer’, the default pen settings of the printer will be
used.
If you selected ‘As in file’, the pen settings as specified in the print file will
be valid.
If you selected ‘Custom’, you can specify your own pen settings as described
in the following steps.
4 Specify the pen width.
Use values in the following ranges:
■ 0.12 - 16.25 mm in increments of 0.01
or
■ 0.0025 - 0.6390 inch, in increments of 0.0001.
5 Specify the pen pattern.
The following pen patterns are available on the printer:
white
black
[44] Available pen patterns
58
Océ Job Director User Manual
6 Specify the required ranges of pens in the From and To fields.
You can use pens from 1 up to 999.
Attention: Adjacent ranges, e.g. from 1 to 10 and from 11 to 20, with the
same width and pattern settings are combined automatically (1 - 20).
Therefore, specify the pen width and pen pattern first and then the range of
pens to which these settings should apply.
7 Click the Insert button.
The pen settings will appear in the edit field.
3055-144
[45] Specified custom pen settings.
Note: Pens that are not specified, will get the printer defaults. Bear in mind
that the printer defines 32 pens.
▼
Deleting pen settings
1 Open a job ticket.
2 Select one or more files in the Files list box.
3 Choose the Extra settings
button.
The job ticket window unfolds and displays the extra settings.
4 Choose Pen settings from the drop-down list box in the job ticket window or
click the
button on the QuickAccess bar.
Printing sets of files
59
The Pen options appear on the right-hand side of the job ticket window.
3056-144
[46] Displaying the pens settings.
5 In the Pen settings menu, select one or more custom pen ranges.
6 Click the ‘Delete’ button to remove the setting.
A window appears asking for your confirmation to delete the selected pens.
3057-144
[47] Deleting pen ranges.
7 Choose ‘Yes’ to delete the selected pens.
8 Choose Save from the File menu.
60
Océ Job Director User Manual
Size, zoom, and media
This button provides access to size and zoom, media type, and cutting
parameters.
Paper size and zoom factor In the main job ticket window, You can specify
the paper size and zoom factor in one of the following ways:
■
If you select ‘Auto’ for paper size and ‘Auto’ for zoom factor, the system will
detect the original size automatically, and select the paper size and zoom
factor that belong to it. The Automatic size and zoom table determines for
each input format on what output format it will be printed. The table can be
modified by clicking the Extra settings
button, and clicking ‘Edit’
(see page 64).
3028-144
[48] ‘Auto’ paper size and ‘Auto’ zoom.
■
If you want to print the file to a special paper size, select the paper size from
the drop-down list box and select the Auto zoom check box.
3029-144
[49] Paper size selected and ‘Auto’ zoom.
■
If you want to print on the original paper size, select the Auto paper size
check box and set Zoom to 100%.
3030-144
[50] ‘Auto’ paper size and 100 % zoom.
■
If you know the original size, you can specify both the output paper size and
zoom factor yourself. If you want to zoom, you must compute the zoom
factor in percents. Refer to page 172 for the table of zoom factors. You can
Printing sets of files
61
specify a zoom factor in steps of 0.1% by clicking in the zoom factor box or
by typing the required zoom factor with a decimal point (e.g. 70.7).
Media type You can specify the copy material type:
■
■
■
Plain paper
Transparent
Polyester film
Cutting Three cutting options are available:
■
■
■
‘Standard paper size’, where the cut is made on standard length. The system
determines the bounding box of the image and uses the first available
standard size that includes the image, or
‘Synchro cut’, where the print engine cuts the copy material at the end of the
printed image, or
‘Custom’, where the system cuts on the specified length.
Synchro cut will not lead to information loss on paper of your digital original.
Standard cut might cut through parts of your printed image.
If paper size unavailable You can specify how the print engine should behave
if paper size would be unavailable. You have three options:
■
■
■
‘Wait for exact size’. If the specified size is not loaded, the printing of this
file will be suspended until the printer will be loaded with the specified paper
size.
‘Use larger size’. If the specified size is not loaded, the printing of this file
will be done on a larger paper size, if present.
‘Use any size’. If the specified size is not loaded, the file will be printed on a
larger size. If this is not present also, it will be printed on a smaller paper
format.
Manual feed If you want to print on cut sheet copy material, this option must
be selected. Job Director will wait for the operator to insert a sheet of copy
material, before the file is printed.
▼
Specifying the paper size, zoom and media
1 Select one or more files in the job ticket window.
2 Specify the required paper size and zoom factor in the main job ticket window.
62
Océ Job Director User Manual
3 Select Size, zoom, and media from the drop-down list box or click the
button on the QuickAccess bar.
3059-144
[51] Size, zoom and media.
If you selected ‘Auto’ for both Paper size and Zoom, the Table Edit button will
be enabled.
Printing sets of files
63
3060-144
[52] ‘Auto’ selected for paper size and zoom: Table Edit button enabled.
4 Choose the Table Edit button to change the output paper size to be used if a
certain original size is detected.
3061-144
[53] Table Edit button.
The Automatic size and zoom window will appear.
3062-144
[54] Automatic size and zoom window.
The automatic size and zoom table determines the paper size for each image
size. By editing this table, you can define the zoom and paper size selection
behaviour for each image size. You have the following options:
64
Océ Job Director User Manual
■
■
■
S1-S1 maps a size to itself.
S1-S0 scales up the image. All A1 originals will be enlarged automatically
to A0.
S2-S3 scales down the image. All A2 originals will be reduced automatically
to A3.
The automatic size and zoom table is used for each file that has both auto paper
size and auto zoom selected.
5 Specify the media type.
3063-144
[55] Specifying one of the media types.
6 Specify the cutting method.
3064-144
[56] Cutting methods.
If you select ‘Custom’, you can specify the length of the copy material.
‘Synchro cut’ means that the print engine cuts the copy material at the end of
the printed image.
7 Specify the behaviour of the machine if the selected paper size is unavailable.
3065-144
[57] What the printer has to do if the paper size is unavailable.
You have the following options:
■
■
■
Select ‘Wait for exact size’ if you want your job to be suspended if the
required size is not available.
Select ‘Use larger size’ to allow printing on a larger paper size.
Select ‘Use any size’ to allow printing on a larger or smaller paper size.
Printing sets of files
65
8 If required, select ‘Manual feed’.
[58] Manual feed selected.
The printer will wait for the operator to insert a sheet of copy material on which
to print the file.
66
Océ Job Director User Manual
Shifting
By shifting the image you can determine the sort and amount of white space
on your print. For example, if you print an A1 original on A0 copy material
you can use the shift image function to centre the image on the page, or to print
it in the bottom left corner.
Shifting the image can be done in horizontal and vertical directions.
▼
Shifting the image
1 Select one or more files in the Files list box.
2 Choose Shifting from the drop-down list box in the job ticket window or click
the
button on the QuickAccess bar.
The Shifting options appear on the right-hand side of the job ticket window.
3068-144
[59] Shifting options.
Printing sets of files
67
3 If you want to specify the amount of shift yourself, select ‘Shift custom’.
Select the shift direction (Up, Down, Left, Right) and specify the amount of
shifting, expressed in mm or inches.
4 If you want to use the automatic shift option, select ‘Shift automatic’.
Specify Upper Left, Upper Right, Lower Left, Lower Right or Centre by
clicking the corresponding dot in the figure or by selecting the corresponding
option from the drop-down list box.
68
Océ Job Director User Manual
Edge correction
By specifying edge correction, you can change the length of the original and/or
printed copy. You can:
■ strip a part of the leading and/or trailing edge of the original
■ add an amount of copy material to the leading and/or trailing edge of the
printed copy.
Both corrections —of original and of printed copy— can be done at the same
time.
Note: The edge of the original will be reduced before scaling or rotation.
Enlarging the edge of the printed copy will be done after scaling or rotation.
▼
Specifying edge correction
1 Select one or more files in the Files list box.
2 Choose Edge correction from the drop-down list box in the job ticket window
or click the
button on the QuickAccess bar.
Printing sets of files
69
The Edge correction options appear on the right-hand side of the job ticket
window.
3070-144
[60] Specifying edge correction.
3 Enter the values for stripping a part of the leading or trailing edge of the
original.
4 Enter the values to add an amount of copy material to the leading or trailing
edge of the printed copy.
70
Océ Job Director User Manual
Rotation and mirror
Images can be rotated by the Océ printer. The rotation angle is anticlockwise
and it can be set to 0˚, 90˚, 180˚, or 270˚.
It is also possible to let the printer choose a rotation automatically:
To landscape: the orientation of the image will be changed, if possible, to
landscape. Drawings in landscape orientation can be printed faster because this
requires less paper movement through the machine.
To portrait: the orientation of the image will be changed, if possible, to
portrait. Only portrait-oriented drawings can be folded with the legend on top.
Extra rotate 180˚: Some digital originals with a legend require an additional
180 degrees rotation for the legend to be printed on top after folding. The place
of the legend is determined by the application that generated the plot file.
Note: A0 originals cannot be rotated without scaling it down. Job Director
does not prevent you from specifying this.
Mirror You can select the mirror option to print mirror images of the pages’
normal appearance.
▼
Specifying the rotation and mirroring
1 Select one or more files in the Files list box.
2 Choose the Extra settings
button.
The job ticket window unfolds and displays the extra settings.
3 Choose Rotation and mirror from the drop-down list box in the job ticket
window or click the
button on the QuickAccess bar.
Printing sets of files
71
The Rotation and mirroring options appear on the right-hand side of the job
ticket window.
3072-144
[61] Rotation and mirroring options.
You now have the following option:
■ You can rotate the image automatically to a portrait or landscape orientation.
■ You can rotate the image in 90-degree increments.
4 If you want to specify the rotation angle yourself, specify the desired rotation
in the ‘Custom’ area.
5 If you want to use the automatic rotation, select ‘To landscape’ or ‘To portrait’
in the ‘Automatic’ area.
6 If required, you select ‘Extra rotate 180˚’.
7 Select the Mirror option, if necessary.
72
Océ Job Director User Manual
Stamp
By using stamps you can insert extra information into your output. It can be
divided into three categories. The first one is printer stamps which are loaded
in the Océ printer. Up to 50 stamps are available on your Océ printer. Each
stamp is identified by a number. The second one is free text stamp. This allows
you to enter special codes which will be replaced by e.g. user name or current
date and time. You can also type some text and use it for your output. The third
one is image stamp. A list of available images has been configured by the
Repro Station operator.
The settings you can specify for a stamp are the following:
■
■
■
Switching stamping off or on
Use the default printer stamp as it has been configured on the printer
Use customised stamping. You can specify:
- printer stamp: choose one of the available printer stamps
- free text stamp
- image stamp
Note: Free text stamp and image stamp are not possible on an Océ 9800 with
FBBS controller.
Printer stamp The Printer stamp option has the following settings:
■
■
▼
The default printer stamp as defined on the printer
or,
Custom: one of the (up to 50) available printer stamps, specifying:
- the position of the stamp (top of legend, middle or bottom)
- the size of the stamp (small or large)
- the greyscale (black ... light grey)
Choosing a printer stamp
1 Select one or more files in the Files list box.
Attention: You have to select at least one file to enable the stamp options. If
no file has been selected, the stamp options will be dimmed, which means
that these options are unavailable.
Printing sets of files
73
2 Choose Stamp from the drop-down list box in the job ticket window or click
the
button on the QuickAccess bar.
The stamp options appear on the right-hand side of the job ticket window.
3074-144
[62] Stamp options.
3 Select one of the following options in the Stamp area:
‘On, as on printer’ (use the default printer stamp).
‘On, custom’.
4 If you chose ‘On, custom’, three stamp options appear in the drop-down list.
Choose ‘Printer stamp’ and specify a number of the Printer stamp, its position,
size and/or grey scale. These settings apply to all selected files in the Files list
box on the left-hand side of the job ticket window.
5 Repeat this procedure for all the files that need a (different) printer stamp.
6 To check the specified stamp settings, you can select a file in the Files list box.
If you specified different stamp settings for different files, you will see how the
settings change as you select another file in the job ticket.
■
■
74
Océ Job Director User Manual
Free text stamp The Free text stamp option has the following settings:
■
■
■
■
▼
Text (you can specify your own stamp text)
Size (Small, Normal or Large)
Rotation (0˚, 90˚, 180˚ or 270˚)
Position (9 standard positions and custom shift))
Choosing a Free text stamp
1 Select one or more files in the Files list box.
Attention: You have to select at least one file to enable the stamp options. If
no file has been selected, the stamp options will be dimmed, which means
that these options are unavailable.
2 Choose Stamp from the drop-down list box in the job ticket window or click
the
button on the QuickAccess bar.
The stamp options appear on the right-hand side of the job ticket window.
3075-144
[63] Free Text Stamp window
3 Select ‘On, custom’ in the Stamp area.
4 Three stamp options appear in the list. Choose ‘Free text stamp’.
Printing sets of files
75
5 Fill in the stamp text. You can use special codes that will be replaced by the
actual parameters before printing:
■ %U%
user name
■ %J%
job name
■ %A%
account name
■ %N%
distribution notes
■ %O%
operator notes
■ %D%
date (when job is sent to printer)
■ %T%
time (when job is sent to printer)
■ %F%
file name
■ %P%
file path
Below the edit field, the current selections of the Windows font are shown. The
text that you type is shown in the selected font and style, but not in the selected
size. Indeed, bigger sizes would not fit in the edit field.
6 You can change the font settings by pressing the ‘Modify’ button. The standard
Windows font selection dialog is shown.
3184-144
[64] Windows font selection dialog
In this dialog, all available fonts with their style and size are shown. The Script
combo box is disabled.
The size of the font must be between 1 and 250 points. When this is not the
case, an error message box will be shown the moment you press the OK button.
When you press the OK button and all font settings are correct, they are
applied to the selected file(s). The font selection dialog is removed and the
settings are shown below the edit field (see figure 63).
7 Click the OK button.
76
Océ Job Director User Manual
Note: It is possible that files with different font settings are selected
simultanuously. In this case, it is not possible to show the text in all selected
fonts in the edit field. The possible situations are listed below.
Font name When it is the same for all selected files, it is used for displaying
the text in the edit box. When it is not the same for all files, the standard font
is used. In the latter case, the ‘Name:’ field below the edit box is empty.
The default setting is ‘Courier New’.
Font style The style is only used for displaying the text when both the font
name and style are the same for all selected files, otherwise the regular style is
used. In the latter case, the ‘Style:’ field below the edit box is empty.
The default setting is ‘regular’.
Font size As explained earlier, the font size of the shown text is fixed and does
not represent the chosen font size. When the size is not the same for all selected
files, the ‘Size:’ field below the edit text box is empty.
The default setting is ‘7 pt’.
When a font name, style or size is not the same for all selected files, its
corresponding field in the font selection dialog (see figure 64) is also empty.
8 If required specify size or extra settings. If you chose the Extra settings a
dialog box will be displayed.
3076-144
[65] Extra settings for Free text stamp
9 Choose the required settings of Rotation or Shifting. If you want to specify the
amount of shift yourself, select ‘Shift custom’. Select the shift direction (Up,
Down, Left, Right) and specify the amount of shifting, expressed in mm or
inches.
Printing sets of files
77
10 Click the OK button
Attention: These settings apply to all selected files in the Files list box on
the left-hand side of the job ticket window.
11 Repeat this procedure for all the files that need a (different) free text stamp.
12 To check the specified stamp settings, you can select a file in the Files list box.
If you specified different stamp settings for different files, you will see how the
settings change as you select another file in the job ticket.
Image stamp The Image stamp option has the following settings:
■
■
■
Image (you can select one of the available images)
Rotation (0˚, 90˚, 180˚ or 270˚)
position (9 standard positions and custom shift))
To use an Image stamp:
▼
Choosing an Image stamp
1 Select one or more files in the Files list box.
Attention: You have to select at least one file to enable the stamp options. If
no file has been selected, the stamp options will be dimmed, which means
that these options are unavailable.
78
Océ Job Director User Manual
2 Choose Stamp from the drop-down list box in the job ticket window or click
the
button on the QuickAccess bar.
The stamp options appear on the right-hand side of the job ticket window.
3077-144
[66] Image stamp window
3 Select ‘On, custom’ in the Stamp area.
4 Three stamp options appear in the list. Choose ‘Image stamp’.
5 Select the image stamp.
Note: The image stamps that can be selected must be configured inside
Repro Station.
Printing sets of files
79
6 If required specify extra settings. If you chose the Extra settings a dialog box
will displayed.
3078-144
[67] Extra settings for image stamp
7 Choose the required settings of Rotation or Shifting. If you want to specify the
amount of shift yourself, select ‘Shift custom’. Select the shift direction (Up,
Down, Left, Right) and specify the amount of shifting, expressed in mm or
inches.
8 Click the OK button
Attention: These settings apply to all selected files in the Files list box on
the left-hand side of the job ticket window.
9 Repeat this procedure for all the files that need a (different) free text stamp.
10 To check the specified stamp settings, you can select a file in the Files list box.
If you specified different stamp settings for different files, you will see how the
settings change as you select another file in the job ticket.
80
Océ Job Director User Manual
Finishing
Finishing is folding and punching. Folding can be switched to one of the
following options:
■
■
■
‘Off’
‘On, as on printer’
‘On, custom’.
If you select ‘On, custom’ you can specify one of the following folding
methods:
■
■
■
Standard (for DIN sizes)
Ericsson
Afnor.
For each of these folding methods you can specify:
■
■
■
a folding packet width
a folding packet length
the binding edge.
If you use fold method Standard or Ericsson to fold portrait originals with
legends, ensure that the legend is located on the lower left-hand side. If not,
you can use the rotate function to move the legend to the lower left corner.
Your legend will then appear at the front side of the folded print. Landscape
originals must have the legend area on the upper right-hand side. Ask the Key
Operator for more details.
You can always select ‘First fold only’.
Note: Folding transparent and polyester copy material is not possible,
although you can specify this combination in Job Director.
Punching When the Punching check box is selected, the printer punches
folded material. American machines punch 3 holes, whereas European
configurations make 4 holes. The binding edge box will be switched on
automatically if punching has been selected.
Reinforcing When the Reinforcing check box is selected, copies are delivered
with a pre-punched, self-adhesive strip. With this strip the copy can be stored
in a binder without the risk that the punching holes tear out. Reinforcing of A4
Printing sets of files
81
formats is determined by a setting on the operating panel of the
Océ 9700/9800. Refer to ‘Handling A4 formats’ in the respective manuals.
Note: Reinforcing is only possible in combination with the Standard folding
method. When you select reinforcing with another folding setting the reinforce
option will be ignored.
▼
Specifying finishing
1 Open a job ticket.
2 Choose the Extra settings
button.
The job ticket window unfolds and displays the extra settings.
3 Choose Finishing from the drop-down list box in the job ticket window or click
the
button on the QuickAccess bar.
The finishing options appear on the right-hand side of the job ticket window.
3080-144
[68] Finishing window
4 Specify one of the following options in the Folding area:
‘Off’
‘On, as on printer’
■ ‘On, custom’.
5 If required, select Punching or Reinforcing.
■
■
82
Océ Job Director User Manual
Note: The settings for Punching and Reinforcing exclude each other.
6 If you have selected Custom in the Folding area, select:
Fold method: Standard, Ericsson or Afnor.
If you select ‘First fold only’, the output will be folded once and it will be
delivered in the First Fold Delivery Tray (if available).
■ fold length and fold width.
7 If required, select ‘Binding edge’ and specify the required binding edge width.
Note: If punching is active, the system automatically activates the binding
edge. You have to specify the binding edge width.
8 Choose Save from the File menu.
■
Printing sets of files
83
Print settings per job
This section will describe those print settings, that can only be specified for all
files in a job.
Copies, sorting, and banner page
You can specify the number of copies (1-999) and the sorting mode (by set or
by page) for the all files in a job.
You can sort the printed output in either one of the following two ways:
■
■
'by set'
or
'by page'.
Suppose your set consists of three files A, B, C:
■
■
When printing three copies, sorted 'by set', you will get ABC, ABC, ABC.
When sorting three copies, sorted 'by page', the output will be AAA, BBB,
CCC.
A
A
A
B
B
B
A
A
A
C
B
B
B
C
C
C
C
C
Output sorted by page
Output sorted by set
[69] Sorting by page versus sorting by set.
Banner page A banner page is a separation page between jobs. You can select
to use a banner page or not and specify the banner page size. Each banner page
84
Océ Job Director User Manual
will be deposited at the same place as the first file of the job and will be folded
like the first file in the job. If folding for this file has not been specified, the
banner page will also not be folded.
The range of available banner page formats is determined by the available
paper sizes. For more information, see ‘Defining paper sizes in menus’ on
page 24.
Note: It is possible to change the settings for all banner pages by changing the
header file (flaghead.txt) with RCF commands.
▼
Specifying the number of copies, sorting mode and banner page
1 Open a job ticket.
2 Specify the number of copies in the Sending to repro area.
You can specify up to 999 copies.
3081-144
[70] Specifying the required number of copies.
Attention: Copies, sorting and banner page applies to entire jobs, not to
individual files in a job. Thus, it makes no difference whether a file is
selected in the Files list box or not. All the files in the job ticket adapt the
copies, sorting and banner page settings as they were last specified.
3 Choose the Extra settings
button.
The job ticket window unfolds and displays the extra settings.
Printing sets of files
85
4 Choose Sorting and banner page from the drop-down list box in the job ticket
window or click the
button on the QuickAccess bar.
The sorting and banner page options appear on the right-hand side of the job
ticket window.
3083-144
[71] Choosing Sorter and banner page.
5 Select sorting by set or by page.
6 Switch banner page printing off or on, and, in the second case, select the size
of the banner page from the drop-down list box.
7 Choose Save from the File menu.
86
Océ Job Director User Manual
User information
For each job, you can specify your user name, account name, and job name.
The user name and the job name will appear in the Repro Station queue, which
allows easy identification of the job.
Repro Station and Machine Monitor will look up the specified user and
account name of a job in a predefined list. This list is used for the following
purposes:
■
■
■
Statistics
In the list a number is assigned to each user and account. This number is used
for statistical purposes (job logging) by Machine Monitor.
Print permission
In Repro Station you can restrict printing. If this option is selected, only users
and/or accounts that are defined in the list are allowed to send jobs to the
printer.
Bin selection High Capacity Stacker
If your printer is equipped with a High Capacity Stacker, you can use the list
to define which output bin should be used for a specified user and/or account.
In Repro Station you can define if this specified bin is to be used.
You may want to change the job name regularly to be able to identify
individual jobs. Normally, your user name and account stay the same.
Note: Consult the Repro Station operator first and then specify your user and
account name.
Note: You can save user, and account name as defaults, as described in ‘Job
Director defaults’ on page 153. If you have done so, every new job ticket will
have your user and account name filled in if you open it.
▼
Specifying user information
1 Open a job ticket.
2 Choose the Extra settings
button.
The job ticket window unfolds and displays the extra settings.
3 Choose User, account, and job name from the drop-down list box in the job
ticket window or click the
button on the QuickAccess bar.
Printing sets of files
87
The User, account, and job name text boxes appear on the right-hand side of
the job ticket window.
3085-144
[72] Specifying user, account and job name.
4 Enter your user, account and job name.
If you leave the job name field empty, the name of the job will be the name of
the first file in the Files area.
Note: If in doubt, consult the Repro Station operator about your user and
account ID.
5 Choose Save from the File menu.
Distribution notes
Distribution notes are instructions for the Repro Station operator about where
to deliver or what to do with the printed copies. If, for example, the print job
you are about to send will produce three sets of folded prints, you can type a
distribution note asking the operator to put the first set in the mail box of mister
X, to place set number two in the company’s archive, and to mail the third set
to customer Y. This kind of information is typical for distribution notes.
Distribution information can only be provided per job, not per file.
88
Océ Job Director User Manual
▼
Including distribution notes
1 Open a job ticket.
2 Choose the Extra settings
button.
The job ticket window unfolds and displays the extra settings.
3 Choose Distribution notes from the drop-down list box in the job ticket
window or click the
button on the QuickAccess bar.
The Distribution notes edit box appears.
3087-144
[73] Distribution notes edit box
4 Type the message for the print room operator in the edit box.
5 Choose Save from the File menu.
Operator notes
This function allows you to include free text messages in your job tickets. An
operator note contains information for the operator about how to produce the
print. For example: ‘print this job before 4 p.m.’. Jobs with operator notes can
be recognised in the Repro Station queue.
Printing sets of files
89
▼
Typing notes for the operator
1 Open a job ticket.
2 Choose the Extra settings
button.
The job ticket window unfolds and displays the extra settings.
3 Choose Operator notes from the drop-down list box in the job ticket window
or click the
button on the QuickAccess bar.
The Operator notes edit field appears on the right-hand side of the job ticket
window.
3089-144
[74] Specifying user, account and job name.
4 Type the message in the edit field.
Note: You cannot use tabs.
5 Choose Save from the File menu.
90
Océ Job Director User Manual
Printing
To print a job you can choose Send from the File menu or use the Send button
on the job ticket. The procedure below explains how to do so.
Sending jobs to Repro Station
▼
Printing a job
1 Open the job ticket or create one.
2 Choose the ‘Send’ button in the bottom left corner of the ticket window or
choose Send from the File menu.
A progress indicator is displayed while the ticket is sent to Repro Station.
3090-144
[75] Sending job ticket to Repro Station in progress.
Attention: Job tickets consist of print information and references to print
files. These references may get lost if the related print files are renamed,
deleted or moved to a different directory. An error message will appear if
tickets containing unresolved references to print files are sent to Repro
Station, e.g.
Getting status from Repro Station
Having sent job tickets to Repro Station, you can check the status of your jobs
by opening the Repro Station Queue window. This window will display the
current Repro Station queue.
Note: Whether you see the queue contents or not depends on the setting (‘yes’
or ‘no’) of the ‘Full queue public’ option in Repro Station.
Printing sets of files
91
▼
Getting status from Repro Station
1 From the View menu, choose Repro Station Queue.
The Repro Station Queue window appears:
3091-144
[76] Repro Station Queue window
2 Specify the refresh rate.
The refresh rate is the time intervals at which the Repro Station Queue window
will be updated, e.g. every 10 seconds.
3 If you want to close the Repro Station Queue window, double-click the
control-menu box in the top left corner of the window. Alternatively, you can
click the upper right
button (only on Windows 95 and Windows NT).
Control-menu box
3091-144
[77] Control-menu box of the Repro Station Queue window.
92
Océ Job Director User Manual
Job Director
User Manual
Chapter 4
Printing matrix jobs
How to define and submit matrix jobs to Océ Repro Station.
93
Matrix Tickets
Use matrix tickets if your print job contains the same set of files that must be
printed for different recipients. The matrix ticket allows you to define a
separate set of print settings for each recipient. The matrix ticket window
provides a survey of all print settings for each recipient.
A matrix is a rectangular array of rows and columns. Rows represent print
files. Columns represent programs (recipients). Each program can be seen as a
kind of job ticket, containing a set of print settings that is used for one
particular recipient.
Opening a new matrix ticket
▼
Opening a new matrix ticket
1 Choose ‘New matrix job’ from the File menu.
An empty, untitled matrix ticket will be displayed.
3092-144
Program
area
Files
area
Matrix
area
Send
button
[78] Matrix ticket window
94
Océ Job Director User Manual
Saving a matrix ticket
When you have specified all the required settings, you can save the matrix
ticket for future use. To save the current matrix ticket in a certain directory
using a name of your choice, choose the Save as option from the File menu.
If you do not specify an extension, the system will add ‘.jt’ to the name you
specified.
Attention: Matrix tickets consist of print information and references to print
files. These references may get lost if the related print files are renamed,
deleted or moved to a different directory. An error message will appear if
tickets containing unresolved references to print files are sent to Repro
Station, e.g.
3039-144
[79] Matrix ticket contains an unresolved reference to a print file.
▼
Saving the matrix ticket
1 Choose ‘Save’ or ‘Save as’ from the File menu or click the
button on the
QuickAccess bar.
The first time you save a new matrix ticket using Save, the ‘Save job ticket as’
window appears.
3040-144
[80] Saving a matrix ticket.
2 Select a drive and directory.
Printing matrix jobs
95
3 Type the file name you want to give to this job in the File Name text box.
Note: If you do not specify an extension, “.jt” will be added automatically.
The extension “.jt” is also used for job tickets. You may want to use a
filename notation which makes it easier to distinguish job tickets from
matrix tickets. For example, you could consistently use “mx” as the first
two characters of the filename of a matrix ticket. Matrix tickets can then
readily be distinguished from job tickets.
4 Choose the OK button.
The matrix ticket will be saved. The matrix ticket window title will change into
the name which you have just specified.
Closing a matrix ticket
Attention: When you close a matrix ticket, the changes you made will not be
saved automatically. Furthermore, Job Director will not prompt you to
save changes. Therefore, make sure that you save the matrix ticket first
before closing it.
▼
Closing a matrix ticket
You can close a matrix ticket in either one of the following ways:
■ Choose Close from the File menu.
or
96
Océ Job Director User Manual
■
Choose Close from the matrix ticket Control menu.
3039-144
Control-menu
box
Control menu
[81] matrix ticket Control menu and Control-menu box.
or
■ Double-click the matrix ticket Control-menu box.
or
■ Click the upper right
button (only on Windows 95 and Windows NT 4.0)
or
■ Select the matrix ticket window and press CTRL-F4.
Printing matrix jobs
97
Opening an existing matrix ticket
You can use the Open command in the File menu to open a matrix ticket that
has been saved before.
▼
Opening a matrix ticket
1 Choose Open from the File menu.
The following window appears:
3042-144
[82] Open an existing matrix ticket
2 Select the drive and directory of the matrix ticket file.
3 Select a file from the File Name list or type its name in the text box.
4 Choose the OK button.
A job or a matrix ticket window will be displayed, depending on the ticket
type.
Deleting a matrix ticket
Use the Windows Explorer (File Manager) to delete matrix tickets.
▼
Deleting a matrix ticket
1 Start Windows Explorer (File Manager).
2 Select the directory where the matrix ticket file is located.
3 Select the matrix ticket file you want to remove.
4 Choose Delete from the File menu or press the Delete key.
98
Océ Job Director User Manual
5 Choose the OK button.
A message appears, asking you for your confirmation to delete the matrix
ticket file.
3047-144
[83] Confirm delete.
6 Choose Yes.
The matrix ticket is removed from your file system.
Printing matrix jobs
99
File handling
Print jobs for the printer can consist of one or more files. This section explains
how to add or remove files from a matrix ticket and how to rearrange the order
of files.
Files that belong together and have to be printed in subsequent order have to
be specified in the desired print order in the matrix ticket.
Adding files to a matrix ticket
You can add files to a matrix ticket in two ways:
using the Add button
or
■ using Windows Explorer (File manager).
■
The files you add must be print or plot files, saved in a data format which is
supported by the Océ printer.
Adding a file means that a reference to that file is stored in the matrix ticket. If
you press the Send button, the matrix ticket information and the corresponding
plot file(s) will be copied to the Repro Station queue.
Note: Job Director defaults apply to new programs. You may need to change
program settings.
100
Océ Job Director User Manual
▼
Adding files using the Add button
1 Open a matrix ticket.
2 Click the Add button in the Files area.
3094-144
Add button
[84] The Add button in the Files area.
The ‘Add files to job ticket’ dialog box appears:
3025-144
[85] The Add files to job ticket window.
3 Select the drive and directory of the print files which you want to add.
4 Select one or more files from the File Name list or type their names in the text
box:
■ You select one file by clicking it.
■ To select two or more files in sequence, click the first file and then press and
hold down SHIFT while you click the last file of the range.
Printing matrix jobs
101
■
■
To select two or more files out of sequence, press and hold down CTRL
while you click each file.
To cancel a selection, press and hold down CTRL while you click the file.
5 Choose the OK button.
The selected files appear as row headings in the matrix.
3094-144
row
headings
[86] Files added to a matrix ticket become row headings in the matrix.
6 Choose Save from the File menu.
▼
Adding files using Windows Explorer (File manager)
1 Open a matrix ticket.
2 Start Windows Explorer (File Manager).
3 In Windows Explorer (File Manager), open the directory where the print files
are stored.
102
Océ Job Director User Manual
4 Reduce the size of the Windows Explorer (File Manager) and Job Director
windows and arrange both application windows side by side on your screen.
3095-144
[87] Windows Explorer and Job Director arranged side by side.
5 Select one or more files in Windows Explorer (File Manager).
Printing matrix jobs
103
6 Hold down the mouse button, drag the selected file(s) to the open matrix ticket
in Job Director and release the mouse button to drop the file(s) in the matrix
ticket window.
3096-144
[88] Adding files to a matrix ticket using drag-and-drop editing.
The files will be added to the matrix ticket and appear in the matrix.
7 Choose Save from the File menu.
Rearranging files in a matrix ticket
Rearranging files in a matrix ticket changes their print order.
▼
Rearranging files in a matrix ticket
1 Open a matrix ticket.
2 In the matrix, select the file(s) which you want to move up or down.
3 Click the
arrow to have the file(s) printed earlier or the
arrow to have
the file(s) printed later.
4 Choose Save from the File menu.
104
Océ Job Director User Manual
Deleting files from a matrix ticket
▼
Deleting files from the ticket
1 Open a matrix ticket.
2 Select the file(s) which you want to delete.
3 Choose the Delete button.
The ‘Delete file(s)’ window appears:
3047-144
[89] Delete file(s) window
4 Click Yes to delete the file(s) from your matrix ticket.
5 Choose Save from the File menu.
Printing matrix jobs
105
Program handling
A matrix ticket can contain more than one program, each containing different
settings for the print job. Each program can be seen as a kind of job ticket. The
job will be printed several times, using the different programs in the specified
order.
This section explains how to add or remove programs and how to rearrange the
order of programs.
Adding programs to a matrix ticket
You can add programs to a matrix ticket using the ‘Add’ button in the
Programs area.
Note: Job Director defaults apply to new programs. You may need to change
program settings.
▼
Adding programs to a matrix ticket
1 Open a matrix ticket.
2 Click the Add button in the Programs area.
3094-144
Add button
[90] The Add button in the Programs area.
106
Océ Job Director User Manual
A new program will be added to the matrix.
3 Choose Save from the File menu.
Applying files to a program
A matrix program is a set of print settings which is used for one particular
recipient. However, a program does not necessarily have to include all files.
3153-144
ies
op d C
5 c an r
int A ste
Pr f file olye add
o n p and ent ate
o lm urr d d
fi e c an
th me
ti
ies
op n
5c so
int file er
Pr f all pap and
o lain d
p tate red
ro irro
m
ies
op
5 c file ter
s
int
Pr f this olye
o np
o lm
fi
y
op
1c
ies
int A
Pr f file B on ranc
o nd pa
a ans
tr
A
B
C
[91] Matrix ticket: sets of files to be printed using different settings for different recipients.
For each program you can specify which file(s) have to be printed.
Printing matrix jobs
107
▼
Applying files to a program
1 Open a New or an existing matrix ticket which consists of multiple files and
multiple programs, e.g.
3098.tif
[92] Added programs include all files by default.
2 Specify which files are applied to a program.
You have the following options:
108
Océ Job Director User Manual
■
If you want one specific file to be included in or excluded from one specific
program, click the corresponding cell. Clicking a cell will select or clear the
cell.
3099.tif
[93] Including or excluding one single file.
■
If you want all files to be included in or excluded from selected programs,
select the column headings (program numbers) ➊ and choose the
button
on the QuickAccess bar ➋. The matrix sorting dialog box appears, in which
Printing matrix jobs
109
you can specify that the selected programs should include or exclude all files
➌.
3101-144
➋
➊
➌
[94] All files included in or excluded from the selected programs.
110
Océ Job Director User Manual
■
➋
If you want some selected files included in or excluded from all programs,
select the row headings (filenames) ➊ and choose the
button on the
QuickAccess bar ➋. The matrix sorting dialog box appears, in which you can
specify that the selected files should be included in or excluded from all
programs ➌.
3102-144
➊
➌
[95] Selected files included in or excluded from all programs.
Printing matrix jobs
111
■
If you want all files included in or excluded from all programs, click the
‘Select All’ button ➊ and choose the
button on the QuickAccess bar ➋.
The ‘Select All’ button is the square located above the row headings and to
the left of the column headings. The matrix sorting dialog box appears, in
which you can specify that all files should be included in or excluded from
all programs ➌.
3103-144
➋
‘Select All’
button ➊
➌
[96] All files included in or excluded from all programs.
Rearranging programs in a matrix ticket
Rearranging programs in a matrix ticket changes the print order.
▼
Rearranging programs
1 Open a matrix ticket.
2 Select the one or more programs by clicking their numbered column headings.
3 Click the
or
arrow to move the programs to the position of your choice.
The contents of the selected program will be moved to a different program
number.
4 Choose Save from the File menu.
112
Océ Job Director User Manual
Deleting programs from a matrix ticket
▼
Deleting programs from the ticket
1 Open a matrix ticket.
2 Select the one or more programs by clicking their numbered column headings.
3 Click the ‘Delete’ button in the Programs area of the matrix ticket.
The ‘Delete program(s)’ window appears:
3104-144
[97] Delete program(s) window
4 Click Yes to delete the program(s) from your matrix ticket.
The columns of the selected programs are removed from the matrix.
5 Choose Save from the File menu.
Printing matrix jobs
113
About print settings
In a matrix ticket, there are three categories of print settings:
■
■
■
Settings per file:
these settings can be specified for each file of a job individually.
Settings per program:
these settings apply to all files in a selected program.
Settings per job:
these settings apply to all programs in a matrix job.
The following print settings can be specified in a matrix ticket:
Settings per file
File type and its special settings
Pen settings
Rotation and mirror
Settings per program
Settings per job
Size, zoom and media
User Information
Shifting
Operator notes
Edge correction
Stamp
Copies, sorting and banner page
Finishing
Distribution notes
[98] Print settings for matrix job
For a detailed description of each setting, see one of the following sections:
■
■
■
114
‘Print settings per file’ on page 115
‘Print settings per program’ on page 128
‘Print settings per job’ on page 146
Océ Job Director User Manual
Print settings per file
You can specify the following file settings in a matrix ticket:
■
■
■
file type, e.g. CalComp, HP-GL ...
pens, i.e. the pen setting that is to be used
rotation.
File settings can be defined separately for each file and are valid for all
programs.
▼
Specifying file settings in a matrix ticket
1 Open a matrix ticket.
2 Select ‘Show settings’ in the Files area.
3105-144
[99] Showing file settings
Printing matrix jobs
115
The ‘Type’, ‘Pens’ and ‘Rotation’ columns are displayed.
3106-144
[100] ‘Type’, ‘Pens’ and ‘Rotation’ columns
3 Double-click the cell in the ‘Type’, ‘Pens’ or ‘Rotation’ column on the same
row of the file for which you want to specify the settings
or
select the appropriate cell and choose the
,
or
button on the
QuickAccess bar
or
double-click the column heading entitled ‘Type’, ‘Pens’ or ‘Rotation’ to
specify the settings for all the files in the matrix.
The window of the selected file setting will appear.
4 Specify the settings and choose the OK button.
See the following subsections for a detailed description of how to specify file
settings in a matrix ticket.
116
Océ Job Director User Manual
File type and its specific settings
For introductory information see ‘File type and its special settings’ on page 53.
▼
Specifying the file type and its specific settings in a matrix ticket
The procedure below explains how to modify HP-GL settings as an example.
You can specify the other available file types in a similar way.
1 Select ‘Show settings’ in the Files area.
3105-144
[101] Showing file settings
The ‘Type’, ‘Pens’ and ‘Rotation’ columns are displayed.
3110-144
[102] ‘Type’, ‘Pens’ and ‘Rotation’ columns
2 Double-click the cell in the ‘Type’ column on the same row of the file for
which you want to specify the file type
Printing matrix jobs
117
or
select the appropriate cell and choose the
button on the QuickAccess bar
or
double-click the column heading entitled ‘Type’ to set the file type for all the
files in the matrix.
The File type dialog box is displayed.
3107-144
[103] File type dialog box.
The Path and filename text box displays the full path and filename of the
selected file, or, if you selected the entire ‘Type’ column, it says ‘(Multiple files
selected)’. This field cannot be edited.
3 Select a file type from the File type list box, e.g. HP-GL.
The File type dialog box is expanded and displays the current settings of the
selected file type, e.g. HP-GL.
Note: The file type options are different for each file type. In figure 104 the
file type options of HP-GL are shown.
3108-144
[104] Expanded File type dialog box.
4 Specify the specific print settings for this file type (see table 40 on page 53).
5 Choose the OK button.
118
Océ Job Director User Manual
The cells in the matrix display the selected file type.
selected file
[105] The selected file type appears in the cell of the corresponding file.
Pen settings
For introductory information on pen settings see ‘Pen settings’ on page 56.
▼
Defining the pen settings in a matrix ticket
1 Select ‘Show settings’ in the Files area.
3105-144
[106] Showing file settings
Printing matrix jobs
119
The ‘Type’, ‘Pens’ and ‘Rotation’ columns are displayed.
3110-144
[107] ‘Type’, ‘Pens’ and ‘Rotation’ columns
2 Double-click the cell in the ‘Pens’ column on the same row of the file for which
you want to specify the pen settings
or
select the appropriate cell and choose the
button on the QuickAccess bar
or
double-click the column heading entitled ‘Pens’ to specify the pen settings for
all the files in the matrix.
120
Océ Job Director User Manual
The Pen settings dialog box is displayed.
3111-144
[108] Pen settings dialog box
3 Select either one of the following options:
■
■
■
as on printer
as in file
custom.
3054-144
[109] Defining pen options at three levels: printer, file or custom.
■
If you selected ‘As on printer’, the default pen settings of the printer will be
used.
Printing matrix jobs
121
■
■
If you selected ‘As in file’, the pen settings as specified in the print file will
be valid.
If you selected ‘Custom’, you can specify your own pen settings as described
in the following steps.
4 Specify the pen width.
Use values in the following ranges:
■ 0.12 - 16.25 mm in increments of 0.01
or
■ 0.0025 - 0.6390 inch, in increments of 0.0001.
5 Specify the pen pattern.
The following pen patterns are available on the printer:
white
black
[110] Available pen patterns
6 Specify a range of pens in the From and To fields.
You can use pens from 1 up to 999.
Attention: Adjacent ranges, e.g. from 1 to 10 and from 11 to 20, with the
same width and pattern settings are combined automatically (1 - 20).
Therefore, specify the pen width and pen pattern first and then the range of
pens to which these settings should apply.
122
Océ Job Director User Manual
7 Click the Insert button.
The pen settings will appear in the edit field.
3055-144
[111] Specified custom pen settings.
Note: Pens that are not specified, will get the printer defaults. Bear in mind
that the printer defines 32 pens.
8 Choose the OK button in the Pen settings dialog box.
9 Choose Save from the File menu.
▼
Deleting pen settings
1 Select ‘Show settings’ in the Files area.
3105-144
[112] Showing file settings
Printing matrix jobs
123
The ‘Type’, ‘Pens’ and ‘Rotation’ columns are displayed.
3113-144
[113] ‘Type’, ‘Pens’ and ‘Rotation’ columns
2 Double-click the cell in the ‘Pens’ column on the same row of the file for which
you want to delete pen settings
or
select the appropriate cell and choose the
button on the QuickAccess bar
or
double-click the column heading entitled ‘Pens’ to delete pen settings for all
the files in the matrix.
The Pen settings dialog box is displayed.
3114-144
[114] Pen settings dialog box displaying the current pens settings.
124
Océ Job Director User Manual
3 In the Pen settings menu, select one or more custom pen ranges.
4 Choose the ‘Delete’ button to remove the setting.
A window appears asking for your confirmation to delete the selected pens.
3057-144
[115] Deleting pen ranges.
5 Choose ‘Yes’ to delete the selected pens.
6 Choose the OK button.
Rotation and mirror
For introductory information on rotation see ‘Rotation and mirror’ on page 71.
▼
Specifying rotation and mirror
1 Select ‘Show settings’ in the Files area.
3105-144
[116] Showing Files settings
The Files setting columns are displayed.
Printing matrix jobs
125
The ‘Type’, ‘Pens’ and ‘Rotation’ columns are displayed.
3113-144
[117] ‘Type’, ‘Pens’ and ‘Rotation’ columns.
2 Double-click the cell in the ‘Rotation’ column on the same row of the file for
which you want to specify the rotation settings
or
select the appropriate cell and choose the
button on the QuickAccess bar
or
double-click the column heading entitled ‘Rotation’ to specify the settings for
all the files in the matrix.
The Rotation and mirror dialog box is displayed.
3115-144
[118] Rotation and mirror dialog box
You now have the following option:
■ You can rotate the image automatically to a portrait or landscape orientation.
■ You can rotate the image in 90-degree increments.
126
Océ Job Director User Manual
3 If you want to specify the amount of rotation yourself, specify the desired
rotation in the ‘Custom’ area.
4 If you want to use the automatic rotation, select ‘To landscape’ or ‘To portrait’
in the ‘Automatic’ area.
5 If required, you can also select ‘Extra rotate 180˚’.
6 Select the Mirror option, if necessary.
7 Choose the OK button.
Printing matrix jobs
127
Print settings per program
You can specify the following program settings in a matrix ticket:
■
■
■
■
■
■
■
■
■
■
size (Auto, A0, A1, etc.)
zoom (Auto, 0 - 100%)
media (plain paper, transparent, polyester film)
shifting (shifting image to one of the corners or to the centre of the copy)
edge correction (enlarging leading edge and or trailing edge)
stamp (printing a specified stamp on the copy)
copies (the number of copies to be printed)
sorting (by set or by page) and selecting a banner page
finishing (specifying the folding method and punching in binding edge)
distribution (message for operator).
Program settings can be defined for each program individually and apply to all
files in that program.
▼
Specifying program settings in matrix ticket
1 Open a matrix ticket.
2 Select ‘Show settings’ in the Programs area.
3116-144
[119] Showing program settings.
128
Océ Job Director User Manual
The program setting columns are displayed.
Note: The rows now represent the programs.
3117-144
[120] Program setting columns
3 Double-click the cell on the same row of the program for which you want to
specify the settings
or
select the appropriate cell and choose the corresponding button from the
QuickAccess bar
or
double-click a column heading to specify the settings for all the programs in
the matrix.
The corresponding dialog box is displayed.
4 Specify the settings and choose the OK button.
Size, zoom, and media
For introductory information on size, zoom, and media see ‘Size, zoom, and
media’ on page 61.
Attention: Using matrix tickets, zooming is only possible in the range
25-100% and manual feed is not possible.
Printing matrix jobs
129
▼
Specifying the paper size, zoom and media
1 Select ‘Show settings’ in the Programs area.
3116-144
[121] Showing program settings.
The program setting columns are displayed.
3117-144
[122] Program setting columns.
2 Double-click the cell in the ‘Size’, ‘Zoom’ or ‘Media’ column on the same row
of the program for which you want to specify the settings
or
select the appropriate cell and choose the
button on the QuickAccess bar
or
double-click the column heading entitled ‘Size’, ‘Zoom’ or ‘Media’ to specify
the settings for all the programs in the matrix.
130
Océ Job Director User Manual
The Size, zoom, and media dialog box appears.
3118-144
[123] Paper size, zoom, and media dialog box.
You now have the following options:
■ You can specify both size and zoom factor yourself.
Select a paper size and zoom factor in the corresponding fields.
Refer to the tables on page 172 how to define the right zoom factors.
3030-144
[124] Specifying paper size and zoom.
Note: You can specify a zoom factor in increments of 0.1% by clicking in
the zoom factor box, and typing the required zoom factor with a decimal
point (e.g. 70.7).
Printing matrix jobs
131
■
You can specify the paper size yourself and still use the automatic zoom
factor.
Specify the required paper size and select ‘Auto’ for Zoom.
3029-144
[125] Paper size specified, ‘Auto’ zoom.
■
You can select ‘Auto’ for both Paper size and Zoom.
3028-144
[126] ‘Auto’ paper size and ‘Auto’ zoom.
If you selected ‘Auto’ for both Paper size and Zoom, the Table Edit button will
be enabled (see page 64).
3030-144
[127] ‘Auto’ selected for paper size and zoom: Table Edit button enabled.
3 Choose the Table Edit button to change the output paper size to be used if a
certain original size is detected.
132
Océ Job Director User Manual
The Automatic size and zoom window will appear.
3062-144
[128] Automatic size and zoom window.
The automatic size and zoom table determines the paper size for each image
size. By editing this table, you can define the zoom and paper size selection
behaviour for each image size. You have the following options:
■ S1-S1 maps a size to itself.
■ S1-S0 scales up the image. All A1 originals will be enlarged automatically
to A0.
■ S2-S3 scales down the image. All A2 originals will be reduced automatically
to A3.
The automatic size and zoom table is used for each file of the selected
program(s), that has both auto paper size and auto zoom selected.
4 Specify the automatic size and zoom settings and choose the OK button.
5 Specify the media type.
30-63-144
[129] Specifying one of the media types.
6 Specify the cutting method.
3064-144
[130] Cutting methods.
If you select ‘Custom’, you can specify the length of the copy material.
Printing matrix jobs
133
7 Specify the behaviour of the machine if the selected paper size is unavailable:
3065-144
[131] What the printer has to do if the paper size is unavailable.
You have the following options:
■ Select ‘Wait for exact size’ if you want your job to be suspended if the
required size is not available.
■ Select ‘Use larger size’ to allow printing on a larger paper size.
■ Select ‘Use any size’ to allow printing on a larger or smaller paper size.
8 Choose the OK button.
Shifting
For introductory information on shifting see ‘Shifting’ on page 67.
Note: Custom shifting is not supported for matrix jobs.Automatic shifting
however, is supported for all jobs.
▼
Shifting the image
1 Select ‘Show settings’ in the Programs area.
3116-144
[132] Showing program settings.
134
Océ Job Director User Manual
The program setting columns are displayed.
3119-144
[133] Program setting columns
2 Double-click the cell in the ‘Shifting’ column on the same row of the program
for which you want to specify the settings
or
select the appropriate cell and choose the
button on the QuickAccess bar
or
double-click the column heading entitled ‘Shifting’ to specify the settings for
all the programs in the matrix.
The Shifting dialog box is displayed.
3120-144
[134] Shifting dialog box
3 Specify Upper Left, Upper Right, Lower Left, Lower Right or Centre by
clicking the corresponding dot in the figure or by selecting an option from the
drop-down list box.
4 Choose the OK button.
Printing matrix jobs
135
Edge correction
By specifying edge correction, you can add an amount of copy material to the
leading or trailing edge of your printed copy.
Note: Enlarging the edge of the printed copy will be done after scaling or
rotation.
▼
Specifying edge correction
1 Select ‘Show settings’ in the Programs area.
3116-144
[135] Showing program settings.
The program setting columns are displayed.
3119-144
[136] Program setting columns
2 Double-click the cell in the ‘Edge correction’ column on the same row of the
program for which you want to specify the settings
or
select the appropriate cell and choose the
button on the QuickAccess bar
or
double-click the column heading entitled ‘Edge correction’ to specify the
settings for all the programs in the matrix.
136
Océ Job Director User Manual
The Edge correction dialog box is displayed.
3121-144
[137] Edge correction dialog box
3 Enter the values to add a strip to the leading or trailing edge.
4 Choose the OK button.
Stamp
For introductory information on stamps see ‘Stamp’ on page 73.
Note: For matrix jobs, you can only use printer stamps (if available on the
printer). Free text stamps and image stamps are not supported.
▼
Choosing a stamp
1 Select ‘Show settings’ in the Programs area.
3116-144
[138] Showing program settings.
Printing matrix jobs
137
The program setting columns are displayed.
3119-144
[139] Program setting columns
2 Double-click the cell in the ‘Stamp’ column on the same row of the program
for which you want to specify the settings
or
select the appropriate cell and choose the
button on the QuickAccess bar
or
double-click the column heading entitled ‘Stamp’ to specify the settings for all
the programs in the matrix.
138
Océ Job Director User Manual
The Stamp dialog box is displayed.
3122-144
[140] Stamp dialog box.
3 Click one of the following options in the Stamp area:
‘On, as on printer’ (use the default printer stamp).
‘On, custom’.
4 If you click ‘On, custom’, you can specify the number of the Printer stamp, its
position, size and/or grey scale.
5 Choose the OK button.
■
■
Copies, sorting, and banner page
For introductory information on copies, sorting and banner page, see ‘Copies,
sorting, and banner page’ on page 84.
▼
Specifying the number of copies, sorting mode, and banner page
1 Select ‘Show settings’ in the Programs area.
3116-144
[141] Showing program settings.
Printing matrix jobs
139
The program setting columns are displayed.
3117-144
[142] Program setting columns
2 Double-click the cell in the ‘Copies’ or ‘Sorting’ column on the same row of
the program for which you want to specify the settings
or
select the appropriate cell and choose the
button on the QuickAccess bar
or
double-click the column heading entitled ‘Copies’ or ‘Sorting’ to specify the
settings for all the programs in the matrix.
The Copies, sorting, and banner page dialog box is displayed.
3123-144
[143] Copies, sorting, and banner page dialog box
140
Océ Job Director User Manual
3 Specify the number of copies.
4 Select sorting by set or by page.
5 If required, click ‘Banner page per set’.
Note: This setting applies to all programs of the matrix ticket.
6 Choose the OK button.
Printing matrix jobs
141
Finishing
For introductory information on finishing see ‘Finishing’ on page 81.
▼
Specifying finishing
1 Select ‘Show settings’ in the Programs area.
3116-144
[144] Showing program settings.
The program setting columns are displayed.
3119-144
[145] Program setting columns
2 Double-click the cell in the ‘Folding’ column on the same row of the program
for which you want to specify the settings
or
select the appropriate cell and choose the
button on the QuickAccess bar
or
double-click a column heading entitled ‘Folding’ to specify the settings for all
the programs in the matrix.
142
Océ Job Director User Manual
The Finishing dialog box is displayed.
3124-144
[146] Finishing dialog box.
3 Specify one of the following options in the Folding area:
‘Off’
‘On, as on printer’
■ ‘On, custom’.
If required, select Punching or Reinforcing.
Note: The settings for Punching and Reinforcing exclude each other.
If you have selected ‘On, custom’ in the Folding area, you can specify the fold
method, First fold only, the fold length and the fold width.
If required, specify the binding edge and set the required binding edge width.
Note: If punching is active, the system automatically activates the binding
edge. You have to specify the binding edge width.
Choose the OK button.
■
■
4
5
6
7
Note: Reinforcing is only possible in combination with the Standard folding
method. When you select reinforcing with another folding setting the reinforce
option will be ignored.
Printing matrix jobs
143
Distribution notes
Distribution notes are instructions for the Repro Station operator about where
to deliver or what to do with the printed copies. You can specify different
distribution notes for each program of a matrix job.
▼
Specifying distribution notes
1 Select ‘Show settings’ in the Programs area.
3116-144
[147] Showing program settings.
The program setting columns are displayed.
3119-144
[148] Program setting columns
2 Double-click the cell in the ‘Distribution’ column on the same row of the
program for which you want to specify the settings
or
select the appropriate cell and choose the
button on the QuickAccess bar
or
double-click the column heading entitled ‘distribution’ to specify the settings
for all the programs in the matrix.
144
Océ Job Director User Manual
The Distribution notes dialog box is displayed.
3125-144
[149] Distribution notes dialog box.
3 Type the message in the edit box, e.g.
3126-144
[150] Giving distribution instructions.
4 Choose the OK button.
Printing matrix jobs
145
Print settings per job
This section describes those print settings, that can only be specified for all
programs in a matrix ticket.
User information
For each matrix job, you can specify your user name, account name, and job
name (see ‘User information’ on page 87).
▼
Specifying user information
1 Click the
button on the QuickAccess bar.
The User, account and job name dialog box appears.
3016-144
[151] User, account and job name dialog box
2 Enter your user, account and job name.
If you leave the job name field empty, the name of the job will be the name of
the file on the first row in the matrix.
Note: If in doubt, consult the Repro Station operator about your user and
account ID.
3 Choose the OK button.
Operator notes
For each matrix job, you can specify free text messages. An operator note
contains information for the operator about how to produce the print. For
example: ‘print this job before 4 p.m.’. Jobs with operator notes can be
recognised in the Repro Station queue.
146
Océ Job Director User Manual
▼
Typing notes for the operator
1 Click the
button on the QuickAccess bar.
The Operator notes dialog box appears.
3127-144
[152] Operator notes dialog box.
2 Type the message in the edit field, e.g.
3128-144
[153] Example of an operator note.
Note: You cannot use tabs.
3 Choose the OK button.
Printing matrix jobs
147
Printing
‘Printing’ a job using Job Director means that you submit the job to the Repro
Station queue. You can do this in two ways:
■
■
▼
by choosing the Send button in the bottom left corner of the ticket window
by choosing the Send command from the File menu.
Printing a job
1 Open a matrix ticket.
2 Choose the Send button or choose Send from the File menu.
3094-144
Send
button
[154] Printing a job using the Send button.
A progress indicator is displayed while the ticket is sent to Repro Station.
3090-144
[155] Sending matrix ticket to Repro Station in progress.
See also ‘Getting status from Repro Station’ on page 91.
148
Océ Job Director User Manual
Job Director
User Manual
Chapter 5
Customizing Job Director
Configuring the user interface
149
Job Director Configurer
You can use the Océ Job Director Configurer in combination with Océ Job
Director Release 3.0 (and upwards). It offers the possibility to enable and
disable certain functions in Job Director. For example, you can hide all
functions that are related to matrix jobs if you never use them, or you can
disable options that your Océ printer does not support. It is also possible to
prevent changing settings that never should be modified, like Calcomp
settings, thereby reducing the chance of errors.
So you use the Océ Job Director Configurer to customise your version of Job
Director. More details are provided via online help (see ‘Using Help’ on
page 33).
Note: If you are working with Job Director and some functions are not
available, but they are shown in the online help or the manual, they have been
disabled by the Configurer. You need to run Océ Job Director Configurer again
to enable these functions.
▼
Starting Job Director Configurer
1 Close all Job Director applications before running Job Director Configurer.
2 Run ‘ocejdgfg.exe’
The following window will appear:
3129-144
[156] Main configurer window
150
Océ Job Director User Manual
3 You can configure one of the following settings, by pressing the corresponding
button:
■ Tickets
■ Menu
■ Settings
If for example, you want to configure the setting options, press ‘Settings’.
The following window will appear:
3130-144
[157] Configurer window for setting options
Select or deselect setting options, and press OK.
4 If you want to select or deselect all configurer options, press the ‘Default’
button in the main configurer window. The following window will appear:
3131-144
[158] Configurer defaults window
Selecting a printer in this window enables all settings that are possible on the
selected printer. Settings that are not allowed are disabled.
Press ‘Enable all’ to enable all configurer options, or ‘Disable all’ to disable
all options, and press OK.
Customizing Job Director
151
5 Press ‘Save’ in the main configurer window to save your changes, or press
‘Undo’ to recover previous settings.
152
Océ Job Director User Manual
Job Director defaults
Job Director can save defaults for file types, e.g. HP-GL, CALS, CalComp,
and for print parameters, e.g users and accounts, operator notes. These default
settings are assigned to new job tickets, and they can be ‘loaded’ when you are
modifying a job ticket (see ‘Loading defaults’ on page 157).
You can specify defaults in two ways:
■
■
starting from the Defaults menu
starting from a matrix or job ticket window
Each way gives access to the same default settings
Specifying defaults, starting from the Defaults menu
After opening the Defaults menu, you can select a file type or print parameter
and specify the settings of your choice.
▼
Specifying defaults, starting from the Defaults menu
1 From the Defaults menu, choose a print parameter, e.g. Stamping.
The corresponding dialog box appears:
3132-144
[159] Default Stamp dialog box.
2 Specify the settings as you want them to be used by Job Director as defaults.
Customizing Job Director
153
3 Click the OK button.
4 Repeat the above steps to specify the print parameters of your choice.
Specifying defaults, starting from a matrix or job ticket window
Starting from a (matrix) job ticket window, you can save specified settings as
default settings.
▼
Specifying defaults, starting from a matrix or job ticket window
1 Open a job or matrix ticket.
2 Choose the
button in a job ticket or ‘Show settings’ in a matrix
ticket.
The ticket window unfolds and displays the extra settings, e.g.:
3133-144
[160] Job ticket window unfolded.
3 Select a file in the job ticket for which you wish to specify extra settings.
154
Océ Job Director User Manual
Attention: If you want to set the defaults for a program in a matrix ticket,
you have to select ‘Show settings’ for programs and select one program as
row heading, as shown in the illustration below.
3134-144
program
selected as
row heading
[161] Selecting a program to specify print settings and save the print settings as defaults.
Customizing Job Director
155
4 Select one of the settings from the drop-down list box ➊ or click the
corresponding button on the QuickAccess bar ➋.
3135-144
➋
➊
[162] Selecting a print parameter setting.
5 Specify the settings as you want them to be used by Job Director as defaults.
6 Repeat steps 4 and 5 to specify all the settings of your choice.
7 Leave the job ticket window open and choose Save active settings from the
Defaults menu.
156
Océ Job Director User Manual
The Save as defaults dialog box appears.
3136-144
[163] Save as defaults dialog box.
8 Click the check boxes of the settings which you wish to save as defaults.
9 Choose the OK button.
The selected settings are now saved as defaults. Later on, you can load these
defaults and apply them to print jobs.
10 Choose Save from the File menu.
Loading defaults
Loading defaults means that you:
■
■
▼
retrieve default settings which have previously been saved
apply these default settings to files in new job tickets.
Loading defaults
1 Open a job or matrix ticket.
2 Select one or more files or programs in the ticket for which you wish to load
the default settings.
3 Leave the ticket window open and select Load default settings from the
Defaults menu.
Customizing Job Director
157
The Load defaults dialog box appears.
3137-144
[164] Load defaults dialog box.
4 Click the check boxes of the settings for which you wish to load defaults.
5 Choose the OK button in the Load defaults dialog box.
The selected settings will return to their defaults in the ticket window.
6 Choose Save from the File menu.
Defining default folding
If you click the folding check box in the Settings area of the job ticket window,
folding will be switched on. You can define what folding method and various
other fold parameters will be used. Follow the procedure below:
▼
Defining default print parameters for folding
1 Choose Finishing from the Defaults menu.
158
Océ Job Director User Manual
The following dialog box appears:
3138-144
[165] Default extra settings dialog
2 Select the option 'Fold as on printer' if you want to use the folding method as
specified by the operator
or
select the option 'Fold custom' if you want to define all folding parameters
yourself.
3 Specify the fold method.
3139-144
[166] Available folding methods.
4 Specify the fold length and the fold width, if applicable.
5 If required, select ‘Binding edge’ and specify the required binding edge width.
6 Choose the OK button.
You now have defined a new folding method for all new job tickets.
▼
Checking the default print parameters
You can easily check how print parameters have been specified as defaults.
Proceed as follows:
1 Choose New from the File menu to open a new job ticket.
2 Add one random file to the job ticket.
This does not necessarily have to be a valid print file.
button.
The job ticket window unfolds and displays the extra settings.
3 Choose the Extra settings
Customizing Job Director
159
4 Choose Finishing from the drop-down list box in the job ticket window or click
the
button on the QuickAccess bar.
You can now see the finishing options as they have been defined as defaults.
3140-144
[167] Finishing window
5 Close the ticket without saving.
160
Océ Job Director User Manual
Using template job tickets
When you add files to a job ticket, the files will get the ticket’s default values.
By defining a template job ticket you streamline the use of Job Director. When
you add a file to such a template job ticket, the file will automatically get the
defaults that belong to this ticket. Every new job ticket you open will have the
last saved set of defaults. To return to your own set of defaults after you have
created a template it is recommended to save your own defaults in a template
as last step.
The procedure below creates three templates ‘client1.jt’, ‘client2.jt’, and
‘default.jt’. In ‘client1.jt’ and ‘client2.jt’ you save the settings for jobs for these
particular customers. The job ticket template ‘default.jt’ contains your settings
and the way in which you want new job tickets to open.
▼
Creating template job tickets
1 From the File menu choose New to open a job ticket.
2 Click the Add button and add a random file.
3 Define the file settings for typical files of this client.
4 Define the job settings for typical jobs of this client.
5 From the Defaults menu choose Save active settings.
The Save as defaults dialog box appears.
3136-144
[168] Save as defaults dialog box
Customizing Job Director
161
6 Select All settings.
7 Choose the OK button.
8 In the Files list box of the job ticket window, select the file which you have just
added.
9 Click the Delete button.
The ‘Delete file(s)’ window appears:
3047-144
[169] Delete file(s) window
10 Click Yes to delete the files from your job ticket.
The selected file is removed from the Files list box.
11 Save the job ticket as client1.jt.
12 Click the minimise button to reduce the ticket client1.jt to an icon.
13
14
15
16
17
18
19
20
21
22
23
24
The template client1.jt is on your desktop.
Repeat steps 1 to 10 for client2.jt
Save the job ticket as client2.jt.
Click the minimise button to reduce the ticket client2.jt to an icon.
From the File menu choose New to open a job ticket.
Click the Add button and add a random file.
Define the file settings you want to use as defaults.
Define your own default job settings.
From the Defaults menu choose Save active settings.
The Save active settings dialog box appears.
Click All settings.
Click the OK button.
In the Files list box of the job ticket window, select the file which you have just
added.
Click the Delete button.
The ‘Delete file(s)’ window appears:
3047-144
[170] Delete file(s) window
25 Click Yes to delete the files from your job ticket.
The selected file is removed from the Files list box.
162
Océ Job Director User Manual
26 Save the job ticket as default.jt
27 To use e.g. client1 settings, you open the client1.jt ticket. Then add files and
specify settings. Send the ticket to the printer, or save it under another name.
Note: New job tickets will get the last saved set of defaults, regardless the name
under which it is saved.
Customizing Job Director
163
Using tools
You can start other applications without leaving Job Director. This allows you
to for instance view, or convert images before they are printed. These
applications are called Tools in Job Director and they are listed in the Tools
menu.
The Tools menu lists either applications, or groups of applications. For
instance: Viewers, Convert, Access. Where Viewers is a group of viewers, and
Convert and Access are applications.
Applications can be associated with certain types of files through their
extension, for instance Viewer1 for all .TIF files, Viewer2 for all .CAL files
and Viewer3 for all other files.
The table below illustrates how the applications in the above example can be
grouped into Tools and how they can be linked to file extensions.
Tool
Extension
Application
Viewers
CAL
TIF
*
@@@
@@@
VIEWER1.EXE
VIEWER2.EXE
VIEWER3.EXE
CONVERT.EXE
MSACCESS.EXE
Convert
Access
There are two ways to start a Tool:
■ Select it from the Tools menu.
When a file in the 'Files' area was selected, the application will start and open
that file.
■ Double click on a file in the 'Files' area.
This feature must be enabled in the 'Configure tools' window.
The application will start and open the selected file.
If a group of applications is selected, e.g. Viewers, which application will be
started, depends on the extension with which it is associated.
Three types of extensions can be used.
'@@@', for an application which must be started without a file,
■ the exact extension (e.g. TIF, CAL), for only files with that extension,
■ an asterisk (*), for any file.
■
164
Océ Job Director User Manual
Applications associated with '@@@' have the highest priority, then the
programs coupled to the exact extension and finally applications associated
with an asterisk.
▼
Defining a tool
1 From the Configure menu, choose Tools.
The Configure Tools dialog box appears.
3141-144
[171] Configure Tools dialog box
2 In the New Menu Entry dialog box, type a descriptive name for a tool you wish
to define, e.g. ‘View file’.
3142-144
[172] Defining a new tool.
3 Choose the Add button.
Customizing Job Director
165
The Associations dialog box appears.
3143-144
[173] Tool association.
4 In the Extension box, type the extension of the print files, e.g. ‘txt’, ‘hgl’, ‘tif’
5
6
7
8
9
10
166
etc.
You can use the wildcard character * for all the extensions which you do not
want to specify explicitly.
Note: You can also enter the extension @@@. You can use this option to
start an application of your choice from within Job Director, but not open
the selected file. This may be handy for applications which are not directly
related to a print file, but which you frequently use in combination with Job
Director, e.g. Microsoft Calculator.
In the Command Line box, type the name of the program file, including the
path and extension.
For example, to add Microsoft Notepad, located in the directory named
C:\WINDOWS, type c:\windows\notepad.exe.
If you don’t know the name of the program file, choose the Browse button to
display a list of files and directories. Select the appropriate filename from the
list, and then choose the OK button.
In the Arguments box, define the necessary arguments. Arguments are fixed
parameters that are used when the application starts. If you need to specify
arguments, this information is supplied with the tool.
Click Add in the Associations dialog box.
Repeat steps 4to 7 to make all the necessary associations.
You can make as many associations as you want. For example, you may have
a number of viewing applications at your disposal, each of which can be used
to view specific file types. You may then want to use the tool Viewers in
different ways, depending on the extension of the selected file, e.g. start an
application to view TIFF files (*.tif) and start another application to view
HP-GL (*.hpg) files.
Click the OK button in the Associations dialog box.
Repeat step 2 to 9 to define all the tools of your choice.
You can define up to 10 tools.
Océ Job Director User Manual
11 Arrange the defined tools in the order of your choice by selecting a tool in the
Menu Contents box and then clicking the Up or Down button.
The first, i.e. the tool which appears on top of the list, is the default tool. This
tool will also be displayed as such in the Tools menu.
3141-144
3144-144
[174] The first tool in the Menu Contents text box is the default tool and appears as the first menu
item of the Tools menu.
12 If necessary, select the option ‘Double click on filename = start first tool’.
This option means that, if you double-click a print filename in a job, the first
(default) tool will start and open the selected file automatically.
13 Click the OK button in the Configure Tools dialog box.
▼
Starting a tool
1 Open a job or matrix ticket.
2 Select a file in the Files area.
Customizing Job Director
167
3 From the Tools menu, choose a tool.
3145-144
➌
➊
➋
[175] Starting a tool: ➊ open a job, ➋ select a file in the ticket and ➌ choose a tool.
If you want to start the default tool, you can also double-click the filename.
The associated application then starts from within Océ Job Director.
If you quit the application, you will return to Océ Job Director.
168
Océ Job Director User Manual
▼
Changing a file association
1 From the Configure menu, choose Tools.
The Configure Tools dialog box appears.
3141-144
[176] Configured tools.
2 Select the tool in the Menu Contents box of which you want to change the file
association.
3 Choose the Associate button.
The Associations dialog box appears.
3143-144
[177] Tool association.
4 In the Extension box, type the extension which you want to associate with a
different application.
You can use the wildcard character * for all the extensions which you do not
want to specify explicitly.
The name, path and extension of the existing associated application, if any,
appears in the Command Line box.
5 In the Command Line box, delete the name, path and extension of the program
file.
You now have the following option:
■ If you just want to delete the file association, proceed with step 8.
■ If you want to create a new association, proceed with step 6.
Customizing Job Director
169
6 In the Command Line box, type the name, path and extension of the new
program file.
If you don’t know the name of the program file, choose the Browse button to
display a list of files and directories. Select the appropriate filename from the
list, and then choose the OK button.
7 In the Arguments box, specify the necessary arguments.
8 Click the OK button in the Associations dialog box.
9 Click the OK button in the Configure Tools dialog box.
170
Océ Job Director User Manual
Job Director
User Manual
Appendix A
Overview and tables
171
Zoom factors
You can specify the desired zoom factor for a given output paper format, if you
use the tables below:
to
→
A0
A1
(841 x1188mm) (594x841mm)
100.0
70.7
141.4
100.0
200.0
141.4
283.5
200.0
400.0
283.5
from
↓
A0
A1
A2
A3
A4
A2
(420x594mm)
50.0
70.7
100.0
141.4
200.0
A3
(297x420mm)
35.3
50.0
70.7
100.0
141.4
A4
(210x297mm)
25.0
35.3
50.0
70.7
100.0
[178] Zoom factor (percentage) table Standard size
to
→
E
(34x44")
100.0
154.6 (129.4)
200.0
309.7 (258.8)
400.0 (400.7)
from
↓
E
D
C
B
A
D
(22x34")
64.7 (77.3)
100.0
129.4 (154.6)
200.4 (200.0)
258.8 (309.7)
C
(17x22")
50.0
77.3 (64.7)
100.0
154.8 (129.4)
200.0 (200.4)
B
(11x17")
32.3 (38.6)
49.0 (50.0)
64.7 (77.3)
100.0
129.2 (154.8)
A
(8.5x11")
25.0
38.6 (32.3)
50.0 (49.9)
77.4 (64.7)
100.0
B+
(12x18")
33.4 (37.5)
50.0
66.7 (74.9)
100.0
133.2 (149.8)
A+
(9x12")
25.1 (25.0)
37.5 (33.4)
50.1
75.1 (66.7)
100.0
[179] Zoom factor (percentage) table USA 8.5" series.
to
→
from
↓
E+
D+
C+
B+
A+
E+
(36x48")
100.0
149.8 (133.4)
200.0 (199.8)
299.7 (266.7)
399.1 (399.7)
D+
(24x36")
66.7 (75.0)
100.0
133.5 (149.8)
200.0
266.5 (299.7)
C+
(18x24")
50.0
74.9 (66.7)
100.0
149.8 (133.5)
199.6 (200.0)
[180] Zoom factor(percentage) table USA 9" series.
Note: In the elements of the tables 179 and 180 the first value is the required
width zoom factor. The value between parentheses is the required length zoom
factor. Advice: choose the smallest value. This guarantees no information loss.
172
Océ Job Director User Manual
Job Director
User Manual
Appendix B
Miscellaneous
173
Notation conventions
There are a number of notation conventions used in this manual. This
consistent style enables you to quickly become conversant with the use of this
manual and consequently the Job Director.
Description Each section or subsection contains a description of the feature or
operation identified in the title. It might also include possible applications, as
well as any guidelines that you should bear in mind.
Procedures A description is followed by a procedure. A procedure always
begins with a phrase which briefly describes the procedure (for example,
Loading paper:) followed by a series of numbered steps that take you, step by
step, through all phases of performing the operation.
Figures and tables Figures and tables are titled and numbered sequentially
throughout this manual. Figures include pictures of product components,
examples, and diagrams of concepts discussed in the description.
Attention getters There are several types of information to which we draw
your attention. This information is classified as follows:
Note: In a ‘Note’, information is given about matters which ensure the proper
functioning of the copier, but useful advice concerning its operation may also
be given.
Attention: The information that follows ‘Attention’ is given to prevent
something (your copy or original, the copier, etc.) being damaged.
Caution: The information that follows ‘Caution’ is given to prevent you
suffering personal injury.
174
Océ Job Director User Manual
Reader’s comment sheet
Have you found this manual to be accurate?
❏ Yes
❏ No
Could you operate the product after reading this manual?
❏ Yes
❏ No
Does this manual provide enough background information?
❏ Yes
❏ No
Is the format of this manual convenient in size, readability and arrangement
(page layout, chapter order, etc.)?
❏ Yes
❏ No
Could you find the information you were looking for?
❏ Always
❏ Most of the times
❏ Sometimes
❏ Not at all
What did you use to find the required information?
❏ Table of contents
❏ Index
Are you satisfied with this manual?
❏ Yes
❏ No
Thank you for evaluating this manual.
If you have other comments or concerns, please explain or suggest
improvements overleaf or on a separate sheet.
7056115
Miscellaneous
175
Comments:
------------------------------------------------------------------------------------------------------------------------------------------------------------------------------------------------------------------------------------------------------------------------------------------------------------------------------------------------------------------------------------------------------------------------------------------------------------------------------------------------------------------------------------------------------------------Date:
This reader’s comment sheet is completed by:
(If you prefer to remain unknown, please do fill in your occupation)
Name:
Occupation:
Company:
Phone:
Address:
City:
Country:
Please return this sheet to:
Océ-Technologies B.V.
For the attention of ITC user documentation.
P.O. Box 101,
5900 MA Venlo
The Netherlands
176
Océ Job Director User Manual
Addresses of local Océ organisations
Océ-Australia Ltd.
P.O.Box 196
Cheltenham VIC 3192
Australia
Océ-Österreich GesmbH
Postfach 95
1233 Vienna
Austria
Océ-Belgium N.V./S.A.
Avenue J.Bordet 32
1140 Brussels
Belgium
Océ-Brasil Comércio e Industria Ltda.
Caixa Postal 3187
01060-970 Sao Paulo, SP
Brazil
Océ-Canada Inc.
525, Logan Avenue,
Toronto, Ontario M4K 3B3
Canada
Océ Office Equipment (Beijing) Co Ltd.
Xu Mu Cheng
Chaoyang District
Beijing 100028
China
Océ-âeská republika s.r.o.
K Ry‰ánce 16
14754 Praha 4
Czech Republic
Océ-Danmark A.S.
Kornmarksvej 6
2605 Brondby
Denmark
Miscellaneous
Océ-France S.A.
32, Avenue du Pavé Neuf,
93882 Noisy-le-grand
Cedex
France
Océ-Deutschland GmbH
Postfach 101454
45481 Mülheim an der Ruhr
Deutschland
Océ (Hong Kong China) ltd.
Post Box 30971
Causeway Bay Post Office
Hong Kong
Océ-Hungária Kft.
P.O.B. 237
1244 Budapest
Hungary
Océ-Italia S.p.A.
Casella Postale
10.230 Milano
Italia
Océ Systems (Malaysia Sdn. Bhd.
#3.01, Level 3, Wisma Academy
Lot 4A, Jalan 19/1
46300 Petalig Jaya
Selangor Darul Ehsan
Malaysia
Océ-Nederland B.V.
P.O.Box 800
5201 AV Den Bosch
The Netherlands
177
Océ Norge A/S
Postboks 53, Grefsen
0409 Oslo
Norway
Océ-Poland Ltd.
Lopuszanska 53
02-232 Warszawa
Poland
Océ-Lima Mayer S.A.
Avenue Infante D.Henrique
Lote 309 - Cabo Ruivo
1900 Lisboa
Portugal
Océ (Far East) Pte. Ltd./
Océ (Singapore) Pte. Ltd.,
1 Clementi Loop
#02-10 Margateo Districentre
Clementi West Distripark
Singapore 129808
Océ España SA
Business Park MAS BLAU
Osona 2
08820 El Prat del Llobregat (Barcelona)
Spain
Océ-Schweiz AG
Postfach 114
CH-8152 Glattbrugg
Switzerland
Océ-Svenska AB
P.O.box 1231
164 28 Kista
Sweden
Océ (Taiwan) Ltd.
No. 99-24 Nan-Kang Road
Sec 2
Taipei
Taiwan, ROC
178
Océ Job Director User Manual
Océ (Thailand) Ltd.
16th Floor, B.B. Building
54 Asoke Road, Sukhumvit 21
Bangkok 10110
Thailand
Océ-U.K.Ltd.
Langston Road
Loughton Essex IG10 3SL
United Kingdom
Océ-USA Inc.
5450 North Cumberland Av.
Chicago, Ill. 60656
U.S.A.
Index
A
account name
defining default 23
specifying in job ticket 87
add button
in job ticket 47
in matrix ticket 101
in the programs area of a matrix ticket 106
adding
files to matrix ticket using file manager 102
files to matrix ticket using the add button 101
programs to a matrix ticket 106
applying programs to files in a matrix ticket 108
associating tools 169
auto paper size
in job ticket 61
in matrix ticket 132
auto zoom
in job ticket 61
in matrix ticket 132
automatic size and zoom table 30, 64, 133
B
banner page
specifying in job ticket 85
specifying in matrix ticket 139
binding edge
specifying default 159
specifying in job ticket 83
specifying in matrix ticket 143
C
check plot
defined 13
versus job ticket 13
closing
job ticket 42
Index
matrix ticket 96
copy material
specifying in job ticket 62
specifying in matrix ticket 130
correction of the edge
specifying in job ticket 69
specifying in matrix ticket 136
D
data format
specifying in job ticket 55
specifying in matrix ticket 117
defaults
checking print parameters 159
defining ~ for print parameters 153
loading 157
specifying, starting from the defaults menu
153
specifying, starting from ticket window 154
deleting
files from a job ticket 49
files from a matrix ticket 105
job ticket 43
matrix ticket 98
pen settings in matrix ticket 123
programs from matrix ticket 113
distribution notes
including in job ticket 89
including in matrix ticket 144
E
edge correction
specifying in job ticket 69
specifying in matrix ticket 136
error
file could not be opened 95
job not sent 95
extra settings
open button 51
specifying 51
179
F
H
file
help, using 33
adding to job ticket using add button 46
adding to job ticket using file manager 47
adding to matrix ticket using add button 101
adding to matrix ticket using file manager
102
changing association of tools 169
could not be opened 95
deleting from matrix ticket 105
excluding from programs in matri 108
including in programs of matrix tickets 108
rearranging order in job ticket 48
rearranging order in matrix ticket 104
removing from job ticket 49
specifying settings in matrix ticket 115
specifying type 26
specifying type in job ticket 55
specifying type in matrix ticket 117
finishing
specifying in job ticket 82
specifying in matrix ticket 142
first fold 81
fold length
specifying in job ticket 83
specifying in matrix ticket 143
fold method
selecting in job ticket 83
selecting in matrix ticket 143
fold width
specifying in job ticket 83
specifying in matrix ticket 143
folding
column in matrix ticket 142
defining default parameters 158
overview of methods 81
portrait-oriented drawings with legend on top
71
selecting 30
selecting in job ticket 82
specifying default binding edge 159
specifying default length 159
specifying default method 159
specifying default width 159
free text stamp 75
180
Océ Job Director User Manual
I
image shifting
specifying in job ticket 67
specifying in matrix ticket 134
image stamp 78
inch, changing into mm in dialog boxes 23
interface language, specifying 21
J
job director
quitting 32
starting 20
job director, defined 9
job name, specifying in job ticket 87
job not sent 95
job ticket
adding files using file manager 47
adding files using the add button 46
closing 42
defined 13
deleting 43
deleting files from ~ 49
opening an existing 43
rearranging files 48
L
language, specifying in windows and dialog boxes
21
legends, checking positioning when folding 81
M
machine monitor
explained 10
matrix job, printing 148
matrix ticket
adding files using file manager 102
adding files using the add button 101
adding programs 106
applying programs to files 108
banner page 139
closing 96
defined 14
deleting 98
deleting files from ~ 105
distribution notes 144
edge correction 136
excluding files from programs 108
file settings 115
finishing 142
image shifting 134
including files in programs 108
media 130
mirror 125
number of copies 139
opening an existing 98
opening new 94
paper size 130
pen settings 119
rearranging files 104
rearranging programs 112
rotation 125
saving 95
selecting pen settings 123
sorting mode 139
specifying program settings 128
stamp 137
zoom 130
measurement unit, specifying default 23
media
specifying in job ticket 62
specifying in matrix ticket 130
mirror
specifying in job ticket 71
specifying in matrix ticket 125
mm, changing into inches in dialog boxes 23
N
notes
distribution in job ticket 89
distribution in matrix ticket 144
operator in job ticket 90
Index
operator in matrix ticket 147
number of copies
specifying in job ticket 85
specifying in matrix ticket 139
O
ocejd.ini 20
opening
existing matrix ticket 98
new matrix ticket 94
operator notes
defining in job ticket 90
defining in matrix ticket 147
example 147
order of files
changing in job ticket 48
changing in matrix ticket 104
P
paper size
in menus and dialog boxes 24
specifying in job ticket 62
specifying in matrix ticket 130
pen pattern
specifying in job ticket 58
specifying in matrix ticket 122
pen settings
deleting in job ticket 59
deleting in matrix ticket 123
specifying in job ticket 57
specifying in matrix ticket 119
pen width
defining in job ticket 58
defining in matrix ticket 122
print order of files
changing in job ticket 48
changing in matrix ticket 104
print parameter
defining defaults 153
example 153
printer stamp 73
programs
rearranging order in matrix tickets 112
181
specifying settings in matrix ticket 128
punching
selecting in job ticket 81
selecting in matrix ticket 143
Q
queue, viewing 92
quitting job director 32
specifying in job ticket 67
specifying in matrix ticket 134
sorting mode
specifying in job ticket 85
specifying in matrix ticket 139
stamp
free text 73
image 73
printer 73
specifying in matrix ticket 137
starting job director 20
stopping job director 32
R
rearranging
files in job ticket 48
files in matrix ticket 104
programs in matrix tickets 112
reference, unresolved when printing 95
reinforcing
selecting in job ticket 81
selecting in matrix ticket 143
removing
files from job ticket 49
files from matrix ticket 105
repro station
explained 10
getting status 92
interaction with job director 10
interaction with machine monitor 10
viewing queue 92
repro station queue
defined 21
specifying 22
viewing 92
retrieving defaults 157
rotation
specifying in job ticket 71
specifying in matrix ticket 125
T
template job ticket, creating 161
ticket. <emphasis>see job ticket or matrix ticket
tool
changing file association 169
default 167
defining 165
first 167
starting 167
tools 164
type of file
specifying in job ticket 26
specifying in matrix ticket 117
U
unit of measurement, specifying default 23
unresolved reference when printing 95
user information
specifying in job ticket 87
specifying in matrix ticket 146
user name
defining default 23
specifying in job ticket 87
specifying in matrix ticket 146
S
saving
job ticket 41
matrix ticket 95
shifting image
182
Océ Job Director User Manual
Z
zoom
factors, overview 172
specifying in job ticket 62
specifying in matrix ticket 130
zoom factor 172
Index
183


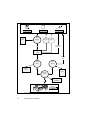
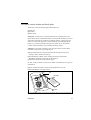
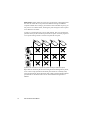


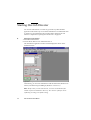
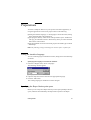


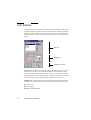


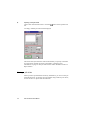
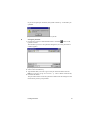
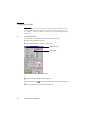

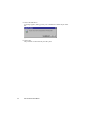
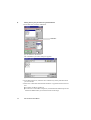
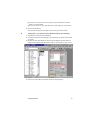
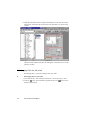
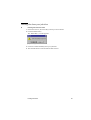
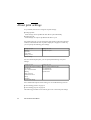
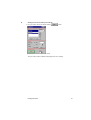


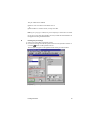


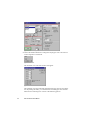
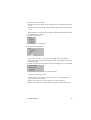
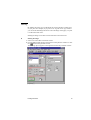
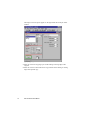

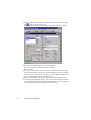

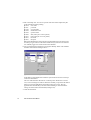
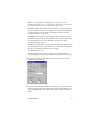

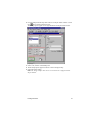


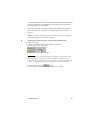
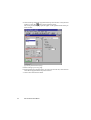
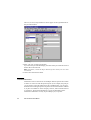
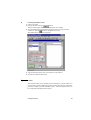
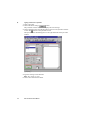

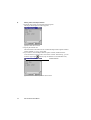
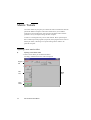
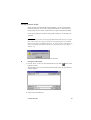
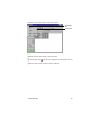


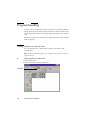
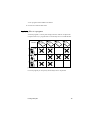
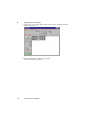

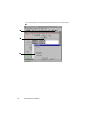

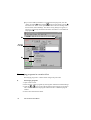


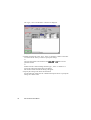

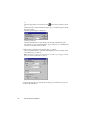

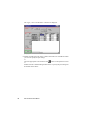


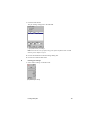

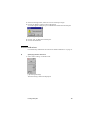
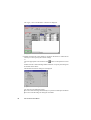

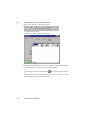
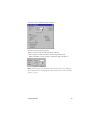

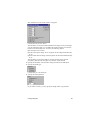
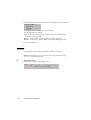
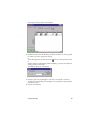
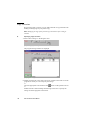
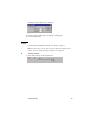


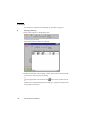
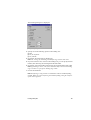
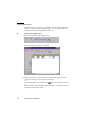
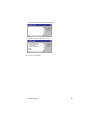
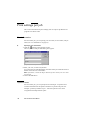
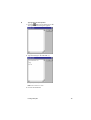


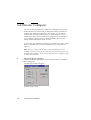


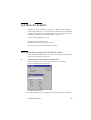
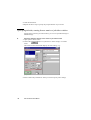
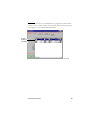
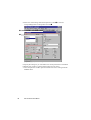


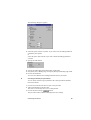


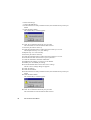


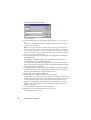
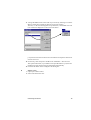
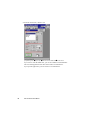
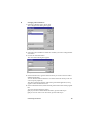


![User's Manual[FBD1] ProMax ProMedia Converter](http://vs1.manualzilla.com/store/data/006881326_1-9e3a0042b45fc9f5f8ff38953ecf78a2-150x150.png)