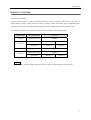
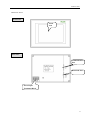
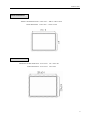
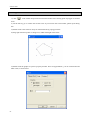
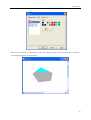
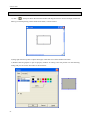
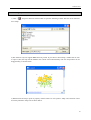
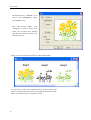
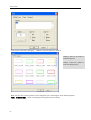
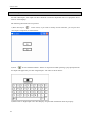
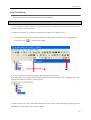
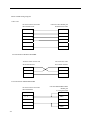
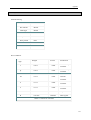
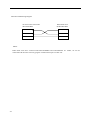
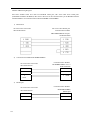
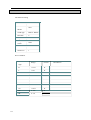
1
TP Series Touch Screen User’s Manual Ying's Electronic Co., Ltd Human Machine Interface PREFACE TP Series Touch Screen 1 ———————————————————— SAFTY PRECAUTIONS 3 ———————————————————— User’s Manual HARDWARE PARTS 4 ———————————————————— SOFTWARE PARTS 21 ———————————————————— APPLICATION PARTS 221 221 ———————————————————— Version 2.0 Revision data 11/2007 APPENDIX ———————————————————— 225 This manual contains notices which you should observe to ensure your own personal safety, as well as to protect the product and connected equipment. These notices are highlighted in the manual by a warning triangle. Please obey the essential electric operation rules which have not indicated in this manual. DANGER CAUTION Please comply with these notices, incorrect handling may cause system working incorrect or abnormal. Severely, may result in property damage. This device and its components may only be used for the applications described in the catalog or the technical descriptions, and only in connection with devices or components from other manufacturers which have been approved or recommended by Thinget. This product can only function correctly and safely if it is transported, stored, set up, and installed correctly, and operated and maintained as recommended. Thinget Electronic Co., Ltd. All rights reserved The reproduction, transmission or use of this document or its contents is not permitted without express written authority. Offenders will be liable for damages. All rights, including rights created by patent grant or registration of a utility model or design, are reserved. Disclaim of Liability We have checked the contents of this manual for agreement with the hardware and software described. Since deviations cannot be precluded entirely, we cannot guarantee full agreement. This manual is subject to change without notice. 2007.11 Table of Contents PREFACE ...............................................................................................................................................1 SAFTY PRCAUTIONS………………………………………………………………………………..3 HARDWARE PARTS………………………………………………………………………………….4 1 PRODUCT OVERVIEW………………………………………………………………………...….5 1-1. Features .....................................................................................................................................6 1-2. Workflow ..................................................................................................................................7 2 GENERAL SPECIFICATION ..........................................................................................................8 3 COMPONENT NAMES .................................................................................................................12 4 EXTERNAL DIMENSIONS ..........................................................................................................16 5 INSTALLATION METHOD...........................................................................................................18 6 PORT INSTRUCTION ...................................................................................................................19 7 REGULAR MAINTANCE AND CLEANING...............................................................................20 SOFTWARE PARTS............................................................................................................................21 1 GRAPHICS SOFTWARE ...............................................................................................................22 1-1. Installing The Software...........................................................................................................22 1-2. Components Of The Software Screen.....................................................................................24 2 GETTING STARTED .....................................................................................................................25 2-1. Creating A New Project...........................................................................................................25 2-2. Editing Project ........................................................................................................................30 2-2-1 Basic operation of editing screens and windows ..................................................................30 2-2-2 Downloading Data................................................................................................................38 3 INTRODUCING MENU ................................................................................................................39 3-1. File ..........................................................................................................................................39 3-2. Edit..........................................................................................................................................51 3-3. View ........................................................................................................................................52 3-4. Part ..........................................................................................................................................53 3-5. Tool .........................................................................................................................................59 3-6. Window...................................................................................................................................61 3-7. Help.........................................................................................................................................61 3-8. Other Operations.....................................................................................................................62 4 MAKING GRAPHICS....................................................................................................................63 4-1. Line .........................................................................................................................................63 4-2. Arc...........................................................................................................................................67 4-3. Rectangle.................................................................................................................................76 4-4. Ellipse .....................................................................................................................................78 4-5. Fold/Polygon...........................................................................................................................79 4-6. Polygon Block.........................................................................................................................82 4-7. Three-Dimensional Frame ......................................................................................................84 4-8. Inserting Map ..........................................................................................................................85 4-9. Changing Dimension ..............................................................................................................87 4-10. Moving Object ......................................................................................................................88 4-11. Cut, Copy and Paste for the selected object ..........................................................................89 4-12. Public Unit and Private Unit .................................................................................................90 4-13. Lock ......................................................................................................................................92 4-14. Moving Layer........................................................................................................................93 4-15. Adjusting Graphics................................................................................................................95 5 BASIC COMPONENTS .................................................................................................................97 5-1. Text .........................................................................................................................................97 5-2. Dynamic Text........................................................................................................................102 5-3. Variational Text .....................................................................................................................104 5-4. Lamp .....................................................................................................................................105 5-5. Button....................................................................................................................................108 5-6. Button Lamp ......................................................................................................................... 111 5-7. Screen Jump .......................................................................................................................... 114 5-8. Digital Display ...................................................................................................................... 116 5-9. Alarm Display ....................................................................................................................... 118 5-10. Text Display ........................................................................................................................ 119 5-11. Set Data ...............................................................................................................................120 5-12. Text Input ............................................................................................................................122 5-13. Set Data...............................................................................................................................123 5-14. Digital Keyboard.................................................................................................................125 5-15. ASCⅡ Keyboard ...............................................................................................................126 5-16. User Input............................................................................................................................127 5-17. Bar Graph............................................................................................................................128 5-18. Dynamic Map......................................................................................................................130 5-19. Call Window .......................................................................................................................132 5-20. Window Button ...................................................................................................................134 5-21. Down Recipe.......................................................................................................................135 5-22. Up Recipe............................................................................................................................138 5-23. Function ..............................................................................................................................139 5-24. Function Field .....................................................................................................................150 5-25. Discrete Column Map .........................................................................................................152 5-26. Continue Cloumn Map........................................................................................................154 6 SPECIAL PART-DISPLAY...........................................................................................................156 6-1. Date.......................................................................................................................................156 6-2. Clock.....................................................................................................................................157 6-3. Buzzer ...................................................................................................................................158 6-4. LCD Light Lamp...................................................................................................................160 6-5. Instrument .............................................................................................................................161 6-6. Valve .....................................................................................................................................164 6-7. Pipe .......................................................................................................................................167 6-8. Pump .....................................................................................................................................170 6-9. Auto Wind .............................................................................................................................172 6-10. Motor ..................................................................................................................................174 6-11. Retort...................................................................................................................................176 6-12.Invert Alarm Information .....................................................................................................178 6-13. Real Time Trend..................................................................................................................180 6-14. History Data Map................................................................................................................183 6-15. Event Button .......................................................................................................................187 6-16. Display Real Time Event ....................................................................................................189 6-17. History Event ......................................................................................................................192 6-18. Sample Save........................................................................................................................195 7 ALARM WINDOW ......................................................................................................................197 8 PRINT WINDOW .........................................................................................................................199 8-1. Create A New Window..........................................................................................................199 8-2. Connection of the printer ......................................................................................................201 9 SIMULATE FUNCTION ..............................................................................................................202 9-1. Simulate Offline....................................................................................................................202 9-2. Simulate Online ....................................................................................................................204 9-3. Configuration ........................................................................................................................207 10 SPECIAL FUNCTIONS .............................................................................................................209 10-1. TP Series Internal Object ....................................................................................................209 10-2. Communication between TP and inverters .........................................................................214 APPLICATIONS................................................................................................................................221 1 TP SEREIES OPERATE METHODS ...........................................................................................222 1-1. TP series online communication ...........................................................................................222 1-2. TP Series Touch Screen Password ........................................................................................222 APPENDIX .........................................................................................................................................225 1 PLC CONNECTING METHODS ................................................................................................225 1-1. Thinget FC/XC Series...........................................................................................................225 1-2. Mitsubishi FX Series.............................................................................................................227 1-3. Siemens S7-200/300/400 Series............................................................................................229 1-4. OMRON C Series .................................................................................................................230 1-5. Koyo S Series........................................................................................................................232 1-6. Delta DVP series...................................................................................................................235 1-7. LG Master-k series PLC .......................................................................................................237 1-8. Matsushita FP series PLC .....................................................................................................240 1-9. Schneider PLC ......................................................................................................................242 1-10. Fatek FB series PLC ...........................................................................................................243 1-11. Vigor VB series PLC...........................................................................................................245 1-12. Fuji SPB series....................................................................................................................247 1-13. Keyence KV series PLC......................................................................................................249 1-14. Emerson EC20 series PLC..................................................................................................250 1-15. OEMax NX7 series .............................................................................................................252 Preface PREFACE —Essential introduction about this manual Thank you for buying TP series touch screen made by Xinje Electronic Co.,Lt ,this manual should be read and understood before attempting relevant operation. Purpose of this manual This manual offers guidance and information about how to use TP correctly and maintenance, including application situations, operations, transportation, storage, installation, maintenance, etc. This manual mainly contains four parts: hardware, software, application and appendix. Hardware Parts: Describing the essential features, specifications, dimensions, installations and communication connecting of TP series. Software Parts: Introducing how to use graphics software TouchWin2.7 and connect it with TP. Application Parts: Illustrating how to use TP with practical cases to make user understand deeply. Appendix Parts: Introducing the connection methods between TP and other popular types of PLC. Qualified Personnel This manual is intent for the following personnel: Terminal Users Debug Engineers Technique Supporters Please read and understand the safety precautions very carefully before operating or debugging. Validity of the Manual This manual may only be used for TP series touch screen and its graphic software made by Xinje. Electronic Documents In addition to our written manuals, we offer electronic documentations of our products by the following ways. User CD There are software, user manual and application tip of relevant products. 1 Preface Website Please visit Ying's Electronic Co.,Ltd. at www.yingselectric.com to obtain all variable electronic documents. Contact Welcome to contact us if you have any problem. Tel: 0577-62791815 62766815 Fax: 0577-62791825 Address:Room 602, No.252 North Liuqing Road, Liushi town, Yueqing City, Zhejiang Province 325604 China 2 Safety Precautions SAFTY PRECAUTIONS -- Essential introduction about product operation Please read this manual very carefully before operation and please operate correctly while paying close attention to all the safety points. The following contents only used for TP series touch screen. Please keep this manual properly, place it where can be read easy for the operators and make sure hand it to terminal user. ◎ Notice Items ◎ Notice ● Please do not bind power line and communication cable together or let them too close, keep at least 10 cm distances between them. ● Please do not install experimental module or refit wiring. Otherwise it may cause malfunction, error action, damage or fire. ● Please shut off the power when there is abnormal smell or voice with TP products. (The briefness call made by buzzer after electrifying is normal) ● Please do not strike the touch panel with a hard or pointed object, or press on the touch panel with too much force or with pen, screw, since these may damage the touch panel and cause malfunction. ● Please tighten the screws while installation. If these screws are not tightened firmly, it may cause short-circuit, fire, or malfunction. ● Please transport, store, set up, installed and maintain the product correctly, otherwise it may damage the touch panel. Danger ● Please be sure the TP's rated voltage is within the designated range, and that the power terminal lines are correctly attached. Otherwise, it may cause damage. ● Please do not touch terminals when power on to avoid causing an electric shock. ● Please do not open the cover board. ● Please cut off all the power while installing or disassembling TP products, otherwise it may cause misoperation and malfunction. ● Please use TP series touch screen in the certain environmental conditions according to this manual , it may cause accident. ● Please do not use the products in the environment with high frequency radiation, high magnetic field or other interferences. 3 Hardware Parts HARDWARE PARTS-- Features, Specifications, Dimensions and Application notes of TP series touch screen 4 1. Product Overview 2. General Specifications 3. Parts Description 4. External Dimension 5. Installing Method 6. Port Instruction 7. Daily Maintenance and Cleaning Hardware Parts 1 PRODUCT OVERVIEW Summary of products TP series touch screen is a device connecting with PLC, inverter and other control devices to carry out digital display, monitor, switch control and other operations. With visual menu, good compatibility, high performance-price ratio, they have been the optimal choice of middle and small size control system. According to product’s sizes, operation modes, there are models in the following table: Display Size Display Material TP Series 4.7 Inch Blue-white LCD TP460-L Blue-white LCD TP560-L TP560-G 256-Color TP560-T TP561-T 5.7 Inch 7.0 Inch 10.4 Inch 256-Color TP760-T Black-white LCD TPA60-L 256-Color TPA60-T TPA61-T NOTE All the models’ working voltage in the above table is DC24V unless otherwise special noted. 5 Hardware Parts 1-1. Features Thinget TP series touch screen contain products with various dimensions and functions as shown below. Moreover, user friendly graphic editor supporting simulate on line/off line and configuration function will make mastery easier for your control system. Display Various models: product size from 4.7” to 10.4” Abundant displays: Blue-white LCD, 4 bits grey scale, 16 bits grey scale, 256-color, support BMP format with vivid screen. Multiplicate languages: simplified Chinese, traditional Chinese, English, Japanese, Korean and so on with font setting freely. Expanding capacity: Add more screens and data Control Controlling dynamic digital display and monitor, bar graphics, real trend map, discrete/continues map and switch. Alarming at real time and record history alarm Picking up data with timer or setting condition Setting three grades password limitation Supporting simulate on line /off line and configuration function which can simulate operations without connecting TP. Communication Double-ports communication separately which can connect two different devices simultaneously. Driving panel printer directly and make the process low cost and flexible. Supporting freedom protocol and drive program compiled by end-users. 6 Hardware Parts 1-2. Workflow The main operating steps of TP series touch screen are shown in the following figure: Installing TP software in PC Editing project graphics in TP software Simulate off line Simulating TP action in graphics software and observing the effect. Electrifying TP and connecting PC and TP Simulate on line Connecting PC and PLC with cable and then simulating TP action in PC. Downloading project data to TP Electrifying PLC and connecting TP and PLC Communicating TP with PLC 7 Hardware Parts 2 GENERAL SPECIFICATION TP460 series Item Electrical Features Port Environment Screen properties Memorizer Configuratio n 8 TP460 Input Voltage DC20-DC28V Current Consumption ﹤180mA Allowable Momentary Power-cut Less than 20ms Voltage Endurance AC1000V-10mA 1 minute(signal and time) Insulated Resistance DC500V-About 10MΩ(signal and time) Communication Port Support RS-232/RS-422/RS-485 Download Port Support RS-232 Operating Temperature 0-60℃ Storage Temperature -20-60℃ Ambient Humidity 20-85% (Non condensing, dry bulb) Vibration Resistance 10-25HZ(X,Y,Z direction for 30 minutes 2G) Interference Rejection Noise voltage:1000Vp-p、pulse duration 1us、1 minute Surrounding Atmosphere free of corrosive gasses Protect Configuration Accord with IP65 Type Monochrome Using Life 50000 hours upwards,environmental temperature 25 ℃,24hours running Display Area 240*128 Lighteness Contrast Adjustable (by regulation resistance) Language setting Chinese: simplified/traditional English ,Japanese, Korean and others Character dimension Discretional font, Discretional dimension Touch panel Matrix type touch Screen 2MB Data 1KB Cooling Manner Natural air cooling External Dimensions(mm) 173.2*121.4*45 Cutout Dimensions (For front panel) (mm) 164*112 Hardware Parts TP560/561 series Model TP560-L TP560-G TP560-T TP561-T Item Electrical Features Port Environmen t Input Voltage DC20-DC28V Current Consumption <240mA Allowable Momentary Power-cut Less than 20ms Voltage Endurance AC1000V-10mA 1 minute(signal and time) Insulated Resistance DC500V-About 10MΩ(signal and time) Communication Port Support RS-232/RS-422/RS-485 Download Port Support RS-232 Operating Temperature 0-50℃ Storage Temperature -20-60℃ Ambient Humidity 20-85% (Non condensing, dry bulb) Vibration Resistance 10-25HZ(X,Y,Z direction for 30 minutes 2G) Interference Rejection Noise voltage:1000Vp-p、pulse duration 1us、1 minute Surrounding Atmosphere Free of corrosive gasses Protect Configuration Accord with IP65 Type CCFL monochrome Screen Size Using Life Screen properties Memorizer Configurati on 16 rank grey color < 280mA TFT 256-color 5.7 Inch TFT 256-color 5.6 Inch 320*240 320*234 Adjustable (by regulation resistance) Can not adjust Language Setting Chinese: brief simplified/complex font English ,Japanese, Korean and others Character Size Discretional font, Discretional dimension Touch Panel Digital matrix touch Screen 4MB Data 2KB Cooling Manner Natural air cooling External Dimension(mm) 200.0*148.0*44.4(mm) Cutout Dimensions (For front panel) (mm) < 280mA 50000 hours upwards, environmental temperature 25 ℃ , 24hours running Display Area Contrast <240mA 182.4*134.4(mm) 4KB 9 Hardware Parts TP760 series Model TP760-T Item Electrical Features Input Voltage DC20-DC28V Current Consumption 280mA Allowable Power-cut Less than 10ms Momentary Voltage Endurance AC1000V-10mA 1 minute(signal and time) Insulated DC500V-About 10MΩ(signal and time) Resistance Port Environment Screen properties Memorizer Configuratio n 10 Communication Port Support RS-232/RS-422/RS-485 Download Port Support RS-232 Operating Temperature 0-50℃ Storage Temperature -20-60℃ Ambient Humidity 20-85% (Non condensing, dry bulb) Vibration Resistance 10-25HZ(X,Y,Z direction for 30 minutes 2G) Interference Rejection Noise voltage:1000Vp-p、pulse duration 1us、1 minute Surrounding Atmosphere Free of corrosive gasses Protect Configuration Accord with IP65 Type TFT 256-color LCD Screen Size 7 Inch Using Life 50000 hours upwards, environmental temperature 25℃, 24hours running Display Area 480*234 Contrast Can not adjust Language Setting Chinese: simplified/traditional English ,Japanese, Korean and others Character Dimension Discretional font, Discretional dimension Touch Panel resistance touch Screen 4MB Data 4KB Cooling Manner Natural air cooling External Dimension(mm) Cutout Dimension (For front panel) (mm) 200.0*148.0*44.4 182.4*134.4 Hardware Parts TPA60/A61 Model TPA60-L TPA60-T TPA61-T Item Electrical Features Port Environme nt Screen properties Memorizer Configurati on Input Voltage DC20-DC28V Current Consumption 380mA Allowable Momentary Power-cut Less than 10ms Voltage Endurance AC1000V-10mA 1 minute(signal and time) Insulated Resistance DC500V-About 10MΩ(signal and time Communication Port Support RS-232/RS-422/RS-485 Download Port Support RS-232 Operating Temperature 0-50℃ Storage Temperature -20-60℃ Ambient Humidity 20-85% (Non condensing, dry bulb) Vibration Resistance 10-25HZ(X,Y,Z direction for 30 minutes 2G) Interference Rejection Noise voltage:1000Vp-p、 pulse duration 1us、 1 minute Surrounding Atmosphere Free of corrosive gasses Protect Configuration Accord with IP65 Type 4 bits grey scale black-white monochrome Screen Size 10.4 Inch Using Life 50000 hours upwards, environmental temperature 25 ℃,24hours running Display Area 640*480 Contrast Can not adjust Language setting Chinese: simplified/complex font English ,Japanese, Korean and others Character dimension Discretional font, Discretional dimension Touch Panel Resistance Screen 8MB Data 4KB Cooling Manner Natural air cooling External Dimension(mm) Cutout Dimension (For front panel) (mm) TFT 256-color LCD 800*640 TFT 256-color LCD 640*480 311*234*48 301*224 11 Hardware Parts 3 COMPONENT NAMES TP460-L: Front View Touch Area Rear View Power outlet Download Port 12 Communication Port Hardware Parts TP560/561 Series: Front View Touch Area Rear View Communication Port Download Port Power Input Termimanl Block 13 Hardware Parts TP760-T: Front View Touch Area Rear View Communication Port Download Port Power Input Termimanl Block 14 Hardware Parts TPA60/A61 Series: Front View Touch Area Rear View Power Input Terminal Block Download Port Communication Port 15 Hardware Parts 4 EXTERNAL DIMENSIONS TP460-L Dimension TP460-L Actual dimensions(Unit: mm):163.2×111.4×45 Cutout dimensions(Unit: mm):165×113 TP560/561 Dimension TP560/561 Actual dimensions(Unit: mm):200.0×148.0×44.4 Cutout dimensions(Unit: mm):182.4×134.4 16 Hardware Parts TP760-T Dimension TP760-T Actual dimensions(Unit: mm):200.0×148.0×44.4 Cutout dimensions(Unit: mm):182.4×134.4 TPA60/61 Dimension TPA60/A61 Actual dimensions(Unit: mm):311×234×48 Cutout dimensions(Unit: mm):301×224 17 Hardware Parts 5 INSTALLATION METHOD When you buy a TP, there will be 4 iron install racks with it. There are two square fix holes on the display’s upside and downside. Use the mounting bracket to fasten the display tightly in the control tank’s install holes. For Touch screen’s temperature will go high if it works too long, be Sure to install the touch screen at least 10cm away from adjacent structures and other equipments (each side 5cm) to keep cross-ventilation. Installation Procedures Step1 Refer to hereinbefore graph’s size. Open an square hole on the control tank’s panel. Step2 Add airproof circles in the airproof trough while installing. Step3 Insert the TP into the cut out of the control tank. Step4 Set the mounting bracket into the display’s side fixing hole and tight the screw. Step5 Connect the display and PLC communication ports with cables. Note The communication cable can be offered by the supplier or made by user according to the connecting graphics,give +24V DC power to start working. 18 Hardware Parts 6 PORT INSTRUCTION Pin assignments of TP series touch screen communication port: TP Communication Port TP Download Port PIN # Signal Name PIN # Signal Name 1 TD+ 1 NC 2 RXD1 2 RXD2 3 TXD1 3 TXD2 4 A1 4 A2 5 GND 5 GND 6 TD- 6 BUSY 7 B1 7 B2 8 RDD- 8 DOWN 9 RDD+ 9 NC Wiring diagram of TP series touch screen download cable: Note 1)On the base of above download cable,jump out the eighth pin and fifth pin, then you can download TP with force. 2)Please refer to appendix about communication wiring between TP series touch screen and other mainstream PLC. 19 Hardware Parts 7 REGULAR MAINTANCE AND CLEANING Maintenance Caution Please do not open the rear board by yourself. Please do not analyze or rebuild TP series products by yourself Please cut off all the power supply while checking. Please do not touch terminals in the electriferous products, otherwise, it may cause electric shock. Please do not insert or pull out cables with power on or draw the cables while communicating .otherwise, it may cause damage of the cables. Please periodically check installation and screws to avoid falling off. Please use TP series touch screen in the certain environment conditions according to this manual Please keep the product film clean as to keep it delicacy. Please clean the products with clean cloths and appropriate amount of detergent Cleaning Caution Please use clean cloths to clean the screen. Please use cloths with appropriate amount of detergent or alcohol while cleaning. Natural detergent, without acid, alkali is recommended. Keep distance from thrill or strong corrosive gas Never spray the detergent directly onto the screen. Please do not touch the screen too hard while wiping. otherwise, it will destroy the screen. Disposal Caution Dispose of the product as industrial waste when it comes into castoff. 20 Software Parts SOFTWARE PARTS--Application of TP series touch screen editor software 1. About Graphics Software 2. Getting Started 3. Introducing Menu 4. Making Graphics 5. Basic Components 6. Special Components—Display 7. Alarm Window 8. Print Window 9. Simulate Functions 10. Special Functions 21 Software Parts 1 GRAPHICS SOFTWARE This chapter describes TP series touch screen software’s project screen and its components, and the components of toolbox, template in addition. 1-1. Installing The Software 1、Operating System: Windows98/2000/XP/ME 2、Installing screen editor software as follows Double-click “setup.exe” from installation file Click “next” or “yes” all along until user information dialog box appears. Input user name、company name and serial number. The serial number is:Thinget TouchWin(note if the letter is incapital or not and the blank),then click “next” 22 Software Parts Select the target file for software installation, the default address is: “C:\Program Files\THINGET\TouchWin” Click “next” all along until completing installation and then click “finish”. After installation, the following icon will appear on the desktop. 23 Software Parts 1-2. Components Of The Software Screen Run “TouchWin Edit Tool” from “Start>All Programs> TouchWin” or double-click TP icon on the desktop. Then, Create a new project and you can see the interface as the following figure: Menu Standard Toolbar Part Toolbar Graphics Toolbar Panel Toolbar Align Toolbar Zoom Toolbar Operate Toolbar Status Toolbar Screen Edit Area Project Manager Note: This manual only introduce the elementary functions of the software. Please refer to other manuals about the advanced functions. 24 Software Parts 2 GETTING STARTED Before you editing TouchWin program, make sure touch screen and PLC models which are the precondition to decide whether the software could download and communicate normally. 2-1. Creating A New Project 1) Click “New” icon in the standard toolbar or click “New” under “File” menu,as shown below: 2) When you create a new project, a pop up dialog box as shown below will appear. Select touch screen model and then click “Next”. 25 Software Parts 3) In the following figure, you can choose port PLC device with default settings of communication parameters. If you want to modify these parameters, click “Setting…” to open its dialog box. 4) Set communication parameters in the following figure and click “ok” to confirm. Then click “Next” to enter download port setting. 26 Software Parts 5) Set COM parameters of download device, please refer to above method. 6) After setting, click “ok” to confirm and then click “Next” to continue. 27 Software Parts 7) Edit name, author and remark as shown in the following below: 28 Software Parts 8) The edit window is shown below: 9) Select “Save” In the “File” menu or click “ ”in the standard toolbar to save your project ,as shown below You can choose where to save files, the auto definition suffix is “.twp” 29 Software Parts 2-2. Editing Project 2-2-1 Basic operation of editing screens and windows 2-2-1-1 Creating a new screen or a window Creating new screens 1)There are two ways to create a new screen: Way A I. Click “screen” in the project manager to make it turn to highlight color. II. Click in the operate toolbar, as shown below. ① Way B I. II. 30 Right-click “screen” in the project manager Then click “Insert” in the pop up menu. ② Software Parts Right-click Screen 2) The new “Screen” dialog box pops up as shown below. Input screen’s ID and screen name and then click “OK” to finish the creature. Creating new windows 1) There are also two ways in creating windows: Way A I. II. Click “window” in the project manager to make it turn to highlight color. Click in the operate toolbar. 31 Software Parts Way B Right-click “window” in the project manager and then click “Insert” in the pop up menu. Right-click window 32 Software Parts 2) There will pop out a new window dialog box, set the window ID and its name, size and then click “OK” to finish the creature. 2-2-1-2 Title setting for a screen or a window 1) While creating a project screen (window), We often give each screen (window) a different name to identify the screen (window). There are two ways to modify their names. A Right-click a screen or window in the project manager, then choose “Property” in its pull down menu. B Select the special screen and the click in the operate toolbox directly 33 Software Parts 2) “Screen” dialog box appears as shown below: E.g: you can type “Front Screen” instead of “Screen1” 34 Software Parts 3) The modification of window property is similar with screen property (as shown below): Revisable E.g.: you can type “Prompt” 2-2-1-3 Cut/Copy of screens or windows There are two ways to do cut/copy for the created screens or windows. A I. Right-click a special screen/window in the project manager and then choose cut/copy in the pull down menu. II. Right-click Screen/Window, choose “Paste” in the pull down menu. 35 Software Parts B Click the screen or window in the project manager, then click “ ”/“ or Edit>Copy, this operation can be realized. Right-click Screen/Window, and then choose “Paste” in the pull down menu. 2-2-1-4 Delete screens or windows Also, there are two ways. A I.Right-click the screen or window needed delete. II.Choose “Delete” in the pull down menu. 36 ”.Also, from Edit>Cut Software Parts I. B I.Click the screen or window needed delete. II.Click in the Operate Toolbar. 37 Software Parts 2-2-2 Downloading Data After editing, connect 9-pin RS-232 port of PC and TP download 9-pin port with download cables. Then confirm that TP has been powered with +24V DC. Click or from File>Download Data to download data. There will pop out a download window to Prompt download process. If “Time out, check table please” appear ,please re-download Note Make sure that TP series touch screen can not be powered off while downloading screen data. When the transmission finished, a pop-up dialog box will appear to show all the project screens have been transferred. Cut off the power supply of display. Then pull out the cable TP-SYS-CAB0 and connect PLC and the PLC port in TP with communication cable. Electrify PLC and the display, then you can do data monitoring and other operations under normal communication. Pay attention that incorrect communication parameters and connection can lead to failed communication and there will appear such words “communicating” ,which show that TP is communicating with PLC. If TP and PLC can not communicate normally, please check following items: 1) PLC model in project should be selected according to the operating one. 2) Communication Cable should be connected. 3) Communication Cable should be connected in the right way. 4) PLC Communication parameters should be set correctly. 5) PLC and display should be electrified. 6)If you still can not find the reason, please contact with suppliers to get help. 38 Software Parts 3 INTRODUCING MENU This chapter introduces contents of menu and how to use them. 3-1. File The function options in the pull down menu of File are used for managing and dealing with the whole project, as shown below: 1) New It is used for creating a new project, please refer to chapter 2-1 for step introductions. Also, you can click new icon to finish the same operation. 2) Open It is used for opening a saved project which type is “*.twp”, Also, you can click .After clicking ,a pop-up dialog box will appear. Choose the project you want to open and then double click its icon, or just click the icon and then click “Open”. 39 Software Parts 3) Close It is used for closing “TouchWin edit tool” software. If you have not saved the updated project, when you choose “Close”, the following window will pop out. If you want to save this project, please click “Yes”; if not, please click “No”. Then, you’ll quit this project. 4) Save If the project you want to save is a new one, “Save” dialog box will pop out, please type your project name, then click Save to confirm. After this operation, it will save the new project instead of the old project automatically. has the same function. When editing the active present project, please click “save” continuously to avoid losing you project .It’s dialog box is shown below. 40 Software Parts 5) Save as It is different from “Save”, “Save” means save active project with its current project name; while, “Save as” means save the modified project with a new name and do not rebuild the old project. After choosing this option, “save” dialog box will appear ,then type your project name and click “save” to quit. 6) Download It is used for downloading data in TouchWin edit tool software to TP touch screen, Click the same operation. To get more particular information, please refer to chapter2-2-2. can finish 7) Simulate on line It is used for realizing simulation on line. Choose this option, you can simulate TP action in TocuchWin Edit Tool after connecting PLC and computer. Click the icon , can finish the same operation. 8) Simulate off line It is used for realizing simulation off line. Without connecting computer and PLC, or downloading screen data to TP, you can simulate TP action in the software. Click the icon can finish the same operation. 9) Setting… (For system) It is used for setting or modifying the main parameters and other items, such as “parameter”, “alternation”, “clock”, “panel” , “device”, “color” , “font” , “project”. The following will describe them one by one. 41 Software Parts Parameter As shown above, parameter set is divided into three items: “Screen”, “Password” and “Screen Save”. Screen It is used for setting the start screen, namely the first screen after TP electrified. Generally, we set this screen as the main menu or the most used screen, it is set by screen No. Password To improve the safety of machines, the data in TP series touch screen can only be modified by special personnel. Therefore, TP touch screen can help user protect data more efficiently. Password has three grades: common, advance and system. Common password can only carry out functions with itself, advance password can carry out function with “advance” and “common”, and system password can carry out all the password operation. There passwords usually for hiding or encrypting the parts or screens. Only type right password, you can open or do the relevant operation. The “password” input box showing above is for common one, if you want to enter advance and system grades, please click 42 and type password as shown below: Software Parts Screen Save This function operate automatically when touch screen has not been sprung for a long time. When it arrives the setting time, touch screen will close the black lamp or jump to the assigned screen, you can only choose one from the two operations. You can set “latency time” as well as canceling “screen save”. When you click “shown screen”, you can type screen number in the blank box to assign screen which you want the TP jump to. Alternation “Change Screen Control: PLC can switch screen by modifying the register’s value. After ticking it, choose the suitable “Device” (PLC port or Download port), “Station” and “Object”. 43 Software Parts “Object” is used to set register of PLC which assign the screen number, as shown above ,the object is D0 ,it means that screen number is determined by the value in D0 of PLC “Report Current Screen ID”: input current screen No. into certain register and transfer the status of panel to PLC Pay attention to that there is an “Indirect” box behind “object”, it is similar with the function of indirect addressing. After ticking it , you can see the following change. Click D0 to open the following window. “Object” is used for save address offset, as shown in the above figure, set “5”(decimal) in D10,it means 44 Software Parts current screen ID is saved in D(0+D(10)),namely saved in D(0+5)=D5.In “Data” box ,you can choose Word of Dword (double word). In “Data” dialog box ,you can choose data format from “Dec”, “Hex”, “Float” and “Unsigned”. Also ,you can set “Times”, if still set “5” in D10, “3” in “Times” box, it means that the address stored is D(0+3*D(10))=D15. Clock TP series touch screen set clock inside, as shown above, this function can educe and save the current time. Tick “Use RTC”, set device, station and particular address in the device. As shown in the above figure, storage current time in D11 of the device with PLC port , station NO. 1 The function of “Indirect” is as same as described in P46.This manual will not introduce this function in the following chapters, please refer to P45 for detail introductions. 45 Software Parts Panel This function mainly describes the touch screen and how to set internal storage space. As shown above, the current touch screen is TP-A60-T, if you want to change its internal storage space setting, please click “Set parameter” to open the following window. About touch screen internal space, please refer to chapter 10 to get particular introductions. 46 Software Parts Device As shown above, this function is to setting PLC port and Download port. When you want to change device or communication parameters while editing, modify the relevant options in “Device” . 47 Software Parts Color “Color” is used for setting background color, there are 256 kinds of color can be choose in this software. Please pay attention that once the color is set, it will effect all the project screens, as shown below: 48 Software Parts Font “Font” is used for setting words in the project screen. click “setting…”to open Font window as shown below: You can set font, font style, size, effects, color, sample, script and so on. These functions will be introduced particularly in the next chapter. 49 Software Parts Project As shown above, you can add name, author and remark in “project set” dialog box. 10) Build SCADA When click “Build SCADA ,there will create some files, Also, a pop-up window will appear to prompt where to save these files. After editing ,find this folder ,execute“AutoWin.exe”can realize configuration function. 11) Last File If you have open or edited some projects recently, the software can store the names of these projects automatically to help user find these more convenient. Instead of finding the project’s paths, click their names can open it to modify. 12) Exit Different from “Close”, ”Exit” means exit from TP edit tool .If you have not save the modified project before exiting, the software will pop out a window to make sure if you want to save .This operation can protect you to avoid losing project. 50 Software Parts 3-2. Edit “Edit” menu is used for carrying out operations of components. This menu contains “Cut”, “copy”, “paste”, “public unit” and “private unit’. 1) Cut “ ” Removes the components from the project and places it on the clipboard. To accomplish this, select component(s), then click cut under the edit menu; you may also right-click the component and then choose “cut” in its pull-down menu. 2) Copy “ ” Copy the component(s) to the clipboard. To accomplish it, select component(s), then click “copy” under the exit menu, you may also right-click then component(s) and then choose “copy” in its pull-down menu. The differences between “Copy” and “Cut” are that, when cut component(s), it will disappear, while, when copy component(s), it will still exist. 3) Paste “ ” Place the contents of the clipboard at the insertion point, it is used to match “Copy” and “Cut”. After clicking “Copy” and “Cut”, you can click “Paste” to displace or copy the original component(s). 4) “ ”Public unit It is used for applying a certain component to all the project screens. To accomplish it, click “public unit” under the edit menu; also, you may right-click on the components and choose “public unit” in its pull-down menu. 5) Private unit “ ” It is only used after a certain component that has been set public. It has the opposite function from “Public Unit” and it can be used in the current screen only. When use it, select a certain component, click “Private Unit” under the edit menu; you may also right-click the component and choose “Private Unit” in its pull-down menu. After accomplishing, this component will be only saved in the current active screen and deleted in other screens. 51 Software Parts 3-3. View The “View” menu is used for display the toolbars. It contains Standard, Status, Project, Paint, Zoom, Status Change, Operate, Part, Align, Advance, Advance2, Panel. Among these, Advance and Advance 2 is in grey color as shown below meaning that they are not sprung. They are available when TouchWin Edit Tool has advanced function. In general, the default setting will show all of these components to convenient operations. 52 Software Parts 3-4. Part The “Part” menu is used for editing components in the screen .It has the function with the Part Toolbar. 1) Text There are “Text”, “Dynamic Text” and “Variational Text” supporting various language, font, size, color and art effect ion. Text “ ” Using it, you can type common characters which are usually static ones. Once you type them, they can not be modified. Refer to chapter 5-1 for particular usage. Dynamic Text “ ” Display corresponding text to prompt user while data in the assigned register changing. Dynamic text can support 16 contents of state, corresponding values are 0-15.Refer to chapter 5-2 for particular usage. Variational Text“ ” Allow user set data values and text prompt of the relevant value. There is no restriction of data number. Refer to chapter 5-2 for particular usage. 2) Operate It contains “Lamp”, “Bit Button”, “Lamp Button” and “Screen Jump”, all of which are used for operating coil. Lamp “ ” 53 Software Parts Show the switch status in order to match the operation of button. Refer to chapter 5-4 for particular usage. Button “ ” Open/Close a certain operation to control the bit component. Refer to chapter 5-5 for particular usage. Lamp Button “ ” Carry out the operations of both lamp and button. Refer to chapter 5-6 for particular usage. Screen Jump “ ” Let the current screen jump to a certain screen. Refer to chapter 5-7 for particular usage. 3) Display It contains “Digital Display”, “Alarm Display” and “Text Display”, all of which are used for reading data or characters from registers. Digital Display “ ” Read data from registers and support various digital format, data length and font. Refer to chapter 5-8 for particular usage. Alarm Display “ ” Read digital values from register, and you can set max and min range, If the data in the register over this range, the reading out value will twinkle to alarm. Refer to chapter 5-9 for particular usage. Text Display “ ” Read characters from registers and support multi-words display, without restriction of length. Refer to chapter 5-10 for particular usage. 4) Input It contains “Digital Input”, “Text Input” and “Set Data”, all of which are used for typing information into register(s). Digital Input “ ” Input user’s data into assigned register(s). Refer to chapter 5-11 for particular usage. Text Input “ ” Input text into assigned register(s).Refer to chapter 5-12 for particular usage. Set Data “ ” Similar with Function Button, it can deal with “+、-、×、÷”for the data in assigned register(s). Refer to chapter 5-14 for particular usage. 54 Software Parts 5) Keyboard It contains “Digital keyboard”, “ASC” and “User Input”, all of which are used for typing digital or text .These input components support pop-up keyboard without setting by user. Digital Keyboard “ ” Place keyboard on the screen and support typing digital only. Refer to chapter 5-15 for particular usage. Text Keyboard “ ” Place keyboard on the screen and support typing characters only. Refer to chapter 5-15 for particular usage. User Input “ ” Type a certain value as a key in keyboard. Refer to chapter 5-15 for particular usage. 6) Bar It contains Vertical Bar and Horizontal Bar, both of which are used for describing use’s data with graphics. Vertical Bar “ ” Show the value stored in certain registers and display real time changes of values. Refer to chapter 5-18 for particular usage. Horizontal Bar “ ” Have the similar usage with “Vertical Bar”, the only difference is that it is level. 7) Dynamic Map Dynamic Map “ ” Show the changing value in the assigned register(s) via map, it is similar with “Dynamic Text”. There are 16 kinds of map in the software, Also, you can use your own maps. Refer to chapter 5-19 for particular usage. 8) Window It contains “Call Window” and “Window Button” which are used for switching screen and window. Call Window “ ” Control the pop-up window by a bit component of appointed coil of a register, usually it is sprung under certain conditions. Refer to chapter 5-20 for particular usage. Window Button “ ”。 Without controlling coil, only press this button can open or close the appointed window. 9) Recipe It contains “Down Recipe” and “Up Recipe” which are used for realizing recipe functions. 55 Software Parts Down Recipe “ ” Download recipe data from touch screen to PLC. Refer to chapter 5-22 for particular usage. Up Recipe “ ” Opposite from down recipe, it is used for uploading recipe data form PLC to touch screen. Refer to chapter 5-23 fro particular usage. 10) Function It contains “Function” and “Function Field” which are used for carrying out some special functions. These functions are “Set Coil”, “Reset Coil”, “Reverse Coil”, “Copy Coil”, “Screen Jump”, “Set Data”, “Copy Register”, “User Input”, “Open Window”, “Close Window”, “Down Recipe”, “Up Recipe”, “Data Block Transmit”, “Arithmetic” and so on. Function “ ” When you click this function button, touch screen will carry out certain operation(s).One function button can spring many functions. Refer to chapter 5-24 for particular usage. Function Field “ ” It is similar with “Function”, however, their spring manner are different as “Function Field” can be sprung by button, timer, scan and so on. Refer to chapter 5-25 for particular usage. 11) Column Map It used for showing comparison of several data groups by column map containing discrete column map and continue column map. Discrete Column Map “ ” It is mainly used for comparison of several data groups that addresses are discrete distributed. There is no limitation of data numbers. Refer to chapter 5-26 for particular usage. Continue Column Map “ ” It is mainly used for comparison of several data groups that addresses are continuous distributed. Also, there is no limitation of data numbers. Refer to chapter 5-27 for particular usage. 12) Basic Tool It contains “Date”, “Clock”, “Buzzer” and “LCD light control” which are used for some assistant functions such as prompt, alarm and so on. Date “ ” With this function, you can display date on the touch screen. So it may make relevant operational convenience and can prompt operators. Clock “ 56 ” Software Parts It is similar with Date as it is used for display time on the touch screen to make relevant operation of time convenient. Buzzer “ ” Spring buzzer by controlling a certain coil or a bit component in a certain register. This function can carry out alarm and prompt functions. Refer to chapter 6-3 for particular usage. LCD Light Control “ ” Similar with buzzer, it is used for starting light to prompt user while using TP by controlling a certain coil or a bit component of a register. Refer to chapter 6-4 for particular usage. 13) Device It contains devices such as “Instrument”, “Valve”, “Pipe”, “Pump”, “Auto Wind”, “Motor” and “Retort”, which are widely used in industry automatization. These device buttons can be used in graphics software directly, therefore, the workload can be reduced. Instrument “ ” It is point to dial instrument used for prompting and reading numerical value as voltage meter and ampere meter. Refer to chapter 6-5 for particular usage. Valve “ ” Its meaning and usage are similar with valves which used in normal industrial control area. Refer chapter 6-6 for particular usage. to ” Pipe “ Show the change and flow direction of numerical value by liquid format. Refer to chapter 6-7 for particular usage. Pump “ ” It is similar with pump used in normal industrial control area. Refer to chapter 6-8 for particular usage. Auto Wind “ ” It is similar with Auto Wind used in normal industrial control area. Refer to chapter 6-9 for particular usage. Motor “ ” It is similar with motor used in normal industrial control area. Refer to chapter 6-10 for particular usage. Retort “ ” It is similar with retort used in normal industrial control area. Refer to chapter 6-11 for particular usage. 14) Invert Alarm Information “ ”Invert Alarm Information It is specially used for invert alarm. With it, you can set max or min value of each alarm information and 57 Software Parts can type alarm contents. Refer to chapter 6-12 for particular usage. 15) Map It contains “Real Trend Map”, “History Data Map”, “Event Button”, “Display Real Time Event” and “Display History Event”. They are used for changing or comparing data as well as recording or displaying alarm event or spring event. Real Trend Map “ ” Observe and compare sole datum or several data by real trend map. History Data Map “ ” It can picking sole datum or several data to form history data and then show them with curve, therefore, you can handle changing situation of data clearly. Refer to chapter 6-14 for particular usage. Event Button “ ” It used for page turning, confirming and clearing the tables recording events, matching “History Data Map” ,Refer to chapter 6-15 for particular usage. Display Real Time Event “ ” Alarm and display several alarm information. When the alarm release, the event will disappear automatically. Refer to chapter 6-16 for particular usage. Display History Event “ ” With it, user can record several alarm information which have been sprung. It also can display the time of event sprung. Refer to chapter 6-17 for particular usage. 16) Sample Save Sample Save “ ” This function is used for picking data of a certain register with no limitation of number or time. The picked data can be saved in a section registers of touch screen. Refer to chapter 6-18 for particular usage. 58 Software Parts 3-5. Tool “Tool” Menu mainly contains several basic tools, such as “Line”, “Rectangle”, “Ellipse”, “Fold”, “Map” and “Option”. Note: “Arc”, “Polygon Block”, “Frame” can be used from “Draw” toolbar. Line “ ” Describe line or bias, both of which can be set line weight, line length and color. Arc “ ” Draw arc, and use these arcs to form sector .Also, you can set their size, line weight, position, color and filling pattern. Rectangle “ ” It is used for protracting rectangle or square, which can be set line weight, size, color, position filling pattern. Ellipse “ and ” It is used for protracting ellipse. It’s setting is similar with rectangle, containing line weight, color, position and filling pattern. Fold/Polygon “ ” It is used for protracting Fold or Polygon and its setting contains line weight, color, position, rotary angle and so on. Polygon Block “ ” It is like a container, you can set block value ,color, direction and so on. Frame “ ” It is similar with rectangle, but it has third dimension as its effect ion is three-dimensional .Also, you can set its color and position. 59 Software Parts Map “ ” It is used for adding bitmap file into screen and it only support suffix“*.bmp”. Option As shown above, there are “Grid Size”, “Auto Save”, “Communicate”, “View” in option dialog box. Grid Size Move Size: the least grid number of moving object. Show Size: setting the density of grid in the screen, the smaller of the value you set, the more grids are. dense the Auto Save With this option, you can set time of “Auto Save” to avoid losing operation .Also, you can save project(s) manually. Communicate You can set default port from COM1-COM16 for downloading. View Set default view proportion, namely scaling. Normally, the default ratio is 100%. 60 Software Parts 3-6. Window Window menu is used for dealing with screen. It contains “New”, “Cascade”, “Tile” and “Arrange Icon”. New Copy the current screen to create a new screen. Cascade Arrange all the open screens with cascade pattern. Tile Arrange all the open screens with file pattern. Arrange icon Arrange the icons. 3-7. Help About “ ” There are imprint and copyright instruction of TP touchwin edit tool. 61 Software Parts 3-8. Other Operations Graphics Adjustment ① ② ③ ④ ⑤ ⑥ As shown above, the Align toolbar is used when several objects need to be arranged. ①Align Left ②Align Center③Align Right④Align Top ⑤Align Middle⑥Align Bottom Zoom ① ② ③ ④ Zoom toolbar is used for making the whole screen or window display more clear to convenient some particular operations. The icons from left to right are: ①zoom in ②current scaling (can be chose from the pull-down menu) ③zoom out ④grid Status 62 Software Parts 4 MAKING GRAPHICS This chapter introduces how to edit graphics with draw toolbar. Draw toolbar 4-1. Line 1) Select “ ”from the Draw toolbar and draw the line by clicking at the starting point and dragging the line to the finishing point. (Please press ESC or right-click your mouse to cancel the operation). Starting Point Finishing Point 2) Change its position , drag and drop its size ,rotate its angle and so on. 3) Click the straight line to choose it (as shown above), then double-click your mouse or click “ ” in the Operate toolbar; also, you can right-click your mouse to open the pop-up menu and choose “property”, then the following dialog box appears: 63 Software Parts , Here you can choose how thick you want your line to be, the input value can be integer between 0-255. 3) Setting Color There are 256 kinds of color. (Only black and white can be chose when the touch screen is unicolor). 4) Setting Position 64 Software Parts “Position”: set the coordinates of the start point. “Size”: In its box, “Width” points to the horizontal length of the line and “Height” points to the vertical length of it. “Animal”: set horizontal and vertical movement. When ticking “horizontal”, a change will appear as following below. As shown in the above figure, there add a button with the name “Alm Code0”.Click this button to open its dialog box. 65 Software Parts “Object” option mainly used for Changing the offset of object coordinates (unit: pixel).It contains the following setting options: “Device”(PLC port and Download port can be chose ), “Station” (number of device), “Object” (Internal space of relevant device), “Data” (Word and Dword can be chose). Note: “Indirect” have the same usage as described in chapter 3-1, please refer to P46. “Format” option can help you select data format from “decimal, hex, float and unsigned” Lock: ticking it, the line will be fixed in the current position while other operations can be done. 5) Click “OK” to save setting. 66 Software Parts Examples of straight line (various thickness) 4-2. Arc 1) Select the icon“ ”from draw toolbar, click at the starting point with pressing down the left mouse button and then release it until dragging the cursor to the finish point. Starting Point Border Point Finish Point 2) Editing arc ① Drag the border Point to change the width and height of arc. ② Drag the starting point or finish point to change the length of arc. 67 Software Parts 3) Property of Arc Thick: integer between 0-255, the larger the value, the thicker the line. Coordinates of points: change the position and angle of starting point and finish point, as shown below: 68 Software Parts Conversion between arc and pie: ticking “pie” can realize this conversion. After[c1][c2][c3][c4] conversion, it turns to pie as shown below: 69 Software Parts Fill (this option can be only used when the graph is pie): There are 256 kinds of color and 7 kinds of fill pattern. Fill Pattern: 70 Software Parts A. None: showing border without fill pattern. B. Solid: filling graph with the selected color. C. Dot: filling graph’s inside with dot. D. Meek: Filling the graph with color desalted. 71 Software Parts As shown above, the original color is greenish black and ratio is 7%, therefore the last filled color is light than the original color. E. Hatch: Filling the graph with hatch chose. 72 Software Parts As shown above, the left bar is used for setting and the right bar is used for choosing hatch.There are 53 kinds of hatch can be chose .Also, you can set origin, forecolor and backcolor at will. F. Linear: Filling the graph with linear gradual change color. As shown above, the left window is used for setting, and the right window is used for set detail effect. Firstly, set color of starting point(first color) and finish point(last color);Secondly, set the middle color freely; Thirdly, control the transition. There are five directions can be selected, you can set angle at will after ticking “Angle” . F. Centerar: Filling the graphic with setting color radially. 73 Software Parts As shown below, the left window is used for setting format and the right window is used for setting effect. Here you can choose center color and brink color freely ,Also, you can change the center position(default position is the centre of a circle) as well as the ratios of X,Y Frame Color: There are 2 56 kinds of color can be selected and the default color is black. 74 Software Parts Position: set the position and size of a certain object accurately by modifying its coordinates, width and height. Example of a pie 75 Software Parts 4-3. Rectangle 1) Click“ ”in the draw toolbar. Press down the left mouse button at the starting point and drag the cursor to the finish point, then release the left mouse button to finish painting. As shown above, there are 8 reference points on the border of rectangle. With these points, you can change the length, width and size of the rectangle. 2) Setting line weight: integer between 0-255, the larger the value, the thicker the line. 76 Software Parts 3. Color There are 256 kinds of selected color which are only for the borders of rectangle .Its setting interface is similar with pie. 4. Fill It has the same setting with pie, please refer to above chapter. 5. Position Please refer to P78 as its setting is as same as a pie. Examples of rectangle filling. (Here we only show the popular setting examples): 77 Software Parts 4-4. Ellipse Please refer to the instruction of Rectangle as Ellipse has the same operation with Rectangle. Note: only the color option is a little different as there are usually “Fill Color” and “Frame Color” can be selected. If there is no “√”in the box before “Fill”, just “Frame Color” can be chose. As shown below: Examples of ellipses 78 Software Parts 4-5. Fold/Polygon 1) Click“ ” in the Draw toolbar and press down the left mouse button to confirm the position of acme. 2) Let the left key go to confirm the second acme, If you increase the acme number, please repeat doing this. 3) Double-click at the end acme to finish drawing polygon. 4) The diversion of fold and polygon The default setting is “Fold”, while it will connect the first acme and the last acme automatically after you let the “Fold” without the tick, the fill mode of polygon is default. 79 Software Parts 5) Revolve Click “Revolve” in “Polygon” option to open the following dialog box, type value (positive value means counterclockwise rotation, negative value means clockwise rotation) in “Angle” box and then click “OK” to confirm. 6) Fill It can be used when the graphic is close type such as polygon. Please refer to relevant chapter of painting pie for setting method. 80 Software Parts 7) Position: Please refer to previous chapters. Examples of fold Examples of polygon 81 Software Parts 4-6. Polygon Block 1) Click“ ”in the toolbar and press down left mouse button at the starting point of polygon to confirm acme. 2) Let the left key go to confirm the second acme. If you increase the acme number, please repeat doing this. 3) Double-click at the end acme and you will finish drawing a polygon block. 4) Drag eight reference points to change size, width and height of the block. 5) Double-click the graphic to open its property window. From “Polygon Block”, you can set direction and block value, as show below: 82 Software Parts Here, we set “Up-Down” in direction box ,type “40” in block box and set color as shown above .Then you can see the final graphic as shown below: 83 Software Parts 4-7. Three-Dimensional Frame 1) Click “ ”,then press down the left mouse button and drag the cursor to form a rectangle ,let the left button go to finish painting a three-dimensional frame, as shown below: 2) Drag eight reference points to adjust the height, width and size of three-dimensional frame. 3) Double-click the graphic to open its property window for setting color and position. Do the following setting and you can see the final effect as shown below: 84 Software Parts 4-8. Inserting Map 1) Click“ ”and press down left mouse button to open the following window after the cursor becomes cross shape. 2) The software only can support BMP format at present. If you choose “flower.bmp”, double-click its icon to open it ,then ,the map will be added to the current screen automatically with size and position can be dragged freely, as shown below: 3) Double-click the map to open its property window. There are two options: “Map” and “Position”. Here we mainly introduce “Map” tab as shown below: 85 Software Parts The default select is “Normal”, if you want to tick Transparency, please select Mask as well Step: After ticking “Mask”, click “Changing” to open its dialog from which you can choose maps. Masked map should be black and white map with the same size Please refer to the following example for better understanding. As shown above, map1 is the original map. Next we deal with this map. Map2 is a masked map with same size and it should be black and white. Map3 is the final map after transparence worked. 86 Software Parts 4-9. Changing Dimension The following describes how to change the size of graph and object which show how to extend or shrink. There are two ways can finish this operation. Way 1 错误!未找到引用源。 Choose one that you want to extend or shrink. , press down left mouse 错误!未找到引用源。 On the button and drag the cursor when it becomes 错误!未找到引用源。 Let the mouse’s left key go to fin ish changing the size. Way 2 Choose “position” in the property dialog box, input the object’s horizontal width and vertical height in the “Width” and “Height”, then click “OK”. 87 Software Parts 4-10. Moving Object The following describes how to move maps and objects. Way 1 错误!未找到引用源。 Choose the map or object you want to move. 错误!未找到引用源。 Move the cursor to the map or object, then the cursor will become . 错误!未找到引用源。 Press down the left mouse button and drag the cursor to the aim position. 错误!未找到引用源。 Let the left key go to confirm the position of maps or objects. Way 2 Choose “position” in the property dialog box, choose the coordinates you want ( the coordinates’norm is in the up-left)。 88 Software Parts 4-11. Cut, Copy and Paste for the selected object The following describes how to cut, copy and paste a graphics or an object 1. Choose the one you want to copy 2. Click Cut “ 3. Click Paste “ ”or Copy“ ”in the toolbar. ”in the toolbar. Shortcut key as shown below Cut:Ctrl+X Copy:Ctrl+C Paste:Ctrl+V 89 Software Parts 4-12. Public Unit and Private Unit In order to improve the work efficiency, we offer “Public Unit” and “Private Unit”. “Public Unit” lets one or more units in the current screen be used by all the screens;”Private Unit” has the opposite function with “Public Unit”, it can be used by the current screen only. Example We create two screens in all. In screen 1,we add a rectangle(other units and components also can be used)and choose it,just as the following map。 Then we click the Public Unit “ ”,we will find in same place of screen 2, it adds a rectangle automatically. 90 Software Parts If we only want to keep the rectangle in the second screen, we can use “Private Unit”. Choose the rectangle in screen 2. Then click Private Unit button “ ”,you can find that only screen 2 has a rectangle and in screen 1 it disappears. 91 Software Parts 4-13. Lock Set an object on the screen and right-click it, then you can see “Lock” in the pop-up menu. Click “Lock”, then the object will be locked and it can not move or zoom. Please pay attention to the locked object that the eight reference points become small rectangles. If you want to unlock the object, please right-click on it and select “Unlock” that change from “Lock”, Clike “unlock” and the you can release the object, as shown below: 92 Software Parts 4-14. Moving Layer TP series touch screen has a layered function in one screen. At present, there are three layers, namely top layer, bottom layer and middle layer which are used for superposing or hiding the objects. When there are more than two objects in one screen, this function will be sprung. As shown below, firstly, we put two rectangles in the screen and right-click one rectangle, then there will be added a function named “Bottom Layer” in the pop-up menu, correspondly, there will be added a function named “Top Layer” in the pop-up menu of the other rectangle. Click “Bottom Layer” and move the small rectangle to the middle of the big one. In default status, the small rectangle will be coved by the big rectangle as they are in the same layer. However, you can find that the small rectangle still can be seen as it is set in the top layer, as shown below. 93 Software Parts If there are three objects, set the biggest rectangle with “Bottom Layer”, the smallest one “Top Layer” and the third one with default setting, then superpose them together. Finally, you can see the following effect: If you want to change this setting, right-click the selected object to open its pop-up menu and choose relevant options. While please note that there are “Bottom Layer” and “Top Layer” withhout “Middle Layer”. 94 Software Parts 4-15. Adjusting Graphics This function is used for aligning and adjusting the maps or components in horizontal or vertical direction. 1) Firstly, Place some components and maps on the project screen, as shown below: 2) Select all of these objects to spring the Align buttons, try to use each of them and you can see the following effect. Align Left“ Align Right“ ”: ”: Align Center “ Align Top“ ”: ”: 95 Software Parts Align Middle“ 96 ”: Align Bottom “ ”: Software Parts 5 BASIC COMPONENTS This chapter introduces how to use components in Part toolbar which are used mostly .As shown below there are “Text”, “Dynamic Text”, “Variational Text”, “Lamp”, “Button”, “Lamp Button”, “Screen Jump”, “Digital Display”, “Alarm Display”, “Text Display”, “Digital Input”, “Text Input”, “Set Data”, “Digital Keyboard”, “ASC 错误!未找到引用源。 Keyboard”, “User Input”, “Bar”, “Dynamic Map”, “Call Window”, “Window Button”, “Down Recipe”, “Up Recipe”, “Function Button”, “Function Field”, “Discrete Column Map” and “Continue Column Map” from left to right. Part Toolbar 5-1. Text 1) Click “ ”icon in the part toolbar. 2) Drag cursor into the screen , click the left mouse button to place the text(click the right button or press the ESC key to cancel your place)。 3) Double click the left key or choose icon “ ”, there will pop out a text setting dialog box. 错误!未找到引用源。 Display: This contains “Content”, “Frame” and “Align mode” boxes. 97 Software Parts Tick “Aspect” and click “Changing….” Button to open the following window: Gallery1: there are 30 kinds of multicolor pattern Gallery 2: there are 3 kinds of white and black pattern Note: All the colors of these patterns can be changed by user containing the white and black pattern. 错误!未找到引用源。I Font: Containing font setting and word art setting 98 Software Parts Setting windows font Word art ① Click “ ② Click“ ”to pop out “Font” dialog box, as shown below: ” to pop out “Style” dialog box. 99 Software Parts 错误!未找到引用源。II Color: as shown below Note: Each component has its own color dialog box and there are some different of color parameters as the structure of components are not same. We’ll not introduce more about these in this manual, you can set freely or refer to color setting of other components. 错误!未找到引用源。V Position: It contains “Position” and “Animal” setting, as shown below: 100 Software Parts Modify the position and size of the Text frame. Move the component simply and swift. Note: we’ll not introduce “Position” of the other components as the position dialog box of each component has the same functions. you can set freely or refer to the above introductions. Next we’ll show how to set “Animal”. Firstly, tick “Horizontal”, then a button shown as“ ”will appear on its right. Click it and you can see a dialog box with “Station”, “Object” and “Data”. Here, we take “D0” as an example. Changing the value of D0, the component will move horizontally to correspond. “Vertical” has the same method as “Horizontal” with only changing the direction to vertical. Do it by yourself and you can find that the operation is easy. 101 Software Parts 5-2. Dynamic Text In the industry control process, there may be several status of machine. By these dynamic texts the machine can display different status. This makes the operation much convenient and can improve the work efficiency. 1) Click “ ” icon in the Part toolbar. 2) Move cursor to the screen, click the left mouse button to place it on the screen(click the right button or press ESC key to cancel place) 3) After selecting the Dynamic Text ,double-click to open its property dialog box (as shown below).There are “Station”, “Object”, “Data” in “Object” property page. Station: stands for the device communicating with display. The setting values are different as station numbers are not the same when using different devices. Normally, we use default value need not to change by user. Object: Setting a number for the register which can be set as internal space of touch screen or communicating device. Take D0 for example (internal data register of Thinget XC series), the display can monitor the changing value of D0 directly. Data: Namely data type, normally we select “Word” stands for separate word 4) Each register corresponds to 16 status , each part’s corresponding value is 0~15, when the register’s value is 0,the dynamic text will display the content of text 0.The rest may be deduced by analogy. You can also select align type and text frame, as shown below 102 Software Parts 5) Font, Color and Position option are as same as “Text” components, please refer to above chapters. 103 Software Parts 5-3. Variational Text In the industry control process, there are several status of machine. By these dynamic texts the machine can display different status. While the dynamic text can only display 16 kinds of status and it will has less advantages in these places where need more status indications. Now the Variational Text can fill this need. It has no difference with dynamic text in usage, however, the display content of “Variatioanal Text” can be added while “Dynamic Text” is fixed with 16 kinds of status, as shown below: Add new content Delete content Content display area Align pattern Change aspect 104 Software Parts 5-4. Lamp In the operation process, in order to display clearly which operation is being taken or which status the machine is in, “Lamp” offer fast way for the operation and monitoring. 1) Click “ ”icon in the Part toolbar. 2) Move cursor into the screen, click the left mouse button to finish placing the lamp(Click the right button or press ESC key to cancel placing). 3) Open its property dialog box containing “Object”, “Lamp”, “Twinkle”, “Color”, “Position”. The first tab is “Object”, as shown below: Station No. Spring Coil 105 Software Parts Note: Click “Object” box to open its pull-down menu and then choose the object type and its value. As show in the right image: the relevant object can be a certain bit of relay or register as the lamp is a double status parts. 4) From the property page of “Lamp”, you can modify “Aspect” and “Use Text” as shown below: Simulate the displays of tow status directly Change aspect of the lamp The default setting of it has no tick. After ticking it ,you can set font and align for the text Click “Change Aspect”to open “Figure” dialog box: There are Gallery 1 and Gallery 2 Gallery1 has 46 kinds of multicolor pattern Gallery 2 has 5 kinds of white and black pattern 5) Next, we introduce property page of “Tinkle” as shown below: when select “ON” or “OFF” ,you can set 106 Software Parts speed of twinkle. Twinkle can be set as alarm in the project application as it can abstract operators’ attention. 6) Here we do not introduce the property pages of “Color” and “Position”, you can refer to previous chapters for more information. 107 Software Parts 5-5. Button 1) Click Button icon “ ”. 2) Move cursor into the screen, click your left key to finish placing the button(click your right key or press ESC to cancel placing) 3) Open property dialog box containing property pages of “Object”, “Operate”, “Button”, “Color”, “Position”. Now we introduce property page of “Object” firstly. As shown below: It’s content is as same as Lamp’s and the button is also a double status part. The differences between Button and Lamp Button is used for controlling while not displaying status of the object. Lamp is used for pointing while not controlling the status of the object. 4) The following figure shows the tab page of Operate with the default status “Set ON” 108 Software Parts Set ON while pressing, Set OFF while releasing Reverse relay status Set OFF for relay status Set ON for relay status 5) Following below is “Button” tab page containing “Password”, “Aspect”, “Use Text” and so on. “Normal”, “Advance” and “System” are available only after setting “Password” in File>setting. Set content, font and align of button display. Set button aspect. After ticking “Hide Button”, the button will become transparency. Click “Change Aspect” to open the following window: 109 Software Parts There are Gallery 1 and Gallery 2: Gallery 1 has 20 kinds of multicolor pattern Gallery 2 has 23 kinds of white and black pattern 6) Here we do not introduce the property pages of “Color” and “Position”, you can refer to chapter before. 110 Software Parts 5-6. Button Lamp The lamp button has a function of both lamp and button. It can control as well as display and each function is relevant with a separated relays .In TP software, the default display and control are pointed to the same relay. 1) Click Lamp Button “ ”to place a lamp button on the screen. 2) Setting property of Lamp Button Status display and status control point to the same relay without ticking “Watch Object”. 3) General 111 Software Parts 4 kinds of Button Operate, as same as “Button” 3 kinds of twinkle, as “Lamp” Set Twinkle Speed, as Lamp Default setting has no password. You can set password with three grades. They are available only after you type right password 4) Aspect Set aspect and you can preview the display in the screen window Please refer to relevant information about Use Text introduced before. Click “Change Aspect” to open the following window: 112 Software Parts There are two galleries: Gallery 1 with 24 patterns Gallery 2 with 4 patterns 5) Please refer to “Lamp” and “Button” to get relevant introduction about “Color” and “Position” 113 Software Parts 5-7. Screen Jump This function is used for jumping among different screens. 1) Click “ ”and place it on the screen (right-click or press ESC to cancel placing). 2) Open its property dialog box and type number in Screen ID box. 3) Next, we choose “Button” tab page and modify its aspect and use display. 114 Software Parts 4) Please refer to chapters before to get particular introduction of “Color” and “Position”. 115 Software Parts 5-8. Digital Display In the industrial control process, the working parameter of the machine could tell whether it is ok or not. So, it is display’s another advantage to display the machine’s action in figure. This function is the contribution of “Digital Display”. 1) Click Digital Display part “ ” 2) Move the cursor to the screen and click left mouse button to finish placing the digital display part (right-click or press ESC to cancel placing). 3) Open its property dialog box, as shown below, the property page of object is used for pointing address that you want to display: 116 Software Parts 4) “Display” tab page is shown below: Set format of the display digital Set bit length of the display digital Set align of the display digital Refer to “Text” for instruction about “Aspect” 5) “Font”,“Color” and“Position” are similar with these in “Text”, you can set them freely. 117 Software Parts 5-9. Alarm Display In order to protect the operation, some data must have certain restriction. Data alarm display will glitter when the data exceed the restriction. This will awoke the operator to take action. 1) Click Alarm Display icon“ ”in part toolbar. 2) Move the cursor to the screen and click left mouse key to finish placing alarm display (Right-click or press ESC can cancel placing). 3) Click “Property” to open its dialog box. Compared with “Digital Display”, they have the same setting except that alarm display add a “Range” tab page. In the following, we mainly introduce “Range” tab page. Without it, “Alarm Display” has the same usage with “Digital Display”. Set the max range of alarm: it will twinkle to alarm when data exceed its max value Set the min range of alarm: it will twinkle to alarm when data exceed its min value 118 Software Parts 5-10. Text Display “Text display” is used to display the register data in the form of text in the touch screen. So we can display text more easily. We can see its intuitionistic advantage when save different files or do the relevant operations according to different names. Its properties are as same as Digital Display. Difference between “Text Display” and “Digital Display”: “Text Display” can show data in the form of Text while “Digital Display” shows data directly. Here we illustrate this in the following figure. 1) Click Text Display part “ ”and place it on the screen, as shown below: 2) Open its property dialog box Set length of display Text Note: One word is composed by two bytes, one character’s size is one byte and one register’s size is one word. Thus, you can set the register’s number (namely the length)to change the content of displayed characters .As shown above, the register’s number is 1 as default setting ,then it will display two characters. 119 Software Parts 5-11. Set Data “Data input” is used to modify the working parameters of the machine freely by touch screen .It is another way of human machine connection. But when inputting data there must be a digital keyboard .So “Data Input” must be used with keyboard. 1) Place Data Input“ ”on the screen, if you want to modify several data, you can put more components, as shown below: 2) Property setting of “Digital Input” is similar with it of “Digital Display”. The only difference is that there add on “Input” function. Here we introduce “Input” tab page. Open its property dialog box to do some setting. Set input limitation. you can not input anything until open password. Set range of Input, the normal status has no setting. Spring a relay finishing input. after Set pop-up keyboard, without ticking, you should add a digital keyboard manually. 2) Press “ 120 ” to enter “Simulate Offline” status. Supposing there is no password while operating, click Software Parts “Digital Input” and a pop-up digital keyboard will appear, as shown below: 3) Press “ENT” to confirm input after typing data. If you want to type data once more, press “CLR” to clear the input box and if you want to exit without modification, please press “ESC”. 121 Software Parts 5-12. Text Input Just like “Data Input”, when input text there should be a small text keyboard with it. It’s properties are as same as “Text Display”. The following introduces how to input text: 1) Place Text Input “ ” on the screen, if you want to modify several characters, you can put more “Text Input” components, as shown below: 2) Press “ ”to enter “Simulate Offline”. If there is no password while operating, a pop-up keyboard for text input will appear after you click “Digital Input”. The effect is shown below: 3) Please refer to “Digital Input” and “Text Display” for particular introduction about its property. 122 Software Parts 5-13. Set Data “Set Data” is used for evaluating register .Although it is not used too often, it is simple and swift in some places. Normally, we use relays to stand for two status and the relay is controlled by button and other components. While ,sometimes we use data to control and “Set Data” can make this operation more simple. 1) Add one Set Data component“ ”,as shown below: 2) Open its property dialog box, the first tab is “Object” which you modified object in it. 123 Software Parts 3) The second tab is “Operate” :Add operand to the current object Subtract operand from the current object Multiply operand to the current object Divide operand to the current object set the current value as operand 4) Please refer to previous chapters for particular introduction about other tab pages. 124 Software Parts 5-14. Digital Keyboard 1) In the process of input and modifying data, keyboard plays an important role in linking people and machine. As it is simple and convenient, the current operator is more likely to use it. 2) You can refer to others to place the small digital keyboard. 3) Small digital keyboard should be used with data input. In the “Data Input” we have introduced before, we adopt the keyboard’s use mode as the default state, this is pop out mode. But we can modify data input and character input property at the same time. Such as the following map: Cancel the pop-up digital keyboard. When typing data, you should add a digital keyboard manually. 4) As shown below, add “ ”to the screen: there should only one digital input component can be sprung for the current screen, then the digital keyboard will connect to the input part automatically. Please press “ENT” to finish inputting after typing data. Thus, set one digital keyboard can be used for all the digital input components to type data. 125 Software Parts 5) Open property tab page of keyboard, there are “Color” and “Position” can be set. From “Color” ,you can change the keyboard color which contains Fore Color ,Black Color and Frame Color. 5-15. ASCⅡ Keyboard Similar with “Digital Keyboard”, ASCⅡ keyboard should be used with “Text Input” .You could refer to Digital Keyboard for usage. Click ASCⅡ Keyboard icon“ 126 ”to add it to the screen, as shown below: Software Parts 5-16. User Input All the buttons of “Digital Input” and “Text Input” are fit together with “User Input” and each button value correspond to one ASCII value, therefore , the data inputted can be divided. With this function button, you can make a keyboard by yourself. Click“ ”and place it on the screen, as shown below: Open its property window: The following shows relationship between normally used button values and ASCII values. 1 2 3 4 5 - - - - - 0X31 0X32 0X33 0X34 0X35 6 7 8 9 0 - - - - - 0X36 0X37 0X38 0X39 0X30 ESC - 0X1D CLR - 0X7F ENT - 0XD 127 Software Parts 5-17. Bar Graph “Bar Graph” can be used widely in Industrial control area. It is more intuitionistic and convenient to show simulated data than “Digital Display”. So it can be used for displaying analog parameters such as temperature, pressure, flux and so on. 1) Add Bar part “ ” (vertical and horizontal bar use the same icon), as shown below: From Property>stick>mode, you can change it to horizontal bar graph 2) Open its property dialog box containing “Object”, “Stick”, “Color”, “Position”, as shown below: 128 Software Parts 3) Her mainly describe the contents of stick tab page. Preview area Set aspect of scale line Set limit range Modify aspect and mode Take an example to illustrate the setting of bar graph. Supposing there is a simulate value input of pressure, max data of A/D is 4095, min data of A/D is 0;Scale is divide into 4 sections each of which has 3 slave scales. As shown below: 129 Software Parts 5-18. Dynamic Map The setting of “Dynamic Map” is similar with “Dynamic Text”. If the register’s value is different, they will all display different text (or map). The register value ranges from 0 to 15 (16 states). As the register value (0-15) is different, it will display different maps. 1) Click“ ”and place it on the screen. 2) Property setting: there are “Object”, “Map” and “Position” tab pages. “Object” is used for setting object that need to control. 130 Software Parts 3) From “Map”, there are 16 maps, choose the map No. from the left box and click “ ” button to change map. Map No. Preview Change Map Note: The format of these maps should be “.bmp” 131 Software Parts 5-19. Call Window “Call Window” is used for opening the needed window by controlling coils (open or close).The following describes how to use it:” 1) Create a new window to be transferred. Set the window’s size, name and other information. 2) Click “ ”in Part toolbar and place it on the screen. 3) Click the property button. Set the relay’s type and address in object tab page and set the window No. called in Window tab page. When the middle relay is in the state of ON, the window to be called will popout. When it is OFF, the window will be close. As shown in the following maps. 132 Software Parts Set address Set Window No. 133 Software Parts 5-20. Window Button We have introduced calling the window before. But in the process of invoking the window, you may discover that you need a relay and that make operation so trivial, also, when we open the window, we couldn’t close it in the current window. Window button can solve all of these problems. The following introduces how to use the “Window Button”. 1) Create a new screen, click “ ”in Part Toolbar and place it on the screen. 2) Open the property setting dialog box, click “Operate” and type the window’s ID which you want to operate. If you want to operate the current window, just choose “current window”. Then, the window ID color will turn to gray .In the “Act” column, you could set act mode: open, close and hold .You could also set the window hide or show. 2) In the “display” column, you can modify the text content which will display on the button .If you want to close a window by this button, you can change it to “close”. 134 Software Parts 5-21. Down Recipe Recipe function is very important in dealing with data in the industrial area, especially for craftwork recipe. There are recipe upload and recipe download, upload means save the device data in locale to recipe database while download means transfer the data in recipe database to device database in locale. We describe how to use recipe download in the following: 1) Firstly, click“ ”to add recipe download function button on the screen. 2) Double-click to open its property dialog box: There are “Device Data” and “Recipe Data” in “Object” tab page. “Device Data” is used for typing head address of the data invoked in work locale and “Recipe Data” is used for saving head address of the recipe database in personal computer, as shown below: A Recipe can be seen as a combination of several continued registers. Its concrete meaning is defined by the user in their programs. Usually, recipe data are considered as parameters in user’s program, therefore, 135 Software Parts different recipes correspond to different parameters and user can change recipes to come to the application of different technics. The combined parameters length means the recipe length. 3) “Count” in “Recipe” tab page stands for the total number of current recipes, as shown below: How can we differentiate recipe No. in application? Now we offer a internal register PSW40 as a skip of the recipe No. When the value of PSW40 change, the recipe will change .Therefore, we can change the value of PSW40 to finish all the recipe operations. 4) Next we take an example to deeply understand the recipe operating. 136 Software Parts Supposing what we operate is a technical recipe needed 6 parameters and 20 groups recipe. the device address is D10-D15 (This data section is used for saving recipe parameters).The head address of recipe database is set as PFW 300,as shown in the left graph From “Recipe”, we type “20” in “Count” box 5) Add a “Digital Input” part to the screen and set PSW40 as its object. 6) Set “1” as the value of PSW40 while system operating. When we press “Down recipe” button, recipe data will transfer the data with PFW300+PSW40*6 as their address and 6 continued register groups as their length to D10-D15 data section 137 Software Parts 5-22. Up Recipe The usage of “Up Recipe” is nearly as same as its of “Down Recipe”, the only difference is that the direction of up recipe is reversed. 1) Click“ ”to add an upload button to the screen. 2) Please refer to “Down Recipe” for the setting method of “Object” . 138 Software Parts 5-23. Function “Function” button gathers the function of all buttons .It can choose functions for the button and then make the button carry out different functions. 1)Click Function icon“ ”and place it on the screen. 2) Double-click function button or select property after right-click it, a pop-up dialog box will appear. The tab page of “Function” is shown below: 139 Software Parts Function The function button has four types, they separately stand for four states: released, pressed, releasing, pressing. We could add different function to the four states at one time. Option It shows that the button’s certain status can add the following function operation: Set Coil, Reset Coil, Reverse Coil, Copy Coil, Screen Jump, Set Data, Copy Register, User Input, Open Window, Close Window, Down recipe, Up recipe, Data Block Transmit, Arithmetic. Add Click a certain function from “All” box in the right, and then “Add” button will be sprung, Click “Add ”, this function will be displayed in the left box showing addition is successful. 140 Software Parts Modify After add a certain function successfully, the “Modify” button will be sprung. Click “Modify” to open its dialog box and do the relevant setting. Delete If you want to delete a certain function, click it in the left box to turn over its color and then click “Delete” to finish this operation. Move Down/Up When there are more than two functions, “Move Down/up” can be sprung. Click a certain function to turn over its color and then click “Move Down/Up” can move this function. If you want to move several steps ,click it continuously. Password Password can affect the limitation of added function, Click “password” to open the following window. If you choose “None”, all the user can carry out this function. If you choose “Normal”, “Advance”, “System”, user should input correct password and then can carry out this function. 141 Software Parts If you tick “Limited By Coil”, it will be available in the case that setting coil has been sprung. Then Click “ ”, The following window will appear. 3) Concrete setting for function component Set coil Set“1”to certain relay or bit. Click “Modify” to enter its setting dialog box, then modify the object address which take MO as default, as shown below: Reset Coil Set“0”to certain relay or bit. Setting method is as same as its of “Set Coil”. 142 Software Parts Reverse coil Reverse certain relay or bit, alternating “0”, “1”of the coil. Please refer to “Set Coil” for setting method. Copy Coil Copy the source coil’s data to the object coil. Please refer to “Set Coil” for setting method. Screen Jump Make the screen jump to the appointed screen. Click “Modify” and then set screen ID in the pop-up window as shown below: Set Data Set the appointed value to the appointed object. Click “Modify” and then modify the object address and set data in the pop-up dialog box, as shown below: Copy Register Copy the source register’s value to the object register. Click “Modify” and then modify address and data type in the source register and target register, as shown below: 143 Software Parts a User Input Input button codes, the codes are in the form of ASC. Click “Modify” and then a pop-up window will appear, as shown below: 144 Software Parts Open Window Open the appointed window by the window ID. Click “Modify” and then set window ID and open mode in the pop-up dialog box, as shown below: Close Window Close the appointed window by the window ID. Click “Modify” and then set window ID in the pop-up window, as shown below: Down Recipe Download the recipe data (touch screen etc.) to the device data (PLC).Click “Modify” and then a dialog box as shown below will appear. Please refer to “Down Recipe” part for more information. 145 Software Parts Up recipe Upload the device data (PLC) to the recipe data (touch screen etc.).Click “Modify” and then its dialog box will appear. Please refer to “Up Recipe” part for more information. Data Block Transmit Transfer a data block starting from the appointed source ID register to the corresponding destination ID register. You can set source address, target address and register number, as shown below: Arithmetic Do arithmetic with the set register’s data, then save the final value in the assigned Register. The arithmetic object can be a constant as well as a variable. 146 Software Parts As shown above, Click “Modify” after add “Arithmetic” to the left box, then a pop-up dialog box will appear. The first graphics shows the tab page of “Object” which is used for assigning address saving final value; the second graphics shows the tab page of “Operand” which is used for setting two operands .When you select “Use Constant”, please input relevant value type in its back box, the default type is algorism; When you select “Use Variable”, please click “ address in it ,as shown below: ” to open its setting dialog box, then set variable 147 Software Parts 4) “Button” is mainly used for modifying text content, button aspect and so on. In its tab page, there are passwords, font, align manner and aspect setting, Please refer to previous chapters for more information. 5) “Limit” supply a function of limitation, After ticking “Limit Button”, the function button will be available when the status of control coil is ON; otherwise, the button will be void. As shown below: 148 Software Parts Click “M0” and then the following dialog box will appear in which you can set coil address, as shown below: 6) Please refer to previous chapters for introduction about “Color” and “Position”. 149 Software Parts 5-24. Function Field The usage of “Function Field” is similar with ‘Function” button, but they are not the same. The difference is on the function’s trigger action. Function button can set different operations to the four trigger actions. But the function field has only one trigger action, and must be sprung under logic conditions of system internal or pre-setting instead of different button actions. Besides, function field is in hidden manner, so it can not be seen in the screen. 1) Click Function Field “ ” and place it on the screen. 2) Double-click it’s property dialog box then you can see the main difference between it and Function button is that it has a “Mode” tab. 150 Software Parts Act Mode (you can only choose one spring action) Start Screen When the screen in which the function field is invoked, the function field’s ever has function carried out. will be Coil spring When the appoint coil jump from 0 to1, the function field’s existing function will be carried out. Time (sec.) When the screen in which the function field is invoked, the function field’s existing function will be carried out. These functions will be carried again in a certain time (which can be set) Continue When the screen in which the function field is invoked, it will carry out the existing function in continually. First scan after down The function of Function Field will be operated once after downloading the project. First scan after power The functions in Function Field will be operated once after every starting. 3) The option tab’s function is the same to the function button. Just add them to the existing function. Please refer to previous chapters for concrete information. 151 Software Parts 5-25. Discrete Column Map Discrete column graph’s horizon axis takes discrete register as fold line object, and presents each register’s value with graph. 1) Click“ ”and place it on the screen. 2) Open its property dialog box. You can see the first tab is “Object”: Object list Add a new object Modify the selected item Delete an item Move up the selected item, presenting as the sequence of abscissa Move down the selected item, presenting as the sequence of abscissa 152 Software Parts 3) Double-click items in the list or click “Modify” button to pop out its property dialog box. Then the display objects can be set in it. The following is “Display” tab page Set data format Range of digital display Column is the default pattern 153 Software Parts 5-26. Continue Cloumn Map Continue column graph’s horizontal axis takes continue registers as its objects. Display each register’s value in the form of graph. It has the same usage with “Discrete Column Map”, the only difference is that one is for displaying discrete data ,and the other is for displaying continue data 1) Click“ ”and place it on the screen. 2) Double-click its property dialog box and set the head address of digital display in “Object” tab page. The following take D0 as an example. 154 Software Parts 3) The following describes the property of “Display” tab page. “Data Number” means the total number of continues data. “Range” set the range of digital display, the default format is “None” and the default pattern is “Column” graph. These setting can be changed by yourself. 155 Software Parts 6 SPECIAL PART-DISPLAY Display components are very useful in the project making process. Here we take a separate chapter to illustrate each component’s usage and operations. As shown below, from left to right are: “Data”, “Clock”, “Buzzer”, “LCD light lamp”, “Instrument”, “Valve”, “Pipe”, “Pump”, “Auto Wind”, “Motor”, “Retort”, “Invert Alarm Information”, “Real Time Map”, “History Data Map”, “Event Button”, “Display Real Time Event”, “Display History Event”, “Sample Save”. Panel Toolbar 6-1. Date 1) Click “ ”in the Panel Toolbar to add it to the screen, as shown below: 2) Open its property dialog box containing “Display”, “Font”, “Color” and “Position”. Firstly, we introduce how to set Display with the following figure: There are two manner for display 3) Please refer to previous chapters for introduction about “font”, “color” and “position” tab. 156 Software Parts 6-2. Clock 1) Click“ ”in Part toolbar and place it on the screen. 2) Open its property dialog box and set relevant parameters for “Display”, as shown below: 3) Please refer to previous chapters for introduction about “Font”, “Color” and “Position”. 157 Software Parts 6-3. Buzzer 1) Click“ ”and place a buzzer on the screen with click left mouse button in the screen, as shown below Pay attention to the buzzer, this is a hidden part, meaning it will not display in the screen. But it will act when conditions are sprung. 2) Double-click “Buzzer” to open its property dialog box containing “Object”, “Buzzer” and “Position” tabs. The following tab is “Object”, in which you can set coil address which is used for springing buzzer. 158 Software Parts 3) There are two bell modes, the first is “One” and the second is “Continue”. Do the setting in the tab page of “Buzzer” as shown below: 4) Refer to previous chapters for relevant setting information about “Position”. 159 Software Parts 6-4. LCD Light Lamp 1) Click “ ”and press left mouse button on the screen to add it .As shown below: 2) Double-click on the screen to open its setting dialog box containing “Object” and “Position” tabs. “Object” is mainly used for setting coil address that control the LCD light. 3) Please refer to previous chapters for relevant introduction about “Position”. 160 Software Parts 6-5. Instrument 1) Click “ ”and press left mouse button on the screen to add an instrument, as shown below: 2) Double-click the instrument in the screen to open its property dialog box. As shown below, the first tab is “Object”, which you can modify data address that needed to display in instrument. 161 Software Parts 3) With modifying “Display” tab (with various aspects), you can add Text, set align manner, change aspect of instrument and so on. Click “Changing”button at the bottom of “Aspect” box, then you can open gallery for choosing suitable aspect. There are 6 patterns can be chose as shown below. Also, you can select color freely in the tab page of “Color”. 4) From tab page of “Set” ,you can set direction, pointer thick, main scale, slave scale, alarm data, danger data as shown below: 162 Software Parts 5) Please refer to previous chapters for relevant introduction about “Font”, “Color” and “Position”. 163 Software Parts 6-6. Valve 1) Click “ ”and press left mouse button to Place it on the screen, as shown below: 2) Open its property dialog box Object: When its status is ON, valve displays as open and when its status is OFF, valve diaplays as closed. Utter Object: When its object’s status is ON, valve displays as flow and when its object’s status is OFF, valve displays as stillness 164 Software Parts 3) Open “Valve” dialog box, you can set valve manner, flowing direction and act mode Act: Set on: let the valve object with the status “ON” Set off: let the valve object with the status “OFF” Reverse: let the valve object turns to opposite status Instant: set “ON” when pressing valve object and set “OFF” when releasing Click “Change ”button to pop out gallery, there are 24 patterns can be chose .The following graphs are part of them. 4) “Speed” tab page is used for setting flow speed of valve, you can set speed range and the current speed, as shown below: 165 Software Parts After ticking “Register”, there will be pop out a button named “ register window, in which address of register can be changed, as shown below: ”, click it you can open 5) Please refer to preview chapters for relevant introduction about “Color” and “Position”. 166 Software Parts 6-7. Pipe 1) Click “ ”and press left mouse button on the screen to add it, as shown below: 2) Double-click it on the screen to open its property window. The first tab is “Object”. Object: means the object flow in the pipe .When its status is ON, the liquid in the pipe will start to flow and when its status is OFF, the liquid in the pipe will stop flowing 167 Software Parts 3) Open “Aspect”tab page, the aspect of pipe and the direction of liquid can be changed, as shown below: Click“ ”button, then the gallery of pipe will pop out. There are 11 patterns offered. As shown in the following figure, there are some examples: 4) “Speed” tab page is used to set flow speed for liquid, its usage is similar with that of “Valve”, Please refer to up chapter for relevant introduction. 168 Software Parts 5)Please refer to previous chapters for relevant introduction about “Color” and “Position”. 169 Software Parts 6-8. Pump 1) Click“ ”and press left mouse button to add a pump to the screen, as shown below: 2) Double-click the pump on the screen ,its property dialog box will pop out containing “Object”, “Aspect”, “Speed”, “Color”, “Position”. In “Object” tab page, control address of the pump can be set, as shown below: 170 Software Parts 3) From “Aspect” tab page, the aspect and direction of the pipe can be set ,as shown below: Click “ ”, a pattern gallery with 10 pattern graphs will pop out, the following are part of them: 4) Please refer to previous chapter for relevant setting instruction about “Speed”, “Color”, “Position”. 171 Software Parts 6-9. Auto Wind 1) Click“ ”and press left mouse button to add Auto Wind to the screen, as shown below: 2) Double-click Auto Wind and open its property dialog box (Setting as pipe). 172 Software Parts 3) There are nine patterns in “Aspect” tag page, the following is part of them: 4) Please refer to “Valve” for setting method about “Speed”, “Color”, “Position”. 173 Software Parts 6-10. Motor 1) Click “ ”and press left mouse button to add it to the screen, as shown below: 2) Double-click it to open its property dialog box. Then click “Object” tab, the address controlling motor switch can be set in this tab page. Other setting have the same setting method with Pipe, as shown below: 174 Software Parts 3) Motor aspect can be set in “Aspect” tab page, as shown below: Click “Change Aspect” button, then four maps will appear, as shown below: 4) Please refer to previous chapters for introduction about “Color” and “Position”. 175 Software Parts 6-11. Retort 1) Click “ ”and press left mouse button to add a retort to the screen, as shown below: 2) Double-click it to open its property dialog box containing “Object”, “Range”, “Manner”, “Scale”, “Color” and “Position”. You can set address of the retort in the “Object” tab page, as shown below: 3) In “Range” tab page, you can set max and min values which can be concrete value as well as values assigned by registers with ticking variable. The alarm is used for starting alarm function when the value 176 Software Parts over the alarm value set. There are four maps in “Manner” tab page 5) “Scale” tab page, in which you can set scale values is shown below: 177 Software Parts 6-12.Invert Alarm Information Inverter alarm information is used for alarming, it will spring alarm under certain conditions. This function can display multi-characters which can be used as multi –item alarm 1) Click and press left mouse button to add it to the screen, as shown below: 2) Double-click it to open its property dialog box, the first tab is “Object” which is used for assigning data address of alarm. 178 Software Parts 3) “Display” tab page is used for setting alarm contents correspond to values. The display characters can be set by ticking “aspect”, as shown below: 4) Please refer to previous chapters for relevant introduction about other tabs . 179 Software Parts 6-13. Real Time Trend “Real Time Trend” is used for reacting the real time status of a certain simulate value. There are various display manner for you to choose ,such as curve, column map ,dot map and other manner. Real Time Trend is often used for prompting temperature, pressure, liquid and so on. Therefore, it plays an important role in the projects. 1) Click and press left mouse button on the screen to add it, as shown below: 2) Double-click it to open its property dialog box.The first tab is “Trend Map”: Add object, one object correspond to one trend curve Modify objects’ property Object: data acquisition source 180 Software Parts 3) Double-click “0 D0” or click “Modify” after selecting “0 D0” can open its property dialog box in which data object can be change (default object is “D0”) 4) In trend map tab page, data number, picking period, data format, map mode, display mode and data range can be set, as shown below: 181 Software Parts 5) Set save area and then save the picking data to the assigned address. 6) Please refer to pervious chapters for setting method about “Pick” and “Color”. 182 Software Parts 6-14. History Data Map “History Data Map” is similar with “Real Time Trend”. As described in the above chapter, “Real Time Trend” can only display the current data in the display area. While “History Data Map” can save the current data in the display area in the format of history data, then you can view and analyze them. 1) Click “ ”and press left mouse button on the screen to add it, as shown below: Vertical line shows the current data 2) Double-click it to open its property dialog box. As shown below, the first tab is “Trend Source”: Add: increase objects Modify: change address and range of the selected item. Delete: delete selected object. the 183 Software Parts 3) Click “Modify” button to open “History Trend Source” dialog box ,as shown below: Set data of picking data Set min and max values for picking objects .The default value are 0~1024 4) From History Data Map >Display, page data, total data, pick period , the place of display position and how to save current data can be set in this tab page. 184 Software Parts Page Data: amount of data that can be displayed in one screen. Total Data: Total amount of picking data When Page Data are less than Total Data, you can use “Event Button” to switch displaying of different data. Pick period: interval between two picking data Ticking “current Data”, then the current data and time will place from PSW500 to PSW506 (default save address) .If you want to modify save address, please click“ ”and modify address in the pop-up dialog box. The current data will not save without ticking “current data”. 185 Software Parts 5) “Save” tab page can be used for storing picking data and it set “Auto Locate” as default. Also, you can set save address with ticking out “Auto Locate” and modifying object address, as shown below: 186 Software Parts 6-15. Event Button “Event Button” is used for viewing history data or multi-page data with operating the cursor of data save components to cooperate with “History Data Map” and “History Event”. 1) Click“ ”and press left mouse button on the screen to add it, as shown below: 2) Double-click it to open its property dialog box. Firstly, set the action of button ,as shown below: Event Button integrates several function buttons, as shown below: 187 Software Parts Prev Page -- Page up the data objects and displays them Next Page -- Page down the data objects and displays them Prev Item -- Point to previous item of the current data item Next Item -- Point to next item of the current data item OK --Confirm all the data items and record the current time. Reset Content –Clear all the data in the data object The following is “Button” tab page, please refer to previous chapters for relevant introduction. 4) Please refer to relevant chapters for introduction about “Color” and “Position”. 188 Software Parts 6-16. Display Real Time Event “Display Real Time Event” is used for reflecting the currents event at real time and describing them with text. In project application it is often used as information note, alarm and so on. 1) Click “ ”and press left mouse button to add it ,as shown below: 2) Double-click it to open its property dialog box. The first tab is “Aspect” with which name, rows, row parameters, align manner can be set. 3) In “Event” tab page, you can set spring address, information and others. Also, you can add several items of event information, as shown below: 189 Software Parts Click “Modify” or double-click the alarm information in the first line, the following dialog box will appear: Modify the alarm information in “Information” tab page, as shown below: 190 Software Parts 4) Please refer to relevant chapters for introduction about “Font”, “Color” and “Position”. 191 Software Parts 6-17. History Event It is similar with Display Real Time Event. The difference between them is that “Display Real Time Event” displays the current status of data source and “History Event” can display and save them. 1) Click “ ”and press left mouse button on the screen to add it, as shown below: 2) Double-click it to open its property dialog box. The following is “Aspect” tab page in which title name, align manner, number of rows, total number of events and if show year can be set. 192 Software Parts 3) In “Event” tab page, you can set spring address, spring manner and alarm information and so on. Click “Add” button can add event; Click “Modify” button can modify the selected event, as shown below: Spring Address 193 Software Parts Spring Event Spring Manner 194 Software Parts 6-18. Sample Save This function is used for picking assigned registers every certain time and saving these data in a section of assigned address. 1) Click“ ”and press left mouse button on the screen to add it, as shown below: 2) Double-click it to open its property dialog box .The first tab is “Object” in which you can add, modify, delete and set sequence of the samples. 3) In “Pick” tab page, you can set total amount of data , pick period ,manner of time and so on . 195 Software Parts 4) In “Save” tab page, you can modify the samples’ save address which is internal address of touch panel, as shown below: 5) Please refer to relevant chapters for setting introduction about “Position”. 196 Software Parts 7 ALARM WINDOW Alarm window is used to display alarm message when triggering. It controls message display by a bit address of PLC. 1) Create a new alarm window. It is similar to creating a new window. So, it has two ways. A:①Click “Alarm” in the manage column with the left mouse button to make it in the highlight color. ②Click New icon “ ”in the Operate Toolbar. ① ② B:Insert a window in the project manager. (The detail operations are as the following) Click the window in the project manager with your left key to make it turn to hightlight color. right-click it and choose “Insert” in the pop-up menu. Then 2) There will come out a new alarm window dialog box. Set the window’s name, width, height, register and pop period and then click “OK” to confirm. 197 Software Parts Signal address which can spring alarm 3) The finished alarm window is showing in the following figure; “No repeat pop” means when the alarm window pop one time, it will not alarm again. “5 sec” means after Alarm window pop out and press “OK” to cancel, the alarm window will appear every five seconds. “10sec”, “30sec”,“1min”,“5min”, “10min” , “30min” are the same as “5 sec” 4) Double-click “Alarm” and “Alarm Define” and then a Text dialog box will open in which information and details can be modified, as shown below: 5) When alarm happens, a window will pop out automatically. The operator can take effective measures at once to solve the problem. Press “OK” to close the alarm window. 198 Software Parts 8 PRINT WINDOW This chapter introduces the essential operation of Print Window 8-1. Create A New Window It is a bit address message of PLC to control the pop of print window and spring the print action. The window’s content is the print content. 1. Create a new window. It is similar to creating a new window. So, it has two ways. A:①Click “Print” in the project manager with the left mouse button to make it turn to highlight color. . ②Click new icon“ ” in the Operate toolbar. ① ② B:Insert a window in the project manager (The following are the details) Click the window in the project manager with the left mouse button to make it turn to highlight color. Then right-click it and choose “Insert” in the pop menu. 2) There will pop out a new print window dialog box. Set its name, width, and height, spring object and print direction. Then, click “OK” to confirm setting. 199 Software Parts A register bit of PLC. Take M0 as an example, when M0=1, the print window pops, at the same time prints the window’s content. When you don’t want to print them, spring object’s value will be set 0. 3) Add the print content you want in the print window’s corresponding position and you will finish print window’s setting. (the left map is a new screen window and the right one is the finished) 200 Software Parts 8-2. Connection of the printer Printer side TP series touch screen side 9 pin D-Sub Female Busy 2 RXD Data 3 TXD GND 5 GND 6 DSR Parameter setting: Baud Rate: 9600, Parity Check: Even, Handshake: has no limitation 201 Software Parts 9 SIMULATE FUNCTION Simulate Function is used for simulating actions and debugs of touch screen in the software without downloading program to TP. With this function, operator can do the project more convenience with less work.. 9-1. Simulate Offline Simulate offline function is used for simulating button actions in TouchWin software in PC without downloading data to touch screen, also, the data address read is local address. Therefore, you can browse the edit effect directly, moreover, you can modify the dissatisfied effect at will which can save time and make the operation more convenient. Take the following as an example: 1) Firstly, edit a new screen and save it, then place a button and a lamp on the screen with two object addresses as default value: PSB0, as shown below: 2) Click “ effect: 202 ”or from File>Run Offline, you can enter the simulating state. The following shows the Software Parts As shown above, the lamp is red which shows the button value is “0”, when you click Control button, the button value will be set “1”, then the lamp will change, as shown below: 203 Software Parts 9-2. Simulate Online This function is used for reading data from PLC and simulating touch screen actions in PC software with connecting PC and PLC. Also, this function can help operator save time as the project needed not to download to the touch screen. Please pay attention that set right connection between PC and PLC as well as COM port Take the following as an example: 1) Firstly, place a lamp on the project screen which will controlled by PLC. Here we choose Thinget XC series, as shown below: 2) After saving this screen , click“ Simulate Online state, as shown below: 204 ”in the Operate toolbar or from File> Run online, you can enter Software Parts 3) Right-click on the simulating screen, a pop-up menu will appear (as shown above).Pay attention to “Com Port” and click it, then you can see the following window: 4) Please set PLC and Download Ports correctly, otherwise “Communicating” will appear in the screen and it can’t simulate, as shown below: 5) Turn on the X0 of PLC, namely set “1” for X0, and then observe what will change in the simulating screen, as shown below: 205 Software Parts 6) Now, the PLC succeeds to simulate the control process without connecting touch screen. 206 Software Parts 9-3. Configuration This function is similar with “Simulate Online”. The only difference is that Configuration can do the simulating function separately without opening graphics edit software. 1) Firstly, edit a project screen and save it . 2) From File menu, select “Build SCADA” 3) Then, a window will pop out which is used for saving configuration files, as shown below: 4) Select address to save files, then click “OK” to finish it. 5) In the address of saving, you may find there have been add some files: 6) When you need to simulate operations, please click “AutoWin.exe”to enter its state, as shown below 207 Software Parts 7) Please refer to Simulate Online for more information about how to set COM port . 208 Software Parts 10 SPECIAL FUNCTIONS This chapter mainly introduces the internal address of TP series touch screen and relevant operations between TP and inverts. 10-1. TP Series Internal Object There are three kinds of TP series internal object: PSB, PSW and PFW PSB: Bit PSW: Word object need power PFW: Word object which can maintenance without power 1) The following figure shows internal object’s range of various types of inverter. Type Object TP460-L PSB PSB256~PSB1023 PSW PSW256~PSW1023 PSW256~PSW409 5 PFW PFW256~PFW1023 PFW256~PFW409 5 TP560\561 TP760-T TPA60\A61 2) The range of PFW can be set by yourself, the above figure describes the default value of system. How to set PFW is shown below: ①Click “Setting” from “File” menu, as shown below: 209 Software Parts ②From “panel”, click “set parameter” can modify the number of PFW, as shown below: 210 Software Parts 0~255 internal objects are used for system to realize special functions. The following figure shows part of these functions with high frequency used. Bit object: PSB Object Name Function PSB0 Normal Closed Coil PSB1 Normal Open Coil PSB2 Set the coil “On” when frist scan after TP starts up Illustration 50m s PSB3 ON Pulse coil with 100ms as period O FF 50m s 500m s PSB4 Pulse coil with 1s as period ON O FF 500m s 30 s PSB5 Pulse coil with 1 minute as period ON O FF 30s 150 m s PSB6 Pulse coil with 300ms as period ON O FF 15 0 m s PSB10 Flag coil of general password (1: password closed) open, 0:password PSB11 Flag coil of advance password (1:password open, 0:password closed) PSB12 Flag coil of system password (1: password closed) open, 0:password PSB15 Flag of failed communication 0:communication 1:communication failed successful PSB16 Flag of one successful screen scan PSB30 first scan after downloading PSB31 first scan after electrifying PSB39 Close touch screen 211 Software Parts Word Object: PSW Object Name Function PSW0 Start screen No. PSW1 Current screen No. PSW20 Screen width (Read only ) PSW21 Screen height (Read only) PSW26 Total Number of PSB ( Read only) PSW27 Total Number of PSW ( Read only) PSW28 Total Number of PFW (Read only)With PSW28 and PSW 29 PSW30 Year (Hex)(Read only) PSW31 Month (Hex)(Read only) PSW32 Day (Hex)(Read only) PSW33 Hour (Hex)(Read only) PSW34 Minute (Hex)(Read only) PSW35 Second (Hex)(Read only) PSW36 Week (Hex)(Read only) PSW40 Recipe index PSW54 Number of Device PSW60 COM 1(Download) Times of successful communication PSW61 COM 1 (Download) Times of failed communication PSW62 COM 1(Download) Times of overtime communication PSW63 COM 1 (Download) Times of communication data turn wrong PSW64 COM 1(Download) Device version PSW65 COM 1(Download) Device Type PSW70 Times of successful communication of COM 2 (PLC) PSW71 Times of failed communication of COM 2(PLC) PSW72 Times of overtime communication of COM 2 (PLC) PSW73 Times of error data communication of COM 2 (PLC) PSW74 Device version of COM 2 (PLC) PSW75 Device Type of COM 2 (PLC) Illustration Note: PSW60~ PSW65 shows communication condition when use COM 1(Download) to connect slave PLC 212 Software Parts Word Object: PFW Object Name Function PFW1 Start Screen No. PFW2 Black color Setting 0~255(256 color) PFW4 Common password PFW4、PFW5 PFW6 Advance password PFW6、PFW7 PFW8 System Password PFW8、PFW9 PFW10 Time for start screen protect PFW11 Displayed screen No. for Illustration screen protect PFW20 COM 1(Download ) baud rate 4800、9600、19200、38400、115200、 187500 PFW21 COM 1(Download) data bit 7,8 PFW22 COM 1(Download ) stop bit 0-1 bit, 1-1.5 bits, 2-2 bits PFW23 COM 1(Download) parity check 0-None, 1-Odd, 2-Even PFW24 COM1(Download) station No. PFW25 COM 1(PLC) Send delayed data Unit: ms PFW30 COM 2(PLC) baund rate 4800、9600、19200、38400、115200、 187500 PFW31 COM 2 (PLC) data Bit 7,8 PFW32 COM 2 (PLC) stop bit 0-1 bit, 1-1.5 bits, 2-2 bits PFW33 COM 2(PLC) parity check 0-None, 1-Odd, 2-Even PFW34 COM 2(PLC) station No. PFW35 COM 2 (PLC) send delayed data Unit : ms 213 Software Parts 10-2. Communication between TP and inverters TP series touch screen add a new function to communicate with inverter on the base of original function. The following will take Mitsubishi FR series transducer as example to describe. 1)Firstly, open TouchWin Edit Tool to create a new project: 2) Choose a corresponding display, click “next”: 3) Choose Mitsubishi FR series inverter in the table, take “setting” as system default and then click “next”: 4) Type name, author, remark and so on, then click “Finish” to enter the edit screen. 214 Software Parts Here TP control forward, reverse, stop of the motor by modifying internal parameters, input frequency of inverter .At the same time, touch screen can display the alarm code, output frequency, output voltage, output current and other status. The following will give a detail presentation for the unit. Place the “Digital Display” component on the screen and open its property dialog box. From default tab “Object”, you can select object type from the object list. 215 Software Parts Alm Code: Correspond to the alarm codes inside the inverter. You can use Chinese to display the alarm message Set Frequency: Correspond to the set of inverter’s frequency. Out Frequency: Correspond to the output frequency of the inverter. Out (I): Correspond to the output current of the inverter Out (V): Correspond to the output voltage of the inverter Parameters: Correspond to the different parameters inside the inverter, the you can appoint a certain pa rameter in the inverter and display it on the touch screen. Code: Correspond to the different command codes inside the inverter, you can assign a certain order code to control the frequency and make it do the corresponding action. Click “Display” and set it with screen clue and technical requirements, as shown below: 216 Software Parts ②.Place “ ” (inverter alarm information) on the screen, as shown below: The object tab of Inverter Alarm Information is same to digital display’s. The following describes relevant parameters of Display tab: Description presentation: 16 Over-circuit is cut off when speeding up 17 Over-circuit is cut off when speed is determined 18 Over-circuit is cut off when speeding down 217 Software Parts 32 Regenerative over-voltage is cut off when speeding up 33 Rebirth over-voltage is cut off when speed is determined 34 Rebirth over-voltage is cut off when speeding down or stop 48 Inverter over-load open circuit 49 Electric machine over-load open circuit 64 Radiator is over the temperature 96 Loss speed precaution 112 Control-action transistor alarm 128 Output side connect to the ground over-circuit protection 129 Output wrap the phase protect 144 Outside hot relay act 160 Choose unit abnormal 176 Parameter memory abnormal 177 Parameter unit drop off 178 Retry times exceeds 243 Choose unit abnormal 246 CPU error 247 CPU error 0 No alarm information 218 Software Parts ③.Place“ ” on the screen and open its property dialog box, as shown below: The following mainly introduce object type in object tab page. you can refer to other components for more information about other tab pages. Forward/Stop corresponds to forward status or stop status of inverter, ON stands for forward, OFF stands for reverse and stop. Reverse/Stop correspond to reverse status or stop status of inverter, On stands for forward, OFF stands for reverse, OFF stands for forward and stop Run Status correspond to running status of inverter, On stands for running, OFF stands for stop running. Rolling status correspond to rolling status of inverter, ON stands for forward, OFF stands for not forward. Alarm correspond to current internal alarm code of inverter ④.Please refer to previous chapters for introduction about relevant properties. 219 Application APPLICATION -- This chapter takes connecting communication of TP series ouch screen and password setting as examples to describe how to operate TP in pplications 1. TP series operate methods 1-1. TP series online communication 1-2. TP series touch screen password 221 Application 1 TP SEREIES OPERATE METHODS Take TP’s communication and password application as examples. 1-1. TP series online communication After the screen’s data download is finished, cut the power off and pull out the screen transfer cable OP-SYS-CAB0.Then, connect TP series DOWNLOAD port and PLC communication port with PLC communication cable. Check that if the PLC’s communication parameters are correct. Meanwhile, electrfy PLC and TP(TP series use DC 24V power),the display will enter the status of run at once. NOTE:No matter whether PLC is in the status of running or programming, TP series touch screen can work regularly. 1-2. TP Series Touch Screen Password In order to improve the machine’s safety, the data on the touch screen must be modified only by the professional personnel. So, this demands that the touch screen must have the function of data protection. The following we will introduce the touch screen’s password setting. 1) Firstly, from File/Setting, set the system’s parameter. 2) There will pop out a system setting dialog box, input the password and then click “OK” to confirm it The password has three grades: Common, Advanced and Systemic Common password can only carry out password protection function of normal grade. Advanced grade password can carry out password protection function of high grade and common grade. When input system password, you can carry out all the password operations. 222 Application 3) Create a project screen, set a “Screen Jump” button with which it can jump to password page. 4) Press “Screen Jump” button to jump to the password screen 5) Press “open password” button to enter password input screen.. 223 Application 6) Press “ ”after inputting the password. If the password is right, it will prompt password is open, otherwise, it will prompt password is wrong, as shown below: Prompt after inputting correct password Prompt after inputting wrong password 7) Press “Close password”,pop out the close password dialog box, but the operation that has password protection cannot be carried out. 8) Press “back” button to return to the original screen. 224 Appendix -- connecting methods with popular PLC APPENDIX 1 PLC CONNECTING METHODS The following introduces communication setting and connecting of TP and various popular types of PLC. 1-1. Thinget FC/XC Series TP Software Setting Parameters Recommend PLC model Thinget FC/XC series COM port RS232 Data bits 8 Stop bits 1 Parity bits Odd Baud rate 9600 Station No. 1 Device Address: FC ID type Range Format Introduction M 0~383 DDD Assistant point inside W 0~2047 DDDD Data memorizer D stands for decimal data XC ID type Range Format Presentation M 0~7999 DDDD Assistant point inside D 0~7999 DDDD Data memorizer D stands for decimal data 225 Appendix TP-FC- CAB0 Wiring Diagram TP series touch screen side 9P D-SUB Female FC/XC series PLC side 8P D-SUB male 8P Mini DIN Male(Port1、Port2) 226 Appendix 1-2. Mitsubishi FX Series TP software setting Parameters Recommend PLC model Mitsubishi FX series Data bits 7 Stop bits 1 Parity Check Even Baud rate 9600 Station No. 0 Device Address: PLC Address Type Range Format Introduction X① 0~267 O Exterior input terminals Y① 0~177 O Exterior output terminals M① 0~1023 D Internal assistant terminals S① 0~999 D Special assistant terminals T(as status) 0~255 D Timer status C 0~255 D Counter terminals C16 0~199 D 16 bits counter (C32) 200~255 D 0~8255 T(as register) 0~255 32 bits counter D Data memorizer Current Value ①X、Y、M、S can be extend as registers 227 TP-FX-CAB0 Wiring Diagram 1 CPU Unit TP series touch screen side 9P D-SUB Female FX series CPU RS422 port 8P Mini Din Female 1 TD+ 2 RD+ 6 TD- 1 RD- 8 RD- 4 TD- 9 RD+ 7 TD+ 5 GND 3 GND 2 Communication Modules RS232BD TP series touch screen side 9P D-SUB Female FX series PLC side 8P D-SUB Female 2 TX 2 SD 3 RX 3 RD 5 GND 5 GND 3 Communication Module RS485BD TP series touch screen side 9P D-SUB Male 4 A 5 GND 7 B FX series RS485BD module RS485 port 5 wiring terminals RDA ● SDA SG ● RDB SDB 228 Appendix 1-3. Siemens S7-200/300/400 Series Software Setting Parameters Recommend PLC Model S7-200 COM Type RS485 Data Bits 8 Stop Bits 1 Parity Check Even Baud Rate 9600 Station No. 2 Device Address PLC Address Type Range Format Introduction VB 0~4095 DDDD Data register (byte) VW 0~4095 DDDD Data register (word) M 0~255.7 DDD.O Internal terminals VD 0~4095 DDDD Data register (double-word) assistant Memo: D stands for decimal data TP-S7-CAB0 Wiring Diagram CPU Unit TP series touch screen side 9P D-SUB Male FX series RS485 BD module RS485 port 5 wiring terminals 229 Appendix 1-4. Omron C Series Software Setting Parameters Recommend PLC Model OMRON COM Type RS232 Data Bits 7 Stop Bits 2 Parity Check Even Baud Rate 9600 Station No. 0 Device Address PLC Address Type Range Format Introduction IR 00000~24315 DDD(BB) As terminals and registers SR 24400~25515 DDD(BB) As terminals and registers HR 0000~9915 DD(BB) PLC As terminals and registers AR 0000~2715 DD(BB) PLC As terminals and registers LR 0000~6315 DD(BB) As terminals and registers TC 0~512 DDD Status value Timer/Counter DM 0~6655 DDDD Data register PV 0~512 DDD Current value Timer/Counter of of TP-CQM-CAB0 Wiring Diagram 230 Appendix TP series touch screen side 9P D-SUB Female OMRON PLC side 9P D-SUB Male 2 RXD 3 RXD 3 TXD 2 TXD 5 GND 9 GND Memo: A)Set OMRON plc in “Monitor Run” mode. Operation: change the value in DM6600 to H0201 and electrify afresh ,then it will operate. B)Communicating with CPM1A, you need to use CIF01 cable supplied by Xinje Electronic Co.,Ltd. 231 Appendix 1-5. Koyo S Series Software Setting Parameters Recommend PLC Model KOYO COM Type RS232 Data Bits 8 Stop Bits 1 Parity Check Odd Baud Rate 9600 Station No. 1 Device Address PLC Address Type Range0 Format Introduction I 0~477 OOO Exterior input terminals Q 0~477 OOO Exterior output terminals M 0~377 OOO Internal assistant terminals T 0~177 OOO Timer terminals C 0~177 OOO Counter terminals S 0~777 OOO Step terminals R 0~41037 OOOOO Data register Memo: O stands for octal data 232 Appendix TP-SZ-CAB0 Wiring Diagram 1. CPU Unit (DL05/DL105/DL230/DL250/DL350/DL450 RS232 Port) Direct Logic series RS232 port 6P RJ-11 Male 4 TX TP series touch screen side 9P D-SUB Female 2 TX 3 RX 5 GND ● 3 RX 1 GND 6 GND Memo: DL05 series port1&2、DL240’s port1&2、DL250’ port1、DL350’s port1 and DL450’s port2 are all hardware ports of RJ-11, the wiring diagram as shown above. 6P RJ-11 Phone Jack 233 Appendix 2. CPU Unit(DL250 CPU Unit Port2 RS422) DL250 CPU unit RS422 port 15 P SVGA Female 10 TX- TP series touch screen side 9P D-SUB Female 8 RD- 9 RD+ 9 TX+ 5 GND 7 GND 6 TD- 6 RX- 1 TD+ 13 RX+ 11 RTS+ 14 CTS+ 12 RTS- 15 CTS- Memo: DL250 unit’s Port2 combines RS232 and RS422 these two electric ports, when using, please pay attention to their type setting. 3. CPU Unit(DL430/DL440/DL450 CPU Unit Port1&DL350 CPU Unit Port2 RS232) 3 TXD DL350/405 series CPU RS232 port 25P D-SUB Female 2 TX 2 RXD 3 RX 5 GND 7 GND 4 RTS 5 CTS TP series touch screen side 9P D-SUB Male 234 Appendix 1-6. Delta DVP series Software Setting Parameters Recommend PLC Model Delta DVP COM Type RS232 Data Bits 7 Stop Bits 1 Parity Check Even Baud Rate 9600 Station No. 1 Device Address PLC Type Address Range Format Introduction X① 0~377 OOO Exterior terminals input Y① 0~377 OOO Exterior terminals output M① 0~1279 DDDD Internal relay S① 0~1023 DDDD Step terminals T 0~255 DDD Timer terminals C 0~255 DDD Counter terminals D 0~1279 DDDD Data register TD 0~255 DDD Current timer value of CD 0~255 DDD Current counter value of assistant Memo: D stands for decimal number, O stands for octal ①X、Y、M、S all could be extend as registers 235 TP-DVP-CAB0 Wiring Diagram TP series touch screen side 9P D-SUB Male Delta DVP series 8P MiniDin Male 2 RXD 4 RXD 3 TXD 5 TXD 5 GND 8 GND Memo: Delta DVP series PLC contain DVP-14/24/32/60ES00 and DVP-XXESO1 etc model,all can be connected with TP touch screen by program communication port on CPU unit. 236 Appendix 1-7. LG Master-k series PLC Software Setting Parameters Recommend PLC Model LG Master-k PLC COM PORT2 PORT1 protocol Modbus Slave PRG Data Bits 8 8 Stop Bits 1 1 Parity Check Even None Baud Rate 9600 34800 Station No. 1 1 237 Device Address PLC Address Type Range Format Introduction P① 0~127F DDDH Input/Output terminals K① 0~31F DDH Guard terminals M① 0~191F DDDH Internal assistant terminals L① 0~63F DDH connect termials F① 0~63F DDH Read only T 0~255 DDD Timer Terminals C 0~255 DDD Counter Terminals TD② 0~255 DDD Current value of Timer CD② 0~255 DDD Current value of Counter D② 0~5119 DDDD Data register SD② 0~100 DDD Step relay relay ① As register ② Can be extended as register. TP-LG-CAB0 Wiring Diagram 1. PORT1 TP series touch screen side 9P D-SUB Female 238 Master k series CPU 9P D-SUB Female 2 RXD 2 RXD 3 TXD 3 TXD Appendix 5 GND 5 GND 2.PORT2 TP series touch screen side 9P D-SUB Female Master k series CPU RS232 port 9P D-SUB Female 4 RXD 2 RXD 3 TXD 7 TXD 5 GND 5 GND 239 1-8. Matsushita FP series PLC Software Setting Parameters Recommend PLC Model Panasonic FP COM Type RS232 Data Bits 8 Stop Bits 1 Parity Check None Baud Rate 9600 Station No. 1 Usually we default FP series PLC’s station number as 1,but FP3 has special control,the station number must be 0. Please pay attention to communication setting of PLC when connecting. Device Address PLC Address Type 240 Range Format Introduction X 0~12F DDH Exterior terminals WX 0~12 DD As registers Y 0~12F DDH Exterior terminals WY 0~12 DD As registers R 0~62F 90~903F DDDH Internal terminals WR 0~62 900~903 T 0~99 DD Timer terminals C 100~143 DD Counter terminals SV 0~143 DDD setting value of timer or counter EV 0~143 DDD Current value of timer of counter DT 0~9999 DDDD Data registers input output assistant As registers Appendix TP-FP-CAB0 Wiring Diagram Memo: NAIS FP series PLC contains FP0/1/2/3/2SF/10SH etc. all of them can be connected to TP touch screen by program port on CPU or communication port. 1. CPU Unit RS232 TP series touch screen side 9P D-SUB Female FP0/FP2/FP2SH/FPM CPU 5P MiniDin Female 2 RXD 3 RXD 3 TXD 2 TXD 5 GND 1 GND TP series touch screen side 9P D-SUB Female FP1/FP2/GP2SH/FP10SH CPU RS232 Port 9P D-SUB Female 3 TXD 2 RXD 3 TXD 2 RXD 5 GND 5 GND 1 CD 7 RTS 8 CTS 4 DTR 6 DSR ● 5P MiniDin Female Memo: 241 In FP0 series only FP0-CXXCXX model has RS232 communication port. 1-9. Schneider PLC TP Software Setting Parameters Recommend PLC Model Schneider COM Type RS485 Protocol MODBUS Transfer MODE Frame RTU Data Bits 8 Stop Bits 1 Parity Check Even Baud Rate 9600 Station No. 1 Device Address PLC Address Type Range Fromat M 0~2047 DDDD Internal terminals MW 0~2047 DDDD Register terminals Introduction TP-NEZA-CAB0 Wiring Diagram TP series touch screen side 9P D-SUB Female Schneider PLC side 8P D-SUB Male 4 A 1 A 7 B 2 B 5 242 Appendix 7 1-10. Fatek FB series PLC TP Software Setting Parameters Recommend PLC Model Fatek FB COM Type RS232 Data Bits 7 Stop Bits 1 Parity Check Even Baud Rate 9600 Station No. 1 Device Address PLC Address Type0 Range Format X① 0~255 DDD Exterior input terminals Y① 0~255 DDD Extrior output terminals M① 0~2001 DDD Internal input terminals S① 0~999 DDD Sequence control terminals T(As status) 0~255 DDD Timer status C 0~255 DDD Counter terminals C16 0~199 DDD 16 bits counter 200~255 DDD 32 bits counter 0~9000 DDDD Data Memory D 0~3071 DDDD Data Memory TD ( As register) 0~255 DDD Timer (C32) R Introduction ①X、Y、M and S all could be expand as register 243 TP-FB-CAB0 Wiring Diagram MA series standard CPU unit offer one HCMOS COM port, MC series offer three COM ports (1HCMOS & 1RS232 & 1RS485). MA series CPU unit can be connected after you let HCMOS transfer to RS232/RS485 visa communication module FB-DTBR or FB-DTBR-E. 1) RS232 Port TP series touch screen side 9P D-SUB Female MC series CPU RS232 port communication module FB-DTBR/DTBR-E 232 port 15P D-SUB Male 2) Communication Module FB-DTBR/DTBR-E TP series touch screen side 9P D-SUB Female 2 RXD 3 TXD 5 GND Communication Module FB-DTBR/DTBR-E 232 口 9P D-SUB Male 2 TXD 3 RXD 7 GND 3) RS485 port TP series touch screen side 9P D-SUB Female 244 4 A1 7 B1 Communication Module FB-DTBR/DTBR-E RS485 port DD+ Appendix 1-11. Vigor VB series PLC TP Software Setting Parameters Recommend PLC Model Vigor VB COM Type RS232 Data Bits 7 Stop Bits 1 Parity Check Even Baud Rate 19200 Station No. 1 Device Address PLC Address Type Range Format X① 0~777 O Exterior input terminals Y① 0~777 O Exterior output terminals M① 0~9255 D Internal assistant terminals S① 0~999 D Special assistant terminals TSTATUS 0~255 D Timer status CSTATUS 0~255 D Counter terminals TCOIL 0~255 D CCOIL 0~255 D C16 0~199 D 16 bits counter C32 200~255 D 32 bits counter D 0~9255 D Data memory TW ( As register) 0~255 D Current value Introduction ①X、Y、M and S could be expanded as registers 245 TP-VB-CAB0 Wiring Diagram TP series touch screen side 9P D-SUB Female 246 Vigor VB side RS232 port Appendix 1-12. Fuji SPB series TP Software Setting Parameters Recommend PLC Model Fuji SPB COM Type RS485 Data Bits 8 Stop Bits 1 Parity Check Odd Baud Rate 19200 Station No. 1 247 Device Address PLC Address Type Range Format X 0~63 D Exterior input terminals Y 0~63 D Exterior output terminals M 0~63 D Internal assistant terminals L 0~255 D Special assistant terminals T 0~511 D Timer status C 0~255 D Counter terminals SM 32768~33279 D WX 0~63 D WY 0~63 D WM 0~63 D WL 0~255 D WSM 32768~33023 D D 0~8191 D Data memory TW ( As register) 0~511 D Timer CW 0~255 D Counter LD 0~10000 D SD 32768~33023 D Introduction TP-SPB-CAB0 Wiring Diagram TP series touch screen side 9P D-SUB Female 248 Fuji SPB side 8P D-SUB Male Appendix 1-13. Keyence KV series PLC TP Software Setting Parameters Recommend PLC Model KV COM Type Program RS232 Data Bits 8 Stop Bits 1 Parity Check Even Baud Rate 9600 Station No. 1 Port Device Address PLC Address Type Range Format Introduction R 0~999 D Coil terminals DM 0~8000 D Data memory TP-SPB-CAB0 Wiring Diagram TP series touch screen side 9P D-SUB Female KV side RS232 port 249 1-14. Emerson EC20 series PLC TP Software Setting Parameters Recommend PLC Model EC20 COM port RS232 Data Bits 8 Stop Bits 1 Parity Check Even Baud Rate 19200 Station No. 1 Device Address 250 PLC Address Type Range Format X 0~377 O Exterior input terminals Y 0~377 O Exterior output terminals M 0~2047 D Internal assistant terminals S 0~1023 D Special assistant terminals T 0~255 D Timer Status C 0~255 D Couter terminals SM 0~9999 D D 0~7999 D SD 0~255 D Z 0~15 D T 0~255 D Timer C16 0~199 D 16 bits counter C32 200~255 D 32 bits counter Introduction Data register Appendix TP-EC20-CAB0 Wiring Diagram RS232 communication TP series touch screen side 9P D-SUB Female EC20 side COM0, COM1 RS485 communication TP series touch screen side 9P D-SUB Female EC20 side COM0, COM1 251 1-15. OEMax NX7 series TP Software Setting Parameters Recommend PLC Model NX7 COM Type RS232、RS485 Data Bits 8 Stop Bits 1 Parity Check None Baud Rate 9600 Station No. 1 Device Address 252 PLC Address Type Range Format R 0~127 D L 0~63 D M 0~127 D K 0~127 D F 0~15 D TC 0~255 D W 0~6000 D SV 0~255 D PV 0~255 D SR 0~511 D Introduction Appendix TP-NX7-CAB0 Wiring Diagram TP series touch screen side 9P D-SUB Female NX7 side 232 port 9P D-SUB 253 MEMO 254