Download 19-inch LED Adjustable Upright Console Piano Lamp
Transcript
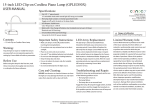
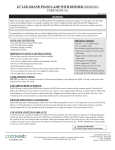
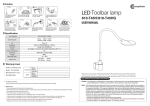
19-inch LED Adjustable Upright Console Piano Lamp (PLED100A)
USER MANUAL
Specifications:
One-point adjustable height
19” swivelable shade with natural light LED array pre-installed
The lamp shade contains 12 evenly spaced LED nodes
Toggle on/off switch located on the lamp shade
LED lifespan: 50,000 hours
Color Temperature: 3000 K
Power Usage: Less than 10 watts
Electrical cord: 9.5 feet long
UV and infrared-free LED technology
Universal 24v 0.5A DC power adapter
Contents:
19-inch LED Upright Console Piano Lamp
24V 0.5A DC Power Adapter
Caution:
Any attempts to repair or modify this lamp in
any way which are not expressly approved in
writing by Conoco Web will void any warranties.
Before Use:
Before using this lamp for the first time, read
these instructions thoroughly and store them
in a safe place for future reference.
Important Safety Instructions: LED Array Replacement:
Make sure the lamp is in the off position before
plugging into a wall outlet.
Do not place near any extreme heat or in direct
sunlight.
Place on an even and secure surface.
Use only the supplied power adapter.
Do not use with damaged electrical cords.
Keep the lamp dry and clean.
Never overload electrical circuits as it may cause
electrical shock or fire.
For use in indoor dry rooms only. Not suitable
for damp rooms.
Do not look directly into the light source.
Care and Cleaning:
DO NOT use abrasives or chemical cleaners to clean
the lamp as it may damage the finish. Use only warm
water, then wipe dry with a clean soft cloth.
The LED array is rated to last 50,000 hours.
Should the LED bulbs cease to function in the
warranty period, Conoco Web will replace the
LED array free of charge. Conoco Web may at its
choice, send a replacement LED array or request
for the whole lamp to be shipped to a Conoco
Web location or authorized dealer. Shipping and
handling charges may be incurred. After the 2 year
warranty period, you may purchase a replacement
LED array by contacting Conoco Web
customer service.
Troubleshooting and Repair:
Should the lamp stop working properly and/or one
of the following problems occur:
The lamp fails to turn on.
The lamp flickers.
The lamp dims to an unusual level.
Turn the lamp off using the toggle switch, recheck
all connections and then turn the lamp back on.
If the problem persists, discontinue use of lamp and
contact Conoco Web customer service.
The information contained in this document is subject to change without notice.
COPYRIGHT © CONOCO WEB 2013
™
CONOCO WEB, INC.
42 Corporate Park, Suite 250
Irvine, CA 92606
Phone: 1-888-783-0378
www.conocoweb.com
Danger of suffocation
Keep children away from packaging
Limited Warranty Info:
Conoco Web warrants its products to be made
of first class materials, free from defects of
material or workmanship under normal use and
to perform the service for which they are
intended in a reliable and efficient manner when
properly installed, for a period of two years from
the date of purchase. Failure of the product
under normal operating conditions, may be
repaired by Conoco Web or our authorized
service dealer free of charge. Some shipping
and handling charges may be incurred. During
the warranty period, Conoco Web will, at its
choice, repair or replace any part or parts which
prove to be defective if returned to Conoco
Web. Warranty may be void if mishandling,
abuse, improper operation, modification,
attempted repair or any unauthorized tampering occurs. Damage from natural conditions
such as fires, pollution, earthquakes or any other
natural or unnatural conditions, accidents, etc.
are not covered under this limited warranty.
LAMP USAGE
STEP I. TURN THE LAMP SHADE TO THE DESIRED
POSITION (FIGURE A AND B).
STEP II. ADJUST THE HEIGHT OF THE LAMP;
HEIGHT CAN BE ADJUSTED BETWEEN 14.5”
AND 16.5“.
1. To adjust the height of the lamp -- Loosen the
thumbscrew at the back of the lamp (Figure C)
2. Adjust to the desired height (Figure D)
3. Tighten the thumbscrew to secure the lamp
height in place.
STEP III. PLUG THE ADAPTER CONNECTION INTO
THE BACK OF THE LAMP BASE (Figure E).
(Figure D)
(Figure C)
STEP IV. PLUG THE POWER ADAPTER INTO A
WALL OUTLET.
STEP V. LIGHT CONTROLS: THE ON/OFF TOGGLE
SWITCH IS PRE-INSTALLED ON THE LAMP
SHADE. SIMPLY TOGGLE THE TOGGLE SWITCH
TO TURN THE LAMP ON OR OFF.
(Figure E)
™
(Figure A and B)
The information contained in this document is subject to change without notice.
COPYRIGHT © CONOCO WEB 2013
CONOCO WEB, INC.
42 Corporate Park, Suite 250
Irvine, CA 92606
Phone: 1-888-783-0378
www.conocoweb.com


