1
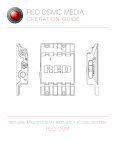
Controlling the Red Dragon using the Laptop:
User Manual V1.1 February 2015
Controlling the Epic or Dragon is rock-solid using the laptop. It’s also possible to control
the camera via a Redmote, but it may not be as reliable.
To control the Dragon through the AgileCine-modified Cineflex laptop do the following:
There are two modes: Production mode– for when you are shooting. Setup mode for all
other times.
Production Mode:
Doubler switch is in 1x.
Use this mode when shooting. Here are the functions:
Record:
Press the joystick Quick Zoom Button (closest to operator):
Press and release: Record/Pause toggle.
Control the Motion Mount ND:
Press and hold the joystick button. While doing this, move the zoom rocker lever up or
down to increment/ decrement the ND.
Toggle Overlay-Free Mode For Clean HDSDI Recording:
Hold up on the Roll switch (as though you were adjusting the backfocus) for 10 seconds.
This mode will allow a clean HDSDI recording whenever the Red is commanded to
record. When you stop recording, the menu overlays will return.
To enable, hold the spring-loaded roll switch up once to enable Overly-Free Mode.
Toggle again to disable. Note that Overly-Free-Mode is set to OFF at power up.
Expended Focus Range:
Each lens has two focus ranges. These include Enhanced Infinite Mode, and Broad
Range Mode(BRM). In Enhanced Infinite mode close-focus is limited so that more of
the focus know will control the region of the lens near infinite. In BRM, the lens has a
broader focus range. Note that this function is available on systems that have been
upgraded after 1/1/15.
To enter Enhanced Infinite Mode: While in 1x, hold the joystick button down. Then roll
the focus know to infinite twice. Simply move the focus know from the middle to
infinite then back. Do it twice within a couple of seconds, and the system will give you
better focus at infinite.
To enter Broad Range Mode, do the opposite. Roll the focus to minimum focus twice
while holding the joystick button (while in 1x mode). Roll the focus knob twice, and the
system will give you more range for close focusing.
Note: Our newest lenses have a dip switch on the lens board. If the dip switch is turned
on, then the lens only has one focus range, which is full focus, from end to end. This is
useful for dolly work. Only lenses built after 1/1/15 have this feature.
Note2: Some Cineflex laptops use 32bit focus control and others use 64bit control. If
you find that your focus know does nothing for ½ of the turn, then you may be using a
64bit laptop with the lens set to 32bits. On lenses made after 1/1/15, there is a dip switch
on the lens board to select 64/32bits. Dip switch #2 selects the range.
Set Up Mode, used to control most of the Dragon’s functions:
Doubler switch is set to 2x:
Enter/Yes/Accept command:
Joystick button:
Press and release quickly: Enter
Back/Go Back in the Menu
Joystick button:
Press and Hold: Back
Curser left/Right:
Zoom in/out: Will move Curser left/right (remember only in 2x mode)
Curser North/South
Focus knob: North/South menu functions (up/down on the screen) (remember only in 2x
mode)
Curser East/West (and often left/right)
Aperture dial: East/West menu functions (this is left/right. In some cases, the Epic
accepts either East/West or Left/Right for the same curser function. For example, you
can move across the main top menu either by rolling the aperture or by using the zoom.
In some menus, however, Left/Right and East/West do different things. You simply need
to get use to it.)
Shutdown:
To safely shut down the Dragon, set the doubler switch to 2x and hold the joystick for 10
seconds. The screen will display a message indicating that the camera is shutting down.
To repower in flight, simply cycle power to the camera after sending the shutdown
command. Note that on the original version of the upgrade system, we used the
backfocus lever to trigger shutdown. If you are not able to do a safe shutdown using the
joystick button (make sure you are in 2x), then try the backfocus lever.
Startup and Power of Camera:
Unlike the Sony and Alexa, the Epic draws a great deal of power. Power up the gimbal
first, then wait 5 seconds before powering up the Epic. It takes 26 long seconds for the
picture from the Epic to appear after power up. If you cycle power on the gimbal, the
epic will shut off. Try not to do this, because the Epic wants a Safe Shutdown or your
media could be corrupted.
It will take a few minutes to get use to these controls, especially when trying to use the
playback functions. Playback is the most convoluted of all Epic controls, but these can
be mastered using the laptop controls.
Examples of driving the Epic:
To change the frame rate:
Switch to 2x.
Use the zoom function or iris function to move the red curser to the current frame
rate. Press the joystick button once quickly (Enter). The frame rate options will
appear.
Use the zoom function to select a frame rate.
Press the joystick button and hold until the menu options go away (Back).
Switch back to 1x so you can use the joystick button to record again.
To Playback:
Switch to 2x
Use the zoom or iris control to move the curser to Menu
Press the joystick (Enter)
Use the zoom or iris dial to move the curser to Playback
Press the joystick (Enter)
This is where it starts getting goofy.
You will use the focus (North/South) to drop down, but the playback controls only
work if the curser is first on Menu.
Roll the iris or use the zoom to move the top curser to Menu.
Press the joystick (Enter)
Now use the focus to drop down to the playback bar.
Note: the payback bar barely lights up when it’s active. Play with the focus to see
the subtle change when it’s lit.
Press the joystick to begin playing.
Use the iris dial to move back one clip.
Select 1x and press the joystick button as though you want to start recording to
return instantly to Record mode. Pressing the record button while in playback
will return you to record mode, but it will not start recording.
To Playback specific clips:
Switch to 2x
Use the zoom or iris control to move the curser to Menu
Press the joystick (Enter)
Use the zoom or iris dial to move the curser to Playback
Press the joystick (Enter)
This is where it gets SUPER goofy.
Roll the iris or use the zoom to move the top curser to Menu.
Press Joystick (Enter)
Use the zoom or iris dial to go to Media. When in playback, the media button is a
media-playback button (different than what the button does when in Record
mode)
Press joystick/Enter
All of your clips are in the window on the left.
Use the zoom rocker (the iris will not work for this) to select the clip you want to
view.
Roll the focus (North/South) to highlight the Load button.
Press the joystick/enter button and the clip will play.
Now you are back at the menu level.
Roll the focus knob to highlight the Play scroll bar.
Press Joystick/Enter to play.
To get another clip, hold down on the Joystick/Enter button.
Remember that it’s the zoom function that scrolls up/down on the clips. This should be
the North/South or East/West button, but for some reason Red has the left/right buttons
command the up/down of the clips.
A final reminder: When switching between the Sony/Alexa/Epic, the first thing you must
do is remove either the Sony camera cable or the fiber cable- whichever was last used.
Make a habit of doing this so that you don’t accidently power up the system with the
wrong cable attached. This could either damage the camera or the slip ring in a very bad
way. We are working on a fix for this, but it’s not done yet. If you have any questions
about this, please ask!