Download MedCork - User Manual v1.2.1
Transcript
RUA CENTRAL DA VERGADA, 1280
4535-166 MOZELOS VFR - PORTUGAL
TEL.: + 351 227 471 120 FAX.: +351 227 471 129
E-mail: [email protected]
WEB: www.egitron.pt
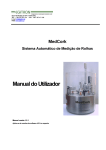
MedCork
Automatic System for Cork Stopper Measuring
User Manual
Manual Version 1.2.1
Valid for the software version 4.5.0 and above
Page 2 of 39
RESPONSIBILITY EXEMPTION
This manual was produced and revised trying to describe MedCork functioning and
characteristics the most correct way possible, specially the PC control software. However this
manual and/or the equipment can suffer modifications without previous notice. EGITRON is
not responsible for any damaged caused by any direct or indirect error, omission, or
discrepancies between the MedCork and the instructions or descriptions included in this
manual.
This document, or any part of this document, can not be reproduced or transmitted under any
format and for any purpose, without EGITRON written authorization.
TRADE MARKS
Excel, Windows and Microsoft are Microsoft Corporation registered trade marks. Other trade
marks or registered trade marks not listed above can be used in this manual.
CONFORMITY DECLARATION
This product exhibits CE marking, according to European Union applicable directives.
GENERAL PRECAUTIONS
EGITRON equipments are produced to optimise security and minimize effort. Nevertheless,
certain precautions should be taken to reduce even more the risk of any human physical damage
or equipment damage.
Please read carefully the general precautions below and take attention to the warning signs in the
manual text.
Keep away from children access;
The machine should only be operated by persons with the appropriate training;
Do no remove any cover or mechanical protection;
All maintenance should be executed by specialize technicians;
Page 3 of 39
The machine should not operate on facilities with severe environment conditions,
like dust or humidity;
The equipment should be connected to the ground by the power supply plug;
In case of successive power supply breakdowns, the equipment should be
disconnected from the power supply;
The equipment transporting and handling should be done with extremely
precautions because it has fragile parts. For transportation use an adequate pack
so the machine remains well accommodated and protected.
GUARANTEE AND TECHNICAL ASSISTANCE
EGITRON guarantees the correct functioning of products with the EGITRON trade mark, in
general for 1 year, or for a different period when specifically settled and written by EGITRON. The
guarantee covers workmanship and materials required but not the equipment transportation or
site displacements, which will be charged according to the displacement prices in practice at the
time.
This is valid excepting for the 1st displacement or equipment transport if required in the first month
of the guarantee period, which will be free. In this last case, EGITRON will decide between the
technician on site displacement and the equipment transportation to EGITRON facilities and back
to the client.
If the equipment presents any malfunctioning during the warranty period, EGITRON, according to
its own criteria, will repair or replace without any charge, excepting the following situations. Any
product and/or part that have been replaced will be EGITRON property.
The warranty will not have effect in malfunctioning produced by non imputable causes to the
equipment such as:
Anomalies caused by maltreatment, recklessness or handling contrary to the manual
instructions;
Modifications or incorporations of parts with a different provenience, done by non
authorized technicians;
Defects provoked by short circuit or mechanical injury;
Indemnity for personal or material damages directly or indirectly caused;
Any installation service or functioning explanation at client facilities, when not directly
imputable to EGITRON technicians;
Page 4 of 39
Equipment replacement.
To request for the warranty services contact EGITRON technical assistance. EGITRON can ask
for the equipment invoice. This equipment is suitable only for the design purposes and EGITRON
is not responsible for its improper use.
In case of malfunctioning or request for technical assistance
Before asking for EGITRON assistance read “Problems Resolution” chapter, when available in the
manual, call your company technical services (if available) and/or use all existing auto-help tools.
If the problem is unsolved contact EGITRON, having the following information:
Equipment name
Serial number
Purchase date
Problem description
Error message that may appear.
EGITRON can be reach at:
Phone: + 351 227 471 120
Fax: +351 227 471 291
E-mail: [email protected]
Mail: Rua Central da Vergada, 1280
4535-166 Mozelos VFR - PORTUGAL
Page 5 of 39
Index
1.
WELCOME NOTE ........................................................................................................................................................... 8
2.
ABOUT THIS MANUAL .................................................................................................................................................. 8
3.
INTRODUCTION.............................................................................................................................................................. 9
4.
MEDCORK INSTALL AND SETUP ............................................................................................................................. 10
5.
MEDCORK BASIC FUNCTIONING ............................................................................................................................. 13
6.
TEST CONFIGURATION AND EXECUTION.............................................................................................................. 14
6.1.
TEST CONFIGURATION.......................................................................................................................................... 15
6.2.
TESTS EXECUTION................................................................................................................................................. 16
6.3.
OTHER OPERATIONS RELATIVE TO TESTS...................................................................................................... 18
6.3.1.
ADD A TEST ......................................................................................................................................................... 18
6.3.2.
REPEAT AND DELETE CORKS......................................................................................................................... 19
6.3.3.
VALUES GRAPHIC VIEW ................................................................................................................................... 20
6.4.
SAVING AND CONSULTING TESTS ..................................................................................................................... 21
6.4.1.
SAVE A TEST ....................................................................................................................................................... 21
6.4.2.
OPEN A TEST....................................................................................................................................................... 22
7.
CORK SIZES AND TYPES TABLES........................................................................................................................... 22
8.
FORMAT OF THE DECIMAL PLACES IN THE STATISTIC TABLE........................................................................ 23
9.
DATA EXPORT TO MS EXCEL................................................................................................................................... 23
10.
CONNECTION WITH EGITRON CORKLAB AND EGITRON SPC...................................................................... 24
10.1.
CONNECTIONS CONFIGURATION ................................................................................................................... 24
10.2.
EXPORT TO EGITRON CORKLAB.................................................................................................................... 25
10.3.
EXPORT TO EGITRON SPC ............................................................................................................................... 26
11.
CALIBRATION MODE.............................................................................................................................................. 26
12.
ADJUST EQUATIONS.............................................................................................................................................. 27
13.
MALFUNCTIONS AND MAINTENANCE................................................................................................................ 27
13.1.
ERROR LOGFILE................................................................................................................................................. 27
13.2.
MAINTENANCE AND PROBLEMS RESOLUTION .......................................................................................... 28
14.
OPTIONAL AND ACCESSORIES........................................................................................................................... 30
15.
TECHNICAL CHARACTERISTICS ......................................................................................................................... 31
ANNEX A – COMMUNICATION CABLE ............................................................................................................................. 32
ANNEX B – MEDCORK VERIFICATION PROCEDURE .................................................................................................... 33
NOTES .................................................................................................................................................................................... 38
Page 6 of 39
Page 7 of 39
1. Welcome note
Congratulations for having acquired MedCork - Automatic System for Cork Stopper Measuring.
With this excellent equipment it is possible to control in a totally automatic and accurate way, the
length, the diameter, the weight and the moisture of cork stoppers, in agreement with the norms in
force. For the first time, users have to they disposal a high-tech equipment, developed with
metrological rigorous techniques, that eliminates the manual handling of the measuring devices or
sensors, guaranteeing a quality superior control and completely innovative. MedCork is supplied
with software for Microsoft Windows operating systems, which allows to configure and to carry-out
several tests in a friendly way, to verify, at any time, the status of the system, allowing a fast
resolution of anomalies that may occur during its functioning. This manual will allow the MedCork
installation, supplying detailed information about the equipment functioning and about the
Windows interface program.
2. About this manual
This manual describes the MedCork functioning and the control software for PC, compatible with
Microsoft Windows 9X/Me/2000/NT/XP. This software was especially developed to allow
MedCork control and has some additional features, like save or open tests or to export data to
other software applications. After reading this manual you will be apt to:
Install the MedCorK and the control software for PC;
Configure and accomplish tests and learn all MedCork functionalities;
Save in a database all the collected data, for later consult;
Connect with the EGITRON CorkLab – Software for Cork Stopper Quality Control;
Connect with EGITRON SPC – Software for Statistical Process Control;
Export test values to Microsoft Excel;
Execute a proper maintenance and learn how to solve the most possible frequent error
situations.
Besides this User Manual you should find:
Software installation CD;
PC serial communication cable;
Power supply cable;
2 feed tubes;
Calibration certificate, emitted by an accredited laboratory;
Page 8 of 39
Manuals of other devices integrated in the MedCork.
This manual starts by the MedCork characteristics, its installation and connection to a PC and its
control software installation process. After the installation chapter, is explained the MedCork
functioning followed by the description of the tests configuration and execution. In the following
chapters we talk about the connection to EGITRON CorkLab, to EGITRON SPC and the data
exportation to Microsoft Excel. In the last chapters is described the calibration process, the
maintenance operations and the resolution of some potential problems. Detailed information
about the control software database and about the communication protocol is supplied in annex.
3. Introduction
The MedCork was developed and produced using high quality components and materials, in
order to be an equipment of great reliability and with precision in accordance with the sector
standards. Working together with the SMA - Modular Feeding
System as shown in figure 1, and depending on the physical
parameters to control, the MedCork it will be able to measure
uninterrupted and without any user intervention many cork
samples in the same test. The SMA was specifically developed
to perform automatic feeding to MedCork and it enables all the
MedCork advantages. There are two models, one with guide
and another without. The only thing the user must do is to
supply the hopper with corks. Then the MedCork will command
the SMA functioning when it detects the feed pipe without corks.
MedCork has three measuring stations - Dimension, Weight
and Moisture - where it is possible to control:
Figure 1 - SMA (Modular Feeding System)
1. Diameters from 18mm to 38mm, with 0,01 mm
resolution
2. Lengths from 24mm to 60mm , with 0,01 mm resolution
3. Weight with 0,01g resolution
4. Moisture with 0,1% RM resolution
In the same test it is possible to control a different number of corks in each station. The user can
easily change the number of measures of each measuring station. MedCork is completely
controlled from a PC through its control software. With the software is possible to verify at each
Page 9 of 39
moment the MedCork status, to acquire, to visualize and to save in database for later consult all
the values measured during the tests.
4. MedCork install and setup
MedCork is very easy to setup. You should start for choosing an appropriate place. For the
MedCork and the SMA, for example, we recommend a bench with 60cm high. MedCork needs to
be plug-in to a power supply plug with 110-130 or with 220-230 VAC, to an air supply plug with
pressure between 6 to 8 bar and to a personal computer with
Microsoft Windows 95 or superior. After cheeking this
requirements, please follow the next steps:
1.
MedCork unpacking. In case of receiving the
MedCork in a wooden pack, you will have to release
the screw in the wooden box base;
On/Off
button
Figure 2 - Mitutoyo indicator
2.
Indicators power-on. The Mitutoyo indicators are in
the Dimensions station. If the indicators do not
show any value in the LCD viewer, press the
On/Off button, as shown in figure 2. The
indicators are feed by a long duration NiCd
battery and should stay always on;
Scale plate
3.
Place the scale plate in the weight station (see
Figure 3 - Scale
Figure 3);
4.
Connect the MedCork to the compressed air, through existing plug in the MedCork
panel, as shown in figure 4. The feed pipe must have 6mm diameter (ref. Festo PUN –
H – 6x1);
5.
Power switch and plug
Connect the MedCork to the PC
with the supplied communication
cable
through
a
RS232
Compressed air plug-in
communication port. If the PC has
only USB communication, you
SMA connector (Modular
Feeding System)
RS 232 port
must use a RS232/USB converter;
Figure 4 -MedCork panel
Page 10 of 39
6.
Connect the MedCork to the power supply with the supplied cable and push the
ON / OFF button to the ON position, in order to turn on the MedCork;
MedCork should be connected to a power supply plug with the specified voltage and earth
connection. Special attention should be given to the earth connection, in order to guarantee the
users security but also the equipment correct functioning. If necessary consult an electricity
technician.
7.
Install the MedCork Control Software on the PC. For Windows 2000 and XP
please note that you must have user permissions to install software. Proceed with the
following steps:
Insert the installation CD in the CD-ROM drive;
Through the button Start, select the Run option and to write "D:\setup\setup", were D:
is the CD-ROM drive letter and press OK. The installation will start and just follow the
instructions. By default the software is installed in the folder "C:\Program
Files\EGITRON\MedCork", but is possible to change this folder in the installation
process. After the installation ends, there will be created in the menu Programs, a
group called EGITRON containing the MedCork program. It is also possible install the
software, accessing the content of the CD-ROM, through "My Computer" or through
Windows Explorer.
8.
Start the MedCork software. When starting the software, the communication with the
MedCork is tested. In case the communication is not established, an error
message will be emitted. It will be able trying to establish the communications, by
pressing the button Test (Test communication). In case of fail verify if the communication
cable is properly connected and if the communication port number is correct. To change
the
communication
number,
go
to
port
the
Communication option in the
Configuration
menu.
The
Communication Parameters
window will open, as it
shown
in
figure
5.
To
change the communication
Figure 5 – Communication Parameters window configuration
Page 11 of 39
port number press the Edit button, and then press the same button, now with the
indication Save. In this window it will be able to test immediately t communication status,
pressing the button Test (Test communication).
9.
Start the MedCork. Every time that the MedCork is connected to the power supply, it
remains in the state Not Initialized. In this situation the software main window is like
the one shown in figure 6. The initialize operation is necessary because
MedCork will perform several verifications, guaranteeing a correct initial
state. To execute the MedCork Initialize just press the Initialize button.
MedCork status
MedCork status
Figure 6 – MedCork Control Software main window
Through the main window, at the right top
corner and in the box at the bottom, you
can verify the MedCork status: compressed
air pressure, pipe type in place, nº of corks
tested, etc.
The MedCork software has number version that
can be checked in the About window, see figure 7.
In
case
that
the
MedCork
software
is
in
Figure 7 – About window
Page 12 of 39
communication with the MedCork itself, it is possible to also check the MedCork embedded
control software. This embedded software is responsible for the MedCork complete control
and its version number is independent from the MedCork interface software.
5. MedCork basic functioning
In this chapter we will learn the MedCork basic functioning and the types of measures that
can be done in each one of the measuring stations, that can be identify through figure 8.
Cork feeder
Corks way-out
Transportation system
Dimensions station
Moisture station
Weight station
Figure 8 – MedCork top view
MedCork is an equipment with great flexibility, which can control corks of different sizes and
execute it by diverse ways. Therefore, before the MedCork starts a test it will receive a command
from the interface software in order to specify:
Type or test configuration;
Samples dimensions to control in each one of the measuring stations. It must
be mentioned that the dimensions of the samples for the different measuring
stations, will be able to assume different values from 0 until a number that
depends on the MedCork memory capacity, but that it is enough for almost all
usual situations. This maximum limit of corks to control depends on the number
of readings for each cork. While trying to start a new test, the MedCork software
will emit an error message if it detects a risk to exceed its memory capacity.
Page 13 of 39
Corks size to control. MedCork will have to know the cork sizes to control, so
that it can feed the corks correctly and to implement some securities in the
movements.
The test configuration indicates what type of test we are dealing with, Normal or Calibration
and the measures to control for each cork. The measures are:
Dimensions station
Lenght (L)
High Edge Diameter (DTS)
Centre Diameter (DC)
Low Edge Extra Diameter (DETI)
Low Edge Extra Diameter (DTI)
TS (High edge)
It is possible to read diameters for
each position from 1 to 9 values,
by rotating the cork.
C (Centre)
Weight station
Weight (W)
Moisture station
High Edge Moisture (HTS)
Centre Moisture (HC)
Low Edge Extra Moisture (HETI)
Low Edge Moisture (HTI)
ETI (Extra low edge)
TI (Low edge)
Figure 9 – Diameters and
Moistures possible
reading positions
The quantity of possible measures allows testing all known cylindrical cork types in the market:
Natural, Aglo 1+1, Champagne, etc..
Each time a cork is analysed the values will be sent to the PC and kept in the MedCork internal
memory. These values will be kept till the MedCork is ON and a new test is started, and they can
be read by the PC at any moment, as we will see ahead.
6. Test configuration and execution
In this chapter we will learn go about the MedCork interface software, how to configure tests, how
to execute tests, how to repeat some readings, how to save and consult tests already done, etc..
All software was implemented with mind that it will be operated by a user with little computer
knowledge. We work hard with the goal to make the MedCork control software intuitive and simple to
Page 14 of 39
operate. Other goal was to prevent operating errors. All the data introduced data is duly validated, with
the operator being warn if a specific value is invalid, or if one specific operation is not possible. By this
way, we avoid the machine to enter in error status and prevent risks for the operator and for machine
itself. The operator will be able thus, with very simplicity, to try for it itself, without great fears, if is or not
possible to introduce some value or to execute a specific action.
As we saw before it is necessary to previously configure the test. Nest we will learn how to
configure tests.
6.1.
Test configuration
The software has some preloaded tests configurations. The user can modify, delete or create new
configurations. Each configuration has a code, which is saved into the database, so later on, in
order to select a test configuration in the Main windows, simply select the code from the Internal
Tests combo box. To configure test select the Configurations option in the Test menu The Tests
Configuration window s is shown in figure 10.
To create a new configuration, press the New button and select the boxes of the desired
measures. For the top measures you must type the distances from the respective top at which is
desired the reading. The distances must be between the following intervals:
Dimensions: Between 2,5 and 60 mm
Moistures: Between 3 and 60 mm
If it is necessary to
guide the corks, in
order to guarantee
that the same top is
controlled
always
on the same side,
case of champagne
corks, the box Test
with guide must be
selected.
After
introducing the test
code,
that
can
contain up to 50
characters
(letters
Figure 10 – Tests Configuration window
Page 15 of 39
and/or numbers), press the Save button.
The descriptions (L, DTS, DC, etc.) indicated for each one of the measures, will be the head of
which column in the table. In case of reading more than one diameter for position, it will be added
to the column heads a number with the following criteria: DxTS – Diameter x in the High Edge,
with x from 1 to 9.
Examples:
D1TS - Diameter 1 in High Edge
D3C - Diameter 3 in the Centre
To consult a configuration in the database, just select the code in the List of saved configurations.
At any moment it is possible to cancel the introduction configurations or modifications in a saved
configuration pressing the Cancel button. To erase a configuration press the Delete button. It will
be asked a delete confirmation. When closing the Test Configuration window, through the button
Close, the list of Internal Tests, in the Main window, will be updated with all the existing codes in
the database.
6.2.
Tests execution
To start a new test, the MedCork must be still and without any test being done; the main window
should appear like figure 6, with the Run Test button available. In case a test has finished, it is
possible to verify, looking at the MedCork status board if there are corks in the pipe from the last
cork sample. If there are corks in the pipe, the status will show Chamber with corks, and you can
press the Escape button in order to expel the remaining corks. The corks will be drive out through
the expel pipe between the dimensions station and the feed pipe.
Before starting the test
guarantee that the Normal operating mode is selected.
To star the test, follow the next steps:
1. Place the correct feed pipe according the corks to analyse:
Narrow pipe: diameters 22 mm; lengths < 44 mm
Wide Pipe: diameters > 22 mm and
36 mm; lengths
60 mm
2. Manually supply the pipe with corks, oriented if need, or place them in the proper SMA
hopper;
3. Select the test configuration, through the list of Internal Tests. As we will see ahead, the
configuration can be selected in the EGITRON CorkLab reports list or in the EGITRON
SPC control charts, if the MedCork Control Software is connected to EGITRON CorkLab
or to EGITRON SPC;
Page 16 of 39
4. Select the cork size to examine;
5. Setup the sample size for each station unit;
6. Select the Normal operation mode;
7. Press the Run Test button.
In case the cork size does not exist in the list of sizes, the size table can be selected from the Size
option in the Tables menu.
When initiating a new test and during its execution process, the MedCork verifies, continuously, if it is
out of corks, if the feed pipe and the SMA - Modular Feeding System for MedCork – hopper are suitably for
the selected cork size, if the compressed air is at the correct pressure level, etc.. In case that any of these
conditions are not met, an error will be indicated and the MedCork status will display "MedCork standing-by
and with a test running". In this situation, the operator should correct the error and then press OK-Resume
button. The test will go on, without any data loss.
As we previously saw, it could be necessary to initialize the MedCork, after connect it to the power
supply. After a functioning error it will be also necessary to initialize the MedCork, as we will see
ahead.
Figure 11 – Main window with a test running
When MedCork resume the test, the MedCork status should display Test running. MedCork
sends the measured values to the PC after the inspection of each cork and the values can be
read in the datasheet as shown in figure 11. Every time that new set of values is received, the
Page 17 of 39
statistics table is updated. This table, in the right side of main window, shows the Average,
Maximum, Minimum, Standard Deviation and Amplitude, (difference between the Maximum and
the Minimum) for the respective values table column. The corks counter shows to the number of
controlled corks at that moment.
While a test is running, there are available only 2 commands: Stop and Read
Values. The Read Values command collects the values from all the tested corks
from the running test or from any saved test. There is a particular situation when a
new test is added that we will se ahead. The Stop button can terminate the test at
any time. In this situation the MedCork will finish the pending operation and goes
to Test interrupted through Stop button status. With this status you can press the
OK-Resume button to continue the test or the End Test button to cancel the test.
In this last case, MedCork will throw out all the existing corks in the measuring
stations.
In the MedCork frontal panel there is an Emergency button. This button allows stopping the MedCork in
any danger situation for the user or for the MedCork itself. In this condition, the MedCork status will
display Emergency Status and MedCork will emit a continues beep. To leave the emergency status the
Emergency button must be released. From this status it may be necessary to press the Initialize button.
The test values will be kept in the MedCork until:
It is disconnected from the power supply;
If it starts a new test;
If it runs a initialization;
If the values are cleaned through the button Clean Values button.
6.3.
Other operations relative to tests
6.3.1. Add a test
If the MedCork is stopped and without
a test running but with one or more
corks already measured, it is possible
to add to the existing test, a new test
Figure 12 – Add Test window
Page 18 of 39
with new samples for each one of the measuring units.
It may be necessary to add a new test in the following situations:
Test interruption by any anomaly or by the user;
Control of a higher number of corks, for one or several of the
measure units.
To add a test, press the Add Test button.
In Add Test window, shown in figure 12, the user should indicate the cork number from
which to add and the number of corks, for the different measure units, intend to be added.
The test addition could be done from a test, finished or interrupted, or from a test saved in
the database. Take note that for MedCork is like a new test where the sample is equal to
the corks to add, therefore, in MedCork memory, only these corks will exist. The addition
process is done through the PC. This means, that for example, if adding a test to an
existing test, that is not saved, pressing Read Values, all the values of the previous test
will be lost. In this situation, the program will emit a warning message.
6.3.2. Repeat and delete corks
Repeat readings – the cork replication or continuation command is available
always when the MedCork is stopped and without a test running and with one or
more corks already measured.
To repeat values, press the Repeat/Continue
button.
After
pressing
Repeat/Continue
the
button,
the
figure 13 will be shown. An
alternative way to open this
window,
is
through
the
Repeat/Continue option in the
Utilities
menu.
In
Figure 13 – Repeat/Continue window
windows
introduce the number of the initial and the final cork to repeat. The number could
be same in case repeating only a cork. The new readings will substitute the
previous readings. It is possible to Repeat/Continue the reading of corks without
values in the main window table, because the test was not yet completed. Unlike
Page 19 of 39
the Add Test option, it is not possible Repeat/Continue beyond the dimensions
limit of the current samples.
Delete Corks –This command allows deleting existing corks in the main windows
table and like the Repeat/Continue option, it is always available when
MedCork is stopped and without a test running and with one or more
corks already measured. To delete corks, press the Delete Corks
button.
After pressing the Delete Corks button, will be shown a window like figure 13. An
alternative way to open this window is through the Delete Corks option in the
Utilities menu. This option will be useful, when saving a test in the database or
exporting a test, but before the user intends to eliminate one or more corks.
Ahead we will learn how save and export values of tests.
6.3.3. Values graphic view
At any time, all values from the main window table can be graphically observed.
To go to the graphical visualization window, press the Graphical Visualization
Figure 14 – Test graphic visualization window
Page 20 of 39
button or select the Visualize Graphic from the Utilities menu.
The test graphical visualization window is shown in figure 14. When opening the window, it
will be represented the graphs of the first the 4 columns. In each graph there is a list that
allows selecting the column to visualize. It is possible to visualize the different graph points
and verify which cork corresponds, by clicking the graph line and select a point. In the bottom
of the window it will appear a text box indication the cork number and its value.
The YY axis limits can be change through the option buttons in the top of the window.
6.4.
Saving and consulting tests
6.4.1.
Save a test
As previously mentioned, the MedCork control software has a database, allowing to save
internal test configurations and to save the results of performed test. Besides saving the results
in a new test, it can add the results to an existing test already in the database. To save test
follow the next steps from the main window:
1. Select the Save option from
the Test menu. The Save
Test window will open;
2. Introduce the Test Code for
saving a new test or select
an existing test. In the case
of selecting an existing test,
the program will ask if it is
intended
existing
to replace the
test.
If
it
Figure 15 – Save Test window
is
intended to add values to an existing test, press the Add button. It is only possible
to add test with the same test configuration;
3. Select the cork type used in the test;
4. The test information can be complemented with the date and comments.
Page 21 of 39
It must be mentioned that the test addition option explained here, is an alternative way to the
Add Test option from the main
window, as already mentioned.
6.4.2.
Open a test
After saving a test in the database
you can consult, at any time, the
test results. To open a test just
press the Open button in the
Tests menu. A window like figure
16 will open, where is possible to
view
the
saved
test
in
Figure 16 – Open Test window
the
database. When selecting a test, its information will be displayed in the right side of the
window. To open it just press the Open button or double-click it. In this window is also possible
to delete test by pressing the Delete button.
7. Cork sizes and types tables
As previously mentioned, it is necessary to indicate the cork size before initiating any test.
The control software has a table where the sizes should be introduced, so it will not be
necessary to reintroduce the size in all the tests. Just select it from the size list in the main
window.
The cork type field isn’t required to execute a test but to save it, this field must be introduced. The
cork sizes and types tables can be open from the main window Tables menu. Figure 17 shows
the table of cork sizes. The basic operations in the tables windows are:
Data edition – Press the Edit button to
execute the modifications;
Create a new record – Press the New
button or select, with the mouse, the last
line in table without any data;
Delete records – Place the cursor over
the desired line corresponding to the
record to delete, press the Delete button
and confirm the operation;
Figure 17 – Cork sizes table
Page 22 of 39
Cancel and save records – When introduction records, there are available only the
buttons Cancel and Save, allowing to cancel the data introduction or to save a new
record;
Close window – Press the Close button.
8. Format of the decimal places in the statistic
table
The control software allows the decimal places
configuration the statistic table values. From the
Configuration menu, select the Decimal Places
option. A window like figure 18 will open. Through
each one of the lists, the number of decimal places
for each one of the values of the statistic table. To
modify the current formatting, press the Edit button.
After the modification press Save. In order to set the
default values, press the Reset Initial Values button.
Figure 18 – Decimal places format window
9. Data export to MS Excel
The MedCork Control Software allows exporting the values of test to a Microsoft Excel
spreadsheet, facilitating personalized data management. To open the exportation window, select
the Export Vales to Excel option from the Export menu in the main window. The data export
window is shown in figure 19. The exportation is very flexible and is able to export data to any
place of an Excel file.
Before initiating the exportation,
introduced the following:
Excel file name (Workbook)
Worksheet name;
First
line
and
first
column
numbers indicating the cell where
Figure 19 – Export values to Excel window
will start the table. These values must be introduced in numbers;
Page 23 of 39
MS Excel language number corresponding to the MS Excel language that is installed in PC
(according to the Excel Language list)
The table can be exported with the main window format presented or with the corks number in the
horizontal. For this select the Table in Rows check-box. Another option is to export the data with
or without the statistic table.
Take note that the MS Excel file must exist already in your hard-drive. The MS Excel file must
be created and opened before exporting.
10. Connection with EGITRON CorkLab and EGITRON SPC
One of most interesting features of the MedCork Control Software for PC is its full integration
with the EGITRON CorkLab (Software for Cork Quality Control) and with the EGITRON SPC
(Software
for
Statistical
Process
Control). MedCork, integrated with any
of these software applications, reveals
all its potential and benefits on the
corks control. In this chapter we will
learn how to establish the connections
and to export data to each application,
through
a
friendly
and
total
transparent way.
10.1. Connections configuration
To integrate the MedCork with the
EGITRON
CorkLab
and/or
the
EGITRON SPC it is necessary to
setup the connection. For that you will
Figure 20 – EGITRON CorkLab / SPC connection configuration window
need the following information:
EGITRON CorkLab with MS Access database
-
database path
-
database name
Page 24 of 39
-
database password
EGITRON CorkLab or EGITRON SPC with MS SQL Server database
-
server name
-
database name
-
username
This information must be introduced in the CorkLab/SPC connection window, shown in figure 20.
To open this window selects the CorkLab/SPC option from the Configuration menu.
To activate any of these connections it is necessary to be a user of these applications, since it will
be asked a user identification and password.
The connection configuration is saved in the MedCork Control Software database. Each time the
MedCork Control Software starts and a connection to EGITRON CorkLab or EGITRON SPC is
configured, it will be asked user identification for this applications.
10.2. Export to EGITRON CorkLab
After the connection configuration and the EGITRON CorkLab user identification, the existing
in process EGITRON CorkLab reports can be viewed in CorkLab Reports list. This list is at
the main window left top of the MedCork Control Software. To start a test from an EGITRON
CorkLab report, the MedCork must be unmoving and without any test running, following the next
steps:
Select, from the CorkLab Reports
list, the intended report. While
selecting
the
report,
MedCork
Control
the
Software
access EGITRON CorkLab and
gets the cork size and the
samples dimensions for each
measuring unit.
Figure 21 – EGITRON CorkLab export window
Press the Start Test button.
Page 25 of 39
After ending the test, the MedCork Control Software automatically indicates the user that the
test is finish and asks if is to export the values. If the answer is yes, the values will be sent to
the EGITRON CorkLab. In the event of exportation failure, due to server malfunction or other
any reason, the data exportation can be done later on through the Export to CorkLab/SPC
option from the Export menu if the exportation is not possible at all, the test can be saved in
the MedCork Control Software database, as explained before. Afterwards the test can be
open end exported to EGITRON CorkLab. The EGITRON CorkLab export window is shown
in figure 21 and allows exporting data to one or several reports.
When executing the connection to EGITRON CorkLab, the Refresh button
becomes visible (near the CorkLab Reports list), allowing to update the reports
list with the in process reports existing in the CorkLab.
10.3. Export to EGITRON SPC
The exportation to EGITRON SPC is very
similar to the exportation to EGITRON
CorkLab,
described
in
the
previous
section. In the EGITRON SPC there is an
active Control Charts list, that will allow
selecting one Control Chart from which to
start the test and where will be sent the
values. In the end of the test, the
EGITRON
SPC
export
window
Figure 22 – EGITRON SPC export window
will
appear (figure 22) where must be introduce the Production
Order and the measure nominal
Figure 23 – Operation Mode box
value.
11. Calibration Mode
MedCork has two operation modes:
Normal
mode
Corresponds to
execution
–
the test
mode
and
Figure 24 – Adjust equations window
Page 26 of 39
described in the previous chapters;
Calibration mode – Special operation mode to turn the calibration process a much
easier task.
The operation mode can be selected from the main window, through the Operation Mode
box, as shown in figure 23.
A test configuration in Calibration Mode is identical to the Normal Mode. The only difference
in the Calibration Mode is that the cork feeding and transportation is not executed. When
starting a test in Calibration Mode the transportation jaws opens, without moving, allowing to
place measure standards in one or more measuring units. After placing the measure
standards, press the Continue button to start the test. The values will be sent to the PC, in
the same way described for the Normal mode.
12. Adjust equations
The MedCork Control Software allows adjusting the values read by the MedCork to the exact
values. After calibration, if there is available a list of exact values and their correspondence to the
values read by the MedCork, is possible to determine equations with coefficients till 3º degree,
using for example the Microsoft Excel. The coefficients could be introduced in the respective text
boxes, as is shown in figure 24. The values shown in the values table are calculated with the
introduced equations.
For example:
Shown size = C
3
xL
3
+C
2
xL
2
+C
1
xL
1
+C
0
xL
0
where L is the value read by
MedCork and C the coefficients.
For default only C 1 = 1 and all the other are = 0.
13. Malfunctions and Maintenance
13.1. Error logfile
With the purpose to assist in malfunctions detection and to hasten any anomaly resolution,
the MedCork Control Software, saves automatically in the database, the occurrence of the
following errors:
Page 27 of 39
Reading errors
Errors of readings
out of the limits
System errors
This error logfile can be
open by the Error Log
option in the Tables menu.
Figure 25 shows the error
logfile. From this window
is possible to delete the
error list or save it to a text
Figure 25 – Error logfile window
file. This text file is very
useful, since it can be sent by email to EGITRON and be a very helpful toll in any problem
resolution.
13.2. Maintenance and problems resolution
In order to guarantee a better functioning we advise to carry out a regular cleaning, avoiding
the accumulation of rubbish, dust and cork residues. It can be used a vacuum cleaner or a
slightly wet cloth. Special attention must be given to the following points:
Cleaning spots
Optic fibre lens in the feed chamber
With compressed air blow the holes marked in figure 26, wit
the aim to remove the accumulated dust and cork residues.
In case need you will be able also to clean directly the lens
Figure 26 – Fedding chamber lens
with the aid of a swab.
Cork detector cell in the feeding system
Clean the sensor viewfinder with a dry cloth (see figure 27). Take
care to not modify the cell adjust value.
Figure 27 – Cork detector cell
Indicators for size and diameter measurement
Page 28 of 39
-
Indicators shanks
To guarantee a soft movement of the indicators shanks,
they must be cleaned with a dry cloth or with cloth very
slightly wet with alcohol. It is important to guarantee that
the shanks are well clean and stay without any
Figure 28 – Indicator shank
accumulated grease. (See figure 28).
-
Palpation base
Using corks with much treatment surface will accumulate treatment
surface product in the palpation bases. Therefore is necessary to
clean the palpation bases preventing the corks sticking. This
problem is more evident in the palpation base of the size indicator
Figure 29 – Size indicator
(see figure 29).
Indicators transport car guides
Use a dry cloth to remove accumulated garbage in the guides;
does not need lubrication (see figure 30).
Figure 30 – Indicator guides
Scale plate
To prevent the accumulation of dust and cork residues is
convenient to clean the scale plate. This operation can be done
with a dry or slightly wet cloth. Notice that to much pressure in the
Figure 31 – Scale plate
plate my damage the scale load cell (see figure 31).
Electrodes for moisture measuring
With the multiple moisture measurement operations, the
electrodes accumulate cork bits. To guarantee the measure
reliability, remove these remaining cork bits with a dry cloth.
Handle this operation with careful because the electrodes are
Figure 32 – Electrodes
sharp-pointed.
Replacement of the indicatores batteries
Page 29 of 39
If the indicator LCD displays a letter “B”, indicating battery fault, the
battery should be replaced in order to guarantee a correct
measurement. To replace the battery, remove the cover marked in
figure 33. You can use a coin to rotate the cover. Place the new
battery with the positive sign turned to the exterior (in case of doubt
consult the indicator manual). The battery tyre is Silver Oxide
SR44. After the battery replacement, the indicator origin (zero)
must be reset by pressing the origin button during two seconds.
Figure 33 – Indicator
Replacement of the power supply fuses
After power supply overload the MedCork protection fuses may
need replacement. To replace them just open, with the aid of a
coin or a large screwdriver, the fuse covers, as the illustrated in
figure 34. The fuses must be standard type for 5.0A.
Figure 34 – Power supply
connector
14. Optional and Accessories
Although the MedCork must be calibrated regularly (normally each year), by an accredited
laboratory, it is available a MedCork verification kit, that will be supplied with the respective
calibration certificates. With this kit it is possible, during the calibrations intervals, to verify the
measures are within the allowed limits.
The kit is composed by
Weight standards for scale verification;
Cylindrical standards for size and diameter verification;
Moisture standards for moisture meter verification.
Page 30 of 39
15. Technical characteristics
-
Dimensions: (a) 630mm x (Ø) 610mm
-
Weight: 60 kg
-
Temperature storage: -20oC.. +70oC
-
Operating temperature: 0 º C.. +50 º C
-
Environment moisture: 10%.. 90% without condensation
-
Power supply:
230 VAC 50HZ/110 VAC 60HZ
Fuses 20x5 mm of 5,0A
-
Pneumatic supply:
Recommended air pressure from 6 to 8 bar
Functioning air pressure from 4,5 to 6 bar
Compressed air must be filtered and dry
-
Measure equipments:
Mitutoyo indicators ID-U1025 with 0,01mm resolution; Oxide Silver batteries SR44
Sartorius scale with RS232 communication interface of; 0,01g resolution
Moisture meter (conductive method) with 0,1% HR resolution of; 2% to 10%
functioning gama; 25mm electrodes that guarantee readings at the Centre of the
cork.
- Admissible cork types: cylindrical natural cork, agglomerated or mixed.
- Cork stopper diameter range: from 19mm to 36mm with 1mm tolerance
- Cork stopper size range: from 24mm to 60mm with 1mm tolerance
- RS232 Interface – 9600, N, 8, 1 (Baud Rate 9600, without parity, 8 bits and 1 Stop bit)
Page 31 of 39
ANNEX A – Communication Cable
PC – MedCork
TxD
RXD
3
2
RXD
TXD
2
3
GND
5
DB–9 Female
GND
5
DB–9 Female
Page 32 of 39
ANNEX B – MedCork verification procedure
This procedure must be read before operating, and in case of doubt ask the
EGITRON technical support.
This procedure must be followed with maximum care, as incorrect operation may
damage the equipment.
A. MedCork preparation
1. Remove the acrylic cover. Unscrew the cover and lift up very carefully, paying special
attention to the digital indicators, in order to avoid contact (We recommend that this
operation is carried out with MedCork disconnected). Put the cover in a safe place.
2. Connect MedCork and press ‘Initialize’.
3. Remove the pincers from the measurement unity.
B. Dimensions measurement unit (DMU)
1. Configure the test on PC:
i.
Select calibration mode.
ii.
Choose the test on the existing test list. A pre-defined test should be selected for
testing length and diameters (For a new configuration see chapter 7.1 of MedCork
Manual).
iii.
Select a small size on the available size list (ex.: 25x18).
iv.
Fill sample field with the value 5 for dimensions.
2. Clean the shanks and contact surfaces of the digital
indicators. Use a cloth or clean paper slightly moistened
with a little quantity of alcohol.
i.
Digital Indicators for diameter verification.
ii.
Digital Indicator for length verification.
Page 33 of 39
3. Apply the cylindrical calibration standard on the base
of the DMU, warranting that it is well centered
The standard calibration must be clean before
being placed on the DMU base.
4. Press ‘Run Test’ and afterwards ‘Resume’.
5. Wait for the end of the test. At this time it is possible to transfer the values to an Excel
sheet (see chapter 10 of MedCork Manual) for analyzing the results (see Excel
datasheet example).
6. If it is necessary to check with other calibration cylindrical standards, return to point 3.
7. Ensure that in the end no calibration standard is left on the DMU base.
In the end, the calibration standards must be lubricating with vaseline and packed
in paper (as provided).
C. Moisture measurement unit (MMU)
1. Configure the test on PC:
i.
Select Calibration mode.
ii.
Choose the test on the existing test list. A pre-defined test should be selected for
testing moisture (For a new configuration see chapter 7.1 of MedCork Manual).
iii.
Select a size on the available size list (ex.: 48x31).
iv.
Fill sample field with 5 for moisture value.
2. Prepare MMU to check moisture
i.
Disconnect the reading cable from the electrodes
support (if necessary use an opened spanner, size
11).
ii.
Connect the cable on the ‘Moisture Adapter’.
Page 34 of 39
iii.
Apply the moisture reference to be
checked.
iv.
Put the set on a place with an isolating
material. Take care to avoid contact
between the metallic parts of the set
and the metallic structure of MedCork.
3. Press ‘Run Test’ and afterwards ‘Resume’.
4. Wait for the end of the test. At this time it is possible to transfer the values to an Excel
sheet (see chapter 10 of MedCork Manual) for analyzing the results (see Excel
datasheet example).
5. If it is necessary to check with other calibration standard, return to point 3.
6. After conclusion of the verification, re-tighten the reading cable on the electrode support.
Tighten without spanner, to avoid damaging the connector or the support.
7. Ensure that no tool stays on the MedCork table.
D. Weight measurement unit (WMU)
To check this unity it is necessary to connect MedCork 30 minutes before. If this time
is not observed, the measurements can be mistaken.
1. Balance calibration
i.
Prepare a standard mass of 100 g to be
put on the balance plate.
ii.
Select on the main menu “Utilities” and
afterwards “Balance Calibration”.
iii.
Press ‘Balance Calibration’.
Page 35 of 39
iv.
After
the
message
‘Calibration
in
progressW’ appears, apply the standard
mass of 100 g on the balance plate.
v.
Wait for the calibration result.
vi.
If the message ‘Calibration concluded with
successW’
appears,
press
‘Exit’.
Otherwise repeat the process.
vii.
Remove the 100 g mass from the plate of the balance (do not place it in the action
range of the transport pincers).
viii.
Press ‘Run Test’.
2. Configure test on PC:
i.
Select ‘Calibration mode’.
ii.
Choose the test on the existing test list. A pre-defined test should be selected for
testing mass (For a new configuration see chapter 7.1 of MedCork Manual).
iii.
Select a size on the available size list (ex.: 48x31).
iv.
Fill the sample field with 5 for value of mass.
3. Apply the standard calibration mass at the center of
the balance plate
4. Press ‘Run Test’ and afterwards ‘Resume’.
i.
After collecting the value, raise the mass from
the plate and put it on the plate again.
ii.
Press ‘Resume’.
iii.
Repeat the steps i. and ii. until collecting the 5 readings.
5. At this time it is possible to transfer the values to an Excel sheet (see chapter 10 of
MedCork Manual) for analyzing the results (see Excels datasheet example).
6. If it is necessary to check with other calibration standard, return to point 3.
Page 36 of 39
7. On the end collect the standards used, ensuring that no tool stays on the table of
MedCork.
E. Prepare MedCork to normal operation
1. Apply the acrylic cover, paying special attention to the digital comparers in order to avoid
the contact (We recommend that this operation is carried out with MedCork
disconnected). Screw the shield.
In case of doubt, or if the values have unexpected deviations, please contact the
EGITRON technical support.
Page 37 of 39
NOTES
Page 38 of 39
RUA CENTRAL DA VERGADA, 1280
4535-166 MOZELOS VFR - PORTUGAL
TEL.: + 351 227 471 120 FAX.: +351 227 471 129
E-mail: [email protected]
WEB: www.egitron.pt
Page 39 of 39


