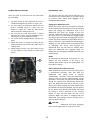
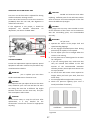
1
INTRODUCTION
We would like to thank you, our valuable customers, for purchasing this TARAL product.
This instruction manual contains information on the operation, lubrication and maintenance of your tractor. The information contained
is comprehensive and essential, and is designed to assist you, even-if unexperienced, in utilizing your Tractor.
If the tractor is sold or transferred to another person, please give this manual to any new owners or operators of the tractor as they
may need the information contained.
If you lose this manual, request a new one from the dealer.
How well your Tractor continues to give satisfactory performance depends greatly upon the manner in which it is operated. It is,
therefore, requested that this manual be read carefully and kept ready for use so that the operation and maintenance services will
properly be carried out in order to keep the tractor in top mechanical condition at all times.
Should any information as to your tractor be required, consult your local dealer or distributor stating the product model and its chassis
and engine serial numbers of the Tractor concerned.
We are sure you will be happy with your Tractor.
NOTE:
The drawings used in this catalogue are for demonstration purposes only and may slightly be different from your tractor.
NOTE:
Keep this tractor instruction manual in a safe and convenient place to avoid any damages or wearing. Read this manual carefully when
you require any information or have concerns about operation and maintenance of your tractor.
NOTE:
Expressions such as LEFT, RIGHT, FRONT or REAR used in this manual should be understood in accordance with following rules:
FRONT means the front grill end while REAR means the lifting arm end of the Tractor. LEFT or RIGHT means the left or right hand side of
the Tractor looking forward from operator's seat.
RIGHT
REAR
FRONT
LEFT
TRACTOR TYPE INFORMATION
Tractor Brand:
TARAL
Tractor Type:
800D
Tractor Variant:
850D 4WD SWB ÖR
855D 4WD SWB ÖR
860D 4WD SWB ÖR
856D 4WD SWB ÖR
850G 4WD SWB ÖR
855G 4WD SWB ÖR
860G 4WD SWB ÖR
856G 4WD SWB ÖR
850G 4WD LWB ÖR
855G 4WD LWB ÖR
860G 4WD LWB ÖR
856G 4WD LWB ÖR
850G 4WD LWB AR
855G 4WD LWB AR
860G 4WD LWB AR
856G 4WD LWB AR
T2
TARAL 850
TARAL 855
TARAL 860
TARAL 856
TARAL-agrimac 850
TARAL-agrimac 855
TARAL-agrimac 860
TARAL-agrimac 856
TARAL Tarım Makine ve Aletleri
Sanayi A.Ş.
Maltepe Mah. Hastane Yolu Sok.
No:1, 34010, Zeytinburnu,
İstanbul
+90 212 5679550
+90 212 6740679
+90 212 6121239
[email protected]
www.taral.com
Tractor Category:
Tractor Trade Name:
Manufacturer of Tractor:
Address:
Telephone:
Fax:
e-mail:
Web site:
TRACTOR IDENTIFICATION PLATE:
It is located at the right side of the tractor tunnel
(service) sheet.
CHASSIS SERIAL NUMBER:
It is placed on transmission case, specifically under
the right side of tractor tunnel (service) sheet.
ENGINE SERIAL NUMBER:
A: Engine Identification Plate: It is placed on the
cylinder head.
B: Engine Serial Number Barcode: It is placed either
on manifold or cylinder head.
C: Engine Serial Number: It is located at the right
side of the cylinder block, next to injection pump.
FRONT AXLE SERIAL NUMBER:
It is placed on the center body of the front axle,
specifically at the front side.
TAKING DELIVERY
TRACTOR
OF
THE
When your tractor is delivered, ask your dealer to
perform the first operation and provide you
information on instruction and maintenance.
If you have further questions, please contact the
factory.
Make sure all components are installed and in
perfect working condition before taking the
delivery of the tractor. Make sure all accessories
are provided, the tool box including all tools is
available and no manual is missing. Two ignition
keys are delivered with the tractor.
Documentation of the tractor:
Instruction Manual
Log Book
Warranty Card
Service Center List
THE LIFE OF THE TRACTOR
Tractor is designed to operate for 10 years.
The life of your tractor may be realized or even
extended by observing the rules and methods
described in this manual, performing scheduled
maintenance before and after warranty period at
authorized maintenance centers and using original
TARAL spare parts.
WARRANTY
All products manufactured by TARAL and
purchased from authorized dealers and services
are under warranty.
We recommend you to use original TARAL parts
supplied by authorized dealers or services.
Damages resulting from faulty operation,
insufficient or late maintenance, use of nonoriginal spare parts or implements not allowed are
not covered under warranty.
NOTE:
The tractor may be operated with several
implements; however, this manual may not give
information about each possible implement to be
used. Consult your dealer or the factory about the
conformity of such implements which are not
described in this manual, before using them.
TARAL may not be held liable for the damages or
unexpected losses that may result from the
incorrect installation, handling of undescribed or
unapproved
implements
and/or
incorrect
operation of the tractor.
SAFETY
One of the main concerns focused during the
development and production of the tractor is
operator’s safety. Design is composed of several
safety issues.
Despite all these precautions, accidents may still
occur and most of them are caused due to the
safety precautions neglected.
The best way to prevent accidents is to be aware of
the possible risks and precautions to be taken and
behave accordingly.
Prior to the operation of the tractor, operator must
be aware and have a through understanding of the
safety warnings and precautions described in this
manual.
All protective elements must be in place and
undamaged, and if damaged they must be serviced
immediately.
Tractor must not be operated without the operator
is seated. Ensure that all warning labels is in place
and legible, and if not, replace the labels.
Operator of the tractor must always be well-rested
and alert and must not be under the influence of
alcohol or drug. Persons who use prescribed
medicines may not use a tractor without the
permission or report by a doctor.
TREATMENT OF A NEW
TRACTOR
All components of your tractor are subject to
stringent checking during assembly in the factory.
However, a new tractor should be carefully
checked over by the operator himself for the first
25—50 hours operation, heavy duty work should
be avoided. If heavy duty work is unavoidable,
drive in a gear one stage lower than you would
normally use, and run the engine at lower rpm.
“IMPORTANT”
50 HOURS SERVICE
When the tractor is brand new, after the first 50
hours of running, the following service,
maintenance and checking should be carried out as
specified below.
1.
2.
3.
4.
5.
6.
7.
8.
9.
10.
11.
12.
13.
14.
15.
16.
17.
18.
Replace engine filter and engine oil.
Replace transmission oil.
Replace the oil of front axle.
Replace traction oil.
Retighten all bolts and nuts, paying special
attention to those for steering linkage and
wheel.
Check and adjust the fan belt tension.
Check the wheels to see if their condition is
good and tire pressure is correct.
Retighten the cylinder head bolts and adjust
valve clearances.
Replace the air cleaner and clean its container.
Replace the fuel filter and clean its container.
Replace the transmission oil filter and clean its
container.
Replace the engine oil filter and clean its
container.
Check the front hub for end-play.
Check brake fluid.
Check battery charge level.
Clean the hydraulic oil filter.
Check parking brake/foot brakes and clutch
pedal free play.
Check transmission and engine link bolts.
This 50-hour Service is an essential procedure for
keeping the tractor in top condition, so it must be
done properly.
CONTENTS
SECTION 1. SAFETY WARNINGS ...................................................................................................... 1
SAFETY PRECAUTIONS.................................................................................................................. 2
GENERAL OPERATING SAFETY PRECAUTIONS .................................................................. 2
BASIC SAFETY PRECAUTIONS FOR MAINTENANCE .......................................................... 3
OPERATING THE TRACTOR ...................................................................................................... 4
PREVENTING SIDE ROLLOVER .............................................................................................. 10
PREVENTING REAR ROLLOVER ............................................................................................ 10
SOUND LEVELS ......................................................................................................................... 11
WASTE OIL PICK-UP ................................................................................................................. 11
RECOMMENDED IMPLEMENTS ............................................................................................. 11
WARNING LABELS .................................................................................................................... 13
SECTION 2. EXTERNAL VIEW AND NOMENCLATURE OF EACH PART ................................ 15
FRONT DASHBOARD CONTROLS .............................................................................................. 15
TRACTOR CONTROLS .................................................................................................................. 15
SECTION 3. FUNCTIONS AND USAGE OF PARTS ....................................................................... 17
INSTRUMENT PANEL.................................................................................................................... 17
USAGE OF FRONT DASHBOARD CONTROLS .......................................................................... 19
USAGE OF TRACTOR CONTROLS .............................................................................................. 20
TRANSMISSION .............................................................................................................................. 25
FRONT AXLE .................................................................................................................................. 25
HYDRAULIC LIFT .......................................................................................................................... 26
3 POINT LINKAGE SYSTEM ......................................................................................................... 27
IMPLEMENT MOUNTING ............................................................................................................ 28
IMPLEMENT REMOVAL ............................................................................................................... 28
MIDDLE ARM CONNECTION....................................................................................................... 28
HITCH CONNECTIONS .................................................................................................................. 29
POWER TAKE-OFF HOUSING ...................................................................................................... 31
DIFFERENTIAL LOCK ................................................................................................................... 31
HYDRAULIC CIRCUIT ................................................................................................................... 32
ELECTRICAL CIRCUIT .................................................................................................................. 33
TIRES AND RIMS ............................................................................................................................ 34
RIM ASSEMBLY DETAILS ............................................................................................................ 34
TIRE MOUNTING............................................................................................................................ 35
WEIGHTS ......................................................................................................................................... 36
SECTION 4 - OPERATION ................................................................................................................. 39
BEFORE OPERATING THE TRACTOR ........................................................................................ 39
STARTING THE ENGINE ............................................................................................................... 39
STARTING IN COLD WEATHER .................................................................................................. 39
AFTER THE ENGINE IS STARTED .............................................................................................. 40
DRIVING THE TRACTOR .............................................................................................................. 40
STOPPING THE TRACTOR ............................................................................................................ 41
SECTION 5. PERIODIC AND PREVENTIVE MAINTENANCE ..................................................... 43
GENERAL RULES FOR MAINTENANCE .................................................................................... 44
AIR CLEANER ................................................................................................................................. 45
RADIATOR ...................................................................................................................................... 46
FUEL FILTER................................................................................................................................... 47
ENGINE OIL FILTER ...................................................................................................................... 48
ENGINE OIL LEVEL ....................................................................................................................... 48
TRANSMISSION OIL FILTER ....................................................................................................... 48
TRANSMISSION OIL LEVEL ........................................................................................................ 48
BRAKE FLUID ................................................................................................................................. 49
ENGINE OIL REPLACEMENT....................................................................................................... 50
TRANSMISSION OIL REPLACEMENT ........................................................................................ 50
REPLACING THE OIL OF FRONT AXLE..................................................................................... 51
LUBRICATION TABLE .................................................................................................................. 52
REFUELLING................................................................................................................................... 53
ADJUSTMENT OF FAN BELT TENSION ..................................................................................... 53
ADJUSTMENT OF CLUTCH PEDAL ............................................................................................ 54
FOOT CLUTCH PEDAL .............................................................................................................. 54
HAND CLUTCH .......................................................................................................................... 54
BRAKE ADJUSTMENT .................................................................................................................. 55
FOOT BRAKE .............................................................................................................................. 55
HAND BRAKE ............................................................................................................................. 56
AXIAL TRAVEL ADJUSTMENT OF FRONT AXLE .................................................................. 56
ADJUSTING TOE-IN ON FRONT AXLE ...................................................................................... 57
SAFETY START CONTROL........................................................................................................... 58
HYDRAULIC CONTROL ADJUSTMENT ..................................................................................... 58
GREASE LOCATIONS .................................................................................................................... 59
INJECTION NOZZLE INSPECTION .............................................................................................. 60
CYLINDER HEAD BOLT TIGHTENING ...................................................................................... 60
VALVE CLEARANCE ADJUSTMENT.......................................................................................... 61
SETTING INJECTION PUMP TIMING .......................................................................................... 62
ELECTRICAL SYSTEM .................................................................................................................. 64
BATTERY..................................................................................................................................... 64
BOOSTER CONNECTION .......................................................................................................... 65
PROPER BATTERY SERVICE AND TIPS FOR SAFETY ....................................................... 66
HEADLAMPS............................................................................................................................... 67
TRAILER SOCKET...................................................................................................................... 67
ILLUMUNATION LAMPS .......................................................................................................... 67
FUSES ........................................................................................................................................... 68
GLOW PLUG................................................................................................................................ 68
RELAYS ....................................................................................................................................... 69
STARTER MOTOR ...................................................................................................................... 70
ALTERNATOR ............................................................................................................................ 70
INSTRUMENT PANEL WIRING DIAGRAM ........................................................................... 71
OPENING THE BONNET ............................................................................................................... 72
WASHING THE TRACTOR ............................................................................................................ 72
SECTION 6- STORING........................................................................................................................ 73
STORAGE ......................................................................................................................................... 73
REOPERATION AFTER STORAGE .............................................................................................. 73
SECTION 7. TECHNICAL SPECIFICATIONS .................................................................................. 75
TECHNICAL SPECIFICATIONS .................................................................................................... 75
ENGINE SPECIFICATIONS............................................................................................................ 76
SPEEDS VIA TIRES......................................................................................................................... 76
TURNING RADIUS ......................................................................................................................... 77
ENGINE LUBRICATION SYSTEM................................................................................................ 78
ENGINE SPEED GOVERNOR ........................................................................................................ 78
TRANSMISSION .............................................................................................................................. 78
CLUTCH ........................................................................................................................................... 78
DIFFERENTIAL LOCK ................................................................................................................... 78
COOLING SYSTEM ........................................................................................................................ 78
AIR CLEANER ................................................................................................................................. 78
FUEL SYSTEM ................................................................................................................................ 79
HYDRAULIC PUMP ........................................................................................................................ 79
BRAKES ........................................................................................................................................... 79
STEERING ........................................................................................................................................ 79
FRONT AXLE .................................................................................................................................. 79
REAR HITCH ................................................................................................................................... 79
MAXIMUM AXLE LOADS............................................................................................................. 80
POWER TAKE-OFF ......................................................................................................................... 80
HYDRAULIC SYSTEM ................................................................................................................... 80
3 POINT LINKAGE SYSTEM ......................................................................................................... 80
ELECTRIC ........................................................................................................................................ 80
CAPACITIES .................................................................................................................................... 80
UNIT CONVERSION TABLE ......................................................................................................... 81
SECTION 8. TROUBLESHOOTING .................................................................................................. 83
ENGINE HARD TO START ............................................................................................................ 83
BAD EXHAUST COLOUR .............................................................................................................. 84
ENGINE STOPS ABRUPTLY ......................................................................................................... 84
IN CASE ENGINE IS STOPPED ABRUPTLY ............................................................................... 84
TRACTOR WILL NOT START ....................................................................................................... 85
TRACTOR WILL NOT START ....................................................................................................... 85
TRACTOR WILL NOT MOVE WITH ENGINE RUNNING ........................................................ 85
3 POINT LINKAGE SYSTEM WILL NOT MOVE ........................................................................ 85
BATTERY PROBLEMS ................................................................................................................... 86
SECTION 1. SAFETY WARNINGS
SAFETY AND WARNING SIGNS AND INSTRUCTIONS
This symbol means be CAREFUL and AWARE; YOUR SAFETY IS IN DANGER.
The symbol above describes significant safety warnings when it is used in this manual. Please pay particular
attention when you see this warning and follow subsequent safety precautions.
WHY IS SAFETY IMPORTANT?
ACCIDENTS CAN CAUSE INJURIES AND EVEN DEATH
ACCIDENTS ARE COSTLY
ACCIDENTS CAN BE AVOIDED
DANGER: When the word DANGER appears next to this symbol, it indicates the risk which may
be resulted in serious injuries or even deaths if the subsequent precautions are not avoided.
CAUTION When the word CAUTION appears next to this symbol, it indicates risks which may be
resulted in serious injuries or even deaths if the subsequent precautions are not considered and
obeyed.
WARNING: When the word WARNING appears next to this symbol, it indicates risks to pay
special attention to avoid causing accidents.
1
SAFETY PRECAUTIONS
REMEMBER: "SAFETY" IS ONLY A WORD UNTIL IT IS
PUT INTO PRACTICE
WARNING
It is recommended to have a fire extinguisher and a
first aid kit in the vehicle. Operator must know the
place and utilization of these equipments.
Improper handling of the tractor could lead to an
accident. Prior to the operation of the tractor, be
sure to read this Manual carefully and have a
thorough understanding of all of the contents. In
particular, the instructions given in this section
entitled "SAFETY PRECAUTIONS" must be strictly
followed.
GENERAL OPERATING SAFETY
PRECAUTIONS
WARNING
Observe all the safety precautions in this manual
when operating the tractor.
WARNING
Do not allow children or adults having no
knowledge of the tractor or tractor operation, to
operate the tractor.
If you have any doubts regarding the operation of
the tractor, please consult this manual.
WARNING
Operate the tractor with suitable clothing that will
allow easy movement. Avoid loose jackets,
mufflers, ties, scarves, or loose shirt sleeves to
prevent from being caught by moving parts.
Recommended protective items:
• Helmet
• Mask
• Earphone
• Protective goggles
• Suitable clothes
• Reflective tapes
• Safety gloves
• Safety shoes
WARNING
Never allow riders on the tractor, hitch drawbar or
attachments while travelling and operating them.
2
BASIC SAFETY REQUIREMENTS
FOR MAINTENANCE
CAUTION
Hydraulic oil or fuel escaping under pressure can
penetrate the skin, causing serious injury. Before
disconnecting oil or fuel lines, be sure to relieve all
pressure. Before restoring pressure after repair, be
sure all connections are tight and all hydraulic
components are in normal condition.
Pressure oil may not be observed visually. You may
use a carton for detection purposes. If injured by
leaking fluid, see a doctor immediately for proper
treatment.
WARNING
Always follow these maintenance instructions
before operating the tractor:
WARNING
Immediately repair the head lights and work lamps
required to conform to traffic regulations where
the tractor is operated.
WARNING
Keep tractor steps clean to avoid accidents due to
slippage. Dust, mud, snow, ice, etc. must be
removed from the pedals and brakes as they may
cause slippage.
WARNING
Cover the PTO shaft with a guard when not being
used.
CAUTION
DANGER
Be sure to apply the brake and lower any
attachment or implement before disassembling
any part.
When refueling, be particularly careful first to stop
the engine completely to prevent the fuel from
igniting. Never refuel in the presence of an open
flame or while smoking. Always use funnel when
adding fuel and refuel only out of doors. When
refueling is completed, wipe any spilled fuel off the
tractor and securely fasten the cap of the fuel tank.
DANGER
Never adjust or service the tractor when it is in
motion or while the engine is running. Always
adjust the brake or clutch properly in accordance
with the adjusting procedure in the instruction
book.
WARNING
Do not remove the radiator cap while the engine is
running. Shut down the engine and wait until it
cools sufficiently. For removal, turn the cap to the
first stop to relieve pressure. Do not touch engine,
muffler, exhaust pipe or exhaust manifold while
the tractor is running or just after running, wait
until these parts are cold before performing any
procedures.
WARNING
Before driving the tractor, perform daily
inspections such as controlling oil level, fuel level,
tire air pressure, etc.
3
WARNING
WARNING
Before starting any work on electrical equipment
or work that may cause you to touch the electrical
part accidentally, first disconnect the battery
cables. Never remove the rubber cap cover at the
positive terminal of the battery cable end. Before
connecting the battery to the charger, make sure
that the charger switch is in "OFF" position. Besure to connect the charger to the correct
terminals on the battery, (positive to positive,
negative to negative). A great amount of hydrogen
gas is generated by the battery when it is being
charged. Take precautions against fire: Do not have
any exposed flame in the area where you are
working. Be sure not to cause any leakage of the
electrolyte, since it will corrode the skin or
clothing. In case of accident as described below,
immediately seek first aid, and see a doctor
immediately for proper treatment.
•
•
•
•
When you are working the electrical system of the
tractor, do not forget to remove (-) terminal.
WARNING
Stop the engine and make sure the PTO shift lever
is in neutral before performing any of the following
services, including:
•
•
•
Removal of the propeller shaft between
PTO and any attachment,
Adjustment of PTO drive train and hitch.
Adjustment or cleaning of PTO driven
attachment.
WARNING
The steering wheel always has built-in play to some
extent, which is required for smooth working of
sector gear and pinion gear. Always inspect the
amount of the play. Do not operate the tractor if
there is too much or too little play in the steering.
If the diluted sulfuric acid from the battery has
gotten into the eyes: Cleanse the eyes with a
lot of clean running water for more than 15
minutes, while opening the eyes widely.
If diluted sulfuric acid from the battery has
been swallowed: Rinse the mouth with clean
water immediately and drink a lot of raw eggs
or milk. Lie down quietly.
If diluted sulfuric acid has gotten on the skin or
clothing: Wash away the diluted sulfuric acid
completely with a lot of clean running water
and neutralize with soap solution. Then rinse
with water.
If the diluted sulfuric acid is spilled: Wash away
with a lot of water or neutralize with slacked
lime or bicarbonate of soda.
OPERATING THE TRACTOR
Before Starting and Driving the Tractor
WARNING
Operate the tractor only when seated properly in
operator's seat and keep a firm grip on the steering
wheel at all times. Never attempt to perform any
operation of the tractor from anywhere else, on or
off the tractor. Always wear a helmet when
operating the tractor. Do not attempt to jump start
the tractor, always start the engine with ignition
key.
WARNING
Wear suitable protective equipment such as
goggles, mask, gloves, etc. when you are using the
tractor for agricultural spraying purposes. Zirai
ilaçların teneffüs edilmesi veya direk temas
edilmesi sağlığınız açısından bir risktir.Inhalation of,
or direct contact with, agricultural pesticides is
risky for your health. Daha detaylı bilgiler için ilacın
kullanım kılavuzuna başvurunuz.For more detailed
information, please consult pesticide manual.
READY
WARNING
Do not remove the labels on the tractor. If the
labels are worn out and become illegible etc.,
replace them.
4
Starting and Driving the Tractor
WARNING
Always operate the tractor at the proper speed
which enables you to keep the tractor under your
complete control.
WARNING
Never attempt to jump on or off a moving tractor.
To start travelling, lower the engine speed and
release the clutch pedal slowly. Abrupt releasing
causes the tractor to jump off.
WARNING
Before leaving the tractor, stop the engine, remove
the key, apply the parking brake and make sure
that the engine has come to a complete stop, and
any attachment is completely touching the ground.
Do not leave the seat before tractor and the
implement stops completely.
CAUTION
When starting the tractor, operating any
attachment or engaging the PTO make sure that no
one is in the way, especially children.
KEY
LOCK
DANGER
When starting the engine in an enclosed area or
building, ensure proper ventilation by opening the
doors and/or windows to prevent carbon
monoxide inhalation. Mount the extension exhaust
pipe on the tractor which has a cabin.
WARNING
Slow down when operating the tractor on rough
ground.
5
CAUTION
Ensure that the glass of the lamps and signals are
clean.
If ROPS is folded, level it down, fasten the seat belt
before using the tractor and keep it fastened while
in operation.
WARNING
Keep rotating beacon lamp on when travelling on
road, this will help other vehicles that are distant,
behind a hill or out of the field of clear view to
notice you easily.
DANGER
For travelling on roads and streets be sure to lock
both brake pedals together before driving to
prevent either brake from acting independently.
DANGER
It is not recommended to use tractors without
ROPS.
CAUTION
Never operate the differential lock while driving at
high speed or travelling on the road. For driving the
4-WO tractor on the road, be sure to place the 4WD shift lever in OFF position.
DANGER
Travelling on Roads and Streets:
In case you notice a loose bolt or any damage on
some of the equipments or parts, stop the tractor
immediately and do not turn back to working until
the failure/problem is solved.
CAUTION
Prior to the operation of the tractor, be sure that
all functions described in this manual perform
properly.
CAUTION
WARNING
Be sure that PTO is deactivated, brakes are linked
and the differential lock is released.
Operator must know local traffic rules and laws
and has a valid driving license for driving on road.
WARNING
Ensure that the plate is placed so that it is visible
during travelling and all documents that may be
necessary are around.
DANGER
Do not allow children to use the tractor or hitch
any implement to the tractor.
6
DANGER
Safety frame must always be rolled out (unfolded)
and in undamaged condition. Do not perform any
modifications on the safety frame for any
purposes.
DANGER
Do not allow any person under the implement,
when the tractor is operated and the implement is
in use.
WARNING
DANGER
Move the implement to the carrying position on
road and tie and carry it without interrupting the
driving and view of other travelling vehicles.
Always fasten your seat belts when using the
tractor.
WARNING
DANGER
Avoid operating the tractor close to the areas
where fixed obstacles such as walls, fences, etc. are
present as they may restrain the maneuver
capability of the tractor.
Always operate and stop the tractor while you are
seated.
CAUTION
When safety frame (ROPS) is open, be careful while
passing under bridges, canals, low-height
structures or electric cables in order to eliminate
the risk of banging into them, if there is risk, you
can fold up the safety frame temporarily, when the
obstacle is passed return the safety frame to its
initial position and continue to travel.
CAUTION
Do not use the tractor on neutral position,
especially when operating on downward slow, be
sure that the tractor is in gear.
CAUTION
If the road is wet or slippery, pay particular
attention.
DANGER
Tractor is only for 1 person; do not carry any other
passengers on the fender, bonnet or other
components of the tractor.
WARNING
Lower your speed when approaching to hills.
DANGER
WARNING
Be sure that there is not any person in the circle of
the tractor while maneuvering.
Signal before turning.
WARNING
DANGER
Control the traffic on the intersections or while
crossing; start crossing if the traffic allows.
Do not perform any adjustments, mounting or
demounting while the tractor is operated.
WARNING
Do not try to pass cars on road.
DANGER
While mounting, removing or using an implement,
be sure that there are no persons between the
tractor and the implement.
WARNING
If the traffic behind becomes busy, pull over at an
appropriate place and give way to the vehicles
behind.
DANGER
Do not attempt or allow others to attempt to
operate the tractor or reach to the control levers
from the area on which the implement is mounted.
WARNING
While driving and working during night time, turn
on the lights; maintain your speed lower than your
daytime speed; and turn on the work light for
better sight when working night time.
CAUTION
Never remove or mount the implements when the
tractor is operated or the parking brake is not
applied.
7
Steering and Turning the Tractor
CAUTION
CAUTION
Slow down your tractor and disengage the
differential lock before going into a turn, being
careful to prevent any attachment mounted on the
front or rear from hitting anyone or anything. Note
that the turning radius may be higher especially
with large implements.
For towing, be sure to use the drawbar only. Set
the hitch point below the center line of the rear
axle. When using a chain, never try to move
forward abruptly. When using a long chain or cable
to hitch the tractor to the load, drive the tractor
forward slowly until all slack is taken out.
Towing and Operating on Hills
CAUTION
For towing work on downward slope, place the
shift lever in low speed and use engine brake.
Never try to reduce the speed with brake only.
WARNING
Towing a heavy object on a hill is highly hazardous.
Widen the tread of the tractor and mount the
wheel weight or chassis weight to increase the
stability and operate with extra caution. If
necessary, connect front wheels drawbar (4WD).
CAUTION
Avoid operating the tractor on an extreme slope
that appears hazardous, when forced to operate
on such slope, use extra care.
CAUTION
When operating the tractor on higher a steep slope
or flat ground, be sure not to suddenly steer, brake
or operate clutch or attachments.
CAUTION
Do not operate the tractor at the edge of cliff or
steep slope. Be particularly careful right after the
rain when soil is soft and may give way easily. If
necessary, connect front wheels drawbar (4WD).
CAUTION
Always load the tractor based on the axle loads
defined in this manual while towing with tractor.
8
Using attachments
CAUTION
Driving forward out of a ditch or mired condition or
up a steep slope could cause tractor to tip over
rearward. Back out of such situation if possible. If
the situation does not permit you to back out, use
the front wheel weight or the chassis weight for
balancing the tractor lengthwise. Also in case any
extra heavy rear mounting attachment is used, try
to obtain better balance in this manner.
WARNING
To mount or operate attachments, follow the
instruction manual for the particular attachment
for safe operation.
CAUTION
When backing down a slope in reverse gear or
going up the grade in forward gear, never operate
the clutch, brake, throttle lever or steering wheel
abruptly. Be particularly careful on slippery roads.
WARNING
In any case of towing (by use of a rope or by
hanging up the front), be sure to place the both
main shift lever and sub shift lever at "NEUTRAL'
position so long as the rear wheels are on the
ground. These shift levers shall not be placed at
any other speed range. If the front tires are
contacting the ground, 4-wheel drive shift lever
should be placed in 2WD position in addition to the
precautions described above.
WARNING
When using agricultural chemicals with an
attachment on the tractor, always follow the
Instructions in the manual for the attachment as
well as the Instructions provided by the chemical
manufacturer.
WARNING
CAUTION
When starting the engine by towing the tractor
with a battery as discharged, be sure to place the
main shift lever at the 4th speed step and the sub
shift lever at the high speed step, then operate the
clutch slowly. Never place the sub shift lever at the
low speed step.
It is not recommended to use or mount heavy work
equipment such as front loader, front shovel, rear
shovel, crane, etc. with this tractor. The tractor is
only suitable for agricultural purposes.
Roll Over Protective Structure (ROPS)
WARNING
CAUTION
When towing the tractor, be sure to keep the
safety speed. It is advisable to operate at 10 km/h
or less in towing the tractor under 20 HP and at 15
km/h or less in towing the tractor over 20 HP.
We strongly recommend a ROPS (Roll Over
Protective Structure) install to your tractor. It must
not be removed even temporarily. It must not be
folded when travelling. It is not recommended to
utilize additional elements to perform drilling,
welding or reinforcement on the construction, this
procedure will weaken the construction. If any
damage is observed on the construction, it must be
repaired at a technical service or replaced. Exercise
good care in seat belt Installation as regard belt
strength and the bucket, which must not be broken
off or disconnected. For further details, ask your
authorized technical service.
WARNING
When towing or running on a steep downward
slope, be sure to apply the engine brake to keep
safety speed. Never run by inertia (coasting) with
main shift lever placed "NEUTRAL' position or the
clutch disengaged.
9
CAUTION
CAUTION
PREVENTING SIDE ROLLOVER
PREVENTING REAR ROLLOVER
•
•
•
•
•
•
•
•
•
•
•
•
•
Adjust thread to the widest range suitable for
the desired work.
Lock brake pedals together prior to driving at
carrying speed.
Lower the speed according to working
conditions.
Make wide and slow turns at low speed. Do
not allow tractor to shake, you may lose
steering control.
Do not tow loads too heavy for tractor. The
vehicle may slip out of control or twist around
the load while operating on downward slope.
Apply the brake properly and gradually; avoid
applying the brake abruptly.
When running on a downward slope, be sure
to apply the engine brake to lower the tractor
speed and when operating downwards
maintain the same speed you apply while
climbing.
Engage the 4-wheel drive so that you can apply
brake to all 4 wheels.
Do not disengage the clutch or shift gear when
operating on downward slope.
It is more likely for the tractor to rollover while
driving straight up or straight down on a steep
slope compared to rolling over while traversing
the slope.
Do not cross steep slopes; if necessary, avoid
holes, depressions or other similar irregular
terrains as much as possible. Avoid any tree
roots, bumps and elevated areas on the uphill
side of the slope. While working near ditches
and heaps, keep the tractor always behind the
slippage line. Avoid ditches, embankments,
heaps and river banks that may collapse.
If you are driving the tractor on a hillside that is
too steep, do not turn to the uphill side of the
slope; slow down and make a wide turn if
necessary. Drive directly over the slope, or, if
not possible, cross it upwards or downwards;
however, do not attempt to traverse the slope.
When crossing the slope upwards or
downwards, the heavier part of the tractor
must be always on the uphill side of the slope.
•
•
•
•
•
•
•
•
•
•
10
Do not pull loads using 3 point linkage arms or
rear axle center line. Use only the hitch hooks
to pull loads.
Hitching the load at a high point may cause
rear rollover and this may lead to serious
injuries and death. Link the loads to the hitch
hook only.
Add front-end weights when pulling heavy
loads to counterbalance the tractor or the
heavy rear mounted equipment.
Start forward motion slowly and raise speed
gradually. Do not raise the engine speed or
engage the clutch. If the tractor is linked to a
heavy load or stationary equipment, improper
engagement of clutch may cause a rollover.
If the front-end of the tractor raises upwards,
lower your speed and engage the clutch if
required.
If the tractor is stuck in the mud or terrain, do
not attempt to move forward. If there is a
hitched equipment, remove it and back out. If
not possible, get another tractor to pull it out.
If you are stuck in a ditch, back out of it where
possible. If you drive forward, move slowly and
carefully.
If stuck in a ditch, the tractor and, if any, rear
mounted equipment can be backed up steep
slopes, and come down forward slowly.
While operating on downward slope, always
keep the tractor in gear; do not drive the
tractor while it is out of gear or the shift is
placed in the neutral position.
Prefer flat grounds to change speed, make
proper shift adjustment and start driving. Do
not change these adjustments and try to
maintain them while driving up or down on a
slope, wait until you get to a flat ground to
make adjustments if necessary.
Choose a flat area to park the tractor.
SOUND LEVELS
WARNING
According to 2009/63/EC, the noise level measured
is 79,1dB(A), and as per 2006/26/EC the noise
exposed by the operator is 85,9dB(A). These values
can vary depending on models, refer to product
values.
According to the NIOSH criteria, the maximum
exposure must be limited to 8 hours for 85dB,
without additional precautions are taken.
Persons who are exposed to noise must take
additional precautions according to their exposure
time and the level of the noise. We advise you to
wear earphones for such cases.
It is not recommended to use tires other than the
ones given with the tractor or described in this
catalogue. Since the tractor is a 4-wheel drive, the
tire pairs must be compatible with one another.
Front tire slip angle is designed to be 1%-4%
greater than rear tires. Other values may cause tire
wear and are not recommended.
Replace your tires with tires in the same sizes from
the same brand.
WARNING
We recommend using only low-sulfur (No. 2) diesel
for fuelling. The clarity and purity of the fuel used
has a significant impact on the life of the engine
injectors, pumps and other components of the fuel
system, and the components of the combustion
chamber. Use of low-quality diesel will reduce
engine power and consequently the efficiency of
your tractor. Use of high-quality diesel reduces
negative impacts of the exhaust emissions on the
environment.
WARNING
Do not throw away or scrap the waste oil or
components like end-of-life tires or batteries after
replacing them. These components contain
materials such as rubber, heavy metals and acid,
and therefore they are very harmful to the
environment.
They must be delivered always to recycling
facilities. If you are not able to find a suitable
facility to deliver such components- consult your
dealer.
WASTE OIL PICK-UP
After replacing oil, deliver the used oil to a waste
oil facility. 1 liter of oil can pollute 1 million liters of
drinking water.
Environmental awareness is an individual
responsibility and a legal obligation.
If you are not able to find a suitable waste oil
facility, consult authorized distiributor dealers.
RECOMMENDED IMPLEMENTS
There are a number of implements available which
match the 3-point linkage system of the tractor.
When mounting and using these implements, it is
very important you load the tractor according to
the permitted axle loads, otherwise unexpected
failures or accidents may occur.
For main implements that can be mounted to the
tractor, use the recommended implements listed
below:
CAUTION
It is not recommended to use or mount heavy work
equipment such as front loader, front shovel, rear
shovel, crane, etc. with this tractor.
The tractor is only suitable for agricultural
purposes.
CAUTION
1. 4 disc 9" plough.
2. 6 lines, 24 blades 850mm and 1500mm rotary
tiller.
3. 400lt mounted pesticide tank.
4. 2000lt pull-type pesticide tank.
Do not operate the tractor on slopes with an
incline above 20°; this may cause problems related
to the lubrication of the engine and accordingly to
mechanical components.
11
12
LOCATION OF WARNING LABELS
7106262
7106123
7106263
7106128
7106125
7106127
7106261
7106122
7106126
7106124
7106122
7106124
On the left side of the service
sheet.
On the left side of
the axle carrier.
CAUTION: Before leaving the
tractor, apply hand brake and
lower the equipment to the
ground. Stop the engine and
remove the ignition key. If the
engine needs to be left
running, apply hand brake,
lower the equipment, place
the shift and PTO shaft to the
first position.
CAUTION:
Always
remove
the
(-)
terminal
before
performing
any
procedures on the
electrical system.
7106125
7106123
On the starter motor.
Next to the battery.
DANGER: Do not start
the
engine
using
control lead; this may
lead to serious fatal
accidents. Start the
engine only when you
are seated.
CAUTION: When working on
the battery or electrical circuit,
remove the negative terminal
of the battery from the
electrical circuit.
13
7106130
7106126
7106261
On the left fender.
On the service sheet.
CAUTION: Do not carry any
other passengers on the
fender or any other place or
on an implement.
CAUTION:
Read
the
information about safety and
operation of the tractor
defined in maintenance and
instruction manuals.
7106127
On the left side of the safety
frame.
7106262
CAUTION: Risk of rollover. Do
not remove the protection
bar, or perform drilling or
welding on it and do not hitch
any implements to the bar.
On the right side of the
radiator separator sheet.
CAUTION: Pressure hot water
vapor. Protect your face and
hands while the radiator is
hot, radiator contains a
certain amount of pressure.
Wait until the engine cools
down before opening the cap
and turn it slowly to allow
pressure to escape.
7106128
On the right side of the safety
frame.
DANGER: Hold the steering
tightly in case the tractor rolls
over, protection bar protects
the driver unless he attempts
to stand up and leave the
tractor.
7106263
On the left side of the
radiator separator sheet.
CAUTION: There are hot
surfaces, stay at a safe
distance.
7106130
On the power take off housing.
CAUTION: There are moving
parts. Keep your hands away
from the belt and moving
parts while engine operates.
Ensure the protection sheets
are in place.
DANGER: Stay away from the
rotary power take off and the
connected shaft.
Do not
attempt to disconnect the
cardan shaft from the power
take off. Ensure tractor, cardan
shaft
and
implement
protections
are
properly
installed and secured.
14
SECTION 2. EXTERNAL VIEW AND NOMENCLATURE OF
EACH PART
4
FRONT DASHBOARD CONTROLS
1.
2.
3.
4.
5.
6.
7.
Ignition Key
Rotating Beacon Lamp Control
Work Light Control
Instrument Panel
Hazard Warning Light Control
Differential Lock Control
Illumination, Flasher and Horn Control
3
5
2
6
1
7
11
20
21
Figure 1
TRACTOR CONTROLS
8.
9.
10.
11.
12.
13.
14.
15.
16.
17.
18.
19.
20.
21.
22.
23.
24.
25.
Operator’s Seat
Shift Lever
Hand Throttle
Gas Pedal
Speed Shift Lever
Brake Pedal Lock
Right Brake Pedal
Left Brake Pedal
Clutch Pedal
Hand Operated Clutch Lever
Power Take Off Lever
Shuttle Shift Lever
Position Control Lever
Depth Control Lever
Parking Brake
Power Take Off Speed Lever
4-Wheel Drive Lever
External Power Outlet Lever
19
9
18
10
13
17
12
16
14
Figure 2
15
25
8
23
24
22
Figure 3
15
16
SECTION 3. FUNCTIONS AND USAGE OF PARTS
INSTRUMENT PANEL
Figure 4
S1:
S2:
S3:
Fuel Meter. Indicates the rate of remaining
fuel in the tank. When the pointer comes
over the red zone, you have about 4lt fuel
in the tank, fill fuel as soon as possible.
Engine rpm gauge. Indicates one percent of
the engine speed in r/min (rpm).
Digital gauge.
Upper line indicates engine operating
hours. Blinking hour glass symbol indicates
the engine is running, this symbol
disappears when the engine is not
operating. Digits before the point indicates
the engine operating time in hours. First
digit after the point indicates the one-tenth
of the one-hour operation (1/10 hours = &
minutes) of the engine. Independently of
the engine speed, every 1 hour of engine
operation, the counter shows 1 units of
increase.
The bottom line indicates power take off
speed in rpm. The tractor has two power
take off speeds as standard. When 540 rpm
is selected, this value is shown with a turtle
symbol and when 750 rpm is selected the
value is indicated with a rabbit symbol.
Power take off speeds for engine speeds:
540 Standard = 2540 engine rpm
540 Economy = 1875 engine rpm
750 Economy = 2600 engine rpm
S4:
Water temperature gauge.
The water temperature pointer will move
when the engine heats up. Normal
operating range of the engine is 75°C-95°C.
These two values are indicated with a point
on the gauge. Under normal operating
conditions, pointer must be placed
between this range.
The red zone indicates high operating
temperature. It starts at 115°C and ends at
125°C. If the pointer enters this zone,
remove the engine load immediately and
run at idle speed, then wait for 3-5 minutes
for the pointer to return to the normal
operating range; if the pointer stays in the
red zone, shut the engine off and after the
engine is cooled down, check radiator fluid
level and engine oil level, and control the
hoses for leakage, if the levels are not
satisfying, replenish appropriately. Consult
your dealer if necessary.
17
L1:
L2:
L3:
L4:
L5:
L6:
L7:
L8:
L9:
L10:
L11:
L12:
L18:
L19:
check radiator fluid level and engine oil
level, and control the hoses for leakage, if
the levels are not satisfying, replenish
appropriately.
Consult your dealer if
necessary.
Battery not charging warning light. It lights
in red. When the engine starts to run, the
warning light should normally go off.
Air cleaner warning light. It lights in red. It
lights up when the air cleaner is jammed.
Power take off warning light. It lights in
red. It lights up when the PTO lever is
applied.
Engine oil pressure warning light. It lights in
red. When the engine starts to run, the
warning light should normally go off.
Transmission oil filter jammed warning
light. It lights in red. It lights up when the
transmission oil filter is jammed.
Parking brake warning light. It lights in red.
It lights up when the parking brake is
applied.
Glow warning light. It lights in orange. It
lights up when the ignition key is turned
ON, it remains on for a certain period of
time to facilitate the engine operation and
goes off.
540 PTO warning light. It lights in orange.
It lights up when the PTO is applied, if the
PTO speed lever is at 540.
750 PTO warning light. It lights in green. It
lights up when the PTO is applied, if the
PTO speed lever is at 750.
High beam warning light. It lights in blue. It
lights up when the high beams are on or
when the headlights are flashed.
Low beam warning light. It lights in green.
It lights up when the low beams are on.
Fuel warning light. It lights in yellow. It
lights up when the fuel level in the tank is
under the limit.
4,wheel drive warning light. It lights in
orange. It lights up when this function is
engaged using 4-wheel drive lever.
Water temperature warning light. It lights
in red. It lights up when the engine
temperature rises above the limit. If the
lamp light up, remove the engine load
immediately and run at idle speed, then
wait for 3-5 minutes for the lamp to go off;
if the lamp does not go off, shut the engine
off and after the engine is cooled down,
L20:
L21:
18
Left-hand-side turn signal warning light. It
lights in green. It flashes when the left
signal is on.
Right-hand-side turn signal warning light. It
lights in green. It flashes when the right
signal is on.
USAGE OF FRONT DASHBOARD CONTROLS
When the key is released, it turns back to
ignition position and starter motor stops. If
the engine starts when returned to the
ignition position, normally the battery
warning light and engine oil warning light go
off, tachometer moves to indicate engine
rpm, meter starts counting and hour glass
starts to flash on the digital gauge.
1. Ignition Controls
OFF position: Power supply to the tractor is
off and the engine is not operating. In order
to stop the engine while running and shut
down the controls, turn the ignition key to
the counterclockwise to this position
(backmost). When the ignition key is at this
position, or even there is no key, the hazard
warning light and horn continue to operate.
2. Rotating Beacon Lamp
Press the upper side of the
button to turn on the rotating
beacon lamp. The lamp continues
to illuminate as long as the
button is pressed. In order to
turn off the lamp, press the
bottom of the button. It is
obligatory to turn on the lamp
Ignition position: Power supply to the
tractor is on and certain circuits are
supplied with electricity. If there are any
controls engaged, associated warning
lights illuminate on the dashboard.
Normally, battery charging and engine oil
pressure warning lights should illuminate
on a continuous basis. The tractor has a
auto glow system, when the ignition key
is turned clockwise from off to this
position, glow system is engaged and runs
for a certain period of time to facilitates
the initial operation of the engine. As long
as the glow system runs, the warning light
will continue to illuminate on the
dashboard. The operating time of the
glow system varies according to the
temperature of the environment.
40-45 seconds @ -20°C
25-30 seconds @ 0℃
1±0,2 second @+45°C
After the warning light goes off, the
engine starts to run, meanwhile the glow
system continue to run for another 20
seconds to facilitate the operation of the
engine. If the engine is operated before
the warning light goes off (not
recommended), the light goes off and
relay continues to glow the plugs for 20
seconds.
3. Working Light
When the button is pressed,
working lamp turns on and
continues to illuminate as long as
the button is pressed. In order to
turn off the lamp, press the bottom
5. Hazard Warning Light
When the button is pressed,
hazard warning light turns on and
continues to illuminate as long as
the button is pressed. In order to
turn off the lamp, press the
bottom of the button.
6. Differential Lock Control
When the button is pressed,
differential lock is applied and
it continues to operate when
the button is pressed. In order
to turn off the lamp, press the
bottom of the button. When it
is engaged, an audible alarm
will sound to warn the
operator.
For
detailed
information, see operation
section.
Start position: When the ignition key is
turned clockwise after the glow plug warning
light goes off from ignition to this position,
starter motor starts to run and the engine
starts. As long as the key is placed at this
position, starter motor continues to run.
19
7. Illumination, Flasher and Horn Control
USAGE OF TRACTOR CONTROLS
8. Operator’s Seat
OFF position: Illumination is off.
2
First position: Parking warning lights and
dashboard background illumination is
on.
Second position:
headlights are on.
The
low
1
beam
Figure 5
To flash the headlights, pull the lever to
yourself and release.
1
To turn on the high beams, place the
lever to the second position and push it
For turning right, push the lever
forward.
Press the horn symbol on the lever to
operate the horn.
Figure 6
Tractor is equipped with a seat that provides
maximum operator comfort.
Vibration levels of the seat measured for
lightweight and heavy operators as per 78/764/EC
are 1.24m/s2 and 1.16m/s2, respectively.
In order to reduce the vibration levels:
i.
Try to keep the vertical position adjustment of
the seat at medium level.
ii.
Adjust the spring tension according to the
weight of the operator by twisting the screw at
the back side.
In order to adjust your seat forward or backwards,
pull up the lever (1) as seen in “Figure 5", the seat
will be secured when the lever is released.
20
12. Speed Shift Lever
In order to adjust your seat up or down, loosen the
screw (2) at both sides as seen in “Figure 5”, after
you place the seat to the desired position, secure it
by tightening the screws at both sides by hand
ensuring they are fully secured.
There 3 speed shifts. High (symbolized with a
rabbit), Medium (symbolized with a human) and
Low (symbolized with a snail). There are idle shifts
between each consecutive speed shifts.
In order the adjust the suspension of the seat,
loosen and tighten the screw (2) by hand as seen in
“Figure 6”. It can be hardened or softened by
turning
clockwise
or
counterclockwise,
respectively. Consider the weight of the operator
when adjusting the suspension unit.
13. Brake Pedal Lock
Must be engaged to lock brake pedals together
especially when driving on roads to ensure
simultaneous use of the brakes.
To unlock the pedals, turn the pin halfway
clockwise (A) as seen in “Figure 7” without
depressing the pedals (on reverse position), pull it
to the right and turn it counterclockwise (B) to fix it
to the pin slot on the right pedal.
To lock the pedals, turn the pin halfway clockwise
(A) as seen in “Figure 7” without depressing the
pedals (on reverse position), pull it to the left to
place the pin into slot and turn it counterclockwise
(B) to fix it on the right pedal.
9. Shift Lever
There are 4 main shift positions. Shifts are
synchromesh-type. Depress clutch pedal all the
way to shift gears, release the pedal slowly after
making the proper shift adjustment.
10. Hand Throttle
Boosts engine rpm and enables the tractor to
increase its speed. It is operated by hand. The
rabbit symbol indicates high speed and snail
symbol indicates low speed. Hand throttle enables
fixed adjustments, after the desired throttle setup
is made, this adjustment continues to apply after
you release the lever.
A
B
11. Gas Pedal
Boosts engine rpm and enables the tractor to
increase its speed. It is operated by foot. The speed
increases as depressing continues and it turns to its
original position after the pedal is released. It can
be used with hand throttle simultaneously, if used
when there is a fixed throttle setup, the speed may
increase even more. When the pedal is released,
throttle setup starts to apply again.
Figure 7
21
When the lever is in the upper position: The clutch
is deactivated, there is a power transmission from
the engine to the PTO, and the PTO moves.
When the lever is in the lower position: The clutch
is activated, there is no power transmission from
the engine to the PTO, and the PTO does not move.
In order to stop the PTO and disengage the clutch,
push down the (A) knob shown in “Figure 8” until it
locks; when it locks you will hear a sound.
In order to move the PTO and engage the clutch,
pull the handle (B) shown in “Figure 8” towards
yourself, and release the knob (A) until it reaches
the highest position so that it makes the lever
travel upwards.
Normally, the play of the hand clutch control lever
should be 1-2 cm.
14. Right Brake Pedal
When depressed, it engages the right brake and
brakes the right wheel. When released,
automatically returns to its original position and
braking effect also disappears. Normally, the play
of the pedal should be 1-2 cm.
15. Left Brake Pedal
When depressed, it engages the left brake and
brakes the left wheel. When released,
automatically returns to its original position and
braking effect also disappears. Normally, the play
of the pedal should be 1-2 cm.
16. Clutch Pedal
18. Power Take Off Lever
When the pedal is in the upper position: The clutch
is deactivated, and there is a power transmission
from the engine to the transmission.
When the pedal is in the lower position: The clutch
is activated, and there is no power transmission
from the engine to the transmission.
If the engine stalls, do not use the tractor by half
engaging the clutch, instead shift to a lower speed.
Normally, the play of the clutch pedal should be 23 cm.
It has 3 positions:
Ahead: The position of movement from the engine.
Middle: Neutral position.
Behind: The position of movement from the wheel.
Movement
From the Engine
Movement
From the Wheel
CAUTION
When operating the tractor, do not put your feet
on the pedals, rest them on the footboard.
In order to move the lever, the hand clutch should
have been disengaged and the foot clutch should
have been fully depressed.
17. Hand Operated Clutch Lever
Movement from the Engine
The PTO speed is chosen by the PTO speed lever.
When operating the PTO, you will need to use the
hand clutch.
Movement from the Wheel
This option is used when the equipment need to be
operated in sync with the advancement speed of
the tractor.
To use it, first disengage the hand clutch and fully
depress the foot clutch. Set the PTO speed lever to
the 750 speed option, take the PTO to the
“movement from the wheel” position and release
the foot clutch slowly.
ACTIVATED
DEACTIVATED
Figure 8
22
downwards. Normally, there is one click play on
the parking brake.
CAUTION
Remember that when the wheel is in movement
position, while the tractor moves backwards the
PTO will also rotate in opposite direction. This
situation may constitute a problem when using
certain equipment. When required, disengage and
deactivate the PTO by using the PTO lever.
CAUTION
When activating and deactivating the parking
brake, also depress the service brakes to prevent
the tractor from slipping and for your safety; upon
activating the parking brake, release the service
brakes slowly.
1 Wheel Rotation = 11.076 PTO Rotations
CAUTION
The parking brake is a mechanical braking system
and independent of the service brakes, thus it can
also be used for emergency braking when required.
Before braking in emergency situations, if possible,
slow down the tractor by using the motor brake
and by downshifting and apply the parking brake
slowly and gradually.
19. Shuttle Lever
The shuttle lever enables selecting the direction, in
which the tractor will travel. If pushed forward it
travels frontward, and if pulled backwards, it
travels rearward.
When using the shuttle lever, depress the foot
clutch completely even if synchromesh exists in
shuttle control, and allow the tractor to completely
stop; upon putting the lever in required position,
slowly release the foot clutch.
1
2
20. Position Control Lever
Figure 9
It serves to command the position control of the
equipment installed in the 3-point linkage system
For further information, refer to the usage of the
Control Valve of the Hydraulic.
23. Power Take Off Speed Lever
The power take off speed is selected by this
control. When lever (1) shown in “Figure 10” is
above and below, 540 rpm and 750 rpm (540
Economy) options are enabled, respectively.
The 750 rpm option may be preferred when used
with equipment not requiring as much power as
the 540 rpm option does. In 750 rpm option, when
the engine is at 1875 rpm, 540 rpm power take off
speed is obtained, this in turn offers the possibility
to operate with low fuel consumption, noise and
vibration.
21. Depth Control Lever
It serves to command the precision control of the
equipment installed in the 3-point linkage system
For further information, refer to the usage of the
Control Valve of the Hydraulic.
22. Parking Brake
When the lever shown in “Figure 9” is pulled up, it
squeezes the brakes of the tractor, thus ensuring
stopping without slippage and parking. To
deactivate the parking brake, press button (2) in
“Figure 9” and lower the lever (1) slowly
23
It can be used to feed single-effect and dual-effect
cylinders.
1
Control arms have 3 positions:
Above: Hydraulic is given from outlet A.
Middle: Circuit is closed.
Below: Hydraulic is given from outlet B.
2
In order to move the control levers, first pull the
safety lock and the lever (3) shown in “Figure 11”
forward and put the control levers (1-2) shown in
“Figure 11” in the positions you desire. The
pressure oil is driven from “A” or “B” outlets
according to the position taken by the control
lever.
Figure 10
24. 4-Wheel Drive Lever
When lever (2) shown in “Figure 10” is in lower
position, the four wheel drive function activates,
and when it is taken to the upper position, the
function deactivates. When the four wheel drive is
active, roadholding and braking ability improves on
muddy and slippery surfaces and fields. When
activating or deactivating the four wheel drive, be
sure the tractor is at standstill.
CAUTION
When using an implement, which requires a mass
amount of oil, the oil level on the transmission case
of the tractor may drop below the minimum
baseline. If this happens, components of the
tractor may be damaged due to insufficient
lubricating. To prevent this from happening, be
watchful of oil level when using hydraulic outlets;
and if necessary, replenish oil using the oil
recommended for transmission.
WARNING
Use the four wheel drive function where required
only. Do not use it on hard soil, asphalt, cement
surface and highways; this may cause wheels to
wear.
2
4
5
1
25. External Power Outlet Lever
3
Figure 11
There are external power outlets on the back of
the tractor you can make use of for using in
equipment hydraulics. These are parts of the
hydraulic circuit of the tractor, and they use the
same oil as in the gearbox of the tractor.
The control levers are situated on the left side,
beside the seat. These power outlets can be
connected to the equipment with standard ½”
quick fit coupling connection. Required male
connecting terminals are supplied in the tool box
together with the tractor.
Together with the tractor, there is 1 hydraulic
distribution valve with 2 dual-effect independent
circuits, which can be converted to single-effect..
1A
Figure 12
24
1B
B
2B
A
2A
Lever (1) shown in “Figure 11”, directs the pressure
fluid from the outlets shown in “Figure 12” to
outlets (1A) and (1B) respectively according to “A”
or “B” position, to which it is taken.
Lever (2) shown in “Figure 11”, directs the pressure
fluid from the outlets shown in “Figure 12” to
outlets (2A) and (2B) respectively according to “A”
or “B” position, to which it is taken.
Maximum oscillation angle of the front axle is 12°.
This is factory setting. It is a setting determined by
considering the axle, the axle carrier, the
peripherals, and dynamic movements; do not alter
this setting.
The permitted turning angle of the front axle is 40°
in narrow axles, and 45° in wide axles for the side
close to the turning center (inside); and 35° in
narrow axles and 40° in wide axles for the distant
side (outside). You can make adjustment in a way
to decrease this angle, but it is not recommended
to increase it.
There is possibility to adjust the turning amount of
the wheels on the front axle. Length of the stopper
is adjusted by tightening and loosening bolt (1)
shown in “Figure 14”, and after making the
adjustment, nut (2) is tightened to fix and lock. It is
recommended the distance from above the
stopper to the casting (distance A) to be minimum
35mm in narrow axles, and minimum 30mm in
wide axles. This setting is the same for both sides
(right and left).
As defaults, the distribution valves are set to dualeffect.
In order to convert from dual-effect to singleeffect, loosen the nut (5) shown in “Figure 11” in
requested section, and loosen stay bolt (4), then
retighten nut (5).
In order to convert from single-effect to dualeffect, loosen bolt (5) shown in “Figure 11” in
requested section, and tighten stay bolt (4), then
retighten nut (5).
When using single-effect, the pressurized fluid is
directed from (outlets 1A) and (1B) shown in
“Figure 12”.
TRANSMISSION
As a standard, the transmission of the tractor has
12x12 speed options. These speeds are achieved
by 4 main shift, 3 speed shifts and the forwardbackward shuttle shift lever.
In addition, there are a power take off outlet and
external power outlets for the use of equipment.
For further information on the use, refer to the
“Usage of the Tractor Controls” section.
By taking into consideration the speed table given
in this manual and also found on the tractor, select
the proper speed according to the work you will
carry out, and use it at the gear and rpm you
determined.
CAUTION
Decreasing this value increases the turning angle
and decreases the lateral stability of the tractor,
which can cause the tractor to tip over on bends or
inclined lands. Hence, do not make an adjustment
lower than recommended value.
F
1
A
2
Figure 14
NOTE: There is 1 pc of the (F) figure shown in
“Figure “4” on each axle housing in narrow axles
while there are 2 pcs on each axle housing in wide
axles. By this means, you can distinguish the axle
type.
FRONT AXLE
Figure 13
25
application travel is proportional to the position
control lever 18 of the lift.
Depth Control:
Control is carried out by lever (20) shown in “Figure
2”. Immersion depth of the equipment is
proportional to the resistance faced when driving.
The control valve changes the immersion depth of
the equipment in a way to keep constant the
resistance with predetermined value, and allows
constant power consumption. After lifting the
equipment while driving, do not forget to bring it
to the same depth setting when you lower it again.
Combined Control:
You are recommended to use the combination
control when carrying out works having a risk of
passing to subsoiling in regions, whose grading was
not carried out, especially with irregular surface or
soft soil.
Lower the equipment down the ground and adjust
the depth as described above. Lower the position
control lever slowly; in this way you will also make
position control.
In this way, a working possibility is acquired with a
constant power by preventing too deep ploughing.
Flotation Control:
Bring both (20) and (21) levers shown in “Figure 2”
to the lowest position.
Use the lever (1) shown in “Figure 16” to set its
precision.
If precision is increased during flotation control,
bounce of the equipment increases, and if
precision is decreased, jounce of the equipment
decreases.
Turn it clockwise (A) to increase the precision.
Turn it counterclockwise (B) to decrease the
precision.
Toe-in adjustment on the front axle is carried out
at the factory and it is set to max 6.5°. This angle is
important for steerability at high speeds, easier
control of the tractor on bends, and simple turning.
You are not recommended to alter this value.
To make this adjustment, after centering the
steering wheel and putting in the tires as a straight
position as possible, lock nut (2) shown in “Figure
“5” is loosened and rods (1) are adjusted by
tightening and loosening them from the key
opening. Normally, front side of the front tires
should be turned in with reference to the rear side,
and the angle between these tires should not
exceed 6.5°. Although the difference between the
track on the front side and the track on the rear
side of the tires differs according to the tire type, a
value of 75-90mm would be convenient.
1
2
Figure 15
HYDRAULIC LIFT
The hydraulic lift is a system, which is used to lift
and lower the equipment connected to the threepoint lifting system. It carries out these controls
with tubes, hoses, two lifting cylinders, the
hydraulic gear pump and the control valve.
It carries out following functions with levers (2021)shown in “Figure 2”:
• Position Control
• Depth Control
• Combination Control
• Flotation Control
These functions are selected depending on the
work to be done, and soil conditions.
Position Control:
Control is carried out by the lever (21) shown in
“Figure 2”. Pull the lever backwards to lift up the
equipment. Height of the equipment is directly
proportional to the position of the lever. The
A
B
1
Figure 16
26
3 POINT LINKAGE SYSTEM
1
The tractor is equipped with a 3 Point (3P) Linkage
System, Category 2 (CAT-II). To make sure that the
tractor runs smoothly, check if the equipment is
suitable for three point linkage and hydraulic lift.
2
3P linkage system consists of the parts shown in
"Figure 17".
1. Center Arm:
3
Links the top of the equipment frame to the top
point and conveys the sensitivity data from the
equipment to the hydraulic valve.
i.
The center arm has two stabilizing holes
for tractor linkage.
ii.
The center arm pipe is movable and can
be turned clockwise and counterclockwise
to adjust the equipment angle according
to the ground; it is fixed with the lock nut
at the end of the pipe.
4
5
Figure 17
4. Drawbars
It is used for linkage to the lower points of
implement frame and it is fixed. The arms that
draw the equipment are these two drawbars.
CAUTION
2. Linkage Arms:
The drawbars have a play that allows the lateral
movement of it and to balance this, it is supplied
with a spring on it, part (5) shown in “Figure 17”.
With the implement disengaged this spring should
be installed, thereby, it prevents drawbars to hit
the tires particularly when the tractor is adjusted
to small track width.
There are two linkage arms with one on each side
and they link the lifting arms to drawbars. They are
used to adjust the position of the equipment
according to the ground. Turn them clockwise or
counterclockwise to adjust their position according
to the level of drawbars. Once the adjustment is
completed, you can fix them with the lock nut at
the end of the pipe.
CAUTION
While driving on the road ensure that the stabilizer
chain slack is took up and the springs have been
placed on the arms if the implement is not
engaged.
3. Stabilizer Chains
These chains can be adjusted to limit the side-toside movement of lower drawbars of the three
point linkage system.
For plough and similar equipment, adjust the
length of the chains to give a 5 to 6 cm free play.
While carrying equipment in 3 point linkage
system, restrict the lateral movements completely.
To increase or decrease the lateral movements
turn it clockwise or counterclockwise, when you
make the desired adjustments tighten the lock nut.
CAUTION
After mounting and dismounting the equipment,
be sure that you safely hitch the equipment by
using safety pins.
CAUTION
Pay special attention
implement to the tractor.
27
while
mounting
an
IMPLEMENT MOUNTING
MIDDLE ARM CONNECTION
1. Move the three point linkage system to the
lowest position.
2. Slacken the stabilizer chain with a certain
amount, so you can mount the drawbars to the
linkage point of the equipment easily.
3. Approach the tractor to the implement by
driving it backward slowly.
4. Raise the arms until the axis of the drawbar pin
aligns with the axes at the implement linkage
point.
5. Attach the drawbars to the implement linkage
points and secure with safety pins.
6. Adjust the stabilizer chains.
7. Link the middle arm and adjust its length by
proper angle.
There are two holes at the tractor side of the
middle arm for linkage.
The implement to be used should be determined
according to the desired work and the force
generated.
•
•
The hole at the lower position provides
further sensitivity so it should be preferred
for implement that is light and generates
small force.
The hole at the upper position provides
less sensitivity so it should be preferred for
implement that is heavy and generates
large force.
IMPLEMENT REMOVAL
1. Lower the implement.
2. Slacken the stabilizer chains.
3. Remove the safety pins, pull out the drawbars
and install the safety pins to their seats on the
drawbar.
CAUTION
Always stop the engine while adjusting the
drawbar and mounting the implement.
CAUTION
Figure 18
While carrying implement always keep the position
control lever at the uppermost position and lock
the hydraulic valve.
CAUTION
While mounting and dismounting the implement
always use the position control lever.
CAUTION
Be sure to lower
dismounting it.
the
implement
before
CAUTION
Never work around the implement raised by the
hydraulic system.
Secure the implement to
prevent it from falling and stop the engine.
28
HITCH CONNECTIONS
Front Hitch
The front hitch is supplied with the tractor. It is
possible to link the front hitch, the part (1) shown
in “Figure 19”, to the weights on the chassis as well
as it is possible to link it to the chassis directly. To
link the front hitch to the weights, the front hitch
(1) shown in “Figure 19” is fixed by installing to the
part (2) “Figure 19” with the bolts (1) “Figure 21”.
To link the front hitch to the chassis, the front hitch
(1) shown in “Figure 20” is fixed by installing to the
part (2) “Figure 19” with the bolts (1) “Figure 21”.
While attaching to the chassis, the part (2) shown
in “Figure 19” is placed inside the bumper.
1
2
Figure 19
All the required parts have been supplied with the
tractor. For mounting you can use the toolkit
supplied with the tractor.
1
CAUTION
While fixing the implement linkage always use the
pin supplied with the tractor, do not use another
parts even if they are similar.
CAUTION
After combining the implement, lock the pin (2)
shown in “Figure 21” with the safety pin (3) shown
in “Figure 21” securely.
Figure 20
CAUTION
While using the rear hitch take care the axle loads.
Use the front hitch to push the implements, do not
use it for drawing. If you need to draw, use the rear
hitch.
Figure 21
3
29
2
1
Rear Hitch
The tractor is equipped with a ISO certified rear
hitch that is compatible to link implement, one and
two axle trailer.
The ground clearance of the hitch is non-adjustable
and fixed.
The rear hitch (1) shown in “Figure 22” is
connected to the lifting brackets with 4 pcs Ø18
pins (4) shown in “Figure 22” and the pins are fixed
with the hairpin (3) shown in “Figure 22”. The hitch
support bracket is supported with the part (2)
shown in “Figure 23”. The hitch support bracket is
fixed to the rear hitch via the 2 x M12x30 bolts (2)
shown in “Figure 23”. The hitch support bracket is
attached to the chassis via the 4 x M12x40 bolts (3)
shown in “Figure 23”. There is a identification plate
(5) shown in “Figure 22” , if further guidance is
required.
5
3
4
2
1
Figure 22
3
1
CAUTION
2
All the required parts have been supplied with the
tractor and they have been mounted on the
tractor. Do not try to remove or replace with other
similar parts. To obtain the offered performance
replace the broken parts with the genuine parts at
the authorized service stations. To mount the
parts, it is necessary to tighten them with the
special torque. These operations should be done
at the service stations as it is not possible for the
operators to know these descriptions and they
should not try to undertake such procedures
themselves.
Figure 23
CAUTION
Always use the supplied pin while mounting the
implement to the rear hitch. After combining the
implement, lock the joint pin (2) shown in “Figure
23” with the safety pin securely.
CAUTION
While using the rear hitch take care the axle loads.
30
POWER TAKE-OFF HOUSING
DIFFERENTIAL LOCK
There are parts on and around of the PTO outlet
for your safety.
This function links the right and left wheels in the
transmission and rotates them at the same speed
to prevent either wheel from slipping, or to
increase traction force.
1. For extra safety, in every operation be sure to
install the PTO guard (1) shown in “Figure 24”
2. For your safety, at the portion where the PTO
shaft is installed there is a safety zone (2)
shown in “Figure 24” made by metal sheet.
Never remove or deform this part.
3. Be sure that the PTO shaft which is linked
between the tractor and the implement has a
housing, do not use it without housing.
4. For tractor-trailer linkage always use the rear
hitch.
5. While the tractor is running or moving, do not
walk in between the tractor and trailer, and let
nobody does.
6. While towing a trailer, carry only loads; do not
use the trailer to carry persons or other living
things.
Engaging the Differential Lock
Before the tractor slips and the speed is lowered,
press the differential lock button on the instrument
panel and engage the differential lock. If the
differential lock does not engage at the first
attempt, repeat the operation by deactivating with
the same button. If it still does not engage, lower
the engine speed and after disengaging the clutch,
repeat the whole operation as described above. If
either of the left or right wheels has already begun
slipping, turn the throttle lever to the idle running
or disengage the clutch, then activate the
differential lock. You will hear an audible alarm
while the differential lock engaged; when the
differential lock disengaged, audible alarm will stop
automatically.
NOTE:
By pressing the differential lock button you can
release the lock, however, if the lock is not
released press either side of the brake pedal, not
both sides, instantly.
2
How to Release the Differential Lock
With the differential lock button the locking force
is immediately removed, after that with the
differential lock spring force it releases
automatically. However, it must be remembered
that the lock may not be released under special
conditions. In this case, the right or left brake pedal
should be instantly and alternatively depressed,
then, the differential lock will be set free. If the
same occurs while plowing, the brake pedal of the
land wheel side should be applied. The lock will be
let out. When both right and left brakes are linked
for towing a trailer, operation of the steering
handle to right and left allow the lock to be
released. When the tractor is stopped with the
differential lock applied, reverse running with a
jerk can release the lock.
1
Figure 24
CAUTION
Avoid using the differential lock when operating
the tractor at high speed or running on a road.
31
HYDRAULIC CIRCUIT
The hydraulic circuit diagram of the working principle indication of the steering wheel, 3 point linkage system
and external power outputs and the description of the elements are provided below.
Figure 25
Descriptions of the parts in the circuit:
1.
2.
3.
4.
5.
6.
7.
8.
9.
10.
Steering Cylinder.
Pump.
Hydraulic Filter.
Differential Lock Cylinder.
Hydraulic Control Valve.
Hydraulic Distribution Valve.
Orbitrol.
PMV Valve.
Hydraulic Lift Cylinders.
External Outlet Quick-Fit Couplings.
32
ELECTRICAL CIRCUIT
The electric circuit diagram and the elements of the tractor are provided below.
Figure 26
33
TIRES AND RIMS
You can find the tires on the tractor and the rims, tire pressures, axle loads, tracks and mounting types suitable
to these tires in the following table.
Table 1
The bold measurements shown in the Table 1 shows the factory defaults.
There may be variations in these values up to ±20mm depending on the production.
RIM ASSEMBLY DETAILS
34
Table 2
The axle loads specified in Table 2 are the total axle loads for the axle which the tire is mounted on and the tire
pressure for driving on the road is taken as reference. The carrying capacities are lower with lower tire
pressures.
TIRE MOUNTING
WARNING
Tire pressure should be checked frequently. Either
too high or too low pressure results in
deterioration of the tire. To keep the tires in a
good condition, check the tire pressures daily and
adjust them according to the work to be done.
Make sure that rear tires are mounted so that the
lugs on the tire form the staggered V's in series as
viewed from the front of the tractor.
CAUTION
The tightening torque of the front and rear wheel
nuts are 100-120Nm. As they have been tightened
with torque while removing or installing the wheel
nuts, keep the tires on ground. Before tightening
with torque and after the torque is removed raise
the tires from the ground.
WARNING
If the tire strips fill with mud lower the pressure
and drive in a gear one stage lower than you would
normally use.
WARNING
If you find any damage on the tire make it repaired
as soon as possible, if it is not able to be repaired,
replace with new one.
CAUTION
If it is needed to use the jack while changing the
tractor tires, it should be raised at the front under
the front bumper, at the rear under the rear hitch.
WARNING
It is not recommended to use tires that are worn
more than 50%.
CAUTION
Before jacking up, place the tractor on a level
surface, apply the parking brake, put the tractor in
gear and be sure there is nobody around the
tractor and raise the tractor only as much as
necessary.
WARNING
Avoid widening front tread of the 2- and 4-wheel
drive tractor by switching the right and left front
tires as this may cause serious troubles on the
steering linkage.
CAUTION
WARNING
Never raise the tractor both points at the same
time. Always be sure that the tractor is touching
the ground at least on three points.
Check at frequent intervals to make sure that the
rear and front wheel are tightened securely to
specified torque and that the axle housing and gear
case are secured each other to specified torque.
35
WEIGHTS
Providing road handling and decreasing the
slipping are important for the life of tire and fuel
economy.
While working with the heavy implements on the 3
point linkage system, to counterbalance the tractor
it is necessary to attach the front-end weights.
4 x 25kg weights can be attached to the front
bumper. Each weights are attached with M16 bolt
and nut and the weights are connected to each
other with a M16 stud bolt.
These weights are supplied with the tractor as
standard.
In addition to or alternative to the weights, also,
the water in the tire operation could be
performed.
Figure 29
1.
2.
3.
4.
Figure 27
While working on heavy duty work to increase the
tractor’s traction capability it is possible to attach
the weights to the rear wheels.
Figure 28
Each of the weights is 25 kg and only one weight
can be attached to each tire. The weights are
attached to the rim with four M16 bolts and nuts.
These weights are supplied with the tractor as
standard.
Valve
Water inlet
Water filling attachment
Air discharge
Filling the Tires with Water
1. Raise the tire to be filled with water using a
jack as valve positioned at the upper side.
2. Remove the valve cap and release the tire
pressure.
3. Install the attachment (3) shown in “Figure 29”
to the valve (1) shown in “Figure 29” and fill
the water from the water opening (2) shown in
“Figure 29”. Keep filling operation until water
comes from the air discharge (4) shown in
“Figure 29”.
4. Pull out the attachment and pump air into the
tire until the recommended pressure reached.
Draining Water from the Tires
1. Raise the tire to be drained using a jack as
valve positioned at the lower side, discharge
the air form the tire.
2. Remove the valve cap and wait until all the
water is drained.
3. Install the attachment (3) shown in “Figure 29”
and pump air into the tire. Do not exceed the
recommended air pressure while pumping air.
4. Wait until the residual water comes out.
5. Pull out the attachment and pump air into the
tire until the recommended pressure is
reached.
36
Table 3
In Table 3, additive and solution amount per tire is shown.
WARNING
Use the weights based on the requirement of the
work to be done. The weights increase the fuel
consumption and tire wear, remove the weights if
it is not necessary to use.
WARNING
While filling the tires with water, never use only
water. Especially in cold areas, to prevent freezing
use antifreeze additives at require levels. To avoid
the corrosion could be found on the rims, it is also
recommended to add additives.
CAUTION
While water in the tires, never operate the tractor
above the 10 km/h speed.
CAUTION
While attaching weights to the tires and filling the
tires with water be careful not to exceed the
maximum axle loads.
DANGER
To inflate the tires never use inflammable or
explosive gases.
37
38
SECTION 4 - OPERATION
9. Disengage the clutch and perform warm up run
at about 1,500 rpm for about 5 minutes.
BEFORE OPERATING THE TRACTOR
1. Check the fuel level in fuel tank and replenish
as necessary.
2. Check the levels of engine oil, transmission oil,
and front drive differential.
3. Check the lubrication at every specified point
on the chassis.
4. Check each bolt and nut for tightness.
5. Check the coolant level in radiator.
6. Check the fan belt tension for water pump,
alternator-generator and cooling fan.
7. Check the air pressure in tires.
8. Check every indicator lamp on instrument
panel for operation.
CAUTION
Use of the starter should be limited for about 10
seconds per trial. If it is not successful, wait for
about 10 seconds before another trial. Using the
starter intermittently without waiting for certain
period of-time, can cause the battery to run down.
CAUTION
Do not turn the starter while engine is running. It
can lead to the starter failure.
CAUTION
Be sure to perform the warm-up run regardless of
the climate. Travelling before engine gets warm,
shortens the engine life.
STARTING THE ENGINE
1. Always get on the tractor from the left side,
since the right side is the emergency exit.
When you get off, do not lean on the hand
lever, mirror, mirror lever, pedals, etc., if you
need to lean on something, you can either use
the handle on the left fender or steering
wheel.
2. Keep the parking brake applied.
3. Place the main shift lever, High-Low shift lever
and PTO shift lever and sloop lever in NEUTRAL
and depress clutch pedal all the way.
4. Set the throttle lever midway between its
idling and high speed positions.
5. Turn the ignition key to "ON" position, and
then see that oil pressure warnings as well as
battery charge warning lamps go on.
6. As soon as the ignition key is on, the glow
signal is on in the instrument cluster indicating
heating and when the glow signal is off turn
the ignition key to 'start' position to start the
engine.
7. Immediately after starting, release the ignition
key. The key will return to "ON" position
automatically.
8. Check the oil pressure and battery charge
warning lamps to see they went off. If not, stop
the engine immediately and inspect.
STARTING IN COLD WEATHER
1. The fuel injection pump of this engine adopts
the mechanism to ensure easier engine start
by sufficient injection of fuel when the throttle
lever is fully pushed.
2. To start the engine especially in cold weather
fully push the throttle lever, heat the glow plug
enough and crank the engine.
CAUTION
After the engine has started confirm that the
engine is running smoothly listening carefully to
ascertain if nothing abnormal sounds, and inspect
for oil and water leakage.
WARNING
In case fuel runs out, be sure to bleed the fuel
system after refilling the fuel tank, otherwise the
engine may not be started (or even stops soon
after started).
DANGER
Do not use starting aids such as Gasoline or Ether
in the air intake. Explosion may result.
39
brakes being independent to each other (not being
interlocked).
AFTER THE ENGINE IS STARTED
1. Check the oil pressure and battery charge
warning lamps to see they went off. If the lamp
"does not go off, immediately pull the throttle
lever all the way backward and turn the starter
key counter clockwise to shut down the
engine, and locate the cause to correct.
7. Do not attempt to stop tractor using brakes,
which may cause failure of transmission
internals or prematured wear of brake linings.
8. To avoid damaging brake or transmission
system, be sure to release the parking brake
before travelling.
9. While increasing the engine speed gradually,
release the clutch pedal slowly.
CAUTION
Particularly, by starting the engine while oil
pressure is too low, serious trouble could occur
because of insufficient lubrication.
WARNING
CAUTION
Release the clutch gradually. Releasing it suddenly
is hazardous causing the tractor to lunge.
Rotate steering wheel to see that front wheels turn
to desired direction.
WARNING
Before travelling backward, be sure to check for
any obstacle behind the tractor.
DRIVING THE TRACTOR
1. With the engine running, hold the tractor with
the brakes if necessary.
2. By pulling hydraulic control lever backward,
raise the implement.
WARNING
For travelling on public road or working" at high
speed, be sure to lock the left and right brake
pedals with locking plate so that both brakes are
applied simultaneously.
WARNING
Raise or lower the implement with sufficient
caution against any obstacle around.
WARNING
During high speed operation or travelling on road,
do not use differential lock. The 4-wheel drive shift
lever and PTO shift lever should be placed in
"2WD" and "NEUTRAL' positions respectively.
3. Bring the engine speed to about 1,500 rpm
(warm-up run).
4. Depress clutch pedal all the way.
5. Move each shift lever to desired position.
6. While travelling, interlock left and right brake
pedals with locking plate so that they are
applied simultaneously.
WARNING
While travelling, remove your foot off the clutch or
brake pedals.
WARNING
WARNING
Independent use of left or right brakes should only
be allowed for low speed operation.
When you are working with the tractor or
travelling on road, be careful that the engine speed
is between the max. torque range (1500~1700
rpm), this range also ensures the most efficient and
economic operation.
CAUTION
For travelling with 3-point linkage attached, tie it
with belt or the like for prevention of swinging of
the lower link.
WARNING
For travelling at high speed, interlocking the left
and right brakes is particularly essential. Be sure
not to travel at high speed with left and right
40
STOPPING THE TRACTOR
1. By pulling throttle lever, reduce engine speed.
2. Depress clutch pedal all the way.
3. Keep the brake depressed until the tractor
comes to a complete stop.
4. Place the PTO shift in the “NEUTRAL” position.
5. Move main shift lever to NEUTRAL.
6. Move the sloop lever to NEUTRAL.
7. Remove foot off the clutch pedal slowly.
8. Stop the engine by moving the ignition key to
'STOP' position.
9. Apply parking brake.
10. Push hydraulic control lever slowly forward to
lower implement to ground.
11. Remove the key.
12. Turn off illumination components, hazard
warning light, rotating beacon lamp, etc.
13. Always get off the tractor from the left side,
since the right side is the emergency exit.
When you get off, do not lean on the hand
lever, mirror, mirror lever, pedals, etc., if you
need to lean on something, you can either use
the handle on the left fender or steering
wheel.
WARNING
If any implement is mounted, turn the tractor
slowly paying particular care for the space.
WARNING
Do not make a sharp turn at high speed. Be sure to
lower the engine speed before turning.
WARNING
Before starting the operation on slope, check for
the existence of stone, irregularity or other
dangerous factors which could lead to an accident.
WARNING
Do not operate the tractor at steep slopes as it
may cause the vehicle to roll over.
WARNING
While operating on downward slope, use the
engine brake. Do not place the main shift in the
“NEUTRAL” position.
WARNING
For towing, be sure to use the drawbar only. Set
the hitch point below the center line of the rear
axle.
CAUTION
Be sure to always apply the parking brake while the
tractor is in parking or standing.
WARNING
Brake discs may show different levels of wear due
to the more frequent use of right brake than the
left brake, or vice versa. This difference in wearing
may cause different braking on right and left
wheels especially when the brake pedals are
locked and this may cause the tractor to lean one
side, or even get out of control. In order to prevent
this, service the brakes frequently for equal braking
and get them readjusted if necessary.
CAUTION
Select flat and level ground for parking.
CAUTION
Apply blocks to the front or to the back of rear
wheels on the slope.
CAUTION
Do not park the tractor on oily, greasy or other
slippery surfaces.
41
42
SECTION 5. PERIODIC AND PREVENTIVE
MAINTENANCE
Table 4: Periodic Maintenance Table
Periodic inspection must be performed when
necessary to keep your tractor operating in the top
condition is indispensable.
First service must be performed after the first 50
hours of running. The service must be carried out
in every 100 hours. 150 and 250 hour services must
be carried out in every 200 hours respectively.
Annual servicing must be performed for tractors
that are slightly or never used.
See log book for more detailed about servicing.
SYMBOS AND RELATED PROCEDURES
Check and/or replenish
Clean/Wash
Adjust
Procedures to be performed only by the dealer
43
Figure 29
"Figure 29" shows the locations of each position
described in “Table 4” on the tractor.
GENERAL RULES FOR MAINTENANCE
The following section provides servicing instruction
required for maintenance procedures. When
carrying out the maintenance services for tractor
or its parts, follow this instructions and perform
the same sequence of procedures described.
Be sure to take safety precautions described in this
manual when performing maintenance services.
Service periods given are the ones recommended
by the manufacturer and are only for information
purposes, earlier maintenance may be performed
if deemed necessary.
First three servicing will be performed by
authorized distiributor dealers free of charge.
In addition to the maintenance procedures
described above, visit you authorized dealer for the
procedures every 1000 hours of operation.
• Calibrate the injections and injection
pump.
• Empty fuel tank completely and clean it.
• Empty the radiator fluid completely to
clean the radiator and replenish again as
per the instruction described in this
manual.
44
AIR CLEANER
The air cleaner element, when remarkably stained
or clogged, may prevent smooth start of the engine
or deteriorate its performance, preventing normal
operation. Keep the element always clean to
ensure full performance of engine.
As known the air cleaner filters the intake air. Air
cleaners used are mostly the types that are
composed of 2 nested papers. These elements
keeps 99.9% of the dust in the air. Depending on
the operation conditions of the tractor, the
element gradually becomes stained as operation
hours increase.
Air cleaner must be checked daily, sealing must be
checked and when clogged the element must be
cleaned by blowing 5-6 bars compressed air to
inside of it, And then it must be installed ensuring
that it is free of ruptures or holes.
Sealing gasket is checked, it may be reused after
washing with water and drying under shade. If it is
not clean enough, you must replace it.
To clean the air cleaner, push the clips (1) shown in
“Figure 30” towards (A) to unlock them, pull the
cover (2) towards (2) to remove. Blow off with air
the dust on the cover.
The filter has one cartridge inside and one outside..
Blow air from inside to outside to clean the
external cartridge as seen in "Figure 31". Replace
with a new one if it is not able to be cleaned. You
must not clean the internal filter cartridge, replace
it during maintenance.
A
Figure 31
CAUTION
Do not use exhaust gases to clean the element.
CAUTION
Do not use oil, fuel, etc. to clean filter cartridges.
CAUTION
Do not cover the case without filter cartridges are
placed, unintentional operation of the engine
without the air cleaner may result in serious
damages.
After cleaning the air cleaner, assembly it following
the demounting instruction in reverse order.
1
B
2
Figure 30
45
The tractor does not have an external overflow jar.
The upper part of the radiator is designed to
function like an overflow jar.
The table below shows the amount of antifreeze
solution that needs to be used depending on the
season and weather conditions.
RADIATOR
It has a critical function for engine cooling,
performance and life. To ensure proper
functioning, radiator grill and the grilles of the
tractor must be kept clean and open. Level of the
radiator coolant must be check daily.
Turn the cap no (1) as shown in “Figure 32”
counterclockwise, loose by pressing and remove
the cap.
Minimum
Temperature (°C)
Volumetric
antifreeze
proportion (%)
-8°
-15°
-25°
-35°
20
30
40
50
CAUTION
CAUTION
Do not open the radiator cap when the engine is
warm; as there is pressure inside the radiator, the
pressurized steam might cause injury.
For the freezing temperature of antifreeze
solution, always refer to manufacturer’s
information first; if it is not provided, refer to the
information provided in “Table 5”.
1
CAUTION
Replace the radiator coolant fluid for every 1000
hours or at least once a year, preferably before
winter.
CAUTION
Always add clean and soft water to the radiator.
River water or unclean, muddy or hard water may
cause clogging and corrosion in the radiator and
engine block.
CAUTION
We recommend adding antifreeze to the radiator
fluid for all seasons in order to prevent corrosion in
the radiator and engine block.
Figure 32
The radiator must be filled with coolant fluid to the
3 cm below from the top of the radiator cap; if the
coolant level is below this level, add coolant.
To remove the radiator fluid, disconnect the hose
from the lower part of the radiator to the engine
and wait until it is completely drained.
CAUTION
In cold regions and cold weather conditions, never
add only water to the radiator; if additives are
necessary, add antifreeze solution.
After replacing or adding radiator fluid, assembly
the parts by following the demounting instructions
in reverse order.
WARNING
CAUTION
If the radiator coolant level over the specified limit,
do not pour the fluid out of the radiator; the
excessive liquid will be drained through the hose
on the radiator cap during use.
Make sure that the radiator cap is closed tight and
properly.
46
When adding or replacing antifreeze solution, the
following rules should be observed, otherwise, the
cylinder block will rust.
1. This tractor's engine is of a diesel type and its
cylinder block is made of cast iron. Therefore,
suitable anti-freeze solution for such a cast
engine block must be used.
2. Before adding mixture of antifreeze and water,
completely drain cooling water and clean the
radiator with detergent.
3. Water to be added to antifreeze should be
clean soft water.
4. If no antifreeze is used (not recommended),
drain and wash the cooling system using
detergent and refill it with clean water. Do not
re-use antifreeze drained from the engine.
FUEL FILTER
To replace the fuel filter, first remove the hoses on
the filter and loosen the clogging plug (4) shown in
"Figure 34" to drain the fuel in the tank. Turn the
filter housing (3) shown in “Figure 34” with a filter
wrench counterclockwise and remove it. Clean the
filter element in the filter housing, if necessary; if it
is not possible to clean, replace with a new one
and tighten it.
To drain the water in the filter, loosen the clogging
plug (4) shown in "Figure 34" and let the water
drain away through the hose at the lower part.
Wait the water is fully drained and when the diesel
starts to come through the hose, tighten the
clogging plug securely.
WARNING
Do not remove the radiator cap except for
checking the coolant level or coolant replacement.
To remove the air from the fuel system, first fill the
fuel tank, connect fuel hoses and check for
leakages; if you detect a leakage get the parts
replaced at a dealer. Loosen the screw (2) shown in
“Figure 34” and pump by repeatedly pressing the
string (1) until fuel comes. Tighten the screw (2)
after the fuel comes and pump 10-15 times more.
This will help you remove the air from the fuel
system. If it fails, repeat the same procedures.
WARNING
To ensure a good cooling performance, make sure
that the seals around the radiator (1) shown in
“Figure 33” are complete and firm.
1
1
2
3
4
Figure 33
Figure 34
CAUTION
Do not smoke, and keep the flammable materials
away while working on the fuel system parts.
Take necessary precautions to prevent the fuel
from spilling around and on vehicle parts.
47
ENGINE OIL FILTER
To replace the engine oil filter, first drain all the
engine oil and turn the filter housing (1) shown in
“Figure 35” with a filter wrench counterclockwise
to remove it. Replace and tighten the filter
element.
1
2
3
Figure 36
1
TRANSMISSION OIL FILTER
To replace the transmission oil filter, first drain all
the transmission oil and turn the filter housing (1)
shown in “Figure 36” with a filter wrench
counterclockwise to remove it. Replace and tighten
the filter element.
Figure 35
TRANSMISSION OIL LEVEL
ENGINE OIL LEVEL
Place the tractor on a level ground to check the
transmission oil level. Check the transmission oil
level when the transmission is cool and wait until it
cools if the transmission is warm.
Pull and remove the bolt (1) shown in “Figure 37”
and check if the oil level is between the two lines
on it.
If the oil level is below the lines, add any oil from
"Table 6" only as much as necessary to reach the
proper level.
Place the tractor on a level ground to check the
engine oil level. Check the engine oil level when
the engine is cool and wait until it cools if the
engine is warm.
Pull and remove the stick (2) shown in “Figure 36”
and check if the oil level is between the two lines
on it.
If the oil level is below the lines, add any oil from
"Table 6" only as much as necessary to reach the
proper level.
1
Figure 37
48
BRAKE FLUID
CAUTION
Never try to replace brake fluid. This requires post
adjustment and removing the air from the system;
therefore it should only be performed by
authorized dealers.
The tractor has hydraulic brakes which use
hydraulic pressure to function. If the amount of
brake fluid decreases due to some reasons, it must
be topped up.
The hydraulic brake reservoir shown in “Figure 38”
has two lines; this represents the range for normal
brake fluid level.
If the fluid level decreases, open the cap (1) shown
in “Figure 38” by turning it counterclockwise and
add any oil from “Table 6” as much as necessary to
reach the proper level.
CAUTION
Only use the oil types recommended in "Table 6"
or an equivalent "DOT 4" oil for brake fluid. Using a
different oil type may cause damage on seals,
which can lead to decreases in oil or air formation
in the system due to evaporation. The braking
function might be partially or completely affected
from these causes, which can lead to accidents
with injuries or even deaths.
1
Figure 38
CAUTION
Pay maximum care while refilling the brake fluid;
avoid contact with your skin or eyes and do not
inhale. If the brake fluid accidentally contacts with
an open wound, eyes or skin, or if it is inhaled or
swallowed, wash the contact area with plenty of
water and immediately see your doctor.
CAUTION
The brake fluid can cause the paint of the tractor
or other contacted areas flake away due to is
chemical content. Pay attention to avoid spilling
out while using it.
49
ENGINE OIL REPLACEMENT
TRANSMISSION OIL REPLACEMENT
First remove the cap (3) shown in "Figure 36".
Then, remove the plugs (1) seen in “Figure 39” and
wait until the oil drains away. When the oil drains
away completely, insert the plugs with seals
changed and tighten them securely.
To refill, use suitable oil described in “Table 6" at
the level specified without overflowing by placing a
funnel on the groove from which the cap (3) shown
in “Figure 36” was removed. After refill, place the
cap back.
After oil replacement, wait for 5 minutes to allow
the oil to penetrate into the crankcase and check
the oil level on the oil dipstick to make sure.
Move the 3P linkage arms to the lowest position
before oil replacement.
First, remove the cap (1) and plugs (1) shown in
“Figure 37” and “Figure 41”, respectively. Then,
remove the plugs (1 and 2) seen in “Figure 40” and
wait until the oil drains away. When the oil drains
away completely, insert the plugs shown in “Figure
40” with seals changed and tighten them securely.
To refill, use suitable oil described in “Table 6" at
the level specified without overflowing by placing a
funnel on the groove from which the cap (1) shown
in “Figure 37” was removed and on the plug holes
(1) shown in “Figure 41”. After replenishing, mount
the plugs back and place the cover.
After oil replacement, wait for 5 minutes to allow
the oil to penetrate and check the oil level on the
oil dipstick to make sure.
1
Figure 39
CAUTION
Run the engine at idle speed after oil replacement
in order to enable proper lubrication of engine
parts.
2
CAUTION
1
During oil replacements, make sure that the waste
oil does not spill around; pour all waste oil into
containers and deliver them to oil collection
centers. If you cannot find an oil collection center;
you can deliver the waste oil to authorized dealers.
Figure 40
50
1
1
3
2
Figure 42
Figure 41
CAUTION
Run the tractor at idle speed after oil replacement
in order to enable proper lubrication of
transmission parts.
1
REPLACING THE OIL OF FRONT AXLE
Figure 43
First remove the plugs (1) shown in "Figure 42".
Then, remove the plugs (2) shown in "Figure 42"
and (1) in “Figure 43” and let the oil flow out. After
the oil is full discharged, replace the seals and
mount the plugs (2) shown in "Figure 42" and (1) in
“Figure 43” and fully tighten.
To replenish, use suitable oil described in “Table 6"
at the level specified without overflowing by
placing a funnel on the plug holes (1) shown in
“Figure 42” . After replenishing, mount the plugs
back and place the cover.
After oil replacement, wait for 15 minutes to allow
the oil to penetrate and check the oil level to make
sure.
To check the front axle oil level, remove the plugs
(3) shown in “Figure 42”. Normally the oil level
reaches just under this plug.
CAUTION
After any kind of oil replacement procedure and on
a daily basis, check the plugs, joints and hoses for
oil leakage; if any leakage is identified, consult you
dealer as soon as possible for remedy.
51
Table 6: Lubrication Table
52
Final Reducer
Brakes
4
5
Transmission
2
Front Axle
Engine
1
3
Application
No
1+1
0.2
API GL 5
DOT 4
Mobillube HD
85W-140
Mobillube HD
85W-140
Brake Fluid
DOT 4
Axle EPX
85W-140
Axle EPX
85W-140
Brake Fluid
DOT 4
Energear Hypo
85W-140
Hydraulic Brake
Fluid DOT 4
Mobilfluid 422
Delvac MX
MOBIL
Energear Hypo
85W-140
GP 80W-90
Hypo Gear
80W-90
20
API GL 4
1.5 + 1.5
0.4 + 0.4
Agri Classic
15W-40
Vanellus
Universal
15W-40
9
API SL/CF-4
API GL 5
CASTROL
BP
Amount(lt)
Specification
LUBRICATION TABLE – RECOMMENDED LUBRICANTS
Donax YB
DOT 4
Spirax
85W-140
Spirax
85W-140
Donax TD
Helix HX5G
SHELL
REFUELLING
ADJUSTMENT OF FAN BELT TENSION
When the fuel warning light goes on or the pointer
comes over the red zone, you must refuel your
tractor as soon as possible.
For refueling, remove the tank cap (1) seen in
“Figure 44”. Tank cap is locked with a key code and
has to be locked/unlocked with the ignition key.
To unlock the tank cap, place ignition key to the
tank cap and turn counterclockwise without
moving the cap. After unlocking, remove the cap
by twisting counterclockwise.
Refill the tank 1 cm below the tank cap; overfilling
may cause overflowing when placing the cap back.
Check fan belt tension periodically.
Proper deflection is 8-10mm. Fan belt must be
seated on the pulley at sides; it is not proper for it
to be seated at the bottom, if the latter happens
replace the fan belt.
To adjust the tension, loosen the nut (1) seen in
“Figure 46” and pull the alternator towards
yourself to stretch the belt using a lever. After
proper tension is obtained, tighten the nut
securely.
1
Figure 45
Figure 44
CAUTION
1
Do not smoke and keep flaming objects at distance
when refueling.
When refueling is completed, place the cap back
and securely fasten by twisting it counterclockwise
until you hear a “click” sound. After you hear the
sound, lock the tank cap by placing the ignition key
to the slot on the cap and twist the key clockwise
without moving the cap.
Figure 46
53
ADJUSTMENT OF CLUTCH PEDAL
FOOT CLUTCH
Foot clutch free play must be check on a daily
basis. The play of the foot clutch is appropriate if it
is between 2 to 3 cm. The free play must be
adjusted if not appropriate.
To adjust free play, loosen the nut (1) seen in
“Figure 47”; twist the part (2) clockwise or
counterclockwise from driver’s seat perspective to
reduce or increase the amount of free play,
respectively. After obtaining proper adjustment,
tighten lock nut (1) to secure it.
1
2
Figure 47
HAND CLUTCH
Hand clutch free play must be check on a daily
basis. The play of the foot clutch is appropriate if it
is between 1.5 to 2.5 cm. The free play must be
adjusted if not appropriate.
To adjust hand clutch free play, open the bonnet
first and loosen or tighten the nut (1) seen in
“Figure 48” to reduce or increase the amount of
free play, respectively.
Normally, it is not
necessary to remove any parts for making this
adjustment; however, if you are not able to reach
the nut, you may remove side part of the
dashboard housing to adjust the nut as an
alternative. Until proper adjustment is obtained,
loosen or tighten the nut (1).
1
Figure 48
54
BRAKE ADJUSTMENT
2
FOOT BRAKE
1
Foot clutch free play must be check on a daily
basis. The play of the foot clutch is appropriate if it
is between 1 to 2 cm. The free play must be
adjusted if not appropriate.
To adjust free play, open the bonnet first and
loosen the nut (1) seen in “Figure 49”; twist the
part (2) clockwise or counterclockwise from
driver’s seat perspective to reduce or increase the
amount of free play, respectively. After obtaining
proper adjustment, tighten lock nut (1) to secure it.
In addition to the brake free play adjustment, disc
tightness must also be adjusted. Disc adjustment is
crucial for proper braking.
To adjust discs, jack up the wheel to be adjusted
(only the wheel to be adjusted). Twist and tighten
the nut (1) seen in “Figure 50” while at the same
time turning the jacked up wheel by hand.
Continue to tighten the nut until the wheel is
locked and is not able to be turned any more.
When the wheels are locked, loosen the nut by a
half turn.
Perform this procedure separately for each wheel.
Figure 49
1
CAUTION
Unbalanced braking or accidents may occur due to
the earlier wear of discs caused by the
independent use of left or right brakes. In order to
prevent this from happening, service the brake
discs frequently.
CAUTION
Since the adjustment of brake discs must be
performed carefully, it is very important that you
visit your dealer and use brake dynamometer to
check your brake discs.
Figure 50
55
HAND BRAKE
Parking brake operates independently from the
brake pedal, yet squeezes brake discs through the
same mechanism.
When the brake disc is
adjusted, it also applies to the hand brake.
Adjust the distance between stoppers and nuts (1)
seen in “Figure 51” and “Figure 52” in a way to
leave 2 clicks on hand brakes.
1
Figure 51
1
Figure 52
AXIAL TRAVEL ADJUSTMENT OF FRONT AXLE
1
When the axial travel amount of front axle
increases, it must be adjusted properly.
Jack up the front axle first to adjust axial travel.
Loosen the nut (1) seen in “Figure 53” and adjust
travel amount to 0.1-0.3mm by tightening the bolt
(2). After the adjustment is completed, secure the
bolt with the lock nut (1). After the proper
adjustment is obtained, the axle must oscillate
freely, if so, lower the jack.
Figure 53
56
2
ADJUSTING TOE-IN ON FRONT AXLE
CAUTION
Tire toe-in on the front axle is adjusted for driving
comfort and easier steering control.
Front side of the front tires is a bit more turned in
(75-90mm) than the rear side; this alignment is
called front axle toe-in.
If this alignment is not proper, it should be
readjusted. For detailed information on
adjustment, see section “FRONT AXLE”.
REAR
Figure 54
FRONT
TIRE REPLACEMENT
Tractor tire replacement requires expertise, special
equipment and tools. Perform this procedure only
at authorized tire dealers.
WARNING
We recommend you to replace your tires when
treads reach 70% wear or fractures occur.
CAUTION
It is important that you replace all tires at the same
time, otherwise your new tires will also be worn
out during the time due to different slip angles
between used tires and the new ones, and your
fuel consumption will increase.
Use only recommended and same-size tires when
replacing. Different pairs of tires will cause earlier
wear of the tires and overconsumption of the fuel
due to the different slip angles.
CAUTION
Using larger-size tires may cause trouble in terms
of the resistance of the tractor and its interaction
with the surrounding parts; use recommended
tires only.
WARNING
To extend the life of your tires:
1. Operate the tractor at the proper shift and
speed avoiding slippage.
2. Do not engage the 4WD option when driving
particularly on asphalt, if not required.
3. Do not expose your tires to sunlight when the
tractor is not running.
4. Do not place tires on humid ground or in water
for a long time.
5. If you are storing spare tires, make sure that
they are rimmed and inflated to the half
amount of the recommended maximum
inflation pressure; do not pile more than 4 tires
on top of another.
6. Do not fill tires with water unless required as
weight; when you finish your work, drain the
water away.
7. Do not apply ballast weight unless necessary.
8. Check tire pressure regularly (min. once a
week) and inflate if necessary.
CAUTION
Do not throw away or scrap the old tires after
replacement, it is very harmful for the
environment. Consult the service for appropriate
recycling.
Insufficient
Figure 55
57
Normal Excessive
SAFETY START CONTROL
HYDRAULIC CONTROL ADJUSTMENT
The Tractor is equipped with a safety starter switch
to protect the operator and the persons around
him from potential dangers caused the abrupt
starting of the engine with gear applied or an
implement mounted.
This safety system prevents tractor from starting
before shuttle lever and PTO shift lever are placed
in NEUTRAL and the clutch is depressed.
To make sure if this function works properly, try
starting the tractor when PTO shift lever and/or
shuttle lever is engaged and the clutch pedal is
depressed or not. If the tractor does not start, it
means that these functions are working properly.
If the tractor starts when even one of the
conditions above is not met, take it to your dealer
as soon possible for repair.
Operation of the hydraulic control systems of the
tractor is described in sections “HYDRAULIC LIFT”
and “3 POINT LINKAGE SYSTEM”. In order that
controls are functioning properly, the mechanical
adjustments must be performed fully.
If any problem occurs relating to the operation of
the hydraulic system, check the adjustments
below.
CAUTION
When checking the function, make sure that the
main shift lever is in neutral and hand clutch lever
is not engaged (lower) for your safety.
WARNING
When performing these adjustments, mount a 150kg weight to the links in order to see and evaluete
the impact.
In order to adjust position control:
1. Release the hydraulic valve lock.
2. If the arms do not go up when the position
control lever is pushed forward, tighten the nut
(1) seen in “Figure 56”.
3. If the arms are moving when the position
control lever is applied lower but you want it to
move at a higher position, loosen the nut (no1)
seen in "Figure 56".
In order to adjust depth control:
3
2
Figure 56
1
1. Move the weight on the lifting arms upward
using position control lever but do not adjust it
to the highest level; try to keep it at a medium
level.
2. Release the hydraulic valve lock.
3. Stretch the precision string (3) seen in "Figure
56" by using the middle arm to apply force to
the front side of the tractor.
4. If the mounted weight does not move despite
stretching the string, tighten the nut (2) seen in
"Figure 56" and continue to tighten the nut
until the weight moves.
5. Loosen the nut (2) seen in “Figure 56”, if the
mounted weight is moving too much when a
little amount of force is applied, or if the
weights are moving when the force is stopped
instead the force is applied.
58
GREASING LOCATIONS
Certain moving mechanisms of the tractor are
lubricated with grease oil. This oil may diminish or
lose its function in time due to use. If these parts
are stuck during the operation or any other
problem occurs, the following locations should be
greased.
WARNING
For greasing, use general purpose lithium Number
3 grease only.
Figure 59: Clutch Shaft
Figure 57: Middle Arm
Figure 60: Brake Shaft
Figure 58: Lifting Arm
59
INJECTION NOZZLE INSPECTION
CYLINDER HEAD BOLT TIGHTENING
CAUTION
CAUTION
Inspection of injection nozzles requires expertise
and special equipment; the inspection must be
performed only at authorized service centers.
Operator instructions provided in this section are
only for information purpose.
Removal and mounting of cylinder head requires
expertise and special equipment; the inspection
must be performed only at authorized service
centers. Operator instructions provided in this
section are only for information purpose.
When the injection pressure of the nozzle is
lowered or injection deteriorates, the exhaust gas
becomes extremely black resulting in the loss of
engine power and the engine will also make
greater noise.
Be sure to always maintain the correct injection
pressure of 150 - 160 kgf/cm2 (2134 - 2271 psi).
Normally the exhaust gases are unstained. In case
of abrupt acceleration, black gas can be observed
for a short period of time but it turns back to
normal (unstained) immediately.
When you need to open the cylinder head, loosen
the bolts in the same sequence with numbers from
18 to 1 as seen in “Figure 63”.
When mounting the cylinder head, tighten the
bolts in the same sequence with numbers from 1
to 18 as seen in “Figure 63”.
When tightening the bolts adjust the clearance first
and in the same order described first tighten with
40Nm torque and then following the same
sequence tighten 90° with angled torque meter
and once again in the same order tighten it 80° for
the last time with angled torque meter.
CAUTION
The bolts used in the cylinder head are single use
special extension bolts. After every removal of the
head, the cylinder head must be mounted using
new bolts.
FAN SIDE
Figure 61
Figure 63
Figure 62
60
VALVE CLEARANCE ADJUSTMENT
CAUTION
Inspection and adjustment of valve clearance
requires expertise and special equipment; the
inspection must be performed only at authorized
service centers. Operator instructions provided in
this section are only for information purpose.
Adjust the valve clearances when the sound of the
tappets is loud or when the engine does not run
smoothly. The valve clearance should be checked
with a cold engine. Bonnet, tank and engine cover
must be removed for adjustment.
Move the piston to the location shown in “Figure
64” by rotating the engine crankshaft from fan by
hand or directly with key and check the clearance
of marked valves with thickness gauge as seen in
“Figure 65”. Adjust the valve clearances by
loosening the lock nut (B), the adjusting screw (A)
using a screwdriver and then applying a thickness
gauge (C). When locking the adjusting screw by
means of the lock nut (B), support the adjusting
screw firmly using a screwdriver so that both are
not rotated together.
Valve clearance: Intake & Exhaust 0.2 mm.
Flywheel
Cooling fan
Piston no.1 is at top dead center and valves are at overlap position with the valves
closed
Flywheel
Cooling fan
Piston no.1 is at top dead center with valves overlapped (Rotate 360® from upward
position)
Check valve clearance when valves are closed
Figure 64
Figure 65
61
SETTING INJECTION PUMP TIMING
CAUTION
Adjustment of injection pump requires expertise
and special equipment; the inspection must be
performed only at authorized service centers.
Operator instructions provided in this section are
only for information purpose.
A certain amount of variation can apply to the
injection pump timing due to mechanical wear.
This problem is indicated by the loss of engine
power, the exhaust gas becoming extremely black
and the engine making greater noise.
In some cases white exhaust gas can be observed
in high altitude geographical regions; ignition
advance may need to be adjusted for proper
engine performance.
Factory setting for engine ignition advance is 12°.
For adjustment, perform the following in the same
order:
1. Remove the engine shut-off solenoid or place
the key to ignition-1.
2. Remove the safety frame and check the lines
on the flywheel looking through the peep hole
on the right side of the flywheel housing or
track top dead centers or ignition timings by
checking the lines on the crank pulley.
3. To find the "1,4 AZ' sign on the flywheel, twist
the flywheel (see “Figure 67”). You can twist
the flywheel by placing a ring spanner to the
hub (see “Figure 66”)
Figure 66
Definitions for the abbreviations on the flywheel
are as follows:
“1,4 AZ”: Injection timing for 1st or 4th cylinder.
“1,4 UN”: Top dead center timing for 1st or 4th
cylinder.
“2,3 AZ”: Injection timing for 2nd or 3rd cylinder.
“2,3 UN”: Top dead center timing for 2nd or 3rd
cylinder.
There is a 360° (one crankshaft cycle) phase
difference between the first cylinder and fourth
cylinder.
There is a 360° (one crankshaft cycle) phase
difference between the second cylinder and third
cylinder.
Figure 67
4. When the sign is found, turn the crankshaft
about 30° counterclockwise (when viewed
from the front of the engine).
5. "1,4 AZ', means injection timing for cylinders 1
or 4.
6. To turn the crankshaft by holding with a ring
spanner, use a special service tool (ring
spanner). Remove the high pressure pipe.
7. Slightly loosen the nozzle holder, the part (1)
shown in “Figure 68” and tighten after filled
with fuel as seen in “Figure 68”.
8. Wipe the fuel on the nozzle holder with a clean
cloth and leave only a small amount of fuel.
9. Observe the fuel on the nozzle holder by slowly
turning the crankshaft clockwise (when viewed
from the front side of the engine).
10. The moment when the fuel on the nozzle
holder increases abruptly is injection timing.
11. If the fuel increases too much, it means the
injection time have passed. To identify the
time when the fuel amount increases, repeat
the procedure above.
62
12. If the fuel does not increase, it is exhaust time.
Therefore, turn the crankshaft 360° and repeat
the procedures above to find the compression
time.
13. Mark the injection timing measured from the
timing window and measure the interval
between your mark and "1, 4 AZ'. Note this
measurement; it will be used when calculating
the shim for adjustment of pump timing.
Taking the positions of two points on the flywheel
housing into consideration, if the line on the
flywheel seen on the window during the observed
injection time is; (see "Figure 70")
I.
in alignment, it means the ignition advance is
in factory settings; no adjustment is required.
II.
above the level, it means the advance is
insufficient, delay is required.
III.
under the level, it means the advance is
excessive; it requires to be put forward.
To adjust injection timing, it is required to
add/remove shims, the parts (1) shown in "Figure
71", under the pump.
To delay injection timing (increase ignition timing,
e.g. from 10° to 12°), reduce shims.
To put injection timing forward (reduce ignition
timing, e.g. from 14° to 12°), increase shims.
1
Figure 71
At the 9” flywheel option, every 2.4mm is equal to
1°.
At the 11” flywheel option, every 2.9mm is equal
to 1°.
To delay injection timing to 1°, add 0.1mm shim
under the pump.
To put injection timing 1° forward, remove 0.1mm
shims under the pump.
To identify the flywheel type, use the overall
dimensions (A) of the flywheel housing shown in
“Figure 72”.
This is 390 mm for tractor with 9” flywheel.
This is 436 mm for tractor with 11” flywheel.
Figure 68
Figure 69
Figure 72
Figure 70
63
water to the battery during freezing cold, run
the engine at least for an hour to allow the
electrolyte to fully merge.
12. If necessary, add only distilled water; never
add acid. For guidance see “Figure 74”.
13. If the tractor is not used, recharge the battery
once a month.
ELECTRICAL SYSTEM
BATTERY
The tractor is equipped with a maintenance free
battery which normally does not require special
maintenance.
The specific gravity of battery electrolyte Is
11280kg/m3 ± 0.01 at 20°C.
Keeping clean and servicing the battery, increase
the service life. To reach the battery, open the
bonnet; you will see it at the foremost part of the
tractor.
During maintenance, pay attention to the following
points.
1. The battery must be securely mounted on the
tractor.
2. Battery terminals must not be loose and must
be fully tightened. (+) and (-) terminal cables
must also be connected to the tractor securely.
3. When the battery is not used for a long period
of time in cold weather, check the specific
gravity and charge the battery periodically.
4. In order to prevent the development of rust or
other corrosion at the battery terminal, coat
the terminal lightly with gel.
5. Before demounting the battery, be sure to shut
down the engine and turn off all the electrical
switches. Battery cable at earthing end
(negative
terminal
end)
should
be
disconnected first.
6. For cleaning the terminal stud, first remove the
battery cable then use a wire brush for
cleaning it.
7. For the reinstallation of the battery, make sure
to set it on the battery support properly.
8. For connecting the battery cables, connect (+)
end of it first, followed by earthing end.
9. Check the electrolyte level after battery
recharging; if necessary, add distilled water
until it reaches the proper level.
10. Check battery terminals for acidification. If any,
clean the terminal stud with a wire brush after
removing and grease it after mounting back.
11. Keep the battery fully charged during winter
months to prevent freezing. When you add
Figure 73
Insufficient
Normal
Excessive
Figure 74
CAUTION
The electrical system is of negative earth type. Care
should be taken to ensure that the battery
terminals are correctly connected when installing
the battery.
For dependable battery service, see your local
dealer.
CAUTION
Do now throw away or scrap the unserviceable
battery. It contains heavy metals and chemicals
and is very harmful for the environment. Consult
your dealer for delivery.
64
CAUTION
During charging, hydrogen gas is generated on
terminals. Since this is a flammable gas, it is very
important that the environment is properly
ventilated during charging. Do not smoke and
keep flaming objects at distance during charging.
BOOSTER CONNECTION
In case the battery has run down making it
impossible to start the engine, the booster is used
for starting the engine using good battery of the
other vehicle (12V vehicle) as power source.
1. Select a booster cable with as large a capacity as
possible. It must resist a 200A current.
2. Stop the engine of the vehicle (source side)
which is in normal operation.
Connect a clip of the booster cable (in red) to (+)
terminal of the battery on the troubled vehicle and
firmly connect another clip to (+) terminal of the
normal vehicle.
4. Then connect a clip of another booster cable
(in black) to (-) terminal of the normal vehicle
and finally connect another clip firmly to the
engine block.
5. Start the engine on the troubled vehicle. If the
engine is difficult to start, try to start it after
starting the engine of the normal vehicle.
After the engine is started, remove the booster
cables in the reversed procedure of above.
1. First remove the (-) end clip from the engine
block of the troubled vehicle, then remove another
clip from the (-) terminal of the normal vehicle.
2. Then remove a clip from (-) terminal of the
normal vehicle, followed by removal of another
clip from the (-) terminal of the troubled vehicle.
BATTERY RECHARGING
1. Remove battery terminal cables. You must
remove first the chassis cable and then the (+)
cable.
2. Remove the bracket securing the battery to the
tractor and remove the battery.
3. Connect the terminals to the charger properly.
WARNING
Do not fail to perform in above order.
CAUTION
See charger manual for correct connection and
usage.
4. For charging the battery on this tractor, a slow
charging operation should be carried out at 4.5
amp.
5. In case the specific gravity is below
1.200kg/m3, make lower rate charging at 3
amp. For more information, consult local
dealer.
Damaged Tractor
Engine
Figure 75
CAUTION
During the final connection, spark will be
generated. Therefore, connect the (-) clip to the
engine block at as far away point from the battery
that is generating gas as possible.
WARNING
Do not forget to turn off illumination elements
such as head lamps, hazard warning light and
rotating beacon lamp when the tractor is not
operated; do not turn on/off the ignition
consecutively and do not use the battery in a way
making it discharged quickly.
WARNING
Before connecting the cables, remove the
electrolyte port plugs where possible, because as
long as such plugs have been removed, the
explosion will be smaller even if it may catch fire
resulting in smaller damage.
CAUTION
For charging the battery on this tractor, a slow
charging operation should be carried out at 4.5
amp. See section “SAFETY PRECAUTIONS”.
65
PROPER BATTERY SERVICE AND TIPS FOR SAFETY
Table 7
66
HEADLAMPS
TRAILER PLUG
Perform periodic maintenance in order not to disturb
other drivers when using the front head lamps of the
tractor on roads, and to comply with the laws and
regulations.
There is a 7 terminal plug at the tractor. Location
of pins and the terminal connection of the plug are
as follows:
Your tractor is equipped with a proper head lamp in
accordance with the local and country laws and
provides suitable head lamp alternatives for rightand left-hand traffic patterns.
1.
2.
3.
4.
5.
6.
7.
WARNING
Adjustment of the front head lamps is a device
requiring procedure; we recommend you to visit your
dealer.
Illumination adjustment of the front head lamps can
be performed alternatively as follows:
1. Pull your tractor over on a smooth surface next
to a white wall with head lamps positioned as
nearest as possible to the wall, after loads and
weights are disconnected and the tires are
adjusted to the recommended road pressure.
2. Turn on the head lamps and draw a line on the
wall right through the middle of the highest and
lowest point illuminated by the head lamps. Now
draw a vertical line on the wall towards to
ground at the level aligned with the center of the
tractor.
3. Pull the tractor 5 meters backwards.
4. Illumination cone of the head lamps must collide
with the line drawn on the wall. Maximum
variation may be 130 mm.
5. For each head lamp, the distance between the
refraction on the illumination cones and vertical
line must be equal. Maximum variation may be
50mm.
6. If the adjustments above is not proper, adjust by
tightening/loosening the screws (1) shown in
“Figure 76”. These screws are on the back of the
head lamps; you must open the bonnet first.
Right Hand-Side Turn Signal
Chassis
NEUTRAL
Left Hand-Side Turn Signal
Brake
Parking
NEUTRAL
Figure 77
ILLUMUNATION LAMPS
The specifications for the bulbs used in illumination
lamps are as follows:
Front head lamp: 12V 55/60W bulbs, double
filament each
Front parking lambs, 12V 5W bulbs each
Front signal lambs, 12V 21W bulbs each
Rear parking lambs, 12V 5W bulbs each
Rear signal lambs, 12V 21W bulbs each
Braking lambs, 12V 21W bulbs each
Rotating beacon lamp 12V 55W bulbs
Plate lightning 12V 4W bulbs
If the bulbs are burn, contact your dealer for
replacement.
1
Figure 76
67
FUSES
GLOW PLUG
The tractor is equipped with a fuse in the circuit to
protect the electrical system against jump starts
and overloads.
The glow plugs are of a sheathed type and
connected in parallel. Therefore, if one of the plugs
is disconnected, performance is not totally
defective. When the heat wire of the glow plug is
disconnected, the preheat time of the control
resistance is abnormally prolonged. When the
center polarity, the body and the sheath come In
contact with one another, the glow signal lamp will
be heated quickly and the wiring of the pre-heated
circuit will burn out.
Fuses installed in the tractor is shown in “Figure
77”.
1. Main Fuse (80A)
2. Fuse Box
1
2
Figure 77
See “Figure 78” for locations of the fuses in the
fuse box.
The circuits equipped with fuses are described
below:
To replace the damaged fuse, remove the covers
by hand to reach the fuses.
1.
2.
3.
4.
5.
6.
7.
8.
9.
10.
11.
12.
13.
14.
15.
16.
17.
18.
Figure 78
68
Instrument Parking Lights
Main Illumination Parking Lamps
Rear Illumination Lamps
Left Hand-Side Turn Signal
Right Hand-Side Turn Signal
Front Head Lamp High Beam
Front Headlight Low Beam
Signal Switch – Direct Electric
Differential Lock / Instrument
Stop Solenoid Relay / Alternator
Brake
Signal Switch – Ignition 1
Rotating Beacon Lamp
Ignition key - Direct Electric
Starter Motor Start - Flasher
Stop Solenoid Relay – Direct Electric
Spare
Spare
RELAYS
Relays are located under the tank except for the
glow relay; it is placed under the upper part of the
dashboard housing.
Relays in the electrical circuit of the tractors are
shown in “Figure 79” and “Figure 80”.
To reach the relay, bonnet, tank and dashboard
upper housing parts must be removed.
1
5
2
Contact your dealer in case of relay failures for
repair or replacement.
3
6
4
7
Figure 79
8
Figure 80
The functions of the relays are listed below:
1.
2.
3.
4.
5.
6.
7.
8.
Buzzer
Flasher
Front Head Lamp Low Beam Relay
Front Head Lamp High Beam Relay
Shut-Off Solenoid Relay
Timer
Starter Relay
Glow Relay
69
STARTER MOTOR
ALTERNATOR
Starter motor is a maintenance free motor. In case
of failure, contact your dealer.
Stretch and check the tightness of the cable
connections on the starter motor by hand; if loose,
tighten.
Alternator charges the battery during engine
running. It s bearing are special and maintenance
free. In case of failure, contact your dealer.
CAUTION
Always remove the (-) terminal before performing
any procedures on the electrical system.
When you are done, mount them back and
securely tighten.
CAUTION
Never attempt to start the tractor by hotwiring
through starter motor; it is highly dangerous.
Pay attention to the following points about the
alternator:
1. If the polarity of alternator is reversed, the
diode will short-circuit and burn and damaged.
2. Never run the alternator (engine) with the
battery disconnected. When the battery is not
connected, voltage may increase excessively
and it will be dangerous to contact with
alternator leads.
3. Do not ground the alternator terminals
through chassis; this may damage the electrical
system.
4. Make sure that the alternator chassis
connection leads and the battery chassis
connection leads are the same; otherwise it
may cause alternator diodes to be damaged.
5. Make sure that the battery terminals and
alternator connections are removed when
performing welding on the tractor.
70
INSTRUMENT PANEL WIRING DIAGRAM
Figure 81
S1:
S2:
S3:
S4:
J1:
J2:
J3:
J4:
J5:
J6:
J7:
J8:
J9:
J10:
J11:
J12:
J13:
J14:
J15:
J16:
J17:
J18:
J20:
J21:
J22:
J23:
J25:
J26:
J28:
DESCRIPTION
Fuel Meter
Engine Rpm Gauge.
Hour Meter
Engine Water Temperature Gauge
Battery Charge Warning Lamp
Air Cleaner
Background Illumination
PTO Warning Light
(+) Supply
Oil Pressure Warning Light
Air cleaner warning light.
Hand Brake Warning Light
S4 Signal Inlet
Glow warning light.
S2 Signal Inlet
(-) Chassis
PTO 540 Warning Light
PTO 750 Warning Light
High Beam Warning Light
S1 Signal Inlet
Low beam warning light
Fuel warning light
4WD Warning Light
Water Temperature Warning Light
Left-hand-side turn signal warning light.
Right-hand-side turn signal warning light
PTO Warning Light
S3 Signal Inlet
540/750 Signal Inlet
POLARIZATION
Ohm
Hz
Hz
Ohm
Negative
Negative
Positive
Negative
Positive
Negative
Negative
Negative
Ohm
Positive
Hz
Negative
Negative
Negative
Positive
Ohm
Positive
Negative
Negative
Negative
Positive
Positive
Negative
Negative
Negative
71
OPENING THE BONNET
WASHING THE TRACTOR
To open the bonnet, pull the arm (1) seen in
"Figure 81" to the right side of the tractor; this will
release the latch. After unlocking, pull the bonnet
up by holding it appropriately from split point on
the seal.
Simply push down the bonnet to close it back. The
bonnet will be locked automatically when fitted.
If it is not fitted, pull the bonnet up by releasing
the latch as described above and close it again.
When pressure washing the tractor, safeguard the
parts below and avoid washing the injection
nozzles directly:
•
•
•
•
•
CAUTION
•
•
Be careful not to crash the bonnet over your hands
or other persons’ hands or a body part.
1
Figure 82
72
Alternator
Starter Motor
Battery and terminals
Front axle rod arms and steering cylinder
Electric cables, relays, fuses, sockets and cable
connections
Isolation materials
Safety warning labels
SECTION 6. STORING
STORAGE
REOPERATION AFTER STORAGE
A tractor should be stored in a dry and protected
place when it is left without use for some period.
Leaving a tractor outdoors will result in shortened
life of the tractor.
For storing the tractor please follow the
procedures described below:
1. After washing and cleaning the tractor be sure to
lubricate it. And if hydraulic Implement is
mounted apply grease to all the exposed cylinder
or piston rod surfaces.
2. Run the engine until oil in the crankcase gets
warm enough, then drain oil and replace oil filter.
Refill the crankcase with fresh oil specified in the
"Lubrication Table" and run the engine for five
minutes or so.
3. Store the tractor in the place where the tires may
not be in the sun. Before storing wash and clean
the tires. In case of long term storage jack up the
tractor so that the tires may not be under any
load. When the tractor is not jacked up, check
and inflate the tires periodically.
4. After the engine gets cooled enough, pour one
table-spoonful of engine oil from the air breather
pipe. Be sure to reinstall the breather hose on
the pipe after pouring oil. Unplug the engine stop
solenoid to prevent engine from starting. To
distribute the oil all over the cylinder walls, crank
the engine for five or ten seconds. Plug the
solenoid back in.
5. Dry the engine cooling system and fill It with a
mixture of antifreeze and water as specified on
the container for the lowest expected
temperature.
6. Fill the fuel tank with fuel, and clean the fuel
filter.
7. Plug up the end of the exhaust pipe.
8. Clean the air cleaner and then cover it so as to
seal the air intake system.
9. Check the battery for proper electrolyte level and
specific gravity at least once a month. In order to
increase the durability as well as prevent
freezing, the battery should be kept fully charged
all the time.
1. Check to make sure that viscosity of the oil in
the engine crankcase is as specified in
"Lubrication Table".
2. Check transmission oil, Front Axle, Traction
Case and brake fluid levels, replenish
appropriately.
3. Remove the plug from the exhaust pipe.
4. Remove the cover over the air cleaner.
5. Check to make sure that the battery is fully
charged and the terminal is clamped tightly
enough.
6. Fill the fuel tank.
7. If the tractor is jacked up, bring it down.
8. Make sure that the main shift lever, speed shift
lever, shuttle lever, PTO lever is in neutral and
the parking brake is applied.
10. Just like in the case of storing, pour a table
spoonful of engine oil from the breather pipe.
Be sure to reinstall the breather hose on the
pipe after pouring oil. Unplug the engine stop
solenoid to prevent engine from starting. To
distribute the oil all over the cylinder walls,
crank the engine for five or ten seconds. Plug
the solenoid back in.
9. Start the engine as described in "Starting The
Engine" and let it run slowly. Do not accelerate
the engine rapidly or operate it at high speed
immediately after starting.
10. After starting, check the functions of the
tractor such as dashboard lights, hydraulic lift,
steering, braking, shifting, operation at low
speed (max. 5km/h) and then repeat the
control at higher speeds (max. 10km/h); if you
observe any trouble, consult your dealer
immediately.
73
74
SECTION 7. TECHNICAL SPECIFICATIONS
Figure 83
Table 8: Technical Specs
75
Table 9: Engine Specs
Table 10: Speeds via Tires.
NOTE: The table above indicates forward speeds. For reverse speeds, multiply the speeds on the table by 0.988.
76
Figure 84
Table 11: Turning Radius
77
ENGINE LUBRICATION SYSTEM
Lubrication Pump
Filter
Oil Pressure
Trochoid Gear Pump
Cartridge Type, Paper
0.4 kgf/cm2 (at idle)
ENGINE SPEED GOVERNOR
Speed Governor Type
Mechanical, Centrifuge
TRANSMISSION
Gear Range
Main Shifting
Shuttle Shifting
Maximum Speed
Filter
Filter Sensor Pressure
12 Forward 12 Reverse
Synchromesh
Synchromesh
32 km/h
Cartridge Type, Paper
0.3 kgf/cm2 (absolute)
CLUTCH
Clutch Type
Clutch Stage
Clutch Size
Clutch Material
Dry Type
Double
9”
Organic
DIFFERENTIAL LOCK
Control Type
Control Method
Hydraulic Pressure
Deactivation Method
Electro Hydraulic
Button
18 bar
Spring
COOLING SYSTEM
Radiator Capacity
Radiator Type
Radiator Cap Pressure
Circulation Pump
Fan Diameter
Ventilation Direction
5 liters
Copper
1 bar
Centrifuge
400 mm
Intake
AIR CLEANER
Filter Type
Number of Elements
Filter Sensor Pressure
Dry
2
54 mbar (absolute)
78
FUEL SYSTEM
Fuel
Fuel Filter
Fuel Pump
Fuel Tank Material
Fuel Tank Capacity
Diesel
Cartridge Type, Paper
Sequential
PE
32 liters
HYDRAULIC PUMP
Pump Type
Number of Sections
Pump 1 Flow Rate
Pump 1 Pressure
Pump 2 Flow Rate
Pump 2 Pressure
Gear Pump
2
7.2cc/rev (18.7 l/d @2600)
120 bar
12cc/rev (31.2 l/d @2600)
180 bar
BRAKES
Brake Type
Disc Number
Disc Material
Braking Mechanism
Parking Brake
Oil Bath
4 (2+2)
Organic
Hydraulic
Independent, Mechanical
STEERING
Control
Control Type
Maximum Steering Wheel Lock
Steering Cylinder
Hydrostatic
1.5
FRONT AXLE
Type
Maximum Oscillation Angle
Maximum Turning Angle
Toe-in Value
4WD
12°
45°/40°
0 – 90 mm
REAR HITCH
Type
Max. Vertical Load
Max. Horizontal Load
Fixed
400 kg
5000 kg
79
MAXIMUM AXLE LOADS
Front Axle
Rear Axle
1000 kg
1750 kg
NOTE: Maximum front axle load is 975 kg when 7.00-12 front tire is used.
POWER TAKE-OFF
Measure
Engine-driven PTO RPM 540
Engine-driven PTO RPM 750
Wheel driven PTO RPM
1-3/8” 6spline (ISO500)
540 @ 2540
750 @ 2600
11.076 x Wheel Rot.
HYDRAULIC SYSTEM
Control Functions
Position, Depth,
Floatation & Combined
Single Effect, 2
180 bar
3/8” Quick-Fit Coupling
Cylinder Type and Number
Safety Valve Pressure
External Power Output
3P LINKAGE SYSTEM
Class
Lift (Equipment Linkage Point, Vertical)
Center Arm Pin Hole Dia
Lifting Arm Pin Hole Dia
Category 2 (CAT-II)
1800 kgf
25.8 mm
29 mm
ELECTRIC
Battery
Chassis Type
Alternator
Starter Motor
Glow Plug
12V 75Ah
Negative (-) Chassis
45A
1.7 kW
30A
CAPACITIES
Fuel Tank
Cooling Water
Engine Oil
Transmission Fluid
Front Axle Oil
Reverse Traction Oil
Brake Fluid
32 liters
9 liters
9 liters
22 liters
12 liters
3 liters (1.5+1.5)
200 cm3 (cc)
80
UNIT CONVERSION TABLE
LENGTH
1 inch
30.48 cm
0.91 m
1 statute miles
1 nautical miles
0.0254 m
0.3048 m
0.9144 m
1,609 m
1,852 m
1m
1m
1m
1m
1m
39.37 inches
99.97 cm
1.00 m
0.00062 statute miles
0.00053 nautical miles
VOLUME
1 US ounces
1 Imperial ounces
1 US gallons
1 Imperial gallons
1 US pints
1 Imperial pints
1 liters
29,574 cm3
28,413 cm3
3785.43 cm3
4546.09 cm3
473.17 cm3
568,261 cm3
100 cm3
1cm3
1cm3
1cm3
1cm3
1cm3
1cm3
1 cm3
0.0338 US ounces
0.0352 Imperial ounces
0.00026 US gallons
0.00022 Imperial gallons
0.0021 US pints
0.0017 Imperial pints
0.001 liters
MASS
1 ounces
1 pound
28.35 g
453.59 g
1g
1g
0.035 ounces
0.0010 kg
TEMPERATURE
°F
°K
°C*9/5+32
°C+273.14
°C
°C
(°F-32)*5/9
°K-273.14
FORCE
1 lbf
1 ozf
1 poundal
0.45 kgf
0.028 kgf
0.1383 N
1kgf
1kgf
1kgf
2,204 lbf
35.27 ozf
70.93 pdl
POWER
1HP (metric)
1HP (UK)
0.7355 kW
0.7457 kW
1kW
1kW
1.359 HP (metric)
1.341 HP (UK)
TORQUE
1 lbf-in
1 ozf in
0.1129 Nm
0.00706 Nm
1Nm
1Nm
8.85 lbf in
141.61 ozf in
PRESSURE
1 psi
1 Torr
1 bar
1mmSS
1mmHgS
6895 Pa
133.32 Pa
100 kPa
9.8 Pa
133.32 Pa
1Pa
1Pa
1kPa
1Pa
1Pa
0.000145 psi
0.0075 Torr
0.01 bar
0.1019 mmSS
0.0075 mmHgS
81
82
SECTION 8. TROUBLESHOOTING
ENGINE STARTS DIFFICULT
Possible Cause
Increased fuel thickness or
viscosity.
Air or water penetration into
the fuel system
Remedy
-
Check fuel tank and fuel filter.
Remove water, dust and other dirt.
As the filter is used to clean the entire fuel, replace the filter if there is
water or foreign matter on it.
-
The fuel pump will not function properly if there is air in the fuel filter or
injector pipes.
Check if the fuel tank cap is loose to ensure proper fuel pumping
pressure.
To remove all the air from the fuel system, follow the procedures
described in the manual.
-
This occurs when the fuel is contaminated with water or dirt. Clean the
injection nozzle without damaging the hole.
Check if the injection nozzle functions properly; if not, replace the
injection nozzle.
Soot accumulation on the
injection nozzle hole
-
Valve clearance out of range
-
Adjust the valve clearance
Valve leakage
-
Tighten the valve.
Incorrect fuel injection timing
-
Adjust the injection timing.
Engine oil thickens in cold
weather, slowing down the
engine operation.
-
Replace the oil with an oil type suitable for the weather conditions.
-
It is caused by bad valve adjustment or when the piston, piston ring or
liners are over worn.
Replace wearing parts with new parts.
Low compression pressure
-
Empty battery
Moving parts overheat
Injection pump wear
-
Recharge the battery
Use a pressure reducing device.
Remove and recharge the battery when the tractor Is not in use,
especially during winter, and reconnect it when you will use the tractor.
-
Check the engine lubrication system.
Check the engine filter for congestion; replace it if congested.
Check the crank shaft end play.
Check injection timing.
-
Avoid using low quality fuel; this may cause pump wear. Use diesel fuel
number 2 only.
Check fuel injection pump elements and intake valve and replace these
parts if necessary.
-
83
BAD EXHAUST COLOUR
Possible Cause
Deteriorated injector pump
Remedy
-
Consult your dealer for repair.
-
Use high quality fuel.
o Diesel No.2 for over 10°C
o Diesel No 1 for below 10°C
-
Replace with a new part if necessary.
-
This problem is caused by bad pulverization, improper injection
timing, a problem with the injection system, incorrect valve
adjustment or bad compression.
Low fuel quality
Deteriorated injector nozzle
Combustion interrupted
ENGINE STOPS ABRUPTLY
Possible Cause
Remedy
Fuel leakage or out of fuel
-
Check the fuel tank and refuel if necessary
Check the fuel system for air or leakage.
Deteriorated injector nozzle
-
Replace with a new part if necessary.
Moving parts overheated
-
Check the oil level with oil dipstick
Check the lubrication system.
Check the oil filter.
Check the crank shaft end play.
IN CASE ENGINE IS STOPPED ABRUPTLY
Possible Cause
Speed increases/decreases abruptly
Remedy
-
Consult your dealer for repair.
-
Use high quality fuel.
o Diesel No.2 for over 10°C
o Diesel No 1 for below 10°C
-
Replace with a new part if necessary.
-
This problem is caused by bad pulverization, improper injection
timing, a problem with the injection system, incorrect valve
adjustment or bad compression.
Low fuel quality
Deteriorated injector nozzle
Combustion interrupted
84
TRACTOR IS NOT STARTING
Possible Cause
Remedy
-
No sound from starter motor
-
Starter motor starts but the engine
does not start.
-
Safety switches may be on. Move the PTO shaft and shuttle
shift lever to neutral and depress clutch pedal all the way.
One or more of fuses may be damaged; check the fuses and
replaced damaged ones.
Ignition or starter circuit wires might be damaged; consult your
dealer.
The battery charge condition might be insufficient. Check the
battery charge condition and recharge if insufficient.
Glow relay or plugs might be not functioning, consult your
dealer.
Engine oil might be thickened; check the engine oil and replace
it if necessary.
TRACTOR IS NOT MOVING WHILE ENGINE IS RUNNING
Possible Cause
Remedy
Main shift lever or gearshift lever on
Neutral position
-
Move the shift levers to the position appropriate for the
desired road speed.
Parking brake is applied.
-
Deactivate the parking brake.
Unadjusted foot clutch
-
Get the foot clutch adjusted.
3 POINT LINKAGE SYSTEM IS NOT MOVING
Possible Cause
Remedy
Congested oil filter
-
Replace the transmission fluid filter with a new one.
Control valve might be broken; consult your dealer.
3 point linkage system does not
move down
-
Move the hydraulic lever to down position.
Release the valve lock.
Hydraulic power outputs do not
work
-
Dispensing valve might be broken; consult your dealer.
85
BATTERY PROBLEMS
Possible Cause
Low electrolyte level
The battery does not recharge
Remedy
-
Add treated water and recharge for a long time.
-
As the current of the alternator is very high, the plates are
displaced or short-circuit occurred. Reduce the charging
current of the alternator and replace the faulty battery.
The battery was not used for a long time. Remove the battery
when the tractor is not in use and recharge it regularly. Replace
the faulty battery.
-
-
The connections are loose or the current of the alternator is
too high. Reduce the charging current of the alternators, clean
the terminals and tighten thoroughly and grease them.
-
Excessive charging causes overheating; reduce the charging
current of the alternator.
Check the body of the battery for cracks and replace it is
cracked.
Terminals highly corroded
Electrolyte level decreases suddenly
-
86
CAUTION
FOR CONDITIONS THAT ARE NOT DESCRIBED IN THE INSTRUCTION
MANUAL, PLEASE CONSULT YOUR DEALER.
IN CASE OF FAILURE TO USE THE MACHINE PROPERLY AS INSTRUCTED IN
THIS BOOK, ALL RESPONSBILITY MUST BE UNDERTAKEN BY THE USER.
87
88
TARAL reserves the right to change tractor design and specifications shown in this Instruction Manual at
any time without prior notice.
DEALER
Taral Tarım Makina ve Aletleri Sanayi A.Ş.
Maltepe Mah. Hastane Yolu Sok. No:1 P.K. 34010
Zeytinburnu/İSTANBUL
Tel: +90 212 5679550 (Pbx)
Fax: +90 212 6740679
+90 212 6121239
e-mail: [email protected]
web site: http://www.taral.com
1