1
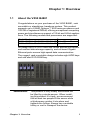
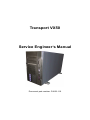
Transport VX50
Service Engineer’s Manual
Document part number: D1652-110
Preface
Copyright
This publication, including all photographs, illustrations, and software, is protected under international copyright laws, with all rights
reserved. Neither this manual, nor any material contained herein,
may be reproduced without written consent of the manufacturer.
Copyright 2006
Version 1.00
Disclaimer
Information contained in this document is furnished by TYAN
Computer Corporation and has been reviewed for accuracy and reliability prior to printing. TYAN assumes no liability whatsoever, and
disclaims any express or implied warranty, relating to sale and/or
use of TYAN products including liability or warranties relating to fitness for a particular purpose or merchantability. TYAN retains the
right to make changes to product descriptions and/or specifications
at any time, without notice. In no event will TYAN be held liable for
any direct or indirect, incidental or consequential damage, loss of
use, loss of data or other problem resulting from errors or inaccuracies of information contained in this document.
Trademark recognition
All registered and unregistered trademarks and company names
contained in this manual are property of their respective owners
including, but not limited to the following.
TYAN, Tyan Thunder K8QW Pro S4881, and VX50 B4881 are
trademarks of TYAN Computer Corporation.
AMD, Opteron, and combinations thereof are trademarks of
Advanced Micro Devices Corporation.
AMI, AMIBIOS, and combinations thereof are trademarks of AMI
Software Incorporated.
Microsoft Windows is a trademark of Microsoft Corporation.
IBM, PC, AT and PS/2 are trademarks of IBM Corporation.
Winbond is a trademark of Winbond Electronics Corporation.
Federal Communications Commission
Notice for the USA Compliance Information Statement (Declaration of Conformity Procedure) DoC
FCC Part 15: This device complies with part 15 of the
FCC Rules
Operation is subject to the following conditions:
1) This device may not cause harmful interference, and
2) This device must accept any interference received including interference that may cause undesired operation. If this equipment does
cause harmful interference to radio or television reception, which
can be determined by turning the equipment off and on, the user is
encouraged to try one or more of the following measures:
•
•
Reorient or relocate the receiving antenna.
•
Plug the equipment into an outlet on a circuit different from
that of the receiver.
Increase the separation between the equipment and the
receiver.
Consult the dealer or an experienced radio/television technician for
help.
Notice for Canada
This apparatus complies with the Class B limits for radio interference as specified in the Canadian Department of Communications
Radio Interference Regulations. (Cet appareil est conformé aux
norms de Classe B d’interference radio tel que specifie par le Ministere Canadien des Communications dans les reglements d’interférence radio.)
Notice for Europe (CE Mark) This product is in conformity
with the Council Directive 89/336/EEC, 92/31/EEC
(EMC).
CAUTION: Lithium battery included with this board. Do not puncture,
mutilate, or dispose of battery in fire. Danger of explosion if battery
is incorrectly replaced. Replace only with the same or equivalent
type recommended by manufacturer. Dispose of used battery
according to manufacturer instructions and in accordance with your
local regulations.
ii
About this manual
This manual provides you with instructions on installing your VX50
B4881, and consists of the following sections:
Chapter 1 – Overview:
Provides an introduction to the VX50 B4881 barebones, shows a
packing list, describes the external components, shows tables of key
components, and provides a block diagram of the system.
Chapter 2 – Setting up:
Covers procedures on installing the CPUs, memory modules,
optional PCI card, and hard drives.
Chapter 3 – Replacing pre-installed components:
Covers removal and replacement procedures for pre-installed components.
Appendix:
Provides detailed specifications, maintenance and troubleshooting
procedures, an explanation of BIOS, and technical diagrams.
iii
Safety information
Before installing and using the VX50 B4881, take note of the following precautions:
iv
•
•
•
Read all instructions carefully.
•
Only use the power source indicated on the marking label.
If you are not sure about your power source, contact the
power company.
•
The unit uses a three-wire grounded cable, which is supplied with a third pin to ground the unit and prevent electric
shock. Do not defeat the purpose of this pin. If your outlet
does not support this type of plug, contact an electrician to
replace the obsolete outlet.
•
Do not place anything on the power cord. Place the power
cord where it will not be stepped on.
•
Follow all warnings and cautions in this manual and on the
unit case.
•
Do not push objects in the ventilation slots, as they may
touch high voltage components and result in shock and
damage to the components.
•
When replacing parts, ensure that you use parts specified
by the manufacturer.
•
When service or repairs have been carried out, perform
routine safety checks to verify that the system is operating
correctly.
•
Avoid using the system near water, in direct sunlight, or
near a heating device.
•
•
Cover the unit when not in use.
•
Do not attempt to lift or move this product alone. When
moving this product, at least two people should lift it onto a
suitable trolley or cart. When bolting the product into a
rack, two people should hold the device in place while a
third person bolts the device securely to the rack.
Do not place the unit on an unstable surface, cart, or stand.
Do not block the slots or openings on the unit which are
provided for ventilation.
Disassembly of this unit should not be attempted by
unqualified persons. When the chassis cover is removed
there is a danger of electric shock and risk of damage to
the system.
Table of Contents
Chapter 1: Overview
1.1 About the VX50 B4881 ...................................................... 1
1.2 Features............................................................................. 2
1.3 Unpacking .......................................................................... 3
1.3.1 Box contents ................................................................ 3
1.3.2 Accessories ................................................................. 4
1.3.3 Opening the box .......................................................... 5
1.4 About the product............................................................... 6
1.4.1 System front view and front panel ............................... 6
1.4.2 System rear view ......................................................... 6
1.4.3 System internal view.................................................... 7
1.4.4 LED control panel ........................................................ 8
1.4.5 Rear LEDs ................................................................... 8
1.4.6 S4881 motherboard block diagram.............................. 9
1.4.7 M4881 CPU board block diagram.............................. 10
1.4.8 ID LED function.......................................................... 10
1.4.9 Fan header locations ................................................. 11
Chapter 2: Setting up
2.1 Before you begin..............................................................
2.1.1 Work area ..................................................................
2.1.2 Tools ..........................................................................
2.1.3 Precautions................................................................
2.2 Installing motherboard components.................................
2.2.1 Removing the chassis cover......................................
2.2.2 Installing CPUs and heatsinks ...................................
2.2.3 Installing memory.......................................................
2.2.4 Installing the M4881 CPU expansion board ..............
2.2.5 Installing PCI-X cards ................................................
2.3 Installing hard drives ........................................................
2.3.1 Installing a storage backplane ...................................
2.3.2 Installing SATA/SCSI hot swap drives .......................
2.3.3 Installing internal hard drives .....................................
2.4 Rack mounting .................................................................
2.5 Standalone.......................................................................
2.6 Fitting the front door assembly.........................................
13
13
13
14
15
15
16
18
20
22
22
23
25
26
28
32
33
Chapter 3: Replacing pre-installed components
3.1 Introduction ......................................................................
3.2 Replacing motherboard components ...............................
3.2.1 Disconnecting all motherboard cables .......................
3.2.2 Replacing the CPU expansion board.........................
35
35
35
39
3.2.3 Replacing the motherboard .......................................
3.3 Replacing the slim DVD-ROM drive.................................
3.4 Replacing the floppy disk drive ........................................
3.5 Replacing the SATA/SCSI backplane..............................
3.6 Replacing power supplies ................................................
3.7 Replacing cooling fans.....................................................
40
40
42
43
44
45
Appendix
BIOS Notice ............................................................................
Introduction ..........................................................................
Hardware monitor submenu.................................................
Integrated devices submenu ................................................
Remote access configuration submenu ...............................
M1207 Jumper Setting ............................................................
PW1 and PW2 big 4-pin out.................................................
SW5 dip switch setting.........................................................
SCSI ID settings...................................................................
Technical support....................................................................
Help resources .....................................................................
Returning merchandise for service ......................................
47
47
47
48
49
50
50
50
51
52
52
52
Chapter 1: Overview
1.1
About the VX50 B4881
Congratulations on your purchase of the VX50 B4881, rack
mountable or standalone, barebone system. This product
supports up to 8 AMD Opteron™ 800 series processors and
128 GB of registered DRAM, offering exceptional computing
power and simultaneous support of 32-bit and 64-bit applications. The following models and processors are supported:
Model Number
Processor support
B4881 V50S4H -4P / B4881 V50U8H -4P Up to 4 P
B4881 V50S4H -8P / B4881 V50U8H -8P Up to 8 P
Hot swap SATA or SCSI hard disk drives provide convenient
and resilient data storage capacity, and on-board Gigabit
Ethernet ports ensure high-speed data communication.
The rugged, rack mountable design includes eight HDD bays
and one slim DVD-ROM bay.
WARNING: This product is very heavy and should not
be lifted by a single person. When installing this product in a rack, we recommend
that at least two people lift the server while
a third person guides it into place and
tightens the fixings. Always use a suitable
trolley or cart to transport the device.
Chapter 1: Overview
1
1.2 Features
1.2
Features
Enclosure
• Industry standard pedestal or 19-inch
rack mountable, 5U chassis
• (1) slim DVD-ROM drive bay
• (1) standard FDD bay
• (3) 5.25-inch device bays
• Dimensions:
- 26.8 x 16.7 x 8.7-inch (5U)
- 680 x 425 x 220 mm
• B4881V50S4H
- (4) hot swap SATA HDD bays
- (4) internal HDD bays (upgradable
to hot swap bays)
• B4881 V50U8H
- (8) hot swap SCSI HDD bays
Processors
• Support for up to eight AMD®
Opteron™ 800 series processors.
Chipset
• NVIDIA nForce4 Professional + AMD8131 HyperTransport PCI-X tunnel
• Winbond W83627HF Super I/O chip
• ADT7468 hardware monitor IC
Memory
• (16) 184-pin 2.5V DDR DIMM
sockets on S4881 motherboard
• (16) 184-pin 2.5V DDR DIMM
sockets on M4881 CPU board
• Up to 128 GB of registered, ECC
DDR400/333/266 memory
Expansion slots
• (2) x16 PCI Express slots (one with x4
signal)
• (2) Independent 64-bit PCI-X bus
• (1) 64-bit 133 MHz (3.3V) PCI-X slot
• (2) 64-bit 100 MHz (3.3V) PCI-X slot
Back I/O ports
• PS/2 mouse and keyboard ports
• (2) RJ-45 10/100/100BaseT with
activity LED
• (2) USB 2.0 ports
• (1) 9-pin UART serial port
• (1) 15-pin VGA port
Environment
• 5 ~ 35 ºC operating environment
• -40 ~ 70 ºC storage environment
2
Storage Controller
• (2) dual port SATA II controllers
integrated in NVIDIA nForce4 Pro chip
• Support for up to four SATA HDDs
• Supports 3 Gb/s per port, 1.5 Gb/s in each
direction per channel
• Support for RAID 0, 1, 0+1, and NVIDIA
Morphing RAID
Motherboard
• Tyan Thunder K8QW Pro S4881
• SSI EEB 3.5 footprint (13 x 16-inch)
CPU board (for 8P configuration)
• Tyan M4881
• 13 x 12-inch
Networking
• (2) Gbit Ethernet ports (Broadcom®
BCM5704 dual port controller)
BIOS
•
•
•
•
Phoenix 8Mbit LPC Flash ROM
Serial Console Redirect
USB device boot
ACPI 2.0 power management support
Power supply
• Redundant power supply modules (4-8).
• Total power 1140W (4P), 1620W (8P)
• AC input 100-230 VAC full range
Video
• ATI® Rage™ XL PCI Graphics controller
• 8 MB Frame Buffer video memory
Server Management
•
•
•
•
Automatic fan speed control
Chassis intrusion alert
Tyan Server Management Support
Tyan SMDC, IPMI 2.0 compliant remote
server management kit (option)
Front panel
• (2) USB 2.0 ports
• LED indicators (power, LAN x2, HDD
activity, ID)
• Switches (power, reset, ID)
Regulatory
• FCC Class B (declaration of conformity)
• CE (declaration of conformity)
Chapter 1: Overview
1.3 Unpacking
1.3
Unpacking
This section describes the VX50 B4881 package contents
and accessories.
1.3.1 Box contents
Component
Description
Industry standard 5U chassis with eight
HDD bays and three further 5.24-inch
device bays
Tyan S4881 motherboard (pre-installed)
Tyan M4881 CPU board (8P model preinstalled) and two HyperTransport (HT)
cards (required to mount CPU board to
motherboard)
SATA backplane (S4H model preinstalled)
SCSI backplane (U8H Model preinstalled)
8x slim DVD-ROM (pre-installed)
Floppy disk drive (pre-installed)
Chapter 1: Overview
3
1.3 Unpacking
Component
Description
• Up to 8P model
- 3+1 Redundant / Total 1620W
• Up to 4P model
- 2+1 Redundant +Dummy module
/ Total 1140W
Three system cooling fans (pre-installed)
120 x 120 x 38 mm
1.3.2 Accessories
Cable set:
(8) power cord 4 x US, 4 x EU
Rack mounting kit; mounting ears,
and rail assembly
Four feet for standalone use
WWW.t
yan.co
01010
m
Basic
Driver CD
Four internal hard disk drive mounting kits
2U Server Platform
High Performance Motherboard
S2882
K8S Pro AJS
#D 1528 - 100
B2882
Transport TA26
ID : 1540 - 100
Revision 1.0
Revision 1.0
User's Manual
Hardware
Installation Guide
Motherboard and system manual
Four or eight processor heatsink
assemblies
4
Chapter 1: Overview
1.3 Unpacking
1.3.3 Opening the box
Open the box carefully and ensure that all the following components are present and undamaged.
•
•
•
•
•
•
•
•
•
•
•
•
•
(4/8) CPU heat sink kits (4/8, based on sku)
(4) Power supply units
(8) Power cords (4 US and 4 European)
(2) Rack mount ears
(1) Rack mount slide kit (with screws and fixings)
(1) Door assembly
(8) Internal HDD mounting kits
(4) Chassis foot stands
(1) Screw pack
(1) Barebone service engineer’s manual
(1) Motherboard user’s manual
(1) Driver CD
(1) Ultra DMA 100/66 cable
Contact your distributor if anything is missing or appears
damaged.
Chapter 1: Overview
5
1.4 About the product
1.4
About the product
This section contains hardware diagrams and a block diagram of the VX50 B4881 system.
1.4.1 System front view and front panel
See the diagram below for details of the front panel indicators
and switches.
Hotswap
HDD
bays
USB ports
Internal
HDD
bays
id
button
Slim
DVDROM
Power
button
Reset
button
5.25-inch
device
bays
Floppy
disk drive
LED
control
panel
1.4.2 System rear view
Power
supply
USB
ports
VGA
port
Expansion
slots
Rear ID
LED
Stacked keyboard
and mouse ports
6
Serial port
(COM 1)
RJ45
ports
AC input
Chapter 1: Overview
1.4 About the product
1.4.3 System internal view
1
10
2
3
4
5
6
7
8
9
1
Hard disk drive cradles
6
SATA ports
2
HDD backplane
7
Floppy disk drive socket
3
System cooling fans
8
PCI slots
4
Memory bank
9
CPU
5
IDE socket (DVD-ROM drive)
10
Cradle for 5.25-inch devices
Chapter 1: Overview
7
1.4 About the product
1.4.4 LED control panel
Power on
ID
HDD
LAN1
LAN2
LED
Power LED
Status
Color
On
Green
System is turned on
On
Amber
System is turned off
Red
HDD access
Off
HDD LED
Random
blink
No mains power
Off
LAN LED
ID LED
Description
No disk activity
On
Amber
LAN is connected
Blinking
Amber
LAN is active
On
Blue
ID select on
1.4.5 Rear LEDs
LED
RJ45 NIC 1
Linkage
(Left)
Status
Color
On
Green
LAN linked
Blinking
Green
LAN access
Off
RJ45 NIC 1 On
Mode (Right) On
No LAN linked
Amber
Gigabit mode
Green
100M mode
Off
RJ45 NIC 2
Linkage
(Left)
10M mode
On
Green
LAN linked
Blinking
Green
LAN access
Off
RJ45 NIC 2 On
Mode (Right) On
No LAN linked
Amber
Green
Off
8
Description
Gigabit mode
100M mode
10M mode
ID LED
On
Red
ID select on
Power supply module
On
Green
Power on
Off
Power off / fail
Chapter 1: Overview
1.4 About the product
1.4.6 S4881 motherboard block diagram
HT Connector( connect to CPU board)
HT Connector( connect to CPU board)
184 pin 184 pin 184 pin 184 pin
DIMM3 DIMM2 DIMM1 DIMM0
184 pin 184 pin 184 pin 184 pin
DIMM0 DIMM1 DIMM2 DIMM3
LINK 0
LINK 0
Third CPU
DDR266/333
H2
Fourth
OUT
16x16 Hyper Transport@1600MT/s
LINK 2
144-Bit
DDR266/333
LINK 1
144-Bit
H3
IN
LINK 1
LINK 2
16x16 Hyper Transport@1600MT/s
16x16 Hyper Transport@1600MT/s
184 pin 184 pin 184 pin 184 pin
DIMM3 DIMM2 DIMM1 DIMM0
184 pin 184 pin 184 pin 184 pin
DIMM0 DIMM1 DIMM2 DIMM3
LINK 0
LINK 0
Secondary CPU
DDR266/333
H1
Primary CPU
OUT
16x16 Hyper Transport@1600MT/s
LINK 1
144-Bit
DDR266/333
LINK 2
144-Bit
H0
IN
LINK 2
LINK 1
16x16 Hyper Transport@1600MT/s
16x16 Hyper Transport@1600MT/s
4 SATA ports
LINK 0
SATA
Nvidia CK8-04 Pro
PCI-X Slot
LINK 0
BUS A
64-Bit/100/66MHz
SATA
PCI-X Slot
SATA
SATA
PCI-Express
x 16 slot
BUS B
Golem
AMD8131
64-Bit/100/66MHz
PCI Express X16 slotll
( X4 Signals)
32Bit/33MHz PCI BUS
BCM5704C Gigabit LAN two Port
ATI RAGE XL
LPC
bus
EIDE(ATA/133) x2
LPC ROM
IEEE1394
USB2.0 x 2rear panel
Fport X2
LPC Super I/O
Floppy Disk Drive
W83627HF
SVMG interface
USB2.0 x 6 front
PS/ Kstboard & Mouse
ADT7463 x2
Hardware Monitoring
panel headers
SERIAL port x 2
Parallel Port
(Pin header)
Chapter 1: Overview
9
1.4 About the product
1.4.7 M4881 CPU board block diagram
184 pin 184 pin 184 pin 184 pin
DIMN 3 DIMN 2 DIMN 1 DIMN 0
OUT
IN
H1
DDR266/333
144-Bit
IN
LINK 0
Secondary CPU
OUT
HT Connector
LINK 2
LINK 1
OUT
(connect to Motherboard)
16x16 HyperTransport@1600MT/s
IN
LINK 0
OUT
LINK 1
184 pin 184 pin 184 pin 184 pin
DIMN 3 DIMN 2 DIMN 1 DIMN 0
IN
OUT
144-Bit
Third CPU
LINK 2
OUT
16x16 HyperTransport@1600MT/s
OUT
HT Connector
H0
Primary CPU
DDR266/333
LINK 0
IN
OUT
LINK 2
144-Bit
H2
OUT
IN
(connect to Motherboard)
IN
184 pin 184 pin 184 pin 184 pin
DIMN 0 DIMN 1 DIMN 2 DIMN 3
IN
LINK 1
IN
16x16 HyperTransport@1600MT/s
DDR266/333
OUT
IN
LINK 1
H3
OUT
DDR266/333
LINK 0
IN
144-Bit
Fourth
LINK 2
IN
OUT
184 pin 184 pin 184 pin 184 pin
DIMN 0 DIMN 1 DIMN 2 DIMN 3
16x16 HyperTransport@1600MT/s
1.4.8 ID LED function
The System Identification LED is used to help identify a system for servicing when it is installed within a high density rack
or cabinet that is populated with several other similar systems.
The system ID LED is illuminated when the system ID button
on the front panel is pressed. It also can be illuminated
remotely through server management software.
10
Previous Status
Action
Status after action
1. LED off, interface shows off;
Press ID BTN
LED on, interface
shows on
2. LED on, interface shows on
Press ID BTN
LED off, interface
shows off
Chapter 1: Overview
1.4 About the product
1.4.9 Fan header locations
CPU fan
CPU fan
CPU fan
header0, J117 header1, J116 header3, J109
CPU fan
header2, J108
System fan
header1,
J103
System fan
header2,
J107
System fan
header3,
J105
Chapter 1: Overview
11
2.1 Before you begin
Chapter 2: Setting up
2.1
Before you begin
This chapter explains how to install motherboard components, including CPUs, memory modules, and PCI cards.
There are also instructions in this section for installing SATA
hard drives.
Careful attention should be given to the precautions mentioned in this section when setting up your system.
2.1.1 Work area
Make sure you have a stable, clean working environment.
Dust and dirt can get into components and cause malfunctions. Use containers to keep small components separated.
Putting all small components in separate containers prevents
them from becoming lost. Adequate lighting and proper tools
can prevent you from accidentally damaging the internal
components.
2.1.2 Tools
The following tools will be required to complete the installations described in this chapter.
•
•
A cross head (Phillips) screwdriver
A grounding strap and/or anti-static pad
Most of the electrical and mechanical connectors in your system can be disconnected using your fingers. It is recommended that you do not use needle-nosed pliers to remove
connectors as these can damage the soft metal or plastic
parts of the connectors.
Chapter 2: Setting up
13
2.1 Before you begin
2.1.3 Precautions
Components and electronic circuit boards can be damaged
by static electricity. Working on a system that is connected to
a power supply can be extremely dangerous. Follow the
guidelines below to avoid damage to the VX50 B4881 or
injury to yourself.
•
•
•
•
•
•
•
Note:
14
Ground yourself properly before removing the top
cover of the system. Unplug the power from the
power supply and then touch a safely grounded
object to release static charge (i.e. power supply
case). If available, wear a grounded wrist strap. Alternatively, discharge any static electricity by touching
the bare metal chassis of the unit case, or the bare
metal body of any other grounded appliance.
Avoid touching motherboard components, IC chips,
connectors, memory modules, or leads.
The motherboard is pre-installed in the system.
When removing the motherboard, always place it on
a grounded anti-static surface until you are ready to
reinstall it.
Hold electronic circuit boards by the edges only. Do
not touch the components on the board unless it is
necessary to do so. Do not flex or stress circuit
boards.
Leave all components inside the static-proof packaging that they ship with until they are ready for installation.
After replacing optional devices, make sure all
screws, springs, or other small parts are in place and
are not left loose inside the case. Metallic parts or
metal flakes can cause electrical shorts.
Always use the correct size screws and fixings when
installing or replacing components.
All connectors are designed to fit one way
only, no force should required to make a
connection.
Chapter 2: Setting up
2.2 Installing motherboard components
2.2
Installing motherboard components
This section describes how to install CPUs, memory modules, and expansion cards.
2.2.1 Removing the chassis cover
Follow these instructions to remove the chassis cover. This
step is required before any other procedures in this chapter
can be undertaken.
1. Press the two blue buttons on the release catches and lift
the catches.
The chassis lid slides back slightly.
2. Lift the lid free from the chassis.
Refitting the chassis cover is a reverse of the removal process. Place the lid on the chassis and push it forward into
place before tightening the screw on the rear of the unit.
Chapter 2: Setting up
15
2.2 Installing motherboard components
2.2.2 Installing CPUs and heatsinks
This section describes how to install AMD Opteron processors and heatsinks on the VX50 B4881 motherboard and
CPU expansion board.
1. Remove the chassis cover. See Removing the chassis
cover on page 15.
2. Remove the optional processor board if it is present, see
“Replacing the CPU expansion board” on page 39
3. Locate the four CPU sockets on the motherboard or CPU
expansion board.
CPU socket 0
CPU socket 1
CPU socket 2
CPU socket 3
4. Lift the locking lever on the CPU socket to the upright
position.
Locking lever
16
Chapter 2: Setting up
2.2 Installing motherboard components
5. Place the CPU in the socket as shown, making sure that
pin 1 is located correctly.
6. Push the CPU locking lever down to lock the CPU in
place.
Locking lever
7. Take a new heatsink and remove all packaging and covers from it.
8. Apply some thermal grease to the top of the CPU and
place a heatsink on top of the CPU as shown.
Note:
All heatsink fans must face the rear of the
chassis to ensure proper airflow.
Chapter 2: Setting up
17
2.2 Installing motherboard components
9. Screw the heatsink to the heatsink retainer as shown.
Heatsink retainer
screws
10. Plug the cooling fan lead into a CPU fan pin header as
shown. See “Fan header locations” on page 11.
CPU cooling fan pin
header
11. Repeat steps three to seven with the other CPUs.
Note:
CPU and heatsink installation is the same
for CPUs on the motherboard or on the
CPU expansion board.
2.2.3 Installing memory
Follow the instructions in this section to install memory modules in your VX50 B4881 system.
1. Remove the chassis cover. See Removing the chassis
cover on page 15.
18
Chapter 2: Setting up
2.2 Installing motherboard components
2. Locate the memory sockets on the motherboard or CPU
expansion board.
Memory sockets
Memory sockets
3. Move the memory slot locking levers to the widest position as shown.
Locking levers
4. Position the memory module in the slot.
Note:
Memory modules will fit in the slot only
one way. Ensure that the notches in the
memory modules line up with the corresponding bumps in the socket.
Chapter 2: Setting up
19
2.2 Installing motherboard components
The locking levers will return to the locked position. Make
sure that the memory module is firmly in place.
2.2.4 Installing the M4881 CPU expansion board
The CPU expansion board can accommodate a further four
processors and 16 memory DIMMS. When upgrading with a
CPU expansion board, a further power supply module must
be installed.
1. Remove the chassis cover. See Removing the chassis
cover on page 15.
2. Remove the chassis side panel as shown.
3. Place the HT board guides in place on the motherboard
sockets.
4. Position the CPU expansion board in place over the
motherboard. Ensure that the HT cards are located correctly above the HT card sockets on the motherboard.
5. Push the CPU expansion board firmly into place.
20
Chapter 2: Setting up
2.2 Installing motherboard components
Note:
Do not use excessive force to push the
CPU expansion board into place. When
properly aligned, the board should slot into
place easily.
6. Secure in place with two screws as shown.
7. Insert two further coutersunk screws through the chassis
to secure the expansion board to the chassis as shown.
8. Connect the five power cables as shown.
9. Replace the chassis covers.
Screws Required
Location
4 hex head #6-32-L6
CPU board
2 #6-32 L5 Flat Head
Chassis cover
Chapter 2: Setting up
21
2.3 Installing hard drives
2.2.5 Installing PCI-X cards
Follow the instructions in this section to install a PCI card in
your system.
1. Remove the chassis cover. See Removing the chassis
cover on page 15.
2. Remove a blanking plate from the rear panel of the chassis as shown.
3. Insert the PCI/PCI-X card into a spare slot as shown.
4. Secure the PCI card with the screw you removed with the
blanking plate.
Screws Required
1 hex head #6-32-L6
2.3
Location
PCI card
Installing hard drives
The VX50 B4881 supports eight, hot-swappable SCSI or
SATA hard drives. The unit is shipped with four hot-swap
bays and a SATA back plane. A further four hot-swap bays
can be added with either a SATA or SCSI backplane.
22
Chapter 2: Setting up
2.3 Installing hard drives
2.3.1 Installing a storage backplane
The VX50 B4881 S4H SKU is shipped with a single SATA
backplane installed that can support up to four hot-swap
SATA hard disks. A second SATA backplane can be installed
or a similar SCSI backplane can be installed. The installation
process for SCSI and SATA backplane is the same.
Note:
Up to 8 hot-swap SCSI or SATA drives
can be supported when two backplanes
are installed.
To install a storage backplane:
1. Remove the chassis cover. See Removing the chassis
cover on page 15.
2. Remove the two screws holding the cradle locking bar in
place and remove the bar.
3. Lift the drive housing to the vertical position.
Chapter 2: Setting up
23
2.3 Installing hard drives
4. Fix the storage backplane to the drive housing using six
screws.
5. Press the drive housing release button and lower the
drive housing back into place.
Drive housing
release button
6. Connect power and data cables to the backplane.
Note:
24
The VX50 B4881is not shipped with a
SCSI controller as standard. If you want to
add a SCSI backplane, a PCI-X SCSI controller must also be added. See “Installing
PCI-X cards” on page 22.
Chapter 2: Setting up
2.3 Installing hard drives
Screws Required
Location
6 Pan Head screws, #6-32-L6 B type
Backplane
2 Hex head #6-32-L6
Cradle locking bar
2.3.2 Installing SATA/SCSI hot swap drives
1. Press the release clip and pull the release lever to unlock
the drive tray from the chassis.
2. Pull the empty drive tray from the chassis.
3. Remove the four screws holding the plastic spacer in
place in the drive tray and remove it from the tray.
4. Place a SATA or SCSI drive in place in the drive tray and
secure with four screws.
Chapter 2: Setting up
25
2.3 Installing hard drives
5. Insert the drive tray back into the chassis and push the
locking lever into place to secure it.
2.3.3 Installing internal hard drives
The VX50 B4881 ships with four drive bays that can each
accommodate a standard SCSI, SATA, or IDE hard disk.
1. Attach a rail to each side of new hard disk. Ensure that
the locking clip faces the rear of the drive. Use two
screws for each rail.
2. Remove the chassis cover. See Removing the chassis
cover on page 15.
3. Remove the two screws holding the cradle locking bar in
place and remove the bar.
26
Chapter 2: Setting up
2.3 Installing hard drives
4. Lift the drive housing to the vertical position as shown.
5. Slide the new drive into place until it locks.
6. Press the drive housing release button and lower the
drive housing back into place.
Drive housing
release button
7. Connect power and data cables to the new drive.
Screws Required
8 hex head #6-32-L6
Chapter 2: Setting up
Location
Cradle locking bar and HDD rails
27
2.4 Rack mounting
2.4
Rack mounting
The VX50 B4881 can be mounted in a standard rack using
the rail assembly supplied.
1. Remove the thin, center rail from each sliding rail set.
Thin center rails are bolted to the VX50 B4881 chassis.
2. Take the remaining wide, outer rails and attach the
brackets to them using the two M4L4-H2.4 screws and
washers -4.2L10-0.8.
Brackets
Bolt the brackets to the wide, outer rails.
Note:
28
Measure the depth of the cabinet and
make the rails exactly the right length to
fit. The brackets have long slits in them to
allow them to be fixed to the other part of
the rails in various positions.
Chapter 2: Setting up
2.4 Rack mounting
3. Bolt the assembled rail sets to the rack using M5L8-H3
screws and small rack mounting brackets supplied.
Small rack
mounting
bracket
4. Fit the rails directly behind the rack frame. The small rack
mounting brackets should be against the rails as shown.
The rails should not be mounted in front of the rack
frame.Use the top and bottom holes to fix the brackets to
the rack frame.
Use the top and bottom holes to fix
the rails to the rack
Correct
Incorrect
5. Remove the top, black panel from the server to reveal the
rail mounting screws beneath.
Chapter 2: Setting up
29
2.4 Rack mounting
6. Bolt one of the thin, center sliding rails to each side of the
server using M4L6-H2.5 screws. Ensure that each rail is
bolted on the right way round as shown.
7. Bolt the ears to the front of the server chassis using 8 flat
head, M5L8 screws as shown.
8. Lift the server up to the level of the rack and slide it
between the rails mounted in the rack.
30
Chapter 2: Setting up
2.4 Rack mounting
9. Bolt the ears to the rack using M5L15-H3 screws to
secure the server in place.
Note:
When the rails are extended, they will
lock. To shorten the rails again, you will
need to operate the release mechanism in
each rail.
Screws Required
Location
2 hex head #6-32-L6
Chassis cover
8 flat head M5L8
Rackmount ears
8 flat head M4L6-H2.5
Sliding rail / chassis
Chapter 2: Setting up
31
2.5 Standalone
2.5
Standalone
The VX50 B4881 can be used as a standalone device when
fitted with the plastic feet in the accessory pack. When used
as a standalone device, the feet must be fitted to prevent the
unit from falling over.
The four feet should be attached as follows:
1. Each foot consists of two pieces. Insert the round piece
of the foot into the other foot section. The small plastic
tab on the round piece should fit into the curved slot on
the other piece.
Curved slot
Tab fits in curved slot
2. Use a single screw through the center of the round section to fasten the foot assembly to the bottom of the chassis. The plastic tab that protrudes through the curved slot
should fit into an indent in the chassis case.
When fitted, each foot should rotate about 90°.
3. Fit all four feet in the same way.
32
Chapter 2: Setting up
2.6 Fitting the front door assembly
Note:
When using as a standalone unit, all four
feet should be fitted and extended fully to
prevent instability.
Screws Required
Pan Head, M5L20
2.6
Location
Foot screws
Fitting the front door assembly
A door is supplied with the VX50 B4881 that can be used
when the unit is rack mounted or standalone. To attach the
door:
1. Release the hinge clip from the top of the hinge section
on the door.
Chapter 2: Setting up
33
2.6 Fitting the front door assembly
2. Insert the top hinge pin into the hole in the server casing.
Align the lower hinge pin with the hole in the casing and
lower the door into place.
3. Replace the hinge clip on the top hinge pin.
34
Chapter 2: Setting up
3.1 Introduction
Chapter 3: Replacing pre-installed
components
3.1
Introduction
This chapter describes how to replace all the pre-installed
components of your VX50 B4881, including PCI-X cards,
motherboard, DVD-ROM drive, and floppy disk drive. There
is also a section covering the replacement of the SATA backplane.
Before you attempt to replace any components, make sure
you have read section 2.1 Before you begin, in chapter 2,
which describes the precautions you need to take and the
tools you will require.
3.2
Replacing motherboard components
This section describes how to replace pre-installed motherboard components.
3.2.1 Disconnecting all motherboard cables
When replacing the motherboard, CPU board or certain
motherboard or CPU board components, it may be necessary
to remove cables. Follow these instructions to remove all
motherboard and CPU board cabling.
Power cables
Disconnect all the power cables as shown.
Chapter 3: Replacing pre-installed components
35
3.2 Replacing motherboard components
IDE cable (DVD-ROM)
IDE socket for DVD-ROM
PRI-IDE, SEC-IDE
SATA cables
SATA ports
SATA0, SATA1, SATA2, SATA3
CPU fan power cables
CPU fan pin headers.
See“Fan header locations” on page 11 for
more information.
36
Chapter 3: Replacing pre-installed components
3.2 Replacing motherboard components
Floppy disk drive cables
Floppy disk drive port
FDD
USB cables
USB pin header
J30, J31, J95
LED control board cables
LED front panel pin header
J115
Chapter 3: Replacing pre-installed components
37
3.2 Replacing motherboard components
Front panel LED assembly
Function
HDD LED
RESET SW
Wire
color
Wire
color
Pin
Pin
1
2
Green
3
4
Orange
5
6
7
8
9
10
11
12
13
14
15
16
17
18
JP4
JP5
Green
1
1
Green
Orange
2
2
Orange
Orange
Blue
Function
Power on LED
Power on SW
Blue
JP4/JP5 LAN LED
LAN1
LAN2
J119 ID Switch and J118 LED
ID SW
38
J119
J118
Orange
1
1
Black
2
2
ID LED
Blue
Chapter 3: Replacing pre-installed components
3.2 Replacing motherboard components
3.2.2 Replacing the CPU expansion board
Follow these instructions to replace the CPU expansion
board:
1. Remove the chassis cover. See Removing the chassis
cover on page 15.
2. Remove the chassis side panel as shown.
3. Remove the power cables from the CPU expansion
board.
4. Remove the two countersunk screws from the side of the
chassis.
5. Remove the screw that secures the board to the chassis.
6. Lift the CPU expansion board from the chassis.
7. Replace the CPU expansion board as described in
“Installing the M4881 CPU expansion board” on page 20.
Chapter 3: Replacing pre-installed components
39
3.3 Replacing the slim DVD-ROM drive
3.2.3 Replacing the motherboard
Follow these instructions to replace the motherboard from
your VX50 B4881.
1. Remove the chassis cover. See Removing the chassis
cover on page 15.
2. Remove all cables to the motherboard. See Disconnecting all motherboard cables on page 35.
3. Remove the 10 screws as shown securing the motherboard to the chassis as shown, and lift the board free.
Note:
3.3
The motherboard is fitted tightly into the
chassis and will not lift straight out. You
will need to lift one side of the board first
and slide it out.
Replacing the slim DVD-ROM drive
This section describes how to remove and replace the
DVD-ROM drive in your VX50 B4881 system.
1. Remove the chassis cover. See Removing the chassis
cover on page 15.
40
Chapter 3: Replacing pre-installed components
3.3 Replacing the slim DVD-ROM drive
2. Remove the power and data cables from the DVD-ROM
drive.
3. Press the release catch that secures the DVD-ROM drive
and slide the DVD-ROM drive from the front of the chassis.
4. Remove the four screws that secure the DVD-ROM drive
in the cradle and remove the old unit.
Chapter 3: Replacing pre-installed components
41
3.4 Replacing the floppy disk drive
5. Remove the two screws that hold the DVD-ROM backplane to the DVD-ROM drive, and remove back plane.
3.4
Replacing the floppy disk drive
This section describes how to replace the FDD on your VX50
B4881.
1. Loosen the two screws that secure the lower cover to the
chassis of the VX50 B4881. Slide the cover back and
remove it to expose the service port for the floppy disk
drive.
2. Remove the power and data cables from the floppy disk
drive.
42
Chapter 3: Replacing pre-installed components
3.5 Replacing the SATA/SCSI backplane
3. Loosen the two retaining screws that secures the floppy
disk drive in place.
4. Slide the disk drive from the chassis.
5. Slide the new unit into place, secure with the retaining
screw and replace the power and data cables.
3.5
Replacing the SATA/SCSI backplane
This section describes how to replace the SATA/SCSI backplane on your VX50 B4881.
1. Remove the chassis cover. See Removing the chassis
cover on page 15.
2. Remove all the SATA hot-swap HDD trays from the VX50
B4881.
3. Remove all cables from the SATA backplane.
Chapter 3: Replacing pre-installed components
43
3.6 Replacing power supplies
4. Remove the two screws holding the cradle locking bar in
place and remove the bar.
5. Lift the disk drive cradle to the vertical position as shown.
Remove the six screws and lift the backplane from the
chassis.
6. Place a new backplane in position and secure in place
with six screws.
7. Lower the disk drive cradle into place.
8. Replace the power and data cables.
3.6
Replacing power supplies
The VX50 B4881 has four hot-swap, redundant power supply
bays.
To replace a power supply:
1. Unplug the power cable from the faulty power supply.
2. Loosen the retaining screw.
44
Chapter 3: Replacing pre-installed components
3.7 Replacing cooling fans
3. While pressing the release catch, pull the faulty power
supply from the chassis using the handle.
Release catch
4. Push the new power supply into place and secure with
the retaining screw.
Note:
3.7
When the CPU expansion board is
installed, A bare minimum of three power
supplies are required to run the VX50
B4881. A fourth power supply should be
installed as soon as possible in the event
of a failure.
Replacing cooling fans
The VX50 B4881 requires three chassis cooling fans.
To replace a cooling fan:
1. Remove the chassis cover. See Removing the chassis
cover on page 15.
2. Remove the CPU expansion board as described in
“Replacing the CPU expansion board” on page 39
Chapter 3: Replacing pre-installed components
45
3.7 Replacing cooling fans
3. Unplug the cooling fan power supply lead from the pin
header on the mother board.
4. Remove the four screws that hold the fan to the chassis
and remove the fan.
5. Place a new fan in position in the chassis and secure in
place with four screws.
6. Plug the fan power supply into the pin header.
46
Chapter 3: Replacing pre-installed components
Appendix
BIOS Notice
Introduction
Your VX50 B4881 system includes a powerful TYAN Thunder
K8QW Pro S4881 motherboard with Phoenix 8 Mbit LPC
Flash ROM.
The BIOS is the motherboard’s basic input/output system.
The BIOS contains all the settings required to control the keyboard, display, disk drives, serial communications, and a
number of miscellaneous functions. This section of the
appendix describes the various BIOS settings that can be
used to configure your system.
This section covers some aspects of BIOS. Consult the motherboard manual for a complete description.
Hardware monitor submenu
Use this screen to monitor hardware information. Use the up
and down <Arrow> keys to select an item. Use the <Plus>
and <Minus> keys to change the value of the selected option.
PhoenixBIOS Setup Utility
Advanced
CPUx Temperature
Sysx VRM temperature
CPUx Fan Speed
System Fan Speed
CPUx VDD Voltage
+12V
+12V CPU Board
+5v
+5v CPU Board
+3.3V
AMD8131 Vcore
VCK804 Vcore
xxC
xxC
xxxxRPM
xxxxRPM
xxV
xxV
xxV
xxV
xxV
xxV
xxV
xxV
Item specific help
F1: Help ÇÈ:Select Item +/-:Setup Values F9:Setup Defaults Esc:Exit
ÅÆ:Select screen Enter: Select X:Sub-menu F10:Previous Values
47
Integrated devices submenu
Use this screen to view and alter the setup of integrated
devices, including the USB configuration.
PhoenixBIOS Setup Utility
Advanced
USB Control
USB BIOS Legacy Support
SATA0 Controller
SATA1 Controller
[Disabled]
[Disabled]
[Enabled]
[Enabled]
Interrupt Mode
[PIC]
Item specific help
XNV RAID Configuration
F1: Help ÇÈ:Select Item +/-:Setup Values F9:Setup Defaults Esc:Exit
ÅÆ:Select screen Enter: Select X:Sub-menu F10:Previous Values
Feature
Option
Description
USB
control
• Disabled
• On-board
COM A
• On-board
COM B
Set USB controllers.
USB BIOSlegacy
support
• Disabled
• Enabled
Set support for USB keyboard and
mouse.
SATA0
controller
• Enabled
• Disabled
Set first serial ATA device.
SATA1
controller
• Enabled
• Disabled
Set second serial ATA device.
Interrupt
mode
• PIC
• 8529/PIC
Select Interrupt Mode, 8259/PIC mode
or APIC mode.
NV RAID
configuration
Menu Item
Set NVidia RAID control.
48
Remote access configuration submenu
Use this screen to view the remote access configuration
menu. This feature allows remote access to the Server using
the serial port.
PhoenixBIOS Setup Utility
Advanced
Com Port Address
[Disabled]
Baud Rate
Console Type
Flow Control
Console Connection
Continue CR after POST
[300]
[VT100]
[None]
[Direct]
[Off]
Item specific help
F1: Help ÇÈ:Select Item +/-:Setup Values F9:Setup Defaults Esc:Exit
ÅÆ:Select screen Enter: Select X:Sub-menu F10:Previous Values
Feature
Option
Description
Configure remote access type and parameters
Com Port
Address
• Disabled
• On-board
COM A
• On-board
COM B
Select the COM port address.
Baud Rate
• 300
• 1200
Specify the baud rate.
Console
Type
• VT100
• VT100, b-bit
Specify a console type.
Flow
Control
• None
• XON/XOFF
Enable flow control.
Console
Connection
• Direct
• Via modem
Specify whether the console is connected directly to the system or a
modem is used to connect.
Continue
CR after
POST
• Off
• On
Enable Console Redirection after OS
has loaded.
49
M1207 Jumper Setting
PW1 and PW2 big 4-pin out
1
VDD
2
GND
3
GND
4
VCC
SW5 dip switch setting
50
Switch
ON
OFF
1
For delay_start function
Motor mode off
2
For remove_start function
Motor mode off
3
None
4
None
SCSI ID settings
Dip switich for ID-SEL1, ID-SEL2, ID-SEL3 and ID-SEL4 setting.
SCSI ID
Position 1,
ID=1
Position 2,
ID=1
Position 3,
ID=1
Position 4,
ID=1
0
OFF
OFF
OFF
OFF
1
ON
OFF
OFF
OFF
2
OFF
ON
OFF
OFF
3
ON
ON
OFF
OFF
4
OFF
OFF
ON
OFF
5
ON
OFF
ON
OFF
6
OFF
ON
ON
OFF
7
ON
ON
ON
OFF
8
OFF
OFF
OFF
ON
9
ON
OFF
OFF
ON
10
OFF
ON
OFF
ON
11
ON
ON
OFF
ON
12
OFF
OFF
ON
ON
13
ON
OFF
ON
ON
14
OFF
ON
ON
ON
15
ON
ON
ON
ON
•
•
Please avoid setting SCSI ID 7 for SCSI drive.
It is normally occupied SCSI host adaptaer.
The default setting on left SCSI backplane is from ID 0, ID 1,
ID 2 and ID3.
51
Technical support
If a problem arises with this system, you should consult your
dealer first for help. The system is likely to have been configured by your dealer, making him the most appropriate choice
when seeking technical advice. Your dealer may also be
close enough to visit with the hardware for servicing or testing.
Help resources
1. See the beep codes section in the motherboard manual
2. See the TYAN Web site for FAQs, bulletins, driver
updates and other information: http://www.tyan.com
3. Only contact TYAN after first speaking with your dealer
4. Check the TYAN user group:
alt.comp.periphs.mainboard.TYAN
Returning merchandise for service
If any problems occur during the product’s warranty period,
consult your system vendor or distributor before contacting
TYAN. The warranty covers normal customer use of the product. The warranty does not cover damages sustained during
shipping or failure due to alteration, misuse, abuse, or
improper maintenance of the unit.
Note:
A receipt or copy of your invoice, marked
with the date of purchase, is required
before any warranty service can be provided. You may obtain service by calling
the manufacturer for a Return Merchandise Authorization (RMA) number. The
RMA number should be displayed prominently on the outside of the shipping carton, and the package should be mailed
prepaid. TYAN will pay to have the product
shipped back to you.
Transport VX50 B4881 Service engineer’s Manual.
Document part number: D1652-110
52