1
GRID superscalar User’s Manual
Version 1.6.0
June 2007
1 INTRODUCTION..................................................................................5
2 DEVELOPING YOUR PROGRAM WITH GRID SUPERSCALAR7
2.1 QUICKSTART.........................................................................................7
2.2 IDENTIFYING FUNCTIONS THAT WILL BE RUN ON THE GRID..........................7
2.3 DEFINING THE IDL FILE.........................................................................9
2.4 WRITING THE MAIN PROGRAM (MASTER)..................................................11
2.4.1 Special primitives.....................................................................11
2.5 WRITING THE PROGRAM TASKS (WORKER)................................................13
2.5.1 Special primitives.....................................................................14
2.6 THE EXCEPTION HANDLING MECHANISM....................................................15
2.7 EXPRESSING CONSTRAINTS AND COST BETWEEN JOBS AND MACHINES.............17
2.8 HINTS TO ACHIEVE A GOOD PERFORMANCE...............................................20
2.9 KNOWN RESTRICTIONS..........................................................................21
3 RUNNING THE DEVELOPED PROGRAM....................................23
3.1 QUICKSTART.......................................................................................23
3.2 COPYING AND COMPILING YOUR CODE......................................................24
3.2.1 The deployment tool.................................................................24
3.2.1.1 Running the deployment tool............................................24
3.2.1.2 Configuring the available hosts.........................................26
3.2.1.3 Creating a simple project...................................................32
3.2.1.4 Adding hosts to your project.............................................33
3.2.1.5 Using hosts with a common installation directory............34
3.2.1.6 Sharing directories between hosts.....................................35
3.2.1.7 Deploying the master program..........................................36
3.2.1.8 Other considerations..........................................................36
3.2.1.9 Deployment of complex applications................................36
3.2.2 The gsbuild tool........................................................................37
3.2.2.1 Developing complex applications.....................................38
3.2.2.1.1 Editing the Makefile.am file.......................................39
3.2.2.1.2 Editing the configure.in file........................................39
3.2.2.1.3 Generating the Makefile.............................................39
3.2.3 Copying and compiling your code by hand..............................40
3.2.3.1 C/C++ Binding..................................................................41
3.2.3.2 Perl Binding.......................................................................44
3.3 DEFINING ENVIRONMENT VARIABLES........................................................46
3.4 AM I READY TO RUN?...........................................................................48
3.5 RECOVERING FROM A CHECKPOINT FILE....................................................49
4 DEBUGGING YOUR GRID SUPERSCALAR PROGRAM..........50
4.1 MONITORING YOUR EXECUTION..............................................................50
4.2 MASTER DEBUG INFORMATION................................................................51
4.3 WORKER LOG FILES..............................................................................52
4.4 CLEANING TEMPORARY FILES.................................................................53
5 FREQUENTLY ASKED QUESTIONS (FAQ).................................55
5.1 GLOBUS..............................................................................................55
5.1.1 What is Globus? Why do I need it? Can you give me some useful
commands? 55
5.1.2 I have several log files In my workers’ home directory. They are
named gram_job_mgr_<number>.log.......................................................55
1
5.2 GRID SUPERSCALAR TOOLS..................................................................55
5.2.1 When I use gsstubgen I get this output: “Warning: renaming file
'app-stubs.c' to 'app-stubs.c~'. Warning: renaming file 'app-worker.c' to 'appworker.c~'. Warning: renaming file 'app.h' to 'app.h~'.”. What is this for?55
5.3 THE MASTER.......................................................................................56
5.3.1 When I set GS_DEBUG to 10 or 20, the output of my main program
seems to appear in really weird places. What is happening?....................56
5.3.2 When I redirect all output given from the master to a file, sometimes
at the end some information is missing. Why?...........................................56
5.3.3 I get a message like this when trying to run the master: “ERROR
activating Globus modules. Check that you have started your user proxy with
grid-proxy-info”.........................................................................................56
5.3.4 The master ends with this message (or similar): “./app: error while
loading shared libraries: libGS-master.so.0: cannot open shared object file: No
such file or directory”................................................................................56
5.3.5 When I set GS_SHORTCUTS to 1 I get this message “ERROR:
Check environment variables values”. Why?.............................................56
5.3.6 I get this message: “ERROR: Check environment variables values”.
But I have all variables defined and GS_SHORTCUTS is set to 0.............57
5.3.7 When working with GS_SOCKETS set to 1 I get a segmentation fault
at the master. More precisely, this happens when a previous execution ends
(prematurely or not) and I try to launch the master immediately..............57
5.3.8 I get this message: “******** ERROR AT TASK 0 !!! *********
******** MACHINE khafre.cepba.upc.es ********* the job manager could
not stage in a file........................................................................................57
5.3.9 I get this message: “ERROR: Submitting a job to hostname. Globus
error: the connection to the server failed (check host and port)”..............57
5.3.10 When the master is going to end I get this message: “ERROR:
REMOTE DELETION OF FILES IN MACHINE hostname HAS FAILED.
Globus error: (error from system). Checkpoint file erased for safety reasons”.
What happened?.........................................................................................58
5.4 THE WORKERS....................................................................................58
5.4.1 The first task executing returns an error of this kind “********
ERROR AT TASK 0 !!! *********”. When I see log files at the worker side I
find this at the ErrTask0.log: “../app-worker: error while loading shared
libraries: libGS-worker.so.0: cannot open shared object file: No such file or
directory”
58
5.4.2 I get this message when I try to execute a remote task: “********
ERROR AT TASK 0 !!! ********* ******** MACHINE hostname *********
the executable file permissions do not allow execution”...........................58
5.4.3 The firs task ends with an error, but now when I look into the worker
I find in ErrTask0.log: “workerGS.sh: ../app-worker: No such file or directory”
59
5.4.4 Once more my first task fails but my log files are empty. That’s
crazy!
59
5.4.5 I always get errors when trying to run a task into a worker. Is it
Globus fault? Is it GRID superscalar fault? Is it my fault?.......................59
5.4.6 I receive this message at the master: “ERROR: Submitting a job to
hostname. Globus error: the cache file could not be opened in order to relocate
the user proxy”...........................................................................................59
2
5.4.7 I receive this message at the master: “ERROR: Submitting a job to
hostname. Globus error: the job manager failed to create the temporary stdout
filename”
59
5.4.8 I get this message: “ERROR: Submitting a job to hostname. Globus
error: data transfer to the server failed”...................................................60
5.4.9 After having a quota problem in a worker, I see some temporary files
remaining. How can I manage to erase them correctly?...........................60
5.5 OTHER QUESTIONS................................................................................60
5.5.1 I love GRID superscalar! It has saved me lots of work hours! 60
5.5.2 I hate your run-time. It’s giving me lots of problems...............60
3
4
1 Introduction
The aim of GRID superscalar is to reduce the development complexity of Grid
applications to the minimum, in such a way that writing an application for a
computational Grid may be as easy as writing a sequential application. Our
assumption is that Grid applications would be in a lot of cases composed of tasks,
most of them repetitive. The granularity of these tasks will be of the level of
simulations or programs, and the data objects will be files. GRID superscalar allows
application developers to write their application in a sequential fashion. The
requirements to run that sequential application in a computational Grid are the
specification of the interface of the tasks that should be run in the Grid, and, at some
points, calls to the GRID superscalar interface functions and link with the run-time
library. The rest of the code already written for your application doesn’t have to
change, because GRID superscalar has bindings to several programming languages.
Our tool provides an underlying run-time that is able to detect the inherent
parallelism of the sequential application and performs concurrent task submission. In
addition to a data-dependence analysis based on those input/output task parameters
that are files, techniques such as file renaming and file locality are applied to increase
the application performance. Current GRID superscalar version is based on Globus
Toolkit 2.x.
GRID superscalar is a new programming paradigm for GRID enabling
applications, composed of an interface and a run-time. With GRID superscalar a
sequential application, composed of tasks of certain granularity, is automatically
converted into a parallel application where the tasks are executed in different servers
of a computational GRID.
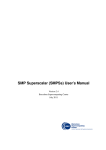
The behavior of the application when run with GRID superscalar is the
following: for each task candidate to be run in the GRID, the GRID superscalar runtime inserts a node in a task graph. Then, the GRID superscalar run-time system seeks
for data dependences between the different tasks of the graph. These data
dependences are defined by the input/output of the tasks that are files. If a task does
not have any dependence with previous tasks that have not been executed or which
are still running (i.e., the task is not waiting for any data that has not been already
generated), it can be submitted for execution to the GRID. If that occurs, the GRID
superscalar run-time requests a GRID server to the broker and if a server is provided,
it submits the task. Those tasks that do not have any data dependence between them
can be run on parallel on the grid. This process is automatically controlled by the
GRID superscalar run-time, without any additional effort for the user.
Figure 1-1 shows an overview of the behavior that we have described above.
The reason for only considering data dependences defined by parameter files is
because we assume that the tasks of the applications which will take advantage of
GRID superscalar will be simulations, finite element solvers, biology applications...
In all such cases, the main parameters of these tasks are passed through files. In any
case, we do not discard that future versions of the GRID superscalar will take into
account all data dependencies.
GRID superscalar separates the target program in two parts: the master and the
worker. The worker contains all the functions that are to be run in the grid. The master
contains the code that calls those functions. The applications will be composed of a
client binary, run on client host, and one server binary for each server host available in
5
the computational GRID. However, this structure will be hidden to the application
programmer when executing the program.
Other features offered by GRID superscalar are shared disks management, intertask checkpointing mechanism, deployment tool, exception handling, and
requirements specification (between machines and jobs) using ClassAds.
Applica tion code
initia liza tion( ) ;
for ( i= 0; i< N; i+ + ) {
T1 ( “ file1. tx t” , “ file2. tx t” ) ;
T2 ( “ file4. tx t” , “ file5. tx t” ) ;
T3 ( “ file2. tx t” , “ file5. tx t” , “ file6. tx t” ) ;
T4 ( “ file7. tx t” , “ file8. tx t” ) ;
T5 ( “ file6. tx t” , “ file8. tx t” , “ file9. tx t” ) ;
}
T10
T20
G r id
T40
T30
T50
T11
T21
T41
T31
T51
T12
…
Figure 1-1
6
2 Developing your program with GRID superscalar
To develop an application in the GRID superscalar paradigm, a programmer
must go through the following three stages:
1. Task definition: identify those subroutines/programs in the application that
are going to be executed in the computational Grid.
2. Task parameters definition: identify which parameters are input/output files
and which are input/output generic scalars.
3. Write the sequential program (main program and task code).
In current version, stages 1 and 2 (task definition and task parameters definition)
are performed by writing an interface definition file (IDL file). This interface
definition file is based in the CORBA IDL language, which allows an elegant and
easy way to write and understand syntax. We selected that language simply because it
was the one that best fitted our needs, although GRID superscalar does not have any
relation with CORBA. We are going to see all this in more detail into this chapter 2.
2.1 Quickstart
This section is intended to be a reference of the steps that you have to follow
when developing your program with GRID superscalar.
•
•
•
Define an IDL file named <myapplication>.idl that contains the headers
of the functions that are going to be run on the Grid. Write as parameters
all files and scalars involved in the computation, trying to avoid out and
inout scalars.
Write / change your master code to call these new defined functions. Use
GS_On() at the beginning, GS_Off(0) when the program ends correctly,
GS_Off(-1) when you detect an error in the master, and the file
management primitives when working with files in the master (don’t
expect that files have their original names). Avoid using GS_Barrier.
Create a file named <myapplication>-functions.[c | pm] that contains the
body of the functions defined in the IDL file. Use passed parameters
instead of the expected file names. Call external binaries with
GS_System and leave a possible error code at gs_result.
In next sections you will get more detailed information about each step.
However, you can go to section 3.1 to see a quick guide about how to run your
program.
2.2 Identifying functions that will be run on the GRID
In application programming, there are some options available in structuring the
code. One really useful way is to program functions, instead of programming
everything in a big main function. This helps in two ways: it makes your code easier
to understand, and allows you to repeat the same functionality in other stages of your
application.
This basic programming technique will be the key to gridify your application.
Your code may have some computation that you may want to be performed on the
7
grid. This computation can be already in a function, called from the main program. If
this is not the case, we recommend you to put this computation into a local function,
in order to ease even more the use of GRID superscalar.
And what should be suitable to be executed on the grid? A first step is to decide
which functions are to be run on the grid. There are two main scenarios in which a
programmer may use GRID superscalar. The first scenario consists of a program that
cannot be fully executed on the local machine because it requires more resources than
there are locally available. In those cases the target functions are those functions that
cannot be executed locally. The second scenario is composed of those cases in which
more performance is desired than there is locally available. In those cases the target
functions are those that consume most CPU time and are executed most often. To aid
you in your measurements you may use profiling or tracing tools. GRID superscalar is
not limited to those two scenarios. Other scenarios may require formulating a function
selection strategy according to their objectives and constraints
Another important step is to define the header of the function properly. You
have to put in this header the files needed (input files, output files, or input/output
files) and scalar parameters needed (input or output) (i.e. you could need a scalar
value to start a simulation). If you need to return a file, or a scalar, write it in the
header parameters as an output parameter. This way you can return more than one
value or file. Current version doesn’t allow the functions to have a return value, so
you have to return this value in the header.
GRID superscalar can use the following data types for function parameters:
integers, floating point types, booleans, characters, filenames and strings. Each
parameter can be an input parameter, an output parameter or an input and output
parameter. You must adequate each function to the available data types.
This whole process will be seen really clear in our matrix multiplication
example. One typical operation done between matrixes is the multiplication. When the
matrixes grow in size, it grows also the complexity of the algorithm. Then we search a
way to speed up this computation trying to parallelize our code. A first step is to
divide matrixes in blocks, so we get several advantages from a version without doing
this division. We don’t need a full row or column to do some calculation, because we
can operate between blocks. Another advantage is that you don’t need to have all
matrixes in memory, because we just need the blocks that are going to be operated.
This is known as an out-of-core implementation.
This example is included in the GRID superscalar distribution, so you can
follow this explanation while looking at the source code. We see that in our main code
(matmul.cc) there are three local functions: PutBlock, GetBlock and matmul. The file
named block.cc contains the definition of a block, and some useful operations. We
want to put the matrix multiplication running on the Grid, so we must pay attention to
matmul function. We see that the definition is correct, because it has an input block
named f1, another input block named f2, and an input/output block named f3.
void matmul(char *f1, char *f2, char *f3)
Each block is stored into a different file. We can suppose a less favorable
situation, like this one:
double matmul(char *f1, char *f2, char *f3)
Imagine that you have a returning double, which has the mean value between all
the elements of the block. We recommend you to add this double to the header, and
remove it from the return value, so next steps will be even easier.
8
2.3 Defining the IDL file
GRID superscalar uses a simplified interface definition language based on the
CORBA IDL standard. The IDL file describes the headers of the functions that will be
executed on the GRID. If you have this functions already defined with a function
structure in your main code, this step will be really simple. You just have to write
your function headers in our IDL form into a file called <myapplication>.idl (we will
assume from now that is named app.idl). In order to learn how the syntax works, we
present a generic example:
interface MYAPPL {
void myfunction1(in File file1, in scalar_type scalar1,
out File file2);
void myfunction2(in File file1, in File file2, out
scalar_type scalar1);
void myfunction3(inout scalar_type scalar1, inout File
file1);
};
As you can see there is one requirement needed in this interface: all functions
must begin with void. If you have to return a parameter, you have to specify it as an
output parameter. Files are a special type of parameters, since they define the tasks'
data dependences. For that reason, a special type File has been defined. This type is
also needed to differentiate a file from a string that could be needed in your function
as an input (i.e. when passing modifiers to a simulator call, -v –f ...). All parameters
can be defined as in, out or inout.
Currently GRID superscalar supports integers, floating point numbers, booleans,
characters, filenames and strings as data types for function parameters, so the
scalar_type can be one of these: char, wchar, string, wstring, short, int, long, float,
double and boolean. You can use the following conversion table (Table 2-1) to aid
you in choosing the data types for your IDL definitions.
9
Semantic meaning
Input integer
Output integer
Input and output integer
Input character
Output character
Input and output
character
Input boolean
Output boolean
Input and output boolean
Input floating point
Output floating point
Input and output floating
point
Input string
Output string
Input and output string
Read only file (filename)
Write only file (filename)
Read and write file
(filename)
C type
int
short
long
int *
short *
long *
int *
short *
long *
char
char *
IDL type
in int
in short
in long
out int
out short
out long
inout int
inout short
inout long
char
out char
char *
inout char
int
int *
int *
float
double
float *
double *
float *
double *
char *
char *
char *
char *
char *
in boolean
out boolean
inout boolean
in float
in double
out float
out double
inout float
inout double
in string
out string
inout string
in File
out File
char *
inout File
Table 2-1
There is no Perl column in the previous table because in the Perl case functions
don’t have a signature.
Another important thing to have in consideration is that we do not recommend
the use of output scalar parameters, because they will have a little influence in the
parallelism extracted from your code (it can be reduced). This only happens with
output, or inout scalar parameters, not with input scalars. So, if you don’t really need
a scalar value to go on with your algorithm (i.e. when you need this value to take a
decision), don’t put it as an out scalar_type.
We can see all this now in the matrix example. We are going to create a file
named matmul.idl. This file is going to have this content:
interface MATMUL {
void matmul(in File f1, in File f2, inout File f3);
};
10
So we have two input files, and an input/output file (where the multiplication is
going to be stored). Remember that we don’t have to add GetBlock and PutBlock
functions to this IDL file, because they are just functions to support our
implementation (they don’t have any computation).
If you don’t have your code structured in functions, this and next steps will be
not so easy, but won’t be difficult at all. You have to think what parts of your code are
needed to be run on the GRID, and write a line in your IDL file for each of these
parts. There is also mandatory to see what files and parameters will be needed as
inputs of this part of the code, and what files and parameters are considered as results
or outputs. You just have to write it following the syntax described above.
2.4 Writing the main program (master)
The main program that the user writes for a GRID superscalar application is
basically identical to the one that would be written for a sequential version of the
application. Maybe you will have to modify a bit your functions (that is, the header),
because you have to call now the functions described in your IDL file. If your
program was not written in functions, you will have to extract the code you have
identified to be run into the GRID from your main program, and call the primitives
that you have described in your IDL (each primitive corresponds to a part of your
code). This is like putting the code from a part of your program into a function, but
the functions won’t be written here. You can save the code into another file or leave it
here by now (outside the main source of your program).
Other differences would be that at some points of the code, some primitives of
the GRID superscalar must be called. For example, GS_On() and GS_Off() are called
at the beginning and at the end of the application respectively (even if this end is
caused by a premature exit). As these functions are defined in the GS_master.h file
(given with the GRID superscalar distribution), it is necessary to include this file.
Also you have to include app.h file (generated with gsstubgen1), because it contains
the headers of your new GRID superscalar functions (defined in app.idl).
In Perl case you must include the GSMaster module and the app module
(remember that the syntax is: “use GSMaster;”). The On and Off functions are called
as GSMaster::on(), and GSMaster::off(). And now your local functions are in an
external module, so you must call them beginning with app::your_function() (with all
parameters, of course).
Another change would be necessary on those parts of the main program where
files are read or written. Since the files are the objects that define the data
dependences, the run-time needs to be aware of any operation performed on a file.
Let’s see all those primitives. We have detailed Perl syntax in parentheses. Remember
to put the name of the module before the call (GSMaster::).
2.4.1 Special primitives
•
•
GS_On() (on()): Tells the GRID superscalar run-time that the program
is beginning. The best place of putting this is at the beginning of your
main code, but you can put it later, always considering that you cannot
call any GRID superscalar primitive or function if you have not called
first GS_On.
GS_Off(code) (off(code)): This call will wait for all remote tasks to end,
and will tell to the GRID superscalar run-time to stop. In order to
1
gsstubgen is a code-generation tool provided with the GRID superscalar distribution that
generates several files required to build a Grid-enabled application.
11
•
•
•
indicate an error situation (i.e. when your program has to end
prematurely because you detect an error) you have to set code to -1. Take
into account that this GS_Off(-1) will exit your main program. You can
put this also at the end of your code with GS_Off(0) (indicating that
there has been no error). GS_Off(0) won’t exit your main program, but
remember that you won’t be able to call any GRID superscalar primitive
or function from this point and till the end of your program.
GS_Barrier() (barrier()): In some special cases you may need this
advanced feature. Sometimes you might need all the submitted tasks to
finish, in order to take a decision and start working again. GS_Barrier()
allows you to do that kind of synchronization, as GS_Off does, but it
allows you to call more GRID superscalar functions later. Don’t use this
function unless you don’t have any other choice, because it can severely
slow the parallelization of your code.
GS_Speculative_End(my_func): This primitive will be covered in
more detail at chapter 2.6, because it tries to provide a more complex
behavior in your code. Basically, it waits till an exception has risen into a
worker, or till all previous tasks have ended. At the former case, a
function specified by the user will be executed. At the latter case, the
function won’t be called.
GS_Open(filename, mode) and GS_FOpen(filename, mode): As
explained in previous section 2.4, GRID superscalar needs to have full
control over the files. These primitives will allow you to work with files
while keeping GRID superscalar in control. They both return a descriptor
that MUST be used in order to work with these files (i.e. to call
read/write functions). These descriptors correspond to the ones returned
by your C library (when using open and fopen), so you won’t have to
change following C library calls that work with these file descriptors.
Modes currently supported are: R (reading), W (writing) and A (append).
Perl case is special, because several functions are defined:
open_r(*file_handle, file_name), open_w(*file_handle, file_name),
open_a(*file_handle, file_name).
Because some file renaming techniques are used to avoid data-dependencies
in your code (and so achieve more parallelism), you have to use this file
descriptor returned in order to work with the file. There is no guarantee that
the files will be available with the original name.
•
GS_Close(file_des) and GS_FClose(file_des): You have to call this
primitives to close the file you opened before. The previous file
descriptor explained as the return of the GS_Open and GS_FOpen
primitives must be used here as a parameter. You cannot forget this step,
or your GRID superscalar execution will never end. Working with Perl
you have to call close(*file_handle).
You have to replace your calls for opening and closing files by GRID
superscalar primitives to do this. There is no need to change your read/write calls.
Another important point is that you can not rename a file in your main code,
because this can affect GRID superscalar run-time behavior. If this renaming is
unavoidable, you can copy that file giving to the new copy the name you want, but
always using the GRID superscalar file primitives.
12
The current set of specific GRID superscalar primitives is relatively small, and
we do not discard the possibility that more primitives could be included in future
versions. However, what is more probable is that these functions will be hidden to the
programmer by writing wrapper functions that will replace the system functions.
In the matrix multiply example, our master will be:
#include
#include
#include
#include
#include
<time.h>
<stdio.h>
<errno.h>
"GS_master.h"
"matmul.h"
int main(int
{
long
char
FILE
argc, char **argv)
int t = time(NULL);
f1[15], f2[15], f3[15], file[15];
*fp;
GS_On();
......
for(int i = 0; i < MSIZE; i++)
for(int j = 0; j < MSIZE; j++)
for(int k = 0; k < MSIZE; k++)
{
sprintf(f1, "A.%d.%d", i, k);
sprintf(f2, "B.%d.%d", k, j);
sprintf(f3, "C.%d.%d", i, j);
//f3 = f3 + (f1 * f2)
matmul(f1, f2, f3);
}
GS_Off(0);
printf("Total time:\n");
t = time(NULL) - t;
printf("%d Hours, %d Minutes, %d Seconds\n", t/3600,
(t%3600)/60, (t%3600)%60);
return 0;
In this particular case, we just have to add GS_On() and GS_Off(0), because
matmul is defined exactly with the same parameters that in our sequential version. We
have decided to remove all the local functions that we don’t need, and leave them in
another file.
2.5 Writing the program tasks (worker)
Additionally, the user provides the code of the functions that have been selected
to run on the GRID. The code of those functions does not differ from the code of the
functions for a sequential application. The only current requirement is that they
should be provided in a separated file from the main program. This file must be called
app-functions.[c | pm] (remember that app is the name we gave to the IDL file).
Moreover, there are some basic rules to build it: you have to include GS_worker.h file
(given with GRID superscalar distribution) and app.h (generated by gsstubgen). This
file will have as many functions as defined in your IDL file, so you have to copy the
code of your functions here, or, if your code was not structured in functions, the parts
of the code according to the ones defined in the IDL file. You can find (and copy)
generated headers for your functions at app.h file. In Perl case you have to write your
app-functions.pm file also copying your functions, and you should look at the IDL file
13
and shift the parameters into variables in the same order. Remember to “use
GSWorker” module.
All file accesses performed inside those functions must be normalized. This
normalization process consists of making GRID superscalar aware of those accesses.
To accomplish that purpose, you must pass the name of each file that is to be used by
the target function as a parameter to that function. Then, the function will have to and
open and close the file using the name provided as a parameter. You must remember
that renaming techniques could have been applied to files, so you cannot refer to a file
with the name you think it has. You have to use the input/output parameters defined in
the function header. By the way, you are allowed to create a temporary file, with the
name you prefer (but ALWAYS referring to current working directory), and do
whatever is required. So you can’t create temporary files with other paths (absolute or
relative). All temporary files will be destroyed at the end of the task.
As an example, Figure 2-2 shows the code for the matrix multiply function.
#include
#include
#include
#include
#include
#include
<time.h>
<stdio.h>
<errno.h>
"block.cc"
"GS_worker.h"
"matmul.h"
#define BSIZE 2 //Blocks size in elements
block<double> * GetBlock(char *file, int rows, int cols)
{…}
void PutBlock(block<double> *A, char *file)
{…}
void matmul(char *f1,
{
block<double>
block<double>
block<double>
char *f2, char *f3)
*A;
*B;
*C;
A = GetBlock(f1, BSIZE, BSIZE);
B = GetBlock(f2, BSIZE, BSIZE);
C = GetBlock(f3, BSIZE, BSIZE);
A->mul(A, B, C);
PutBlock(C, f3); //A and B are sources
delete A;
delete B;
delete C;
}
Figure 2-2
We can see that our matmul-functions.c file needs to include the definition of
the block (block.cc), and define the size of the block. Also PutBlock and GetBlock
functions are required to get the blocks from disk to memory, and then proceed with
the multiplication. These functions could have been also defined in a separated file
and then included in matmul-functions.c.
There are some special variables and primitives that must be called when
creating the worker code. We will give more details in the following subsection.
2.5.1 Special primitives
14
•
•
GS_System(command_line): When you need to call an external
executable file (i.e. a simulator), you have to use GS_System, passing as
a parameter the command line to be executed. You can use an absolute
path or a relative path to call that program.
gs_result: This is not a primitive. This is a special variable that can be
used to pass an error code to the master, so the master can stop the
execution. If you don’t use it, gs_result defaults to 0 (that means no error
is detected in the task). If you detect an error, you can put an error code
in this variable. This code must be higher than 0, because 0 is used to say
that everything is ok, and negative values are reserved for the GRID
superscalar run-time. You can even build your own error code mapping
to detect what is happening in the worker by giving each number a
meaning.
And now we have all the programming work done, so we are ready for running
our application.
2.6 The exception handling mechanism
From version 1.6.0, GRID superscalar provides a mechanism for achieving
speculative execution of tasks. This mechanism is known as exception handling,
because the syntax is really similar to the exception treatment done in languages such
as C++ or Java, but its behavior is not exactly the same.
To understand the benefits of the exception handling we will provide an
example. Imagine that you want to call to a simulator as many times as necessary to
reach a goal. Each call will have different input parameters, so the output produced
will be probably different. A first option will be to check for the result of a simulation
when it ends, before launching another one. This is valid for a sequential
environment, but is not feasible in a parallel execution model (if you have to wait for
a simulation results before launching another one, no parallelism can be applied). And
a second option is to make a program that calls N times to your simulator (using
parallelism), and checks results at the end. If you do this, you will always have to do
all N simulations, even if in the first simulations you already have reached the
objective you were looking for. Therefore, sometimes we do more computation of
which is it really needed, and this is efficient neither for us, nor for the Grid.
Thus, as we can extract from previous explanations, we want a way of executing
simulations till we reach an objective, but taking benefit of parallelism, and not doing
more work of what is really needed. The exception handling mechanism will be the
answer to our pleas.
To enable the mechanism, you just have to call to the special primitive
GS_Speculative_End(my_func) (at the master), after calling to the functions that can
rise the exception (when the objective is reached). This primitive will wait till all
previous generated tasks end, or till an exception rises from a task. In the first case all
tasks will be executed, so the behavior is like any other GRID superscalar programs.
In the second case, all tasks that have been generated after the task that rises the
exception will be undone. This means that, if the task is pending it won’t be executed,
if the task is running it will be canceled, and if the task has ended its results will be
discarded.
It exists the possibility of calling a function when an exception rises. This is
done by passing a function pointer to the GS_Speculative_End primitive. This
function must accomplish some requirements: it has to be a function without a return
value, and without parameters. So with this function you can, for instance, print a
15
message to know that the exception has risen, or also you can modify a global
variable in your main program, so the rest of your algorithm will be aware about the
rising of the exception. If you are not interested in calling a function you just have to
pass a NULL as an argument.
As we previously stated, our mechanism is similar to the native exception
treatment in C++ or Java (it allows you to jump in the logical sequence of the code
when something happens), but in our case you have to take into account that the only
things that won’t be executed are the GRID superscalar generated tasks. All the
master code that will be found while generating the tasks will be executed. This is
really important to consider, because if you modify variables in your code inside the
speculative region, these modifications will be executed in all cases (whether the
exception comes or not).
In the worker part, everything is simpler. When you detect the situation to rise
the exception you just have to call GS_Throw. Consider that GS_Throw will make
your remote function return, so all code following this primitive is not going be
executed. Also take into account that if you call to GS_Throw at a worker and no
GS_Speculative_End is called at the master, an error will rise.
Now we are going to give an example, so everything will be clearer. The master
part could be:
#include "GS_master.h"
#include "mcarlo.h"
#define MAXITER 5
void myfunc()
{
printf("EXCEPTION received from a worker\n");
}
int main(int argc, char **argv)
{
......
GS_On();
for(int i = 0; i < MAXITER; i++)
{
Subst(referenceCFG, (double)i * 1111, newCFG);
Dimem(newCFG, traceFile, DimemasOUT);
Post(newCFG, DimemasOUT, FinalOUT);
}
GS_Speculative_End(myfunc);
printf("Execution ends\n");
GS_Off(0);
}
We have three operations: Subst, Dimem and Post. When an exception rises
from an operation, all following operations won’t be executed. For instance, imagine
that operation Dimem at iteration 2 causes an exception. This will mean that Post
operation of the same iteration 2 won’t be executed or will be discarded if it was
already executed. The same will happen for all operations at iteration 3 and 4.
In this example we consider that Subst operation will cause the exception. So,
the code for that operation will be like that:
void Subst(file referenceCfg, double seed, file newCfg)
{
char aux[200];
double r;
16
double pow;
long int t;
double rndNum;
t = time(NULL);
t += (long int) seed;
srandom((unsigned int) t);
pow = 2;
for(int i = 0; i < 30; i++)
pow *= 2;
r = ((float) random()) / pow;
rndNum = (double) (12 + (120 - 12) * r);
printf("RANDOM Number: %.2f Seed: %d\n", rndNum, (unsigned int)
seed);
sprintf(aux, "./CanviaBw %s %s %lf", referenceCfg, newCfg, rndNum);
gs_result = GS_System(aux);
if(rndNum > 50 && rndNum < 70)
GS_Throw;
}
Remember that GS_Throw makes your function return, so if there is any code
after that call, it won’t be executed. In our particular case we generate a random
number, from a seed, and if this number is into a desired range, we tell the master to
stop the computation.
Just to end this chapter, we have to remember to the reader that this feature has
been presented very focused to optimization solving environments for a better
understanding, but it’s not only useful for that. You can think of environments and
algorithms that when an event is received, change their behavior to follow with the
computation. This is in contrast to a mechanism that detects an error and stops
(gs_result provides that in GRID superscalar. See chapter 2.5.1).
2.7 Expressing constraints and cost between jobs and
machines
A Grid is typically composed of lots of different machines. They can be from
clusters to single personal computers, with different software installed, different
architecture, operating system, network speed, and so on. In this sense, there is a need
of expressing what elements compose this heterogeneity. And thus, if we have a
description of what is available in each machine, we can therefore ask for a concrete
feature in our grid. For instance, imagine that we want to execute an algorithm that
uses an external simulator. Maybe you don’t have this simulator installed in all the
machines that compose your grid, so it will be interesting to be able to say what
machines have the simulator available, and of course what jobs need that simulator to
be executed.
In order to implement this feature, GRID superscalar takes advantage of the
ClassAds Library, developed by the Computer Science department at the University
of Wisconsin. You can find more information and a complete documentation at
http://www.cs.wisc.edu/condor/classad/.
The interesting part to see in this chapter is how to specify constraints and cost
for a job. First we have to notice that the gsstubgen tool included from version 1.6.0
generates three extra files: app_constraints.h, app_constraints.cc and
app_constraints_wrapper.cc (as explained in chapter 3.2.3.1). The content of the last
file is not important, because, as its name states, it contains wrappers to call to the
functions defined in app_constraints.cc. If we edit app_constraints.cc we will see
several functions (two for each operation defined in the IDL file). The functions are
17
named operation_name_constraints and operation_name_cost, and they return a
default value (true for the constraints and 1 for the cost).
In order to specify a constraint, you have to build an Expression (basically a
string) with the requirements for your job, and return it in the corresponding function.
This expression must be of the format expected by the ClassAds library (similar to
those found in C/C++, with literals, aggregates, operators, attribute references and
calls to in-built functions). We will give you some basic guides to build an expression.
If you want to build more advanced ones, we recommend you to review the ClassAds
documentation.
You can state that a job must be executed in a machine with a concrete
architecture:
"(other.Arch == \"powerpc\")"
Note that a job ClassAd will be created, containing this string as the
Requirements of this job, and it will be tried to match with a machine ClassAd
(created from the machine information gathered with the Deployment Tool). So if you
want to refer to a machine attribute, you have to add the keyword other before the
attribute that you are referring. Current version supports this set of attributes for a
machine:
•
•
•
•
•
•
•
•
•
•
OpSys: Operating system at the machine. It’s a string.
Mem: Physical memory installed in the machine expressed in
Megabytes. Has type integer.
QueueName: Name of the queue where jobs are going to be executed.
Type string.
MachineName: Host name of the worker. Type string.
NetKbps: Speed of the network interface given in Kilobits per second.
Double type.
Arch: Processor’s architecture. It’s a string.
NumWorkers: Number of jobs that can be run at the same time in the
machine. Integer type.
GFlops: Floating point operations that the machine is able to perform in
a second, expressed in GigaFlops. It can be theoretical or effective (user
decides this when specifying machine characteristics in the deployer.
See chapter 3.2.1.2). Type double.
NCPUs: Number of CPUs the machine has. Integer type.
SoftNameList: List of software available in the machine. Its type is a
ClassAd list of strings.
We can use logical operators and arithmetic operators to build more complex
expressions. The SoftNameList is a special case. We have to call to a built-in function
to access its content. Here comes an example, which also includes the header of a
constraints function:
string Dimem_constraints(file cfgFile, file traceFile)
{
return "(member(\"Dimemas23\", other.SoftNameList))"
}
18
Using the function member we can check if “Dimemas23” is a member of the
machine’s SoftNameList. An important thing to know is that the attributes with string
values are case-insensitive. So it’s the same writing “Dimemas23”, than
“dimemas23”, and so on.
Don’t forget that if you don’t need to specify any constraints between your task
and the machines, the value that the function must return is true.
When working with GRID superscalar, all machine characteristics are specified
with the deployment tool (see chapter 3.2.1.2). All this information is later saved into
a file called project.gsdeploy in XML format. As this file is generated by the
deployment tool, there is no need to edit or modify this file by hand. But, if you edit
this file, you will see that is really self-explaining. If you search for a tag called
“master”, you are going to see all attributes that the master has. And the same happens
for the “worker” tag. Here comes an example:
<master name="kandake.cepba.upc.es"
installDir="/home/ac/rsirvent/McarloClAds" NetKbps="54000">
<directories>
……
</directories>
</master>
<workers>
<worker name="khafre.cepba.upc.es" deploymentStatus="deployed"
installDir="/home/ac/rsirvent/DEMOS/mcarlo" LimitOfJobs="5"
Queue="none" NetKbps="10000" Arch="i386" OpSys="Linux" GFlops="1.475"
Mem="2587" NCPUs="4">
<directories>
……
</directories>
<SoftName>Perl560</SoftName>
<SoftName>Dimemas23</SoftName>
</worker>
......
</workers>
In the master you can see the name, the working directory (installDir), and the
speed of its network interface expressed in Kilobits per second (NetKbps). In the
workers more information is available: the name of the machine, the working
directory, number of jobs that can run simultaneously (LimitOfJobs), name of the
execution queue, speed of the network interface, architecture, operating system,
Gigaflops of the machine, physical memory and number of CPUs. And after that, with
the “SoftName” tag it describes the software available on the machine. In this case we
have Perl version 5.6.0 and Dimemas version 2.3.
As you can guess, the decision of how a software name must be specified, or
other decisions for matching information between jobs and machines, is always up to
the user. When you configure machines, you can state that you have software “A” at a
machine, and then you have to ask for that software that you named “A” when
creating the requirements of the job. The same happens when deciding if GFlops are
theoretical or effective, if Mem is physical memory, virtual memory, available
memory, … User can self-tune this attributes for its own purpose.
Finally we are going to see how to specify the cost of an operation. As we said
before, the name of the function that we have to edit is operation_name_cost (at
app_constraints.cc file). The function returns a double, which is the time in seconds
that the task is going to spend into a machine. There are two functions provided by
GRID superscalar helping the user to calculate this time:
• GS_GFlops(): GigaFlops of the machine that is going to perform this
task. This is extracted as defined at the Deployment Tool.
19
•
GS_Filesize(name): Size of a file in bytes. It is mandatory to use this
primitive when a size of a file is needed because the file doesn’t have to
be physically in the master machine.
To illustrate its use, we give an example:
double Dimem_cost(file cfgFile, file traceFile)
{
double factor, operations, cost;
factor = 1.0486-e06; //How size of trf affects the number of
ops generated
operations = GS_Filesize(traceFile) * factor;
cost = operations / GS_GFlops();
return(cost);
}
In this example we have empirically determined how the size of a trace file
affects to the number of operations generated by Dimemas in order to solve the
simulation. So we multiply this factor by the size of the trace file. And we finally
divide the operations that have to be solved by the power in GigaFlops that the
machine has. The result is the time in seconds that the simulation is going to last.
Remember that if you don’t want to specify the cost of executing your
functions, you can leave the default value 1 when the function returns.
2.8 Hints to achieve a good performance
When programming your application, you can take into account several
indications in order to achieve a better performance than if you don’t. This is not a
mandatory thing to do, because you can have already your code programmed and you
don’t want to severely modify the sources. So you can run your application without
knowing anything about this section, but we recommend you to follow reading
because maybe with some little changes you can really increase the performance of
your application.
The first restriction we find when trying to run some tasks in parallel is when a
true data-dependence is found. This happens when a task wants to read a file (input
File) that is generated at a previous task (output File). If the input file is not really
necessary (i.e. it could be some debug information, not needed data) we recommend
that you do not include this file as an input file in the task definition at the IDL file.
You could also think about other data-dependencies, when a task needs to write
in the same file that a previous one, and when a task needs to write into a file that has
first to be read by another task. You don’t have to worry about these dependencies,
because GRID superscalar will eliminate them.
The next indication is about out scalars. In section 2.3, we have described that
you can define a parameter as an output scalar, but we also point that when you define
this kind of parameter, the performance could be worst than if you don’t. That is
because you can be using this parameter immediately after calling to this IDL defined
function. Then, the GRID superscalar runtime doesn’t have any other possibility than
to wait for this task to complete, so this output scalar will be available. This wait can
be hidden if GRID superscalar has enough tasks available to be run in parallel, and
when the task with the output scalar is early scheduled for execution. If we don’t meet
this conditions, performance will diminish.
20
Another thing to avoid when trying to get a better performance is the call to
GS_Barrier. We have presented it as an advanced feature in section 2.4.1 because in
most of cases you will never use this call. In other cases, you may need it. When you
call to GS_Barrier you tell the GRID superscalar run-time to continue to run previous
generated tasks, but wait for all of them to finish. This waiting means that no new
tasks are going to be generated from this point (main code is not going to continue)
till all previous tasks are done. This synchronism point makes you to loose potential
parallelism. So we recommend that you don’t use this call unless there is no other
option.
The last thing you can consider is to turn GS_SOCKETS to 1 in order to allow
communications by sockets. In current version this is only allowed when working
with the C/C++ bindings (in Perl is not supported). GRID superscalar works with files
to achieve communication between the master and the workers. But, when all
involved machines have external connectivity, you can set this communication to be
done by sockets. This way of sending messages is faster, because no information is
written to disk, and it is sent directly to the destination. We recommend that you take
benefit from this advanced feature if your machines accomplish the requirements.
2.9 Known restrictions
You have to remember always that GRID superscalar run-time considers files as
the main operands of each function (they define the data-dependencies and they have
the main information required to execute a task, and to store results). In order to
achieve better performance when executing your application, GRID superscalar uses
renaming techniques in your files. This way more parallelism can be extracted from
your algorithm. But, that feature has several implications regarding file names when
programming with GRID superscalar. Here is the list of restrictions.
•
•
•
•
•
•
It is not allowed to change your working directory in your program
before calling to GS_On(). The runtime searches for configuration files
in the current working directory when GS_On() is called.
You have to use GRID superscalar special primitives to open and close
files (section 2.4.1) in the master. And you must use the file descriptors
returned by this functions to work with the files. You can never suppose
that a file has its original name.
You cannot rename files at the master side in your program. If this
renaming is unavoidable, you have to copy the file to a new one with the
new name (but remember to use GRID superscalar special primitives to
handle files while doing this copy).
You cannot remove files that are used as input or output parameters in
your IDL defined functions before calling to GS_Off, because you
cannot do it in a safe way.
In the worker side, you cannot call an external application in your
functions code by calling “system” (provided by the C library). You
must use GS_System (section 2.5.1). But you can use a relative or
absolute path when calling to this external application.
Inside worker functions it is not allowed to refer to a file by its original
name when this file is passed as a parameter from the function. You
must use the parameters defined in the function. However, you can
create a temporary file in current working directory, and refer to it by its
name.
21
•
•
•
You cannot define the same working directory between a master and a
worker (section 3.2.1.5).
It is not available to define output files that belong to a shared disk. This
feature is provided to share source files (section 3.2.1.6).
Perl binding doesn’t allow you to set GS_SOCKETS to 1.
You can see that not all this restrictions are because of the file renaming done
by GRID superscalar. But you must consider them all.
22
3 Running the developed program
In order to run our developed application, we have to prepare the binary files in
every machine that will be used for running our program, other configuration files and
environment variables. In current version of GRID superscalar we provide a
deployment environment, which will automate all this steps. Anyway, it’s always
good to know how the internals work, so we will also explain how to prepare all
execution files by hand, or even using the gsbuild tool.
This section will explain how to deploy (copy and compile) your code, how to
define environment variables, and finally some basic Globus commands needed to run
your program if you are not working with the deployment tool.
First of all we can talk about installation requirements. Current version of GRID
superscalar uses Globus Toolkit 2.2 or 2.4 (2.0 is not compatible). You need at least a
client installation in the master machine, and a server installation in each machine that
is going to be a worker. You also need to have the gsiftp service running in every
machine involved in the computation (included in Globus Toolkit distribution), so
transfer of files between machines can be done. From GRID superscalar you will need
the GS-master library at master machine, and the GS-worker library at worker
machines. You will need also the gsstubgen tool at the master side, and the library
includes (GS-master.h at the master, GS-worker.h at the workers, and gs_base64.h at
every machine). All these files are included in the GRID superscalar distribution.
The GRID superscalar also includes a tool called moved-libtool.sh. This tool
repairs the library files if you decide to move them to a new directory. You have to
use it like this:
moved-libtool.sh new_path_for_the_libraries $GS_HOME/lib/*.la
We will suppose from now that you have an installation of GRID superscalar
under $GS_HOME directory.
Other libraries required are the ClassAds library, developed by the Condor
Team, from the Computer Science department at the University of Wisconsin
(http://www.cs.wisc.edu/condor/classad/), and the XML C parser and toolkit of
Gnome, more known as libxml2 (http://www.xmlsoft.org/). You can download and
install both before working with GRID superscalar. The master program will need to
link against these two libraries.
3.1 Quickstart
These are the main steps that you have to follow when running you GRID
superscalar enabled application.
•
•
Install Globus 2.2 or 2.4 (not 2.0 or 3.x) and GRID superscalar libraries.
Copy in the corresponding machines the files that each of them needs.
You can automate this step using our deployment tool. In C/C++ case
you need app.h, app-stubs.c, app_constraints.h, app_constraints.cc,
app_constraints_wrapper.cc, and app.c at the master, and app.h, appworker.c and app-functions.c at the workers. When working with Perl
involved files are app.pl, app.so and app.pm at the master, and appworker.pl, app-functions.pm at the workers (section 3.2.3). Compile
when needed.
23
•
•
•
Consider modifying environment variables to change their default
values. You can set the run-time to write debug information, leave logs
at workers, pass messages with sockets instead of files, define which
port uses your gsiftp servers, length of your parameters, length of paths
and URL’s, length of messages and length of the RSL string that
describes each job. If you change a value, do the same at the worker side
if this variable applies also at the worker side. Also define
LD_LIBRARY_PATH when needed (section 3.3).
Start your Globus proxy with grid-proxy-init (if it wasn’t already
started). This is not necessary when working with the deployment tool.
Check that no file named .tasks.chk exists if you want to start the
computation from the beginning.
The final step is running your application by simply executing the binary that
contains your main code.
3.2 Copying and compiling your code
We already know that there is a part of the code that is going to act as a master,
and another part that is going to be the worker’s code. We have to compile our master
code and the worker code has to be sent and compiled at the machines that are going
to be the workers. But, how can we do this? We give you three options:
•
•
•
Using the deployment tool.
Using the gsbuild tool.
Doing everything by hand.
Of course the recommended one is to use our deployment tool, that automates
the steps of sending and compiling the code in all machines involved in the
computation. But, as always, it’s good to know other alternatives, because it can
happen that you are not able to run the deployment tool (if you don’t have the right
runtime environment, …). Or maybe there are some users that prefer to make things
by hand in order to learn the internals of the deploying process. In this sense, we will
try to give a complete idea of that in this chapter.
3.2.1 The deployment tool
Once you know that your code can be built you are ready for testing and
deploying it. This section explains how to use the deployment tool for those purposes.
3.2.1.1 Running the deployment tool
The deployment tool is run on the host that will hold the master program. To
start it you must launch the “deployment-center” tool from the command line:
deployment-center
This tool requires the Java Runtime Environment version 1.4 or later to run. If
you cannot find it, please consult with your system administrator.
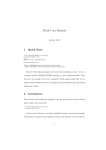
When you run the deployment tool for the first time a window will appear
asking to select the fully qualified domain name of your local machine and to specify
its network bandwidth. This data persists across executions and will never be asked
24
again. If you don’t know the proper answers, please contact with your administrator.
This window looks like this:
Figure 3-3
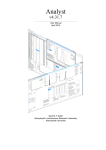
Next, the deployment tool will check if you have a valid Globus proxy
certificate. It you don’t have one, it will ask you for your certificate password and it
will create a new proxy certificate with the supplied data. The corresponding window
is shown below.
Figure 3-4
25
After the initialization steps, you are presented with the application main
window. It looks like this:
Figure 3-5
The icons in the toolbar have the following functionalities:
Create a new project
Open an existing project
Save the current project
Save the current project with a different name
Show or hide the hosts window
Renew the globus proxy certificate
Most of those icons have menu equivalents.
The rightmost part of the toolbar contains he remaining time for the expiration
of your globus proxy certificate.
3.2.1.2 Configuring the available hosts
Before you can start any deployment you must enter the information of the
available machines. This process must be repeated for each machine, but the data will
persist through later executions and no reentry will be required. This information is
shown in the host configuration window. To open it you have to press the show hosts
window button ( ) from the toolbar.
26
This is the aspect of the host configuration window:
Figure 3-6
The icons of the toolbar have the following functionalities:
Add a new host
Modify a host configuration
Remove a host permanently
To add a new host you must press the add new host button ( ). This will pop
up a new window asking for the host data. This window has four tabs. The first tab
looks like this:
Figure 3-7
27
The meaning of each field is the following:
•
•
•
•
•
•
•
•
•
•
Host name: Fully qualified domain name of the host you are adding.
Operating system: Name of the operating system that runs on the host.
Architecture: Architecture of the host processors.
GigaFlops: GigaFlops of the host.
Network bandwidth: Network bandwidth of the host in kilobits per
second.
Memory size: Memory size of the host in Megabytes.
CPU count: Number of CPUs that the host has.
Min port and Max port: Port range to be used for machines that have
inbound port restrictions. If you think that machine may have inbound
port restrictions and you don’t know them, please consult with the
machine administrators. The default values match the full port range.
Globus path: Full path of the Globus installation prefix. If you don’t
know it, you may ask your administrators.
GRID superscalar path: Full path of the GRID superscalar installation
prefix. If you don’t know, you may ask your administrators.
Some of these parameters are flexible in the sense that you can set GigaFlops as
effective or peak, Memory as physical, free, virtual, … The only requirement is that
you give the same meaning to these attributes here and when specifying constraints at
the jobs (see chapter 2.7).
The second tab contains queue information. Queues are commonly used in
machines that have many processors and in clusters with many nodes. If the host you
are adding has globus configured to use queues, then you must configure them,
otherwise you can skip this part. The queues tab looks like this:
Figure 3-8
28
The first button on the toolbar allows you to add a new queue. When you press
it, a new empty row will appear on the queue list. You can enter the name of the new
queue in that row. The second button on the toolbar allows you to remove a queue. To
do that you must first select it from the list and then press the remove button. At any
time you can rename a queue by editing its name in the list.
The last item of the toolbar contains the name of the queue that will be used to
perform the deployment operations of that host. You can select any queue you have
entered.
The software packages tab contains the list of software packages installed in the
host. If this is the first time you want to add software to a host, then this list will be
empty. To create a new software package you can push the first icon in the toolbar. A
window will pop up asking for the name of the software package. Take into account
that the name you specify here will be case-insensitive when specifying constraints
for a job (as explained in chapter 2.7). This window looks like this:
Figure 3-9
When you create a software package, this package will appear in the list of
software packages of all the hosts unchecked as non-available except for the host you
are adding. In this case, the software package will be selected as available.
The following image shows the software packages tab of our example.
Figure 3-10
29
The last tab allows entering environment variables that will be used during the
deployment process such as what compiler to use. In most cases you will not need to
add new environment variables. The environment variables tab looks like this:
Figure 3-11
The toolbar icons work identically to those in the queues tab. In this case the
row has two columns: the variable name and its value.
Once all the information has been introduced and the “OK” button has been
pressed the new host will appear in the hosts window. From this point forward, any
project you create or open will have that host available for joining the deployment.
All data corresponding to the hosts is stored in a file called “config.xml” inside
the “.gridsuperscalar” subdirectory on your home directory.
30
The image below shows the results of adding two hosts.
Figure 3-12
The lower part of the main window is dedicated to the logging area. In this case
it shows that the hosts that has been added are being checked and one of them has
failed the test. The checking process ensures that the configuration you provided for
that host is a working configuration and thus the tool will be able to deploy there any
correct program you choose. It accomplishes this by checking that the host is
reachable, that all required services are running properly and that all the required
programs and libraries are installed in that host.
This checking process is performed on the background and will not interfere
with your work. Whenever you start the deployment tool it will proceed automatically
to check all the hosts that you have configured. While this process is running you may
use the tool normally.
31
Whenever a host check has finished, a new entry appears in the logging area. If
the check failed, the entry will be shown in red as in the last example. In that case you
can double click the entry to see a more accurate description of the error. An example
follows:
Figure 3-13
The second and third toolbar buttons of the hosts window allow you to modify
and remove hosts respectively. To use any of those functionalities, you must first
select the host that is to be modified or removed. All operations that you perform on
the hosts window will affect all your projects. For example, if you delete a host, your
projects will not be able to use that host again.
At any time you may close the hosts window or press the show/hide hosts
window button to close it.
3.2.1.3 Creating a simple project
The deployment tool is designed to work with projects. Each project
corresponds to an application with one IDL file and a set of parameters that determine
how it is to be deployed.
To create a new project you have to press new project button ( ) in the main
window or select the corresponding option from the File menu. Then the deployment
tool will pop up a new window asking for the IDL file used in that project. This file
must reside in the top of your source directory. The window looks like this:
Figure 3-14
32
Once you have created your project, a window will appear with your newly
created project. It will look similar to this:
Figure 3-15
3.2.1.4 Adding hosts to your project
The project window is composed of six tabs. The first tab is the available hosts
tab. This tab contains a table with all the hosts that have been added in the hosts
window and that can be used for workers on your project. The columns of the table
have the following contents:
•
•
•
•
•
Use: It has a check box that is checked if the host is to be used in that
project. When it is to be used but the deployment hasn’t finished yet or it
finished unsuccessfully then it has additional text indicating that status.
Host name: Fully qualified domain name of the host.
Availability: Indicates if the host has passed all checks and thus it is
ready to be used to deploy a worker or if it has failed or has not been
checked yet.
Execution queue: Queue that will be used to execute the worker
program in that host. This field is only editable if that host is to be used
by that project.
Job limit: Maximum number of concurrent tasks that the host will hold.
To use a host in a project you must check its check box on the use column.
After five seconds the deployment tool will start to deploy the worker program to that
33
host. If there are more hosts being deployed the tool may wait until other deployments
have finished before starting the deployment on that host. During that time or after the
deployment you can uncheck the use checkbox.
Deployment of worker programs is executed on the background. This process
does not interfere with normal program usage. The deployment consists of sending
the source code files, compiling them and linking them into the worker program.
For those selected hosts that use queues, one queue must be selected for
execution. You can set it in the fourth column. If you click over a cell a drop down
menu will appear with all available queues for that host. You can then select the
correct queue. An example is shown below:
Figure 3-16
Selected hosts will also have the Job limit cell available for editing. This number
represents the maximum number of jobs that the host can have at a given time. For
hosts that do not use queues it represents the maximum number of tasks that the host
will run concurrently. For hosts that use queues it represents the maximum number of
tasks that the queue will have at a given time (these tasks can be running or waiting
for resources, as determined by the queue system).
3.2.1.5 Using hosts with a common installation directory
The “working directories” tab looks like this:
34
Figure 3-17
This tab shows the installation directory for each selected host and its virtual
disk name. The installation directory is shown in the table’s second column. The
virtual disk name is show in the third column. The disk name is a label that is
assigned to that particular directory of that host. If two or more hosts have the same
label it means that their installation directories are shared.
By default each machine is given a generated disk name for its installation
directory. You can edit the disk name on the table. This allows you to set the same
name for the installation shared disks or change the names for more descriptive ones.
Take into account that you cannot set a shared working directory between the
master and a worker, as stated in chapter 2.9.
3.2.1.6 Sharing directories between hosts
The next tab is the “shared disks” tab. An example follows:
Figure 3-18
The shared disks tab contains shared disks other than the installation disks. The
shared disks tab allows specifying shared disks between hosts. This allows the
runtime to skip transferring files across the network when they are already in a shared
directory. Remember that you cannot use a shared directory to leave your output files,
as it is said in chapter 2.9.
The columns have the same order and semantics as in the working directories
tab. There is a toolbar with two buttons. The first allows adding an entry. The second
allows removing an entry.
When the first button is pressed, the deployment tool shows a new window
asking for the entry information. This is the aspect of the window:
Figure 3-19
35
The second and third columns of the table can be edited directly.
3.2.1.7 Deploying the master program
The “local” tab allows deploying the master program. By default it is deployed
into a subdirectory of your home directory using the name of your project with
“-master” appended to it.
This tab has only a button. This button launches de local compiling process and
generates all required configuration files for the GRID superscalar master library. If
you have performed changes to the project after launching the local deployment, then
you should perform the local deployment again. This will make the configuration files
reflect the changes of the project.
3.2.1.8 Other considerations
The last tab is the logging tab. This tab contains data about the deployment
progress. If there has been any problem performing the deployment, a log entry will
appear in that tab with its contents in red. You can double click it similarly to the
application logging area and get a more detailed explanation of the problem.
At any time you may save your project by pressing the save project button ( )
or selecting the save option from the File menu. When a project is saved, it also saves
the deployment status for each host. If a host is still being deployed, it will be saved
as ‘pending deployment’ and the next time that the project is loaded, the tool will
restart the deployment on that host.
3.2.1.9 Deployment of complex applications
To deploy a complex application you will need to build first a compiling
environment. The procedure for doing this is explained in chapter 3.2.2.1.
After these steps you must first uncheck the use default parameters check box
when you create your deployment project. The creation window will expand and show
more entries as shown below:
Figure 3-20
In addition to the IDL file, you must also provide the following information:
• Name of your project
• Shell script that must be executed to build the master program
36
•
•
Shell script that must be executed to build the worker program
Directory where your master program will be installed
Each building script must reside at the top of its respective source directory.
Typically you would have a customized set of automake file sets created by the
gsbuild copy tool. In this case you would edit your autogen.sh file to suit your needs
and use it as your building script. You can take advantage of the following
environment variables in your worker building scripts:
•
•
GSS_LOCATION: Grid superscalar base installation directory on the
target host.
GLOBUS_LOCATION: Globus base installation directory on the
target host.
The deployment tool will also prepend the GSS_LOCATION/bin directory to
the shell search path and the GSS_LOCATION/lib directory to the library search path
before running the building scripts.
A building script may look like this:
#!/bin/sh
set -e
aclocal
automake -a -c
autoconf
./configure --with-gs-prefix=$GSS_LOCATION
make
As we stated before, you have to first prepare a compiling environment, as
explained in chapter 3.2.2.1.
3.2.2 The gsbuild tool
The “gsbuild” command line tool allows you to compile your application. There
are two parts to be compiled: the master program and the worker program. The master
contains the part of the program that performs calls to the functions that are to be
executed on the grid. The worker program contains the implementation of those
functions wrapped into a program. This program is run in a remote machine by the
GRID superscalar runtime whenever a function must be executed.
GRID superscalar provides facilities that allow you to build and deploy simple
applications without needing building systems like makefiles or scripts. Although it is
possible to use GRID superscalar with your own building system, you may find this
capability useful.
Applications that use the simple building capability must adhere the following
file structure:
• app.idl: Containing the interface definition of your functions as explained
before.
• app.c: Containing the main program.
• app-functions.c: Containing the functions of the program that are to be
executed on the grid.
Additionally they may provide the app_constraints.cc file for function cost and
constraints specification.
You can use any name instead of “app”. This file structure forces you to use a
unique file for your main program and a unique file for your functions. If your
37
application diverges from this model, you can’t use the simple building capability.
You also need to have previously installed in your system the tools automake,
autoconf and the library named libxml2 version 2.6.x.
If you execute it without parameters, the help will appear:
Usage: gsbuild <action> <component> <appname>
Available actions:
copy
Setup a compilation environment for the component for
customization.
build
Build the selected component.
clean
Remove generated binaries.
Available components:
master
Build or copy the master part.
worker
Build or copy the worker part.
all
Build or copy the master and workers parts.
<appname> corresponds to the name of the application used for source
files and IDL files.
There are some things to take into account before using the gsbuild tool. You
just can choose the build option when your code is done in C (not C++). If your main
code is done in C++ and named <appname>.cc (or other) you will have to use the
copy option, which will create an environment to configure your compilation options.
When this configuration environment is ready, you just have to call configure:
./configure --with-gs-prefix=$GS_HOME
Here $GS_HOME means the path were you have installed GRID superscalar.
3.2.2.1 Developing complex applications
Complex applications may not always have the structure required for being built
automatically using the gsbuild tool. The gsbuild tool has been extended with a copy
mode to cover those cases. To use this mode you must first separate the master and
worker parts into different directories containing the corresponding original code and
the IDL file. You must execute the gsbuild command in each directory. An example
follows:
gsbuild copy master app
The gsbuild tool will copy and create the required files for the automake and
autoconf tools. The generated files contain rules to generate the Makefile for an
application that follows the file structure explained in the previous section. You must
customize those files according to your application structure and requirements.
The generated files are:
•
•
38
Makefile.am: Contains a skeleton of the final makefile. This file is the
one that contains rules that specify which files must be compiled and
how to link them into the final program.
configure.in: Contains directives for checking where are located the
required tools and libraries. It is used by autoconf to generate the final
configure script.
•
autogen.sh: This is a script file that executes all commands required to
create a Makefile. This file must be executed every time that changes
have been made to the “Makefile.am” or “configure.in” files.
The following two sections give a very light overview of the automake and
autoconf systems. It is by no means complete. If you wish to use those tools to their
full potential, please refer to their respective documentation.
3.2.2.1.1 Editing the Makefile.am file
An example of a generated Makefile.am for a master follows:
bin_PROGRAMS = mcarlo
mcarlo_SOURCES = mcarlo_constraints.cc \
mcarlo_constraints_wrapper.cc \
mcarlo-stubs.c \
mcarlo.c
mcarlo_LDFLAGS =
GSSTUBGEN_FLAGS = -n
mcarlo_constraints.cc mcarlo_constraints_wrapper.cc mcarlo-stubs.c
mcarlo.h: mcarlo.idl
$(GSSTUBGEN) $(GSSTUBGEN_FLAGS) mcarlo.idl
The PROGRAMS rule indicates the name of the resulting executable.
The SOURCES rule contains the names of the source files that must be
compiled and linked to generate that executable. The first file corresponds to the file
that specifies the function cost and constraints. The second and third files correspond
to files generated by the gsstubgen tool that must be compiled in. Finally, the fourth
file corresponds to the expected name of the file containing the main code. You may
replace it with the names of your source files.
The LDFLAGS rule contains parameters that are to be passed to the linker. Here
you can specify additional objects and libraries. For libraries you would typically use
configure.in rules as explained in the next section.
The rest of the lines contain makefile rules for the stub generator, explained in
chapter 3.2.3. You can add additional makefile rules you may need for your specific
case.
3.2.2.1.2 Editing the configure.in file
The generated configure.in file contains rules that specify the checks that must
perform the configure script. One of those checks is the check for additional libraries.
This is done with the AC_CHECK_LIB directive as follows:
AC_CHECK_LIB(m, sin)
In this example, the configure script would check that the m library (the
mathematical library) contains the “sin” function and will add it and its dependencies
to the linker parameters.
Some libraries provide their own macros that may be more helpful. For
example, the GTK+ library provides the AM_PATH_GTK macro, which performs
additional validity checks and is preferable than using an AC_CHECK_LIB directive.
3.2.2.1.3 Generating the Makefile
39
The next step is to generate the Makefile. This is accomplished by executing the
generated autogen.sh script. This will first run the automake and autoconf tools to
generate a configure script. Next it will run the configure script with the correct GRID
superscalar path. The configure script will search for the required compiler, linker,
include headers, libraries, tools, etc in the platform that is run on and will generate a
Makefile for that configuration.
When you have the Makefile you may use the “make” command to build the
final program.
For more information on the automake and autoconf tools, please visit the
documentation at the GNU web site.
3.2.3 Copying and compiling your code by hand
It’s essential to know that some files are going to be at the master side, and
some files are going to be at the worker side. But, as we are now doing all by hand,
we have to first generate all files that must be compiled, and later we will copy files
where they are needed, and compile them at target machines.
From the interface definition that we have done in chapter 2.3, some code is
automatically generated by gsstubgen, a tool provided with the GRID superscalar
distribution. This automatically generated code is mainly two files: the function stubs
and the skeleton for the code that will be run on the servers. If you are not familiar
with this two terms (stubs and skeleton) we can say as a summary that stubs are
wrappers on the client (or master) side, and skeletons are wrappers on the server (or
worker) side. Some specifications are needed in order to communicate a client and a
server, and this wrappers are the key point to do it (they can code or decode
parameters, pass some information between them, ...). These wrappers can be also
described as glue code between your code and GRID superscalar library. This code
redirects your function calls to the GRID superscalar library and allows the library to
schedule those function calls for execution on the grid. The gsbuild tool performs the
stub generation automatically when it is used in the building mode. It is also used to
generate the worker main code that links with the function implementations.
Normally you will not need to call this tool, as the gsbuild command and the
generated makefiles will run it with the proper parameters. It can be just necessary
when you decide to configure everything by hand.
The “gsstubgen” usage is the following:
Usage: gsstubgen [-spxn] [-P<perl-binary>] <input file>
The output files are generated according to the input filename.
-s Generate swig files.
-p Generate perl files.
-P Specify which perl interpreter to use (default /usr/bin/perl).
-Q Specify the directory where the GRID superscalar perl modules
are installed.
-x Generate XML formatted file.
-n Do not generate backups of generated files.
From the user’s point of view, he just has to call in C/C++ case:
gsstubgen app.idl
Or in Perl case:
gsstubgen –s –p app.idl
40
At current version of GRID superscalar we have bindings for C/C++ and Perl.
We are going to see in more detail what happens in each case. These bindings have in
common that the name chosen for the IDL file will determine the name of the
generated files.
In both versions we need an additional file called workerGS.sh that will define
all environment variables at the worker side. We will talk about this in the next
section 3.3.
3.2.3.1 C/C++ Binding
For C and C++, the files generated by gsstubgen are: app-stubs.c, app-worker.c,
app.h, app_constraints.h, app_constraints.cc and app_constraints_wrapper.cc. The last
three files have been covered in more detail in chapter 2.7, although you must know
that they are ready for compile when generated.
app.c
User provided files
Generated files
app-stubs.c
app.h
app
master
app_constraints.cc
app.idl
Stub
Generator
app_constraints.h
app_constraints_
wrapper.cc
app-worker.c
app
worker
appfunctions.c
Figure 3-21
The “app.h” file is a header file. This file contains the C definitions for the
functions that you have declared in your IDL file. If it doesn’t match your function
definitions, you must modify your IDL file and reprocess it or modify your functions
and function calls accordingly.
The “app-stubs.c” file contains stub implementations of your functions. They
perform parameter conversions and call the GRID superscalar library. They work as a
glue and allow you to use the same interface to your functions as if you were linking
directly with them. This file must be compiled and linked with your main program
and the GRID superscalar master library. This will generate the master executable.
The “app-worker.c” file contains the worker main code. This code calls your
real function implementations. You must compile it and link it with your application
functions and the GRID superscalar worker library. This will generate the worker
program.
41
The other three files are used for function cost and constraints specification. The
“app_constraints.h” contains definitions used by the other two files.
The “app_constraints_wrapper.cc” contains glue code that is needed by the
GRID superscalar library.
Finally, the “app_constraints.cc” contains functions that determine the cost and
constraints of each function defined in the IDL file. When the gsstubgen runs for the
first time, it will create this file but afterwards it will not overwrite it. By default it
contains each function is unconstrained and has a cost of one unit of time. The user
may edit this file to suit its needs.
From Figure 3-21 we can extract where each file has to be located, just adding
that app.h file is needed in master machine and in worker machines.
We can see now how will be this files in our matrix example. Figure 3-22 shows
the stubs file that will be generated for the IDL file (defined in previous section 2.3)
when the C/C++ interface is used. For each function in the IDL file, a wrapper
function is defined. In the wrapper function, the parameters of the function that are
strings and filenames are encoded using base64 format. Then, the Execute function is
called. The Execute function is the main primitive of the GRID superscalar interface.
It’s the entrance point to the run-time.
#include
#include
#include
#include
#include
#include
#include
<stdio.h>
<stdlib.h>
<limits.h>
<string.h>
<gs_base64.h>
<GS_master.h>
"matmul.h"
int gs_result;
void matmul(file f1, file f2, file f3)
{
/* Marshalling/Demarshalling buffers */
/* Allocate buffers */
/* Parameter marshalling */
Execute(matmulOp, 3, 0, 1, 0, f1, f2, f3, f3);
/* Deallocate buffers */
}
Figure 3-22
The other file automatically generated by gsstubgen is shown in Figure 3-23.
This is the main program of the code executed in the servers. Inside this program,
calls to the original user functions are performed. Before calling the user functions,
the parameters are decoded.
#include
#include
#include
#include
#include
#include
#include
<stdio.h>
<stdlib.h>
<limits.h>
<string.h>
<gs_base64.h>
<GS_worker.h>
"matmul.h"
int main(int argc, char **argv)
42
{
enum operationCode opCod = (enum operationCode)atoi(argv[2]);
IniWorker(argc, argv);
switch(opCod)
{
case matmulOp:
{
matmul(argv[3], argv[4], argv[6]);
}
break;
}
EndWorker(gs_result, argc, argv);
return 0;
}
Figure 3-23
Final step in C/C++ binding is to compile all parts. You can take our example as
the base to make your own Makefile:
CC=gcc
CFLAGS=-g -Wall –I$(GS_HOME)/include
CXX=g++
CXXFLAGS=-g -Wall –I$(GS_HOME)/include
all: matmul
matmul-stubs.c matmul.h: matmul.idl
gsstubgen matmul.idl
matmul-clad.o: matmul-clad.cc
g++ -Wall -g –I$(GS_HOME)/include –I$(CLAD_HOME)/include -o
matmul-clad.o -c matmul-clad.cc
matmul_constraints.o: matmul_constraints.cc
g++ -Wall -g –I$(GS_HOME)/include –I$(CLAD_HOME)/include -o
matmul_constraints.o -c matmul_constraints.cc
matmul_constraints_wrapper.o: matmul_constraints_wrapper.cc
g++ -Wall -g –I$(GS_HOME)/include –I$(CLAD_HOME)/include -o
matmul_constraints_wrapper.o -c matmul_constraints_wrapper.cc
matmul.o: matmul.cc matmul.h
matmul: matmul.o matmul-stubs.o
g++ -Wall -g matmul.o matmul-stubs.o –L$(GS_HOME)/lib -o matmul
-lGS-master
matmul: matmul.o matmul-stubs.o matmul_constraints.o
matmul_constraints_wrapper.o
g++ -Wall -g matmul.o matmul-stubs.o matmul_constraints.o
matmul_constraints_wrapper.o –L$(GS_HOME)/lib –L$(CLAD_HOME)/lib
–L$(XML_HOME)/lib -o matmul -lGS-master -lclassad -lxml2
clean:
rm -f matmul *.o core* *~
43
As this master Makefile rules describe, our matmul.o must be linked with
matmul-stubs object, all the constraints objects and the libraries GS-master, ClassAds,
and XML2. Remember that your app.c code must include GS_master.h (given with
GRID superscalar distribution) and app.h in order to compile correctly.
At the worker we could have this Makefile:
CC=g++
CFLAGS=-g -Wall -I$(GS_HOME)/include
all: matmul-worker
matmul-worker: matmul-worker.o matmul-functions.o
g++ -Wall matmul-worker.o matmul-functions.o -o matmul-worker
-L$(GS_HOME)/lib -lGS-worker
clean:
rm -f core *.o matmul-worker
Note that we are compiling with C++ because the block type included in
matmul-functions.c is defined in C++. Here we have to link matmul-worker with
matmul-functions object and with GS-worker library. The resulting executable will be
named matmul-worker.
Remember that each part must be compiled in the machine where it is going to
be run (in the C/C++ case), so we can avoid architecture incompatibilities and GRID
superscalar library location differences.
3.2.3.2 Perl Binding
The gsbuild command doesn’t support building Perl programs yet. For this
reason, you must create your building environment. This section shows how to create
the stubs for Perl programs.
When generating stubs for Perl programs, the “gsstubgen” command must be
run as follows:
gsstubgen –sp app.idl
The “s” flag will generate the “app.i” file. The “p” flag will generate the “appworker.pl” and the “app-stubs.c” files.
44
app.idl
Stub generator using
perl and swig flags
Worker
app.i
app-worker.pl
GSWorker
module for Perl
app.pm
SWIG
Master
app-stubs.c
app.pl
app_master.pm
app_wrap.c
User provided files
GSMaster
module for Perl
Generated files
GRID superscalar
library modules
Figure 3-24
The first file is the header that contains the SWIG equivalent to the IDL file. It
is used by SWIG to generate Perl bindings to the C stubs. SWIG is a software
development tool that connects programs written in C and C++ with a variety of highlevel programming languages, primarily common scripting languages such as Perl,
Python, Tcl/Tk and Ruby. Basically, the app.i file it is a translation from the IDL
syntax to the interface syntax required by SWIG of the application functions interface.
You must run the following command to generate the Perl bindings:
swig –perl5 app.i
It will generate the “app_master.pm” and “app_wrap.c” files. The former is the
Perl module definition file for the bindings. The latter is the C file that contains the
bindings. You must compile this file and the “app-stubs.c” file using your C compiler
and link them together with the Globus and GRID superscalar libraries into a shared
object (app.so).
The “app_master.pm” file and the shared object must be placed in a directory
reachable by your Perl interpreter. Typically you will place them in the directory that
contains your main program or in the Perl extensions directory. File app_master.pm
45
indicates the Perl interpret to dynamically load the library (app.so) when the
application functions specified by the IDL file are called from the client program.
The “app-worker.pl” file contains the main program for the worker. This file
and the file containing your functions must be installed in each machine that is to be
used as a worker. No further actions are required for the worker program.
From Figure 3-24 you can extract where each file has to be located.
3.3 Defining environment variables
Some environment variables are required to get your program running. These
environment variables allow you to change some behavior of the GRID superscalar
run-time without having to recompile neither your program nor the GRID superscalar
library. You don’t have to define them if you don’t want, because they have a default
value, but we recommend you to check if the default value satisfies your
requirements. This part is concerning the master (or client):
• GS_DEBUG: You can set this variable to receive more or less debug
information. When it’s 20, the master will write at its standard output
lots of useful information in order to determine potential problems.
When set to 10, you will receive less information than before, but
enough to follow the execution of your tasks. If you set this variable to 0
it means that we don’t want debug information. Default value is 0.
• GS_LOGS: Set to 1 tells the master to leave execution logs of all tasks
executed in all server machines. These logs will be named
OutTaskXX.log and ErrTaskXX.log, according to the standard output
and standard error messages given at that task (where XX is the number
of the task). Each time you call to a function defined in the IDL file, a
new task number is generated. This way you can know to which call
corresponds the log file. If set to 0, this logs won’t be left at workers.
Default value is 0.
• GS_SOCKETS: Currently GRID superscalar allows two ways of
master and worker communication in the C/C++ binding: sockets or
files. The former means that the worker machine has external
connectivity and can talk to the master with a direct connection. The
latter means that the worker doesn’t have direct external connectivity
(i.e. a node of a cluster) and has to communicate with the master through
files. To choose socket communication we have to set this variable to 1.
Otherwise, if we want to use file communication we must set it to 0.
Default value is 0. Note that in Perl version you cannot set it to 1. This is
also explained in section 2.8.
• GS_MIN_PORT: This variable only applies when working with
GS_SOCKETS set to 1. Some machines have constraints in
connectivity, regarding to opened ports. For this reason you have to tell
to GRID superscalar an available range of ports to be used to open a
reply port when working with the sockets version. Default value is
20340.
• GS_MAX_PORT: The upper threshold. It is considered only when
GS_SOCKETS is set to 1.
• GS_SHORTCUTS: Allow or not (1 or 0) shortcut mechanism between
workers. This mechanism allows you to resolve faster more datadependencies between tasks. Currently this feature is not supported so
you won’t be able to change its value to 1.
46
•
•
•
•
•
•
•
•
GS_FTPORT: This integer tells us where the gsiftp port is located for
transferring files. If you don’t know which port is the gsiftp using, you
can ask your system administrator. Default port is 2811.
GS_NAMELENGTH: Maximum length of the names of the files
involved in the computation. This means the files used when calling
your new GRID superscalar functions defined with our IDL. Default
value is 255.
GS_GENLENGTH: Maximum length of scalar variables involved in
the computation (i.e. maximum digits of a number). This value doesn’t
determine the precision when representing the scalar in the computer
arquitecture. Default value is 255.
GS_MAXPATH: Maximum length of a given path in your application.
Must be 10 or more characters. Default value is 255.
GS_MAXURL: Maximum URL size from your program (i.e. machine
name plus invoked service and port). You can approximate this value by
adding 40 characters to the maximum length of a machine name in your
system. Default value is 255.
GS_MAXMSGSIZE: Size of the messages that will be sent between
the master and the worker. This could grow if you use lots of output
files, or output scalars. Default value is 1000 (it’s the lower limit).
GS_MAXRSL: This variable is related to Globus. In order to run a
Globus job a string that describes it must be constructed. This is done
with a language called Resource Specification Language. In addition,
you can receive a message from the master recommending you to raise
this value, or telling that the value is not big enough. Default value is
5000 (the lower limit is set to 1000).
GS_ENVIRONMENT: This variable is considered an advanced
feature. Some extra environment variables could be needed to be passed
when executing your jobs with Globus (i.e. when your jobs are parallel).
These variables can be passed with this parameter. Your
GS_ENVIRONMENT string can be as long as pointed by
GS_MAXPATH. Each variable must be in parentheses: (VARIABLE1
value1)(VARIABLE2 value2) … Take into account that the content of
GS_ENVIRONMENT will be sent to each worker machine.
Note that you can use “setenv” or “export” as the command to define an
environment variable. This can change depending on the shell your system has.
Your main program is going to load the GRID superscalar shared library, so you
have to put its path into an environment variable called LD_LIBRARY_PATH. You
have to avoid erasing other previous defined library paths when defining the new one
(check it with “env” command). An example follows:
setenv LD_LIBRARY_PATH $GS_HOME/lib:$LD_LIBRARY_PATH
Don’t do this if the variable doesn’t exist previously. This step is not needed
when GRID superscalar libraries are installed in a standard location. You may ask
your system administrator about this.
At the worker side there is a file named workerGS.sh. This file will be
automatically created when using the deployment tool or the gsbuild tool, to invoke
the final worker executable. If there is not, you must create one. This file MUST have
47
execute permission, because the master will invoke it. It’s content must be similar to
this:
#!/bin/sh
export GS_MIN_PORT=20341
export GS_MAX_PORT=20459
export LD_LIBRARY_PATH=$GS_HOME/lib
../app-worker "$@"
Take into account now that we used “export” to define the environment
variables, because we are now using a shell that supports this command. This file will
set the environment variables in the worker side. You can suppose that no previous
environment variables are defined, and set them here if needed (i.e. when running an
external simulator). GS_MIN_PORT and GS_MAX_PORT are only required when
working with GS_SOCKETS set to 1, and when we want to modify the default
values. Also LD_LIBRARY_PATH must be set (if needed) considering the local
machine, not the master. If you are familiar with scripting languages, you could think
that you can add an exec before last line, so the new process will replace the current
one. Don’t do this because if someone kills your worker, you won’t get any
information about that.
3.4 Am I ready to run?
Not yet. Before you run something that uses Globus (and GRID superscalar
does) you have to start a user proxy. This proxy will authenticate the current user in
all the machines that are going to be the workers, so you don’t have to type your
password every time you access to a machine. This step is not needed if you run the
deployment tool, because it includes the initialization of your Globus proxy. The
command is:
grid-proxy-init
There is a useful flag (-valid) that allows you to make it last more than 12 hours.
You can see this and more flags with -help. You can also use grid-proxy-info, to see if
your proxy is already running, or grid-proxy-destroy, to stop your proxy.
If you don’t have this command in the path, you better ask your system
administrator about how to initialize your Globus environment.
Another important thing to consider is at the worker side. You can copy all the
code in the worker side in whatever machines that are going to be workers from our
execution. But you must remember to change in workerGS.sh the line that points to
the LD_LIBRARY_PATH (it must contain the right path, regarding that machine).
And also remember to change GRID superscalar library location from Makefile (if
needed). Again, with the deployment tool this is not necessary.
Yes! You are now ready! If you want to be really sure about this, you can do
again some checks. Be sure to have all files mentioned in previous sections in the
master side and in the worker machines. Remember to have all code compiled and
ready to run in all machines. Check also that your workerGS.sh files have execute
permission.
You can check also if you have all GRID superscalar environment variables you
need defined at the master side. Take a look at LD_LIBRARY_PATH and confirm
that the GS-master library path is defined there (if needed). And just run your main
code:
48
./app
3.5 Recovering from a checkpoint file
GRID superscalar has a feature that automatically checkpoints your tasks. This
means that previously executed tasks won’t have to be repeated when we detect an
error in a task. When restarting from a checkpoint file, GRID superscalar will warn
you with this message at the master:
FOUND CHECKPOINT FILE
This file is named “.tasks.chk” and is in you master’s working directory.
Sometimes you won’t desire that GRID superscalar restarts from this checkpoint. If
this is the case, you can simply delete this file from your file system and GRID
superscalar will start execution from the beginning.
Do not try to build your own checkpoint file, because it can be really dangerous.
This file is not the only one that stores information in order to recover your previous
executed tasks.
49
4 Debugging your GRID superscalar program
4.1 Monitoring your execution
GRID superscalar run-time doesn’t have by now a specific monitoring system.
This means that if you want to see how your jobs are going you have to use standard
operating system methods of monitoring processes. These commonly are: ps and top.
This section is not intended to be an operating systems tutorial, but we can give
you some hints and examples of what you can, and cannot see.
So, when you run your master program, you can see several threads belonging
to it (in particular you can see 3 for example in Linux, see Figure 4-25). This is
normal, because the master creates a thread to listen to messages, and this thread
needs a thread master in Linux. So don’t be worried if the name of your master
process appears more than once.
PID
25273
25272
25266
25267
25268
USER
PRI
username 19
username 19
username
9
username
9
username
9
NI
10
10
0
0
0
SIZE
3012
3012
6172
6172
6172
RSS SHARE STAT %CPU %MEM
3012 2384 S N 94.8 2.3
3012 2384 S N 88.7 2.3
6172 2656 S
0.0 4.8
6172 2656 S
0.0 4.8
6172 2656 S
0.0 4.8
TIME
0:00
0:01
0:00
0:00
0:00
COMMAND
in.ftpd
in.ftpd
matmul
matmul
matmul
Figure 4-25
At the master side you can also see a process called in.ftpd and owned by root
consuming CPU (Figure 4-25). This means that a file is being transferred, so the
gsiftp service is being used.
If you want to see what processes are running in a worker you don’t have any
other way (by now) than to log into that machine and see it for yourself. You can see
several processes that can tell you what is happening in that machine (all owned by
your username). The most common is globus-jobmanager, started by globus-jobmanager-script.pl (so you can see sometimes both, Figure 4-26). This process (globusjobmanager) will handle the execution of your remote job (copy files, start the binary,
...). When files are being copied to that machine you can see the corresponding
globus-url-copy process running (Figure 4-26). And when the worker binary is
running, you can see a workerGS.sh and a ../matmul-worker processes (Figure 4-27).
When the worker binary ends, you can see still the remaining globus-jobmanager. The
most typical case is to have as many globus-jobmanager processes as the limit of jobs
defined for that machine in the configuration files. If there is a queue system in that
machine, some more processes can be there (depending on your queue system), but
the basic ones described before will also appear.
username 7312 22.0 0.1 5356 3956 ?
S
12:06
0:00
/usr/bin/perl /aplic/GLOBUS/2.2/libexec/globus-job-manager-script.pl
username 7235 2.7 0.1 5208 3244 ?
S
12:06
0:00 globusjob-manager -conf /aplic/GLOBUS/2.2/etc/globus-job-manager.con
username 7319 0.0 0.0 5216 2376 ?
S
12:06
0:00
/aplic/GLOBUS/2.2/bin/globus-url-copy gsiftp://kandake.cepba.upc.es:2
Figure 4-26
And when the transfers end:
username 8035 1.0 0.0 2152 1016 ?
S
12:06
0:00 /bin/sh
/home/at/khafre/MatMul/workerGS.sh 0 0 A.0.0 B.0.0 C.0.0 C.0.0
username 8036 1.0 0.0 1804 580 ?
S
12:06
0:00
../matmul-worker 0 0 A.0.0 B.0.0 C.0.0 C.0.0
50
Figure 4-27
Another hint of how many jobs are being executed in a worker machine at the
same time is in the file system. You can see several sub-directories named
“gram_scratch_<random_name>”. Each of this directory is created to let the user
work with it’s own temporary files. So the directory where the worker is really being
executed is the weirdly named one.
You can see also other files in master and worker named .RENXX (where XX is
an integer number). Do not mess with these files, because they are the result of
applying renaming techniques to your main code. They will be correctly removed
during the execution and at the end of the main master program.
If your master seems stopped and no process owned by your username is in any
of the worker machines, you may have a problem because the execution won’t go on.
In order to solve this situation, you have to see all information first, as the master
debug information.
4.2 Master debug information
In previous section 3.3 (Defining environment variables) we have seen that we
can set GS_DEBUG to 10 or 20 so the master is going to give us more information on
how the execution is going. It is useful to redirect all this standard output to a file, so
you can examine it with more patience.
The most important information you have to consider is the one that is given
about the queues that are defined inside the GRID superscalar run-time. You can see
prints about running, waiting, pending and ready tasks. Waiting means that they are
stopped waiting for a file to be transferred, but this transfer has been started from
another task. Pending means that the task still has data-dependencies to be resolved
and ready means that it can be submitted at any time.
You can see also the decision that GRID superscalar takes when choosing
which is going to be the next running task. When the sentence “ESTIMATION
BEGINS” appears, this means that the run-time is deciding where to run the job.
There is an estimation of transfer files and execution time for each task in the ready
queue against each worker. Estimation comes like this:
ESTIMATION: 0.200000 Task: 14 Machine: 0 Size: 0.000000 TransfTime: 0.000000
ESTIMATION: 0.203664 Task: 14 Machine: 1 Size: 4802.000 TransfTime: 0.003664
ESTIMATION: 0.203664 Task: 14 Machine: 2 Size: 4802.000 TransfTime: 0.003664
You can see here that the task 14 is going to last 0.2 seconds in worker 0, and
more than 0.20 in worker 1 and worker 2. That is because the files needed are not in
these two workers, in contrast with worker 0, that already has the files (as pointed by
the Size value, that means how many file bytes do we have to transfer to that
machine). TransfTime refers to how much time we will spend transferring files to that
machine if we execute our job there. So worker 0 will be chosen as shown in
sentence:
<------------------ MARKED MACHINE: 0 ------------------>
<---------------- SUBMITTED : 1 ---------------->
This also tells us how many jobs are submitted to that worker at the same time.
If you are familiar with Globus RSL language and its callbacks mechanism, you
can find this also as printed information. If you are not familiar, the information is
really self-explaining. Remember that all this parameters refer to the worker where the
job is going to be run.
51
There is also another important thing to remember about returning values of
tasks. You can see at some point this debug information:
TASK 11 JUST EXTRACTED!!!
(and some lines later)
ERROR Code: 0
In this case the returning value of the task is 0, so everything is ok. But if
something different from 0 is returned, a worker has detected an error, so the master is
going to stop its execution. An error code different from 0 will be shown in the master
even when you have GS_DEBUG set to 0. As described in section 2.5 “Writing the ”,
you can detect errors by setting gs_result to a value different from 0. So here we will
know at the master when a worker fails. If you receive a negative error code this
means that there is an operating system problem (your code can have an invalid
memory reference, someone could have killed your process, ...). Probably you want to
see what happens into the worker, and look at the worker log files.
4.3 Worker log files
As shown in section 3.3, we can tell GRID superscalar run-time to leave
standard output and standard error information in the worker that has executed a task.
This information can be really useful when trying to determine why our program
doesn’t run. You can print information from inside your app-functions.[c | pm] file to
standard output and standard error that can give you a hint of what is happening there.
Each call to an IDL function from your master main program generates a new task, so
a new number to name it is also generated. First task will be named task 0, next will
be 1, and so on. This will help you to determine which IDL call has generated a log
file. Some default information is printed from the run-time at OutTaskXX.log:
Executing the function defined in position 1 into your IDL file
Task: 0. SCode: 0
Getting stats of: TMP.0.cfg
We are sending this: 1 0 78.194940442219376564 3121 0
MasterName is: kandake.cepba.upc.es. ReplyPort is: 20342
Moving TMP.0.cfg
This log is for Task 0 (so it must be named OutTask0.log). The first sentence
informs you about the operation that is executed in this task number. In this case the
first operation defined in the IDL file. This is essential to know if you want to
interpret correctly all the following information printed by yourself. The SCode refers
to the shortcut mechanism, but we don’t have to worry about that, as explained when
defining GS_SHORTCUTS environment variable. When the worker gets stats of a
file, this means that this file is an output of this task (also a “Moving filename” will
appear for each output file. Beyond the “We are sending this” sentence we have a
message that is going to be sent to the master. First integer refers again to shortcut
stuff, so we don’t worry, next we have the task number, all its output scalars, all the
size of output files, and the last integer refers to the value of gs_result. This can be 0,
positive or negative. A 0 value would mean that there is no error, a positive value
would mean an error detected by the programmer, and a negative value would mean
that a signal has been received. Several signals can be received, so this could tell you
that your program has an invalid memory reference (typically a –11 error code), been
terminated (almost always a –15 error code), aborted ( –6 ) , ... Signal number 9 (kill)
cannot be reprogrammed, so you will never receive a –9 error code (You will have to
look at the worker logs to see if a worker has been killed). Not all signal numbers are
52
standard, so, if you are not familiar with this operating system features, you can ask
your system administrator about this.
4.4 Cleaning temporary files
There are several hidden files that you can find in your master and in your
workers when running your application developed with GRID superscalar. These
files, that are needed to implement techniques as renaming (to improve parallelism,
and so performance of your application) or checkpointing (to avoid repeating
computation that has been already done), are automatically erased during the
execution of your program and when the application finishes. For some strange
reasons, the application cannot finish correctly (i.e. when the master crashes) and
some of these files can remain in their locations. There is no real need to deal with
these files, because they will be overwritten if you execute again your application.
However, we can see what are their names and which is their purpose, so, if you find
yourself in trouble, you can decide if you want to delete them or not.
• .RENXX: These files are used for renaming techniques. They are
different versions of a file during the original file lifetime. They can
appear at the master and at the workers.
• .GS_fileXX: Some extra information must be saved when checkpointing
local tasks in your main program. This information is stored in those
files. They are created at the master side.
• .tasks.chk: This file is only in the master. It allows you to restart from a
task your execution, without having to repeat previously done
computations. If you delete it, the master will restart all the
computations from the beginning.
• OutTaskXX.log / ErrTaskXX.log: Standard output and standard error
from the task with number XX at the worker side. They won’t be
generated when GS_LOGS is set to 0.
• destGen.XX: They appear at the master and at the workers. This name
identifies the files that are messages from a task between the master and
the workers. When GS_SOCKETS is set to 1, these files don’t have to
appear. If the master is stopped, you can delete them without any danger.
Some files transferred as sources to tasks can remain in the working directory of
the workers. You can also delete them with no danger if everything is stopped.
However, remember that if you are planning to execute your program again, you don’t
have to worry, because these files will also be overwritten.
In addition, you can add to your Makefile some basic rules to erase all this files.
So we have at the master side:
delete:
rm –f .REN* .GS_file* .tasks.chk destGen.*
And now the worker side:
delete:
rm –f .REN* destGen.*
So you can “make delete” anytime you want to clean all those files. You will
seldom need to do this, but it could be useful if you find a bug in your master code, or
even in GRID superscalar (although we hope you don’t!).
53
54
5 Frequently Asked Questions (FAQ)
Here there are some typical questions that may arise when working with GRID
superscalar. We recommend you to look in the table of contents of this manual to find
faster what you are looking for.
5.1 Globus
5.1.1 What is Globus? Why do I need it? Can you give me some
useful commands?
Globus provides services for running your jobs remotely, transferring files, and
more. It is needed to access other machines outside your administration domain.
There are some useful commands that you can test: grid-proxy-info (to see the status
of your proxy), grid-proxy-init (to start your proxy), grid-proxy-destroy (to end your
proxy), globus-job-run (to run remote jobs), globus-url-copy (to copy files between
machines).
5.1.2 I have several log files In my workers’ home directory.
They are named gram_job_mgr_<number>.log
Usually, when a Globus job fails it leaves information in a log called
gram_job_mgr_<number>.log. If you don’t need the information inside, you can erase
them safely. Depending on your Globus installation they can appear always, when
errors rise, or never. You can contact your system administrator to know that.
5.2 GRID superscalar tools
5.2.1 When I use gsstubgen I get this output: “Warning:
renaming file 'app-stubs.c' to 'app-stubs.c~'. Warning:
renaming file 'app-worker.c' to 'app-worker.c~'. Warning:
renaming file 'app.h' to 'app.h~'.”. What is this for?
In this case gsstubgen has done backups for your old generated files from your
IDL definition. This backups end with the ‘~’ character. You can remove them by
hand. Next time, if you don’t want to generate backups, use –n flag.
55
5.3 The master
5.3.1 When I set GS_DEBUG to 10 or 20, the output of my main
program seems to appear in really weird places. What is
happening?
If you print something to the standard output the system has a buffer to print
more information from one call. So it’s normal that sometimes appears in weird
places.
5.3.2 When I redirect all output given from the master to a file,
sometimes at the end some information is missing. Why?
Again buffering of the operating system is cheating you. You can also see that
the order of some prints also change when printing by screen or when printing to the
file. But that’s normal. You can repeat the execution and see how it ends printing by
screen.
5.3.3 I get a message like this when trying to run the master:
“ERROR activating Globus modules. Check that you have
started your user proxy with grid-proxy-info”
You forgot to start your Globus proxy or its lifetime has expired. Try the Globus
command grid-proxy-info to see if you have started it. If you have not, remember to
use grid-proxy-init. If it has expired, you can run grid-proxy-destroy and grid-proxyinit again.
5.3.4 The master ends with this message (or similar): “./app:
error while loading shared libraries: libGS-master.so.0:
cannot open shared object file: No such file or directory”
You have to add to your environment variable LD_LIBRARY_PATH your
GRID superscalar library location.
5.3.5 When I set GS_SHORTCUTS to 1 I get this message
“ERROR: Check environment variables values”. Why?
That is because you haven’t read this manual! We said that you won’t be able to
turn this to 1, because file forwarding mechanism is no more supported. We don’t
discard to recover this feature in the future, so that’s the reason because this variable
still remains.
56
5.3.6 I get this message: “ERROR: Check environment
variables values”. But I have all variables defined and
GS_SHORTCUTS is set to 0
Your environment variables are wrong or too small. You cannot set
GS_SOCKETS to a value different from 0 or 1, for example. We have set some lower
limits in order to run your master correctly. See chapter 3.3 “Defining environment
variables”.
5.3.7 When working with GS_SOCKETS set to 1 I get a
segmentation fault at the master. More precisely, this
happens when a previous execution ends (prematurely or
not) and I try to launch the master immediately
The problem is that some previous jobmanagers stay running at worker
machines, because socket verision of the run-time doesn’t wait for them to finish (to
be faster than file version). Before executing again be sure that no globus process
remains in the workers, or simply wait 30 seconds (the higher time the running
jobmanagers will stay when the worker ends).
5.3.8 I get this message: “******** ERROR AT TASK 0 !!!
********* ******** MACHINE khafre.cepba.upc.es
********* the job manager could not stage in a file
The cause can be that your gsiftp service is not reachable or is not started in
your master. Be sure to have an opened port for it. You can telnet to that port (default
is 2811).
localhost> telnet localhost 2811
Trying 127.0.0.1...
Connected to localhost.
Escape character is '^]'.
220 localhost GridFTP Server 1.5 GSSAPI type Globus/GSI wu-2.6.2
(gcc32dbg, 1032298778-28) ready.
If you don’t get this output (or a similar one), contact your system administrator
and tell him that the gsiftp service is not working.
5.3.9 I get this message: “ERROR: Submitting a job to
hostname. Globus error: the connection to the server failed
(check host and port)”
One of your workers cannot run Globus jobs because the service called
“gatekeeper” is not started or its port is closed by a firewall. You can do this to check
it:
localhost> telnet hostname 2119
Trying 147.83.42.31...
57
Connected to hostname.
Escape character is '^]'.
Where hostname is the worker that we suspect is failing. The connection has to
remain till you write ‘quit’. If you get a “Connection refused” message, tell your
system administrator that Globus is not working properly because the gatekeeper is
not started or is unreachable.
5.3.10When the master is going to end I get this message:
“ERROR: REMOTE DELETION OF FILES IN
MACHINE hostname HAS FAILED. Globus error: (error
from system). Checkpoint file erased for safety reasons”.
What happened?
When the master ends it recovers all result files and erases temporary files in all
the workers involved in the computation. If this final process fails, the master reaches
a non consistent state. In this situation it cannot recover from the checkpoint file. You
can get your results by hand, and erase temporary files, or start your execution again
from the beginning. The main reason that makes this error appear is when you don’t
have enough quota in the master to receive the result files, but check the “Globus
error” sentence to know this more precisely.
5.4 The Workers
5.4.1 The first task executing returns an error of this kind
“******** ERROR AT TASK 0 !!! *********”. When I
see log files at the worker side I find this at the
ErrTask0.log: “../app-worker: error while loading shared
libraries: libGS-worker.so.0: cannot open shared object
file: No such file or directory”
You, probably with good intentions, deleted at workerGS.sh a line that defines
the LD_LIBRARY_PATH environment variable to load the GS-worker library. You
cannot remove it if your GRID superscalar library is not installed into a standard
location. Just put it back.
5.4.2 I get this message when I try to execute a remote task:
“******** ERROR AT TASK 0 !!! ********* ********
MACHINE hostname ********* the executable file
permissions do not allow execution”
58
You must check that the workerGS.sh file in the worker named hostname has
execute permission. To change permissions you can run “chmod ugo+x
workerGS.sh”.
5.4.3 The firs task ends with an error, but now when I look into
the worker I find in ErrTask0.log: “workerGS.sh: ../appworker: No such file or directory”
You have not compiled the worker in this machine.
5.4.4 Once more my first task fails but my log files are empty.
That’s crazy!
Be sure that your paths for finding the worker executable are correctly defined
in broker.cfg, and that nobody has deleted last line from workerGS.sh. It has to
contain this: “../app-worker "$@"”
5.4.5 I always get errors when trying to run a task into a
worker. Is it Globus fault? Is it GRID superscalar fault? Is
it my fault?
The first thing you can do when the remote executions fail is to run a single test
to check that Globus can run jobs. You can do:
globus-job-run worker1 /bin/date
And see if this returns the current date and time. If this fails, you can contact
your system administrator and tell him that you cannot use Globus for running your
jobs.
5.4.6 I receive this message at the master: “ERROR: Submitting
a job to hostname. Globus error: the cache file could not be
opened in order to relocate the user proxy”
Check if you have available disk space in that worker machine. This error can
leave some .gram_scratch_<random_name> subdirectories in the involved worker.
5.4.7 I receive this message at the master: “ERROR: Submitting
a job to hostname. Globus error: the job manager failed to
create the temporary stdout filename”
This can be also a problem with quota in hostname.
59
5.4.8 I get this message: “ERROR: Submitting a job to
hostname. Globus error: data transfer to the server failed”
The reason could be that you don’t have enough quota on the worker machine to
transfer your input files. Check this with the “quota” command.
5.4.9 After having a quota problem in a worker, I see some
temporary files remaining. How can I manage to erase
them correctly?
You
can
erase
all
subdirectories
that
are
named
.gram_scratch_<random_name>. Some input files can remain also (their names will
be familiar for you). The rest of temporary files are described in section 4.4.
5.5 Other questions
5.5.1 I love GRID superscalar! It has saved me lots of work
hours!
We will appreciate comments and suggestions about our tool. You can reach the
authors at [email protected] .
5.5.2 I hate your run-time. It’s giving me lots of problems.
Don’t give up. If you really think you are in a situation that you cannot solve,
we can try to see what could be happening in your particular case. Contact us at GRID
superscalar mailing list ([email protected]).
60