1
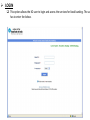
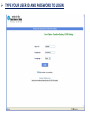
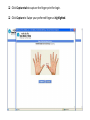
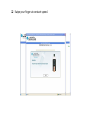
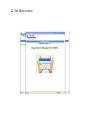
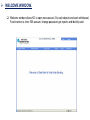
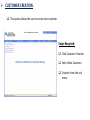
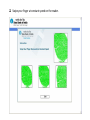
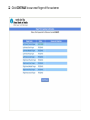
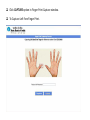
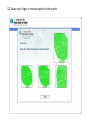
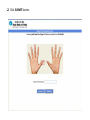
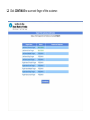
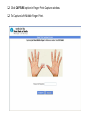
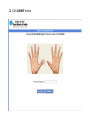
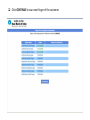
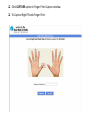
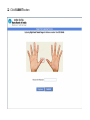
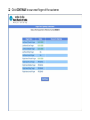
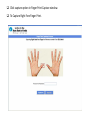
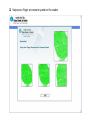
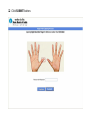
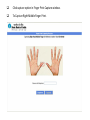
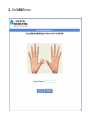
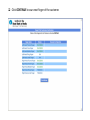
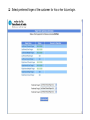
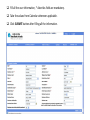
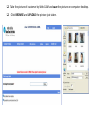
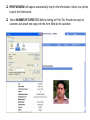
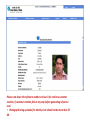
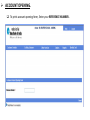
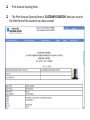
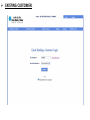
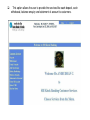
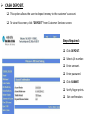
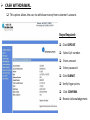
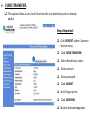
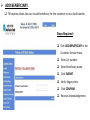
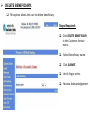
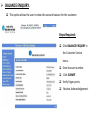
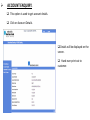
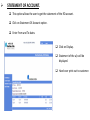
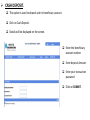
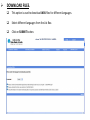
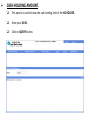
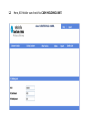
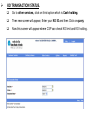
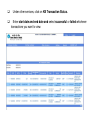
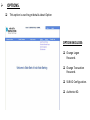
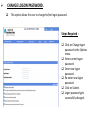
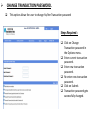
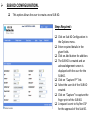
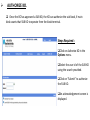
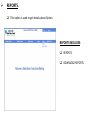
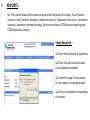
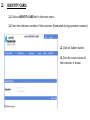
SBI KIOSK BANKING USER MANUAL LOGIN This option allows the KO user to login and access the services for kiosk banking. The us has to enter the below. TYPE YOUR USER ID AND PASSWORD TO LOGIN Click Capture tab to capture the finger print for login. Click Capture to Swipe your preferred finger as highlighted. Swipe your finger at constant speed. Click Ok to continue. WELCOME WINDOW. Welcome window allows KO to open new account, Do cash deposit and cash withdrawal, Fund transfer to other SBI account, change password, get reports and identity card. CUSTOMER CREATION. This option allows the user to create new customer. Steps Required: Click Customer Creation. Select New Customer. Creation from the sub menu. Fill the names in given fields Click CAPTURE option in Finger Print Capture window. To Capture Left Thumb Finger Print. Swipe your finger at constant speed on the reader. Click SUBMIT button. Click CONTINUE to scan next finger of the customer. Click CAPTURE option in Finger Print Capture window. To Capture Left Fore Finger Print. Swipe your finger at constant speed on the reader. Click SUBMIT button. Click CONTINUE to scan next finger of the customer. Click CAPTURE option in Finger Print Capture window. To Capture Left Middle Finger Print. Swipe your finger at constant speed on the reader. Click SUBMIT button. Click CONTINUE to scan next finger of the customer. Click CAPTURE option in Finger Print Capture window. To Capture Right Thumb Finger Print. Swipe your finger at constant speed on the reader. Click SUBMIT button Click CONTINUE to scan next finger of the customer. Click capture option in Finger Print Capture window. To Capture Right Fore Finger Print. Swipe your finger at constant speed on the reader. Click SUBMIT button. Click CONTINUE to scan next finger of the customer. Click capture option in Finger Print Capture window. To Capture Right Middle Finger Print. Swipe your finger at constant speed on the reader. Click SUBMIT button. Click CONTINUE to scan next finger of the customer. Select preferred finger of the customer for his or her future login. Click Ok to continue customer registration process. Fill all the user information, * Asterisks field are mandatory. Take the values from Calendar wherever applicable. Click SUBMIT button after filling all the information. Take the picture of customer by Web CAM and save the picture on computer desktop. Click BROWSE and UPLOAD the picture just taken. PRINT WINDOW will appear automatically to print the information. Select your printer to print the information. Select NUMBER OF COPIES TO 2 before clicking on Print Tab. Provide one copy to customer and attach one copy with the form filled by the customer. Please note down the reference number and use it for continue customer creation, if customer creation fails at any step before generating reference card. • Photograph being uploaded for Identity Card should not be more than 25 KB. ACCOUNT OPENING. To print account opening form, Enter your REFERENCE NUMBER. Print Account Opening Form. The Pri t A ou t Ope i g For i CUSTOMER CREATION helps you to print the filled form of the customer you have created. EXISTING CUSTOMER. This option allows the user to provide the services like cash deposit, cash withdrawal, balance enquiry and statement of account to customers. CUSTOMER SERVICES. CASH DEPOSIT. CASH WITHDRAWAL. FUNDS TRANSFER. ADD BENEFICIARY. DELETE BENEFICIARY. BALANCE ENQUIRY. STATEMENT OF ACCOUNT. CLOSE SB ACCOUNT. OPEN STDR. CASH DEPOSIT. This optio allo s the user to deposit To ie this s ree , li k DEPOSIT fro o ey to the usto er s a ou t. Custo er “er i es s ree . Steps Required: Click DEPOSIT. Select A/c number. Enter amount. Enter password. Click SUBMIT. Verify finger prints. Get confirmation. CASH WITHDRAWAL. This option allows the user to withdraw money from customer's account. Steps Required: Click DEPOSIT. Select A/c number. Enter amount. Enter password. Click SUBMIT. Verify finger prints. Click CONFIRM. Receive Acknowledgement. FUND TRANSFER. This option allows a user to do fund transfer to a beneficiary who is already added. Steps Required: Click DEPOSIT under Customer Service menu. Click FUND TRANSFER. Select Beneficiary name. Enter amount. Enter password. Click SUBMIT. Verify finger prints. Click CONFIRM. Receive Acknowledgement. ADD BENEFICIARY. This option allows the user to add beneficiary for the customer to do a fund transfer. Steps Required: Click ADD BENEFICIARY in the Customer Service menu. Enter A/c number. Enter Beneficiary name. Click SUBMIT. Verify finger prints. Click CONFIRM. Receive Acknowledgement. DELETE BENEFICIARY. This option allows the user to delete beneficiary. Steps Required : Click DELETE BENEFICIARY in the Customer Service menu. Select Beneficiary name. Click SUBMIT. Verify finger prints. Receive Acknowledgement. BALANCE ENQUIRY. This option allows the user to show the account balance for the customer. Steps Required : Click BALANCE ENQUIRY in the Customer Service menu . Enter Account number. Click SUBMIT. Verify finger prints. Receive Acknowledgement. STATEMENT OF ACCOUNT. This option allows the user to display the statement of account for the customer. Steps Required : Click Statement of Account in the Customer Service menu. Enter CIF number/Account number. Enter date range of statement needed. Click Display. Verify finger prints. Statement gets displayed on the screen. OPEN STDR. This option allows the user to open STDR account for the customer. If the “TD‘ a ou t is losed the the status of the a ou t ill e CLO“E other ise the status ill e OPEN . Steps Required : Click Open STDR option in the Customer Service menu. Enter STDR Account duration and amount. Get ATDR Account. opening confirmation. OPEN RD ACCOUNT. This option allows the customer to create a Recurring Deposit account, linked to his saving account in the Kiosk Banking. Click on Open RD. Enter amount. Click on SUBMIT. It will display the details of maturity date, now Click on CONFIRM. Receipt is generated. Hand over print out to the customer. RD REMITTANCE. To do RD remittance, click on Existing Customer option. Fill up Custo er s CIF u er a d li k o Query A ou t. Now select the RD a/c from the drop down list. This will be the initial screen. Now click on RD Remittance. Enter amount. Enter transaction password. Click on submit. Now check the details. and click on confirm to make the payment. This will be the screen showing transaction details. Hand over print out to customer. ACCOUNT ENQUIRY. This option is used to get account details. Click on Account Details. Details will be displayed on the screen. Hand over print out to customer. STATEMENT OF ACCOUNT. This option allows the user to get the statement of the RD account. Click on Statement Of Account option. Enter From and To dates. Click on Display. Statement of the a/c will be displayed. Hand over print out to customer. OTHER SERVICES. This option is used to get details about other services. OTHER SERVICE INCLUDES: Cash Deposit. Download Files. Cash Holding Amount. KO transaction Status. CASH DEPOSIT. This option is used to deposit cash in beneficiary account. Click on Cash Deposit. Details will be displayed on the screen. Enter the beneficiary account number. Enter deposit Amount. Enter your transaction password. Click on SUBMIT. DOWNLOAD FILES. This option is used to download WAV files for different languages. Select different languages from the List Box. Click on SUBMIT button. CASH HOLDING AMOUNT. This option is used to know the cash holding limit of the KO HOLDER. Enter your KO ID. Click on QUERY button. Here, KO Holder can check his CASH HOLDING LIMIT. KO TRANSACTION STATUS. Go to other services, click on third option which is Cash holding. Then new screen will appear, Enter your KO ID and then Click on query. Now this screen will appear where CSP can check KO limit and KO holding. Under other services, click on KB Transaction Status. Enter start date and end date and select successful or failed whichever transactions you want to view. OPTIONS. This option is used to get details about Option OPTION INCLUDES: Change Logon Password. Change Transaction Password. SUB KO Configuration. Authorize KO. CHANGE LOGON PASSWORD. This option allows the user to change his/her logon password. Steps Required : Click on Change logon password in the Options menu. Enter current logon password. Enter new logon password. Re-enter new logon password. Click on Submit. Logon password gets successfully changed. CHANGE TRANSACTION PASSWORD. This option allows the user to change his/her Transaction password Steps Required : Click on Change Transaction password in the Options menu. Enter current transaction password. Enter new transaction password. Re-enter new transaction password. Click on Submit. Transaction password gets successfully changed. SUB KO CONFIGURATION. This option allows the user to create a new SUB KO. Steps Required : Click on Sub KO Configuration in the Options menu. Enter required details in the given fields. Click on Add button for addition. The SUB KO is created and an acknowledgement screen is displayed with the user for the SUB KO. Cli k o Capture FP li k. Select the user id of the SUB KO created. Cli k o Capture to apture the finger print of the SUB KO. A request is sent to his/her CSP for the approval of this Sub KO. AUTHORIZE KO. Once the BC has approved a SUB KO, the KO can authorize the sub kiosk, if main kiosk wants that SUB KO to operate from the kiosk terminal. Steps Required : Click on Authorize KO in the Options menu. Select the user id of the SUB KO using the search provided. Cli k o “u the SUB KO. it to authorize An acknowledgement screen is displayed. REPORTS. This option is used to get details about Option. REPORTS INCLUDES: REPORTS. DOWNLOAD REPORTS. REPORTS. This option allows KO to observe reports like Payments & receipts, Fund Transfer Success, Fund Transfer Exceptions, Balance enquiries, Statement of Account, Customers created, Customers rejected/pending, SB account closure, STDR account opening and STDR premature closure. Steps Required : Enter the sub kiosk id (optional). Enter the start and end dates (Use Calendar provided). Select the type of transaction for the report is to be generated. Click on Download to download the report. IDENTITY CARD. Click on IDENTITY CARD link in the main menu. Enter the reference number of the customer (Generated during customer creation). Click on Submit button. Else the current status of the customer is shown. The identity card of the customer is shown If the customer is successfully created in the CBS. THANK YOU