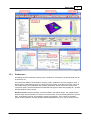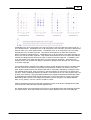
1
Pdisp
Version 19.2
Oasys Ltd
13 Fitzroy Street
London
W1T 4BQ
Central Square
Forth Street
Newcastle Upon Tyne
NE1 3PL
Telephone: +44 (0) 191 238 7559
Facsimile: +44 (0) 191 238 7555
e-mail: [email protected]
Website: http://www.oasys-software.com/
© Oasys Ltd. 2014
Pdisp Oasys Geo Suite for Windows
© Oasys Ltd. 2014
All rights reserved. No parts of this work may be reproduced in any form or by any means - graphic, electronic, or
mechanical, including photocopying, recording, taping, or information storage and retrieval systems - without the
written permission of the publisher.
Products that are referred to in this document may be either trademarks and/or registered trademarks of the
respective owners. The publisher and the author make no claim to these trademarks.
While every precaution has been taken in the preparation of this document, the publisher and the author assume no
responsibility for errors or omissions, or for damages resulting from the use of information contained in this
document or from the use of programs and source code that may accompany it. In no event shall the publisher and
the author be liable for any loss of profit or any other commercial damage caused or alleged to have been caused
directly or indirectly by this document.
This document has been created to provide a guide for the use of the software. It does not provide engineering
advice, nor is it a substitute for the use of standard references. The user is deemed to be conversant with standard
engineering terms and codes of practice. It is the users responsibility to validate the program for the proposed
design use and to select suitable input data.
Printed: June 2014
I
Pdisp Oasys Geo Suite for Windows
Table of Contents
1 About Pdisp
1
1.1
General...................................................................................................................................
Program Description
1
1.2
Components
...................................................................................................................................
of the User Interface
1
1.2.1 Preferences
......................................................................................................................................................... 2
1.3
Program...................................................................................................................................
Features
3
1.4
Sample ...................................................................................................................................
Files
4
2 Methods of Analysis
4
2.1
General................................................................................................................................... 4
2.2
Boussinesq
...................................................................................................................................
Analysis Method
5
2.2.1 Determ ination of
.........................................................................................................................................................
5
Stresses
2.2.2 Strains and Displacem
.........................................................................................................................................................
6
ents
2.2.2.1
Global Poisson's
..................................................................................................................................................
Ratio
6
2.2.2.2
Calculation ..................................................................................................................................................
Details
7
2.2.3 Accuracy of the .........................................................................................................................................................
8
Boussinesq Solution
2.3
Mindlin ...................................................................................................................................
Analysis Method
8
2.3.1
2.3.2
2.3.3
2.3.4
9
Mindlin and the .........................................................................................................................................................
Legacy Mindlin Method
.........................................................................................................................................................
10
Settlem ent above
the Load
.........................................................................................................................................................
12
Settlem ent below
the Load
......................................................................................................................................................... 13
Calculation Details
2.3.4.1
Vertical Displacements
.................................................................................................................................................. 13
2.3.4.2
Horizontal..................................................................................................................................................
Displacements
14
2.3.5 Accuracy of the.........................................................................................................................................................
15
Mindlin Solution
2.4
1D Compression
................................................................................................................................... 16
3 Input Data
3.1
General
................................................................................................................................... 17
3.1.1 Titles
3.1.1.1
3.2
17
......................................................................................................................................................... 18
Titles w indow
..................................................................................................................................................
- Bitmaps
18
Data Input
................................................................................................................................... 18
3.2.1 Units
......................................................................................................................................................... 19
3.2.2 Analysis Options
......................................................................................................................................................... 19
3.2.3 Soil Profiles ......................................................................................................................................................... 21
3.2.3.1
Displacement
..................................................................................................................................................
Levels
22
3.2.3.2
Number of..................................................................................................................................................
Displacement Levels
22
3.2.3.3
Location of
..................................................................................................................................................
Displacement Levels
23
3.2.3.4
Young's Modulus
..................................................................................................................................................
(E)
24
3.2.4 Load Data
......................................................................................................................................................... 24
3.2.5 Soil Zones
......................................................................................................................................................... 26
3.2.6 Displacem ent Data
......................................................................................................................................................... 27
3.2.7 Non-linear Materials
......................................................................................................................................................... 28
3.2.8 Pile-Soil Interaction
.........................................................................................................................................................
29
Using GsRaft
3.2.9 Pile-Soil Interaction
.........................................................................................................................................................
30
Curves (PSICs) C(..)
© Oasys Ltd. 2014
Contents
II
3.2.10Allocation of PSICs
.........................................................................................................................................................
30
to Soil Strata
3.2.11Im ported Displacem
.........................................................................................................................................................
30
ents
3.2.12Graphical Input......................................................................................................................................................... 33
3.2.12.1 Inserting Bitmaps
.................................................................................................................................................. 33
3.2.12.2 Soil Zones..................................................................................................................................................
- Graphical input
33
3.2.12.3 Displacement
..................................................................................................................................................
Grids - Graphical input
34
3.2.12.4 Load Data..................................................................................................................................................
- Graphical input
34
4 Output
35
4.1
Analysis
...................................................................................................................................
and Data Checking
35
4.2
Tabular...................................................................................................................................
Output
35
4.2.1 Full Tabular Results
......................................................................................................................................................... 36
4.2.2 Condensed Tabular
.........................................................................................................................................................
36
Results
4.3
Graphical
...................................................................................................................................
Output
37
4.3.1 Tem plates
......................................................................................................................................................... 37
4.3.2 Plan View
......................................................................................................................................................... 37
4.3.2.1
Set Contour
..................................................................................................................................................
Interval
38
4.3.2.2
Set Exact ..................................................................................................................................................
Scale
39
4.3.2.3
Line Displacements
.................................................................................................................................................. 39
4.3.2.4
Soil Column
..................................................................................................................................................
Displacements
39
4.3.3 Cross Section .........................................................................................................................................................
39
Plot
4.3.3.1
Label objects
.................................................................................................................................................. 39
4.3.4 3D Graphical Output
......................................................................................................................................................... 40
4.3.4.1
Graphic Settings
.................................................................................................................................................. 40
4.4
CSV Results
...................................................................................................................................
File
44
5 Keyboard Accelerators
5.1
List of References
................................................................................................................................... 47
5.1.1 References
......................................................................................................................................................... 47
6 Brief Technical Description
6.1
47
Pdisp ................................................................................................................................... 47
7 Manual Example
7.1
46
48
General
................................................................................................................................... 48
Index
© Oasys Ltd. 2014
49
1
Pdisp Oasys Geo Suite for Windows
1
About Pdisp
1.1
General Program Description
Pdisp Pressure Induced Displacement Analysis
Pdisp calculates the displacements (and stresses if required) within a linear elastic or non-linear soil
mass, arising from uniform normal or tangential pressure, applied to rectangular and circular loaded
planes.
The program is ideal for predicting the displacements that may arise due to the action of several
loads in a soil mass.
Pdisp is a development of (and replacement for) Vdisp. Vdisp predicted displacements induced by
vertical loads on horizontal loaded areas only. Pdisp is capable of predicting displacements due to
both vertical and horizontal loads.
1.2
Components of the User Interface
The principal components of Pdisp's user interface are the Gateway, Table Views, Graphical Input,
Plan View, Cross Sectional View, 3D Graphical Output, Tabular Output, toolbars, menus and input
dialogs. Some of these are illustrated below.
© Oasys Ltd. 2014
About Pdisp
1.2.1
2
Preferences
This dialog can be accessed by clicking Tools | Preferences. Preferences can be set whether a file
is opened or not.
The Preferences dialog is accessible by choosing Tools | Preferences from the program's menu. It
allows user to modify settings such as numeric format for output, show welcome screen, option for
new model wizard, print parameters and company information. These choices are stored in the
computer's registry and are therefore associated with the program rather than the data file. All data
files will adopt the same choices.
Numeric Format controls the output of numerical data in the Tabular Output. The Tabular Output
presents input data and results in a variety of numeric formats, the format being selected to suit the
data. Engineering, Decimal, and Scientific formats are supported. The numbers of significant
figures or decimal places, and the smallest value distinguished from zero, may be set by the user.
© Oasys Ltd. 2014
3
Pdisp Oasys Geo Suite for Windows
Restore Defaults resets the Numeric Format specifications to program defaults.
A time interval may be set to save data files automatically. Automatic saving can be disabled if
required by clearing the "Save file.." check box.
Show Welcome Screen enables or disables the display of the Welcome Screen. The Welcome
Screen will appear on program start-up, and give the option for the user to create a new file, to open
an existing file by browsing, or to open a recently used file.
Company Info allows the user to change the company name and logo on the top of each page of
print out. To add a bitmap enter the full path of the file. The bitmap will appear fitted into a space
approximately 4cm by 1cm. The aspect ratio will be maintained. For internal Arup versions of the
program the bitmap option is not available.
Page Setup Opens the Page Setup dialog allowing the style of output for printed text and graphics
to be selected.
If 'Calculation Sheet Layout´ is selected the page is formatted as a calculation sheet with details
inserted in the page header.
If `Logo´ is selected the company logo is inserted in the top left corner of the page.
If `Border´ is selected this gives a border but no header information.
If `Clipped´ is selected the output is clipped leaving a space for the logo. This has no effect on text
output.
1.3
Program Features
The main features of Pdisp are summarised below.
displacements are calculated using a profile of Young's modulus with depth. The modulus can
be constant or vary linearly with depth for each soil layer. Non-linear stress/strain curves may
also be specified.
Displacements and stresses can be calculated at several levels and at any location in plan.
The location of the displacement/stress points is defined by means of two-dimensional
orthogonal grids, by lines or by points. The results from the grids can be displayed graphically
as contours .
Loaded areas can be defined as rectangles or circles. Pressures are applied as vertically and/
or horizontally and uniformly distributed loads to rectangular and/or circular loaded areas. Areas
can be superimposed and placed at any level. All loads are completely flexible i.e. no
allowance is made for stiffness of the structures.
The base of the model is defined by the specification of an equivalent rigid boundary.
The ground is modelled using a series of vertical soil profiles each consisting of a number of
horizontal soil layers. The plan distribution of the soil profiles is specified in rectangular areas
known as soil zones. These can be superimposed allowing the development of complicated
ground models.
No allowance is made for the effect of soil zoning on stress distribution.
© Oasys Ltd. 2014
About Pdisp
1.4
4
Sample Files
Sample files are provided during the installation process. These demonstrate Pdisp's features. By
default they are installed in the folder 'C:\Program Files\Oasys\Pdisp n\Samples', where n indicates
the version of the program. These files may be opened and inspected in Pdisp in order to become
familiar with the typical input data that is required to create a Pdisp model.
File Name
PdispMan.vdd
Brief Description
Example file containing two soil zones and non-linear material
property
Pdisp 3d Graphics Sample.vdd
Example file containing four soil zones and more scope to explore
3D graphics settings.
Horizontal Loading.vdd
Example file containing horizontal loading and horizontal
displacement results
Pile-Soil Interaction.vdd
Example file containing Pile-Soil interaction properties associated
with soil strata
2
Methods of Analysis
2.1
General
Two methods of analysis are available in Pdisp:
Boussinesq
Mindlin
The Boussinesq method has the advantage that it gives a report of stresses in the ground in addition
to displacement. It has the disadvantage, however, that the results are sensitive to the spacing of
© Oasys Ltd. 2014
5
Pdisp Oasys Geo Suite for Windows
the number of intermediate displacement levels specified. The accuracy of the result can therefore
be improved by introducing more displacement levels. This is particularly true just beneath small
loaded areas which are carrying a significant load. If the distribution of settlement close to the load
is important then the vertical spacing of the displacement levels should be set so that they do not
exceed 25% of the size of the loaded area.
The Mindlin method only provides details of vertical and horizontal displacements and not stresses.
It predicts:
vertical displacements resulting from vertical loads;
horizontal displacements resulting from vertical loads; and
vertical displacements resulting from horizontal loads.
The Mindlin method considers the effect of all the soil, above and below the load, acting elastically
when calculating vertical displacements. It is not sensitive to the spacing of intermediate
displacement levels, unless there is a sharp gradient of stiffness, see Displacement Levels.
2.2
Boussinesq Analysis Method
The Boussinesq analysis method calculates the stresses in the strata due to the applied loads.
The method uses integrated forms of the well known equations derived by Boussinesq (1885).
Strains are calculated within the strata. Displacements are then defined by integrating vertical
strains.
Stresses are calculated at points vertically beneath each intersection within a displacement grid
(see Displacement Data) and at the centre of each sub-layer, see Displacement Levels.
Vertical displacements resulting from normal loads applied on horizontal planes only are calculated
in this method. The Mindlin method may be used to calculate horizontal displacements.
2.2.1
Determination of Stresses
The vertical stress
z
and the sum of principal stresses
p
are calculated using the integrated
Boussinesq equations, with respect to x and y, over the area of a uniformly loaded rectangle.
where:
© Oasys Ltd. 2014
Methods of Analysis
6
p = x+ y + z
The general equations are:
and
R = distance between the centre of the loaded area and the stress evaluation point.
z = vertical distance from the loaded area to the stress evaluation point.
p = applied pressure on loaded area
g
= GLOBAL Poisson's ratio.
For this calculation it is assumed that Young's modulus and Poisson's ratio are constant throughout
the soil. This assumption is generally considered to give a satisfactory distribution of stress, but its
validity can be doubtful where stiff strata overlie softer ones.
The pressure loads can be specified as acting at different levels. If a stress evaluation point is above
an applied load, then no account of that load is made when determining the stresses at that point.
In other words the displacement at a point above a loaded area is equal to the displacement at the
level of the load.
2.2.2
Strains and Displacements
The vertical strains, and thereby displacements, are calculated for each sub-layer at every stress
evaluation point. For this calculation local values of Young's modulus and Poisson's ratio are used.
The vertical displacement, at each grid location, is calculated by summing the displacement of each
of the sub-layers from the rigid boundary up to the grid level. For information on the location of sublayers, see Displacement Levels.
If a non-linear curve is specified for this stratum the program calculates the stiffness factor
appropriate to the final resulting value of strain (see Non-linear Materials).This stiffness factor is
multiplied by the appropriate Young's modulus to obtain the final stiffness value.
2.2.2.1
Global Poisson's Ratio
The use of the Boussinesq method of solution requires the user to specify a value of global
Poisson's ratio ( g) to enable the stress calculations to be made. In general the choice of an
average value of
© Oasys Ltd. 2014
g
will not result in a significant error in the calculated displacements. The
7
Pdisp Oasys Geo Suite for Windows
maximum expected error in the calculated displacements, by a poor choice of
, is only about 5 to
g
10%.
In certain circumstances, however, the selection of
g
is important. This is because although
g
no effect on the calculated value of vertical stress ( z), it does affect the calculated mean stress
has
p
,
which is used to derive vertical strain ( v ):
An example of this is a short term analysis with interbedded granular and cohesive materials. The
cohesive layer(s) will have an undrained Poisson's ratio, g, whilst the granular layer will have a
drained Poisson's ratio, '. In this case the highest relevant value of Poisson's ratio (the undrained
value) should be entered as g. Errors due to calculation of p , will be less in the layers of drained
granular material, than in the layers of undrained cohesive material if the drained value had been
substituted for g.
In cases such as these it is advisable to use the Mindlin method of solution, or at least to carry out
a separate run to provide a check. This method does not generate these kind of errors.
2.2.2.2
Calculation Details
The determination of displacement for stress evaluation point 'i', at the centre of each sub-layer
proceeds as follows.
Young's modulus at 'i' is:
Where
Et = Young's modulus at top of layer
Eb = Young's modulus at base of layer
z = Level
The vertical strain of the sub-layer is
= Poisson's ratio of sub-layer
Where
z
= vertical stress at the stress evaluation point
© Oasys Ltd. 2014
Methods of Analysis
p
8
= sum of the principal stresses at the stress evaluation point
For non-linear soil curves Pdisp calculates the corresponding stress change at 'i' where
i
=
zi
Ei
The appropriate stiffness, modified for this stress level, is then determined by linear interpolation of
the stress values corresponding to the strain values input by the user.
Vertical displacement within the sub-layer is then:
When Eti = Ebi, this is approximated as:
When Eti
2.2.3
Ebi:
Accuracy of the Boussinesq Solution
The accuracy of the predicted settlement is influenced by the spacing of the stress evaluation
points. Decreasing the vertical distance between the points increases accuracy.
Large changes of stress or stiffness between adjacent points will lead to a reduction of accuracy.
Stress evaluation points should therefore also be closely spaced beneath and around localised loads
and where the variation of stiffness with depth is large.
For soils in which the Young's modulus (E) varies linearly with depth, additional sub-layers can be
generated automatically by specifying the maximum allowable ratio of E between adjacent stress
evaluation points. This ratio controls the maximum variation of E within each sub-layer.
The default ratio value is 1.5. It must be emphasised, however, that even with constant E the
accuracy of the Boussinesq solution is still a function of the number of sub-layers.
For further information see Young's modulus (E) and Displacement Levels.
2.3
Mindlin Analysis Method
The Mindlin method calculates relative displacements across a stratum directly from the applied
loads. It calculates the displacements due to a vertical or horizontal load applied as a uniform
stress on a rectangular or circular area on or beneath the surface of a semi-infinite homogeneous,
isotropic and elastic half-space material. The method uses equations derived by Vaziri et al (1982)
from the work of Mindlin (1936) and does not calculate stresses.
© Oasys Ltd. 2014
9
Pdisp Oasys Geo Suite for Windows
A value for global Poisson's ratio is not required for the Mindlin calculation.
2.3.1
Mindlin and the Legacy Mindlin Method
The Legacy Mindlin method represents the Mindlin method of Pdisp versions 18.2 and earlier. It has
the following characteristics.
Only vertical loads on horizontal planes are considered. Other load orientations are ignored.
No consideration is given to the influence of ground above a vertical load when calculating
settlements at points below the load. That is, all loads are treated as though they are at the
ground surface, so that soil above the load does not contribute to resisting the settlement of
the load.
The influence of ground above a vertical load, when calculating settlements in ground that is
above the load, is considered if the "Elastic analysis above loads" check-box is checked in
the Analysis Options dialog. If that option is unchecked then Pdisp will assume that all points
above the load settle by the same amount as those at the level of the load.
Horizontal displacements resulting from vertical loads on horizontal planes are not calculated.
If the Mindlin method is chosen without the Legacy Mindlin option, then the most recently
implemented Mindlin method of Pdisp versions 19.0 and later will be invoked. This has the following
characteristics that supplement those of the Legacy Mindlin method.
Both vertical and horizontal displacements are calculated resulting from normal and tangential
loads on vertical and horizontal planes.
Consideration is given to the influence of ground above a load acting on horizontal plane when
calculating settlements at points below the load, so soil above the load contributes to
resisting the settlement of the load. However, this can be changed by the user.
Displacements "behind" horizontal loads are calculated assuming elastic soil behind the
load.
Ta bl e 1
S um m a ry of Mi ndl i n Me thods
Legac y
Mindlin
S oil above load c ons idered t o
dampen dis plac ement s below it
New Mindlin
X
Original c orrec t ion fac t or for
heave in s oft s oils above t he
load
New c orrec t ion fac t or for heave
in s oft s oils above t he load
New Mindlin
wit hout
c orrec t ion fac t or
(in P dis p 19. 0)
X
X
X
V ert ic al (normal) loads on
horiz ont al planes
© Oasys Ltd. 2014
Methods of Analysis
2.3.2
V ert ic al (t angent ial) loads on
vert ic al planes
X
Horiz ont al (normal) loads on
vert ic al planes
X
Horiz ont al (t angent ial) loads on
horiz ont al planes
X
10
Settlement above the Load
Pdisp allows computation of settlement by several different methods. In particular, for the Mindlin
methods, alternative assumptions can be made about the effect of the ground above a subsurface
load.
These methods are believed to be reasonably good for computation of elastic settlements beneath a
load, provided that the stiffness of the ground is wither constant or generally increasing with depth.
Settlement above the load
In Figure 1 the blue solid curve represents settlements computed for a subsurface load in a uniform
material. Settlements above the load are derived in Pdisp in one of 2 ways:
A) Assume the settlement is the same as at the level of the load – line AB in Figure 1.
B) Assume the Mindlin distribution above the level of the load – line AC in Figure 1.
If the load is deep in the ground, method A may seriously overestimate the settlements at higher
levels above the load. Method B might be reasonably OK in uniform material.
The red curve in Figure 1 represents a situation in which the soil below the load is about 5 times
stiffer than it was for the blue line, but the soil above the load is unchanged. For this situation, a
“correct” solution for settlement above the load would probably look something like curve A'D'. At
present GSPR uses method B above in Pdisp, so adopts curve A'C'. It can be seen that this can
give the unreasonable result that points above the load actually heave.
The problem is that A'C' relates to the settlement that would occur at level A if the material below A
were the same as that above (ie point A). This curve needs to be corrected to relate to the
settlement actually computed at level A (ie point A').
© Oasys Ltd. 2014
Pdisp Oasys Geo Suite for Windows
Settlement
D’
C’
B’
C
B
Soil 1
Vertical load
A’
A
Soil 2
Mz
Soil 3 etc
Rigid base
Depth z
11
MRB
To correct the settlements above the load, either of the following two correction factors are applied:
Notation:
w(Zi) – vertical displacement at level Zi ,
M(Zi) – Mindlin integral at level Zi
© Oasys Ltd. 2014
Methods of Analysis
12
Zn – level of first displacement point immediately above the load
M(Zn) – Reference Mindlin integral for use in equation (2) below. This is actually, the Mindlin integral
at level Zn
Legacy Correction Factor
For Zi > Zn( > ZL),
w(Zi) = w(Zi-1)*M(Zi)/M(Zi-1)
---(1)
For location Zn (displacement level immediately
above load),
w(Zn) = w(ZL)*M(Zn)/M(Zn) = w(ZL)
For the other points above the load,
w(Zn+1) = w(Zn)*M(Zn+1)/M(Zn) = w(ZL)*M(Zn+1)/
M(Zn)
New Correction Factor
With correction factor applied, the settlement
is calculated up to the level of load in the
same way as the Legacy Mindlin method,
BUT here the Mindlin integrals take into
account the soil above the load.
For Zi > Zn( > ZL),
w(Zi) = w(Zi-1) + [{M(Zi)-M(Zi-1)}/Ei]*w(ZL)
[{M(Zi)-M(ZRBL)}/Ei]
where Ei is the Young’s modulus in the sub-
layer immediately below Zi.
w(Zn+2) = w(Zn+1)*M(Zn+2)/M(Zn+1) = w(ZL)*M(Zn
For location Zn,
+2)/M(Zn)
Thus, it can be seen that, equation (1) simplifies
to,
w(Zi) = w(ZL)*M(Zi)/M(Zn) , where Zi > Zn
w(Zn) = w(ZL) + [{M(Zn)-M(ZL)}/En]*w(ZL)
[{M(Zn)-M(ZRBL)}/En]
---(2)
It should be noted that the Reference Mindlin
integral is evaluated at the location of the
displacement level immediately above the load(i.e.
Zn), but NOT at the load(i.e. ZL). As a result, w
(Zn) is NOT the actual displacement at the level
Zn, but the displacement at the load level, ZL.
Thus, the heave in the zone between the levels Zn
and ZL is not taken into account. Also, these
Mindlin integrals take into account the soil above
the load, unlike those used in the evaluation of
settlements up to the level of the load.
2.3.3
Settlement below the Load
The following discussion applies to only the new Mindlin method.
The settlement below the level of the load is also affected by the presence of soil above the load. In
Pdisp, this effect may be
© Oasys Ltd. 2014
13
Pdisp Oasys Geo Suite for Windows
(1) included as if the soil above were of the same stiffness as that below or
(2) disregarded (i.e. the computation is as though the load were at a soil surface).
This is applicable only for loads acting on horizontal planes. The user may choose either of these
options in Pdisp.
In GSPR, option (1) is currently used for horizontal loads on horizontal planes, and option (2) is used
for vertical loads on horizontal planes. These cannot be changed by the user.
These are also the default options for the new Mindlin method, when the user creates a new file in
the current version of Pdisp.
Note: When files created by version Pdisp 19.0 are read by this current version of Pdisp, option (1) is
used for vertical loads on horizontal planes.
2.3.4
Calculation Details
The Mindlin method does not calculate stresses, but implicitly assumes that the stresses in a
given layer are the same as they would be if the whole of the ground had the same elastic properties
as that layer.
The solution is therefore exact for a soil of constant elastic properties irrespective of layer thickness.
If the value of Young's modulus or Poisson's ratio varies with depth, then the materials should be
divided into sub-layers.
Displacements are calculated at the strata boundaries and at intermediate displacement levels when
these are specified, see Displacement Levels.
Mindlin (1936) derived equations for the displacement due to a vertical or horizontal point load
applied within a semi-infinite homogeneous, isotropic elastic half space. Vaziri et al (1982) provided
integrated forms of these equations to give horizontal and vertical displacements due to uniform
stresses applied to horizontal or vertical rectangular areas.
2.3.4.1
Vertical Displacements
The basic equation can be expressed as:
where:
M = Function of the relative distance between the load and the displacement point and Poisson's
ratio.
E = Young's modulus of the half space.
To analyse the sub-layer, the function M is first calculated at the top (Mti) and base (Mbi) of the layer.
© Oasys Ltd. 2014
Methods of Analysis
14
For a layer with constant E, the relative settlement across the layer is:
Where E is assumed to vary linearly with depth, the approximation that M also varies linearly is
made:
where:
Et = Young's modulus at top of layer
Eb = Young's modulus at base of layer
z = Level
2.3.4.2
Horizontal Displacements
There are three options available to calculate the stiffness of soil for calculating horizontal
displacements
use weighted average
use greatest stiffness
use stiffness at displacement point
Displacements "behind" horizontal loads are calculated assuming elastic soil behind the load.
Use Weighted Average
In this method, the average stiffness is calculated between the centroid of load and the displacement
point at which the horizontal displacement is required.
A line connecting the load and the displacement point is considered for the calculation of horizontal
displacements. This line can pass through different layers of different soil profiles associated with
different zones. Each layer has its own Young's modulus and Poisson's ratio. The average Young's
modulus and shear modulus are calculated by considering a weighting based on the length of the
line passing though each of the layers. The Poisson’s ratio to be used is then derived from the ratio
of average Young’s modulus to average shear modulus.
Let the required Young's modulus and Poison's ratio be E* and *.
The “average” E = E* =
EiLi} / Li
The “average” G = G* =
GiLi}/ Li
and G* = E*/(2(1+ *)). So * = E* / (2G*) - 1.
Where E varies with depth within a stratum, the average within the stratum is calculated by
© Oasys Ltd. 2014
15
Pdisp Oasys Geo Suite for Windows
integration.
Use Greatest Stiffness
In this method, Pdisp takes the maximum Young’s modulus that occurs along the line connecting
the load and the displacement point. The Poisson's ratio is set to that of the stratum where the
greatest E is found.
Use Stiffness at Displacement Point
This method should be used with caution.
In this method the stiffness at the displacement point is used for calculating horizontal
displacements. The soil properties between the load and the displacement points are disregarded.
The horizontal displacements are calculated through soil zones. The properties of soil material for
calculating horizontal displacements are taken by it Z co-ordinate. If a point lies in a soil strata with
different top and bottom Young's modulus, the value at the point is linearly interpolated.
Intermediate points within the zone for calculating the horizontal displacement are taken in the
direction of the load.
2.3.5
Accuracy of the Mindlin Solution
The Mindlin solution is exact if the elastic properties are constant with depth. The solution for an
individual layer with constant elastic properties is also exact. The solution for vertical loading is a
good approximation provided stiffness does not decrease significantly with depth. For horizontal
loading the accuracy of each of the methods offered by the program is problem-dependent and
should be considered by the user.
Sub-layers are therefore only required if the value of stiffness varies within a layer.
© Oasys Ltd. 2014
Methods of Analysis
16
The default ratio for the maximum variation of Young's modulus within the sub-layer is 1.5. This
provides sufficient accuracy for most purposes.
2.4
1D Compression
Pdisp assumes the Boussinesq stress distributions.
For the purpose of this note uniform pressure loading of a circular area is considered, concentrating
on a point at the ground surface and at the centre of the load. Also, Poulos and Davies Eq 3.13a and
3.13b are used.
In 1D compression, the ratio of the horizontal to vertical stress change is /(1 ). In Boussinesq it
is (1+2 )/2, which is larger than in the 1D case. The reason for this larger horizontal stress increase
is that the load is not transferred vertically, but spreads into the ground:
The process of spreading implies a horizontal component of stress which converges on the loaded
area, increasing the horizontal stress by more than /(1 ). The larger increase of horizontal stress
leads to a smaller vertical strain. The ratio of vertical strains (1D Boussinesq) / 1D is equal to .
The Boussinesq stress distribution is strictly only correct for loading on the surface of a
homogeneous isotropic infinite half-space. It may be thought that by loading a very large area, 1D
compression would apply at the ground surface and at the centre of the load. But no matter how
large the loaded area, it is small compared with the “infinite” half space of the theory, so the effect on
horizontal stress still applies.
In reality, the stress distribution is changed by the non-homogeneity of the ground, a generally
increasing stiffness with depth. This has proportionately more effect on horizontal than on vertical
stress, although the horizontal stresses have proportionately less effect on vertical strain and
settlement.
The fundamental assumption and approximation of Pdisp is that it uses the Boussinesq stress
distribution irrespective of non-homogeneity, and even of the rigid boundary at the base. (In this
respect, the Mindlin approach is no different.) This approximation is reasonably good in most cases,
but its inaccuracy may vary from case to case.
© Oasys Ltd. 2014
17
Pdisp Oasys Geo Suite for Windows
The graph below shows the settlement computed for a 4.1m thick layer with Young’s modulus
2500kPa, located beneath the centre of a large area loaded to 100kPa. The computed settlements
are shown for various values of Poisson’s ratio.
Users should be aware of this feature so that they can decide whether the error involved is of
concern. Finite element analysis by programs such as Oasys Safe may provide a better general
solution in cases where inaccuracy is high. Analytical solutions for special cases might be found,
for example in Poulos & Davis.
3
Input Data
3.1
General
The following provides details of all the information required to run the Pdisp program.
On selection of the Pdisp program the main screen will open.
The "Welcome to Pdisp screen" will pop up next, if it is enabled by the user in the Preferences
dialog. This allows the user to either create a new data file, to open an existing file, or to select a
file from a list of recently used files.
If the startup dialog on the program menu is disabled, the user can create a new project file via:
File | New menu button or
the new file icon in the standard toolbar.
This will open a new "Titles" window and allows the user to proceed.
The About button allows the user to view the program details, whereas the Home Page button
opens the Pdisp home page in a browser.
© Oasys Ltd. 2014
Input Data
3.1.1
18
Titles
The first window to appear, for entry of data into Pdisp, is the Titles window.
This window allows entry of identification data for each program file. The following fields are
available:
Job Number
allows entry of an identifying job number
Initials
for entry of the user's initials
Date
this field is set by the program at the date the file is saved
Job Title
allows a single line for entry of the job title
Subtitle
allows a single line of additional job or calculation information
Calculation Heading
allows a single line for the main calculation heading
The titles are reproduced in the title block at the head of all printed information for the calculations.
The fields should therefore be used to provide as many details as possible to identify the individual
calculation runs.
An additional field for notes has also been included to allow the entry of a detailed description of the
calculation. This can be reproduced at the start of the data output by selection of notes using File |
Print Selection.
3.1.1.1
Titles window - Bitmaps
The box to the left of the Titles window can be used to display a picture beside the file titles.
To add a picture place an image on to the clipboard. This must be in a RGB (Red / Green / Blue)
Bitmap format. Select the
button to place the image in the box.
The image is purely for use as a prompt on the screen and can not be copied into the output data.
Care should be taken not to copy large bitmaps, which can dramatically increase the size of the file.
To remove a bitmap select the
3.2
button.
Data Input
All data is input via the Data menu, or via the Gateway.
© Oasys Ltd. 2014
19
Pdisp Oasys Geo Suite for Windows
The information can be entered in any order. The exception is that Soil Profiles must be entered
before Soil Zones. Once the data has been entered the program places a tick against that item in
the menu list.
Graphical Input allows the areas for load data, soil zones and displacement data to be drawn rather
than entered as tabular input.
The Graphic Settings option displays a dialog that controls the format and content of 3D Graphics
View.
Pile-soil interaction related information can be entered only if the "GSA raft analysis data" option is
selected in the Analysis Options.
3.2.1
Units
The Units dialog is accessible via the Gateway, or by choosing Data | Units from the program's
menu. It allows the user to specify the units for entering the data and reporting the results of the
calculations. These choices are stored in, and therefore associated with, the data file.
Default options are the Système Internationale (SI) units - kN and m. The drop down menus provide
alternative units with their respective conversion factors to metric.
Standard sets of units may be set by selecting any of the buttons: SI, kN-m, kip-ft kip-in.
Once the correct units have been selected then click 'OK' to continue.
SI units have been used as the default standard throughout this document.
3.2.2
Analysis Options
The following general data is entered to define the outline of the problem and type of analysis to be
carried out.
Analysis Method
Boussinesq
© Oasys Ltd. 2014
Input Data
20
This method calculates vertical displacements only. It is applicable for settlements and
stresses resulting from vertical loads on horizontal planes. If other loads are specified, these
will be ignored by the analysis. For further details see the Boussinesq Analysis Method.
Mindlin
The Legacy method represents the Mindlin method of Vdisp versions 18.2 and earlier. If
the Legacy Mindlin checkbox is unchecked, then the most recently implemented Mindlin
method, of Pdisp versions 19.0 and later, will be invoked. See Mindlin and the Legacy
Mindlin Method for a comparison of these methods.
Elastic analysis above loads reduces, with height, the settlement above loads which are
applied below ground level. It may only be switched off in the Legacy Mindlin solution, see
Mindlin and the Legacy Mindlin Method.
If horizontal displacements are not required, then Calculate horizontal displacements
should be un-checked. This will speed up the calculations. This option is not applicable for
the Legacy Mindlin and Boussinesq methods since they do not predict horizontal
displacements.
Stiffness for horizontal displacement calculations
Use weighted average
In this method, the average Young’s modulus and Poisson's ratio are calculated between
the centroid of each load and the displacement point at which the horizontal displacement is
required. For further details see Horizontal displacements.
Use greatest stiffness
In this method, the maximum Young’s modulus that occurs between the centroid of each
load and the displacement point is used for the calculations. The Poisson's ratio is set to
that of the stratum where the greatest E is found. For further details see Horizontal
displacements.
Use stiffness at displacement point
In this method, the stiffness at the displacement point is used for calculating horizontal
displacements. The soil properties between the load and the displacement points are
disregarded. This method should be used with caution. For further details see the
Horizontal displacements.
Heave correction factor
When calculating the displacements above the load, especially when there are softer soils
over stiffer soils, correction factors are applied to the calculations to prevent excessive
displacements in the softer soil layers.There are two options to choose from - the older
version of correction factor that was used in the legacy Mindlin solution, or the new
correction factor which is believed to be more accurate. By default, the newer option is used.
However, if the user decides to use the Legacy correction factor, he should select the
corresponding check box. See also Settlement above the load.
© Oasys Ltd. 2014
21
Pdisp Oasys Geo Suite for Windows
Effect of soil above load
When calculating the displacements below the load acting on horizontal plane, the user has
the option to ignore the effect of soil above the load in calculations - both for normal and
tangential loads. See also Mindlin and Legacy Mindlin methods and Settlement below the
load.
Global Poisson's Ratio for calculation of stresses (Boussinesq solution only)
See also Global Poisson's ratio.
Maximum Allowable Ratio (Ra) between values of Young's modulus (E) at adjacent
displacement levels. The default value is 1.5.
See also Young's modulus (E).
An equivalent rigid boundary level i.e. the solution boundary or base of the lowest soil
layer.
GSA raft analysis data enables the input of pile-soil interaction properties and pile-soil
interaction coefficients. The pile-soil interaction data is not used in Pdisp's analyses and so
does not affect its results. These data are included for export to Oasys GSA in order for GSA
to perform raft analysis.
Displacements at load centroids reports the displacements and stress/strain results at the
centre of the specified loaded areas. This is in addition to the locations specified by
Displacement Data.
3.2.3
Soil Profiles
The soil profiles window allows the ground conditions to be entered. These are modelled as a
series of ground profiles. The profiles are entered in tabular form.
Soil profiles are vertical columns through the ground which are separated into levels of strata. A new
table is created for each soil profile. Each new profile is created by selecting the next tab along the
top of the table.
Layers must be entered in order of decreasing level.
The lateral extent of each soil profile is specified later as a soil zone.
Each soil profile requires the following data to be entered:
level at top of each stratum
number of intermediate displacement levels
Young's modulus
Poisson's ratio
Default values for the above can be set by clicking on the grey default boxes at the top of each
column and entering a value. These values are then adopted for new layers unless reset by the
user.
The Colour field indicates the colour of the stratum of the profile when displayed in the 3D Graphical
© Oasys Ltd. 2014
Input Data
22
Output. The program will assign a default colour when creating a record if all other fields in the
record are valid. The colour can be changed by left-clicking the cell.
The column for identifying non-linear curves to individual layers of strata is only added to the table for
soil profiles once a non-linear curve has been defined. See section for Non-linear Materials.
The pile-soil interaction property column is only available if GSA raft analysis data has been
enabled in the Analysis Options. It allows the selection of a pile-soil interaction property to be
associated with each layer of a soil profile. The pile-soil interaction data is not used in Pdisp's
analyses and so does not affect its results. These data are included for export to Oasys GSA in
order for GSA to perform raft analysis. For further details see the Pile-soil interaction using GsRaft.
3.2.3.1
Displacement Levels
Displacement levels sub-divide each layer of soil into a number of sub-layers. For example the
specification of two intermediate displacement levels will divide the layer of soil into three sub-layers.
This process also defines the number of stress calculation points, with depth, for the Boussinesq
solution. The stresses are calculated at the centre of each sub-layer.
The lateral location of each calculation point is defined by the use of displacement grids, see
Displacement Data.
3.2.3.2
Number of Displacement Levels
The number of displacement levels calculated is determined as the larger of:
a user-specified number (N) given for each soil layer
a computer generated number (n) taken from the Maximum Allowable Ratio (Ra) between
values of Young's modulus (E), see Young's modulus (E).
The value of n is calculated by
So, for the example illustrated above, if Ra=1.5
© Oasys Ltd. 2014
23
Pdisp Oasys Geo Suite for Windows
then
The value of n is always taken as the next lowest integer.
The value of Ra=1.5 is normally sufficiently accurate for most problems.
3.2.3.3
Location of Displacement Levels
If Young's modulus (E) is constant with depth then the displacement levels will be evenly spaced. If
E increases with depth then the sub-layers are bunched around the lowest values of E in the
following way:
z t = level of top of strata layer
z
= thickness of strata layer
j = number of sub-layer (as shown above)
l = level of sub-layer
n = n or N (See Number of Displacement Levels).
e.g
where:
© Oasys Ltd. 2014
Input Data
24
e.g.
3.2.3.4
Young's Modulus (E)
The Young's modulus for the soil can be entered as a constant value or varying linearly with depth.
Values are required for the top and base of each stratum layer.
For soils in which the Young's modulus (E) varies linearly with depth, additional sub-layers can be
generated automatically by specifying the Maximum Allowable Ratio (Ra) of Young's modulus
between adjacent stress evaluation points. This ratio controls the maximum variation of E within
each sub-layer.
The Maximum Allowable Ratio (Ra) between values of E at adjacent displacement levels is
where:
Et = Young's modulus at the top of the stratum
Eb = Young's modulus at the base of the stratum
The minimum value of Ra is 1.0. The default value of Ra is 1.5. This is normally sufficiently accurate
for most general models. See also Number of Displacement Levels.
3.2.4
Load Data
Pressures are applied as vertically and/or horizontally and uniformly distributed loads to rectangular
and/or circular loaded areas. Areas can also be superimposed and placed at any level. All loads
are completely flexible - no allowance is made for stiffness of the structures.
Note : The loaded areas can be entered in tabular form (as described below). Horizontal planes with
vertical loads and without any rotation can be entered in graphical form. For information on entry of
graphical data see Graphical Input.
Specification of the loaded is as follows.
Horizontal or vertical, rectangular or circular loads can be entered by the tabular input.
Columns A to F specify the planes upon which the loads act.
Orientation can be either horizontal or vertical.
Centre of load is the centre-point of the load for defining its plane entered in global co-ordinates.
Angle of local x w.r.t. global X orientates the local axis. The plane can be rotated (in plan) by an
angle. The base point for the rotation is the centre of the load. The figures below illustrate the local
axis in relation to the global axis. Circular loads can also be rotated. Although the shape then
remains the same, and normal loads are unaffected, the directions of tangential loads will be
© Oasys Ltd. 2014
25
Pdisp Oasys Geo Suite for Windows
affected. The angle of local x w.r.t. global X is zero for loads parallel to the Cartesian co-ordinate
system. Positive angles are counter-clockwise.
Shape can be either rectangular or circular.
Dimension specifies the width and depth of rectangular loads or the radius of circular loads. The
width of rectangular loads is measured in the local x direction.
Load value specifies the load intensity to be applied to the plane. Loads can be either normal or
tangential to the loading plane. Tangential loads are specified with respect to the local axis of the
loaded plane (i.e. "tangential x" and "tangential y"). Normal loads on horizontal planes are applied
vertically downwards. The direction of normal loads on vertical planes depends on the angle of
rotation of the loaded plane as shown in figures below. Negative load intensities can be specified to
reverse their direction.
Vertical load on horizontal plane rotated in counter-clockwise direction
© Oasys Ltd. 2014
Input Data
26
Horizontal load on vertical plane rotated in counter-clockwise direction
Number of rectangles specifies the number of rectangles that are to be used to represent a
circular load for the purposes of calculation. The minimum number is three, but, to improve the
accuracy of the results close to the edge of the loaded area, the user may enter a larger odd
number.
Representation of circular load by rectangles
3.2.5
Soil Zones
The soil zones window allows the lateral limits, if any, of each soil profile to be specified. This is
defined in terms of rectangular areas specified by corner x and y co-ordinates. The soil zones are
therefore aligned with the Cartesian coordinate system.
Soil zone areas may overlap. If this occurs then the profile relating to the soil zone with highest
allocated number will be used in the calculation.
If no soil zone is specified then the first soil profile is assumed to be widespread. Similarly, if
displacements are to be calculated for locations that are wide of any soil zones then the first soil
profile will be used.
The soil zones can be entered in either this tabular form or graphical form. For information on entry
of graphical data see Graphical Input.
© Oasys Ltd. 2014
27
3.2.6
Pdisp Oasys Geo Suite for Windows
Displacement Data
The points at which displacement results are required can be specified using grids, lines or individual
points. Results can also be given for the centre of each loaded area, see Analysis Options.
The grids, lines or points can be entered in tabular form (as described below). Horizontal grids and
lines can also be entered in graphical form. For information on entry of graphical data see Graphical
Input.
Any number of grids, lines or points can be entered. Show detailed results allows the user to
choose for which displacement grids, lines and points results are required.
Grids can be entered horizontally,vertically or at an vertical inclination by extruding a line. The
Direction of extrusion is specified as one of the Global axes (X, Y or Z). A Line for extrusion must be
entered by specifying its end coordinates. For example, if 'Global X' is the direction of extrusion
then the table allows the specification of a line in the YZ plane.
The extrusion depth should not be zero. Negative extrusion depth extrudes in the opposite to the
global directions.
The number of intervals is specified across and along the extrusion as shown below.
© Oasys Ltd. 2014
Input Data
28
Lines can be entered in any orientation by specifying the co-ordinates at both ends.
Points are specified by single x, y and z co-ordinates.
3.2.7
Non-linear Materials
The value of stiffness (Young's modulus E) with depth is specified in the Soil Profiles window. For
linear materials each specified value of E will remain constant, at the given depth, throughout the
calculation for stress, strain and thereby displacement.
For models of materials where the relationship between stress and strain is non-linear a non-linear
curve must also be specified. This can be defined by the specification of a curve of strain versus
stiffness factor.
The curve is developed from the soil stress/strain relationship.
For increasing values of strain, the factor (F) by which Young's modulus is to be modified, is defined
by:
where
L is the equivalent stress for a linear curve at a given strain ( ) and nl is the stress for the
non-linear curve.
All stresses referred to in this manual are stress changes due to the application of loads. No
account is taken of stresses existing in the ground before loading.
Entering new data
To enter a new non-linear curve click on the Add Curve tab at the top of the grid. This highlights the
Graph title box and provides the number of the next curve. If you then click the right button whilst still
on the tab the Page Edit Options screen will appear. This allows the name of the curve to be altered
in addition to copying and deleting curves.
Non-linear curves can then be specified either in the table provided or by using the mouse cursor on
a pre-defined grid and clicking the left button to identify the required points.
Strain can be entered on a linear or log scale. The scales on the x and y axes can also be changed
© Oasys Ltd. 2014
29
Pdisp Oasys Geo Suite for Windows
clicking on the X max and Y max arrow keys in the view's status bar.
Editing data
Points entered on the grid can be refined by editing the values displayed on the table.
Once the required curves have been entered then the user must return to the soil profile data
window. The table now allows the appropriate curve to be allocated to the correct soil type.
3.2.8
Pile-Soil Interaction Using GsRaft
Pile-soil interaction properties can be entered only if the "GSA raft analysis data" option is selected
in the Analysis Options. The Oasys GSA program, which depends on Pdisp application data for
GsRaft analyses, uses these Pile-soil interaction properties, which provide additional information for
each soil stratum. The Pile-soil interaction properties do not affect the analyses or results of Pdisp.
The facility can also be used to model interaction between soil and spread foundations.
The ground interacts with elements of the shaft of a pile in 3 dimensions (x, y, z) and in the vertical,
z, direction at the pile base. In each case, the shape of the force-displacement curve for the
interaction is represented by / ult = C( /D) for vertical displacement and C( /B) for horizontal
displacement, where:
ult
= interaction stress (shear or normal as relevant)
= maximum value of the stress
C()
= a coefficient defined by a user-defined function (see Pile-soil interaction curves C
D, B
= displacement
= geometry parameters defined as below.
(..))
The values of represent the relative displacement between the pile and the elastic ground near it.
That is, is the non-linear deformation of the soil local to the pile, which is usually behaving in a nonlinear manner.
For circular piles:
D
Bx
= diameter
= By = D
For rectangular piles, Bx and By are the sides of the rectangle.
p
= 2Bx + 2By
D
= p/
For H sections:
Bx
By
p
= flange width
= web height + 2 x flange thickness
= complete perimeter (roughly 2 x web height + 4 x flange)
© Oasys Ltd. 2014
Input Data
D
3.2.9
30
= (2Bx + 2By )/
Pile-Soil Interaction Curves (PSICs) C(..)
The user is required to specify a number of shapes for the Pile-Soil Interaction Curves named PSIC1,
PSIC2 etc.
For each PSIC, the coefficient C(d) is related to normalised relative displacement d (= /B or /D). C
values for d beyond the range of values specified will be taken as 1.0 on the positive side and -1.0 on
the negative side.
The scales on the x and y axes can also be changed by clicking on the x max and y max arrow
keys in the view's status bar. There is no limit for x max but 1.0 is the limit for y max.
The curve can be made symmetric about the origin by selecting the Symmetric check box for the
view's status bar. An asymmetric curve can be converted to a symmetric curve by choosing either to
use positive values to replace the negative values or vice-versa.
3.2.10 Allocation of PSICs to Soil Strata
In each soil stratum, a Pile-Soil Interaction Curve (PSIC) is required for each dimension of
displacement of the shaft and for the vertical displacement of the base. If there is no pile base in the
stratum, then the base data are ignored. The maximum stress in each mode of interaction is also
required.
3.2.11 Imported Displacements
Displacements from other programs may be imported from CSV files via 'File | Import |
Displacements...' from the program menu.
The purpose of Imported Displacements is to combine the displacements from other programs
together with those from Xdisp. The combined displacements may then be shown on the Tabular
Output, the Plan View or the 3D Graphical Output View.
The import file should include rows of data beginning with one of the following keywords. Each row
of data contains displacement results for a single coordinate.
LOAD_RESULT
POI NT_RESULT
LPOI NT_RESULT
GPOI NT_RESULT
I NTERMEDI ATE_LOAD_RESULT
I NTERMEDI ATE_POI NT_RESULT
I NTERMEDI ATE_LPOI NT_RESULT
I NTERMEDI ATE_GPOI NT_RESULT
Whichever of these keywords is used, the data will be imported and treated in the same way. The
range of keywords is to allow the import of CSV files that have been exported from Xdisp or Oasys
Pdisp, which may contain any of these keywords.
© Oasys Ltd. 2014
31
Pdisp Oasys Geo Suite for Windows
Displacements follow the sequence: Keyword,x Coordinate,y Coordinate,z Coordinate,x
Displacement,y Displacement,z Displacement.
Units for data in the file are specified by the keywords UNI T_DI SP and UNI T_LENGTH
(displacement and length units respectively) followed by the index of the unit. Length and
displacement units' indices are: 0 - metres; 1 - centimetres; 2 - millimetres; 3 - feet; 4 - inches.
Units information should appear in the file before the displacement results.
e.g.
UNI T_DI SP, 2
UNI T_LENGTH, 0
LOAD_RESULT, 0. 5, 43. 5, 0, - 0. 4967472, - 93. 72664, 47. 38838
I NTERMEDI ATE_LOAD_RESULT, 0. 5, 43. 5, - 2. 587683439, 0, 0, 38. 77201
I NTERMEDI ATE_LOAD_RESULT, 0. 5, 43. 5, - 4, 0, 0, 34. 85815
GPOI NT_RESULT, - 80, - 90, 0, 32. 98127, 27. 33411, - 0. 5642965
I NTERMEDI ATE_GPOI NT_RESULT, - 80, - 90, - 4, 0, 0, - 0. 5535589
I NTERMEDI ATE_GPOI NT_RESULT, - 80, - 90, - 6, 0, 0, - 0. 5062072
LPOI NT_RESULT, - 70, - 80, 0, 41. 05777, 32. 48021, - 6. 13E- 03
I NTERMEDI ATE_LPOI NT_RESULT, - 70, - 80, - 4, 0, 0, 3. 54E- 02
I NTERMEDI ATE_LPOI NT_RESULT, - 70, - 80, - 6, 0, 0, 0. 1545731
POI NT_RESULT, 0, 0, 0, 0. 7738549, - 31. 88898, 30. 52104
I NTERMEDI ATE_POI NT_RESULT, 0, 0, - 4, 0, 0, 26. 76711
I NTERMEDI ATE_POI NT_RESULT, 0, 0, - 6, 0, 0, 23. 55008
If units are not specified in the file then a dialog will be shown at the beginning of the import process
for the user to specify the units of the data in the file.
These imported displacements may be viewed via 'Data | Imported Displacements...' from the
program menu or via the Gateway. Once imported they are non-editable. Imported displacements
can be deleted by right-clicking in the Imported Displacements Table View and selecting 'Delete All'
from the subsequent context menu.
In order that imported displacements may be combined sensibly with displacements that are
generated by Xdisp, the following rules apply.
1) All coordinates of data in the import file are imported whether a match is found for them or
not in the displacement grids, lines and points of the current Xdisp file.
2) The checking of whether coordinates match those of the displacement grids, lines and
points in the Xdisp file is performed at the time of analysis. The tolerance for coincidence is
1 mm in all of the x, y and z directions. Those coordinates which match any in the Xdisp file
will have their results added to those of that Xdisp file after analysis.
3) If there are multiple entries of displacements for the same point in the import file, all those
displacements will be added to those calculated by Xdisp for the displacement position,
whether that position is modelled by Xdisp as a displacement point, or as a point within a
displacement line or grid.
4) Similarly, if one point in the import file is matched with more than one in the data file, e.g. if
displacement points, lines or grids contain coincident positions, then the imported
displacements will be added to each of the matching positions in the data file.
The diagram below illustrates a series of displacement coordinates in a CSV import file, a
Displacement Grid, a Displacement Line, and three Displacement Points in an Xdisp data file. It
shows how the results would be combined.
© Oasys Ltd. 2014
Input Data
32
Coordinates such as 'A' are present in the CSV import file in one row of data only with one set of x, y
and z displacements. Coordinates such as 'B' are present in the CSV file in two rows of data and so
have two sets of x,y and z displacements. Coordinates such as 'C' are present only in the Xdisp
data file and not in the CSV import file. Their results will therefore only reflect the results from
Xdisp's calculation of displacements. Coordinates such as 'D' are present in the Xdisp data file, but
also in two rows of the CSV import file. Their results will therefore be the sum of those from Xdisp's
calculation of displacements and the two rows of results in the CSV import file. Coordinates such
as 'E' are present in the Xdisp data file and in one row of the CSV import file. Their results will
therefore be the sum of those from Xdisp's calculation of displacements and that one row of results
in the CSV import file.
If an imported result is intended to be added to results at each displacement point in the Xdisp data
file, then care should be taken to ensure that the imported file contains one result for every data
point. When importing results from Oasys Pdisp this is most easily achieved by creating the same
set of Displacement Grids, Lines and Points in the two programs for export from one and import to
the other. Having created the Displacement Grids, Lines and Points in one of the programs they can
be input to the other by copying and pasting between the programs' Displacement Data table views
by highlighting the required cells and via the right-click context menu options of 'Copy' and 'Paste'.
Note that the last columns in the Displacement Data for the two programs may display different
data, so only the first, common columns should be copied.
Caution should be employed if results are inspected for which not all points of Displacement Grids,
Lines and Points have matching imported displacements.
The Tabular Output may be inspected for a summary of the displacements that have been imported
and, after analysis, those which have been found to match displacement points in the Xdisp file.
© Oasys Ltd. 2014
33
Pdisp Oasys Geo Suite for Windows
3.2.12 Graphical Input
Graphical Input is accessed via the Data menu, the Gateway or the Pdisp toolbar. The following data
can be entered in both tabular and graphical form. The methods are fully interchangeable.
Soil Zones
Displacement Data
Load Data
This section describes how to enter the data graphically.
Entering New Data
1.
2.
Select 'Data->Graphical Input' from the program's menu.
Select 'Graphics->Input' from the program's menu or select the appropriate icon from the
Graphics Toolbar for soil zones
, displacement data
or load data
. These
buttons are context dependent. When the Graphical Input View is active they both display and
allow input of soil zones, displacement data and load data respectively. Subsequently deactivating
a button does not hide the entity. Instead, when the Graphical Input View is active these entities
are hidden via 'Graphics -> Toggle items' from the program's menu. When the Plan View is active
these buttons allow display or hiding of soil zones, displacement data and load data respectively.
Once selected the cursor and left and right mouse buttons can then be used to enter the data.
Corresponding items can also be accessed via Graphics | Input from the program menu.
3.2.12.1 Inserting Bitmaps
Bitmaps can be inserted behind the plan view. If the site plan is available, at a suitable scale in
bitmap form, then this can be placed behind the input data to check locations of loads etc. The
bitmap can be inserted in the following manner:
Select the bitmap button and open the required bitmap file.
This opens the Bitmap Scaling dialog.
Define the area required for the bitmap to cover in terms of maximum and minimum co-ordinates and
select "Load Bitmap".
The bitmap is then placed behind the main graphic in the Plan View.
Care should be taken not to copy large bitmaps, which can dramatically increase the size of the file.
If the bitmap was used during data input it may be better to remove and store it separately from the
Pdisp file.
3.2.12.2 Soil Zones - Graphical input
To enter the soil zones graphically; select the appropriate button for soil zones
from the
Graphics Toolbar. Or select: Graphics | Input | Soil zones from the program's menu.
1.
Place the cursor (cross) over the start of the area required.
© Oasys Ltd. 2014
Input Data
2.
34
Hold down the left button and drag the mouse until the full area is defined.
Once the area has been defined the screen will prompt for the entry of additional data.
Enter the number of the appropriate soil zone and "Add to data".
This will also update the tabular input. If the zone's area requires additional editing then this should
be carried out using the tables.
3.2.12.3 Displacement Grids - Graphical input
To enter the displacement points, lines and grids graphically, select the appropriate button on the
Graphics Toolbar
or select: Graphics ->Input ->Displacements -> Points (Lines or
Grids) from the program's menu.
1.
2.
Use the cursor (cross) to place the corner of a grid or at the start of the a line or point
location.
Left-click to place a displacement point, or hold down the left button and drag the mouse until
the full displacement grid's area or displacement line's extent is defined .
Once defined the screen will prompt for the following additional information.
This will also update the Displacement Data table. If the grid requires additional editing then this
should be carried out using that table.
Once input of displacement points, lines or grids has been selected, the right mouse button may be
used to active a context menu from which the type of displacement entity for subsequent input may
be changed.
Only horizontal lines and horizontal grids can be entered by Graphical Input. Others must be entered
in the Displacement Data table.
3.2.12.4 Load Data - Graphical input
To enter the load data graphically, select the load data button on the Graphics Toolbar
Select: Graphics ->Input ->Loads from the program's menu.
. Or
1.
Use the right mouse button to activate the context menu from which to select the type of data
entry.
2.
3.
Use the cursor (cross) to place the corner of a rectangular area or centre of a circle.
Hold down the left button and drag the mouse until the full area is defined.
Once defined the screen will prompt for the following additional information.
© Oasys Ltd. 2014
35
Pdisp Oasys Geo Suite for Windows
The number of rectangles is only required for the circular loaded areas, see Load Data.
This will also update the Load Data table. If the area requires additional editing then this should be
carried out using that table.
Only normal (vertical) loads on horizontal planes, with no rotation in plan can be entered by
Graphical Input. Others must be entered in the Load Data table.
4
Output
4.1
Analysis and Data Checking
Results can be obtained by selection of the Analysis menu:
Prior to analysis the program provides warning messages if applicable.
Note: The option to 'Delete Results' becomes active once the calculations have been completed.
4.2
Tabular Output
Tabular output is available from the View menu, the Gateway or the Pdisp toolbar. This output may
include input data and results - if an analysis has been performed. The results are provided in both a
full and condensed tabular form. The lists of tabulated output can be highlighted and then copied to
the clipboard and pasted into most Windows type applications e.g. Word or Excel. The output can
also be directly exported to various text or HTML formats by selecting Export from the File menu.
RESULTS FOR GRIDS
Analysis: Boussinesq
Global Poisson's ratio:
Rigid boundary level:
0.2
-30.0
The maximum displacement difference between
Boussinesq method = 168.0mm and Mindlin method = 59.17mm
occurs at point X=16.00m Y=-39.00m Level -2.588mOD and is: 108.9mm
Type
Location
Displacement
X
Y
Z[Level]
X
Y
Z
[m]
[m]
[mOD]
[mm]
[mm]
[mm]
Loads
0.5000
43.50
0.0
105.8
-12.50
1.253
1.000
-54.00
-2.000
117.1
-12.50
1.253
0.0
-6.000
-1.000
31.97
-12.50
1.253
Point 1
0.0
0.0
-10.00
34.90
-12.46
1.641
Point 2
0.0
4.000
-10.00
36.67
-14.46
2.539
Point 3
0.0
8.000
-10.00
38.23
-15.96
3.327
Point 4
0.0
12.00
-10.00
38.16
-16.61
3.676
Grid 1
0.0
0.0
-10.00
34.90
-12.46
1.641
0.0
4.000
-10.00
36.67
-14.46
2.539
0.0
8.000
-10.00
38.23
-15.96
3.327
0.0
12.00
-10.00
38.16
-16.61
3.676
0.0
16.00
-10.00
36.03
-16.25
3.668
© Oasys Ltd. 2014
Output
0.0
4.000
4.000
4.000
4.000
4.000
4.000
20.00
0.0
4.000
8.000
12.00
16.00
20.00
-10.00
-10.00
-10.00
-10.00
-10.00
-10.00
-10.00
33.12
36.72
37.66
38.50
38.23
36.18
32.82
-15.14
-10.72
-12.84
-14.13
-14.67
-14.84
-14.52
36
3.799
2.827
4.777
6.645
7.302
6.865
6.859
An asterisk "*" at the right of a row indicates that the coordinate's result includes an imported
displacement.
4.2.1
Full Tabular Results
The tabulated results listed below are available in the full output.
Type lists the type of location for the displacement co-ordinates, i.e. the centre of the loaded areas,
the points, lines and grids.
Location provides the global co-ordinates for the displacement points (X, Y, Z[level]) in metres.
Displacement calculation level provides the level of the grid and all intermediate displacement
levels
Displacement lists displacements at the displacement points and all intermediate displacement
levels. Displacement in mm. Positive displacement indicates settlement, negative indicates heave.
An asterisk "*" to the right of the 'Displacement' columns indicates that the coordinate's result
includes an imported displacement.
For the Boussinesq solution only, and if the point does not include the results of an imported
displacement:
Stresses list the stress values at all stress calculation points and at the centre of each sub-layer, as
defined by the intermediate displacement levels.
Once selected the program will scroll through all the results before allowing access to the data.
4.2.2
Condensed Tabular Results
The tabular results listed below are available in the condensed output.
Type describes the type of location for the displacement co-ordinates, i.e. the centre of the loaded
areas, the points, lines and grids.
Location provides the global co-ordinates for the displacement points (X, Y and Z[level]).
Displacement lists displacement of the point resulting from the applied loading. Horizontal
displacements are given in Global X, Y directions. Positive Z displacements indicate settlement,
negative Z displacements indicate heave.
An asterisk "*" to the right of the 'Displacement' columns indicates that the coordinate's result
© Oasys Ltd. 2014
37
Pdisp Oasys Geo Suite for Windows
includes an imported displacement.
4.3
Graphical Output
Graphical output is accessed via the View menu, the Gateway or the Pdisp toolbar.
The graphics menu is available if any of the following windows is visible:
Plan
Cross section
Graphical Input
This menu allows the use of templates to save specific types of graphical displays. It also allows
the user to display the load magnitudes, to annotate the grids, lines and points and to set an exact
scale for the display.
Label objects is only available for the cross section view.
Input is only available for the Graphical Input view.
4.3.1
Templates
The templates function is used as follows.
1.
2.
3.
4.
4.3.2
Set up the graphics view which you would like to repeat for other files in the future.
Select the 'Save as template' option and save the view with a specific file name.
To reload the template select the 'Load template' option.
To return to the original view when the graphics option is opened select "reset defaults".
Plan View
Plots of the plan area of the problem can be created.
The graphical displays may be customised via menu commands or the following icons on the
toolbars.
Axis: Provides a reference grid behind the drawing.
Displacement Data (Grids, Lines and Points): All shown in as a grid or
using crosses to define individual points and points along lines. The plan
view shows only horizontal lines and horizontal grids. Inclined lines and
grids can be viewed on the 3D graphical output.
Imported Displacements: Plots the locations of imported displacement
points.
Soil Zones: Plots the extent of the soil zones.
Loaded Areas: Plots the locations and sizes of the defined loaded areas.
The plan view shows only normal (vertical) loads on horizontal planes, with
no rotation in plan.
Contours: The plan view shows contours (line contours or filled contours)
for only vertical displacements. Contours for horizontal, vertical and
resultant displacements can be viewed on 3D graphical output.
© Oasys Ltd. 2014
Output
38
Inserting Bitmaps: Allows a bitmap to be placed behind the main
graphical view, see Inserting Bitmaps.
Engineering Scale: This allows the user to toggle between the default
'best fit' scale and the closest available engineering scale. e.g. 1:200,
1:250, 1:500, 1:1000, 1:1250, 1:2500.
Zoom: The user can select an area to 'zoom in' to by using the mouse to
click on a point on the drawing and then dragging the box outwards to
select the area to be viewed. The program will automatically scale the new
view. The original area can be restored by clicking on the 'restore zoom'
icon as shown here.
Save Metafile: Save icon allows the file to be save in the format of a
Windows Metafile. This retains the viewed scale. The metafile can be
imported into other programs such as a word processor, spreadsheets and
drawing packages.
Copy: This icon allows the view to be copied to the clipboard in the form of
a Windows Metafile.
Change Displacement Grids: The user can move up or down to the data
defined for the different displacement grid levels. The number of the level
currently being viewed is given at the top of the figure.
Annotation: Selection of this button allows the use of the mouse to place
the value of settlement at the exact location of the cursor and at the level of
the displacement grid selected. Not the closest contour value.
To operate place the cursor over the required location and press return or
the left button on the mouse.
Tip: If a displacement line is in the vicinity of a point you wish to
annotate then de-select the displacement grids icon and proceed with the
annotation. To get the maximum accuracy for the location of the points
maximise the size of the screen and scale of working.
Line Graph: Selection of this button allows the user to view a plot of
displacement (mm) versus distance along a defined displacement line by
clicking on it.
4.3.2.1
Set Contour Interval
The "Set contour interval" option from the View menu allows the contour interval to be changed.
Select the option and the Interval dialog box will appear. Amend the contour interval for the plan view.
© Oasys Ltd. 2014
39
4.3.2.2
Pdisp Oasys Geo Suite for Windows
Set Exact Scale
Selection of Set Exact Scale allows you to set any required scale for the graphics. The chosen
scale will be maintained when the graphic is printed. The scale is set via the Specify Scaling dialog.
4.3.2.3
Line Displacements
This provides a plot of displacement versus distance along the defined displacement lines.
To reach the plots click the "Line Graph" button, then place the cursor over the line you wish to view
and click with the left button. The program then requests whether you wish to view the line number
available.
This view shows only horizontal lines. The deflected shapes of inclined lines can be viewed on the
3D graphical output.
If 'No' is selected then the program will go to any lines below the area and ask again. This allows
you to view lines which are superimposed at different levels.
4.3.2.4
Soil Column Displacements
This view provides the displacement profile along a vertical line under the user specified point.
Displacement is plotted against level or depth according to the user's choice.
To view the graph click the "Soil Column Displacements" item in the Gateway, or select "View | Soil
Column Displacements" on the program menu. A dialog box will pop up which asks for the plot data.
Enter the coordinates of the point under which the displacement profile is to be generated, and the
parameter against which displacement is to be plotted i.e. level or depth..
Press the "OK" button to view the graph.
The different soil layers of the zone in which the point lies are represented as coloured rectangles in
the graph.
The coordinates and the parameter against which the displacement should be plotted can be
changed via the dialog bar at the top of the view.
Select the "Apply" button to view the graph.
4.3.3
Cross Section Plot
This provides a plot of the generalised cross-section through the problem.
The section is not at any particular location and merely provides an illustration of the location of all
the input information which has both line and level.
4.3.3.1
Label objects
This option from the view menu allows the user to label the Grids, Lines and Points with their
appropriate numbers and the Loads with their assigned values.
© Oasys Ltd. 2014
Output
4.3.4
40
3D Graphical Output
The 3D Graphical Output displays a three dimensional plot of the model and its available results.
This view is dependent on parameters defined in the Graphic Settings property sheet.
Rotate
The model can be rotated by pressing and holding the left mouse button and dragging the mouse.
Horizontal drag rotates the model with respect to its Z axis. Vertical drag rotates the model with
respect to the axis parallel to a horizontal line through the centre of the view.
Zoom
The model can be zoomed in or out by scrolling the mouse wheel. The model can be zoomed to its
original scale by pressing 'z' from keyboard.
Pan
The model can be panned by holding 'shift + left-click' and dragging the mouse. Panning is effective
for the orthogonal view.
Saving the view
The view point and zoom factor can be saved by selecting "Save default view settings" from the
context menu of the view. The context menu is accessible by right-clicking in the view or by using
the context menu key on the keyboard).
Printing
The view can be printed. The current version of Pdisp does not print a title block. The print may
differ slightly from the image viewed on screen owing to differing resolutions.
4.3.4.1
Graphic Settings
The Graphic Settings property sheet allows the parameters that govern the format and content of 3D
Graphical Ourtput View to be specified.
These graphic settings are stored in the data file. Default settings are provided by the program. The
defaults can be restored by clicking the ‘Restore Defaults’ button. The 'Apply' button applies the
settings to the 3D Graphics view.
This property sheet may be accessed via:
"Data | Graphic Settings" from the program's main menu; or
the Wizard button
on the Pdisp Toolbar when the 3D Graphics Output is active; or
selecting "Graphic settings" from the context menu of the 3D Graphics Output (the context menu
is accessible by right-clicking in the view or typing the context menu key from keyboard); or
the Gateway, by selecting "Output | 3D Graphics".
The controls are separated into four different pages:
© Oasys Ltd. 2014
41
Pdisp Oasys Geo Suite for Windows
Soil
Loads
Displacements
Preferences
Each of these is described in detail below.
Soil zones and labelling
This section specifies which soil zones are to be displayed, and, if displayed, which should be
labelled.
Soil profiles
This section specifies how soil profiles are to be displayed.
Solid display
If this is selected soil profiles will be displayed as solid surfaces with their respective strata colours
as specified in the Soil Profiles table. Solid display does not allow the display of loads or
displacements.
Wire frame display
If this is selected soil profiles are displayed as a wire frame. Wire frame display allows the display of
loads and displacements.
Soil zones display
This selection chooses which soil zones are to be displayed. The list shows those soil zones that
have been defined in the Soil Zones table. It allows multi-selection.
All
This button causes all the soil zones to be selected.
None
This button clears the selection of soil zones.
Annotation
When this is checked all displayed zones are given labels on the 3D Graphics view.
Loads
This specifies which loads are to be displayed.
All the controls from this page are enabled only when the 'Wire frame display' button is selected in
the Soil page -> 'Soil profiles' section.
Loads and labelling
This section specifies which loads are to be displayed, and, if displayed, which should be labelled.
Load intensity can be viewed in two ways.
© Oasys Ltd. 2014
Output
42
Loaded areas
Each different load intensity, as specified in the Load Data table, is displayed with a different colour.
A legend of colour vs load intensity will be displayed. Load orientation i.e. normal, tangential x and
tangential y can be selected from the drop down list.
Loads as arrows
All loads associated with a loaded plane are viewed at once as arrows. The values of intensity will be
displayed at the tip of each arrow. Arrow size based on intensity allows the arrow length to be
scaled according to the size of the load. The scale can be doubled or halved by clicking the "x2" or
"/2" buttons.
Displacements
The Displacements' page specifies how the displacement input data and results are to be displayed.
The components of this page are enabled only when the 'Wire frame display' option is selected in the
'Soil profiles' section.
After performing an analysis, results are available for the Points, Lines and Grids specified in the
Displacement Data table. The 3D Graphics View can illustrate these results. If no results are
available then only the undeflected locations of the proposed displacement data are available for
display.
Displacement data and labelling
This section specifies which displacement entities are to be displayed, and, if displayed, which
should be labelled.
Grids
Filled polygons
When this is checked the deflected nodes on a grid form a surface with filled polygons. When
unchecked it displays polygons by outlines. This button is enabled only if results exist and when
the 'Contour surface' button is unchecked.
Contour surface
This selection allows display of line contours, filled contours or no contours. Contours are displayed
with an interval specified in the 'Contour interval' edit box. This represents the deflection pattern on a
grid. This contour surface is drawn on an undeflected grid. This is enabled only if results exist.
Contour interval
The value of the contour interval is automatically initialised with a default value based on the
minimum and maximum extents of the deflection results. The contour surface can be viewed at
another contour interval by changing this value. The minimum value that is required is such as to
limit the number of contours to less than 50. The maximum value is the contour range.
© Oasys Ltd. 2014
43
Pdisp Oasys Geo Suite for Windows
Direction
The component of displacement in the X, Y and Z directions, or the resultant displacement, may be
chosen for display. The contour surface or deflected shape will be based on this selection.
Display nodes
When this is checked the nodes on the grid will be highlighted with a small cube. This is helpful to
identify nodes on a deflected surface when the 'Filled polygons' button is unchecked.
Display values
When this is checked the nodes will be annotated with displacement values. This button is enabled
only if results exist.
Undeflected/Deflected shape
When this is checked the undeflected positions of Points, Lines and Grids are displayed. This is
required to view the locations of displacement entities when there are no results.
General
Centre of rotation
This specifies the co-ordinate of the centre for rotating and zooming.
Centre of drawing
When this is selected the centre of rotation is set to the centre of the model, the resulting X and Y
co-ordinates are displayed in the edit boxes. These cannot be edited directly.
Custom
When this is selected the edit boxes X and Y are enabled so that the centre of rotation may be
entered directly.
Labels
Name
Indicates that labels, where specified, are to display the names of entities only.
No.
Indicates that labels are to display the reference numbers of entities only.
No.:Name
Indicates that labels, where specified, are to display both the names and numbers of entities.
Transparent
© Oasys Ltd. 2014
Output
44
When this is checked the surfaces become semi-transparent. The transparency depends on the
sequence of the drawing order.
Lighting
When this is checked light falls on the model from a pre-defined position set by the program. This
button is enabled only when lighting is appropriate.
Picture area to exclude legend panel
When this is checked the picture area used for the legend is used exclusively for the legend and that
used for the display of the image is reduced by the width of the legend panel. Otherwise the legend
is superimposed on the image.
Perspective view
Toggles the view between orthogonal and perspective.
Defaults
This resets all the settings to the program's defaults and applies them to the 3D Graphics View.
OK
This applies to the 3D Graphics View the current settings from all the pages, and closes the
property sheet.
Undo
This undoes the changes to all those pages that have been modified since the 'Apply' button was
last pressed.
Apply
This applies to the 3D Graphics View the current settings from all the pages without exiting the
property sheet.
4.4
CSV Results File
A comma-separated value (CSV) file of results may be output by selecting 'File | Export | CSV
Results File ..." on the program menu. This option is disabled if there are no results, so an analysis
must have first been performed. On selection of that option the CSV output selection dialog will
appear.
The CSV output file may contain any of the following:
grid, line and point displacements;
© Oasys Ltd. 2014
45
Pdisp Oasys Geo Suite for Windows
alignments of displacement contours in any of x, y, z or resultant directions.
If a grid is selected for a direction that contains results that are all zero, then that direction will be
disabled.
One purpose of this output is to allow building damage segments/categories and displacement
contours to be plotted on drawings in other design programs e.g. AutoCAD.
The output file includes keywords to identify the content of each row of data. Samples are given
below which show the format.
Grid, line and point displacements follow the sequence: Keyword,x Coordinate,y Coordinate,z
Coordinate,x Displacement,y Displacement,z Displacement.
Contour data lines follow the sequence: Keyword,Grid No.,Contour value,x Coordinate 1,y Coordinate
1,x Coordinate 2,y Coordinate 2. They describe discrete segments of a contour line.
Dimensions for output data are chosen by the user in the "Save As" dialog that follows the "CSV
Results File Output Selection" dialog. Length and displacement units' indices are: 0 - metres; 1 centimetres; 2 - millimetres; 3 - feet; 4 - inches.
Units information should appear in the file before the results.
e.g.
UNI T_DI SP, 2
UNI T_LENGTH, 0
CONTOUR_RESULTANT, 1, 10. , 30. , 22. 94968, 27. 96293, 23. 98147
CONTOUR_RESULTANT, 1, 10. , 27. 96293, 23. 98147, 26. 13617, 25.
CONTOUR_RESULTANT, 1, 10. , 26. 13617, 25. , 23. 26587, 26. 63294
...
CONTOUR_X, 1, - 60. , 90. , 80. 55464, 89. 26049, 80. 36975
CONTOUR_X, 1, - 60. , 89. 26049, 80. 36975, 88. 89082, 80.
CONTOUR_X, 1, - 60. , 95. 56882, 75. , 91. 57434, 74. 21283
...
CONTOUR_Y, 1, - 60. , 48. 88889, 80. , 49. 25906, 79. 62953
CONTOUR_Y, 1, - 60. , 49. 25906, 79. 62953, 50. , 79. 4441
CONTOUR_Y, 1, - 60. , 49. 77666, 85. , 49. 81781, 84. 90891
...
CONTOUR_Z, 1, 0. , 50. , 0. 4412712, 48. 84946, 0. 5752676
CONTOUR_Z, 1, 0. , 48. 84946, 0. 5752676, 43. 20705, 0.
CONTOUR_Z, 1, 0. , 60. , 0. 3418683, 59. 22948, 0. 3852612
...
GPOI NT_RESULT, 150. , 240. , - 25. , 0. , 0. , - 1. e- 003
GPOI NT_RESULT, 150. , 250. , - 25. , 0. , 0. , - 1. e- 003
...
LPOI NT_RESULT, 50. , 150. , 0. , 0. 4636086, 0. , 0. 3708869
LPOI NT_RESULT, 51. , 150. , 0. , 0. 6526436, 0. , 0. 5438696
...
POI NT_RESULT, 5. , 150. , 0. , 0. 9029427, 0. , 0. 7851676
POI NT_RESULT, 55. , 150. , 0. , 1. 227543, 0. , 1. 115948
© Oasys Ltd. 2014
Keyboard Accelerators
5
Keyboard Accelerators
Key
Action
Ctrl+Num 1
Window bottom-left
Ctrl+Num 2
Window bottom
Ctrl+Num 3
Window bottom-right
Ctrl+Num 4
Window left
Ctrl+Num 5
Window middle (full)
Ctrl+Num 6
Window right
Ctrl+Num 7
Window top-left
Ctrl+Num 8
Window top
Ctrl+Num 9
Window top-right
Ctrl+C
Copy
Ctrl+F
Find
Ctrl+G
Go To
Ctrl+H
Replace
Ctrl+M
Modify
Ctrl+N
New
Ctrl+O
Open
Ctrl+P
Print
Ctrl+S
Save
Ctrl+Shft+S
Save As
Ctrl+V
Paste
Ctrl+W
Wizard
Ctrl+X
Cut
F1
Context Help
Esc
Quit
Tab
Next Cell
Return
Next Cell
Insert
Insert
Delete
Delete
Home
Beginning of Cell
Ctrl+Home
Beginning of Table
End
End of Cell
Ctrl+End
End of Table
Page Up
Scroll up
Page Down
Scroll down
Row Up
Column Left
© Oasys Ltd. 2014
46
47
Pdisp Oasys Geo Suite for Windows
Column Right
Row Down
5.1
List of References
5.1.1
References
Boussinesq J (1885). Applications des potentials a l'etude de l'equilibre et de movement des
solides elastiques. (Gouthier-Villars,Paris)
Mindlin R D (1936). Force at a point in the interior of a semi-infinite solid. Journal Appl. Phys. 7,
No.5 195-202.
Vaziri H, Simpson B, Pappin J W and Simpson L, (1982). Integrated forms of Mindlin's
equations. Geotechnique Vol. 32 No.3 September.
Poulos H G & Davis E H (1974). Elastic solutions for soil and rock mechanics. Wiley.
6
Brief Technical Description
6.1
Pdisp
Pdisp Pressure Induced Displacement Analysis
Pdisp is a program which can calculate the displacements (and stresses if required) within a linear
elastic or non-linear soil mass, arising from uniform normal or tangential pressure, applied to
rectangular and circular loaded planes.
The ground is represented as a series of soil profiles. These are located in plan by using designated
areas known as soil zones.
Loads are completely flexible. Pressures are applied as vertically and/or horizontally and uniformly
distributed loads to rectangular and/or circular loaded areas. No allowance is made for the stiffness
of the structures.
Displacements can be calculated both beneath and adjacent to the applied loads. Horizontal and
vertical displacements can be calculated by choosing the Mindlin method. Vertical displacements
and stresses can be calculated by choosing Boussinesq method.
Vertical displacements (settlement and heave) are calculated relative to a rigid base, using one of
two approaches: Boussinesq and Mindlin.
In the Boussinesq method the stress distribution is correct for a uniform isotropic, elastic material
having a constant Poisson's ratio (which must be specified). Vertical strains are derived from this
stress distribution using the elastic constants appropriate to that strain level for each soil layer and
then summed to give displacements.
In the Mindlin method relative displacements across each soil layer are calculated directly as if the
whole of the ground had the same elastic properties as the layer concerned. The relative
displacements are then summed to give total displacements.
© Oasys Ltd. 2014
Brief Technical Description
48
The Mindlin approach is more accurate, but the Boussinesq method allows non-linear soil properties
and is relatively accurate if sufficient sub-layers (intermediate displacement levels) are used.
The sides of all soil zones are parallel to the Cartesian co-ordinate axes.
7
Manual Example
7.1
General
The data input and results for the Pdisp manual are available in the 'Samples' sub-folder of the
program installation folder. The example has been created to show the data input for all aspects of
the program and does not seek to provide any indication of engineering advice.
Screen captures from this example have also been used throughout this document.
This example can be used by new users to practice data entry and become familiar with the details
of the program.
© Oasys Ltd. 2014
49
Pdisp Oasys Geo Suite for Windows
Displacement Grids
27
Displacement Grids - Graphical input
34
Displacement Levels
22
Displacement Lines
27
Displacement Points
27
Displacements at load centroids
19
Display nodes
40
Display values
40
Index
3
3D Graphical Output
40
A
E
Accuracy of the Boussinesq solution
8
Accuracy of the Mindlin solution
15
Analysis and Data Checking
35
Analysis Options
19
Annotation
40
Average Poisson's ratio
14
Average Young's modulus
14
B
19
F
Filled polygons
40
Full Tabular Results
36
G
Boussinesq
19
Boussinesq Analysis Method
5
C
Calculation details
7, 13
Centre of drawing
40
Centre of rotation
40
Coefficients
30
Components of the User Interface
Condensed Tabular Results
36
Contour interval
40
Contour surface
40
Cross Section Plot
39
CSV
30, 44
Cx
29, 30
Cy
29, 30
Cz
29, 30
D
Data Input
18
Determination of Stresses
Diameter
29
Displacement Data
27
Elastic analysis above loads
Export
35, 44
1
Gateway
1
General
4, 17, 48
General Program Description
1
Geometry parameters
29
Global Poisson's Ratio
6, 19
Graphic Settings
40
Graphical Input
33
Graphical Output
1, 37
Graphics menu
37
Graphics Toolbar
1
Greatest stiffness
14, 19
GsRaft analyses
29, 30
H
Horizontal displacements
14, 19
I
Imported Displacements
30
Inserting Bitmaps
33
Intermediate displacement levels
21
5
© Oasys Ltd. 2014
Index
Rigid boundary level
Rotate
40
L
Label objects
39
Layer
21
Layers
29, 30
Legacy
9
Legacy Mindlin
19
Legend panel
40
Lighting
40
Line Displacements
39
Load Data
24
Load Data - Graphical input
34
Location of Displacement Levels
S
23
M
Maximum stress
29, 30
Mindlin
9, 19
Mindlin Analysis Method
8
N
Non-linear curves
21
Non-linear Materials
28
Normalised relative displacement
30
Number of Displacement Levels
22
P
Pile base
29, 30
Pile-soil interaction coefficients
29, 30
Pile-soil interaction properties
21, 29, 30
Plan View
37
Poisson's ratio
14, 21
Printing
40
Program Features
3
PSI property
21
PSIC
29, 30
R
References
47
Relative displacement
Results
44
Results Output
35
© Oasys Ltd. 2014
19
Set contour interval
38
Set Exact Scale
39
Soil profiles
21, 29, 30
Soil zone display
40
Soil Zones
26
Soil Zones - Graphical input
Standard Toolbar
1
Stiffness
14
Strains and Displacements
Stratum
21
Symmetric curve
30
T
Table View
1
Tabular Output
1
Templates
37
Titles
18
Titles window - Bitmaps
Toolbar
1
Transparent
40
18
U
Ultimate stress
29
Undeflected shape
40
Units
19
User Interface
1
V
VDISP
47
Vdisp Toolbar
1
Vertical displacements
View menu
37
13
W
30
Weighted average
Wire frame display
14, 19
40
33
6
50
51
Pdisp Oasys Geo Suite for Windows
Y
Young's
Young's
Young's
Young's
modulus
13, 14, 21
modulus (E)
24
modulus at base of layer
13
modulus top of layer
13
Z
Zoom
40
© Oasys Ltd. 2014