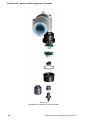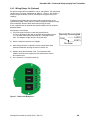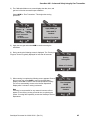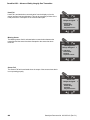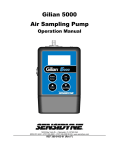
1
Advanced Safety Integrity Universal Gas Transmitter User Manual Document No. 360-0152-01, Rev C1 Sensidyne, LP TH 1000 112 Circle N, Suite 100 St. Petersburg, Florida 33716 USA Tel: 800-451-9444 / +1 727-530-3602 • Fax: +1 727-539-0550 [fax] web: www.Sensidyne.com • www.SensidyneGasDetection.com e-mail: [email protected] SensAlert ASI – Advanced Safety Integrity Gas Transmitter How to Use This Manual This manual is a basic guide for using the SensAlert ASI Transmitter. It contains information on the transmitter, transmitter components, sensor types, and the Normal Operation Display. It also shows how to mount and wire the transmitter, initial setup, zeroing, and span calibration. In addition, it covers commonly used operations regarding alarms, relays, and Test-On-Demand. For reference, the entire menu structure is outlined in Section Menu Map, with descriptions of each function described in Section 5.3. Important notes, cautions, and warnings are set off from the other text as follows: NOTE This is an important note Because the SensAlert ASI Transmitter is menu driven it is important to become familiar with how the four magnetic switch controls are used to navigate through the menus, select specific menu items, and change the many different parameters available to the user. The Basic Guide below will help you toward this end. Basic Guide to Using the Menu System Selecting ACK from the Normal Operation Display enters the SensAlert ASI menu system. Within the menu system ACK is used in several ways: 1) to select an item from a list of menu items, 2) to confirm that an action has occurred (e.g. changing an alarm from “Non-Latching” to “Latching”), or 3) to save a new value that has been entered (e.g., a new alarm setpoint). The << control backs up to the previously displayed menu. If a change was in progress, the changes are discarded. It is similar in use to an ESC key on a computer keyboard. The ▲ control arrow is used to move UP a list of menu items. The ▼ control arrow is used to move DOWN a list of menu items. The ▲ and ▼ control arrows also are used to increase/decrease numeric values of certain menu items (e.g. alarm setpoint, cal gas concentration, etc.). PLEASE NOTE This manual contains illustrations of those display screen menu options generally used in the normal course of operation of the SensAlert ASI Transmitter. The transmitter may also display a variety of additional warning or cautionary screens. These additional display screens are generally instructive and self-explanatory in nature. The user should read each display screen carefully and perform the recommended actions as required. Important Factory Default Settings Each transmitter is shipped from the factory with default settings. These include default settings for alarms, warnings and relays. The default settings can be found in Section 13 – Appendix G: Configuration Reference (page 112). Please note that boxes filled with an “X” indicate a default setting for that particular alarm, warning, or relay. Additional blank copies of the Configuration Reference form can be found in Section 13. These blank forms are intended for use by the user to document user-defined changes from the factory default settings. Sensidyne Document No. 360-0152-01 (Rev C1) 1 SensAlert ASI – Advanced Safety Integrity Gas Transmitter Table of Contents How to Use This Manual ................................................................................................................................ 1 Basic Guide to Using the Menu System......................................................................................................... 1 Packing List and Notices ................................................................................................................................ 7 WARNINGS.................................................................................................................................................... 8 1 INTRODUCTION......................................................................................................... 10 1.1 Product Versions................................................................................................................................. 10 1.2 Standard Features .............................................................................................................................. 11 1.2.1 Universal Sensor Capability ....................................................................................................... 11 1.2.2 Large Display for Ease of Operation .......................................................................................... 11 1.2.3 Worldwide Certifications............................................................................................................. 11 1.2.4 Transportable Calibration ........................................................................................................... 11 1.2.5 Unrestricted Operation in Hazardous Areas .............................................................................. 11 1.2.6 Predictive Sensor Failure ........................................................................................................... 12 1.3 Optional Features................................................................................................................................ 12 1.3.1 Test-On-Demand™ .................................................................................................................... 12 1.3.2 Remote Sensor Operation.......................................................................................................... 12 1.3.3 Relay Outputs............................................................................................................................. 12 1.3.4 Communication Options ............................................................................................................. 12 1.4 Components........................................................................................................................................ 13 1.4.1 Sensor Interface Assembly ........................................................................................................ 13 1.4.2 Plus Series sensor ..................................................................................................................... 13 1.4.3 Test-on-Demand™..................................................................................................................... 13 1.4.4 Sensor Holder............................................................................................................................. 13 1.4.5 Rainshield................................................................................................................................... 13 1.4.6 Calibration Plug Assembly ......................................................................................................... 13 1.4.7 Liquid Crystal Display................................................................................................................. 17 1.4.8 Sensor Types ............................................................................................................................. 18 2 INSTALLATION .......................................................................................................... 20 2.1 Location............................................................................................................................................... 20 2.2 Transmitter .......................................................................................................................................... 22 2.3 Transmitter Board Removal ................................................................................................................ 23 2.3.1 Transmitter, 2-Wire, Non-I.S., No Optional Boards................................................................... 23 2.3.2 Transmitter, 3-Wire, Non-I.S., No Optional Boards................................................................... 24 2.3.3 Transmitter, 3-Wire, I.S., No Optional Boards........................................................................... 25 2.3.4 Transmitter, 3-Wire, Non-I.S., Two Optional Boards................................................................. 26 2.4 Wiring .................................................................................................................................................. 27 2.4.1 Allowable Line Length ................................................................................................................ 28 2.4.2 Wiring the Power Supply Board ................................................................................................. 29 2.4.2.1 2.4.2.2 2.4.2.3 2.4.3 2.4.4 DC Wiring Procedure 2 wire Transmitters ............................................................................................ 29 DC Wiring Procedure 3 wire Transmitters ............................................................................................ 31 Wiring The Built-In Relay ...................................................................................................................... 32 Wiring Relays 2-4 (Optional) ...................................................................................................... 33 Intrinsic Safety Barrier ................................................................................................................ 34 2.5 Start Up ............................................................................................................................................... 35 2 Sensidyne Document No. 360-0152-01 (Rev C1) SensAlert ASI – Advanced Safety Integrity Gas Transmitter 3 OPERATING FUNCTIONS.......................................................................................... 36 3.1 Zeroing The Sensor.............................................................................................................................36 3.2 Span Calibration ..................................................................................................................................38 3.2.1 General .......................................................................................................................................38 3.2.2 Calibration Equipment.................................................................................................................38 3.2.3 Span Calibration Procedure........................................................................................................38 3.3 Sensor Adjustment ..............................................................................................................................42 3.3.1 Accessing The Sensor Adjustment Menu...................................................................................42 3.3.2 Select Cal Gas ............................................................................................................................43 3.3.3 Selecting a K Factor....................................................................................................................44 3.3.3.1 3.3.3.2 3.3.3.3 3.3.3.4 3.3.4 Catalytic Bead Combustible Sensor Installed (Calibration Gas is Methane) .........................................44 Catalytic Bead Combustible Sensor Installed (Calibration Gas is Propane) .........................................45 Infrared Combustible Sensor Installed (Calibration Gas is Propane) ....................................................45 Infrared Combustible Sensor Installed (Calibration Gas is Methane)....................................................46 Selecting a Custom K Factor ......................................................................................................46 3.4 TOD Mode Adjustment ........................................................................................................................47 3.4.1 Accessing The TOD Mode Adjustment Menu.............................................................................47 3.4.2 Auto Mode Enable ......................................................................................................................49 3.4.3 Test Date/Time ...........................................................................................................................49 3.4.4 Days Between Tests ...................................................................................................................50 3.4.5 Cell Intensity ...............................................................................................................................50 3.4.6 Output Indicators.........................................................................................................................51 4 ALARMS AND RELAYS ............................................................................................. 52 4.1 Accessing Alarm & Relay Menus ........................................................................................................52 4.2 Alarm Functions...................................................................................................................................53 4.2.1 Alarms 1 – 3, TWA Alarm ...........................................................................................................53 4.2.1.1 4.2.1.2 4.2.1.3 4.2.1.4 4.2.1.5 4.2.1.6 4.2.1.7 Add Relay .............................................................................................................................................53 Delete Relay .........................................................................................................................................54 Enable/Disable Alarm............................................................................................................................54 Ascending/Descending Alarm ...............................................................................................................55 Alarm Setpoint.......................................................................................................................................55 Release Offset (Alarms 1 – 3) ...............................................................................................................56 Average Time Adjust (TWA Alarm) .......................................................................................................56 4.3 Fault Functions ....................................................................................................................................58 4.3.1 Head Fail.....................................................................................................................................58 4.3.1.1 4.3.1.2 4.3.1.3 4.3.1.4 4.3.1.5 Add Relay .............................................................................................................................................58 Delete Relay .........................................................................................................................................59 Enable/Disable ......................................................................................................................................60 Adjust Fault Current ..............................................................................................................................60 Adjust Current Delay .............................................................................................................................60 4.4 Relays 1 - 4..........................................................................................................................................61 4.4.1 Latching/Non-Latching ................................................................................................................61 4.4.2 Norm Energized/Norm De-energized .........................................................................................62 4.4.3 Time Delay..................................................................................................................................63 4.5 Warn Current – Relay 5.......................................................................................................................63 4.5.1 Latching/Non-Latching ................................................................................................................63 4.5.2 Enable/Disable............................................................................................................................64 4.5.3 Low Current Time Adjust ............................................................................................................64 5 MENU STRUCTURE ................................................................................................... 66 Sensidyne Document No. 360-0152-01 (Rev C1) 3 SensAlert ASI – Advanced Safety Integrity Gas Transmitter 5.1 Basic Guide to Using the Menu System ............................................................................................. 66 5.2 Menu Map ........................................................................................................................................... 66 5.2.1 Calibration Mode ........................................................................................................................ 66 5.2.1.1 5.2.1.2 5.2.1.3 Zero Transmitter ................................................................................................................................... 66 Calibrate ............................................................................................................................................... 66 Set Cal Gas Conc................................................................................................................................. 66 5.2.3.1 5.2.3.2 5.2.3.3 5.2.3.4 5.2.3.5 5.2.3.6 5.2.3.7 5.2.3.8 5.2.3.9 5.2.3.10 Previous Cal Info .................................................................................................................................. 67 Sensor Status ....................................................................................................................................... 67 Sensor Data.......................................................................................................................................... 67 Active Alarms/Faults............................................................................................................................. 67 Fault Current......................................................................................................................................... 67 Fault Current Delay .............................................................................................................................. 67 Rly Alm Fault Config............................................................................................................................. 67 TOD Data Review................................................................................................................................. 69 Communications Review ...................................................................................................................... 69 Firmware Version ................................................................................................................................. 69 5.2.4.1 5.2.4.2 4-20 mA Not Active............................................................................................................................... 69 4-20 mA Active ..................................................................................................................................... 69 5.2.5.1 5.2.5.2 5.2.5.3 5.2.5.4 5.2.5.5 5.2.5.6 5.2.5.7 5.2.5.8 5.2.5.9 5.2.5.10 5.2.5.11 Self Test 70 Alarm Settings ...................................................................................................................................... 70 4/20ma Adjustment............................................................................................................................... 76 Adjust Date/Time .................................................................................................................................. 76 Communication Setup .......................................................................................................................... 76 T-O-D Mode Adjustment....................................................................................................................... 76 Sensor Adjustment ............................................................................................................................... 77 Set Password ....................................................................................................................................... 78 Reset Defaults ...................................................................................................................................... 78 Set Transmitter Tag.............................................................................................................................. 78 Screen Contract.................................................................................................................................... 78 5.2.2 5.2.3 Maintenance Mode..................................................................................................................... 66 Data Review ............................................................................................................................... 67 5.2.4 Test On Demand ........................................................................................................................ 69 5.2.5 System Configuration ................................................................................................................. 70 5.2.6 Lost Password ............................................................................................................................ 78 5.3 Main Menu .......................................................................................................................................... 79 5.3.1 Calibration Mode ........................................................................................................................ 79 4 5.3.1.1 5.3.1.2 5.3.1.3 Zero Transmitter ................................................................................................................................... 79 Calibrate ............................................................................................................................................... 80 Set Cal Gas Concentration ................................................................................................................... 80 5.3.3.1 5.3.3.2 5.3.3.3 5.3.3.4 5.3.3.5 5.3.3.6 5.3.3.7 5.3.3.8 5.3.3.9 5.3.3.10 Calibration Info ..................................................................................................................................... 81 Sensor Status ....................................................................................................................................... 81 Sensor Data.......................................................................................................................................... 81 Active Alarms/Faults............................................................................................................................. 82 Fault Currents....................................................................................................................................... 82 Fault Current Delay .............................................................................................................................. 82 Rly Alm Fault Config............................................................................................................................. 83 TOD Review ......................................................................................................................................... 83 Communication Review........................................................................................................................ 84 Firmware Review.................................................................................................................................. 84 5.3.5.1 5.3.5.2 5.3.5.3 5.3.5.4 5.3.5.5 5.3.5.6 5.3.5.7 5.3.5.8 5.3.5.9 Self Test 86 Alarm Settings ...................................................................................................................................... 86 4/20 mA Adjustment ............................................................................................................................. 91 Adjust Date/Time .................................................................................................................................. 91 Communication Setup .......................................................................................................................... 92 TOD Mode Adjustment ......................................................................................................................... 93 Sensor Adjustment ............................................................................................................................... 93 Set Password ....................................................................................................................................... 94 Reset Defaults ...................................................................................................................................... 95 5.3.2 5.3.3 Maintenance Mode..................................................................................................................... 80 Data Review ............................................................................................................................... 81 5.3.4 5.3.5 Test-On-Demand (Main Menu) .................................................................................................. 85 System Configuration ................................................................................................................. 85 Sensidyne Document No. 360-0152-01 (Rev C1) SensAlert ASI – Advanced Safety Integrity Gas Transmitter 5.3.5.10 Set Transmitter Tag ..............................................................................................................................95 5.3.5.11 Screen Contrast ....................................................................................................................................96 6 PRODUCT NUMBERS & PARTS LIST ...................................................................... 97 6.1 Transmitters.........................................................................................................................................97 6.2 Sensors................................................................................................................................................98 6.3 Options & Accessories ........................................................................................................................99 6.4 Spare Parts..........................................................................................................................................99 6.5 Calibration Equipment .......................................................................................................................100 6.6 Zero Calibration Gases......................................................................................................................100 6.7 Calibration Gases ..............................................................................................................................100 7 APPENDIX A: SAFETY REQUIREMENTS FOR SIL2 APPLICATIONS .................. 102 7.1 Safety Function..................................................................................................................................102 7.2 Topology ............................................................................................................................................102 7.3 Throughput ........................................................................................................................................102 7.4 User Input ..........................................................................................................................................102 7.5 Proof Interval .....................................................................................................................................102 8 APPENDIX B: DECLARATION OF CONFORMITY.................................................. 103 9 APPENDIX C: SPECIFICATIONS............................................................................. 105 10 APPENDIX D: TROUBLESHOOTING GUIDE .......................................................... 106 11 APPENDIX E: APPROVAL RATINGS...................................................................... 108 • SensAlert ASI 2-Wire Div2 Transmitter ...............................................................................................108 • SensAlert ASI 3Wire Div2 Transmitter.................................................................................................108 • SensAlert ASI 2-Wire IS Transmitter....................................................................................................109 • SensAlert ASI 3-Wire IS Transmitter....................................................................................................109 • SensAlert ASI 2-Wire XP Transmitter ..................................................................................................110 • SensAlert ASI 3-Wire XP Transmitter ..................................................................................................110 12 APPENDIX F: RETURNED MATERIAL AUTHORIZATION ..................................... 111 13 APPENDIX G: CONFIGURATION REFERENCE ..................................................... 112 14 APPENDIX H: MOUNTING DRAWINGS .................................................................. 114 Sensidyne Document No. 360-0152-01 (Rev C1) 5 SensAlert ASI – Advanced Safety Integrity Gas Transmitter 15 APPENDIX I: CERTIFICATION DRAWINGS ........................................................... 116 6 Sensidyne Document No. 360-0152-01 (Rev C1) SensAlert ASI – Advanced Safety Integrity Gas Transmitter Packing List and Notices You should have the following items: SensAlert ASI Universal Gas Transmitter (includes a reversible screwdriver with magnetic end and a Sensor Shield) User Manual (this document) Plus Series Sensor is sold separately (Please contact factory for a complete list of available sensors.) Always check to make certain you have received all of the items listed above. If you have any questions or need assistance, contact your Sensidyne Representative, or call 800-451-9444 or +1 727-530-3602 PROPRIETARY NOTICE This manual was prepared by Sensidyne, LP exclusively for the owner of the SensAlert ASI Universal Gas Transmitter. The material within this manual is the proprietary information of Sensidyne, LP and is to be used only to understand and operate the instrument. By receiving this document, the recipient agrees that neither this document nor the information disclosed within nor any part shall be reproduced or transferred, physically, electronically or in any form or used or disclosed to others for manufacturing or for any other purpose except as specifically authorized in writing by Sensidyne, LP. COPYRIGHT NOTICE ©2012, Sensidyne, LP All rights reserved. Information contained in this document is protected by copyright. No part of this document may be photocopied, reproduced, or translated to another program or system without prior written authorization from Sensidyne, LP TRADEMARK NOTICE Sensidyne, the Sensidyne logo, SensAlert, the SensAlert & SensAlert ASI logos, T-O-D & Test-onDemand are registered trademarks of Sensidyne, LP. The trademarks and service marks of Sensidyne, LP are protected through use and registration in the United States of America. SOFTWARE LICENSE The software included with the SensAlert ASI Transmitter is the property of Sensidyne, LP and shall remain the property of Sensidyne, LP in perpetuity. The software is protected by U.S. and international copyright laws and is licensed for specific use with the SensAlert ASI Universal Gas Transmitter. The user may not reverse-engineer, disassemble, decompile, or make any attempt to discover the source code of the software. The software may not be translated, copied, merged or modified in any way. The user may not sublicense, rent, or lease any portion of the software. The right to use the software terminates automatically if any part of this license is violated. DISCLAIMER SENSIDYNE, LP ASSUMES NO RESPONSIBILITY WHATSOEVER, TO ANY PARTY WHOSOEVER, FOR ANY PROPERTY DAMAGE, PERSONAL INJURY, OR DEATH CAUSED BY OR RESULTING FROM, IN WHOLE, OR IN PART, THE IMPROPER USE, INSTALLATION, OR STORAGE OF THIS PRODUCT BY THE USER, PERSON, FIRM, ENTITY, CORPORATION OR PARTY NOT ADHERING TO THE INSTRUCTIONS AND WARNINGS OR NOT ADHERING TO ALL FEDERAL, STATE, AND LOCAL ENVIRONMENTAL AND OCCUPATIONAL HEALTH AND SAFETY LAWS AND REGULATIONS. THE SELLER SHALL NOT BE LIABLE FOR DIRECT, INDIRECT, CONSEQUENTIAL, INCIDENTAL OR OTHER DAMAGES RESULTING FROM THE SALE AND USE OF ANY GOODS AND SELLER’S LIABILITY HEREUNDER SHALL BE LIMITED TO REPAIR OR REPLACEMENT OF ANY GOODS FOUND DEFECTIVE. THIS WARRANTY IS IN LIEU OF ALL OTHER WARRANTIES, EXPRESSED OR IMPLIED, INCLUDING BUT NOT LIMITED TO THE IMPLIED WARRANTIES OF MERCHANTABILITY AND FITNESS FOR USE OR FOR A PARTICULAR PURPOSE WHICH ARE EXPRESSLY DISCLAIMED. Sensidyne Document No. 360-0152-01 (Rev C1) 7 SensAlert ASI – Advanced Safety Integrity Gas Transmitter WARNINGS READ AND UNDERSTAND ALL WARNINGS BEFORE USE Read and understand ALL warnings before using this product. Failure to read, understand, and comply with ALL warnings could result in property damage, severe personal injury, or death. Product is calibrated prior to shipment, however, this product must be calibrated prior to initial use. Calibrate at regular intervals in accordance with the User Manual. Failure to calibrate in accordance with the instructions in this manual and at the specified intervals may result in the product not operating properly or malfunctioning. Read and understand ALL applicable federal, state, and local environmental health and safety laws and regulations, including OSHA. Ensure complete compliance with ALL applicable laws and regulations before and during use of this product. The user/installer must understand the Hazardous Area Protection Concepts and Area Classifications applicable to their operation. UNDER NO CIRCUMSTANCES should this product be used except by qualified, trained, technically competent personnel and not until the warnings, User Manual, labels, and other literature accompanying this product have been read and understood. Failure to read and understand the User Manual may result in preventable severe personal injury or death. ALWAYS wash your hands thoroughly after handling, calibrating, or servicing this product. ALWAYS wear eye protection (such as safety goggles), face shield, chemical resistant gloves and chemical resistant clothing when handling chemicals, or calibration sources. DO NOT get chemicals, gases, fumes, or vapors in your eyes or on your skin, as they may cause severe burns to skin and eyes. If chemicals, gases, fumes, or vapors get in your eyes or on your skin, wash the affected area with copious amounts of water and call a physician immediately. ALWAYS avoid any contact of acids with your skin or eyes. Seek immediate medical attention for any contact with acids. ALWAYS calibrate in a well ventilated area. Adequate precautions should be taken to prevent the buildup of ANY calibration sources or vapors. Avoid breathing ANY calibration fumes or vapors as they may be hazardous to your health. ALWAYS dispose of chemicals and calibration sources in compliance with ALL applicable safety laws, regulations, and guidelines for proper disposal. Failure to do so may result in environmental damage, property damage, personal injury or death. ALWAYS close ALL containers of chemicals used with this product after use. ALWAYS ensure that any compressed calibration substance sources are empty prior to disposal, should they be used. ALWAYS use clean, dry, inert materials to contain and transfer substances used for calibration. DO NOT remove, cover, or alter any label or tag on this product, its accessories, or related products. DO NOT operate this product should it malfunction or require repair. Operation of a malfunctioning product, or a product requiring repair may result in serious personal injury or death. DO NOT attempt to repair or modify instrument, except as specified in the Operation & Service Manual. If repair is needed, contact the Sensidyne Service Dept. to arrange for a Returned Material Authorization (RMA) (See Section 12 for details). Users should refer to MSDS and suppliers’ instructions for proper handling and safety instructions for any chemicals used with this equipment. For Combustible Sensors installed per Canadian requirements the Sensor Interface (Head) shall be mounted remotely from the Display Unit. 8 Sensidyne Document No. 360-0152-01 (Rev C1) SensAlert ASI – Advanced Safety Integrity Gas Transmitter WARNINGS READ AND UNDERSTAND ALL WARNINGS BEFORE USE Use ONLY genuine SENSIDYNE® replacement parts when performing any maintenance procedures described in this manual. Failure to do so may seriously impair instrument performance and affect the Hazardous Area Certification. Repair or alteration of the product beyond the scope of these maintenance instructions, or by anyone other than an authorized SENSIDYNE® service technician, could cause the product to fail to perform as designed and persons who rely on this product for their safety could sustain severe personal injury or death. The SensAlert ASI Universal Gas Transmitter is an ambient air monitoring device. Restricting the access of ambient air to the sensor may result in less than optimal monitoring performance. Prolonged exposure to excessively high concentrations of toxic gas may cause the sensor to produce erroneous readings. Always make use of a rainshield to protect against variations caused by environmental conditions. Perform tests only within the specified operating ranges. Sudden changes in pressure may cause temporary fluctuations in the sensor reading. Sensors should be hot-swapped only when the Normal Operation Mode screen is displayed. Important Calibration Considerations: Verify concentration of calibration gas before making calibration adjustments. Concentration can be altered by: Deterioration of the concentration of compressed calibration gas sources during storage. Interaction of the calibration gas with materials used to contain and transfer the gases, as for example, absorption onto and permeation through certain plastics. Interaction of the calibration gas with materials and/or ambient contaminants, as for example, absorption into water. If further translation is required, please contact the Sensidyne EU Authorized Representative (see Back Cover for contact information). . Sensidyne Document No. 360-0152-01 (Rev C1) 9 SensAlert ASI – Advanced Safety Integrity Gas Transmitter 1 INTRODUCTION This manual provides specific information concerning the installation, operation, calibration, and maintenance of the SensAlert ASI Universal Gas Transmitter. The transmitter is capable of detecting the presence of potentially hazardous concentrations of a target gas. 1.1 Product Versions SensAlert ASI is a configurable instrument. The part numbering convention contains all necessary information to express the configuration: 10 Sensidyne Document No. 360-0152-01 (Rev C1) SensAlert ASI – Advanced Safety Integrity Gas Transmitter A standard transmitter consists of an electronics module (Inside metal housing), a sensor interface assembly, and a sensor assembly specifically designed to detect a target substance. Product specifications for the SensAlert ASI Transmitter can be found in Appendix C: Specifications. 1.2 Standard Features 1.2.1 Universal Sensor Capability The SensAlert ASI transmitter unit is capable of utilizing a variety of sensor technologies, including electrochemical, catalytic bead combustible, and infrared combustible and carbon dioxide. Sensors may be installed without having to reconfigure or modify the transmitter in any way. When a different Plus Series sensor type is installed in the transmitter, the unit completely reconfigures the system functions to match those of the new sensor. This includes changing all alarm and calibration settings to match those of the new sensor. The sensor interface assembly is certified as Intrinsically Safe, allowing sensors to be changed in hazardous areas with the transmitter under power. 1.2.2 Large Display for Ease of Operation The transmitter has a large built-in graphical display that is easy to read and operate. See Section 1.4.7 for more information. 1.2.3 Worldwide Certifications The SensAlert ASI Universal Gas Transmitter is certified for operation in hazardous environments worldwide. The transmitter is SIL 2 certified. FM certification for both hazardous area and measurement performance is available for a large variety of combustible and toxic sensors. 1.2.4 Transportable Calibration Plus Series sensors have transportable calibration capabilities. Sensor may be calibrated in the laboratory and then installed in the field without any special tools or adjustments -- and without declassifying the area. When a new sensor is installed in the unit, the transmitter automatically adjusts to recognize the new gas type and range and adjusts the transmitter system function accordingly. The new sensor information is also sent to the SensAlert 4channel controller (if one is connected). The SensAlert 4channel controller “self-configures” to accommodate for the newly installed sensor. 1.2.5 Unrestricted Operation in Hazardous Areas Magnetic switches on the front panel allow calibrations to be performed without opening the transmitter enclosure. This is especially useful when the area is classified as potentially hazardous and declassification is required to open the transmitter. The only tool required to perform a calibration is the magnetic screwdriver provided with the transmitter (part number 7013201-1). The integral LCD readout has been calibrated at the factory for direct reading in ppm, %vol, or %LEL. Field calibration consists of calibrating the sensor output to the applied calibration gas. Sensidyne Document No. 360-0152-01 (Rev C1) 11 SensAlert ASI – Advanced Safety Integrity Gas Transmitter 1.2.6 Predictive Sensor Failure Predictive Sensor Failure is a unique feature that provides the user with an early warning of the pending expiration of a sensor. When the sensor has less than 10% of its life remaining, a warning appears on the main display, and can be assigned to activate other warning indicators. 1.3 Optional Features 1.3.1 Test-On-Demand™ The Test On-Demand™ (TOD) feature allows the performance of the system to be checked quickly, easily and often. When activated, either manually, at programmed times or by remote control, the T-O-D™ generator produces a small gas output that is intended to produce a response from the gas sensor to verify that the sensor is responsive to gas. This is intended to be a “bump” test and is not to replace recommended calibration procedures. The intended purpose of this feature is to provide a level of system operating assurance by providing the user with the ability to test the sensor on demand. This feature can be activated via the display screen, via a communications link, or automatically using the Test Date/Time menu. 1.3.2 Remote Sensor Operation The sensor is mounted in the sensor interface assembly that can be located up to 100 feet from the display housing. The sensor interface is intrinsically safe, allowing it be connected without special cable or conduit regardless of combustible gas [Zone 0 with Toxic Sensors, Zone 1 with Catalytic Bead and Infrared Combustible Sensors]. 1.3.3 Relay Outputs An optional Relay Board can be installed that provides three additional relays for use with horns, strobes, and other external devices. 1.3.4 Communication Options An optional Communications Board can be installed for RS-485 with Modbus, or HART protocol. 12 Sensidyne Document No. 360-0152-01 (Rev C1) SensAlert ASI – Advanced Safety Integrity Gas Transmitter 1.4 Components 1.4.1 Sensor Interface Assembly The sensor interface assembly contains the electronics that operate the sensor and houses the Plus Series sensor and the Test-on-Demand™ cell. The electronics are intrinsically safe, allowing you to hot swap the sensor or T-O-D cell in hazardous areas when the transmitter is under power. 1.4.2 Plus Series sensor The Plus Series sensor comes in a variety of sensor technologies for detecting toxic, oxygen, and combustible gases. The Plus Series sensor is discussed in greater detail in Section 1.4.8. The sensor gasket seals the sensor inside the sensor holder. 1.4.3 Test-on-Demand™ The unique Test-on-Demand™ (T-O-D™) gas generating cell (optional) provides a method for periodic sensor testing (programmed or manually activated) ensuring the sensor reacts to gas. The T-O-D gasket seals the generating cell inside the sensor holder. 1.4.4 Sensor Holder The sensor and T-O-D gas generating cell are housed in the Sensor Holder. The sensor holder is easily installed and removed via the retaining ring located on the sensor interface assembly. 1.4.5 Rainshield The optional rainshield shields the sensor and T-O-D cell from liquid intrusion due to rain, splash-back, or unintentional hosing. The rainshield is IP56 (Ingress Protection) rated. 1.4.6 Calibration Plug Assembly The calibration plug assembly secures into the sensor shield and replaces the rainshield while the transmitter is being calibrated. Sensidyne Document No. 360-0152-01 (Rev C1) 13 SensAlert ASI – Advanced Safety Integrity Gas Transmitter Figure 2-1a SensAlert ASI Transmitter Standard Horizontal Mount 14 Sensidyne Document No. 360-0152-01 (Rev C1) SensAlert ASI – Advanced Safety Integrity Gas Transmitter Figure 2-2b SensAlert ASI Transmitter Standard Vertical Mount Sensidyne Document No. 360-0152-01 (Rev C1) 15 SensAlert ASI – Advanced Safety Integrity Gas Transmitter Figure 2-3c SensAlert ASI Transmitter for two option cards 16 Sensidyne Document No. 360-0152-01 (Rev C1) SensAlert ASI – Advanced Safety Integrity Gas Transmitter 1.4.7 Liquid Crystal Display The Liquid Crystal display has a backlight feature for all 3-wire transmitters. The backlight feature is not available on 2-wire transmitters. (1) Gas Concentration The gas concentration is displayed in large characters, along with the appropriate unit of measure (ppm, %vol, %LEL) depending on the sensor installed. (2) Gas Type & Maximum Sensor Range Displays the chemical symbol or abbreviated name of the toxic gas or combustible gas sensor installed in the transmitter. The range of the sensor is also displayed. (3) Local Date and Time Local date and time. The time is displayed in 24 hour format. The date format is user definable. (4) Transmitter Name/ID User-defined field for transmitter identification. (5) ACK Control (Switch) ACK represents one of the four magnetic switches used to operate the transmitter menu system. ACK is used to confirm operations or select a menu item. Activating ACK from the Main Display brings up a menu listing the operations that can be performed on the transmitter. (6) << (Go Back) This switch is the opposite of ACK. If you change your mind while performing any operation, activating << will take you back to the previous operation. (7) ▲ and ▼ The ▲ and ▼ control arrows are used to scroll up or down a list of items. These controls are also used to increase or decrease a value (such as an alarm setpoint). Holding the wand near the control (switch) causes the displayed value to either increase or decrease automatically. (8) LEDs 1-4 The transmitter display has four LEDs that light up when there is an alarm or fault condition occurring. Each LED is normally associated with their respectively numbered relays (i.e., LED 1 with Relay 1, LED 2 with Relay 2, etc.). LED 1 (associated with Relay 1) is factory set as the “fault” LED/Relay and can be found on all 3-wire non-I.S. transmitters. LED 2 (Relay 2), LED 3 (Relay 3), and LED 4 (Relay 4) are associated with relays on the optional relay board. Note: There are no relays on 2-Wire or 3-wire, I.S. transmitters. Also, when the magnetic wand is brought close to a magnetic switch the LED associated with that switch lights up, confirming that contact has been made between the wand and the switch. (Note: LEDs do not light up under any circumstances on 2-wire transmitters.) (9) This line is used to display important system messages and warnings. Sensidyne Document No. 360-0152-01 (Rev C1) 17 SensAlert ASI – Advanced Safety Integrity Gas Transmitter 1.4.8 Sensor Types NOTE DO NOT attempt to install sensors other than Plus Series sensors into the SensAlert ASI Transmitter. ONLY SENSORS LABELED AS PLUS SERIES WILL WORK IN THE SENSALERT ASI TRANSMITTER. A complete list of available sensors, sensor specifications, interferents, and calibration equipment can be found by contacting Sensidyne or on the sensor specification sheet. Sensors should be hot-swapped only when the Normal Operation Mode screen is displayed. Sensor Types Infrared Infrared sensors are used to detect combustible gases and Carbon Dioxide. Infrared sensors cannot be used in 2-wire transmitters. Sealed Electrochemical Sealed electrochemical sensors are used to detect toxic gases. Oxygen Oxygen sensors are used to monitor ambient Oxygen levels. Catalytic Bead Combustible Catalytic Bead sensors are used to detect combustible gases. Catalytic bead sensors cannot be used in 2-wire transmitters. 18 Sensidyne Document No. 360-0152-01 (Rev C1) SensAlert ASI – Advanced Safety Integrity Gas Transmitter Sensor Assembly The sensor assembly consists of a gas sensor attached to a circuit board. An EEPROM on the circuit board contains essential sensor identification information that is communicated to the transmitter during sensor installation. This information allows the sensor to be calibrated in the laboratory and hotswapped in the field without further calibration. NOTE Some sensors are shipped with battery boards attached to maintain a sensor bias. Batteries are designed to maintain biasing for up to 90 days. Battery boards should remain attached to the sensor until just prior to sensor installation, and should be removed in a non-classified (safe) area prior to installation of the sensor into the SensAlert ASI Transmitter. The sensor can be unplugged from the battery board for a maximum of 5 minutes. Note that, if unplugged or unpowered for 15 seconds, a sensor may take 2 minutes to return to zero once it is plugged into a transmitter or powered up. If unplugged from the bias board or unpowered for 5 minutes or longer, a sensor may take several hours to return to zero once it is plugged into a transmitter or powered up. NOTE If the sensor is missing or not completely engaged, the transmitter returns a “Loop-Fail” condition by providing an unvarying default output of < 3.0 mA (user adjustable 1-4 mA 3 wire Transmitter, 3-4 mA 2wire Transmitter). This is shown as “MISSING SENSOR” on the display. Sensidyne Document No. 360-0152-01 (Rev C1) 19 SensAlert ASI – Advanced Safety Integrity Gas Transmitter 2 INSTALLATION Each transmitter is shipped with wires connected to each of the internal terminal points. These leads are used in the final test of the transmitter before being shipped from the factory. For your convenience in testing the transmitter upon delivery, the color code of the wires is given in the table below. In typical practice the pigtail leads will be replaced by the installer when the unit is put into service. Power 3-Wire Powered Unit V+ Red 4-20 Output 4-20 mA White Ground RTN Black Power 2-Wire Powered Unit V+ 4-20 Output Energized RTN (4-20 mA Output) Built-In Relay Output A Red Black Orange Common COM Blue De-energized B Yellow Relay Outputs (Optional) ** De-energized A Orange Common COM Blue Energized B Yellow ADD ADDITIONAL INFO IF NECESSARY ** Each set of three relay wires will be labeled with their relay number If other options are installed that provide wired outputs, leads will be provided for access. Each option has a separate set of instructions, please see the appropriate documents for more information. 2.1 Location Monitoring efficiency will depend upon the appropriate mounting placement of the gas transmitter(s).The SensAlert ASI Gas Transmitter is a point (local area) gas detector which should be mounted in the appropriate proximity to a potential leak source. Expert consultation may be necessary to determine the most appropriate location for optimum monitoring. In all circumstances, the plant safety officer or other appropriate personnel should be consulted before installation. 20 Sensidyne Document No. 360-0152-01 (Rev C1) SensAlert ASI – Advanced Safety Integrity Gas Transmitter Site determination, at a minimum, must consider the following factors: • most probable location(s) of a leak • physical properties of the target gas • air convection in the area due to ventilation or ambient conditions • operational environment (temperature, humidity, wind, etc.) • presence of interferent gases Sensidyne Document No. 360-0152-01 (Rev C1) 21 SensAlert ASI – Advanced Safety Integrity Gas Transmitter 2.2 Transmitter Refer to all NEC and local electrical codes to ensure compliance for proper installation. SensAlert ASI transmitters with metallic condulet mount to 3/4” wiring conduit via 3/4” NPT female connectors or to 20mm conduit depending on the transmitter ordered conduit seals should be installed within 2” / 50.8mm of the condulet to provide an environmental seal for the electronics. Shielded cable must be used to achieve maximum RFI/EMI immunity. The display must be mounted vertically (± 45° from center) with the sensor assembly pointing down. The transmitter is available in a horizontal wiring configuration and a vertical wiring configuration. NOTE Mounting drawing can be found in Section 14: Appendix H (Transmitter Mounting Drawings). 1) Get confirmation from the safety officer that the area is declassified. 2) Loosen the hex head screw. 3) Unscrew and remove the condulet cover. 4) Confirm that the input and output wires are not energized, and thread them through the desired opening (right or left side) of the condulet. Use a screwdriver or “hook” device to pull the wires up to the surface of the electronics module. Extend the wires an additional 6–8” / 152-203 mm to facilitate wiring to the terminal strip. 5) Hold the wires out of the way and screw the condulet firmly into the conduit. 6) Cap the wires and replace the condulet cover if you are not going to wire the transmitter at this time. (You need not tighten the hex head screw at this time.) 22 Sensidyne Document No. 360-0152-01 (Rev C1) SensAlert ASI – Advanced Safety Integrity Gas Transmitter 2.3 Transmitter Board Removal Prior to wiring the transmitter it is necessary to remove the transmitter boards in order to gain access to the power terminal block located on the power supply board. Board removal varies depending on the configuration of the transmitter. 2.3.1 Transmitter, 2-Wire, Non-I.S., No Optional Boards Board removal for this configuration involves removing the display board stack. 1) Loosen the hex head screw and remove the transmitter cover. 2) Grab the display cover plate and carefully pull upward to disengage from the transmitter. Note: The display board stack is attached to the transmitter by means of three (3) banana plugs]. 3) Locate the power supply board attached to the display board. The power terminal block is located on the underside of the power supply board. Once the board stack has been removed wire the transmitter according to the instructions found in Section 2.4. Sensidyne Document No. 360-0152-01 (Rev C1) 23 SensAlert ASI – Advanced Safety Integrity Gas Transmitter 2.3.2 Transmitter, 3-Wire, Non-I.S., No Optional Boards Board removal for this configuration involves removing the display board stack. 1) Loosen the hex head screw and remove the transmitter cover. 2) Grab the display cover plate and carefully pull upward to disengage from the transmitter. Note: The display board stack is attached to the transmitter by means of three (3) banana plugs. 3) Locate the power supply board attached to three (3) standoffs at the bottom of the transmitter enclosure. The power terminal block is located next to the terminal block for the builtin fault relay. NOTE The relay terminal block is designated as “Relay 1” and is the factory-set fault relay. Once the board stack has been removed wire the transmitter according to the instructions found in Section 2.4. 24 Sensidyne Document No. 360-0152-01 (Rev C1) SensAlert ASI – Advanced Safety Integrity Gas Transmitter 2.3.3 Transmitter, 3-Wire, I.S., No Optional Boards Board removal for this configuration involves removing the display board stack. 1) Loosen the hex head screw and remove the transmitter cover. 2) Grab the display cover plate and carefully pull upward to disengage from the transmitter. Note: The display board stack is attached to the transmitter by means of three (3) banana plugs. 3) Locate the power supply board attached to the display board. The power terminal block is located on the underside of the power supply board. Once the board stack has been removed wire the transmitter according to the instructions found in Section 2.4. Sensidyne Document No. 360-0152-01 (Rev C1) 25 SensAlert ASI – Advanced Safety Integrity Gas Transmitter 2.3.4 Transmitter, 3-Wire, Non-I.S., Two Optional Boards Board removal for this configuration involves removing the display board stack and then the relay board. 1) Loosen the hex head screw and remove the transmitter cover if the transmitter has a metallic condulet. 2) Grab the display cover plate (and attached display board stack) [E-1] and carefully pull upward to disengage from the transmitter. Note: The display board stack is attached to the transmitter by means of three (3) banana plugs [E2]. 3) There are three (3) banana jacks [E-3] that secure the next board to the transmitter. That board is either an optional relay board or an unpopulated dummy board. Remove the banana jacks using either a ¼” / 6.35 mm open wrench or an equivalent nut driver. 4) Carefully remove the relay/dummy board to gain access to the power supply board [E-6]. 5) The power terminal block [E-7] is located on the power supply board next to the terminal block for the built-in fault relay. NOTE The relay terminal block [E-8] is designated as “Relay 1” and is the factory-set fault relay. Once the board stack has been removed, wire the transmitter according to the instructions found in Section 2.4. 26 Sensidyne Document No. 360-0152-01 (Rev C1) SensAlert ASI – Advanced Safety Integrity Gas Transmitter 2.4 Wiring Refer to all NEC and local electrical codes to ensure proper wiring compliance. The use of twisted, shielded wire is recommended. Refer to 2.4.2 below wiring the power supply board. NOTES If you have optional boards installed in the transmitter, refer to the wiring instructions for that board before wiring the transmitter. The power supply from the controller should have a power source return isolated from earth ground. Shielded cable is recommended with shield terminated to earth ground (at the power source only) to ensure maximum RFI/EMI immunity (dependent on the transmitter type). Either two or three wires are required to connect a transmitter to a Sensidyne controller or a user supplied 18–30 VDC power supply and readout device. Any supplemental readout device used must have a termination resistance of 250 ohms or less (100 ohms or less for 2-wire transmitter). The Sensidyne SensAlert Controller has a termination resistance of 100 ohms. Sensidyne Document No. 360-0152-01 (Rev C1) 27 SensAlert ASI – Advanced Safety Integrity Gas Transmitter 2.4.1 Allowable Line Length The maximum distance between the power supply and the transmitter is known as the “allowable line length.” It is a function of the power supply voltage and termination resistance, which in turn determines allowable loop resistance and wire size. The allowable voltage range for the power supply is 18–30 VDC. The table below lists the maximum wire lengths for both 2-Wire and 3-Wire transmitters. WARNING The following table is for use only with non-I.S. SensAlert ASI Transmitters Gauge (AWG) 2-Wire Transmitter 3-Wire Transmitter Maximum Wire Length – non-I.S. Transmitters 16 18 20 22 24 3281 ft 1000 m 1106 ft 337 m 3281 ft 1000 m 696 ft 212 m 3281 ft 1000 m 438 ft 133 m 3079 ft 938 m 274 ft 83 m 1948 ft 593 m 173 ft 52 m 26 28 1225 ft 373 m 109 ft 33 m 770 ft 234 m 68 ft 20 m WARNING To maintain Intrinsic Safety do not exceed the specified wire lengths below. Refer to Drawing 0996007-02 The table below assumes cable inductance of 0.2 µH/ft (or less) and cable capacitance of 60 pf/ft or less. The wire length specified below is between Safety Barrier and Transmitter. If you cable does not meet these specifications, please contact Sensidyne. Maximum Wire Length –Three wire I.S. Transmitters Gauge (AWG) Gas Type IIC (Groups A,B) IIB (Groups C,D) 14 16 18 20 22 24 26 28 535 ft 163 m 2138 ft 651 m 535 ft 163 m 2185 ft 666 m 535 ft 163 m 1379 ft 420 m 535 ft 163 m 870 ft 265 m 549 ft 167 m 549 ft 167 m 346 ft 105 m 346 ft 105 m 218 ft 66 m 218 ft 66 m 137 ft 42 m 137 ft 42 m Maximum Wire Length –Three wire I.S. Transmitters W/ Toxic and O2 Sensors Gauge (AWG) Gas Type IIC (Groups A,B) IIB (Groups C,D) 28 14 16 18 20 22 24 26 28 535 ft 163 m 2138 ft 651 m 535 ft 163 m 6833 ft 2082 m 535 ft 163 m 4144 ft 1345 m 535 ft 163 m 2786 ft 849 m 1757 ft 535 m 1757 ft 535 m 1108 ft 338 m 1108 ft 338 m 699 ft 213 m 699 ft 213 m 441 ft 134 m 441 ft 134 m Sensidyne Document No. 360-0152-01 (Rev C1) SensAlert ASI – Advanced Safety Integrity Gas Transmitter 2.4.2 Wiring the Power Supply Board The transmitter terminals will not accept wire gauges larger than 14 AWG. In all cases, the connections must be clean, tight and protected from the weather. They must meet all required electrical codes. There are two types of power supply boards used in the transmitter, depending on the transmitter configuration (refer to 2.4.2). TB1. This is the supply terminal block which contains either 2 or 3 terminals. TB1 is the block you will be wiring. TB2. This block is used to connect the internal transmitter electronics with the sensor interface assembly. The block is factory pre-wired, except in the case where the sensor interface assembly is to be mounted remotely. The block is pre-wired as follows: 2/3-Wire (remote compatible) 2-Wire (No remote) Red wire R Red wire R Black wire B Black wire B Orange wire O White wire W Yellow wire Y Green wire G Shield ** ** The shield wire terminal is used when Remote Mounting a sensor Check Points. These are used to check voltages against display values (display verification) when the transmitter is being serviced in a non hazardous area. WARNING: DO NOT APPLY DC POWER TO POWER SUPPLY BOARD WITHOUT DISPLAY BOARD ATTACHED. 2.4.2.1 DC Wiring Procedure 2 wire Transmitters Before wiring go to Section 2.3 to removed the transmitter boards. When the boards are removed for your particular transmitter configuration proceed below. To wire the transmitter to a DC power source, follow the steps below. 1) Get confirmation from the safety officer, or appropriate personnel, that the area is declassified. 2) Verify that the conduit and the transmitter are properly connected. 3) Verify that the input and output wires are not energized. Sensidyne Document No. 360-0152-01 (Rev C1) 29 SensAlert ASI – Advanced Safety Integrity Gas Transmitter 4) Verify that the total resistance of the wiring does not exceed the allowable loop resistance. 5) Connect the positive lead from the input wire to the input terminal of the transmitter (labeled V +). 6) Connect the 4-20 mA output wire to the RTN (4-20 mA OUT) terminal of the transmitter. 7) Insert the board stack back inside the transmitter housing as shown in Section 2.3. 8) Replace / close the transmitter cover. For transmitters with metallic condulet covers, tighten the hex head screw to secure the condulet cover. 9) Go to Section 2.4.4 to perform Start Up. Figure 4 - 700-0100-01 2-Wire Power Supply 30 Sensidyne Document No. 360-0152-01 (Rev C1) SensAlert ASI – Advanced Safety Integrity Gas Transmitter 2.4.2.2 DC Wiring Procedure 3 wire Transmitters Before wiring go to Section 2.3 to removed the transmitter boards. When the boards are removed for your particular transmitter configuration proceed below. To wire the transmitter to a DC power source, follow the steps below. 1) Get confirmation from the safety officer, or appropriate personnel, that the area is declassified. 2) Verify that the conduit and the transmitter are properly connected. 3) Verify that the input and output wires are not energized. 4) Verify that the total resistance of the wiring does not exceed the allowable loop resistance. 5) Connect the positive lead from the input wire to the input terminal of the transmitter (labeled V +). 6) Connect the 4-20 mA output wire to the 4-20 mA terminal of the transmitter labeled 4-20 mA. 7) Connect the Power Return wire to third terminal of the transmitter (labeled RTN). NOTE If you have a 3-wire non-I.S. transmitter and wish to wire the built-in relay on the power supply board at this time go to Section 2.4.2.3. Otherwise continue with the Steps below. 8) Insert the board stack back inside the transmitter housing as shown in Section 2.3. 9) Replace / close the transmitter cover. For transmitters with metallic condulet covers, tighten the hex head screw to secure the condulet cover. 10) Go to Section 2.4.4 to perform Start Up. Figure 5 - 700-0101-01 3-Wire Power Supply Sensidyne Document No. 360-0152-01 (Rev C1) 31 SensAlert ASI – Advanced Safety Integrity Gas Transmitter 2.4.2.3 Wiring The Built-In Relay 3-Wire non-I.S. transmitters have a built-in relay on the power supply board. This relay (“Relay 1”) is factory-set as the fault relay. It is preset at the factory to be “Normally Energized” and “Non-Latching.” Transmitters are shipped from the factory with the built-in relay pre-wired. These wires are used for testing the transmitter relays prior to shipment. Remove these wires before wiring the relay. Wire the built-in relay as follows: 1) There are three terminals on the relay terminal block: A, Com, & B. Because the relay is normally energized terminal “A” = Normally Closed (NC) and terminal “B” = Normally Open (NO). The diagram at right will aid in wiring the relay. 2) Wire the relay as outlined in the diagram. Normally Energized A (NC) COM B (NO) No Alarm 3) When wiring has been completed, insert the board stack back inside the transmitter housing as shown in Section 2.3. 4) Replace /close the transmitter cover. For transmitters with metallic condulet covers, tighten the hex head screw to secure the condulet cover. 5) Go to Section 2.4.4 to perform Start Up. Figure 6 - 700-0102-01 3-Wire Power Supply 32 Sensidyne Document No. 360-0152-01 (Rev C1) SensAlert ASI – Advanced Safety Integrity Gas Transmitter 2.4.3 Wiring Relays 2-4 (Optional) An optional relay board is available for non-I.S. transmitters. The relay board contains three (3) relays, designated as “Relay 2,” “Relay 3,” and “Relay 4.” All three relays are factory set to be “Normally De-energized” and “NonLatching.” Transmitters are shipped from the factory with pre-wired relays on the optional relay board. These wires are used for testing the transmitter relays prior to shipment. Remove these wires before wiring the relay. If your transmitter has an optional relay board installed, wire the relays as described below. Wire Relays 2-4 as follows: 1) There are three terminals on each relay terminal block: A, Com, & B. Because the relay is normally de-energized terminal “A” = Normally Open (NO) and terminal “B” = Normally Closed (NC). The diagram at right will aid in wiring the relay. 2) Wire the relays as outlined in the diagram. Normally De-energized A (NO) COM B (NC) No Alarm 3) When wiring has been completed, insert the board stack back inside the transmitter housing as shown in Section 2.3. 4) Replace /close the transmitter cover. For transmitters with metallic condulet covers, tighten the hex head screw to secure the condulet cover. 5) Go to Section 2.4.4 to perform Start Up. Figure 7 - 700-0114-01 Relay PCA Sensidyne Document No. 360-0152-01 (Rev C1) 33 SensAlert ASI – Advanced Safety Integrity Gas Transmitter 2.4.4 Intrinsic Safety Barrier To wire the transmitter to an Intrinsic Safety Barrier see the wiring diagram below. For additional wiring information refer to control drawing 099-2005-02 (3-wire transmitter) in Appendix I. WARNING The 3-Wire I.S. Transmitters (S2S-XXXX-XX) are designed for use exclusively with the Sensidyne Intrinsic Safety Barrier (P/N add replacement barrier pn). Failure to use this barrier will void all product warranties and may jeopardize intrinsic safety protections and result in permanent damage to the transmitter. WIRING DIAGRAM (3-Wire) SAFE AREA HAZARDOUS AREA Control Equipment + – SensAlert Plus Transmitter (3-Wire) +V 1 4-20 mA 2 RTN 3 Sensidyne IS Barrier 4 + V (1) 5 4-20 mA (2) 6 RTN (3) P/N 821-0212-01 + – 14 AWG Refer to Control Drawing No. 099-6007-02 for specific barrier information Figure 2-5 Intrinsic Safety Barrier Wiring 34 Sensidyne Document No. 360-0152-01 (Rev C1) SensAlert ASI – Advanced Safety Integrity Gas Transmitter 2.5 Start Up This section contains information necessary to perform the initial start up of the SensAlert ASI Transmitter. You will need the magnetic screwdriver (provided) to complete this procedure. If the sensor is not already installed start with Step 1 (see Figure 2-6). If the sensor is installed apply power to the transmitter and go to Step 5. 1) Unscrew the retainer ring (turn left to right) and remove the sensor holder by pulling down. 2) Apply power to the transmitter. After the start-up screens have been displayed a “Missing Sensor” screen appears on the display. IMPORTANT Some Plus Series sensors have battery boards attached to their assemblies. This is to maintain biasing. If you have a sensor with a battery board, follow Step 3 carefully. Biased sensors may require an extended period of time to stabilize if they have been disconnected from the battery board for more than five (5) minutes. Note that, if unplugged or unpowered for 15 seconds, a sensor may take 2 minutes to return to zero once it is plugged into a transmitter or powered up. If unplugged or unpowered for 5 minutes or longer, a sensor may take several hours to return to zero once it is plugged into a transmitter or powered up. NOTE When “Missing Sensor” appears on the display, perform Step 3 as soon as possible after this message appears. 3) Remove the battery board from the sensor while in a nonclassified (safe) area and quickly (10-20 seconds) mount the sensor into the transmitter. This is done by inserting the sensor up into the sensor interface assembly using the two larger mounting posts as guides. Continue pushing the sensor assembly upward until the sensor connector is engaged. Figure 2-6 Sensor Installation 4) Once the SensAlert ASI Transmitter recognizes the sensor assembly a “Warm Up” screen appears on the display for 60 seconds before the transmitter begins normal operation. 5) Make certain the gasket is seated inside the sensor holder. As shipped, the sensor holder has a plug in the Test-on-Demand™ well. This plug should be removed only if a Test-On-Demand™ cell will be installed in the transmitter. Place the sensor holder over the mounted sensor. Make certain the large opening on the sensor side of the holder aligns with the body of the sensor. Secure the holder by turning the retainer ring on the sensor interface assembly from right to left. WARNING After power has been applied to the transmitter sensor stabilization occurs (lasting about 1 hour). During this time the sensor reading may fluctuate, possibly causing the alarms to activate (including any external alarms connected to the controller). 6) Allow the transmitter to stabilize at least one (1) hour before zeroing. During stabilization the display reading should change toward “0” (or 20.9 %vol for ambient Oxygen sensors). After stabilization has been completed go to Section 3.1 and perform the zeroing procedure (even if the display shows “0”). Sensidyne Document No. 360-0152-01 (Rev C1) 35 SensAlert ASI – Advanced Safety Integrity Gas Transmitter 3 Operating Functions In this Section, the procedures for performing common operating functions are presented in detail. For complete information on the structure of the SensAlert ASI operational menu system refer to Section 5. 3.1 Zeroing The Sensor Zeroing the sensor establishes the output of the sensor when no gas is present and provides a baseline for the measurement of the target gas. The following zeroing procedure applies to most sensors. However, for some sensors special zeroing instructions are needed that differ from the steps described below. These special instructions are located in the Sensor Data Sheet that came with your sensor. NOTE Transmitters with ambient Oxygen sensors cannot be zeroed from this menu. Instead, ambient Oxygen sensors are calibrated to ambient air only through the Span Calibration menu. NOTE In order to exclude interferent gases, zeroing with bottled air is preferred (or 100% nitrogen for process oxygen sensors). It is important that a known zero gas is used for this procedure. 1) Select ACK on the Normal Operation Display to bring up the Main Menu. 2). Select ACK to bring up the Calibration Mode menu. > Calibration Mode Maintenance Mode Data Review Test-On-Demand System Configuration Lost Password 36 Sensidyne Document No. 360-0152-01 (Rev C1) SensAlert ASI – Advanced Safety Integrity Gas Transmitter 3) The Calibration Mode menu screen displays the date, time, and gas level of the last successful span calibration. Select ACK for “Zero Transmitter.” This begins the zeroing procedure. Calibration Mode Last Cal @ 50 PPM 05/17/06 11:23:34 PreCal Value XX PPM > Zero Transmitter Calibrate Set Cal Gas Conc Apply ZERO gas Select ACK To Continue Select << To Cancel 5) Apply the zero gas and select ACK to continue zeroing the transmitter. 6) During zeroing the following screen is displayed. The “Zeroing In Progress” screen is typically displayed for less than 60 seconds. Zeroing In Progress Select << To Cancel 7) When zeroing is complete the following screen appears. Remove the zero gas, then select ACK to return to the Main Menu Display. Select << to return to the Normal Operations Display. The screen automatically returns to the Normal Operations Display after 5 minutes if nothing is selected. Note If zeroing is not successful for any reason this screen will not appear. If zero fails try zeroing a second time or replacing the sensor. If zeroing fails repeatedly contact the Sensidyne Service Department. Sensidyne Document No. 360-0152-01 (Rev C1) Zero Complete GOOD Select ACK To Continue 37 SensAlert ASI – Advanced Safety Integrity Gas Transmitter 3.2 Span Calibration 3.2.1 General Plus Series sensors have the capacity to be calibrated in the laboratory using one transmitter and then installed in another transmitter in the field without any further modification or recalibration. Data stored on the sensor include the zero and span calibration parameters, as well as the temperature compensation characteristics for that particular sensor. When the sensor is calibrated on any SensAlert ASI transmitter it can be transferred to any other transmitter without recalibration. The SensAlert ASI Universal Gas Transmitter should be calibrated before initial use and at regular monthly intervals thereafter. The transmitter should also be calibrated if any of the following has occurred: • The sensor assembly has been replaced. • The transmitter has been exposed to gas concentrations at alarm levels. IMPORTANT If a Catalytic Bead or an Infrared Combustible sensor is installed in the transmitter you may need to go to Section 3.3.3 to select a K Factor before calibrating the transmitter. A K Factor is needed when the target gas is different from the gas (Methane or Propane) used to calibrate the transmitter. NOTE If calibration is being performed prior to initial use, the transmitter must be allowed to stabilize with power applied for at least 1 hour before performing zeroing or span calibration. Zeroing should always be performed prior to span calibration. 3.2.2 Calibration Equipment For a list of calibration equipment available for calibrating the SensAlert ASI Transmitter see Section 6.5: Calibration Equipment. NOTE You must only use certified Bottled Calibration Gas supplied by Sensidyne. Use of non-Sensidyne bottled gas is AT YOUR OWN RISK. 3.2.3 Span Calibration Procedure Sensidyne equipment is tested and calibrated prior to shipment. After installation and stabilization of the gas monitor, qualified personnel should verify calibration by applying zero and span gases. This procedure should be performed at commissioning, then repeated 30 and 60 days afterwards, with deviations in zero and span recorded. The calibration or functional check interval can then be adjusted to suit that application’s conditions. For further information, please refer to Recommended Practice for the Installation, Operation, and Maintenance of Combustible Gas Detection Instruments (ANSI/ISA TR12.13.02-2003) published by the ISA. Equipment Needed for this Procedure • 38 Magnetic Wand (provided, part number 7013201-1). Sensidyne Document No. 360-0152-01 (Rev C1) SensAlert ASI – Advanced Safety Integrity Gas Transmitter • Calibration Equipment (calibration plug, regulator, tubing, & gas) – see Section 6.5: Calibration Equipment IMPORTANT The span calibration procedure described below applies to most sensors. However, for some sensors special calibration instructions are needed that differ from the step described below. These special instructions are described in the Sensor Data Sheet that came with your sensor. Perform calibration at ambient conditions. See Appendix C: Specifications for humidity and temperature requirements. Maintain an accurate and up-to-date Calibration Record. Always calibrate in a well ventilated area. Prevent buildup of any gases or vapors. Avoid breathing any fumes or vapors as they are hazardous to your health. A) Apply power to the transmitter and allow it to stabilize. B) Remove the sensor shield (or optional rainshield) and attach the calibration plug to the sensor holder. NOTE If calibrating an oxygen transmitter use either bottled air or a known oxygen concentration at 20.9% by volume. C) Set up the calibration equipment according to the instructions that came with the equipment. Attach the delivery tubing from the calibration equipment to the hose connector on the calibration plug. NOTES During calibration, the 4–20 mA signal (using factory settings) is locked at 4 mA for many sensors and 17.38 mA for ambient Oxygen sensors. See the Sensor Data Sheet that came with your sensor for other possible values. Certain gases require Teflon® tubing, while others can use Tygon® tubing. Gases that require Teflon® tubing include chlorine, hydrogen chloride, hydrogen fluoride, nitrogen dioxide, phosgene, sulfur dioxide, and ethylene oxide. See Sensor Data Sheets for specific information. After the calibration equipment has been set up, continue with calibration as shown below: 1) Select ACK with the magnetic wand to bring up the Main Menu. Note: To cancel calibration at any time select <<. Sensidyne Document No. 360-0152-01 (Rev C1) 39 SensAlert ASI – Advanced Safety Integrity Gas Transmitter 2) Select ACK to bring up the Calibration Mode menu. > Calibration Mode Maintenance Mode Data Review Test-On-Demand System Configuration Lost Password 3) Use the ▼ arrow to move to “Calibrate.” Select ACK to begin Calibration. Note To verify that the current gas level used in calibration is the same as the bottled calibration gas level, use the ▼ arrow to move to “Set Cal Gas Conc” and select ACK. If the levels match select << to return the Calibration Mode menu. Calibration Mode Last Cal @ 50 PPM 05/17/06 11:23:34 PreCal Value XX PPM Zero Transmitter > Calibrate Set Cal Gas Conc Note If you wish to change the calibration gas level used to calibrate the transmitter, go to Step 4. Otherwise, skip to Step 7. 4) If the bottled gas concentration being used is different from the preset gas concentration, scroll down to Set Calibration Gas Concentration (shown as “Set Cal Gas Conc” on the display) and select ACK. 5) Use the ▲ and ▼ arrows to adjust the calibration gas level. Select ACK to set the new gas level. The unit returns to the Calibration Mode menu after a few seconds. Calibration Mode Last Cal @ 50 PPM 05/17/06 11:23:34 PreCal Value XX PPM Zero Transmitter Calibrate > Set Cal Gas Conc Set Cal Gas Conc 25 PPM 40 Sensidyne Document No. 360-0152-01 (Rev C1) SensAlert ASI – Advanced Safety Integrity Gas Transmitter 6) Scroll to “Calibrate” and select ACK to begin Span Calibration. Calibration Mode Last Cal @ 50 PPM 05/17/06 11:23:34 PreCal Value XX PPM Zero Transmitter > Calibrate Set Cal Gas Conc 7) When this screen appears begin applying the calibration gas. The system will automatically begin calibration Apply Gas Now Select << To Cancel 8) During calibration this screen will appear. Exposure times will vary depending on the gas used to calibrate the sensor. The gas “Level” shown is a “live” reading. During exposure the “live” reading will increase until the gas concentration reaches stability. Cal In Progress Cal To: 50 PPM Level: 19 PPM Select << To Cancel 9) Exposure has been completed when the “live” reading reaches stability (stability is defined as a concentration change of < 3% of the calibration value over a 60 second period). The gas concentration used for calibration is that value displayed when stability is reached. Cal In Progress Cal To: 50 PPM Level: 50 PPM Select << To Cancel Sensidyne Document No. 360-0152-01 (Rev C1) 41 SensAlert ASI – Advanced Safety Integrity Gas Transmitter 10) When calibration is complete this screen appears showing the gas level to which the sensor was successfully calibrated. A message also appears to “Remove Gas Now.” Remove the calibration gas and the calibration plug. Selecting ACK returns you to the Normal Operations Display when the gas level reading returns to zero. If you do not select ACK the screen automatically changes to the Normal Operations Display after 5 minutes has elapsed. Returning to the Normal Operations Display re-activates the 4 – 20 mA output. Calibration Complete OK @ 50 PPM Remove Gas Now Select ACK To Complete Note You may want to allow the gas reading to fall below alarm levels or to zero prior to returning to the Normal Operations Display. Note If calibration is not successful a similar screen appears displaying “FAIL @ XX PPM” (or %LEL or %VOL).” 3.3 Sensor Adjustment This section covers Sensor Adjustment and is applicable only when a Catalytic Bead Combustible or Infrared Combustible sensor is installed in the transmitter. If an Oxygen or toxic gas sensor is installed and “Sensor Adjustment” is selected the screen shown at the right will appear. Sensor Adjustment includes two functions: Selecting the calibration gas and selecting the K Factor. A K Factor is used when the target gas is different from the calibration gas (Methane or Propane). Different K Factors are needed depending on the type of combustible sensor installed (Catalytic Bead or Infrared), and the gas used to calibrate the sensor (Methane or Propane). Sensor Adjustment No Adjustments Are Possible Select ACK To Continue 3.3.1 Accessing The Sensor Adjustment Menu 1) From the Main Menu use the ▼ arrow to scroll to “System Configuration.” Select ACK to bring up the System Configuration Menu. Main Menu Calibration Mode Maintenance Mode Data Review Test On Demand > System Configuration Lost Password 42 Sensidyne Document No. 360-0152-01 (Rev C1) SensAlert ASI – Advanced Safety Integrity Gas Transmitter 2) From the System Configuration Menu use the ▼ arrow to scroll to “Sensor Adjustment.” Select ACK to bring up the Sensor Adjustment Menu. Note The initial System Configuration Menu screen has “--more--“ as the last menu item. This indicates that there are additional menu items that cannot be displayed in the initial screen. Use the ▼ arrow to continue scrolling down the list until “>” is next to “Sensor Adjustment.” System Configuration --more-Adjust Date/Time Communication Setup TOD Mode Adjustment > Sensor Adjustment Set Password 3.3.2 Select Cal Gas Access the Sensor Adjustment Menu as shown in Section 3.3.1 1) Select ACK for “Select Cal Gas” to bring up the Select Cal Gas screen. Sensor Adjustment > Select Cal Gas Select K Factor 2) A screen appears indicating that Methane is the current combustible calibration gas (the “>” points to the current calibration gas). For this example, the calibration gas will be changed to Propane. Use the ▼ arrow to scroll to “Propane” and select ACK. Select Cal Gas > Methane Propane Other Note There is a third choice of “Other.” If “Other” is selected as the calibration gas then all options under the Select K Factor menu change to either “None” (1.00) or “Custom K Factor.” You might select “Other” as the calibration gas if both the target gas and the calibration gas are the same (e.g., Butane). In this case a K-Factor of “None” would also be selected. 3) Either of two screens will appear confirming the new cal gas. The first screen appears if a Catalytic Bead Combustible sensor is installed. The screen below it typically appears if an Infrared Combustible sensor is installed (see Note below). Select ACK to save the new cal gas. Select Cal Gas Propane Has Been Selected Select ACK to Save Select << To Cancel Sensidyne Document No. 360-0152-01 (Rev C1) 43 SensAlert ASI – Advanced Safety Integrity Gas Transmitter Note The IR combustible sensor will be reset only if the calibration gas that is selected is different from the current calibration gas. When the sensor is reset the system will go through “Warm Up” for the sensor. Also, all span calibration data will be reset to their default values. When this occurs you must recalibrate the sensor. Select Cal Gas Propane Has Been Selected Save Will Cause Sensor To Reset Select ACK to Save Select << To Cancel 3.3.3 Selecting a K Factor Access the Sensor Adjustment Menu as shown in Section 3.3.1. K Factors are used for combustible sensors to adjust the displayed reading when the transmitter is detecting a target gas that is different from the gas used to calibrate the transmitter. For example, a transmitter has a Catalytic Bead Combustible sensor installed and is calibrated using Propane. If the transmitter is being used to detect Hexane then a K Factor must be applied so the displayed gas level more accurately reflects the actual concentration of Hexane at the sensor. In this case the K Factor would be 1.23. That means the raw gas level reading is multiplied by 1.23 before being displayed. Sensor Adjustment Select Cal Gas > Select K Factor The examples below will show how to select a K Factor when a Catalytic Bead Combustible sensor is installed, when an Infrared Combustible sensor is installed and when the cal gas is either Methane or Propane. From the Sensor Adjustment menu use the ▼ arrow to scroll to “Select K Factor” and select ACK. 3.3.3.1 Catalytic Bead Combustible Sensor Installed (Calibration Gas is Methane) 1) After choosing “Select K Factor” from the Sensor Adjustment screen, a screen appears showing the available gases with preset K Factors. The “>” indicates there is no K Factor currently applied. For this example the K Factor for Propane will be selected. Use the ▼ arrow to scroll to “Propane” and select ACK. Select K Factor Cal Gas Is Methane > None Hydrogen Propane Hexane Butane Custom K Factor Note K Factors are preset for the following gases: None, Hydrogen, Propane, Hexane, Butane, Custom K factor 44 Sensidyne Document No. 360-0152-01 (Rev C1) SensAlert ASI – Advanced Safety Integrity Gas Transmitter 2) A screen appears displaying a K Factor of 1.90 for Propane. Select ACK to save the new K Factor. Select K Factor Cal Gas Is Methane Propane K Factor Is: 1.90 Select ACK to Save Select << to Cancel 3.3.3.2 Catalytic Bead Combustible Sensor Installed (Calibration Gas is Propane) 1) After choosing “Select K Factor” from the Sensor Adjustment screen, a screen appears showing the available gases with preset K Factors. The “>” indicates there is no K Factor currently applied. For this example the K Factor for Methane will be selected. Use the ▼ arrow to scroll to “Methane” and select ACK. Select K Factor Cal Gas Is Propane > None Hydrogen Methane Hexane Butane Custom K Factor Note K Factors are preset for the following gases: None, Hydrogen, Methane, Hexane, Butane, Custom K factor 2) A screen appears displaying a K Factor of 0.53 for Methane. Select ACK to save the new K Factor. Select K Factor Cal Gas Is Propane Methane K Factor Is: 0.53 Select ACK to Save Select << to Cancel 3.3.3.3 Infrared Combustible Sensor Installed (Calibration Gas is Propane) 1) After choosing “Select K Factor” from the Sensor Adjustment screen, a screen appears showing the available gases with preset K Factors. The “>” indicates there is no K Factor currently applied. For this example the K Factor for Butane will be selected. Use the ▼ arrow to scroll to “Butane” and select ACK. Note K-Factors are not applicable when an Infrared Combustible sensor is installed and Methane is used as the calibration gas. Select K Factor Cal Gas Is Propane > None Custom K Factor Acetone Butadiene Butane Ethane Note K Factors are preset for the following gases: None, Custom K Factor, Acetone, Butadiene, Butane, Ethane, Ethanol, Ethyl Sensidyne Document No. 360-0152-01 (Rev C1) 45 SensAlert ASI – Advanced Safety Integrity Gas Transmitter Acetate, Ethylene, Ethylene Oxide, Gasoline, Hexane, IPA, Methanol, MEK, Pentane, Propylene, THF, Toluene, Xylenes 3.3.3.4 Infrared Combustible Sensor Installed (Calibration Gas is Methane) 1) K-Factors are not applicable when an Infrared Combustible sensor is installed and Methane is used as the calibration gas. After choosing “Select K Factor” from the Sensor Adjustment screen, the screen shows there are no options for K factor. Select K Factor Cal Gas Is Methane > None 3.3.4 Selecting a Custom K Factor Access the Sensor Adjustment Menu as shown in Section 3.3.1 In some cases the target gas (for example, Pentane) is not on the list of available preset K Factors. In this case a custom K Factor must be applied. A list of K-Factors for Catalytic Bead and Infrared Combustible sensors can be found in their respective Sensor Data sheets. Please consult factory for Custom K-Factors not found on the Sensor Data sheet. The screens shown below are applicable whether the installed sensor is Catalytic Bead Combustible or Infrared Combustible. The only exception is the situation where an Infrared Combustible sensor is installed and is calibrated using Methane. A Custom K Factor is not available in this case. The example below assumes a Catalytic Bead Combustible sensor is installed and calibrated with Propane. The target gas is Pentane. 1) After choosing “Select K Factor” from the Sensor Adjustment screen, a screen appears showing the available gases with preset K Factors. The “>” indicates there is no K Factor currently applied. For this example a custom K Factor will be selected. Use the ▼ arrow to scroll to “Custom K Factor” and select ACK. Select K Factor Cal Gas Is Propane > None Custom K Factor Acetone Butadiene Butane Ethane Note If “Other” is selected as the calibration gas then all options under the Select K Factor menu change to either “None” (1.00) or “Custom K Factor.” You might select “Other” as the calibration gas if both the target gas and the calibration gas are the same (e.g., Butane). In this case a K-Factor of “None” would also be selected. 2) A screen appears displaying the current K Factor (in this example the current K-Factor is 2.23). Use the ▲ and ▼ arrows to change the K Factor to 1.18. This is the K Factor for Pentane when a Catalytic Bead Combustible sensor is installed and is calibrated with Propane. An expanded list of K-Factors can be found in the Sensor Data Sheets for the Catalytic Bead Combustible and Infrared Combustible sensors. 46 Select K Factor Cal Gas Is Propane Custom K Factor K Factor Is: 2.23 Select ACK to Save Select << to Cancel Sensidyne Document No. 360-0152-01 (Rev C1) SensAlert ASI – Advanced Safety Integrity Gas Transmitter 3) When the Custom K Factor has been changed to 1.18, select ACK to save the new value. Select K Factor Cal Gas Is Propane Custom K Factor K Factor Is: 1.18 Select ACK to Save Select << to Cancel 3.4 TOD Mode Adjustment This section covers the Test-On-Demand™ (TOD) Mode Adjustment functions. Here, you will be shown how to enable and disable the automatic testing mode, set the date & time for testing, set the number of days between tests, set the cell intensity, and designate output & fault indicators. 3.4.1 Accessing The TOD Mode Adjustment Menu 1) From the Main Menu use the ▼ arrow to scroll to “System Configuration.” Select ACK to bring up the System Configuration Menu. Main Menu Calibration Mode Maintenance Mode Data Review Test On Demand > System Configuration Lost Password System Configuration 2) From the System Configuration Menu use the ▼ arrow to scroll to “TOD Mode Adjustment.” Select ACK to bring up the TOD Mode Adjustment Menu. --more-Adjust Date/Time Communication Setup > TOD Mode Adjustment Sensor Adjustment Set Password Note The initial System Configuration Menu screen has “--more--“ as the last menu item. This indicates that there are additional menu items that cannot be displayed in the initial screen. Use the ▼ arrow to continue scrolling down the list until “>” is next to “TOD Mode Adjustment.” Sensidyne Document No. 360-0152-01 (Rev C1) 47 SensAlert ASI – Advanced Safety Integrity Gas Transmitter 3) From the TOD Mode Adjustment Menu use the ▼ arrow to scroll to the desired menu item (e.g., “Test Date/Time,” “Cell Intensity,” etc.). Select ACK to bring up that menu item. 48 TOD Mode Adjustment > Auto Mode Enable Test Date/Time Days Between Tests Cell Intensity Output Indicators Sensidyne Document No. 360-0152-01 (Rev C1) SensAlert ASI – Advanced Safety Integrity Gas Transmitter 3.4.2 Auto Mode Enable Auto Mode Enable is a convenient way to automatically perform a Test-On-Demand at regular intervals (e.g., every 7 days). Note When Test-On-Demand is performed automatically and the test fails because gas is present, system message will appear on the Normal Operation Mode Display and fault output (if enabled) will appear. Access the TOD Mode Adjustment Menu as shown in Section 3.4.1. Auto Mode Enable > Disable Automatic Enable Automatic 1) From the TOD Mode Adjustment Menu select ACK for “Auto Mode Enable” to bring up the Auto Mode Enable screen. The “>” points to the current setting. 2) To enable automatic testing use the ▼ arrow to scroll to “Enable Automatic and select ACK. Auto Mode Enable Disable Automatic > Enable Automatic 3.4.3 Test Date/Time Access the TOD Mode Adjustment Menu is located under the System Configuration. 1) From the TOD Mode Adjustment Menu use the ▼ arrow to scroll to “Test Date/Time” and select ACK. Note If you set a Test Date/Time and Auto Mode is not enabled, no test will be performed when that Test Date/Time occurs. Instead, the Test Date/Time will change when the system clock changes. For example, the system time is 15:00 and you set the Test Time for 17:00. When the system time becomes 17:00 no test will be performed. Instead, the Test Date/Time will change whenever the system time changes (i.e., both the system and test times change to 17:01, 17:02, 17:03, etc.). If you then enable the Auto Mode a test will be immediately performed, and will be repeated at intervals set in the Days Between Tests Menu. Sensidyne Document No. 360-0152-01 (Rev C1) TOD Mode Adjustment Auto Mode Enable > Test Date/Time Days Between Tests Cell Intensity Output Indicators 49 SensAlert ASI – Advanced Safety Integrity Gas Transmitter 2) The first screen that appears refers to the month of the test. Use the ▲ and ▼ arrows to change the test month. When finished select ACK to bring up the Date screen. This continues with the Year, Hour, and Minute screens. If the DD/MM/YY format is chosen in the “Adjust Date/Time” menu then the Date screen will be shown first, followed by the Month screen, etc. Adj Test Date/Time Month 04/26/06 16:33 Note If a date or time is entered that is PRIOR to the time on the transmitter system clock, the Month, Date, Year, Hour, and Minutes screens will continuously cycle through until the test date/time has been changed to a date/time occurring in the future. 3.4.4 Days Between Tests TOD Mode Adjustment Access the TOD Mode Adjustment Menu under System Configuration. 1) From the TOD mode Adjustment Menu use the ▼ arrow to scroll to “Days Between Tests” and select ACK. 2) A screen appears showing the current number of days between TOD tests. Use the ▲ and ▼ arrows to change the number of days (between 1 and 60). Select ACK to save the new value. Note If Auto Mode is disabled, adjusting the number of days between tests will have no effect on TOD testing. Once auto Mode is enabled the system will perform the TOD test based on the date & time set in the Test Date/Time menu. The test will be repeated at regular intervals based on the number of days between tests set in this menu. Auto Mode Enable Test Date/Time > Days Between Tests Cell Intensity Output Indicators Adjust Num Of Days 04 3.4.5 Cell Intensity Cell intensity refers to the amount of gas that is generated by the Test-On-Demand cell. Cell intensity is nominally set at 50%, though cell intensity can range from 10% to 100%. Cell intensity may need to be adjusted, for example, to compensate for undesirable environmental conditions (e.g., high winds). Access the TOD Mode Adjustment Menu as shown in Section 3.4.1. 50 TOD Mode Adjustment Auto Mode Enable Test Date/Time Days Between Tests > Cell Intensity Output Indicators Sensidyne Document No. 360-0152-01 (Rev C1) SensAlert ASI – Advanced Safety Integrity Gas Transmitter 1) From the TOD mode Adjustment Menu use the ▼ arrow to scroll to “Cell Intensity” and select ACK. 2) A screen appears showing the current cell intensity. Use the ▲ and ▼ arrows to change the cell intensity. Select ACK to save the new value. Cell Intensity 50% Is Nominal Intensity 100% UP = Increase DOWN = Decrease 3.4.6 Output Indicators There are two output indicators when the Test-On-Demand cell is activated. These indicators apply only when the Automatic Test Mode has been enabled. If “None” is selected current output will remain at nominal levels during testing. If “4-20 mA Current Loop” is selected all outputs remain active during testing. 1) To change the output indicators use the ▼ arrow to scroll to “Output Indicators” and select ACK. TOD Mode Adjustment Auto Mode Enable Test Date/Time Days Between Tests Cell Intensity > Output Indicators 2) A screen appears showing the current output indicator, in this case “None.” To change the output indicator use the ▼ arrow to scroll to “4-20 Current Loop.” Select ACK to save. Output Indicators > None 4-20 Current Loop Sensidyne Document No. 360-0152-01 (Rev C1) 51 SensAlert ASI – Advanced Safety Integrity Gas Transmitter 4 Alarms and Relays This section covers alarm functions, warning functions, and relays. Within this section you will be shown how to add and delete relays for specific alarms and warnings, how to change the status and setpoint of each alarm, and how to change the status of specific relays. 4.1 Accessing Alarm & Relay Menus The alarm and relay menus are accessible as follows: 1) From the Main Menu use the ▼ arrow to scroll to “System Configuration.” Select ACK to bring up the System Configuration Menu. Main Menu Calibration Mode Maintenance Mode Data Review Test On Demand > System Configuration Lost Password 2) From the System Configuration Menu use the ▼ arrow to scroll to “Alarm Settings.” Select ACK to bring up the Alarm Settings Menu 3) From the Alarm Settings Menu use the ▼ arrow to scroll to the desired menu item (e.g., “Alarm Functions,” “Fault Functions,” etc.). Select ACK to bring up that menu item. System Configuration Self Test > Alarm Settings 4/20 mA Adjustment Adjust Date/Time Communication Setup TOD Mode Adjustment --more-- Alarm Settings > Alarm Functions Fault Functions Relay 1 – Fail Relay 2 Relay 3 Relay 4 Warn Current-Relay5 52 Sensidyne Document No. 360-0152-01 (Rev C1) SensAlert ASI – Advanced Safety Integrity Gas Transmitter 4.2 Alarm Functions Access the Alarm Functions Menu from the Alarm Settings Menu under System Configuration. Alarm Functions 4.2.1 Alarms 1 – 3, TWA Alarm There are three primary gas alarms and a TWA alarm. All four alarms function similarly. The examples shown for Alarm 1 apply equally to Alarm 2, Alarm 3, and the TWA Alarm. Alarm functions include adding one or more relays, deleting one or more relays, enabling or disabling the alarm, making the alarm ascending or descending, adjusting the alarm setpoint, and adjusting the alarm release offset. Note: For the TWA Alarm “Average Time Adjust” is used instead of “Alarm Release Offset.” > Alarm 1 Alarm 2 Alarm 3 TWA Alarm Select ACK to Change 4.2.1.1 Add Relay 1) Select ACK for “Alarm 1” from the Alarm Functions menu. (To select a different alarm use the ▼ arrow to scroll to that alarm.) A screen appears displaying the available functions for Alarm 1. The screen also shows the relays that have already been assigned to Alarm 1. In this case only Relay 2 has been assigned. For this example we will add Relay 3. Select ACK to bring up the Add Relay screen. Alarm 1 Relays Assigned 2 > Add Relay Delete Relay Enabled Ascending Setpoint Release Offset 2) The Add Relay screen displays a list of all relays. Use the ▼ arrow to scroll to Relay 3. Select ACK to add the relay. Alarm 1 Relays Assigned 2 Relay 1 - Fail Relay 2 > Relay 3 Relay 4 Warn Current-Relay5 Select ACK to Add 3). A screen appears showing that Relay 3 has been added to Alarm 1. To add another relay use the ▼ arrow to scroll to the relay and select ACK. When you are finished adding relays select << to return to the Alarm 1 menu screen. Alarm 1 Relays Assigned 23 > Relay 1 - Fail Relay 2 Relay 3 Relay 4 Warn Current-Relay5 Select ACK to Add Sensidyne Document No. 360-0152-01 (Rev C1) 53 SensAlert ASI – Advanced Safety Integrity Gas Transmitter 4.2.1.2 Delete Relay 1) The Alarm 1 menu screen shows that Relay 2 and Relay 3 have been assigned to Alarm 1. For this example, we will delete Relay 3. Use the ▼ arrow to scroll to “Delete Relay” and select ACK to bring up the Delete Relay screen. 2) The Delete Relay screen displays a list of all relays and the relays currently assigned to Alarm 1. Use the ▼ arrow to scroll to Relay 3. Select ACK to delete the relay. Alarm 1 Relays Assigned 23 Add Relay > Delete Relay Enabled Ascending Setpoint Release Offset Alarm 1 Relays Assigned 23 Relay 1 - Fail Relay 2 > Relay 3 Relay 4 Warn Current-Relay5 Select ACK to Delete 3). A screen appears showing that Relay 3 has been deleted. To delete another relay use the ▼ arrow to scroll to the desired relay and select ACK. When you are finished deleting relays select << to return to the Alarm 1 menu screen. Alarm 1 Relays Assigned 2 > Relay 1 - Fail Relay 2 Relay 3 Relay 4 Warn Current-Relay5 Select ACK to Delete 4.2.1.3 Enable/Disable Alarm 1) The screen shows that Alarm 1 is enabled. To disable the alarm use the ▼ arrow to scroll to “Enabled” and select ACK. Alarm 1 Relays Assigned 2 Add Relay Delete Relay > Enabled Ascending Setpoint Release Offset 54 Sensidyne Document No. 360-0152-01 (Rev C1) SensAlert ASI – Advanced Safety Integrity Gas Transmitter 2) A screen appears showing that the alarm has been disabled. Select ACK to save the change. Alarm 1 Disabled Select ACK to Save 4.2.1.4 Ascending/Descending Alarm 1) The Alarm 1 menu screen shows that Alarm 1 is ascending. To change the alarm to descending use the ▼ arrow to scroll to “Ascending” and select ACK. Alarm 1 Relays Assigned 2 Add Relay Delete Relay Enabled > Ascending Setpoint Release Offset 2) A screen appears showing that Alarm 1 is now descending. Select ACK to save the change. Alarm 1 Descending Select ACK to Save 4.2.1.5 Alarm Setpoint 1) Use the ▼ arrow to scroll to “Setpoint.” Select ACK to bring up the Setpoint screen. Alarm 1 Relays Assigned 2 Add Relay Delete Relay Enabled Ascending > Setpoint Release Offset Sensidyne Document No. 360-0152-01 (Rev C1) 55 SensAlert ASI – Advanced Safety Integrity Gas Transmitter 2) The Setpoint screen displays the current alarm setpoint. Use the ▲ and ▼ arrows to increase/decrease the setpoint. Select ACK to save the new value. Alarm 1 Setpoint 10 PPM Select ACK to Save UP = Increase DOWN = Decrease 4.2.1.6 Release Offset (Alarms 1 – 3) Release Offset is the amount (in ppm, %LEL, or %vol) by which the gas level must differ from the alarm setpoint before an ongoing alarm stops. The release offset can refer to the amount above or below the alarm setpoint, depending on whether the alarm has been designated as “ascending” or “descending.” If the alarm is “ascending” the release offset refers to the amount below the alarm setpoint, and vice versa. The Release Offset applies to Alarms 1 – 3 only. Alarm 1 Relays Assigned 2 Add Relay Delete Relay Enabled Ascending Setpoint > Release Offset 1) Use the ▼ arrow to scroll to “Release Offset.” Select ACK to bring up the Release Offset screen. 2) The Release Offset screen displays the current release offset amount. Use the ▲ and ▼ arrows to increase/decrease the release offset. Select ACK to save the new value. Alarm 1 Release Offset 3 PPM Select ACK to Save UP = Increase DOWN = Decrease 4.2.1.7 Average Time Adjust (TWA Alarm) To adjust the time period used to calculate the Time Weighted Average (TWA): From System Configuration, Alarm Settings, Alarm Functions, and select Average Time Adjust. The Average Time Adjust for the TWA Alarm is the time period (in either minutes or hours) used to calculate the Time Weighted Average (TWA). The Average Time Adjust applies only to the TWA Alarm. The Average Time Adjust can be in either minutes or hours. 1) Use the ▼ arrow to scroll to “TWA Alarm.” Select ACK to bring up the TWA Alarm screen. Alarm Functions Alarm 1 Alarm 2 Alarm 3 > TWA Alarm Select ACK to Change 56 Sensidyne Document No. 360-0152-01 (Rev C1) SensAlert ASI – Advanced Safety Integrity Gas Transmitter 2) Use the ▼ arrow to scroll to “Average Time Adjust.” Select ACK to bring up the Average Time Adjust screen. TWA Alarm Relays Assigned 4 Add Relay Delete Relay Enabled Ascending Setpoint > Average Time Adjust 3) For this example use the ▼ arrow to scroll to “8 Hours.” Select ACK to change the time period. TWA Alarm Average Time Adjust 15 Minutes 30 Minutes 60 Minutes 2 Hours 4 Hours > 8 Hours Sensidyne Document No. 360-0152-01 (Rev C1) 57 SensAlert ASI – Advanced Safety Integrity Gas Transmitter 4.3 Fault Functions Access the Fault Functions Menu from System Configuration, Alarm Settings. The following screen will be displayed. There are nine separate fault functions. These include Head Fail, Missing Sensor, Sensor Fail, Sensor End Of Life, Output Current Track, Calibration Mode, Maintenance Mode, TOD Fail, and TOD End of Life. Functions for each fault include adding one or more relays, deleting one or more relays, enabling or disabling the warning, and adjusting the fault current level. (For Sensor End of Life, Output Current Track, TOD Fail, and TOD End of Life functions and Adjust Current Delay selection is available. Fault Functions > Head Fail Missing Sensor Sensor Fail Sensor End Of Life Output Current Track Calibration Mode --more-- 4.3.1 Head Fail The examples shown for Head Fail are applicable to the other eight fault functions. The Head Fail, Missing Sensor, and Sensor Fail fault functions are initially assigned to ”Relay 1 – Fail” at the factory. The Sensor End Of Life, Output Current Track, Calibration Mode, Maintenance Mode, TOD Fail, and TOD End of Life fault functions are not assigned to any relays at the factory. Relays will not transition in Calibration Mode or Maintenance Mode. Fault Functions 4.3.1.1 Add Relay 1) To access Head Fail select ACK for “Head Fail” from the Warning Functions menu. (To select a different item use the ▼ arrow to scroll to a different warning function.) A screen appears displaying the available functions for Head Fail. The screen also shows the relays that have already been assigned to Head Fail. In this case Relay 1 has been assigned (factory default). For this example we will add Relay 4. Select ACK to bring up the Add Relay screen. --more-Maintenance Mode TOD Fail TOD End of Life Head Fail Relays Assigned 2) The Add Relay screen displays a list of all relays. Use the ▼ arrow to scroll to Relay 4. Select ACK to add the relay. 1 > Add Relay Delete Relay Disabled Adj Fault Current Head Fail Relays Assigned 1 Relay 1 - Fail Relay 2 Relay 3 > Relay 4 Select ACK to Add 58 Sensidyne Document No. 360-0152-01 (Rev C1) SensAlert ASI – Advanced Safety Integrity Gas Transmitter 3). A screen appears showing that Relay 4 has been added. To add another relay use the ▼ arrow to scroll to the relay and select ACK. When finished select << to return to the Head Fail screen. Head Fail Relays Assigned 14 > Relay 1 - Fail Relay 2 Relay 3 Relay 4 Select ACK to Add 4.3.1.2 Delete Relay 1) The Head Fail menu screen shows that Relay 1 and Relay 4 have been assigned to Head Fail. For this example, we will delete Relay 4. Use the ▼ arrow to scroll to “Delete Relay” and select ACK to bring up the Delete Relay screen. 2) The Delete Relay screen displays a list of all relays. Use the ▼ arrow to scroll to Relay 4. Select ACK to delete the relay. Head Fail Relays Assigned 14 Relay 1 - Fail Relay 2 Relay 3 > Relay 4 Select ACK to Delete 3). A screen appears showing that Relay 4 has been deleted. To delete another relay use the ▼ arrow to scroll to the desired relay and select ACK. When finished select << to return to the Head Fail screen. Head Fail Relays Assigned 1 > Relay 1 - Fail Relay 2 Relay 3 Relay 4 Select ACK to Delete Sensidyne Document No. 360-0152-01 (Rev C1) 59 SensAlert ASI – Advanced Safety Integrity Gas Transmitter 4.3.1.3 Enable/Disable 1) The screen shows that Head Fail is disabled. To enable the warning use the ▼ arrow to scroll to “Disabled” and select ACK. Head Fail Relays Assigned 1 > Add Relay Delete Relay Disabled 2) A screen appears showing that Head Fail has been enabled. Select ACK to save the change. Head Fail Enabled Select ACK to Save 4.3.1.4 Adjust Fault Current The Adjust Fault Current menu is used to change the fault current level. In this example, when a Head Fail fault occurs the current level will drop to 2.25 mA. Each of the six other fault functions can have a different specified fault current level. Head Fail Adj Fault Current 2.25 Select ACK To Save UP = Increase Down = Decrease 1) To adjust the fault current level use the ▼ arrow to scroll to “Adj Fault Current” and select ACK. 2) A screen appears showing the present Fault Current Value for the displayed fault. Use the ▲and ▼arrows to adjust the fault current in 0.05 mA steps. The minimum fault current is 1.00 mA for the 3-wire transmitter and 3.00 mA for the 2-wire transmitter. When finished adjusting the value select ACK to save the new value. Sensor End of Life Adj Current Delay 15 Select ACK To Save UP = Increase Down = Decrease 4.3.1.5 Adjust Current Delay The Adjust Current Delay menu is used to change the fault current duration for the specific fault. In this example, when a Sensor End of Life fault occurs 60 Sensidyne Document No. 360-0152-01 (Rev C1) SensAlert ASI – Advanced Safety Integrity Gas Transmitter the 4-20mA output current will drop to the specified current level for 15 seconds each hour. Adjust Current Delay is only applicable for Sensor End of Life, Output Current Track, TOD Fail, and TOD End of Life. 1. To adjust the current delay use the ▼arrow to scroll to “ Adj Current Delay” and select ACK . 2. A screen appears showing the present Current Delay Value for the displayed fault. Use the ▲and ▼arrows to adjust the fault current in 1second steps. The minimum Delay is 0 seconds and maximum is 300 seconds. When finished adjusting the value select ACK to save the new value. 4.4 Relays 1 - 4 Access the menus for Relay 1 - Fail, Relay 2, Relay 3, or Relay 4 from System Configuration, Alarm Settings. There may be up to four separate relays, with Relay 1 designated as the Fail relay (factory default). All four relays function similarly. The examples shown for Relay 1 apply equally to Relay 2, Relay 3, and Relay 4. Relay functions include making the relay either latching or non-latching, designating the relay as either normally energized or normally de-energized, and adjusting the relay’s time delay. 4.4.1 Latching/Non-Latching 1) The screen shows that Relay 1 is currently Non-Latching. To change the status select ACK. Relay 1 - Fail > Non-Latching Norm Energized Time Delay Select ACK to Change 2) A screen appears showing that-Relay 1 is now Latching. Select ACK to save the change. Note A non-latching relay will automatically reset (deactivate) when the condition causing the relay to activate (e.g. gas alarm, missing sensor, etc.) no longer exists. A “latching” relay, however, will remain active even when the activating condition no longer exists. This is indicated when the LED associated with the “latched” relay remains lit. The relay must be manually deactivated (reset) by selecting << from the Normal Operation Display screen (see screen at right). Sensidyne Document No. 360-0152-01 (Rev C1) Relay 1 - Fail Latching Select ACK to Save 61 SensAlert ASI – Advanced Safety Integrity Gas Transmitter 4.4.2 Norm Energized/Norm De-energized 1) The screen shows that Relay 1 is currently normally energized (factory default). To change the status use the ▼ arrow to scroll down to “Norm Energized” and select ACK. Relay 1 - Fail Non-Latching > Norm Energized Time Delay Select ACK to Change 2) A screen appears showing that-Relay 1 is now “Norm Deenergized.” Select ACK to save the change. Relay 1 - Fail Norm De-energized Select ACK to Save 62 Sensidyne Document No. 360-0152-01 (Rev C1) SensAlert ASI – Advanced Safety Integrity Gas Transmitter 4.4.3 Time Delay Time Delay refers to the time between the onset of a condition (e.g., Missing Sensor, Alarm, etc.) and the activation of the associated relay. The Time Delay function can be set from 1 to 240 seconds. A time delay is typically set when the user does not want the relay to activate external strobes or horns for intermittent, transient gas spikes at lower concentrations. 1) To adjust the time delay use the ▼ arrow to scroll to “Time Delay” and select ACK. The minimum time delay is 1 second, while the maximum time delay is 240 seconds. 2) A screen appears showing the present time delay. Use the ▲ and ▼ arrows to adjust the time delay. When finished select ACK to save the new value. 4.5 Warn Current – Relay 5 The Warn Current-Relay 5 is a warning function that drops the 4-20 mA output to the Fault Current Level when an assigned condition occurs (e.g., alarms). The Warn Current-Relay 5 warning function is present on all transmitters, including those with no mechanical relays installed (i.e., 2-Wire and IS transmitters). Relay 1 - Fail Non-Latching Norm Energized > Time Delay Select ACK to Change Relay 1 - Fail Time Delay Adjust Delay 003 Seconds UP = Increase DOWN = Decrease Select ACK to Save Warn Current-Relay5 > Non-Latching Enabled Low Current Time Adj Select ACK to Change Access the Warn Current – Relay 5 Menu as shown in Section 4.1. The following screen will be displayed. 4.5.1 Latching/Non-Latching 1) The screen shows that the Warn Current-Relay 5 is currently Non-Latching. To change the status select ACK. Warn Current-Relay5 Latching Select ACK to Save Sensidyne Document No. 360-0152-01 (Rev C1) 63 SensAlert ASI – Advanced Safety Integrity Gas Transmitter 2) A screen appears showing that Warn Current-Relay 5 is now Latching. Select ACK to save the change. Warn Current-Relay5 Non-Latching > Disabled Low Current Time Adj Select ACK to Change 4.5.2 Enable/Disable 1) The screen shows that the Warn Current-Relay 5 is currently Disabled. To change the status use the ▼ arrow to scroll to “Disabled” and select ACK. Warn Current-Relay5 Enabled Select ACK to Save 2) A screen appears showing that Warn Current-Relay 5 is now Enabled. Select ACK to save the change. 4.5.3 Low Current Time Adjust The Low Current Time Adjust is used to change the amount of time the Warn Current Adjust-Relay 5 remains at the Fault Current level when a fault occurs. 1) To adjust the low current time use the ▼ arrow to scroll to “Low Current Time Adj” and select ACK. Warn Current-Relay5 Non-Latching Disabled > Low Current Time Adj Select ACK to Change 64 Sensidyne Document No. 360-0152-01 (Rev C1) SensAlert ASI – Advanced Safety Integrity Gas Transmitter 2) A screen appears showing the present Low Output Current delay. Use the ▲ and ▼ arrows to adjust the time delay. The minimum time delay is 1 second, while the maximum time delay is 240 seconds. When finished select ACK to save the new value. Sensidyne Document No. 360-0152-01 (Rev C1) Warn Current-Relay5 Low Output Current Delay 020 Seconds UP = Increase DOWN = Decrease Select ACK to Save 65 SensAlert ASI – Advanced Safety Integrity Gas Transmitter 5 Menu Structure The setup and operation of the SensAlert ASI is controlled by parameters and procedures that are accessed through the menu structure. The menu structure is entered from the Normal Operation Display by selecting ACK. This brings up the Main Menu from which all other menus and menu items can be selected. 5.1 Basic Guide to Using the Menu System Selecting ACK from the Normal Operation Display enters the SensAlert ASI menu system. Within the menu system ACK is used in several ways: 1) to select an item from a list of menu items, 2) to confirm that an action has occurred (e.g. changing an alarm from “Non-Latching” to “Latching”), or 3) to save a new value that has been entered (e.g., a new alarm setpoint). The << control backs up to the previously displayed menu. If a change was in progress, the changes are discarded. It is similar in use to an ESC key on a computer keyboard. The ▲ control arrow is used to move UP a list of menu items. The ▼ control arrow is used to move DOWN a list of menu items. The ▲ and ▼ control arrows also are used to increase/decrease numeric values of certain menu items (e.g. alarm setpoint, cal gas concentration, etc.). 5.2 Menu Map SensAlert ASI Menu Structure 5.2.1 5.2.1.1 5.2.1.2 5.2.1.3 Calibration Mode Zero Transmitter 5.2.1.1.1 Calibration Mode Main Screen 5.2.1.1.2 “Apply ZERO gas” 5.2.1.1.3 “Zeroing In Progress” 5.2.1.1.4 “Zero Complete” (either “Good” or “Fail”) Calibrate 5.2.1.2.1 Calibration Mode Main Screen 5.2.1.2.2 “Apply Gas Now” 5.2.1.2.3 “Cal In Progress” (stabilizing) 5.2.1.2.4 “Cal In Progress” (stable) 5.2.1.2.5 “Calibration Complete” (either “OK” or “FAIL”) Set Cal Gas Conc. 5.2.1.3.1 5.2.2 Maintenance Mode 5.2.2.1.1 66 Screen for changing concentration “Transmitter will be isolated for 10 minutes” Sensidyne Document No. 360-0152-01 (Rev C1) SensAlert ASI – Advanced Safety Integrity Gas Transmitter 5.2.3 5.2.3.1 Data Review Previous Cal Info 5.2.3.1.1 5.2.3.2 Sensor Status 5.2.3.2.1 5.2.3.3 -- Head Fail -- Missing Sensor -- Sensor Fail -- Sensor End Of Life -- Output Current Track -- Calibration Mode -- Maintenance Mode -- TOD Fail -- TOD End of Life X.XX X.XX X.XX X.XX X.XX X.XX X.XX X.XX X.XX Fault Current Delay 5.2.3.6.1 5.2.3.7 (and/or - only “Active” displayed) -- Alarm 1 --Alarm 2 --Alarm 3 -- TWA Alarm -- Head Fail -- Missing Sensor -- Sensor Fail -- Sensor EOL -- Out Cur Track -- Calibration Mode -- Maintenance Mode Fault Current 5.2.3.5.1 5.2.3.6 – Max Exposure -- Sensor Temp -- Max Temp -- Min Sensor Temp Active Alarms/Faults 5.2.3.4.1 5.2.3.5 – Gas Name -- TWA Concentration -- Sensor Life Remaining -- K Factor (for Combustible sensor) Sensor Data 5.2.3.3.1 5.2.3.4 2nd, 3rd, 4th Pre Cal info -- Sensor EOL -- Output Curr Track -- TOD Fail -- TOD End Of Life -- Calibration Due XX XX XX XX XX Rly Alm Fault Config 5.2.3.7.1 Relay 1 – Fail -- Latching/Non-Latching -- Norm Energized or Deenergized -- Time Delay XXX Sec 5.2.3.7.2 Relay 2 – Fail -- Latching/Non-Latching -- Norm Energized or Deenergized -- Time Delay XXX Sec Sensidyne Document No. 360-0152-01 (Rev C1) 67 SensAlert ASI – Advanced Safety Integrity Gas Transmitter 5.2.3.7.3 Relay 3 – Fail -- Latching/Non-Latching -- Norm Energized or Deenergized -- Time Delay XXX Sec 5.2.3.7.4 Relay 4 – Fail -- Latching/Non-Latching -- Norm Energized or Deenergized -- Time Delay XXX Sec 5.2.3.7.5 Warn Current – Relay 5 -- Latching/Non-Latching -- Enabled/Disabled -- Low Current Time XXX 5.2.3.7.6 Alarm 1 -- Relays Assigned 1, and/or 2, 3, 4, 5 -- Enabled/Disabled -- Ascending/Descending -- Setpoint XXXPPM --Release Offs XXPPM 5.2.3.7.7 Alarm 2 -- Relays Assigned 1, and/or 2, 3, 4, 5 -- Enabled/Disabled -- Ascending/Descending -- Setpoint XXXPPM --Release Offs XXPPM 5.2.3.7.8 Alarm 3 -- Relays Assigned 1, and/or 2, 3, 4, 5 -- Enabled/Disabled -- Ascending/Descending -- Setpoint XXXPPM --Release Offs XXPPM 5.2.3.7.9 TWA Alarm -- Relays Assigned 1, and/or 2, 3, 4, 5 -- Enabled/Disabled -- Ascending/Descending -- Setpoint XXXPPM -- Average Time Adjust X Hours 5.2.3.7.10 Head fail -- Relays Assigned 1, and/or 2, 3, 4 -- Enabled/Disabled -- Fault Current X.XX 5.2.3.7.11 Missing Sensor -- Relays Assigned 1, and/or 2, 3, 4 -- Enabled/Disabled -- Fault Current X.XX 5.2.3.7.12 Sensor Fail -- Relays Assigned 1, and/or 2, 3, 4 -- Enabled/Disabled -- Fault Current X.XX 5.2.3.7.13 Sensor EOL -- Relays Assigned 1, and/or 2, 3, 4 -- Enabled/Disabled -- Fault Current X.XX -- Current Delay XX 5.2.3.7.14 Out Cur Track -- Enabled/Disabled -- Fault Current X.XX -- Current Delay XX 5.2.3.7.15 Calibration Mode -- Relays Assigned 1, and/or 2, 3, 4 68 Sensidyne Document No. 360-0152-01 (Rev C1) SensAlert ASI – Advanced Safety Integrity Gas Transmitter -- Enabled/Disabled -- Fault Current X.XX 5.2.3.7.16 Maintenance Mode -- Relays Assigned 1, and/or 2, 3, 4 -- Enabled/Disabled -- Fault Current X.XX 5.2.3.7.17 TOD Fail-- Relays Assigned 1, and/or 2, 3, 4 -- Enabled/Disabled -- Fault Current X.XX -- Current Delay XX 5.2.3.7.18 TOD End of Life-- Relays Assigned 1, and/or 2, 3, 4 -- Enabled/Disabled -- Fault Current X.XX -- Current Delay XX 5.2.3.8 TOD Data Review TOD Cell Not Present -or TOD Cell Present -- Auto Mode status (Enabled/Disabled) -- Date & Time of last TOD -- Status of last TOD (Pass/Fail) -- Number of tests completed -- Cumulative elapsed time of tests (in seconds) 5.2.3.9 Communications Review 5.2.3.9.1 4/20mA Communications 5.2.3.9.1.1 5.2.3.9.2 None or SensAlert Sensor ID HART Comm or Modbus or No Comm Installed 5.2.3.9.2.1 HART 5.2.3.9.2.1.1 5.2.3.9.2.2 No User Adjustments Through this Interface Use Current Loop Modbus 5.2.3.9.2.2.1 Modbus Address XXX 5.2.3.9.2.2.2 Baud Rate 5.2.3.9.2.2.2.1 9600 or 19200 or 38400 5.2.3.9.2.2.3 5.2.3.9.2.2.4 5.2.3.9.2.3 5.2.3.10 Parity 5.2.3.9.2.2.3.1 None or Odd or Even Stop Bits 5.2.3.9.2.2.4.1 1 or 2 No Comm Installed Firmware Version -- Display Version XX.XX -- Head Version XX.XX -- Sensor Version XX.XX -- Date Format MM/DD/YY -- Comm Installed / No Comm Installed 5.2.4 Test On Demand 5.2.4.1 4-20 mA Not Active 5.2.4.1.1 5.2.4.2 -- “In Progress” screen, then result 4-20 mA Active 5.2.4.2.1 -- “In Progress” screen, then result Sensidyne Document No. 360-0152-01 (Rev C1) 69 SensAlert ASI – Advanced Safety Integrity Gas Transmitter 5.2.5 System Configuration 5.2.5.1 Self Test 5.2.5.1.1 5.2.5.2 -- Turns on and off all pixels, lights all LEDs and activates all installed relays Alarm Settings 5.2.5.2.1 Alarm Functions 5.2.5.2.1.1 Alarm 1 5.2.5.2.1.1.1 Add Relay -- Select “ACK” to add relay(s), then “<<” when done 5.2.5.2.1.1.1.1 Relay 1 – Fail Relay 2 5.2.5.2.1.1.1.2 5.2.5.2.1.1.1.3 Relay 3 Relay 4 5.2.5.2.1.1.1.4 Warn Current-Relay 5 5.2.5.2.1.1.1.5 5.2.5.2.1.1.2 Delete Relay -- Select “ACK” to delete relay(s), then “<<” when done 5.2.5.2.1.1.2.1 Relay 1 – Fail Relay 2 5.2.5.2.1.1.2.2 5.2.5.2.1.1.2.3 Relay 3 Relay 4 5.2.5.2.1.1.2.4 5.2.5.2.1.1.2.5 Warn Current-Relay 5 Enabled ◄► Disabled 5.2.5.2.1.1.3 -- Select “ACK” to change status, then select “ACK” again to save 5.2.5.2.1.1.4 Ascending ◄► Descending -- Select “ACK” to change status, then select “ACK” again to save 5.2.5.2.1.1.5 Setpoint -- Use ▲ and ▼ to change value, then select “ACK” to save 5.2.5.2.1.1.6 Release Offset -- Use ▲ and ▼ to change value, then select “ACK” to save 5.2.5.2.1.2 Alarm 2 5.2.5.2.1.2.1 Add Relay -- Select “ACK” to add relay(s), then “<<” when done 5.2.5.2.1.2.1.1 Relay 1 – Fail 5.2.5.2.1.2.1.2 Relay 2 5.2.5.2.1.2.1.3 Relay 3 Relay 4 5.2.5.2.1.2.1.4 5.2.5.2.1.2.1.5 Warn Current-Relay 5 Delete Relay 5.2.5.2.1.2.2 -- Select “ACK” to delete relay(s), then “<<” when done 5.2.5.2.1.2.2.1 Relay 1 – Fail Relay 2 5.2.5.2.1.2.2.2 Relay 3 5.2.5.2.1.2.2.3 5.2.5.2.1.2.2.4 Relay 4 Warn Current-Relay 5 5.2.5.2.1.2.2.5 5.2.5.2.1.2.3 Enabled ◄► Disabled -- Select “ACK” to change status, then select “ACK” again to save 5.2.5.2.1.2.4 Ascending ◄► Descending -- Select “ACK” to change status, then select “ACK” again to save 5.2.5.2.1.2.5 Setpoint -- Use ▲ and ▼ to change value, then select “ACK” to save 5.2.5.2.1.2.6 70 Release Offset Sensidyne Document No. 360-0152-01 (Rev C1) SensAlert ASI – Advanced Safety Integrity Gas Transmitter -- Use ▲ and ▼ to change value, then select “ACK” to save 5.2.5.2.1.3 Alarm 3 5.2.5.2.1.3.1 Add Relay -- Select “ACK” to add relay(s), then “<<” when done 5.2.5.2.1.3.1.1 Relay 1 – Fail Relay 2 5.2.5.2.1.3.1.2 Relay 3 5.2.5.2.1.3.1.3 5.2.5.2.1.3.1.4 Relay 4 Warn Current-Relay 5 5.2.5.2.1.3.1.5 5.2.5.2.1.3.2 Delete Relay -- Select “ACK” to delete relay(s), then “<<” when done 5.2.5.2.1.3.2.1 Relay 1 – Fail 5.2.5.2.1.3.2.2 Relay 2 5.2.5.2.1.3.2.3 Relay 3 Relay 4 5.2.5.2.1.3.2.4 5.2.5.2.1.3.2.5 Warn Current-Relay 5 Enabled ◄► Disabled 5.2.5.2.1.3.3 -- Select “ACK” to change status, then select “ACK” again to save 5.2.5.2.1.3.4 Ascending ◄► Descending -- Select “ACK” to change status, then select “ACK” again to save 5.2.5.2.1.3.5 Setpoint -- Use ▲ and ▼ to change value, then select “ACK” to save 5.2.5.2.1.3.6 Release Offset -- Use ▲ and ▼ to change value, then select “ACK” to save 5.2.5.2.1.4 TWA Alarm 5.2.5.2.1.4.1 Add Relay -- Select “ACK” to add relay(s), then “<<” when done 5.2.5.2.1.4.1.1 Relay 1 – Fail 5.2.5.2.1.4.1.2 Relay 2 5.2.5.2.1.4.1.3 Relay 3 Relay 4 5.2.5.2.1.4.1.4 5.2.5.2.1.4.1.5 Warn Current-Relay 5 Delete Relay 5.2.5.2.1.4.2 -- Select “ACK” to delete relay(s), then “<<” when done 5.2.5.2.1.4.2.1 Relay 1 – Fail Relay 2 5.2.5.2.1.4.2.2 Relay 3 5.2.5.2.1.4.2.3 Relay 4 5.2.5.2.1.4.2.4 5.2.5.2.1.4.2.5 Warn Current-Relay 5 Enabled ◄► Disabled 5.2.5.2.1.4.3 -- Select “ACK” to change status, then select “ACK” again to save 5.2.5.2.1.4.4 Ascending ◄► Descending -- Select “ACK” to change status, then select “ACK” again to save 5.2.5.2.1.4.5 Setpoint -- Use ▲ and ▼ to change value, then select “ACK” to save 5.2.5.2.1.4.6 5.2.5.2.2 Average Time Adjust 15 Minutes 5.2.5.2.1.4.6.1 5.2.5.2.1.4.6.2 30 Minutes 5.2.5.2.1.4.6.3 60 Minutes 2 Hours 5.2.5.2.1.4.6.4 5.2.5.2.1.4.6.5 4 Hours 8 Hours 5.2.5.2.1.4.6.6 Fault Functions Sensidyne Document No. 360-0152-01 (Rev C1) 71 SensAlert ASI – Advanced Safety Integrity Gas Transmitter 5.2.5.2.2.1 Head Fail 5.2.5.2.2.1.1 Add Relay -- Select “ACK” to add relay(s), then “<<” when done 5.2.5.2.2.1.1.1 Relay 1 – Fail 5.2.5.2.2.1.1.2 Relay 2 5.2.5.2.2.1.1.3 Relay 3 Relay 4 5.2.5.2.2.1.1.4 5.2.5.2.2.1.2 Delete Relay -- Select “ACK” to delete relay(s), then “<<” when done 5.2.5.2.2.1.2.1 Relay 1 – Fail 5.2.5.2.2.1.2.2 Relay 2 5.2.5.2.2.1.2.3 Relay 3 Relay 4 5.2.5.2.2.1.2.4 5.2.5.2.2.1.3 Enabled ◄► Disabled -- Select “ACK” to change status, then select “ACK” again to save 5.2.5.2.2.1.4 Adjust Fault Current -- Use ▲and ▼to change value, then select “ACK” to save 5.2.5.2.2.2 Missing Sensor Add Relay 5.2.5.2.2.2.1 -- Select “ACK” to add relay(s), then “<<” when done 5.2.5.2.2.2.1.1 Relay 1 – Fail Relay 2 5.2.5.2.2.2.1.2 Relay 3 5.2.5.2.2.2.1.3 5.2.5.2.2.2.1.4 Relay 4 Delete Relay 5.2.5.2.2.2.2 -- Select “ACK” to delete relay(s), then “<<” when done 5.2.5.2.2.2.2.1 Relay 1 – Fail Relay 2 5.2.5.2.2.2.2.2 Relay 3 5.2.5.2.2.2.2.3 5.2.5.2.2.2.2.4 Relay 4 Enabled ◄► Disabled 5.2.5.2.2.2.3 -- Select “ACK” to change status, then select “ACK” again to save 5.2.5.2.2.2.4 Adjust Fault Current -- Use ▲and ▼to change value, then select “ACK” to save 5.2.5.2.2.3 Sensor Fail Add Relay 5.2.5.2.2.3.1 -- Select “ACK” to add relay(s), then “<<” when done 5.2.5.2.2.3.1.1 Relay 1 – Fail Relay 2 5.2.5.2.2.3.1.2 Relay 3 5.2.5.2.2.3.1.3 5.2.5.2.2.3.1.4 Relay 4 Delete Relay 5.2.5.2.2.3.2 -- Select “ACK” to delete relay(s), then “<<” when done 5.2.5.2.2.3.2.1 Relay 1 – Fail Relay 2 5.2.5.2.2.3.2.2 Relay 3 5.2.5.2.2.3.2.3 5.2.5.2.2.3.2.4 Relay 4 Enabled ◄► Disabled 5.2.5.2.2.3.3 -- Select “ACK” to change status, then select “ACK” again to save 5.2.5.2.2.3.4 Adjust Fault Current -- Use ▲and ▼to change value, then select “ACK” to save 5.2.5.2.2.4 72 Sensor End of Life Sensidyne Document No. 360-0152-01 (Rev C1) SensAlert ASI – Advanced Safety Integrity Gas Transmitter 5.2.5.2.2.4.1 Add Relay -- Select “ACK” to add relay(s), then “<<” when done 5.2.5.2.2.4.1.1 Relay 1 – Fail Relay 2 5.2.5.2.2.4.1.2 Relay 3 5.2.5.2.2.4.1.3 5.2.5.2.2.4.1.4 Relay 4 Delete Relay 5.2.5.2.2.4.2 -- Select “ACK” to delete relay(s), then “<<” when done 5.2.5.2.2.4.2.1 Relay 1 – Fail Relay 2 5.2.5.2.2.4.2.2 Relay 3 5.2.5.2.2.4.2.3 5.2.5.2.2.4.2.4 Relay 4 Enabled ◄► Disabled 5.2.5.2.2.4.3 -- Select “ACK” to change status, then select “ACK” again to save 5.2.5.2.2.4.4 Adjust Fault Current -- Use ▲and ▼to change value, then select “ACK” to save 5.2.5.2.2.4.5 Adjust Current Delay -- Use ▲and ▼to change value, then select “ACK” to save 5.2.5.2.2.5 Output Current Track 5.2.5.2.2.5.1 Add Relay -- Select “ACK” to add relay(s), then “<<” when done 5.2.5.2.2.5.1.1 Relay 1 – Fail 5.2.5.2.2.5.1.2 Relay 2 5.2.5.2.2.5.1.3 Relay 3 Relay 4 5.2.5.2.2.5.1.4 5.2.5.2.2.5.2 Delete Relay -- Select “ACK” to delete relay(s), then “<<” when done 5.2.5.2.2.5.2.1 Relay 1 – Fail 5.2.5.2.2.5.2.2 Relay 2 5.2.5.2.2.5.2.3 Relay 3 Relay 4 5.2.5.2.2.5.2.4 5.2.5.2.2.5.3 Enabled ◄► Disabled -- Select “ACK” to change status, then select “ACK” again to save 5.2.5.2.2.5.4 Adjust Fault Current -- Use ▲and ▼to change value, then select “ACK” to save 5.2.5.2.2.5.5 Adjust Current Delay -- Use ▲and ▼to change value, then select “ACK” to save 5.2.5.2.2.6 Calibration Mode 5.2.5.2.2.6.1 Add Relay -- Select “ACK” to add relay(s), then “<<” when done 5.2.5.2.2.6.1.1 Relay 1 – Fail 5.2.5.2.2.6.1.2 Relay 2 5.2.5.2.2.6.1.3 Relay 3 Relay 4 5.2.5.2.2.6.1.4 5.2.5.2.2.6.2 Delete Relay -- Select “ACK” to delete relay(s), then “<<” when done 5.2.5.2.2.6.2.1 Relay 1 – Fail 5.2.5.2.2.6.2.2 Relay 2 5.2.5.2.2.6.2.3 Relay 3 Relay 4 5.2.5.2.2.6.2.4 5.2.5.2.2.6.3 Enabled ◄► Disabled -- Select “ACK” to change status, then select “ACK” again to save Sensidyne Document No. 360-0152-01 (Rev C1) 73 SensAlert ASI – Advanced Safety Integrity Gas Transmitter 5.2.5.2.2.6.4 Adjust Fault Current -- Use ▲and ▼to change value, then select “ACK” to save 5.2.5.2.2.7 Maintenance Mode 5.2.5.2.2.7.1 Add Relay -- Select “ACK” to add relay(s), then “<<” when done 5.2.5.2.2.7.1.1 Relay 1 – Fail 5.2.5.2.2.7.1.2 Relay 2 5.2.5.2.2.7.1.3 Relay 3 Relay 4 5.2.5.2.2.7.1.4 5.2.5.2.2.7.2 Delete Relay -- Select “ACK” to delete relay(s), then “<<” when done 5.2.5.2.2.7.2.1 Relay 1 – Fail 5.2.5.2.2.7.2.2 Relay 2 5.2.5.2.2.7.2.3 Relay 3 Relay 4 5.2.5.2.2.7.2.4 5.2.5.2.2.7.3 Enabled ◄► Disabled -- Select “ACK” to change status, then select “ACK” again to save 5.2.5.2.2.7.4 Adjust Fault Current -- Use ▲and ▼to change value, then select “ACK” to save 5.2.5.2.2.8 TOD Fail 5.2.5.2.2.8.1 Add Relay -- Select “ACK” to add relay(s), then “<<” when done 5.2.5.2.2.8.1.1 Relay 1 – Fail Relay 2 5.2.5.2.2.8.1.2 Relay 3 5.2.5.2.2.8.1.3 5.2.5.2.2.8.1.4 Relay 4 Delete Relay 5.2.5.2.2.8.2 -- Select “ACK” to delete relay(s), then “<<” when done 5.2.5.2.2.8.2.1 Relay 1 – Fail Relay 2 5.2.5.2.2.8.2.2 Relay 3 5.2.5.2.2.8.2.3 5.2.5.2.2.8.2.4 Relay 4 Adjust Fault Current 5.2.5.2.2.8.3 -- Use ▲and ▼to change value, then select “ACK” to save 5.2.5.2.2.8.4 Adjust Current Delay --Use ▲and ▼to change value, then select “ACK” to save 5.2.5.2.2.9 TOD End of Life 5.2.5.2.2.9.1 Add relay -- Select “ACK” to add relay(s), then “<<” when done 5.2.5.2.2.9.1.1 Relay 1 – Fail Relay 2 5.2.5.2.2.9.1.2 Relay 3 5.2.5.2.2.9.1.3 5.2.5.2.2.9.1.4 Relay 4 Delete Relay 5.2.5.2.2.9.2 -- Select “ACK” to delete relay(s), then “<<” when done 5.2.5.2.2.9.2.1 Relay 1 – Fail Relay 2 5.2.5.2.2.9.2.2 Relay 3 5.2.5.2.2.9.2.3 5.2.5.2.2.9.2.4 Relay 4 Adjust Fault Current 5.2.5.2.2.9.3 -- Use ▲and ▼to change value, then select “ACK” to save 5.2.5.2.2.9.4 Adjust Current Delay --Use ▲and ▼to change value, then select “ACK” to save 74 Sensidyne Document No. 360-0152-01 (Rev C1) SensAlert ASI – Advanced Safety Integrity Gas Transmitter 5.2.5.2.2.1 Calibration Due 5.2.5.2.2.1.1 Adjust Cal Due Date -- Select “ACK” to add relay(s), then “<<” when done 5.2.5.2.2.1.1.1 30 5.2.5.2.2.1.1.2 60 5.2.5.2.2.1.1.3 90 180 5.2.5.2.2.1.1.4 5.2.5.2.2.1.2 Add Relay -- Select “ACK” to add relay(s), then “<<” when done 5.2.5.2.2.1.2.1 Relay 1 – Fail 5.2.5.2.2.1.2.2 Relay 2 5.2.5.2.2.1.2.3 Relay 3 Relay 4 5.2.5.2.2.1.2.4 5.2.5.2.2.1.3 Delete Relay -- Select “ACK” to delete relay(s), then “<<” when done 5.2.5.2.2.1.3.1 Relay 1 – Fail 5.2.5.2.2.1.3.2 Relay 2 5.2.5.2.2.1.3.3 Relay 3 Relay 4 5.2.5.2.2.1.3.4 5.2.5.2.2.1.4 Adjust Fault Current -- Use ▲and ▼to change value, then select “ACK” to save 5.2.5.2.2.1.5 Adjust Current Delay --Use ▲and ▼to change value, then select “ACK” to save 5.2.5.2.3 Relay 1 – Fail 5.2.5.2.3.1 Latching ◄► Non-Latching -- Select “ACK” to change status, then select “ACK” again to save 5.2.5.2.3.2 Norm Energized ◄► Norm De-energized -- Select “ACK” to change status, then select “ACK” again to save 5.2.5.2.3.3 Time Delay -- Use ▲ and ▼ to change value, then select “ACK” to save 5.2.5.2.4 Relay 2 5.2.5.2.4.1 Latching ◄► Non-Latching -- Select “ACK” to change status, then select “ACK” again to save 5.2.5.2.4.2 Norm Energized ◄► Norm De-energized -- Select “ACK” to change status, then select “ACK” again to save 5.2.5.2.4.3 Time Delay -- Use ▲ and ▼ to change value, then select “ACK” to save 5.2.5.2.5 Relay 3 5.2.5.2.5.1 Latching ◄► Non-Latching -- Select “ACK” to change status, then select “ACK” again to save 5.2.5.2.5.2 Norm Energized ◄► Norm De-energized -- Select “ACK” to change status, then select “ACK” again to save 5.2.5.2.5.3 Time Delay -- Use ▲ and ▼ to change value, then select “ACK” to save 5.2.5.2.6 Relay 4 Latching ◄► Non-Latching 5.2.5.2.6.1 -- Select “ACK” to change status, then select “ACK” again to save 5.2.5.2.6.2 Norm Energized ◄► Norm De-energized Sensidyne Document No. 360-0152-01 (Rev C1) 75 SensAlert ASI – Advanced Safety Integrity Gas Transmitter -- Select “ACK” to change status, then select “ACK” again to save 5.2.5.2.6.3 Time Delay -- Use ▲ and ▼ to change value, then select “ACK” to save 5.2.5.2.7 Warn Current-Relay 5 Latching ◄► Non-Latching 5.2.5.2.7.1 -- Select “ACK” to change status, then select “ACK” again to save 5.2.5.2.7.2 Enabled ◄► Disabled -- Select “ACK” to change status, then select “ACK” again to save 5.2.5.2.7.3 Low Current Time Adj -- Use ▲ and ▼ to change value, then select “ACK” to save 5.2.5.3 4/20ma Adjustment 5.2.5.3.1 4 mA -- Use ▲ and ▼ to adjust 4 mA output current, then select “ACK” to save 5.2.5.3.2 20 mA -- Use ▲ and ▼ to adjust 20 mA output current, then select “ACK” to save 5.2.5.3.3 1.00 mA (if 3-wire) or 3.00 mA (if 2-wire) -- Use ▲ and ▼ to adjust fault output current, then select “ACK” to save 5.2.5.4 Adjust Date/Time 5.2.5.4.1 MM/DD/YY Format -- Use ▲ and ▼ to change value of month, date, year, hour & minute, then select “ACK” to save 5.2.5.4.2 DD/MM/YY Format -- Use ▲ and ▼ to change value of date, month, year, hour & minute, then select “ACK” to save 5.2.5.5 Communication Setup 5.2.5.5.1 4-20ma Communications 5.2.5.5.1.1 None 5.2.5.5.1.2 SensAlert Sensor ID 5.2.5.5.2 Communication Set Up 5.2.5.5.2.1 Hart Comm 5.2.5.5.2.1.1 5.2.5.5.2.2 Modbus Comm 5.2.5.5.2.2.1 Modbus Address 5.2.5.5.2.2.2 Baud Rate 5.2.5.5.2.2.3 Parity 5.2.5.5.2.2.4 Stop bits 5.2.5.5.2.3 No Comm Installed 5.2.5.5.2.3.1 5.2.5.6 – No Communications Board Installed T-O-D Mode Adjustment 5.2.5.6.1 Auto Mode Enable 5.2.5.6.1.1 Disable Automatic 5.2.5.6.1.2 Enable Automatic 5.2.5.6.2 76 – No User Adjustments Through this Interface Use Current Loop Test Date/Time Sensidyne Document No. 360-0152-01 (Rev C1) SensAlert ASI – Advanced Safety Integrity Gas Transmitter 5.2.5.6.3 Days Between Tests 5.2.5.6.4 Cell Intensity 5.2.5.6.5 Output Indicators 5.2.5.6.5.1 None 5.2.5.6.5.2 4-20ma Current Loop 5.2.5.7 Sensor Adjustment 5.2.5.7.1 • Toxic or Oxygen sensor installed -- No Adjustments Possible 5.2.5.7.2 Select Cal Gas (CB or IR CMB Sensor installed) 5.2.5.7.2.1 Methane 5.2.5.7.2.2 Propane 5.2.5.7.2.3 Other 5.2.5.7.3 Select K Factor (Cat Bead CMB Sensor) 5.2.5.7.4 If Cal Gas is Methane 5.2.5.7.4.1 None 5.2.5.7.4.2 Hydrogen 5.2.5.7.4.3 Propane 5.2.5.7.4.4 Hexane 5.2.5.7.4.5 Butane 5.2.5.7.4.6 Custom K Factor 5.2.5.7.5 If Cal Gas is Propane 5.2.5.7.5.1 None 5.2.5.7.5.2 Hydrogen 5.2.5.7.5.3 Methane 5.2.5.7.5.4 Hexane 5.2.5.7.5.5 Butane 5.2.5.7.5.6 Custom K Factor 5.2.5.7.6 If Cal Gas is Other 5.2.5.7.6.1 None 5.2.5.7.6.2 Custom K Factor 5.2.5.7.7 IR Combustible sensor installed 5.2.5.7.8 Select K Factor (IR CMB Sensor) 5.2.5.7.9 If Cal Gas is Methane 5.2.5.7.9.1 5.2.5.7.10 None If Cal Gas is Propane 5.2.5.7.10.1 None 5.2.5.7.10.2 Custom K Factor 5.2.5.7.10.3 Acetone 5.2.5.7.10.4 Butadiene 5.2.5.7.10.5 Butane 5.2.5.7.10.6 Ethane 5.2.5.7.10.7 Ethanol Sensidyne Document No. 360-0152-01 (Rev C1) 77 SensAlert ASI – Advanced Safety Integrity Gas Transmitter 5.2.5.7.10.8 Ethyl Acetate 5.2.5.7.10.9 Ethylene 5.2.5.7.10.10 Ethylene Oxide 5.2.5.7.10.11 Gasoline 5.2.5.7.10.12 Hexane 5.2.5.7.10.13 IPA 5.2.5.7.10.14 Methanol 5.2.5.7.10.15 MEK 5.2.5.7.10.16 Pentane 5.2.5.7.10.17 Propylene 5.2.5.7.10.18 THF 5.2.5.7.10.19 Toluene 5.2.5.7.10.20 Xylenes 5.2.5.7.11 If Cal Gas is Other 5.2.5.7.11.1 None 5.2.5.7.11.2 Custom K Factor 5.2.5.8 Set Password 5.2.5.8.1 5.2.5.9 Enter NewPassword Reset Defaults 5.2.5.9.1 5.2.5.10 Select “ACK” to restore system to Factory Defaults Set Transmitter Tag 5.2.5.10.1 Enter New Transmitter Tag 5.2.5.10.2 Accept New Transmitter Tag 5.2.5.11 Screen Contract 5.2.5.11.1 Adjust Screen Contract Up (Increase) or Down (Decrease) 5.2.6 Lost Password 78 Sensidyne Document No. 360-0152-01 (Rev C1) SensAlert ASI – Advanced Safety Integrity Gas Transmitter 5.3 Main Menu As shown on the example display to the right, the top level (main) menu allows the selection of several submenus, documented below. Selecting ACK brings up the submenus. Main Menu > Calibration Mode Maintenance Mode Data Review Test On Demand System Configuration Lost Password 5.3.1 Calibration Mode The Calibration mode menu shows information about the last calibration, including the concentration of gas used and the date and time of the last successful calibration. Unless reset, the displayed gas concentration is assumed for the current calibration. A complete calibration is done by zeroing the transmitter to establish the sensor response without any gas present, and the calibrate step which adjusts the response of the unit to a known concentration of gas. The combination of zero and calibrate steps adjusts the unit to display accurate measurements across the entire range of the sensor. The sensor contains an internally stored gas response curve that compensates variations caused by temperature excursions. Calibration Mode Last Cal @ 50 PPM 05/17/06 11:23:34 PreCal Value Zero Transmitter > Calibrate Set Cal Gas Conc 5.3.1.1 Zero Transmitter When this menu item is selected, the unit displays a screen requesting the application of zero gas. It is important to use pure zero gas and not assume that the ambient is gas interferent free. When ACK is selected, the zeroing in progress screen appears. After the zero gas reading stabilizes, the display will show “Zero Complete” and “Good” and the unit stores the zero gas value for subsequent use. If the gas reading does not stabilize, or the sensor output is not within acceptable limits the display will show “Zero Complete” and “Fail” and the previously stored zero reading will not be altered. See Section 3.1 for more information. Sensidyne Document No. 360-0152-01 (Rev C1) Apply ZERO gas Select OK To Continue Select << To Cancel 79 SensAlert ASI – Advanced Safety Integrity Gas Transmitter 5.3.1.2 Calibrate When this menu item is selected, the unit suppresses the 4 – 20 mA output , displays “Apply Gas Now” and waits for calibration gas to be applied. The calibration plug should be used with a flow rate of 0.5 to 1.5 LPM. The concentration of gas used should match the value displayed on the screen. If you are using a different concentration, alter the setting using the “Set Cal Gas Concentration” menu item before entering Calibrate. After the gas reading stabilizes, the unit calculates a span calibration factor and stores it for subsequent use. If the gas reading does not stabilize, or the sensor output is not within acceptable limits the display will show “Fail” and the previously stored span value will not be altered. See Section 3.2 for more information. > Calibration Mode Maintenance Mode Apply Gas Now Data Review Test-on-Demand System Config Select << To Cancel 5.3.1.3 Set Cal Gas Concentration This menu item allows selecting the calibration gas concentration. The ▲ and ▼ keys can be used to adjust the concentration. The value will be stored when ACK is selected and presented as the default value in subsequent span calibrations. See Section 3.2 for more information. Set Cal Gas Conc 25 PPM 5.3.2 Maintenance Mode Maintenance mode allows the output indication of the unit to be disabled for ten minutes. The outputs, both 4-20 ma and data communication, will not respond to gas during the maintenance mode time. On units equipped with Relays, the relays will not change state while in Maintenance Mode. This is to allow for periodic maintenance on the unit without setting off alarms. Maintenance Mode Transmitter will be isolated for 10 minutes Select OK To Continue Select << To Exit 80 Sensidyne Document No. 360-0152-01 (Rev C1) SensAlert ASI – Advanced Safety Integrity Gas Transmitter 5.3.3 Data Review Data review allows the examination of data stored by the unit. Data reviews are available for the Test-On-Demand gas generating cell, the installed sensor, Fault Currents, Active Alarms/Faults, Rly Alm Fault Config., Calibration Info, and Communication Review. Data Review > Calibration Info Sensor Status Sensor Data Active Alarms/Faults Fault Currents Fault Current Delay -- more -- 5.3.3.1 Calibration Info The Calibration Info review screen displays the last Calibration gas concentration, the Date of last successful calibration, and Pre Calibration gas concentration (as found condition). Data Review -- more -Rly Alm Fault Config TOD Data Review Communication Review Firmware Review Calibration Info Last Cal @ 01/24/06 PreCal Value 50PPM 04:08:17 48PPM 5.3.3.2 Sensor Status The Sensor Status review screen displays the abbreviated gas name, upper range of the sensor, and Time Weighted Average Gas Concentration. It also displays the percentage of sensor life remaining. Sensors start at 100% and decline as they age. The Sensor End Of Life warning occurs at 10% Sensor Life Remaining. Sensor Status Gas Name H2S 100 TWA CONC 090ppm Sensor Life Remaining 25% 5.3.3.3 Sensor Data The Sensor Data review screen displays maximum gas concentration with time stamp, present sensor temperature in degrees C, maximum sensor temperature with time stamp, and minimum sensor temperature with time stamp. All Sensor Data values are reset with a successful sensor calibration. Sensidyne Document No. 360-0152-01 (Rev C1) Sensor Data Max Exposure 11/19/07 Sensor Temp C Max Temp C 11/20/07 Min Temp C 11/15/07 2.5ppm 20:46:35 23.2 25.3 14:35:10 19.7 05:46:20 81 SensAlert ASI – Advanced Safety Integrity Gas Transmitter 5.3.3.4 Active Alarms/Faults The Active Alarms/Faults review screen displays the Active Alarms and Faults. Active Alarms/Faults Out Cur Track 5.3.3.5 Fault Currents The Fault Currents review screen displays the fault currents in mA for each of the nine Fault Functions. Fault Currents Head Fail Missing Sensor Sensor Fail Sensor EOL Out Cur Track Calibration Mode Maintenance Mode Fault Currents 1.00 2.00 1.55 3.00 3.00 2.55 3.50 -- more -- Maintenance Mode 3.50 TOD Fail 2.50 TOD End of Life 2.75 5.3.3.6 Fault Current Delay The Fault Current Delay review screen displays the number of seconds of each hour that the Fault Current will be active for an active fault. Fault Current Delay Sensor EOL Out Cur Track TOD Fail TOD End of Life 82 30 45 60 90 Sensidyne Document No. 360-0152-01 (Rev C1) SensAlert ASI – Advanced Safety Integrity Gas Transmitter 5.3.3.7 Rly Alm Fault Config The Rly Am Fault Config review screen displays the Relays, Alarms, and Fault settings. The Transmitter will only show the options included. i.e. A Transmitter without a Relay board option will not show Relay2, Relay 3, and Relay 4. Relay 1 – Fail Relay 2 Relay 3 Relay 4 Warn Current – Relay 5 Alarm 1 Alarm 2 Rly Alm Fault Config Sensor Fail Relays Assigned 1 Enabled Fault Current 2.55 Alarm 3 TWA Alarm Head fail Missing Sensor Sensor Fail Sensor EOL Out Cur Track Calibration Mode Maintenance Mode TOD Fail TOD End of Life 5.3.3.8 TOD Review The TOD Review screen displays the data stored on the TOD cell. If a TOD cell is not installed “TOD Cell Not Present” will be displayed. The data displayed include the status of Auto Mode (Enabled/Disabled), the date and time of the next automatic TOD test (if Auto Mode Enabled), the date and time of the last TOD test, the results of the test (Pass/Fail), the number of tests that have been performed by the cell, and the total amount of testing time (in seconds). Sensidyne Document No. 360-0152-01 (Rev C1) TOD Data Review TOD Cell Present Auto Mode Enabled Next 01/26/06 09:07 Last 01/24/06 09:07 Passed @ 74 PPM Tests 2 Sec 120 83 SensAlert ASI – Advanced Safety Integrity Gas Transmitter 5.3.3.9 Communication Review The Communication Review screen displays the present setting of the 4/20mA Current Loop (SensAlert sensor ID or None). Depending on which Communications Option is installed (None, HART, or Modbus) the display will vary. Communications Review 4/20mA Communications SensAlert Sensor ID Modbus Comm Add 013 Baud 38400 Parity Even Stop 1 5.3.3.10 Firmware Review The Firmware Review screen displays the firmware version of the display board, Sensor interface, sensor, and communications board if installed. Also the present Data Format the Display is using. 84 Firmware Review Display Version 1.17 Head Version 1.09 Sensor Version 1.04 Data Format MM/DD/YY No Comm Installed Sensidyne Document No. 360-0152-01 (Rev C1) SensAlert ASI – Advanced Safety Integrity Gas Transmitter 5.3.4 Test-On-Demand (Main Menu) The Test-On-Demand™ menu item allows the unit to manually activate the gas generating cell to present gas to the sensor to qualitatively check the operation of the unit from sensor to analog and digital outputs. The outputs may be disabled to remain at nominal levels, or remain active so that the output connections can be tested. If the outputs are active, system gas alarms may be set off. The Test-On-Demand returns either a “TOD PASS” or “TOD FAIL” result. The Test-On-Demand can fail if a TOD cell is not present, there is gas present, or if a sensor that is incompatible with the TOD cell is installed. The Test-On-Demand feature can also be set to automatically perform these tests on a periodic basis (see Section 3.4.2). Test On Demand > 4-20 mA Not Active 4-20 mA Active Select OK To Continue Select << To Cancel 5.3.5 System Configuration The System Configuration menu provides a large number of functions for configuring the operation of the unit. These include conducting a self test, alarm and relay setup, adjusting the 4 mA & 20 mA outputs, setting the date and time, communications setup, adjusting TOD cell functions, setting combustible sensor parameters, and setting a password. System Configuration > Self Test Alarm Settings 4/20 mA Adjustment Adjust Date/Time Communication Setup TOD Mode Adjustment --more-- System Configuration --more-TOD Mode Adjustment Sensor Adjustment Set Password Reset Defaults Set Transmitter Tag Sensidyne Document No. 360-0152-01 (Rev C1) 85 SensAlert ASI – Advanced Safety Integrity Gas Transmitter 5.3.5.1 Self Test In a 3-wire transmitter the self test checks LED operation and activates all of the screen pixels for a visual inspection. In addition, any relays in the transmitter are tested. In a 2-wire transmitter the Self Test activates all of the screen pixels for a visual inspection. Self Test will turn ON all pixels, turn OFF all pixels. Cycle all LEDs. Activate installed Relays. Select OK To Continue Select << To Cancel 5.3.5.2 Alarm Settings The Alarm Settings menu contains the following items: Alarm Functions, Fault Functions, Warn Current-Relay 5, Relay 1 – Fail, Relay 2, Relay 3, and Relay 4. Each item is discussed below. See Section 4 for instructions on using the functions in the Alarm Settings menu. Alarm Settings > Alarm Functions Fault Functions Warn Current-Relay5 Relay 1 – Fail Relay 2 Relay 3 Relay 4 Alarm Functions The Alarm Functions menu is used for setting and adjusting the three primary gas alarms (Alarm 1, Alarm 2, Alarm 3), as well as the TWA Alarm. Instructions for using this menu are found in Section 4.2. Alarm Functions > Alarm 1 Alarm 2 Alarm 3 TWA Alarm Select OK to Change 86 Sensidyne Document No. 360-0152-01 (Rev C1) SensAlert ASI – Advanced Safety Integrity Gas Transmitter Alarm 1 Alarm 1 is usually associated with the lowest level alarm setpoint. Also known as the “LO” Alarm. The Alarm 1 screen is shown at the right. The descriptions of the functions for Alarm 1 are also applicable to Alarm 2, Alarm 3, and the TWA Alarm. The TWA Alarm, however, uses Average Time Adjust instead of Release Offset. In this menu you can add or delete relays for Alarm 1, enable or disable the alarm, make the alarm ascending or descending, adjust the alarm setpoint, and change the release offset. These functions are discussed in greater detail in Section 4.2.1. Alarm 1 Relays Assigned 2 > Add Relay Delete Relay Enabled Ascending Setpoint Release Offset Alarm 2 Alarm 2 is usually associated with the next highest alarm setpoint. Also known as the “Hi” Alarm Alarm 3 Alarm 3 is usually associated with the highest alarm setpoint. Also known as the “HiHi” Alarm. TWA Alarm The TWA (Time Weighted Average) Alarm is a calculated alarm associated with gas exposure over a longer time period than the other gas alarms. The time period can range from 15 minutes to 8 hours. Eight hours is considered the typical calculated time period. The only function that differs from Alarm 1 – 3 is Average Time Adjust. This is the time period over which the TWA Alarm calculates its weighted average. The time period can range from 15 minutes to 8 hours. TWA Alarm Relays Assigned 3 > Add Relay Delete Relay Enabled Ascending Setpoint Average Time Adjust Fault Functions The Fault Functions menu contains the following items: Head Fail, Missing Sensor, Sensor Fail, Sensor End Of Life, Output Current Track, Calibration Mode, and Maintenance Mode, TOD Fail, TOD End of Life, Calibration Due. Fault Functions are described in detail in Section 4.3. Fault Functions > Head Fail Missing Sensor Sensor Fail Sensor End Of Life Output Current Track Calibration Mode --more-- Sensidyne Document No. 360-0152-01 (Rev C1) Fault Functions --more-Maintenance Mode TOD Fail TOD End Of Life Calibration Due 87 SensAlert ASI – Advanced Safety Integrity Gas Transmitter Head Fail Head Fail is activated when communication from the display unit to the sensor interface has been disrupted. This can be caused by a failure of the head processor or interruption of the communication path. Head Fail Relays Assigned 1 > Add Relay Delete Relay Disabled Adj Fault Current Missing Sensor The Missing sensor fault is activated when communication between the transmitter and the sensor has been disrupted or the sensor has been removed. Missing Sensor Relays Assigned 1 > Add Relay Delete Relay Disabled Adj Fault Current Sensor Fail The Sensor Fail fault is activated when the output of the sensor shows that it is not operating properly. Sensor Fail Relays Assigned > Add Relay Delete Relay Disabled Adj Fault Current 88 Sensidyne Document No. 360-0152-01 (Rev C1) 1 SensAlert ASI – Advanced Safety Integrity Gas Transmitter Sensor End of Life The Sensor End Of Life fault is activated when the predicted life of the sensor falls below 10% of its initial lifetime expectation. The sensor lifetime expectation varies from gas type to gas type. It is based on the calculated predictive failure measurement, and a set of expected end-of-life conditions. Sensor End Of Life Relays Assigned 1 > Add Relay Delete Relay Disabled Adj Fault Current Adj Current Delay Output Current Track The Output Current Track is activated when the actual output of the transmitter differs from the expected output of the system. This ensures that the 4-20 mA output agrees with the reading on the transmitter display. This warning function should be disabled when the 4-20 mA output loop is not used or with the 2 wire transmitter. Calibration Mode The Calibration Mode fault is activated when the transmitter is put into the Calibration Mode. Output Current Track Relays Assigned 1 > Add Relay Delete Relay Enabled Adj Fault Current Adj Current Delay Calibration Mode Relays Assigned 1 > Add Relay Delete Relay Disabled Adj Fault Current Maintenance Mode The Calibration Mode fault is activated when the transmitter is put into the Maintenance Mode. Maintenance Mode Relays Assigned 2 > Add Relay Delete Relay Disabled Adj Fault Current Sensidyne Document No. 360-0152-01 (Rev C1) 89 SensAlert ASI – Advanced Safety Integrity Gas Transmitter TOD Fail The TOD Fail fault is activated when the transmitter fails a manual or automatic TOD test. The fault can be cleared by a successful TOD test or Disabling the fault function. TOD Fail > Calibration Mode Relays Assigned 1 Maintenance Mode Data Review > Add Relay Delete Relay Test-on-Dema nd Disabled System Config Adj Fault Current Adj Current Delay TOD End of Life Tod end of life fault is activated when the predicted life of the TOD cell is reached. It is based on a set of expected end of life conditions TOD End of Life > Calibration Mode Relays Assigned 1 Maintenance Mode Data Review > Add Relay Delete Relay Test-on-Dema nd Disabled System Config Adj Fault Current Adj Current Delay Warn Current-Relay 5 The Warn Current-Relay 5 is a warning function that drops the 4-20 mA output to the Fault Current Level when an assigned condition occurs. The Warn Current-Relay 5 warning function is present on all transmitters, including those with no relays installed (i.e., 2-Wire and IS transmitters). The Low Current Time Adjust is used to change the amount of time the Warn Current Adjust-Relay 5 remains at the Fault Current level when a warning occurs. Warn Current-Relay5 > Calibration Mode Maintenance Mode > Non-Latching Enabled Data Revi ew Low Current Time Adj Test-on-Demand System Config Select OK to Change Calibration Due Calibration due fault can be set for 30, 60, 90 or 180 days. The fault is activated when this time has been reached. It is based on time elapsed from previous calibration date. Calibration Due Relays Assigned 1 > Adjust Cal Due Date Add Relay Delete Relay Enable Adj Fault Current 90 Sensidyne Document No. 360-0152-01 (Rev C1) SensAlert ASI – Advanced Safety Integrity Gas Transmitter Relay 1 – Fail This is the factory default relay for all warnings. Relay 1 can be set as latching or non-latching and normally energized or normally de-energized. The relay is shipped from the factory as “Non-Latching, Normally Energized, Time Delay – 10 Seconds.” The activation time delay for the relay is user adjustable. Relay 2 Relay 2 can be set as latching or non-latching and normally energized or normally de-energized. The activation time delay for the relay can also be adjusted. Relay 3 Relay 3 can be set as latching or non-latching and normally energized or normally de-energized. The activation time delay for the relay can also be adjusted. Relay 1 - Fail > Non-Latching Norm De-energized Time Delay Select OK To Change Relay 4 Relay 4 can be set as latching or non-latching and normally energized or normally de-energized. The activation time delay for the relay can also be adjusted. 5.3.5.3 4/20 mA Adjustment The 4/20 mA adjustment menu provides the capability of adjusting the 4 mA minimum, 20 mA maximum, and fault output current using the ▼ and ▲ control arrows. To use this feature you must have a current monitor (or equivalent device) connected to the transmitter. Note: For 3-wire transmitters 1 mA is displayed and for 2-wire transmitters 3 mA is displayed. 4/20 mA Adjustment > 4 mA 20 mA 1 mA 5.3.5.4 Adjust Date/Time Allows the system clock and date format to be set. The two available date formats are “DD/MM/YY” and “MM/DD/YY.” When setting or adjusting the date & time, screens are presented in the following sequence: Month, Date, Year, Hour, Minute. Note: The month and date screens are reversed when the “DD/MM/YY” format is selected. Adjust Date/Time > MM/DD/YY Format DD/MM/YY Format 04/26/06 Sensidyne Document No. 360-0152-01 (Rev C1) 16:33:37 91 SensAlert ASI – Advanced Safety Integrity Gas Transmitter 5.3.5.5 Communication Setup This menu provides adjustment for both standard and optional installed communications methods. Options installed will be displayed. Possible options are Hart Comm Modbus Comm Communication Setup > 4/20mA Communication Modbus Comm (If no Communications Option is installed Display will read) No Comm Installed 4-20mA Communications The 4-20 mA Communications menu allows the unit to send the SensAlert identification and configuration message. It is used to allow the transmitter to identify itself to SensAlert 4Channel controller. If you do not have a SensAlert 4Channel controller installed select “None” from the menu. 4/20mA communication None > SensAlert Sensor ID HART Comm Modbus Comm No Comm Installed HART Comm No User Adjustments Through this Interface Use Current Loop 92 Modbus Comm > Modbus Address Baud Rate Parity Stop Bits No Comm Installed No Communication Board Installed Sensidyne Document No. 360-0152-01 (Rev C1) SensAlert ASI – Advanced Safety Integrity Gas Transmitter 5.3.5.6 TOD Mode Adjustment The TOD Mode Adjustment menu allows you to enable and disable the automatic testing mode, set the date & time for testing, set the number of days between tests, set the cell intensity, and designate output & fault indicators. Step-by-step instructions on using the functions in this menu are described in Section 3.4. TOD Mode Adjustment > Auto Mode Enable Test Date/Time Days Between Tests Cell Intensity Output Indicators 5.3.5.7 Sensor Adjustment This menu covers Sensor Adjustment and is applicable only when either a Catalytic Bead Combustible or Infrared Combustible sensor is installed. If either an Oxygen or Toxic gas sensor is installed and “Sensor Adjustment” is selected from the System Configuration menu the following screen appears. Sensor Adjustment No Adjustments Are Possible Select ACK To Continue When a Catalytic Bead Combustible sensor or Infrared Combustible sensor is installed and “Sensor Adjustment” is selected the following screen appears (right). Sensor Adjustment includes two functions: Selecting the calibration gas and selecting the K Factor. A K Factor is used when the target gas is different from the calibration gas (Methane or Propane). Different K Factors are used depending on whether a Catalytic Bead Combustible or Infrared Combustible sensor is installed, and whether Methane or Propane is the calibration gas. Sensor Adjustment > Select Cal Gas Select K Factor Instructions for making sensor adjustments for combustible sensors can be found in Section 3.3. Sensidyne Document No. 360-0152-01 (Rev C1) 93 SensAlert ASI – Advanced Safety Integrity Gas Transmitter 5.3.5.8 Set Password The transmitter comes from the factory without a password. When a password is set the System Configuration menu cannot be accessed without first entering the password. Other menu items in the Main Menu are still accessible without a password. To set a new password, select “System Configuration” from the Main menu. Within the Systems Configuration menu select “Set Password.” The screen at right will appear. To set a new password use the ▲ and ▼ arrow keys to enter a number between 0 and 9.Select ACK to set the number and move to the next character. Enter New Password 0XXXXX 6 Digits 0 - 9 Select << To Exit Note All passwords must be 6 characters long and consist only of the numbers 0 through 9. A second screen will appear showing the number you have just entered, followed by a “0” and “XXXX.” Use the ▲ and ▼ arrows to enter a number. Select ACK to set the number and move to the next character. Enter New Password 10XXXX 6 Digits 0 - 9 Select << To Exit Continue doing this until you reach the last digit. The screen will look like the one on the right. When you have entered the last digit of the new password select ACK to set the new password. Enter New Password 123450 6 Digits 0 - 9 Select << To Exit 94 Sensidyne Document No. 360-0152-01 (Rev C1) SensAlert ASI – Advanced Safety Integrity Gas Transmitter A screen will appear asking you to confirm your new password. Select ACK to save your new password. Note To change a password repeat the above steps by entering six different digits. To disable/delete your password repeat the above steps but enter “000000” as your new password, Note If you lose your password go to “Lost Password” in the Main Menu and select ACK. A screen will appear (right) giving you a number to call and a code number. Give the code number that appears on your transmitter screen to the appropriate service person to reset your password. Note The code at right is a sample code. The real code will change every time you change your password. New Password Entered Select << To Cancel Select ACK to Save Password > Lost Calibration Mode Please Call Sensidyne Maintenance Mode At 727Review 530-3602 Data Please Provide Test-on-Demand This System Code Config 16653759 5.3.5.9 Reset Defaults This will restore the transmitter to the Factory Default Values. The transmitter restarts if ACK is selected. Reset Defaults This will reset all Relays, Alarms, and Faults to Factory Defaults Values Select ACK To Continue 5.3.5.10 Set Transmitter Tag The Transmitter Tag is the text that appears at the top of the display on the Main Display, Missing Sensor Display, and Sensor Warm up Display. The Tag can hold up to 21 symbols. The symbols consist of upper case letters, numbers, math symbols, and some punctuation symbols. The inverse character indicates the current selected location. Use the ▲ and ▼ arrow keys to scroll through the potential Symbols until you reach the desired symbol. Select ACK to select the present symbol and advance to the Next location. Select << to go to a previous location. If the Selected location is at the left edge of the display selecting << one more time will cancel any changes to the Tag line. Selecting ACK when the selected location is at the right edge of the display will advance to the next screen. Sensidyne Document No. 360-0152-01 (Rev C1) Set Transmitter Tag SENSALERT ASI ACK Selects Character Select << to Cancel 95 SensAlert ASI – Advanced Safety Integrity Gas Transmitter Selecting ACK will save the displayed Tag Line. Selecting << will cancel the operation and retain the previous Tag Line. Set Transmitter Tag SENSALERT ASI ACK To Accept Tag Select << to Cancel 5.3.5.11 Screen Contrast The Transmitter display contract can be adjusted from System Configuration, Screen Contrast. Use the ▲ and ▼ arrow keys to increase or decrease the display contrast. The ▲key will increase the contrast. The ▼key will decrease the contrast. The counter will show an increase in number to reflect the change in contrast. 96 Adjust Screen Contrast XXXXX Counts UP=Increase Down=Decrease ACK To Accept Tag Select << to Cancel Sensidyne Document No. 360-0152-01 (Rev C1) SensAlert ASI – Advanced Safety Integrity Gas Transmitter 6 Product Numbers & Parts List 6.1 Transmitters Product Numbers & Parts List Sensidyne Document No. 360-0152-01 (Rev C1) 97 SensAlert ASI – Advanced Safety Integrity Gas Transmitter 6.2 Sensors 823-0201-21............. SENSOR, AMMONIA 100ppm SA+ 823-0201-22............. SA+ FM NH3 50ppm SENSOR 823-0201-41............. SA+ NH3 300ppm SENSOR 823-0201-42............. SA+ NH3 500ppm SENSOR 823-0202-21............. SENSOR, CHLORINE 10ppm 823-0202-22............. SA+ FM Cl2 5ppm SENSOR 823-0202-23............. SA+ Cl2 20 ppm SENSOR 823-0202-41............. SA+ Cl2-S 10ppm SENSOR 823-0202-42............. SA+ Cl2-S 5ppm SENSOR 823-0203-21............. SA+ HCN 20ppm SENSOR 823-0203-41............. SA+ HCN100ppm SENSOR 823-0205-52............. SA+ P-CO2 5.00% VOL SENSOR 823-0206-21............. SENSOR, HYDROGEN SULFIDE 100p 823-0206-22............. SA+ FM H2S 50ppm SENSOR 823-0207-21............. SA+ FM HF 10ppm SENSOR 823-0207-22............. SA+ HF 20ppm SENSOR 823-0208-21............. SA+ FM HCl 10ppm SENSOR 823-0208-22............. SA+ FM HCl 20ppm SENSOR 823-0210-21............. SA+ H 1000ppm HYDROGEN SENSOR 823-0210-41............. SA+ H2 EC 100%LEL SENSOR 823-0211-31............. SA+ CAT BEAD COMB SENSOR 823-0211-51............. SA+ IR COMB SENSOR 823-0215-21............. SA+ F2 10ppm SENSOR 823-0215-22............. SA+ F2 25ppm SENSOR 823-0218-21............. SENSOR, SULFUR DIOXIDE FT 20p 823-0218-22............. SA+ FM SO2 FILT 10ppm SENSOR 823-0219-22............. SA+ FM CO 500ppm SENSOR 823-0219-23............. SA+ FM CO 100ppm SENSOR 823-0219-41............. SA+ CO LI 100ppm SENSOR 823-0219-42............. SA+ CO LI 500ppm SENSOR 823-0219-43............. SA+ CO LI 1000ppm SENSOR 823-0221-21............. SA+ NO2 10ppm SENSOR 823-0222-41............. SA+ Br2 1ppm SENSOR 823-0239-41............. SA+ ClO2 1ppm SENSOR 823-0239-42............. SA+ ClO2 5ppm SENSOR 823-0240-22............. SA+ FM O2 SENSOR 823-0242-21............. SA+ NO 100ppm SENSOR 823-0243-21............. SA+ O3 1ppm SENSOR 823-0243-22............. SA+ O3 2ppm SENSOR 823-0245-21............. SA+ ETO 10ppm SENSOR 823-0247-21............. SA+ COCL2 1ppm PHOSGENE SENSOR 823-0249-51............. SA+ IR ACETYLENE 0-50%LEL SENSOR For a complete list of available sensors and ranges contact the factory. 98 Sensidyne Document No. 360-0152-01 (Rev C1) SensAlert ASI – Advanced Safety Integrity Gas Transmitter 6.3 Options & Accessories Product Number Description 821-0204-02............. Test-on-Demand™ (Type C) 821-0204-10............. Test-on-Demand™ (Type H) 821-0204-06............. Test-on-Demand™ (Type S) 821-0206-01............. Test-on-Demand™ Cell Gasket 821-0219-02............. Relay Board (3 relays) 821-0220-02............. HART Board 821-0221-02............. Modbus Board 821-0203-01............. Rainshield 7013154-1 ................ Aspirator, encased (Brass) 7013154-2 ................ Aspirator, encased (Stainless Steel) 7013227-3 ................ SensAlert Four Channel Controller (with horn) 7013227-4 ................ SensAlert Four Channel Controller with strobe (and horn) 6.4 Spare Parts Product Number Description 700-0100-01............. Power Supply Board (2-wire) 700-0102-01............. Power Supply Board (3-wire, 1 relay) [non-I.S.] 700-0101-01............. Power Supply Board (3-wire, no relay) [I.S.] 821-0214-01............. Sensor Shield 821-0215-01............. Sensor Gasket 821-0217-01............. Sensor Holder O-Ring 7013201-1 ................ Magnetic Screwdriver (with reversible screwdriver blade) 360-0152-01............. SensAlert ASI User Manual Sensidyne Document No. 360-0152-01 (Rev C1) 99 SensAlert ASI – Advanced Safety Integrity Gas Transmitter 6.5 Calibration Equipment Product Number Description 009827-1 .................. Regulator (1 LPM), for use with all gases 7016929 ................... Regulator (1 LPM), for use with NH3, Cl2, HCl, SO2, NO2 7010032-1 ................ PVC Carrying Case (holds two gas cylinders, plus regulator, tubing & fitting) 7013885 ................... Humidification Kit (Recommended for setting acid gas zero) for use with Cl2, HCl, HF, NO2, and SO2 821-0223-01............. Calibration Plug 7016042 ................... Tygon® Tubing, 3/16” ID x 5/16”, sold per foot 7015551 ................... Teflon® Tubing, 1/4” OD, sold per foot 6.6 Zero Calibration Gases Product Number Description 009824-12 ................ Zero Air 100%volume (103L) 009824-15 ................ Zero Gas for Oxygen (O2) or Infrared sensors, 100% Nitrogen (103L) 009824-25 ................ Zero Gas for all other sensors including Infrared, 20.9% O2 in N2 (103L) 6.7 Calibration Gases All calibration gases are in Aluminum or Steel cylinders containing either 58 SL or 103 SL of gas. PPM gas has an eight (8) month shelf life and all other gases have a one (1) year shelf life. Select span gas level to prove alarm settings are functioning. Gas is shipped with a Material Safety Data Sheet (MSDS). A NIST traceable calibration certificate is available upon request. Product Number Description 009824-68 ................ Acetylene [C2H2], 1.25 %vol in Air 009824-57 ................ Ammonia [NH3], 25 ppm in Nitrogen (58L) 009824-38 ................ Ammonia [NH3], 50 ppm in Nitrogen (58L) 009824-67 ................ Ammonia [NH3], 300 ppm in Nitrogen (58L) 009824-14 ................ Argon 100%volume (103L) 009824-5 .................. Carbon Dioxide [CO2], 5000 ppm in Air (103L) 009824-62 ................ Carbon Dioxide [CO2], 1.5 %vol in Nitrogen (103L) 009824-77 ................ Carbon Dioxide [CO2], 0.5 %vol in Nitrogen (103L) 009824-4 .................. Carbon Monoxide [CO], 50 ppm in Nitrogen (103L) 009824-65 ................ Carbon Monoxide [CO], 100 ppm in Nitrogen (103L) 009824-18 ................ Carbon Monoxide [CO], 250 ppm in Nitrogen (103L) 009824-53 ................ Chlorine 009824-34 ................ Chlorine 009824-44 ................ Chlorine 009824-41 ................ Chlorine [Cl2], 2 ppm in Nitrogen (58L) [Cl2], 5 ppm in Nitrogen (58L) [Cl2], 10 ppm in Nitrogen (58L) [Cl2], 50 ppm in Nitrogen (58L) 009824-60 ................ Ethylene Oxide [C2H4O], 5 ppm in Nitrogen (58L) ................................. 009824-6 .................. Hydrogen [H2], 2 %vol / 50 %LEL in Air (103L) 009824-16 ................ Hydrogen [H2], (ppm) Electrochemical, 500 ppm in Air (103L) 009824-56 ................ Hydrogen Chloride [HCl], 5 ppm in Nitrogen (58L) 009824-37 ................ Hydrogen Chloride [HCl], 10 ppm HCl in Nitrogen (58L) 009824-42 ................ Hydrogen Chloride [HCl], 50 ppm HCl in Nitrogen (58L) 009824-54 ................ Hydrogen Cyanide [HCN], 10 ppm in Nitrogen (58L) 100 Sensidyne Document No. 360-0152-01 (Rev C1) SensAlert ASI – Advanced Safety Integrity Gas Transmitter 009824-55 ................ Hydrogen Sulfide 009824-9 .................. Hydrogen Sulfide 009824-33 ................ Hydrogen Sulfide 009824-10 ................ Hydrogen Sulfide [H2S], 5 ppm in Nitrogen (58L) [H2S], 10 ppm in Nitrogen (58L) [H2S], 25 ppm in Nitrogen (58L) [H2S], 50 ppm in Nitrogen (58L) 009824-2 .................. Methane [CH4], 1.5 %vol / 30 %LEL in Air (103L) 009824-3 .................. Methane [CH4], 2.5 %vol / 50 %LEL in Air (103L) 009824-35 ................ Nitric Oxide [NO], 30 ppm in Nitrogen (58L) 009824-43 ................ Nitrogen Dioxide [NO2], 5 ppm in Nitrogen (103L) 009824-36 ................ Nitrogen Dioxide [NO2], 10 ppm in Nitrogen (103L) 009824-25 ................ Oxygen [O2], 20.9 %vol in Nitrogen (103L) 009824-72 ................ Pentane 0.75%volume, 50%LEL 009824-61 ................ Propane [C3H8], 0.95 %vol / 50 %LEL in Air (103L) 009824-58 ................ Phosphine [PH3], 0.5 ppm in Nitrogen (58L) 009824-73 ................ Phosphine [PH3], 5ppm in Nitrogen (58L) 009824-59 ................ Silane [SiH4], 5 ppm in Nitrogen (58L) 009824-8 .................. Sulfur Dioxide [SO2], 5 ppm in Nitrogen (58L) 009824-39 ................ Sulfur Dioxide [SO2], 10 ppm in Nitrogen (58L) 009824-17 ................ Sulfur Dioxide [SO2], 50 ppm in Nitrogen (58L) 1 2 3 4 Recommended practice for determining calibration frequency. Sensidyne equipment is tested and calibrated prior to shipment. After installation and stabilization of the gas monitor, qualified personnel should verify calibration by applying zero and span gases. This procedure should be performed at commissioning, then repeated 30 and 60 days afterwards, with deviations in zero and span recorded. The calibration or functional check interval can then be adjusted to suit that application’s conditions. For further information, please consult the ISA Recommended Practices for gas detectors. The use of functional check or surrogate gases do not represent actual calibration of the sensor with the target gas, and should not be employed as such, unless the user has established a known, repeatable correlation with the target gas. The humidification kit is recommended for setting the sensor zero, ONLY for acid gases. See Sensidyne's "Sensor Exchange Programs" regarding these gases. Please contact factory for further information. Sensidyne Document No. 360-0152-01 (Rev C1) 101 SensAlert ASI – Advanced Safety Integrity Gas Transmitter 7 Appendix A: Safety Requirements for SIL2 Applications 7.1 Safety Function SensAlert ASI a gas detector with a specific gas sensor will detect the presents of the respective gas and output a 4/20 mA current loop proportional to the gas concentration. The gas detector has a user specified High Concentration Gas Alarm level. Hardware Safety Function – Detection of gas and generation of 4/20 mA current loop. Software Safety Function – Floating point conversion to gas concentration. Safe Failure Mode – Upon detection of a failure by the diagnostics or watchdog circuits, the 4/20 mA current loop output will go to 1-3 mA for the 3-wire device and to 3 mA for the 2-wire device. 7.2 Topology SensAlert ASI has a hardware fault tolerance of 0 (HFT 0) and is “Fit For Use” in a SIL2 Low Demand Mode application. Without optional Relay board SIL HFT 2 0 SFF 90% PFD 3.24 x 10⁻⁴ λs 6.43 x 10⁻⁷ λDD 6.68 x 10⁻⁹ λDU 7.39 x 10⁻⁸ With optional Relay board SIL HFT SFF PFD λs λDD λDU 1 0 84% 6.06 x 10 -7 6.60 x 10 -7 4.02 x 10 -8 1.38 x 10⁻⁷ 7.3 Throughput Each cell has certain response times. The quickest cell has a response time of 6 seconds. 7.4 User Input Current Loop adjustment High Concentration Alarm 7.5 Proof Interval Calibration of sensor - IR sensor 1 year interval, other sensors 6 months. Refer to Section 3.1 Zeroing The Sensor and Section 3.2 Span Calibration for instructions to perform these procedures. 102 Sensidyne Document No. 360-0152-01 (Rev C1) SensAlert ASI – Advanced Safety Integrity Gas Transmitter 8 Appendix B: Declaration of Conformity Sensidyne Document No. 360-0152-01 (Rev C1) 103 SensAlert ASI – Advanced Safety Integrity Gas Transmitter 104 Sensidyne Document No. 360-0152-01 (Rev C1) SensAlert ASI – Advanced Safety Integrity Gas Transmitter 9 Appendix C: Specifications General Specifications Sampling System................................................. Diffusion Non-Intrusive Magnetic Controls ......................... ACK, << (Go Back), ▲, ▼ Transmitter with Standard Dome Dimensions: Horizontal Mount: .......................... 6.6” (W) x 12.0” (H) x 6.1” (D) / 168 mm (W) x 305 mm (H) x 155 mm (D) Dimensions: Vertical Mount:............................... 6.7” (W) x 12.2” (H) x 6.5” (D) / 170 mm (W) x 310 mm (H) x 165 mm (D) Weight.................................................................. 6.1-7.5 lbs / 2.8-3.4 kg Transmitter with Long Dome Dimensions: Horizontal Mount: .......................... 6.2” (W) x 11.5” (H) x 7.2” (D) / 158 mm (W) x 292 mm (H) x 183 mm (D) Dimensions: Vertical Mount:............................... 6.3” (W) x 11.7” (H) x 7.2” (D) / 160 mm (W) x 297 mm (H) x 183 mm (D) Weight.................................................................. 7.0-8.7 lbs / 3.2-4.0 kg Electrical/Electronic Specifications Power Input Requirements .................................. 18–30 VDC, 2-wire, 12-30 VDC, 3-wire I.S. Barrier Resistance......................................... 250Ω I.S. Barrier Input Voltage ..................................... 15-30 VDC Current Consumption........................................... 300 mA maximum (with relay board connected) Output .................................................................. 4-20 mA maximum load 3 wire - 600 ohms (input voltage dependent) 2 wire - 300 ohms (input voltage dependent) User-selectable output current during calibration; ability to test current loop and adjust output current at the 4 mA and 20 mA extremes, and Fault Output Current Relay(s) ............................................................... 240V, 3A, 50/60 Hz 6A, 24V Check points ........................................................ Enable reading of output current as 40–200 mV. Transmission Link................................................ 4–20 mA current, non-isolated 2 wires or 3 wires, Optional: RS-485, 2 or 4 wires, RF , HART Environmental Temperature Range............................................. -40°F to 158°F / -40°C to 70°C (Storage) -4°F to 140°F / -20°C to 60°C (XP Display) -20°F to 167°F / -29°C to 75°C (Display) -40°F to 185°F / -40°C to 85°C (Head or Sensor Limits) Humidity Range 0-90 %RH, non-condensing Subject to sensor limitations. Ingress Protection................................................ Non-Metallic: IP56 / NEMA 4X Approvals: (Refer to Appendix E for full ratings) Explosion Proof.................................................... NEC and CEC Class I Div 1, Grps A, B, C, D; Class II Grps E, F, G; Class III T4 Flame proof.......................................................... ATEX EEx d[ia] IIC T4 II 2 [1] G Non-Incendive...................................................... NEC and CEC Class I Div 2, Grps A, B, C, D; (Enclosed Break) Class II Grps E, F, G; Class III T4 ATEX EEx nC [ia] IIC T4 II 3 [1] G Intrinsic Safety ..................................................... NEC and CEC Class I Div 1, Grps A, B, C, D; Class II Grps E, F, G; Class III T4 ATEX EEx ia IIC T4 II 1 G CE compliant, RoHS exempt Sensidyne Document No. 360-0152-01 (Rev C1) 105 SensAlert ASI – Advanced Safety Integrity Gas Transmitter 10 Appendix D: Troubleshooting Guide Symptom Remedy Unusual operation at installation of power Display irregularities at the initial power application. Reset system by removing power, waiting 15 seconds and reapplying power. Normal startup should be observed. Cannot obtain voltage at check points Inadequate or no power supplied to the transmitter. Measure voltage across terminals 1 & 2. If <10 VDC measure voltage at power supply. If voltage is correct check wiring. Repair if necessary. Cannot derive 40 mV at check points, but display shows zero Wiring at Terminal #2 of the Check and correct wiring. transmitter is defective. Zero control out of electronics Zero the transmitter. If unsuccessful replace module is defective. electronics. After “Zero OK”, display shows a slightly positive value instead of zero Presence of target gas. Normal operation. After “Zero Failed” 2nd time, display shows a slightly positive value Presence of target gas A biased sensor (Ammonia or Hydrogen Chloride) has not yet stabilized. Incorrect battery board used for biased sensor. Sensor is damaged or defective. Normal operation. Biased sensors typically take longer to stabilize than non-biased sensors, especially if the bias sensor has become de-stabilized. A destabilized biased sensor may take up to 72 hours to re-stabilize. Check to ensure proper battery bias board is used. Replace suspect sensor with a backup sensor known to be good. Repeat start-up procedure. If display shows slightly positive value, gas is present. If display shows zero, suspect sensor is bad. Screen shows that span calibration has failed. Calibration gas concentration is incorrect. Sensor is defective. Sensor Interface Assembly is defective. Verify calibration gas concentration with a detector tube and assure proper delivery of calibration gas to sensor assembly. Replace sensor assembly. Replace Sensor Interface Assembly. Transmitter shows “Missing Sensor” on display. Sensor assembly is loose or missing. Make certain sensor assembly is properly installed. This can be tested by removing and reinserting the sensor. Make certain sensor head unit is properly connected to the power supply board. Sensor board or interface is defective. Contact Sensidyne for RMA. Transmitter remains with “APPLY GAS NOW” on display. Calibration gas is present. Sensor or Transmitter is defective. 106 Verify gas is correct type for sensor calibration. Apply gas in normal operation. If no response, sensor is defective. If response shown, transmitter is defective. Sensidyne Document No. 360-0152-01 (Rev C1) SensAlert ASI – Advanced Safety Integrity Gas Transmitter Transmitter displays garbled characters. Sensor assembly not correctly installed. Remove sensor, wait 10 seconds, and then reinstall sensor in sensor holder. No gas concentration reading displayed on controller. “SensAlert Sensor ID” has not be selected in communications setup. Go to System Configuration/Communication Setup/4-20 mA Communication and select “SensAlert Sensor ID.” Relay(s) assigned to alarm condition(s) do not activate. Relays not assigned. Time delay is not set as desired for each relay. Alarm is disabled. Alarm is incorrectly set as ascending or descending. Alarm setpoint has been incorrectly set. Verify that relay(s) desired for each alarm condition have, in fact, been assigned. Go to System Configuration/Alarm Settings/Alarm Functions/Alarms 1, 2, 3, and/or TWA. “Relays assigned ______” will be displayed. Use the Add Relay function to assign the relay(s) for that alarm. Go to System Configuration/Alarm Settings/Alarm Functions/Relays 1, 2, 3, 4, and/or Warn current-Relay5 and set the desired time delay for each relay. Go to System Configuration/Alarm Settings/Alarm Functions/Alarms 1, 2, 3, and/or TWA and enable the alarm(s). Go to System Configuration/Alarm Settings/Alarm Functions/Alarms 1, 2, 3, and/or TWA and correctly set the alarm(s) as ascending or descending. Go to System Configuration/Alarm Settings/Alarm Functions/Alarms 1, 2, 3, and/or TWA and correctly set the alarm setpoint(s). 2-Wire Transmitter erroneous / No 4-20mA output. Fault Condition Active Relay 5 Active Different Earth Ground Potential Termination Resistance too high Clear Fault or Disable Fault Function. Clear Alarm or Disable Relay. Earth Ground at Transmitter and Controller must be the same. Connect conductor between Transmitter Safety Ground and Controller ground, or use galvanic isolation between transmitter and controller. Verify Termination Resistance is 100 ohms or less. Sensidyne Document No. 360-0152-01 (Rev C1) 107 SensAlert ASI – Advanced Safety Integrity Gas Transmitter 11 Appendix E: Approval Ratings See Introduction Section for exact Part Number • SensAlert ASI 2-Wire Div2 Transmitter WARNING: Substitution of components may impair suitability for Division 2. WARNING: Do not open enclosure while circuits are live, or when combustible vapors may be present. CAUTION: Read and understand instruction manual before operating or servicing. Install in accordance with Control Drawing Number 099-2005-05. NEC/CEC CL I, DIV 2, GPS A, B, C, D, CL II GPS E, F, G, CL III T4 with Intrinsically Safe Sensor Outputs CL I, DIV 1, GPS A, B, C, D, CL II GPS E, F, G, CL III T4 When installed with FM Approved Sensors. FM6320, C22.1 No. 152, (FM6340). CE 0518 II 3 G Ex nC IIC T4 Gc • The most restrictive of Ta = -29°C to +75°C and Sensor limit FM09ATEX0064 Input Ratings: 18-30VDC 50mA 1.0W. • SensAlert ASI 3Wire Div2 Transmitter WARNING: Substitution of components may impair suitability for Division 2. WARNING: Do not open enclosure while circuits are live, or when combustible vapors may be present. CAUTION: Read and understand instruction manual before operating or servicing. Install in accordance with Control Drawing Number 099-2005-06. NEC/CEC CL I, DIV 2, GPS A, B, C, D, CL II GPS E, F, G, CL III T4 with Intrinsically Safe Sensor Outputs CL I, DIV 1, GPS A, B, C, D, CL II GPS E, F, G, CL III T4 When installed with FM Approved Sensors. FM6320, C22.1 No. 152, (FM6340). CE 0518 II 3 [1] G Ex nC [ia] IIC T4 • The most restrictive of Ta = -29°C to +75°C and Sensor limit FM09ATEX0064 Input Ratings: 12-30VDC 500mA 6W. Output Ratings: 240VAC 3A 50/60Hz 108 Sensidyne Document No. 360-0152-01 (Rev C1) SensAlert ASI – Advanced Safety Integrity Gas Transmitter • SensAlert ASI 2-Wire IS Transmitter WARNING: Substitution of components may impair Intrinsic Safety. CAUTION: Read and understand instruction manual before operating or servicing. Install in accordance with Control Drawing Number 099-2005-03. Intrinsically Safe NEC/CEC CL I, DIV 1, GPS A, B, C, D, CL II GPS E, F, G, CL III T4 When installed with FM Approved Sensors. FM6320, C22.1 No. 152, (FM6340).. CE 0518 II 1 GD Ex ia IIC T4 • The most restrictive of Ta = -29°C to +85°C and Sensor limit FM09ATEX0064 Entity Parameters: Vmax (Ui) = 30VDC Imax (Ii) = 120mA Li = 0 Ci = 0 Pi = 1W • SensAlert ASI 3-Wire IS Transmitter WARNING: Substitution of components may impair Intrinsic Safety. CAUTION: Read and understand instruction manual before operating or servicing. Install in accordance with Control Drawing Number 099-2005-04. Intrinsically Safe NEC/CEC CL I, DIV 1, GPS A, B, C, D, CL II GPS E, F, G, CL III T4 When installed with FM Approved Sensors. FM6320, C22.1 No. 152, (FM6340).. CE 0518 II 1 G Ex ia IIC T4 • The most restrictive of Ta = -29°C to +75°C and Sensor limit FM09ATEX0064 Entity Parameters: Vmax (Ui) = 18VDC Imax (Ii) = 600mA Li = 0 Ci = 0.12uF Pi = 3.3W Sensidyne Document No. 360-0152-01 (Rev C1) 109 SensAlert ASI – Advanced Safety Integrity Gas Transmitter • SensAlert ASI 2-Wire XP Transmitter WARNING: Do not open enclosure while circuits are live, or when combustible vapors may be present. CAUTION: Read and understand instruction manual before operating or servicing. Install in accordance with Control Drawing Number 099-2005-01. Explosion-Proof with Intrinsically Safe Sensor Outputs NEC/CEC CL I, DIV 1, GPS A, B, C, D, CL II GPS E, F, G, CL III T4 When installed with FM Approved Sensors. FM6320, C22.1 No. 152, (FM6340). CE 0518 II 2 (1) G Ex d [ia] IIC T4 Gb Ta = -20C to +60C or Sensor limit FM09ATEX0064 Input Ratings: 18-30VDC 50mA 1.0W. • SensAlert ASI 3-Wire XP Transmitter WARNING: Do not open enclosure while circuits are live, or when combustible vapors may be present. CAUTION: Read and understand instruction manual before operating or servicing. Install in accordance with Control Drawing Number 099-2005-02. Explosion-Proof with Intrinsically Safe Sensor Outputs NEC/CEC CL I, DIV 1, GPS A, B, C, D, CL II GPS E, F, G, CL III T4 When installed with FM Approved Sensors. FM6320, C22.1 No. 152, (FM6340). CE 0518 II 2 (1) G Ex d [ia] IIC T4 Ta = -20C to +60C or Sensor limit FM09ATEX0064 Input Ratings: 12-30VDC 500mA 6W. Output Ratings: 240VAC 3A 50/60Hz 110 Sensidyne Document No. 360-0152-01 (Rev C1) SensAlert ASI – Advanced Safety Integrity Gas Transmitter 12 Appendix F: Returned Material Authorization Sensidyne maintains an instrument service facility at the factory to provide its customers with both warranty and non-warranty repair. Sensidyne assumes no liability for service performed by personnel other than authorized Sensidyne authorized personnel. To facilitate the repair process, please contact the Sensidyne Service Department in advance for assistance with a problem which cannot be remedied and/or requires the return of the product to the factory. All returned products require a Returned Material Authorization (RMA) number. Sensidyne Service Department personnel may be reached at: Sensidyne, LP 1000 112th Circle N, Suite 100 St. Petersburg, FL 33716 USA 800-451-9444 • +1 727-530-3602 +1 727-538-0671 [Service Fax] email: [email protected] All non-warranty repair orders will have a minimum fee assessed whether the repair is authorized or not. This fee includes handling, administration and technical expenses for inspecting the instrument and providing an estimate. However, the estimate fee is waived if the repair is authorized. If you wish to set a limit to the authorized repair cost, state a “not to exceed” figure on your purchase order. Please indicate if a price quotation is required before authorization of the repair cost, understanding that this invokes extra cost and handling delay. Sensidyne’s repair policy is to perform all needed repairs to restore the instrument to its full operating condition. Repairs are handled on a “first in - first out” basis. Your order may be expedited if you authorize an expediting fee. This will place your order next in line behind orders currently in process. Pack the instrument and its accessories (preferably in their original packing) and enclose your return address, purchase order, shipping and billing information, RMA number, a description of the problem encountered with your instrument and any special instructions. All prices are subject to change without notice. If this is the first time you are dealing directly with the factory, you will be asked to prepay or to authorize a COD shipment. Send the instrument, prepaid, to: SENSIDYNE 1000 112th CIRCLE N, SUITE 100 ST. PETERSBURG, FL 33716 USA ATTENTION: Service Department RMA #:_______________________ SERVICE OPTIONS The Sensidyne Service Department offers a variety of service options which will minimize costly interruptions and maintenance costs. These options include initial training, on-site technical assistance, and full factory repairs. Sensidyne has developed several programs which offer options best suited to your applications and needs. For further information, contact the Sensidyne Service Department at the following numbers: 800-4519444 • +1 727-530-3602 • +1 727-538-0671 [Service Fax]. Sensidyne Document No. 360-0152-01 (Rev C1) 111 SensAlert ASI – Advanced Safety Integrity Gas Transmitter 13 Appendix G: Configuration Reference Password is: ___000000_________ • Transmitter P/N ____________ • Transmitter S/N _________________ Sensor (Gas) ____**___ (Conc.) ____**_____ (P/N) ________________ TOD Cell P/N _______________ Calibration Gas Concentration ______**_______ ppm %LEL Communication Setup: 4/20 mA Communication None SensAlert Sensor ID %vol Boxes with “X” indicate default setting TOD Mode Adjustment (** = Value depends on type of installed sensor) Auto Mode Enable: Disabled Enabled • Days Between Tests___**__ • Cell Intensity ___**___% Output Indicators: None 4-20 Current Loop Alarm Settings – Alarm Functions (** = Value depends on type of installed sensor) Relays Assigned Alarm 1 Alarm 2 Alarm 3 TWA Alarm 1 – Fail 2 3 4 5 – Warn Current Enabled Disabled Ascending ** Descending ** Setpoint ** ____ Release Offset ** ______ Average Time Adjust for TWA Alarm ______ ______ 15m 30m ______ ______ 60m 2h ______ ______ 4h 8h Alarm Settings – Fault Functions (** = Value depends on type of installed sensor) Relays Head Missing Sensor Sensor Output Current Cal Maint. Assigned Fail Sensor Fail End Of Life Track Mode Mode 1 - Fail 2 3 4 Enabled Disabled Fault Current 3.0mA 3.0mA 3.0mA Current Delay NA NA NA Alarm Settings – Relay Status Functions Relay Status Relay 1 - Fail Relay 2 Norm Energized Norm De-energized Latching Non-Latching Time Delay (in secs) 10 112 3.0mA 10 3.0mA 10 Relay 3 3.0mA NA 3.0mA NA TOD TOD Fail End Of Life 3.0mA 3.0mA 10 10 Relay 4 Relay 5 – Warn Current Enabled Disabled 10 10 10 30 Sensidyne Document No. 360-0152-01 (Rev C1) SensAlert ASI – Advanced Safety Integrity Gas Transmitter SensAlert ASI CONFIGURATION REFERENCE Transmitter P/N ____________ • Transmitter S/N _________________ Password is: ___ ___ ___ ___ ______ • Sensor (Gas) _________ (Conc.) ___________ (P/N) ________________ TOD Cell P/N _______________ Calibration Gas Concentration _______________ ppm %LEL Communication Setup: 4/20 mA Communication None SensAlert Sensor ID %vol TOD Mode Adjustment Auto Mode Enable: Disabled Enabled • Days Between Tests_______ • Cell Intensity ________% Output Indicators: None 4-20 Current Loop • Fault Indicators: None 4-20 Current Loop Alarm Settings – Alarm Functions Relays Assigned Alarm 1 Alarm 2 1 – Fail 2 3 4 5 – Warn Current Enabled Disabled Ascending Descending Setpoint ______ Release Offset ______ Average Time Adjust for TWA Alarm Alarm Settings – Fault Functions Relays Head Missing Assigned Fail Sensor ______ ______ 15m 30m ______ ______ 60m 2h Sensor Sensor Output Current Cal Fail End Of Life Track Mode 1 - Fail 2 3 4 Enabled Disabled Fault Current _____ _____ _____ Current Delay NA NA NA Alarm Settings – Relay Status Functions Relay Status Relay 1 - Fail Relay 2 Norm Energized Norm De-energized Latching Non-Latching Time Delay (in secs) ___ Alarm 3 _____ _____ _____ _____ Relay 3 _____ NA TWA Alarm ______ ______ 4h 8h Maint. Mode _____ NA TOD TOD Fail End Of Life _____ _____ _____ _____ Relay 4 Relay 5 – Warn Current Enabled Disabled ___ ___ ___ ___ For Combustible Sensor Only: Combustible Sensor Type: Infrared Catalytic Bead Select CMB Cal Gas Methane Propane Other _______________ Select K Factor ______________________ Sensidyne Document No. 360-0152-01 (Rev C1) 113 SensAlert ASI – Advanced Safety Integrity Gas Transmitter 14 Appendix H: Mounting Drawings 114 Sensidyne Document No. 360-0152-01 (Rev C1) SensAlert ASI – Advanced Safety Integrity Gas Transmitter Sensidyne Document No. 360-0152-01 (Rev C1) 115 SensAlert ASI – Advanced Safety Integrity Gas Transmitter 15 Appendix I: Certification Drawings 116 Sensidyne Document No. 360-0152-01 (Rev C1) SensAlert ASI – Advanced Safety Integrity Gas Transmitter Sensidyne Document No. 360-0152-01 (Rev C1) 117 118 4. 5. 6. 7. 2. 3. 1. OR CERTIFIED ASSOCIATED APPARATUS MTL7787P+ 3 4 DISPLAY UNIT DISPLAY UNIT Hazardous (Classified) Location SENSOR INTERFACE Entity Parameters: Input: Vmax (Ui) = 30VDC Imax (Ii) = 120mA Li = 0 Ci = 0 Pi = 1W SENSOR INTERFACE The Intrinsic Safety Entity concept allows the interconnection of two FM Approved Intrinsically safe devices with entity parameters not specifically examined in combination as a system when: Voc or Uo or Vt </= Vmax, Isc or Io or It </= Imax, Ca or Co >/= Ci + Ccable, La or Lo >/= Li + Lcable, Po </= Pi Control equipment connected to the Associated Apparatus must not use or generate more than 250 Vrms or Vdc. Installation in the U.S. should be in accordance with ANSI/ISA RP12.06.01 "Installation of Intrinsically Safe Systems for Hazardous (Classified) Locations" and the National Electrical Code® (ANSI/NFPA 70) Sections 504 and 505. Installation in Canada should be in accordance with the Canadian Electrical Code, CSA C22.1, Part 1, Appendix F. Installation in Europe must comply with the requirements of EN 60079-14. The configuration of associated Apparatus must be FM Approved under Entity Concept. Associated Apparatus manufacturer's installation drawing must be followed when installing this equipment Notes: CONTROL EQUIPMENT 20 354 2.05 1 2 10.04 176 0.627 IIB (C/E) Inductance Capacitance Ca La per Ohm (uF) (uH) (uH/O) 44 0.078 2.51 +V 4-20 mA 3 4 VOC = 28.5V ISC = 119mA Po = 0.835W MTL7787P+ Maximum Parameters: 1 2 OR CERTIFIED ASSOCIATED APPARATUS IIA (D/F/G) IIC (A/B) Group CONTROL EQUIPMENT +V 4-20 mA Nonhazardous Location Ta = -29 C to +85 C Ta = -29 C to +85 C DO NOT CHANGE WITHOUT THE APROVAL OF FM FM09ATEX0064 Sensors and T.O.D. (Test-On-Demand) Modules may be replaced in hazardous location. LIVE MAINTENANCE: Ex ia IIC T4 IECEx APPROVAL RATINGS: II 1 G Ex ia IIC T4 EUROPEAN APPROVAL RATINGS: Intrinsically Safe NEC/CEC CL I, DIV 1, GPS A, B, C, D, CL II GPS E, F, G, CL III T4 When installed with FM Approved Sensors. FM6320, C22.1 No. 152, (FM6340). U.S. AND CANADIAN APPROVAL RATINGS: SensAlert ASI – Advanced Safety Integrity Gas Transmitter Sensidyne Document No. 360-0152-01 (Rev C1) Sensidyne Document No. 360-0152-01 (Rev C1) 4. 5. 6. 7. 2. 3. SP5 3wire Barrier Ref 821-0212-01 1 2 3 848 424 106 SP5 3wire Barrier Ref 821-0212-01 128.96 64.48 16.12 La (uH) Inductance per Ohm (uH/O) 4 5 6 4 5 6 DISPLAY UNIT Entity Parameters: Input: Vmax (Ui) = 18VDC Imax (Ii) = 600mA Li = 0 Ci = 0.12uF Pi = 3.3W DISPLAY UNIT HAZARDOUS AREA OPTIONAL REMOTE INSTALLATION SENSOR INTERFACE MAXIMUM 100ft (30m) SENSOR INTERFACE OPTIONAL REMOTE INSTALLATION SENSOR INTERFACE MAXIMUM 100ft (30m) SENSOR INTERFACE The Intrinsic Safety Entity concept allows the interconnection of two FM Approved Intrinsically safe devices with entity parameters not specifically examined in combination as a system when: Voc or Uo or Vt </= Vmax, Isc or Io or It </= Imax, Ca or Co >/= Ci + Ccable, La or Lo >/= Li + Lcable, Po </= Pi Control equipment connected to the Associated Apparatus must not use or generate more than 250 Vrms or Vdc. Installation in the U.S. should be in accordance with ANSI/ISA RP12.06.01 "Installation of Intrinsically Safe Systems for Hazardous (Classified) Locations" and the National Electrical Code® (ANSI/NFPA 70) Sections 504 and 505. Installation in Canada should be in accordance with the Canadian Electrical Code, CSA C22.1, Part 1, Appendix F. Installation in Europe must comply with the requirements of EN 60079-14. The configuration of associated Apparatus must be FM Approved under Entity Concept. Associated Apparatus manufacturer's installation drawing must be followed when installing this equipment Notes: 1. 13.1 IIA (D/F/G) 18-30Vdc 4-20 mA RTN 3.28 IIB (C/E) Ca (uF) Capacitance 0.53 CONTROL EQUIPMENT 1 2 3 Maximum Parameters: IIC (A/B) Group CONTROL EQUIPMENT 18-30Vdc 4-20 mA RTN Nonhazardous Location 9.92 FACTORY SEAL 79.35 39.67 8.76 50 70.05 35.02 5.9 1000 IIB (C/E) La (uH) Inductance Lo/Ro (uH/O) Ca (uF) IIA (D/F/G) IIC (A/B) Group Capacitance Maximum Parameters: Output: Voc = 8.61V Isc = 1.89A FACTORY SEAL - - FM09ATEX0064 DO NOT CHANGE WITHOUT THE APROVAL OF FM Sensors and T.O.D. (Test-On-Demand) Modules may be replaced in hazardous location. LIVE MAINTENANCE: Display Unit: Ex ia IIC T4 Ta = -29 C to +75 C Sensor Interface: Ex ia IIC T4 Ta = -40 C to +75 C IECEx APPROVAL RATINGS: Display Unit: II 1 G Ex ia IIC T4 Ta = -29 C to +75 C Sensor Interface: II 1 G Ex ia IIC T4 Ta = -40 C to +75 C II 2 G with IR and Catalytic Bead Sensors EUROPEAN APPROVAL RATINGS: Intrinsically Safe NEC/CEC CL I, DIV 1, GPS A, B, C, D, CL II GPS E, F,G, CL III T4 when installed with FM Approved Sensors. FM6320, C22.1 No. 152, (FM6340). U.S. AND CANADIAN APPROVAL RATINGS: SensAlert ASI – Advanced Safety Integrity Gas Transmitter 119 120 1. 2. 3. 4. 5. +V 4-20 mA DISPLAY UNIT SEE NOTE 5 * SEE NOTE 5 SENSOR INTERFACE * SEAL REQUIRED * * SEAL REQUIRED SENSOR INTERFACE * * Input Ratings: 18-30VDC 50mA 1.5W. Output Ratings (NONE) DISPLAY UNIT Hazardous (Classified) Location - (NEC/CEC) Division 2; (Europe) Zone 2 Control equipment connected to the Associated Apparatus must not use or generate more than 250 Vrms or Vdc. Installation in the U.S. should be in accordance with the National Electrical Code® (ANSI/NFPA 70) Sections 501 - 505. Installation in Canada should be in accordance with the Canadian Electrical Code, CSA C22.1, Part 1, Appendix F. Installation in Europe must comply with the requirements of EN 60079-14. Install per the appropriate Division 2/Zone 2 wiring method excluding Non-Incendive Field Wiring (NIFW) methods. Notes: CONTROL EQUIPMENT CONTROL EQUIPMENT +V 4-20 mA Nonhazardous Location REV Ta = -29°C to +75° Ta = -29°C to +75° DO NOT CHANGE WITHOUT THE APROVAL OF FM FM09ATEX0064 Sensors and T.O.D. (Test-On-Demand) Modules may be replaced in hazardous location. LIVE MAINTENANCE: Ex nC IIC T4 IECEx APPROVAL RATINGS: II 3 G Ex nC IIC T4 EUROPEAN APPROVAL RATINGS: NEC/CEC CL I, DIV 2, GPS A, B, C, D, CL II GPS E, F, G, CL III T4 with Intrinsically Safe Sensor Outputs When installed with FM Approved Sensors. C22.1 No. 152, (FM6340). U.S. AND CANADIAN APPROVAL RATINGS: EFF SensAlert ASI – Advanced Safety Integrity Gas Transmitter Sensidyne Document No. 360-0152-01 (Rev C1) Sensidyne Document No. 360-0152-01 (Rev C1) 3-Wire Wiring shown 4 +V 5 4-20 mA 6 RTN CONTROL EQUIPMENT CONTROL EQUIPMENT 1. 2. 3. 4. 5. 6. * DISPLAY UNIT (WHEN REMOTE INSTALLATION IS USED) SEE NOTE 5 SEE NOTE 6 OPTIONAL REMOTE INSTALLATION SENSOR INTERFACE MAXIMUM 100ft (30m) SENSOR INTERFACE * SEAL REQUIRED * SENSOR INTERFACE OPTIONAL REMOTE INSTALLATION SENSOR INTERFACE MAXIMUM 100ft (30m) * SEAL REQUIRED Input Ratings: 12-30VDC 500mA 6W. Output Ratings (3-Wire Relays): 240VAC 3A 50/60Hz DISPLAY UNIT (WHEN REMOTE INSTALLATION IS USED) * SEE NOTE 5 * SEE NOTE 6 Hazardous (Classified) Location - (NEC/CEC) Division 2; (Europe) Zone 2 Control equipment connected to the Associated Apparatus must not use or generate more than 250 Vrms or Vdc. Installation in the U.S. should be in accordance with the National Electrical Code® (ANSI/NFPA 70) Sections 501 - 505. Installation in Canada should be in accordance with the Canadian Electrical Code, CSA C22.1, Part 1, Appendix F. Installation in Europe must comply with the requirements of EN 60079-14. (Display Units) Partition must be installed over sensor connector to maintain I.S. output ratings to Sensor Interface. Install per the appropriate Division 2/Zone 2 wiring method excluding Non-Incendive Field Wiring (NIFW) methods. Notes: 3-Wire Wiring shown 4 +V 5 4-20 mA 6 RTN Nonhazardous Location Output: (from Display Unit) Voc = 8.61V Isc = 1.89A FACTORY SEAL 35.02 70.05 39.67 79.35 Inductance La (uH) 9.92 Lo/Ro (uH/O) 8.76 DO NOT CHANGE WITHOUT THE APROVAL OF FM FM09ATEX0064 50 1000 IIC (A/B) IIB (C/E) IIA (D/F/G) Group Capacitance Ca (uF) 5.9 Maximum Parameters (remote from Display): Sensors and T.O.D. (Test-On-Demand) Modules may be replaced in hazardous location. LIVE MAINTENANCE: Display Unit: Ex nC [ia] IIC T4 Ta = -29C to +75C Sensor Interface: Ex ia IIC T4 Ta = -40°C to +85° IECEx APPROVAL RATINGS: Display Unit: II 3 [1] G Ex nC [ia] IIC T4 Ta = -29C to +75C Sensor Interface: II 1 G Ex ia IIC T4 Ta = -40°C to +85° II 2 G with IR and Catalytic Bead Sensors EUROPEAN APPROVAL RATINGS: Hazardous (Classified) Location - (NEC/CEC) Division 1; (Europe) Zone 0; Zone 1 - with IR and Catalytic Bead Sensors FACTORY SEAL NEC/CEC CL I, DIV 2, GPS A, B, C, D, CL II GPS E, F, G, CL III T4 with Intrinsically Safe Sensor Outputs CL I, DIV 1, GPS A, B, C, D, CL II GPS E, F, G, CL III T4 When installed with FM Approved Sensors. FM6320, C22.1 No. 152, (FM6340). U.S. AND CANADIAN APPROVAL RATINGS: SensAlert ASI – Advanced Safety Integrity Gas Transmitter 121 NOTES: Manufactured by: Sensidyne, LP 1000 112th Circle N, Suite 100 St. Petersburg, Florida 33716 USA 800-451-9444 • 727-530-3602 • 727-539-0550 [fax] www.Sensidyne.com • [email protected] Authorized EU Representative Schauenburg Electronic Technologies GmbH Weseler Str. 35 · 45478 Mülheim-Ruhr Germany +49 (0) 208 9 99 10 • +49 (0) 208 5 41 10 [fax] www.schauenburg.com • [email protected] Sensidyne, LP 1000 112th Circle N, Suite 100 St. Petersburg, Florida 33716 USA Tel: 800-451-9444 / +1 727-530-3602 • Fax: +1 727-539-0555 web: www.Sensidyne.com • www.SensidyneGasDetection.com e-mail: [email protected]