1
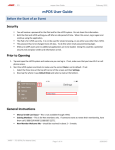
miEbooks 1.5 iPad User Manual miEbooks 1.5 iPad User Manual miEbooks 1.5 iPad User Manual miEbooks 1.5 iPad User Manual Prerequisites for iOS The miEbooks application has been optimised for Apple products that meet the below specifications: • iOS 7 or 8 should be installed • iPad 2 and up, iPad Mini or iPad Air • Minimum 1GB RAM • 2GHz Dual core CPU or Quad Core CPU • Wi-‐Fi (A-‐grade quality) • Minimum screen resolution of 1024 x 600 • Battery life of at least 5 and a half hours on video play Installing miEbooks from the App Store 1. Tap on the App Store icon on your device. 2. In the search bar, in the top-‐right corner, type in miEbooks and tap on Search. 3. The miEbooks app will come up on the screen. 4. Tap on Free and then on Install to install the app. miEbooks 1.5 iPad User Manual 5. Once the app has been installed on your device, the miEbooks icon will appear with the rest of your apps. Entering your Login Details 1. When you open miEbooks for the first time the following screen will appear: 2. Tap on Continue to fill in your login details on the miEbooks General Settings screen: miEbooks 1.5 iPad User Manual 3. From the School scroll you can select your school, from the Grade scroll you select your grade, and from the Language scroll your learning language. 4. Once you have selected your school, grade and language you have the opportunity to fill in your unique username and password. The school server address will automatically be picked up. 5. Once you have filled in this information you can tap on Save. You also have the option to Test School Server Connection. miEbooks 1.5 iPad User Manual 6. If you choose to Test School Server Connection a screen will appear that will display indicators to assist in identifying if your login is successful or not. All indicators should show green if your details are entered correctly and your Wi-‐Fi is connected. 7. If all of the indicators go green, tap on General Settings in the top-‐left corner and then tap on Save. Fast Troubleshooting Using Test School Server Connection: All RED Wi-‐Fi not connected or connection is too slow Top one GREEN, all others RED Server address typed incorrectly Last 3 RED Username or password is wrong Last one RED Date and time is wrong Goes all RED, then all GREEN, but it doesn’t login Check for spaces in, before or after the correctly, even after pressing refresh in the library server address/username/password General Settings – Choosing a colour 1. Under General Settings you can also choose a colour for miEbooks. To choose a colour, tap on the Which colour do you like? block. miEbooks 1.5 iPad User Manual 2. This will take you to the following screen: 3. Tap on the colour that you would like and then tap on Select Colour. You will then go back to the General Settings page. 4. On this page there is also the option to sign in with Google and to reset the app. 5. The Google – Sign in option allows you to sign in using your Google account. miEbooks 1.5 iPad User Manual 6. If you have signed in and, at some stage, wish to sign out you can tap on the same block. 7. The Reset App option allows you to wipe all of the information on the app. This is only to be used if advised to do so. Library/Home Page Layout Once the user has filled in their school’s server address, their unique username and the password into the server settings and tapped on Save, all the books required by that user will automatically appear in the library. The below image displays the layout of the library/home page: miEbooks 1.5 iPad User Manual Layout Options By tapping on this icon you can change the layout of your books on the homepage. They can appear underneath one another, as in the image above, or next to one another, like this: miEbooks 1.5 iPad User Manual Book Indicator The book indicator will show the status of a book for the user logged in on miEbooks. The ‘status’ refers to whether or not that book is available for use by that specific user. a) If the book has not been assigned to a user it means they cannot access the content of the book. They will receive this message: In order for the user to access this book they need to be assigned to it (the user will need to report this to the teacher handling the tablets at their school). If they do not need to access the book, it must be deleted off their tablet. b) If a book has been downloaded and the user has permission to access the book they can tap on it to open it: miEbooks 1.5 iPad User Manual c) If the user is assigned to a book but has not yet downloaded the book they will need to tap on it to prompt it to download onto their tablets: When a book is tapped so that it can download, the user can see the progress of the download: New Resources If a teacher adds resources to a book and the user has not yet opened that book, the user will be notified on how many resources have been added to that book since it was last open miEbooks will check for updates intermittently. Users can tap on the refresh icon in the library or inside a book at any time to initiate an update of resources. Status Bar The status bar shows when last the information on miEbooks was backed up to the school server and the cloud. It also displays the app version and the current action happening on the app. Menu From here you can access the library, the resources, the agenda, the newsletter and the general settings. miEbooks 1.5 iPad User Manual Library The library contains all of the books that the miEbooks user has access to. Resources Here the user can see all of the resources that have been pushed to the e-‐pubs. Agenda The user’s agenda is their diary. From here you can access the calendar on your iPad. Newsletter The school can upload newsletters to the miEbooks app. When they have done so, the newsletter will appear in the Newsletter section of the menu. The date indicated is the date that the newsletter was downloaded by the user. Tapping on the Newsletter tab will automatically open the newsletter. Navigating in a Book To open a book, you tap on it once on the Home Page. To exit the book, you tap on the book icon in the top-‐left side of the book. To go to a specific section of a book, you can navigate from the Table of Contents (TOC). To access this, tap on the Table of Contents icon on the top-‐left side of the book and the TOC will appear on the left of the book. miEbooks 1.5 iPad User Manual You can also simply place your finger anywhere on the screen, while a book is open, and swipe right to see the TOC on the left side of the screen. Scroll to the section of the book you want to open. Tap on the heading for that section. The book will display the section selected. If you simply want to go to the next section, you can make use of the arrows at the bottom and the top of the pages. To find annotations (attached resources or notes and sketches) in a book, first navigate to the section where the annotations have been added. You are then able to open the annotations by swiping to the left of the screen to open the Annotations panel or by, or tap on the Annotations icon on the top-‐right side of the book, and tapping on the resource that you want to open. You can also simply place your finger anywhere on the screen, while a book is open, and swipe left to see the annotations on the right side of the screen. Below is an example image of the icons in the right-‐hand margin and associated indicators in the Annotations Panel. miEbooks 1.5 iPad User Manual The resources will appear like this in the book, and will appear on the right of the screen once you have tapped on the resources icon or swiped left. You also have the option of increasing or decreasing the size of text in a book. You can do this by zooming in and out using the options at the top of the screen. The fluid text will resize to fit the screen. miEbooks 1.5 iPad User Manual Functionalities in book You can make notes and sketches in a book. These will be saved in the right-‐hand margin of the book next to the section where you made the sketch or highlight. They can be viewed by tapping on the annotations icon and selecting the note or sketch. 1. In a book, tapping on text and holding your finger on the screen brings up several different options: 2. If you tap on Add Note you can type up a note with the iPad’s keyboard that will be placed in that section of the book. 3. If you tap on Add Freehand you can make a sketch that will be placed in that section of the book. 4. If you are unsure of the meaning of a word you can find the definition by tapping on the word and holding your finger on the screen until the options appear. You can then tap on Define. 5. If you tap on the Add Google Drive File, you have the option of adding a Google Drive File to a book. You will need to be signed in to Google to make use of this feature.