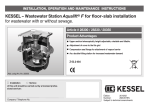
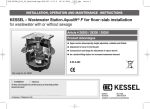
1
INSTALLATION AND USER’S MANUAL
KESSEL-Staufix® FKA
Backwater Valve
Z
NET
SIGNAL
AU
KST
RÜC
PPE
KLA FEN
PRÜ
m Double flap backwater valve with motorized flap
and manual closure lever
m Optical probe for backwater detection
m For sewage and greywater
m Control unit with SDS (Self Diagnosis System)
m Automatic closure during backwater
m Simple access for maintenance
m Simple installation of replacement parts
The installation and service of this unit should be carried out
by a licensed professional servicer.
m Rotatable, tiltable and vertically adjustable cover
(1.5 ton load class)
m Also available for exposed / suspended pipe
Company Telephone No.
(Subject to technical amendments)
m Upgradable to Pumpfix® F backwater valve with integrated sewage pump.
Rev. 06/2000-HG
Sach-Nr. 010-180
Everything for drainage
Table of Contents
1. Safety Instructions
.......................................................................................................... page
4
2. General
2.1
2.2
2.3
2.4
Areas of application ..........................................................................
Staufix® FKA description...................................................................
When to install the Staufix® FKA .......................................................
Upgradability.....................................................................................
page
page
page
page
5
5
5
6
3. Installation
3.1
3.2
3.3
3.4
3.5
Installation in a concrete slab / floor..................................................
Deep installation in a concrete slab / floor ........................................
Installation subject to groundwater ...................................................
Installation in an exposed / suspended pipe .....................................
Installation Example..........................................................................
page
page
page
page
page
7
7
8
8
9
4. Electrical connections
4.1
4.2
4.3
4.4
4.5
4.6
4.7
Wall mounting of the control unit.......................................................
Cable connections ............................................................................
Installing the motor............................................................................
Installing the optical probe ................................................................
Audible signalling device with extension cable (optional) .................
Signalling device with auxiliary connection (optional) .......................
Shortening the cables .......................................................................
page
page
page
page
page
page
page
10
10
11
12
12
12
12
.......................................................................................................... page
13
5. Initializing the System
Everything for drainage
Table of Contents
6. Operation
6.1
6.2
Examples of operation ...................................................................... page
Control unit function buttons ............................................................. page
14
15
7. Problem Notification
7.1
7.2
Problems during power operation ..................................................... page
Problems during battery operation / power outages ......................... page
16
18
8. Additional Functions
8.1
8.2
8.3
Self Diagnosis System (SDS) ........................................................... page
Sleep Mode....................................................................................... page
Battery life and replacement ............................................................. page
20
20
20
.......................................................................................................... page
21
Inspection .........................................................................................
Maintenance .....................................................................................
Operational test ................................................................................
Testing the optical probe ...................................................................
page
page
page
page
22
22
23
23
11. Replacement Parts
.......................................................................................................... page
24
12. Warranty
.......................................................................................................... page
25
9. Technical Data for control unit
10. Inspection and Maintenance
10.1
10.2
10.3
10.4
3
Everything for drainage
1. Safety instructions
Dear customer,
Important
Before placing the KESSEL Staufix® FKA
in service, please carefully read and follow this Installation and User’s Manual.
The information provided in this manual
is valuable and will help provide years of
safe and reliable service of the KESSEL
Staufix® FKA backwater valve.
Always unplug the Staufix® FKA before
inspection or maintenance!
Upon receipt of the Staufix® FKA please
check to make sure that it has been delivered
undamaged. In the case that the Staufix®
FKA has been damaged during delivery,
please follow the warranty instructions in
Chapter 12.
Installation and User’s Manual could result
in bodily injury or a fatal accident.
Use caution during installation, inspection,
maintenance, use and repair of this product.
Do not manually move the black motor lever
on the cover of the Staufix® FKA while the
motor is installed as this can damage the
motor. This black motor lever can be
manually moved if the motor has been
removed.
The Staufix® FKA is not to be installed in an
area which is or could be subject to explosion.
The Staufix® FKA uses electricity and
moving mechanical parts. Not following the
Everything for drainage
4
If at any time the electrical cables or any
other part of the Staufix® FKA is damaged,
the backwater valve should in no way be
placed into operation.
Do not inspect or maintain the Staufix® FKA
during times of backwater or during times of
risk of backwater (heavy rain / flooding).
The backwater flaps, motorized lever and
the manual closure lever must always have
full range of motion.
KESSEL recommends that a maintenance
contract be signed with a licensed professional servicer.
2. General
2.1 Areas of application
The Staufix® FKA is designed to be installed
in a downward sloped, continous run
drainage pipe. In this application the Staufix®
FKA will provide through drainage during
normal conditions and protection against
backwater during times of backwater.
© a splash proof control unit (120V - 60Hz
or 230V - 50 Hz) with back up batteries
(two 9 volts) for operation of the Staufix®
FKA for up to 10 hours after power
failures
© Installation and User’s Manual
© Funnel for watertight test
2.2 Staufix® FKA description
The Staufix® FKA electronic backwater valve
consists of:
2.3 When to install the Staufix® FKA
If the Staufix® FKA is being installed during
the construction phase only the body of the
valve and cover should be installed (the
motor, optical probe and control unit should
not be installed or connnected) (Chapter 3).
During this time make sure to store the
electrical components in a clean and dry
place. When the construction phase is over
the motor and optical probe should be
© a body with motorized and manually
operated backwater flaps
© a motor (IP68, limited submersibility) to
operate the motorized flap
© an optical probe (IP 68,
limited
submersibility)
5
installed in the cover of the valve, the control
unit mounted on a nearby wall and all
necessary electrical connections made. This
will help prevent damage to the mechanical
and electrical equipment of the Staufix® FKA
during the construction phase.
During the construction phase the two
closure levers of the Staufix® FKA can be
manually set in three different positions to
provide different protection options before all
the electrical connections to the Staufix®
FKA are made. The red manual closure
lever and the motorized backwater flap lever
can be both set in the ‘FLAP LOCKED CLOSED’ position which will completely shut
both backwater flaps and not allow flow in
either direction. The red manual closure
Everything for drainage
2. General
lever can also be set in the ‘FLAP OPEN
(
F
R
E
E
HANGING)’ position (lever is vertical) and
the motorized backwater lever in the ‘FLAP
OPEN (OUT OF FLOW)’ position which
allows plumbing fixtures to be drained
through the valve and also provides
protection against backwater because the
manual backwater flap is in a closed but free
hanging position. The red manual closure
lever and the motorized backwater flap lever
can also both be set in the ‘FLAP OPEN
(OUT OF FLOW)’ position by releasing the
flexible tab in the middle of the red manual
closure lever from the tab stop and pulling
the lever all the way back until it goes no
further (beyond vertical). At this setting the
manual backwater flap is completely open
and will allow plumbing fixtures to be drained
Everything for drainage
through the valve.
2.4 Upgradability
The KESSEL Staufix® FKA can be easily upgraded to the KESSEL Pumpfix® F
electronic backwater valve with optical
probe, intregrated sewage pump and control
unit (North American Option -8, please
specify pipe size / European Order Number
28079 for 3 inch pipe, Order Number 28080
for 4 inch pipe or Order Number 28081 for 6
inch pipe).
6
3. Installation
Please note:
The drainage pipe to which the Staufix® FKA
is connected is installed at the slope required by the local governing code. It is recommended that all plumbing fixtures above the
backwater level be connected downstream
of the Staufix® FKA since these fixtures do
not need to be protected against backwater.
Only fixtures below the backwater level
should be plumbed through the Staufix®
FKA.
3.1 Installation in a concrete slab / floor
North American Product Numbers 65023,
65024 and 65026 / European Product
Numbers 83100 S or X, 83125 S or X and
83150 S or X.
The body of the Staufix® FKA should be
installed level as shown in Illustration 1. The
electrical cables connecting the Staufix®
FKA to the control unit should be run through
a 1.5 inch Schedule 40 DWV pipe (DN 50)
as shown in Illustration 2 + 5. Grease and install the included rubber gasket between the
Staufix® FKA body and the access chamber
as shown in Illustration. 3. As seen in
Illustration 4, the access chamber of the
Staufix® FKA body is completely adjustable.
This access chamber can be raised or
lowered to meet floor heights, tilted laterally
to meet grades in the floor and rotated to
match floor patterns.
3.2 Deep installation in a concrete slab
/ floor
For deep installation depths use extension
section (North American Option -4 /
European Product Number 83070 (adds 7
inches / 180mm)). If installing an extension
section make sure to grease the rubber
gasket. If more than one extension section
is needed, make sure not to install the
Pumpfix® F so deep that access to the valve
for inspection and maintenance is hindered.
7
Illus. 2
Illus. 1
Illus. 3
Illus. 4
Illus. 5
Everything for drainage
3. Installation
3.3 Installation subject to groundwater
There are certain circumstances where the
upward force of groundwater can penetrate
through slab installed fixtures and cause
moisture problems. The KESSEL Staufix®
FKA provides protection against the upward
force of groundwater by including the water
barrier (North American Option -5 / European
Product Number 83019 (rubber barrier) and
83018 (flange)) during installation. This
barrier is simply placed between the body of
the Staufix® FKA and the flange which is
then bolted tight with the included bolts as
shown in Illustration 6.
3.4 Installation in an exposed /
suspended pipe
(North American Product Numbers 65033,
65034 and 65036 / European Product
Numbers 83100, 83125 and 83150)
The Staufix® FKA backwater valve,
designed to be installed in an exposed /
suspended pipe, comes equipped with a
see-thru, easily removable protective cover.
Flange
The motor cable and the optical probe cable
should be run through their two respective
holes in the body of the valve. Firmly tighten
the 2 nuts to secure the cables.
Rubber barrier
ATTENTION:
Make sure that no cables or other
objects impair the movement of the
motorized closure lever and the manual
closure lever or interfere with the operation,
inspection or maintenance of the valve.
Illus. 6
Everything for drainage
8
3. Installation
3.5 Installation Example
a Staufix® FKA
b Flange
c Motorized backwater flap
d Manual closure lever
e Motor
f Control unit
g Cover (Load capacility 1.5 tons)
Cellar drain, washing machines,
sinks, bathtubs, toilets
Power and
probe cables
cm
9
Everything for drainage
4. Electrical connections
4.1 Wall mounting of the control unit
As always, make sure the control unit is disconnected from the power supply before
opening the cover!
Unscrew the four screws located in each corner of the front of the control unit and open
the cover. In each corner of the inside of the control unit will be four holes for mounting
the control unit to the wall (as seen in Illusration 7). Included with the control unit are 4
mounting screws,
6
4 plastic wall
plugs and a
drilling template
which is printed
on the cardboard
control unit box.
4.2 Cable connections
An electrical connection plan is located on
the inside of the control unit cover.
Open and pierce the two middle gaskets on
the bottom of the control panel (as seen in
Illustration 8). Push the nut and hand bolt
onto each cable (as seen in Illustration 9).
Insert the cable for the motor through the left
Illus. 8
pierced gasket and the cable for the optical
probe through the right pierced gasket and
into the control unit making sure to pull only
enough cable into the control unit to make
the necessary connections. Secure the cables to the control unit box (as seen in Illus.
9) by tightening the plastic hand bolts.
Illus. 7
a Cover screws (x4)
b Hinges (x2)
c Connection diagram
Everything for drainage
d Mounting screws (x4)
e Plastic wall plugs (x4)
f 9 volt batteries (x2)
10
4. Electrical connections
4.3 Installing the motor
Remove the four white plastic protectors
from the motor screw holes on the cover of
the Staufix® FKA. Make sure the black lever
on the cover of the Staufix® FKA for the
motorized flap is in the ‘FLAP LOCKED
CLOSED’ position. If it is not, close it by
hand. Place the motor over the four screw
holes on the Staufix® FKA cover and also
Illus. 9
To connect the wires, firmly insert a small
screwdriver into the upper opening of each
jack and push up (as seen in Illustration 10).
This opens the terminal below. Insert the
lead of the corresponding wire into the lower
opening of the jack and release the
screwdriver. This will connect the wire. Now
connect the wires of the motor and the
optical probe to their respective terminals
(as seen in Illustration 10). The three wires
for the motor are labelled ‘1’, ‘2’ and ‘3’ and
should be connected to the corresponding
numbered wire jacks on the jacks marked
‘MOTOR’. The three wires for the optical
probe are also labelled ‘1’, ‘2’ and ‘3’ and
Illus. 11
Illus.
should be connected to the corresponding
numbered wire jacks on the jacks marked
‘SONDE’.
11
Everything for drainage
4. Electrical connections
make sure that the drive shaft of the motor
fits into the drive shaft slot on the black lever
(as seen in Illustration 11). Secure the motor
firmly with the four included screws.
4.4 Installing the optical probe
To install the optical probe into the Staufix®
FKA simply remove the small purple plug
from the cover of the Staufix® FKA by
unscrewing the two screws. Now insert the
probe and tighten with the same two screws
(as seen in Illustration 12). The optical
probe is designed so that it can only be installed the proper way.
4.5 Audible signalling device with
extension cable
An optional audible signalling device with
extension cable (North American Option -6
/ European Product Number 20162) can be
connected if it is required that the audible
warning signal be located in other areas of
the building.
Illus. 12
4.6 Signalling device with auxiliary
connection
4.7 Shortening the cables
The cables from the control unit to the
Staufix® FKA can be shortened if necessary.
However, please insure that there is
always enough cable so that the Staufix®
FKA motor and cover can be removed for
inspection and maintenance.
NOTE: VDE 0100, VDE 01107, IEC
guidelines or regulations issued by local
power companies must always be
followed. Also, the control unit must not
be installed in areas where there is an
explosion risk.
Illus. 13
Everything for drainage
An optional additional circuit board with an
auxiliary connection (North American Option
-7 / European Product Number 80072) can
be installed to allow the Staufix® FKA to be
connected to a warning beacon, audible
alarm or a building’s central control system.
The additional circuit board is plugged into
the mother board inside the control unit and
fastened with the 4 provided screws (as
seen in Illustration 13).
12
5. Initializing the system
While the control unit is unplugged connect
the two supplied 9-volt batteries which are
already located inside the control unit.
Close the cover of the control unit and tighten the four screws. Plug in the control unit
to a proper power supply. The control unit
will perform a basic systems check. This is
indicated by the ‘CLOSED / TEST FLAP’
light which will begin to blink about 15 seconds after either the two batteries are
connected or the control unit is plugged in.
D
u
r
i
n
g
initialization the system checks the
batteries, the optical probe and the motor
connections to confirm that they are
properly connected and in working order. It
will also perform a flap closure check by
closing and opening the motorized flap if
initially in the open position or by opening
the motorized flap if initially in the closed
position.
If the entire system has been installed
correctly the green ‘POWER’ LED on the
control unit will turn on and remain on. The
Staufix® FKA is now ready for operation.
When the system is ready for
13
operation, make sure that the red manual
closure lever for the backwater flap is in the
‘FLAP OPEN (FREE HANGING)’ or the
‘FLAP OPEN (OUT OF FLOW)’ position. If
it is not, open it with the red manual closure
lever. Also make sure that the the motorized
flap is in the ‘FLAP OPEN (OUT OF FLOW)’
position. If it is not press the ‘CLOSED /
TEST FLAP’ button which will open the motorized flap.
To
check
if
the
system
is
functioning properly, perform the steps in
Chapter 10.3 and 10.4.
Everything for drainage
6. Operation
6.1 Examples of operation
System Functioning
Flap closing - backwater
Flap closed - backwater
Everything for drainage
LED
POWER
ALARM
BACKWATER
CLOSED /
TEST FLAP
POWER
ALARM
BACKWATER
CLOSED /
TEST FLAP
POWER
ALARM
BACKWATER
CLOSED /
TEST FLAP
AUDIBLE ALARM
LED Color
green
orange
red
Power Operation
On
Off
Off
Battery Operation
Off
flashes
Off
orange
green
orange
red
Off
On
On
flashes
Off
Off
Off
Off
orange
green
orange
red
flashes
On
On
flashes
flashes
Off
Off
Off
orange
On
beeping (fast)
Off
beeping (2 seconds)
14
6. Operation
6.2 Control unit function buttons
‘ALARM’ button
The audible alarm can be acknowledged
and turned off by pressing the ‘ALARM’
button. This will also turn off the ‘ALARM’
LED. The audible alarm is only re-activated
the next time backwater occurs.
‘CLOSED / TEST FLAP’ button
This test button is used to operate the
motorized backwater flap for maintenance
or testing purposes. The flap can be closed
by pressing the button and opened by pressing the button again. The ‘CLOSED / TEST
FLAP’ LED will blink as the motorized flap is
closing or opening and remain on once the
flap is closed. An audible alarm will also
sound once the flap has been closed by
means of the button. A different audible
alarm sounds when the flap has closed
because of backwater.
in battery backup mode. During battery
backup, backflow is displayed by an audible
‘beep’. No LEDs are lit.
Please note that if the motorized flap is
closed using the ‘CLOSED / TEST FLAP’
button, it will not reopen automatically. The
button must be pressed again to open the
motorized flap. It is important to always
check that the motorized flap is in the ‘FLAP
OPEN (OUT OF FLOW)’ position after
maintenance or testing has been completed.
In order to conserve battery power, the
Staufix® FKA will not allow the user to close
the motorized flap for maintenance or testing
purposes while it is in battery back-up mode.
Only the presence of backwater will close
the motorized flap while the Staufix® FKA is
15
Everything for drainage
7. Problem notification
If problems occur during initialization and operation, the Staufix FKA’s control unit will detect, diagnose and display the problem using the
LEDs and audible alarms from the control unit.
7.1 Problems during power operation:
Notification
Problem
9 volt batteries in control unit
not connected or low on
power. Batteries missing or
faulty.
Solution
Disconnect Staufix® FKA from power source, connect or replace batteries (Please
dispose of old batteries properly). Close
the cover and tighten the cover screws of
the control unit and then plug in control
unit.
Tips
If the batteries have not been connected,
the system will have to be re-initialized.
Disconnect the Staufix® FKA from its
power source, wait 10 seconds, connect
the two 9-volt batteries and plug the
Staufix® FKA back in for re-initialization.
All four LEDs blink
simultaneously and
audible alarm
sounds.
During initialization, motor
cables not properly connected, polarity reversed or
motor is damaged. During
operation, motor control
leads faulty.
Disconnect Staufix® FKA from power source, disconnect 9 volt batteries in control unit. Inspect
the motor and all cables to make sure they are
in working order and properly installed. Replace motor if necessary. Reconnect batteries,
close the cover and tighten the cover screws of
the control unit and then plug in control unit.
Install motor and cables carefully to
prevent incorrect connections and
polarity problems.
The upper two LEDs
(‘POWER’ and ‘ALARM’)
and the lower two LEDs
(‘BACKWATER’
and
‘CLOSED / TEST FLAP’)
blink alternatingly and
audible alarm sounds.
During initialization, optical
probe cables not properly
connected, polarity reversed
or optical probe is damaged.
During operation, optical
probe leads faulty.
Disconnect Staufix® FKA from power source,
disconnect 9 volt batteries in control unit.
Inspect the optical probe and all cables or install
new optical probe if necessary. Reconnect batteries, close the cover and tighten the cover screws
of the control unit and then plug in control unit.
‘POWER’ LED
blinks and
audible alarms
sounds
Everything for drainage
16
The optical probe and its connections are checked by the control unit
every 2 seconds.
7. Problem notification
Notification
‘POWER’ and
‘ALARM’ LEDs are
on, the ‘CLOSED /
TEST FLAP’ LED
blinks and audible
alarm sounds.
Problem
Motorized flap cannot close
completely during initialization
or testing. In this case the
motorized flap is being
obstructed by an object.
Solution
Disconnect Staufix® FKA from
power source, disconnect 9 volt
batteries in control unit. Remove
the cover of the Staufix® FKA,
remove
the
obstruction.
Reconnect batteries, close the
cover and tighten the cover
screws of the control unit and
then plug in control unit.
‘POWER’ and
‘ALARM’ LEDs are
on, ‘BACKWATER’
and ‘CLOSED /
TEST FLAP’ LEDs
blink alternatingly
and audible alarm
sounds
Motorized flap cannot close
completely during times of
backwater. In this case the
motorized flap is being
obstructed by an object.
Close manual closure lever to
protect against backwater. Wait
for backwater to subside then
disconnect Staufix® FKA from
power source, disconnect 9 volt
batteries in control unit. Remove
the cover of the Staufix® FKA,
remove
the
obstruction.
Reconnect batteries, close the
cover and tighten the cover
screws of the control unit and
then plug in control unit.
17
Tips
When the motorized flap cannot close
completely due to an obstruction, the control
unit makes three attempts to close the motorized
flap in an attempt to dislodge the obstruction.
If it succeeds in dislodging the object, the
Staufix® FKA returns to normal operation. If the
obstruction remains in place an alarm will
sound to notify the user of the blockage which
could subject the building to backwater risk.
Pressing the ‘ALARM’ button will not turn off
the audible alarm. The audible alarm continues
to sound to make sure that the user realizes
that the blockage must be removed. Pressing
the ‘CLOSED / TEST FLAP’ button will re-open
the flap and stop the audible alarm. It is now
important to disconnect the Staufix® FKA from
the power source and to disconnect 9 volt
batteries in control unit. Remove the cover of
the Staufix® FKA, remove the obstruction and
re-start the system.
Everything for drainage
7. Problem notification
7.2 Problems during battery operation / power outages
Notification
Problem
Solution
‘ALARM’ LED blinks every Staufix® FKA is in battery Check power source and restore main
two seconds.
back up mode (not power if possible.
receiving outlet power).
All LEDs blink
simultaneously every 2
seconds and audible
alarm sounds.
During
initialization,
motor cables not properly
connected, polarity reversed
or motor is damaged.
During operation, motor
control leads faulty.
Disconnect Staufix® FKA from power
source, disconnect 9 volt batteries in
control unit. Inspect the motor and all
cables. Install new motor if necessary.
Reconnect batteries, close the cover
and tighten the cover screws of the
control unit and then plug in control unit.
The upper two LEDs
(‘POWER’ and ‘ALARM’) and
the lower two LEDs
(‘BACKWATER’ and
‘CLOSED / TEST FLAP’)
blink alternatingly every two
seconds and audible alarm
sounds.
During
initialization,
optical probe cables not
properly
connected,
polarity reversed or
optical probe is damaged.
During operation, optical
probe leads faulty.
Disconnect Staufix® FKA from power
source, disconnect 9 volt batteries in
control unit. Inspect the optical probe
and all cables. Install new optical probe
if necessary. Reconnect batteries,
close the cover and tighten the cover
screws of the control unit and then plug
in control unit.
Everything for drainage
18
Tips
The Staufix® FKA will remain operational for approximately 10 hours on
battery back up. After this time period
the Staufix® FKA will go into ‘sleep
mode’ (see Chapter 7.2, Additional
Functions).
During battery operation, motor
problems are only detected while
the motorized flap is in operation.
The optical probe and its connections are checked by the control unit
every 60 seconds.
7. Problem notification
Notification
‘CLOSED / TEST
FLAP’ LED blinks
every 2 seconds
and audible alarm
sounds (motorized
flap in the ‘open’
position).
Problem
Motorized flap cannot
close completely during
initialization or testing. In
this case the motorized
flap is being obstructed
by an object.
Solution
Disconnect Staufix® FKA from
power source, disconnect 9 volt
batteries in control unit. Remove
the cover of the Staufix® FKA, remove the obstruction. Reconnect
batteries, close the cover and tighten the cover screws of the control
unit and then plug in control unit.
‘CLOSED / TEST
FLAP’ LED blinks
every 2 seconds
and audible alarm
sounds (motorized
flap in the ‘closed’
position or between
‘open’ and ‘closed’).
Motorized flap cannot
close completely during
times of backwater due to
an obstruction.
Close manual closure lever. Wait for
backwater to subside then
disconnect Staufix® FKA from power
source, disconnect 9 volt batteries in
control unit. Remove the cover of the
Staufix® FKA, remove the obstruction. Close the cover and tighten the
cover screws of the control unit and
then plug in control unit. Make sure
to reopen the manual closure lever
after backwater has subsided.
19
Tips
When the motorized flap cannot close
completely due to an obstruction, the control
unit makes three attempts to close the motorized
flap in an attempt to dislodge the obstruction.
If it succeeds in dislodging the object, the
Staufix® FKA returns to normal operation. If the
obstruction remains in place an alarm will
sound to notify the user of the blockage which
could subject the building to backwater risk.
Pressing the ‘ALARM’ button will not turn off
the audible alarm. The audible alarm continues
to sound to make sure that the user realizes
that the blockage must be removed. Shut the
manual closure lever and wait for the backwater to subside. Disconnect Staufix® FKA from
the power source and disconnect 9 volt batteries in control unit. Remove the cover of the
Staufix® FKA, remove the obstruction and restart the system.
Everything for drainage
8. Additional Functions
8.1 Self Diagnosis System (SDS)
The Staufix® FKA control unit is equipped
with SDS. This system automatically tests
the motor and the motorized flap once every
week. During this test the motorized flap will
close once, check to see that it can make a
complete water tight seal and then re-open.
If faults or an obstruction in the valve is
detected during this test, the problems will
be indicated on the control unit and can be
corrected by following the instructions in
Chapter 7.
Everything for drainage
8.2 Sleep mode
The Staufix® FKA can operate on battery
backup power for approximately 10 hours
after which it will automatically go into sleep
mode. This is a backwater protection
precaution when outlet power is no longer
available and battery power is low. When the
Staufix® FKA goes into sleep mode it will
shut the motorized flap until power is restored
to the unit. During this time there will be no
audible or visual warnings unless the
system is equipped with the signalling device
with auxiliary connection in which case this
system will still receive a signal. When
power is returned to the Staufix® FKA it will
return to normal operation.
20
8.3 Battery life and replacement
While the Staufix® FKA is connected to a
suitable power supply, the unit continuously
checks the condition of the two batteries. If
at time of initialization the batteries hold
under 12.5 Volts total power, the Staufix®
FKA will not initialize itself. In this case,
unplug the Staufix® FKA control unit from its
power source, check and replace the
batteries if necessary and then reconnect
the control unit to its power source. The
estimated life of new batteries is four years.
Batteries certified for use with the KESSEL
Staufix® FKA are Duracell 9 Volt Type MN
1604/6LR61 (Requirement - 2). If discarding
batteries, please do so properly.
9. Technical Data for control unit
Voltage
120 Volt AC (USA model) / 230 Volt AC (European Model)
Frequency
60 Hz (USA model) / 50 Hz (European Model)
Signalling device with auxiliary connection
42 Volt DC / 0.5 A
Operating temperature range
32 deg F - 104 def F (0°C - 40°C)
Splash protection rating
IP 54 (Splash proof)
Motor cable check cycle
Checked each time motor is operated
Optical probe cable check cycle
Continuously during power operation / Every 60 sec during battery operation
Optical probe check cycle
Continuously during power operation / Every 2 sec during battery operation
Battery condition check cycle
Every 300 sec
Motor closing time
30 seconds
21
Everything for drainage
10. Inspection and Maintenance
10.1 Inspection
The Staufix® FKA should be inspected every
month by the operator or a person authorized
to do so. The control unit and valve should be
visually inspected and the motorized flap
should be closed and re-opened by pressing
the ‘CLOSED / TEST FLAP’ button on the
control unit. The manual flap closure lever
should also be closed and opened by hand
several times to make sure that it is in proper
working order. When the monthly inspection
is completed, make sure that both the
motorized and manual backwater flaps are
both in the open position so that wastewater
can drain normally through the valve.
10.2 Maintenance
The Staufix® FKA must be inspected every six
months by a licensed professional servicer as
shown in Illus. 15 - 19. It is important not to
drain any plumbing fixtures connected to the
Staufix® FKA during this inspection and also
not to perform this inspection during times of
potential backwater (heavy rain / flooding).
Everything for drainage
Illus. 15
a) Close the motorized flap using
the ‘CLOSED / TEST FLAP’ button
and also close the manual flap
by hand using the manual flap
closure lever.
b) Unscrew the six nuts on the
cover of the valve
c) Remove the cover being careful
not to pull on the cables connected
to the control unit
Illus. 16
a) Remove both backwater flaps
along with their housings
b) Clean all parts
c) Check condition of all rubber
seals
Apply grease to all
seals and to curved
interior of motorized
flap grip.
22
Illus. 17
a) Apply grease to the rubber seal
on the outside of both of the
support brackets and also apply
grease in the body of the valve
where the support brackets are
seated
b) Replace both backwater flaps
along with their support
brackets in their appropriate
slots
c) Replace the cover. Retighten
the six bolts in a crosswise pattern to a torque of 6 lbf-ft (8Nm).
d) Now carry out a operational and
optical probe check as described
in section 10.3 and 10.4
10. Inspection and Maintenance
Close the motorized flap (#7) using the
‘CLOSED / TEST FLAP’ button and also
close the manual flap by hand using the
manual flap closure lever (#6). Remove the
1/2 inch plug (#1) from the cover of the
Staufix® FKA with a large screwdriver and by
hand screw on the funnel (#2) with its
extension if available (#3, not included).
Now pour water into the funnel until a level
of 100 cm (1 meter) is reached. Over the
next ten minutes observe the water level in
the funnel and refill if necessary keeping
track of how much water is needed to keep
the water level constant. If after ten minutes
the amount of water needed to keep the
water level constant at 100 cm is less than
500 cubic centimeters (1/2 liter, approx 1/2
quart), the backwater valve is considered to
be water tight. This is a performance test
Illus. 18
TEST FUNNEL
10.3 Operational Check
(According to DIN 19578)
(Please see Illustration 18)
10.4 Testing the optical probe
(Please see Illustration 19)
Unscrew the two screws on the optical probe and
remove the optical probe. Immerse the lens of the
optical probe in a glass of water. The motorized flap
should begin to close as well as the visual and
audible alarms sounding once the motorized flap is
fully closed. As soon as the optical probe is removed
from the water, the motorized flap should re-open
and the visual and audible alarms should stop. If the
optical lens is dirty it should be cleaned with a clean
soft cloth or tissue. When finished, re-insert the
optical probe and tighten the two screws.
Illus. 19
used by the German Industry Norm. After
the test, remove the calibration funnel and
extension tube by hand and with a large
screwdriver firmly replace the plastic plug.
Re-open the manual closure lever by hand
to the ‘open’ (vertical) position and re-open
the motorized flap by pressing the ‘CLOSED
/ TEST FLAP’ button on the control unit.
23
Everything for drainage
11. Replacement Parts
Description
FKA Motor (limited submersibility) (IP 68)
Signalling device with auxiliary connection
Audible signalling device with extension cable (33 feet)
Audible signalling device with extension cable (66 feet)
FKA cover with manual closure lever
FKA motorized flap with large rubber seal
FKA motorized flap housing with large rubber seal
Manual closure backwater flap with housing
Test funnel
Seal for FKA cover with manual closure lever
Inner large seal for motorized flap
Outer thin seal for motorized flap housing
Outer seal for manual closure backwater flap housing
Seal for manual closure backwater flap (flat seal)
9 Volt battery (x1)
Everything for drainage
Order Number
80075
80072 (Option -7 / USA)
20161
20162 (Option -6 / USA)
80026
80031
80032
80036
70214
70202
70230
70240
70157
70156
197-081
24
12. Warranty
This product is warranteed to be free of
defects in material and workmanship. This
warranty is for a period of six (6) months and
begins with the date of purchase. This
warranty is only valid on material and
workmanship that upon the manufacturer’s
inspection is deemed to be the fault of the
manufacturer. Warranty claims shall be
submitted to the manufacturer in writing. In
cases where the manufacturer is found to be
at fault, the manufacturer shall have the
option of repairing or replacing the defective
25
item. The manufacturer shall not be
responsible for any labor or shipping
charges or any loss, injury or damages
whatsoever, including incidental or
consequential damages.
Everything for drainage
Notes
Everything for drainage
26
Notes
27
Everything for drainage
Everything for Drainage
Solutions from a single source
Backwater valves and cleanouts
Polymer and cast iron drains
Volatile liquid traps
Lifting stations, pumps, warning
and control units
Rainwater management systems
Grease, starch and oil / fuel
separators
Inspection chambers
Custom projects for industrial
applications
Polymer pipe fittings
Stainless steel drains and
channels
Everything for drainage