1
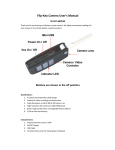
Nemesis™ User Manual
1. Lens
2. USB Slot
3. LED indicator
4. Hole to wear on a necklace (necklace not included)
5. Start recording/stop recording button 6. Power ON/OFF button 7. Micro SD card slot
8. Pin
BEFORE USING THE CAMERA FOR THE FIRST TIME
Be sure you have a micro SD card. The device has no built in storage and will not work without one. To be able to
record for the full 2 hours and 30 minutes, be sure the device is fully charged (see below) and you have enough free space
on the micro SD card. Each hour of video requires up to 6.7 GB of free space (up to 16.75 GB for the full 2 hours and
30 minutes).
Make sure you are familiar with how to operate the camera and how to use the LED indicator (3) to know when the
device is stopped (solid red light) or recording (blinking red light). See below for detailed operating instructions. You
may also want to take some sample video to make sure everything is working properly and to get a feel for the camera’s
viewing angle. You can try pinning it on your shirt (rotate pin clasp (8) to secure or release pin) or wearing it on a
necklace (4).
And most importantly, be sure to use common sense, obey all laws, and be respectful. Any place where an individual is
entitled to a reasonable expectation of privacy (i.e. bathrooms, bedrooms, etc.), video recording is strictly prohibited by
law. Local governments and private establishments may also have additional laws and/or regulations regarding the use of
cameras. ReliveTONIGHT stresses that all Nemesis users obey such laws and regulations. In addition, if anyone asks
you to turn the camera off, please respectfully do so. The Nemesis’s intended use is to be a fun way to relive the
highlights of your social event. ReliveTONIGHT does not condone the use of its cameras in any way that violates the
law.
CHARGING THE CAMERA
The camera comes with a built-in rechargeable lithium-ion battery. To maximize the life of your battery, it is
recommended that you first use the battery until it is completely exhausted, and then fully charge the battery before using
the camera for your social event. It can be charged by using the included USB cable to connect it to a computer or any
5V 500mA USB charger (most cell phone chargers). During charging, the LED indicator blinks red. After a full
charge, the LED indicator will stop blinking and stay red constantly while still plugged in.
LED INDICATOR
1) Standby mode (power is on but camera is not recording): the red light will be constant.
2) Video is recording: the red light will blink once every three seconds.
3) Battery power is low: the red light flashes quickly and turns off. What has been recorded will be saved automatically.
4) Memory card is full: the blue light flashes quickly and turns off. What has been recorded will be saved automatically.
5) No memory card: the red and blue lights flash quickly for about 10 seconds, and then automatically turn off.
6) Power is off: both red and blue lights are off
PINNING THE Nemesis ON A SHIRT
Rotate the pin clasp to free the pin. Put the pin through shirt material, being careful not to poke yourself as the pin is
sharp. Guide the pin back into the clasp while it is in the open position, and then rotate the clasp to lock the pin in.
OPERATION
Turn the device on:
Insert a Micro SD card into the Micro SD card slot (7). Press and hold the power ON/OFF button (6) for 2 seconds.
The red and blue light will go on at the same time for a few seconds. When the blue light goes off and the red light
stays on, the device is now in standby mode and ready to start recording.
Record video:
In standby mode, press the start recording/stop recording button (5) once. The LED indicator will now flash red once
every three seconds to indicate that it is recording.
To stop recording, press the start recording/stop recording button again. The LED indicator will stop blinking and be a
constant red. The video will be saved and the device will be back in standby mode.
If the user never presses the start recording/stop recording button again to stop recording, the camera will keep recording
until the battery runs out or the memory card is full.
Turn the device off:
When the device is either in standby mode or recording mode, press and hold the ON/OFF button for 2 seconds. The
LED indicator will quickly flash red two times and then turn off, meaning the camera is turned off. The video files will
save automatically if the device is powered off.
Connect camera to a computer to watch, share and/or delete videos:
Follow the directions on your computer for connecting a removable storage device. The process may vary slightly
based on your computer. Connect the camera to your computer using the included USB cord. Your computer should
recognize the camera as a removable storage device (or “Removable Disk”), and give you the option to open the folder to
view the files. Select this option. Open the “DCIM” folder, and then the “100DSCIM” folder. Videos will be
initially saved as “PICT0001” “PICT0002” and so on. From here, you can click on each file to play the video. If your
computer does not automatically recognize the device, you should be able to go to the “My Computer” folder and select
the device (“Removable Disk”) from there.
To play a video, either double click the video you want to play (this should open it with your computer’s default video
player) or use your video player to open and play the file. The video player must be able to play videos in AVI format.
From the “100DSCIM” folder, you can also delete unwanted videos (click on them and press delete), rename them, or
transfer files from the camera to your computer to free up more space for future recordings.
Note:
If the camera was recording for more than 30 minutes at a time, it will automatically save every 30 minutes as a separate
file. For example, if the camera was recording for an hour and 15 minutes, it would save the video as two 30 minute
files and one 15 minute file.
DISPOSAL
Please pay attention to environmental regulations for disposing of electronics with lithium ion batteries. Do not throw
the device into a fire, chemical liquid, or any other dangerous material, otherwise an explosion or any unexpected results
may occur.
CAMERA SPECS
Video format
AVI
Code
M-JPEG
Video resolution
1280 * 720
Lens angle
120 degrees
Video frame
30fps
Video ratio
16:9
Any player that can decode M-JPEG and play AVI files, such as
Playing video
Quick Timer Player, MPC player, Windows Media Player.
USB compatible systems
Battery working time
Voltage
Windows ME/2000/XP/2003/Vista/7/8;Mac OS;Linux;
About 150 minutes (2 hours 30 minutes)
DC-5V
USB slot
Mini 8Pin USB
External memory
Micro SD card
TROUBLESHOOTING
Device will not turn on/stay on:
1) Make sure the battery is charged.
2) Make sure the micro SD card is inserted properly and there is available space. A micro SD card is required for
operation and the device will not work without one. If there is no Micro SD card, or if there is no space left on the
Micro SD card, the device will shut off automatically.
3) Be sure to press and hold the power ON/OFF button for at least 2 seconds.
My computer cannot play the video file:
1) Make sure the program you are opening it can decode M-JPEG and play AVI files. The most up to date versions of
Windows Media Player and Quick Time, MPC and VLC should work. If these players do not work, you may need to
update your software or download and install a plug-in.
2) If the file size is very small, it may be because the camera was almost out of battery when the user tried to start a new
video. When the battery is almost completely exhausted, it reserves just enough power to save what has been already
recording, and then shuts off. Since it saves a very small portion of its power for this function, after this happens you
may be able to turn it on briefly for a few more seconds before it is completely dead. However, if you try to record a
new video at this time, the camera may begin recording a new video file for a few seconds, but not have enough time to
save it properly.
The camera will not charge properly:
1) Be sure the USB cord is inserted securely.
2) If the battery has not been used in a long time, it may go into protection mode to preserve its battery life. To
re-activate the battery, use the USB cord to plug the device into a computer or 5V 500mA USB charger (most cell phone
chargers) for 30 minutes. Unplug the device and turn it on for about a minute, and then re-connect the device and
charge it for 12 hours. This will re-condition the battery for long use.
Video seems to lag during playback:
1) Video playback can require a significant amount of your computer’s resources. Close extra programs on your
computer that are taking up some of your computer’s resources to improve performance. If this still doesn’t work, try
restarting your computer. Sometimes programs are still running in the background and restarting your computer may
close some of these and speed up performance.
2) Try transferring the video to your computer first, and then playing the video from the file on your computer. Most of
the time you should just be able to play it right from the device, but if there is a lot of data going through the USB port, it
may cause the video to lag on some computers.
For additional troubleshooting, visit our FAQ section at www.relivetonight.com/faq