1
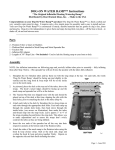
What is calibration?
In order to know where the participant’s eyes are fixating on the computer screen, you must first
“teach” the computer what the eye looks like when the participant is fixated on known locations on
the screen. This is what happens during the calibration and validation procedure. During a
calibration session, the participant fixates on 9-13 points on the screen while the eyetracker
monitors the eye. After calibration is performed, the computer then “validates” the information by
re-presenting the targets and determining whether its estimation of eye position is indeed close to
the known position of the targets. If errors are found to be minimal, calibration is indicated as
successful (green bars appear on the EyeTracker Monitor), and the trials may start. During the
experimental trials, the computer interpolates between the calibrated landmarks to determine where
the eye is fixating on the screen.
What parts of the eye does the calibration focus on?
The tracker operates by tracking the pupil of the eye (the “dark/black” part of the eye, which will
appears as filled-in with blue in the camera-view of the eye), as well as the “corneal reflection” (a
reflection off of the cornea that appears in yellow on the eye-view). The relative positions (and
size) of these two landmarks are measured as the participant looks at specific points on the screen
during calibration. During the rest of the experiment, the tracker figures out where the eye must be
looking, depending on the relative size of the pupil as well as the relative location of the pupil and
corneal reflection. Anything that disrupts the pupil capture, or interferes with the corneal reflection
will cause calibration to be very difficult (or impossible).
How many calibration points do I need to get accurate tracking?
You have the choice of calibrating/validating with 3, 5, 9 or 13 points on the screen. The default is
generally 9 spots, though this can be changed easily.
From within the Experiment Builder interface, navigate to the “EL_CAMERA_SETUP” node in
your experiment. In the “Properties” panel on the bottom left-hand side of the screen, you will see a
“Calibration Type” property with a set of pull-down options. Choose “HV 9” if you would like the
9-point calibration. Choose “HV 13” if you would like the 13-point calibration. Anecdotal reports
from the Dassonville Lab indicate that calibration with 13-points is superior to 9-points (and only
takes a little longer to run through).
Alternately, you may change the calibration pattern from the EyeTracker monitor by clicking the
“Set Options” button from the main screen, and then clicking on the 13-point icon in the
“Calibration and Validation” section (upper left-hand side of the screen).
What assumptions does the calibration mechanism make?
Vergence
Calibration is done assuming that the participant is always focusing at screen depth (that is,
at the same plane as the screen). Any vergence movements (e.g. crossing or uncrossing
eyes) will be treated as the eyes moving on the screen. So, if you are attempting to show
“3d” objects while doing eyetracking, you may not be able to get accurate location
information from the eyetracker. (In addition, if your participant is tired and “zoning out” or
fixating “behind” the computer screen, you may see unanticipated changes in the eye
position making calibration and drift-correction difficult.)
6/29/07
2
Lighting
The eyetracker assumes that the eye is constantly lit. Therefore, it assumes that any changes
in pupil size occur because of a change in eye location. So, if you are running a participant
in near-complete darkness (with pupils quite large), and suddenly a bright white screen is
presented (or even a smaller luminant object on the screen), the pupil will constrict
somewhat and this will be interpreted as an eye movement (likely a “dip”), even though the
eyes may have remained steady on the screen. This is not usually a problem if you are
running in dim-to-normal light, but may be an issue if you are running in near-darkness.
For more information on calibrating, see Section 2.3.4 in the EyeLink User’s Manual found on the
stimulus-presentation computer at: (C:\Program Files\SR Research\ELCL_UserManual.pdf).
How do I calibrate someone?
1. Start the EyeTracker (open up EyeLink, by pressing “t” from the C:\ prompt on the EyeTracker
computer).
2. Have the participant sit comfortably in the chair with his chin on chin-rest. (The chin rest may
easily be adjusted by turning the handles on either side to loosen and then tighten once chinrest is in
the appropriate spot. Note that the handles/dials turn in opposite directions from one another.)
3. Ensure that the participants’ eyes are visible from the camera view. If your participant is
shorter- or taller- than average, you may need to physically adjust the camera itself, using the grey
knob at the neck of the eyetracker. Loosen knob to move tracker, then tighten knob to ensure
tracker stays in the correct place.
4. Once you can see both eyes on the EyeTracker Computer, use the mouse to “click” in the center
of each eye. This should cause a green diamond and red circle to surround each eye more or less
symmetrically (the “clown” view). These guides let the tracker know where to expect the eye.
5. Adjust pupil and corneal reflection (CR) thresholding as needed.
PUPIL THRESHOLDING:
- use the “up” and “down” arrow keys to change thresholding of the pupil; “up” includes
more of the eye in the pupil, “down” decreases the amount of eye considered to be pupil
-PUPIL number should be in the 80s (high 70s – low 90s) for experiments run in dim
to regular lighting
CORNEAL REFLECTION THRESHOLDING:
-use the “+” and “-” keys (no shift needed) to change thresholding of CR
-CR (corneal reflection) number should be around 230s for experiments run in dim to
regular lighting
6. Press “C” to calibrate (or click on “Calibrate” on the EyeTracker Monitor)
7. Once successful, press “V” to validate (or click on “Validate” on the EyeTracker Monitor)
8. If validation is successful, press “O” to begin experimental trials
6/29/07
3
In general, these commands are used to calibrate, and then switch to running trials:
“ENTER” = switch to camera view of eyes
-once in this view, using the RIGHT and LEFT arrow keys will toggle between
right, left and full-field view of eyes
-ideally the entire pupil will be blue (with no eyelashes as blue)
-usually the tracker automatically calibrates pupil-size and corneal
reflection (CR) appropriately; if it does not work, you can change the
thresholds for pupil (P) and CR
“C” = calibrate – starts the calibration process
-on the eyetracker computer display screen you can choose to use the 9-dot
calibration pattern or 13-dot pattern; 13-dot pattern will take longer but result in
finer-grained tracking resolution
-once the initial target appears on screen, press “space” or “enter” to start
-make sure result is a green “GOOD” for all tracked eyes
-to “force” the tracker to accept a less-than-ideal calibration, press the
“FORCE ACCEPT” button on the right-hand side of the screen
“V” = validate – essentially a check of the calibration; must run after calibration
-again the result should be a green “GOOD” for all tracked eyes
“O” = once the calibration has been performed, press “o” to jump to the actual trials
-can also be used after re-calibrating subject to get back to actual trials
“ESC” = when pressed during the “drift correct” portion of a trial, this will jump you back
to the calibration/set-up screen
-press this if participants are not able to start the next trial because of calibration
issues
-also use if participant takes a break and needs to be recalibrated before re-starting
the experiment
“CTL” + “C” = to exit program without finishing, press control and “C” to cancel out; all
trials up until the point of cancellation should still be saved in the .edf file
If pressing a command key doesn’t work, try pressing “ENTER” and then letter command.
See next page for calibration tips.
6/29/07
4
Helpful hints for successfully calibrating and running participants:
MASCARA: do not allow participants to wear mascara!! (Seriously – put it in the sign-up!!)
Since the tracker tracks the pupil of the eye (the “dark” part of the eye), eyelashes with
mascara on them will be counted as “pupil” and the calibration will not be successful.
GLASSES: are generally OK to wear; make sure that the large, square (yellow) reflection off of the
glasses does not interfere with the pupil capture or corneal reflection.
If the reflection on the glasses is getting in the way of the pupil, try tilting the glasses
slightly forward (or backwards) on the person’s face. Also try sitting the participant slightly
higher or lower within the camera’s view or moving the glasses further up or down on the
nose.
CONTACTS: are generally are OK to wear; make sure participants’ eyes are not overly watery
If you see more than one corneal reflection, try to readjust participant relative to camera’s
view. Sometimes contacts cause eyes to dry out; allow participant to rest and try again.
I’ve tried calibrating six times and it won’t work! What do I do?
Re-threshold pupil and CR
If you have re-calibrate a participant a few times and are not successful, it is possible that
you have not entered ideal parameters for the pupil and CR thresholds. Go back to the
Camera View (hit “ENTER”) and ensure that the pupil is indeed filled-in with blue and that
the yellow CR is visible. Ask the participant to move his eyes in sequence to the corners of
the computer screen. Inspect the Camera View for anomalies as the participant moves his
eyes. In particular note whether the pupil has “static” in it, which is an indication that you
should increase the pupil threshold number. Also look to see whether the CR is not visible
from a certain position, which indicates that you should probably reposition the participant.
If participant has glasses, check for interfering reflections
Ask the participant to look from one corner of the screen to the next while you inspect the
Camera View. Look to see whether large, square, yellow reflections off of the glasses
lenses are obscuring or interfering with the yellow CR. If so, try tilting the glasses or
adjusting the chin-rest height to minimize the interference.