1
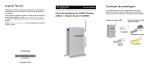
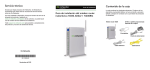
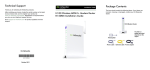
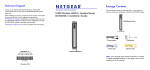
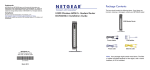
Technical Support Easy, Reliable & Secure Thank you for selecting On Networks products. On Networks recommends that you use only the official On Networks support resources. After installing your device, locate the serial number on the label of your product and use it to register your product at www.on-networks.com/register. Registration is required before you can use our telephone support service. Visit support.on-networks.com for product updates and web support. Installation Guide N300 Wireless ADSL2+ Modem Router N300RM Installation Guide Package Contents The box should contain the following items. If any items are incorrect, missing, or damaged, contact your On Networks dealer. N300 Modem Router The filter or splitter provided depends on the region. Filter/splitter Power adapter Phone cable On Networks November 2012 Ethernet cable Compliance You can follow this diagram to connect your modem router, or follow the instructions in this booklet. For the complete EU Declarations of Conformity, visit : support.on-networks.com/doc. 1. ADSL This symbol is placed in accordance with the European Union Directive 2002/96 on the Waste Electrical and Electronic Equipment (the WEEE Directive). If disposed of within the European Union, this product should be treated and recycled in accordance with the laws of your jurisdiction implementing the WEEE Directive. 3. Computer Phone ADSL Line 2. Power Declarations of Conformity 4. Browser Intended for indoor use only in all EU member states, EFTA states, and Switzerland. Contents Before You Begin . . . . . . . . . . . . . . . . . . . . . . . . . . . . . . . . . . . . 2 Install Your Modem Router . . . . . . . . . . . . . . . . . . . . . . . . . . . . . 3 Preset Wireless Security . . . . . . . . . . . . . . . . . . . . . . . . . . . . . . 5 Wireless Network Settings . . . . . . . . . . . . . . . . . . . . . . . . . . 6 Add Wireless Devices to the Network . . . . . . . . . . . . . . . . . . . . 7 WPS Method . . . . . . . . . . . . . . . . . . . . . . . . . . . . . . . . . . . . 7 Manual Method . . . . . . . . . . . . . . . . . . . . . . . . . . . . . . . . . . 7 Access the Modem Router to Make Changes . . . . . . . . . . . . . . 8 Troubleshooting . . . . . . . . . . . . . . . . . . . . . . . . . . . . . . . . . . . . . 9 1 Before You Begin Make sure that your DSL service is active before you install the modem router. You need the information that is listed here to install your DSL modem and connect to the Internet. Locate it and have it on hand before you start the installation procedure. • DSL user name and password. This information is included in the welcome letter your DSL ISP sent you when you signed up for your service. Record your DSL Internet service account user name and password here: User name: Password: • Your telephone number or DSL account number. If you do not have voice service, you can use your DSL account number in place of a phone number. 2 Install Your Modem Router A microfilter filters DSL interference out of standard phone equipment that shares the line with DSL service. Examples of devices are telephones, fax machines, answering machines, and caller ID displays. 1. Connect the ADSL. Phone ADSL Line 1 a. Install an ADSL filter/splitter between the phone line and the phone. b. Connect the ADSL port of the modem router to the ADSL port of the filter/splitter. c. If your modem router and telephone connect to the same phone line, use an ADSL filter/splitter for every phone line in the house. 3 2. Add power to the modem router. Phone ADSL Line 2 a. Connect the power adapter to the router, and plug the power adapter into an outlet. b. Wait for the WiFi LED on the front panel to light. If none of the LEDs on the front panel are lit, press the Power On/Off button on the rear panel of the modem router. 3. Connect a computer. You can use an Ethernet cable or connect wirelessly. 3 • • Phone ADSL Line Use the yellow Ethernet cable to connect your computer to an Ethernet port on your router. Or connect wirelessly by using the preset wireless security settings on the label on the bottom of the router. 4 4. Open a browser. If an On Networks screen does not display, close and reopen the browser and enter http://www.mywifirouter.com (or http://192.168.0.1/index.htm) in the address bar. See Troubleshooting on page 9. Preset Wireless Security This product has a unique WiFi network name (SSID) and password. To protect and maximize your wireless security, the default SSID and password are uniquely generated for every device, like a serial number. This information is on the label on the bottom of the product. On Networks recommends that you do not change the preset WiFi network name (SSID) and password. If you change these settings, 5 the security, SSID, and password on the label no longer apply. Wireless Network Settings Record the default preset wireless settings that are printed on the label in the spaces for easy reference. WiFi network name (SSID): Network key (password): If you change the default settings, record them here for easy reference, and then store this booklet in a safe place: WiFi network name (SSID): Network key (password): To retrieve or update your wireless password, type http://www.mywifirouter.com in a web browser, and log in using the default user name (admin) and password (admin). Select Wireless Setup to locate your wireless password. 6 Add Wireless Devices to the Network Choose either the manual or Wi-Fi Protected Setup (WPS) method to add wireless computers and other devices to your wireless network. WPS Method When your wireless device supports WPS (Wi-Fi Protected Setup), you might be prompted to press the WPS button on the router instead of entering a password. If you are prompted: 1. Press the WPS button on the router. 2. Within 2 minutes, press the WPS button on the client device. Otherwise, follow the WPS instructions that came with your wireless device to complete the WPS process. The device is then connected to your router. 3. Repeat this process to add other WPS wireless devices. Note: WPS does not support WEP security. If you try to connect a WEP client to your network using WPS, it does not work. Manual Method 1. On the wireless device (iPhone, laptop, computer, or gaming device) that you want to connect to your router, open the software utility that manages the device wireless connections. This utility scans for all wireless networks in your area. 2. Look for the preset WiFi network name (SSID) and select it. The SSID is on the product label on the bottom of the router. Note: If you changed the name of your network during the setup process, look for that network name. 3. Enter the preset password (or your custom password if you changed it), and click Connect. Repeat steps 1–3 to add other wireless devices. 7 Access the Modem Router to Make Changes After you set up the modem router, you can log in to the router to view its settings or change them. To log in to the modem router: 1. Launch a web browser from a computer or wireless device that is connected to the modem router. 2. Type www.mywifirouter.com in the address field of the browser. A login screen displays: 3. Enter admin for the user name and admin for the password. The modem router interface screen displays: See the user manual for more information about the modem router screens. 8 To change the password for the modem router user name: 1. Log in to the modem router. 2. Select MANAGEMENT > Set Password to display the Set Password screen: 3. Type your old password, and type the new password twice. Troubleshooting When the browser does not display the web page: • • • • • Make sure that the computer is connected to one of the four LAN Ethernet ports, or wirelessly to the router. Make sure that the modem router has full power and that the WiFi LED is lit. Close and reopen the browser to make sure that the browser does not cache the previous page. Browse to http://www.mywifirouter.com. If the computer is set to a static or fixed IP address (which is not common), change the setting to have the computer obtain an IP address from the modem router. Refer to the manual that came with your computer for instructions. 9 If the modem router is unable to access the Internet: 1. Check your cables. • Disconnect and reconnect each cable. There is usually an audible click when the cable is correctly connected. • See if the telephone cable connecting your DSL modem router to the wall jack is plugged into a filter. A filter is not required when you do not have telephone voice service. A filter that is installed where it is not needed eliminates your ADSL signal. 2. Power down your DSL modem router, and then power it up again. a. Shut down your computer and turn off the modem router. b. Unplug the power adapter and all other cables from the back of the DSL modem router. c. Wait 30 seconds, then reconnect the cables and adapter to your DSL modem router, and turn it on. d. Make sure that the router Power LED is lit. If the LED is off, try plugging the adapter into another power outlet. e. Turn your computer back on, and wait for the indicator LEDs to turn green. 3. Open a web browser and try to access the Internet. When steps 1–3 do not resolve the problem: 4. Reset your modem. To reset your DSL modem router, use a pin or paper clip to press and hold the Reset button for at least 7 seconds. (The Reset button is located inside a small hole on side panel above the On Networks logo.) Reset button 10