1
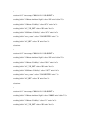
INTERCEPT V.5
USER MANUAL
December 5, 2011
1. Introduction
1.1
1.2
1.3
Document Conventions……………………………………………pg 3
Getting Started……………………………………………………..pg 4
Administrator Log In………………………………………………pg 5
INTERCEPT® Station Configuration……………………………..pg 6
2. User Interface
2.1
2.2
User Roles…………………………………………………………..pg 7
Overview……………………………………………………………pg 7
3. Menus
3.1
3.2
3.3
3.4
3.5
User Menu…………………………………………………………...pg 10
Records………………………………………………………………pg 10
Data Log……………………………………………………………...pg 11
Archive Files…………………………………………………………pg 12
Help…………………………………………………………………..pg 14
4. Observer
4.1
4.2
4.3
4.4
4.5
Observer Perspective…………………………………………………pg 15
Station Groups and Navigation……………………………………….pg 16
Weather Summary……………………………………………………pg 16
Wind Dials……………………………………………………………pg 17
Status and Alerts……………………………………………………...pg 17
5. Maintenance
5.1
5.2
5.3
5.4
5.5
5.6
5.7
5.8
5.9
Station Status…………………………………………………………pg 18
Settings……………………………………………………………….pg 18
Data Collection……………………………………………………….pg 19
Stations……………………………………………………………….pg 19
Data Elements………………………………………………………..pg 21
Diagnostics…………………………………………………………...pg 22
Data Display………………………………………………………….pg 22
Alerts………………………………………………………………….pg 22
Groups………………………………………………………………..pg 23
6. Maps
6.1
Map Display…………………………………………………………..pg 25
7. Administrator
7.1
User Administration………………………………………………….pg 26
8. External Data
8.1
External Data Feed…………………………………………………..pg 28
Appendix A
Troubleshooting……………………………………………………………...pg 31
1. INTRODUCTION
Coastal Environmental System's INTERCEPT® application connects to one or more
stations to retrieve weather data. INTERCEPT® is installed on a PC that is connected to
the stations either directly or over a radio or phone modem link.
A station is a ZENO® or WEATHERPAK® with sensors attached. The INTERCEPT®
software performs the following functions:
•
•
•
•
•
•
Gathers and displays the latest data from the configured data acquisition systems.
Monitors the data quality.
Checks the data for user configured alarm conditions and issues alarm messages
accordingly
Archives data to disk.
Provides a data feed of real-time data, which can be collected for analysis on
other systems.
Allows multiple users to view the data on their own desktop via the web-based
user interface (UI).
INTERCEPT® can be installed on a PC or server running Windows XP, Windows 2003
server, VISTA or Windows 2008 Server.
1.1 Document Conventions
Alarm: Used to refer to status information generated by a sensor, WEATHERPAK® or
ZENO®, or the INTERCEPT® application.
Alert: An indication generated on the UI [and within the XML feed] when an alert
condition is met. An Alert condition is a set of criteria applied to one or more data
elements as established by the user.
Algorithms: Computations performed by the INTERCEPT® application (as opposed to
averaging or other computations done within a sensor or by the ZENO®).
BIT: Built-In-Test information is returned from the ZENO®. Some sensors also return
bit encoded status information but that will be referred to as sensor status.
Log files: Standard data files written by INTERCEPT®. There are log files for raw data
as it comes in from the stations, any algorithms that run in the application, Maintenance
logs of all system status information and alert logs. The set of log files generated is
determined by the type of INTERCEPT® system and the stations connected.
Perspective: All of the content available to a specific user role. It includes all the
content that can be reached through any tab or button on the screen, not just the visible
content.
Role: Specific way in which a user can interact with INTERCEPT®. Observers
primarily view data. Maintenance users can configure settings related to the stations,
communication with the stations and how the data is displayed for Observers of the data.
Administrators manage user accounts. A particular user can be assigned to one or more
roles though only one role's perspective is active at a time.
Skin: Set of colors and graphics applied to the screen. Changing the skin modifies the
aesthetics of the screen without changing the content or position of any elements. Skins
are also sometimes called themes.
View: Display as seen by a particular user perspective or role. For the Observer and
Maintenance perspective the view does not contain all the content available to the user
since the content is contained in tabs, each presenting a subset of the entire content
available in that perspective.
1.2 Getting Started
INTERCEPT® is delivered on a CD containing an installer and custom configuration
files created at CES. The configuration files are installed along with the application.
Instructions for installing INTERCEPT® are included on the CD.
CES creates your custom configuration while testing your stations. Each station is added
to INTERCEPT® and the communication settings are configured according to your
instructions. The Observer screen layouts are configured to display the data coming from
your stations. If you have more than a few stations then the stations may be organized
into groups.
These configuration settings are included in the version of the software when you install
it on your own server. In some cases INTERCEPT® will begin receiving data from your
stations as soon as it starts running and the stations are connected. In other cases you may
have to adjust some communication settings. See the section on Data Collection for
instructions on configuring stations.
INTERCEPT® comes with default users assigned for each of the User roles. Additional
users can be added using the Administrator screen.
The default Administrator log in is:
ID: admin
PW: coastal
1.3 INTERCEPT® Station Configuration
Once INTERCEPT® is installed you can configure your station or stations. Coastal
configures systems before shipping based on information that you provide. You may
need to adjust certain properties, such as the communications settings. Also,
INTERCEPT® may be best viewed on a display with resolution set to a minimum of
1280 x 1024.
You need the following information to configure a station:
• The station ID. This is the unique ZENO® ID for the station and will be set by CES.
• How the station connects to the computer running INTERCEPT® - Serial port, TCP/IP
or modem.
• The configuration information for the connection.
• The data interval for the station.
• Whether the station is polled and if so the polling interval.
It is a good idea to do the basic configuration for one station and confirm that it is
communicating correctly with INTERCEPT® before configuring the display. You can do
this by following the instructions in Basic Settings under section 5.4 Stations. Once you
have a station configured and enabled, INTERCEPT® will begin receiving data from the
station immediately. You can verify that the data is coming in by switching to the
Observer perspective. Using either the summary screen or the station tab for the station,
review the data. Note that for stations with a low update frequency, you may have to wait
for the next data interval to complete before you will see data.
2. USER INTERFACE
2.1 User Roles
INTERCEPT® supports five user roles. Four of the roles provide access to various
functions in the application through the user interface. The fifth role, external user,
provides access to an xml data feed. How an external user accesses the feed is described
in the External User section. The four roles with perspectives in the user interface are:
•
•
•
•
Observer - a user who views the weather data
Maintenance - a user who configures the systems and reviews diagnostic
information
Administrator - a user who creates and edits user accounts, assigning
permissions to the available roles
Map - optional add-on feature that provides a map view showing the locations of
all stations connected to INTERCEPT ® with the data for the currently selected
station on the right-hand side.
A user can be assigned to more than one role. At least one user must have Administrator
permissions so that accounts can be managed.
The application ships with default user accounts created for each of the roles. The
account information for these accounts is included in the installation instructions.
2.2 Overview
The INTERCEPT® application has two parts. The INTERCEPT® server, installed on the
computer that is connected to your stations, collects data, logs activity and responds to
requests from the client. The INTERCEPT® client user interface (UI) is accessed
through a browser. The URL is:
http://hostname/intercept/
where hostname is the IP address or domain name of the server running your
INTERCEPT® software.
The UI requires the Adobe Flash player. If you try to run the client without the correct
version of the player, a warning will be displayed along with a link to the download
location on the Adobe site. If your system cannot access the Adobe site, the installer for
the Adobe Flash player is included on the INTERCEPT® installation CD.
The UI polls the INTERCEPT® server for data at a regular interval. This interval, the
INTERCEPT Client Polling Interval, is set on the Settings tab of the Maintenance UI.
The default is thirty seconds. If your stations are being polled less frequently, you can
increase this time.
The UI is arranged into three sections. The menu bar runs along the top of the screen. The
large section of the screen beneath the menu bar is the data area. The content of the data
areas is determined by the current perspective. A status ticker runs across the bottom of
the display.
The left side of the menu bar contains drop-down menus. These are described in detail in
the Menus section of this documentation. The menus are displayed for all users except
those logged in with only the Map role.
If you log in to an account with more than one type of access permission, the right-hand
side of the menu bar lists the perspectives available to you. If you have been assigned to
all three of the UI perspectives then Observer, Maintenance and Administrator will be
listed in that order. The active perspective is highlighted in orange. Clicking on one of the
other perspectives reloads the data area with the content association with that perspective.
The content of the data area is described in detail in the Observer, Maintenance and
Administrator sections of this manual.
The Observer and Maintenance perspective are further organized into tabs that run
across the top of the data display. The currently selected tab is highlighted in orange. This
organization allows INTERCEPT® to provide access to more data than would fit onto
one screen.
INTERCEPT® tabs available in the Observer screen may include any of the following
tabs depending on how the system has been configured:
•
•
•
Weather Summary tab containing the data for all stations presented in a tabular
format.
Wind Dial tab showing the wind dials for all stations.
Station tab for each station or, if the stations are grouped, for each station in the
currently selected group.
Beneath the data display is a status ticker. The status ticker is shown for all perspectives
and shows the most recent status, alarm and alert information for the stations. The ticker
also provides information on communications between the client and the server. If your
client cannot communicate with the server, for example, a message indicating that will be
displayed in the ticker.
At the right-hand side of the ticker is an Expand button. Clicking on this opens a Status
and Alerts window that displays the last fifty alarm and alert conditions generated by the
application.
Several tabs in the Maintenance perspective contain accordion style controls. This style
of control consists of a set of collapsible panels, only one of which can be open at a time.
The accordion headers are stacked vertically and the content area opens beneath the
header. Clicking on a header opens the corresponding content area and closes the one
that is open.
3. MENUS
3.1 User Menu
The User menu contains two entries: Log Out and User Profile. You use Log Out to exit
INTERCEPT®. This disconnects the client from the server and takes you back to the
login screen.
On the User Profile screen you can change your profile, display settings and password.
To change contact information or the display settings, make the appropriate edits in the
fields on the left-hand side of the window and then click on Submit Profile Changes.
If INTERCEPT® is configured with more than one group, you can select which group of
stations should be displayed when you log in. The Default View drop-down contains a list
of all of the station groups. The one you select will always be set as the current one when
you log in to INTERCEPT®. For Aviation systems there aren't groups so this drop-down
is empty.
The default display uses the "Day" skin, dark text on light background. There is a "Night"
skin with light text on a dark background that you can switch to using the Skin dropdown.
To change your password, enter a new password in the field on the right-hand side of the
window and click Submit New Password.
The User Profile window will stay open until you click on the "x" in the upper right-hand
corner to close it.
3.2 Records
You use the Records menu to access the data log files. Users with Maintenance
permission can also manage Archive files using this menu. Log files are dated files
written by INTERCEPT® to a log folder in the INTERCEPT® installation folder.
Archive files are data files that you can customize to export data into other systems.
Archive files are written to a path you specify. The default location is also within the
INTERCEPT® installation folder.
Log and Archive files are written folders on disk. Log files are always written to a log
folder within the INTERCEPT® installation folder. The folders are organized into a tree
structure that includes both the station ID and the date in the path. You can request that
CES configure either the station ID or date be the highest-level entry. The default is to
begin with the date. Depending on this setting, the path to each data file is either:
YYYY/MM/DD/Station ID
or
Station ID\YYYY\MM\DD
For hourly files the file name has the hour in the form "HH" added to the end of the file
name before the extension where "HH" is the two-digit hour using the 24-hour clock.
To view log files select the View Logs entry in the Records menu. A log view window
will open on the top of the display.
Since log files are written for each station you begin by selecting a station in the Select a
Station drop down. Then enter a date into the calendar entry Log Dates. The default date
is the current day. Click the Get Logs button and a list of available logs for that station
and date will be displayed in the list area.
Click on the log that you wish to view. The selected log will open in the pane next to the
list. For more information on the data logs see the Data Log section of this manual.
Once you have opened a log you can slide the log picker closed by grabbing the slider
icon and pulling it to the left-hand side of the pane. The slider icon is three parallel lines
in the middle of the right-hand side of the selection column,
To create or manage an archive file, use the Manage Archives selection in the Records
menu.
3.3 Data Log
The Data log is one of the standard log files created by INTERCEPT® and is accessed
through the View Logs option of the Records menu.
The Data log records all the data received from the station in daily log files. Each record
is displayed on one line of the display beginning with the date and time the data was
received followed by the data.
The data is arranged in the same order as the list widgets on the Station screen. Each list
widget is displayed as a group of columns, one for each element in the widget. The
columns are labeled with the short labels.
To the right of the group label is an arrow pointing to the label. Clicking on this collapses
the group. You can use this feature when there are specific data groups that you are
interested in seeing on the screen without scrolling. The arrow representing the group
changes to point in the opposite direction. Clicking on it will expand the group. You can
use this feature to narrow the data view when you are interested in a subset of the data
and wish to view it without scrolling.
3.4 Archive Files
Archive files are data files created to your specification. You specify the data to include,
the order, and which of three field delimiters to use. The first line of the file contains the
short labels for the data elements. Each subsequent row contains the data values for one
reading from the station. The delimiter you select separates the data elements.
You can also specify hourly or daily archives.
Maintenance Users can define archive files using the Manage Archives option of the
Records menu. The Archive Management pane opens with a list of existing archives.
The list contains the enabled status and path for the archive. Note that the path is a
combination of the file path to the root of the archives and the base filename. So a path
with value:
C:\Program Files\Coastal Environmental Systems\INTERCEPT1.11.15\archives\Winds
will result in archives stored in:
C:\Program Files\Coastal Environmental Systems\INTERCEPT1.11.15\archives\
with subfolders for each station. Within the station folders, archives are further arranged
by date in the structure:
yyyy\mm\dd
The day folder will contain one file named Winds.csv if daily archives have been
selected. If you select hourly files then there will be one file for each hour of the day with
the name Windshh.csv where "hh" is a two-digit identifier for the hour using the 24-hour
clock.
Beneath the list of archives are three buttons. These are to add a New Archive, Edit
Archive and Delete respectively. The later two are only enabled when you have selected
an entry in the list.
Creating an archive is a two-step process. First you define the data you want saved in the
archive file and the order. Next you specify the properties associated with the archive file.
Selecting either New or Edit will take you to the archive format screen. For New
archives, this screen defaults to the same groups defined for the Observer station layout.
Only the actual data within the groups is saved to the archive file. The group construct is
used to order the file.
The archive format screen is similar to the screen used to modify the station layout. You
can create as many groups as you like and then drag data elements from the list on the left
into groups. You can also reorder elements within groups and reorder groups by simply
dragging elements to their new location. You can delete a group by selecting the box in
the upper right-hand corner of the group box and selecting the Delete option in the dropdown that opens.
You can name a group by selecting the box in the upper right-hand corner of the group
and then entering a name in the text field in the first row of the drop-down.
When you have finished defining the archive format, click Next in the lower right-hand
corner of the screen. The screen where you set the file related properties will replace the
archive format screen. You can set five file related properties:
•
•
•
•
•
File Name - this is the base file name for the archive.
File Enabled - enable/disable file write. The default setting is Enable, checked.
File frequency - you can set archives to write daily or hourly. The hourly setting
is used when data is updated frequently and the archive file size might get too
large.
Delimiter - you can select Comma, Pipe or Tab as the delimiter between data
elements.
File Output Path - the default location is a folder called "archive" within the
INTERCEPT® installation folder.
When you are done configuring the archive file, select Save in the lower right-hand
corner. If you exit Archive Management without saving you will lose your changes. You
can also Cancel at any time during either step of the process.
To exit the Archive Manager, click on the "x" in the upper right-hand corner.
3.5 Help
The Help menu provides access to information about INTERCEPT®. The menu options
are Contents and About.
Selecting Contents from the Help menu opens a window displaying application help. The
window is split into two sections vertically. On the left side is a table of contents and the
right side displays the selected help contents.
Selecting About from the Help menu opens a window that displays the version number
and copyright information for INTERCEPT®. You close the box by clicking on the "x"
in the upper right-hand corner.
4. OBSERVER
4.1 Observer
The Observer perspective is the primary data display for INTERCEPT®. It presents data
from stations connected to INTERCEPT®. The Observer perspective has two types of
views: those that show data for all of the stations and those that show data for just one
station. The views are presented as a set of tabs spanning the display from left to right.
Two default views are configured by CES before your systems are shipped. These are:
•
•
Weather Summary
Fixed Station
The Weather Summary tab displays the data from all the configured stations in a tabular
format. CES configures this view and always makes it the first, left-most tab in the
Observer perspective.
A Station Tab is a detailed display of the data for one station. There is a Station Tab
displayed for each station in the currently selected group. The station tabs are customized
for your specific data set at CES before the system is shipped. Data is displayed in
labeled text boxes by data type. Typical data groups are:
•
•
•
•
Wind
Temperature and Humidity
Pressure
Precipitation
The Wind Dial may also be included on the station display.
The Wind Dials tab displays a dial widget for each station. CES configures this view and
makes it the second tab for each group in the Observer perspective.
For more information on the three types of Observer views and how you can customize
them further, see the Layout topic in the Maintenance section (Section 5) of this manual.
If you have more than one group of stations defined, then only the station tabs for the
currently selected station group will be displayed. You can customize your default group
using the User Profile option in the File Menu. When ever you login, the display is set to
show your default group.
In the upper right-hand corner of the window, beneath the perspective buttons is the
group selection drop-down. Use this drop-down to change which group is displayed if
you have more than one group.
At the bottom of the screen is a display field containing the most recent status or alert
condition. This is also where the client displays information about its session with the
server. For example, when you login the message "Welcome username" is displayed to
show that you are logged in and connected to the server correctly. These entries begin
with date and time followed by the message.
Entries related to specific stations show the date and time followed by a station ID and
then the relevant message text. The test for alarm conditions is determined by CES. Text
for alert conditions is set when you create alerts in the Maintenance perspective.
To the right of the status field is an Expand button. Clicking this opens a window with
the last fifty messages displayed in the status field. Additionally, alarm conditions are
logged in the Maintenance log and Alert conditions to the Alerts log.
4.2 Station Groups and Navigation
The Observer perspective has an additional control on the data display to facilitate
navigation between stations and station groups. The station tabs displayed by default are
those whose stations are part of the default group chosen in user preferences.
Navigation to stations in other groups is done using group selection drop-down in the
upper right-hand corner of the window just beneath the perspective buttons. You can
select a different group from the drop-down and it will replace the current group. Since
all groups display the Station Summary pane that will be the selected tab when you
switch groups.
4.3 Weather Summary
The Weather Summary pane is the default Observer screen. The weather summary
provides a tabular view of all the data from all of the stations. When the weather
summary is the active screen the Weather Summary tab (the left-most tab) is
highlighted.
Stations are organized into groups on the Weather Summary pane. By default all groups
will be opened. Each group can be closed or re-opened by clicking on the arrow to the
left of the group name and folder icon.
The Weather Summary uses the short labels for the data elements if these have been
created. Otherwise it will use the input data labels. Each row of the table begins with the
timestamp and station ID.
Alert conditions are displayed on the Station Summary. When alert conditions exist, the
individual table cell containing the data element whose value matches the alert condition
will be highlighted in the alert color.
4.4 Wind Dials
The Wind Dials tab displays one wind dial for each of the stations. This provides a quick
view of the wind data across all stations. Like the Station Summary screen, the Wind
Dial tab shows all the stations, not just those for the current group.
A wind dial is a graphical representation of wind data. The dial represents the 360
degrees of wind direction with North at the top of the dial. The usual configuration of the
dial is to use the pointer to show the current wind direction, the number in the center to
show the wind speed and the wedge beneath the direction tick marks to show the wind
direction variation.
4.5 Status and Alerts
The Status and Alerts window displays the most recent alarm and alert conditions. The
most recent is displayed on the top. Alerts are displayed by date, time, station ID and the
name given to the alert condition. If a device has not passed its self-test then a
notification will be displayed with the date, time, device name and the status.
The Status and Alerts display can be closed using the 'X' in the upper right-hand corner.
5. MAINTENANCE
5.1 Station Status
The primary screen in the Maintenance perspective is the Station Status pane. This pane
allows the Maintenance Technician to see the status of all the connected stations at a
glance. At the top of the screen is an indicator for each station group. The indicator has
three color states:
Dark Gray - all the stations in the group are disabled.
Green - all the stations in the group are running without alarm conditions.
Red - one or more station in the group has an alarm condition.
Each indicator has a button beneath labeled with the name of the group. Clicking on one
of these buttons displays the status for all of the stations in that group in the pane beneath
the indicators.
The pane contains a text box for each station labeled with the station name and
displaying:
•
•
•
•
The timestamp for the last message from the station
The status of the station
A button to disable the station
A button to open a window with more Details about the station.
5.2 Settings
The Settings pane in the Maintenance perspective is for setting system properties. The
pane is divided into three sections:
•
•
•
General Settings
Logging
Mail
General Settings
The following general settings can be modified:
Allow Sounds
Checking this setting enables audio for Alert notifications.
Intercept Client Polling Interval (seconds)
This value determines how frequently the client polls the server for data. The default
value is every 5 seconds. However, this can reasonably be set to the shortest sampling
rate defined in the Sampling and Averaging section.
Max. Time Between Polls
Determines how many seconds can elapse between data samples before a timeout
warning is set.
Logging
The following logging settings can be modified:
Retain Data (days)
Setting this property tells INTERCEPT® how many days to retain logs. Logs older than
this value will be deleted.
Mail
Mail Server Address
Enter the address for your local mail server.
Support Email Address
The email address of the person or persons supplying support for questions and problems
regarding INTERCEPT®.
After you change any of the settings on this pane, click Save to make those changes
permanent. To reset changes that you have made before saving, click Cancel.
5.3 Data Collection
The Data Collection screen contains an accordion style control. The control accesses the
following panels:
•
•
•
Stations where you can add, edit and change communications settings for
stations.
Data Elements where you can modify the labels used for data that comes in from
the stations.
Diagnostics where you can set the display text associated with the ZENO bit
messages.
5.4 Stations
The Stations section of the Data Collection accordion is used to configure a station.
CES will define your stations before sending you the software. The installation
instructions tell you how to add your custom settings to the software when you install it.
Therefore, when you enter this screen, it will already display a list of your stations.
There are three steps to configure a station. The first step is Basic Settings. These are
properties that identify the station. The second step is Communications where you
configure station communications and associated properties. The final step is Data
Retrieval where you configure the data retrieval interval. When adding a new station,
required properties for each step must be set before you can advance to the next step.
Icons in the lower left-hand corner indicate which sections have been completed
successfully.
The Stations section of the accordion opens to a list box containing the names of existing
stations. To add a new station, click the Add Station button beneath the list. To edit an
existing station, click the station name in the list box and then click the Edit button. The
Basic Settings pane will replace the Stations pane.
Basic Settings
Basic settings are station properties that define the station. They are:
•
Station ID for the station you are configuring
The Station ID for your stations at CES. For Zeno3200 and Weatherpak stations the
Station ID is shown as ZENO ID. For Aviation stations it is shown as FDCU ID.
•
•
•
•
Name of the station
Optionally enter the Latitude and Longitude for the station.
Time Zone that the station is set to. Note that CES sets stations to UTC by
default.
The Configuration to use.
Each station has been configured to send data in a specific format to INTERCEPT®. The
available configurations are defined in a properties file that matches the correct
configuration with the settings of your station.
This will be set at CES. If the configuration of your station is changed then the
Configuration settings in INTERCEPT® must be changed to match it. When
INTERCEPT® is installed it will contain a file defining the configuration of your
station plus the common configurations used. If your station is changed, CES will
either tell you which new Configuration to set for the station or send you a new
configuration file with instructions on how to install it.
Stale Data (seconds) indicates how long data stays valid on the GUI.
You can set the Basic Settings immediately if you are adding a new station. When you
are done click Next to continue on to the Communications pane, which will replace the
Basic Settings Pane. If you have not set one of the required properties, the field for that
property will have a warning next to it in a red box and the screen will not advance.
If you are editing an existing station the Basic Settings pane will open with the data for
that station populating the fields.
Communications
INTERCEPT® receives data from each station using the method defined in the
Communications pane. This pane opens with just a drop-down menu labeled Type. Select
the correct communications type from those available in the menu: Serial, TCP/IP or
modem. The fields for configuring that communication type are displayed beneath the
menu when the type is selected.
Serial Communication
You must set both properties to configure a Serial Port. The first is the number of the
Serial Port through which the station is connected to the server. Enter the Serial Port
number in the box next to the label “Serial Port COM”. For example, if the station was
connected through Com 1 on the server you would enter “1”.
Next, choose the speed, or baud rate, used by the station by choosing the correct speed
from the drop-down menu next to the label “Baud Rate”. Some common settings are
1200, 4800, and 9600.
TCP/IP
To set up TCP/IP communications you must enter the IP address of the station in the box
labeled IP Address/URL. Enter the correct Port Number for the station in the Port box.
MODEM
A data modem is usually assigned to a serial port. Enter the phone number for the
station in the Phone Number box. In the Timeout box, enter the number of seconds
INTERCEPT® will wait for the station to answer before timing out. Enter the Serial Port
number in the box labeled Serial Port COM and choose the correct Baud Rate from the
drop-down menu.
When you have set the Communications properties for a new station, click Next and the
Data Retrieval Pane will replace the Communications pane.
Data Retrieval
Use the Data Retrieval pane to configure how often the station sends data and other
properties associated with the timing of data retrieval. The Data Interval is either how
often the station sends data or how often it should be polled for data in seconds.
If the station is polled select the Polled Station check box. You can then enter the
additional parameters that should be set for a polled station.
•
Initial Offset
The Initial Offset determines how many seconds into the polling interval this specific
station should be polled for data. This allows you to make sure that different stations are
polled at a different time during the interval. This is particularly useful when more than
one station is polled through the same device.
•
Poll Timeout
The Poll Timeout indicated how many seconds to let a poll attempt continue without
response before terminating.
•
Number of Retries
Number of Retries indicates how many times Intercept should attempt to reach a station
during one polling interval.
•
Samples in Request
“Samples in Request” indicates how many samples will be returned for each poll when
performing DA polling.
•
Polling Method
DA returns all the data since the last successful poll. Intercept requests the number
of samples set in the Samples in Request field for each request and continues to
poll until it has caught up. DL requests return only the most recent data sample.
You can schedule exact times on the hour when you wish the poll to take place. After
selecting Polled Station, select Use Scheduled Polling. Set the offset and the interval. The
sum of these two numbers will give you the time on the hour when the poll will occur.
For example, an offset of 1 and an interval of 30 will cause the poll to occur at 1 and 31
minutes of the hour.
When you are done setting up the Data Retrieval for a new station, click Save.
INTERCEPT® will save the station configuration to the server.
Note that it may take a moment for the information to register with the server.
You can verify that the station has been added and that INTERCEPT® is receiving data
by switching to the Observer perspective. The station will appear in the Station Summary
tab. If the connection was successful there will be data in the summary screen as soon as
it is received from the station. This will be dependent on how often the station sends data
or is polled.
5.5 Data Elements
Data Elements is used to modify the default labels and display units for data reported in
INTERCEPT®. The list of data elements in the table is populated with all the data
elements reported by stations of the type selected.
The first column labeled Data Element lists all the data obtained from the station using
the data labels from the Station Types file. This is the only entry in the column that can't
be changed.
The third column labeled Label defaults to the data element label and is used in the
station Observer screen. This can be changed by selecting the label and then typing the
new label in its place.
The second column is an optional Short Label. When this is set, it is used in the Summary
screen in place of the longer labels. It is also used in the Alerts creation panel.
5.6 Diagnostics
This tab defines the text that is displayed for the various BIT codes from the ZENO®.
This is configured by Coastal and BIT errors are restricted to the Maintenance screen
and logs.
5.7 Data Display
The Data Display tab on the Maintenance perspective provides access to the controls for
laying out the Observer screen views, defining localized Alerts and grouping stations.
Like the Data Collection tab, the Data Display tab is an accordion control and it has up to
three panels depending on your configuration:
•
•
Alerts - define localized alerts.
Groups - define and add stations to groups.
5.8 Alerts
Alerts are user-defined conditions that are highlighted on the display. Alerts are typically
set to call attention to specific conditions such as high winds. The INTERCEPT Alert
feature provides compound alerts that are triggered when one or more criteria are met.
Alerts are named so that multiple alert conditions defined for the same data element can
be easily distinguished.
Adding an Alert
To add an alert perform the following steps:
1. In the Maintenance perspective, click on the Data Display tab.
2. Click on the Alerts bar.
3. Click the New Alert button beneath the Alert list box
4. In the Condition Editor, select an Element.
The Element list contains all of the data elements that are retrieved from any of the
connected stations.
5. Next, select an Operator.
There are three Operators available; two for numeric data and one for text. Use “>” when
creating an alert on numeric values that are greater than are greater than a specific value
such as wind speed greater than 15 kts. Use “<” for numeric values that are less than a
specific value such as temperature less than 34°.
6. Enter a Value.
Enter the Value to compare the selected data element against using the selected operator.
7. Click Add Condition button. At this point the alert criteria will be added to the Alert
Conditions. To add more conditions to the alert select "AND" or "OR" and then create
another condition following steps 3 through 6 above.
When "AND" is selected an alert will be generated only when all conditions defined are
true. An "AND" could be used to check for wind chill by combining temperature and
wind speed checks.
When "OR" is selected an alert will be generated when any of the alert conditions are
met. An "OR" could be used to test for a cross wind from either direction by checking for
a wind direction shift from the prevailing wind in either direction.
8. When all the alert conditions have been created, enter an Alert ID in the Alert Settings
Panel.
9. Enter a more detailed description of the alert in the Alert Text field. This will display
in the ticker when the alert is triggered.
10. (Optional) The alert will apply to all stations by default. You can limit the alert to a
specific station by checking the Apply to Specific Station checkbox, then selecting the
station from the drop-down menu.
11. (Optional) If you wish a sound to play when the alert condition is triggered, check the
Alert Sound checkbox. Then select a sound file from the drop-down menu.
12. (Optional) Pick foreground and background colors for the display of the data
elements in the GUI. Foreground color is the color of the text. Background color is the
background color of the cell displaying the data.
13. (Optional) If you want the alert to blink, check the Blink Effect box.
14. To save the alert click Save Alert. When the alert has been successfully registered at
the server, the ticker will display a confirmation message.
5.9 Groups
Use the Groups bar of the Data Display accordion to create station groups and assign
station views to groups.
To create a new group, click the New Group button in the upper-left of the pane. An
empty group will open at the end of the groups. Click the button in the upper right-hand
corner of the new group and enter the group name in the box in place of the text "New".
You can then add views to the group by selecting one from the Views list and dragging it
to the group box. CES will have configured INTERCEPT® so that there is a Weather
Summary view, a Wind Dials view and a Station view for each station.
A view can be assigned to more than one group. CES will assign the Weather Summary
to all groups, for example.
6. MAPS
6.1 Map Display
The Map view is an optional perspective that displays a map provided for a specific
INTERCEPT installation. Each of the stations is shown on the map as a circular icon.
Clicking on one of the station icons loads the data for the station into a pane to the right
of the map.
For more information on this option, contact Coastal Environmental Systems.
7. ADMINISTRATOR
7.1 User Administration
An Administrator manages user accounts in INTERCEPT®. The Administrator
perspective is used to create new accounts, review or edit existing accounts and delete
accounts. The Administrator can also reset passwords for users who forget their
password and can lock accounts.
To get to the User Administration screen select the Administrator perspective from the
menu bar.
When opened the User Administration screen contains a list box showing all existing
usernames. To the right is the Create New User form.
Create a New User Account
To create a new user account, enter the account information in the Create New User
form. If the window is set to Edit mode, click the Create New User button. This will
clear the form and reset it to Create New User mode.
1. Enter a Username.
2. Enter an Email Address.
3. Enter a Password.
4. Select one or more User Roles. If none is selected the user will be set to the default
role which is Observer.
5. Optionally Enter a First Name and Last Name.
6. Optionally set Console View.
7. Click Save New User.
When a user has been added successfully the message:
New User Added
will be shown in the ticker. If a required field is empty or if one of the fields is not valid
an error will be displayed in the ticker.
Editing a User Account
To edit a user account, click on the username. The account settings will display in the
Edit User Profile form. The name, username, email, user roles, and defaults can be
changed. Clicking the Save Changes button saves the changes.
To change the user's password use the Change User Password form. Enter the new
password and click Submit.
To lock the account, select the Lock Account entry in the Account Lock form and then
click Submit.
Deleting a User Account
To delete a user account:
1. Select the user name for the account in the list box.
2. Select the Delete User option in the Delete User form.
3. Click Submit in the Delete User box.
The Edit User form will be cleared of account information, the user name is removed
from the list box and the following message will display in the ticker:
User deleted.
8. External Data
8.1 External Data Feed
The external data feed is an XML feed. It contains the latest data from each station.
INTERCEPT® is pre-configured with one XML data feed account with:
Username = feed
Password = coastal
You can create a different account in the Administrator perspective.
The feed is accessed through the URL:
http://hostname/intercept/wxws/reading/all?username=feed&password=coastal
where hostname is the URL for your server where INTERCEPT® is installed.
Below is a sample of the data from an RVR system with an RLIM and three stations with
Visibility sensors.
<readings>
−
<station id="RLIM" timestamp="2009-04-28 11:05:43 PDT">
<reading label="RLIM_Edge" value="5" unit=""/>
<reading label="RLIM_Center" value="5" unit=""/>
<reading label="RLIM_status" value="CONNECTED" unit=""/>
<reading label="Active_Heading" value="0" unit=""/>
</station>
−
<station id="3" timestamp="2009-04-28 11:05:00 PDT">
<reading label="1-Minute Ambient Light" value="M" unit="cd/m^2"/>
<reading label="1-Minute Visibility" value="678" unit="m"/>
<reading label="AV_VIS_BIT" value="00" unit="hex"/>
<reading label="10-Minute Visibility" value="679" unit="m"/>
<reading label="zeno_status" value="CONNECTED" unit=""/>
<reading label="AV_BIT" value="0" unit="hex"/>
</station>
−
<station id="2" timestamp="2009-04-28 11:05:00 PDT">
<reading label="1-Minute Ambient Light" value="M" unit="cd/m^2"/>
<reading label="1-Minute Visibility" value="1091" unit="m"/>
<reading label="AV_VIS_BIT" value="00" unit="hex"/>
<reading label="10-Minute Visibility" value="1077" unit="m"/>
<reading label="zeno_status" value="CONNECTED" unit=""/>
<reading label="AV_BIT" value="0" unit="hex"/>
</station>
−
<station id="1" timestamp="2009-04-28 11:05:00 PDT">
<reading label="1-Minute Ambient Light" value="20000" unit="cd/m^2"/>
<reading label="1-Minute Visibility" value="11" unit="m"/>
<reading label="AV_VIS_BIT" value="00" unit="hex"/>
<reading label="10-Minute Visibility" value="9" unit="m"/>
<reading label="zeno_status" value="CONNECTED" unit=""/>
<reading label="AV_BIT" value="0" unit="hex"/>
</station>
</readings>
Appendix A
Troubleshooting
1. I am unable to see all of the selection boxes in the Maintenance screens.
A: Check the resolution of your computer monitor. INTERCEPT® may be best
viewed on a display with resolution set to a minimum of 1280 x 1024.