1
TS-209 Turbo Station User Manual (Version: 1.0.0) ©Copyright 2007. QNAP Systems, Inc. All Rights Reserved. FOREWORD Thank you for choosing QNAP products! instructions of using TS-209. This user manual provides detailed Please read carefully and start to enjoy the powerful functions of TS-209! NOTE • This manual provides the description of all functions of TS-209. The product you purchased may not support certain functions dedicated to specific models. • All features, functionality and other product specifications are subject to change without prior notice or obligation. • All brands and products names referred to are trademarks of their respective holders. LIMITED WARRANTY In no event shall the liability of QNAP Systems, Inc. (QNAP) exceed the price paid for the product from direct, indirect, special, incidental, or consequential software, or its documentation. QNAP makes no warranty or representation, expressed, implied, or statutory, with respect to its products or the contents or use of this documentation and all accompanying software, and specifically disclaims its quality, performance, merchantability, or fitness for any particular purpose. QNAP reserves the right to revise or update its products, software, or documentation without obligation to notify any individual or entity. CAUTION 1. 2. Back up your system periodically to avoid any potential data loss. QNAP disclaims any responsibility of all sorts of data loss or recovery. Should you return any components of TS-209 Turbo Station package for refund or maintenance, make sure they are carefully packed for shipping. Any form of damages due to improper packaging will not be compensated. -2- Table of Contents Table of Contents .....................................................................................3 Safety Warnings.......................................................................................6 Chapter 1. Overview of TS-209 Turbo Station .....................................7 1.1 Introduction...................................................................................7 1.2 Package Contents ...........................................................................8 1.3 Hardware Illustration ......................................................................9 Chapter 2. Install TS-209 ..................................................................10 2.1 Install Hard Disk........................................................................... 10 2.2 Hard Disk Recommendation List...................................................... 12 2.3 Set up TS-209.............................................................................. 14 2.4 Check System Status .................................................................... 16 2.5 Configure Software Settings ........................................................... 18 2.5.1 Windows® Users ...................................................................... 18 2.5.2 Mac Users............................................................................... 29 Chapter 3. Enjoy the Powerful Services of TS-209 ............................31 3.1 Server Administration.................................................................... 36 3.2 Quick Configuration 3.3 System Settings ....................................................... 37 ............................................................ 41 3.3.1 Server Name........................................................................... 41 3.3.2 Date & Time ........................................................................... 42 3.3.3 Encoding Setting ..................................................................... 43 3.3.4 View System Settings............................................................... 43 3.4 Network Settings .......................................................... 44 3.4.1 TCP/ IP Configuration ............................................................... 44 3.4.2 Microsoft Networking................................................................ 47 3.4.3 Apple Network......................................................................... 49 3.4.4 NFS Service ............................................................................ 49 3.4.5 Web File Manager .................................................................... 50 3.4.6 FTP Service............................................................................. 51 3.4.7 Multimedia Station................................................................... 53 -3- 3.4.8 Download Station .................................................................... 53 3.4.9 Web Server ............................................................................ 54 3.4.10 DDNS Service ......................................................................... 56 3.4.11 MySQL Server ......................................................................... 57 3.4.12 Protocol Management ............................................................... 59 3.4.13 View Network Settings ............................................................. 60 3.5 Device Configuration ...................................................... 62 3.5.1 SATA Disk .............................................................................. 63 3.5.2 USB Disk ................................................................................ 65 3.5.3 USB Printer............................................................................. 66 3.6 User Management ......................................................... 68 3.6.1 Users ..................................................................................... 68 3.6.2 User Groups............................................................................ 70 3.6.3 Quota .................................................................................... 77 3.7 Network Share Management ........................................... 79 3.7.1 Create ................................................................................... 80 3.7.2 Property ................................................................................. 81 3.7.3 Access Control ........................................................................ 82 3.7.4 Delete.................................................................................... 82 3.7.5 Restore .................................................................................. 83 3.7.6 NFS Access Control .................................................................. 84 3.8 System Tools ................................................................ 85 3.8.1 Alert Notification...................................................................... 86 3.8.2 Restart/ Shutdown................................................................... 86 3.8.3 Hardware Settings ................................................................... 87 3.8.4 UPS ....................................................................................... 88 3.8.5 System Update........................................................................ 89 3.8.6 Change Logo........................................................................... 90 3.8.7 Remote Replication (Disaster Recovery)...................................... 91 3.8.8 Backup/ Restore/ Reset Settings ................................................ 94 3.8.9 IP Filter .................................................................................. 94 3.8.10 Network Recycle Bin ................................................................ 95 3.8.11 Remote Login.......................................................................... 96 3.9 Event Logs ................................................................... 97 -4- Chapter 4. Copy Data Directly by Front USB Port to TS-209 ..............98 Chapter 5. Multimedia Station ...........................................................99 5.1 Share Photos and Multimedia Files via Web Interface ......................... 99 5.2 Enable iTunes Service.................................................................. 109 5.3 Use UPnP Media Server ............................................................... 111 Chapter 6. 6.1 Download Station...........................................................114 Use Download Software QGet ....................................................... 124 Chapter 7. Web Server ....................................................................126 Chapter 8. FTP Server .....................................................................130 Chapter 9. Web File Manager ..........................................................133 Chapter 10. NetBak Replicator Chapter 11. Configuring AD Authentication.......................................151 Chapter 12. Access TS-209 via Linux OS ...........................................155 Chapter 13. TS-209 Maintenance ......................................................156 ...................................................138 13.1 Restart/ Shut down Server........................................................... 156 13.2 Reset Administrator Password and Network Settings ........................ 157 13.3 Disk Failure or Malfunction ........................................................... 158 13.4 Power Outage or Abnormal Shutdown............................................ 158 Technical Support ................................................................................159 GNU GENERAL PUBLIC LICENSE ...........................................................160 -5- Safety Warnings 1. TS-209 can operate normally in the temperature of 0ºC-40ºC and relative humidity of 0%-90%. Please make sure the environment is well-ventilated. 2. The power cord and devices connected to TS-209 must provide correct supply voltage (60W, 90-264V). 3. Do not place TS-209 in direct sunlight or near chemicals. Make sure the temperature and humidity of the environment are in optimized level. 4. Unplug the power cord and all connected cables before cleaning. Wipe TS209 with a wet towel. Do not use chemical or aerosol to clean TS-209. 5. Do not place any objects on TS-209 for the server’s normal operation and to avoid overheat. 6. Use the flat head screws in the product package to lock the hard disks in TS209 when installing hard disks for proper operation. 7. Do not place TS-209 near any liquid. 8. Do not place TS-209 on any uneven surface to avoid falling off and damage. 9. Make sure the voltage is correct in your location when using TS-209. If you are not sure, please contact the distributor or the local power supply company. 10. Do not place any object on the power cord. 11. Do not attempt to repair your TS-209 in any occasions. Improper disassembly of the product may expose you to electric shock or other risks. For any enquiries, please contact the distributor. -6- Chapter 1. Overview of TS-209 Turbo Station 1.1 Introduction Thank you for choosing TS-209 Turbo Station. This product has the following key features: 9 9-in-1 server: Multimedia Station, iTunes server, media server, Download Station, Mirror Station, Disaster Recovery, Web Server, MySQL server, Backup Server, File Server, FTP Server, and Printer Server. 9 Easy-to-use, simple configuration in a few steps and TS-209 is ready to use! 9 Supports RAID 0, RAID 1 and JBOD disk volume 9 Web interface for authority configuration and folder management, even novice can mange the server easily 9 Supports PHP and MySQL/ SQLite to establish interactive websites 9 Embedded digital album supports automatic thumbnail generation, easy backup, browsing and sharing of photos 9 Supports UPnP (DLNA compatible) multimedia technology for sharing of multimedia files at home 9 Supports iTunes service to enable computers in LAN to play the songs shared by TS-209 via iTunes 9 Supports 2 large-sized SATA disks and hotswap function 9 3 high speed USB 2.0 ports to support multiple USB devices like printer, disk, digital camera, thumb drive, card reader etc. to provide diversified functions. 9 High speed transfer, 480Mbps USB 2.0, Gigabit Ethernet, 1.5GB SATA high speed file transfer. With highly efficient block level algorithm, data transfer can be done instantly. 9 Block level remote replication for secure data backup 9 Incomparable high reliability: NetBak Replicator for instant and schedule backup 9 Independent BT, HTTP and FTP to minimize electricity expense 9 Supports Network Recycle Bin, files deleted by mistake can be restored 9 Built-in Smart Fan function -7- 1.2 Package Contents Your TS-209 package contains: 9 TS-209 Turbo Station 9 Adaptor 9 Power cord 9 CD-ROM (user manual, Quick Install Wizard & utility inclusive) 9 Quick Installation Guide 9 Flat head screws x 8 9 Ethernet cable x 1 9 Front panel x 1 9 Thumb screws x 4 -8- 1.3 Hardware Illustration One Touch Copy Button Power Button USB 2.0 LED Indicators: USB, Status, HDD1, HDD2, LAN, and Power Smart Fan* K-Lock Security Slot Power Connector Reset Button Giga LAN -9- USB 2.0 x 2 Chapter 2. Install TS-209 2.1 Install Hard Disk 1. Loosen the screws on the disk trays and take out the disk trays. 2. Install a hard disk on each tray. Make sure the disk holes match the holes at the base of the disk tray and lock the disk with four screws. - 10 - 3. Insert the disk trays to TS-209. Push the disk trays to the end. Fasten the screws on the trays. When two disks are installed, make sure HDD1 is installed on top of HDD2. 4. Remove the protection films on the LED panel and take out the front panel. 5. Cover TS-209 with the front panel and fasten the four screws. - 11 - 2.2 Hard Disk Recommendation List The following HDD models are verified by QNAP that are compatible with TS-209. It is recommended to use the disk models listed here. Other HDD brands that are not tested by QNAP may or may not work properly with TS-209. For more updated compatible hard disk information, please visit QNAP website at http://www.qnap.com. QNAP disclaims any responsibility for product damage/ malfunction or data loss/ recovery due to misuse or improper installation of hard disks in any occasions for any reasons. Seagate Model Name Barracuda 7200.10 SATA Barracuda 7200.9 SATA Barracuda 7200.9 SATA Barracuda 7200.8 SATA Barracuda 7200.10 SATA Barracuda 7200.9 SATA Barracuda 7200.9 SATA Barracuda 7200.8 SATA Barracuda 7200.7 SATA Barracuda 7200.7 SATA Model No. ST3750640AS ST3500641AS ST3400633AS ST3400832AS ST3320620AS ST3300622AS ST3250824AS ST3250823AS ST3160827AS ST3120827AS Interface SATA II 3Gb/s with NCQ SATA II 3Gb/s with NCQ SATA II 3Gb/s with NCQ SATA 1.5Gb/s with NCQ SATA II 3Gb/s with NCQ SATA II 3Gb/s with NCQ SATA II 3Gb/s with NCQ SATA 1.5Gb/s with NCQ SATA 1.5Gb/s with NCQ SATA 1.5Gb/s with NCQ - 12 - Capacity (GB) Rotational Speed (RPM) Buffer Size (MB) 750 7200 16 500 7200 16 400 7200 16 400 7200 8 320 7200 16 300 7200 16 250 7200 8 250 7200 8 160 7200 8 120 7200 8 Maxtor Model Name Model No. Capacity Rotational (GB) Speed (RPM) Interface Buffer Size (MB) Grizzly 3H500F0 SATA II 3Gb/s 500 7200 16 Grizzly 3H400F0 SATA II 3Gb/s 400 7200 16 DiamondMax 10 6L300S0 SATA 1.5Gb/s with NCQ 300 7200 16 DiamondMax 10 6L250S0 SATA 1.5Gb/s with NCQ 250 7200 16 DiamondMax 10 6L200M0 SATA 1.5Gb/s with NCQ 200 7200 8 DiamondMax 10 6B200M0 SATA 1.5Gb/s with NCQ 200 7200 8 Hitachi Model Name Model No. Interface Capacity Rotational (GB) Speed (RPM) Buffer Size (MB) Deskstar 7K500 HDS725050KLA360 SATA II 3Gb/s with NCQ 500 7200 16 Deskstar 7K400 HDS724040KLSA80 SATA 1.5Gb/s 400 7200 8 Western Digital Model Name Capacity Rotational (GB) Speed (RPM) Buffer Size (MB) Model No. Interface WD Caviar SE16 WD5000KS SATA II 3Gb/s 500 7200 16 WD Caviar SE16 WD4000KS SATA II 3Gb/s 400 7200 16 WD Caviar® SE Serial ATA WD4000KD SATA 1.5Gb/s 400 7200 16 WD Caviar® RE2 WD4000YR SATA 1.5Gb/s 400 7200 16 WD Caviar SE16 WD2500KS SATA II 3Gb/s 250 7200 16 WD Caviar® SE Serial ATA WD2500KD SATA 1.5Gb/s 250 7200 16 WD Caviar SE WD2000JS SATA II 3Gb/s 200 7200 8 WD Caviar SE WD1600JS SATA II 3Gb/s 160 7200 8 WD Caviar® SE Serial ATA WD1600JD SATA 1.5Gb/s 160 7200 8 - 13 - 2.3 Set up TS-209 Please check your network environment and select the appropriate installation method before installing TS-209. 1. Office/ Home Connect TS-209 and PC to the same hub/ switch/ router. 2. Individual Connect TS-209 directly to your PC by a network cable. - 14 - When you have verified your network environment, please follow the steps below to install TS-209. 1 Network cable USB cable 2 3 1. Connect TS-209 to the hub/ switch/ router or PC according your network environment. 2. Connect USB printer to TS-209 and enable USB printer service*. 3. Connect the power. 4. Turn on TS-209. * Note: Please connect a USB printer to the server after the software configuration is completed. - 15 - 2.4 Check System Status TS-209 provides LED indicators for you to indicate the system status and information easily. When TS-209 is turned on, please check the following items to make sure the system status is normal. Note that the following LED information is applicable only when you have properly installed HDD1 and/or HDD2, and connected TS-209 to the network and power. n USB Status o Status p HDD1 q HDD2 r LAN s Power - 16 - LED Display & System Status Overview LED LED Display & System Status n Front USB Blue: You can press the copy button to copy data Status Blink in blue: Accessing data Green: System is normal o Status Blink in green: Hard disk not detected; Hard disk not initialized Red: Warning on disk full status; Disk capacity is almost full Blink in red: RAID 1 degraded mode Blink in green and red alternatively: Update firmware; RAID 1 rebuilding/ synchronizing Off: HDD standby mode pHDD1/ qHDD2 r Network s Power Blink in orange: Accessing data Orange: with HDD installed Blink in orange: Accessing data Blue: System has started Blink in blue: Update firmware - 17 - 2.5 Configure Software Settings After checking the system status, please follow the steps below to configure the software settings of TS-209. The configuration procedure of Windows and Mac users are different. Please select the appropriate procedure according to your OS. 2.5.1 Windows® Users Insert TS-209 CD-ROM in your PC. Wait for a few seconds until the following screen shows up. Then start to configure the software settings of TS-209. 1. Select TS-209. - 18 - 2. Install Quick Install Wizard. - 19 - 3. Follow screen instructions to install QNAP Finder. QNAP Finder will run automatically. If you are using Windows XP SP2, the following screen will be shown. Please select “Unblock”. - 20 - 4. QNAP Finder will detect the Turbo Station in the network and ask if you want to perform quick setup. Click Yes to continue. Note: If the server is not found, click Refresh to try again. 5. Enter the default user name and password. Default user name: admin Password: admin - 21 - 6. The first page of the Quick Setup Wizard will be shown. Click Next to continue and complete the configuration. - 22 - 7. Follow the on-screen instructions to complete the configuration. Please wait patiently while changing the system settings. Turbo Station will restart after changing the settings. Note: The configuration process may take up to twenty minutes if you are using a hard disk drive with capacity larger than 500GB. - 23 - 8. After quick setup is completed, click Finish to continue. TS-209 provides several default share folders for data sharing and access. To map the share folders on TS-209 as your drive, check the option “Continue to map network drive for me” and follow the steps below to proceed. - 24 - Map Network Drive Turbo Station provides several default share folders for sharing and access. Select the share folder to be mapped as the local drive and click Map Network Drive. The share folders Qdownload, Qmultimedia, Qusb, and Qweb are system default network share of TS-209 for the use of Download Station, Multimedia Station, USB auto-copy and Web Server. Enter the default user name and password. - 25 - Select the drive letter for the connection and click Finish. Upon successful connection, you can start to use the share folder on TS-209. You can access these folders by opening My Computer. - 26 - 9. QNAP Finder will appear when all configurations are completed. Choose the name of Turbo Station on the list, and click the Connect button. - 27 - 10. When the administration page of TS-209 is shown, you can start to use the services. If you have any questions during web administration, please click the help button on the top right hand corner of the page. To modify system settings, click Administration. Enter the user name and password to login. Default user name: admin Password: admin Note: 1. It is recommended to use Internet Explorer 6.0 or above to access TS-209. If the OS of your PC is Windows® 98, TS-209 supports Internet Explorer 6.0 or above only. 2. TS-209 also supports Mozilla Firefox. - 28 - 2.5.2 Mac Users Insert TS-209 CD-ROM in your Mac and find the directory MacWizard. Then run MacWizard.dmg. You can find and run the QIW image file on desktop after MacWizard.dmg is opened. Run Quick Install Wizard. - 29 - Follow the on-screen instructions to complete the configuration. Please wait patiently while changing the system settings. Turbo Station will restart after changing the settings. Note: 1. Mac Quick Install Wizard does not support mapping network drive. 2. The Map Drive function of Windows Quick Install Wizard is replaced as “Quick Setup” in Mac Quick Install Wizard. 3. It is recommended to access TS-209 by Mozilla Firefox in Mac. Safari does not support Download Station of TS-209. - 30 - Chapter 3. Enjoy the Powerful Services of TS-209 TS-209 provides the following powerful functions and applications. A. Use network share-Public folder 1. You can access the public folder of TS-209 by the following means: a. Open My Network Places and find the workgroup of TS-209. If you cannot find the server, please browse the whole network to search for TS-209. Double click the name of TS-209 for connection. b. Use Run function in Windows®. Enter \\[TS-209 name]* or \\[TS-209 IP]# to access share folder on TS-209. c. Windows® users can use Quick Install Wizard to find TS-209. When the administration page is shown, click Web File Manager. Enter the user name and password, and then start to manage TS-209. 2. You can upload files to the Public folder. - 31 - B. Manage TS-209 Manage TS-209 using web browser by Windows® or Mac 1. You can access TS-209 web administration page by the following methods: a. Use Quick Install Wizard to find TS-209. b. Open a web browser and enter http://[TS-209 IP]:8080# Note: 1. It is recommended to use Microsoft® Internet Explorer 6.0 or above to access TS-209. If the OS of your PC is Windows® 98, TS-209 supports Internet Explorer 6.0 only. 2. Please use Mozilla Firefox to access TS-209 in Mac. *The user name here should be the same as the server name you enter in Chapter 2.5 Configure Software Settings. #The IP address here should be the same as the IP address you enter in Chapter 2.5 Configure Software Settings. If you are using DHCP: (a) connect the PC to TS-209 directly, please use the default IP address 169.254.100.100 of TS-209; (b) connect TS-209 by network, please run Quick Install Wizard to view the IP address of TS-209. 2. When the administration page is shown, click Administration, Web File Manager, Web Server, Multimedia Station, or Download Station. Enter the user name and password, and then start to manage TS-209. 3. TS-209 supports SSL secure login which enables you to configure and manage the server by encrypted transfer. To use this function, check the box SSL login on the administration page and login the server. Note: If your TS-209 is placed behind an NAT gateway and you want to access TS-209 by secure login from the Internet, you must open the port 443 on your NAT and forward this port to TS-209 LAN IP. - 32 - - 33 - C. Use TS-209 Services Multimedia Station TS-209 provides a user-friendly web management interface for you to manage and share personal albums and multimedia files via network easily. Supports embedded iTunes Server music sharing, UPnP and DLNA standard multimedia technology to establish home multimedia sharing center. Please refer to Chapter 5. Download Station TS-209 supports BT, FTP, and HTTP download. You can add download tasks to TS-209 and let the server finish downloading independently of your PC. Please refer to Chapter 6. Mirror Station Provides RAID 1 mirroring disk volume for data protection. Please refer to Chapter 3.5.1. Disaster Recovery TS-209 supports remote share folder backup via the network. In case of data damage in PC, you can restore all backup data. Please refer to Chapter 3.8.7. Web Server TS-209 enables you to create your own website easily. It also supports PHP and SQLite to establish interactive websites. Please refer to Chapter 7. Printer Server TS-209 supports network printer sharing function by direct USB connection. No extra help from PC is needed. Please refer to Chapter 3.5.3. FTP Server TS-209 offers the simplest FTP server setup procedure for you to establish FTP server without any professional assistance. Please refer to Chapter 8. - 34 - Backup Server NetBak Replicator is a powerful backup software designed for Windows users to configure automatic backup schedule. Block level remote replication is supported to provide the most reliable, instant and secure data backup mechanism. Please refer to Chapter 10. File Server TS-209 provides convenient and secure file server functions that support central data management. Users can be granted with the right to access network share and share important files. Please refer to Chapter 3.7 and Chapter 9. - 35 - 3.1 Server Administration There are 8 main sections in server administration: - 36 - 3.2 Quick Configuration Please follow the step-by-step guide in Quick Configuration to complete the settings of TS-209. If you have any questions during web administration, please click the help button on the top right hand corner of the page. Other buttons are described as below: : Return to previous page : Return to home page : Logout system Step 1. Enter the server name. - 37 - Step 2. Change the administrator password or select to use the original password. Step 3. Enter the date, time and select the time zone for the server. Step 4. Select the language the server uses to display files and directories. The default setting is English. - 38 - Step 5. Enter the IP address, subnet mask and default gateway for the server. Note: 1. Please contact your ISP or network administrator for the IP address of primary and secondary DNS servers. When TS-209 plays the role as a terminal and needs to perform independent connection, e.g. BT download, you must enter at least one DNS server IP for proper URL connection. Otherwise, the function may not work properly. 2. If you select to obtain IP address via DHCP, there is no need to configure the primary and secondary DNS servers. You can enter “0.0.0.0” in the settings. - 39 - Step 6. Initialize disk volume in TS-209 for the first time configuration. Step 7. When TS-209 is initialized, the basic settings will be shown. - 40 - 3.3 System Settings Basic system settings include the server name, date, time, and view system settings. 3.3.1 Server Name Enter the name of TS-209. The server name can be 14 characters long at maximum, which supports alphabets, numbers and hyphen (-). The server does not accept names with space, period (.), or names in pure number. - 41 - 3.3.2 Date & Time Set the date, time, and time zone according to your location. If the settings are incorrect, the following problems may occur: 9 When using a web browser to access or save a file, the display time of the action will be incorrect. 9 The time of event log displayed will be inconsistent with the actual time when an action occurs. 9 Synchronize with an Internet time server automatically You can enable this option to update the date and time of the system automatically with specified NTP (Network Time Protocol) server. Enter the IP address or domain name of the NTP server, e.g. time.nist.gov, time.windows.com. Then enter the time interval for adjusting the time. Note: The first time you enable NTP server, it may take several minutes for time synchronization before the time is correctly adjusted. - 42 - 3.3.3 Encoding Setting Select the language TS-209 uses to display files and directories. Note: All files and directories on TS-209 will be created using Unicode encoding. If your FTP clients or the OS of your PC does not support Unicode, e.g. Windows® 95/98/ME, select the language the same as your OS here in order to view the files and directories on the server properly. 3.3.4 View System Settings You can view all current system settings, e.g. server name, on this page. - 43 - 3.4 Network Settings You can configure network settings in this section and enable several powerful applications of TS-209, e.g. Multimedia Station, Download Station, and Web Server. 3.4.1 TCP/ IP Configuration You can select one of the following two methods to configure the TCP/IP settings of TS-209. 1. Obtain IP address settings automatically via DHCP If your network supports DHCP, TS-209 will use DHCP protocol to retrieve the IP address and related information automatically. 2. Use static IP address To use fixed IP address for network connection, enter fixed IP address, subnet mask and default gateway. - 44 - Primary DNS Server: Enter the IP address of primary DNS server that provides DNS service for TS-209 in external network. Secondary DNS Server: Enter the IP address of secondary DNS server that provides DNS service for TS-209 in external network. Note: 1. Please contact your ISP or network administrator for the IP address of primary and secondary DNS servers. When TS-209 plays the role as a terminal and needs to perform independent connection, e.g. BT download, you must enter at least one DNS server IP for proper URL connection. Otherwise, the function may not work properly. 2. If you select to obtain IP address via DHCP, there is no need to configure the primary and secondary DNS servers. You can enter “0.0.0.0” in the settings. Enable DHCP Server If no DHCP is available in the LAN where TS-209 locates, you can enable this function to enable TS-209 as a DHCP server and allocate dynamic IP address to DHCP clients in LAN. You can set the range of IP addresses allocated by DHCP server and the lease time. Lease time refers to time that IP address is leased to the clients by DHCP server. When the time expires, the client has to acquire an IP address again. For example, to establish a DLNA network, and share the multimedia files on TS209 to DLNA DMP via UPnP while there is no NAT gateway that supports DHCP server, you can enable DHCP server of TS-209. TS-209 will allocate dynamic IP address to DMP or other clients automatically and set up a local network. Note: If there is an existing DHCP server in your LAN, do not enable this function. Otherwise, there will be IP address allocation and network access errors. - 45 - Jumbo Frame Settings (MTU) "Jumbo Frames" refer to Ethernet frames that are larger than 1500 bytes. It is designed to enhance Ethernet networking throughput and reduce the CPU utilization of large file transfers by enabling more efficient larger payloads per packet. Maximum Transmission Unit (MTU) refers to the size (in bytes) of the largest packet that a given layer of a communications protocol can transmit. TS-209 uses standard Ethernet frames: 1500 bytes by default. If your network appliances support Jumbo Frame setting, select the appropriate MTU value for your network environment. TS-209 supports 4074, 7418, and 9000 bytes for MTU. Note: Jumbo Frame setting is valid in Gigabit network environment only. Besides, all network appliances connected must enable Jumbo Frame and use the same MTU value. - 46 - 3.4.2 Microsoft Networking Enable file service for Microsoft networking: If you are using Microsoft® Windows® OS, enable this service to access the files on network share folders. Assign a workgroup name. 9 Standalone Server Use local users for user authentication. 9 AD Domain Member TS-209 supports Windows 2003 AD (Active Directory) to provide quick and direct import of user accounts to the existing AD server available in your network. This function helps you to save time and effort on creating user accounts and passwords and lowers IT maintenance cost by automatic configuration procedure. ¾ Server Description Describe TS-209 for users to identify the server. To use TS-209 on the Microsoft Windows OS, you must enable Microsoft Network Services. ¾ Workgroup Specify the workgroup TS-209 belongs to. The workgroup is a computer group unit in Microsoft Windows network for network sharing. ¾ AD Server Name Enter the name of the AD server when AD domain is selected for - 47 - authentication. ¾ Domain Name The name of Microsoft domain. When you select AD domain, you must enter the domain name, the login user name, and the password. Please refer to Chapter 11 for the information of AD authentication. 9 WINS server If the local network has a WINS server installed, specify the IP address. TS209 will automatically register its name and IP address with WINS service. If you have a WINS server in your network and want to use this server, enter the WINS server IP. 9 Domain Master There is a unique Domain Master Browser for collecting and recording resources and services available for each PC in the network or workgroup of Windows. When you find the waiting time for accessing Network Neighborhood too long, it may be caused by failure of an existing master browser, or there is no master browser in the network. If there is no master browser in your network, you can check the box Domain Master in this section to configure TS-209 as the master browser to enhance the speed of accessing information on Network Neighborhood. - 48 - 3.4.3 Apple Network To use TS-209 on Apple Mac operating system, enable AppleTalk network support. If your AppleTalk network uses extended networks, and is assigned with multiple zones, assign a zone name to TS-209. If you do not want to assign a network zone, enter an asterisk (*) to use the default setting. This setting is disabled by default. 3.4.4 NFS Service (for TS-209 Pro only) After enabling this service, you can click here to set up the Network access authority to configure the settings. For detailed configuration, please refer to Chapter 3.7.6. For the information of connecting to TS-209 via NFS on Linux, please refer to Chapter 12. - 49 - 3.4.5 Web File Manager To access files on TS-209 via web browser, enable Web File Manager. If TS-209 is connected to the Internet and uses a valid IP address, you can access files on the server by web browser from anywhere. For more information, please refer to Chapter 9. TS-209 supports SSL secure login. You can select SSL login on TS-209 administration page and login Web File Manager via https; or enter https://TS209 IP:443/Qfilemanager/ in the browser. - 50 - 3.4.6 FTP Service When you enable FTP service, you can define the port number for the service and maximum number of users connected to the FTP at the same time. 9 Select Protocol Type Select to use standard FTP connection or SSL/TLS encrypted FTP. Select the corresponding protocol type in your client FTP software to ensure successful connection. 9 Unicode Support Select to enable or disable Unicode Support. The default setting is No. Since most FTP clients do not support Unicode currently, it is recommended that you disable Unicode support here and select the language the same as your OS in “System Settings—Encoding Setting” page so that the folders and files on FTP can be properly shown (please refer to Chapter 3.3.3). If your FTP client supports Unicode, make sure you have enabled Unicode support for both your client and TS-209. - 51 - 9 Log on anonymously You can enable anonymous login to allow users to access the FTP server of TS-209 anonymously. The users can access the folders and files which are opened for public access. If this option is disabled, users must enter an authorized user name and password to access the server. 9 Passive FTP Port Range You can use the default port range (55536-56559) or define a port range larger than 1023. When using this function, please make sure you have opened the configured port range on your router or firewall. 9 FTP Transfer Limitation You can configure the maximum number of all FTP connections, maximum connections of a single account and the maximum upload/ download rates of a single connection. - 52 - 3.4.7 Multimedia Station To share multimedia files like photos, music or video files on the network, please enable Multimedia Station. For further information of Multimedia Station, iTunes service and UPnP Media Server, please refer to Chapter 5. 3.4.8 Download Station TS-209 supports BT, HTTP and FTP download independent of PC/notebook. To use download function of TS-209, please enable Download Station. For further information, please refer to Chapter 6. Warning: Please be warned against illegal downloading of copyrighted materials. The Download Station functionality is provided for downloading authorized files only. Downloading or distribution of unauthorized materials may result in severe civil and criminal penalty. Users are subject to the restrictions of the copyright laws and should accept all the consequences. - 53 - 3.4.9 Web Server You can publish your own server by enabling Web Server function of TS-209. Enter the port number for web server service, the default number is 80. For further information, please refer to Chapter 7. Configure register_globals Select to enable or disable register_globals. The setting is disabled by default. When the web program asks to enable php register_globals, please enable this option. However, for system security concerns, it is recommended to disable this option. SMTP Server With the correct SMTP server settings, you will be able to use the PHP mail () delivery function immediately. The SMTP server can be represented as an IP address or a domain name. If you have entered a web domain name for the SMTP server instead of an IP address, please check that you have provided the correct DNS server location in Network Settings > TCP/IP Settings. Enable SMTP Authentication: If your SMTP server requires verification, please check this option. - 54 - php.ini Maintenance Check the box “php.ini Maintenance” to select to upload, edit or restore php.ini. Edit: Edit the current php.ini file. Upload: Upload a new php.ini file to replace the current file. Restore: Restore the php.ini file to system default. - 55 - 3.4.10 DDNS Service To set up a server on the Internet and enable users to access it easily, a fixed and easy-to-remember host name is often required. However, if ISP provides only dynamic IP address, the IP address of the server will change from time to time and is difficult to recall. You can enable DDNS service to solve the problem. After enabling DDNS service of TS-209, whenever TS-209 restarts or the IP address is changed, TS-209 will notify DDNS provider immediately to record the new IP address. When the user tries to connect TS-209 via the host name, DDNS will transfer the recorded IP address to the user. Enable and configure DDNS of TS-209: Before using DDNS service, please register a host name from the DDNS provider*. TS-209 supports the 5 DDNS providers: members.dyndns.org, update.ods.org, members.dhs.org, www.dyns.cx, www.3322.org. Enable Dynamic DNS Service, and select DDNS server. Then enter the user name, password, and hostname. * For the information of DDNS service registration, please refer to the website of the DDNS providers. - 56 - 3.4.11 MySQL Server You can enable MySQL Server as the website database.. Enable remote connection of MySQL Server You can enable this option to configure your Turbo Station’s MySQL Server as a database server of another web server in remote site through Internet connection. When you disable this option, your MySQL Server will only be configured as local database server for Turbo Station’s web server. After enabling remote connection, please assign a port for the remote connection service of MySQL server. The default port is 3306. Database Maintenance Click Database Maintenance to reset the database password or initialize the database. Reset root password: Execute this function to reset the password of MySQL root as “admin”. Re-initialize database: Execute this function to delete all the data on MySQL database. - 57 - Description: File location of MySQL database 1. Create a network share in Network Share Management. 2. Enter the network share name and select “Enter path manually”. Then click “Browse…” 3. Select .@mysql and click “OK”. After the network share has been created, configure the access right. The network share name configured in the above step is the file location of MySQL database. - 58 - 3.4.12 Protocol Management Assign a protocol for the system management. The default port is 8080. The services of this protocol include: System Management, Web File Manager, Multimedia Station, and Download Station. The system will restart after clicking Apply. Please wait. The website will automatically change to the homepage of the new protocol system. - 59 - 3.4.13 View Network Settings You can view current network settings and status of TS-209 in this section. - 60 - - 61 - 3.5 Device Configuration You can configure SATA disk, USB disk and USB printer settings in this section. - 62 - 3.5.1 SATA Disk This page shows the model, size and current status of the disk(s) installed on TS209. You can format and check disks, and scan bad blocks on the disks. When the SATA disks are formatted, TS-209 will create the following default share folders: 9 Public: Network share for file sharing 9 Qdownload: Network share for Download Station 9 Qmultimedia: Network share for Multimedia Station 9 Qusb: Network share for data copy function via USB ports 9 Qweb: Network share for Web Server - 63 - You can create the following disk volumes: • Single Disk Volume Each disk will be used as a standalone disk. However, if a disk is damaged, all data will be lost. • RAID 1 Mirroring Disk Volume RAID 1 (mirroring disk) protects your data by automatically backing up the contents of one drive onto the second drive of a mirrored pair. This protects your data if one of the drives fails. Unfortunately, the storing capacity is equal to a single drive, as the second drive is used to automatically back up the first. Mirroring Disk is suitable for personal or corporate use to store important data. • RAID 0 Striping Disk Volume RAID 0 (striping disk) combines 2 or more drives into one larger disk. It offers the fastest disk access but it does not have any protection of your data if the striped array fails. The disk capacity equals the number of drives in the array times the size of the smallest drive. Striping disk is usually used to maximize your disk capacity or for fast disk access but not for storing important data. • Linear Disk Volume You can combine two or more disks into one larger disk. During file saving, the file will be saved on physical disks sequentially but does not have a disk failure file protection function. The overall capacity of linear disk is the sum of all disks. Linear disk is generally used for storing large data and is not appropriate to use for file protection of sensitive data. - 64 - 3.5.2 USB Disk TS-209 supports USB disks and thumb drives for extended storage. Connect the USB device to the USB port of TS-209, when the device is successfully detected, the details will be shown on this page. - 65 - 3.5.3 USB Printer 1. To provide printer sharing function for network users, you can simply connect a USB printer to the USB port of TS-209. TS-209 will detect the printer automatically. 2. A printer icon should be shown in the share folder of the server. Double click the icon. - 66 - 3. Install the printer driver. 4. When finished, you can start to use network printer service of TS-209. Note: 1. TS-209 supports general USB printer only but not multifunction printer. 2. TS-209 printer service is only supported in Windows OS but not Mac OS. 3. For the information of supported USB printer models, please visit http://www.qnap.com. - 67 - 3.6 User Management The files on TS-209 can be shared among multiple users. For easier management and better control of users’ access right, you have to organize users, user groups and their access right control. 3.6.1 Users The system has created the following users by default: n admin By default, administrator has access to system administration and cannot be deleted. o guest This is a built-in user and will not be displayed on User Management page. When you use a non-registered user name to login, the server will recognize the user as a guest and will allow limited access. A guest does not belong to any user group. The login password for guest is guest. p Anonymous This is a built-in user and will not be displayed on User Management page. When you connect to the server by FTP service, you can use this name to login as a guest. - 68 - 256 users can be created at maximum (including system default users). You can create a new user according to your needs. The following information is required to create a new user: 9 User name The user name must not exceed 32 characters. It is case-insensitive and supports double-byte characters, such as Chinese, Japanese, and Korean except: " / \ [ ] : ; | = , + * ? < >` ' 9 Password The password is case-sensitive and can be 16 characters long at maximum. It is recommended to use a password of at least 6 characters. You can perform the following actions for user management: - 69 - 3.6.2 User Groups User group is a collection of users with the same access right to files or folders. TS-209 has created the following user groups by default: n Administrators All members in this group have administration right. You cannot delete this group. o Everyone All registered users belong to everyone group. You cannot delete this group. You can manage user groups with the following options: 128 groups can be created at maximum. A group name must not exceed 256 characters. It is case-insensitive and supports double-byte characters, such as Chinese, Japanese, and Korean, except the following ones: " / \ [ ] : ; | = , + * ? < >` ' - 70 - Create Users and Assign Users to User Group The following example demonstrates how to create new users and assign users to a user group. ABC Co. has recently recruited two employees Mr. Jones Lee for Administration Department and Ms. Jane Wu for Sales Department. The IT Department therefore needs to create two user accounts for them to access company data on TS-209. i. To create a user account, go to User Management-Users. Click Create. - 71 - ii. Enter the user name (Jones Lee/ Jane Wu) and password. Check the box “Continue to set the user groups to which this user belongs” and click OK. - 72 - iii. Select the user groups the users belong to on the right list, i.e. Mr. Jones Lee for Administration Dept and Ms. Jane Wu for Sales Dept, and click Add. Then click Close. - 73 - iv. The user names will appear on the list on Create User Page. - 74 - Create Private Network Share for User Groups You can create particular network share for each user group. The procedure is described as below: 1. To create a network share called media accessible by Administration Department only, please go to “User Management—User Groups” page. Select the user group Administration Dept and click Create Private Network Share on the right. 2. Enter the network share name media. Select the disk volume that the share will be created in and specify the path automatically or manually. Enter the comment for the network share, e.g. media folder for Admin Dept and click Apply. - 75 - 3. You can see the folder media in Network Share Management page. 4. Enter Access Control. You can see that only Administration Dept has full access right to the folder. - 76 - 3.6.3 Quota To allocate disk volume efficiently, you can specify the quota that can be used by each user. When this function is enabled and a user has reached his/her disk quota, he/she cannot upload data to the server anymore. By default, no limitations are set for users. You can modify the following two options: i. Enable quota for all users ii. Quota size on each disk volume Please refer to the following example to configure the quota setting of users: The IT department is planning to set the disk quota of Mr. Jones Lee from Administration Department and Ms. Jane Wu from Sales Department on TS-209. The disk quota is 2000MB for Mr. Jones Lee and 4000MB for Ms. Jane Wu. 1. Please go to Quota page in User Management to enable quota for all users. Enter the quota size on each disk volume, e.g. 1000MB. The quota for individual user can be modified later. - 77 - 2. Select Jones Lee on User page and click Quota Settings on the right. 3. Enter the quota size 2000MB and click OK. 4. Follow the same steps and enter the quota size 4000MB for Jane Wu and click OK. The quota setting is successfully applied. - 78 - 3.7 Network Share Management The primary purpose of network storage is file sharing. You can create different network share folders for various types of files, and provide different file access rights to users or user groups. There are five options in Network Share Management: - 79 - 3.7.1 Create To create a network share, enter the following information: 9 Network share name The length of the network share name cannot exceed 32 single-byte characters or 10 double-byte characters, and cannot contain the following characters: ".+=/\:|*?<>;[]% 9 Disk volume This area shows the disk volume status. 9 Path All data is stored under the assigned path onto the disk volume. You can select “Specify path automatically” or assign a path manually. The path cannot exceed 256 characters and cannot contain the characters below: ".+=/\:|*?<>;[]% 9 Comment Enter a brief description for the share folder. The comment cannot exceed 128 characters. Note: When you select to enter the path manually, click “Browse…” and the .@mysql directory will be shown. This is the file location of MySQL database. - 80 - 3.7.2 Property To edit the property of an existing network share, select a share and click Property. You can then edit the content of that share. - 81 - 3.7.3 Access Control When a network share is created, you can assign access rights to users or user groups: 9 Deny access Access to the network share will be denied. 9 Read only Users can read the files only on the network share. 9 Full access Users can read, write, create, or delete files and folders on the network share. 3.7.4 Delete Select a share and click Delete. Click OK to confirm. - 82 - 3.7.5 Restore If the default network shares of TS-209 are not created successfully, you can use the Restore function to restore the network shares. To do so, click Restore and the shares will be created. - 83 - 3.7.6 NFS Access Control (for TS-209 Pro only) You can set the NFS access right of the network share. The Public folder is for open access while access is denied for other default network shares. For detailed configuration, please click on the link “Click here for more detailed description”. - 84 - 3.8 System Tools System Tools enable you to optimize the maintenance and management of TS209. - 85 - 3.8.1 Alert Notification Enter the e-mail address of the administrator and the IP address of the SMTP server. In case of warning or malfunction, e.g. CPU fan fails, a drive fails or is unplugged, an email will be sent to the administrator automatically. You can go to Event Logs (refer to Chapter 3.9) to check the details of all errors and warnings. If your mailbox requires SMTP authentication, enter the user name and password. Note: It is recommended to send a test e-mail to make sure you can receive the alert mails. 3.8.2 Restart/ Shutdown Select to restart or shut down TS-209. - 86 - 3.8.3 Hardware Settings You can enable or disable the hardware functions of TS-209. i. Enable configuration reset switch By enabling this option, you can press the reset button for 3 seconds to reset the administrator password and system settings to default. ii. Enable hard disk standby mode When this function is enabled, hard disk will go to standby mode if there is no access within the specified period. The Power LED will glow in blue and the Status LED will be off in hard disk standby mode. iii. Enable light signal alert when the free size of SATA disk is less than the value The Status LED will blink red and green when this function is enabled and the free space of the SATA disk is less than the value. The range of the value is 1-51200 MB. iv. Auto power on when power resumes after power loss When this function is enabled, TS-209 will turn on automatically when power resumes after improper shutdown or power loss. v. Smart Fan configuration After enabling Smart Fan, the fan rotation speed will be automatically adjusted according to the server temperature. It is recommended to enable this option. By manually setting the fan rotation speed, the fan will rotate at the defined speed continuously. Note: When Smart Fan is enabled, the fan will rotate at high speed when the system temperature reaches 48℃ or above. The fan will rotate at low speed when the system temperature is below 40℃. - 87 - 3.8.4 UPS If your UPS device provides USB interface, you can enable UPS (uninterruptible power supply) support to protect your system from abnormal system shutdown caused by power outage. In case of utility power failure, the system will shut down automatically by probing the power status of the connected UPS unit. 9 Enable UPS support To activate the UPS support, you can select this option. You can set the shutdown timer to turn off the system automatically after the system detects the AC power is abnormal. In general, the UPS can keep supplying the power for the system for about 5~10 minutes, depending on the maximum load of the UPS and the number of the loads connected to it. UPS Model Select the UPS model from the list. If the UPS model you are using is not available on the list, please contact our technical support. IP Address of UPS If you have selected APC UPS with SNMP for UPS model, enter the IP address of the UPS. - 88 - 3.8.5 System Update Note: If the system is running properly, you do not need to update the firmware. Before updating system firmware, please make sure the product model and firmware version are correct. Follow the steps below to update firmware: Step 1: Download the release notes of the same version as the firmware from QNAP website http://www.qnap.com. Read the release notes carefully to make sure you need to upgrade the firmware. Step 2: Before upgrading system firmware, back up all disk data on the server to avoid any potential data loss during system update. Step 3: Click the [Browse…] button to select the correct firmware image for system update. Click Update System to update the firmware. Note: System update may take tens of seconds to several minutes to complete depending on the network connection status. Please wait patiently. The system will inform you when system update is completed. - 89 - 3.8.6 Change Logo You can choose your own picture to display on the login page of TS-209. The size of the picture cannot exceed 20K bytes. - 90 - 3.8.7 Remote Replication (Disaster Recovery) Remote Replication enables you to replicate files on TS-209 to another TS-209 or QNAP NAS series. The files will be compressed before the replication process in order to save time for data transfer. Make sure a network share is created before creating a remote replication task. Using Remote Replication Login TS-209 and go to Remote Replication in System Tools. i. New a. Click New to enter the following page. - 91 - b. Complete all settings and click OK to save or Cancel to quit. c. The port for remote replication is 873, 445, 137~139. If you are using two TS-209 servers behind an NAT router, please open the port 873, 445, 137~139 on NAT router and forward the port to the corresponding LAN IP of TS-209. Otherwise, the remote replication service will be blocked by NAT. Note: To use remote replication, enable Microsoft Networking service, make sure the destination network share and directory have been created, and the user name and password are valid to login the destination folder. - 92 - ii. Edit a. Select the task to be edited. b. Click Edit. c. Modify the settings. d. Click OK to save or Cancel to quit. iii. Delete a. Select the task to be deleted. b. Click Delete. - 93 - 3.8.8 • Backup/ Restore/ Reset Settings To backup all settings, including user accounts, server name and network configuration etc., click Backup and select to open or save the setting file. • To restore all settings, click Browse to select a previously saved setting file and click Restore to confirm. • To reset all settings to default, click Reset. 3.8.9 IP Filter Enter the IP address or network from which the connections to this server will be allowed or rejected. When the connection of a host server is denied, all protocols of that server will not be allowed to access the local server. - 94 - 3.8.10 Network Recycle Bin This function enables files deleted on the shares of TS-209 to be removed to Network Recycle Bin to reserve the files temporarily. To enable this function, check the box “Enable Network Recycle Bin” and click Apply. The system will create a network share "Network Recycle Bin" automatically. To delete all the files in network recycle bin, click “Clean Network Recycle Bin”. - 95 - 3.8.11 Remote Login After enabling this option, you can access this server via Telnet or SSH encrypted connection (only the account “admin” can login remotely). You can use certain Telnet or SSH connection clients for connection, e.g., putty. Please make sure you have opened the configured ports on your router or firewall when using this function. - 96 - 3.9 Event Logs TS-209 can store thousands of recent event logs, including warning, error and information messages. In case of system malfunction, event logs can be retrieved to analyze system problems. - 97 - Chapter 4. Copy Data Directly by Front USB Port to TS-209 TS-209 supports direct copy of data on USB devices to TS-209 by using the Copy button. To use this function, please follow the steps below: 1. Make sure a SATA disk is installed correctly in TS-209 according to the instructions in Chapter 2.1. 2. Turn on TS-209. 3. Format the SATA disk in SATA Disk page of Device Configuration (refer to Chapter 3.5.1). A system default folder Qusb will be created in TS-209. 4. Connect USB devices, e.g. digital camera, flash to the front USB port of TS209. 5. Press the Copy button on TS-209. All data on the USB device will be copied to the folder Qusb/(xxxxyyzz)* on TS-209 instantly. Intelligent One Touch Copy Button# USB 2.0 #Intelligent one touch copy button: TS-209 will detect the data in the connected USB device automatically. The first time a USB device is connected, press the Copy button and TS-209 will copy all data in the device automatically. When the same device is connected again and there are changes to the data in the device, press the Copy button and TS-209 will copy all files in the device. If there are no changes, press the Copy button and TS-209 will not copy the files. * xxxx: year ; yy: month; zz: date - 98 - Chapter 5. Multimedia Station 5.1 Share Photos and Multimedia Files via Web Interface TS-209 provides a user-friendly web management interface for you to manage personal albums easily. You can view images and multimedia files, or browse photos by thumbnails preview. A. Upload photos by web administration 1. To use Multimedia Station of TS-209, make sure a SATA disk is installed correctly in TS-209 according to the instructions in Chapter 2.1. A share folder Qmultimedia will be created. Enable Multimedia function in Network Settings. - 99 - 2. Click on the link http://TS-209 IP/Qmultimedia on Multimedia Station page or click Multimedia Station on the login page of TS-209 to access Multimedia Station. 3. Click on the top right hand corner. Login with administrator name and password to manage Multimedia Station. Users without administration right can view the photos and multimedia files on Multimedia Station but they do not have the right to modify the files. When logging in as Multimedia Station user, you can access the albums authorized for browsing. - 100 - 4. Click Browse to select the multimedia file and then click Upload to upload the file to the folder. 5. You can also create folders by clicking and upload files to the folders. - 101 - B. Upload photos to Qmultimedia folder directly You can upload multimedia files to TS-209 directly by the following steps. 1. Use Run function in Windows. Enter \\[server name] or \\[server IP] to access share folder on TS-209. 2. Open the folder Qmultimedia. Enter the user name and password to login. 3. Drag the files and folders to the folder directly. Please wait patiently when TS-209 is generating thumbnails for images during uploading. - 102 - When you login Multimedia Station by web browser again, all multimedia files will be shown. Buttons on Multimedia Station page Sort files by name Sort files by size Sort files by date Return to previous page Return to Home Create folder Rename file or folder Select all Select none Delete Support file format list Type Picture File format jpg, bmp, gif Video wmx, wvx, avi, mpeg, mpg, mpe, m1v, mp2, mpv2, mp2v, mpa, dvr-ms, asf, asx, wpl, wm, wmx, wmd, wmz Audio wma, wax, cda, wav, mp3, m3u, mid, midi, rmi, aif, aifc, aiff, au, snd Others (Other formats not mentioned above) - 103 - View Photo Information 1. To view detailed information of a photo, click on the thumbnail of the picture. 2. The information of the photo, e.g. file name, resolution, size, camera producer will be shown on the right. You can enter a description for the picture in the box below the photo and click Submit. To reset the description to previously saved version, click Reset. - 104 - Buttons Description You can use the buttons on top of the photo to manage the album. Back to previous level Previous image Next image Rotate image anticlockwise Rotate image clockwise Zoom in Zoom out Play slideshow. Select the time interval in seconds. Click play to play slide show. To stop playing, click stop. Print the image Save the picture Set the picture as album cover - 105 - Play music or video files To play music or video files on Multimedia Station, you can click on the thumbnail of the file displayed on the page. The file will be played by the default music or video playing program of your PC. *It is recommended to use Media Player 10.0 or above as the default playing program. - 106 - C. Configure album authority 1. After logging in as administrator (admin), click to enter the configuration page for album authority. 2. You can view, add, delete and edit users. For any inquiries when using these functions, click on the help button page. - 107 - on the top right corner of the 3. You can edit user profile and album access authority on this page. For any inquiries when using these functions, click on the help button the top right corner of the page. - 108 - on 5.2 Enable iTunes Service Enable iTunes service on TS-209. The mp3 files on Qmultimedia folder of TS-209 will be shared via iTunes. All the computers with iTunes installed on LAN will be able to find, browse and play the music files on TS-209. - 109 - Note: You can download the latest iTunes software from official Apple website http://www.apple.com. - 110 - 5.3 Use UPnP Media Server TS-209 is built-in with TwonkyMedia, DLNA compatible UPnP media server. Enable this function and TS-209 will share particular music, photos or video files to DLNA network. You can use DLNA compatible digital media player (DMP), to play the multimedia files on TS-209 on TV or acoustic sound system. To use UPnP Media Server, please enable this function and click the following link (http://TS-209 IP:9000/) to enter the configuration page of UPnP Media Server. - 111 - Click on the link http://TS-209 IP:9000/ to enter UPnP Media Server configuration page and configure the following settings. (1) Language: Select the display language. (2) Server Name: Enter the name of TS-209 UPnP Media Server. This name will be shown on DMP operation interface, e.g. NAS. (3) Content Locations: Select the share folder on TS-209 to be shared to DMP. The default folder is Qmultimedia. You can add more than one share folder. Click Save Changes to save the settings. After configuring the settings, you can upload mp3, photos, or video files to Qmultimedia folder or other specified folders on TS-209. Note: If you upload multimedia files to the default share folder but the files are not shown on Media Player, you can click “Rescan content directories” or “Restart server” on the Media Server configuration page. The built-in UPnP Media Server of TS-209 is compatible with the DLNA DMP devices in the market. - 112 - About UPnP and DLNA Universal Plug and Play (UPnP) is a set of computer network protocols promulgated by the UPnP Forum. The purpose of UPnP is to allow devices to connect seamlessly and to simplify the implementation of networks at home and in corporate environment. UPnP achieves this by defining and publishing UPnP device control protocols built upon open, Internet-based communication standards. The term UPnP is gleaned from Plug-and-play, a technology for dynamically attaching devices to a computer directly. The Digital Living Network Alliance (DLNA) is an alliance of a number of consumer electronics, mobile and personal computer manufacturers. Its aim is to establish a home network in which the electronic devices from all companies are compatible with each other under an open standard. The alliance also tries to promote the idea of digital home by establishing DLNA certification standard. All DLNA certified products connected to the home network can be accessed seamlessly to enable consumers to enjoy digital life conveniently. - 113 - Chapter 6. Download Station TS-209 supports BT, HTTP and FTP download mechanism. You can add download task to TS-209 and let the server finish downloading independent of PC. Warning: Please be warned against illegal downloading of copyrighted materials. The Download Station functionality is provided for downloading authorized files only. Downloading or distribution of unauthorized materials may result in severe civil and criminal penalty. Users are subject to the restrictions of the copyright laws and should accept all the consequences. 1. To use Download Station, make sure one or two SATA disks are installed correctly in TS-209 according to the instructions in Chapter 2.1. A share folder Qdownload will be created. Enable this function in Network Settings. - 114 - 2. Click on the link http://TS-209 IP/Qdownload on Download Station page or click Download Station on the login page of TS-209 to access Download Station. - 115 - 3. Select Add new BT task or Add new FTP/HTTP task. (A) Add new BT task Click Add new BT task on the left and upload a torrent file. You can download legal torrent files by searching on the Internet. There are websites that provide legally sharing torrents e.g. www.legaltorrents.com. Please download the torrent files to your local disk and then upload them to TS-209. - 116 - (B) Add new FTP/HTTP task To run an FTP download task, click Add new FTP/HTTP task. Enter the FTP URL of the download task and select the share folder to save the files. Enter the user name and password to login the FTP server (if necessary). Then click OK to start downloading. To run an HTTP download task, click Add new FTP/HTTP task. Enter the HTTP URL of the download task and select the share folder to save the files. Then click OK to start downloading. 4. After uploading a download task, the task will appear on View Run List. - 117 - 5. You can select an available download task and click Set Share Time to configure the time for sharing the torrent file, or click Set Config to set the maximum number of downloads at the same time (default value is 3). You can also set the maximum download and upload rate (default value is 0, which means unlimited), and port range (default range is 6881-6999). Note: If the sharing time (larger than 0 hr) is set for a download task, the download task will be moved to Finish List after download completes and the sharing time ends. - 118 - 6. To pause a running download task, select the task in View Run list and click Pause/ Restart download task. You can view tasks that are paused or finished in View Pause List and View Finish List respectively. To restart a paused task, select the task in View Pause List and click Pause/ Restart download task. 7. You can also increase or decrease task priority by clicking Increase download priority and Decrease download priority when there are multiple download tasks. - 119 - 8. To delete a running, paused, or finished task, select the task and click Delete download task. You can select to remove the download task only and retain the downloaded files, or remove the task and downloaded files. 9. To logout Download Station, click on the top right hand corner. - 120 - 10. To access the folders you have downloaded, please go to the share folder Qdownload of TS-209. - 121 - Dump Diagnostic Information To view the diagnostic details of a download task, select a task on the list and click [Dump Diagnostic Information]. - 122 - The common reasons for slow BT download rate or download error are as follow: 1. The torrent file has expired, the peers have stopped sharing this file, or there is error in the file. 2. TS-209 has configured to use fixed IP but DNS server is not configured, or DNS server fails. 3. Set the maximum number of simultaneous downloads as 3-5 for the best download rate. 4. TS-209 is located behind NAT router. The port settings have led to slow BT download rate or no response. You may try the following means to solve the problem: a. Open the BitTorrent port range on NAT router manually. Forward these ports to the LAN IP of TS-209. b. The new TS-209 firmware supports UPnP NAT port forwarding. If your NAT router supports UPnP, enable this function on the NAT. Then enable UPnP NAT port forwarding of TS-209. The BT download rate should be enhanced. - 123 - 6.1 Use Download Software QGet QGet is a powerful management software for maintaining the BT, HTTP and FTP download tasks of multiple TS series NAS servers via LAN or WAN. By using QGet, you no longer need to login the Download Station web interface of multiple servers and manage the settings one by one. Simply install QGet on any computer running Windows 2000/XP, you can manage the download tasks of all your NAS servers. 1. To use QGet, install the software from the product CD-ROM. - 124 - 2. Follow the instructions to install QGet. 3. Run QGet from the installed location. 4. For the details of using QGet, please refer to the online help of the software. - 125 - Chapter 7. Web Server TS-209 enables you to upload web pages and manage your own website easily by Web Server function. It also supports PHP and SQLite for you to establish an interactive website. Once you activate Web Server function, you can access your own homepage from anywhere. You can add hyperlinks in your homepage to connect to all the features of TS-209, such as Download Station, Multimedia Station and Web Server. 1. To use Web Server, make sure a SATA disk is installed correctly in TS-209 according to the instructions in Chapter 2.1. A share folder Qweb will be created. Enable Web Server function and enter the port number in Network Settings. - 126 - 2. You can upload your web pages to the folder Qweb by the following methods: a. By using samba: You can open a web browser and type \\[TS-209 IP]\Qweb or \\[TS-209 name]\Qweb. Login the folder and upload your web pages. b. By FTP: You can login FTP service and upload your web pages to the folder (please refer to Chapter 8). c. By Web File Manager: You can login Web File Manager and upload your web pages to the folder (please refer to Chapter 9). The file index.html, index.htm or index.php will be the home path of your webpage. - 127 - 3. Click on the link http://TS-209 IP/ on Web Server page or click Web Server on the login page of TS-209 to access the web page you upload. Note that when Web Server is enabled, you have to type [http://TS-209 IP address:8080] in your web browser to access the login page of TS-209. - 128 - SQLite Management SQLiteManager is a multilingual web-based tool to manage SQLite databases and can be downloaded from http://www.sqlitemanager.org/. Please follow the steps below or refer to the INSTALL file in the downloaded SQLiteManager-*.tar.gz? to install the SQLiteManager. (1) Unpack your download file SQLiteManager-*.tar.gz. (2) Upload the unpacked folder SQLiteManager-* to \\TS-209 IP\Qweb\. (3) Open your web browser and go to http://TS-209 IP/SQLiteManager-*/. ? : The symbol "*" refers to the version number of SQLiteManager. MySQL Management phpMyAdmin is a multilingual web-based tool to manage MySQL database. You can download phpMyAdmin via http://www.phpmyadmin.net. Please follow the steps below or refer to the downloaded phpMyAdmin INSTALL file to install MySQL. (1) Unzip phpMyAdmin (2) Upload the folder phpMyAdmin to \\TS-209 IP\Qweb\. (3) Open the web browser and go to http://TS-209 IP/phpMyAdmin. Note: Follow the steps below to install and configure phpMyAdmin 2.10.2: 1. Use notepad to edit the file config.sample.inc.php in the folder phpMyAdmin 2. Find $cfg['blowfish_secret'] = ''; 3. Enter a value for '' in the last step; for example, $cfg['blowfish_secret'] = 'myNAS'; 4. Find /* Authentication type */ 5. Following the texts in the last step, enter $cfg['Servers'][$i]['user'] $cfg['Servers'][$i]['password'] = 'root'; = 'admin'; 6. Save config.sample.inc.php as config.inc.php, and upload to \\TS-209 IP\Qweb\phpMyAdmin 7. Enter the administration page of phpMyAdmin, and change your password immediately. - 129 - Chapter 8. FTP Server TS-209 supports FTP service. To use FTP service, enable this function in Network Settings and follow the steps below: 1. Open an IE browser and enter ftp://[TS-209 IP] or ftp://[TS-209 name]. OR 2. By Web File Manager of TS-209. a. Go to TS-209 administration page and click Web File Manager. Enter user name and password to login TS-209. - 130 - b. Click FTP. - 131 - c. Enter the user name and password to login FTP service. d. You can start to use FTP service. - 132 - Chapter 9. Web File Manager Using Web File Manager To use Web File Manager, enable web service in Network Settings first. Launch the web browser and go to TS-209 administration page. Select Web File Manager and enter the correct login name and password. You can login as “guest” to access the network shares open to guest access on TS-209. The login password of guest is guest. Note: Make sure a network share has been created before using Web File Manager. - 133 - Select an existing network share. You can organize share folders of TS-209. With Web File Manager, you can upload, rename, or delete files and folders in the network shares. View files online Click on a file displayed on the web page. The information of the file will be shown. If your browser does not support the file format, a download window will pop up automatically. Download the file and you can open it on your PC. Create folder i. Select a network share or folder in which you want to create a new folder. ii. Click (Create Folder) on the toolbar. iii. Enter the name of the new folder and click OK. - 134 - Rename file or folder i. Select a file or folder to rename. ii. Click iii. Enter the new file or folder name and click OK. (Rename) on the toolbar. Delete file or folder i. Select a file or folder to delete. ii. Click iii. Confirm to delete the file or folder. (Delete) on the toolbar. To delete all files and folders, click (Select All) and Upload file i. Open the folder to upload file to. ii. Click Browse to select the file. iii. Click Upload. Download file i. Select a file to download. ii. Right click the file and select “Save Target As” to save the file. Logout To exit Web File Manager, click (Logout). - 135 - (Delete). View Files Named in Local Language To view files named in Chinese, you may have to configure the browser settings. Take Internet Explorer as an example, follow the steps below to configure the settings. 1. Click on Tools in IE browser. 2. Click Internet Options. 3. Cancel this option in Advanced tab. 4. Click OK. 5. Restart the browser. - 136 - Web File Manager Icons Icon Description Return to the parent folder Refresh the current page Return to network share list home page Create folder Rename file or folder Delete file or folder Select all Cancel selection Logout Full access network share folder Read-only network share folder Malfunction network share folder - 137 - Chapter 10. NetBak Replicator NetBak Replicator is a powerful program installed in user’s system (Windows® OS only) for data backup. You can back up any files or folders on local PC to specified share folder on TS-209 by LAN or WAN. Main Functions 1. Backup • Instant Backup You can select files and folders on local PC and back up files to specified network share folder on TS-209 immediately. • File Filter You can select particular file types to be excluded from backup. The system will filter all files belonging to these file types when backing up data. • Schedule You can specify a schedule for backing up data with this option, e.g. 12:00 every day or 05:00 every Saturday. • Monitor When this option is enabled, the system will upload all files or folders to the server instantly for backup when the files or folders are modified. 2. Restore Select this option to restore backed up data to the original location of the file or to a new directory. 3. Log Enable this option to record events of NetBak Replicator, e.g. the time when NetBak Replicator starts and terminates. - 138 - Install NetBak Replicator 1. Select Install NetBak Replicator in TS-209 CD-ROM. 2. Follow the steps to install NetBak Replicator. 3. Upon successful installation, a shortcut icon will be shown on the Desktop. Double click the icon to run NetBak Replicator. - 139 - Use NetBak Replicator 1. Before using NetBak Replicator, please login TS-209 administration and go to Network Share Management to create a share folder for backup. Make sure the share folder is open for everyone access or you login the share folder with an authorized account or administrator by NetBak Replicator. 2. Run NetBak Replicator. Click . All TS-209 and their share folders within the network will be displayed. - 140 - 3. When the following window appears, all TS-209 in the LAN will appear on the left list. Select a server and a share folder on the right. NetBak Replicator also supports backup via WAN, you can enter the IP address of TS-209 for data backup directly and select a share folder. Then click OK. 4. Enter the user name and password to login the server. 5. You can start the backup procedure upon successful connection to the TS-209. - 141 - Description of Buttons on NetBak Replicator Open Configuration: Open a previously saved NetBak Replicator configuration. Save Configuration: Save the settings on NetBak Replicator. The file will be named as *.rpr Select All: Select all items in the window. Clear All: Clear selection. Select My Document: Select all folders in My Document. • Backup Select files and folders for backup. - 142 - 9 Start When you have selected the files for backup to TS-209, click Start on NetBak Replicator. The program will start to copy the selected files to the specified share folder on TS-209. - 143 - 9 File Filter Click File Filter on NetBak Replicator main page to select file format to be skipped from backup. Then click OK. - 144 - 9 Schedule Click Schedule on NetBak Replicator main page. Then check the box “Enable Backup Schedule” and select the frequency and time for backup. Click OK to confirm. - 145 - 9 Monitor Select a folder for monitoring. When this option is enabled, the system will upload all files or folders to the server instantly for backup when the files or folders are modified. Other files will be gray and cannot be selected. Click Monitor again to cancel monitoring. An icon ® appear on task bar of Windows when monitoring is in process. - 146 - will 9 Initialize Configuration When using this function, NetBak Replicator will record all current settings of the user, including whether or not monitor function is enabled. When the user login again, this program will load the previous recorded settings for users to manage data backup. - 147 - • Restore Please follow the steps below to restore files from TS-209 to your PC. a. Restore to original position: Select the location that the data will be restored to. b. Select new restore position: Click to select the directory to restore data to or select a previously chosen location from the drop-down menu. c. Select the folder(s) and sub-folder(s) for restoring data on the right list and click Start. - 148 - d. Option: Select recovery option and error option. If the restoring file existed, NetBak Replicator will: 9 Overwrite all the files 9 Ask first 9 Skip this file If an error happens in the process of file restoring, NetBak Replicator will: 9 Stop the restoring 9 Ask first 9 Ignore this error message - 149 - • Log a. Save As…: To save all logs on NetBak Replicator, click this button. All logs will be saved as text file. b. Clear All: Click this button to clear all logs. c. Option: Select the type of logs to be recorded― “Record all logs” or “Record error logs only”. - 150 - Chapter 11. Configuring AD Authentication (for TS-209 Pro only) AD environment mixed mode can be supported by TS-209. For example, qatest.com.tw and sub2.qatest.com.tw are domains controlled by Windows 2003 server, and sub1.qatest.com.tw domain is controlled by Windows 2000 server. Please make sure you have enabled the Active Directory Service on the Windows Server and check the following items: z TS-209 DNS server setting must be assigned to AD server. z TS-209 and AD server can synchronize only if their time difference is less than 5 minutes. z TS-209 and AD server will synchronize every 5 minutes. To configure the settings manually, TS-209 has to be set as standalone mode and then added to AD domain. z After adding to AD domain, you must login as Domain_name\Username to - 151 - access Network Neighborhood. Local users of TS-209 cannot access the server by Network Neighborhood. z It is suggested to use Windows 2000 Service Pack 4, or Windows 2003 Service Pack 1. z When TS-209 is added to AD domain, the authority of “everyone” will not work, “everyone” is the default account of TS-209, but is not supported in AD domain. Therefore the authority has to be reset. z The IP address of the AD server should be recorded in the DNS settings on the AD server. z You must change the password of “administrator” after you create “Active Directory” service on the AD server. z The DNS server on the AD Server should have two records on it. For example, when the AD server name is 2003tc.testad.com, the records will be: 2003tc.testad.com Testad.com A A 192.168.1.100 192.168.1.100 One is “A record” for AD server, and the other is the domain “A record” for DNS queries. Adding TS-209 to Windows Server 2003 Active Directory Domain 1. In TCP/IP Configuration in Network Settings, enter the IP address of Windows AD server as the primary DNS Server IP. 2. Go to Microsoft Networking of Network Settings. Enable AD Domain Member, and enter the domain name and the user name with administrator access right to that domain. - 152 - Note: a. Make sure that a fully qualified domain name such as AD.local has been filled in. b. Make sure the user name with administrator access right to that domain. 3. When the following message appears after applying the settings in step 2, check the time zone settings. Make sure the difference of your time and that of AD server is less than 5 minutes. If the time difference is larger than 5 minutes, you will not be able to add the domain member. 4. Upon successful adding of domain member, you can view the list for domain users and local users in User Management. - 153 - 5. Go to Access Control in Network Share Management to configure the access control right of AD users for all available network shares. Using AD users to access services To access services like FTP, Network Neighborhood, or Apple Talk with an AD user account, add DomainName\ before the user name when logging in. - 154 - Chapter 12. Access TS-209 via Linux OS In addition to Microsoft and Mac OS, TS-209 also supports Linux systems through the NFS service: 1. In Linux, run the following command: mount -t nfs <TS-209 IP address>:/<Network Share Name> <Directory to Mount> For example, if the IP address of your TS-209 is 192.168.0.1 and you want to link the network share folder “public” under the /mnt/pub directory, use the following command: mount -t nfs 192.168.0.1:/public /mnt/pub Note: You must login as “root” user to initiate the above command. 2. Login as the user ID you define, you can use the mounted directory to access your network share files. - 155 - Chapter 13. TS-209 Maintenance This section provides a general overview on system maintenance. 13.1 Restart/ Shut down Server Follow the steps below to restart or shut down TS-209. 1. Enter the administration page and select Restart/ Shutdown in System Tools. 2. Click Restart to reboot the server or Shut Down to turn off the server. - 156 - 13.2 Reset Administrator Password and Network Settings To reset the administrator password and network settings of TS-209, 1. Press the reset button of TS-209 for a few seconds. A beep sound will be heard. 2. Login TS-209 with the default user name and password: Default user name: admin Password: admin Note: To reset the system by the reset button, the option “Enable configuration reset switch” in Hardware Settings must be activated. - 157 - 13.3 Disk Failure or Malfunction When you encounter disk malfunction or failure, please do the following: 1. Record the malfunction status or error messages shown in Event Logs. 2. Stop using the failed TS-209 and turn off the server. 3. Contact customer service for technical support. Note: TS-209 must be repaired by professional technicians, do not try to repair the server yourself. Please back up any important files or folders to avoid potential data loss due to disk crash. 13.4 Power Outage or Abnormal Shutdown In case of power outage or improper shutdown of TS-209, the system will resume to the state before it is shut down. If your server does not function properly after restart, please do the following: 1. If the system configuration is lost, configure the system again. 2. In the event of abnormal operation of the server, contact customer service for technical support. To avoid the above situations, please back up your data periodically and make sure you have done the following: • Follow the instructions described in Chapter 13.1 to restart or shut down the server. • If there is an anticipated power outage, back up all important data and turn off the server properly until power supply is resumed. - 158 - Technical Support QNAP provides dedicated online support and customer service via instant messenger. You can contact us by the following means: Online Support: http://www.qnap.com E-mail: [email protected] MSN: [email protected] SKYPE: qnapskype - 159 - GNU GENERAL PUBLIC LICENSE Version 2, June 1991 Copyright (C) 1989, 1991 Free Software Foundation, Inc. 51 Franklin Street, Fifth Floor, Boston, MA 02110-1301, USA Everyone is permitted to copy and distribute verbatim copies of this license document, but changing it is not allowed. Preamble The licenses for most software are designed to take away your freedom to share and change it. By contrast, the GNU General Public License is intended to guarantee your freedom to share and change free software--to make sure the software is free for all its users. This General Public License applies to most of the Free Software Foundation's software and to any other program whose authors commit to using it. (Some other Free Software Foundation software is covered by the GNU Lesser General Public License instead.) You can apply it to your programs, too. When we speak of free software, we are referring to freedom, not price. Our General Public Licenses are designed to make sure that you have the freedom to distribute copies of free software (and charge for this service if you wish), that you receive source code or can get it if you want it, that you can change the software or use pieces of it in new free programs; and that you know you can do these things. To protect your rights, we need to make restrictions that forbid anyone to deny you these rights or to ask you to surrender the rights. These restrictions translate to certain responsibilities for you if you distribute copies of the software, or if you modify it. For example, if you distribute copies of such a program, whether gratis or for a fee, you must give the recipients all the rights that you have. You must make sure that they, too, receive or can get the source code. And you must show them these terms so they know their rights. We protect your rights with two steps: (1) copyright the software, and (2) offer you this license which gives you legal permission to copy, distribute and/or modify the software. Also, for each author's protection and ours, we want to make certain that everyone understands that there is no warranty for this free software. If the - 160 - software is modified by someone else and passed on, we want its recipients to know that what they have is not the original, so that any problems introduced by others will not reflect on the original authors' reputations. Finally, any free program is threatened constantly by software patents. We wish to avoid the danger that redistributors of a free program will individually obtain patent licenses, in effect making the program proprietary. To prevent this, we have made it clear that any patent must be licensed for everyone's free use or not licensed at all. The precise terms and conditions for copying, distribution and modification follow. TERMS AND CONDITIONS FOR COPYING, DISTRIBUTION AND MODIFICATION 0. This License applies to any program or other work which contains a notice placed by the copyright holder saying it may be distributed under the terms of this General Public License. The "Program", below, refers to any such program or work, and a "work based on the Program" means either the Program or any derivative work under copyright law: that is to say, a work containing the Program or a portion of it, either verbatim or with modifications and/or translated into another language. (Hereinafter, translation is included without limitation in the term "modification".) Each licensee is addressed as "you". Activities other than copying, distribution and modification are not covered by this License; they are outside its scope. The act of running the Program is not restricted, and the output from the Program is covered only if its contents constitute a work based on the Program (independent of having been made by running the Program). Whether that is true depends on what the Program does. 1. You may copy and distribute verbatim copies of the Program's source code as you receive it, in any medium, provided that you conspicuously and appropriately publish on each copy an appropriate copyright notice and disclaimer of warranty; keep intact all the notices that refer to this License and to the absence of any warranty; and give any other recipients of the Program a copy of this License along with the Program. You may charge a fee for the physical act of transferring a copy, and you may at your option offer warranty protection in exchange for a fee. 2. You may modify your copy or copies of the Program or any portion of it, thus forming a work based on the Program, and copy and distribute such modifications - 161 - or work under the terms of Section 1 above, provided that you also meet all of these conditions: a) You must cause the modified files to carry prominent notices stating that you changed the files and the date of any change. b) You must cause any work that you distribute or publish, that in whole or in part contains or is derived from the Program or any part thereof, to be licensed as a whole at no charge to all third parties under the terms of this License. c) If the modified program normally reads commands interactively when run, you must cause it, when started running for such interactive use in the most ordinary way, to print or display an announcement including an appropriate copyright notice and a notice that there is no warranty (or else, saying that you provide a warranty) and that users may redistribute the program under these conditions, and telling the user how to view a copy of this License. (Exception: if the Program itself is interactive but does not normally print such an announcement, your work based on the Program is not required to print an announcement.) These requirements apply to the modified work as a whole. If identifiable sections of that work are not derived from the Program, and can be reasonably considered independent and separate works in themselves, then this License, and its terms, does not apply to those sections when you distribute them as separate works. But when you distribute the same sections as part of a whole which is a work based on the Program, the distribution of the whole must be on the terms of this License, whose permissions for other licensees extend to the entire whole, and thus to each and every part regardless of who wrote it. Thus, it is not the intent of this section to claim rights or contest your rights to work written entirely by you; rather, the intent is to exercise the right to control the distribution of derivative or collective works based on the Program. In addition, mere aggregation of another work not based on the Program with the Program (or with a work based on the Program) on a volume of a storage or distribution medium does not bring the other work under the scope of this License. 3. You may copy and distribute the Program (or a work based on it, under Section 2) in object code or executable form under the terms of Sections 1 and 2 above provided that you also do one of the following: - 162 - a) Accompany it with the complete corresponding machine-readable source code, which must be distributed under the terms of Sections 1 and 2 above on a medium customarily used for software interchange; or, b) Accompany it with a written offer, valid for at least three years, to give any third party, for a charge no more than your cost of physically performing source distribution, a complete machine-readable copy of the corresponding source code, to be distributed under the terms of Sections 1 and 2 above on a medium customarily used for software interchange; or, c) Accompany it with the information you received as to the offer to distribute corresponding source code. (This alternative is allowed only for noncommercial distribution and only if you received the program in objects code or executable form with such an offer, in accord with Subsection b above.) The source code for a work means the preferred form of the work for making modifications to it. For an executable work, complete source code means all the source code for all modules it contains, plus any associated interface definition files, plus the scripts used to control compilation and installation of the executable. However, as a special exception, the source code distributed need not include anything that is normally distributed (in either source or binary form) with the major components (compiler, kernel, and so on) of the operating system on which the executable runs, unless that component itself accompanies the executable. If distribution of executable or object code is made by offering access to copy from a designated place, then offering equivalent access to copy the source code from the same place counts as distribution of the source code, even though third parties are not compelled to copy the source along with the object code. 4. You may not copy, modify, sublicense, or distribute the Program except as expressly provided under this License. Any attempt otherwise to copy, modify, sublicense or distribute the Program is void, and will automatically terminate your rights under this License. However, parties who have received copies, or rights, from you under this License will not have their licenses terminated so long as such parties remain in full compliance. 5. You are not required to accept this License, since you have not signed it. However, nothing else grants you permission to modify or distribute the Program or its derivative works. These actions are prohibited by law if you do not accept - 163 - this License. Therefore, by modifying or distributing the Program (or any work based on the Program), you indicate your acceptance of this License to do so, and all its terms and conditions for copying, distributing or modifying the Program or works based on it. 6. Each time you redistribute the Program (or any work based on the Program), the recipient automatically receives a license from the original licensor to copy, distribute or modify the Program subject to these terms and conditions. You may not impose any further restrictions on the recipients' exercise of the rights granted herein. You are not responsible for enforcing compliance by third parties to this License. 7. If, as a consequence of a court judgment or allegation of patent infringement or for any other reason (not limited to patent issues), conditions are imposed on you (whether by court order, agreement or otherwise) that contradict the conditions of this License, they do not excuse you from the conditions of this License. If you cannot distribute so as to satisfy simultaneously your obligations under this License and any other pertinent obligations, then as a consequence you may not distribute the Program at all. For example, if a patent license would not permit royalty-free redistribution of the Program by all those who receive copies directly or indirectly through you, then the only way you could satisfy both it and this License would be to refrain entirely from distribution of the Program. If any portion of this section is held invalid or unenforceable under any particular circumstance, the balance of the section is intended to apply and the section as a whole is intended to apply in other circumstances. It is not the purpose of this section to induce you to infringe any patents or other property right claims or to contest validity of any such claims; this section has the sole purpose of protecting the integrity of the free software distribution system, which is implemented by public license practices. Many people have made generous contributions to the wide range of software distributed through that system in reliance on consistent application of that system; it is up to the author/donor to decide if he or she is willing to distribute software through any other system and a licensee cannot impose that choice. This section is intended to make thoroughly clear what is believed to be a consequence of the rest of this License. - 164 - 8. If the distribution and/or use of the Program are restricted in certain countries either by patents or by copyrighted interfaces, the original copyright holder who places the Program under this License may add an explicit geographical distribution limitation excluding those countries, so that distribution is permitted only in or among countries not thus excluded. In such case, this License incorporates the limitation as if written in the body of this License. 9. The Free Software Foundation may publish revised and/or new versions of the General Public License from time to time. Such new versions will be similar in spirit to the present version, but may differ in detail to address new problems or concerns. Each version is given a distinguishing version number. If the Program specifies a version number of this License which applies to it and "any later version", you have the option of following the terms and conditions either of that version or of any later version published by the Free Software Foundation. If the Program does not specify a version number of this License, you may choose any version ever published by the Free Software Foundation. 10. If you wish to incorporate parts of the Program into other free programs whose distribution conditions are different, write to the author to ask for permission. For software which is copyrighted by the Free Software Foundation, write to the Free Software Foundation; we sometimes make exceptions for this. Our decision will be guided by the two goals of preserving the free status of all derivatives of our free software and of promoting the sharing and reuse of software generally. NO WARRANTY 11. BECAUSE THE PROGRAM IS LICENSED FREE OF CHARGE, THERE IS NO WARRANTY FOR THE PROGRAM, TO THE EXTENT PERMITTED BY APPLICABLE LAW. EXCEPT WHEN OTHERWISE STATED IN WRITING THE COPYRIGHT HOLDERS AND/OR OTHER PARTIES PROVIDE THE PROGRAM "AS IS" WITHOUT WARRANTY OF ANY KIND, EITHER EXPRESSED OR IMPLIED, INCLUDING, BUT NOT LIMITED TO, THE IMPLIED WARRANTIES OF MERCHANTABILITY AND FITNESS FOR A PARTICULAR PURPOSE. THE ENTIRE RISK AS TO THE QUALITY AND PERFORMANCE OF THE PROGRAM IS WITH YOU. SHOULD THE PROGRAM PROVE DEFECTIVE, YOU ASSUME THE COST OF ALL NECESSARY SERVICING, REPAIR OR - 165 - CORRECTION. 12. IN NO EVENT UNLESS REQUIRED BY APPLICABLE LAW OR AGREED TO IN WRITING WILL ANY COPYRIGHT HOLDER, OR ANY OTHER PARTY WHO MAY MODIFY AND/OR REDISTRIBUTE THE PROGRAM AS PERMITTED ABOVE, BE LIABLE TO YOU FOR DAMAGES, INCLUDING ANY GENERAL, SPECIAL, INCIDENTAL OR CONSEQUENTIAL DAMAGES ARISING OUT OF THE USE OR INABILITY TO USE THE PROGRAM (INCLUDING BUT NOT LIMITED TO LOSS OF DATA OR DATA BEING RENDERED INACCURATE OR LOSSES SUSTAINED BY YOU OR THIRD PARTIES OR A FAILURE OF THE PROGRAM TO OPERATE WITH ANY OTHER PROGRAMS), EVEN IF SUCH HOLDER OR OTHER PARTY HAS BEEN ADVISED OF THE POSSIBILITY OF SUCH DAMAGES. END OF TERMS AND CONDITIONS - 166 -

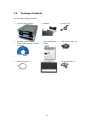
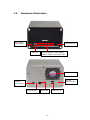
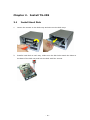
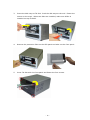

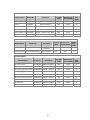
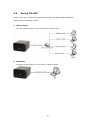
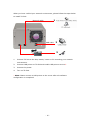
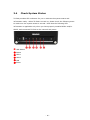
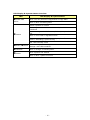
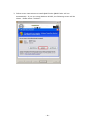
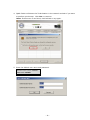
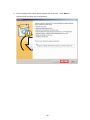
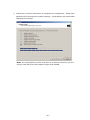
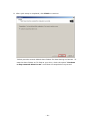
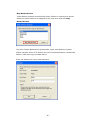
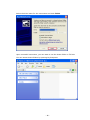

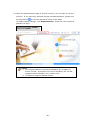
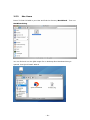
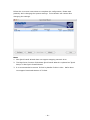
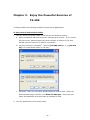
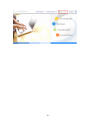
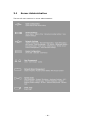
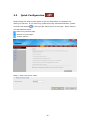
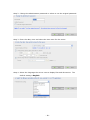

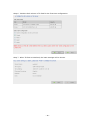
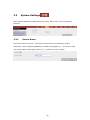
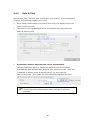
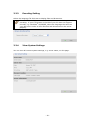
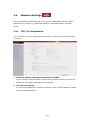

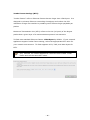

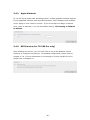
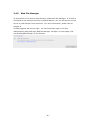
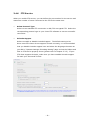
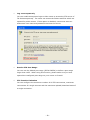
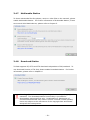
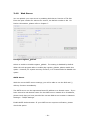
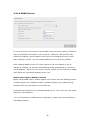
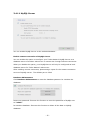
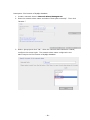
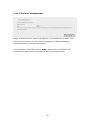
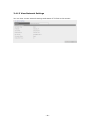
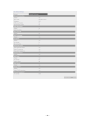
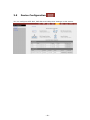
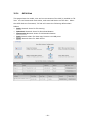
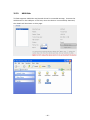
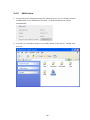
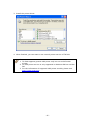
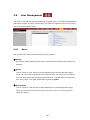
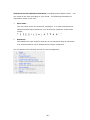
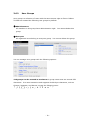
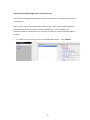
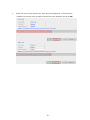
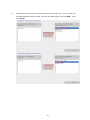

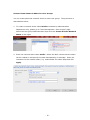
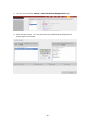
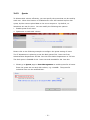

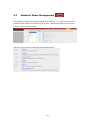
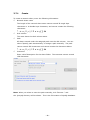
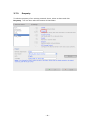
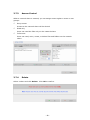
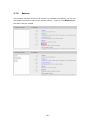
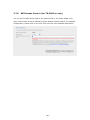
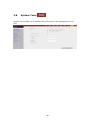
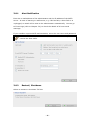
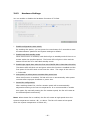
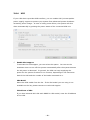
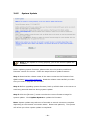
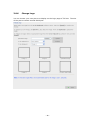
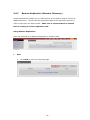
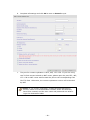
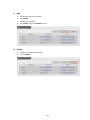
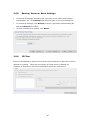
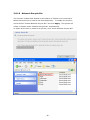
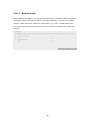
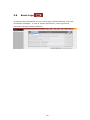
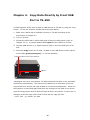
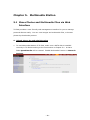
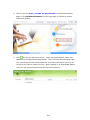
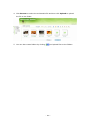
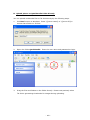
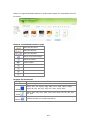
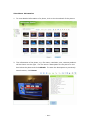

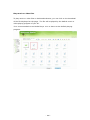
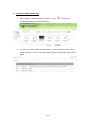
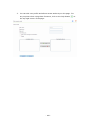
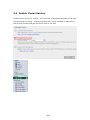
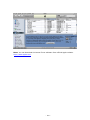
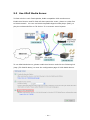

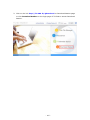
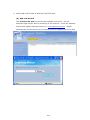
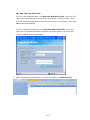
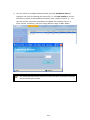
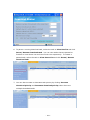
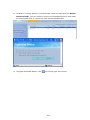
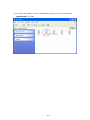
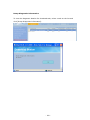
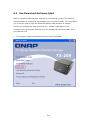
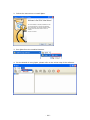
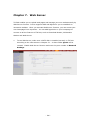
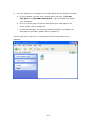
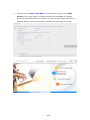
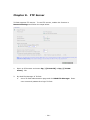
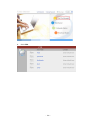
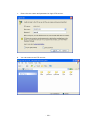
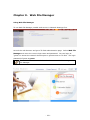
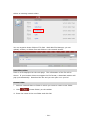
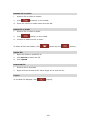
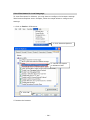
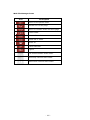
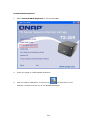
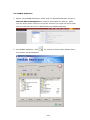
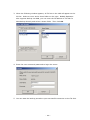
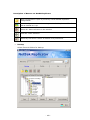
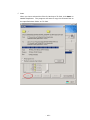
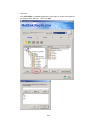
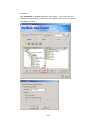
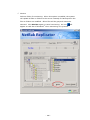
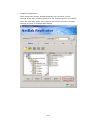
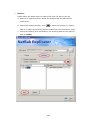
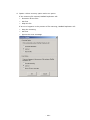
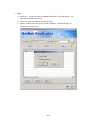
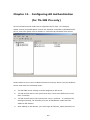
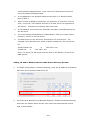

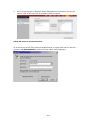
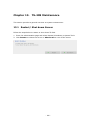
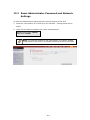


![Manual del usuario - [ [ [ ANSEL ] ] ]](http://vs1.manualzilla.com/store/data/006306298_1-4b727a9f513ab88544573091f86e1211-150x150.png)