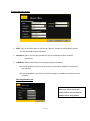
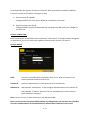
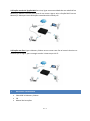
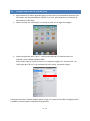
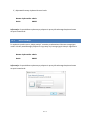
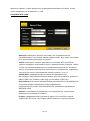
1
Memory 2 Move MAX Short Manual V1.2 INHALT 1. Produktübersicht ...................................................................................................................................... 2 2. Produktfunktionen .................................................................................................................................... 2 3. Lieferumfang ............................................................................................................................................. 3 4. Technische Daten ...................................................................................................................................... 4 5. Mindestanforderungen ............................................................................................................................. 4 6. Produktansicht .......................................................................................................................................... 5 7. LED Anzeige ............................................................................................................................................... 6 8. Nutzung eines PC’s oder MAC ................................................................................................................... 7 8.1 Herstellen einer Wireless LAN Verbindung mit einem PC ........................................................................ 7 8.2 PC Client Software..................................................................................................................................... 8 8.2.1 Mein Speicher ........................................................................................................................................... 9 8.3 Herstellen einer Wireless LAN Verbindung mit einem MAC ................................................................... 10 8.3.1 MAC WiFi Finder ..................................................................................................................................... 11 8.3.2 Mein Speicher ........................................................................................................................................ 13 8.4 Konfiguration des WiFi Gerätes .............................................................................................................. 14 9. Nutzung von mobilen Geräten ................................................................................................................ 18 9.1 iOS Memory 2 Move App Installation ..................................................................................................... 18 9.2 Kabellose Verbindung mit Ihrem iPhone/iPad ........................................................................................ 19 9.3 Benutzeranmeldung (iOS) ....................................................................................................................... 20 9.4 Android Memory 2 Move App Installation ............................................................................................. 21 9.5 Kabellose Verbindung mit Ihrem Android Gerät ..................................................................................... 21 9.6 Benutzer Anmeldung (Android) .............................................................................................................. 23 10. Eingeschränkte Garantiebedingungen .................................................................................................... 24 11. Entsorgung von Elektro-Altgeräten ......................................................................................................... 24 12. EG Konformitätserklärung....................................................................................................................... 25 DE - 1 1. PRODUKTÜBERSICHT Die Memory 2 Move MAX ermöglicht Ihnen einen kabellosen Zugang zu Ihren Videos, Musik, Fotos und Daten, um Sie auf Ihrem iPad®, iPhone®, Tablet PC, Smartphone und Notebook zu streamen – ohne unnötigen Kabelsalat. Weiter bietet Ihnen der USB Steckplatz die Möglichkeit auf eine externe Festplatte oder einen USB Stick zuzugreifen. Wegen der Vielzahl an Anschlussmöglichkeiten von externen Speichermedien, brauchen Sie sich nie wieder Sorgen um begrenzten Speicherplatz zu machen. Für eine bestmögliche Mobilität verfügt die Memory 2 Move MAX über einen wiederaufladbaren Akku. Um den Akku aufzuladen, können Sie das Gerät einfach mit einem freien USB Anschluss Ihres Computers verbinden. Während des Ladevorgangs kann auf die angeschlossenen Speichermedien zugegriffen werden. 2. PRODUKTFUNKTIONEN Streaming von Mediendateien über eine Wi-Fi Verbindung für bis zu 5 Benutzer gleichzeitig. Zugang zu Ihren Musik-, Video-, und Fotodateien über die kostenfreie App für iOS und Android. Batterielaufzeit von bis zu 9 Stunden*. Internetzugriff über die optionale RJ45 Verbindung (LAN-Anschluss) oder kabellos mit 802.11 b/g/n Standard Unterstützt NTFS und FAT32 Formatierung Unterstützt plattformübergreifenden Datenaustausch über LAN-Verbindung zwischen Windows, Mac, iOS und Linux. Unterstützt Nutzeranwendungen auf den verschiedensten Plattformen, inkl. Windows/Mac/Linux/iPad/iPhone/Android *Die genaue Batterielaufzeit ist abhängig von den genutzten Anwendungen und Einstellungen. DE - 2 Nutzung per LAN-Verbindung: Verbinden Sie hierzu ein Ende Ihres RJ45 Kabels mit Memory 2 Move und das andere Ende mit einem freien Port an Ihrem Router. Nun aktivieren Sie die DHCP Funktion an Ihrem Memory 2 Move für eine automatische Vergabe der IP Adresse. Kabellose Nutzung: Verbinden Sie Memory 2 Move mit Ihrem kabellosen Router wie in der nachfolgenden Anleitung beschrieben, um per Wi-Fi auf das Internet zugreifen zu können. 3. LIEFERUMFANG Memory 2 Move USB 3.0 Kabel CD Bedienungsanleitung DE - 3 4. TECHNISCHE DATEN Abmessungen:96mm (L) X 72mm (B) X 17mm (H) WiFi: Standard: 802.11 b/g/n, Frequenz: 2.4 GHz Übertragungsraten: 72Mbps (20MHz) / 150Mbps (40MHz) Netzwerk Interface: 100Mbps Ethernet RJ45 USB Anschluss: Micro USB 2.0, für Datentransfer und Aufladen des Akkus Akkukapazität: 2.600 mAh Betriebstemperatur : Die optimale Betriebstemperatur liegt zwischen 5°C und 40°C 5. MINDESTANFORDERUNGEN Internetverbindung Systemanforderungen: o Windows: XP/Vista/Windows 7/8 o Mac: OS X 10.6.0 und höher o Weitere: Fedora 12 (Linux) und höher PC Internet Browser o Windows: Unterstützt Internet Explorer 7.0 und höher o Mac: Unterstützt Safari 3.0 und höher o Weitere: Firefox 3.5 und höher Router oder Switch DE - 4 6. PRODUKTANSICHT DE - 5 7. LED ANZEIGE Power LED: - Leuchtet nicht: Schnell blinkend -grün: Langsam blinkend -grün: Ständig leuchtend - rot: Schnell blinkend - rot: Das Gerät ist ausgeschaltet. Das Gerät wird ausgeschaltet. Das Gerät wird geladen. Akkuladung unter 30% Akkuladung kritisch Speicher LED: - Ständig weiß leuchtend: Weiß blinkend: Bereitschaftsmodus Aktive Schreib- / Lesevorgänge SD WiFi LED - blau: - Flackernd: LED leuchtet nicht: der Initialisierungsprozess wird gestartet. das Gerät ist ausgeschaltet oder bekommt keinen Strom - Ständig leuchtend: o Initialisierungsprozess abgeschlossen o Bereitschaftsmodus Geräte können verbunden werden. Internet LED: - - Router Modus o Blaue Farbe: o Blau/Rot im Wechsel: o Led leuchtet nicht: gute Signalqualität schlechte Signalqualität keine Internetverbindung Bridge Modus o Blaue Farbe: o Led leuchtet nicht: gute Signalqualität keine Internetverbindung DE - 6 8. NUTZUNG EINES PC’S ODER MAC 8.1 HERSTELLEN EINER WIRELESS LAN VERBINDUNG MIT EINEM PC 1.) Schalten Sie das WiFi Gerät durch Drücken des Power Knopfes auf der Vorderseite des Gerätes an. 2.) Aktivieren Sie die WLAN Funktion an Ihrem PC und klicken Sie in der Taskleiste unten rechts auf das WLAN Symbol. Es öffnet sich folgende Anzeige: 3.) Wählen Sie das Netzwerk mit dem Namen „Memory2Move-XXXX“ aus. Hinweis: Das voreingestellte Passwort lautet im Auslieferungszustand „intenso1“. Bitte geben Sie nach erfolgreich hergestellter Verbindung zu Ihrer eigenen Sicherheit ein neues Passwort ein. 4.) Nachdem Sie erfolgreich eine Verbindung zu Ihrem WiFi Gerät hergestellt haben, starten Sie bitte die mitgelieferte Client Software auf Ihrem PC oder MAC. DE - 7 8.2 PC CLIENT SOFTWARE Bitte starten Sie die Anwendung mit einem Doppelklick auf die Verknüpfung „WiFi Finder“. Die Software sucht automatisch im verbundenen Netzwerk nach Memory 2 Move (siehe Screenshot). Hinweis: Sollte „M2M“ nicht in der Liste der verbundenen Netzwerk Clients zu finden sein, drücken Sie bitte auf „Refresh“, um erneut nach dem Wi-Fi Gerät zu suchen. 1.) Bitte wählen Sie Memory 2 Move im Menü aus und drücken Sie auf „ Log In“, um sich mit der Web Administrationsoberfläche zu verbinden (siehe Screenshot). DE - 8 2.) Bitte geben Sie den Benutzernamen und das zugehörige Passwort ein: Benutzername: admin Passwort: 00000 Hinweis: Bitte geben Sie nach erfolgreich hergestellter Verbindung, zu Ihrer eigenen Sicherheit, ein neues Passwort ein. 3.) Wenn Sie den Menüpunkt „Mein Gerät“ auswählen, wird Ihnen der aktuelle Speicherinhalt der Memory 2 Move angezeigt. Um sich erfolgreich zu verbinden, müssen Sie sich als Administrator mit zugehörigem Passwort verbinden. 8.2.1 MEIN SPEICHER Wenn Sie den Menüpunkt „Mein Gerät“ auswählen, wird Ihnen das unten stehende Bild angezeigt. Um sich erfolgreich zu verbinden, nutzen Sie die folgenden Log In Details: Benutzername: admin Passwort: 00000 Hinweis: Bitte geben Sie nach erfolgreich hergestellter Verbindung, zu Ihrer eigenen Sicherheit, ein neues Passwort ein. DE - 9 8.3 HERSTELLEN EINER WIRELESS LAN VERBINDUNG MIT EINEM MAC Schalten Sie das Wi-Fi Gerät durch Drücken des Power Knopfes auf der Vorderseite des Gerätes an. Warten Sie einige Minuten, bis die LED Leuchte aufhört zu blinken. Aktivieren Sie die WLAN Funktion an Ihrem PC und klicken Sie in der Taskleiste unten rechts auf das WLAN Symbol. Wählen Sie das Netzwerk mit dem Namen „Memory2Move-XXXX“ aus. Hinweis: Das voreingestellte Passwort lautet im Auslieferungszustand „intenso1“. Bitte geben Sie nach erfolgreich hergestellter Verbindung zu Ihrer eigenen Sicherheit ein neues Passwort ein. Nachdem Sie erfolgreich eine Verbindung zu Ihrem Wi-Fi Gerät hergestellt haben, installieren Sie bitte die mitgelieferte Client Software wie folgt: Als Voraussetzung, um das verbundene Wi-Fi Gerät mit Ihrem Computer zu verbinden, nutzen Sie bitte das inkludierte Software Tool „WiFi Finder“ von der beigelegten Treiber CD. Die Software sucht für Sie automatisch das verbundene Wi-Fi Gerät in Ihrem Netzwerk. Klicken Sie einfach per Doppelklick auf das Icon und folgen Sie den Anweisungen auf dem Bildschirm. DE - 10 8.3.1 MAC WIFI FINDER Bitte starten Sie mit einem Doppelklick auf die Verknüpfung die Anwendung „WiFi Finder“. Die Software sucht automatisch im verbundenen Netzwerk nach Memory 2 Move (siehe Screenshot). Hinweis: Sollte „M2M“ nicht in der Liste der verbundenen Netzwerk Clients zu finden sein, drücken Sie bitte auf „Refresh“, um erneut nach dem Wi-Fi Gerät zu suchen. 1.) Bitte wählen Sie Memory 2 Move im Menü aus und drücken Sie auf „ Log In“, um sich mit der Web Administrationsoberfläche zu verbinden (siehe Screenshot). DE - 11 2.) Bitte geben Sie den Benutzernamen und das zugehörige Passwort ein: Benutzername: admin Passwort: 00000 Hinweis: Bitte geben Sie nach erfolgreich hergestellter Verbindung, zu Ihrer eigenen Sicherheit, ein neues Passwort ein. 3.) Wenn Sie den Menüpunkt „Mein Speicher“ auswählen, wird Ihnen der aktuelle Speicherinhalt der Memory 2 Move angezeigt. Um sich erfolgreich zu verbinden, müssen Sie sich als Administrator mit zugehörigem Passwort verbinden. DE - 12 8.3.2 MEIN SPEICHER Wenn Sie den Menüpunkt „Mein Gerät“ auswählen, wird Ihnen das unten stehende Bild angezeigt. Um sich erfolgreich zu verbinden, nutzen Sie die folgenden Log In Details: Benutzername: admin Passwort: 00000 Hinweis: Bitte geben Sie nach erfolgreich hergestellter Verbindung, zu Ihrer eigenen Sicherheit, ein neues Passwort ein. Sie können die Verzeichnisse und Ordner auf der Memory 2 Move erstellen, löschen, kopieren, editieren, umbenennen oder hin-und herschieben. Des Weiteren können Daten zwischen Ihrem MAC und der Memory 2 Move beidseitig ausgetauscht werden (upload/download). DE - 13 8.4 KONFIGURATION DES WIFI GERÄTES Bitte nutzen Sie die PC Client Software, wie oben beschrieben, um eine Verbindung zum WiFi Gerät herzustellen und loggen Sie sich als Administrator auf der WebAdministrationsoberfläche ein. Sie können nun Ihr Gerät konfigurieren. 1.) Während der ersten Nutzung des Gerätes startet nach erfolgter Anmeldung ein sogenannter „Start-Assistent“, der es Ihnen ermöglicht, alle wichtigen Einstellungen einfach vorzunehmen. Hinweis: Wenn Sie auf das X (oben rechts im Assistenten) drücken, verlassen Sie den Start-Assistenten und alle Werkseinstellungen werden als Standard Einstellungen übernommen. 2.) Bitte drücken Sie auf den „Weiter“ Button, um Ihr Gerät zu konfigurieren. 3.) Einrichten des Internetzugriffs .. durch Herstellung einer Verbindung zu einem weiteren verfügbaren Netzwerk DE - 14 Sie haben folgende Optionen: A) Wi-Fi-Modus: Die Memory 2 Move stellt bei dieser Einstellung einen Zugangspunkt für andere drahtlose Geräte dar, damit diese, über eine weitere verfügbare drahtlose Verbindung, in das Internet gelangen können. Dies ist die Standardeinstellung. Hierzu müssen Sie folgende Einstellungen vornehmen: SSID: Geben Sie den SSID Namen ihres Netzwerkes ein oder klicken Sie auf „Neuer Scan“, um automatisch nach allen verfügbaren Netzwerken zu suchen. Passwort: Bitte geben Sie das Passwort für das gewählte lokale drahtlose Netzwerk ein. IP Adresse: 1. Bei Auswahl von „Automatisch“ stellt das Netzwerk Ihnen automatisch eine IP Adresse zur Verfügung. 2. Bei Auswahl von „Statische IP“ müssen Sie selber Ihre IP Adresse für das Netzwerk, mit dem Sie sich verbinden wollen, eingeben. B) LAN-Modus: Direkter Anschluss des Gerätes mit einem LAN Kabel an einen vorhandenen Router. Bitte nutzen Sie hierzu einen freien Steckplatz für ein LAN Kabel an Ihrem Router. Bei dieser Konfiguration schließen Sie das WiFi Gerät per Netzwerkkabel an ein weiteres verfügbares Netzwerk an. Auswahl der LAN Optionen In der Grundeinstellung ist „Dynamische IP“ ausgewählt. Sie können manuell eine IP Adresse vergeben, indem Sie auf den gelben Pfeil klicken und die Option „Statische IP“ auswählen. Hinweis: Durch Klicken auf das X (links oben) können Sie das WAN Optionsmenü verlassen. Hinweis: Sollten Sie keine Verbindung mit einem weiteren Netzwerk herstellen können, fragen Sie bitte Ihren Netzwerk Administrator nach den für Sie gültigen Richtlinien! DE - 15 4.) Klicken Sie auf „Weiter“, um mit der Konfiguration des Gerätes fortzufahren. Sie nehmen nun die WiFi Einstellungen vor. - SSID: Bitte tragen Sie hier den Namen Ihres Netzwerkes ein. In der Grundeinstellung steht hier „Memory2Move-XXXX“. 32 Zeichen sind maximal für den SSID Namen möglich. - Kanal: Bitte tragen Sie hier den Kanal ein, auf dem das WiFi Gerät senden und empfangen soll. Die Grundeinstellung ist „Auto“. Der Kanal wird in diesem Fall automatisch vom Gerät festgelegt. Sie können aber auch manuell festlegen, auf welchem Kanal empfangen und gesendet werden soll. Es stehen die Kanäle 1 bis 14 zur Verfügung. - Wi-Fi-Modus: Der voreingestellte drahtlose Netzwerkstandard lautet: 802.11/b/g/n. Sie können ebenfalls manuell die Modi 11Mbps (802.11b), 54 Mbps (802.11g) oder 150Mbps (802.11n) einstellen. - Sicherheit: Im Auslieferungszustand ist Mixed WPA/WPA2-PSK ausgewählt. Sie haben die Wahl zwischen folgenden Verschlüsselungstypen: WPA-PSK,WPA2-PSK, Mixed WPA/WPA2-PSK. - Passwort: Es muss, je nach ausgewähltem Verschlüsselungstyp, ein Passwort mit mindestens 8 und höchstens 63 Zeichen eingegeben werden. - IP Adresse: Die voreingestellte IP Adresse lautet: 10.10.10.254 mit der Subnetmaske 255.255.255.0 Diese IP Adresse können Sie manuell verändern. DE - 16 5.) Klicken sie auf „Weiter“, um das Administrator Passwort festzulegen. Sollten Sie auf „Überspringen“ drücken, verzichten Sie auf die Festlegung eines neuen Passwortes und übernehmen das Voreingestellte. Nach Beendigung des Start-Assistenten startet das System neu. Dieser Vorgang dauert ca. 2 Minuten. Den aktuellen Status können Sie der Benachrichtigung entnehmen. DE - 17 9. NUTZUNG VON MOBILEN GERÄTEN 9.1 IOS MEMORY 2 MOVE APP INSTALLATION 1. Klicken Sie auf das App Store Icon auf Ihrem Homescreen, wie auf folgendem Bild zu sehen. Suchen Sie nach der kostenfreien „Memory 2 Move“ App und folgen Sie den Anweisungen zur Installation auf dem Bildschirm. Sobald die Installation erfolgreich beendet wurde, ist die „Memory 2 Move” App auf dem Homescreen Ihres Gerätes zu finden (siehe folgendes Bild). DE - 18 9.2 KABELLOSE VERBINDUNG MIT IHREM IPHONE/IPAD 1. Schalten Sie die Memory 2 Move an. Warten Sie ein paar Minuten, bis die Initialisierung des Geräts abgeschlossen ist. Dies ist erkennbar an der blauen Wi-Fi LED, die nach Abschluss der Initialisierung aufhört zu blinken. 2. Klicken Sie auf das Icon für „Einstellungen”, wie in folgendem Bild zu sehen. 3. Klicken Sie auf den Menüpunkt “Wi-Fi”. In der Liste der vorhandenen Wi-Fi Netzwerke sollte das Netzwerk „Memory2Move-XXXX” angezeigt werden. Klicken Sie auf dieses Netzwerk, wie in folgendem Bild zu sehen. Falls Sie in Schritt 8.4. unter „Wi-Fi & Lan Einstellungen“ ein Passwort festgelegt haben, geben Sie dies nun an. Sobald „Memory2Move-XXXX” ausgewählt wurde, erscheint ein Haken vor der SSID und das Wi-Fi Logo in der linken oberen Ecke des Geräts wird angezeigt. DE - 19 9.3 BENUTZERANMELDUNG (IOS) Klicken Sie auf das „Memory 2 Move” Logo um die Anwendung zu starten, wie in folgendem Bild zu sehen. Geben Sie das Administrator Passwort ein, welches Sie während der Konfiguration vergeben haben (Werkseinstellung: 00000). Das Passwort ist nur für die erste Anmeldung erforderlich. Das Gerät speichert Ihre Eingabe, sodass bei der 2. Anmeldung keine Eingabe mehr erforderlich ist. Sobald Sie das Passwort korrekt eingegeben haben, werden Sie automatisch in das Menü „Memory 2 Move“ geführt. Dies ist Ihr direkter Zugriff auf die Wi-Fi Festplatte. DE - 20 9.4 ANDROID MEMORY 2 MOVE APP INSTALLATION 1. Öffnen Sie „Google Playstore“ oder das „App Center“ und suchen Sie nach der kostenfreien „Memory 2 Move“ App. 2. Folgen Sie den Installationsanweisungen auf dem Bildschirm, wie auf dem nachfolgenden Bild zu sehen. 3. Sobald die Installation erfolgreich beendet wurde, ist die „Memory 2 Move” App auf dem Homescreen Ihres Gerätes zu finden (siehe folgendes Bild). 9.5 KABELLOSE VERBINDUNG MIT IHREM ANDROID GERÄT 1. Schalten Sie Memory 2 Move an. Warten Sie ein paar Minuten, bis die Initialisierung des Geräts abgeschlossen ist. Dies ist erkennbar an der blauen Wi-Fi LED, die nach Abschluss der Initialisierung aufhört zu blinken. DE - 21 2. Klicken Sie auf das Icon für „Einstellungen” wie in folgendem Bild zu sehen. 3. Schalten Sie die Wi-Fi Funktion ein, indem Sie den“ virtuellen Schalter “ nach rechts schieben. In der Liste der vorhandenen Wi-Fi Netzwerke sollte das Netzwerk „Memory2MoveXXXX” angezeigt werden. Klicken Sie auf dieses Netzwerk, wie in folgendem Bild zu sehen. Falls Sie in Schritt 8 unter „Wi-Fi & Lan Einstellungen“ ein Passwort festgelegt haben, geben Sie dieses nun an. 4. Wenn das Gerät erfolgreich mit der Wi-Fi Festplatte verbunden wurde, erscheint das Wort “Verbunden” unter der SSID. DE - 22 9.6 BENUTZER ANMELDUNG (ANDROID) 1. Klicken Sie auf das “Memory 2 Move” App Logo, um die App zu starten (siehe nachfolgendes Bild). 2. Geben Sie das Administrator Passwort ein, welches Sie während der Konfiguration vergeben haben (Werkseinstellung: 00000). Das Passwort ist nur für die erste Anmeldung erforderlich. Das Gerät speichert Ihre Eingabe, sodass bei der 2. Anmeldung keine Eingabe mehr erforderlich ist. 3. Sobald Sie das Passwort korrekt eingegeben haben, werden Sie automatisch in das Menü „Memory 2 Move“ geführt. Dies ist Ihr direkter Zugriff auf die Wi-Fi Festplatte. DE - 23 10. EINGESCHRÄNKTE GARANTIEBEDINGUNGEN Die Garantie deckt nur den Ersatz dieses Intenso Produkts ab. Die Garantie gilt nicht für normale Verschleißerscheinungen, die sich aus fehlerhaftem, unsachgemäßem Gebrauch, Nachlässigkeit, Unfall, Inkompatibilität, oder aus mangelhafter Leistung einer bestimmten Computer Hardware oder Computer Software ergeben. Es besteht kein Garantieanspruch bei Nichteinhaltung der Intenso Bedienungsanleitung sowie bei unsachgemäßer Montage, Gebrauch oder bei Defekten durch andere Geräte. Wird das Produkt Erschütterungen, elektrostatischer Entladungen, Wärme- oder Feuchtigkeitseinwirkungen jenseits der Produktspezifikationen ausgesetzt, besteht kein Garantieanspruch. Intenso haftet nicht für Datenverluste oder jegliche, auftretende Begleitschäden oder Folgeschäden, für die Verletzung der Garantiebedingungen oder für sonstige Schäden, gleich welche Ursache zugrunde liegt. Dieses Produkt ist nicht für eine kommerzielle Nutzung oder für medizinische und spezielle Anwendungen vorgesehen, in denen der Ausfall des Produktes Verletzungen, Todesfälle oder erhebliche Sachschäden verursachen kann. 11. ENTSORGUNG VON ELEKTRO-ALTGERÄTEN Die mit diesem Symbol gekennzeichneten Geräte unterliegen der europäischen Richtlinie 2002/96/EC. Alle Elektro- und Elektroaltgräte müssen getrennt vom Hausmüll über die dafür vorgesehenen staatlichen Stellen entsorgt werden. Mit der ordnungsgemäßen Entsorgung von Elektro-Altgeräten vermeiden Sie Umweltschäden. (Intenso)® 49377 Vechta Germany www.intenso.de DE - 24 Intenso GmbH Datum: 19.Juni 2013 12. EG KONFORMITÄTSERKLÄRUNG Wir, die Intenso GmbH, mit Sitz in der Diepholzerstr. 15 in 49377 Vechta, Deutschland erklären auf eigene Verantwortung, dass das Produkt: Modell: Memory 2 Move Max (Artikel Nr. 7405500, 7405501) Beschreibung: Wi-Fi Data Reader auf das sich diese Erklärung bezieht, mit den folgenden Richtlinien und Normen konform ist: R&TTE Richtlinie 1999/5/EG EN 301 489-1 V1.9.1 EN 301 489-17 V2.1.1 EN 300 328 V1.7.1: 2006-10 EN 55022:2006+A1:2007 (Class B) EN 55024:1998+A1:2011+A2:2003 EN 61000-3-2:2006+A1 :2009+A2 :2009 (Class D) EN 61000-3-3:2008 Niederspannungsrichtlinie 2006/95/EG EN 60950-1:2006+A11:2009+A1:2010+A12:2011 Öko-Design Richtlinie 2009/125/EG 1275/2008 278/2009 ROHS Richtlinie 2011/65/EU Die auf das oben angeführte Gerät bezogenen technischen Unterlagen sind an folgender Stelle hinterlegt: Intenso GmbH Diepholzerstr. 15, 49377 Vechta, Deutschland Autorisierte Person: ____________________________ Geschäftsführer: Thomas Pöhlking DE - 25 DE - 26 TABLE OF CONTENT 1. PRODUCT OVERVIEW .............................................................................................................................. 2 2. PRODUCT FEATURES ............................................................................................................................... 2 3. CONTENT OF PACKAGE ........................................................................................................................... 3 4. PRODUCT SPECIFICATION ....................................................................................................................... 4 5. MINIMUM HARDWARE REQUIREMENTS ................................................................................................ 4 6. PRODUCT VIEW....................................................................................................................................... 5 7. LED PANEL .............................................................................................................................................. 6 8. USING PC OR MAC .................................................................................................................................. 7 8.1 LIAISE A WIRELESS LAN CONNECTION WITH THE PC ............................................................................... 7 8.2 PC WIFI FINDER ....................................................................................................................................... 8 8.2.1 MY STORAGE .......................................................................................................................................... 9 8.3 LIAISE A WIRELESS LAN CONNECTION WITH MAC ................................................................................. 10 8.3.1 MAC WIFI FINDER ................................................................................................................................. 11 8.3.2 MY STORAGE......................................................................................................................................... 12 8.4 “MEMORY 2 MOVE” CONFIGURATION .................................................................................................. 13 9. USING MOBILE DEVICES ......................................................................................................................... 18 9.1 IOS CLIENT APP INSTALLATION .............................................................................................................. 18 9.2 WIRELESSLY CONNECTING YOUR IPHONE/IPAD .................................................................................... 19 9.3 IOS USER LOGIN..................................................................................................................................... 20 9.4 ANDROID CLIENT APP INSTALLATION ..................................................................................................... 21 9.5 WIRELESSLY CONNECTING YOUR ANDROID DEVICES .............................................................................. 21 9.6 ANDROID USER LOGIN............................................................................................................................ 23 10. LIMITED WARRANTY TERMS .................................................................................................................. 24 11. DISPOSAL OF USED ELECTRONIC EQUIPMENT ........................................................................................ 24 12. EC DECLARATION OF CONFORMITY ........................................................................................................ 25 EN - 1 1. PRODUCT OVERVIEW “Memory 2 Move” allows to wirelessly access your videos, music, photos, data and stream it to your iPad®, iPhone®, tablets, smartphones, and notebooks – no cords or cables to tangle. The USB-connection offers you furthermore the possibility to access an external hard disc or a USB stick. You will never again have to worry about restricted memory capacity due to the multiple connection variations. The Memory 2 Move has a rechargeable battery for an utmost mobility. In order to charge the battery just connect the device to your computer via a free USB slot. You can access connected memory media while the charging is in progress. 2. PRODUCT FEATURES Stream media over WiFi enabled devices up to 5 users simultaneously Access and stream your music, videos, photos and data using the free custom mobile app supporting iOS and Android operating systems Up to 9 Hours of continuous battery life* Search function to locate and access your file much faster. Internet access capability via the optional RJ45 or wireless, supporting 802.11 b/g/n speeds Supports NTFS, exFAT, FAT and FAT32 Supports LAN data-shares and cross-platforms including Windows, Mac, Linux, iOS and Android. Support multiple NSA, including samba Support multiple platform client tools, including Windows/Mac/Linux/iPad/iPhone/Android *Battery life subject to normal usage conditions and configurations. EN - 2 Wired mode, connect the RJ45 cable into the available port on the back of your router, then enable the DHCP feature of “Memory 2 Move” to automatically assign an IP address. Wireless mode; wirelessly connect “Memory 2 Move” to your existing wireless router to have internet access as illustrated below. 3. CONTENT OF PACKAGE Memory 2 Move USB 2.0 cable CD Manual EN - 3 4. PRODUCT SPECIFICATION Dimensions: Wi-Fi: Standard: 802.11 b/g/n, Frequency: 2.4 GHz Speed: 72Mbps at 20MHz 96mm (L) X 72mm (B) X 17mm (H) 150Mbps at 40MHz Network Interface: 100Mbps Ethernet RJ45 USB Interface: Micro USB 2.0, for data transfer and charging Battery Capacity: 2.600 mAh Operating temperature: The normal operating temperature of the device is between 5-40 Degrees Celsius. 5. MINIMUM HARDWARE REQUIREMENTS Internet Connection PC Operating System Requirements Windows: XP/Vista/Windows 7/8 Mac: OS X 10.6.0 and later Others: Fedora 12 (Linux) and later PC Web Browser Windows: Supports Internet Explorer 7.0 and higher version Mac: Supports Safari 3.0 and higher version Others: Firefox 3.5 and higher version Router or Switch EN - 4 6. PRODUCT VIEW EN - 5 7. LED PANEL Power LED: LED Off: The device is switched-off or no power Green Color: Off: Battery is fully charged Slowly Blinking: Battery charging Blinking Fast: Device Shutting-Down Red Color: Steady Light: Less than 30% available power Blinking Fast: Will soon shut-down, must be charged immediately Storage LED: LED Off: The device is switched-off or no power. White LED: Steady Light: Ready to use Wi-Fi LED: Blue Color: Flashing: Starts the Initialization process Steady Light: Initialization process completed Ready to use Wi-Fi signal is normal LED Off: The device is switched-off or no power Internet LED: Router Mode: Blue Color: Good signal No LED: No connection established Bridge Mode: Blue Color: Good signal No LED: No connection established EN - 6 8. USING PC OR MAC 8.1 LIAISE A WIRELESS LAN CONNECTION WITH THE PC Switch-on “Memory 2 Move” by pressing the power button at the front panel. Wait for few minutes until the Wireless LED stops flashing. Enable the Wi-Fi feature on your PC and open the Wireless Network Connection. Select the “Memory 2 Move” wireless connection (default wireless SSID: Memory2Move-XXXX and password: intenso1). Note: For your own safety, please change your password after successful connection. Once you have successfully connected to “Memory 2 Move”, you may now run the “WiFi Finder” to search for your device and complete the configuration process. Our included “WiFi Finder” is the only software that you will need to install on your computer. This software utility allows you to easily search and look for your “Memory 2 Move” that is connected from your home network. The software must not be installed. Simply click on the WiFi Finder Icon which is part of CD content. EN - 7 8.2 PC WIFI FINDER Double- click the “WiFi Finder” icon to start the software. This utility will search for all the connected devices in your network as mentioned on below screenshot. If you do not find the Memory 2 Move on the list of devices connected in your network, click on the “Refresh” button to update the device list. 1.) Select the Memory 2 Move on the list, and then click on the “Log In” button to enter the web interface. EN - 8 Default user name: admin Default password: 00000 Click on the “Log In” button to access the Web Management Interface. Note: For your own safety, please change the password after successful connection. 2.) You may transfer the data between PC and Memory 2 Move, such as upload the data from PC into the WiFi Disk, or download the data from the WiFi Disk into PC. 8.2.1 MY STORAGE Click “My Storage” button. The above shown window will appear. After input the correctly user name (admin) and password (00000), you may access the Memory 2 Move. For your own safety, please change the password after successful connection. You may transfer the data between PC and Memory 2 Move, such as upload the data from PC into the WiFi Disk, or download the data from the WiFi Disk into PC. EN - 9 8.3 LIAISE A WIRELESS LAN CONNECTION WITH MAC Switch-on the “Memory 2 Move” by pressing the power button at the front panel. Wait for few minutes until the Wireless LED stops flashing. Enable the Wi-Fi feature on your MAC and open the Wireless Network Connection. Select the Memory 2 Move wireless connection (default wireless SSID: Memory2Move-XXXX and password: intenso1). Once you have successfully connected to “Memory 2 Move”, you may now run the “WiFi Finder” to search for your device and complete the configuration process. Our included “WiFi Finder” is the only software that you will need to install on your computer. This software utility allows you to easily search and look for your “Memory 2 Move” that is connected from your home network. The software must not be installed. Simply click on the WiFi Finder Icon which is part of CD content. EN - 10 8.3.1 MAC WIFI FINDER Double-click the “WiFi Finder” icon on your desktop. The software utility will search all the connected devices in your network. If you do not find the Memory 2 Move on the list of devices connected in your network, click on the “Refresh” button to refresh the device list. 1.) Select the Memory 2 Move on the list, and then click on the “Log In” button to enter the web interface. EN - 11 Default user name: admin Default password: 00000 Click on the “Log In” button to access the Web Management Interface. Note: For your own safety, please change the password after successful connection. 2.) You may transfer the data between PC and Memory 2 Move, such as upload the data from PC into the WiFi Disk, or download the data from the WiFi Disk into PC. 8.3.2 MY STORAGE Select the Memory 2 Move and click “My Storage” button. A pop-up window appears. After input the correctly user name (admin) and password (00000), you may access the Memory 2 Move by samba. EN - 12 You may operate all files and directories on the Memory 2 Move by samba, such as: create, edit, delete, copy, move, rename. Furthermore you can transfer the data between MAC and the Memory 2 Move, such as upload the data from MAC into the WiFi Storage, or download the data from the WiFi Storage into MAC. 8.4 “MEMORY 2 MOVE” CONFIGURATION When you are connected successfully to the Memory 2 Move, your Web-Browser opens. You have to log in to the web interface. Default user name: admin Default password: 00000 Click on the “Log In” button to access the Web Management Interface. Once your Wi-Fi enabled-PC is successfully connected to the “Memory 2 Move”, using the “WiFi Finder” will allow you to access our built-in Web Management Interface and configure your device. EN - 13 Startup Wizard During the initial setup, our Wizard will automatically run and will guide you through the stepby-step process on configuring the “Memory 2 Move” as seen on the screenshot above. You may cancel this process by clicking on the “X” at the top right corner of the window. If you cancel the Wizard, it will keep the factory default settings of your “Memory 2 Move”. Click on the “Next” button to continue. Internet Setting … through another connection with an available network You can choose between two available Internet Access options – By default Wireless Access is selected (as you can see on the picture). A. Wireless Access: Connecting the “M2M” device to another wireless network to have internet access. B. Wired Access: Directly connecting the “M2M” to the available port on the back of the router to connect to another network. EN - 14 Selecting Wireless Access SSID: Type-in the SSID name or click on the “Rescan” button to automatically search for the available wireless networks. Password: Type-in the correct password to join the selected wireless network connection. IP Address: Select either DHCP or manually assign an IP address o By selecting DHCP, the host will provide an automatic IP address to connect to the internet. o By selecting Manual, you have to manually assign an IP address to connect to the internet. Selecting Wired Access Note: If you cannot connect with another network, ask your network administrator for the guidelines applicable to you! EN - 15 By selecting Wired Access, the Dynamic IP is selected as the default setting. You can manually assign your own IP address by clicking on the green arrow and select the Static IP option. Click on the “X” button if you wish to cancel and exit this window. Click on the “Next” button to continue the process. The next step is to configure the WiFi and LAN settings. WiFi & LAN Setting SSID: Type-in a combination of letters and numbers only. 32 characters is the maximum allowable SSID length. Channel: The default setting is set to Auto. There are 14 channels available to choose from. Modes: The default setting is 802.11b/g/n. You can also manually set the modes to 11Mbps (802.11b), 54MBPS (802.11G), and 150Mbps (802.11n). Security: Password: Minimum 8 (Maximum 63) characters. IP Address: The default IP address is set to 10.10.10.254 with subnet mask of The WPA-PSK, WPA2-PSK , Mixed WPA/WPA2-PSK (default) are available. 255.255.255.0. The IP address can be changed Click on the “Next” button to change the admin default password. Click on the “Next” button once the password has been modified. You may click on the “Skip” button to keep the default password. EN - 16 After finishing the startup wizard the system will start rebooting. This process will take 2 minutes (see picture below) EN - 17 9. USING MOBILE DEVICES 9.1 IOS CLIENT APP INSTALLATION 1. Click on the “App Store” icon on the Home screen as seen on the following image. Search and locate the free “Memory 2 Move” app and follow the on-screen installation instructions. 2. Once the installation process has been completed, the “Memory 2 Move” app can be found on the home screen as seen on the image. EN - 18 9.2 WIRELESSLY CONNECTING YOUR IPHONE/IPAD 1. Turn-on the “Memory 2 Move”. Wait for a few minutes to complete the initialization process. The blue Wi-Fi LED on the device should remain solid indicating that the initialization process has been completed. 2. Click on the “Settings” icon on the desktop as seen on the screenshot. 3. Click on “Wi-Fi”. Inside the Wi-Fi Networks, the “Memory2Move-XXXX” should appear on the list. Click on the “Memory2Move-XXXX”. Enter the password (default: intenso1) 4. Once the “Memory2Move-XXXX” is selected, a check mark will appear before the SSID and the Wi-Fi logo will appear after the device name on the top left of the display. EN - 19 9.3 IOS USER LOGIN 1. Click on the “Memory 2 Move” icon to launch the app as seen on the image. 2. Enter the Admin password that you assigned during the configuration process (00000). The password is only required during the first login. The device remembers the password and there is no need to enter it again the second time you login. 3. Once the password has been entered correctly, you will be automatically connected into the “Memory 2 Move”. This is your direct access to the connected data carriers that are connected to the device. EN - 20 9.4 ANDROID CLIENT APP INSTALLATION 1. Download the Client App called “Memory 2 Move” from the official website (Google Play Store, Android Market) as seen on the screenshot. 2. Click on the “Install” button and follow the on-screen instructions. 3. Once the Client App is successfully installed, the “Memory 2 Move” icon can be found on your desktop as seen on the image. 9.5 WIRELESSLY CONNECTING YOUR ANDROID DEVICES 1. Turn-on the “Memory 2 Move”. Wait for a few minutes to complete the initialization process. The blue Wi-Fi LED on the device should remain solid indicating that the initialization process has been completed. EN - 21 2. Click on the “Settings” icon on your desktop as seen on the screenshot. 3. Switch the Wi-Fi to ON position. Inside the Wi-Fi networks, the “Memory2MoveXXXX” should appear on the list. Click on the “Memory2Move-XXXX” and enter your password (default: intenso1). 4. The word “Connected” will appear under the SSID name of which is an indication that the Android Device is connected to the “Memory 2 Move” EN - 22 9.6 ANDROID USER LOGIN 1. Click on the “Memory 2 Move” icon to launch the app as seen on the image below. 2. Enter the Admin password that you assigned during the configuration process (default: 00000). The password is only required during the first login. The device remembers the password and there is no need to enter it again the second time you login. 3. Once the password has been entered correctly, you will be automatically connected into the “Memory 2 Move” menu. This is your direct access to the connected data carriers that are connected to the device. EN - 23 10. LIMITED WARRANTY TERMS The warranty covers only the replacement of this Intenso product. The warranty does not cover normal wear and tear resulting from faulty, improper use, negligence, accident, incompatibility, or poor performance of specific computer hardware or computer software. There is no warranty in the case of non-compliance with the Intenso user manual, improper installation, use, or defects caused by other equipment. Warranty is also excluded if the product is subjected to the effects of vibration, electrostatic discharge, heat or moisture beyond the product specifications. Intenso is not liable for data loss or any collateral damage, or consequential damages, for breach of warranty or for any other damage, whatever the underlying cause. This product is not intended for commercial use or for medical and special applications in which the failure of the product may cause injury, death or substantial property damage. 11. DISPOSAL OF USED ELECTRONIC EQUIPMENT Equipment marked with this symbol is subject to the European Directive 2002/96/EC. All electrical devices and used electrical equipment must be disposed of separately from household waste over the appropriate government agencies. Proper disposal of old electronic equipment helps avoid ® (Intenso)environmental damage. 49377 Vechta Germany www.intenso.de EN - 24 Intenso GmbH Date: 19th June 2013 12. EC DECLARATION OF CONFORMITY We, the company Intenso GmbH, with headquarters located at: Diepholzerstr. 15 in 49377 Vechta, Germany Declare under our sole responsibility that the product: Model: Memory 2 Move Max (Artikel Nr. 7405500, 7405501) Description: Wi-Fi Data Reader is in conformity with the provisions of the following Council Directives: Directive R&TTE 1999/5/CE EN 301 489-1 V1.9.1 EN 301 489-17 V2.1.1 EN 300 328 V1.7.1: 2006-10 EN 55022:2006+A1:2007 (Class B) EN 55024:1998+A1:2011+A2:2003 EN 61000-3-2:2006+A1 :2009+A2 :2009 (Class D) EN 61000-3-3:2008 Low Voltage Directive 2006/95/EC EN 60950-1:2006+A11:2009+A1:2010+A12:2011 Ecodesign Directive 2009/125/EC 1275/2008 278/2009 ROHS Richtlinie 2011/65/EU The technical documents related to the device mentioned above have been deposited at: Intenso GmbH Diepholzerstr. 15, 49377 Vechta. Germany Authorized Representative: ____________________________ Executive Director: Thomas Pöhlking EN - 25 EN - 26 SOMMAIRE 1. Aperçu du produit ........................................................................................................................................ 2 2. Fonctions du Produit .................................................................................................................................... 2 3. Volume de livraison ..................................................................................................................................... 3 4. Caractéristiques techniques ........................................................................................................................ 4 5. Configuration matérielle minimum ............................................................................................................. 4 6. Description du produit ................................................................................................................................. 5 7. Affichage LED ............................................................................................................................................... 6 8. Utilisation d’un PC ou d’un MAC .................................................................................................................. 7 8.1 Création d’une connexion Wireless LAN avec un PC ................................................................................... 7 8.2 WiFi Finder sur PC ........................................................................................................................................ 8 8.2.1 Ma mémoire ................................................................................................................................................ 9 8.3 Création d’une connexion Wireless LAN avec un MAC .............................................................................. 10 8.3.1 WiFi Finder sur MAC .................................................................................................................................. 11 8.3.2 Ma mémoire .............................................................................................................................................. 13 8.4 Configuration de Memory 2 Move ............................................................................................................ 14 9. Utilisation d’appareils mobiles .................................................................................................................. 18 9.1 Installation de l’app iOS Memory 2 Move ................................................................................................. 18 9.2 Connexion sans fil à votre iPhone / iPad ................................................................................................... 19 9.3 Connexion de l’Utilisateur iOS ................................................................................................................... 20 9.4 Installation de l’App Android Memory 2 Move ......................................................................................... 21 9.5 Connexion sans fil à votre appareil Android .............................................................................................. 21 9.6 Connexion de l’utilisateur (Android) .......................................................................................................... 23 10. Conditions de garantie limitée ................................................................................................................... 24 11. Élimination des vieux équipements électroniques .................................................................................... 24 12. Déclaration de conformité CE .................................................................................................................... 25 FR - 1 1. APERÇU DU PRODUIT « Memory 2 Move » vous permet l’accès sans fil à vos vidéos, à votre musique, à vos photos et vos données pour les diffuser sur votre iPad®, iPhone®, tablette PC, Smartphone et ordinateur portable – sans salade de câbles inutile. Le port USB vous permet également d’accéder à un disque-dur externe ou une clé USB. En raison de la variété de possibilités de branchement de supports de mémoire externes, vous n’aurez plus jamais besoin de vous inquiéter du manque d’espace. Le biscuit dispose d’une pile rechargeable pour la meilleure mobilité possible. Pour recharger la pile, il suffit de brancher l’appareil dans un port USB libre de votre ordinateur ; il est en même temps possible d’accéder aux supports de mémoire qui y sont branchés 2. FONCTIONS DU PRODUIT Diffusion de fichiers de médias via une connexion Wi-Fi, pour jusqu’à 5 utilisateurs simultanément. Accès à vos fichiers musique, vidéo et photos via l’application gratuite pour iOS et Android. Jusqu’à 9 heures de batterie en autonomie* Accès à Internet via la connexion optionnelle RJ45 (connexion LAN) ou sans fil avec standard 802.11 b/g/n Supporte le formatage NTF et FAT32 Supporte le partage des données via une connexion LAN entre Windows, Mac, iOS et Linux Supporte des applications clients sur différentes plates-formes, y compris Windows/Mac/Linux/iPad/iPhone/Android *La durée de vie précise de la batterie est fonction des applications utilisées et des réglages. FR - 2 Mode par connexion LAN : Pour ce faire, connectez une extrémité de votre câble RJ45 à Memory 2 Move et l’autre extrémité à un port libre de votre routeur. Activez maintenant la fonction DHCP sur votre Memory 2 Move pour l’allocation automatique de l’adresse IP. Utilisation sans fil : Connectez le Memory 2 Move à votre routeur sans fil tel que décrit dans le mode d’emploi suivant pour avoir accès à Internet par la Wi-Fi. 3. VOLUME DE LIVRAISON Câble USB 3.0 Memory 2 Move CD Mode d’emploi FR - 3 4. CARACTERISTIQUES TECHNIQUES Dimensions : 96mm (L) X 72mm (B) X 17mm (H) Wi-Fi : Standard : 802.11 b/g/n, Fréquence : 2.4 GHz Taux de transfert : 72Mbps (20MHz) / 150Mbps (40MHz) Interface réseau : 100Mbps Ethernet RJ45 Branchement USB: Micro USB 2.0, pour le transfert de données et la charge de l’accu Capacité de l’accu: 2600 mAh Température de service : La température de service optimale se situe entre 5 °C et 40 °C. 5. CONFIGURATION MATÉRIELLE MINIMUM Connexion Internet Système d’exploitation o Windows : XP/Vista/Windows 7/8 o Mac : OS X 10.6.0 et versions supérieures o Autres : Fedora 12 (Linux) et versions supérieures Navigateur Internet PC o Windows : Supporte Internet Explorer 7.0 et versions supérieures o Mac : Supporte Safari 3.0 et versions supérieures o Autres : Firefox 3.5 et versions supérieures Routeur ou switch FR - 4 6. DESCRIPTION DU PRODUIT FR - 5 7. AFFICHAGE LED LED Power : - Est éteinte : Est allumée en permanence –vert : Clignote rapidement – vert : Clignote lentement – vert : Est allumée en permanence – rouge : L’appareil est coupé. La batterie est entièrement chargée. L’appareil est en cours de coupure. L’appareil est en opération de charge. Charge de l’accu inférieure à 30 % - Clignote rapidement – rouge : Charge de l’accu critique Mémoire LED : - Est allumée en permanence en blanc : Clignote en blanc : Mode d’attente Opérations d’écriture / lecture actives LED Wi-Fi – bleue : - Vacillante : La LED est éteinte : Le processus d’initialisation est en cours de démarrage. L’appareil est coupé ou ne reçoit pas de courant - Est allumée en permanence : o Processus d’initialisation terminé o Mode d’attente – les appareils peuvent être connectés. LED Internet : - - Mode routeur o Couleur bleue : o Bleu / rouge en alternance : o La LED ne s’allume pas : Fonction Bridge o Couleur bleue : o La LED ne s’allume pas : Bonne qualité de signal Mauvaise qualité de signal Pas de connexion Internet Bonne qualité de signal Pas de connexion Internet FR - 6 8. UTILISATION D’UN PC OU D’UN MAC 8.1 CREATION D’UNE CONNEXION WIRELESS LAN AVEC UN PC Enclenchez l’appareil Wi-Fi en appuyant sur le bouton Power sur la face avant de l’appareil. Activez la fonction WLAN sur votre PC et cliquez dans la barre de tâches en bas à droite sur le symbole WLAN. L’affichage suivant s’ouvre : Sélectionnez le réseau nommé « Memory2Move-XXXX ». Remarque : Le mot de passe préréglé est « intenso1 » à la livraison. Pour votre propre sécurité, veuillez saisir un nouveau mot de passe après la réalisation réussie de la connexion. Lorsque vous avez créé avec succès une connexion avec votre appareil Wi-Fi, veuillez installer le logiciel Client fourni comme décrit ci-dessous : La condition préalable pour connecter l’appareil Wi-Fi connecté avec votre ordinateur, veuillez utiliser l’outil de logiciel intégré « WiFi Finder » du CD de driver. Le logiciel recherche pour vous automatiquement l’appareil Wi-Fi connecté dans votre réseau. Faites simplement un double clic sur l’icône et suivez les instructions à l’écran. FR - 7 8.2 WIFI FINDER SUR PC Double-cliquez sur l’icône « WiFi Finder » pour démarrer le logiciel. Le logiciel cherche automatiquement Memory 2 Move dans le réseau connecté (voir Screenshot). Remarque : Si vous ne trouvez pas « M2M » dans la liste des clients connectés au réseau, veuillez cliquer sur le bouton « Refresh » pour chercher à nouveau l’appareil Wi-Fi. 1.) Veuillez sélectionner Memory 2 Move dans le menu et cliquez sur "Log in" pour vous connecter en tant qu´administrateur (voir photo écran). FR - 8 2.) Pour vous connecter avec succès, utilisez les détails de Log In suivants : Nom d’utilisateur : admin Mot de passe : 00000 Remarque : Pour votre propre sécurité, veuillez saisir un nouveau mot de passe après la réalisation réussie de la connexion. 3.) Vous pouvez créer, effacer, copier, éditer, renommer les répertoires et dossiers sur Memory 2 Move ou les déplacer. 8.2.1 MA MEMOIRE Lorsque vous cliquez sur le bouton « My Storage » ou « Ma mémoire », la fenêtre présentée cidessus s’affiche. Pour vous connecter avec succès, utilisez les détails de Log In suivants : Nom d’utilisateur : admin Mot de passe : 00000 Remarque : Pour votre propre sécurité, veuillez saisir un nouveau mot de passe après la réalisation réussie de la connexion. FR - 9 8.3 CREATION D’UNE CONNEXION WIRELESS LAN AVEC UN MAC Enclenchez l’appareil Wi-Fi en appuyant sur le bouton Power sur la face avant de l’appareil. Activez la fonction WLAN sur votre PC et cliquez dans la barre de tâches en bas à droite sur le symbole WLAN. L’affichage suivant s’ouvre : Sélectionnez le réseau nommé « Memory2Move-XXXX ». Remarque : Le mot de passe préréglé est « intenso1 » à la livraison. Pour votre propre sécurité, veuillez saisir un nouveau mot de passe après la réalisation réussie de la connexion. Lorsque vous avez créé avec succès une connexion avec votre appareil Wi-Fi, veuillez installer le logiciel Client fourni comme décrit ci-dessous : Lorsque vous avez créé avec succès une connexion avec votre appareil Wi-Fi, veuillez installer le logiciel Client fourni comme décrit ci-dessous : La condition préalable pour connecter l’appareil Wi-Fi connecté avec votre ordinateur, veuillez utiliser l’outil de logiciel intégré « WiFi Finder » du CD de driver. Le logiciel recherche pour vous automatiquement l’appareil Wi-Fi connecté dans votre réseau. Faites simplement un double clic sur l’icône et suivez les instructions à l’écran. FR - 10 8.3.1 WIFI FINDER SUR MAC Double-cliquez sur l’icône « WiFi Finder » pour démarrer le logiciel. Le logiciel cherche automatiquement Memory 2 Move dans le réseau connecté (voir Screenshot). Remarque : Si vous ne trouvez pas « M2M » dans la liste des clients connectés au réseau, veuillez cliquer sur le bouton « Actualiser » pour chercher à nouveau l’appareil Wi-Fi. 1.) Veuillez sélectionner Memory 2 Move dans le menu et cliquez sur "Log in" pour vous connecter en tant qu´administrateur (voir photo écran). FR - 11 2.) Pour vous connecter avec succès, utilisez les détails de Log In suivants : Nom d’utilisateur : admin Mot de passe : 00000 Remarque : Pour votre propre sécurité, veuillez saisir un nouveau mot de passe après la réalisation réussie de la connexion. 3.) Vous pouvez créer, effacer, copier, éditer, renommer les répertoires et dossiers sur Memory 2 Move ou les déplacer. FR - 12 8.3.2 MA MEMOIRE Lorsque vous cliquez sur le bouton « My Storage » ou « Ma mémoire », la fenêtre présentée cidessus s’affiche. Pour vous connecter avec succès, utilisez les détails de Log In suivants : Nom d’utilisateur : admin Mot de passe : 00000 Remarque : Pour votre propre sécurité, veuillez saisir un nouveau mot de passe après la réalisation réussie de la connexion. Vous pouvez créer, effacer, copier, éditer, renommer les répertoires et dossiers sur Memory 2 Move ou les déplacer. De plus, vous pouvez transférer les données entre votre MAC et Memory 2 Move (télécharger / charger). FR - 13 8.4 CONFIGURATION DE MEMORY 2 MOVE Veuillez utiliser le logiciel Client tel que décrit ci-dessus pour réaliser une connexion avec l’appareil Wi-Fi et connectez-vous comme administrateur à l’interface d’administration Web. Vous pouvez maintenant configurer votre appareil. Assistant de Démarrage Lors de la première utilisation de l’appareil, un « Assistant de démarrage » s’exécute après l’inscription réussie et vous permet de réaliser aisément tous les réglages importants. Remarque : Lorsque vous cliquez sur le « X » (en haut à droite dans l’assistant), vous quittez l’assistant de démarrage et tous les réglages d’usines seront conservés en tant que réglages standards. Veuillez cliquer sur le bouton « Suivant » pour configurer votre appareil. Réalisation de l’accès Internet … grâce à la réalisation d’une connexion avec un autre réseau disponible. Vous avez le choix entre deux options d’accès à Internet disponibles. En réglage standard, l’accès par fil est préréglé (comme affiché sur l’image ci-dessus). FR - 14 A. Accès sans Fil (WLAN) : Connexion de l’appareil « M2M » à un autre routeur WLAN pour avoir accès à internet. B. Accès avec fil (LAN) : Connexion directe du « M2M » au port disponible à l’arrière de votre routeur pour vous connecter à un autre réseau. Accès LAN En réglage de base, « IP dynamique » est sélectionné. Vous pouvez allouer manuellement une adresse IP en cliquant sur la flèche jaune et en sélectionnant l’option « IP statique ». Accès WLAN : SSID : Saisissez le nom SSID de votre réseau ou cliquez sur « Nouveau Scan » pour rechercher automatiquement tous les réseaux disponibles. Mot de passe : Veuillez saisir le mot de passe pour le réseau local sans fil sélectionné. Adresse IP : - Lorsque vous sélectionnez « Automatique », le réseau met automatiquement une adresse IP à votre disposition. - Lorsque vous sélectionnez « IP statique », vous devez saisir vous-même votre adresse IP pour le réseau auquel vous voulez vous connecter. Remarque : En cliquant sur le « X » (en haut à droite), vous pouvez quitter le menu d’option LAN. Remarque : Si vous ne pouvez pas vous connecter à un autre réseau, questionnez votre fournisseur d’accès pour obtenir les directives qui s’appliquent à votre cas ! FR - 15 Cliquez sur le bouton « Suivant » pour continuer la configuration de Memory 2 Move. L’étape suivant consiste à configurer les réglages Wi-Fi et LAN. Réglages WiFi & LAN SSID: Veuillez saisir ici le nom de votre réseau. En réglage de base, il s’appelle « Memory2Move-XXXX ». 32 caractères sont possibles au maximum pour le nom SSID. Canal: Veuillez saisir ici le canal sur lequel l’appareil Wi-Fi doit émettre et recevoir. Le réglage de base est Auto. Dans ce cas, le canal est déterminé automatiquement par l’appareil. Vous pouvez toutefois aussi déterminer manuellement le canal sur lequel il faut émettre et recevoir. Entre 1 et 13 canaux sont disponibles. Mode Wi-Fi : Le standard de réseau sans fil préréglé est 802.11b/g/n. Vous pouvez aussi régler manuellement les modes 11Mbps (802.11b), 54 MBPS (802.11G), ou 150Mbps (802.11n). Sécurité: A la livraison, Mixed WPA/WPA2-PSK est sélectionné. Vous avez le choix entre les types de codage suivants : Pas de codage, WPA-PSK, WPA2-PSK , Mixed WPA/WPA2-PSK. Mot de passe:En fonction du type de codage, il faut saisir un mot de passe comprenant au moins 8 caractères et 63 au maximum. Adresse IP: L’adresse IP préréglée est 10.10.10.254 avec le masque de sous-réseau 255.255.255.0. Vous pouvez modifier manuellement cette adresse IP. FR - 16 Cliquez sur le bouton « Suivant » pour déterminer le mot de passe de l’administrateur. Si vous cliquez sur le bouton « Sauter », vous renoncez à la détermination d’un nouveau mot de passe et vous gardez le mot de passe préréglé. Après avoir terminé l’assistant de démarrage, le système redémarre. Cette opération dure 2 minutes. Vous pouvez consulter le statut actuel dans le message. FR - 17 9. UTILISATION D’APPAREILS MOBILES 9.1 INSTALLATION DE L’APP IOS MEMORY 2 MOVE 1. Cliquez sur l’icône « App Store » sur l’écran d’accueil comme l’image suivant le montre. Cherchez l’application gratuite « Memory 2 Move » et suivez les instructions d’installation qui s’affichent à l’écran. 2. Une fois l’installation terminée, l’application « Memory 2 Move » se trouve sur l’écran d’accueil de votre appareil (voir l’image ci-dessous). FR - 18 9.2 CONNEXION SANS FIL A VOTRE IPHONE / IPAD 1. Activez le « Memory 2 Move ». Attendez quelques minutes la fin du processus d’initialisation de l’appareil. La LED Wi-Fi bleue sur l’appareil doit arrêter de clignoter, indiquant que le processus d’initialisation est terminé. 2. Cliquez sur l’icône « Réglages » comme indiqué sur l’image suivante. 3. Cliquez sur le point de menu « Wi-Fi ». Dans la liste des réseaux Wi-Fi disponibles, le réseau « Memory2Move-XXXX » devrait apparaître. Cliquez sur « Memory2Move-XXXX ». Entrez le mot de passe (intenso1 par défaut)Si vous avez saisi un mot de passe tel que décrit au point 8.4. sous « Réglages Wi-Fi & LAN », saisissez-le maintenant. Une fois le « Memory2Move-XXXX » a été sélectionné, une coche apparaîtra avant le SSID et le logo Wi-Fi apparaît dans le coin haut à gauche de l’écran. FR - 19 9.3 CONNEXION DE L’UTILISATEUR IOS Cliquez sur le logo « Memory 2 Move » pour lancer l’application tel que le montre l’image cidessous. Entrez le mot de passe d’administrateur que vous avez alloué pendant la configuration (réglage d’usine 00000). Le mot de passe n’est requis que pour la première connexion. L’appareil enregistre votre saisie, ainsi, une nouvelle saisie n’est pas nécessaire à la 2ème connexion. Dès que vous avez saisi correctement le mot de passe, vous arrivez automatiquement dans le menu « Memory 2 Move ». Ceci est votre accès direct au disque dur Wi-Fi. FR - 20 9.4 INSTALLATION DE L’APP ANDROID MEMORY 2 MOVE 1. Ouvrez « Google Play Store » ou le « App Center » et recherchez l’app gratuite « Memory 2 Move ». 2. Suivez les instructions d’installation à l’écran tel que montré sur l’image suivante. 3. Dès que l’installation a été terminée avec succès l’app « Memory 2 Move » se trouve sur l’écran d’accueil de votre appareil (voir l’image suivante). 9.5 CONNEXION SANS FIL A VOTRE APPAREIL ANDROID 1. Activez le « Memory 2 Move ». Attendez quelques minutes la fin du processus d’initialisation de l’appareil. La LED Wi-Fi bleue sur l’appareil doit arrêter de clignoter, indiquant que le procédé d’installation est terminé. FR - 21 2. Cliquez sur l’icône « Réglages » tel que montré dans l’image suivante. 3. Activez la fonction Wi-Fi en glissant le « commutateur virtuel » vers la droite. Dans la liste des réseaux Wi-Fi disponibles, le réseau « Memory2Move-XXXX » devrait apparaître. Cliquez sur ce réseau tel que montré dans l’image suivante. Si vous avez déterminé un mot de passe au point 8 sous « Réglages Wi-Fi & LAN », saisissez-le maintenant. 4. Le mot « Connecté » apparaît sous le nom SSID lorsque l’appareil a été connecté avec succès au disque dur Wi-Fi. FR - 22 9.6 CONNEXION DE L’UTILISATEUR (ANDROID) 1. Cliquez sur le logo de l’app « Memory 2 Move » pour lancer l’application (voir l’image cidessous). 2. Saisissez le mot de passe d’administrateur que vous avez alloué pendant la configuration (réglage d’usine 00000). Le mot de passe n’est requis que pour la première connexion. L’appareil enregistre votre saisie, ainsi, une saisie n’est pas nécessaire lors de la connexion 2ème connexion. 3. Dès que vous avez saisi correctement le mot de passé, vous arrivez automatiquement dans le menu « Memory 2 Move ». Ceci est votre accès direct au disque dur Wi-Fi. FR - 23 10. CONDITIONS DE GARANTIE LIMITÉE La garantie couvre uniquement le remplacement de ce produit Intenso. La garantie ne couvre pas l'usure normale résultant d'une mauvaise, d’une inappropriée, d'une négligence, d'un accident, d’une incompatibilité ou d'une mauvaise performance d'un matériel informatique ou de logiciels informatiques définis. Il n'y a aucun bénéfice de la garantie en cas de non-respect du manuel utilisateur Intenso ainsi qu'en cas de mauvaise installation, utilisation, ou en cas de défauts causés par d'autres équipements. Si l'appareil est exposé à des vibrations, des décharges électrostatiques, aux effets de la chaleur ou de l'humidité au-delà des spécifications du produit, il n'est plus garanti. Intenso n'est pas responsable des pertes de données ou de la survenue de tout autre dommage collatéral ou dommage consécutif, de la violation des conditions de garantie ou de tout autre dommage, quelle qu'en soit la cause sous-jacente. Ce produit n'est pas destiné à un usage commercial ni à des applications médicales et spéciales dans laquelle la défaillance du produit peut entraîner des blessures, la mort ou des dommages matériels considérables. 11. ÉLIMINATION DES VIEUX ÉQUIPEMENTS ÉLECTRONIQUES Les équipements marqués avec ce symbole sont soumis à la directive européenne 2002/96/EC. Tous les appareils électriques et les déchets d'équipement électroniques et électriques doivent être éliminés séparément des ordures ménagères en utilisant les lieux prévus par l'état à cet effet. Éviter d'endommager l'environnement en éliminant les vieux équipements électroniques. (Intenso)® 49377 Vechta Germany www.intenso.de FR - 24 Intenso GmbH Date : 19 Juin 2013 12. DÉCLARATION DE CONFORMITÉ CE Nous, Intenso GmbH, avec siège à Diepholzer Str. 15 à 49377 Vechta, Allemagne déclarons sous notre responsabilité que le produit : Modèle : Memory 2 Move Max (n° article 7405500, 7405501) Description : Wi-Fi Data Reader est conforme aux directives et normes suivantes : directive R&TTE 1999/5/CE EN 301 489-1 V1.9.1 EN 301 489-17 V2.1.1 EN 300 328 V1.7.1: 2006-10 EN 55022:2006+A1:2007 (Class B) EN 55024:1998+A1:2011+A2:2003 EN 61000-3-2:2006+A1 :2009+A2 :2009 (Class D) EN 61000-3-3:2008 directive basse tension 2006/95/CE EN 60950-1:2006+A11:2009+A1:2010+A12:2011 directive conception écologique 2009/125/CE 1275/2008 278/2009 ROHS Richtlinie 2011/65/EU Les documents techniques faisant référence à l'appareil cité en haut sont déposés à l'endroit suivant Intenso GmbH Diepholzer Str. 15, 49377 Vechta, Allemagne Personne autorisée : ____________________________ Directeur général : Thomas Pöhlking FR - 25 FR - 26 INDICE 1. Presentazione introduttiva del prodotto .................................................................................................. 2 2. Funzioni del prodotto................................................................................................................................ 2 3. Dotazione .................................................................................................................................................. 3 4. Dati tecnici ................................................................................................................................................ 4 5. equisiti minimi........................................................................................................................................... 4 6. Raffigurazione delle parti del prodotto..................................................................................................... 5 7. Spia LED ..................................................................................................................................................... 6 8. Uso del PC o del MAC ................................................................................................................................ 7 8.1 Stabilire una connessione WLAN con un PC ............................................................................................. 7 8.2 Wi-Fi Finder per PC ................................................................................................................................... 8 8.2.1 Il mio archivio ............................................................................................................................................ 9 8.3 Stabilire una connessione senza fili con un MAC ................................................................................... 10 8.3.1 Wi-Fi Finder per MAC .............................................................................................................................. 11 8.3.2 Il mio archivio .......................................................................................................................................... 13 8.4 Configurazione di Memory 2 Move ........................................................................................................ 14 9. Utilizzo di apparecchi mobili ................................................................................................................... 17 9.1 Installazione della app Memory 2 Move per iOS .................................................................................... 17 9.2 Connessione senza fili con iPhone/iPad .................................................................................................. 18 9.3 Login dell’utente (iOS) ............................................................................................................................ 20 9.4 Installazione della app Memory 2 Move per Android............................................................................. 21 9.5 Connessione senza fili con il vostro dispositivo Android ........................................................................ 21 9.6 Login utente (Android) ............................................................................................................................ 23 10. Condizioni di garanzia limitate ................................................................................................................ 24 11. Smaltimento di vecchi apparecchi elettrici ............................................................................................. 24 12. Dichiarazione di conformità .................................................................................................................... 25 IT - 1 1. PRESENTAZIONE INTRODUTTIVA DEL PRODOTTO Memory 2 Move vi consente di accedere in modalità senza fili ai vostri video, alla musica, alle foto e ai dati per trasferirli in streaming sul vostro iPad®, iPhone®,tablet, smartphone e notebook – senza l’ingombro dei cavi. Inoltre, la presa USB Le offre la possibilità di accedere a un disco rigido esterno o a una chiavetta USB. Date le innumerevoli possibilità di collegamento di dispositivi di memoria esterni, non deve più preoccuparsi di salvaguardare lo spazio di memoria. Per una mobilità ottimale, Biskuit dispone di una batteria ricaricabile. Per ricaricare la batteria basta collegare il dispositivo ad una porta USB libera del Suo computer. Durante il processo di caricamento è comunque possibile accedere ai dispositivi di memoria collegati. 2. FUNZIONI DEL PRODOTTO Streaming di file multimediali tramite connessione senza fili fino a 5 utenti simultaneamente. Accesso a vostri file musicali, video e fotografici mediante la app gratuita per iOS e Android. Autonomia della batteria fino a 9 ore*. Accesso a Internet mediante cavo RJ45 (rete LAN) oppure senza fili con lo standard 802.11g. Supporta la formattazione NTFS e FAT32. Supporta lo scambio di dati multipiattaforma mediante rete LAN tra Windows, Mac,iOS e Linux. Supporta le applicazioni utente sulle più svariate piattaforme, incl. Windows/Mac/Linux/iPad/iPhone/Android * l’autonomia precisa della batteria dipende dalle applicazioni utilizzate e dalle impostazioni. IT - 2 Uso mediante la connessione LAN: collegate un’estremità del vostro cavo RJ45 a Memory 2 Move e l’altra estremità a un porta libera del vostro router. Ora attivate la funzione DHCP di Memory 2 Move per un’assegnazione automatica dell’indirizzo IP. Uso senza fili: collegate Memory 2 Move con il vostro router senza fili, come descritto nelle seguenti istruzioni d’uso, per accedere a Internet in modalità Wi-Fi. 3. DOTAZIONE Memory 2 Move cavo USB 3.0 CD Istruzioni per l'uso IT - 3 4. DATI TECNICI 5. Dimensioni: Wi-Fi: Standard: Frequenza: Velocità di trasmissione: Interfaccia di rete: Porta USB: dell’accumulatore Capacità dell’accumulatore: Temperatura operativa: 96mm (L) X 72mm (B) X 17mm (H) 802.11 b/g/n, 2.4 GHz 72Mbps (20MHz) / 150Mbps (40MHz) 100Mbps Ethernet RJ45 micro USB 2.0, per trasferimento dati e carica 2600 mAh la temperatura operativa ottimale è compresa tra 5°C e 40°C EQUISITI MINIMI Connessione Internet Requisiti di sistema: o Windows: XP/Vista/Windows 7/8 o Mac: OS X 10.6.0 e versioni più recenti o Inoltre: Fedora 12 (Linux) e versioni più recenti Browser: o Windows: Internet Explorer 7.0 e versioni più recenti o Mac: Safari 3.0 e versioni più recenti o Inoltre: Firefox 3.5 e versioni più recenti Router oppure switch IT - 4 6. RAFFIGURAZIONE DELLE PARTI DEL PRODOTTO IT - 5 7. SPIA LED LED di alimentazione: - Spento: il dispositivo è spento. - Luce verde: la batteria è completamente carica. - Luce verde lampeggiante in modo rapido: è in corso lo spegnimento del dispositivo. - Luce verde lampeggiante in modo lento: è in corso la ricarica del dispositivo. - Luce rossa: carica dell’accumulatore sotto il 30% - Luce rossa lampeggiante in modo rapido: l’ accumulatore è quasi scarico LED de memoria: - Luce bianca: modalità stand-by - Luce bianca lampeggiante: operazioni di lettura/scrittura in corso LED Wi-Fi blu: - Tremolante: avvio del processo di inizializzazione. - Il LED non è acceso: il dispositivo è spento o non riceve corrente elettrica - Sempre acceso: o il processo di inizializzazione è concluso o Modalità stand-by: è possibile collegare dispositivi. LED Internet: - - Modalitàrouter: o Colore blu: buona qualità del segnale. o Blu/rosso in alternanza: cattiva qualità del segnale. o Led non acceso: non connesso a Internet Funzione Bridge o Colore blu: buona qualità del segnale. o Led non acceso: non connesso a Internet IT - 6 8. USO DEL PC O DEL MAC 8.1 STABILIRE UNA CONNESSIONE WLAN CON UN PC Accendere il dispositivo Wi-Fi premendo il pulsante di accensione sul lato anteriore del dispositivo stesso. Attivare la funzione WLAN sul PC e nella barra delle applicazioni in basso a destra fare clic sull’icona WLAN. Si visualizza ora il messaggio: Selezionare la rete con il nome “Memory2Move-XXXX“. Nota: la password predefinita è “intenso1“. Dopo aver stabilito la connessione, inserite per la vostra sicurezza una nuova password. Dopo aver stabilito la connessione al vostro dispositivo Wi-Fi, installate il software client in dotazione nel seguente modo: Per collegare il dispositivo Wi-Fi al vostro computer, utilizzate il tool in dotazione “Wi-Fi Finder“ sul CD driver fornito. Il software cerca automaticamente il dispositivo Wi-Fi nella vostra rete. Basta fare doppio clic sull’icona e seguire le istruzioni sullo schermo. IT - 7 8.2 WI-FI FINDER PER PC Avviare l’applicazione con un doppio clic sul link “Wi-Fi Finder“. Il software cerca automaticamente Memory 2 Move (vedere schermata) nella rete collegata. Nota: se “M2M“ non dovesse essere presente nell’elenco delle reti collegate, fare clic su “Aggiorna“ per effettuare una nuova ricerca del dispositivo Wi-Fi. Selezionare il Memory 2 move dalla lista, poi cliccare su "log in" per entrare nell'interfaccia web IT - 8 Inserite il vostro nome utente e la password Nome utente: admin Password: 00000 Nota: Dopo aver stabilito la connessione, inserite per la vostra sicurezza una nuova password. 8.2.1 IL MIO ARCHIVIO Selezionando la voce del menu “Il mio archivio” si visualizza l’immagine qui sotto. Per stabilire la connessione servitevi dei seguenti dati di accesso: Nome utente: admin Password: 00000 Nota: dopo aver stabilito la connessione, inserite per la vostra sicurezza una nuova password. IT - 9 8.3 STABILIRE UNA CONNESSIONE SENZA FILI CON UN MAC Accendere il dispositivo Wi-Fi premendo il pulsante di accensione sul lato anteriore del dispositivo stesso. Attendere alcuni minuti finché il LED smette di lampeggiare. Attivare la funzione WLAN sul PC e, nella barra delle applicazioni in basso a destra, fare clic sull’icona WLAN. Selezionare la rete con il nome “Memory2Move-XXXX“. Nota: la password predefinita è “intenso1“. Dopo aver stabilito la connessione, inserite per la vostra sicurezza una nuova password. Dopo aver stabilito la connessione al vostro dispositivo Wi-Fi, installate il software client in dotazione nel seguente modo: Per collegare il dispositivo Wi-Fi al vostro computer, utilizzate il tool in dotazione “Wi-Fi Finder“ sul CD driver fornito. Il software cerca automaticamente il dispositivo Wi-Fi nella vostra rete. Basta fare doppio clic sull’icona e seguire le istruzioni sullo schermo. IT - 10 8.3.1 WI-FI FINDER PER MAC Avviare l’applicazione con un doppio clic sul link “Wi-Fi Finder“. Il software cerca automaticamente Memory 2 Move (vedere schermata) nella rete collegata. Nota: se “M2M“ non dovesse essere presente nell’elenco delle reti collegate, fare clic su “Aggiorna“ per effettuare una nuova ricerca del dispositivo Wi-Fi. Selezionare il Memory 2 move dalla lista, poi cliccare su "log in" per entrare nell'interfaccia web IT - 11 Inserite il vostro nome utente e la password Nome utente: admin Password: 00000 Nota: Dopo aver stabilito la connessione, inserite per la vostra sicurezza una nuova password. IT - 12 8.3.2 IL MIO ARCHIVIO Selezionando la voce del menu “Il mio archivio” si visualizza l’immagine qui sotto. Per stabilire la connessione servitevi dei seguenti dati di accesso: Nome utente: admin Password: 00000 Nota: Dopo aver stabilito la connessione, inserite per la vostra sicurezza una nuova password. È possibile creare, cancellare, copiare, modificare, rinominare o spostare directory e cartelle in Memory 2 Move. Inoltre è possibile scambiare dati tra il MAC e Memory 2 Move (caricamento/scaricamento). IT - 13 8.4 CONFIGURAZIONE DI MEMORY 2 MOVE Utilizzare il software come sopra descritto per stabilire un collegamento con il dispositivo Wi-Fi e accedere come amministratore all’interfaccia di connessione con il web. Ora è possibile configurare il dispositivo. Procedura guidata In occasione del primo utilizzo del dispositivo, dopo l’accesso si visualizza una “Procedura guidata” che vi consente di definire facilmente tutte le impostazioni. Nota: premendo sulla X (a destra in alto) si esce dalla procedura guidata e vengono rilevate tutte le impostazioni di fabbrica come impostazioni standard. Fare clic sul pulsante “Successivo” per configurare il dispositivo. Stabilire l’accesso a Internet .. creando la connessione a un’altra rete disponibile. IT - 14 Sono disponibili due opzioni di accesso a Internet. Nelle impostazioni standard è definito l’accesso tramite cavo (vedere l’immagine in alto). A. Accesso senza fili (WLAN) Collegare M2M a un altro router WLAN per connettersi a Internet. B. Accesso tramite cavo (LAN) Collegare M2M a una porta disponibile sul lato posteriore del router per collegarsi a un’altra rete. Accesso cablato LAN: Nelle impostazioni predefinite è stato selezionato “IP dinamico”. È quindi possibile assegnare un indirizzo IP, con un clic sulla freccia gialla e selezionando l’opzione “IP statico”. Accesso WLAN: SSID: inserire il nome SSID della rete oppure fare clic su “Nuova scansione“ per cercare automaticamente tutte le reti. Password: inserire la password per la rete locale senza fili selezionata. Indirizzo IP: selezionando “Automatico” la rete assegna automaticamente un indirizzo IP. selezionando “IP statico” dovrete inserire manualmente la rete tramite la quale desiderate collegarvi. Nota: con un clic su X (in altro a destra) si esce dal menu LAN. Nota: se non dovesse essere possibile stabilire un collegamento con un’altra rete, chiedete al vostro amministratore di rete delucidazioni sulle direttive valide nel vostro caso! IT - 15 Impostazioni Wi-Fi e LAN SSID: inserire il nome della rete. Nelle impostazioni predefinite è indicata “Memory2Move-XXXX“. Il nome SSID può comprendere al massimo 32 caratteri. Canale: inserire qui il canale tramite il quale il dispositivo Wi-Fi deve trasmettere e ricevere. L’impostazione predefinita è “Auto“. Il canale viene definito automaticamente dal dispositivo. È possibile, tuttavia, definire manualmente il canale di trasmissione e ricezione. Sono disponibili da 1 a 13 canali. Modalità Wi-Fi: la modalità standard predefinita per la connessione senza fili è: 802.11/b/g/n. È possibile anche stabilire manualmente le modalità: 11Mbps (802.11b), 54 Mbps (802.11g) o 150Mbps (802.11n). Protezione: come default è selezionata la codifica “WPA/WPA2-PSK mista“. È possibile scegliere tra le seguenti tipologie di codifica: nessuna codifica,WPA-PSK,WPA2-PSK, WPA/WPA2PSK mista. Password: a seconda del tipo di codifica è necessario inserire una password con almeno 8 e al massimo 63 caratteri. Indirizzo IP: l'indirizzo IP preimpostato è: 10.10.10.254 con subnet mask 255.255.255.0. È possibile modificarlo manualmente . Fare clic su “Successivo” per impostare la password di amministratore. Con un clic su “Ignora” si rinuncia a definire una nuova password e si rileva quella esistente, predefinita. IT - 16 Al termine della procedura guidata, viene riavviato il sistema. Questa procedura richiede due minuti. La notifica vi informa dello stato attuale. 9. UTILIZZO DI APPARECCHI MOBILI 9.1 INSTALLAZIONE DELLA APP MEMORY 2 MOVE PER IOS Fare clic sull'icona App Store sulla vostra schermata principale, come raffigurato nell’immagine seguente. Ricercare la app gratuita “Memory 2 Move“ e seguire le istruzioni per l’installazione. IT - 17 9.2 Una volta conclusa l’installazione, l’icona della app “Memory 2 Move“ si visualizza sulla schermata principale (vedere l’immagine seguente). CONNESSIONE SENZA FILI CON IPHONE/IPAD Accendere Memory 2 Move. Attendere qualche minuto fino alla conclusione dell’inizializzazione del dispositivo. Il LED Wi-Fi blu smette di lampeggiare, una volta terminata l’inizializzazione. Fare clic sull’icona “Impostazioni”, come raffigurato nell'immagine seguente. Fare clic sulla voce del menu "Wi-Fi". Nell’elenco delle reti Wi-Fi si dovrebbe ora visualizzare la rete “Memory2Move-XXXX” . IT - 18 Fare clic su questa rete, come raffigurato nell’immagine seguente. Se nel procedimento 8.4. “Impostazioni Wi-Fi e Lan“ avete stabilito una password, inseritela ora. Una volta selezionata “Memory2Move-XXXX”, compare una casella di spunta in corrispondenza di SSID e il logo Wi-Fi si visualizza nell’angolo in alto, a sinistra. IT - 19 9.3 LOGIN DELL’UTENTE (IOS) Fare clic sul logo “Memory 2 Move” per avviare l’applicazione, come raffigurato nell’immagine seguente. Inserire la password di amministratore stabilita durante la configurazione (predefinita: 00000). La password è necessaria solo per il primo login. Il dispositivo memorizza l’inserimento e nel secondo login non è necessario indicare nuovamente la password. Una volta inserita correttamente la password si viene guidati automaticamente al menu “Memory 2 Move“. Questo è l’accesso diretto al disco rigido. IT - 20 9.4 INSTALLAZIONE DELLA APP MEMORY 2 MOVE PER ANDROID 9.5 Aprire “Google Playstore” oppure “App Center” e ricercare la app gratuita “Memory 2 Move“. Seguire le istruzioni per l’installazione, come rappresentato nell’immagine seguente. Una volta conclusa l’installazione, l’icona della app “Memory 2 Move“ si visualizza sulla schermata principale (vedere l’immagine seguente). CONNESSIONE SENZA FILI CON IL VOSTRO DISPOSITIVO ANDROID Accendere Memory 2 Move. Attendere qualche minuto fino alla conclusione dell’inizializzazione del dispositivo. Il LED Wi-Fi blu smette di lampeggiare, una volta terminata l’inizializzazione. IT - 21 Fare clic sull’icona “Impostazioni”, come raffigurato nell’immagine seguente. Attivare la funzione Wi-Fi, spostando verso destra il “pulsante virtuale”. Nell’elenco delle reti Wi-Fi si dovrebbe ora visualizzare la rete “Memory2MoveXXXX”. Fare clic su questa rete, come raffigurato nell’immagine seguente. Se nel procedimento 8. “Impostazioni Wi-Fi e Lan “ avete stabilito una password, inseritela ora. Una volta collegato il dispositivo con il disco rigido Wi-Fi, compare in SSID la parola “Collegato”. IT - 22 9.6 LOGIN UTENTE (ANDROID) Fare clic sulla app con il logo “Memory 2 Move” per avviare l’applicazione, come raffigurato nell’immagine seguente. Inserire la password di amministratore stabilita durante la configurazione (predefinita: 00000). La password è necessaria solo per il primo login. Il dispositivo memorizza l’inserimento e nel secondo login non è necessario indicare nuovamente la password. Una volta inserita correttamente la password, si viene guidati automaticamente al menu “Memory 2 Move“. Questo è l’accesso diretto al disco rigido. IT - 23 10. CONDIZIONI DI GARANZIA LIMITATE La garanzia copre solo la sostituzione di questo prodotto Intenso. La garanzia non vale per normale usura derivante da uso errato o improprio, trascuratezza, incidente, incompatibilità o da altre prestazioni manchevoli di un certo hardware o software. Non sussiste garanzia col mancato rispetto delle istruzioni Intenso, così come col montaggio e uso improprio o con difetti causati da altri apparecchi. Se il prodotto viene esposto a scosse, scariche elettrostatiche, calore o umidità non in conformità alle specifiche del prodotto, non sussiste alcuna garanzia. Intenso non è responsabile per perdite di dati o per danni concomitanti e conseguenti, per la violazione delle condizioni di garanzia o per altri danni indipendentemente dalla loro causa. Questo prodotto non è previsto per un uso commerciale o per applicazioni mediche o di altro genere dove il mancato funzionamento del prodotto possa causare ferimenti, morte o notevoli danni materiali. 11. SMALTIMENTO DI VECCHI APPARECCHI ELETTRICI Gli apparecchi contrassegnati da questo simbolo sono soggetti alla direttiva europea 2002/96/EC. Tutti gli apparecchi elettrici vecchi e non devono essere smaltiti separatamente dai rifiuti domestici presso i luoghi previsti dallo stato. Con uno smaltimento corretto dei vecchi apparecchi elettrici evita danni all’ambiente. (Intenso)® 49377 Vechta Germany www.intenso.de IT - 24 Intenso GmbH Data:19.06.2013 12. DICHIARAZIONE DI CONFORMITÀ Noi, la Intenso GmbH, con sede in Diepholzer Str. 15 a 49377 Vechta, Deutschland dichiariamo su nostra responsabilità che il prodotto: Modello: Memory 2 Move Max (articolo n°. 7405500, 7405501) Descrizione: Wi-Fi Data Reader è conforme alle seguenti direttive e norme: Direttiva R&TTE 1999/5/EG EN 301 489-1 V1.9.1 EN 301 489-17 V2.1.1 EN 300 328 V1.7.1: 2006-10 EN 55022:2006+A1:2007 (Class B) EN 55024:1998+A1:2011+A2:2003 EN 61000-3-2:2006+A1 :2009+A2 :2009 (Class D) EN 61000-3-3:2008 Direttiva Bassa Tensione 2006/95/EG EN 60950-1:2006+A11:2009+A1:2010+A12:2011 Direttiva Ecodesign 2009/125/EG 1275/2008 278/2009 ROHS Richtlinie 2011/65/EU La documentazione tecnica riferita all’apparecchio sopra citato è stata depositata presso il seguente luogo: Intenso GmbH Diepholzer Str. 15, 49377 Vechta, Deutschland Persona autorizzata: ___________________________________ Amministratore delegato: Thomas Pöhlking IT - 25 IT - 26 ÍNDICE 1. Panorâmica geral do produto ................................................................................................................... 2 2. Funções do produto .................................................................................................................................. 2 3. Material fornecido .................................................................................................................................... 3 4. Especificações técnicas ............................................................................................................................. 4 5. Requisitos mínimos ................................................................................................................................... 4 6. Panorâmica do produto ............................................................................................................................ 5 7.1 Indicação LED ............................................................................................................................................ 6 8. Utilização de um PC ou MAC ..................................................................................................................... 7 8.1 Estabelecimento de uma ligação Wireless LAN a um PC .......................................................................... 7 8.2 PC WiFi Finder ........................................................................................................................................... 8 8.2.1 Meu armazenamento ............................................................................................................................... 9 8.3 Estabelecimento de uma ligação Wireless LAN a um MAC..................................................................... 10 8.3.1 MAC WiFi Finder ..................................................................................................................................... 11 8.3.2 Meu armazenamento ............................................................................................................................. 13 8.4 Configuração do Memory 2 Move .......................................................................................................... 14 9. Utilização de dispositivos móveis............................................................................................................ 18 9.1 Instalação da aplicação iOS Memory 2 Move ......................................................................................... 18 9.2 Ligação sem fios ao iPhone/iPad ............................................................................................................. 19 9.3 Login do utilizador (iOS) .......................................................................................................................... 20 9.4 Instalação da aplicação Android Memory 2 Move .................................................................................. 21 9.5 Ligação sem fios a um dispositivo Android ............................................................................................. 21 9.6 Login do utilizador (Android) .................................................................................................................. 23 10. Condições de garantia limitada ............................................................................................................... 24 11. Eliminação de aparelhos electrónicos fora de uso.................................................................................. 24 12. Declaração de conformidade CE ............................................................................................................. 25 PT - 1 1. PANORÂMICA GERAL DO PRODUTO O Memory 2 Move permite-lhe um acesso sem fios aos seus vídeos, músicas, fotos e dados, com vista a transferi-los (stream) para o seu iPad®, iPhone®,Tablet PC, smartphone e portátil – sem um emaranhado de cabos desnecessário. slot USB oferece-lhe ainda a possibilidade de aceder a um disco rígido externo ou a uma pen drive. Devido à diversidade de possibilidades de ligação de suportes de memória externos nunca mais precisará preocupar-se de um espaço de memória limitado. O Biskuit dispõe de uma bateria recarregável para permitir a melhor mobilidade possível. Para carregar a bateria necessita apenas ligar o aparelho a uma conexão USB livre no seu computador. Durante o carregamento pode aceder aos suportes de memória conectados. 2. FUNÇÕES DO PRODUTO Transferência de ficheiros mídia através de uma ligação Wi-Fi para até 5 utilizadores em simultâneo. Acesso aos seus ficheiros de música, vídeo e fotos através de uma aplicação gratuita para iOS e Android. Duração da bateria até 9 horas*. Acesso à Internet através de ligação RJ45 opcional (ligação LAN) ou por rede sem fios 802.11 b/g/n padrão Suporta formatação NTFS e FAT32 Suporta troca de dados multiplataforma através da ligação LAN entre Windows, Mac, iOS e Linux. Suporta aplicações do utilizador nas mais diferentes plataformas, incluindo Windows/Mac/Linux/iPad/iPhone/Android *A duração exata da bateria depende das aplicações e configurações usadas. PT - 2 Utilização através da ligação LAN: Para isso, ligue uma extremidade do seu cabo RJ45 ao Memory 2 Move e a outra à porta livre do seu router. Agora, ative a função DHCP no seu Memory 2 Move para uma atribuição automática do endereço IP. Utilização sem fios: Ligue o Memory 2 Move ao seu router sem fios tal como é descrito no manual que se segue, para conseguir aceder à Internet por Wi-Fi. 3. MATERIAL FORNECIDO Cabo USB 3.0 Memory 2 Move CD Manual de instruções PT - 3 4. ESPECIFICAÇÕES TÉCNICAS Dimensões: Wi-Fi: Padrão: Frequência: Taxas de transferência: Interface de rede: Porta USB: Capacidade da bateria: Tepmperaturade serviço: 96mm (L) X 72mm (B) X 17mm (H) 802.11 b/g/n, 2.4 GHz 72Mbps (20MHz) / 150Mbps (40MHz) 100Mbps Ethernet RJ45 Micro USB 2.0, para transferência de dados e carregamento da bateria 2600mAh A temperatura de serviço ideal encontra-se entre 5 °C e 40 °C 5. REQUISITOS MÍNIMOS Ligação à Internet Requisitos do sistema: o Windows: XP/Vista/Windows 7/8 o Mac: OS X 10.6.0 e superior o Outros: Fedora 12 (Linux) e superior Navegador de Internet para PC o Windows: Suporta Internet Explorer 7.0 e superior o Mac: Suporta Safari 3.0 e superior o Outros: Firefox 3.5 e superior Router ou Switch PT - 4 6. PANORÂMICA DO PRODUTO PT - 5 7.1 INDICAÇÃO LED LED de energia: - Apagado: Sempre aceso – verde: A piscar rapidamente - verde: A piscar lentamente - verde: Sempre aceso - vermelho: A piscar rapidamente - vermelho: O dispositivo está desligado. A bateria está completamente carregada. O dispositivo está a desligar. O dispositivo está a carregar. Carga da bateria inferior a 30% Carga da bateria crítica LED memoria: - Sempre aceso em branco: A piscar em branco: Modo de prontidão Processo de leitura/escrita ativo LED Wi-Fi - azul: - Intermitente: LED não acende: O processo de inicialização está a ser iniciado. O dispositivo está desligado ou sem abastecimento de energia - Sempre aceso: o Processo de inicialização concluído o Modo de prontidão - os dispositivos podem ser ligados. LED de Internet: - - Modo Router o Cor azul: o Azul/vermelho em alternância: o LED não acende: Função Bridge o Cor azul: o LED não acende: Boa qualidade do sinal Má qualidade do sinal Sem ligação à Internet Boa qualidade do sinal Sem ligação à Internet PT - 6 8. UTILIZAÇÃO DE UM PC OU MAC 8.1 ESTABELECIMENTO DE UMA LIGAÇÃO WIRELESS LAN A UM PC Ligue o dispositivo Wi-Fi premindo o botão Power (energia) na parte dianteira do dispositivo. Ative a função WLAN no seu PC e clique no símbolo WLAN presente na parte inferior direita da barra de tarefas. Abre-se a seguinte indicação: Selecione a rede com o nome "Memory2Move-XXXX". Nota: A senha predefinida na entrega do equipamento é "intenso1". Depois de a ligação estar estabelecida, escolha uma nova senha por razões de segurança. Depois de ter estabelecido com sucesso uma ligação ao seu dispositivo Wi-Fi, instale o Client Software fornecido tal como indicado a seguir: Para ligar ao seu computador o dispositivo Wi-Fi conectado é necessário usar a Software Tool "WiFi Finder" fornecida que se encontra no CD do controlador em anexo. O software procura automaticamente na sua rede o dispositivo Wi-Fi ligado. Basta clicar duas vezes no ícone e seguir as instruções no ecrã. PT - 7 8.2 PC WIFI FINDER Inicie a aplicação clicando duas vezes na ligação "WiFi Finder". O software procura automaticamente na rede conectada o Memory 2 Move (veja screenshot). Nota: Se o "M2M" não aparecer na lista de clientes conectados na rede, clique em "Atualizar", para procurar novamente o dispositivo Wi-Fi. 1.) Por favor, escolha Memória 2 Move no menu e clique em "Entrar" para se conectar à interface de administração web. PT - 8 2.) Digite o nome de usuário ea senha associada Nome de utilizador: admin Senha: 00000 Nota: Depois de a ligação estar estabelecida, escolha uma nova senha por razões de segurança. 8.2.1 MEU ARMAZENAMENTO Se selecionar o item do menu "My Storage" ou "Meu armazen.", será exibida a imagem que se segue. Para se conectar corretamente, utilize os seguintes detalhes para login: Nome de utilizador: admin Senha: 00000 Nota: Depois de a ligação estar estabelecida, escolha uma nova senha por razões de segurança. PT - 9 8.3 ESTABELECIMENTO DE UMA LIGAÇÃO WIRELESS LAN A UM MAC Ligue o dispositivo Wi-Fi premindo o botão Power (energia) na parte dianteira do dispositivo. Aguarde alguns minutos, até o LED parar de piscar. Ative a função WLAN no seu PC e clique no símbolo WLAN presente na parte inferior direita da barra de tarefas. Selecione a rede com o nome "Memory2Move-XXXX". Nota: A senha predefinida na entrega do equipamento é "intenso1". Depois de a ligação estar estabelecida, escolha uma nova senha por razões de segurança. Depois de ter estabelecido com sucesso uma ligação ao seu dispositivo Wi-Fi, instale o Client Software fornecido tal como indicado a seguir: Para ligar ao seu computador o dispositivo Wi-Fi conectado, é necessário usar a Software Tool "WiFi Finder" fornecida que se encontra no CD do controlador em anexo. O software procura automaticamente na sua rede o dispositivo Wi-Fi ligado. Basta clicar duas vezes no ícone e seguir as instruções no ecrã. PT - 10 8.3.1 MAC WIFI FINDER Clique duas vezes na ligação para iniciar a aplicação "WiFi Finder". O software procura automaticamente na rede conectada o Memory 2 Move (veja screenshot). Nota: Se o "M2M" não aparecer na lista de clientes conectados na rede, clique em "Atualizar", para procurar novamente o dispositivo Wi-Fi. 1.) Por favor, escolha Memória 2 Move no menu e clique em "Entrar" para se conectar à interface de administração web. PT - 11 2.) Digite o nome de usuário ea senha associada Nome de utilizador: admin Senha: 00000 Nota: Depois de a ligação estar estabelecida, escolha uma nova senha por razões de segurança. PT - 12 8.3.2 MEU ARMAZENAMENTO Se selecionar o item do menu "My Storage" ou "Meu armazen.", será exibida a imagem que se segue. Para se conectar corretamente, utilize os seguintes detalhes para login: Nome de utilizador: admin Senha: 00000 Nota: Depois de a ligação estar estabelecida, escolha uma nova senha por razões de segurança. Pode criar, apagar, copiar, editar, mudar o nome e deslocar diretórios e pastas no Memory 2 Move. Além disso, é possível trocar dados (upload/download) entre o seu MAC e o Memory 2 Move e vice-versa. PT - 13 8.4 CONFIGURAÇÃO DO MEMORY 2 MOVE Utilize o PC Client Software, como descrito anteriormente, para estabelecer uma ligação ao dispositivo Wi-Fi e faça login como administrador na interface do administrador. Pode configurar agora o seu dispositivo. Assistente inicial Durante a primeira utilização do dispositivo e após um login correto inicia-se o chamado "Assistente de início", que lhe permite efetuar todas as configurações importantes com maior facilidade. Nota: Se clicar no X (no lado superior direito no Assistente), sai do Assistente de início e todas as definições de fábrica serão assumidas como configurações padrão. Clique no botão "Seguinte", para configurar o seu dispositivo. Definição do acesso à Internet . através do estabelecimento de uma ligação a uma outra rede disponível PT - 14 Pode escolher entre 2 opções de acesso à internet disponíveis. Na configuração padrão está predefinido o acesso por cabo (tal como é visível na imagem em cima). A. Acesso sem fios (WLAN): Ligue o M2M a um outro router WLAN, para conseguir uma ligação à Internet. B. Acesso com fio (LAN): Ligue o M2M diretamente a uma porta disponível na parte traseira do seu router, para ligar a uma outra rede. Acesso LAN: Na configuração básica está selecionado o "IP dinâmico". Pode atribuir o endereço IP manualmente, clicando na seta amarela e selecionando a opção "IP estático". Acesso WLAN: SSID: Senha: Endereço IP: Introduza o nome do SSID da sua rede ou clique em "Nova procura", para procurar automaticamente todas as redes disponíveis Introduza a senha para a rede sem fios local. -Se selecionar "Automático" a rede disponibiliza automaticamente um endereço IP. -Se selecionar "IP estático" deve introduzir o seu endereço IP para a rede, à qual se pretende ligar. Nota: Se clicar no X (do lado superior direito) pode sair do menu de opções LAN. Nota: Se não conseguir estabelecer nenhuma ligação a uma outra rede, consulte o seu administrador de rede sobre as diretivas em vigor para o seu caso! PT - 15 Clique em "Seguinte", para prosseguir com a configuração do Memory 2 Move. Irá definir agora as definições de Wi-Fi e de LAN. Definições Wi-Fi & LAN - SSID: - Canal: Introduza aqui o nome da sua rede. Na configuração básica encontrase aqui "Memory2Move-XXXX". 32 caracteres são o máximo possível para o nome SSID. Introduza aqui o canal, por onde o dispositivo Wi-Fi deve realizar o envio e a receção. A configuração básica é "Auto"- O canal é, neste caso, estabelecido automaticamente pelo dispositivo. Também pode determinar manualmente, por que canal se deve receber e enviar. Estão disponíveis os canais 1 a 13. - Modo Wi-Fi: O padrão de rede sem fios predefinido é: 802.11/b/g/n. Também pode ajustar manualmente os modos 11Mbps (802.11b), 54 Mbps (802.11g) ou 150Mbps (802.11n). - - Segurança: No estado de fornecimento está selecionado WPA/WPA2-PSK combinada. Pode escolher entre os seguintes tipos de encriptação: Nenhuma encriptação,WPA-PSK,WPA2-PSK, WPA/WPA2PSK combinada. Senha: De acordo com o tipo de encriptação, introduza uma senha com no mínimo 8 e no máximo 63 caracteres. Endereço IP: O endereço IP predefinido é: 10.10.10.254 com a máscara de subrede 255.255.255.0. Este endereço IP pode ser alterado manualmente. PT - 16 Clique em "Seguinte", para determinar a senha do administrador. Se clicar em "Saltar", desiste de determinar uma nova senha e assume o que foi predefinido. Depois de terminar o assistente de início, o sistema reinicia. Este processo demora 2 minutos. Pode consultar o estado atual na informação. PT - 17 9. UTILIZAÇÃO DE DISPOSITIVOS MÓVEIS 9.1 INSTALAÇÃO DA APLICAÇÃO IOS MEMORY 2 MOVE 1. Clique no ícone da aplicação no seu ecrã inicial, tal como se pode ver na seguinte imagem. Procure a aplicação gratuita "Memory 2 Move" e siga as instruções de instalação no ecrã. Assim que a instalação tiver sido concluída com sucesso, irá encontrar a aplicação "Memory 2 Move" no ecrã inicial do seu dispositivo (veja a imagem seguinte). PT - 18 9.2 LIGAÇÃO SEM FIOS AO IPHONE/IPAD 1. Ligue o Memory 2 Move. Aguarde alguns minutos até a inicialização do dispositivo ter terminado. Isso é assinalado pelo LED Wi-Fi em azul, que começa a piscar depois de terminada a inicialização. 2. Clique no ícone das "Definições", tal como se pode ver na seguinte imagem. 3. Clique na opção do menu "Wi-Fi". Na lista das redes Wi-Fi existentes deve ser indicada a rede "Memory2Move-XXXX". Clique nesta rede, tal como se pode ver na seguinte imagem. Se, no passo 8.4., em "Definições Wi-Fi & Lan" tiver estabelecido uma senha, introduza-a agora. Assim que selecionar "Memory2Move-XXXX" surge um visto antes de SSID e o logótipo Wi-Fi é exibido no canto superior esquerdo do dispositivo. PT - 19 9.3 LOGIN DO UTILIZADOR (IOS) Clique no logótipo do "Memory 2 Move" para abrir a aplicação, tal como é indicado na imagem. Introduza a senha do administrador que atribuiu durante a configuração (definições de fábrica: 00000). A senha apenas é necessária no primeiro início de sessão (login). O dispositivo guarda a sua introdução de forma que no 2º login já não a solicita. Assim que a senha tiver sido introduzida corretamente, entra automaticamente no menu "Memory 2 Move". É o seu acesso direto ao disco Wi-Fi. PT - 20 9.4 INSTALAÇÃO DA APLICAÇÃO ANDROID MEMORY 2 MOVE 1. Abra o "Google Playstore" ou o "App Center" e procure a aplicação gratuita "Memory 2 Move". 2. Siga as instruções de instalação no ecrã, tal como se pode ver na imagem que se segue. 3. Assim que a instalação tiver sido concluída com sucesso, irá encontrar a aplicação "Memory 2 Move" no ecrã inicial do seu dispositivo (veja a imagem seguinte). 9.5 LIGAÇÃO SEM FIOS A UM DISPOSITIVO ANDROID 1. Ligue o Memory 2 Move. Aguarde alguns minutos até a inicialização do dispositivo ter terminado. Isso é assinalado pelo LED Wi-Fi em azul, que começa a piscar depois de terminada a inicialização. PT - 21 2. Clique no ícone das "Definições", tal como se pode ver na imagem que se segue. 3. Ative a função Wi-Fi, deslocando o “interruptor virtual“ para a direita. Na lista de redes Wi-Fi existentes deve ser indicada a rede "Memory2Move-XXXX". Clique nesta rede, tal como se pode ver na imagem que se segue. Se, no passo 8, em "Definições Wi-Fi & Lan" tiver estabelecido uma senha, introduza-a agora. 4. Se o dispositivo tiver sido conectado com sucesso ao disco Wi-Fi, surgirá a palavra “Ligado” no SSID. PT - 22 9.6 LOGIN DO UTILIZADOR (ANDROID) 1. Clique no logótipo da aplicação “Memory 2 Move”, para iniciar a aplicação (veja a imagem que se segue). 2. Introduza a senha do administrador que atribuiu durante a configuração (definições de fábrica: 00000). A senha apenas é necessária no primeiro início de sessão (login). O dispositivo guarda a sua introdução de forma que no 2º login já não a solicita. 3. Assim que a senha tiver sido introduzida corretamente, entra automaticamente no menu "Memory 2 Move". É o seu acesso direto ao disco Wi-Fi. PT - 23 10. CONDIÇÕES DE GARANTIA LIMITADA A garantia cobre apenas a substituição deste produto da Intenso. A garantia não é válida em caso de desgastes normais resultantes de uso inadequado, negligência, acidentes, incompatibilidade ou rendimento insuficiente de um certa hardware ou software de computador. O direito a garantia expira em caso de não-cumprimento com o manual de instruções da Intenso, bem como em caso de montagem e uso indevido ou defeitos causados por outros aparelhos. Caso o produto esteja sujeito a vibrações, descargas electrostáticas, influências de calor ou humidade que não estejam incluidas nas especificações do produto, não tem direito a garantia. A Intenso não se responsabiliza por perda de dados ou danos colaterais ou subsequentes, pela violação das condições de garantia ou outros danos independente das suas causas. Este produto não se destina ao uso comercial ou a nível medicinal ou especial, nos quais uma falha do produto pode causar lesões, mortes ou elevados danos materiais. 11. ELIMINAÇÃO DE APARELHOS ELECTRÓNICOS FORA DE USO Aparelhos identificados com este símbolo estão sujeitos à Directiva Europeia 2002/96/EC. Todos os equipamentos eléctricos e electrónicos devem ser separados do lixo doméstico e eliminados pelas respectivas instituições públicas. A eliminação devida de equipamentos electrónicos evita a poluição do ambiente. (Intenso)® 49377 Vechta Germany www.intenso.de PT - 24 Intenso GmbH Data:19 de março de 2013 12. DECLARAÇÃO DE CONFORMIDADE CE Nós, a Intenso GmbH, com sede em Diepholzer Str. 15, 49377 Vechta, Alemanha declaramos sob a nossa responsabilidade que o produto: Modelo: Memory 2 Move Max (Nº de artigo 7405500, 7405501) Descrição: Wi-Fi Data Reader se encontra em conformidade com as seguintes diretivas e normas: Diretiva R&TTE 1999/5/EG EN 301 489-1 V1.9.1 EN 301 489-17 V2.1.1 EN 300 328 V1.7.1: 2006-10 EN 55022:2006+A1:2007 (Class B) EN 55024:1998+A1:2011+A2:2003 EN 61000-3-2:2006+A1 :2009+A2 :2009 (Class D) EN 61000-3-3:2008 Diretiva de baixa tensão 2006/95/EG EN 60950-1:2006+A11:2009+A1:2010+A12:2011 Diretiva de Eco-Design 2009/125/EG 1275/2008 278/2009 ROHS Richtlinie 2011/65/EU Os documentos técnicos relativos ao aparelho acima especificado, estão arquivados no seguinte local: Intenso GmbH Diepholzer Str. 15, 49377 Vechta, Alemanha Pessoa autorizada: ____________________________ Gerente: Thomas Pöhlking PT - 25 PT - 26 ÍNDICE DE CONTENIDO 1. VISIÓN GENERAL DEL PRODUCTO .......................................................................................................... 2 2. FUNCIONES DEL PRODUCTO .................................................................................................................. 2 3. VOLUMEN DE SUMINISTRO ................................................................................................................... 3 4. DATOS TÉCNICOS ................................................................................................................................... 4 5. REQUISITOS MÍNIMOS ........................................................................................................................... 4 6. PRODUCTO ............................................................................................................................................. 5 7. INDICADORES LED .................................................................................................................................. 6 8. UTILIZACIÓN DE UN PC O MAC .............................................................................................................. 7 8.1 ESTABLECIMIENTO DE UNA CONEXIÓN DE RED DE ÁREA LOCAL (LAN) INALÁMBRICA A UN PC .......... 7 8.2 WIFI FINDER PARA PC ............................................................................................................................. 8 8.2.1 MI MEMORIA ......................................................................................................................................... 9 8.3 ESTABLECIMIENTO DE UNA CONEXIÓN DE RED DE ÁREA LOCAL (LAN) INALÁMBRICA A UN MAC ..... 10 8.3.1 WIFI FINDER PARA MAC ....................................................................................................................... 11 8.3.2 MI MEMORIA ....................................................................................................................................... 13 8.4 CONFIGURACIÓN DEL MEMORY 2 MOVE ............................................................................................ 14 9. UTILIZACIÓN DE DISPOSITIVOS PORTÁTILES ........................................................................................ 18 9.1 INSTALACIÓN DE LA APLICACIÓN «MEMORY 2 MOVE» PARA IOS ...................................................... 18 9.2 CONEXIÓN INALÁMBRICA A SU IPHONE/IPAD ..................................................................................... 19 9.3 INICIO DE SESIÓN DE USUARIO (IOS) ................................................................................................... 20 9.4 INSTALACIÓN DE LA APLICACIÓN «MEMORY 2 MOVE» PARA ANDROID ............................................ 21 9.5 CONEXIÓN INALÁMBRICA A SU DISPOSITIVO ANDROID ...................................................................... 21 9.6 INICIO DE SESIÓN DE USUARIO (ANDROID) ......................................................................................... 23 10. CONDICIONES DE GARANTÍA LIMITADA............................................................................................... 24 11. ELIMINACIÓN DE APARATOS ELECTRÓNICOS FUERA DE USO ............................................................. 24 12. DECLARACIÓN DE CONFORMIDAD CE .................................................................................................. 25 ES - 1 1. VISIÓN GENERAL DEL PRODUCTO «Memory 2 Move» le posibilita el acceso inalámbrico a sus contenidos de vídeo, música, fotos y datos para difundirlos a través de su iPad®, iPhone®, tableta, smartphone y ordenador portátil, sin el uso de cables innecesario y fastidioso. Además la ranura USB ofrece la posibilidad de acceder a un disco duro externo o una memoria USB. Nunca más tendrá que preocuparse por el espacio de almacenamiento limitado debido a la variedad de opciones de conexión de medios de almacenamiento externos. Para una movilidad óptima Biskuit dispone de una batería recargable. Para cargar la batería el dispositivo puede conectarse simplemente a un puerto USB libre del ordenador. Durante el proceso de carga se puede acceder al medio de almacenamiento conectado 2. FUNCIONES DEL PRODUCTO Transmisión mediante flujo continuo de datos (streaming) de medios a través de una conexión Wi-Fi para hasta cinco usuarios simultáneamente. Acceso a sus archivos de música, vídeo y fotos mediante la aplicación gratuita para iOS y Android. Duración de la batería de hasta cinco 9 horas*. Acceso a Internet mediante la conexión RJ45 opcional (conexión LAN) o inalámbricamente mediante el estándar 802.11 b/g/n. Compatible con los tipos de formato NTFS y FAT32. Admite el intercambio multiplataforma de datos vía conexión LAN entre Windows, Mac, iOS y Linux. Admite aplicaciones de usuario en las más diversas plataformas, incluidos Windows/Mac/Linux/iPad/iPhone/Android. *La duración exacta de la batería depende de las aplicaciones y la configuración utilizadas. ES - 2 Utilización mediante conexión LAN: Para ello, conecte un extremo de su cable RJ45 al Memory 2 Move y el otro extremo a un puerto libre de su enrutador. A continuación active la función DHCP en su Memory 2 Move para obtener la asignación automática de la dirección IP. Utilización inalámbrica: Conecte el Memory 2 Move a su enrutador inalámbrico tal como se explica en las siguientes instrucciones, para poder acceder a Internet por vía Wi-Fi. 3. VOLUMEN DE SUMINISTRO Memory 2 Move con cable USB 3.0 CD Manual de manejo ES - 3 4. DATOS TÉCNICOS Dimensiones 96mm (L) X 72mm (B) X 17mm (H) Wi-Fi: Estándar: 802.11 b/g/n, Frecuencia: 2,4 GHz Tasas de transferencia: 72 Mbps (20 MHz) / 150 Mbps (40 MHz) Interfaz de red: 100 Mbps Ethernet RJ45 Conexión USB: carga de la batería Micro USB 2.0, para transferencia de datos y Capacidad de la batería: 2.600 mAh Temperatura de funcionamiento: La temperatura de funcionamiento óptima se sitúa entre 5 °C y 40 °C 5. REQUISITOS MÍNIMOS Conexión a Internet Requisitos del sistema: o Windows: XP/Vista/Windows 7/8 o Mac: OS X 10.6.0 y superior o Otros: Fedora 12 (Linux) y superior Navegador de Internet en el PC o Windows: Compatible con Internet Explorer 7.0 y superior o Mac: Compatible con Safari 3.0 y superior o Otros: Firefox 3.5 y superior Enrutador o conmutador (switch) ES - 4 6. PRODUCTO ES - 5 7. INDICADORES LED LED de alimentación: - Apagado: Permanece encendido (verde): Parpadea rápidamente (verde): Parpadea lentamente (verde): Permanece encendido (rojo): Parpadea rápidamente (rojo): El dispositivo está apagado La batería está completamente cargada Se está apagando el dispositivo Se está cargando el dispositivo Carga de la batería inferior al 30% Nivel de carga de la batería crítico LED de memoria: - Permanece encendido en blanco: Parpadea en blanco: El dispositivo está listo para funcionar Procesos de lectura/escritura activos LED Wi-Fi (azul): - Parpadea: El LED no se ilumina: Se está iniciando el proceso de inicialización El dispositivo está apagado o no recibe corriente - Permanece encendido: o Proceso de inicialización completado o Listo para funcionar pueden conectarse dispositivos LED de Internet: - - Modo de enrutador o Color azul: o Alternando azul/rojo: o El LED no se ilumina: Función de puente o Color azul: o El LED no se ilumina: Buena calidad de señal Mala calidad de señal Sin conexión a Internet Buena calidad de señal Sin conexión a Internet ES - 6 8. UTILIZACIÓN DE UN PC O MAC 8.1 ESTABLECIMIENTO DE UNA CONEXIÓN DE RED DE ÁREA LOCAL (LAN) INALÁMBRICA A UN PC Encienda el dispositivo Wi-Fi pulsando el botón de alimentación situado en la parte frontal del dispositivo. Active la función WLAN en su PC y haga clic en el símbolo WLAN en la barra de tareas, en la parte inferior derecha. Se mostrará el siguiente mensaje: Seleccione la red con el nombre «Memory2Move-XXXX». Nota: El dispositivo se suministra con la contraseña predefinida «intenso1». Por su propia seguridad, introduzca una nueva contraseña después de haber establecido con éxito la conexión. Una vez que haya establecido con éxito una conexión a su dispositivo Wi-Fi, instale el software cliente suministrado siguiendo el proceso explicado a continuación: Como requisito para poder conectar a su ordenador el dispositivo Wi-Fi conectado, debe instalar la herramienta de software incluida «WiFi Finder» desde el CD de controladores suministrado. Esta aplicación buscará automáticamente en su red el dispositivo Wi-Fi conectado. Tan solo tiene que hacer doble clic sobre el icono y seguir las instrucciones que se mostrarán en la pantalla. ES - 7 8.2 WIFI FINDER PARA PC Inicie la aplicación haciendo doble clic en el icono «WiFi Finder». La aplicación buscará automáticamente el dispositivo Memory 2 Move en la red conectada (véase la captura de pantalla). Nota: En caso de que no se encontrara «M2M» en la lista de los clientes de red conectados, haga clic en el botón «Actualizar» para realizar una nueva búsqueda del dispositivo Wi-Fi. 1.) Por favor eliga en el menu Memory 2 Move y pulse „Log In“, para conectarse con el Web Administrador (ver Screenshot). ES - 8 2.) Por favor introduzca Nombre y la contraseña: Nombre de usuario: admin Contraseña: 00000 Atencion: Por favor introduzca despues de conectarse para su seguridad una nueva contraseña. 8.2.1 MI MEMORIA Al seleccionar la opción de menú «My Storage» o «Mi memoria», se le mostrará el cuadro de diálogo reproducido más abajo. Para poder conectarse correctamente, introduzca los siguientes datos de inicio de sesión: Nombre de usuario: admin Contraseña: 00000 Nota: Por su propia seguridad, introduzca una nueva contraseña después de haber establecido con éxito la conexión. ES - 9 8.3 ESTABLECIMIENTO DE UNA CONEXIÓN DE RED DE ÁREA LOCAL (LAN) INALÁMBRICA A UN MAC Encienda el dispositivo Wi-Fi pulsando el botón de alimentación situado en la parte frontal del dispositivo. Espere unos minutos hasta que el indicador LED deje de parpadear. Active la función WLAN en su PC y haga clic en el símbolo WLAN en la barra de tareas, en la parte inferior derecha. Seleccione la red con el nombre «Memory2Move-XXXX». Nota: El dispositivo se suministra con la contraseña predefinida «intenso1». Por su propia seguridad, introduzca una nueva contraseña después de haber establecido con éxito la conexión. Una vez que haya establecido con éxito una conexión a su dispositivo Wi-Fi, instale el software cliente suministrado siguiendo el proceso explicado a continuación: Como requisito para poder conectar a su ordenador el dispositivo Wi-Fi conectado, debe instalar la herramienta de software incluida «WiFi Finder» desde el CD de controladores suministrado. Esta aplicación buscará automáticamente en su red el dispositivo Wi-Fi conectado. Tan solo tiene que hacer doble clic sobre el icono y seguir las instrucciones que se mostrarán en la pantalla. ES - 10 8.3.1 WIFI FINDER PARA MAC Inicie la aplicación «WiFi Finder» haciendo doble clic en el icono. La aplicación buscará automáticamente el dispositivo Memory 2 Move en la red conectada (véase la captura de pantalla). Nota: En caso de que no se encontrara «M2M» en la lista de los clientes de red conectados, haga clic en el botón «Actualizar» para realizar una nueva búsqueda del dispositivo Wi-Fi. 1.) Por favor eliga en el menu Memory 2 Move y pulse „Log In“, para conectarse con el Web Administrador (ver Screenshot). ES - 11 2.) Por favor introduzca Nombre y la contraseña: Nombre de usuario: admin Contraseña: 00000 Atencion: Por favor introduzca despues de conectarse para su seguridad una nueva contraseña. ES - 12 8.3.2 MI MEMORIA Al seleccionar la opción de menú «My Storage» o «Mi memoria», se le mostrará el cuadro de diálogo reproducido más abajo. Para poder conectarse correctamente, introduzca los siguientes datos de inicio de sesión: Nombre de usuario: admin Contraseña: 00000 Nota: Por su propia seguridad, introduzca una nueva contraseña después de haber establecido con éxito la conexión. Puede crear, eliminar, copiar, editar, renombrar o mover los directorios y las carpetas contenidos en el dispositivo Memory 2 Move. Además pueden intercambiarse bilateralmente datos entre su MAC y el Memory 2 Move (carga/descarga). ES - 13 8.4 CONFIGURACIÓN DEL MEMORY 2 MOVE Utilice el software cliente para PC de la manera anteriormente descrita para establecer una conexión con el dispositivo Wi-Fi, e inicie sesión como administrador en la interfaz de administración web. Ahora puede configurar su dispositivo. Asistente de inicio La primera vez que utilice el dispositivo, una vez iniciada la sesión se abrirá un denominado «Asistente de inicio», que le permitirá llevar a cabo fácilmente todos los ajustes importantes. Nota: Si hace clic en la X (en el ángulo superior derecho del asistente), se cerrará el asistente de inicio y se adoptarán como configuración predeterminada todos los ajustes de fábrica. Pulse el botón «Siguiente» para configurar su dispositivo. Configuración del acceso a Internet .. mediante el establecimiento de una conexión a otra red disponible ES - 14 Puede escoger entre dos opciones de acceso a Internet disponibles. En la configuración estándar está predeterminado el acceso mediante conexión por cable (como se muestra en la figura superior). A. Acceso inalámbrico (WLAN): Conecte el M2M a otro enrutador WLAN, a fin de establecer una conexión a Internet. B. Acceso mediante conexión por cable (LAN): Conecte el M2M directamente a un puerto disponible en la parte posterior de su enrutador para establecer la conexión con otra red. Acceso por cable: En la configuración predeterminada está seleccionada la opción «IP dinámica». Puede asignar manualmente una dirección IP: para ello haga clic en la flecha amarilla y seleccione la opción «IP estática». Acceso inalámbrico: SSID: Introduzca el nombre SSID de su red o haga clic en «Actualizar lista» para buscar automáticamente todas las redes disponibles. Contraseña: Introduzca la contraseña para la red inalámbrica local seleccionada. Dirección IP: Si se ha seleccionado «Automática», la red le asigna automáticamente una dirección IP. Si se ha seleccionado «IP estática», deberá introducir usted mismo su dirección IP para la red a la que desee conectarse. Nota: Haga clic en la X (ángulo superior derecho) para salir del menú de opciones LAN. Nota: ¡En caso de que no pueda establecer una conexión a otra red, consulte a su proveedor de servicios de red para averiguar las directrices aplicables en su caso! ES - 15 Haga clic en «Siguiente» para continuar con la configuración del Memory 2 Move. El siguiente paso consiste en configurar los parámetros Wi-Fi y LAN. Configuración Wi-Fi y LAN - SSID: Introduzca aquí el nombre de su red. El parámetro predeterminado en este caso es «Memory2Move-XXXX». Pueden introducirse un máximo de 32 caracteres para el nombre SSID. - Canal: Indique aquí el canal por el que el dispositivo Wi-Fi deberá transmitir y recibir. El parámetro predeterminado es «auto». En este caso, el dispositivo establece automáticamente el canal. Pero también puede especificar manualmente el canal por el cual se recibirán y transmitirán datos. Están disponibles los canales 1 hasta el 13. - Acceso inalámbrico: El estándar de red inalámbrica predeterminado es: 802.11/b/g/n. También puede seleccionar manualmente los modos de 11 Mbps (802.11b), 54 Mbps (802.11g) o 150 Mbps (802.11n). - Seguridad: La configuración de seguridad predeterminada es mixta WPA/WPA2-PSK. Puede escoger entre los siguientes tipos de cifrado: Sin cifrado, WPA-PSK, WPA2-PSK o mixta WPA/WPA2-PSK. - Contraseña: Dependiendo del tipo de cifrado seleccionado, debe introducirse una contraseña con un mínimo de 8 y un máximo de 63 caracteres. - Dirección IP: La dirección IP predeterminada es: 10.10.10.254 con la máscara de subred 255.255.255.0. Puede modificar manualmente esta dirección IP. ES - 16 Haga clic en «Siguiente» para introducir la contraseña de administrador. Si hace clic en «Omitir» renunciará a establecer una nueva contraseña y adoptará la contraseña predeterminada. Al completarse el asistente de inicio, el sistema se reiniciará. Este proceso dura dos minutos. A continuación se le mostrará un mensaje que le informa sobre el estado actual. ES - 17 9. UTILIZACIÓN DE DISPOSITIVOS PORTÁTILES 9.1 INSTALACIÓN DE LA APLICACIÓN «MEMORY 2 MOVE» PARA IOS 1. Haga clic en el icono de App Store en su pantalla de inicio, tal como se muestra en la siguiente figura. Busque la aplicación gratuita «Memory 2 Move» y siga las instrucciones que aparecen en pantalla para su instalación. 2. Una vez completada correctamente la instalación, encontrará la aplicación «Memory 2 Move» en la pantalla de inicio de su dispositivo (véase la siguiente figura). ES - 18 9.2 CONEXIÓN INALÁMBRICA A SU IPHONE/IPAD 1. Encienda el dispositivo Memory 2 Move. Espere un par de minutos hasta que haya concluido la inicialización del dispositivo. Esto se indica mediante el LED Wi-Fi azul, que deja de parpadear al completarse la inicialización. 2. Haga clic en el icono «Ajustes», como se muestra en la siguiente imagen. 3. Haga clic en la opción de menú «Wi-Fi». En la lista de redes Wi-Fi disponibles debería aparecer la red «Memory2Move-XXXX». Haga clic en esta red, tal como se muestra en la siguiente imagen. En caso de que haya establecido una contraseña en el paso 8.4. en «Configuración de Wi-Fi y LAN», introduzca ahora dicha contraseña. Una vez haya seleccionado «Memory2Move-XXXX», aparece una marca de verificación delante de la SSID y se muestra el logo Wi-Fi en el ángulo superior izquierdo del dispositivo. ES - 19 9.3 INICIO DE SESIÓN DE USUARIO (IOS) Haga clic en el logo «Memory 2 Move» para iniciar la aplicación, tal como se muestra en la siguiente imagen. Introduzca la contraseña de administrador que haya establecido durante la configuración (contraseña predeterminada: 00000). La contraseña tan solo es necesaria para el primer inicio de sesión. El dispositivo memoriza su contraseña, de modo que ya no tendrá que introducirla la próxima vez que inicie sesión. Una vez que haya introducido la contraseña correcta, accederá automáticamente al menú «Memory 2 Move». Éste es su acceso directo al disco duro Wi-Fi. ES - 20 9.4 INSTALACIÓN DE LA APLICACIÓN «MEMORY 2 MOVE» PARA ANDROID 1. Acceda a «Google Playstore» o al «App Center» y busque la aplicación gratuita «Memory 2 Move». 2. Sigas las instrucciones de instalación que aparecerán en la pantalla, tal como se muestra en la siguiente imagen. 3. Una vez completada correctamente la instalación, encontrará la aplicación «Memory 2 Move» en la pantalla de inicio de su dispositivo (véase la siguiente figura). 9.5 CONEXIÓN INALÁMBRICA A SU DISPOSITIVO ANDROID 1. Encienda el dispositivo Memory 2 Move. Espere un par de minutos hasta que haya concluido la inicialización del dispositivo. Esto se indica mediante el LED Wi-Fi azul, que deja de parpadear al completarse la inicialización. 2. Haga clic en el icono «Ajustes», como se muestra en la siguiente imagen. ES - 21 3. Active la función Wi-Fi deslizando el «interruptor virtual» hacia la derecha. En la lista de redes Wi-Fi disponibles debería aparecer la red «Memory2Move-XXXX». Haga clic en esta red, tal como se muestra en la siguiente imagen. En caso de que haya establecido una contraseña en el paso 8 en «Configuración de Wi-Fi y LAN», introduzca ahora dicha contraseña. 4. Una vez que el dispositivo se haya conectado con éxito al disco duro Wi-Fi, aparecerá la palabra «Conectado» bajo la SSID. ES - 22 9.6 INICIO DE SESIÓN DE USUARIO (ANDROID) 1. Haga clic en el logo «Memory 2 Move» para iniciar la aplicación (véase la siguiente imagen). 2. Introduzca la contraseña de administrador que haya establecido durante la configuración (contraseña predeterminada: 00000). La contraseña tan solo es necesaria para el primer inicio de sesión. El dispositivo memoriza su contraseña, de modo que ya no tendrá que introducirla la próxima vez que inicie sesión. 3. Una vez que haya introducido la contraseña correcta, accederá automáticamente al menú «Memory 2 Move». Éste es su acceso directo al disco duro Wi-Fi. ES - 23 10. CONDICIONES DE GARANTÍA LIMITADA La garantía cubre solamente la sustitución de este producto de Intenso. La garantía no es válida en el caso de desgastes resultantes de un uso inadecuado, negligencia, accidentes, incompatibilidad, o rendimiento insuficiente por parte de un cierto Hardware o Software de ordenador. El derecho a la garantía expira en caso de incumplimiento de las instrucciones elaboradas por Intenso así como en caso de montaje o uso indebido o defectos causados por otros aparatos. En caso de que el producto esté expuesto a vibraciones, descargas electroestáticas, influencia del calor o de la humedad, o en cualquier otro caso en que se exponga al producto más allá de sus especificaciones, no existe derecho a garantía. Intenso no se responsabiliza por la pérdida de datos o por daños colaterales o subsecuentes, por la violación de las condiciones de garantía y por otros daños, independientemente de cuáles sean sus causas. Este producto no se debe destinar a un uso comercial o a niveles medicinales o especiales, en los que una avería del producto pueda causar lesiones, fallecimiento o elevados daños materiales. 11. ELIMINACIÓN DE APARATOS ELECTRÓNICOS FUERA DE USO Los aparatos identificados con este símbolo están sujetos a la Directiva Europea 2002/96/EC. Todos los equipamientos eléctricos y electrónicos han de separarse de la basura doméstica y deben ser eliminados por las respectivas instituciones públicas. La eliminación debida de equipamientos electrónicos evita la contaminación del medio ambiente. (Intenso)® 49377 Vechta Germany www.intenso.de ES - 24 Intenso GmbH Fecha:19 Junio 2013 12. DECLARACIÓN DE CONFORMIDAD CE Nosotros, la empresa Intenso GmbH, con sede social en la Diepholzer Str. 15 en 49377 Vechta, Alemania declaramos bajo nuestra responsabilidad que el producto: Modelo: Memory 2 Move Max (Artículo Nº 7405500, 7405501) Descripción: Wi-Fi Data Reader cumple con las siguientes directrices y normativas: Normativa R&TTE 1999/5/CE EN 301 489-1 V1.9.1 EN 301 489-17 V2.1.1 EN 300 328 V1.7.1: 2006-10 EN 55022:2006+A1:2007 (Class B) EN 55024:1998+A1:2011+A2:2003 EN 61000-3-2:2006+A1 :2009+A2 :2009 (Class D) EN 61000-3-3:2008 Normativa de baja tensión 2006/95/CE EN 60950-1:2006+A11:2009+A1:2010+A12:2011 Normativa de diseño ecológico 2009/125/CE 1275/2008 278/2009 ROHS Richtlinie 2011/65/EU Los documntos técnicos relaciones con el dispositivo arriba mencionado han sido depositados en: Intenso GmbH Diepholzer Str. 15, 49377 Vechta. Alemania Persona autorizada: ____________________________ Director ejecutivo: Thomas Pöhlking ES - 25 ES - 26 SPIS TREŚCI 1. Opis wyrobu ............................................................................................................................................... 2 2. Funkcje wyrobu .......................................................................................................................................... 2 3. Zakres dostawy .......................................................................................................................................... 3 4. Dane techniczne ......................................................................................................................................... 4 5. Wymagania minimalne .............................................................................................................................. 4 6. Wygląd wyrobu .......................................................................................................................................... 5 7. Sygnalizacja LED ......................................................................................................................................... 6 8. Używanie komputera osobistego lub MAC ................................................................................................ 7 8.1 Tworzenie połączenia bezprzewodowego LAN z komputerem osobistym ................................................ 7 8.2 PC WiFi Finder ............................................................................................................................................ 8 8.2.1 Moja pamięć .............................................................................................................................................. 9 8.3 Utworzenie bezprzewodowego połączenia LAN z MAC........................................................................... 10 8.3.1 MAC WiFi Finder ...................................................................................................................................... 11 8.3.2 Moja pamięć ............................................................................................................................................ 13 8.4 Konfiguracja Memory 2 Move ................................................................................................................. 14 9. Używanie urządzeń przenośnych ............................................................................................................. 18 9.1 Instalowanie aplikacji iOS Memory 2 Move ............................................................................................. 18 9.2 Bezprzewodowe połączenie z Państwa iPhone/iPad ............................................................................... 19 9.3 Logowanie użytkownika (iOS) .................................................................................................................. 20 9.4 Instalowanie aplikacji Android Memory 2 Move ..................................................................................... 21 9.5 Bezprzewodowe połączenie z Państwa urządzeniem Android ................................................................ 21 9.6 Logowanie użytkownika (Android)........................................................................................................... 23 10. Warunki ograniczonej gwarancji .............................................................................................................. 24 11. Utylizacja zużytych urządzeń elektrycznych............................................................................................. 24 12. Deklaracja zgodności UE .......................................................................................................................... 25 PL - 1 1. OPIS WYROBU Memory 2 Move umożliwia Państwu bezprzewodowy dostęp do wideo, muzyki, fotografii i danych w celu medialnego transmitowania internetowego, czyli ich przesyłania strumieniowego na Państwa iPad®, iPhone®, tablet PC, smartfon i laptop bez konieczności stosowania kabli. Ponadto złącze USB umożliwia dostęp do zewnętrznego dysku twardego lub pamięci USB. Ze względu na wiele możliwości podłączenia zewnętrznych nośników danych, już nigdy nie trzeba się martwić o ograniczoną ilość miejsca na dysku. Dla największej możliwej mobilności Biskuit wyposażony jest w akumulator. Aby naładować akumulator, wystarczy podłączyć urządzenie do wolnego złącza USB komputera. Podczas ładowania można korzystać z podłączonych nośników danych. 2. FUNKCJE WYROBU Przesyłanie strumieniowe plików medialnych poprzez połączenie Wi-Fi dla maksymalnie 5 użytkowników jednocześnie. Dostęp do plików muzycznych, wideo, fotograficznych za pośrednictwem bezpłatnej aplikacji dla iOS i Android. Czas działania baterii do 9 godzin*. Dostęp do internetu przez opcjonalne połączenie RJ45 (przyłącze LAN) lub bezprzewodowo za pomocą 802.11 b/g/n Standard. Obsługuje NTFS i formatowanie FAT32. Obsługuje wymianę danych między platformami poprzez połączenie LAN między Windows, Mac,iOS i Linux. Obsługuje zastosowania użytkownika na najróżniejszych platformach, włącznie z Windows/Mac/Linux/iPad/iPhone/Android *Dokładny czas działania baterii zależny jest od używanych zastosowań i ustawień. PL - 2 Użytkowanie przez połączenie LAN: Proszę połączyć jeden koniec Państwa kabla RJ45 z Memory 2 Move i drugi koniec z wolnym portem w Państwa routerze. Teraz proszę aktywować funkcję DHCP w swym Memory 2 Move w celu automatycznego przydzielenia adresu IP. Użytkowanie bezprzewodowe: Proszę połączyć Memory 2 Move ze swym bezprzewodowym routerem zgodnie z poniższym opisem w celu umożliwienia sobie dostępu do internetu za pośrednictwem Wi-Fi. 3. ZAKRES DOSTAWY Memory 2 Move USB 2.0 z kablem Płyta CD Instrukcja obsługi PL - 3 4. DANE TECHNICZNE Wymiary: Wi-Fi: standard: 802.11 b/g/n, częstotliwość: 2.4 GHz prędkość transmisji: 72 Mbps (20 MHz) / 150 Mbps (40 MHz) Interfejs sieciowy: 100 Mbps Ethernet RJ45 Przyłącze USB: akumulatorka Micro USB 2.0, dla transferu danych i ładowania Pojemność akumulatorka: 2600 mAh Temperatura pracy: Optymalna temperatura pracy leży w przedziale od 5°C 96mm (L) X 72mm (B) X 17mm (H) do 40°C 5. WYMAGANIA MINIMALNE Połączenie internetowe Wymagania systemowe: o Windows: XP/Vista/Windows 7/8 o Mac: OS X 10.6.0 i wyżej o Pozostałe: Fedora 12 (Linux) i wyżej Przeglądarka internetowa PC o Windows: Obsługuje Internet Explorer 7.0 i wyżej o Mac: Obsługuje Safari 3.0 i wyżej o Dalsze: Firefox 3.5 i wyżej Router lub switch PL - 4 6. WYGLĄD WYROBU PL - 5 7. SYGNALIZACJA LED LED zasilania: - Nie świeci się: Urządzenie jest wyłączone. - Świeci się stale na zielono: Akumulatorek jest całkowicie naładowany. - Miga szybko na zielono: Urządzenie zostanie wyłączone. - Miga powoli na zielono: Urządzenie jest ładowane. - Świeci się stale na czerwono: Stan naładowania akumulatorka poniżej 30% - Miga szybko na czerwono: Krytycznie niski stan naładowania LED pamięć: - Świeci się stale na biało: Tryb gotowości - Miga na biało: Aktywne procesy pisania / czytania LED niebieska dla Wi-Fi: - Migocząco: Uruchamiany proces inicjalizowania. - LED nie świeci się: Urządzenie wyłączone lub nie otrzymuje zasilania elektrycznego - Świeci się ciągle: o Zakończony proces inicjalizacji o Tryb gotowości - urządzenia można połączyć. LED internetu: - - Tryb routera: o Kolor biały: Dobra jakość sygnału o Niebieski/czerwony na przemian: Zła jakość sygnału o LED nie świeci się: Brak połączenia internetowego Funkcja Bridge o Kolor niebieski: Dobra jakość sygnału o LED nie świeci się: Brak połączenia internetowego PL - 6 8. UŻYWANIE KOMPUTERA OSOBISTEGO LUB MAC 8.1 TWORZENIE POŁĄCZENIA BEZPRZEWODOWEGO LAN Z KOMPUTEREM OSOBISTYM Proszę włączyć urządzenie Wi-Fi przez naciśnięcie przycisku zasilania znajdującego się na przedzie urządzenia. Proszę aktywować funkcję WLAN na swym komputerze osobistym i kliknąć na belce narzędzi na dole po prawej stronie na symbol WLAN. Otworzy się następujący komunikat: Proszę wybrać sieć o nazwie „Memory2Move-XXXX“. Informacja: Ustawione hasło w stanie dostawy brzmi „intenso1“. Proszę po prawidłowym wykonaniu połączenia wczytać dla własnego bezpieczeństwa nowe hasło. Po prawidłowym wykonaniu połączenia do swego urządzenia Wi-Fi proszę w następujący sposób zainstalować dostarczone przez nas oprogramowanie dla klienta: Warunkiem prawidłowego połączenia urządzenia Wi-Fi z Państwa komputerem jest skorzystanie z narzędzi oprogramowania „WiFi Finder“ z dostarczonej przez nas płyty CD. Oprogramowanie szuka dla Państwa automatycznie połączone urządzenie Wi-Fi z Państwa siecią. Proszę kliknąć podwójnie na ikonę i postępować zgodnie z instrukcjami na ekranie. PL - 7 8.2 PC WIFI FINDER Proszę rozpocząć stosowanie za pomocą podwójnego kliknięcia na symbol „WiFi Finder“. Oprogramowanie automatycznie w połączonej sieci szuka urządzenia Memory 2 Move (patrz zrzut ekranu). Informacja: Jeżeli urządzenie „M2M“ nie znajduje się na liście urządzeń połączonych z siecią klienta, wtedy proszę nacisnąć na „Odśwież“ w celu ponownego szukania urządzenia Wi-Fi. 1.) Wybierz Memory 2 Move z menu i kliknij "Zaloguj się" przycisk, aby połączyć się z interfejsem administracyjnym internetowej. PL - 8 2.) Wprowadź nazwę użytkownika oraz hasło: Nazwa użytkownika: admin Hasło: 00000 Informacja: Po prawidłowo wykonanym połączeniu proszę dla własnego bezpieczeństwa wczytać nowe hasło. 8.2.1 MOJA PAMIĘĆ Po wybraniu punktu menu „Moja pamięć“ zostanie przedstawiona Państwu następująca maska. W celu prawidłowego połączenia się proszę użyć następujących danych logowania: Nazwa użytkownika: admin Hasło: 00000 Informacja: Po prawidłowo wykonanym połączeniu proszę dla własnego bezpieczeństwa wczytać nowe hasło. PL - 9 8.3 UTWORZENIE BEZPRZEWODOWEGO POŁĄCZENIA LAN Z MAC Proszę włączyć urządzenie Wi-Fi przez naciśnięcie przycisku zasilania znajdującego się na przedzie urządzenia. Proszę odczekać kilka minut, aż kontrolka LED skończy migać. Proszę aktywować funkcję WLAN na swym PC i kliknąć na symbol WLAN na belce narzędzi u dołu po prawej stronie. Proszę wybrać sieć o nazwie „Memory2Move-XXXX“. Informacja: Ustawione hasło w stanie dostawy brzmi „intenso1“. Po prawidłowym wykonaniu połączenia proszę dla własnego bezpieczeństwa wczytać nowe hasło. Po prawidłowym wykonaniu połączenia z Państwa urządzeniem Wi-Fi, proszę w następujący sposób zainstalować dostarczone przez nas oprogramowanie dla klienta: Warunkiem prawidłowego połączenia urządzenia Wi-Fi z Państwa komputerem jest skorzystanie z oprogramowania „WiFi Finder“ z dostarczonej przez nas płyty CD. Oprogramowanie szuka dla automatycznie Państwa połączonego urządzenia Wi-Fi z Państwa siecią. Proszę kliknąć podwójnie na ikonę i postępować zgodnie z instrukcjami na ekranie. PL - 10 8.3.1 MAC WIFI FINDER Proszę rozpocząć podwójnym kliknięciem na symbol aplikacji „WiFi Finder“. Oprogramowanie w połączonej sieci szuka automatycznie urządzenia Memory 2 Move (patrz zrzut ekranu). Informacja: Jeżeli „M2M“ nie można odnaleźć na liście połączonej sieci klienta, wtedy proszę nacisnąć na przycisk „Odśwież” w celu ponownego poszukiwania urządzenia Wi-Fi. 1.) Wybierz Memory 2 Move z menu i kliknij "Zaloguj się" przycisk, aby połączyć się z interfejsem administracyjnym internetowej. PL - 11 2.) Wprowadź nazwę użytkownika oraz hasło: Nazwa użytkownika: admin Hasło: 00000 Informacja: Po prawidłowo wykonanym połączeniu proszę dla własnego bezpieczeństwa wczytać nowe hasło. PL - 12 8.3.2 MOJA PAMIĘĆ Po wybraniu punktu menu dla „Moja pamięć“ zostanie przedstawiona Państwu następująca maska. W celu prawidłowego połączenia się proszę użyć następujących danych do logowania: Nazwa użytkownika: admin Hasło: 00000 Informacja: Po prawidłowo wykonanym połączeniu proszę dla własnego bezpieczeństwa wczytać nowe hasło. Na Memory 2 Move mogą Państwo sporządzać, usuwać, kopiować, edytować, zmieniać nazwy i przemieszczać katalogi i foldery. Oprócz tego, można obustronnie wymieniać dane między Państwa MAC i Memory 2 Move (wysyłanie / pobieranie). PL - 13 8.4 KONFIGURACJA MEMORY 2 MOVE Proszę skorzystać z oprogramowania PC klienta według powyższego opisu w celu utworzenia połączenia z urządzeniem Wi-Fi i zalogować się jako administrator na sieciowym poziomie administratora. Teraz mogą Państwo skonfigurować swe urządzenie. Asystent startu Podczas pierwszego użytkowania urządzenia, po prawidłowym zalogowaniu uruchamia się tak zwany „Asystent startu”, który umożliwia Państwu w łatwy sposób wykonanie wszystkich ważnych ustawień. Informacja: Jeżeli nacisną Państwo na X (u góry po prawej stronie w asystencie), wtedy wychodzą Państwo z asystenta startu i wszystkie ustawienia fabryczne zostaną przejęte jako ustawienia standardowe. Proszę nacisnąć na przycisk kontynuacji „Dalej“ w celu skonfigurowania urządzenia. Ustawianie dostępu do internetu .. przez utworzenie połączenia do dalszej, dostępnej sieci PL - 14 Mają Państwo tu możliwość wyboru między 2 możliwymi opcjami dostępu do internetu. W ustawieniu standardowym ustawiony został wstępnie dostęp poprzez połączenie kablowe (jak widać na powyższej ilustracji). A. Dostęp bezprzewodowy (WLAN): Proszę połączyć M2M z innym routerem WLAN w celu wywołania połączenia z internetem. B. Dostęp przez połączenie kablowe (LAN): Proszę bezpośrednio połączyć M2M z dostępnym portem z tyłu Państwa routera w celu umożliwienia połączenia z inną siecią. Dostęp LAN: W ustawieniu podstawowym wybrano „Dynamiczne IP“. Mogą Państwo ręcznie nadać adres IP poprzez kliknięcie na żółtą strzałkę i wybranie opcji „Statyczne IP“. Dostęp WLAN: SSID: Hasło: Adres IP: Proszę podać nazwę SSID swej sieci lub kliknąć na „Nowy skan” w celu automatycznego poszukiwania wszystkich dostępnych sieci. Proszę wczytać hasło dla wybranej lokalnej sieci bezprzewodowej. -Przy wyborze opcji „Automatycznie“, sieć wydaje Państwu automatycznie adres IP. -Przy wyborze opcji „Statyczne IP“ muszą Państwo sami wczytać swój adres IP dla sieci z którą chcą się połączyć. Informacja: Poprzez kliknięcie na X (po prawej stronie u góry) mogą Państwo wyjść z menu opcji LAN. Informacja: Jeżeli nie mogą Państwo utworzyć połączenia z następną siecią, wtedy proszę zapytać swego administratora sieci o aktualne zasady, które Państwa dotyczą! PL - 15 Proszę kliknąć na kontynuację „Dalej“ w celu kontynuowania konfiguracji Memory 2 Move. Dokonują teraz Państwo ustawień Wi-Fi oraz LAN. Ustawienia Wi-Fi & LAN - SSID: Proszę nanieść tutaj nazwę Państwa sieci. W ustawieniu podstawowym „Memory2Move-XXXX“ dla nazwy SSID możliwe są maksimum 32 znaki. - Kanał: Proszę tutaj nanieść kanał na którym urządzenie Wi-Fi ma nadawać i odbierać. Ustawieniem podstawowym jest automatyka „Auto“. Kanał jest w takim przypadku ustalany przez urządzenie w sposób automatyczny. Mogą Państwo jednak ustalić ręcznie, na którym kanale ma być nadawanie i odbiór. Do dyspozycji są kanały od 1 do 13. - Tryb Wi-Fi: Ustawiony bezprzewodowy standard sieciowy brzmi: 802.11/b/g/n. Mogą Państwo ustawić również ręcznie tryb 11 Mbps (802.11b), 54 Mbps (802.11g) lub 150 Mbps (802.11n). - Bezpieczeństwo: W stanie dostawy wybrano Mixed WPA/WPA2-PSK. Mają Państwo wybór między następującymi typami szyfrowania: Brak szyfrowania, WPA-PSK,WPA2-PSK, Mixed WPA/WPA2PSK. - Hasło: - Należy w zależności od typu szyfrowania wczytać hasło z co najmniej 8 znakami i maksymalnie 63 znakami. Adres IP: Ustawiony adres IP brzmi: 10.10.10.254 z maską podsieci 255.255.255.0 Ten adres IP mogą Państwo zmienić ręcznie. PL - 16 Proszę kliknąć na „Dalej“ w celu ustawienia hasła dla administratora. Jeśli nacisną Państwo na „Przeskocz“, wtedy rezygnują z ustalenia nowego hasło i przejmują wcześniej ustawione. Po zakończeniu pracy z asystentem startu system uruchamia się ponownie. Proces ten trwa 2 minuty. O aktualnym statusie mogą Państwo dowiedzieć się z komunikatu. PL - 17 9. UŻYWANIE URZĄDZEŃ PRZENOŚNYCH 9.1 INSTALOWANIE APLIKACJI IOS MEMORY 2 MOVE 1. Proszę kliknąć na ikonę App Store na Państwa ekranie Home, jak przedstawiono na poniższej ilustracji. Proszę poszukać bezpłatnej aplikacji „Memory 2 Move“ i postępować zgodnie z instrukcjami w celu zainstalowania na ekranie. 2. Po tym, gdy instalowanie zakończono pomyślnie można znaleźć aplikację „Memory 2 Move” na ekranie Home Państwa urządzenia (patrz poniższa ilustracja). PL - 18 9.2 BEZPRZEWODOWE POŁĄCZENIE Z PAŃSTWA IPHONE/IPAD 1. Proszę włączyć Memory 2 Move. Proszę odczekać kilka minut, aż inicjalizacja urządzenia zakończy się. Widać to będzie po niebieskiej LED dla Wi-Fi, która po zakończeniu inicjalizacji zakończy miganie. 2. Proszę kliknąć na ikonę „Ustawienia” zgodnie z poniższą ilustracją. 3. Proszę kliknąć na punkt menu “Wi-Fi”. Na liście istniejących sieci Wi-Fi powinna pokazać się sieć „Memory2Move-XXXX”. Proszę kliknąć na tę sieć zgodnie z poniższą ilustracją. Jeżeli w kroku 8.4. pod „Ustawienia Wi-Fi & Lan“ ustalili Państwo hasło, to proszę je teraz podać. O ile wybrano „Memory2Move-XXXX” pokaże się haczyk przed SSID oraz pokazane zostanie logo Wi-Fi w lewym górnym rogu urządzenia. PL - 19 9.3 LOGOWANIE UŻYTKOWNIKA (IOS) Proszę kliknąć na logo „Memory 2 Move” zgodnie z poniższą ilustracją w celu uruchomienia aplikacji. Proszę wczytać hasło administratora, które nadali Państwo podczas konfigurowania (ustawienie fabryczne: 00000). Hasło konieczne jest tylko przy pierwszym logowaniu. Urządzenie zapisuje Państwa wpisy, zatem przy drugim logowaniu podawanie hasła nie jest konieczne. Jeśli Państwo prawidłowo wczytali hasło, wtedy zostaną automatycznie zaprowadzeni do menu „Memory 2 Move“. Jest to Państwa bezpośrednie dojście do twardego dysku Wi-Fi. PL - 20 9.4 INSTALOWANIE APLIKACJI ANDROID MEMORY 2 MOVE 1. Proszę otworzyć „Google Playstore“ lub „App Center“ i poszukać bezpłatnej aplikacji „Memory 2 Move“. 2. Proszę postępować zgodnie z instrukcjami instalowania na ekranie, tak jak to pokazuje poniższa ilustracja. 3. Po pomyślnym zakończeniu instalowania można znaleźć aplikację „Memory 2 Move” na ekranie Home (patrz poniższa ilustracja). 9.5 BEZPRZEWODOWE POŁĄCZENIE Z PAŃSTWA URZĄDZENIEM ANDROID 1. Proszę włączyć Memory 2 Move. Proszę odczekać kilka minut, aż inicjalizacja urządzenia zakończy się. Będzie to widoczne po niebieskiej LED dla Wi-Fi, która po zakończeniu inicjalizacji przestaje migać. PL - 21 2. Proszę kliknąć na ikonę ustawień „Ustawienia” tak jak to przedstawiono na poniższej ilustracji. 3. Proszę włączyć funkcję Wi-Fi poprzez przesunięcie „włącznika wirtualnego” w prawo. Na liście istniejących sieci Wi-Fi powinna zostać zaprezentowana sieć „Memory2Move-XXXX”. Proszę kliknąć na tę sieć zgodnie z poniższą ilustracją. Jeżeli w kroku 8 pod „Ustawienia Wi-Fi & Lan“ ustalili Państwo hasło, to należy je teraz podać. 4. Jeśli urządzenie zostało prawidłowo podłączone do twardego dysku Wi-Fi, wtedy pod SSID pokaże się “Połączone”. PL - 22 9.6 LOGOWANIE UŻYTKOWNIKA (ANDROID) 1. Proszę kliknąć na logo aplikacji „Memory 2 Move” w celu uruchomienia aplikacji (patrz ilustracja poniżej). 2. Proszę wczytać hasło administratora, które nadali Państwo podczas konfigurowania (ustawienie fabryczne: 00000). Hasło konieczne jest tylko przy pierwszym logowaniu. Urządzenie zapisuje Państwa wpisy, zatem przy drugim logowaniu podawanie hasła nie jest konieczne. 3. Po prawidłowym podaniu hasła zostaną Państwo automatycznie zaprowadzeni do menu „Memory 2 Move“. Jest to Państwa bezpośredni dostęp do twardego dysku Wi-Fi. PL - 23 10. WARUNKI OGRANICZONEJ GWARANCJI Gwarancja obejmuje wyłącznie wymianę niniejszego produktu firmy Intenso. Gwarancja nie obejmuje normalnych objawów zużycia, które są wynikiem niewłaściwego, nieprawidłowego użytkowania, niestaranności, wypadku, niekompatybilności lub jest wynikiem niewystarczającej wydajności konkretnego sprzętu lub oprogramowania komputerowego. Roszczenia gwarancyjne nie obejmują przypadków wynikających z niestosowania się do Instrukcji obsługi firmy Intenso oraz nieprawidłowego montażu, użytkowania lub uszkodzenia spowodowanego przez inne urządzenie. Jeśli produkt poddany został wstrząsom, wyładowaniom elektrycznym, temperaturze i wilgotności spoza zakresu specyfikacji produktu, to brak jest podstaw do roszczeń gwarancyjnych. Firma Intenso nie odpowiada za utratę danych lub jakiekolwiek szkody towarzyszące lub następstwa, za przekroczenie warunków gwarancji lub inne szkody bez względu na ich powód. Produkt ten nie jest przeznaczony do wykorzystania komercyjnego lub zastosowań medycznych i specjalnych, w przypadku których awaria produktu może spowodować zranienia, śmierć lub znaczne szkody materialne. 11. UTYLIZACJA ZUŻYTYCH URZĄDZEŃ ELEKTRYCZNYCH Urządzenia oznaczone tym symbolem podlegają europejskiej dyrektywie 2002/96/WE. Wszystkie urządzenie elektrycznie i elektroniczne muszą być utylizowane niezależnie od odpadów komunalnych, przez wyznaczone do tego instytucje. Poprzez prawidłową utylizację zużytych urządzeń elektronicznych zapobiega się skażeniu środowiska naturalnego. (Intenso)® 49377 Vechta Germany www.intenso.de PL - 24 Intenso GmbH Data: 19 czerwiec 2013 12. DEKLARACJA ZGODNOŚCI UE My, Intenso GmbH, z siedzibą Diepholzer Str. 15 w 49377 Vechta, Niemcy deklarujemy na władną odpowiedzialność, że produkt: Model: Memory 2 Move Max (artykuł nr 7405500, 7405501) Opis: Wi-Fi Data Reader jest zgodny z następującymi dyrektywami i normami: Dyrektywa R&TTE 1999/5/WE EN 301 489-1 V1.9.1 EN 301 489-17 V2.1.1 EN 300 328 V1.7.1: 2006-10 EN 55022:2006+A1:2007 (Class B) EN 55024:1998+A1:2011+A2:2003 EN 61000-3-2:2006+A1 :2009+A2 :2009 (Class D) EN 61000-3-3:2008 Dyrektywa niskonapięciowa 2006/95/WE EN 60950-1:2006+A11:2009+A1:2010+A12:2011 Dyrektywa w sprawie ekoprojektu 2009/125/EG 1275/2008 278/2009 ROHS Richtlinie 2011/65/EU Dokumentacja techniczna dotycząca wyżej wymienionego urządzenia została złożona w następującym miejscu: Intenso GmbH Diepholzer Str. 15, 49377 Vechta, Niemcy Osoba upoważniona: ____________________________ Zarządzający przedsiębiorstwem: Thomas Pöhlking PL - 25 PL - 26 СОДЕРЖАНИЕ 1. Общая информация об устройстве ......................................................................................................... 2 2. Функции устройства ................................................................................................................................. 2 3. Комплект поставки ................................................................................................................................... 3 4. Технические характеристики................................................................................................................... 4 5. Минимальные требования ...................................................................................................................... 4 6. Внешний вид устройства ......................................................................................................................... 5 7. Светодиодная индикация ....................................................................................................................... 6 8. Использование компьютера PC или MAC .............................................................................................. 7 8.1 Создание беспроводной LAN сети с одним компьютером PC ............................................................. 7 8.2 PC WiFi Finder(WiFi поисковик) ................................................................................................................ 8 8.2.1 My Storage (Моя Память) ......................................................................................................................... 9 8.3 Создание беспроводной LAN сети с одним компьютером МАС ........................................................ 10 8.3.1 MAC WiFi Finder ...................................................................................................................................... 11 8.3.2 My Storage (Моя память) ....................................................................................................................... 13 8.4 Конфигурация Memory 2 Move ............................................................................................................. 14 9. Использование мобильных устройств .................................................................................................. 18 9.1 Инсталляция приложения iOS Memory 2 Move ................................................................................... 18 9.2 Беспроводное соединение с iPhone/iPad ............................................................................................ 19 9.3 Вход пользователя (iOS)......................................................................................................................... 20 9.4 Инсталляция приложения Android Memory 2 Move ............................................................................ 21 9.5 Беспроводное соединение с устройством на платформе Android .................................................... 21 9.6 Вход пользователя (Android) ................................................................................................................. 23 10. Ограничение гарантийного срока ......................................................................................................... 24 11. Утилизация электрического оборудования ......................................................................................... 24 12. ЕС Заявление о соответствии товара .................................................................................................... 25 RU - 1 1. ОБЩАЯ ИНФОРМАЦИЯ ОБ УСТРОЙСТВЕ Memory 2 Move позволяет обеспечить беспроводной доступ к видео, музыке, фотографиям и данным для их стриминга на iPad®, iPhone®, планшете, смартфоне и ноутбуке – и все это без ненужных пучков кабелей. Также наличие гнезда для подсоединения USB дает возможность подключения внешнего жесткого диска или USB накопителя. Благодаря большому количеству возможностей подключения внешних носителей информации, вам не придется беспокоиться об ограниченности объемов памяти. Для обеспечения наилучшей мобильности Biskuit снабжен перезаряжаемой аккумуляторной батареей. Для зарядки аккумулятора необходимо подсоединить устройство к компьютеру при помощи свободного USB порта. Во время зарядки аккумулятора возможен доступ к данным, сохраненным на носителе информации. 2. ФУНКЦИИ УСТРОЙСТВА Стриминг медиафайлов через Wi-Fi соединение одновременно для 5 пользователей. Доступ к музыкальным, видео- и фото- файлам с помощью бесплатного приложения для iOS и Android. Время работы батареи без подзарядки до 9 часов*. Доступ к интернету через опциональное соединение RJ45 (LAN порт) или в беспроводном режиме с помощью стандарта 802.11 b/g/n. Поддерживается NTFS (New Technologie File System – файловая система новой технологии) и форматирование FAT32 (File Allocation Table – таблица размещения файлов). Поддерживается межплатформенный обмен данными через соединение LAN (Local Area Net – локальная сеть) между Windows, Mac, iOS и Linux. Поддерживаются пользовательские прикладные программы на разных платформах, включая Windows/Mac/Linux/iPad/iPhone/Android. *Точное время работы батареи зависит от используемых программ и настроек. RU - 2 Использование в LAN соединении: Для этого соедините один конец кабеля RJ45 с Memory 2 Move, а другой конец – со свободным портом маршрутизатора. Теперь активируйте функцию DHCP (Dynamic Host Configuration Protocol – протокол динамического конфигурирования узла) на Memory 2 Move для автоматической настройки IP адреса. Беспроводное использование: Подключите Memory 2 Move к беспроводному маршрутизатору, как описано в приведенной ниже инструкции, чтобы можно было получить доступ к интернету по Wi-Fi. 3. КОМПЛЕКТ ПОСТАВКИ Memory 2 Move USB 3.0 кабель CD Руководство по применению RU - 3 4. ТЕХНИЧЕСКИЕ ХАРАКТЕРИСТИКИ Габариты: Wi-Fi: Стандарт: 802.11 b/g/n, Частота: 2,4 ГГц Скорость передачи: 72 Мбит/с (20 МГц)/150 Мбит/с (40МГц) Сетевой интерфейс: 100 Мбит/с Ethernet RJ45 USB порт: Micro USB 2.0, для передачи данных и зарядки 96mm (L) X 72mm (B) X 17mm (H) аккумулятора Емкость аккумулятора: 2.600 мА-ч Рабочая температура: оптимальная рабочая температура в пределах от 5 до 40°C 5. МИНИМАЛЬНЫЕ ТРЕБОВАНИЯ Связь с интернетом Системные требования: o Windows: XP/Vista/Windows 7/8 o Mac: OS X 10.6.0 и выше o Прочие: Fedora 12 (Linux) и выше PC интернет браузер o Windows: поддерживает Internet Explorer 7.0 и выше o Mac: поддерживает Safari 3.0 и выше o Прочие: Firefox 3.5 и выше Маршрутизатор и сетевой коммутатор RU - 4 6. ВНЕШНИЙ ВИД УСТРОЙСТВА RU - 5 7. СВЕТОДИОДНАЯ ИНДИКАЦИЯ Светодиод питания (Power LED): - не светится: непрерывно светится зеленым цветом: быстро мигает зеленым цветом: медленно мигает зеленым цветом: постоянно светится красным цветом: быстро мигает красным цветом: устройство выключено; батарея полностью заряжена; устройство выключается; устройство заряжается; зарядка аккумулятора ниже 30%; аккумулятор разряжен. Светодиод жесткого диска (LED): - постоянно светится белым цветом: мигает белым цветом: режим готовности; активный процесс записи/чтения; Синий светодиод Wi-Fi (Wi-Fi LED): - мигающий: светодиод не светится: процесс инициализации начался; устройство выключено или обесточено; - постоянно светится: o процесс инициализации закончился; o режим готовности – устройства можно соединять. Светодиод интернета (Internet LED): - - режим маршрутизатора: o синий цвет: o переменно синий/красный цвет: o светодиод не светится: режим моста: o синий цвет: o светодиод не светится: хорошее качество сигнала; плохое качество сигнала; нет связи с интернетом; хорошее качество сигнала; нет связи с интернетом. RU - 6 8. ИСПОЛЬЗОВАНИЕ КОМПЬЮТЕРА PC ИЛИ MAC 8.1 СОЗДАНИЕ БЕСПРОВОДНОЙ LAN СЕТИ С ОДНИМ КОМПЬЮТЕРОМ PC Включите Wi-Fi устройство, нажав кнопку питания на его передней панели. Активируйте функцию WLAN (Wireless Local Area Network – беспроводная локальная сеть) на ПК и щелкните по символу WLAN в списке задач внизу справа. Открывается следующая индикация: Выберете локальную сеть под именем «Memory2Move-XXXX». Указание: предварительно заданный пароль в состоянии поставки: «intenso1». Пожалуйста, после успешно выполненного соединения в целях собственной безопасности задайте новый пароль. После того как будет успешно выполнено соединение с Wi-Fi устройством, инсталлируйте, пожалуйста, прилагаемое при поставке клиентское ПО (программное обеспечение) следующим образом: В качестве условия соединения Wi-Fi устройства с компьютером используйте, пожалуйста, входящее программное средство «WiFi Finder» (WiFi поисковик) из прилагаемого драйвера на CD. ПО автоматически находит в локальной сети подключенное Wi-Fi устройство. Просто дважды щелкните по иконке и следуйте указаниям на экране. RU - 7 8.2 PC WIFI FINDER(WIFI ПОИСКОВИК) Пожалуйста, двойным щелчком по ссылке запустите программу «WiFi Finder». ПО автоматически находит в подключенной локальной сети Memory 2 Move (см. скриншот). Указание: если в списке подключенных локальных сетей пользователя не удается найти «M2M», нажмите, пожалуйста, на «Обновить», чтобы снова найти Wi-Fi устройство. 1.) Пожалуйста, выберите меню от Memory 2 Move и нажмите на кнопку "Вход" для подключения с интерфейсом веб-администрирования (см. скриншот). RU - 8 2.) Пожалуйста, введите имя пользователя и пароль: Имя пользователя: admin П ароль: 00000 Указание: пожалуйста, после успешно выполненного соединения в целях собственной безопасности задайте новый пароль. 8.2.1 MY STORAGE (МОЯ ПАМЯТЬ) Если выбрать пункт меню «My Storage» (Моя Память), появляется показанная ниже картинка. Чтобы успешно подключиться, используйте следующие данные для входа: Имя пользователя: admin Пароль: 00000 Указание: пожалуйста, после успешно выполненного соединения в целях собственной безопасности задайте новый пароль. RU - 9 8.3 СОЗДАНИЕ БЕСПРОВОДНОЙ LAN СЕТИ С ОДНИМ КОМПЬЮТЕРОМ МАС Включите Wi-Fi устройство, нажав кнопку питания на его передней панели. Подождите несколько минут, пока светодиод прекратит мигать. Активируйте функцию WLAN на ПК и щелкните по символу WLAN в списке задач внизу справа. Выберете локальную сеть под именем «Memory2Move-XXXX». Указание: предварительно заданный пароль в состоянии поставки: «intenso1». Пожалуйста, после успешно выполненного соединения в целях собственной безопасности задайте новый пароль. После того как будет успешно выполнено соединение с Wi-Fi устройством, инсталлируйте, пожалуйста, прилагаемое при поставке клиентское ПО следующим образом: В качестве условия соединения Wi-Fi устройства с компьютером используйте, пожалуйста, входящее программное средство «WiFi Finder» из прилагаемого драйвера на CD. ПО автоматически находит в локальной сети подключенное Wi-Fi устройство. Просто дважды щелкните по иконке и следуйте указаниям на экране. RU - 10 8.3.1 MAC WIFI FINDER Пожалуйста, двойным щелчком по ссылке запустите программу «WiFi Finder». ПО автоматически находит в подключенной локальной сети Memory 2 Move (см. скриншот). Указание: если в списке подключенных локальных сетей пользователя не удается найти «M2M», нажмите, пожалуйста, на «Обновить», чтобы снова найти Wi-Fi устройство. 1.) Пожалуйста, выберите меню от Memory 2 Move и нажмите на кнопку "Вход" для подключения с интерфейсом веб-администрирования (см. скриншот). RU - 11 2.) Пожалуйста, введите имя пользователя и пароль: Имя пользователя: admin П ароль: 00000 Указание: пожалуйста, после успешно выполненного соединения в целях собственной безопасности задайте новый пароль. RU - 12 8.3.2 MY STORAGE (МОЯ ПАМЯТЬ) Если выбрать пункт меню «My Storage», появляется показанная ниже картинка. Чтобы успешно подключиться, используйте следующие данные для входа: Имя пользователя: admin Пароль: 00000 Указание: пожалуйста, после успешно выполненного соединения в целях собственной безопасности задайте новый пароль. На Memory 2 Move каталоги и папки можно создавать, удалять, копировать, редактировать, переименовывать или перемещать. Кроме того, можно осуществлять взаимный обмен данными между компьютером MAC и Memory 2 Move (выгружать/загружать). RU - 13 8.4 КОНФИГУРАЦИЯ MEMORY 2 MOVE Пожалуйста, используйте клиентское ПО ПК, как описано выше, чтобы подключиться к Wi-Fi устройству и войти в качестве администратора в веб-интерфейс администрирования. Теперь можно создать конфигурацию устройства. Start-Assistent (мастер настроек) Во время первого использования устройства после успешного входа запустите так называемый «Start-Assistent» (мастер настроек), который позволяет просто выполнять важные установки. Указание: если нажать на Х (вверху справа в Assistent), происходит выход из StartAssistent, и все заводские настройки сохраняются в качестве стандартных. Чтобы конфигурировать устройство, нажмите, пожалуйста, клавишу «Далее». Настройка доступа к интернету ...с помощью подключения к одной из уже имеющихся сетей. RU - 14 Имеется возможность выбора между 2 имеющимися опциями доступа к интернету. При стандартной установке предусмотрен проводной доступ (как видно на рисунке вверху). A. Беспроводной доступ (WLAN): Чтобы осуществить подключение к интернету, соедините М2М с другим WLAN маршрутизатором. B. Проводной доступ (LAN): Чтобы подключиться к другой сети, соедините М2М непосредственно с портом на обратной стороне маршрутизатора, LAN-доступ: В первоначальных установках выбирается «Динамический IP». Можно вручную задать IP адрес, щелкнув по желтой стрелке и выбрав опцию «Статический IP». WLAN-доступ: Имя сети (SSID): Задайте имя сети или щелкните на «Новое сканирование», чтобы в автоматическом режиме найти все имеющиеся сети. Пароль: Пожалуйста, введите пароль для выбранной беспроводной сети. IP адрес: При выборе «Автоматический режим» сеть представляет IP адрес автоматически. При выборе «Статический IP» нужно IP адрес сети, к которой необходимо подключиться, ввести самостоятельно. Указание: щелкнув по Х (вверху справа), можно покинуть опционное меню LAN. Указание: если не удается подключиться к другим сетям, свяжитесь с сетевым администратором! RU - 15 Щелкните «Далее», чтобы продолжить конфигурирование Memory 2 Move. Теперь нужно осуществить установки Wi-Fi и LAN. Настройки Wi-Fi и LAN - Имя сети: пожалуйста, введите здесь имя сети. В первоначальных настройках здесь стоит всегда «Memory2Move-XXXX». Для имени сети может быть использовано максимум 32 символа. - Канал: пожалуйста, введите здесь канал, на котором Wi-Fi устройство должно передавать и принимать сигнал. Первоначальная установка: «Авто». В этом случае канал определяется устройством автоматически. Но можно канал, на котором сигнал должен приниматься и передаваться, определить вручную. Для этого в распоряжении имеются каналы с 1 по 13. - Режим Wi-Fi: предварительная установка беспроводной сети: 802.11/b/g/n. Здесь равным образом можно вручную установить режимы 11 Мбит/с (802.11b), 54 Мбит/с (802.11g) или 150 Мбит/с (802.11n). - Безопасность: в состоянии поставки выбран смешанный тип WPA/WPA2-PSK. Есть выбор между следующими типами кодирования: кодирование отсутствует, WPA-PSK,WPA2-PSK, смешанное кодирование WPA/WPA2-PSK. - Пароль: в зависимости от выбранного типа кодирования, нужно ввести минимум 8 и максимум 63 символа. - IP адрес: предварительная установка IP адреса: 10.10.10.254 с маской подсети 255.255.255.0, этот IP адрес можно изменить в ручном режиме. RU - 16 Щелкните «Далее», чтобы установить пароль администратора. Если нажать на «Пропустить», установки нового пароля уничтожаются, и сохраняются предварительные. После окончания работы с Start-Assistent система перезапускается. Этот процесс длится 2 минуты. Его фактическое состояние можно отслеживать по соответствующему сообщению. RU - 17 9. ИСПОЛЬЗОВАНИЕ МОБИЛЬНЫХ УСТРОЙСТВ 9.1 ИНСТАЛЛЯЦИЯ ПРИЛОЖЕНИЯ IOS MEMORY 2 MOVE 1. Щелкните иконку App Store на основном окне, как показано на следующей картинке. Найдите бесплатную версию приложения «Memory 2 Move» и следуйте указаниям по инсталляции на экране. Как только инсталляция успешно завершена, приложение «Memory 2 Move» нужно искать на основном экране устройства (см. следующий рисунок). RU - 18 9.2 БЕСПРОВОДНОЕ СОЕДИНЕНИЕ С IPHONE/IPAD 1. Включите Memory 2 Move. Подождите пару минут, пока инсталляция завершится. Это видно по синему Wi-Fi светодиоду, который после завершения инсталляции прекращает мигать. 2. Щелкните иконку «Настройки», как показано на следующем рисунке. 3. Щелкните на пункте меню «Wi-Fi». В списке имеющихся Wi-Fi сетей должна появиться сеть «Memory2Move-XXXX». Щелкните по этой сети, как показано на следующей картинке. Если во время выполнения шага 8.4 «Настройки Wi-Fi и Lan» был установлен пароль, введите его. Как только выбирается «Memory2Move-XXXX», перед именем сети появляется птичка, а в левом верхнем углу устройства – Wi-Fi логотип. RU - 19 9.3 ВХОД ПОЛЬЗОВАТЕЛЯ (IOS) Чтобы начать работу, щелкните по логотипу «Memory 2 Move», как показано на следующей картинке. Введите пароль администратора, который был задан во время конфигурирования (заводская настройка: 00000). Пароль нужен только при первом входе. Устройство запоминает этот ввод, так что при 2-ом входе больше вводить его не нужно. Как только пароль правильно введен, автоматически выдается меню «Memory 2 Move». Это прямой доступ к Wi-Fi жесткому диску. RU - 20 9.4 ИНСТАЛЛЯЦИЯ ПРИЛОЖЕНИЯ ANDROID MEMORY 2 MOVE 1. Откройте «Google Playstore» или «App Center» и найдите бесплатную версию приложения «Memory 2 Move». 2. Следуйте указаниями по инсталляции на экране, как показано на следующей картинке. 3. Как только инсталляция успешно завершена, приложение «Memory 2Move» нужно искать на основном экране устройства (см. следующий рисунок). 9.5 БЕСПРОВОДНОЕ СОЕДИНЕНИЕ С УСТРОЙСТВОМ НА ПЛАТФОРМЕ ANDROID 1. Включите Memory 2 Move. Подождите пару минут, пока инсталляция завершится. Это видно по синему Wi-Fi светодиоду, который после завершения инсталляции прекращает мигать. RU - 21 2. Щелкните иконку «Настройки», как показано на следующей картинке. 3. Включите функцию Wi-Fi, сдвинув «виртуальное окно» вправо. В списке имеющихся Wi-Fi сетей должна появиться сеть «Memory2Move-XXXX». Щелкните по этой сети, как показано на следующей картинке. Если во время выполнения шага 8 «Настройки Wi-Fi и Lan» был установлен пароль, введите его. 4. Если устройство успешно соединено с Wi-Fi жестким диском, появляется сообщение «Подключено» под именем сети (SSID). RU - 22 9.6 ВХОД ПОЛЬЗОВАТЕЛЯ (ANDROID) 1. Щелкните по логотипу приложения «Memory 2 Move», чтобы запустить это приложение (см. следующую картинку). 2. Введите пароль администратора, который был задан во время конфигурирования (заводская настройка: 00000). Пароль нужен только при первом входе. Устройство запоминает этот ввод, так что при 2-ом входе больше вводить его не нужно. 3. Как только пароль правильно введен, автоматически выдается меню «Memory 2 Move». Это прямой доступ к Wi-Fi жесткому диску. RU - 23 10. ОГРАНИЧЕНИЕ ГАРАНТИЙНОГО СРОКА Гарантия покрывает только возмещение продукта Интензо. Гарантия не покрывает и не обеспечивает возмещение явлений предусмотренного износа, который возник по причине ошибочного применения или использования устройства не в предусмотренных целях, а так же царапин, падении, несовместимости с другими устройствами или пот причине вредоносного использования вместе с какими либо программными или внешними устройствами, сопряженными с вашим устройством. Гарантия также не действительна при нарушении каких либо из шагов или правил по использованию устройства Интензо согласно инструкции по эксплуатации, а также при нанесении дефекта при установке или использовании через третьи предметы. При создании условии электрический- статистических разрядов, нагрева или охлаждения за рамками технической спецификации продукта, гарантийный срок перестает действовать. Интензо не несет ответственность за потерю данных или любых других сопровождающих повреждений или последствий, которые приводят к нарушению условий гарантийного срока. Этот продукт не предназначен для использования в коммерческих или медицинских целях, а также для специального применения, в котором сбой устройства может привести к повреждениям, смерти или имущественному ущербу. 11. УТИЛИЗАЦИЯ ЭЛЕКТРИЧЕСКОГО ОБОРУДОВАНИЯ Все устройства имеющие данную маркировку принадлежат к списку товаров включенных в директиву ЕС 2002/96/. Все электротовары и устаревшие электротовары утилизируются раздельно от домашнего мусора на специально оборудованных точках или государственных местах утилизации и переработки. Соблюдая порядок утилизации вы сохраняете природу окружающей среды. RU - 24 Интензо ГмбХ Дата:19.06.2013 12. ЕС ЗАЯВЛЕНИЕ О СООТВЕТСТВИИ ТОВАРА Мы, компания Интензо ГмбХ, с местонахождением в Германии, город Вехта, улица Дипхольцерштрассе 15, заявляем на собственной ответственности , что следующий продукт: Модель: Memory 2 Move Max (Номер артикула 7405500, 7405501) Описание: Wi-Fi Data Reader соответствует следующим директивам и стандартам: Директива R&TTE 1999/5/ЕС EN 301 489-1 V1.9.1 EN 301 489-17 V2.1.1 EN 300 328 V1.7.1: 2006-10 EN 55022:2006+A1:2007 (Class B) EN 55024:1998+A1:2011+A2:2003 EN 61000-3-2:2006+A1 :2009+A2 :2009 (Class D) EN 61000-3-3:2008 Директива низкого напряжения 2006/95/ЕС EN 60950-1:2006+A11:2009+A1:2010+A12:2011 Директива экологического дизайна 2009/125/ЕС 1275/2008 278/2009 ROHS Richtlinie 2011/65/EU Технические документы на выше приведенную модель данного устройства находятся в следующем месте: Интензо ГмбХ Дипхолцерштрассе 15, 49377 Вехта, Германия Уполномоченная личность: ___________________________________ Управляющий директор: Томас Пёлькинг RU - 25 RU - 26 HINWEIS! Sehr geehrte Kundin, sehr geehrter Kunde, Bei Interesse können Sie und jeder Dritte den Quelltext der verwendeten GPL/LGPL von der Intenso Homepage http://www.intenso.de herunterladen. Der Quelltext des gesuchten Produkts ist für jeden zugänglich über Auswahl der gültigen Produktkategorie und des gewünschten Gerätes. In den Produktdetails finden Sie den Menüpunkt „Treiber“. Öffnen Sie dieses Menü, um den zugehörigen GPL/LGPL Quelltext herunterzuladen. Gegen eine Kostenpauschale von 15 € ist es ebenfalls möglich diesen Quelltext per Postzustellung zu erhalten. Gerne können Sie uns auch telefonisch zu dem Thema erreichen unter der kostenpflichtigen Rufnummer 09001504030 (0,39€/Minute aus dem deutschen Festnetz. Mobilfunkpreise können abweichen.) oder per Mail an [email protected] Weitere Informationen über die GPL/LGPL-Lizenzen finden Sie unter www.gnu.org Notice of GNU GENERAL PUBLIC LICENSE and LESSER GENERAL PUBLIC LICENCE Dear Customer, If interested, you and any third party can download the source code of used GPL / LGPL from Intenso Webpage http://www.intenso.de. The source code of the desired product is available to anyone on the selection of valid product category and the desired device. In the product details you will find the entry "drivers". Open this menu to download the corresponding GPL / LGPL code. For a fee of 35 € (delivery to another country as Germany), it is also possible to obtain this code by postal delivery. More information about GNU/LGPL are available on www.gnu.org GNU GENERAL PUBLIC LICENSE Version 2, June 1991 Copyright (C) 1989, 1991 Free Software Foundation, Inc. 51 Franklin Street, Fifth Floor, Boston, MA 02110-1301, USA Everyone is permitted to copy and distribute verbatim copies of this license document, but changing it is not allowed. DE - 1 Preamble The licenses for most software are designed to take away your freedom to share and change it. By contrast, the GNU General Public License is intended to guarantee your freedom to share and change free software--to make sure the software is free for all its users. This General Public License applies to most of the Free Software Foundation's software and to any other program whose authors commit to using it. (Some other Free Software Foundation software is covered by the GNU Lesser General Public License instead.) You can apply it to your programs, too. When we speak of free software, we are referring to freedom, not price. Our General Public Licenses are designed to make sure that you have the freedom to distribute copies of free software (and charge for this service if you wish), that you receive source code or can get it if you want it, that you can change the software or use pieces of it in new free programs; and that you know you can do these things. To protect your rights, we need to make restrictions that forbid anyone to deny you these rights or to ask you to surrender the rights. These restrictions translate to certain responsibilities for you if you distribute copies of the software, or if you modify it. For example, if you distribute copies of such a program, whether gratis or for a fee, you must give the recipients all the rights that you have. You must make sure that they, too, receive or can get the source code. And you must show them these terms so they know their rights. We protect your rights with two steps: (1) copyright the software, and (2) offer you this license which gives you legal permission to copy, distribute and/or modify the software. Also, for each author's protection and ours, we want to make certain that everyone understands that there is no warranty for this free software. If the software is modified by someone else and passed on, we want its recipients to know that what they have is not the original, so that any problems introduced by others will not reflect on the original authors' reputations. Finally, any free program is threatened constantly by software patents. We wish to avoid the danger that redistributors of a free program will individually obtain patent licenses, in effect making the program proprietary. To prevent this, we have made it clear that any patent must be licensed for everyone's free use or not licensed at all. The precise terms and conditions for copying, distribution and modification follow. TERMS AND CONDITIONS FOR COPYING, DISTRIBUTION AND MODIFICATION 0. This License applies to any program or other work which contains a notice placed by the copyright holder saying it may be distributed under the terms of this General Public License. The "Program", below, refers to any such program or work, and a "work based on the Program" means either the Program or any derivative work under copyright law: that is to say, a work containing the Program or a portion of it, either verbatim or with modifications and/or translated into another language. (Hereinafter, translation is included without limitation in the term "modification".) Each licensee is addressed as "you". Activities other than copying, distribution and modification are not covered by this License; they are outside its scope. The act of running the Program is not restricted, and the output from the Program is covered only if its contents constitute a work based on the Program (independent of having been made by running the Program). Whether that is true depends on what the Program does. DE - 2 1. You may copy and distribute verbatim copies of the Program's source code as you receive it, in any medium, provided that you conspicuously and appropriately publish on each copy an appropriate copyright notice and disclaimer of warranty; keep intact all the notices that refer to this License and to the absence of any warranty; and give any other recipients of the Program a copy of this License along with the Program. You may charge a fee for the physical act of transferring a copy, and you may at your option offer warranty protection in exchange for a fee. 2. You may modify your copy or copies of the Program or any portion of it, thus forming a work based on the Program, and copy and distribute such modifications or work under the terms of Section 1 above, provided that you also meet all of these conditions: a) You must cause the modified files to carry prominent notices stating that you changed the files and the date of any change. b) You must cause any work that you distribute or publish, that in whole or in part contains or is derived from the Program or any part thereof, to be licensed as a whole at no charge to all third parties under the terms of this License. c) If the modified program normally reads commands interactively when run, you must cause it, when started running for such interactive use in the most ordinary way, to print or display an announcement including an appropriate copyright notice and a notice that there is no warranty (or else, saying that you provide a warranty) and that users may redistribute the program under these conditions, and telling the user how to view a copy of this License. (Exception: if the Program itself is interactive but does not normally print such an announcement, your work based on the Program is not required to print an announcement.) These requirements apply to the modified work as a whole. If identifiable sections of that work are not derived from the Program, and can be reasonably considered independent and separate works in themselves, then this License, and its terms, do not apply to those sections when you distribute them as separate works. But when you distribute the same sections as part of a whole which is a work based on the Program, the distribution of the whole must be on the terms of this License, whose permissions for other licensees extend to the entire whole, and thus to each and every part regardless of who wrote it. Thus, it is not the intent of this section to claim rights or contest your rights to work written entirely by you; rather, the intent is to exercise the right to control the distribution of derivative or collective works based on the Program. In addition, mere aggregation of another work not based on the Program with the Program (or with a work based on the Program) on a volume of a storage or distribution medium does not bring the other work under the scope of this License. 3. You may copy and distribute the Program (or a work based on it, under Section 2) in object code or executable form under the terms of Sections 1 and 2 above provided that you also do one of the following: a) Accompany it with the complete corresponding machine-readable source code, which must be distributed under the terms of Sections 1 and 2 above on a medium customarily used for software interchange; or, b) Accompany it with a written offer, valid for at least three years, to give any third party, for a charge no more than your cost of physically performing source distribution, a complete machine-readable copy of the corresponding source code, to be distributed under the terms of Sections 1 and 2 above on a medium customarily used for software interchange; or, DE - 3 c) Accompany it with the information you received as to the offer to distribute corresponding source code. (This alternative is allowed only for noncommercial distribution and only if you received the program in object code or executable form with such an offer, in accord with Subsection b above.) The source code for a work means the preferred form of the work for making modifications to it. For an executable work, complete source code means all the source code for all modules it contains, plus any associated interface definition files, plus the scripts used to control compilation and installation of the executable. However, as a special exception, the source code distributed need not include anything that is normally distributed (in either source or binary form) with the major components (compiler, kernel, and so on) of the operating system on which the executable runs, unless that component itself accompanies the executable. If distribution of executable or object code is made by offering access to copy from a designated place, then offering equivalent access to copy the source code from the same place counts as distribution of the source code, even though third parties are not compelled to copy the source along with the object code. 4. You may not copy, modify, sublicense, or distribute the Program except as expressly provided under this License. Any attempt otherwise to copy, modify, sublicense or distribute the Program is void, and will automatically terminate your rights under this License. However, parties who have received copies, or rights, from you under this License will not have their licenses terminated so long as such parties remain in full compliance. 5. You are not required to accept this License, since you have not signed it. However, nothing else grants you permission to modify or distribute the Program or its derivative works. These actions are prohibited by law if you do not accept this License. Therefore, by modifying or distributing the Program (or any work based on the Program), you indicate your acceptance of this License to do so, and all its terms and conditions for copying, distributing or modifying the Program or works based on it. 6. Each time you redistribute the Program (or any work based on the Program), the recipient automatically receives a license from the original licensor to copy, distribute or modify the Program subject to these terms and conditions. You may not impose any further restrictions on the recipients' exercise of the rights granted herein. You are not responsible for enforcing compliance by third parties to this License. 7. If, as a consequence of a court judgment or allegation of patent infringement or for any other reason (not limited to patent issues), conditions are imposed on you (whether by court order, agreement or otherwise) that contradict the conditions of this License, they do not excuse you from the conditions of this License. If you cannot distribute so as to satisfy simultaneously your obligations under this License and any other pertinent obligations, then as a consequence you may not distribute the Program at all. For example, if a patent license would not permit royalty-free redistribution of the Program by all those who receive copies directly or indirectly through you, then the only way you could satisfy both it and this License would be to refrain entirely from distribution of the Program. If any portion of this section is held invalid or unenforceable under any particular circumstance, the balance of the section is intended to apply and the section as a whole is intended to apply in other circumstances. It is not the purpose of this section to induce you to infringe any patents or other property right claims or to contest validity of any such claims; this section has the sole purpose of protecting the integrity of the free software distribution system, which is implemented by public license practices. Many people have made generous contributions to the wide range of software distributed through that system in reliance on consistent DE - 4 application of that system; it is up to the author/donor to decide if he or she is willing to distribute software through any other system and a licensee cannot impose that choice. This section is intended to make thoroughly clear what is believed to be a consequence of the rest of this License. 8. If the distribution and/or use of the Program is restricted in certain countries either by patents or by copyrighted interfaces, the original copyright holder who places the Program under this License may add an explicit geographical distribution limitation excluding those countries, so that distribution is permitted only in or among countries not thus excluded. In such case, this License incorporates the limitation as if written in the body of this License. 9. The Free Software Foundation may publish revised and/or new versions of the General Public License from time to time. Such new versions will be similar in spirit to the present version, but may differ in detail to address new problems or concerns. Each version is given a distinguishing version number. If the Program specifies a version number of this License which applies to it and "any later version", you have the option of following the terms and conditions either of that version or of any later version published by the Free Software Foundation. If the Program does not specify a version number of this License, you may choose any version ever published by the Free Software Foundation. 10. If you wish to incorporate parts of the Program into other free programs whose distribution conditions are different, write to the author to ask for permission. For software which is copyrighted by the Free Software Foundation, write to the Free Software Foundation; we sometimes make exceptions for this. Our decision will be guided by the two goals of preserving the free status of all derivatives of our free software and of promoting the sharing and reuse of software generally. NO WARRANTY 11. BECAUSE THE PROGRAM IS LICENSED FREE OF CHARGE, THERE IS NO WARRANTY FOR THE PROGRAM, TO THE EXTENT PERMITTED BY APPLICABLE LAW. EXCEPT WHEN OTHERWISE STATED IN WRITING THE COPYRIGHT HOLDERS AND/OR OTHER PARTIES PROVIDE THE PROGRAM "AS IS" WITHOUT WARRANTY OF ANY KIND, EITHER EXPRESSED OR IMPLIED, INCLUDING, BUT NOT LIMITED TO, THE IMPLIED WARRANTIES OF MERCHANTABILITY AND FITNESS FOR A PARTICULAR PURPOSE. THE ENTIRE RISK AS TO THE QUALITY AND PERFORMANCE OF THE PROGRAM IS WITH YOU. SHOULD THE PROGRAM PROVE DEFECTIVE, YOU ASSUME THE COST OF ALL NECESSARY SERVICING, REPAIR OR CORRECTION. 12. IN NO EVENT UNLESS REQUIRED BY APPLICABLE LAW OR AGREED TO IN WRITING WILL ANY COPYRIGHT HOLDER, OR ANY OTHER PARTY WHO MAY MODIFY AND/OR REDISTRIBUTE THE PROGRAM AS PERMITTED ABOVE, BE LIABLE TO YOU FOR DAMAGES, INCLUDING ANY GENERAL, SPECIAL, INCIDENTAL OR CONSEQUENTIAL DAMAGES ARISING OUT OF THE USE OR INABILITY TO USE THE PROGRAM (INCLUDING BUT NOT LIMITED TO LOSS OF DATA OR DATA BEING RENDERED INACCURATE OR LOSSES SUSTAINED BY YOU OR THIRD PARTIES OR A FAILURE OF THE PROGRAM TO OPERATE WITH ANY OTHER PROGRAMS), EVEN IF SUCH HOLDER OR OTHER PARTY HAS BEEN ADVISED OF THE POSSIBILITY OF SUCH DAMAGES. END OF TERMS AND CONDITIONS How to Apply These Terms to Your New Programs If you develop a new program, and you want it to be of the greatest possible use to the public, the best way to achieve this is to make it free software which everyone can redistribute and change under these terms. DE - 5 To do so, attach the following notices to the program. It is safest to attach them to the start of each source file to most effectively convey the exclusion of warranty; and each file should have at least the "copyright" line and a pointer to where the full notice is found. one line to give the program's name and an idea of what it does. Copyright (C) yyyy name of author This program is free software; you can redistribute it and/or modify it under the terms of the GNU General Public License as published by the Free Software Foundation; either version 2 of the License, or (at your option) any later version. This program is distributed in the hope that it will be useful, but WITHOUT ANY WARRANTY; without even the implied warranty of MERCHANTABILITY or FITNESS FOR A PARTICULAR PURPOSE. See the GNU General Public License for more details. You should have received a copy of the GNU General Public License along with this program; if not, write to the Free Software Foundation, Inc., 51 Franklin Street, Fifth Floor, Boston, MA 02110-1301, USA. Also add information on how to contact you by electronic and paper mail. If the program is interactive, make it output a short notice like this when it starts in an interactive mode: Gnomovision version 69, Copyright (C) year name of author Gnomovision comes with ABSOLUTELY NO WARRANTY; for details type `show w'. This is free software, and you are welcome to redistribute it under certain conditions; type `show c' for details. The hypothetical commands `show w' and `show c' should show the appropriate parts of the General Public License. Of course, the commands you use may be called something other than `show w' and `show c'; they could even be mouse-clicks or menu items--whatever suits your program. You should also get your employer (if you work as a programmer) or your school, if any, to sign a "copyright disclaimer" for the program, if necessary. Here is a sample; alter the names: DE - 6 Yoyodyne, Inc., hereby disclaims all copyright interest in the program `Gnomovision' (which makes passes at compilers) written by James Hacker. signature of Ty Coon, 1 April 1989 Ty Coon, President of Vice DE - 7