1
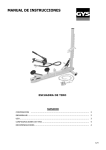
LMC Mini – Facer©™®
USERS MANUAL
Issue Year
2014
Drawn by
Marc Gys
Design and Manuf
Len Matec prio bvba
WWW.LENMATEC.BE
LMC Mini – Facer©™®
Users Manual
Len Matec Prio bvba
Introduction
Thank you for purchasing the Mini Facer ®™ ©.
This easy to use manual driven flange facing apparatus is designed to help the user to
recondition flange gasket seating area’s .
Below User Manual is drawn up to help you operate and maintain the MiniFacer in a safe
way.
The Manual has 4 chapters , added also are recommendations and drawings thus to foresee in
maximum information .
PREFACE
Contains information about the use of this user manual
CONTENCE LIST
1. Introduction
General information about the LMC MiniFacer , the function and the demands that are
requested for the conditions of use and also the operator
2. Safety
Describes the most important safety risc’s , safety precautions to follow from the
operator / user . also the meaning of the safety symbols on the MinFacer®™©
3. Transport and Storage
This chapter gives instruction for transport , maintenance and storage of the
MiniFacer®™©
4. Operating the MiniFacer®™©
Discribes how to use the MiniFacer®™©
5. Photo’s and drawings
© Marc Gys
Issue 2014 rev 0
2
Contence
INTRODUCTION ................................................................................................................................................. 2
CONTENCE .......................................................................................................................................................... 5
1
INTRODUCTION ....................................................................................................................................... 4
1.1
1.2
1.3
1.4
2
SAFETY PRECAUTIONS ......................................................................................................................... 7
2.1
2.2
3
INTRODUCTION .......................................................................................................................................... 7
APPLICABLE SAFETY PRECAUTIONS TO FOLLOW ....................................................................................... 7
TRANSPORT AND STORAGE OF THE MINIFACER®™© .............................................................. 9
3.1
3.2
4
PRODUCT DESCRIPTION ............................................................................................................................. 4
MAINPARTS INDICATION OF THE MINIFACER®™© .................................................................................. 5
CONDITIONS OF USE ................................................................................................................................... 6
INSTRUCTIONS FOR THE USER / OPERATOR ................................................................................................. 6
TRANSPORT ............................................................................................................................................... 9
STORAGE ................................................................................................................................................. 10
OPERATING THE MINIFACER®™© ................................................................................................. 11
4.1
4.2
4.3
INTRO ...................................................................................................................................................... 11
MACHINING WITH THE MINIFACER©™® ................................................................................................ 11
DIMENSIONS ............................................................................................................................................ 13
LMC Mini – Facer©™®
Users Manual
1
Introduction
1.1
Product description
Len Matec Prio bvba
The LMC Mini – Facer©® is per definition not a machine but a manual driven tool to obtain
flat facing of different type and diameters of flanges .
The MiniFacer is desgined to do refacing of flat face flanges of various materials.
The tool provides in a gramophone finish thus to create optimum gasket contact and gasket
seating conditions.
Due to the integrated feed spindel , which is taking care of the cutting tool feed ,whilest
turning the machine and keeping the feed knob , the required surface finish is obtained .
The MiniFacer is supplied with 2 feed spidels. Standard the ASME B 16.5 spindle is
mounted . And the other spindle is in the case . Both spindles are engraveed on the feed nut .
Mounted spindle :
ASME B 16.5 is for “ stock finish = 6.3 to 12.5µm “ according to ASME specification
In the case
Nr 2 is for “ Smooth finish =3.2 to 6.3 µm “ . this finish is used for other types of flanges and
gaskets
These surface conditions are commonly used in flange face finish .
For special surface finish requirements we can supply specific tooling
please contact your dealer for info and or availability .
The MiniFacer has a yellow/gold color body finish , to improve visibility this body carries a
unique serial nr engraved into the body of the tool below the tekst “ LMC Mini Facer®™©
The MiniFacer ™® © is delivered in a sturdy carry case with slotted pockets to store
components from the tool .
The internal clamping diameter range of the LMC Mini – Facer©® is
From +/- 1” to 10” => 24 mm to 250 mm ( with the std supplied clamping gibs )
The facing diameter rage of the LMC Mini-Facer ©™® is
from 1” – to 14” => 24 mm to 355 mm
© Marc Gys
Issue 2014 rev 0
4
LMC Mini – Facer©™®
1.2
Users Manual
Len Matec Prio bvba
Mainparts indication of the MiniFacer®™©
De LMC Mini – Facer©® is built from a number of principle parts , indicated on below
picture.
© Marc Gys
Issue 2014 rev 0
5
LMC Mini – Facer©™®
1.3
Users Manual
Len Matec Prio bvba
Conditions of use
The Minifacer ©® shall only be used in the following conditions . .
-
Make sure the operator / user of LMC Mini – Facer©® has read and understood the
User Manual
-
All Safety precautions are fulfilled .
-
There is no damage to the LMC Mini – Facer©®
-
No other condition to disturb normal working of the Minifacer applies .
-
Maintenance and cleaning shall be taken care off and respected before all use .
1.4
Instructions for the user / operator
The LMC Mini – Facer©®™ shall only be used by operators that are fully
instructed and confident with the operation . Further more it is obligatory to wear
in all conditions of use the necessary safety garments and clothing , such as :
safety clothing , shoes , goggles . Avoid to wear loose clothing.
© Marc Gys
Issue 2014 rev 0
6
LMC Mini – Facer©™®
Users Manual
2
Safety precautions
2.1
Introduction
Len Matec Prio bvba
In this chapter the safety precautions are treated every operator using the MiniFacer shall
follow these instructions in full . .
If there is any safety aspect unclear please check the Users manual or ask for more
information from the safety advisor or from your dealer . .
In certain cases , specific additional safety precations might apply . Please inform and apply
these instructions .
2.2
Applicable Safety precautions to follow
For a safe use of the LMC Mini – Facer©® it is required to respect a number of precautions .
Thee are stipulated below ..
Personal protection :
-
We advise to wear Safety shoes , safety goggles , gloves and applicable work clothing
during the use of the LMC Mini – Facer©®.
-
Assure that all setting components or loose elements ( e.g. the grippers the cutting
toolholer ) of the MiniFacer are tightened or fixed the way they should be .
Check that there are no external damages on LMC Mini – Facer©® .
Assure that the piping you work on is fully safe to work at and no dangerous and
harmful products are present .
Always work in the most ergonomical way . Thus to avoid injuries from the back or
other inconvenient problems of health . .
Also assure people in the direct surrounding wear the necessary personal protection
means
Check before starting to operate that there is no obstacle that can cause injury or
damage to the Minifacer®™©
Also assure that the operators fysical condition is okay to do this kind of work in the
conditions that apply during the work ;
-
© Marc Gys
Issue 2014 rev 0
7
LMC Mini – Facer©™®
Users Manual
Len Matec Prio bvba
Safety measures during the use of the Minifacer®™©
-
Wear the prescribed personal protection means during the use .
E.g. Safety goggles , working clothing , safety boots , etc etc
-
The wear of tight fit long sleeve working clothes is required since the swarf can be
very warm and sharp , thus might cause injury .
-
Make sure the collet is always firmly tightened so that the Minifacer ®™© does not
come loose during the turning operation .
Do not wear loose garment , juwelry( such as rings etc ) or loose hair during the
work. These can cause jamming of fingers or other injuries and might lead to other
dangerous situations ..
Note: Before every use of the Mini facer make sure no dirt, swarf or other components can
fall into the flange bore (pipe).
© Marc Gys
Issue 2014 rev 0
8
LMC Mini – Facer©™®
Users Manual
Len Matec Prio bvba
3
Transport and Storage of the Minifacer®™©
3.1
Transport
De LMC Mini – Facer©® is supplied in a sturdy hard plastic compact carry case .
This sturdy carry case is suitable for the transport of the Minifacer®™©
Do assure that the latches at the front of the carry case are firmly closed before lifting ,
moving, manipulating or carrying the case .
To protect the outside shell of the carry case , it is recommended to cover the casy in a bubble
film or full covering box when shipping .
shipping data :
- dimensions : (45 x 51 x 19) cm
- weight : 13 kg.
Check after every transport that the case is intact and no damage has occurred .
In case of any damage ,replace the carry case for safety reasons and to avoid loss of tooling.
All periferical tooling is also in this carry case . All tooling has a proper place in the box (
cutout spaces foreseen ) and is therewith clearly visible for the user .
During transporting the Minifacer©™® case shall be fixed as load . Never put any
heavy stuff on the Minifacer®™© thus to avoid damage of the tool and the carry
case .
© Marc Gys
Issue 2014 rev 0
9
LMC Mini – Facer©™®
3.2
Users Manual
Len Matec Prio bvba
Storage
-
Always store the Minifacer®™© in a dry and clean place .
-
After every use dry and clean the Minifacer with a clean cloth. Make sure that there is
no swarf or metal particles in or at the Minifacer because they can disturb the
clamping aswel as the movement for normal operation . Remove the clamping spindle
out of the hollow center shaft center , clean , inspect and lubricate slightly with a
smooth film of spindle oil and put back into position.
-
Then inspect to tool for eventual damage or loose parts (e.g. bolts ) etc ( If any loose
parts repair or send to your agent for repair )
-
After cleaning and inspection , lubricate the slides and spindle with a film of spindle
oil, never use WD 40 or similar .
-
If stored for long term , then spray the mini facer with a protective spray layer such as
Molykote 321D . Never use WD 40 or similar.
© Marc Gys
Issue 2014 rev 0
10
LMC Mini – Facer©™®
Users Manual
4
Operating the Minifacer®™©
4.1
Intro
Len Matec Prio bvba
Operating the Minifacer ®™© is very simple . Though it is of great importance to respect and
apply all safety precautions .
4.2
Machining with the Minifacer©™®
1) Fit the correct spindle for the required surface finish in the MiniFacer ( stock finish or
Smooth finish )
2) Check if the inside diam of the flange to machine is clean and does not show any
obstruction or other elements that can disturb correct clamping of the gibs, or center
shaft).
3) Measure the “id” of the flange and select the correct clamping gib set for the diameter
of the flange to machine . Use the gib selector chart . If necessary mount gibs on each
other , use the suitable bolts and allen key. (See the gib selector chart).
Gib selector chart
© Marc Gys
Issue 2014 rev 0
11
LMC Mini – Facer©™®
Users Manual
Len Matec Prio bvba
4) Turn the knurled knob so that the gibs are in its smallest diameter position , but avoid
that the gibs are not in the groove.
5) The Minifacer is now ready to be fit into the bore of the flange.
6) Place the center shaft with the clamping set into the bore of the flange , keep the
fingers around the clamping shaft and smoothly slide the clamps down into the bore .
Position the clamps approx 2 mm lower then the face of the flange .
.
7) Turn the knurled know clockwise so the gibs go out and start to clamp into the bore.
While turning the knob slightly move the minifacer so that the centering is optimal.
When the minifacer is in place , then use the 19 mm spanner ( on the HEX on top of
the knob ) to firmly tighten the minifacer in place .
8) Place the cutting tool into the toolport . Check the cutting tip and replace if necessary.
Assemble the toolpost onto the toolslide so that the cutting tip faces towards you.
9) Now lift the turning (Alu knob with finger indentions ) to disengage the feed and
position the cutting tool with the crank towards the inside of the flange to face.
10) Stop in the middle , release the fixing bolt on the toolpost , and feed down the cutting
tool so that it just contacts the metal face . Then tighten the fixing bolt on the toolpost
again. Position the cutting tool further inwards , until it has gone over the metal to
machine ( I.e. in a position that it is free )
11) Now engage the feed by pushing the Alu knob down . Grab the Alu knob with your
hand and turn round counter clock wise . The feed system will now move the cutting
tool automatically from inside to outside.
Important notice :
DO NOT STOP TURNING WHEN
THE CUTTING TOOL IS
MACHINING AND NEVER TURN
INTO THE OPOSITE DIRECTION .
Otherwise the surface finish is not even
and the cutting tip might
break of
If the whole area is not touched , then lift the aluminium knob again , turn the cutting
tip to the inside , release the fixing bolt on the toolpost , turn the cutting tip down for 1
1/12 revolution ( equals +/- 0.1 mm down feed ) . And repeat the machining operation
. Repeat this until the whole gasket area is done .
© Marc Gys
Issue 2014 rev 0
12
LMC Mini – Facer©™®
Users Manual
Len Matec Prio bvba
12) Turn until the cutting tip is over the metal to machine ( outside the gasket face )
13) When the operation is done and the gasket face is evenly machined , the job is ready
14) To take the Minifacer out of the flange , remove the toolpost ( Alan bolt ) , then
release the hex (19 mm ) center knurled knob . Then support the Minifacer with your
one hand and , tap the center shaft with the plastic hammer . then the clamps will come
loose and the minifacer can be taken out of the bore .
4.3
Dimensions
Please ask your distributor for more info if you find any problem operating
the Minifacer®™©
.
© Marc Gys
Issue 2014 rev 0
13