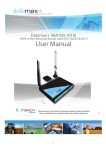
1
Keystone™ Labeling System
Instruction Manual
TimeMed Labeling Systems, Inc.
144 Tower Drive
Burr Ridge, IL 60527
Phone: 800-323-4840
Fax: 800-548-5359
www.TimeMed.com
Keystone™ User Manual
Getting started with the TimeMed® Keystone™ Labeling System
Table of Contents
PAGE
A. Unpacking Keystone................................................................................................................ 3
B. Loading the label media........................................................................................................... 4
• Label media sensor adjustment
C. Equipment service coverage................................................................................................... 6
D. Installing the labeling software................................................................................................. 8
E. Connecting the keyboard to the PC....................................................................................... 14
F. Connecting to a database....................................................................................................... 17
• Option 1 – Microsoft Excel
• Option 2 – Microsoft Access
G. Setting up the labels/building the label template................................................................... 22
•
•
•
•
Map a TEXT label element to a Database Field
Map a BARCODE label element to a Database Field
Map a label element using Keyboard User Input
Other label setup options
H. Transferring labels to the keyboard....................................................................................... 30
I. Stand-alone operation - Calling up/printing a record............................................................... 30
• Calling up a record from a database
• Data entry (Keyboard user input)
J. Frequently asked questions and troubleshooting tips............................................................ 32
K. Reference Information........................................................................................................... 35
• Communication settings on the keyboard/PC/printer
• Cleaning the printhead
TimeMed Labeling Systems, Inc. - Call Toll Free: 800-323-4840 or visit www.timemed.com
A. Unpacking Keystone
After removing the printer from the packaging material, check the contents. The following items
should be included:
• Thermal printer
• Power cord for thermal printer
• Sample roll of labels (HCP-TD-115-Y)
• Keystone user manual
• Keystone brochure/label information
• Keystone keyboard unit
• Serial data transfer cable
• USB to serial power cable (Not for data transfer)
• Keystone installation CD
All technical support calls related to the Keystone product should be directed to TimeMed
Technical Support by contacting:
(800) 323-4840 extension 290
Monday through Friday between 8:00 a.m. and 5:00 p.m. CST
For technical support, please call: 800-323-4840 ext. 290 (M - F 8 a.m. to 5 p.m CST)
Important Safety Instructions
This printer has been carefully designed to provide many years of safe, reliable performance. As
with all types of electrical equipment, however, there are a few basic precautions you should take
to avoid hurting yourself or damaging the device:
•
•
•
•
•
•
•
•
Always ensure that the printer is connected to a UL rated surge protector
Read and follow all warning instruction labels on the printer
Place the printer on a flat, firm, solid surface
To protect your printer from overheating, make sure all openings on the printer are not blocked
Do not place the printer on or near a heat source
Do not use your printer near water, or spill liquid into it
Be certain that your power source matches the rating listed on your printer
Do not place the power cord where it will be walked on. If the power cord becomes damaged
or frayed replace it immediately.
• Do not insert anything into the ventilation slots or openings on the printer
• Only qualified, trained service technicians should attempt printer repair
B. Loading the Label Media
Load label media into the printer as follows:
• Open the media cover and lower the Media Hub Guide and Media Guide.
• Press in on the Printhead Latch and raise the Printhead Assembly.
1. Printhead Latch
2. Media Guide
3. Media Hub Guide
TimeMed Labeling Systems, Inc. - Call Toll Free: 800-323-4840 or visit www.timemed.com
• Slide the Roll Media onto the Media Hub and raise the Media Hub Guide. The Media Hub
Guide should be pushed inward so that it is just touching the Roll Media.
• Route the Media through the printer as shown. Raise the Media Guide. The Media Guide
should be pushed inward so that it is just touching the edge of the Media.
1. Label Roll Media
2. Media Hub Guide
3. Media Sensor
4. Media Guide
• Close the Printhead Assembly and press down until it locks into place.
• Close the cover and press the FEED button several times to position the media and ensure proper tracking.
1. Printhead assembly
Label Media Sensor Adjustment
The Media Sensor needs to be positioned so that the printer can detect the presence of label
media and the top-of-form (except for continuous stock, where the TOF is set through the front
panel.
For technical support, please call: 800-323-4840 ext. 290 (M - F 8 a.m. to 5 p.m CST)
• With label media loaded, grasp the Slide Tab and move the Sensor Eye Mark into the center position over label media.
1. ‘Sensor Eye’ Mark
2. Slide Tab
C. Equipment Service Coverage
Equipment Service/Support
TimeMed has access to an extensive network of service providers to support your Keystone installation. As a Keystone customer, this network is available at a charge for labor and
materials. If you are a Keystone and TimeMed thermal label user, TimeMed will provide full equipment coverage which includes technical support and on-site service*. Please refer to the information in this document for equipment coverage details.
The equipment service coverage is for a period of twenty-four (24) months from the date of the
customer invoice.
All technical support calls related to the Keystone product should be directed to TimeMed
Technical Support by contacting:
(800) 323-4840 extension 290
Monday through Friday between 8:00 a.m. and 5:00 p.m. CST
* Service coverage does not include damage caused by operator error or misuse. Service
coverage beyond the 24-month period can be purchased by contacting TimeMed Technical Support.
Printer Coverage
If the customer problem is printer related, TimeMed Technical Support will collect detailed
information on the symptoms of the printer problem from the customer. A printer service support
representative will contact the customer within 3 business hours to schedule an on-site service
call if necessary. If on-site service for the printer related issue is deemed necessary, an on-site
service technician will be at the customer location within an 8 working business hour window.
Information collected may include:
•
•
•
Description of the equipment and serial numbers
Equipment location
Information regarding the printer issue
TimeMed Labeling Systems, Inc. - Call Toll Free: 800-323-4840 or visit www.timemed.com
The customer will not have to cover the cost of travel and labor related to the service call. Replacement parts will be provided at no charge except for those parts which by their nature are
considered consumable (example: ribbons, paper, printheads, etc).
Maintenance provided shall extend to service, repairs and replacements made necessary by
normal wear and usage of the equipment. Maintenance provided under this Agreement shall not
include any service, repairs or replacements required or made necessary as a result of electrical
power failure, fire, theft, software virus, water, casualty, employee negligence, abuse, misuse,
inadequate or inappropriate environment, room size, inadequate ventilation, or other external
forces. Maintenance provided does not cover consumables or label jams.
TimeMed’s responsibility under this Maintenance Agreement is limited to providing service,
replacement or repair. TimeMed shall not be responsible or liable for any direct, special or
consequential damages resulting from any cause whatsoever.
On-site service calls will be made at the customer’s premises within the next business day. The
principal period of maintenance is Monday through Friday 8 a.m. to 5 p.m. (excluding holidays) in
the time zone where the equipment is located.
The on-site service plan includes preventative maintenance (PM) service calls over the two
year service coverage period and is available on request. Typically during a PM call the service
rep will do a full cleaning of the printer, check that all settings are within factory specifications,
and check all high failure parts for abnormal wear. The PM call helps minimize downtime by
proper inspection and cleaning. TimeMed may initiate a courtesy PM reminder call to Keystone
customers to ensure that their printers are serviced and function correctly.
Thermal Printhead Coverage
The standard manufacturer’s (Datamax) thermal printhead warranty is limited to 1 year (365 days)
or 1,000,000 linear inches, whichever comes first. This warranty does not cover printheads that
have been misused, altered, neglected, handled carelessly, or damaged due to improper cleaning
or unauthorized repairs.
The thermal printhead is covered under the manufacturer’s (Datamax) warranty. In order for
TimeMed to replace a printhead while the original printhead is under warranty evaluation by
Datamax, a customer purchase order will be required for the cost of a new replacement printhead. If the printhead issue is covered under the manufacturer’s warranty, the purchase order will not be
used. We strongly encourage customers to purchase a spare printhead to minimize downtime.
Keyboard Coverage
If the customer issue is deemed to be keyboard or software related, TimeMed Technical
Support will assist in diagnosing errors and malfunctions over the phone. If the issue cannot be
resolved over the phone and/or the issue has been identified as a keyboard hardware failure, a
replacement keyboard will be sent to the customer via next day delivery with a call tag for their
existing keyboard.
For technical support, please call: 800-323-4840 ext. 290 (M - F 8 a.m. to 5 p.m CST)
Returns
If necessary, Keystone products may be returned for credit within 30 days from date of invoice. Returned stock products will be subject to a 20% handling/restocking charge. Shipping costs are
the responsibility of the customer. Stock products that are more than 30 days from the date of
invoice will not be accepted for return. Unauthorized returns sent “collect” to TimeMed will not be
accepted.
Items must be returned in original cartons and in unused re-salable condition. All returns require a
Return Goods Authorization Number obtained from your TimeMed representative or by contacting
the TimeMed Technical Support. The Return Goods Authorization Form must have supporting
paperwork indicating original purchase order number, TimeMed work order number, date of
original order, etc.
D. Installing the Labeling Software
System Requirements:
• Pentium based computer with at least 64 MB of RAM and CD-ROM drive
Windows 98, ME, NT4, 2000, XP
Hard Drive with at least 10 MB of free disk space
• One open COM port
• User database (if applicable) in Microsoft Excel or Microsoft Access.
Files created on a newer version (higher than Excel 2003 or Access 2003) must be saved
down to version 2003 or lower
IMPORTANT:
When using the labeling software, make sure that the user database (Microsoft
Excel or Microsoft Access) is closed before proceeding
Notes for Windows NT/2000/XP/Server 2003 users:
If you are installing onto a Windows NT/2000/XP/Server 2003 system, you must have
“Administrator rights” during the installation. “Normal user rights” are sufficient to run the
program. “Administrator rights” are only required for the initial installation (Please contact your IT
department if necessary).
Notes for Windows 95 users:
Due to Microsoft’s discontinued support for Windows 95, database features within the program are
not supported on this operating system.
Software Installation
Before commencing installation, you should shut down any other applications currently running.
TimeMed Labeling Systems, Inc. - Call Toll Free: 800-323-4840 or visit www.timemed.com
You will be required to restart your PC when the program installation has completed. The program
will not function correctly until your PC has re-started.
Insert the CD into your CD-ROM drive. The install program should run automatically – if it does
not, click Start>Run>Browse and select SETUP.EXE from the root directory of the CD. Follow the
on-screen instructions to complete the installation.
IMPORTANT: During the installation you will asked for a CD key.
Use the CD key #: 42885
Type in the CD key #: 42885, click on “Next” to continue
For technical support, please call: 800-323-4840 ext. 290 (M - F 8 a.m. to 5 p.m CST)
Click on “Next” to continue
Click on “I accept the terms of the license agreement” to continue
10
TimeMed Labeling Systems, Inc. - Call Toll Free: 800-323-4840 or visit www.timemed.com
Type in the appropriate User and Company Names and click on “Next” to continue
Select “English (United States)” from the drop down menu, click on “Next” to continue
For technical support, please call: 800-323-4840 ext. 290 (M - F 8 a.m. to 5 p.m CST)
11
Using the drop down menu, select the appropriate printer model (Select the model: M-4206) and
click “Next” to continue
Click on “Next” to continue for the software to be installed in the default directory
12
TimeMed Labeling Systems, Inc. - Call Toll Free: 800-323-4840 or visit www.timemed.com
Click “Install” to begin the installation process
When the software installation has completed, click on “Finish” to exit
When the program installation has finished you will be prompted to restart your PC.
IMPORTANT: The program will not function correctly until your PC has re-started.
For technical support, please call: 800-323-4840 ext. 290 (M - F 8 a.m. to 5 p.m CST)
13
Running the program:
Double-click on the Solo Studio icon to run the program or click on the Windows Start Menu and
select Program>Solo Studio. Detailed information on the features of the program can be found
under Help>Help Topics.
E. Connecting the keyboard to the PC
Please note: the Keyboard to PC connection is only required when importing the data files and
label formats from the PC to the Keyboard.
1.
The included USB to serial cable will provide power to the keyboard. Simply plug the USB end into your PC and connect the other end of the cable to the serial cable which originates from the back of the keyboard. The keyboard will beep and you will see a welcome message on the keyboard display. 2. Ensure that the included serial data transfer cable is connected to the 2nd port on the keyboard and the other end of the cable is connected to the serial port on your PC.
3. Click on the menu and select Keyboard>Connection Wizard and click Next. You should have a message that the keyboard has been successfully connected. Click on “Finish”.
If you see “Unable to locate a Solo keyboard”,
14
TimeMed Labeling Systems, Inc. - Call Toll Free: 800-323-4840 or visit www.timemed.com
re-check the physical cable connections between the keyboard and the PC. Also re-check the
COM port settings:
Click on the menu bar on the top section of the program and select Keyboard>Keyboard settings
and check that the correct COM port is selected. Click on the “Settings” button and verify that the
following settings are correct and Click on the OK button:
Baud rate: 57,600
Data Bits: 8
Parity: None
Stop Bits: 1
Flow Control: XON/XOFF
Verify (with the help of your IT person if necessary) that the COM settings for your PC COM port
are set at 57,600.
On your PC desktop right click “My Computer” and select “Properties” and click on the “Hardware”
tab. Now click on Device Manager. Click on “Ports” and right click on “COM 1” and select
“Properties”. Verify that the Baud settings for the COM port are set at 57,600.
IMPORTANT: the communication settings MUST BE IDENTICAL between:
• The keyboard and the printer
• The keyboard and the PC
On the keyboard, the communication settings can be accessed by pressing the “Exit” button which
will bring you to the main menu; you will see “Press FORM to select”. While at the main menu,
press and hold the “ALT” key and the “F1” keys simultaneously. You will see “SETUP: COM 1
SETUP”. Using the Up and Down arrow keys, you can scroll between the setup for COM 1 or
COM 2. Press the “Enter” key to select the appropriate choice. You can now use the Up and
Down arrow keys to scroll between the 5 setting choices listed below. Simply press the Right or
Left arrow keys to change each setting. When you are done with the changes, press the “Exit”
button twice to exit to the main menu.
Communication settings on the keyboard:
Keyboard and the printer (COM 1)
BAUD: 9,600
PARITY: NONE
DATA BIT: 8
STOP BIT: 1
SHAKE: XON/XOFF
For technical support, please call: 800-323-4840 ext. 290 (M - F 8 a.m. to 5 p.m CST)
15
Keyboard and the PC (COM 2)
BAUD: 57,600
PARITY: NONE
DATA BIT: 8
STOP BIT: 1
SHAKE: XON/XOFF
Keyboard Internal DIP switches
Default
Datamax M-Class/Z: Both switches are set toward the connector cord
Both switches should be set away from the connector cord
Datamax I-Class: Instructions to change the communication settings for the printer (M-4206)
• Turn on the printer
On the front panel, press the “Menu” button (which is also the left arrow button).
You will see the “User Menu” with various options. Use the Up and Down buttons to scroll to “System Settings” and press the “Enter” button once.
• You will see “Menu Mode” selected; press the “Enter” button once. Scroll down to the “Advanced Menu” option and press the “Enter” button once.
• You will now be back in the main menu. Press the “Menu” button once. Using the “Down arrow” button, scroll down to the “Communications” option and press the “Enter” button
once. The “Serial Port A” option will be highlighted, press the “Enter” button once. • Scroll through the Communication options and press the “Enter” button for each to verify that the settings are correct. BAUD RATE: 9,600
PROTOCOL: BOTH
PARITY: NONE
DATA BITS: 8
STOP BITS: 1
When you have confirmed each Communication option, press the “Left arrow” button to go back.
When you are done, press the “Left arrow” button three times to exit to the main menu.
16
TimeMed Labeling Systems, Inc. - Call Toll Free: 800-323-4840 or visit www.timemed.com
F. Connecting to a database (Option 1 - Microsoft Excel)
1. Ensure that your data is in an Excel Spreadsheet format, as shown below.
RECORD #
123456
654321
9876543
DESCRIPTION
COTTON BALLS
TRAY C SECTION
SYRINGE 10ML
BARCODE #
12345678
87654321
98765432
Give the spreadsheet any name you want and save it on your computer.
IMPORTANT: Be sure to put the column names in ROW 1.
Make sure that the Excel spreadsheet containing the user database is
closed before proceeding with using the Solo Studio software
2. Run SOLO Studio from the Start|Programs|SOLO Studio menu (or by clicking on the Solo Studio icon on your desktop), after it has been installed.
3. Use the Database Connection Wizard, from the Database|Properties top menu item, to connect SOLO Studio to the Excel spreadsheet you have just saved.
Select “Excel (*xls)” and locate your saved Excel spreadsheet
For technical support, please call: 800-323-4840 ext. 290 (M - F 8 a.m. to 5 p.m CST)
17
Select “Sheet 1$”
Click the check box for “First Row Contains Field Names”
Select “Record #” as the field that uniquely identifies each database table row. Notice that “Select
Record” will be the database prompt. Click on Finish button to complete the database connection
process.
You have now connected your Excel spreadsheet to the software.
You can now go directly to Section G - Setting up the labels/building the label template.
18
TimeMed Labeling Systems, Inc. - Call Toll Free: 800-323-4840 or visit www.timemed.com
F. Connecting to a database (Option 2 - Microsoft Access)
1. To set up a new database in Access, an easy method is to first create your data in an Excel Spreadsheet format (as shown below) and export the spreadsheet into Access.
RECORD #
123456
654321
9876543
DESCRIPTION
COTTON BALLS
TRAY C SECTION
SYRINGE 10ML
BARCODE #
12345678
87654321
98765432
Give the spreadsheet any name you want and save it on your computer.
IMPORTANT: Be sure to put the column names in ROW 1.
Make sure that the Access database containing the user database is closed
before proceeding with using the Solo Studio software
Next, follow the detailed instructions on how to import the spreadsheet you just created
into an Access database and give the database any name you want and save it on your
computer.
How to import a Microsoft Excel spreadsheet into an Access database
• Open Microsoft Access
• Click on the top menu “File” and “New”
• Select “Blank Database”
• Assign an appropriate file name to the new Access database and save it to the desired directory
• Click on the “Create” button
• Click on top menu “File” and select “Get External Data” and select “Import”
• Right click on “Tables” in the “Database - Objects” section
• Locate the original spreadsheet containing the label data
• Make sure to use the drop down menu under “Files of Type” and select “Microsoft Excel (*.xls)”
files and click on the “Import” button
• Make sure that the “First Row Contains Column headings” option is selected/checked
• Click “Next”; select “In a New Table” when asked where would you like to store your data, click
“Next” to continue
• You will now see the Field Options screen and “Record #” selected as the “Field Name”, click on “Next”
For technical support, please call: 800-323-4840 ext. 290 (M - F 8 a.m. to 5 p.m CST)
19
• You will now be given the choice to select the primary key, check the “Choose my own Primary
Key” option and select “Record #” as the drop down option, click on “Next”
• Select an appropriate name for the Table and click on “Finish” to complete
• Double click on the new table name you created in the database window
• You will now see the data that was imported from Excel
• Column widths can be adjusted by clicking and dragging the end of each column
•
2.
To add additional data, simply scroll down to the end of the table and add additional information as needed, click on the “Save” icon to save the newly entered data
Run SOLO Studio from the Start|Programs|SOLO Studio menu (or by clicking on the Solo Studio icon on your desktop), after it has been installed.
3. Use the Database Connection Wizard, from the Database|Properties top menu item, to connect SOLO Studio to the Access database you have just saved.
Select “Access (*mdb)” and locate your saved Access database
Select “Sheet 1$”
Click the check box for “First Row Contains Field Names”
20
TimeMed Labeling Systems, Inc. - Call Toll Free: 800-323-4840 or visit www.timemed.com
Select “Record #” as the field that uniquely identifies each database table row. Notice that “Select
Record” will be the database prompt.
Click on Finish button to complete the database connection process.
You have now connected your database to the software.
You can now proceed to Section G - Setting up the labels/building the label template.
For technical support, please call: 800-323-4840 ext. 290 (M - F 8 a.m. to 5 p.m CST)
21
G. Setting up the labels/building the label template
TimeMed’s Keystone product comes pre-installed with TimeMed label formats (20 different
formats) and application specific TimeMed label templates (7 different templates) for your
convenience.
TM LBL 1
(1” x 1-1/2”)
TM LBL 2
(1” x 1-1/2”)
TM LBL 3
(1” x 1-1/2”)
TM LBL 4
(1” x 1-1/2”)
123456
COTTON BALLS
LATEX FREE
ST. LUKE’S HOSPITAL
SOLUTION BTG IV
TYLENOL
LOT: 123456
EXP: 01/01/2008
12345678
12345678
98765
JANE DOE
12345678
JOHN SMITH
TM LBL 6
(1” x 1-1/2”)
123456
COTTON BALLS
12345678
TM LBL 7
(1” x 1-1/2”)
PEEL HERE
TM LBL 5
(3” x 1”)
123456
COTTON BALLS
12345678
To choose from the selection of pre-set label templates, click on “Open” from the menu bar to
select the pre-set label template that best matches your requirements (the preview screen on the
right will display the sample chosen)
22
TimeMed Labeling Systems, Inc. - Call Toll Free: 800-323-4840 or visit www.timemed.com
To select a different label size, you can change the “Stock Settings” on the right. Click on
“Change” and you will be offered a selection of different label choices to select. Click on “OK”
when you are done.
For technical support, please call: 800-323-4840 ext. 290 (M - F 8 a.m. to 5 p.m CST)
23
To verify that the appropriate label type (Direct Thermal/Thermal Transfer) has been selected in
the software, check your printer’s settings under Settings > Printer. Ensure that the printer model matches the printer you are using (M-4206). Make sure that the
Direct Thermal option is selected (For thermal transfer media, ensure that the Print Method is set
to Thermal Transfer and that your printer is appropriately equipped). The correct default settings should be:
Printer Model: M-4206
Print Method: Direct Thermal
Print Speed: 2.0 inches/second
Print Density: 10
Removal Method: Tear-Off
24
TimeMed Labeling Systems, Inc. - Call Toll Free: 800-323-4840 or visit www.timemed.com
There are 3 different options to map each data element (text or barcode):
Fixed Data – The information printed will always be the same
Keyboard – User input is required by typing on the keyboard
Database – The data will come from the database based on the appropriate fields selected
The next step is to either map a label element (text or barcode) to a Database Field or map a label
element using Keyboard User Input
Map a TEXT label element to a Database Field
The example shown below has three data elements:
• Item # (TEXT)
• Description (TEXT)
• Barcode (BARCODE)
1. Select the TEXT label element “123456”, as shown below.
2. Map this label element to a Source Type of “Database” and Field of “Record #” which
are located in the lower right hand section of the screen. This field name is from the Excel Spreadsheet you created earlier.
3. Select the TEXT label element “Cotton Balls”, as shown below.
4. Map this label element to a Source Type of “Database” and Field of “Description” which
are located in the lower right hand section of the screen. This field name is from the Excel Spreadsheet you created earlier.
For technical support, please call: 800-323-4840 ext. 290 (M - F 8 a.m. to 5 p.m CST)
25
Map a BARCODE label element to a Database Field
1. Click on the BARCODE element.
2. Map this barcode label element to the Source Type of “Database” and Field of “Barcode”.
3. The default barcodes used are Code 39. You also have the option to create barcodes using Code 128, 2-D or other barcodes by referring to the barcode section titled “Map a BARCODE label element to a Database Field”.
At this point you can save the label format you have created. Go to the top menu bar and click on
“File, Save As” and type in the appropriate file name (the file name used can be up to a maximum
of 8 characters).
IMPORTANT:
When creating a label template using a DATABASE, we recommend that
you also create a separate label template (with the same layout) using the
KEYBOARD input method. This will allow you to create and print labels
even if an item currently does not exist in your database.
26
TimeMed Labeling Systems, Inc. - Call Toll Free: 800-323-4840 or visit www.timemed.com
Map a Label element using the Keyboard User Input
You can also setup a label format to prompt the user to manually input data with the keyboard. This can be used for expiration dating when user intervention is required to complete the
information (TM LBL 4 from the pre-set selection of label templates is a good example).
1. Select the TEXT label element “01/01/2008”, as shown below.
2. Map this label element to a Source Type of “Keyboard” which is located in the lower right hand section of the screen.
3. Rename the Element name to “EXP DATE” in the top right section of the screen.
4. Set the “Prompt” field on the properties panel to “EXP DATE”. This will be the prompt that the user sees on the Keyboard screen.
At this point you can save the label format you have created. Go to the top menu bar and click on
“File, Save As” and type in the appropriate file name (the file name used can be up to a maximum
of 8 characters).
For technical support, please call: 800-323-4840 ext. 290 (M - F 8 a.m. to 5 p.m CST)
27
Other Label Setup Options
You can also select the label size manually. To set the label size to match the labels you have
loaded into your printer, click on or go to Stock > Select... Look for a label format matching your
label dimensions (select 1.5” x 1” which is a common label size), or click on New to create a new
label size. Click on OK when you are done.
Check your printer’s settings under Settings > Printer... Ensure the printer model matches
the printer you are using. Make sure that the Direct Thermal option is selected (For thermal
transfer media, ensure that the Print Method is set to Thermal Transfer and that your printer is
appropriately equipped).
You can also custom design the label layout to meet your needs.
FOR YOUR REFERENCE: Use the Help Topics (Help > Help Topics) for
detailed information on additional features.
Creating Fixed Text that does not change
1. To choose from a selection of pre-set label templates, click on “Open” to select the pre-set
label template that best matches your requirements (the preview screen on the right will
display the sample chosen).
2. Click on the TEXT icon on the left-hand toolbar.
3. Click on the label and type “XYZ Hospital”.
4. Click on this typed text to highlight it, and resize the text by dragging the resize handles on the text box.
5. Position the text box by using the arrow keys on your computer keyboard, or dragging with your mouse.
6. This label element “XYZ Hospital” will be automatically set to a Source Type of “Fixed” on the right-hand properties panel.
Map a TEXT label element to a Database Field
1. Add a new TEXT label element “Item Description”, as shown below.
2. Map this label element to a Source Type of “Database” and Field of “Item Description”. This field name will be from the Excel Spreadsheet you created earlier.
28
TimeMed Labeling Systems, Inc. - Call Toll Free: 800-323-4840 or visit www.timemed.com
Map a BARCODE label element to a Database Field
1. Click on the BARCODE icon on the left toolbar to add a barcode label element.
The “Select Barcode Type” dialog will pop up. Select the appropriate barcode type and click OK to close the dialog.
Under the barcode properties section, select “High Density” in the format area. You can also click
on the barcode and resize it by dragging the resize points in the top and bottom of the barcode
element.
2. Map this barcode label element to the Source Type of “Database” and Field of “BarcodeData”.
Map a label element using Keyboard User Input
1. Add a TEXT label element “Quantity:”
2. Add another TEXT label element “user input”, and set the Source Type to “Keyboard”.
Rename to “USER_INPUT” in the “Element Name” field on the properties panel
- This element name will be used later in the tutorial.
Set the “Prompt” field on the properties panel to “Enter QTY:” - this will be the prompt that the user sees on the Keyboard’s screen.
Save your label template design by going to the menu bar and selecting “File, Save As”.
IMPORTANT:
When creating a label template using a DATABASE, we recommend that
you also create a separate label template (with the same layout) using the
KEYBOARD input method. This will allow you to create and print labels
even if an item currently does not exist on your database.
For technical support, please call: 800-323-4840 ext. 290 (M - F 8 a.m. to 5 p.m CST)
29
H. Transferring labels to the Keyboard
Your labels can be transferred to the keyboard at any time by selecting Keyboard > Keyboard
Builder or by clicking on the Keyboard Builder which will show a list of all the labels you have
saved on your PC. Check all the labels you wish to include in your keyboard and click on Build
SOLO Keyboard. Please note:
The transfer process will overwrite/erase all existing data on the keyboard.
I. Stand-alone operation - Calling up/Printing a record
Calling up a record from a database
Ensure that the keyboard is connected to your printer and that the printer is switched on. The
keyboard will beep and you will see a welcome message on the keyboard display. Provided the
keyboard has had labels transferred to it, pressing any key will take you to a second screen
displaying the current date and time. You may return to this point at any stage by pressing “Exit”.
Press “Form” for the label selection menu. You will see a prompt reading Select SOLO label:
Scroll through the labels using the “Up” and “Down” arrow keys. Typing a single letter will jump the
selection to the first label template beginning with that letter. Press “Enter” to select the desired
label template. Note: The list will contain a file named AUTO.BAS which should be ignored.
30
TimeMed Labeling Systems, Inc. - Call Toll Free: 800-323-4840 or visit www.timemed.com
You will now be prompted to enter the record you wish to call up. Enter the desired record # and
press the enter key. The keyboard will not prompt you for the number of labels you wish to print. Enter the number of labels required and press the Enter key. Your labels should now print.
Please note: For database records, when entering data relating to a record in a database, you
may experience a delay depending on the size of the database: the Keyboard takes one second
to search approximately 27 records. (Note: Entering *.* will print all records of a database)
Data entry (Keyboard User Input)
If you have created a label template that contains variable data (content that can change on each
label), you will be prompted to enter data or make selections.
When presented with a prompt and one of a series of predefined options, you may navigate
through these using the “Up” and “Down” arrow keys. Press “Enter” to select.
Keyboard input can also be used to create temporary labels if you come across an item that
currently does not exist on your database using the Database label element mapping method.
A prompt with no options indicates that the label requires keyboard input. Enter the requested
information using the Keyboard and press “Enter” to confirm your entry. Use the “Backspace”
key to correct any mistyped errors. To enter country-specific characters, press the key below the
corresponding symbol printed on the decal in conjunction with the “Alt” key, for example - for the £
symbol, hold down and press 3.
After printing, you will be returned either to the first prompt or to the copy/batch prompt for the
label you last selected. To select a different label, press the “Exit” then “Form” keys.
For technical support, please call: 800-323-4840 ext. 290 (M - F 8 a.m. to 5 p.m CST)
31
J. Frequently Asked Questions and Troubleshooting Tips
Q.I am not able to install the label software on my computer, the screen says to contact my IT department.
A. Make sure that the software is installed on a computer with “Administrator rights”. Administrator rights are only required for the initial installation. Please check with the IT department if necessary. Normal user rights are sufficient to run the program.
Q. The keyboard does not respond or the screen is blank.
A. If the keyboard stops responding or the keyboard screen is blank, simply restart the keyboard. Disconnect the keyboard cable connected to the printer for several seconds and reconnect the cable to printer.
Q.After installing the software and connecting the keyboard to the PC, I am not able to get the software/PC to communicate with the keyboard.
A.
Make sure that the keyboard is connected to the printer and the printer is turned on. The
keyboard should be on at this point. Make sure that the keyboard is also connected to the PC and that both cable connections are secure. In the label program, click on the menu and select Keyboard>Connection Wizard and click “Next”. You should have a message that the keyboard has been successfully connected. If not, check that the communication settings on the keyboard and the PC are correctly
configured. The communication settings MUST BE IDENTICAL between the keyboard and the PC. Keyboard communication settings
The default communication settings for COM 2 on the keyboard should be:
Keyboard and the PC (COM 2)
BAUD: 57,600
PARITY: NONE
DATA BIT: 8
STOP BIT: 1
SHAKE: XON/XOFF
Check the communication settings on the keyboard which can be accessed by pressing the “Exit”
button which will bring you to the main menu; you will see “Press FORM to select”. While at the
main menu, press and hold the “ALT” key and the “F1” keys simultaneously. You will see “SETUP:
COM 1 SETUP”. Using the Up and Down arrow keys, you can scroll between the setup for COM
1 or COM 2. Press the “Enter” key to select the appropriate choice. You can now use the Up and
Down arrow keys to scroll between the 5 setting choices listed below. Simply press the Right or
Left arrow keys to change each setting. When you are done with the changes, press the “Exit”
button twice to exit to the main menu.
32
TimeMed Labeling Systems, Inc. - Call Toll Free: 800-323-4840 or visit www.timemed.com
PC and Program Settings
Click on the menu and select Keyboard>Keyboard settings and check that the correct COM port is
selected. Click on the “Settings” button and verify that the following settings are correct and Click
on the OK button:
Baud rate: 57,600
Data Bits: 8
Parity: None
Stop Bits: 1
Flow Control: XON/XOFF
Verify (with the help of your IT person if necessary) that the COM settings for your PC COM port
are set at 57,600.
On your PC desktop right click “My Computer” and select “Properties” and click on the “Hardware”
tab. Now click on Device Manager. Click on “Ports” and right click on “COM 1” and select
“Properties”. Verify that the Baud settings for the COM port are set at 57,600.
Click on the menu and select Keyboard>Connection Wizard and click Next. You should have a
message that the keyboard has been successfully connected. Click on “Finish”.
Q.After successfully transferring data to the keyboard and connecting the keyboard to the
printer, I am not able to get the keyboard to communicate with the printer.
A. Check that the keyboard is securely connected to the printer, the printer is turned on and the keyboard has been powered on as well.
If not, check that the communication settings on the keyboard and the printer are correctly
configured. The communication settings MUST BE IDENTICAL between the keyboard and the printer.
Keyboard communication settings
The default communication settings for COM 1 on the keyboard should be:
Keyboard and the printer (COM 1)
BAUD: 9,600
PARITY: NONE
DATA BIT: 8
STOP BIT: 1
SHAKE: XON/XOFF
Printer communication settings (Datamax M-Class)
Turn on the printer. On the front panel, press the “Menu” button (which is also the left arrow
button). You will see the “User Menu” with various options. Use the Up and Down buttons to
scroll to “System Settings” and press the “Enter” button once. You will see “Menu Mode” selected;
press the “Enter” button once. Scroll down to the “Advanced Menu” option and press the “Enter”
button once.
For technical support, please call: 800-323-4840 ext. 290 (M - F 8 a.m. to 5 p.m CST)
33
You will now be back at the main menu. Press the “Menu” button once. Using the “Down
arrow” button, scroll down to the “Communications” option and press the “Enter” button once. The “Serial Port A” option will be highlighted, press the “Enter” button once. Scroll through the
Communication options and press the “Enter” button for each to verify that the settings are correct. BAUD RATE: 9,600
PROTOCOL: BOTH
PARITY: NONE
DATA BITS: 8
STOP BITS: 1
When you have confirmed each Communication option, press the “Left arrow” button to go back.
When you are done, press the “Left arrow” button three times to exit to the main menu.
Q. The print quality on my labels is poor – (streaking lines, print density is too light)
A. Make sure that the print head on the printer is secure and in the locked position, also, refer to the instructions on cleaning the printhead in the next section.
34
TimeMed Labeling Systems, Inc. - Call Toll Free: 800-323-4840 or visit www.timemed.com
K. Reference Information:
IMPORTANT: the communication settings MUST BE IDENTICAL between:
• The keyboard and the printer
• The keyboard and the PC
The communication settings on the keyboard can be accessed by pressing the “Exit” button which
will bring you to the main menu; you will see “Press FORM to select”. While at the main menu,
press and hold the “ALT” key and the “F1” keys simultaneously. You will see “SETUP: COM 1
SETUP”. Using the Up and Down arrow keys, you can scroll between the setup for COM 1 or
COM 2. Press the “Enter” key to select the appropriate choice. You can now use the Up and
Down arrow keys to scroll between the 5 setting choices listed below. Simply press the Right or
Left arrow keys to change each setting. When you are done with the changes, press the “Exit”
button twice to exit to the main menu.
Communication settings on the keyboard:
Keyboard and the printer (COM 1)
BAUD: 9,600
PARITY: NONE
DATA BIT: 8
STOP BIT: 1
SHAKE: XON/XOFF
Keyboard and the PC (COM 2)
BAUD: 57,600
PARITY: NONE
DATA BIT: 8
STOP BIT: 1
SHAKE: XON/XOFF
Keyboard Internal DIP switches
Default
Datamax M-Class/Z: Both switches are set toward the connector cord
Datamax I-Class: Both switches should be set away from the connector cord
For technical support, please call: 800-323-4840 ext. 290 (M - F 8 a.m. to 5 p.m CST)
35
Communication settings on the PC:
Click on the menu bar on the top section of the program and select Keyboard>Keyboard settings
and check that the correct COM port is selected. Click on the “Settings” button and verify that the
following settings are correct and Click on the OK button:
Baud rate: 57,600
Data Bits: 8
Parity: None
Stop Bits: 1
Flow Control: XON/XOFF
Verify (with the help of your IT person if necessary) that the COM settings for your PC COM port
are set at 57,600.
On your PC desktop right click “My Computer” and select “Properties” and click on the “Hardware”
tab. Now click on Device Manager. Click on “Ports” and right click on “COM 1” and select
“Properties”. Verify that the Baud settings for the COM port are set at 57,600.
Communication Settings on the Printer
(Instructions on how to change the settings for a Datamax M-Class printer)
•
Turn on the printer
•
On the front panel, press the “Menu” button (which is also the left arrow button).
You will see the “User Menu” with various options. Use the Up and Down buttons to scroll to “System Settings” and press the “Enter” button once.
•
You will see “Menu Mode” selected; press the “Enter” button once. Scroll down to the “Advanced Menu” option and press the “Enter” button once.
•
You will now be back in the main menu. Press the “Menu” button once. Using the “Down arrow” button, scroll down to the “Communications” option and press the “Enter” button once. •
The “Serial Port A” option will be highlighted, press the “Enter” button once. Scroll through the Communication options and press the “Enter” button for each to verify that the settings are correct. BAUD RATE: 9,600
PROTOCOL: BOTH
PARITY: NONE
DATA BITS: 8
STOP BITS: 1
When you have confirmed each Communication option, press the “Left arrow” button to go back.
When you are done, press the “Left arrow” button three times to exit to the main menu.
36
TimeMed Labeling Systems, Inc. - Call Toll Free: 800-323-4840 or visit www.timemed.com
Cleaning the Printhead
If print quality declines (symptoms include non-compliant bar codes, print dropouts, and streaks;
see sample label below), the typical cause is debris build-up on the printhead. Furthermore, when
the build-up is not removed it may lead to element failure, greatly reducing the service life of the
printhead. Streaks indicate a dirty or faulty printhead.
To clean the printhead:
• Turn ‘Off’ and unplug the printer.
• Open the cover. Unlock the Printhead Latch and raise the Printhead assembly. Allow the
printhead to cool before proceeding.
• Move media and ribbon away from the printhead as necessary.
• Using a Cotton Swab moistened, not soaked, with isopropyl alcohol gently wipe away any
build-up on the printhead surface, paying close attention to the Burn Line. Allow the printhead
to dry.
• Replace the ribbon and media. Lower the Printhead Assembly back to the locked position.
• Close the cover. Plug in and turn ‘On’ the printer. Feed several labels to normalize tracking.
1. Printhead Latch
2. Printhead Assembly
3. Cotton Swab
For technical support, please call: 800-323-4840 ext. 290 (M - F 8 a.m. to 5 p.m CST)
37
TimeMed Labeling Systems, Inc.
144 Tower Drive
Burr Ridge, IL 60527
Phone: 800-323-4840
Fax: 800-548-5359
www.TimeMed.com
38
TimeMed Labeling Systems, Inc. - Call Toll Free: 800-323-4840 or visit www.timemed.com