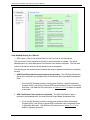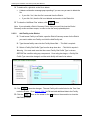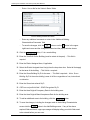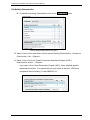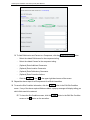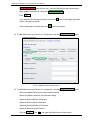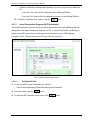
1
Washington State Office of Superintendent of Public Instruction Inventory and Condition of Schools (ICOS) User Manual Author: Mary Freitas Version: 1.0 Date: April 9, 2012 Inventory and Condition of Schools (ICOS) User Manual Table of Contents 1.0 Introduction ............................................................................................................. 1 1.1 Accessing ICOS ................................................................................................. 1 1.2 Logging into EDS ............................................................................................... 2 2.0 Inventory and Condition Of Schools (ICOS)......................................................... 4 2.1 Home ................................................................................................................. 5 2.2 Inventory and Condition ..................................................................................... 6 2.2.1 Tree View Pane and Viewer Screen ..................................................................... 6 2.2.2 Information Center ...............................................................................................11 2.2.3 District Summary .................................................................................................15 2.2.3.1 View District Summary ................................................................................................ 15 2.2.3.2 Add Facility to the District ............................................................................................ 17 2.2.4 Facility Information ...............................................................................................18 2.2.4.1 View Facility Summary ................................................................................................ 18 2.2.4.2 Edit Facility .................................................................................................................. 21 2.2.5 Site Inventory Information ....................................................................................25 2.2.5.1 2.2.6 View and Edit Site Inventory ....................................................................................... 25 Building Inventory Information ..............................................................................31 2.2.6.1 View Building Inventory Summary .............................................................................. 31 2.2.6.2 Add Building to the Facility .......................................................................................... 32 2.2.6.3 Edit Building Inventory................................................................................................. 36 2.2.7 Site Condition Information ....................................................................................42 2.2.7.1 View Site Condition Summary..................................................................................... 42 2.2.7.2 Edit Site Condition ....................................................................................................... 44 2.2.8 Building Condition Information .............................................................................47 2.2.8.1 View Building Condition Summary .............................................................................. 47 2.2.8.2 Edit Building Condition ................................................................................................ 48 2.2.9 Energy Management Information .........................................................................51 2.2.10 FEMA Pre-Disaster Mitigation Information ...........................................................52 2.2.10.1 Add Pre-Disaster Mitigation Data ................................................................................ 52 2.2.10.2 Copy Pre-Disaster Mitigation Data to Another Building .............................................. 53 2.2.10.3 Edit Pre-Disaster Mitigation Data ................................................................................ 53 2.2.10.4 Add/View Files ............................................................................................................. 53 OSPI School Facilities & Organization a Inventory and Condition of Schools (ICOS) User Manual 2.2.11 Asset Preservation Program (APP) Information ...................................................54 2.2.11.1 Edit/Add APP Data ...................................................................................................... 54 2.2.11.2 Upload APP Files ........................................................................................................ 55 2.2.12 Washington Sustainable Schools Protocol (WSSP) .............................................57 2.2.12.1 Edit/Add WSSP Data................................................................................................... 58 2.2.12.2 Add/View Files ............................................................................................................. 60 2.3 Reports ............................................................................................................ 61 2.4 District Contacts ............................................................................................... 64 2.5 2.4.1 Create Contact ................................................................................................................ 64 2.4.2 Contact Search................................................................................................................ 67 2.4.3 Edit Contact ..................................................................................................................... 68 Maps and Boundaries ...................................................................................... 70 OSPI School Facilities & Organization b Inventory and Condition of Schools (ICOS) User Manual 1.0 Introduction OSPI School Facilities and Organization supports the State Superintendent in providing School Districts with financial and technical assistance in three primary areas: Capital construction, facilities maintenance/management initiatives, and School District organization issues. The Inventory and Condition of Schools (ICOS) is a web-based system where the inventory details about the facilities operated by the Districts and the current condition of those facilities are documented and stored. This information is used to support the performance-based Asset Preservation Program which gauges how well the facilities, buildings and sites are maintained, as well as meet the increasing demand for accurate school facility inventory and building condition data that supports statewide programs (such as the School Construction Assistance Program), District facility management and school facility information requests or policy decisions. ICOS is a software system that provides inventory and building condition data and reporting capabilities. This system benefits the Districts by providing functionality for inventory system, record keeping, and comparative analysis between Districts. 1.1 Accessing ICOS At this time, OSPI recommends using Microsoft Internet Explorer version 8 or higher. In order to view the ICOS system, the Silverlight applet, a common add-in, must be downloaded onto the computer viewing the system. Silverlight can be accessed at this website at no charge: http://www.silverlight.net/getstarted/. Once Silverlight has been installed, go to the ICOS site to access the system: http://eds.ospi.k12.wa.us/Login.aspx Obtaining a Login for ICOS In order to have access to ICOS, users need a login for the OSPI Education Data System (EDS). EDS is the web portal used at OSPI allowing users to access various systems for which they have permissions. To request access to EDS and ICOS, contact your Regional Coordinator. OSPI School Facilities & Organization 1 Inventory and Condition of Schools (ICOS) User Manual 1.2 Logging into EDS To login into the EDS system to view the ICOS go to the following website: http://eds.ospi.k12.wa.us/Login.aspx Enter your Username and Password. Click the Login button. Click the My Applications tab or click on View my Applications. Click Either Location OSPI School Facilities & Organization 2 Inventory and Condition of Schools (ICOS) User Manual Click on ICOS. Click to Enter ICOS System You are now in the ICOS system! If “ICOS” is not one of the choices in My Applications List, please contact your District Data Security Manager. NOTE: The screen prints in this manual do not reflect any actual or real data for the Districts displayed. The screens and data are used as examples only. OSPI School Facilities & Organization 3 Inventory and Condition of Schools (ICOS) User Manual 2.0 Inventory and Condition Of Schools (ICOS) ICOS is developed inside the existing OSPI Web portal called the Education Data System (EDS). The screens headers and footers have the standard design features as specified by the EDS portal (EDS Home, Logout and Help) and meet the accessibility standards and hardware and software requirements, for example, a minimum 1024x768 screen resolution, IE Explorer 6.0 or higher. The EDS Home will take you back to the ICOS Home page. The Help link opens the School Facilities ICOS website where there are various ICOS documents. The Feedback button opens a web page to enter comments and then submit to the Help Desk. The header navigation button menu is the first level of screens within the ICOS application. Clicking on a navigation button takes the user to the appropriate screen. Beneath the header navigation, there are two graphic icons on the right-side of the page: Print Friendly and Logout. Clicking the Print Friendly icon takes the user to a print-friendly view of the current screen. Clicking the Logout icon logs the user out of the system and returns to the EDS Login screen. Underneath these graphic icons is the name of the School District in which the user chose at the Login screen. The navigation tool bar has the following buttons which are discussed in detail in the next section: − Home: ICOS Home page, the first screen viewed when entering the ICOS system. − Inventory and Condition: Contains the screens to enter data about Facility, Site, and Building Inventory and Condition ratings; Energy Management; FEMA pre-disaster mitigation; Asset Preservation Program (APP); and Washington Sustainable Schools Protocol (WSSP). − Reports: The page to select and run reports based on various user-selected criteria. − District Contacts: The page used to enter and view district contacts. − Maps and Boundaries: The page displays the GIS-based interactive map that contains information on school district boundaries, demographics and capital projects. The bottom footer provides links to the OSPI Privacy Policy, a Disclaimer, and Customer Support. Clicking one of these links redirects the user to the appropriate page. OSPI School Facilities & Organization 4 Inventory and Condition of Schools (ICOS) User Manual 2.1 Home The first screen displayed after logging into the ICOS system is the Home page. This screen displays the navigation tool bar with the various items the user can choose to open. The picture displayed is the main Office of the Superintendent of Public Instruction building in Olympia, Washington. 2.1.1 ICOS Home Screen From this welcome screen, the user can go to various pages by clicking on the desired navigation button on the tool bar. OSPI School Facilities & Organization 5 Inventory and Condition of Schools (ICOS) User Manual 2.2 Inventory and Condition Inventory and Condition is the main location to find the site and building inventory and condition screens, and the other related screens. When the Inventory and Condition button is clicked, a sub-menu appears below with the following available screens: • District Summary • FEMA Pre-Disaster Mitigation • Asset Preservation Program (APP) • Washington Sustainable Schools Protocol (WSSP) Each of these screens are described in the following sections. 2.2.1 Tree View Pane and Viewer Screen All of the screens in the Inventory and Condition section have a Tree View pane where the screen navigation occurs. The Viewer Screen is where the information appears after the user clicks on a choice in the Tree View. Viewer Screen Tree View 2.2.1.1 Tree View and Viewer Screen OSPI School Facilities & Organization 6 Inventory and Condition of Schools (ICOS) User Manual Navigating the Tree View The left-hand tree view panel displays two tabbed screens: The ‘General’ tab displays all of the Facilities within the School District. If the user singleclicks on a Facility Name, the Facility Summary page for that facility will be displayed. If the user single-clicks on the right pointing expander triangle next to a Facility, all of the Facility options in the hierarchy will be expanded fully, to view Inventory, Condition, Site, and Building. Once expanded, the user can then single-click on the downward pointed triangle symbol to collapse the list. The tree view is organized hierarchically with the District and its related Facilities listed alphabetically. The hierarchy is depicted below: ð District level 1 ð Facility level 2 ð Inventory level 3 ð Site level 4 ð Building level 4 ð Condition level 3 ð Site level 4 ð Building level 4 2.2.1.2 ICOS Hierarchy Screen Example OSPI School Facilities & Organization 7 Inventory and Condition of Schools (ICOS) User Manual The ‘Information Center’ tab is displayed when a user first enters the Inventory and Condition for their District. This screen displays the needed actions the user needs to complete for each Facility. If there are no needed actions, then the screen will say “No actions needed”. The Information Center screen can be opened at any time by clicking the tab in the tree view. The Actions Needed can be refreshed / updated in the screen by clicking the ‘Refresh’ button. Once the action has been successfully completed, the action will no longer display in the Information Center screen. Note: OSPI users need to select a ‘District’ to view the Information Center for a specific District. Also, at the bottom of the Information Center screen there is a link to the ICOS Information webpage where the user manual and other help links can be found. General Tab - How to Drill Down to the Details Click directly on a District name to open the District details in the Viewer Screen. Click on the small gray expander triangle symbol next to the name to expand the District tree view list. All of the Facilities in the District are listed. 2.2.1.3 Tree View Expanded OSPI School Facilities & Organization 8 Inventory and Condition of Schools (ICOS) User Manual Once the list is expanded there will be a small black downward pointed triangle symbol next to the item. Clicking on this black triangle will collapse the list back up and hide the Facilities. Navigating the General Tab Viewer Screen and Accordion The viewer screen bar is the vertical bar to the left of an opened screen. All viewer screens have the same screen controls: 1) To close a screen, click on the button at the top of the Screen bar. 2) To minimize a screen, click on the button at the bottom of the Screen bar. 3) To re-open/maximize a screen, click on the button at the bottom of the Screen bar. The screen bar is light blue colored when it is maximized and white colored when it is minimized. Close Screen Control Minimize/Maximize Screen Controls 2.2.1.4 Minimize and Maximize Screen Examples OSPI School Facilities & Organization 9 Inventory and Condition of Schools (ICOS) User Manual When a screen opens, it will open to the right, and therefore, it may be possible that the screen has opened to the right of the user’s visible screen view, and must scroll to the right to view the screen. Up to five screens can be open at the same time. If a user attempts to open a sixth screen, a pop up message will display saying that one of the current five screens must be closed before opening a new screen. At this time, the screen size is fixed. The user may need to use the scroll bars in order to navigate an individual screen. The screens can be minimized, maximized, or closed in any order. The example below shows all five screens minimized. Right-click to Expand or Collapse All Screens 2.2.1.5 Accordion Screen Closed To open or expand all accordion screens, right-click on any of the viewer screen bars and select ‘Collapse All’ or ‘Expand All’. A singe screen can also be expanded or collapsed by just single-clicking on its viewer screen bar. OSPI School Facilities & Organization 10 Inventory and Condition of Schools (ICOS) User Manual 2.2.1.6 Main Screen Expander Arrow To increase the right-hand viewer screen and allow the fields to be viewed without the user of scroll bars, place your cursor over the divider line between the left pane and the right-hand viewer and find where your cursor turns into a the double headed arrow. Leftclick when the cursor is double-headed arrow and drag the screen to the left (or right) to your desired screen size. 2.2.2 Information Center The Information Center page is the first page displayed when clicking on the Inventory and Condition navigation button. This screen is the location where the user views the actions that need to be completed and the corresponding due dates. If there are no actions listed, it will say there are no actions needed, and the user has completed all of the needed actions for the year. This screen also has a link to the Facilities webpage where the user can find the User Manual and other ICOS information. Click on the link http://www.k12.wa.us/SchFacilities/Inventory.aspx to open the webpage. OSPI School Facilities & Organization 11 Inventory and Condition of Schools (ICOS) User Manual 2.2.2.1 Information Center Screen View Needed Actions for a District OSPI Users - Click on the desired District in the Tree View in the General tab. The first column ‘Facility’ specifies the facility for which the action is needed. The Action Needed column is a short description of the task the user needs to complete. The Due Date column is the date in which the Action Needed must be completed. The following are the possible Actions Needed that may be displayed and how to accomplish the task: 1. APP Board Resolution Document needs to be uploaded – The APP Board Resolution document is required to be uploaded within 6 months from the Project Board Acceptance Date. Go to the APP Summary screen (Inventory and Condition > Asset Preservation Program (APP)), and click the ‘Upload APP Board Resolution’ button to upload the document. See Add/View File instructions in Section 2.2.11.2 for details to upload a document. 2. APS Certification Letter needs to be uploaded – The APS Certification Letter is required to be uploaded within 6 months from the Project Board Acceptance Date. Go to the APP Summary screen (Inventory and Condition>Asset Preservation Program (APP)), and click the ‘Upload APS Certification Letter Completed' button to upload the document. See Add/View File instructions in Section 2.2.11.2 for details to upload a document. OSPI School Facilities & Organization 12 Inventory and Condition of Schools (ICOS) User Manual 3. APP 6-Year Certification Letter needs to be uploaded – A letter of certification is required every 6 years that demonstrates that the facility’s condition has been inspected by a third party. This letter is required to be uploaded every 6 years from the Project Board Acceptance Date. For example, on the 6th,12th, 18th, 24th and 30th year from the Project Board Acceptance Date. Go to the APP Summary screen (Inventory and Condition>Asset Preservation Program (APP)), and click the ‘Upload 6- Year Certification Letter' button to upload the document. See Add/View File instructions in Section 2.2.11.2 for details to upload a document. 4. Board Meeting Date When Report Was Presented needs to be entered on the APP Summary page – It is required that the facility condition report be presented to the board yearly and the date be recorded in ICOS. Go to the APP Summary screen (Inventory and Condition>Asset Preservation Program), and enter the date (format MM/DD/YYYY) or click the calendar icon and select the date for the ‘Board Meeting Date When Report Was Presented’ field. 5. Site Map has not been uploaded for the Facility – It is required that a site map be uploaded for the facility. Go to the Facility Inventory Site screen (Inventory and Condition > Facility > Inventory > Site), and click the Add/View File tab to upload the file. Or click on the ‘View Site Area Map’ button and click ‘Yes’ when the pop up message asks if you wish to upload the Site Map now. See Add/View File instructions in Section 2.2.5.1 for details to upload a document. 6. Building Area Analysis has not been uploaded for the Facility – It is required that a building area analysis be uploaded for each building for a facility created in ICOS. This action needed will continue to display until all of the buildings have a building area analysis uploaded. Go to the Facility Building Inventory Summary screen (Inventory and Condition > Facility > Inventory > Building), and click the Add/View File tab to upload the file. Or click on the ‘View Building(s) Area Analysis’ button and click ‘Yes’ when the pop up message asks if you wish to upload the Building Area Analysis now. See Add/View File instructions in Section 2.2.6.3 for details to upload a document. 7. WSSP Annual Report needs to be completed – It is required that the WSSP Annual Report be completed annually for five years after first occupancy. a. Go to the Facility WSSP Annual Report screen (Inventory and Condition > Facility > Washington Sustainable Schools Protocol (WSSP)), and complete the required fields. See Washington Sustainable Schools Protocol (WSSP) instructions in Section 2.2.12.1 for details. OSPI School Facilities & Organization 13 Inventory and Condition of Schools (ICOS) User Manual 8. XXX/XXX Building Conditions have been successfully rated – This is a count of how many buildings have completed their condition ratings out of the total number of buildings in the Facility. It is required that all components for all sub-assemblies for all buildings in the facility be rated every year. a. Go to the Facility Building Condition screen (Inventory and Condition > Facility > Condition > Building), and complete the rating for all components for each subassembly for each building. See Building Condition instructions in Section 2.2.8.2 for details. 9. Site Condition rating has not been completed - It is required that all components for all sub-assemblies for the facility site be rated every year. a. Go to the Facility Building Condition screen (Inventory and Condition > Facility > Condition > Site), and complete the rating for all components for each subassembly. See Site Condition instructions in Section 2.2.7.2 for details. OSPI School Facilities & Organization 14 Inventory and Condition of Schools (ICOS) User Manual 2.2.3 District Summary 2.2.3.1 View District Summary In the tree view on the left-hand side of the screen, click directly on the name of the District to open the District Summary screen. The District Summary page is the first page that displays when a District is clicked. It displays specific information about the district, including the rollup totals from all of its facilities and the buildings within those facilities. This is a read-only screen and no changes can be made. Click directly on the District Name 2.2.3.1.1 View District Summary Screen View District Map To view the district map, click the ‘View District Map’ button. A separate Internet explorer window opens with a map of the state of Washington. Click on the desired District to see details. See Section 2.5 for detailed instructions. To print the district map, click on the To close the window, click on the button on the toolbar. button in the upper right-hand corner to close the window. OSPI School Facilities & Organization 15 Inventory and Condition of Schools (ICOS) User Manual Add/View Files To add a District Summary photo and other documents, click on the button. Note: The system will not allow duplicate file names to be uploaded for a District. Each file for the District must have a unique File Name. Hint: If you must upload the same document for multiple buildings or facilities, create as many copies of the file as needed, but with different file names. 2.2.3.1.2 Add/View Files Example In the pop up ‘Add/View Files’ window, click the − button. In the pop up ‘Select a file to Upload’ window, click the button and select file. If you are uploading a file for the District Summary Page Photo, then the file must have a file type of: gif, jpeg, jpg or png. If the file is not intended to be used for the Summary Photo, then any file type is allowed. − In the ‘Select a file to Upload’ window, select a Document Type from the drop down list. If the file is intended to be the District Summary Page Photo, then it is required that the document type be “Photo”. If it is not the Summary page photo then, “Other” or one of the other choices can be chosen. − Click − In the ‘Add/View Files’ window, the file is displayed. If the file is intended to be the in the ‘Select a file to Upload’ window. District Summary Page Photo, then it is required for you to click the ‘Summary Page Photo’ check box in order to have the photo display in the District Summary Screen. − Click − After receiving the Saved Confirmation pop up message, click . in the ‘Add/View Files’ window OSPI School Facilities & Organization 16 Inventory and Condition of Schools (ICOS) User Manual To delete a file, right-click on the file to delete. A delete confirmation message pops up asking if you are sure you want to delete the file. • If you click ‘Yes’, then the file is removed from the District. • If you click ‘No’, then the file is not deleted and remains in the District list. To close the ‘Add/View Files’ window, click button Note: If you uploaded a District Summary Photo, then you must first close the District Summary screen and then reopen, in order to view the newly uploaded photo. 2.2.3.2 Add Facility to the District To add a new Facility to a District, open the District Summary screen for the District you want to add a new Facility and click the Add Facility tab. Type the new facility name into the Facility Name field. - This field is required Select a Facility Site Profile Type from the drop down box. - This field is required – Warning: You must make sure that the correct Facility Site Profile Type is chosen BEFORE the condition rating any components. Once rating has begun, a Facility Site Profile Type cannot be changed, and the entire facility will need to be redone. 2.2.3.2.1 Add New Facility Screen Click to save the changes. The new Facility will now be listed on the Tree View under the District. Go to Section 2.2.4.2 to Edit and add additional data to the Facility. Click the button on the screen or the button on the accordion to close the Add Facility screen. OSPI School Facilities & Organization 17 Inventory and Condition of Schools (ICOS) User Manual 2.2.4 Facility Information 2.2.4.1 View Facility Summary The Facility Summary page displays specific information about the facility, including the rollup totals from all of its buildings. This is a read-only screen and no changes can be made. To Add Building see Section 2.2.6.2. To expand the District to view the Facilities, click on the small gray expander triangle next to the District. 2.2.4.1.1 View Facility Summary Screen OSPI School Facilities & Organization 18 Inventory and Condition of Schools (ICOS) User Manual View Site Map To view the site area map, click the button. A separate Internet explorer window opens with the Facility Site Map. − If a Site Map has not been uploaded for the Site, then a message pops up asking if you wish to upload a Site Map. This message will appear each time until a Site Map is uploaded into ICOS. Clicking ‘No’ will close the pop up. Clicking ‘Yes’ will open the Add/View Files screen in a separate accordion screen for you to upload the Site Map. To print the Site Map, click on the button on the toolbar. To close the Site Map window, click on the button in the upper right-hand corner to close the window. View Facility Notes To view the Facility Notes that are added and edited by OSPI only, click the button. Add/View Files To add a Facility Summary photo and other documents, click on the button. Note: The system will not allow duplicate file names to be uploaded for a Facility. Each file for the Facility must have a unique File Name. 2.2.4.1.2 Add/View Files Example In the pop up ‘Add/View Files’ window, click the − button. In the pop up ‘Select a file to Upload’ window, click the button and select file. OSPI School Facilities & Organization 19 Inventory and Condition of Schools (ICOS) User Manual If you are uploading a file for the Facility Summary Page Photo, then the file must have a file type of: gif, jpeg, jpg or png. If the file is not intended to be used for the Summary Photo, then any file type is allowed. In the ‘Select a file to Upload’ window, select a Document Type from the drop down list. If the file is intended to be the Facility Summary Page Photo, then it is required that the document type be “Photo”. If it is not the Summary page photo then, “Other” or one of the other choices can be chosen. Click In the ‘Add/View Files’ window, the file is displayed. If the file is intended to be in the ‘Select a file to Upload’ window. the Facility Summary Page Photo, then it is required for you to click the ‘Summary Page Photo’ check box in order to have the photo display in the Facility Summary Screen. Click . After receiving the Saved Confirmation pop up message, To delete a file, right-click on the file to delete. A delete confirmation message pops up asking if you are sure you want to delete the file. If you click ‘Yes’, then the file is removed from the Facility. If you click ‘No’, then the file is not deleted and remains in the Facility list. To close the ‘Add/View Files’ window, click button. Note: If you uploaded a Facility Summary Photo, then you must first close the Facility Summary screen and then reopen, in order to view the newly uploaded photo. OSPI School Facilities & Organization 20 Inventory and Condition of Schools (ICOS) User Manual 2.2.4.2 Edit Facility The Edit Facility screen is where the facility data can be edited. To add a building via the Add Building tab, see Section 2.2.6.2. To edit a Facility, click directly on the the Facility Name for the Facility you want to edit and click the Edit tab. In the Facility Summary screen, click the ‘Edit’ tab. 2.2.4.2.1 Edit Facility Screen Edit the desired fields, if needed. − Add School Code, see next page for details. − Change Facility Name, if necessary. − Change the Facility Site Profile Type, if needed. Warning: You must make sure that the correct Facility Site Profile Type is chosen BEFORE the condition rating any components. Once rating has begun, a Facility Site Profile Type cannot be changed, and the entire facility will need to be redone. − View Facility Notes, this is edited by OSPI only. − Enter the number of students that physically attend the Facility in the Students Served field. OSPI School Facilities & Organization 21 Inventory and Condition of Schools (ICOS) User Manual − Enter the facility related dates by clicking on the calendar next to the field or type the date into the field in format MM/DD/YYYY. − Enter the number of Teaching Stations. Note: Teaching Stations are typically defined as any room where class instruction would take place, which includes: gymnasiums, art rooms, music rooms, shop rooms, greenhouses, etc. Teaching Stations for students with disabilities are typically defined as any room dedicated to the instruction of students with mental and/or physical disabilities. − Enter Latitude and Longitude coordinates: Latitide format (numbers only): +- n.nnnnnnnn to +- nn.nnnnnnnn Longitude format (numbers only): +- n.nnnnnnnn to +- nnn.nnnnnnnn − Click the Skills Center Programs check box, if the Facility has Skills Center programs. − Click the Remote & Necessary School check box, if the Facility a Remote & Necessary school. − Click − Click the to save the changes. button on the screen or the button on the accordion to close the Facility screen. Add/Edit School Code To add a School Code to the Facility, click the button next to the School Code field. OSPI School Facilities & Organization 22 Inventory and Condition of Schools (ICOS) User Manual In the School Code pop up screen, click the button to add a School Code. Note: A Facility Number (assigned by OSPI) refers to a physical building and typically stays with that building regardless of change of use. A School Code refers to a program (high school, skills center, alternative program) and will move with the program if it relocates to another facility. 2.2.4.2.2 Add/Edit School Code Pop-up Screen − In the School Code column field, begin typing a word in the School Name or a few numbers from the School Code to do a search for the desired School Code. For example, to search for Franklin High School, start typing “fra” and a list of Schools will appear with those letters in the name. − To select a School from the list, click on the name and it will appear in the School Code field box. − Click the ‘Do the students primarily attend this School’ check box, if the majority of the students attend also attend this School. − To add another School Code, click the − To delete a School Code row, click the button again. button. A delete confirmation message pops up asking if you are sure you want to delete the School Code from the facility. If you click ‘Yes’, then the School Code is removed from the facility. If you click ‘No’, then the School Code is not deleted and remains in the facility grid. OSPI School Facilities & Organization 23 Inventory and Condition of Schools (ICOS) User Manual To delete a School Code, click the button next to the School Code you want to delete. 2.2.4.2.3 Add/Edit School Code Pop-up Screen – Delete School Code − A delete confirmation message pops up asking if you are sure you want to delete the School Code from the facility. Click ‘Yes’, then the School Code is removed from the facility. Click ‘No’, then the School Code is not deleted and remains in the facility grid. Click to close the School Code pop up screen. Add/Edit Facility Space Inventory To add/edit the Facility Space Inventory, click the ‘Facility Space Inventory’ button. A separate screen opens with the Facility Space Inventory data. 2.2.4.2.4 Facility Space Inventory Screen OSPI School Facilities & Organization 24 Inventory and Condition of Schools (ICOS) User Manual Enter the quantity for each Space/Room Type for the Facility, only numbers are allowed (format nn.n). − Tip - Double-click in the first Quantity field, then use your Tab button on your keyboard to move to the next field. To close the window, click on the button or on the button in the upper right-hand corner. 2.2.5 Site Inventory Information 2.2.5.1 View and Edit Site Inventory To add Facility Site Inventory information, click on the small gray expander triangle next to the Facility to expand the tree to view Inventory and Condition folders. Click directly on Site to open the Site Inventory screen. 2.2.5.1.1 Add/Edit Site Inventory Screen Enter the total acreage for the Site in the Total Site Acreage field. (Numbers only.) Select the ‘Is this site shared with other facilities?’ check box, if the site acreage is used by another facility. Leave unchecked if site is not shared. If the Site is shared with another Facility, a box will appear with an Add and Delete button. − Click the button to add a shared facility. OSPI School Facilities & Organization 25 Inventory and Condition of Schools (ICOS) User Manual − Enter in either two or three letters (Facility Name) or numbers (School Code) of the Shared Facility you wish to find. 2.2.5.1.2 Share Facility Search Example − Choose a Facility from the drop down search result, or enter another search criteria. − Click to add the facility to the Shared Facility grid. Repeat above steps to add another Facility, if needed. − Click on the − To delete a selected Shared Facility, click on the Facility Name in the Site Inventory grid. • Click the Click button, to add the Shared Facility to the Site Inventory screen. button. A delete confirmation message pops up asking if you are sure you want to delete the shared facility from the Site. − If you click ‘Yes’, then the share facility is removed from the shared facility grid. − If you click ‘No’, then the shared facilty is not deleted and remains in the shared facility grid. . OSPI School Facilities & Organization 26 Inventory and Condition of Schools (ICOS) User Manual Add/View Parcel and Census Tract Numbers To add/view the parcel numbers and the census tract number for the Facility Site, click button. A pop up window displays with the Parcel Number the and Census Tract Number screen. 2.2.5.1.3 Add/Edit Parcel and Census Number Screen To add a parcel number, click to add an additional parcel number for the Site. (Maximum 14 numbers allowed.)Repeat as necessary. Enter the Census Tract Number, if known. (Maximum 11 numbers allowed.) − For additional census tract information, click on the link at the bottom of the pop up screen. Click the button, to save the changes. To delete a parcel number , click Delete next to the Parcel Number you want to delete. 2.2.5.1.4 Delete Parcel Number Screen A delete confirmation message pops up asking if you are sure you want to delete the parcel number from the Site. − If you click ‘Yes’, then the parcel number is removed from the site. − If you click ‘No’, then the parcel number is not deleted and remains in the site grid To close, click the button or the button on the accordion to close the pop up Parcel and Census Tract screen. OSPI School Facilities & Organization 27 Inventory and Condition of Schools (ICOS) User Manual View Site Map To view the site area map, click the − button. If a Site Map has been uploaded for the Site then a separate Internet explorer window opens with the Facility Site Map. − If a Site Map has not been uploaded for the Site, then a message pops up asking if you wish to upload a Site Map. This message will appear each time until a Site Map is uploaded into ICOS. Clicking ‘No’ will close the pop up. Clicking ‘Yes’ will open the Add/View Files screen in a separate accordion screen for you to upload the Site Map. To print the Site Map, click on the button on the toolbar. To close the Site Map window, click on the button in the upper right-hand corner to close the window. Note: The system will not allow duplicate file names to be uploaded for a Facility/Site. Each file for the Facility/Site must have a unique File Name. Add/Edit Sub-Components to Site Components For each Site Component, complete the following: − Enter the Unit of Measure, this is required if Quantity has a value. − Enter the Quantity or Estimated Size, this is required if the Unit of Measure has a value selected. − Click on the Component. − button to add a pre-assigned sub-component to the Site Enter the Unit of Measure, this is required if Quantity or Estimated Size has a value. Enter the Quantity or Estimated Size, this is required if Unit of Measure has a value selected. Click the button to add an additional Sub-Component. Repeat the above steps for each Site Component. OSPI School Facilities & Organization 28 Inventory and Condition of Schools (ICOS) User Manual To delete a sub-component row, select the sub-component by clicking on the Quantity button. field for the sub-component, and then click the A Delete confirmation message pops up asking if you are sure you want to delete the sub-component row. − If you click ‘Yes’, then the row is removed from the sub-component list. − If you click ‘No’, then the row is not removed and remains in the subcomponent list. To save the Site Inventory information, click the button in the Site Inventory screen. If any of the required fields are blank, a pop up message will display telling you which fields need to be entered. To close the Site Inventory screen, click the button or the button on the accordion to close the Site Inventory screen. Add/View Files To add Site Inventory photo and other documents, click the button. Note: The system will not allow duplicate file names to be uploaded for a Facility/Site. Each file for the Facility/Site must have a unique File Name. In the pop up ‘Add/View Files’ window, click the − button. In the pop up ‘Select a file to Upload’ window, click the button and select file. If you are uploading a file for the Site Inventory Page Photo, then the file must have a file type of: gif, jpeg, jpg or png. If the file is not intended to be used for the Summary Photo, then any file type is allowed. In the ‘Select a file to Upload’ window, select a Document Type from the drop down list. If the file is intended to be the Site Inventory Page Photo, then it is required that the document type be “Photo”. If it is not the Summary page photo then, “Other” or one of the other choices can be chosen. Click In the ‘Add/View Files’ window, the file is displayed. If the file is intended to be in the ‘Select a file to Upload’ window. the Site Inventory Page Photo, then it is required for you to click the ‘Summary OSPI School Facilities & Organization 29 Inventory and Condition of Schools (ICOS) User Manual Page Photo’ check box in order to have the photo display in the Facility Summary Screen. Click . A saved confirmation message appears, click ‘OK’. To delete a file, right-click on the file to delete. A delete confirmation message pops up asking if you are sure you want to delete the file. − If you click ‘Yes’, then the file is removed from the Site. − If you click ‘No’, then the file is not deleted and remains in the Site list To close the ‘Add/View Files’ window, click button. Note: If you uploaded a Site Inventory Photo, then you must first close the Site Inventory screen and then reopen, in order to view the newly uploaded photo. OSPI School Facilities & Organization 30 Inventory and Condition of Schools (ICOS) User Manual 2.2.6 Building Inventory Information 2.2.6.1 View Building Inventory Summary To add Building Inventory information, click directly on Building to open the Building Inventory screen. If you do not see Building, you may need to click on the small gray expander triangle next to the Facility to expand the tree to display Inventory and Condition folders. Then click on the gray expander triangle next to Inventory to display Site and Building. If no buildings have been created in ICOS for the Facility, then the Building Inventory Summary will not display any buildings. You must first add a new building to add the inventory information. See below Section 2.2.6.2 to Add Building. 2.2.6.1.1 Building Inventory Summary Screen with Buildings View Site Map To view the site area map, click the − button. If a Site Map has been uploaded, then a separate Internet explorer window opens with the Facility Site Map. − If a Site Map has not been uploaded for the Site, then a message pops up asking if you wish to upload a Site Map. This message will appear each time until a Site Map is uploaded into ICOS. Clicking ‘No’ will close the pop up. Clicking ‘Yes’ will open the Add/View Files screen in a separate accordion screen for you to upload the Site Map. To print the Site Map, click on the OSPI School Facilities & Organization button on the toolbar. 31 Inventory and Condition of Schools (ICOS) User Manual To close the Site Map window, click on the button in the upper right-hand corner to close the window. Note: The system will not allow duplicate file names to be uploaded for a Facility/Site. Each file for the Facility/Site must have a unique File Name. 2.2.6.2 Add Building to the Facility To add a new Building to a Facility, open the Facility Summary screen you want to add a new building, and click the ‘Add Building’ tab. . 2.2.6.2.2 Add Building Inventory Screen Type the new building name in the District Assigned Building Name or Identification field. - This field is required – Select a Building Profile Type from the drop down box. - This field is required – Warning: You must make sure that the correct Building Profile Type is chosen BEFORE the condition rating any components. Once rating has begun, a Building Profile Type cannot be changed, and the entire building will need to be redone. Enter a number for the Number of Floors (including Basements) field. - This field is required - OSPI School Facilities & Organization 32 Inventory and Condition of Schools (ICOS) User Manual Edit Building Characteristics To add/edit the building Characteristics, click on the button. 2.2.6.2.3 Building Characteristics Screen Select a Yes or No for each field in the first section ‘Building Characteristics’. At least one field must be a Yes. – Required Select a Yes or No for the ‘School Construction Assistance Program (SCAP) Requirements’ section. – Required − If you select Yes for ‘Asset Preservation Program (APP)’, then a date field appears underneath the section. It is required that you enter a date in this field, ‘APP Board Acceptance Date for Building’. Format MM/DD/YYYY. 2.2.6.2.4 Building Characteristics Screen OSPI School Facilities & Organization 33 Inventory and Condition of Schools (ICOS) User Manual − Enter a Yes or No for the ‘Historic Status’ fields. 2.2.6.2.5 Building Characteristics Screen − Enter any additional comments or notes in the ‘Additional Building Characteristics/Comments’ field. − To save the changes, click the button or on the button in the upper right-hand corner and the changes are saved and the pop up window closes. Click the button, if it is a new building. Enter the Year Built for the Building (must be a date in the past). - This field is required Enter the District Assigned Area, if applicable. Select the District Assigned Area Use(s) from the drop down box. Select all that apply for that area of the building. - This field is a required Enter the Gross Building Sq Ft for the area. - This field is required – Note: Gross Building Sq Ft is the entire building’s area of all floors regardless of use, instructional or otherwise. Enter the Gross Instructional Sq Ft. OSPI can only edit this field - SCAP Recognized Sq Ft. Enter the Area Original Occupancy Date for the building area. Enter the Area Original Board Acceptance Date for the building area. To add an additional area to the building, click the button. To save the changes, including the changes made in the building Characteristics screen click the button in the Add Building screen. If any of the above required fields are blank, a pop up message will display telling you which fields need to be entered before you can save. OSPI School Facilities & Organization 34 Inventory and Condition of Schools (ICOS) User Manual To Delete an Area Use row, click into any of the fields of the row to delete, then click the button. A Delete Confirmation message pops up asking if you are sure you want to delete the area use row. − If you click ‘Yes’, then the area use row is removed from the building. − If you click ‘No’, then the area use row is not deleted and remains in the building list. To close the screen, click the button in the Add Building screen or the button on the accordion to close the Add Facility screen. Upload Building Area Analysis To upload the Building Area Analysis, click the button. The Add/View Files window opens in another accordion screen. − Include the name of the building in the original file name to distinguish the different Building Area Analysis for the Facility, i.e., Building Area Analysis – Main Building. The system will not allow duplicate file names to be uploaded. Each file for the Facility must have a unique File Name. In the pop up ‘Add/View Files’ window, click the − button. In the pop up ‘Select a file to Upload’ window, click the button and select file. In the ‘Select a file to Upload’ window, select a Document Type: Building Area Analysis. Click In the ‘Add/View Files’ window, the file is displayed. Click in the ‘Select a file to Upload’ window. . After receiving the Saved Confirmation pop up message, click in the ‘Add/View Files’ window. To view/print the Building Area Analysis, in the Add/View File pop up window, click on the File Name of the document you want to view/print. Click Yes, when a message asks if you want to allow the file to open. To print the file when it has opened, click the click on the button on the toolbar, the button or go to File>Print on the toolbar. OSPI School Facilities & Organization 35 Inventory and Condition of Schools (ICOS) User Manual To close the window, click on the button in the upper right-hand corner to close the window. To save the data, click the button in the Add Building screen, to save the changes, including the changes made in the Building Characteristics screen. If any of the above required fields are blank, a pop up message will display telling you which fields need to be entered. To close, click the button in the Add Building screen or the button on the accordion to close the Add Facility screen. Note: The system will not allow duplicate file names to be uploaded for a Facility. Each file for the Facility must have a unique File Name. 2.2.6.3 Edit Building Inventory To view Buildings in a Facility, click directly on “Building” to open the Building Inventory Summary screen. If you do not see any Buildings listed, then you may need to click on the small gray expander triangle next to the Facility to expand the tree to display Inventory and Condition folders. Then click on the gray expander triangle next to Inventory to display Site and Building. 2.2.6.3.1 Building Inventory Summary Screen If no buildings have been created in ICOS for the Facility, then the Building Inventory Summary will not display any buildings. You must first add a new building to add the inventory information. See Section 2.2.6.2 to Add Building. OSPI School Facilities & Organization 36 Inventory and Condition of Schools (ICOS) User Manual From the Building Inventory Summary screen, there are two ways to navigate to the Edit Building screen: 1. Click on the button in the Building Inventory Summary screen next to the Building you want to edit. The Building you selected to edit is automatically populated in the District Assigned Bulding Name or Identification in the Edit Building screen. 2. Click on the Edit tab in the Building Inventory Summary screen. Select the desired Building that you want to edit from the District Assigned Bulding Name or Identification from the drop down box. 2.2.6.3.2 Edit Building Inventory Screen (Optional) Edit the building name in the District Assigned Building Name or Identification field. (Optional) Edit the Building Profile Type from the drop down box. − Note: If the building has component condition ratings, then a message will display warning that if the Building Profile Type is changed, then all of the condition ratings will be deleted from the building. (Optional) Edit the Number of Floors (including Basements) field. OSPI School Facilities & Organization 37 Inventory and Condition of Schools (ICOS) User Manual Edit Building Characteristics To add/edit the building Characteristics, click on the button. 2.2.6.3.3 Building Characteristics Screen (part 1) Select a Yes or No for each field in the first section ‘Building Characteristics’. At least one field must be a Yes. – Required Select a Yes or No for the ‘School Construction Assistance Program (SCAP) Requirements’ section. – Required − If you select Yes for ‘Asset Preservation Program (APP)’, then a date field appears underneath the section. It is required that you enter a date in this field, ‘APP Board Acceptance Date for Building’. Format MM/DD/YYYY. 2.2.6.3.4 Building Characteristics Screen (part 2) OSPI School Facilities & Organization 38 Inventory and Condition of Schools (ICOS) User Manual − Enter a Yes or No for the ‘Historic Status’ fields. 2.2.6.3.5 Building Characteristics Screen (part 3) − Enter any additional comments or notes in the ‘Additional Building Characteristics/Comments’ field. − To save the changes, click the button or on the button in the upper right-hand corner and the changes are saved and the pop up window closes. (Optional) Edit the Year Built for the building (must be a date in the past). - This field is required (Optional) Edit the District Assigned Area. (Optional) Edit the District Assigned Area Use(s) from the drop down box. Select all that apply for that area of the building. - This field is required – (Optional) Edit the Gross Building Sq Ft for the area. - This field is required – (Optional) Edit the Gross Instructional Sq Ft. OSPI can only edit this field - SCAP Recognized Sq Ft. (Optional) Edit the Area Original Occupancy Date for the building area. (Optional) Edit the Area Original Board Acceptance Date for the building area. To add an additional area to the building, click the OSPI School Facilities & Organization button. 39 Inventory and Condition of Schools (ICOS) User Manual To delete an Area Use row, click into any of the fields of the row to delete, then click the button. A Delete Confirmation message pops up asking if you are sure you want to delete the area use row. − If you click ‘Yes’, then the area use row is removed from the building. − If you click ‘No’, then the area use row is not deleted and remains in the building list. To save the changes, including the changes made in the building Characteristics button in the Add Building screen. If any of the above screen click the required fields are blank, a pop up message will display telling you which fields need to be entered before you can save. To close the Edit Building screen, click the or the button in the Add Building screen button on the accordion to close the Add Facility screen. Upload Building Area Analysis To upload the Building Area Analysis, click the button. The Add/View Files window opens. − Include the name of the building in the original file name to distinguish the different Building Area Analysis for the Facility, i.e., Building Area Analysis – Main Building. The system will not allow duplicate file names to be uploaded. Each file for the Facility must have a unique File Name. In the pop up ‘Add/View Files’ window, click the − button. In the pop up ‘Select a file to Upload’ window, click the button and select file. In the ‘Select a file to Upload’ window, select a Document Type: Building Area Analysis. Click In the ‘Add/View Files’ window, the file is displayed. Click OSPI School Facilities & Organization in the ‘Select a file to Upload’ window. . 40 Inventory and Condition of Schools (ICOS) User Manual To delete a file, right-click on the file to delete. A delete confirmation message pops up asking if you are sure you want to delete the file. − If you click ‘Yes’, then the file is removed from the Building. − If you click ‘No’, then the file is not deleted and remains in the Building list To close the ‘Add/View Files’ window, click button. To view/print the Building Area Analysis, in the Add/View File pop up window, click on the File Name of the document you want to view/print. Click Yes, when a message asks if you want to allow the file to open. To print the file when it has opened, click the click on the button on the toolbar, then button or go to File>Print on the toolbar. To close the window, click on the button in the upper right-hand corner to close the window. To save the data, click the button in the Add Building screen, to save the changes, including the changes made in the Building Characteristics screen. If any of the above required fields are blank, a pop up message will display telling you which fields need to be entered. To close, click the button in the Add Building screen or the button on the accordion to close the Add Facility screen. Note: The system will not allow duplicate file names to be uploaded for a Facility. Each file for the Facility must have a unique File Name. OSPI School Facilities & Organization 41 Inventory and Condition of Schools (ICOS) User Manual 2.2.7 Site Condition Information 2.2.7.1 View Site Condition Summary The Site Condition Summary screen displays the rating status of the Sub-Assemblies for the Site, including the rollup condition ratings for each Sub-Assembly and the Site combined condition rating. This is a read-only screen and no changes can be made. To open the Site Condition Summary screen, click directly on Site under the Condition folder for the Facility. If you do not see Site, you may need to click on the small gray expander triangle next to the Facility to expand the tree to display Inventory and Condition folders. Then click on the gray expander triangle next to Condition to display Site and Building. 2.2.7.1.1 Site Condition Summary Screen OSPI School Facilities & Organization 42 Inventory and Condition of Schools (ICOS) User Manual Add/View Files To add Site Condition documents, click the button. Note: The system will not allow duplicate file names to be uploaded for the Facility Site Condition section. Each file for the section must have a unique File Name. In the pop up ‘Add/View Files’ window, click the − button. In the pop up ‘Select a file to Upload’ window, click the button and select file. In the ‘Select a file to Upload’ window, select a Document Type from the drop down list. “Other” will probably be the choice for this section. Click In the ‘Add/View Files’ window, the file is displayed. To save, click the in the ‘Select a file to Upload’ window. button. To delete a file, right-click on the file to delete. A delete confirmation message pops up asking if you are sure you want to delete the file. − If you click ‘Yes’, then the file is removed from the Site Condition. − If you click ‘No’, then the file is not deleted and remains in the Site Condition list To close the ‘Add/View Files’ window, click the OSPI School Facilities & Organization button. 43 Inventory and Condition of Schools (ICOS) User Manual 2.2.7.2 Edit Site Condition The Site Condition Edit screen is where the Sub-Assembly components are rated. Once all of the components for all Sub-Assemblies for the Facility are rated, then the Site Combined Condition Rating appears in the Site Condition Summary screen. There are two ways to navigate to the Edit Site Condition screen: 1. Click on the Sub-Assembly button in the Site Condition Summary screen that you want to edit. The Sub-Assembly you selected to edit is automatically populated in the Site SubAssembly field. 2. Click on the Edit tab in the Site Condition Summary screen. Select the desired Site Sub-Assembly that you want to edit from the drop down box. 2.2.7.2.1 View Site Condition Summary Screen The Site Sub-Assembly can be changed at any time to another by selecting a SubAssembly from the drop down box, or clicking on one of the Sub-Assembly buttons. − The components in the Component Name column will change depending on the Site Sub-Assembly selected. For each Component Name, complete the following: OSPI School Facilities & Organization 44 Inventory and Condition of Schools (ICOS) User Manual − Enter the Unit of Measure, this is required if Quantity or Estimated Size has a value. − Enter the Quantity or Estimated Size, this is required if a Unit of Measure has been selected for the component. To rate the Component, click the button. 2.2.7.2.2 Add Component Rating Screen − The Rate screen pops up with five rating levels. Click on one ratings for the Component. If the chosen rating is “Poor” or “Unsatisfactory”, a pop up message will appear saying that at least one Deficiency and one Cause must be chosen and the button will turn red. Once the Deficiencies and Causes have . been chosen, the button will turn green − Click − If you want to close the pop up screen, click on the . button in the upper right-hand corner of the pop up screen. − Once a component has been rated, the OSPI School Facilities & Organization button turns green. 45 Inventory and Condition of Schools (ICOS) User Manual 2.2.7.2.3 Add Component Deficiencies and Causes Screen To Add Deficiencies and Causes to a Component, click the − Select the related Deficiences for the component rating. − Select the related Causes for the component rating. − (Optional) Enter Additional Comments. − (Optional) Enter Location Comments. − (Optional) Enter Defeiciency Comments. − (Optional) Enter Corrective Actions. − Click the or the button. in the upper right-hand corner of the screen. Repeat the above steps for all Components for all Sub-Assemblies. To save the Site Condition information, click the button in the Edit Site Condition sceen. If any of the above required fields are blank, a pop up message will display telling you which fields need to be entered. To close the Site Condition screen, click the screen or the button in the Edit Site Condition button on the accordion. OSPI School Facilities & Organization 46 Inventory and Condition of Schools (ICOS) User Manual 2.2.8 Building Condition Information 2.2.8.1 View Building Condition Summary To open the Building Condition Summary screen, click directly on Building under the Condition folder for the Facility. If you do not see Building, you may need to click on the small gray expander triangle next to the Facility to expand the tree to display Inventory and Condition folders. Then click on the gray expander triangle next to Condition to display Site and Building. If no buildings have been created in ICOS for the Facility, then the Building Condition Summary will not display any buildings. You must first add a new building to add the inventory information. See Section 2.2.6.2 to Add Building. 2.2.8.1.1 View Building Condition Screen Add/View Files To add Site Condition documents, click the button. Note: The system will not allow duplicate file names to be uploaded for the Facility Building Condition section. Each file for the section must have a unique File Name. In the pop up ‘Add/View Files’ window, click the − button. In the pop up ‘Select a file to Upload’ window, click the button and select file. In the ‘Select a file to Upload’ window, select a Document Type from the drop down list. “Other” will probably be the choice for this section. Click OSPI School Facilities & Organization in the ‘Select a file to Upload’ window. 47 Inventory and Condition of Schools (ICOS) User Manual In the ‘Add/View Files’ window, the file is displayed. Click . To delete a file, right-click on the file to delete. A delete confirmation message pops up asking if you are sure you want to delete the file. − If you click ‘Yes’, then the file is removed from the Building Condition. − If you click ‘No’, then the file is not deleted and remains in the Building Condition list. To close the ‘Add/View Files’ window, click the 2.2.8.2 button. Edit Building Condition The Edit Building Condition screen is where the Sub-Assembly components are rated. Once all of the components for all Sub-Assemblies for the Facility are rated, then the Building Combined Condition Rating appears in the Building Condition Summary. 2.2.8.2.1 Edit Building Condition Screen Click on the Edit Site Condition screen is where the Sub-Assembly components are rated. Once all of the components for all Sub-Assemblies for the Facility are rated, then the Site Combined Condition Rating appears in the Site Condition Summary. There are two ways to navigate to the Edit Site Condition screen: OSPI School Facilities & Organization 48 Inventory and Condition of Schools (ICOS) User Manual 1. Click on the Sub-Assembly button in the Site Condition Summary screen that you want to edit. The Sub-Assembly you selected to edit is automatically populated in the Site SubAssembly field. 2. Click on the Edit tab in the Site Condition Summary screen. Select the desired Site Sub-Assembly that you want to edit from the drop down box. The Site Sub-Assembly can be changed at any time to another by selecting a SubAssembly from the drop down box, or clicking on one of the Sub-Assembly buttons. − The components in the Component Name column will change depending on the Site Sub-Assembly selected. For each Component Name, complete the following: − Enter the Unit of Measure, this is required if Quantity has a value. − Enter the Quantity for the Component. − Enter the Estimated Size, if applicable, for the Component Repeat the above steps for each Component. To rate the Component, click the button. 2.2.8.2.2 Add Component Rating Screen − The Rate screen pops up with five rating levels. Click on one ratings for the Component. If the chosen rating is “Poor” or “Unsatisfactory”, a pop up message will appear saying that at least one Deficiency and one Cause must be chosen and the OSPI School Facilities & Organization 49 Inventory and Condition of Schools (ICOS) User Manual button will turn red. Once the Deficiencies and Causes have . been chosen, the button will turn green − Click − If you want to close the pop up screen, click on the . button in the upper right-hand corner of the pop up screen. − Once a component has been rated, the button turns green. To Add Deficiencies and Causes to a Component, click the button. 2.2.8.2.3 Add Deficiencies and Causes Screen To Add Deficiencies and Causes to a Component, click the − Select the related Deficiences for the component rating. − Select the related Causes for the component rating. − (Optional) Enter Additional Comments. − (Optional) Enter Location Comments. − (Optional) Enter Defeiciency Comments. − (Optional) Enter Corrective Actions. − Click the or the OSPI School Facilities & Organization button. in the upper right-hand corner of the screen. 50 Inventory and Condition of Schools (ICOS) User Manual Repeat the above steps for all Components for all Sub-Assemblies. To save the Building Condition information, click the button in the Edit Building Condition sceen. If any of the above required fields are blank, a pop up message will display telling you which fields need to be entered. To close the Building Condition screen, click the Condition screen or the button in the Edit Building button on the accordion. 2.2.9 Energy Management Information The Energy Management screen is used to document the yearly Facility energy benchmark scores. This screen has not been developed yet. OSPI School Facilities & Organization 51 Inventory and Condition of Schools (ICOS) User Manual 2.2.10 FEMA Pre-Disaster Mitigation Information The FEMA Pre-Disaster Mitigation screen is where the Facility documents each of its building’s pre-disaster mitigation data. 2.2.10.1 FEMA Pre-Disaster Mitigation Screen 2.2.10.1 Add Pre-Disaster Mitigation Data Select a Facility from the left hand tree view. Select a Building from the drop down menu in the main screen. − Select an Earthquake Building Type from the drop down menu. − Select an Earthquake Design Level from the drop down menu. − Select an Earthquake Foundation Type from the drop down menu. − Select the Building Landslide Susceptibility from the drop down menu. − Select the Soil Type from the drop down menu. − Select the Flood Building Type from the drop down menu. − Select the Flood Design Level from the drop down menu. − Select the Flood Protection Return Period / Yrs from the drop down menu. − Select the Flood Foundation Type from the drop down menu. − Enter the Water Table Depth / Meters. Numbers only. − Select the Backup Power from the drop down menu. − Select the Facility Class from the drop down menu. − Select the Kitchen in Building answer from the drop down menu. OSPI School Facilities & Organization 52 Inventory and Condition of Schools (ICOS) User Manual − Enter the number of beds the Building can accommodate. Numbers only. To save, click the button. To close the Pre-Disaster Mitigation screen, click the 2.2.10.2 button. Copy Pre-Disaster Mitigation Data to Another Building Within another Facility Building with completed and saved data, click the Copy Data to Another Building button. In the pop up ‘Copy Data to the Selected Building window, select the Building you want to add the copied data, and then click OK. Follow the steps above to enter the non-copied fields. To save, click the button. To close the Pre-Disaster Mitigation screen, click the 2.2.10.3 button. Edit Pre-Disaster Mitigation Data Select a Facility from the left hand tree view. Select a Building from the drop down menu in the main screen. Make changes as needed. To save, click the button. To close the Pre-Disaster Mitigation screen, click the 2.2.10.4 button. Add/View Files To add Pre-Disaster Mitigation documents, click the button. Note: The system will not allow duplicate file names to be uploaded for the FEMA PreDisaster Mitigation section. Each file for the section must have a unique File Name. In the pop up ‘Add/View Files’ window, click the − button. In the pop up ‘Select a file to Upload’ window, click the button and select file. In the ‘Select a file to Upload’ window, select a Document Type from the drop down list. “Other” will probably be the choice for this section. Click in the ‘Select a file to Upload’ window. In the ‘Add/View Files’ window, the file is displayed. Click . To delete a file, right-click on the file to delete. OSPI School Facilities & Organization 53 Inventory and Condition of Schools (ICOS) User Manual A delete confirmation message pops up asking if you are sure you want to delete the file. − If you click ‘Yes’, then the file is removed from the Building PDM list. − If you click ‘No’, then the file is not deleted and remains in the Building PDM list. To close the ‘Add/View Files’ window, click the 2.2.11 button. Asset Preservation Program (APP) Information The Asset Preservation Program screen is used for District who have Facility Buildings that are participants in the Asset Preservation Program. NOTE: In order for the Facility and Building to appear in the APP screen, they must be approved in the system by your OSPI Regional Coordinator (RC). (Please contact your RC if you have any questions.) 2.2.11.1 Asset Preservation Program Screen 2.2.11.1 Edit/Add APP Data To view the APP Summary information for a District. − Enter in the Board Meeting Date When Report Was Presented. To save the data, click the button. To close the APP Summary screen, click on the OSPI School Facilities & Organization button. 54 Inventory and Condition of Schools (ICOS) User Manual 2.2.11.2 Upload APP Files Include the name of the Facility and Building in the original file name to distinguish the different files for the District, i.e., APP Board Resolution – Blaine Elementary - Main Building. The system will not allow duplicate file names to be uploaded. Each file must have a unique File Name. Note: The system will not allow duplicate file names to be uploaded for the APP section. Each file for the section must have a unique File Name. To upload the APP Board Resolution, click on the button. The Add/View Files screen opens. Note: The APP Board Resolution button will always display on the screen. If APP Board Resolution has been uploaded for a building, then the Board Resolution Completed check box will be checked as completed. − In the pop up ‘Add/View Files’ window, click the − In the pop up ‘Select a file to Upload’ window, click the button button and select file. In the ‘Select a file to Upload’ window, select “APP Board Resolution” from the Document Type drop down list. − Click in the ‘Select a file to Upload’ window. In the ‘Add/View Files’ window, the file is displayed. Click . To upload the 6-Year Certification Letter, click on the button. The Add/View Files screen opens. Note: The 6-Year Certification Letter button will only appear on the screen if the District has an APP building that is in year 6, 12, 18, 24, or 30. If there are no buildings in those APP years, then the button will not be displayed. − In the pop up ‘Add/View Files’ window, click the − In the pop up ‘Select a file to Upload’ window, click the button button and select file. In the ‘Select a file to Upload’ window, select “APP 6-Year Certification Letter” from the Document Type drop down list. Click in the ‘Select a file to Upload’ window. In the ‘Add/View Files’ window, the file is displayed. Click . OSPI School Facilities & Organization 55 Inventory and Condition of Schools (ICOS) User Manual To upload the APS Certification Letter, click on the button. The Add/View Files screen opens. Note: The APS Certification Letter button will only appear on the screen if there are APP buildings in the District without an uploaded APS Certification Letter. If all District APP buildings have it uploaded, then the APS Certification Letter Completed check box will be checked, and the APS Certification Letter button will not be displayed. − In the pop up ‘Add/View Files’ window, click the − In the pop up ‘Select a file to Upload’ window, click the button button and select file. In the ‘Select a file to Upload’ window, select “APP Certification Letter” from the Document Type drop down list. Click in the ‘Select a file to Upload’ window. In the ‘Add/View Files’ window, the file is displayed. Click . To delete a file, right-click on the file to delete. A delete confirmation message pops up asking if you are sure you want to delete the file. − If you click ‘Yes’, then the file is removed from the Building APP list. − If you click ‘No’, then the file is not deleted and remains in the Building APP list. To close the ‘Add/View Files’ window, click the OSPI School Facilities & Organization button. 56 Inventory and Condition of Schools (ICOS) User Manual 2.2.12 Washington Sustainable Schools Protocol (WSSP) The Washington Sustainable Schools Protocol screen is used to track the Facility data for those Facilities involved in the WSSP program. 2.2.12.1 Washington Sustainable Schools Protocol Screen OSPI School Facilities & Organization 57 Inventory and Condition of Schools (ICOS) User Manual 2.2.12.1 Edit/Add WSSP Data Select a Facility from the ‘Choose a Facility’ drop down menu. Enter the ‘Design Capacity’ for the Facility. Select the reporting year from the ‘Choose a Reporting School Year’ drop down menu. Select the School Construction Assistance Program project from the ‘Choose a Project’ drop down menu. Check the box if the annual report data is less than the total SCAP Recognized Sq Ft for the facility. Enter the total square feet for the WSSP area in the ‘Enter the WSSP Area in Sq Ft’ field. Type in a description of the significant differences between the WSSP area and the whole facility energy characteristics, if you are reporting on the whole facility area instead of only the WSSP area. Enter in the ‘Number of Months the Facility is used per School Year’. Check the box if the Facility is normally open on weekends. Enter the Average Weekly Hours the Facility has school activities for the month range: − September through June − July through August Enter the Average Weekly Hours the Facility has community activities for the month range: − September through June − July through August Energy and Water Performance − Enter the ‘Energy Efficiency Goal’ percentage − Enter the ‘Water Efficiency Goal’ percentage. − Energy Use Characteristics − Enter the percentage of the Facility that is heated in the ‘% Total Space – Heated’ field. − Enter the percentage of the Facility that has air-conditioning in the ‘% Total Space – Cooled’ field. − Select the type of cooking there is on-site from the ‘Type of Cooking – On-Site’ drop down menu. − Enter the number of computers in the ‘# of Computers’ field. − Enter the number of walk-in freezers and refrigerators there at the ‘Facility in the # of Walk-In Freezers/Refrigerators’ field. − If the Facility has a computer data center with servers then: OSPI School Facilities & Organization 58 Inventory and Condition of Schools (ICOS) User Manual Enter the total square feet for the data center in the ‘Enter the Data Center Total Sq Ft field’. Enter the number of hours per week the data center is used in the ‘How many Hr/Wk is Data Center in Use’ field. − Type any other high energy uses in the ‘Describe any other high energy uses, i.e. kiln, special lab equipment’ field. − Check the ‘Building has a Pool’ box, if the Facility has a pool. − Check the ‘Pool Heated’ box, if the Facility has a heated pool. − Check the ‘Indoor Pool’ box, if the Facility has an indoor pool. − Select the size of the pool from the ‘Pool Size/Sq Ft’ drop down menu. The valid values are: − Olympic (50 m x 25 m) Recreational (20 yds x 15 yds) Short Course (25 yds x 20 yds) Enter the number of months the pool is used per year in the ‘# Months Used/Year’ field. Water Use Characteristics − Enter the total square feet for the ‘Area Served for Indoor Domestic Water’ field. − Enter the total square feet for the ‘Area Served for Irrigation in 1,000s of Sq Ft’ field. − Type any other potable water uses in the ‘Describe any other potable water uses’ field. − Type any other non-potable water uses in the ‘Describe any other non-potable water uses’ field. − Type any other non-potable water sources in the ‘Describe any other non-potable water sources’ field. To save the data, click to save the data. To close the WSSP screen, click the OSPI School Facilities & Organization button. 59 Inventory and Condition of Schools (ICOS) User Manual 2.2.12.2 Add/View Files To add WSSP documents, click the button. Note: The system will not allow duplicate file names to be uploaded for the WSSP section. Each file for the section must have a unique File Name. In the pop up ‘Add/View Files’ window, click the − button. In the pop up ‘Select a file to Upload’ window, click the button and select file. In the ‘Select a file to Upload’ window, select a Document Type from the drop down list. “Other” will probably be the choice for this section. Click in the ‘Select a file to Upload’ window. In the ‘Add/View Files’ window, the file is displayed. Click . To delete a file, right-click on the file to delete. A delete confirmation message pops up asking if you are sure you want to delete the file. − If you click ‘Yes’, then the file is removed from the WSSP Facility. − If you click ‘No’, then the file is not deleted and remains in the WSSP Facility list. To close the ‘Add/View Files’ window, click the OSPI School Facilities & Organization button. 60 Inventory and Condition of Schools (ICOS) User Manual 2.3 Reports The ICOS reports are created to display data regarding District, Facility and Building inventory and condition; School Construction Assistance Program; Sub-Assembly/ Component totals; Washington Sustainable Schools Protocol; Energy Management and other lookup data. The first screen displayed in the Reports section is the User Selection screen where the user selects the report to view. 2.3.1 Report User-Selection Screen 2.3.2 Report User-Selection – Choose Report Screen OSPI School Facilities & Organization 61 Inventory and Condition of Schools (ICOS) User Manual Once a report has been chosen, additional fields appear for the user to enter the specific criteria for the report. − (Optional) Click the Show Legislative Districts check box, if applicable to report. − (Optional) Click the Show Congressional District check box, if applicable to report. 2.3.3 Report Specific User-Selection Screen To view the report with the user-selected criteria, click Run Report. The Report Viewer opens in a separate window with the report data. 2.3.4 Report Sample Screen OSPI School Facilities & Organization 62 Inventory and Condition of Schools (ICOS) User Manual Navigate Report Pages The toolbar in the Report Viewer has four buttons: go to first page, go back one page, go forward one page, go to last page. Resize Report Viewer The page size drop down list allows the user to resize the view of the report. Find To find a specific word or number, type the search criteria into the Find window Click Find. To find the next occurance of the search, click Next. Download/Export Report To download the report, click in the Select a Format drop down list, and select the file format you wish to export the data, i.e., Microsoft Word, Excel, Comma Delimited. After selecting a print format, click the Export button. In the File Download pop up box it asks if you wish to save or open the file. − If you click Open, then the report will open in the format chosen. − If you click Save, the Save As window will appear for you to select the location to save the report in the format chosen. OSPI School Facilities & Organization 63 Inventory and Condition of Schools (ICOS) User Manual Refresh/Rerun Report To refresh or rerun the same report, click the Refresh button. Print Report To print the report, click the small printer icon. 2.4 District Contacts 2.4.1 Create Contact Click the button. In the Add Person pop up window, type the First Name and Last Name of the new contact in their respective fields. − If there is already a contact with that name in the system, the records will appear in the grid below the name fields. 2.4.1.1 Add Contact Search Screen If the person(s) listed is not the same person you are creating, then click to create a new contact record. If your contact is listed, then click that contact row in the grid and click edit the contact data. Go to Section 2.4.3. If you decide not to edit or add a contact, click the OSPI School Facilities & Organization to button. 64 Inventory and Condition of Schools (ICOS) User Manual − In the Create contact screen, do the following: 2.4.1.2 Create New Contact Screen Click the o button. In the Add Contact Type Detail window, enter the related data for the contact. Note: At least one Contact Type is required to save the contact. Click the button. o In the Add Phone Detail window, enter the data for each field. o Check the ‘Is Primary’ check box to make it the main phone number. Note: Only one phone record can be designated as primary, and must be checked at the time of creating the record. OSPI School Facilities & Organization 65 Inventory and Condition of Schools (ICOS) User Manual Click the button. o In the pop up Add Email Detail window, enter the data for the contact. o Check the ‘Is Primary’ check box to make it the main email. Note: Only one email record can be designated as primary, and must be checked at the time of creating the record. Click the button. o In the pop up Add Address Detail window, enter the data for the contact. o Check the ‘Is Primary’ check box to make it the main address. Note: Only one address record can be designated as primary, and must be checked at the time of creating the record. Click the button in the Create screen, if you do not want the contact to appear in search results. For example, Bugs Bunny is the Business Manager for Blaine School District. If he is set to Inactive, then a search by School District, Contact Type, First Name or Last Name will not show Bugs Bunny in the results. − To reactive an In-Active contact, click the button on the Edit screen, see Section 2.4.3 below for more information. To save the data, click to save the data. To close the Create screen, click the OSPI School Facilities & Organization button. 66 Inventory and Condition of Schools (ICOS) User Manual 2.4.2 Contact Search 2.4.2.1 Search Contact Screen To search for Active contacts, the Active Contact check box must be checked. To search for In-Active contacts, the Active Contact check box must be unchecked. Enter one or more of the following criteria to assist in your contact search: − School District − Contact Type − First Name − Last Name − Facility, only available if School District was chosen Click button and the search results will display in the search result grid. Click on the contact row in the grid to view the contact details below the grid. OSPI School Facilities & Organization 67 Inventory and Condition of Schools (ICOS) User Manual 2.4.3 Edit Contact Note: Only Facilities specific contacts can be edited. The Contact Types that cannot be edited are Principal and Superintendent. If a contact is not editable, the Edit Contact button will be grayed out. 2.4.3.1 Search Results Screen Search for the contact to edit by following the instructions above in Section 2.4.2. Click on the contact row that needs to be edited in the search results grid. Click button. The Edit screen will open for the contact selected. OSPI School Facilities & Organization 68 Inventory and Condition of Schools (ICOS) User Manual In the Edit contact screen, enter your changes. 2.4.3.2 Edit Contact Screen To make a contact Active and searchable, click the button in the upper right hand corner of the screen. To make a contact In-Active and not display in searches, click the button in the upper right hand corner of the screen. The data entered in the screen cannot be edited directly. The record that needs to be changed must first be deleted. − To delete a Contact Type, Phone Number, Email or Address, click on the corresponding button next to the record to delete. A Delete Confirmation message pops up asking if you are sure you want to delete the contact record. − If you click ‘Yes’, then the record is removed from the contact. − If you click ‘Cancel’, then the record is not deleted and remains in the contact screen. OSPI School Facilities & Organization 69 Inventory and Condition of Schools (ICOS) User Manual − Click ‘Add’ next to the data section you want to add the edited or new information. To save the changes, click the button. To close the Edit screen, click the 2.5 button. Maps and Boundaries Click on the Maps and Boundaries button on the navigation tool bar. The School Facilities Information Portal opens with a map of Washington and all of its School District boundaries outlined in red. Click on the Zoom bar on the left of the screen to focus in on your district. Click on the Map Layer icon on the tool bar to see other Click on the Map Legend icon on the tool bar to view the color definitions for the Map Layers, if needed. − Select the check box for the layers you wish to view on the map. OSPI School Facilities & Organization 70 Inventory and Condition of Schools (ICOS) User Manual Click on the Help icon on the tool bar to get more instructions for the page. Click the OSPI icon in the lower right-hand corner to go to the ICOS Webpage. OSPI School Facilities & Organization 71