1
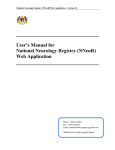
NCVD-ACS Registry Web Application User Manual NCVD-ACS Registry User Manual_Apr2013 | 2 NCVD Web Application Modules Online Data Access and Remote Data Capture Each SDP is given the rights to access their own data and enter data remotely at their site via the eNCVD Web Application. Depending on its rights, each SDP may access one or more of the following eNCVD web application: Acute Coronary Syndrome (ACS) Registry Percutaneous Coronary Intervention (PCI) Registry Real-time Report Reports are generated on a real-time basis based on data entered via the online data access and remote data capture module. Data Standard These documents contain the definition of all variables collected in the NCVD registries. Maintenance This module allows user to change their password. Users are responsible for changing their password every time it expires. Security Each authorised user is required to read through, understand, and sign the Security Policy for NCVD Web Application before being authorised to access the application. This is to ensure that users play an active role in ensuring security of data at their level. You need to inform the *NCVD RCC immediately if: 1. You change your mobile phone number 2. You lost/ forgot your password and username 3. You are no longer involved in the NCVD 4. You have a change of responsibility or task in the NCVD 5. You are transferred to a different hospital 6. You are transferred to another NCVD-participating hospital ( *NCVD RCC: NCVD Registry Coordinating Centre NCVD-ACS Registry User Manual_Apr2013 | 3 How to access the eNCVD web application 1. Register your centre as a Source Data Provider (SDP) with the NCVD Management. 2. Two forms need to be filled in: 1. Authorisation List, 2. Security Policy Fill in the Authorisation List form for the purpose of access control and individually sign the Security Policy form to receive your username and password. Access control Only authorised users, for authorised purposes, can gain access to the system. Depending on the assigned role, different roles have different access rights to the web application; i.e. some user may be able to view data only, without the ability to edit the data. Access the NCVD website at http://www.acrm.org.my/ncvd The NCVD homepage will be displayed as shown in Figure 1.0 Figure 1.0 Homepage of the National Cardiovascular Disease Database (NCVD) Click on the icon below and the eNCVD welcome page will be displayed as NCVD-ACS Registry User Manual_Apr2013 | 4 Figure 1.1 eNCVD welcome page To access the eNCVD web application, key in your username and password in the designated column and click on ‘Sign in’ button. (Note: You are required to change your password every 3 months for security reasons) User authentication There are two levels of user’s authentication. After user logs in using username and password, an SMS containing authentication code will be sent to user’s mobile phone. User then types in the authentication code given in the designated box displayed on Confidentiality Statement page as shown in Figure 1.2 (Note: The password sent via SMS will be different for each new log in) Alternatively, for SDP users with poor phone line reception, type the fixed password (given to you by the NCVD RCC, by request) in the authentication page. Figure 1.2 Confidentiality Statement page Authentication code received via sms The next page brings the user to the Patient List page as in Figure 1.3 NCVD-ACS Registry User Manual_Apr2013 | 5 Patient List Patient list shows all of the patients registered by your centre, in a descending order (recently entered patient will be top of the list). Column ‘Reporting Centre’ should show your centre’s name. Figure 1.3 Patient List page Reporting Centre Name of Source Data Provider (SDP)/ Hospital where the patient is admitted. Patient ID (Pt ID) ID which is uniquely given to each patient registered in the registry web. Patient Name Please enter patient’s full name with the correct spelling in capital letters. Old IC In the event that patient doesn’t have MyKad, please enter patient’s Old IC. NCVD-ACS Registry User Manual_Apr2013 | 6 MyKad/MyKid Compulsory to enter patient’s MyKad as this is the useful criteria used for patient verification. Other ID document no. In the event that patient doesn’t have MyKad or Old IC, please select Other ID Document No. Please specify the type of document from the drop-down box provided (Registration Number, Passport, Birth Certificate, Mother’s I/C, Father’s I/C, Armed Force ID, Work Permit #, Date of Birth, Lab Number, Patient ID, Others) Date of Admission Date patient is admitted to hospital in dd-mm-yyyy format. PCI: Date of Procedure For patients who had undergone PCI, Date of PCI Procedure in dd-mm-yyyy format. NCVD Application User is able to filter patient based on record in ACS or PCI or both. General Information Radio buttons Radio buttons are used for data that requires selection of only one pre-defined value, as shown below. The default value for all radio buttons is assigned to ‘Missing’ unless user chooses otherwise (except fields that are specified otherwise). Check box Check box is used for data field which has either Yes or No values, as shown below. The default value for all check boxes is set to Unchecked unless user chooses otherwise. NCVD-ACS Registry User Manual_Apr2013 | 7 Date Picker To prevent user from entering invalid dates, you are to pick a date from the date picker (located next to every date field). If you click on the calendar icon, a calendar will pop up for you to select the respective date. Alternatively, you can also enter the data manually in the text box provided. Click on calendar icon Buttons Each icon represents different functions as defined in Appendix. (Note: Please refer to Icons & Functions) Navigation toolbar There are 7 navigation items in the toolbar on top of each page, where the user could click to do a specific task. These include: i. ii. iii. iv. v. vi. vii. Patient Pending Task Report Data Download (limited access) Change Password Support Logout NCVD-ACS Registry User Manual_Apr2013 | 8 Notification Form Before entering data, please make sure that the ‘Reporting Centre’ is the NAME OF YOUR CENTRE. Calendar button is available to add the admission date. Date of admission is default to current date. PLEASE CHANGE THE DATE ACCORDINGLY. Remember that if the application is left idle for more than 60 minutes, the application will be logged off automatically. The timer is displayed at the top left of the page viewed and counts down the 60 minutes as shown below: ACS Notification The notification form consists of 11 different sections that need to be filled in. NCVD-ACS Registry User Manual_Apr2013 | 9 Patient This tab can be used to search/ view patient list and add/ register patient. When cursor is placed on the ‘Patient’ tab, dropdown menu is shown as below: a. View Patient (Patient List) To VIEW a patient who has been registered in the database, select ‘Patient List’ under the ‘Patient’ tab. Search patient by filling in the selection criteria and click on ‘Show’ button as shown below: Fill in selection criteria b. Register Patient (Patient Verification) To REGISTER a new patient, select ‘Patient Verification’ under the ‘Patient’ tab. Before registering a patient, please verify that the patient has not been registered in the system before. Below is how you do it: (Note: This is an important step - to avoid any duplication of patient or notification) 1. Click on ‘Patient Verification’ under the ‘Patient’ tab as shown below: NCVD-ACS Registry User Manual_Apr2013 | 10 2. SEARCH patient by entering their MyKad and click on ‘Search’ button *This search function will search patients from your centre as well as patients that has been registered in the entire registry from other centres Enter MyKad 3. “Patient Not Found, Kindly check the criteria you have provided…” – means patient is not registered in the system for ACS or PCI. This is where you register/add notification for ACS or PCI by clicking on the button. Fill in accordingly by sections and click on ‘Save’. Important: For ACS Date of Admission before 2013: Click on Add ACS V1 For ACS Date of Admission 2013 and onwards: Click on Add ACS V2 Once saved, to check if your patient has been entered in the system – click on ‘Patient List’ and your new entry should be top of the Patient List. 4. For existing patients, it will be listed as below: Indicates the number of existing notifications for this patient in the database. E.g. this patient has one ACS admission and one PCI admission *Next step for this is to click to ADD new notification (Please refer to ‘Add New Notification’) NCVD-ACS Registry User Manual_Apr2013 | 11 c. Add New Notification To ADD NEW NOTIFICATION Click on SEARCH patient via MyKad under ‘Patient Verfication’ OR For existing patient (already entered previously) search MyKad under ‘Patient List’ and next page will be displayed: Click on Add Notification V1 for admission before 2013 OR Add Notification V2 for admission 2013 and onwards. Fill in accordingly by sections and click on ‘Save’. Once saved, to check if your patient has been entered in the system – click on ‘Patient List’ and your new entry should be top of the Patient List. (Note: For existing patient, Section 1 is prefilled based on their previous admission. To edit Section 1, please refer to d. Edit Patient Demographics) Fields marked with *asterisk are mandatory to be filled in. Failed to do so, user won’t be able to save the data. System will prompt user as shown below: NCVD-ACS Registry User Manual_Apr2013 | 12 d. Edit Patient Demographics (Section 1) 1. To edit Section 1 Demographics, click on icon (Patient List). 2. Update/ edit where necessary and click on ‘Save’ button once completed. NCVD-ACS Registry User Manual_Apr2013 | 13 Follow Up Forms ACS Follow Up (30 days or 1 year) Add Follow Up 1. To add follow up, click on the follow up icon 2. In the case where patient has a few admissions, select notification that you wish to add follow up 3. Select the follow up duration: 30 days or 1 year? Fill in accordingly and click on ‘Save’ button once completed entry 4. Next page will show the follow up has been added to the notification NCVD-ACS Registry User Manual_Apr2013 | 14 Request to Delete User can request to delete their entry if they’ve mistakenly duplicated the patient’s data. Click on ‘Request Delete’ and you will see the summary page of requests to delete by your centre. Page will list ‘Total records’ of requests to delete by applications (ACS or PCI patients) and forms (notifications, follow ups). Click on ‘Click to View List’ to see the full list: Full list shown as below: NCVD-ACS Registry User Manual_Apr2013 | 15 a. Request to Delete Notification 1. In the case of duplication (same date of admission entered twice – see below), click on for the duplicate notification Selected notification to delete 2. Check if this is the notification that you want to delete. Compulsory* to state your reason for request delete in the designated box. Click on ‘Request Delete’ button *if field is left blank you will not be able to save NCVD-ACS Registry User Manual_Apr2013 | 16 3. Next page will show the specific notification in faded font to indicate that this notification has been requested to be deleted. Once requested to delete, the ‘Update’ icon will not be available 4. To notify the NCVD RCC please send standard email to the NCVD RCC as below: Email to: [email protected] OR [email protected] Details to include in email: 1) SDP / Hospital 2) Patient Name 3) MyKad 4) Patient ID 5) Notification ID/ Lesion ID 6) Reason for deletion b. Request to Delete Patient ID Each patient registered in the registry web is given one unique Patient ID throughout the country. This is where patient verification steps are important to avoid duplication of Patient ID. Below example of Patient ID duplication where few Patient IDs share the same MyKad number: 1. Please follow the steps shown in ‘Request to Delete Notification’ 2. Email to the NCVD RCC for further action. Please refer to the standard email. NCVD-ACS Registry User Manual_Apr2013 | 17 c. Request to Delete Follow Up 1. To request delete follow up, identify the correct notification and click on ‘Follow up’ column icon in the 2. State your reason to delete follow up and click on ‘Request Delete’ 3. Next page will show the particular Follow Up is dimmed, to indicate that user has requested to delete this follow up NCVD-ACS Registry User Manual_Apr2013 | 18 Common problem Unable to Add Notification Normally user will face this problem if patient is recorded as ‘Died’ (outcome for PCI: Died).There won’t be any icon to add notification. What do you need to do? Contact or email to the NCVD RCC with the required details and we will guide you on the next step. Standard email to the NCVD RCC: Email to: [email protected] OR [email protected] Details to include in email: 1) SDP 2) Patient Name 3) MyKad 4) Patient ID 5) ACS/PCI Audit This section is useful to keep track of the last person who did the changes to the information. NCVD-ACS Registry User Manual_Apr2013 | 19 Icons & functions Different icon represents different functions: Icon Function Icon Function To show number of notification To request record to be deleted To Add New record To Add New Follow Up To View existing record Calendar icon To Edit/ Update record Instant data definition To Request to Delete record Mandatory field Different color to differentiate time frame Description Blue Buttons for Notification Red Buttons for Follow Up Green Buttons for Outcome Figure Function Non-editable text box Editable text box, requires manual data entry Drop-down box - select input from the list provided Manually enter data or pick from the calendar provided To view all records that fulfill the criteria entered To show all records (ignoring any criteria entered) NCVD-ACS Registry User Manual_Apr2013 | 20 Helpdesk support For assistance in completing your application for access or if you experience technical difficulties while using the web application, including problems related to data entry; please contact: NCVD Registry Coordinating Centre (RCC) Personnel S Gunavathy Selvaraj Noor Amirah Muhamad Email: [email protected] Email: [email protected] The NCVD Management Office Contact 03-4023 1500 Fax 03-4023 9400 Address National Cardiovascular Disease Database (NCVD) c/o National Heart Association of Malaysia (NHAM) Heart House, First Floor, Medical Academies of Malaysia 210 Jalan Tun Razak, 50400 Kuala Lumpur, MALAYSIA NCVD-ACS Registry User Manual_Apr2013 | 21 Notes Note: The NCVD User’s Manual for NCVD-ACS & PCI Registry Web Application is subject to future amendments for better quality of the NCVD. © National Cardiovascular Disease Database (NCVD) Prepared by: NCVD Management Team, April 2013 Strictly for training purposes only NCVD-ACS Registry User Manual_Apr2013 | 22 NCVD-ACS Registry User Manual_Apr2013 | 23