1
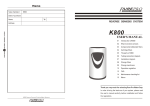
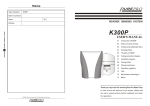
General-purpose Battery Charger
User’s Manual
Battery Charger Special Feature:
1. LED indicator light show charging status.
2. Temperature controlled cooling fan.
3. 3-stage Battery Charging: Bulk Charge, Absorption Charge, Float Charge
Important Safety Instructions
Read all instructions and cautions printed on the battery charger, battery, and vehicle or equipment using
battery.
• Use only attachments recommended or sold by manufacturer. The use of attachments not recommended by
the manufacturer may result in fire, electric shock, or injury.
• Do not disassemble charger. Take it to a qualified service professional if service or repair is required.
Incorrect assembly may result in fire or electrical shock.
• To reduce risk of electrical shock, unplug the charger from the outlet before attempting any maintenance or
cleaning.
• Always charge battery in a well ventilated area.
•Place charger as far away from battery being charged as the charger cables will permit.
• Do not expose charger to rain or snow.
• Never charge a frozen battery. If battery fluid (electrolyte) becomes frozen, bring battery into a warm area
to thaw before you begin charging.
• Never allow battery acid to drip on charger when reading specific gravity or filling battery.
• Never set a battery on top of the charger.
• Never place charger directly above battery being charged. The gases from the battery will corrode and
damage the charger.
• Never use charger for charging dry-cell batteries that are commonly used with home appliances. These
batteries may burst and cause personal injury.
• Never touch the battery clamps together when the charger is energized.
• Never operate charger if it has received a hard blow, been dropped, or otherwise damaged. Take it to a
qualified professional for inspection and repair.
• Be sure to position the charger power cord to prevent it from being stepped on, tripped over, or damaged.
• Never pull out the plug by the cord when unplugging the charger. Pulling on the cord may cause damage to
the cord or the plug.
• Do not operate the charger if it has a damaged power cord or plug. Have the cord replaced.
• Wear complete eye and clothing protection when working with lead-acid batteries.
• Be sure that someone is within range of your voice to come to your aid if needed while you work with or
are near a lead-acid battery.
• Have plenty of fresh water and soap nearby for use in case battery acid contacts your eyes, skin, or
clothing. If this happens, wash immediately with soap and water. Then get medical attention.
• Avoid touching your eyes while working with a battery. Acid particles (corrosion) may get into your eyes.
If this occurs, flush eyes immediately with running cold water for at least ten minutes. Then immediately get
medical attention.
• Remove all personal metal Items from your body, such as rings, bracelets, necklaces, and watches while
working with a lead-acid battery. A battery can produce a short circuit current high enough to weld a ring (or
the like) to metal, causing a severe burn.
• Take care not to drop any metal tool or metal object onto the battery. This may spark or short circuit the
battery or another electrical device that may cause an explosion.
• Always operate your battery charger in an open, well ventilated area,
• Never smoke or allow a spark or flame in the vicinity of the battery or engine. Batteries generate explosive
gases.
• Neutralize any acid spills thoroughly with baking soda before attempting to clean up.
Part Description
Mains side
Battery side
Operating Instructions
Step1.Connecting the charger to battery
1.Set the ON/OFF switch to OFF position.
2.AC power cord must be unplugged.
3.Connect the black cable to the black post marked (-) on Battery Side of the charger. Connect the
other end to the negative terminal on the battery post.
4.Connect the red cable to the red post marked (+) on the Battery Side of the charger. Connect the
other end to the positive terminal on the battery post.
Step2.Turning the charger on
5.Connect the AC power cord to Battery and AC outlet.
6.Turn the ON/OFF switch to ON position.
Step3.Turning the charger off
7..Unplug the AC power cord from the outlet.
8.Set the ON/OFF switch to OFF position.
9.Remove charger clip connected away from battery
PROHIBITED REVERSE POLARITY.
If reverse polarity, please replace with one of the same rating fuse.
Charging Diagram
Ⅰ:A/B/C/D/E revolving flashing
Ⅱ:A is solid green, B/C/D/E revolving flashing
Ⅲ:A/B are solid green, C/D/E revolving flashing
Ⅳ: A/B/C are solid green, D/E revolving flashing
Ⅴ: A/B/C/D are solid green, E is flashing
Ⅵ: A/B/C/D/E are solid green, the battery fully charged.
Notice:
a. A/B/C/D/E are flashing, it means the battery is not correct connect to battery.
b. Re-connect battery to charger, you must plug it to mains to check the battery correct connect or not.
c. If battery voltage is more than 12.8V(12V version)/25.6V(24V version),its charging will start from
VI stage.
Three-stage Charging
Stage
Stage 1:Bulk Charge
(Constant current)
Stage2:Absorption Charge
(Constant Voltage)
Stage3:Float Charge
Description
Current is supplied to the battery at a constant rate
while voltage gradually rises.
Voltage remains constant and current reduces as the
battery becomes charged. This ensures complete
charging.
After the battery reach full charge, charging voltage is
reduced to a lower level to prevent gassing and to
prolong life. This stage is often referred to as a
maintenance charge. Rather than charging a battery, it
keeps an already-charged battery from discharging
while providing load current.