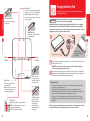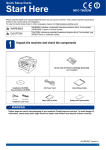
1
OPERATIONS MANUAL
FRANÇAIS Pg. 67 • ESPAÑOL Pg. 133
This product is a precision electronic device that can be damaged by direct physical impact or contact with dust
or other foreign material. A protective carrying case (sold separately) may help prevent damage to your
New Nintendo 3DS™ XL system.
Please carefully read this Operations Manual before setup or use of the New Nintendo 3DS XL system. If, after reading all of the
instructions, you still have questions, please visit our customer service area at support.nintendo.com or call 1-800-255-3700. Also,
built-in instruction manuals are available for many software applications from the HOME Menu (page 22).
A NOTE ABOUT COMPATIBILITY: The New Nintendo 3DS XL system is only compatible with Nintendo 3DS, Nintendo DSi™, and Nintendo
DS™ software. Nintendo 3DS Game Cards are only compatible with the New Nintendo 3DS XL, Nintendo 3DS, Nintendo 3DS XL, and
Nintendo 2DS systems (hereafter referred to as the Nintendo 3DS family of systems). Some accessories may not be compatible with
this system.
3D Screen
Super-stable 3D for optimal
images (page 20).
Your system includes:
•
•
•
•
•
3D Depth Slider
New Nintendo 3DS XL system
New Nintendo 3DS XL stylus (inserted into the system’s stylus holder, page 14)
microSDHC card (inserted into the system’s microSD card slot, page 52)
AR Cards
Operations Manual
Adjusts the depth of 3D images (page 21).
Circle Pad
Allows precise 360˚control for software
that includes this feature (page 13).
NOTE: The AC adapter is sold separately or can be ordered from the Nintendo website at store.nintendo.com
(USA/Canada only). This system is compatible with the Nintendo 3DS AC adapter (WAP-002). If you already own
other models in the Nintendo 3DS family of systems, or the Nintendo DSi or Nintendo DSi XL systems, you can use
the AC adapter included with those systems.
C Stick
Allows pressure-sensitive, intuitive control
for software that includes this feature
(page 13).
Touch Screen
A touch-sensitive display screen controlled
by the stylus (page 13).
HOME Button
Allows you to access the HOME
Menu (page 22).
Keeping your system charged using the New Nintendo 3DS XL charging cradle
(sold separately).
Product recycling information:
Visit recycle.nintendo.com
Trademarks are property of their respective owners. Nintendo 3DS is a trademark of Nintendo. © 2015 Nintendo
Elements of the New Nintendo 3DS XL system and related network services are patented or patent pending, both in the United States and internationally.
Patent: patents.nintendo.com
When not in use, you can keep the system in the charging cradle so it
stays fully charged. This accessory may be ordered through Nintendo’s
website at store.nintendo.com (USA/Canada only) or by calling
Customer Service at 1-800-255-3700.
1
An optimal 3D viewing experience with
Explore new software
Super-Stable 3D
Using facial recognition with
the inner camera...
Even if your face or the screen
moves during play...
The 3D images will always be
optimized for where your face is.
Find software
Watch videos
Download software
Download demo
software
Super-Stable 3D uses the inner camera to track your face and provide you with an optimal 3D image even when your body or head
moves while using the New Nintendo 3DS system (page 20).
Even better network services with a
A Nintendo Network ID
is required.
Nintendo Network ID
Register a Nintendo Network ID to enjoy the services listed below. (A Nintendo Network ID
is an ID required to use Nintendo’s network services. See page 32 for more information.)
You can connect to Nintendo eShop through the Internet and view information and videos about software, or purchase and
download software to play on your system.
NOTE: A broadband wireless network connection is required to connect to the Internet. See page 34 for more information on
setting up a connection.
Downloadable software
Nintendo 3DS Downloadable
Software
Download free or demo software
from Nintendo eShop
2
Communication in Miiverse
Combine Nintendo eShop balances
from the Wii U and the New
Nintendo 3DS XL systems.
Some Nintendo 3DS software is
available exclusively through Nintendo
eShop. You can also download certain
Game Card-based titles rather than
purchasing the Game Card.
Virtual Console titles
Nintendo DSiWare
You can download games originally
released on platforms prior to
Nintendo DS, such as Game Boy™ and
Game Boy™ Color.
You can download Nintendo
DSiWare–games originally released for
the Nintendo DSi system.
3
Receive data on your system
Automatically talk to other systems
SpotPass™
StreetPass™
The SpotPass feature allows the New Nintendo 3DS XL system to automatically communicate with a nearby wireless LAN access point, enabling it to connect to the Internet and
transmit a variety of data. The system can also do this while playing a game or in Sleep
Mode (power is on, but the system is closed).
The StreetPass feature allows your system to automatically search for and communicate
with other systems in the Nintendo 3DS family and to exchange information with them
as you walk by.
Internet
Free software
3D image
content
Notifications
System
Updates
Other
Information
The LED flashes
blue to notify you of
inbound content.
NOTE: Data received via SpotPass is
saved on the microSD card.
The LED flashes
green to notify you
of inbound content.
NOTE: A message will appear in
your notification list (page 27).
If the system is in Sleep Mode (turned on but closed) or certain other modes, and you pass someone who
has enabled StreetPass for the same software, you will exchange game data with them. (If you don’t want
to allow data exchange, you can disable wireless communication.)
StreetPass settings for Nintendo 3DS software are saved on the system. The data you transmit with StreetPass varies depending
on the software using this feature. Each software program has its own StreetPass settings.
To connect to a wireless LAN access point, you will need to configure the Internet settings for your system (page 34) .
• SpotPass may not be available depending on the play environment or the software you are using. SpotPass is also not
available during local communication (page 22), or when playing Nintendo DS or Nintendo DSi software.
• The Notification LED may not light for some types of data.
• You will need a Nintendo Network ID (page 32) to download demo games or other free content from Nintendo eShop.
4
• Up to 12 Nintendo 3DS software titles can use StreetPass simultaneously.
• Some Nintendo DS and Nintendo DSi software have a similar feature called tag mode. (The name for this mode may vary
depending on the game you are playing.) Tag mode is only active when the system is in Sleep Mode while the software and
tag mode feature are in use. When tag mode is in use, the StreetPass feature will not work for Nintendo 3DS software.
• If you turn the power off or disable wireless communication, the system cannot communicate (page 26).
• StreetPass may not be available depending on the play environment or the software you are using. StreetPass does not work
if you are connected to the Internet or are using local communication (page 22).
5
Health and Safety Information and Usage
Guidelines
Table of Contents
System features
1
Health and Safety Information
7
Usage Guidelines
9
Basic Operations
System Components
12
Charging the Battery Pack
15
Power On/Off and Basic Configuration 16
Sleep Mode and turning the system off
Configuring System Settings for the first time
Using the keyboard
Power LED status
Battery endurance
System Configuration
16
16
18
19
19
To view the best-quality 3D images
Adjusting the depth of the 3D images
20
21
HOME Menu
HOME Menu electronic manual
Software icons
Starting a software application
Electronic manuals for software applications
HOME Menu Settings
Icons for HOME Menu features
Using Game Cards
Starting a game
Using Downloaded Software
6
Starting downloaded software
22
23
23
25
26
26
27
28
28
30
30
Nintendo Network ID Settings
32
Linking a Nintendo Network ID
Internet connection requirements
Configure your Internet settings
Setup using Search for Access Point
Setup using Wi-Fi Protected Setup
Setup using AOSS
Parental Controls
Using Software
31
Internet Settings
Viewing and adjusting the 3D Image 20
System Settings
Content or features that can be limited
Configuring Parental Controls
33
34
34
35
36
37
38
Throughout this manual, you will see this symbol
followed by WARNING or CAUTION, or you may see the term IMPORTANT.
These terms have different levels of meaning as outlined below. Please read and understand these terms and the information that
appears after them before using your New Nintendo 3DS XL system:
WARNING
39
CAUTION
39
40
Data Management
41
Other Settings
42
System Transfer
System Update
Format System Memory
Important Safety Information – Read the following warnings before setup or use of the New Nintendo 3DS XL
system. Also be sure to read the Health and Safety Information application by selecting on the HOME
Menu. If this product will be used by young children, this manual should be read and explained to them by an
adult. Failing to do so may cause injury. Please carefully review the instruction booklet for the game you are
playing for additional health and safety information.
43
51
51
Consumer Information
IMPORTANT:
Health and Safety Information
Warns you about incorrect use of the system that could result in serious personal injury.
Cautions you about incorrect use of the system that could result in personal injury or damage to the
system, components, games, or accessories.
Informs you about incorrect use of the system that could result in damage to the system, components,
games, or accessories.
Health and Safety Information
WARNING - 3D FEATURE ONLY FOR CHILDREN 7 AND OVER
Viewing of 3D images by children 6 and under may cause vision damage.
Use the Parental Control feature to restrict the display of 3D images for children 6 and under. See the Parental Controls section in this
manual for more information.
WARNING - SEIZURES
Replacing the microSD Card or
Battery Pack
52
microSD Card Capacity
55
Troubleshooting
56
Warranty and Service Information
64
Regulations for Equipment Use
64
Legal Notices
65
• Some people (about 1 in 4000) may have seizures or blackouts triggered by light flashes or patterns, and this may occur while
they are watching TV or playing video games, even if they have never had a seizure before.
• Anyone who has had a seizure, loss of awareness, or other symptom linked to an epileptic condition should consult a doctor
before playing a video game.
• Parents should watch their children play video games. Stop playing and consult a doctor if you or your child has any of the
following symptoms:
Convulsions
Eye or muscle twitching
Loss of awareness
Altered vision
Involuntary movements
Disorientation
To reduce the likelihood of a seizure when playing video games:
1.
2.
3.
4.
5.
Sit or stand as far from the screen as possible.
Play video games on the smallest available television screen.
Do not play if you are tired or need sleep.
Play in a well-lit room.
Take a 10 to 15 minute break every hour.
7
WARNING - EYESTRAIN AND MOTION SICKNESS
Playing video games can result in eyestrain after a sustained period of time, and perhaps sooner if using the 3D feature. Playing video
games can also result in motion sickness in some players. Follow these instructions to help avoid eyestrain, dizziness, or nausea:
WARNING - REPETITIVE MOTION INJURIES
Playing video games can make your muscles, joints or skin hurt. Follow these instructions to avoid problems such as tendinitis, carpal
tunnel syndrome or skin irritation:
• Avoid excessive play. Parents should monitor their children for appropriate play.
• Take a 10 to 15 minute break every hour, even if you don’t think you need it.
• When using the stylus, you do not need to grip it tightly or press it hard against the screen. Doing so may cause fatigue
or discomfort.
• If your hands, wrists or arms become tired or sore while playing, or if you feel symptoms such as tingling, numbness, burning or
stiffness, stop and rest for several hours before playing again.
• If you continue to have any of the above symptoms or other discomfort during or after play, stop playing and see a doctor.
WARNING - BATTERY LEAKAGE
The New Nintendo 3DS XL system contains a rechargeable lithium ion battery pack. Leakage of ingredients contained within the
battery pack, or the combustion products of the ingredients, can cause personal injury as well as damage to your New Nintendo 3DS
XL system. If battery leakage occurs, avoid contact with skin. If contact occurs, immediately wash thoroughly with soap and water. If
liquid leaking from a battery pack comes into contact with your eyes, immediately flush thoroughly with water and see a doctor.
To avoid battery leakage:
• Do not expose battery to excessive physical shock, vibration, or liquids.
• Do not disassemble, attempt to repair, or deform the battery.
• Do not dispose of battery pack in a fire.
• Do not touch the terminals of the battery or cause a short between the terminals with a metal object.
• Do not peel or damage the battery label.
WARNING - RADIO FREQUENCY INTERFERENCE
The New Nintendo 3DS XL system can emit radio waves that can affect the operation of nearby electronics, including cardiac pacemakers.
• Do not operate the New Nintendo 3DS XL system within 9 inches of a pacemaker while using the wireless feature.
• If you have a pacemaker or other implanted medical device, do not use the wireless feature of the New Nintendo 3DS XL system
without first consulting your doctor or the manufacturer of your medical device.
• Observe and follow all regulations and rules regarding use of wireless devices in locations such as hospitals, airports, and on
board aircraft. Operation in those locations may interfere with or cause malfunctions of equipment, with resulting injuries to
persons or damage to property.
1. Do not disassemble or try to repair the New Nintendo 3DS XL system, components, or accessories. Doing so voids your warranty.
2. Only insert or remove Game Cards while the system is turned off or while the HOME Menu is displayed. Insert the Game Card
completely until it clicks into place, without forcing either the Game Card or the New Nintendo 3DS XL system.
3. Do not store the system in a humid place, on the floor, or in any location where it may contact moisture, dirt, dust, lint, or
any other foreign material.
4. Do not drop, hit, or otherwise abuse the system, components, or accessories. Doing so may damage the LCD screens or other
precision components of the system. Do not use damaged components, accessories, Game Cards, or SD Cards with your system.
Usage Guidelines
Health and Safety Information
• Avoid excessive play. It is recommended that parents monitor their children for appropriate play.
• Take a 10 to 15 minute break every hour, or every half hour when using the 3D feature, even if you don’t think you need it.
Each person is different, so take more frequent and longer breaks if you feel discomfort.
• If your eyes become tired or sore while playing, or if you feel dizzy or nauseated, stop and rest for several hours before
playing again.
• If you continue to have any of the above symptoms, stop playing and see a doctor.
HARDWARE PRECAUTIONS AND MAINTENANCE
5. Make sure all connections to the system are made carefully and inserted into the correct locations only. Hold plugs straight
when inserting them into sockets.
6. When disconnecting any plugs from the system or wall outlet, first turn the system off. Then carefully pull by the plug itself
rather than by the cord. Do not step on, sharply pull, or bend any wires or cables.
7. Do not expose the system, Game Cards, or any of the components or accessories to extreme heat or cold. The liquid crystal displays (LCD) may become slower or may not work when the temperature is low. The LCD will deteriorate at a high temperature.
Take care not to expose the system to direct sunlight for extended periods of time.
8. The LCD screens may be damaged by sharp objects or pressure. Take care to protect the displays from scratches or stains.
9. Connect ONLY accessories designed and licensed for use with the system to any external connectors.
10. Do not spill liquids on the system, Game Cards, or other components or accessories. If the system comes into contact with
liquids, wipe clean with a soft, slightly damp cloth (use water only). Remove the battery cover and battery. If liquid came
into contact with the battery, do not reuse it. Call Nintendo Customer Service at 1-800-255-3700 for further instructions on
battery replacement and possible service for your system.
11. Do not rapidly turn the power switch ON and OFF, as this may shorten the life of the battery and cause Game Cards to lose
your stored game information.
12. To avoid dirt or dust from getting into the system, always leave a Game Card loaded (with the power off), when not in use.
13. When using an AC adapter, make sure you are using the correct model appropriate for your system. Always unplug the AC
adapter from the wall outlet when not in use.
14. Do not use the AC adapter if the cable or plug is damaged.
15. The AC adapter is intended to be correctly oriented in a vertical or floor mounted position.
GAME CARD PRECAUTIONS AND MAINTENANCE
1. Avoid touching the connectors with your fingers. Do not blow on them or allow them to get wet or dirty. Doing so may
damage the Game Card and/or the system.
2. The Game Card is a high-precision electronic device. Do not store it in places that are very hot or cold. Do not hit, drop, or
otherwise abuse it. Do not attempt to take it apart.
3. Do not clean with benzene, paint thinner, alcohol or any other solvent.
4. Always check the Game Card edge connector for foreign material before inserting the Game Card into the system.
IMPORTANT: The New Nintendo 3DS XL system allows you to disable wireless communication. To turn off all wireless
communication, go to HOME Menu settings (page 26). Make sure the wireless LED is off.
8
NOTE: This product does not contain latex. This product complies with applicable laws barring the use of toxic materials such as lead, mercury, cadmium,
hexavalent chromium, PBB, or PBDE in consumer products.
9
IMPORTANT BATTERY GUIDELINES
1. Do not remove the battery pack from the system unless it needs to be replaced.
Usage Guidelines
2. Do not use any battery other than the Nintendo 3DS XL rechargeable battery pack, Model No. SPR-003. A replacement
battery may be ordered through Nintendo’s website at store.nintendo.com (USA/Canada only) or by calling Customer
Service at 1-800-255-3700. See page 52 for more information on replacing the battery.
3. When recharging the battery, use ONLY AC adapter Model No. WAP-002(USA) (sold separately).
4. When disposing of the battery, follow appropriate local guidelines and regulations. For information on battery disposal
contact your local solid waste authority. See page 52 for more information on recycling the battery.
5. If liquid comes into contact with the battery, do not reuse it. Call Nintendo Customer Service at 1-800-255-3700 for further
instructions on battery replacement and possible service for your system.
IMPORTANT STYLUS AND SCREEN GUIDELINES
1. Use the stylus ONLY on the Touch Screen (lower screen).
2. Use only enough pressure to operate the game. Excessive pressure may damage the Touch Screen.
3. Do not use the stylus if it is broken.
4. Use only a Nintendo licensed stylus on the Touch Screen.
5. Replace the stylus in the stylus holder when not in use.
6. If you use a screen protector on your system, use only a Nintendo licensed screen protector.
CLEANING THE TOUCH SCREEN AND 3D SCREEN
IMPORTANT: If the Touch Screen becomes dirty or contaminated with foreign material, do not continue to use your
system. It may not work properly and can become more damaged. Follow the cleaning procedures below. If it still
does not work after cleaning, visit support.nintendo.com for information on repair services.
If the screens on your system have visible smudges, fingerprints, or other foreign material on them, you can clean them by using a
soft clean cloth, such as a lens or eyeglass cleaning cloth.
1. Slightly dampen the cloth with water ONLY and wipe off the screens to loosen any dirt or foreign material.
2. Using a dry cloth, wipe the screens to dry them and finish the cleaning process. If needed, repeat the process.
10
11
System Components
Notification LED
Inner camera
Infrared LED
Used by games or other applications that include
camera features or super-stable 3D (page 20).
NOTE: Avoid getting the camera lens dirty. If it
becomes dirty, wipe gently with a soft cloth, being
careful not to damage the lens.
Illuminates your face to allow super-stable 3D
to work in darker environments (page 20).
Capable of displaying 3D content for games that
include this feature (page 20).
C Stick
When opening or closing
the system, keep your fingers away from the
hinge to avoid pinching them.
Right speaker
For game-play control
that supports this feature,
including Right Circle Pad
functions of the Nintendo
3DS Circle Pad Pro accessory.
See the instructions for the
game you are playing for
specific control information.
Circle Pad
For game-play control that
supports this feature. See
the instructions for the
game you are playing for
specific control information.
3D Depth Slider
Volume
+
–
Volume control
Slide to adjust the volume.
NOTE: The camera shutter sound always plays
at a fixed volume and is not affected by the
volume control.
Game Card slot
For loading Nintendo 3DS Game Cards. Also compatible with
Nintendo DS and Nintendo DSi Game Cards (page 28).
Built-in near-field
communication
(NFC) feature enables
compatible software
to read or write to an
amiibo™ figure or other
supported device.
+ Control Pad
Lights when the power is
turned on (page 19).
Touch Screen (Lower screen)
Touch-sensitive screen. This screen should only be
operated with a Nintendo licensed stylus.
Using the Touch Screen
(page 16)
Audio jack
Microphone
For connection of stereo headphones (sold separately). If headphones are connected, no sound will play through the speakers. (This system is not compatible
with the Nintendo DS Headset.)
Used by games and applications that
include microphone features.
When using headphones, set the volume at a safe level. Setting
the volume too high may harm your hearing or damage the headphones.
NFC area
Power LED ( )
Power Button ( )
System Components
System Components
Left speaker
Adjusts the depth of the 3D
image from zero to maximum.
12
3D Screen (Upper screen)
Basic Operations
Basic Operations
Indicates the status of the system.
Blue – You have received SpotPass data; blinks for about five seconds (page 4).
Green – You have received StreetPass data; blinks for about five seconds (page 5).
Orange – A friend has come online; blinks for about five seconds (page 27).
Red – Battery power is low; blinks continuously when very low (page 19).
A/B/X/Y Buttons
START/SELECT
Recharge LED ( )
Lights when the battery is being charged
(page 15).
Wireless LED ( )
Lights when wireless communication is turned
on, turns off when communication is turned
off, and blinks while data is being sent or received or when
the system is in Sleep Mode (dimly).
The lower LCD screen, or Touch Screen, is touch-sensitive. For games that include this game control feature,
operate the screen by using the included stylus.
Lightly touch or slide the stylus across the Touch
Screen as shown.
NOTE: Wireless communication and the NFC feature can be
turned on or off from HOME Menu settings (page 26).
HOME Button ( )
Displays the HOME Menu during a game (page 22).
13
Charging the Battery Pack
Outer cameras
For attachment of a licensed wrist strap
(sold separately).
Charge the battery pack before using the system for the first time or if you have not
used it for a long period of time.
WARNING
Do not use the Nintendo 3DS AC adapter or charging cradle during a lightning storm.
There may be a risk of electric shock from lightning.
IMPORTANT: The Nintendo 3DS AC adapter (sold separately), Model No. WAP-002(USA), is for use only with the
Nintendo 3DS family of systems and the Nintendo DSi and Nintendo DSi XL systems. It is not compatible with
any other Nintendo system. Do not use the AC adapter with voltage transformers, dimmer switches, or any other
equipment. It is only for use in a standard 120-volt AC wall outlet.
Infrared transceiver
Sends and receives information when using
infrared communication.
Basic Operations
Basic Operations
Wrist strap attachment
Used by games or other applications that include camera
features. Two cameras allow you to take 3D photographs.
NOTE: Avoid getting the camera lenses dirty. If they
become dirty, wipe gently with a soft cloth, being careful
not to damage the lenses.
AC plug
2
DC plug (logo side faces up)
L Button
R Button
ZR Button
ZL Button
1
Recharge LED lights up.
It will turn off when the battery
is fully charged.
Charging the Battery Pack
System Components
1
Insert the DC plug from the AC adapter into the AC adapter connector on the back of the New Nintendo 3DS XL. Be sure to
insert it straight into the connector.
IMPORTANT: Be sure the DC connector plug is facing in the correct direction before inserting into the
connector to avoid damaging either the plug or connector.
2
Cradle connectors
Battery cover
Remove cover to replace the battery or
microSD card (page 52).
NOTE: Do not remove the cover unless you
need to replace the battery or microSD
card or check battery installation.
Allows connection to the New
Nintendo 3DS XL charging cradle
(sold separately, see page 1).
AC adapter connector
Stylus holder
Always replace the stylus into the stylus holder after use.
NOTE: To prevent damage to your system, do not insert
anything other than a New Nintendo
3DS XL licensed stylus into the stylus holder.
14
Allows connection of the
Nintendo 3DS AC adapter
(sold separately), for
recharging the battery or
operation using household
current (page 15).
Swing the prongs out of the AC adapter and insert into a standard 120-volt AC wall outlet. The recharge LED will light,
indicating the system is charging. When fully charged, the recharge LED will go out. When charging is complete, remove
the AC adapter from the wall outlet and fold the prongs back into the housing.
Charging information
• Battery recharge time is approximately 3 1/2 hours, depending on remaining charge when you start and whether or
not you are using your system during recharging.
• If you play a game while recharging, the recharge LED may not always turn off once charging has completed.
• Optimal charging temperature is between 40º and 95º Fahrenheit (5-35º Celsius). Temperatures above or below this
may decrease the life of the battery and adversely affect the ability of the battery to charge.
• The battery pack can be recharged approximately 500 times, after which battery life may be 70% of a new battery.
• Battery packs become worn with repeated charge/discharge cycles. If usage time gets very short, replace the battery
pack (page 52).
NOTE: Due to the properties of lithium-ion batteries, they can permanently lose their charge when not in use for an
extended period of time. Be sure to charge lithium-ion batteries at least once every six months.
15
Power On/Off and Basic Configuration
Use the keyboard to enter a nickname or user name (page 18). You can
enter up to 10 characters.
Remember that other people using systems in the Nintendo 3DS family will
see your nickname when interacting with them, so do not use your real name
or otherwise share any personal information in your nickname.
Power LED
The first time you turn the system on, you will need to select a
language and then configure the System Settings.
Power Button
Set your birthday.
5
Set the country and state or province where you live.
6
Read the Nintendo 3DS Service User Agreement, and after reading, tap I Accept.
To continue without agreeing, tap Later. If you tap Later, you cannot connect to the
Internet until you agree to the Nintendo 3DS Service User Agreement.
7
Configure the Internet Settings.
8
Configure the Parental Controls.
Sleep Mode and turning the system off
Power On/Off and Basic Configuration
Putting the system into Sleep Mode
Closing the system while it is turned on will suspend your game and put the system into Sleep Mode. Sleep Mode will reduce
power consumption while still using features such as StreetPass and SpotPass (see pages 4 and 5 for more information on
these features).
Depending on the software you are using, closing the system may not place it in Sleep Mode. (For example, when listening to
music with Nintendo 3DS Sound.)
Turning the system off
To turn the system off, either press the POWER Button to display the Power menu and tap
Power Off, or press and hold the POWER Button until the power LED turns off.
If you connect to the Internet, you can use SpotPass and other features to enjoy more
ways of playing and interacting. See page 34 for more information on setting up an
Internet connection. To configure these settings later, tap Wait Till Later.
Power On/Off and Basic Configuration
4
Basic Operations
Basic Operations
Press the POWER Button to turn the system on. The Power LED will light up and
after a few seconds the HOME Menu will appear.
For more information on the Power LED and battery life, see page 19.
3
Parental Controls allow you to restrict the use or download of games and some features
by children, such as 3D image display, use of the Internet browser, and communications
with other users (page 39).
Please configure Parental Controls before the system is used by children.
Configuring System Settings for the first time
Would you like to do a System Transfer?
1
Confirm that you are holding the system in the best way to view 3D images by following the on-screen instructions. See
page 20 for more information on viewing 3D images.
If you own another product in the Nintendo 3DS family of systems and would like to
use data from that system on your New Nintendo 3DS XL system, you should perform
a System Transfer (page 43) before playing any software. System Transfer will move
various data, including save data for built-in software, your Nintendo eShop balance,
and account information for downloaded software, from your old system to your new
system.
2
Set the date and time.
NOTE: System Transfer will overwrite any data on the SD card in the destination system, so you will be unable to use any
downloaded software or its save data that was saved on the SD card before the System Transfer.
First select a language. Then you will need to configure the basic system settings. Using the stylus on the lower screen, follow the
on-screen instructions. If a child will be using the system, an adult should assist with these settings.
16
9
Tap the arrows
to adjust the
settings, then tap OK to confirm and move to
the next option.
You have now completed the basic system configuration. Press the HOME ( ) Button to display the HOME
Menu (page 22).
17
Using the keyboard
Power LED status
A keyboard will display when you are required to enter characters. There are two types of keyboards: a standard alphanumeric
keyboard and a ten-key keyboard.
The power LED lights when the system is on. The color and status of the LED changes depending on the remaining battery charge.
Full charge
Low
Predicted word field
Basic Operations
Basic Operations
Alphanumeric keyboard
Very low
Tap the character you want to select.
Predicted word
feature ON/OFF
Steady blue
light
Delete last character
Switch the next character
between upper and lower case.
Steady red
light
Blinking red
light
The Notification LED also
blinks red
Return
English
Special characters or
symbols
Cell phone-style
NOTE: If you run out of remaining battery life while playing a game, you must replay the game from your last saved
location. If the power LED turns red, save your game and charge the system.
If you put the system into Sleep Mode (page 16) while the power LED is a steady blue light, the LED will slowly brighten and darken.
Battery endurance
Switch between upper
and lower case
Uppercase only
Switch between upper and
lower case
Each tap changes which character
you would use from each key
Move to next character
The battery endurance times are estimates. They will vary depending on factors such as the software being played, the amount of
data received by wireless communication, and the ambient temperature. Using the camera features may also reduce the battery
endurance times shown below.
Approximate play times:
Nintendo 3DS software • 3.5–7 hours
Longer Battery endurance time Shorter
Ten-key keyboard
Power On/Off and Basic Configuration
Power On/Off and Basic Configuration
Switch input method
Dim
Screen brightness
Bright
Nintendo DS software • 7–12 hours
The screen brightness setting affects the battery endurance time.
Keeping brightness at lower settings can prolong battery life. If you
tap power-saving mode ON, screen brightness and color gradation
will automatically adjusted to match the displayed images, and
battery consumption will be limited even further (page 26).
Delete last character
• If you put the system in Sleep Mode when not using it, you can reduce power consumption while still being able to send and
receive information from StreetPass and SpotPass via the wireless communication features. If the system is fully charged and put
into Sleep Mode, the system’s battery endurance time in Sleep Mode is roughly 3 days.
• The power LED slowly brightens and darkens while the system is in Sleep Mode. NOTE: Depending on the software you are using,
sometimes pushing the Sleep switch will not cause the system to enter Sleep Mode. In these cases the power LED will remain
steadily lit. (For example, when listening to music with Nintendo 3DS Sound.)
18
19
Viewing and Adjusting the 3D Image
The upper 3D screen allows you to view stereoscopic 3D images.
You can adjust the apparent depth of these images with the 3D depth slider.
Image for left eye
3D image
Image for right eye
You can use the 3D depth slider to adjust the apparent depth when viewing 3D images. If it is difficult to view the image with the
3D slider moved up to the maximum (with the depth set as deep as it will go), try moving the slider to the minimum and then
increasing it in small steps until you find a level where it is easy for you to view the 3D images. Once your eyes are accustomed to 3D
images, you may be able to achieve the best-quality image by moving the 3D slider up.
Greater depth
3D depth
adjustment
Less depth
To view the best-quality 3D images
1 View the screen from directly in front.
Move the 3D depth slider down to its lowest position to switch to
2D (flat) display.
2 Hold the screen about 14 inches (35 cm) from
your eyes.
14” (35cm)
• Moving the 3D depth slider will have no effect on software that does not include 3D data, or on 2D scenes included in 3D
compatible software.
• Some 3D content, such as distributed 3D videos, 3D images, or certain 3D game software, cannot be adjusted with the 3D depth
slider. If this content is difficult or uncomfortable to view, try varying the distance between your eyes and the screen, or turn the
3D effect off by moving the 3D depth slider all the way down to the OFF setting.
• Some software switches between 2D and 3D imagery. With this software, moving the 3D slider does not change the intensity of
the 3D effect.
Viewing and Adjusting the 3D Image
Viewing and Adjusting the 3D Image
If you view the 3D screen from the correct
distance, it displays an image for your left eye
in such a way that only your left eye can see it,
and an image for your right eye in such a way
that only your right eye can see it. Binocular
parallax then allows you to see 3D depth in
the image.
Basic Operations
Basic Operations
The New Nintendo 3DS XL system uses
binocular parallax (the fact that your left and
right eyes are located a short distance apart,
causing them to see different images) to
produce 3D images with a feeling of depth.
Adjusting the depth of the 3D images
A note about viewing 3D images
Super-Stable 3D
The New Nintendo 3DS XL system has Super-Stable 3D, which will provide optimal images even when your body or head moves
while using the system. Super-Stable 3D tracks your face using the inner camera, and automatically adjusts the image (see
page 58 for information about face recognition).
• To turn Super-Stable 3D on or off, see page 42.
• The 3D image will appear as a 2D image or appear doubled or dim if you tilt the system at an extreme angle, or if your face
is out of range of the inner camera. To see how to view it correctly, see 3D Screen Check in System Settings/Other Settings
(page 42).
• Super-Stable 3D is not active when you are using the inner or outer cameras.
• It may be difficult to see the 3D effect in locations with strong direct light, such as sunlight.
• Under certain circumstances, 3D images cannot be seen or are difficult to see. See Troubleshooting, page 58, for more
information.
20
IMPORTANT: The ability to view 3D images may vary from person to person, depending on physical condition,
content of images, and the environment you are viewing them in. A small percentage of people may not be able
to see 3D images at all. If you see double images or have difficulty seeing the 3D effect, turn the 3D
effect off with the 3D depth slider and refrain from using it. The 3D feature can also be turned off in System
Settings/Other Settings (page 42).
Be sure to read the Health and Safety information regarding 3D images at the beginning of this manual
(page 7).
NOTE: You can also use Parental Controls to restrict the display of 3D images (page 39).
21
Home Menu
HOME Menu electronic manual
The HOME Menu will display after you turn the system on.
For details on using the HOME Menu, tap
and then select
HOME Menu Manual to view the built-in electronic manual.
To start a software title, tap its icon on the HOME Menu. On the HOME Menu, you can see several important status indicators including
the time, date, and current day’s step information. If any of your software received new data via SpotPass (page 4),
will be
displayed next to the software icon.
StreetPass icon
Reception signal-strength icon–Internet
Reception signal-strength icon–
Local Communication
Viewing a built-in electronic manual
Steps/Play Coins
Battery status icon
Date / Time
1
2
View the table of contents.
Scroll through the table of contents by sliding
the stylus up and down the Touch Screen. Tap
the page you want to view.
Low
Communication
mode
Almost out (blinking)
Charging (blinking)
View the manual pages.
Scroll through page contents by sliding the
stylus up and down the Touch Screen. Switch
the page by sliding the stylus left or right
across the screen.
Charging complete
HOME Menu
settings (page 26)
Software icon display
Software icons (page 24)
Game Notes
Internet browser
Friend list
Miiverse
If there is new data or notification
for any software application, a
green or blue icon ( ) will be
displayed next to the software icon.
Notifications
• If you press
Codes.
and
Increase or decrease the text size
Software icons
When free software is received via SpotPass, or when software is downloaded through Nintendo eShop, software icons are added to
the HOME Menu.
Scrolling and moving icons
Scrolling
Moving software icons
Tap and hold the stylus on the Touch Screen and slide it to
the left or right to scroll.
To move an icon, touch and hold it for a moment. Then you
can slide it to a new location. Slide the icon to a new location
on the HOME Menu and lift the stylus from the screen to
place the icon.
when the HOME Menu is displayed, you can enter camera mode and take photos or read QR
• You can take pictures of the HOME Menu screen by pressing
and a direction on the + Control Pad ( ). Press up on
to
take a picture of the upper screen, down to take a picture of the lower screen, or right to take a picture of both screens.
You can view the pictures you take with the 3DS camera software (page 24). If the game is paused, only the lower screen can
be captured.
• The display on the upper screen changes depending on the selected software. The display reacts to sounds that the microphone
picks up.
22
Close the manual
HOME Menu
HOME Menu
Tap or to change the
size of the icons displayed on the
lower Touch Screen.
Using Software
Using Software
High
Hold down...
...and slide.
23
Types of software icons
Starting a software application
To start a software application, tap the icon on the HOME Menu, then tap Open.
Game Card icons
3DS Game Card
DS/DSi Game Card
When you insert a Game Card into the Game Card slot, an icon for
the game title will be displayed.
Built-in software icons (Some software titles include built-in manuals, see page 26 for more information.)
Suspending or exiting software
AR Games
Nintendo 3DS Camera
Face Raiders
Review important health and safety information
concerning the use of the system. Also see page 7.
Take 3D photos and record 3D videos.
Nintendo 3DS Sound
Play augmented-reality games using the AR Cards included
with your system and the Camera application.
Play a shooting game where your face and your friends'
faces become game characters.
Activity Log
Check the play times of your software or the steps you have
walked while carrying your system with you.
Mii Maker
Nintendo Zone Viewer
StreetPass Mii Plaza
Download Play
Nintendo eShop
System Settings
Create Mii characters as alter egos for you and your
family and friends.
A place where Mii characters can gather via StreetPass
and other types of communication (page 5).
View information and videos about software, or
download software to play on your system (page 3).
Access free and exclusive content at Nintendo Zone
locations.
If you tap Resume when at the HOME Menu, you can resume playing the
suspended software.
• While software is suspended you can access features on the HOME Menu
(page 27).
• You can also start other software, but if you do, any suspended software
will be closed.
HOME Menu
HOME Menu
Listen to music or record sounds.
If you press the HOME Button while playing software, the software will be
suspended and the HOME Menu will be displayed. If you tap Close when at
the HOME Menu, you will exit the software.
Using Software
Using Software
Health and Safety Information
With a single copy of Download Play-compatible software,
you can play multiplayer games with other system users.
Configure your system's Internet settings, Parental Controls,
and other settings (page 31).
Save your game before exiting the software.
When you exit the software, any unsaved data will be lost. Remember to save your game before exiting the software.
Other icons
Present icon
While software is suspended, do not remove the software or turn the system off.
While software is suspended, do not remove the Game Card or SD Card or turn the system off. This could result in corrupted or
lost data or other malfunctions.
This icon will display when you have new downloadable software (page 30) added to the HOME Menu. Tap the
icon to open the software.
NOTE: The icon will blink if the download is incomplete. To finish the download you can put the system into Sleep
Mode (page 16) in a location where it can connect to the Internet.
• Icons of downloadable software and videos already in the microSD card will also be displayed in the HOME Menu.
24
25
Electronic manuals for software applications
Icons for HOME Menu features
If you tap the icon for a software application that includes a built-in electronic manual, a
button labeled Manual will be displayed at the bottom of the HOME Menu. Tap the button to
You can use Game Notes (
), Friend List (
tapping the icons at the top of the lower screen.
• See page 23 for information on how to view an electronic manual.
• See the built-in electronic manuals for additional details on using these features. You can view the Miiverse manual from within
Miiverse after you launch this software.
view the electronic manual for the highlighted software.
Game Notes
), Notifications (
), Internet Browser (
), and Miiverse (
) by
This software lets you write and draw notes at any time.
HOME Menu Settings
Tap
on the HOME Menu to adjust the settings below. You can also view the built-in
electronic HOME Menu instruction manual.
You can change the design of the HOME Menu by choosing a theme. You can also purchase and download
additional themes.
Save/Load Layout
You can save the current HOME Menu layout of a theme and software icons, or load a saved layout.
Screen Brightness
The screen brightness can be set to one of five levels.
Power-Saving mode
When power-saving mode is on, screen brightness and color gradation will be automatically adjusted to match
the displayed images, and battery consumption will be reduced. When Power saving mode is off, battery life is
decreased and the screen will maintain the level of brightness that you set. (The default setting is off.)
Wireless Communication/
NFC
Enable or disable wireless communication and the NFC feature.
Nintendo 3DS Image Share
You can use this tool to post screen shots from the HOME Menu screen and from compatible games and
applications to popular social networking services (requires Internet connection).
amiibo Settings
Configure various amiibo settings. Visit support.nintendo.com/3ds/amiibo for more information.
Nintendo eShop
Launch Nintendo eShop (requires Internet connection).
System Settings
Access and adjust various system settings (page 31). (Suspended software must be closed first.)
HOME Menu manual
Display the built-in electronic manual for the HOME Menu.
Contact information
View contact information for Nintendo of America Inc.
• Note that Nintendo Network ID friends are separate from your device friends. This friend list software
does not let you add friends to or modify your Nintendo Network ID friends (page 32).
Notifications
This software allows you to receive a variety of notifications from Nintendo and installed
software applications via SpotPass and StreetPass.
Internet Browser
This software allows you to view Internet web pages.
Miiverse
This is a new network service for connecting people around the world through their Mii
characters. You can share game-playing experiences or discussions of interest with people
around the world.
• A Nintendo Network ID is required to post to Miiverse or comment on other posts (page 32).
HOME Menu
HOME Menu
26
Screen brightness will be automatically adjusted based on the ambient light around you.
• This option is turned off for Nintendo DS/Nintendo DSi software.
Auto-Brightness
• This option is turned off when Nintendo 3DS Camera is in use and the brightness level will be set at the level
used by camera application. This option will automatically turn back on when you end use of the application.
Play and communicate with other people registered as your friends via the Internet, no
matter how far away they are.
Using Software
Using Software
Change Theme
Friend List
Use these features even while software is suspended.
You can access the HOME Menu settings, Game Notes ( ), Friend List ( ), Notifications (
Miiverse (
), camera mode, and electronic manuals even while a game is suspended.
), Internet Browser (
),
Press the HOME Button to display the HOME Menu and start the desired feature.
• Depending on the status of the software (for example, when a wireless communication feature or the camera is in use),
the HOME Menu or some of its features might not be available. In addition, some HOME Menu features are not available in
certain software applications.
• You cannot use the HOME Menu while playing Nintendo DS and Nintendo DSi software.
27
Using Game Cards
The New Nintendo 3DS XL system can use Nintendo 3DS, Nintendo DSi™, and Nintendo DS™
Game Cards.
Nintendo 3DS Game Card
Nintendo DS/Nintendo DSi Game Card
Suspending or exiting a game
Press HOME to suspend a game and display the HOME Menu. Save the
game, then tap Close on the HOME Menu to exit the game.
IMPORTANT: If you exit the game without saving, any unsaved data
will be lost.
• Tap Resume to resume your suspended game.
• When you exit a Nintendo DS or Nintendo DSi title, first save your game, then
press HOME and tap OK.
NOTE: If you press the POWER Button, the system will exit the game and display the
Power menu (page 16).
Removing a Game Card
Only insert or remove Game Cards while the system is turned off or while the HOME Menu is displayed. (If software is
suspended, exit it first before removing the Game Card.)
Starting a game
Using Software
Using Software
• Nintendo 3DS Game Cards are only compatible with the Nintendo 3DS family of systems.
• Only Nintendo 3DS software that is designed to support the 3D feature can display images in 3D. Nintendo DS and Nintendo DSi
software do not support 3D image display.
• You cannot access the HOME Menu while playing Nintendo DS/Nintendo DSi software. Likewise, you cannot use SpotPass or
StreetPass features.
2
1
Insert a Game Card into the Game Card Slot.
1
Push the Game Card in, then remove it after it ejects from the Game Card slot.
• If the card seems difficult to insert, remove it and confirm that it is facing in the right direction. The label should face
toward the bottom of the system.
Some Game Cards may include system update data and will require a system update be
performed to play the game. If this occurs, an update guide will be displayed when you
start the software.
Using Game Cards
Using Game Cards
System updates included on Game Cards
Make sure the label faces
towards the bottom of the
system.
Follow the on-screen instructions to update your system. See page 51 for more
information on system updates.
• Only insert or remove Game Cards while the system is turned off or the HOME Menu is displayed (and be sure to exit
suspended games before removing their Game Cards).
2
Turn the power on and when the HOME Menu appears, tap the icon for
the Game Card you have inserted, then tap Open.
NOTE: Nintendo DS/Nintendo DSi titles have a lower screen resolution than
Nintendo 3DS software and are stretched to fit the New Nintendo 3DS XL
screen. For these titles, hold down START or SELECT while tapping the menu
icon to display them at their original screen size ratio. (Hold down START or
SELECT until the game begins.)
For further instructions on how to operate a game, see the manual for the game you are playing.
28
29
Using Downloaded Software
System Settings
Play free software distributed via SpotPass and software downloaded from Nintendo eShop
From System Settings, you can configure various settings for the Nintendo 3DS system, such as
Internet Settings and Parental Controls.
Downloaded software, other than DSiWare (page 3), is saved on SD Cards. The icons for downloadable software that has been
saved are displayed on the HOME Menu.
Start System Settings from the HOME Menu.
NOTE: Software downloaded from Nintendo eShop is licensed to you, not sold. For more information, see the Nintendo 3DS
Service User Agreement by going to Other Information in System Settings/Internet Settings (page 31).
For more detailed information, tap Manual
on the HOME Menu.
• You can download Nintendo 3DS software from Nintendo eShop.
NOTE: Wireless broadband Internet access is required for online features. See page 34 for more information on setting up
an Internet connection.
• Free software may be distributed via SpotPass (page 4).
Nintendo Network
ID Settings
Using Software
Where can I find downloadable software?
Downloading and saving software
Starting downloaded software
2
Tap the icon on the HOME Menu.
NOTE: Nintendo DSiWare titles have a lower screen resolution than Nintendo
3DS software and are stretched to fit the New Nintendo 3DS XL screen. For
these titles, hold down START or SELECT while tapping the menu icon to
display them at their original screen size ratio. (Hold down START or SELECT
until the game begins.)
Operate the software as you normally would for
Game Card software.
Configure Internet connection settings (page 34).
SpotPass
Tap this option to change SpotPass settings for automatically receiving software or
sending system information.
Nintendo DS
Connections
If you are using Nintendo DS software that supports game play over the Internet, use
these settings.
Other Information
Tap this option to agree to or review the Nintendo 3DS Service User Agreement, or to
confirm the MAC address for the New Nintendo 3DS system.
Parental Controls
Restrict a user’s ability to download games and use certain features, such as the display of 3D images, use of the
Internet browser, and communications with other users (page 39).
Data Management
You can check, erase, or move downloaded software, manage activation of StreetPass software, or manage
blocked-user settings (page 41).
Other Settings
Configure your user information, calibrate system components, and perform other system functions (page 42).
System Settings
1
Internet Settings
Connection settings
System Configuration
Using Downloaded Software
• Because software can also be distributed via SpotPass, make sure you always have an SD Card in the SD Card slot.
• You can save up to 40 DSiWare titles in the System Memory and up to 300 other downloaded software titles on an SD
Card. (This number will depend on the data size of the software title and the capacity of the SD Card you are using.)
• Downloadable software can only be used on the system where it was downloaded and is not transferable. You cannot
use the software on another system by inserting the SD Card into another system.
• You will need a Nintendo Network ID to download demo games or other free content from Nintendo eShop (page 32).
• Some demo software may have restrictions on the number of times it can be started or the amount of time it can be
played. A message is displayed when you start software that has exceeded either of these restrictions. If you follow the
on-screen instructions, you can delete the software or return to Nintendo eShop.
You can create a new Nintendo Network ID, link or delete a Nintendo Network ID you have already created, or change
the current IDs settings (page 32).
• To view a built-in manual, go to the HOME Menu and tap Manual.
• ESRB ratings information for the game is available from the built-in manual.
• Ending downloaded software works the same way as ending Game Card software (page 25).
30
31
Nintendo Network ID Settings
You can create a new Nintendo Network ID, or change the details of a Nintendo Network ID you
have already created.
A Nintendo Network ID is an ID required to use Nintendo's network services. Creating a Nintendo Network ID will give you access to
the following services.
Download free or demo software from
Nintendo eShop (page 3)
Communication in Miiverse (page 27)
Combine Nintendo eShop balances from the
Wii U and the New Nintendo 3DS XL systems.
• To register a Nintendo Network ID you will need a broadband Internet connection (page 34) and an e-mail address.
• The consent of a parent or guardian is required before children under the age of 13 are able to create a Nintendo Network ID. To
provide this consent, you must follow the on-screen instructions for the “Parent/Guardian Confirmation” process.
Linking a Nintendo Network ID
There are two ways to link a Nintendo Network ID to your system.
• Create a new Nintendo Network ID.
• Link an Existing Nintendo Network ID to your New Nintendo 3DS
If you already own a Wii U system:
Wii U
If you currently have a Wii U system connected to the
Internet with a Nintendo Network ID linked to it, you
can register the same ID to your New Nintendo 3DS
system and combine Nintendo eShop balances and post
to Miiverse as the same user from both systems.
If you already own another system...
If you own another system from the Nintendo 3DS family and you would like to continue using your old data on your new
system, run System Transfer before linking your Nintendo Network ID (page 43).
Important:
New 3DS ID
When registering a Nintendo Network ID on your system:
NintendoMario123
• Only one ID can be setup for each New Nintendo 3DS system.
One ID per system
NintendoMario123
NintendoMario123
• System Transfer can be used to transfer a different Nintendo
Network ID (page 43).
To link a new or existing Nintendo Network ID, tap Nintendo Network ID Settings on the System
Settings screen (page 31).
1
• You cannot transfer to a system with a registered Nintendo
Network ID .
System Transfer
NintendoMario123
Tap either Link an Existing ID or Create a New ID
• If you create a new ID on this device, you will not be able to combine your
Nintendo eShop account activity and balance with that of any ID you are
already using on a Wii U. If you want to link the ID you are currently using on
a Wii U to this device, be sure to tap Link an Existing ID.
• Once you have successfully linked an ID, you will be asked to sign in with
that ID when you make use of services that require one. If you forget your
password, tap I Forgot at the sign-in screen and follow the instructions that
are displayed.
NintendoLuigi123
• Note that Nintendo Network ID friends are separate from your
device friends. Friends of your Nintendo Network ID can only be
added and changed from a Wii U console, and can only be used
in software that requires a Nintendo Network ID login.
Wii U ID
Already existing ID
2
Follow the on-screen instruction to complete the process.
Nintendo Network ID Settings
Nintendo Network ID Settings
32
• A Nintendo Network ID that is registered to a New Nintendo
3DS system cannot be registered to other 3DS systems.
NintendoLuigi123
You cannot combine your Nintendo
eShop account balances.
System Configuration
System Configuration
NintendoMario123
Combine your Nintendo eShop
account balances.
Unable to
merge IDs
New ID created
• The Nintendo Network ID cannot be combined with other IDs.
As a result, you will not be able to consolidate all the software
across multiple IDs into one Nintendo Network ID.
Wii U ID
Register ID
If a new Nintendo Network ID has been created on this system, you will no longer be able to combine the eShop balance
from a Wii U system.
Once you have set up a new Nintendo Network ID on your new system, you will no longer be able to run a
System Transfer from another 3DS system.
• Once a Nintendo Network ID has been setup, a login will be
needed to access the Nintendo eShop.
• The account activity and account balance registered to the New
Nintendo 3DS will be shared with the ID setup on the system.
New Nintendo 3DS XL
33
Internet Settings
Once you have connected to the Internet and accepted the Nintendo 3DS Service User Agreement,
you can use features such as Nintendo eShop, SpotPass, Internet Browser, and wireless game play
over the Internet.
Internet connection requirements
Configure your Internet settings
After configuring the devices necessary for connecting to the Internet, tap Internet Settings in the System Settings menu.
• If you are using Nintendo DS software that supports game play over the Internet, use these settings.
1
Tap Connection Settings.
2
Tap New Connection.
3
Tap Manual Setup.
4
Tap the setup method that matches your environment:
To connect your Nintendo 3DS system to the Internet, you will need an Internet connection that supports wireless communication.
If you haven’t already set up a wireless network, you may also need a computer to configure a wireless access point such as a wireless
router (sold separately).
Internet
Home Internet environment
(May include a PC)
Broadband
Internet line
Cable modem,
DSL modem, or
other device
Wireless
communication
There are several different ways to establish a connection between your system and your Internet
connection. If you already have a wireless broadband Internet connection available, follow the steps on
this page to connect up to the Internet.
• The New Nintendo 3DS XL is compatible with 802.11g and 802.11b. You should use a wireless router that is
compatible with these wireless standards.
• For information on finding a router, or on accessing and locating security settings on the router you have,
visit support.nintendo.com/nintendo3DSrouter.
• Setup is easy if your router supports Wi-Fi Protected Setup™ or AOSS. Check the documentation that came
with your router to see if it includes one of these features.
• Quickest setup method: If you know your access point name, tap Search for Access
Point (page 36).
• If you know that your access point supports the Wi-Fi Protected Setup method for
configuration, tap
(page 37).
• If you know that your access point is compatible with the proprietary AOSS standard
(found on most routers sold under the Buffalo™ brand), tap
(AOSS)(page 38).
• Configure with Manual Setup. For more information refer to the electronic version of
the instruction manual for System Settings. You can access this by tapping Manual when you have System Settings highlighted
on the HOME Menu.
Internet Settings
Internet Settings
Even if you do not have an Internet connection, in areas where Nintendo Zone is offered, you can connect to the Internet with
no additional settings or equipment.
NOTE: See the information at the bottom of this page for information on the
Tutorial option.
System Configuration
System Configuration
Wireless access point such as an wireless router
NOTE: If you have already created connection settings that were unable to
connect to the Internet, delete these first before configuring a new one.
Choose Tutorial for a guided setup
In step 3 above, tap Tutorial for help determining the best setup method. Follow the on-screen directions to select the best
Internet connection method. NOTE: If you need additional guidance during setup, tap the helper icon at the bottom of the screen.
For more information on where you can find Nintendo Zone locations, visit www.nintendo.com.
34
35
Setup using Wi-Fi Protected Setup
Setup using Search for Access Point
NOTE: You will not be able to search for and configure access points that use WPA2-PSK(TKIP) security.
If you know the name of your wireless network (also known as an access point), and aren’t using Wi-Fi Protected Setup or AOSS to
configure your system, follow these steps:
If you are using the guided setup Tutorial and selected No/I don’t know, proceed to step 2.
1
Tap Search for Access Point.
2
Tap the name of your wireless network to select it.
3
Enter a password, code, or key if required.
If you are using the guided setup Tutorial, proceed to step 2.
Tap OK to save the settings.
5
Tap OK to run a connection test.
1
Tap
2
Tap the connection method that matches your router.
3
On your Wi-Fi Protected Setup compatible router, you will have either one of the following options:
NOTE: It may take up to two minutes to complete the connection.
Push-Button Connection
OR
PIN Connection
The table below lists different types of encryption methods for access points and the level of security they may provide.
Level of security
Decreased security
WPA™-PSK
(TKIP)
WPA2™-PSK
(TKIP)
WPA-PSK
(AES)
WPA2-PSK
(AES)
Increased security
4
Internet Settings
Internet Settings
Use the number displayed on the Nintendo 2DS screen to
configure your router, then tap Next.
About security settings
WEP
Wi-Fi Protected Setup
button
Hold down the Wi-Fi Protected Setup button on the access point until the
corresponding light flashes.
NOTE: If the connection test fails and an error code is displayed, follow the instructions displayed in the error message, or
visit support.nintendo.com and use the Error Code Lookup tool for information on resolving the error.
Security encryption
methods
to begin configuration.
System Configuration
System Configuration
A screen will be displayed if your access point has security settings configured.
You must enter the security password for the access point for your system to
be able to connect to it. This may also be called an encryption key or network
password on your wireless network setup.
For information on accessing and locating the security settings on
your router, refer to the user manual for your router.
4
Setup is easy if you use a wireless router that includes the Wi-Fi Protected Setup feature. Read the instruction manual for your router
for additional information on using this feature.
NOTE: You will not be able to configure an access point using Wi-Fi Protected Setup if its security type is set to WEP. See the table
on page 36 for more information on security encryption methods.
When a Settings Complete screen appears on your system, tap OK to run a connection test. If
the connection test succeeds, setup is complete.
NOTE: The connection test may fail if you try to connect immediately after finishing setup. Wait one or two minutes before trying
the connection test.
36
37
Parental Controls
Setup using AOSS™
IMPORTANT: If a child will be the primary user, a parent or guardian should configure
the settings.
Setup is easy if you use a wireless router that includes the AOSS feature. This is found on many routers sold under the Buffalo™ brand
name. Read the instruction manual for your router for additional information about using AOSS.
NOTE: If you use AOSS, your access point settings may sometimes change. Computers and other devices connected without
using AOSS sometimes lose the ability to connect to the Internet and may need to be reconfigured. (If you configure
your settings by using Search for an Access Point, your access point settings will not change.)
If you are using the guided setup Tutorial, proceed to step 2.
1
2
Tap
to begin AOSS configuration.
Content or features that can be limited
On your AOSS-compatible router, press the AOSS button.
Hold down the AOSS button until the corresponding LED blinks twice.
If the connection fails repeatedly, wait about five minutes and try again.
AOSS Button
You can restrict the use of the Internet browser.
Nintendo 3DS Shopping Services
You can restrict the use of credit cards, prepaid cards, and online purchasing of content and
services through Nintendo eShop.
Display of 3D Images
You can restrict the display of 3D images. This will make all images display in 2D. The restriction of
the display of 3D images is recommended for users 6 years or younger.
Miiverse
You can restrict posting or restrict viewing and posting in Miiverse.
Sharing Images / Audio
/ Video / Long Text
Messages
You can restrict the sending and receiving of photos, images, audio, video, long text messages,
and other data that may include personal information.
NOTE: This restriction does not work with Miiverse (see Miiverse above) or Nintendo DS software.
succeeds, setup is complete.
Online Interaction
You can restrict the exchange of data between users who are not your friends and the ability to
participate in software that can be played via the Internet.
NOTE: This restriction does not work with Miiverse (see Miiverse above) or Nintendo DS software.
StreetPass
You can restrict communications with other users via StreetPass.
NOTE: This restriction does not work with Nintendo DS or Nintendo DSi software.
Friend Registration
You can restrict the registration of friends.
DS Download Play
You can restrict the use of DS Download Play.
Viewing Distributed
Videos
You can restrict the viewing of distributed videos and movie trailers to those suitable for all ages.
Use of some software to play distributed video may also be restricted.
Child Online Privacy
Protection
This system restricts certain online features in order to protect the privacy of children online.
To allow use of these features by a child under the age of 13, you must follow the on-screen
instructions for the “Parent/Guardian Confirmation” process.
NOTE: Even if you restrict access to these features in the System Settings, you can still choose to
enable these features within specific software on a feature-by-feature basis.
Parental Controls
Internet Settings
Internet Browser
On When a Settings Complete screen appears on your system, tap OK to run a connection test. If the connection test
NOTE: The connection test may fail if you try to connect immediately after finishing setup. Wait one or two minutes before trying
the connection test.
38
Software Rating
You can restrict the use of Nintendo 3DS software, including Nintendo 3DS software downloaded
through the Download Play application and Nintendo DSi software based on ratings set by the
Entertainment Software Rating Board (ESRB).
You cannot restrict the use of Nintendo DS software or software downloaded with DS Download Play.
System Configuration
System Configuration
2
Parental Controls can limit the download and use of certain content on the New Nintendo 3DS XL system, and can also limit the use
of certain features such as the display of 3D images, use of the Internet browser, and communications with other users.
NOTE: When Parental Controls are enabled, some System Settings, such as certain Nintendo Network ID settings, Internet Settings,
Region Settings, Outer Cameras, System Transfer, microSD card data management with a PC, and Format System Memory cannot be
accessed. You will need to enter the PIN to access these features.
39
Configuring Parental Controls
NOTE: A single New Nintendo 3DS XL system can only have one Parental Controls configuration. It is recommended that if you want
to restrict the use of content for multiple users, configure the system with settings to match the restrictions for the youngest user
and share the PIN only with those allowed to view restricted content. Please visit www.nintendo.com for more details.
1
From System Settings, tap Parental Controls to begin the setup procedure and then follow the on-screen instructions.
Information and directions for the Parental Controls feature will be displayed on the screens. Carefully read and follow the
instructions.
2
Enter a four-digit PIN.
3
Your answer must be four or more characters. Use the keyboard to enter characters
and follow the on-screen instructions. If you forget your PIN, you can answer the secret
question to retrieve it.
intendo 3DS Data
N
Management
Register your e-mail address.
Software
management
Check or erase Nintendo 3DS Download Software and Virtual
Console software. A backup of save data can be made when you
erase software. (You can save a maximum of 300 downloaded
software titles on an SD Card.)
Extra data
management
Check or erase extra data for Nintendo 3DS software, including
data received via SpotPass.
Downloadable
content
management
Downloadable content is stored here after being downloaded by
software that supports it. Check list of downloadable content and
choose individual items to delete.
Save data
backup
management
Create or delete save data backups for Nintendo 3DS Download
Software and Virtual Console software or restore save data from
a backup.
Tap Set Restrictions and select a category to set and follow the
on-screen instructions.
D SiWare Data
Management
Read the data on the microSD Card inserted into your system using a computer.
(Both the computer and the New Nintendo 3DS system must be connected to the
same access point.
StreetPass Management
You can check the list of software that has the StreetPass feature activated. You can
also turn off StreetPass for each application.
Reset Blocked-User Settings
Clear the blocked-user settings. (All data that you have restricted yourself from
receiving will no longer be restricted.)
If you forget your PIN or answer to your secret
question, see page 62 for more information.
Data Management
Parental Controls
microSD Management
Changing or removing restrictions
From Parental Controls, tap Change and follow the onscreen instructions.
You can check DSiWare software saved on System Memory or an SD Card. You can also
erase DSiWare software or copy it between System Memory and an SD Card. (You can
save a maximum of 40 DSiWare software titles in System Memory.)
System Configuration
System Configuration
By registering your e-mail address, you will be able to receive a master key for
resetting your PIN or the answer to your secret question.
When you are finished with your selections, tap Done.
40
You can check, erase, or move downloaded software, manage activation of StreetPass
software, or manage blocked-user settings. To do so, tap Data Management in System
Settings and then tap the item you want to manage.
Select a secret question and enter an answer.
NOTE: Consider who has access to this email address if you need to
protect this information from children.
5
You can check the software data and settings of software saved in system memory or on a
microSD card.
Enter the PIN a second time to confirm your choice.
NOTE: You will need to enter this PIN each time you would like to suspend or
change Parental Controls settings.
You can also choose Create your own secret question if you would like to create
your own. (Both your question and answer must be four or more characters.)
4
Data Management
• You can save over 300 items of extra data or downloadable content on an SD Card, however only a maximum of 300 can be displayed on the Data
Management screen.
• If you delete software or other content downloaded from Nintendo eShop, you can re-download it again free of charge unless it is no longer available
because distribution has ended.
IMPORTANT: You cannot start DSiWare software from an SD Card. To play a DSiWare application, please copy it to System Memory first. If the
same application already exists in the copy location, it will be overwritten. Take care not to overwrite important save data.
41
Other Settings
Tap Other Settings in System Settings to change your user information, calibrate various system
components, or perform other system functions.
You can tap
or
to switch between pages of options available in Other Settings.
System Transfer
With System Transfer, you can transfer data to your New Nintendo 3DS XL system from any system in
the Nintendo 3DS family, or from a Nintendo DSi or Nintendo DSi XL system. You can only transfer data
from a New Nintendo 3DS XL system to another New Nintendo 3DS XL system.
IMPORTANT: To make sure that neither system turns off during the system transfer, we
recommend that you either perform the transfer while the systems are charging or make sure
the batteries are charged sufficiently before beginning. If the remaining battery life is low, you
will not be able to perform a system transfer. For more information and troubleshooting
for System Transfer, visit support.nintendo.com/new3dsxl/transfer-guide.
Profile
Enter your User Name (to protect your privacy, do not use your real name), Birthday, Region Settings, and Nintendo
DS Profile. Your Nintendo DS Profile sets your Message and Color, which are used by some Nintendo DS/Nintendo DSi
software. (Characters or symbols not supported by Nintendo DS/Nintendo DSi software are displayed as “?”.)
• This is separate from the Nintendo Network ID information. Changing this information will not change the
information associated with a Nintendo Network ID.
Touch Screen
Calibrate the Touch Screen if it does not seem to work correctly.
Sound
Change the sound settings.
Mic Test
Confirm that the microphone is working properly
Speak into the microphone or blow air at it. The microphone is normal if the microphone image in the touch screen
changes color.
3D Screen Check
Check the 3D Screen viewing and Super Stable 3D guidelines.
Super-Stable 3D
Turn the Super-Stable 3D feature on or off, or calibrate Super-Stable 3D.
Outer Cameras
Calibrate the outer cameras.
Circle Pad
Calibrate the Circle Pad if it does not seem to be operating correctly.
System Transfer
Transfer data between systems in the Nintendo 3DS family, or from a Nintendo DSi/Nintendo DSi XL system.
Language
Select a language that the system will display text in.
System Update
Connect to the Internet and check for updates to the system or built-in software (page 51).
Format System Memory
Erase all added software, save data, pictures, and system settings (page 51).
Transfer Nintendo DSiWare, photos, audio and other data to a New Nintendo 3DS XL system.
NOTE: You cannot transfer data from a New Nintendo 3DS XL system to Nintendo DSi/Nintendo DSi XL systems. Once
you have made the transfer, the data cannot be returned to the original system.
System
Transfer
New Nintendo
3DS XL system
Nintendo DSi/
DSi XL system
Data You Can
Transfer
Wi-Fi User Information
Internet connection settings and the Nintendo Wi-Fi Connection ID are
transferred.
Photos and audio data
Photos and audio data recorded using the built-in Nintendo DSi Camera and
Nintendo DSi Sound software on the DSi or DSi XL system are transferred.
DSiWare
Nintendo DSiWare is transferred.
Before using this feature, download the free Nintendo 3DS Transfer Tool
from Nintendo DSi Shop to your Nintendo DSi or Nintendo DSi XL system.
Other Settings
Other Settings
Sets the date and the time.
Transferring from a Nintendo DSi/Nintendo DSi XL system to a New Nintendo 3DS
XL system
System Configuration
System Configuration
Date & Time
• System Transfer uses both an Internet connection and local wireless communication between the two systems (page 34).
Make sure both systems are placed in a location that provides a good environment for wireless communication.
• Both systems must have wireless communications enabled before performing a transfer.
• During the transfer, the system cannot be put into Sleep Mode by closing the system. Do not turn the power off during a transfer.
• A broadband wireless network connection to the Internet is required.
• For details about the Nintendo DSi Shop, see the operations manual for your Nintendo
DSi or Nintendo DSi XL system.
42
43
Precautions when transferring Nintendo Wi-Fi Connection Settings
• This will overwrite the Nintendo Wi-Fi Connection Settings under Nintendo DS Connections on your New Nintendo 3DS
system.
• The Nintendo Wi-Fi Connection ID will be deleted from your Nintendo DSi or Nintendo DSi XL system. For details about
the Nintendo Wi-Fi Connection ID, see the Operations Manual for your Nintendo DSi or Nintendo DSi XL system.
• Your higher-level Internet Settings (under Advanced Setup) will not be transferred.
Precautions when transferring Nintendo DSiWare
Only Nintendo DSiWare software programs will be transferred to your New Nintendo 3DS XL system.
The DSiWare save data will not be transferred. When you transfer DSiWare from your Nintendo DSi or Nintendo
DSi XL system, both software and save data will be erased from the original system. Do not transfer Nintendo
DSiWare unless you are willing to lose the save data associated with that DSiWare.
DSiWare and save data is erased when transferred
Only DSiWare (without save data) is transferred
Precautions when using System Transfer
IMPORTANT: All photos and audio data saved in System Memory on your New Nintendo 3DS XL system will be
deleted. If you don’t want this data to be deleted, copy the photos and audio data to the microSD Card before performing
a System Transfer.
Photo and audio data in system memory will be erased
NOTE: DSiWare will be saved in the System Memory of your New Nintendo 3DS XL system. It cannot be transferred if there
is insufficient space in the System Memory of your system. If necessary, go to Data Management under System Settings
and copy previously saved DSiWare to the microSD Card, and then delete them from System Memory (page 41).
If DSiWare has been deleted or copied to an SD Card...
Photos and audio data
If you purchased a license for DSiWare and then deleted that DSiWare or copied it to an SD Card, you can still transfer
it even though it is no longer saved on the system. In this case, system transfer does not save the software itself on
the New Nintendo 3DS XL system, but it does allow you to re-download the software from Nintendo eShop and play
it on that system.
Nintendo DSi/DSi XL system
New Nintendo
3DS XL system
If you do not want to erase the photo and audio data from system memory of the New
Nintendo 3DS XL system...
Copy the photo and audio data from
system memory to the microSD card before
running the System Transfer.
Photo and audio data on the
microSD card is not erased
even during a System Transfer.
DSiWare Saved
to SD Card*
Erased DSiWare*
NOTE: If you want to transfer photos saved on the SD Card of your Nintendo DSi or Nintendo DSi XL, you must first copy
them from the SD Card to System Memory.
Free re-download from
Nintendo eShop
* Once transferred, DSiWare can no longer be played on the original Nintendo DSi or Nintendo DSi XL system. If you
want to play transferred DSiWare again on that system, you must use Nintendo DSi Points and purchase the
DSiWare licenses again.
• You cannot transfer free DSiWare or DSiWare for which licenses are not sold on the Nintendo eShop. For more
information on non-transferable DSiWare, please visit support.nintendo.com.
• You cannot transfer Nintendo DSi Points™ or software that came included with your Nintendo DSi or Nintendo DSi XL
system.
• You cannot transfer software if the same software already exists on your New Nintendo 3DS system.
Other Settings
Other Settings
44
System Configuration
System Configuration
Only the account activity for DSiWare purchases is transferred to Nintendo eShop
45
Transferring between two systems in the Nintendo 3DS family
When you use System Transfer between two systems in the Nintendo 3DS family, various data is transferred including your save data
for built-in applications, Nintendo eShop balance, and the account activity record of downloaded applications.
Important Information about Transferring Data on SD Cards
The method used for transferring data between SD cards depends on the systems involved in the system transfer procedure.
When transferring from a New Nintendo 3DS XL system to a New Nintendo 3DS XL system
System
Transfer
System
Transfer
New Nintendo
3DS XL
Nintendo 3DS Family
System
New Nintendo
3DS XL
Source
New Nintendo
3DS XL
• The data is all transferred at once. You cannot choose which data and software to transfer.
• You cannot perform a System Transfer from a New Nintendo 3DS XL system to a Nintendo 3DS/Nintendo 3DS XL system. Once the
data has been transferred, it cannot be transferred back to the original system.
Data You Can
Transfer
New Nintendo 3DS XL
New Nintendo 3DS XL
The Internet settings and Nintendo Wi-Fi Connection ID used by Nintendo DS software
are transferred.
Built-in software
save data
Save data for built-in software, such as the friend list, Nintendo 3DS camera photos,
Nintendo 3DS sound recordings, and Mii data from Mii Maker, is transferred.
DSiWare
Nintendo DSiWare and save data saved to system memory are transferred.
The data from the microSD card of the source system can only be used on the target system. After the System Transfer,
insert the microSD card from the source system into the target system before use. If you use the target system before
swapping the microSD card, you may not be able to use save data with certain software programs.
Nintendo Network ID
Your Nintendo Network ID and associated information is transferred. NOTE: Once a
system transfer has been performed, any current or previous IDs that were linked to the
originating system can only be re-linked to the destination system.
When transferring from a Nintendo 3DS/Nintendo 3DS XL system to a New Nintendo 3DS XL system
Nintendo eShop
Account Activity and
balance
Your Nintendo eShop balance and account activity is transferred. The account activity
and eShop balance from both systems will be combined. NOTE: Some account activity
information cannot be transferred, but can be checked on-screen before performing the
system transfer.
Source
Rights to use data
saved on the SD Card
The rights to use data saved on the SD Card (including downloadable content,
downloadable software and associated save data, and other data) are transferred. See
page 47 for instructions on migrating the data on the SD card.
Nintendo 3DS/3DSXL
You cannot perform a System Transfer until you first format the System Memory of the destination system (page 51). This
will erase the Nintendo Network ID from the system and allow you to perform the System Transfer.
Target
System
Transfer
New Nintendo 3DS XL
You cannot insert the SD card from the source system into the microSD card slot of the New Nintendo 3DS XL system. See
the three options below for other methods of transferring the data.
Option 1 – Wireless Transfer
All data
This transfers all of the data on the SD card in the Nintendo 3DS/Nintendo3DS XL to the microSD card in the
New Nintendo 3DS XL.
• The amount of time required for the transfer depends on the amount of data there is to transfer.
• You will not be able to transfer the data if the microSD card on the target system does not have enough free
space. If this is the case, quit the transfer process, and then delete any unnecessary photos, videos, audio, or
software from the microSD card. If there is still not enough space, replace the microSD card in the target system
with one that has a greater capacity, or select the Low-Capacity microSD Card Transfer option.
Other Settings
Other Settings
• Multiple Nintendo Network ID numbers cannot be combined, and software associated with different IDs cannot be
combined under one ID.
• The Nintendo Network ID on the originating system will be erased and can only be re-registered on the destination system.
Insert the microSD card from the source system into the target system.
System Configuration
System Configuration
Nintendo DS
Software Settings
If a Nintendo Network ID is already registered on the system you are transferring to...
46
Target
System
Transfer
47
Data other than
Nintendo 3DS
software
Option 2 – Low-Capacity microSD Card Transfer
Choose this option when the microSD card in the target system does not have
enough capacity. Data other than Nintendo 3DS software on the SD card will be
transferred to the microSD card of the target system. After the System Transfer, you will be able to re-download the
required software programs from Nintendo eShop free of charge.
Precautions regarding System Transfers
After the transfer, all of the data on the source system is deleted.
Data in system memory is erased
Data in system memory is overwritten
• Save data is restored when the software is opened for the first time after download.
Source system
Option 3 – PC-Based Transfer
Data on the SD card is not transferred to the microSD card of
the target system during the transfer procedure. After System
Transfer is complete, use a computer to copy all data from the SD card to the microSD card. After copying the data,
insert the microSD card into the target system to use data on it.
• If you were already using a microSD card in an SD card adapter on the source system, you do not need to copy
the data using a computer. After the System Transfer is complete, just insert the microSD card into the target
system to use data on it.
IMPORTANT:
• If your computer has a built-in SD card slot, you will need to use as SD card adapter (sold separately) to insert
the microSD card from the New Nintendo 3DS XL into the SD card slot.
• If your computer does not have a built-in SD card slot, you will need to use a SD card reader and a microSD card
adapter (both sold separately) during this procedure.
Downloadable Software
• You will no longer be able to use the downloadable software and save data stored in the microSD card that was used
in the target system. (You can re-download software titles from Nintendo eShop.) However, you can move Nintendo
DSiWare and its save data to the system memory of the target system before the System Transfer and you will still be
able to use it after the transfer.
• If you perform a System Transfer between systems that have the same downloadable software, the Account Activity for
the same software on the target system is erased, and the save data will no longer be usable either. The software and
save data from the source system will become playable on the target system.
Notes on Nintendo eShop Balance
Computer
• Copy data to an empty microSD card.
First delete or copy to a PC any data on the microSD
card to make sure it is empty.
Nintendo 3DS folder
microSD card
• Copy data to the upper most level of any directories
on the microSD card.
• Do not move, delete, rename, or otherwise alter any of the data in the Nintendo 3DS folder.
• See page 55 for more information on SD card capacity.
You can move the contents of a single SD card with options 1 or 2. Then you can use a PC to transfer data from the
second or additional SD cards to the microSD card (see option 3) after the system transfer procedure, and then insert
the card into the new system. See page 55 for more information on copying data to SD cards.
You can check the transferred save data from the Data Management screen. You can also
select save data from the Data Management screen and delete it.
Other Settings
Other Settings
If you are using multiple SD cards with your source system...
If you used Option 2, “Low-Capacity microSD Card Transfer” to transfer data from a
Nintendo 3DS/3DS XL to the New Nintendo 3DS XL:
System Configuration
System Configuration
48
• Data other than Nintendo DSiWare saved to the system memory of the target system (such as save data for built-in
software) is all erased before the data from the source console is written. If you have any photo or audio data saved in
the system memory of the target system, copy it to the microSD card before running the System Transfer.
• You will not be able to perform a System Transfer if the combined balance on the source and target systems exceeds the
maximum allowed balance.
Copying data to the microSD card
Copy all data on the source SD card to the PC and then
to the target microSD card. Be sure to copy the entire
Nintendo 3DS folder to the microSD card.
Target system
49
Performing a System Transfer
Nintendo DSi/DSi XL
New Nintendo 3DS XL
System Update
Transferring from a Nintendo DSi/DSi XL to a New Nintendo 3DS
On the New Nintendo 3DS XL system:
Tap Transfer from a System in the Nintendo DSi Family.
1
2
Read the warnings about transferring data and then tap Next.
Tap Receive from Nintendo DSi.
Follow the on-screen instructions to complete the transfer process.
On the Nintendo DSi/DSi XL System:
Start the Nintendo 3DS Transfer Tool from the Nintendo DSi Menu.
3
Follow the on-screen instructions to complete the transfer process.
IMPORTANT: The New Nintendo 3DS XL system specifications and the Nintendo 3DS Service are constantly evolving and we may
update or change the New Nintendo 3DS XL system or the Nintendo 3DS Service in whole or in part, without notice to you. Such updates may be required for you to play new Nintendo 3DS games, enjoy new features, or continue to access the Nintendo 3DS Service.
After the Nintendo 3DS menu is updated, any existing or future unauthorized technical modification of the hardware or software
of your New Nintendo 3DS XL system, or the use of an unauthorized device in connection with your system, will render the system
permanently unplayable. Content deriving from the unauthorized modification of the hardware or software of your New Nintendo
3DS XL system will be removed. Failure to accept the update may render games and new features unplayable.
The New Nintendo 3DS XL system automatically updates a list to help limit the use of inappropriate words and a list of access points
that can be used for network services offered by Nintendo. No prior notice for these or other minor automatic updates will be
displayed on the screen. For other system updates, a notice will be displayed on the screen, and you will need to select “Accept” to
receive such updates.
NOTE: A broadband wireless network connection is required to connect to the Internet and perform a system update unless you are
performing a system update from a Game Card. See page 34 for more information on setting up a connection.
Format System Memory
IMPORTANT: You should delete your Nintendo eShop account first (unless you have registered a Nintendo Network ID
on your system), then format your System Memory, prior to selling, recycling, or otherwise transferring your system
to any third party.
Format System Memory will erase any data saved in System Memory and return the system to its factory-default state. The system
will keep any updates you have made with the System Update feature.
On both systems:
1
Tap Transfer from a System in the Nintendo 3DS Family.
2
On the source system:
Read the warnings about transferring data and then tap Accept.
Tap Send from This System.
Follow the on-screen instructions to complete the transfer process.
On the target system:
Tap Receive from Nintendo 3DS.
Follow the on-screen instructions to complete the transfer process.
1 If you have not deleted your Nintendo eShop account, you can re-download these from Nintendo eShop free of charge unless they
are no longer available because distribution has ended. (If this software was on a system linked to a Nintendo Network ID, the same
ID must be registered to the system the software will be re-downloaded to.)
2 If the system contains an microSD card on which software or save data is saved, and you remove that card before formatting
System Memory, the data on the microSD card will not be deleted but you will no longer be able to use it.
3 Your Nintendo Network ID is unlinked (not erased) when you format the System Memory. You can re-link your ID by choosing Link an
Existing ID from the Nintendo Network ID Settings option in System Settings (page 31).
Other Settings
Other Settings
50
New Nintendo 3DS XL Transferring within the Nintendo 3DS family of systems
System Configuration
System Configuration
Nintendo 3DS family
IMPORTANT: The following data cannot be restored if it is erased:
• All save data in System Memory including your friend list, Notifications, and step count information
• System Settings data
• Built-in software save data
• All photos in System Memory
• Software added to the system1 and its save data
• Nintendo Network ID registration3
Also the following data on your SD Card:2
• Downloadable software1 and its save data
• Downloadable content1
• Extra data
• Backups of save data
NOTE: The photos, audio, and other such data on your microSD card are not erased even if you format system memory. If you plan to
transfer your system to another person, use a computer or other device to erase the data on the microSD card.
51
Replacing the microSD Card or Battery Pack
Battery packs become worn with repeated charge/discharge cycles, and the amount of time they can be used when fully charged
will decrease gradually over time. If you feel the usage time has dropped off noticeably replace the battery pack.
1
• Do not use any battery other than the Nintendo 3DS XL rechargeable battery pack, Model No. SPR-003. A replacement battery may be ordered through Nintendo’s website at store.nintendo.com (USA/Canada only) or by calling
Customer Service at 1-800-255-3700.
To avoid damage to the screw or threads:
• A parent or guardian should replace the battery pack or microSD card if a child is using the system.
• When replacing the battery or microSD card, turn the power off and make sure the AC adapter is unplugged from
the New Nintendo 3DS XL system.
• Use a screwdriver appropriate for the screw (#0). Make sure
the tip fits snugly into the screw head.
• Place the system on a flat stable surface.
• Make sure the tip does not slip out of the screw head.
microSD Cards
The New Nintendo 3DS XL system supports microSD memory cards of up to 2 GB and microSDHC memory cards of between 4
GB and 32 GB.
• Downloaded software and its save data, extra data, downloadable content, and photographs and videos taken with the
camera are saved on the microSD card.
• Downloadable software other than Nintendo DSiWare is saved to the microSD card.
If you run out of free space on your microSD card, see page 55 for available options.
2
Unscrew counterclockwise
Using the nub on the end of the stylus, gently
pry on the small slots on each side near the
L and R Buttons. Once the cover begins to
separate from the system, gently remove the
battery cover.
IMPORTANT: To avoid damage to your
system, do not use excessive force when
opening the cover.
You can use the nub on the
stylus in the slots on the
sides of the cover.
PLEASE RECYCLE YOUR USED BATTERIES
Slightly lift the back edge of the cover first and then slide it towards the
front of the system.
When disposing of a rechargeable battery, take care to follow appropriate local guidelines
and regulations.
• Do not disassemble, attempt to repair, or deform the battery pack.
• Do not dispose of rechargeable batteries in a fire.
To find a collection site near you, contact your local solid waste authority or, in the
United States, visit: http://www.epa.gov/osw/conserve/materials/battery.htm
Place tape over the battery
contacts before recycling.
For more information or for assistance from Nintendo, visit: recycle.nintendo.com
Slide the cover towards
the front of the system to
disengage the tabs inside
the cover.
Consumer Information
Consumer Information
52
Snug
fit
Replacing the microSD Card/Battery Pack
Replacing the microSD Card or Battery Pack
• If you create save data for a title on multiple microSD cards by switching microSD cards and downloading a title, for
example, you cannot consolidate the multiple save data into a single microSD card later on.
Loosen the two cross-head (+) screws on the battery cover
with a screwdriver (not included). Use 4-5 rotations to loosen
the screws. The system is designed so that the screws are not
completely removable from the cover.
53
microSD Card Capacity
3
Replace the microSD card or battery pack.
Push in, then remove the microSD card
Remove the battery pack
About microSD Card capacity
To avoid damage to your system, make sure you push the
microSD card in before removing.
Insert the microSD card
If you begin to run out of room on your microSD card, first try deleting undesired photos, sound files, or software using the Data
Management feature in System Settings (page 41). If you still need more room, you can purchase a higher-capacity microSD
card and move all of the files onto the new card. You can save software to a new microSD card without copying the content over,
but later it will not be possible to re-save to a single microSD card.
Wait at least 10 seconds before inserting the
battery pack
Use a PC that has an microSD card slot or a commercially available microSD card reader/writer to transfer files.
PC
Make sure the logo faces outwards. To avoid contamination,
do not touch the contacts with your fingers.
High-capacity microSD Card
• Copy the content to the uppermost level of the microSD card.
• Downloadable software and its save data are saved in the Nintendo 3DS folder (photo data is not included). Please do not
alter, move, or erase files or change the names of the files in the Nintendo 3DS folder.
Replace the battery cover and tighten the two screws, being careful not to over-tighten.
IMPORTANT: Always be sure to replace the battery cover and tighten the screws before resuming use.
Copying files
Please make sure to copy the entire Nintendo 3DS folder.
If you copy software to a new microSD card, play it, and save your progress, the same software on the old
microSD card may become unusable. You cannot use multiple copies of the software.
If you copy software to a new microSD card, use the new microSD card and do not use the original data.
Make sure to align the Power Button and stylus holder with the holes in the battery cover before reattaching it.
Precautions about copying files
You cannot recombine downloadable software whose folders have been saved to multiple SD Cards. If you copy data to
a new card and then overwrite that data by re-copying it, that data will become unusable.
Consumer Information
Consumer Information
NOTE: After replacing the battery, make sure to go to System Settings and reset the time and date.
microSD Card Capacity
Replacing the microSD Card or Battery Pack
4
Nintendo 3DS folder
Check to make sure it is oriented correctly, as
shown in the illustration.
If you individually copy the files in the Nintendo 3DS
folder, the New Nintendo 3DS XL system will not
recognize them. You must copy the data in the Nintendo
3DS folder without altering the contents.
54
55
Troubleshooting
Before seeking assistance, please review the following problems and solutions. You can also visit
support.nintendo.com for assistance and additional troubleshooting and repair options, or call 1-800-255-3700.
NOTE: Please also review any instructions for games or accessories you may be using and review the Troubleshooting section of the
built-in electronic manual for the HOME Menu (page 23).
The system won’t charge or the recharge LED doesn’t light up or stay lit.
• Make sure you are using the correct AC adapter, Model No. WAP-002(USA).
• Check the battery placement to make sure it is installed correctly (page 52).
• Disconnect the system from the AC adapter and unplug the adapter from the wall outlet. Wait approximately 30 seconds and then
reconnect the components. (Review the battery-charging procedure on page 15.)
• Make sure you are charging the battery pack within an ambient temperature range of 41˚F – 95˚F (5˚C – 35˚C). The battery pack
may not charge properly outside of this range.
• If the recharge LED is blinking or won’t stay lit, visit support.nintendo.com for assistance and additional troubleshooting and
repair options, or call 1-800-255-3700.
It takes a long time to charge the battery pack or a battery charge doesn’t last very long.
• Make sure the Game Card is completely inserted into the Game Card slot until it clicks into place.
• Check the Game Card connectors and Game Card slot for dirt, dust, or other foreign material.
• Make sure the Game Card is for your region (see the Game Card package for this information).
An error message appeared when playing Nintendo DS or Nintendo DSi software:
“An error has occurred. Press and hold the POWER Button to turn the system off. Please refer to the
Operations Manual for details”
• Turn off your system, then on again. Try repeating the same action that caused the error message to occur. If the same error
occurs again, please visit support.nintendo.com for assistance and additional troubleshooting and repair options, or call
1-800-255-3700.
Multi-colored stripes appear on the lower Touch Screen.
• Due to the effects of refraction or reflection of light, changes in temperature, or how you are using the stylus on the Touch Screen,
multi-colored or moire-like patterns may appear on the screen. This is normal and not considered a defect.
• Make sure you aren’t exposing the system to or charging the system in temperatures below the ambient temperature range of
41˚F – 95˚F (5˚C – 35˚C). Cold temperatures can increase the recharge time and decrease the usage time of a charged battery.
• Over time and after repeated charging, the performance of the battery will decrease. If you have had the system for a long time,
or if the battery pack appears slightly swollen, try replacing the battery pack.
Some pixels on either the upper or lower screen are always dark or lit.
The system seems too warm.
• Due to the characteristics of liquid crystal displays, a small number of pixels may not illuminate, or may always stay lit. This is
normal and not considered a defect unless the number of pixels that don’t function normally increase over time.
• Make sure you are neither exposing the system to nor charging the system in temperatures above the ambient temperature range
of 41˚F – 95˚F (5˚C – 35˚C). Do not expose the system to direct sunlight in an enclosed space.
The brightness or color between the upper and lower screens seems different or uneven.
The system won’t turn on or there is no picture or sound.
• The specifications of the upper and lower screens are different so the appearance of images may be different. This is normal and
is not considered a defect.
•
•
•
•
•
A Game Card won’t play.
• Make sure the game content is not restricted by Parental Controls. If this is the case, you can either enter a PIN to temporarily turn
off Parental Controls, or you can reconfigure Parental Controls. See Parental Controls for more information (page 39).
The screen brightness or image colors change, or bright colors appear pale.
• If power-saving mode is on, these may be adjusted automatically to save battery power. For normal appearance, turn the
power-saving mode off (page 26).
• If the automatic brightness adjustment feature is turned on, the screen is automatically adjusted to match the surrounding
brightness. Also, if the power-saving mode is turned on, the screen’s brightness and color gradations are automatically adjusted
to match the images displayed to minimize power usage. You can turn these features off from HOME Menu settings (page 26).
Consumer Information
Consumer Information
Make sure the battery pack is charged (page 15).
Check to see if the power LED lights up when you press the POWER Button.
If you are using a Game Card, make sure it is fully inserted into the Game Card slot until it clicks into place.
The battery pack may be installed incorrectly. Check the installation of the battery pack (page 52).
Wake the system if it is in Sleep Mode. For details on how to wake the system from Sleep Mode, read the instructions for the
software you are using.
Troubleshooting
Troubleshooting
56
The Game Card’s software icon does not appear on the HOME Menu, or the message
“There is nothing inserted into Game Card slot” is displayed on the HOME Menu, even
though a Game Card is inserted in the Game Card slot.
57
3D images can’t be seen or are difficult to see.
• Make sure you are not using Nintendo DS or Nintendo DSi software, which do not support 3D image display.
• Make sure the software you are using includes 3D images. Some software includes both 2D and 3D imagery. Check other software
that includes 3D images.
• Make sure the 3D depth slider is not set all the way to the bottom of its range (in the off position).
• Make sure that the Super-Stable 3D feature is on (page 42).
• Make sure you are holding the system in the proper position to best view 3D images (page 20).
• If your left and right eyes have different visual abilities, this can make 3D images difficult to see. If you use corrective eye wear,
they may help you to see 3D images.
• Make sure that the upper screen, inner camera, and infrared LED are clean. Wipe gently with a soft dry cloth if necessary.
• Make sure you are not using software that uses the cameras, as this will deactivate the 3D feature.
• Screen protectors may make 3D images more difficult to see. Make sure you are using a licensed screen protector and have
installed it correctly.
• Avoid conditions where direct sunlight or other strong light is reflecting off the screen.
• Make sure that this feature is not restricted by Parental Controls. If this is the case, you can either enter a PIN to temporarily turn
off Parental Controls, or you can reconfigure Parental Controls. See Parental Controls in System Settings for more information
(page 39).
• Be aware that 3D images can only be displayed on the upper screen.
NOTE: The ability to view 3D images varies from individual to individual. In rare cases, some individuals may be unable to see
3D images or may only be able to see double images. If this is the case, the 3D screen should be set to display 2D images only by
sliding the 3D depth slider all the way to the bottom of its range.
WARNING: The 3D feature is only for children 7 and older.
The system registers control input when you aren’t operating the controls, or the controls
don’t seem to operate correctly.
• If you use excessive force to operate the Circle Pad, or you use the Circle Pad continuously for a long period of time, in very rare
cases the Circle Pad may start registering incorrect input and need to be calibrated. Use the calibration procedure in System
Settings/Other Settings to recalibrate the Circle Pad (page 42).
NOTE: You can also go directly to the Circle Pad calibration screen by using the following procedure. First turn the power off.
Then press the Power Button while holding down the
,
, and
. The calibration screen will appear after a few
moments.
While holding,
press:
The Touch Screen doesn’t seem to operate or respond correctly to stylus input.
• The Touch Screen may need to be re-calibrated. Use the calibration procedure in System Settings/Other Settings to recalibrate the
Touch Screen (page 42).
NOTE: You can also go directly to the Touch Screen calibration procedure by using the following procedure. First turn the
power off. Then press the Power Button while holding down the
,
, and
. The calibration screen will
appear after a few moments.
While holding,
press:
About Super-Stable 3D and facial recognition
Take photos in a well-lit area
Misaligned
Move your bangs so the cameras can
recognize your eyebrows
58
Face the screen directly
• If you have attached a screen protector (sold separately) incorrectly to the Touch Screen, try removing it and using the Touch
Screen again. If it operates correctly, either try reattaching the screen protector, carefully following the instructions included with
it, or avoid using one. (Please use screen protectors officially licensed by Nintendo.)
Air bubbles or dirt underneath
Consumer Information
Consumer Information
• The surrounding environment, the color
of your hair and beard, or facial and hair
decorations can interfere with facial
recognition.
• In rare cases, the surrounding environment or differences in facial features
may make the facial recognition
process fail.
• If 3D images are difficult to see, you
can try making adjustments in System
Settings/Other Settings/Super-Stable
3D (page 42).
Troubleshooting
Troubleshooting
The Super-Stable 3D feature and certain software titles use the cameras to recognize facial features. Observe the guidelines below to
increase the accuracy of facial recognition.
Remove your glasses if you use them
59
The C Stick is not working.
The icon for the Game Card doesn’t appear on the HOME Menu
• Make sure you are using software that support the use of the C Stick. (For software that supports the Circle Pad Pro accessory [sold
separately], you can use the C Stick.)
• If you touch the C Stick while turning on the power it can become misaligned from the neutral position. To recalibrate the C Stick,
close the system and then re-open it.
• Remove the Game Card and make sure it is oriented and inserted correctly (page 28). Make sure it clicks into place in the Game
Card slot.
The screen appears dark and the system is inoperable.
• If the screen appears dark and the system becomes inoperable when turning on the power, waking the system from Sleep Mode,
or when using software, press and hold the Power Button until the Power LED turns off, and then turn the power back on.
There is no sound from the speakers.
• Check to make sure there are no headphones plugged into the system, as the speakers do not operate when headphones are
plugged into the audio jack.
• Make sure that wireless communication has not been disabled in HOME Menu settings (page 26).
• Check the signal strength icon. If it appears as
or
, move closer to your communications partner or to your wireless
access point.
• External causes, such as cell phones, computers, microwaves, or even physical barriers, can interfere with wireless communications. Check for these conditions and either remove them or move to a different location.
• Stickers or covers may interfere with wireless communication. If you have added these items to your system, try removing them
and checking wireless communication again.
• Try adjusting the volume control to make sure the volume is not turned off.
Unable to make Internet connection settings.
There is no sound from the headphones.
• You cannot use Wi-Fi Protected Setup as your connection method if your access point uses WEP as its security setting.
• You cannot detect and configure a connection to your access point if it uses WPA2-PSK(TKIP) as its security setting.
• Try adjusting the volume control to make sure the volume is not turned off.
• Make sure the headphones are fully inserted all the way into the audio jack.
I can’t connect to the Internet.
The microphone doesn’t seem to work or recognize sounds (including headset microphones).
• Make sure the software you are using includes microphone features.
• Confirm that the microphone is operating correctly by performing a microphone test in System Settings (page 42).
• Some voices may be difficult for the system to recognize. Try having a different person speak the same word or phrase to verify if
this is the problem.
• If you are using a headset microphone, try removing it and using the built-in system microphone.
The system is not counting step numbers accurately.
• If your system is open, it cannot count steps. Steps are only counted when both the power is on and the system is closed.
• If you carry your system in a bag that is not closely connected to your body, or you dangle it by a strap or case as you walk, it
cannot accurately count your steps. The step numbers will be counted more accurately if you carry your system in a bag connected
to your waist (such as a hip pouch).
• Check to make sure the microSD Card is installed correctly (page 52).
• Check the contacts on the microSD card for dirty or contamination. If necessary, gently clean them with a dry cotton swab.
• Try checking the operation of the SD Card on a PC that has an SD Card reader.
If you are playing Nintendo DSi software
It is possible that the New Nintendo 3DS XL
Internet settings are not configured
correctly. Please perform a connection test
and follow any instructions displayed in an
error message.
The system suddenly enters Sleep Mode.
Check for and remove the following possible external causes:
• A strong external magnetic force, such as from an audio speaker, can cause the system to go into Sleep Mode.
• The New Nintendo 3DS XL system may go into Sleep Mode if it is stacked up with other systems in the Nintendo DS/3DS
product line.
Consumer Information
Consumer Information
The microSD Card functions don’t seem to work.
If your Internet settings or Internet connection fails to work you should see an error code and/or error message. Follow the
instructions displayed in the error message, or visit support.nintendo.com and use the Error Code Lookup tool for information on
resolving the error.
Troubleshooting
Troubleshooting
60
Wireless communication or online gameplay doesn’t work or works inconsistently.
61
I can’t disable the Parental Control settings.
Music files saved on an SD Card won’t display in Nintendo 3DS Sound.
• Make sure you have entered the correct PIN to access Parental Control settings.
• Make sure you have entered the correct answer for your secret question.
• Make sure the files are in a format compatible with Nintendo 3DS Sound (see the troubleshooting step below for compatible
file formats).
• Make sure the files are not saved in the “Private” folder inside the “Nintendo 3DS” folder on the SD Card (this folder is visible when
viewing the SD Card contents on a PC). The contents of this folder are not visible in Nintendo 3DS Sound.
If you have forgotten your PIN or answer to your secret question...
1 Select Parental Controls from System Settings and then tap
Forgot PIN.
(You can also tap I Forgot on the PIN entry screen.) Enter the answer to your
secret question, and then tap OK to return to the Parental Controls options.
Music files saved on an SD Card won’t play in Nintendo 3DS Sound.
• Check to make sure the files are in a format compatible with Nintendo 3DS Sound. The files must be in the following format:
AAC files with .m4a, .mp4, and .3gp extensions, or MP3 files with .mp3 extensions.
Bit rate of 16kbps - 320kbps and sampling frequency of 32kHz - 48kHz.
NOTE: The New Nintendo 3DS XL cannot play copy-protected music files.
2 If you have forgotten the answer to your secret question, tap I Forgot
on the answer entry screen.
If your system still does not operate correctly after reviewing the above problems and solutions, visit
support.nintendo.com for assistance and additional troubleshooting and repair options, or call
1-800-255-3700.
3 If you have registered an e-mail address, tap OK to have a master
key sent to that address.
• this step requires a wireless broadband Internet connection.
• make sure your e-mail application does not reject e-mail from the
@nintendo.net domain.
4 If you have not registered an e-mail address, an Inquiry Number
will be displayed.
Visit support.nintendo.com/pin and enter this Inquiry Number to get a master
key that will allow you to access Parental Controls again.
Troubleshooting
Troubleshooting
5 Tap OK.
You will return to Parental Controls.
Consumer Information
Consumer Information
62
6 Enter the master key number and then tap OK.
63
Warranty and Service Information
Regulations for Equipment Use
You may need only simple instructions to correct a problem with your product. Try our website at support.nintendo.com or call our Consumer Assistance Hotline
at 1-800-255-3700, rather than going to your retailer. Hours of operation are 6 a.m. to 7 p.m., Pacific Time, Monday - Sunday (times subject to change). If the problem cannot be
solved with the troubleshooting information available online or over the telephone, you will be offered express factory service through Nintendo. Please do not send any products to
Nintendo without contacting us first.
HARDWARE WARRANTY
Nintendo of America Inc. (“Nintendo”) warrants to the original purchaser that the hardware product shall be free from defects in material and workmanship for twelve (12) months
from the date of purchase. If a defect coveredby this warranty occurs during this warranty period, Nintendo will repair or replace the defective hardware product or component, free of
charge.* The original purchaser is entitled to this warranty only if the date of purchase is registered at point of sale or the consumer can demonstrate, to Nintendo’s satisfaction, that the
product was purchased within the last 12 months.
GAME & ACCESSORY WARRANTY
Nintendo warrants to the original purchaser that the product (games and accessories) shall be free from defects in material and workmanship for a period of three (3) months from the
date of purchase. If a defect covered by this warranty occurs during this three (3) month warranty period, Nintendo will repair or replace the defective product, free of charge.*
SERVICE AFTER EXPIRATION OF WARRANTY
Please try our website at support.nintendo.com or call the Consumer Assistance Hotline at 1-800-255-3700 for troubleshooting information and repair or replacement options and pricing.*
WARRANTY LIMITATIONS
THIS WARRANTY SHALL NOT APPLY IF THIS PRODUCT: (a) IS USED WITH PRODUCTS NOT SOLD OR LICENSED BY NINTENDO (INCLUDING, BUT NOT LIMITED TO, NON-LICENSED GAME
ENHANCEMENT AND COPIER DEVICES, ADAPTERS, SOFTWARE, AND POWER SUPPLIES); (b) IS USED FOR COMMERCIAL PURPOSES (INCLUDING RENTAL); (c) IS MODIFIED OR TAMPERED WITH;
(d) IS DAMAGED BY NEGLIGENCE, ACCIDENT, UNREASONABLE USE, OR BY OTHER CAUSES UNRELATED TO DEFECTIVE MATERIALS OR WORKMANSHIP; OR (e) HAS HAD THE SERIAL NUMBER
ALTERED, DEFACED OR REMOVED.
ANY APPLICABLE IMPLIED WARRANTIES, INCLUDING WARRANTIES OF MERCHANTABILITY AND FITNESS FOR A PARTICULAR PURPOSE, ARE HEREBY LIMITED IN DURATION TO THE
WARRANTY PERIODS DESCRIBED ABOVE (12 MONTHS OR 3 MONTHS, AS APPLICABLE). IN NO EVENT SHALL NINTENDO BE LIABLE FOR CONSEQUENTIAL OR INCIDENTAL DAMAGES RESULTING
FROM THE BREACH OF ANY IMPLIED OR EXPRESS WARRANTIES. SOME STATES DO NOT ALLOW LIMITATIONS ON HOW LONG AN IMPLIED WARRANTY LASTS OR EXCLUSION OF CONSEQUENTIAL
OR INCIDENTAL DAMAGES, SO THE ABOVE LIMITATIONS MAY NOT APPLY TO YOU.
This warranty gives you specific legal rights. You may also have other rights which vary from state to state or province to province. Nintendo’s address is: Nintendo of America Inc., P.O. Box
957, Redmond, WA 98073-0957 U.S.A. This warranty is only valid in the United States and Canada. Revision R-1
FCC and Industry Canada Information
In order to comply with FCC radio-frequency radiation exposure guidelines for an uncontrolled exposure, this device and its antenna must not be co-located or operating in conjunction
with any other antenna or transmitter.
This device complies with Part 15 of the FCC Rules and RSS Standards of Industry Canada. Operation is subject to the following two conditions: (1) This device may not cause harmful
interference, and (2) this device must accept interference received, including interference that may cause undesired operation.
This equipment complies with FCC/IC radiation exposure limits set forth for an uncontrolled environment and meets the FCC radio frequency (RF) Exposure Guidelines and RSS-102 of the
IC radio frequency (RF) Exposure rules. This equipment has very low levels of RF energy that are deemed to comply without testing of specific absorption rate (SAR).
Changes or modifications not expressly approved by the manufacturer could void the user’s authority to operate this device.
• Reorient or relocate the receiving antenna.
• Increase the separation between the equipment and receiver.
• Connect the equipment into an outlet on a circuit different from that to which the receiver is connected.
• Consult the dealer or an experienced radio/TV technician or call Nintendo Consumer Service at 1-800-255-3700 for assistance.
The user may find the following booklet prepared by the Federal Communications Commission helpful: How to Identify and Resolve Radio-TV Interference Problems. This booklet is
available from the U.S. Government Printing Office, Washington, D.C., 20402, Stock No. 004-000-00345-4.
For the FCC ID number and other regulatory information, please see inside the battery cover.
4. The names ”OpenSSL Toolkit” and ”OpenSSL Project” must not be used to endorse or
promote products derived from this software without prior written permission. For
written permission, please contact [email protected].
5. Products derived from this software may not be called ”OpenSSL” nor may ”OpenSSL”
appear in their names without prior written permission of the OpenSSL Project.
6. Redistributions of any form whatsoever must retain the following acknowledgment:
This product includes software developed by the OpenSSL Project for use in the OpenSSL
Toolkit (http://www.openssl.org/)
THIS SOFTWARE IS PROVIDED BY THE OpenSSL PROJECT “AS IS” AND ANY EXPRESS OR
IMPLIED WARRANTIES, INCLUDING, BUT NOT LIMITED TO, THE IMPLIED WARRANTIES OF
MERCHANTABILITY AND FITNESS FOR A PARTICULAR PURPOSE ARE DISCLAIMED. IN NO
EVENT SHALL THE OpenSSL PROJECT OR ITS CONTRIBUTORS BE LIABLE FOR ANY DIRECT,
INDIRECT, INCIDENTAL, SPECIAL, EXEMPLARY, OR CONSEQUENTIAL DAMAGES (INCLUDING,
BUT NOT LIMITED TO, PROCUREMENT OF SUBSTITUTE GOODS OR SERVICES; LOSS OF USE,
DATA, OR PROFITS; OR BUSINESS INTERRUPTION) HOWEVER CAUSED AND ON ANY THEORY OF
LIABILITY, WHETHER IN CONTRACT, STRICT LIABILITY, OR TORT (INCLUDING NEGLIGENCE OR
OTHERWISE) ARISING IN ANY WAY OUT OF THE USE OF THIS SOFTWARE, EVEN IF ADVISED OF
THE POSSIBILITY OF SUCH DAMAGE.
This product includes cryptographic software written by Eric Young. Copyright ©1995-1998
Eric Young ([email protected]). All rights reserved.
This package is an SSL implementation written by Eric Young ([email protected]). The
implementation was written so as to conform with Netscapes SSL.
This library is free for commercial and non-commercial use as long as the following conditions are adhered to. The following conditions apply to all code found in this distribution,
be it the RC4, RSA, lhash, DES, etc., code; not just the SSL code. The SSL documentation
included with this distribution is covered by the same copyright terms except that the holder
is Tim Hudson ([email protected]).
Copyright remains Eric Young’s, and as such any Copyright notices in the code are not to
be removed. If this package is used in a product, Eric Young should be given attribution as
the author of the parts of the library used. This can be in the form of a textual message at
program startup or in documentation (online or textual) provided with the package.
Redistribution and use in source and binary forms, with or without modification, are
permitted provided that the following conditions are met:
1. Redistributions of source code must retain the copyright notice, this list of conditions
and the following disclaimer.
2. Redistributions in binary form must reproduce the above copyright notice, this list of
conditions and the following disclaimer in the documentation and/or other materials
provided with the distribution.
3. All advertising materials mentioning features or use of this software must display the
following acknowledgement: ”This product includes cryptographic software written by
Eric Young ([email protected])” The word ‘cryptographic’ can be left out if the routines
from the library being used are not cryptographic related :-).
4. If you include any Windows specific code (or a derivative thereof) from the apps
directory (application code) you must include an acknowledgement: This product
includes software written by Tim Hudson ([email protected]).
THIS SOFTWARE IS PROVIDED BY ERIC YOUNG ”AS IS” AND ANY EXPRESS OR IMPLIED
WARRANTIES, INCLUDING, BUT NOT LIMITED TO, THE IMPLIED WARRANTIES OF MERCHANTABILITY AND FITNESS FOR A PARTICULAR PURPOSE ARE DISCLAIMED. IN NO EVENT
SHALL THE AUTHOR OR CONTRIBUTORS BE LIABLE FOR ANY DIRECT, INDIRECT, INCIDENTAL,
SPECIAL, EXEMPLARY, OR CONSEQUENTIAL DAMAGES (INCLUDING, BUT NOT LIMITED TO,
PROCUREMENT OF SUBSTITUTE GOODS OR SERVICES; LOSS OF USE, DATA, OR PROFITS; OR
BUSINESS INTERRUPTION) HOWEVER CAUSED AND ON ANY THEORY OF LIABILITY, WHETHER
IN CONTRACT, STRICT LIABILITY, OR TORT (INCLUDING NEGLIGENCE OR OTHERWISE) ARISING
IN ANY WAY OUT OF THE USE OF THIS SOFTWARE, EVEN IF ADVISED OF THE POSSIBILITY
OF SUCH DAMAGE.
The licence and distribution terms for any publicly available version or derivative of this
code cannot be changed. i.e. this code cannot simply be copied and put under another
distribution licence [including the GNU Public Licence.]
This product uses the LC Font by Sharp Corporation. LCFONT, LC Font and the LC logo mark
are trademarks of Sharp Corporation.
Wi-Fi Protected Access® (WPA and WPA2), and the Wi-Fi Protected Setup icon are
registered trademarks of the Wi-Fi Alliance.
Consumer Information
Consumer Information
This equipment has been tested and found to comply with the limits of a Class B digital device, pursuant to part 15 of the FCC Rules. These limits are designed to provide reasonable
protection against harmful interference in a residential installation. This equipment generates, uses and can radiate radio frequency energy and, if not installed and used in accordance
with the instructions, may cause harmful interference to radio communications. However, there is no guarantee that interference will not occur in a particular installation. If this
equipment does cause harmful interference to radio or television reception, which can be determined by turning the equipment off and on, the user is encouraged to try to correct the
interference by one or more of the following measures:
This product includes RSA BSAFE® Cryptographic software of EMC Corporation. RSA and
BSAFE are registered trademarks or trademarks of EMC Corporation in the United States
and other countries. ©2005 EMC Corporation. All rights reserved.
microSDHC Logo is a trademark of SD-3C, LLC.
This product uses certain fonts provided by Fontworks Inc.
This product includes speech rate conversion software developed by Toshiba corporation.
Copyright ©2008 TOSHIBA CORPORATION
“QR code reader” includes software deliverables of Information System Products Co., Ltd.
and Institute of Super Compression Technologies, Inc. QR Code is a registered trademark of
DENSO WAVE INCORPORATED in JAPAN and other countries.
“
“ and AOSS™ are the trademarks of BUFFALO INC.
THIS PRODUCT IS LICENSED UNDER THE AVC PATENT PORTFOLIO LICENSE FOR THE PERSONAL
USE OF A CONSUMER OR OTHER USES IN WHICH IT DOES NOT RECEIVE REMUNERATION TO (i)
ENCODE VIDEO IN COMPLIANCE WITH THE AVC STANDARD (“AVC VIDEO”) AND/OR (ii) DECODE
AVC VIDEO THAT WAS ENCODED BY A CONSUMER ENGAGED IN A PERSONAL ACTIVITY AND/
OR WAS OBTAINED FROM A VIDEO PROVIDER LICENSED TO PROVIDE AVC VIDEO. NO LICENSE
IS GRANTED OR SHALL BE IMPLIED FOR ANY OTHER USE. ADDITIONAL INFORMATION MAY BE
OBTAINED FROM MPEG LA, L.L.C. SEE HTTP://WWW.MPEGLA.COM
THIS PRODUCT IS LICENSED UNDER THE MPEG-4 SYSTEMS PATENT PORTFOLIO LICENSE
FOR ENCODING IN COMPLIANCE WITH THE MPEG-4 SYSTEMS STANDARD. EXCEPT THAT
AN ADDITIONAL LICENSE AND PAYMENT OF ROYALTIES ARE NECESSARY FOR ENCODING IN
CONNECTION WITH (i) DATA STORED OR REPLICATED IN PHYSICAL MEDIA WHICH IS PAID FOR
ON A TITLE BY TITLE BASIS AND/OR (ii) DATA WHICH IS PAID FOR ON A TITLE BY TITLE BASIS
AND IS TRANSMITTED TO AN END USER FOR PERMANENT STORAGE AND/OR USE. SUCH
ADDITIONAL LICENSE MAY BE OBTAINED FROM MPEG LA, LLC. SEE <HTTP://WWW.MPEGLA.
COM> FOR ADDITIONAL DETAILS.
Ubiquitous TCP/IP+SSL Copyright ©2001-2010 Ubiquitous Corp.
Powered by Devicescape Software. Portions of this products are © 2003-2010 Devicescape
Software, Inc. All rights reserved.
Copyright ©2003-2010, Jouni Malinen <[email protected]> and contributors All Rights Reserved.
WPA Supplicant licensed pursuant to BSD License.
Redistribution and use in source and binary forms, with or without modification, are
permitted provided that the following conditions are met:
1. Redistributions of source code must retain the above copyright notice, this list of
conditions and the following disclaimer.
2. Redistributions in binary form must reproduce the above copyright notice, this list of
conditions and the following disclaimer in the documentation and/or other materials
provided with the distribution.
3. Neither the name(s) of the above-listed copyright holder(s) nor the names of its
contributors may be used to endorse or promote products derived from this software
without specific prior written permission.
THIS SOFTWARE IS PROVIDED BY THE COPYRIGHT HOLDERS AND CONTRIBUTORS ”AS IS” AND
ANY EXPRESS OR IMPLIED WARRANTIES, INCLUDING, BUT NOT LIMITED TO, THE IMPLIED
WARRANTIES OF MERCHANTABILITY AND FITNESS FOR A PARTICULAR PURPOSE ARE
DISCLAIMED. IN NO EVENT SHALL THE COPYRIGHT OWNER OR CONTRIBUTORS BE LIABLE FOR
ANY DIRECT, INDIRECT, INCIDENTAL, SPECIAL, EXEMPLARY, OR CONSEQUENTIAL DAMAGES
(INCLUDING, BUT NOT LIMITED TO, PROCUREMENT OF SUBSTITUTE GOODS OR SERVICES;
LOSS OF USE, DATA, OR PROFITS; OR BUSINESS INTERRUPTION) HOWEVER CAUSED AND ON
ANY THEORY OF LIABILITY, WHETHER IN CONTRACT, STRICT LIABILITY, OR TORT (INCLUDING
NEGLIGENCE OR OTHERWISE) ARISING IN ANY WAY OUT OF THE USE OF THIS SOFTWARE,
EVEN IF ADVISED OF THE POSSIBILITY OF SUCH DAMAGE.
This product includes software developed by the OpenSSL Project for use in the OpenSSL
Toolkit. (http://www.openssl.org/). Copyright ©1998-2007 The OpenSSL Project. All
rights reserved.
Redistribution and use in source and binary forms, with or without modification, are
permitted provided that the following conditions are met:
1. Redistributions of source code must retain the above copyright notice, this list of
conditions and the following disclaimer.
2. Redistributions in binary form must reproduce the above copyright notice, this list of
conditions and the following disclaimer in the documentation and/or other materials
provided with the distribution.
3. All advertising materials mentioning features or use of this software must display the
following acknowledgment: ”This product includes software developed by the OpenSSL
Project for use in the OpenSSL Toolkit. (http://www.openssl.org/)”
Legal Notices
Warranty and Service Information/Regulations for Equipment Use
64
*In some instances, it may be necessary for you to ship the complete product, FREIGHT PREPAID AND INSURED FOR LOSS OR DAMAGE, to Nintendo. Please do not send any products to
Nintendo without contacting us first.
Legal Notices
65