1
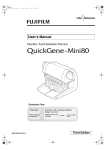
LABORATORY USE ONLY InstantLabs® Porcine Species Food Verification Kit P/N 9034-0600-0012 PRODUCT DESCRIPTION The InstantLabs Medical Diagnostics Corporation (InstantLabs) Porcine Species Food Verification Kit contains the reagents necessary for performing qualitative, real-time PCR on the Hunter Accelerated PCR® system (see Hunter System Specifications below). The kit is intended to be used in an analytical laboratory under standard laboratory conditions. KIT STORAGE AND STABILITY Store the InstantLabs Porcine Species Food Verification Kit at 2 - 8° C. The reagents are stable through the expiration date printed on kit. MATERIALS REQUIRED AND PROVIDED Multiple Assay Cartridges (MAC) Reagent Packs each containing the following: o 6 – Colored Tubes With Lyophilized PCR Reagents o 1 – Tube Positive Control DNA o 1 – Tube Nuclease-Free Water ADDITIONAL MATERIALS REQUIRED BUT NOT PROVIDED: 1. 2. 3. 4. 5. 6. 7. 8. 9. 10. 11. Hunter Accelerated PCR® Instrument (InstantLabs) Extraction Buffer P1 (InstantLabs) 10% Bleach Solution Nitrile or Latex Gloves FujiFilm QuickGene Mini-80 Instrument (InstantLabs) FujiFilm QuickGene DNA Tissue S Kit (InstantLabs) Vortex Mixer 20-200 µL Pipette with RNase/DNase-Free Filter Tips 100-1000 µL Pipette with RNase/DNase-Free Filter Tips Sterile 50 mL Conical Tubes (RNase/DNase-Free) Heat Block Set at 55o C With Insert for 50 mL Conical Tubes 12. Micro-Centrifuge Capable of at Least 6,000 x g 13. Laboratory Balance (With Minimum 0.1 g Sensitivity) 14. Ethanol (≥99%) 15. 1.5 mL Microcentrifuge Tubes (RNase/DNase-Free) 16. Sharpie® Marker or Similar to Label Tubes WARNINGS AND PRECAUTIONS 1. Wear eye protection, gloves, and laboratory coats when handling samples and kit reagents. 2. Avoid contamination of reagents by only using sterile pipette tips. 3. Do not use kits beyond the printed expiration date. 4. Do not use kits that have been stored above 8°C. 5. A negative and a positive control must be included in each test. 6. Do not reuse un-used or partial reagents from one kit to another, dispose of all remaining reagents once all kit MACs have been used. 7. Material Safety Data Sheets (MSDS) are available upon request. 8. Samples and MACs should be disposed of as bio-hazardous waste according to local regulations. AVOIDING CROSS-CONTAMINATION The InstantLabs® Porcine Species Food Verification Kit targets a region of the mitochondrial DNA that can be present in high copy number in foods and other materials that are produced with porcine-derived materials. To minimize the potential for cross-contamination of samples and false positive results please review these recommendations: A. Always wipe the bench area with a freshly prepared 10% bleach solution and wipe until dry before and after running the assay. B. Regularly clean and decontaminate pipets, tube racks, centrifuge, laboratory balance, and the QuickGene instrument by following the manufactures instructions. C. Always use a brand new filtered pipet tip when pipetting reagents or samples. D. Wear clean disposable gloves at all times and change gloves regularly especially between the Sample Preparation, DNA Extraction, and PCR Setup steps. E. Physically separate the steps of Sample Collection, DNA Extraction, and PCR Setup into different areas of the laboratory if possible. F. Use a different set of pipets and racks for the Sample Preparation, DNA Extraction, and PCR Setup if available. G. Use care when opening tubes in order to avoid splashing or spilling of reagents or samples. H. Clean up spills immediately and wash contaminated area with 10% bleach solution and wipe until dry. I. After PCR amplification is complete, dispose of the used MAC cartridge appropriately. Do not open caps on used MAC cartridge or attempt to reuse. INSTRUCTIONS FOR USE FOR TESTING OF FOOD AND NUTRACEUTICALS Sample Preparation 1. Clean the work area and laboratory balance with a 10% bleach solution and wipe until dry. 2. Tare a new 50 mL conical tube on the laboratory balance. 3. Aseptically transfer approximately 1 g of the sample material to be tested to the empty tube and record the weight. Label the tube with identifying information about the sample. 4. Repeat steps 2 and 3 for each additional sample to be tested. 5. Add a volume of fresh Extraction Buffer P1 that is approximately equal to 10x the sample weight to each tube. For example, if the weight of the sample is 1 g, then add 10 mL of Extraction Buffer P1. 6. Add 20 µL of Buffer EDT to each tube and vortex for 30 seconds to mix. Note: Buffer EDT is a component of the QuickGene DNA Tissue S kit. 7. Incubate sample tube(s) at 55°C for 60 minutes with occasional mixing on the vortex to dissolve. Note that sample may not completely dissolve. 8. Let the sample tubes sit undisturbed at room temperature for 3 – 5 minutes. This brief incubation allows the sample to cool and for any fats or oils present in the sample to collect at the top of the solution above the lower DNA-containing aqueous phase. 9. The dissolved samples are now ready for the DNA Extraction step. DNA Extraction 1. Using clean gloves carefully load the QuickGene instrument with appropriate plastic-ware including fresh columns, collection tubes, and elution tubes (refer to QuickGene user manual for instructions). 2. Combine 180 µL of Buffer LDT and 240 µL of Ethanol (≥99%) into a new labeled 1.5 mL tube for each sample. Invert tube(s) 3 – 5 times to mix. 3. Transfer 250 µL of each dissolved sample (from step 8 above) to the appropriate 1.5 mL tube prepared in the previous step and invert 3 – 5 times to mix. Be careful to avoid the top fat layer if present - when transferring the sample. 4. Centrifuge 1.5 mL tubes for 3 minutes at maximum speed and then transfer the supernatant using a pipet to the appropriate column that is loaded in QuickGene instrument. Be careful to avoid transferring any pelleted food debris. 5. Process samples according to the standard QuickGene protocol including 2 washes with Buffer WDT and elution in 200 µL of Buffer CDT. Note the following: o o o Ensure that Ethanol (≥99%) has been added to Buffer WDT before use as described in the QuickGene manual. Make sure that no WDT remains in the cartridge before beginning the elution step. Incubate columns at room temperature for 90 seconds after adding Buffer CDT before applying pressure to elute DNA. 6. The eluted DNA is now ready for testing immediately with the InstantLabs® Food Verification Kit (see below) or can be stored at -20° C for up to 3 months if desired for later analysis. PCR Setup Overview: Each Reagent Pack and Multiple-Assay Cartridge (MAC) can be used to run up to 4 samples plus the required positive and negative controls. The tubes in the reagent pack are color-coded to match the wells on the MAC and contain convenient ready-to-use lyophilized reagents: Procedure: 1. Clean workspace and pipets with a 10% bleach solution and wipe until dry. 2. Using clean gloves remove one Reagent Pack from the kit. 3. Transfer 25 µL of the extracted DNA sample to be tested to the green colored tube using a sterile pipet while being careful to not touch the lyophilized reagents with the pipet tip. Shake tube gently to ensure that lyophilized reagents are reconstituted. 4. Additional lysed samples can be similarly loaded into the Orange, Purple, and Yellow tubes if desired. Shake the tubes to ensure that lyophilized reagents are reconstituted. 5. Using a sterile pipet transfer 25 µL of Nuclease-Free Water to the blue colored Negative Control tube. Shake tube to ensure that lyophilized reagents are reconstituted. 6. Using a sterile pipet transfer 50 µL of Nuclease-Free Water to the tube labeled Positive Control and invert tube 3 – 5 times to mix contents. Using a new pipet tip transfer 25 µL of this solution to the red colored Positive Control tube. Shake tube to ensure that lyophilized reagents are reconstituted. 7. Briefly spin down the 6 colored tubes in a Micro-Centrifuge for 5 seconds to collect contents at bottom of tube. 8. Remove one MAC from the kit. 9. Prepare Hunter by entering test and sample information as outlined in the Hunter User Manual. 10. Pipette 20 µl of each Sample/Control PCR mix solution to the correct port on the MAC by matching the color of the tube to the colors printed on the MAC. Insure that the solution flows into the sample chamber and then close the cap on the port. To ensure a proper seal press the cap down firmly. 11. When all samples have been added to the MAC, tap the MAC gently on the countertop to ensure there are no visible bubbles present in the sample chamber. 12. Place the MAC into Hunter and firmly push latch down to lock MAC in place. 13. Close the Hunter’s door to start the test which will begin in 15 seconds. 14. The results will be displayed automatically as Positive, Negative, or Indeterminate when the test is completed. TROUBLESHOOTING Problem No amplification of Positive Control – The Hunter calls the positive control Negative or Indeterminate High background in the Negative Control – Hunter calls all samples indeterminate (?) Suggestion Positive Control was expired, not reconstituted properly, stored incorrectly, or was not loaded into the MAC properly. Repeat test with fresh reagents. Potential contamination. Repeat test with fresh reagents. HUNTER SYSTEM SPECIFICATIONS System Components • Hunter device • MAC Assay Cartridges (MAC) Additional Components • Hunter device User Manual CD • 2 spare fuses • AC line cord Hunter instrument specifications • Dimensions: 17.2 cm x 41.2 cm x 22 cm (6.77 in. H x 16.22 in. W x 8.66 in. D) • Weight: 6.8 Kg (15 lbs.) • Power usage: 100 to 240 VAC at 3 amps • Fuses (2): 3 AMP slow blow • Peak block heat rate ~ 4.5°C/sec • Peak block cool rate ~ 4.5°C/sec • Warm up time: ~10 minutes • Decibel level: less than 40 db at 1 meter Environment • Temperature 10-35° C (50°-95°F) • Relative humidity up to 90% (noncondensing) • Locate away from heaters, cooling ducts and keep out of direct sunlight • Protect from all fluids Throughput • Six (6) samples every 2.25 hours (run time) • Includes pos/neg control • 18 samples per 8 hour shift • Supported volumes 20ul Area Requirements • 8” recommended free space around the Hunter system for sample preparation, airflow, etc. TECHNICAL ASSISTANCE Contact Your Local Distributor for Technical Assistance Worldwide Support: Phone: Email: Web: 855-800-7086 [email protected] www.instantlabs.com © 2012 by InstantLabs Medical Diagnostics Corporation, Inc All rights reserved. DOCUMENT VERSION 10016