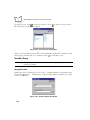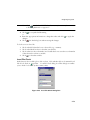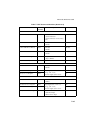
1
MCL-Designer for Phaser Series User’s Guide MCL-Designer for Phaser Series User’s Guide 70-37689-02 Revision A — March 2000 2 Symbol Technologies, Inc. One Symbol Plaza, HoltsvilleN.Y. 11742 MCL-Designer for Phaser Series User’s Guide 70-37689-02 Revision A March 2000 2000 by Symbol Technologies, Inc. All rights reserved. No part of this publication may be reproduced or used in any form, or by any electrical or mechanical means, without permission in writing from Symbol. This includes electronic or mechanical means, such as photocopying, recording, or information storage and retrieval systems. The material in this manual is subject to change without notice. The software is provided strictly on an “as is” basis. All software, including firmware, furnished to the user is on a licensed basis. Symbol grants to the user a non-transferable and non-exclusive license to use each software or firmware program delivered hereunder (licensed program). Except as noted below,such license may not be assigned, sublicensed, or otherwise transferred by the user without prior written consent of Symbol. No right to copy a licensed program in whole or in part is granted, except as permitted under copyright law. The user shall not modify, merge, or incorporate any form or portion of a licensed program with othe program material, create a derivative work from a licensed program, or use a licensed program in a network without written permission from Symbol. The user agrees to maintain Symbol’s copyright notice on the licensed programs delivered hereunder, and to include the same on any authorized copies it makes, in whole or in part. The user agrees not t decompile, disassemble, decode, or reverse engineer any licensed program delivered to the user or any portion thereof. Symbol reserves the right to make changes to any software or product to improve reliability, function, or design. Symbol does not assume any product liability arising out of, or in connection with, the application or use of any product, circuit, or application described herein. No license is granted, either expressly or by implication, estoppel, or otherwise under any Symbol Technologies, Inc., intellectual property rights. An implied license only exists for equipment, circuits, and subsystems contained in Symbol products. Symbol is a registered trademark of Symbol Technologies, Inc. MCL and MCL-Designer, are trademarks of Zetes Technologies S.A. Other product names mentioned in this manual may be trademarks or registered trademarks of their respective companies and are hereby acknowledged Symbol Technologies, Inc. One Symbol Plaza Holtsville, New York 11742-1300 http://www.symbol.com ii Contents About This Guide Notational Conventions . . . . . . . . . . . . . . . . . . . . . . . . . . . . . . . . . . . . . . . . . . . . . . . . . . . . . . . . . . viii Service Information . . . . . . . . . . . . . . . . . . . . . . . . . . . . . . . . . . . . . . . . . . . . . . . . . . . . . . . . . . . . . .ix Symbol Support Center . . . . . . . . . . . . . . . . . . . . . . . . . . . . . . . . . . . . . . . . . . . . . . . . . . . . . . . .ix Chapter 1. Getting Started Installation . . . . . . . . . . . . . . . . . . . . . . . . . . . . . . . . . . . . . . . . . . . . . . . . . . . . . . . . . . . . . . . . . . . 1-1 About MCL-Designer. . . . . . . . . . . . . . . . . . . . . . . . . . . . . . . . . . . . . . . . . . . . . . . . . . . . . . . . . . . 1-2 Introduction . . . . . . . . . . . . . . . . . . . . . . . . . . . . . . . . . . . . . . . . . . . . . . . . . . . . . . . . . . . . . . 1-2 Operator Usage . . . . . . . . . . . . . . . . . . . . . . . . . . . . . . . . . . . . . . . . . . . . . . . . . . . . . . . . . . . . 1-2 MCL-Designer Features. . . . . . . . . . . . . . . . . . . . . . . . . . . . . . . . . . . . . . . . . . . . . . . . . . . . . . 1-2 Starting MCL Designer. . . . . . . . . . . . . . . . . . . . . . . . . . . . . . . . . . . . . . . . . . . . . . . . . . . . . . . . . . 1-3 Setting up a New Project . . . . . . . . . . . . . . . . . . . . . . . . . . . . . . . . . . . . . . . . . . . . . . . . . . . . . . . . 1-3 Scanner Setup . . . . . . . . . . . . . . . . . . . . . . . . . . . . . . . . . . . . . . . . . . . . . . . . . . . . . . . . . . . . . . . . . 1-5 System Setup . . . . . . . . . . . . . . . . . . . . . . . . . . . . . . . . . . . . . . . . . . . . . . . . . . . . . . . . . . . . . . 1-7 Memory Mapping . . . . . . . . . . . . . . . . . . . . . . . . . . . . . . . . . . . . . . . . . . . . . . . . . . . . . . . . . . 1-8 Scanner Setup . . . . . . . . . . . . . . . . . . . . . . . . . . . . . . . . . . . . . . . . . . . . . . . . . . . . . . . . . . . . 1-10 Phaser RS232 Setup . . . . . . . . . . . . . . . . . . . . . . . . . . . . . . . . . . . . . . . . . . . . . . . . . . . . . . . 1-17 MCL-Designer Setup . . . . . . . . . . . . . . . . . . . . . . . . . . . . . . . . . . . . . . . . . . . . . . . . . . . . . . . . . . 1-21 Chapter 2. Quick Tour Project Setup. . . . . . . . . . . . . . . . . . . . . . . . . . . . . . . . . . . . . . . . . . . . . . . . . . . . . . . . . . . . . . . . . . 2-1 Menu Setup . . . . . . . . . . . . . . . . . . . . . . . . . . . . . . . . . . . . . . . . . . . . . . . . . . . . . . . . . . . . . . . . . . 2-4 Designing a Program . . . . . . . . . . . . . . . . . . . . . . . . . . . . . . . . . . . . . . . . . . . . . . . . . . . . . . . . . . 2-10 Saving Your Design . . . . . . . . . . . . . . . . . . . . . . . . . . . . . . . . . . . . . . . . . . . . . . . . . . . . . . . . . . . 2-20 Simulating and Testing Your Design. . . . . . . . . . . . . . . . . . . . . . . . . . . . . . . . . . . . . . . . . . . . . . . 2-20 Editing Your Design . . . . . . . . . . . . . . . . . . . . . . . . . . . . . . . . . . . . . . . . . . . . . . . . . . . . . . . . . . . 2-23 iii MCL-Designer for Phaser Series User’s Guide Chapter 3. Designing a Main Menu How to Create a Main Menu. . . . . . . . . . . . . . . . . . . . . . . . . . . . . . . . . . . . . . . . . . . . . . . . . . . . . . 3-1 Adding Text to the Menu . . . . . . . . . . . . . . . . . . . . . . . . . . . . . . . . . . . . . . . . . . . . . . . . . . . . . 3-1 Adding Variables to the Menu . . . . . . . . . . . . . . . . . . . . . . . . . . . . . . . . . . . . . . . . . . . . . . . . . 3-4 Setting Menu Options . . . . . . . . . . . . . . . . . . . . . . . . . . . . . . . . . . . . . . . . . . . . . . . . . . . . . . . . . . . 3-6 Chapter 4. Designing Programs Main Program Window . . . . . . . . . . . . . . . . . . . . . . . . . . . . . . . . . . . . . . . . . . . . . . . . . . . . . . . . . . 4-1 Screen Description . . . . . . . . . . . . . . . . . . . . . . . . . . . . . . . . . . . . . . . . . . . . . . . . . . . . . . . . . . 4-5 Display Text . . . . . . . . . . . . . . . . . . . . . . . . . . . . . . . . . . . . . . . . . . . . . . . . . . . . . . . . . . . . . . . 4-6 Display Variable . . . . . . . . . . . . . . . . . . . . . . . . . . . . . . . . . . . . . . . . . . . . . . . . . . . . . . . . . . . . 4-7 Barcode Input Dialog Box . . . . . . . . . . . . . . . . . . . . . . . . . . . . . . . . . . . . . . . . . . . . . . . . . . . 4-13 Working With Fields . . . . . . . . . . . . . . . . . . . . . . . . . . . . . . . . . . . . . . . . . . . . . . . . . . . . . . . . . . . 4-19 Placing Fields on a Screen . . . . . . . . . . . . . . . . . . . . . . . . . . . . . . . . . . . . . . . . . . . . . . . . . . . . 4-19 Editing Fields on a Screen . . . . . . . . . . . . . . . . . . . . . . . . . . . . . . . . . . . . . . . . . . . . . . . . . . . . 4-20 Moving Fields. . . . . . . . . . . . . . . . . . . . . . . . . . . . . . . . . . . . . . . . . . . . . . . . . . . . . . . . . . . . . 4-20 Copying Fields . . . . . . . . . . . . . . . . . . . . . . . . . . . . . . . . . . . . . . . . . . . . . . . . . . . . . . . . . . . . 4-21 Working With Screens . . . . . . . . . . . . . . . . . . . . . . . . . . . . . . . . . . . . . . . . . . . . . . . . . . . . . . . . . . 4-22 Inserting a Blank Screen . . . . . . . . . . . . . . . . . . . . . . . . . . . . . . . . . . . . . . . . . . . . . . . . . . . . . 4-22 Copying a Screen . . . . . . . . . . . . . . . . . . . . . . . . . . . . . . . . . . . . . . . . . . . . . . . . . . . . . . . . . . 4-23 Moving a Screen . . . . . . . . . . . . . . . . . . . . . . . . . . . . . . . . . . . . . . . . . . . . . . . . . . . . . . . . . . . 4-24 Deleting a Screen . . . . . . . . . . . . . . . . . . . . . . . . . . . . . . . . . . . . . . . . . . . . . . . . . . . . . . . . . . 4-24 Deleting All Screens . . . . . . . . . . . . . . . . . . . . . . . . . . . . . . . . . . . . . . . . . . . . . . . . . . . . . . . . 4-25 Quick View of All Screens . . . . . . . . . . . . . . . . . . . . . . . . . . . . . . . . . . . . . . . . . . . . . . . . . . . 4-25 Working With Processes . . . . . . . . . . . . . . . . . . . . . . . . . . . . . . . . . . . . . . . . . . . . . . . . . . . . . . . . 4-26 Adding a Process . . . . . . . . . . . . . . . . . . . . . . . . . . . . . . . . . . . . . . . . . . . . . . . . . . . . . . . . . . 4-28 Process List . . . . . . . . . . . . . . . . . . . . . . . . . . . . . . . . . . . . . . . . . . . . . . . . . . . . . . . . . . . . . . . 4-28 Variable Group . . . . . . . . . . . . . . . . . . . . . . . . . . . . . . . . . . . . . . . . . . . . . . . . . . . . . . . . . . . 4-30 Branch Group. . . . . . . . . . . . . . . . . . . . . . . . . . . . . . . . . . . . . . . . . . . . . . . . . . . . . . . . . . . . . 4-40 Files Group. . . . . . . . . . . . . . . . . . . . . . . . . . . . . . . . . . . . . . . . . . . . . . . . . . . . . . . . . . . . . . . 4-49 MCL-Link Communications Group . . . . . . . . . . . . . . . . . . . . . . . . . . . . . . . . . . . . . . . . . . . . 4-61 Serial Communications Group . . . . . . . . . . . . . . . . . . . . . . . . . . . . . . . . . . . . . . . . . . . . . . . . 4-73 Others Group . . . . . . . . . . . . . . . . . . . . . . . . . . . . . . . . . . . . . . . . . . . . . . . . . . . . . . . . . . . . . 4-78 Printing Reports. . . . . . . . . . . . . . . . . . . . . . . . . . . . . . . . . . . . . . . . . . . . . . . . . . . . . . . . . . . . . . . 4-84 Changing the Printer Setup . . . . . . . . . . . . . . . . . . . . . . . . . . . . . . . . . . . . . . . . . . . . . . . . . . . 4-84 Printing a Screen. . . . . . . . . . . . . . . . . . . . . . . . . . . . . . . . . . . . . . . . . . . . . . . . . . . . . . . . . . . 4-84 Printing Options . . . . . . . . . . . . . . . . . . . . . . . . . . . . . . . . . . . . . . . . . . . . . . . . . . . . . . . . . . . 4-84 Working With Files . . . . . . . . . . . . . . . . . . . . . . . . . . . . . . . . . . . . . . . . . . . . . . . . . . . . . . . . . . . . 4-87 Files Windo . . . . . . . . . . . . . . . . . . . . . . . . . . . . . . . . . . . . . . . . . . . . . . . . . . . . . . . . . . . . . 4-87 Working with Variables . . . . . . . . . . . . . . . . . . . . . . . . . . . . . . . . . . . . . . . . . . . . . . . . . . . . . . . . . 4-92 Global View of Variables . . . . . . . . . . . . . . . . . . . . . . . . . . . . . . . . . . . . . . . . . . . . . . . . . . . . 4-93 iv Contents Chapter 5. Simulating the Designed Project Testing and Simulating . . . . . . . . . . . . . . . . . . . . . . . . . . . . . . . . . . . . . . . . . . . . . . . . . . . . . . . . . . Working Items of the Simulator . . . . . . . . . . . . . . . . . . . . . . . . . . . . . . . . . . . . . . . . . . . . . . . . . . . Break. . . . . . . . . . . . . . . . . . . . . . . . . . . . . . . . . . . . . . . . . . . . . . . . . . . . . . . . . . . . . . . . . . . . Bar Code Input . . . . . . . . . . . . . . . . . . . . . . . . . . . . . . . . . . . . . . . . . . . . . . . . . . . . . . . . . . . . Variable List . . . . . . . . . . . . . . . . . . . . . . . . . . . . . . . . . . . . . . . . . . . . . . . . . . . . . . . . . . . . . . File Viewer . . . . . . . . . . . . . . . . . . . . . . . . . . . . . . . . . . . . . . . . . . . . . . . . . . . . . . . . . . . . . . . MCL-Code Display . . . . . . . . . . . . . . . . . . . . . . . . . . . . . . . . . . . . . . . . . . . . . . . . . . . . . . . . . 5-1 5-2 5-3 5-3 5-4 5-5 5-5 Chapter 6. Downloading A Project Downloading to a Scanner . . . . . . . . . . . . . . . . . . . . . . . . . . . . . . . . . . . . . . . . . . . . . . . . . . . . . . . 6-1 Chapter 7. MCL-Code Reference Guide About MCL-Code . . . . . . . . . . . . . . . . . . . . . . . . . . . . . . . . . . . . . . . . . . . . . . . . . . . . . . . . . . . . . 7-1 MCL-Code Program . . . . . . . . . . . . . . . . . . . . . . . . . . . . . . . . . . . . . . . . . . . . . . . . . . . . . . . . 7-1 Typographic Conventions . . . . . . . . . . . . . . . . . . . . . . . . . . . . . . . . . . . . . . . . . . . . . . . . . . . . 7-2 Introduction . . . . . . . . . . . . . . . . . . . . . . . . . . . . . . . . . . . . . . . . . . . . . . . . . . . . . . . . . . . . . . . . . . 7-3 Overview of the MCL-Code . . . . . . . . . . . . . . . . . . . . . . . . . . . . . . . . . . . . . . . . . . . . . . . . . . 7-3 Variables . . . . . . . . . . . . . . . . . . . . . . . . . . . . . . . . . . . . . . . . . . . . . . . . . . . . . . . . . . . . . . . . . . . . 7-3 Using Variables . . . . . . . . . . . . . . . . . . . . . . . . . . . . . . . . . . . . . . . . . . . . . . . . . . . . . . . . . . . . 7-3 Files and Records . . . . . . . . . . . . . . . . . . . . . . . . . . . . . . . . . . . . . . . . . . . . . . . . . . . . . . . . . . . . . . 7-5 General . . . . . . . . . . . . . . . . . . . . . . . . . . . . . . . . . . . . . . . . . . . . . . . . . . . . . . . . . . . . . . . . . . 7-5 Structure Of The Files . . . . . . . . . . . . . . . . . . . . . . . . . . . . . . . . . . . . . . . . . . . . . . . . . . . . . . . 7-6 MCL Commands . . . . . . . . . . . . . . . . . . . . . . . . . . . . . . . . . . . . . . . . . . . . . . . . . . . . . . . . . . . . . . 7-7 Backlight (BL) . . . . . . . . . . . . . . . . . . . . . . . . . . . . . . . . . . . . . . . . . . . . . . . . . . . . . . . . . . . . 7-10 Beep (BP). . . . . . . . . . . . . . . . . . . . . . . . . . . . . . . . . . . . . . . . . . . . . . . . . . . . . . . . . . . . . . . . 7-11 ComPute CRC (CP CRC) . . . . . . . . . . . . . . . . . . . . . . . . . . . . . . . . . . . . . . . . . . . . . . . . . . . 7-13 ComPute XOR (CP XOR). . . . . . . . . . . . . . . . . . . . . . . . . . . . . . . . . . . . . . . . . . . . . . . . . . . 7-15 ComPute ConVert (CP CVT) . . . . . . . . . . . . . . . . . . . . . . . . . . . . . . . . . . . . . . . . . . . . . . . . 7-16 Display Clear (DC) . . . . . . . . . . . . . . . . . . . . . . . . . . . . . . . . . . . . . . . . . . . . . . . . . . . . . . . . 7-19 Display Message (DM) . . . . . . . . . . . . . . . . . . . . . . . . . . . . . . . . . . . . . . . . . . . . . . . . . . . . . 7-20 File Delete (delete record) (FD) . . . . . . . . . . . . . . . . . . . . . . . . . . . . . . . . . . . . . . . . . . . . . . . 7-21 File Erase (delete file) (FE) . . . . . . . . . . . . . . . . . . . . . . . . . . . . . . . . . . . . . . . . . . . . . . . . . . . 7-22 File checK (FK) . . . . . . . . . . . . . . . . . . . . . . . . . . . . . . . . . . . . . . . . . . . . . . . . . . . . . . . . . . . 7-23 File Open (FO) . . . . . . . . . . . . . . . . . . . . . . . . . . . . . . . . . . . . . . . . . . . . . . . . . . . . . . . . . . . 7-24 File Print (FP) . . . . . . . . . . . . . . . . . . . . . . . . . . . . . . . . . . . . . . . . . . . . . . . . . . . . . . . . . . . . 7-26 File Read (FR) . . . . . . . . . . . . . . . . . . . . . . . . . . . . . . . . . . . . . . . . . . . . . . . . . . . . . . . . . . . . 7-28 File Seek (FS). . . . . . . . . . . . . . . . . . . . . . . . . . . . . . . . . . . . . . . . . . . . . . . . . . . . . . . . . . . . . 7-30 File Update (FU) . . . . . . . . . . . . . . . . . . . . . . . . . . . . . . . . . . . . . . . . . . . . . . . . . . . . . . . . . . 7-32 File Write (FW) . . . . . . . . . . . . . . . . . . . . . . . . . . . . . . . . . . . . . . . . . . . . . . . . . . . . . . . . . . . 7-33 File Size (FZ) . . . . . . . . . . . . . . . . . . . . . . . . . . . . . . . . . . . . . . . . . . . . . . . . . . . . . . . . . . . . . 7-34 v MCL-Designer for Phaser Series User’s Guide Input Cash (IC). . . . . . . . . . . . . . . . . . . . . . . . . . . . . . . . . . . . . . . . . . . . . . . . . . . . . . . . . . . . 7-36 Input Date (ID) . . . . . . . . . . . . . . . . . . . . . . . . . . . . . . . . . . . . . . . . . . . . . . . . . . . . . . . . . . . . 7-38 IF (IF) . . . . . . . . . . . . . . . . . . . . . . . . . . . . . . . . . . . . . . . . . . . . . . . . . . . . . . . . . . . . . . . . . . . 7-39 Input Hour (IH) . . . . . . . . . . . . . . . . . . . . . . . . . . . . . . . . . . . . . . . . . . . . . . . . . . . . . . . . . . . 7-40 Input Key (IK) . . . . . . . . . . . . . . . . . . . . . . . . . . . . . . . . . . . . . . . . . . . . . . . . . . . . . . . . . . . . 7-41 Input List (IL) . . . . . . . . . . . . . . . . . . . . . . . . . . . . . . . . . . . . . . . . . . . . . . . . . . . . . . . . . . . . . 7-43 Input eXtended (IX) . . . . . . . . . . . . . . . . . . . . . . . . . . . . . . . . . . . . . . . . . . . . . . . . . . . . . . . . 7-45 LaBel (LB) . . . . . . . . . . . . . . . . . . . . . . . . . . . . . . . . . . . . . . . . . . . . . . . . . . . . . . . . . . . . . . . 7-48 MoDem (MD) . . . . . . . . . . . . . . . . . . . . . . . . . . . . . . . . . . . . . . . . . . . . . . . . . . . . . . . . . . . . 7-49 Menu List (ML) . . . . . . . . . . . . . . . . . . . . . . . . . . . . . . . . . . . . . . . . . . . . . . . . . . . . . . . . . . . 7-50 Network Input (NI) . . . . . . . . . . . . . . . . . . . . . . . . . . . . . . . . . . . . . . . . . . . . . . . . . . . . . . . . 7-52 Network Output (NO) - P360/P460 Memory Scanner . . . . . . . . . . . . . . . . . . . . . . . . . . . . . . 7-55 Network Output (NO) - P370/P470 RF Scanner . . . . . . . . . . . . . . . . . . . . . . . . . . . . . . . . . . 7-57 MCL-Link Start (NS) . . . . . . . . . . . . . . . . . . . . . . . . . . . . . . . . . . . . . . . . . . . . . . . . . . . . . . . 7-59 Parameterize Input (PI) . . . . . . . . . . . . . . . . . . . . . . . . . . . . . . . . . . . . . . . . . . . . . . . . . . . . . . 7-60 Parameterize Time (PT) . . . . . . . . . . . . . . . . . . . . . . . . . . . . . . . . . . . . . . . . . . . . . . . . . . . . . 7-62 Parameter eXchange (PX). . . . . . . . . . . . . . . . . . . . . . . . . . . . . . . . . . . . . . . . . . . . . . . . . . . . 7-63 Parameterize Scanner (PY) . . . . . . . . . . . . . . . . . . . . . . . . . . . . . . . . . . . . . . . . . . . . . . . . . . . 7-64 Quit or eXit (QX). . . . . . . . . . . . . . . . . . . . . . . . . . . . . . . . . . . . . . . . . . . . . . . . . . . . . . . . . . 7-66 Run PrograM (RM) . . . . . . . . . . . . . . . . . . . . . . . . . . . . . . . . . . . . . . . . . . . . . . . . . . . . . . . . 7-67 Serial Input (SI). . . . . . . . . . . . . . . . . . . . . . . . . . . . . . . . . . . . . . . . . . . . . . . . . . . . . . . . . . . . 7-69 SKip (SK) . . . . . . . . . . . . . . . . . . . . . . . . . . . . . . . . . . . . . . . . . . . . . . . . . . . . . . . . . . . . . . . . 7-72 Serial Output (SO) - P360/P460 Memory Scanner . . . . . . . . . . . . . . . . . . . . . . . . . . . . . . . . . 7-73 Serial Output (SO) - P370/P470 RF Scanner . . . . . . . . . . . . . . . . . . . . . . . . . . . . . . . . . . . . . . 7-75 Skip and Return (SR) . . . . . . . . . . . . . . . . . . . . . . . . . . . . . . . . . . . . . . . . . . . . . . . . . . . . . . . 7-77 Variable Compare (VC) . . . . . . . . . . . . . . . . . . . . . . . . . . . . . . . . . . . . . . . . . . . . . . . . . . . . . 7-78 Variable Extract (VE) . . . . . . . . . . . . . . . . . . . . . . . . . . . . . . . . . . . . . . . . . . . . . . . . . . . . . . . 7-80 Variable Format (VF) . . . . . . . . . . . . . . . . . . . . . . . . . . . . . . . . . . . . . . . . . . . . . . . . . . . . . . . 7-81 Variable Justify (VJ) . . . . . . . . . . . . . . . . . . . . . . . . . . . . . . . . . . . . . . . . . . . . . . . . . . . . . . . . 7-84 Variable Length (VL) . . . . . . . . . . . . . . . . . . . . . . . . . . . . . . . . . . . . . . . . . . . . . . . . . . . . . . . 7-86 Variable Move (VM) . . . . . . . . . . . . . . . . . . . . . . . . . . . . . . . . . . . . . . . . . . . . . . . . . . . . . . . 7-87 Variable Operation - Arithmetic (VO) . . . . . . . . . . . . . . . . . . . . . . . . . . . . . . . . . . . . . . . . . . 7-88 Variable Substring (VS) . . . . . . . . . . . . . . . . . . . . . . . . . . . . . . . . . . . . . . . . . . . . . . . . . . . . . 7-90 Variable operation - Arithmetic- eXtended (VX) . . . . . . . . . . . . . . . . . . . . . . . . . . . . . . . . . . 7-92 WaiT (WT). . . . . . . . . . . . . . . . . . . . . . . . . . . . . . . . . . . . . . . . . . . . . . . . . . . . . . . . . . . . . . . 7-94 Programs and File Sizes . . . . . . . . . . . . . . . . . . . . . . . . . . . . . . . . . . . . . . . . . . . . . . . . . . . . . . . . . 7-95 MCL-Code Error Messages . . . . . . . . . . . . . . . . . . . . . . . . . . . . . . . . . . . . . . . . . . . . . . . . . . . . . . 7-96 System Setup Variables . . . . . . . . . . . . . . . . . . . . . . . . . . . . . . . . . . . . . . . . . . . . . . . . . . . . . . . . . 7-98 PY Parameter Numbers . . . . . . . . . . . . . . . . . . . . . . . . . . . . . . . . . . . . . . . . . . . . . . . . . . . . . . . . 7-103 Index Feedback vi About This Guide MCL-Designer® is user-friendly 32-bit Windows software, which allows you to create batch applications. It is a complete, ready-to-work application development system. This guide contains all the necessary information required to work with MCL-Designer ! Chapter 1, Getting Started Introduces the design of a project. Learn how to set up the system, memory, RF, scanner and communication settings. ! Chapter 2, Quick Tou Teaches the basics of designing with MCL-Designer. Learn how to make a menu and a small program, to add a process, and modify your design. ! Chapter 3, Designing a Main Menu Shows how to create a menu depending on the designed programs. ! Chapter 4, Designing Programs Working methods are explained. Learn how to work with programs, variables, fields and files. ! Chapter 5, Simulating the Designed Project Describes how to simulate the project on an integrated scanner simulator. ! Chapter 6, Downloading A Project Explains how to download the entire project to the scanner, after it has been created and tested. ! Chapter 7, MCL-Code Reference Guide Provides a reference guide for MCL-Code commands. MCL-Designer runs under Windows 95 or Windows NT with at least 16 MB RAM and 20 MB of free hard drive space. A 133 Mhz processor and 16 bit color VGA monitor are recommended. vii MCL-Designer for Phaser Series User’s Guide Notational Conventions The following conventions are used in this document: ! “Operator” and “User” refer to anyone using the MCL-Designer software. ! “PC” refers to the IBM personal computer or compatible system that you are using to develop applications. ! “Scanner” refers to various types of Symbol scanners. ! “You” refers to the administrator or person who is using this guide as a reference aid to install, configure, or operate the software. ! Keystrokes in bold type indicate non-alphanumeric keystrokes. For example: Select the F1> key on the scanner to access on-line help. ! Bold type is used to identify menu items and input or text fields on a scanner screen ! Italics are used: " for the names of parameters in function prototypes and variable names in usage and syntax descriptions " to highlight specific items in the general text " to identify chapters and sections in this and related documents ! Square brackets [ ] in a command line enclose optional command line parameters. ! The piping symbol (|) has the effect of “or” when it is used to separate inline parameters on a command line; i.e., it separates alternative values for parameters. ! Bullets ( !) indicate: " action items ! viii " lists of alternatives " lists of required steps that are not necessarily sequential Sequential lists (e.g., those that describe step-by-step procedures) appear as numbered lists. About This Guide Service Information If you have a problem with your software, contact the Symbol Support Center. Call the Support Center from a phone near the development PC so that the service person can try to talk you through your problem. If the software is found to be working properly, the Support Center may request a sample of your code for analysis at our plant. Symbol Support Center For service information, warranty information or technical assistance contact or call the Symbol Support Center in: United States Symbol Technologies, Inc. One Symbol Plaza Holtsville, New York 11742-1300 1-800-653-5350 Canada Symbol Technologies Canada, Inc. 2540 Matheson Boulevard East Mississauga, Ontario, Canada L4W 4Z2 905-629-7226 United Kingdom Symbol Technologies Symbol Place Winnersh Triangle, Berkshire RG41 5TP United Kingdom 0800 328 2424 (Inside UK) +44 208 945 7529 (Outside UK) Asia/Pacific Symbol Technologies Asia, Inc. 230 Victoria Street #04-05 Bugis Junction Office Tower Singapore 188024 337-6588 (Inside Singapore) +65-337-6588 (Outside Singapore) Australia Symbol Technologies Pty. Ltd. 432 St. Kilda Road Melbourne, Victoria 3004 1-800-672-906 (Inside Australia) +61-3-9866-6044 (Outside Australia) Austria Symbol Technologies Austria Gmb Prinz-Eugen Strasse 70 Suite 3 2.Haus, 5.Stock 1040 Vienna, Austria 1-505-5794 (Inside Austria) +43-1-505-5794 (Outside Austria) ix MCL-Designer for Phaser Series User’s Guide Denmark Symbol Technologies AS Gydevang 2, DK-3450 Allerod, Denmark 7020-1718 (Inside Denmark) +45-7020-1718 (Outside Denmark) Europe/Mid-East Distributor Operations Contact your local distributor or call +44 118 945 7360 Finland Oy Symbol Technologies Kaupintie 8 A 6 FIN-00440 Helsinki, Finland 9 5407 580 (Inside Finland) +358 9 5407 580 (Outside Finland) France Symbol Technologies France Centre d'Affaire d'Antony 3 Rue de la Renaissance 92184 Antony Cedex, France 01-40-96-52-21 (Inside France) +33-1-40-96-52-50 (Outside France) Germany Symbol Technologies Gmb Waldstrasse 68 D-63128 Dietzenbach, Germany 6074-49020 (Inside Germany) +49-6074-49020 (Outside Germany) Italy Symbol Technologies Italia S.R.L. Via Cristoforo Columbo, 49 20090 Trezzano S/N Navigilo Milano, Italy 2-484441 (Inside Italy) +39-02-484441 (Outside Italy) Latin America Sales Support 7900 Glades Road Suite 340 Boca Raton, Florida 33434 USA 1-800-347-0178 (Inside United States) +1-561-483-1275 (Outside United States) Mexico Symbol Technologies Mexico Ltd. Torre Picasso Boulevard Manuel Avila Camacho No 88 Lomas de Chapultepec CP 11000 Mexico City, DF, Mexico 5-520-1835 (Inside Mexico) +52-5-520-1835 (Outside Mexico) Netherlands Symbol Technologies Kerkplein 2, 7051 CX Postbus 24 7050 AA Varsseveld, Netherlands 315-271700 (Inside Netherlands) +31-315-271700 (Outside Netherlands) Norway Symbol Technologies Trollasveien 36 Postboks 72 1414 Trollasen, Norway 66810600 (Inside Norway) +47-66810600 (Outside Norway) x About This Guide South Africa Symbol Technologies Africa Inc. Block B2 Rutherford Estate 1 Scott Street Waverly 2090 Johannesburg Republic of South Africa 11-4405668 (Inside South Africa) +27-11-4405668 (Outside South Africa) Spain Symbol Technologies S.A. Edificioi la Piovera Azul C. Peonias, No. 2 - Sexta Planta 28042 Madrid, Spain 9-1-320-39-09 (Inside Spain) +34-9-1-320-39-09 (Outside Spain) Sweden Symbol Technologies AB Albygatan 109D Solna Sweden 84452900 (Inside Sweden) +46 84452900 (Outside Sweden) If you purchased your Symbol product from a Symbol Business Partner, contact that Busines Partner for service. xi MCL-Designer for Phaser Series User’s Guide xii Chapter 1 Getting Started Installation MCL Designer is part of the MCL Collection of software. It can be installed separately or as part of the whole MCL Collection series. To install MCL Designer: 1. Insert the MCL-Collection CD-ROM disk into the CD-ROM drive. 2. Click the Start button on the task bar. 3. Select Run. 4. Type D:\mcl.exe. and click OK (replace D: with the CD-ROM drive letter). 5. Click Finish when the introductory screen appears. 6. Click Yes to accept the license agreement. 7. Click Next to accept the default directory or click Browse to select a different directory. Click OK, then Next. 8. Click Next to install all the MCL programs, or select MCL Designer and de-select all the other options. 9. Click Next to accept the MCL program folder. 10. Setup installs the selected programs onto the hard drive. A screen that monitors the progress appears. When installation is complete, click Finish. 1-1 MCL-Designer for Phaser Series User’s Guide About MCL-Designer Introduction MCL-Designer is a Windows based development tool that generates MCL-Code programs that can be downloaded to the scanner and executed by the MCL-Code runtime installed on the scanner. Operator Usage The program development can be divided into three steps: 1. designing the program 2. simulating the program on a PC 3. downloading the program to the scanner MCL-Designer Features MCL-Designer offers a number of features, which enable you to design: ! total project designs ! main menu ! eight programs with 32 screens per program ! eight local data files (for capture and look up functions) ! 103 variables for temporary data storage ! full data input (keyboard, bar code) control ! generated MCL-Code source file ! full paper report on the project ! full graphic simulator. 1-2 Getting Started Starting MCL Designer To start the MCL Designer program, double-click on the MCL Designer icon on the Windows desktop or: 1. Click on the Start button on the Task bar. 2. Select Programs. 3. Select MCL. 4. Select MCL Designer. The MCL Designer window appears. Setting up a New Project Before designing programs, you must create a project. A project can contain a maximum of eight programs. Refer to Chapter 4, Designing Programs for information on designing programs. To set up a project: 1. In the MCL Designer window, click on the Project tab. Figure 1-1. MCL Designer Window 1-3 MCL-Designer for Phaser Series User’s Guide Note: If you want to keep notes about the project, click the Notes button. Table 1-1. Button Bar Description Button Name Description New Starts a new project. Open Opens an existing project. Save Saves the current project. Trash Deletes a project. Simulate Starts project simulation. Verification Verifies a project. This process check maintains a coherence between programs, files and the setup. Clicking this button gives you an error report on screen and files. Print Enters print definitions. Refer to Chapter 4, Designing Programs. Send Sends the project to the scanner. Refer to Chapter 6, Downloading A Project. Check Accepts entered information or steps. Help Opens the On-Line Help file. Cancel Terminates the current operation or closes a dialog box or window. 2. Choose New from the File menu or click . 3. In the Project Name field, Enter a project name. 4. Click 1-4 to accept the project name. Getting Started Scanner Setup To set up the scanner information, click on dialog box appears. in the Project tab. The Phaser Setup Figure 1-2. Phaser Setup - P360/P460 Memory Scanner The Phaser Setup dialog box allows you to configure: ! the Phaser model ! the version of firmware in the Phaser ! system settings ! the mapping of the data file memory ! the scanner ! the RS232 settings. 1-5 MCL-Designer for Phaser Series User’s Guide The Phaser Setup dialog box contains fields to change the settings of the scanner. Model Sets the Phaser model for which you are designing the project. Click on the list box to select the available model. Firmware Sets the firmware version number. Click on the list box to select the version number. System Sets the system settings. Click on the System button to open the Phaser System Setup dialog box. Memory (P360/P460 Memory Scanner) Sets the amount of memory the scanner is configured with. Click on the Memory button to open the Memory Mapping dialog box. Scanner Sets the default decode parameters. Click on the Scanner button to open the Scanner Setup dialog box. RS23 Sets the RS232 settings. Click on the RS232 button to open the Phaser RS232 Setup dialog box. to accept the default setting ! Click or ! Enter the appropriate information to change the values and click changes. ! Click to close the dialog box without saving the changes. 1-6 to apply the Getting Started System Setup To set up the scanner’s system click on the System button. The Phaser System Setup dialog box allows you to set up the configuration of the system (Figure 1-3). Figure 1-3. Phaser System Setup Dialog Box Phaser System Setup dialog box contains fields to change the settings of the system. Date Format Sets the format for the date that is used in the scanner Click on the list box to display the available options. Time Format Sets the format for the time that is used in the scanner. Click on the list box to display the available options. Decimal Sets the decimal number format to either a comma or a period. Click the appropriate radio button to change the setting. Beeper Volume Sets the beeper volume to high, medium or low, or to a keyboard click sound when data is entered. Click on the appropriate radio button to change the setting. Power Save Time Sets the amount of time that the scanner is not in use before the scanner enters the sleep-mode. Use the arrow buttons to select the time in seconds. 1-7 MCL-Designer for Phaser Series User’s Guide to accept the default setting ! Click or ! Enter the appropriate information to change the values and click changes. ! Click to close the dialog box without saving the changes. to apply the Memory Mapping To set up the data file memory allocation, click on the Memory button on the Phaser Setup dialog box (Figure 1-2). The Memory Mapping dialog box appears. Figure 1-4. Memory Mapping Dialog Box 1-8 Getting Started Memory Size Sets the amount of memory the scanner is configured with. Click the appropriate radio button to change the setting. Data File Memory Allocation Size KB (A - H) Sets the amount of memory to be allocated to each data file. Available Memory Displays the total memory available. Allocated Memory Displays the total amount of memory allocated to the data files. to accept the default setting ! Click or ! Enter the appropriate information to change the values and click changes. ! Click to close the dialog box without saving the changes. to apply the Note: As a general rule, allocate as much room as possible for each data capture file. If a project has look-up files and a capture file, first allocate the necessary amount of memory to the look-up file, and then allocate all remaining memory available to the capture file. Also, if there are multiple capture files, divide all of the available memory among the capture files in proportion to their expected relative sizes. Thus, if one file (e.g., transfer items) is expected to contain only 10% as much data as another file (e.g., received items), allocate 10 times more memory to the larger file than to the smaller file. These steps will help to maximize the life of the flash memory by minimizing the number of write operations to any given memory block. 1-9 MCL-Designer for Phaser Series User’s Guide Scanner Setup To configure the default decode parameters, click on the Scanner button in the Setup dialog box. The Scanner Setup dialog box allows you to specify the bar code types and certain parameters for the scanner. Figure 1-5. Scanner Setup Window - General Tab 1-10 Enable Symbology Decoder Sets the specific type of Symbology Decoder. Click the appropriate check box to enable the selected decode type. Laser On Timeout Sets the Laser On Timeout period (1-10 seconds). Getting Started ! Linear Security Level Sets the Linear Security Level, which determines ho many times a code must be successfully read before being decoded. Bi-directional Redundancy Enables or disables Bi-directional Redundancy. This parameter is only valid when a Linear Security Level has been enabled. When this parameter is enabled, a bar code must be successfully scanned in both directions (forward and reverse) before being decoded. Beep on Good Decode Enables or disables an audible beep when a good decode is achieved. Add Code ID Allows adding a Code ID (Symbol or AIM), or no Code ID (None). Click to accept the default setting or ! Enter the appropriate information to change the values and click changes. ! Click to close the dialog box without saving the changes. to apply the 1-11 MCL-Designer for Phaser Series User’s Guide UPC/EAN Tab To set up the UPC/EAN options, click on the UPC/EAN tab in the Scanner Setup dialog box. Figure 1-6. Scanner Setup Window - UPC/EAN Tab UPC Setting 1-12 Transmit Check Digit Sets which UPC bar codes are transmitted with or without check digits. Click the appropriate check box to enable check digits with UPC-A, UPC-E and/or UPC-E1. System Character Preamble Sets which UPC bar codes are decoded with or without system character preamble. Click the appropriate check box to enable system character preamble for UPC-A, UPC-E and/or UPC-E1. Country Code Preamble Sets which UPC bar codes are decoded with or without country code preamble. Click the appropriate check box to enable country code preamble for UPC-A, UPC-E and/ or UPC-E1. Getting Started Convert to UPC-A Converts UPC-E and/or UPC-E1 to UPC-A format. Click the appropriate check box to convert to UPC-A format. EAN/UPC Setting EAN-8 Zero Extend Sets EAN-8 Zero Extend option. If this parameter is enabled, five leading zeros are added to decoded EAN-8 symbols to make them compatible in format to EAN-13 symbols. Click on the check box to enable EAN-8 Zer Extend EAN-8 to EAN-13 Enables EAN-8 to EAN-13 option. Click on the check box to enable EAN-8 to EAN-13 option. Type Enable Bookland EAN ! Enables Bookland EAN option. Click on the check box to enable Bookland EAN. UPC Security Sets the UPC security level (0-3). Supplementals Sets whether the UPC/EAN bar codes are decoded with or without supplemental characters If Ignore Supp. is selected, the UPC/EAN is decoded and the supplemental characters ignored. If Decode Supp. only is selected, UPC/ EAN symbols without supplemental characters are not decoded. An autodiscriminate (Auto-d) option is also available. If this option is selected, choose an appropriate Redundancy value. A value of 5 or more is recommended. Redundancy Sets Redundancy value (2-20). This option adjusts the number of times a symbol without supplementals is decoded before transmission. Click to accept the default setting or ! Enter the appropriate information to change the values and click changes. ! Click to close the dialog box without saving the changes. to apply the 1-13 MCL-Designer for Phaser Series User’s Guide Code 39 Tab To set up the Code 39 options, click on the Code 39 tab in the Scanner Setup dialog box. Figure 1-7. Scanner Setup Window - Code 39 Tab 1-14 Code 39 Settings Sets the format for Code 39 bar codes. Click the appropriate check box to change the setting. Check Digit Sets the Check Digit options for Code 39 bar codes. When enabled, the Verify Code 39 Check Digit parameter checks the integrity of a Code 39 symbol to ensure it complies with specified algorithms. When selected, the Transmit Check Digit selection allows you to transmit the check digit with the data. Click the appropriate check box to change the setting. Trioptic Sets the Trioptic options for Code 39 bar codes. Trioptic Code 39 symbols always contain six characters. Click the appropriate check box to change the setting. Getting Started Note: Trioptic Code 39 and Code 39 Full ASCII cannot be enable simultaneously. If you get an error beep when enabling Trioptic Code 39, disable Code 39 Full ASCII and try again. ! Click to accept the default setting or ! Enter the appropriate information to change the values and click changes. ! Click to close the dialog box without saving the changes. to apply the Others Tab To set up the options of Other types of bar codes, click on the Others tab in the Scanner Setup dialog box. Figure 1-8. Scanner Setup Window - Others Tab 1-15 MCL-Designer for Phaser Series User’s Guide ! Code 128 Setting Sets the options for Code 128 bar codes. Click the appropriate check box to change the settings. CODABAR Settings Sets the options for Codabar bar codes. When CLSI is enabled, it strips the start and stop characters and insert a space after the first, fifth, and tenth characters of a 14character Codabar symbol. When Notis is enabled, it strips the start and stop characters from decoded Codabar symbol. Click the appropriate check box to change the settings. Code 11 Settings Sets the options for Code 11 bar codes. Click the appropriate check box to change the settings. Interleaved 2 of settings Sets the options for Interleaved 2 of 5 bar codes. Click the appropriate check box to change the settings. MSI Settings Sets the options for MSI bar codes. Click the appropriate check box to change the settings. Click to accept the default setting or ! Enter the appropriate information to change the values and click changes. ! Click to close the dialog box without saving the changes. 1-16 to apply the Getting Started Phaser RS232 Setup To set up the RS232 communication settings, click on the RS232 button in the Phaser Setup dialog box (Figure 1-2). The Phaser RS232 Setup dialog box will appear. Figure 1-9. Phaser RS232 Setup Window Speed Sets the speed (baud rate) of the RS-232 port. Baud rate is the number of bits of data transmitted per second. The scanner's baud rate setting should match the data rate setting of the host device. If not, data may not reach the host device or may reach it in distorted form. Click on the list box to select the RS-232 port speed. Parity Sets the type of parity (none, odd, even, mark or space). Click on the list box to display the parity options. None If no parity is required, select NONE. Even If you select EVEN parity, the parity bit has a value 0 or 1, based on data, to ensure than an even number of 1 bits are contained in the coded character. Odd If you select ODD parity, the parity bit has a value 0 or 1, based on data, to ensure than an odd number of 1 bits are contained in the coded character. Mark If you select MARK parity, the parity bit is always 1. Space If you select SPACE parity, the parity bit is always 0. 1-17 MCL-Designer for Phaser Series User’s Guide Data Bits Sets the number of data bits for the RS-232 port. Click the appropriate radio button to change the setting. Stop Bits Sets the number of stop bits for the RS-232 port. The stop bit(s) at the end of each transmitted character marks the end of transmission of one character and prepares the receiving device for the next character in the serial data stream. Click the appropriate radio button to change the setting. Software H. Selects the Software Handshaking type to be asserted. Click on the list box to select the software handshaking desired. None When this option is selected, data is transmitte immediately. XON/XOFF When this option is selected, an XOFF character turns the scanner transmission off until the scanner receives an XON character. If XOFF is received before the scanner has data to send, the scanner waits up to 2 seconds for an XON character before transmission. If the XON character is not received within this time, the scanner issues an error indication and discards the data. If XOFF is received during a transmission, data transmission stops after sending the current byte. When the scanner receives an XON character, it sends the rest of the data message. The scanner waits indefinitely for the XON character ACK/NAK When this option is selected, after transmitting data, the scanner expects either an ACK or NAK response from the host. Whenever a NAK is received, the scanner transmits the same data again and waits for either an ACK or NAK. After three unsuccessful attempts to send data whe NAKs are received, the scanner issues an error indication and discards the data. The scanner waits up to the programmable Host Serial Response Timeout to receive an ACK or NAK. If the scanner does not get a response in this time, it issues an error indication and discards the data. There are no retries when a timeout occurs. 1-18 Getting Started ENQ Only When this option is selected, the scanner waits for a ENQ character from the host before transmitting data. If an ENQ is not received within 2 seconds, the scanner issues an error indication and discards the data. The host must transmit an ENQ character at least every 2 seconds to prevent transmission errors. ACK/NAK with ENQ Combines the ACK/NAK and ENQ options. Hardware H. Selects the Hardware Handshaking type to be asserted. Click on the list box to select the hardware handshaking desired. None Select None if no hardware handshaking is desired. Standard Selects standard RTS/CTS hardware handshaking. Option 1 When RTS/CTS Option 1 is selected, the scanner asserts RTS before transmitting and ignores the state of CTS. The scanner deasserts RTS when the transmission is complete. Option 2 When RTS/CTS Option 2 is selected, RTS is always high or low. However, the scanner waits for CTS to be asserted before transmitting data. If CTS is not asserted within 2 seconds (default), the scanner issues an error indicatio and discards the data. Option 3 When RTS/CTS Option 3 is selected, the scanner asserts RTS prior to any data transmission, regardless of the state of CTS. However, the scanner waits for CTS to be asserted before transmitting data. If CTS is not asserted within 2 seconds (default), the scanner issues an erro indication and discards the data. The scanner deassert RTS when transmission is complete. Host RS-232 Selects the Host type of the RS-232 port. Click on the list box to select the Host type. Beep on Bell Enables or disables the Beep on Bell option. When enabled, the scanner issues a beep when a bell character is detected on the RS-232 line. Click on the check box to select or deselect the option. 1-19 MCL-Designer for Phaser Series User’s Guide Parity Check Enables or disables the Parity Check option. Click the appropriate radio button to enable or disable parity check. RTS State Sets the idle state of the Serial Host RTS line to low or high. Click the appropriate radio button to change the setting. Intercharacter Delay Sets the Intercharacter Delay (in 100 msec intervals). The intercharacter delay gives the host system time to service its receiver and perform other tasks between characters. Click the arrow box to select the desired delay. Response Timeout Sets the Response Timeout (in 100 msec intervals). This parameter specifies how long the scanner waits for an ACK, NAK or CTS before determining that a transmission error has occurred.Click the arrow box t select the desired timeout. to accept the default setting ! Click or ! Enter the appropriate information to change the values and click changes. ! Click to close the dialog box without saving the changes. 1-20 to apply the Getting Started MCL-Designer Setup To set up the MCL-Designer program, choose Designer Setup from the Tool menu. The MCL Designer Setup dialog box (Figure 1-10) appears: Figure 1-10. MCL Designer Setup Window Project Library Select the project library directory. Simulator Station ID Sets the scanner ID in simulation mode. Use the up and down arrow to set the station ID number. Data files Directory Select the directory to store the data files during simulation. Type the directory path in the text box. Assign Aux Port to This field allows you to assign the terminal’s auxiliary port to a PC communication port (COM1 - COM4). Simulation Startup Options Sets the simulation options at start-up. Click the appropriate check box to: • • Delete capture files when starting the simulator. Start the simulation in step by step mode. to accept the default setting ! Click or ! Enter the appropriate information to change the values and click changes. ! Click to close the dialog box without saving the changes. to apply the 1-21 MCL-Designer for Phaser Series User’s Guide 1-22 Chapter 2 Quick Tour Quick Tour takes you through the steps required to design a simple project using the MCL Designer program. The steps include: ! setting up the project ! creating a menu ! creating a small program ! saving the project ! simulating the project ! editing the project design. Project Setup Before designing a new project, you must first set up the project: To set up a project: 1. Click on the Project tab in the MCL Designer window. 2. Click to create a new project. 3. In the Project text box, enter: QTOUR. 4. Click to accept the project name. 2-1 MCL-Designer for Phaser Series User’s Guide Figure 2-1. MCL Designer Window - ProjectTab 5. Click to add information about the project. The Notes window appears: Figure 2-2. Notes Window 6. In the Author text box, type: My Name. 7. In the Notes text box, type: Quick Tou . 8. Click 2-2 to accept the information. Quick Tour 9. In the MCL Designer window, click scanner. to specify the settings for the 10. Click on the Phaser Model list box to select the scanner type. Select P360/P460 Memory Scanner. 11. Select the firmware version. Select MCL Ver 2.xx. Figure 2-3. Phaser Setup Scree 12. Click to accept the information. 2-3 MCL-Designer for Phaser Series User’s Guide Menu Setup To create a short menu for your designed project: 1. In the MCL Designer window, click on the Main tab. The Main Tab window appears. Figure 2-4. MCL Designer Window - MainTab 2. Click on the Main Program button. The Program Designer QTOUR/MAIN screen appears. Figure 2-5. Program Designer Window - QTOUR / MAIN 2-4 Quick Tour 3. Click to display the Display Text dialog box. 4. In the Display Text box, type: QTOUR MAIN MENU. 5. Choose the Normal radio button to display black text on a white background. 6. Click on the desired check boxes for beep options. Figure 2-6. DisplayText Dialog Box 7. Click to accept the information. 8. A cursor with pages attached appears on the screen. Position the cursor on the first line in screen 1. 9. Click the left mouse button to place the text box on the screen. 10. To edit text in the Main User Menu screen, double-click on the text. The Display Text dialog box appears with the selected text. The text can then be edited. 2-5 MCL-Designer for Phaser Series User’s Guide Display Variable 1. Click to display the Display Variable dialog box. Figure 2-7. Display Variable Dialog Box (Date) 2. Click on the Display Variable list box and select System Date. 3. Click on the desired check boxes for beep options. 4. Click to accept the information. 5. A cursor,with pages attached, appears on the Menu Screen. Position the cursor over the second line in screen 1, to the extreme left. 6. Click the left mouse button to place the text box on the screen. 7. Click to display the Display Variable dialog box again. 8. Click on the Display Variable list box and select Time HH:MM. 9. Select the desired format, length on screen and beep options. 2-6 Quick Tour Figure 2-8. Display Variable Dialog Box (Time) 10. Click to accept the information. 11. A cursor, with pages attached, appears on the Menu Screen. Position the cursor to the right of the date. 12. Click the left mouse button to place the text box on the screen. Display Text 1. Click to switch to Screen 2. 2. Click to display the Display Text dialog box. 2-7 MCL-Designer for Phaser Series User’s Guide 3. In the Display Text box, type: F1. SCAN DATA. Figure 2-9. DisplayText Window 4. Click to accept the information. 5. A cursor,with pages attached, appears on the Menu Screen. Position the cursor over the first line in screen 2 6. Click the left mouse button to place the text box on the screen.Figure 2-10 illustrates screen 1 of the Menu Screen at this time. Figure 2-10. Menu Screen 2-8 Quick Tour Menu Options 1. Click to set the scanner menu keys. The Menu List dialog box (Figure 2-11) appears. Figure 2-11. Menu List Window 2. In the Menu Options area, type SCAN DATA. 3. In the Shortcut area, click on the list box and select F1. 4. In the Goto Program area, click on the list box and select S02 - SCREEN 2. Thi enables the SCAN DATA program to run when the F1 key is pressed. 5. Click to accept the information. 6. The Menu design is complete and a program can now be designed. 2-9 MCL-Designer for Phaser Series User’s Guide Designing a Program This section provides the steps required to create a small program. This program allows the operator to enter a barcode and input keyboard data. 1. In the MCL Designer window, click the Main tab. Figure 2-12. MCL Designer - MainTa 2. Click on the Main Program button for the first Program (1). The Program Designer window (Figure 2-13) appears. 2-10 Quick Tour Figure 2-13. Program Designer Window Display Text - Screen 1 1. In the Program Designer window, click (Figure 2-14). to display the Display Text dialog box 2. In the Display Text box, type: SCAN BARCODE. Figure 2-14. Display Text Dialog Box 2-11 MCL-Designer for Phaser Series User’s Guide 3. Click to accept the information. 4. A cursor,with pages attached, appears on the Menu Screen. Position the cursor over the first line. 5. Click the left mouse button to place the text box on the screen. Display Text - Screen 2 1. Click to switch to Screen 2. 2. Click to display the Display Text dialog box. 3. In the Display Text box, type: Code:. Figure 2-15. Display Text Dialog Box 4. Click to accept the information. 5. A cursor,with pages attached, appears on the Menu Screen. Position the cursor over the left side of the first line in Screen 2. 6. Click the left mouse button to place the text box on the screen. 2-12 Quick Tour Barcode Input 1. Click to open the Barcode Input dialog box. Figure 2-16. Barcode Input Dialog Box - Input Tab 2. In the Input tab, click on to open the Variables dialog box. Figure 2-17. Variables Dialog Box 3. Click on the A0 cell and in the Variable Name column, type: CODE. 2-13 MCL-Designer for Phaser Series User’s Guide 4. Click to accept the information. 5. In the Select Entry Type(s)area, click on the UPC -A, UPC-E0, UPC-E1, EAN 13, EAN 8, PDF 417 and Keyboard check boxes. 6. In the Input Length area, select 1 for Minimum and 13 for Maximum 7. In the Option area, click on the Numeric only check box. 8. In the Validation area, click on the Auto Enter radio button to allow barcode input without clicking the Enter key. Hot Keys 1. In the Barcode Input dialog box, choose the Hot Keys tab. Figure 2-18. Barcode Input Dialog Box - Hot KeysTab 2. In the Other Keys area, click on the Clear list box and select Exit. 3. Click to accept the information. 4. A cursor,with pages attached, appears on the screen. Position the cursor to the right of the word CODE in the first line in Screen 2. 5. Click the left mouse button to place the text box on the screen. 2-14 Quick Tour Display Text - Screen 3 1. Click to switch to Screen 3 2. Click to display the Display Text dialog box. Figure 2-19. Display Text Dialog Box 3. In the Display Text box, type: Qty:. 4. Click to accept the information. 5. A cursor,with pages attached, appears on the screen. Position the cursor over the left side of the first line in Screen 3. 6. Click the left mouse button to place the text box on the screen. 2-15 MCL-Designer for Phaser Series User’s Guide Keyboard Input 1. Click to open the Keyboard Input dialog box. Figure 2-20. Keyboard Input Dialog Box -Input Tab 2. In the Input tab, click to open the Variables dialog box. Figure 2-21. Variables Window 3. Click on the A1 cell and in the Variable Name column, type: QTY. 4. Click to accept the information. 5. In the Input Type area, click on the Numeric radio button. 6. In the Default Value area, type: 1. 2-16 Quick Tour 7. In the Input Length area, select 1 for Minimum and 5 for Maximum. 8. In the Field Validation area, click on the Enter Key radio button to allow the next input only after pressing the Enter key 9. Click to accept the information. 10. A cursor,with pages attached, appears on the screen. Position the cursor to the right of the word QTY: in the first line in Screen 3. 11. Click the left mouse button to place the text box on the screen. Adding a Process 1. Click (Process Out) to add a process. The Process Designer dialog box appears. Figure 2-22. Process Designer Dialog Box 2. Click to insert a goto line. The Goto dialog box appears. Figure 2-23. Goto Dialog Box 3. In the Go To list box, select Current Screen. 4. Click to accept the information. 5. The Goto Process appears in the first line on the Process Out dialog box. 6. Click to accept the information. 2-17 MCL-Designer for Phaser Series User’s Guide Screen Description 1. To insert a description of the screen, cli dialog box. tockdisplay the Screen Description Figure 2-24. Screen Description Dialog Box. 2. In the Screen Name text box, type: SCAN BARCODE. 3. Click to accept the information. Figure 2-25 shows Screen 1 of the program that was just designed. Figure 2-25. Program Designer Window - Screen 1 2-18 Quick Tour Figure 2-26 shows Screen 2 of the program that was just designed. Figure 2-26. Program Designer Window - Screen 2 Figure 2-27 shows Screen 3 of the program that was just designed. Figure 2-27. Program Designer Window - Screen 3 2-19 MCL-Designer for Phaser Series User’s Guide Saving Your Design After creating the program design, it must be saved. Tosave your design, choose Save, or Save . As from the File menu, or click Simulating andTestingYour Design After the program is designed and saved, it can be tested using the simulator. To test the program: 1. In the MCL Designer window or the Program Designer window, click to display the Simulator window. This window displays the first Menu screen that was designe with Quick Tour. Figure 2-28. Simulator Window 2-20 Quick Tour 2. In the Simulator window, click the FUNC and the 1 keys with the left mouse button, or press the F1 key on the computer to start the program simulation. Figure 2-29. Simulator Window - Code Screen 3. Using the computer keyboard, enter the code and press ENTER. The next simulator window appears (Figure 2-30). 2-21 MCL-Designer for Phaser Series User’s Guide Figure 2-30. Simulator Window - Quantity Screen 4. Using the computer keyboard, enter the quantity and press ENTER. Now that the simulation of the program was successful, it can be downloaded to thescanner. Refer to Chapter 6, Downloading A Project for procedures on how to download a program to a scanner. 2-22 Quick Tour Editing Your Design Here are some additional items to work with to edit your design. ! If you want to open a project, choose Open from the File menu or ! If you want to delete an entire project, click ! To delete or modify the menu: ! ! . and confirm. " To delete a field, click on the field and press the delete key on the keyboard. " To modify a field, double-click on the field and type its value. To delete, rename, copy or import a program, click on the Program Tab. Then click with your left mouse button on a specific program name. A menu pops up with the options to: " Edit, which has the same function as . " Remove, to place the program temporarily away. " Copy, to copy the program to another place. " Rename, to give the program another name. " Import, to insert a saved program into a selected program slot. To modify a designed screen: " To delete a field, click on the field and press the delete key on the keyboard. " To modify a field, double-click on the field and type its value. These are only a few basics to modify your design. If you need to know more about editing and modifying, refer to Chapter 4, Designing Programs. 2-23 MCL-Designer for Phaser Series User’s Guide 2-24 Chapter 3 Designing a Main Menu How to Create a Main Menu A menu is like a table of contents for programs designed within your project. The operator can select a program to work with from this menu screen. Designing a menu consists of placing text and variables on the screen and setting up scanner keys to activate stored programs. Adding Text to the Menu To place text on the menu screen: 1. In the MCL Designer window, click on the Main tab. The Main tab window appears. 3-1 MCL-Designer for Phaser Series User’s Guide Figure 3-1. MCL Designer - Main Tab 2. Click on the Main Program button. The Program Designer SAMPLE / MAIN screen appears. Figure 3-2. Program Designer Window - SAMPLE / MAIN 3-2 Designing a Main Menu 3. Click to add text. The Display Text dialog box appears. Figure 3-3. DisplayText Dialog Box 4. In the Display Text field, type in some text (e.g., Main Menu). 5. Click on the Normal radio button if you want black text on a white screen, or on the Reverse radio button if you want white text on a black screen. For this example click on Normal. Note: To add spaces in reverse mode, use the underscore character Example: _Main Menu_ 6. Click on the desired check boxes to select beep options 7. Click to accept the information. 8. A cursor, with pages attached, appears on the screen. Position the cursor in the extreme left side of the first row in screen 1. 9. Click the left mouse button to place the text box on the screen. 10. Repeat steps 3 through 7, to enter the text “F1. Program 1” in normal mode. 11. Position the cursor in the extreme left side of the second row in screen 1. 3-3 MCL-Designer for Phaser Series User’s Guide 12. Click the left mouse button to place the text box on the screen. Figure 3-4. PlacingText on the Screen Adding Variables to the Menu To insert variables, such as a date, a time, etc. in the menu screen: 1. Click to add a variable. The Display Variable dialog box appears. Figure 3-5. Display Variable Windo 3-4 Designing a Main Menu 2. Click on the Display Variable list box and select: System Date . 3. Click on the Normal radio button to set black text on a white background. 4. Click to accept the information. 5. A cursor, with pages attached, appears on the screen. 6. Position the cursor in the first row, next to the words MAIN MENU. 7. Click the left mouse button to place the text box on the screen. Figure 3-6. Variable Placed on the Screen 3-5 MCL-Designer for Phaser Series User’s Guide Setting Menu Options Special keys on the scanner can be specified when working with the Menu. To set these keys, click on the MCL Designer screen. The Menu List dialog box appears: Figure 3-7. Menu List Screen Column Width Sets the number of characters in the function name to be displayed on the menu screen. The maximum is 20. Default Position Sets the default position of the characters to be displayed on the menu screen (1-8). Up/Down Key Mode Sets the up/down key mode to either scrolling or rolling. Menu Options Sets the menu option names entered. Shortcut Sets the programs to start either with the Function Keys (F1,F2,...) or Numeric Keys (1,2,...). F1 or 1 starts Program 1, F2 or 2 starts Program 2, etc. Goto Program Sets the action to be performed, or program screen to be started. to accept the default setting ! Click or ! Enter the appropriate information to change the values and click changes. ! Click to close the dialog box without saving the changes. 3-6 to apply the Chapter 4 Designing Programs Each project can contain up to eight programs. Programs are designed using the Program Designer window. In each program you create a set of screens, variables and processes that perform specific functions on your scanner. Main Program Window The Program Designer window is the workplace for designing programs. To start the Program Designer, click on the Programs tab in the MCL Designer window. Figure 4-1. MCL Designer Window - Programs Tab 4-1 MCL-Designer for Phaser Series User’s Guide Click on next to one of the programs. The Program Designer window opens (Figure 42). Table 4-1 lists the buttons available and a description of each. Figure 4-2. Program Designer Window Table 4-1. Button Description s Button 4-2 Name Description New Creates a new program. Corresponds to the New item in the File menu. Open Opens an existing program. Corresponds to the Open item in the File menu. Save Saves a program. Corresponds to the Save item in the File menu. Cut Cuts a field (text, variable) from the screen. Corresponds to the Cut item in the Edit menu. Copy Copies a field on a screen. Corresponds to the Copy item in the Edit menu. Paste Pastes what was cut or copied onto the screen. Corresponds to the Paste item in the Edit menu. Designing Programs Table 4-1. Button Descriptions (Continued) Button Name Description Duplicate Field Duplicates a field on the screen. Corresponds to the Duplicate item in the Edit menu. Undo Undoes the last action. Corresponds to the Undo item in the Edit menu. Redo Redoes an undone action. Corresponds to the Repeat item in the Edit menu. Duplicate Screen Copies a screen of the program to the same or another program. Insert Inserts a new screen. Move Moves a screen to another location. Delete Deletes a screen. Variable List Displays a list with all the variables in the project. View Displays a general view of all the screens. Simulate Simulates the project design Accept Accepts the entered information. Help Opens the On-Line Help file. Cancel Cancels the current operation. 4-3 MCL-Designer for Phaser Series User’s Guide Table 4-1. Button Descriptions (Continued) Button Name Description Notes Click this button to type notes about the screens. Refer to Screen Description on page 4-5. Display Text Click this button to enter text. Display Variable Click this button to enter a variable like date, time,... Input Keyboard Click this button to enter a keyboard variable. Input Barcode Click this button to enter a barcode variable. Choice Menu Click this button to edit menu list options. Choice Input Click this button to edit input list options. Process In Click this button to add a process before the current screen. Process Out Click this button to add a process after the current screen. First Scree Displays the first screen of the program. Previous Screen Displays the previous screen. 4-4 Next Screen Displays the next screen. Last Screen Displays the last screen of the program. Designing Programs Screen Description Each screen can have a descriptive name associated with it. To assign a name to a screen, click to display the Screen Description dialog box (Figure 4-3). Figure 4-3. Screen Description Dialog Box The Screen Description dialog box displays and sets the screen description. These settings are contained in two text boxes and two check boxes. Screen Name Enter a description of the current screen. This name appears above the main screen in the Program Designer window. Start With Clear Screen Determines if the previous screen remains or if the screen becomes blank. If Clear Screen check box is selected, the screen becomes blank. If the Clear Screen check box is de-selected, the previou screen will remain. This allows an overlap between screens. Start With Beep If selected, enables the scanner to emit a beep when entering the screen. Notes Allows the user to write comments about the program being designed. ! Click or to accept the default setting ! Enter the appropriate information to change the values and click changes. to apply the 4-5 MCL-Designer for Phaser Series User’s Guide ! Click to close the dialog box without saving the changes. Display Text To insert text onto the screen use the Display Text dialog box. Click Text dialog box (Figure 4-4). to open the Display Figure 4-4. DisplayText Dialog Box Display Text Enter the text that appears on the screen. Normal/Reverse Sets the text and background colors. Click on the Normal radio button to display the text in black on a white background or click on the Reverse radio button to display the text in white on a black background. 4-6 Display First Sets this text to display first on the screen when the screen appears. After Display Sets a beep to sound on the scanner after the text displays. Click on the list box to select a short, medium, or long beep (or combination of beeps), and the number of beeps. Click to test the beep options. Click the Pause check box to insert a pause after the text displays, and select the number of seconds of the pause. Click the Enter to Continue check box to make the operator press the Enter key before continuing. Designing Programs ! Enter the appropriate information to change the values and click to accept the information. A cursor with pages attached appears on the screen. Position the curso to the desired location on the screen and click the left mouse button to place the text on the screen. ! Click to close the dialog box without saving the changes. Display Variable The Display Variable dialog box enables you to insert a variable on the screen. This variable can be a date format, a time format, scanner ID, or a variable that has already been created. Click to insert a variable. The Display Variable dialog box appears. Figure 4-5. Display Variable Dialog Box Display Variable Sets the type of variable. Normal/Reverse Sets the text and background colors. Click on the Normal radio button to display the variable in black on a white background or click on the Reverse radio button to display the variable in white on a black background. Display First Sets this variable to display first on the scanner screen when this screen appears. 4-7 MCL-Designer for Phaser Series User’s Guide Format Sets this variable to display in its true size or in truncated format. Length on Scree Sets the number of characters in the variable name to be displayed on the Program screen. The maximum is 40. After Display Sets a beep to sound on the scanner after the text displays. Click on the appropriate radio button to select a short, medium, or long beep (or combination of beeps), and the number of beeps. Click to test the beep options. Click the Pause check box to insert a pause after the text displays and select the number of seconds of the pause. Click the Enter to Continue check box to make the operator press the Enter key before continuing. ! Enter the appropriate information to change the values and click to accept the information. A cursor with pages attached appears on the screen. Position the curso to the desired location on the screen and click the left mouse button to place the text on the screen. ! Click to close the dialog box without saving the changes. Keyboard Input The Keyboard Input dialog box enables you to insert a keyboard variable (enter the data into a variable using the keyboard). Click to open the Keyboard Input dialog box. The Keyboard Input dialog box contains: ! Input tab ! Advanced tab ! Hot Keys tab. 4-8 Designing Programs InputTab The Input tab (Figure 4-6) enables you to insert a keyboard variable (enter the data variable using the keyboard). Figure 4-6. Keyboard Input - Input Tab Input Variable Name Enter or select a variable where the input data will be stored. Click on to open the Variable dialog box to create a new variable or select an existing variable. Refer to Working with Variables on page 4-92 for information on variables. Input Type Sets the keyboard input variable type. Click on the appropriate radio button to set the variable type. The Secret radio button indicates a secret code, like a password. Default value Sets a default value that always appears in the variable field. This is a variable that is used regularly. 4-9 MCL-Designer for Phaser Series User’s Guide Input Lengt Sets the length of the keyboard input. The length can be either an interval or a fixed lengt (minimum=maximum). Use the up and down arrows to select the lengths. Field Validation Assigns an action to take place after data input ha occurred. Click on the appropriate radio button to select the action. End of field When the number of characters entered equals the maximum length, the program goes to the next step. Enter Key When the operator presses the Enter key, the program goes to the next step. Next Scan Each barcode input is scanned without having to press the Enter key. ! Click or ! Enter the appropriate information to change the values and click changes. ! Click to close the dialog box without saving the changes. 4-10 to accept the default setting to apply the Designing Programs Advanced Tab The Advanced tab contains fields that set extra options for the data input. Figure 4-7. Keyboard Input - Advanced Tab Format Field Fills the input field with zeroes or blanks on the left or right side. This is used when the input data is smaller than the required input. Check Range This option makes it possible to make a selection in the data input. If the input corresponds with the range, it will be read. Otherwise, the input will be ignored. Check File This part of the window makes it possible to select that the entered data is or is not in the local data (capture or look up) file. The first field of the file must be the data to check. ! Click or to accept the default setting ! Enter the appropriate information to change the values and click changes. ! Click to close the dialog box without saving the changes. to apply the 4-11 MCL-Designer for Phaser Series User’s Guide Hot Keys Tab The Hot Keys tab configures some of the keys on the scanner keyboard. Figure 4-8. Keyboard Input - Hot KeysTab Time Out Sets a time interval when the scanner will go to another screen or exit if there is no action. Other Keys Assigns another function to several keys on the scanner keyboard. These keys include Clear, Up, Down, F+Up, F+Dw and Star (*). When the key is pressed, the selected action occurs. Function Keys Assigns another function to the scanner’s function keys. When the key is pressed, the selected action occurs. ! Click or ! Enter the appropriate information to change the values and click changes. ! Click to close the dialog box without saving the changes. 4-12 to accept the default setting to apply the Designing Programs Barcode Input Dialog Box The Barcode Input dialog box enables you to insert a barcode variable (enter data from a scanner). There are four tab windows: ! Input Tab ! Advanced Tab ! Hot Keys Tab ! Branch Tab. InputTab The Input tab (Figure 4-9) enables you to insert a bar code variable (enter the data into a variable using the keyboard). Figure 4-9. Barcode Input - Input Tab 4-13 MCL-Designer for Phaser Series User’s Guide Input Variable Name Selects the variable that the input barcode data gets stored into. Click o to open the Variable dialog box to create a new variable or select an existing variable. Refer to Working with Variables on page 4-92 for information on variables. Select Entry Type(s) Selects one or more bar code symbologies. TheKeyboar check box allows the operator the opportunity to enter bar code data on the keyboard. Input Lengt Sets the length of the bar code input. You can set an interval or a fixed length (minimum=maximum) for the input. Option Numeric Only Enter only numeric characters for the barcode variable. Validation Auto Enter Sets the program to continue after each scan without having to enter a keystroke. Enter Key Sets the program to continue after the operator presses the Enter key ! Click or ! Enter the appropriate information to change the values and click changes. ! Click to close the dialog box without saving the changes. 4-14 to accept the default setting to apply the Designing Programs Advanced Tab The Advanced tab sets extra options for the input bar code. Figure 4-10. Barcode Input - Advanced Tab Check Preamble Sets a preamble. These preamble characters are compare with the first characters of the input barcode. The data input is rejected if the preamble does not match the data introduction. If the data is not rejected, you can choose to remove these characters. Fill On Max. Length Fills the input field with zeroes or blanks on the left or right side. This is used when the input data length is smaller than the required input. Propose Default Value Selects a default input value. The default value can be a fixed value or a variable, and can be overwritten at the time of input. Check File Selects if the entered data is or is not in the local data file (capture or look up). Note: The first field of the file must be the data to check. 4-15 MCL-Designer for Phaser Series User’s Guide Store Barcode Descriptor Selects the variable that the barcode descriptor gets stored into. The barcode descriptor is an internal variable which is required to output barcode data to certain host systems (especially RS232 variants and Synapse cables). Click on to open the Variable dialog box to create a new variable or select an existing variable. ! Click or to accept the default setting ! Enter the appropriate information to change the values and click changes. ! Click to close the dialog box without saving the changes. Hot Key Tab The Hot Keys tab configures some of the keys on the scanner keyboard. Figure 4-11. Barcode Input - Hot Keys Ta 4-16 to apply the Designing Programs Time Out Sets a time interval to go to another screen or exit if there is no action. Other Keys Assigns another function to several keys on the scanner keyboard. These include Clear, Up, Down, F+Up, F+Dw and Star (*). Function Keys Assigns another function to the scanner’s function keys. ! Click or to accept the default setting ! Enter the appropriate information to change the values and click changes. ! Click to close the dialog box without saving the changes. to apply the Branch Tab The Branch tab enables the user to set up a case with the bar code type, bar code length or bar code value. Figure 4-12. Barcode Input - Branch Tab 4-17 MCL-Designer for Phaser Series User’s Guide Enable Test Enables or disables this test. IF Selects a variable or value to test. Equal Selects a variable or value to test against the value in theIF list box. Goto Selects the action to perform or the screen to go to if the test is true. Otherwise Goto Selects the action that occurs if the test is false. ! Click or to accept the default setting ! Enter the appropriate information to change the values and click changes. ! Click to close the dialog box without saving the changes. to apply the Note: The values of system variables, in addition to user-defined variables, can be specified using the ampersand ( &”) character plus the name of the system variable to be used. (These system variables are listed in MCL-Code Reference Guid .) For example, system variable 33 (“power source”) indicates whether the scanner is operating off battery power (value=0), in a cradle (value=1), or connected to a host (value=2). This variable can thus be used in a Case-and-Branch to switch automatically between different applications, depending on which of these operating modes the scanner is in. 4-18 Designing Programs Working With Fields Fields are variables, text boxes, or lines that are placed on the screen. The following paragraphs provide information on how to edit these fields. Placing Fields on a Screen To place fields (display fields or input fields) on the screen: 1. In the Program Designer window, click on one of the buttons listed in Table 4-2. Table 4-2. Field Buttons Placing Display Fields Placing Input Fields to enter text to enter keyboard input to enter a variable to enter barcode input 2. Set the appropriate settings for that field. 3. Click to accept the information. A cursor, with pages attached, appears on the screen (Figure 4-13). Figure 4-13. Place a Field on the Screen 4-19 MCL-Designer for Phaser Series User’s Guide 4. Position the cursor over a box on the screen. 5. Click the left mouse button to place the field on the screen. Editing Fields on a Screen To edit a field on the screen: 1. Position the cursor over a field. 2. Double-click on the field. The appropriate dialog box appears. 3. Change or edit the settings. 4. Click to accept the new settings. The field is updated on the screen. Moving Fields To move a field on the same screen: 1. Position the cursor over a field. 2. Drag the left mouse button. 3. Move the cursor to a new position. 4. Release the mouse button. 4-20 Designing Programs Copying Fields To copy a field to the same screen or another screen: Using Cut-and-Paste Using Duplicate Button 1. Select the field to copy 1. Select the field to copy. 2. Click (copy). 2. Click (duplicate). 3. Click (paste). 3. Move the field to the new position. 4. Place the text on the screen by dragging the mouse. 4. Click on the left mouse button. 5. Click on the left mouse button. 4-21 MCL-Designer for Phaser Series User’s Guide Working With Screens Each program in a project can contain up to 32 screens. All screens do not have to be used in a program. When the program goes to a screen, the execution process is as follows: a. execute Process In processes b. clear screen (optional) c. beep (optional) d. display screen content e. process input fields as they are encountere f. execute Process Out processes. Screen execution begins in the top left corner and continues line by line until the lower right hand corner is reached. TOP DOWN Inserting a Blank Screen To insert a blank screen choose Insert A Blank Screen from the Edit menu or clic display the Insert dialog box. Figure 4-14. Insert Dialog Box 4-22 to Designing Programs Insert Blank Screen Before Selects the screen that a blank screen will go before. Click on the list box to select the screen. Update Screen Link Maintains the previous links (goto) for the next screen. to accept the default setting ! Click or ! Enter the appropriate information to change the values and click changes. ! Click to close the dialog box without saving the changes. to apply the Copying a Screen To copy the current screen to a new screen, click . The Copy dialog box appears. Figure 4-15. Copy Dialog Box 1. Click on the Copy Screen To list box and select the screen that the current screen will be copied to. Note: When a screen is copied, it over-writes the selected screen. 2. Click one or all of the check boxes to select the parts of the screen to copy: " Copy Process In check box to copy the process before the screen " Copy Screen check box to copy the screen with the fields " Copy Process Out check box to copy the process after the screen. 3. Click to copy the screen. 4-23 MCL-Designer for Phaser Series User’s Guide Moving a Screen To move the current screen to a new screen, click . The Move dialog box appears. Figure 4-16. Move Dialog Box 1. Click on the Move Screen T list box and select the screen that the current screen will be moved to. Note: When a screen is moved, it over-writes the selected screen. 2. Click the Update Screen Links check box to maintain the previous links for the next screen. 3. Click to move the screen. Deleting a Screen To delete a screen, choose Erase a screen from the Edit menu or click box appear . Figure 4-17. Delete Dialog Box 4-24 . The Delete dialog Designing Programs 1. Click on the Delete Screen list box and select the screen that you want to delete. 2. Click the Update Screen Links check box to maintain the previous links for the next screen. 3. Click to delete the screen. Deleting All Screens To delete all screens, choose Erase all screens from the Edit menu. A Confirm dialog bo appears. Figure 4-18. Confirmation Dialog Box Note: If you erase all the screens, all data will be permanently lost. Click Yes to confirm o No to Cancel. Quick View of All Screens To display a Quick View of all screens, click . The Quick View window appears. Figure 4-19. Quick View Window Use the arrow button on the bottom of the screen to scroll between screens. 4-25 MCL-Designer for Phaser Series User’s Guide Working With Processes A process is a sequence of operations that perform before and/or after a screen. Figure 4-20 illustrates the process sequence. Figure 4-20. Process Operation The processes are executed sequentially, unless a specific goto function is defined in the process. The Process (In or Out) window (Figure 4-21) lists the process number, the process, and a description for each process. Table 4-3 lists and describes the buttons in the Proces window. Figure 4-21. Process (In or Out) Window Table 4-3. Process Window Button Descriptions Button 4-26 Name Description Insert Line Inserts a new process line. Edit Edits a process line. Delete Deletes a line in the process screen. Designing Programs Table 4-3. Process Window Button Descriptions (Continued) Button Name Description Copy Copies a process line. Paste Pastes a process line. GoTo Opens the Goto dialog box. Set a Label Opens the Label dialog box. Test Branch Opens the Test and Branch dialog box. Key Branch Opens the Key and Branch dialog box. Assign a Variable Opens the Variable Assig dialog box. Arithmetic Opens the Variable Arithmetic dialog box. Beep Opens the Bee dialog box. Warning Message Opens the Warning Message dialog box. Comment Line Opens the Comment dialog box. Variable List Opens the project’ Variables list window. OK Confirms a selection. 4-27 MCL-Designer for Phaser Series User’s Guide Table 4-3. Process Window Button Descriptions (Continued) Button Name Description Help Opens the On-Line Help file. Cancel Closes the Process Designer window Adding a Process To add or edit a process click (Process In) or click (Process Out), depending upon where to add the process. The Process (In or Out) window appears (Figure 4-21 on page 426). Process List Processes are divided into six groups with each group containing a number of commands. Table 4-4 lists the process groups and their associated commands. Table 4-4. Process Gro u p Group 4-28 Commands Variable Assig Combine Format Substring Extract Length + - x / %(Arithmetic) Branch Goto Key & Branch Test & Branch Case & Branch Control & Branch Set Label Gosub Designing Programs Table 4-4. Process Groups (Continued) Group Commands Files Write a Record Read a Recor Delete a Record Review File Erase File Seek File Check MCL-Link Communications Send Packet Receive Packet Send File Receive File Host Look-Up MCL-Link Start Remote File Check Remote File Operation Start EXE Program on Host Modem Command Serial Communications String Serial Output Scanner Serial Output Receive Data Print File Other Pause Beep Display Data Warning Message Clear Screen MCL Code Comment 4-29 MCL-Designer for Phaser Series User’s Guide To insert a process, click to edit a process line or click The Insert A Process dialog box appears. to insert a new process line. Figure 4-22. Insert Process Dialog Box Click on a Group in the Group list. The Command list then displays the commands for the selected group. Double-click on a command or click to insert the process. Variable Group Note: The resulting variable can be one of the input variables for the following examples. Assign Variable In the Insert A Process dialog box, click on Grou Variable and then on Command Assign. Click on the to open the Variable Assig dialog box. This dialog box enables you to assig a value to a variable. Figure 4-23. Variable Assign Dialog Box 4-30 Designing Programs Value Enter the value to assign to a variable. Result Variable Name Selects the variable that the value is assigned to. Click o the to open the Variable dialog box to create a new variable. Refer to Working with Variables on page 4-92 for information on variables. ! Click or to accept the default setting ! Enter the appropriate information to change the values and click changes. ! Click to close the dialog box without saving the changes. to apply the Combine In the Insert A Process dialog box, click on Group Variable and then on Command Combine. Click on the to open the Variable Combine dialog box. This dialog box enables you to combine all or part of variables into a new variable. Figure 4-24. Variable Combine Dialog Box 4-31 MCL-Designer for Phaser Series User’s Guide Data/Variable Enter a data string or select a variable from the list box. Extract Selects part of the variable. Add Key Code Enter a key code or select a key code from the list box. Result Variable Selects the variable that the value is assigned to. Click on the to open the Variable dialog box to select a variable. Refer to Working with Variables on page 4-92 for information on variables. ! Click or to accept the default setting ! Enter the appropriate information to change the values and click changes. ! Click to close the dialog box without saving the changes. to apply the To combine variables: 1. Click on the Data String list box to select a variable to combine (e.g., V_PROD). Note: This data string can also be a fixed value entered directly in the field (e.g., 134). 2. Click the Extract check box if only a portion of this variable is required. 3. If so, choose the position of the characters to extract using the From and To counter (e.g., 1 to 6). 4. Repeat steps 1 through 3 for the next variable (e.g., V_LOCAT). 5. Do not select Extract check box if all of the variable is to be used. 6. Click 4-32 to select the variable that contains the combined variables. Designing Programs Format In the Insert A Process dialog box, click on Group Variable and then on Command Format. Click on the to open the Variable Format dialog box. This dialog box enables you to format a variable with a smaller length than the required length. Figure 4-25. Variable Format Dialog Box Input Variable Selects the input variable to format. Length Selects the new length of the variable. Fill With Sets the open spaces between the required length and the variable length. Click on the appropriate radio button to set the fill type. On the Sets the side of the variable that the fill characters will go on. Click on the appropriate radio button to select the side. Result Variable Selects the variable that the value is assigned to. Click on to open the Variable dialog box to create a new variable or select an existing variable. Refer to Working with Variables on page 4-92 for information on variables. to accept the default setting ! Click or ! Enter the appropriate information to change the values and click changes. ! Click to close the dialog box without saving the changes. to apply the 4-33 MCL-Designer for Phaser Series User’s Guide To format a variable: 1. Click on the Input Variable list box and select the input variable to format (e.g., V_CODE). 2. Using the up and down arrow button, select the new length for the variable (e.g., 10). 3. Click on Zero or Blank radio button to fill the open spaces with zeros or blanks. 4. Click on Left or Right radio button to place the open spaces on the left or the right of the variable. 5. Click to select a variable name to put the new format in. Substring In the Insert A Process dialog box, click on Group Variable and then on Command Substring. Click on to open the Variable Substring dialog box. This dialog box enables you to remove a certain number of characters from a variable. Figure 4-26. Variable Substring Dialog Box 4-34 Input Variable Selects the input variable to remove characters from. Substring Selects the starting character and ending character to remove from the variable. Use the up and down arrow keys to select the character position. Result Variable Selects the variable that the value is assigned to. Click on to open the Variable dialog box to create a new variable or select an existing variable. Refer to Working with Variables on page 4-92 for information on variables. Designing Programs ! Click or to accept the default setting ! Enter the appropriate information to change the values and click changes. ! Click to close the dialog box without saving the changes. to apply the To remove characters from a variable: 1. Click on the Input Variable list box to select the variable to remove characters from (e.g., V_BARC). 2. Select From position and the To position (e.g., From position 1 to position 10 ). 3. Click to select the variable to save the string value. Extract In the Insert A Proces dialog box, click on Grou Variable and then on Command Extract. Click on to open the Variable Extract dialog box. This dialog box enables you to extract a specified part out of a variable. Figure 4-27. Variable Extract Window 4-35 MCL-Designer for Phaser Series User’s Guide Input Variable Selects the input variable to extract a field from. Extract Selects the field number and the separator of the variable. Use the up and down arrow keys to select the field number. Result Variable Selects the variable that the value is assigned to. Click on the to open the Variable dialog box to select a variable. Refer to Working with Variables on page 4-92 for information on variables. ! Click or to accept the default setting ! Enter the appropriate information to change the values and click changes. ! Click to close the dialog box without saving the changes. to apply the To extract a field from a variable: 1. Click on the Input Variable list box to select the variable to extract (e.g., V_BARC). Input variable is: 123,abc,456,def. 2. Select the field to extract (e.g., 2). 3. Select the separator between the fields (e.g., (,) Comma). 4. Click to select the variable name to put the extract in. The result variable contains abc. 4-36 Designing Programs Length In the Insert A Process dialog box, click on Group Variable and then on Comman Length. Click on to open the Variable Length dialog box. This dialog box enables you to count the length of a variable. Figure 4-28. Variable Length Dialog Box Variable to Measure Selects the variable whose characters will be counted by this process. Result Variable Selects the variable that the value is assigned to. Click on to open the Variable dialog box to create a new variable or select an existing variable. Refer to Working with Variables on page 4-92 for information on variables. ! Click or to accept the default setting ! Enter the appropriate information to change the values and click changes. ! Click to close the dialog box without saving the changes. to apply the To determine the length of a variable: 1. Click on the Variable to Measure list box to select the variable to count (e.g., V_PROD). 2. Click to select the variable to save the length value. 4-37 MCL-Designer for Phaser Series User’s Guide Arithmetic In the Insert A Process dialog box, click on Grou Variable and then click on Command Arithmetic. Click on to open the Variable Arithmetic dialog box. This dialog box enable you to perform the following operations on a variable: ! add ! subtract ! multiply ! divide ! percent. Figure 4-29. Variable Arithmetic Dialog Box 4-38 Value 1 Selects the first variable to perform the operation. +, -, X, /, % Sets the operation to perform on Value 1 variable. Value 2 Selects the second variable to perform the operation. Result Variable Selects the variable that the value is assigned to. Click on to open the Variable dialog box to create a new variable or select an existing variable. Refer to Working with Variables on page 4-92 for information on variables. Integer Sets the integer format for the resulting variable. Designing Programs Decimals Sets the decimal format for the resulting variable. Fill With Fills the input field with zeroes or blanks. This is used when the input data is smaller than the required input. Add Sign Adds the sign to the result variable. ! Click or to accept the default setting ! Enter the appropriate information to change the values and click changes. ! Click to close the dialog box without saving the changes. to apply the To perform an arithmetic operation on a variable: 1. Click on the Value 1 list box and select one of the two variables/values (e.g., V_QUAN). 2. Click on one of the operation radio buttons (+, -, X, / or %). 3. Click on the Value 2 list box and select the other variable/value (e.g., 12). 4. Click to select the variable to save the result. 5. Select the Integer and Decimal formats for the resulting variable. 4-39 MCL-Designer for Phaser Series User’s Guide Branch Group Goto In the Insert A Process dialog box, click on Group Branch and then click on Command Goto. Click on to open the Goto dialog box. This dialog box enables you to set a goto function: ! a jump to another screen ! a jump to a label (enter the label name directly) ! a jump to a specific process ! exit (or return to the main Menu). Figure 4-30. Goto Dialog Box Goto Selects a screen, label, or process to go to. ! Click or ! Enter the appropriate information to change the values and click changes. ! Click to close the dialog box without saving the changes. 4-40 to accept the default setting to apply the Designing Programs Key & Branch In the Insert A Process dialog box, click on Grou Branch and then click on Comman Key & Branch. Click on to open the Key & Branch dialog box. This dialog box enables you to assign another function to several keys. Figure 4-31. Key & Branch Dialog Box Time Out Second Assigns a time-out interval. If there is no activity after the time-out period, then the action or screen selected in the Goto list box takes effect. Goto Selects the action to perform or the screen to goto if the time-out occurs. Other Keys Assigns another function to keys on the scanner. Key/Goto Assigns another function to the Function keys on the scanner. to accept the default setting ! Click or ! Enter the appropriate information to change the values and click changes. ! Click to close the dialog box without saving the changes. to apply the 4-41 MCL-Designer for Phaser Series User’s Guide Test & Branch In the Insert A Process dialog box, click on Group Branch and then click on Comman Test & Branch. Click on to open the Test & Branch dialog box. This dialog box enables you to set up a test and, depending on the test result, branch to a specified screen Figure 4-32. Test & Branch Dialog Box If Value 1 Sets variable for test. Test Type Determines the operation to = equal to > > greater than <= < less than <> Value 2 Sets variable to test against Value 1 variable. Force Character Comparison Forces the comparison between Value 1 variable and Value 2 variable. Then Goto Sets the action to perform or the screen to go to if the test result is true. Else Goto Sets the action to perform or the screen to go to if the test result is false. be performed. greater than or equal to less than or equal to not equal to ! Click or ! Enter the appropriate information to change the values and click changes. ! Click to close the dialog box without saving the changes. 4-42 to accept the default setting to apply the Designing Programs To test a variable and branch upon a condition: 1. Click on the If Value 1 list box to select the variable to compare (e.g., V_PRICE). 2. Click on Test Type radio button. Available choices are: equal to (=), less than (<), and greater than (>). 3. Click on the Value 2 list box to select the variable to compare (e.g., 120). 4. Click on the Then Goto list box to select a screen/action to go to if the comparison is true. 5. Click on the Else Goto list box to select a screen/action to go to if the comparison i false. Case & Branch In the Insert A Process dialog box, click on Group Branch and then click on Command Case & Branch. Click on to open the Case & Branch dialog box. This dialog box enables you to compare the value of a variable input with other variables or values. Figure 4-33. Case & Branch Window 4-43 MCL-Designer for Phaser Series User’s Guide Case Value Sets variable for testing against the five Equal variables. Equal Sets the variables or value to compare to Case Value. Up to five variables or values can be compared to Case Value variable. Goto Sets the action to perform or screen to go to if the test result are true. Otherwise Goto Sets the action to perform or screen to go to if the test results is false. ! Click or to accept the default setting ! Enter the appropriate information to change the values and click changes. ! Click to close the dialog box without saving the changes. to apply the The value of variable Case Value is compared with the Equal variables or values. When the value of the Case Value equals one of these set Equal values, the action or screen in the Goto list box is performed. If the comparison is false, the action or screen in the Otherwise Goto list box is performed. Control & Branch In the Insert A Process dialog box, click on Grou Branch and then click on Command to open the Control & Branch dialog box. This dialog box Control & Branch. Click on enables you to compare a character pattern of a variable. Figure 4-34. Control & Branch Window 4-44 Designing Programs If Value Selects the variable for testing. Follows Pattern Sets the pattern to compare to th If Value. This pattern can exist out of: • Letters A to Z to specify a specific letter. • Numbers 0 to 9 to specify a specific number • $ to specify numeric characters. • “ to specify text. • ? to specify any character • * to specify all other characters. Then go to Sets the action to perform or the screen to go to if the test result is true. Else Goto Sets the action to perform or the screen to go to if the test result is false. to accept the default setting ! Click or ! Enter the appropriate information to change the values and click changes. ! Click to close the dialog box without saving the changes. to apply the For example: B$$”?4* matches with B21C14ABC123. If the comparison is true, the process follows the screen or action in theThen Goto list box. If the comparison is false, the process follows the screen or action in the Else Goto list box. 4-45 MCL-Designer for Phaser Series User’s Guide Set Label In the Insert A Process dialog box, click on Grou Branch and then click on Command Set Label. Click on to open the Label dialog box. This dialog box enables you to set a label. A label is a reference that can be set to go directly to a certain position, like a specific line in a process. Enter a label name, and it always refers to that position. Figure 4-35. Label Dialog Box Label Sets the label name. Note: The label name must be unique for the program and must begin with an alphabetic character (A to Z). ! Click or ! Enter the appropriate information to change the values and click changes. ! Click to close the dialog box without saving the changes. 4-46 to accept the default setting to apply the Designing Programs Figure 4-36 illustrates the use of a label in a process. Process 1 Process 2 Process 3 process in LABEL Process 4 Process 5 SCREEN Goto LABEL process out Figure 4-36. Label Process Gosub Window In the Insert A Process dialog box, click on Grou Branch and then click on Command on to open the Gosub. Click Gosub dialog box. This dialog box enables you to go to a subroutine and then return. Figure 4-37. Gosub Dialog Box Program Sets the program to go to. Gosub Selects the screen of the program to go to. 4-47 MCL-Designer for Phaser Series User’s Guide Figure 4-38 illustrates the use of a Gosub in a process. LINE 1 LINE 2 LINE 3 GOSUB 20 LINE 4 LINE 5 EXIT LINE 20 Figure 4-38. Gosub Process 1. Start from line 3. Enter Gosub S20-Screen 20. 2. MCL-Designer goes to process line 20 to undertake a certain action. 3. When the action is finished, the exit enables the process to turn back to line 4. Note: The Gosub can go to a label, a screen or another program. Always use Gosub with an exit. Refer to Got on page 4-40. 4-48 Designing Programs Files Group Files store the data input on a permanent basis in the scanner. Due to the interaction between the files and programs through processes, MCL-Designer enables you to read, write and delete the data in a file. Refer toFiles Windo on page 4-87 for more information on working with files. Write a Record In the Insert A Process dialog box, click on Group Files and then click on Command Write a on to open File the Write dialog box. This dialog box enables you to write Record. Click the input of variables into the fields of a file. Figure 4-39. Write File Dialog Box File Name Selects the file to write the fields to. If Write Error Goto Selects the action to perform or screen to go to if a write error occurs. A write error can occur when there is not enough memory to write a record or when a problem is detected on the file itself. 4-49 MCL-Designer for Phaser Series User’s Guide Fields To Write Field Name Shows the fields in the selected file. A file can contain up to 16 fields. Length Shows the length of the fields in the selected file. Value Sets the variable or value to the field.Click on the list box to select the variable or enter a value in the box. ! Click or to accept the default setting ! Enter the appropriate information to change the values and click changes. ! Click to close the dialog box without saving the changes. to apply the To write variables into the fields of a file: 1. Click on the Name list box to select the file to write to (e.g., <A>FILE). The dialog box displays the fields with their lengths. Refer to Files Window on page 4-87. 2. Click on the Value list box to select the variable or value required to write the value or content (of the variable) to the selected field: (e.g., V_PROD to field 1, V_QUAN to field 2, V_BARC to field 3.) Note: Click to go to the Data File Window. For more information, refer to Working With Files on page 4-87 4-50 Designing Programs Read a Record In the Insert A Proces dialog box, click on Group Files and then click on Command Read a to open the File Read dialog box. This dialog box enables you to rea Record. Click on the fields of a record in a file and assign the fields content to a variable. Figure 4-40. File Read Dialog Box File Name Selects the file to read a record from. If Record Not Found Sets the action to perform or the screen to go to if the record is not found. Search Record Mode Selects the search mode: • First: first record • Last: last record • Next: next record • Previous: previous record • Current: current record • Key: If the file is sorted, sets a key to search the record • Recor #: If you know the record number in the file, search using Key 1 list box (= record number). 4-51 MCL-Designer for Phaser Series User’s Guide Key1/Key2 Selects a variable to search for when Key is selected in the Mode list box. Enter a record number whe Record# is selected in the Mode list box. Fields To Read Field Name Shows the fields in the selected file. Length Shows the length of the fields in the selected file. Variable to Update Selects the variable to be assigned to the field. Click on to open the Variable dialog box to create a new variable o select an existing variable. Refer to Working with Variables on page 4-92 for information on variables. ! Click or to accept the default setting ! Enter the appropriate information to change the values and click changes. ! Click to close the dialog box without saving the changes. to apply the To read fields from a file and store them into variables: 1. Click on the Name list box to select the file in which to read the record (e.g. <A>FILE). 2. Click on the Goto list box to select the screen to goto if the record is not found. 3. Click on the Mode list box to select the mode to search. If Key or Record# is selected, select the appropriate variables in the Key list boxes. 4. Click 4-52 to select the variables to store the input in. Designing Programs Delete a Record In the Insert A Proces dialog box, click on Group Files and then click on Command Delete to open the File Delete dialog box. This dialog box enables you to a Recor . Click on delete a record in a file. Figure 4-41. File Delete Dialog Box File Name Selects the file to delete a record from. If Record Not Found Sets the action to perform or the screen to go to if the record is not found. Goto Search Record Mode Selects the search mode: • First: first record • Last: last record • Next: next record • Previous: previous record • Current: current record • Key: If the file is sorted, you can set a key to search the record • Recor #: If you know the record number in the file, you can search using Key 1 (= record number). Key1/Key2 Selects a variable to search for when Key is selected in the Mode list box. Enter a record number whe Record# is selected in the Mode list box. 4-53 MCL-Designer for Phaser Series User’s Guide ! Click or to accept the default setting ! Enter the appropriate information to change the values and click changes. ! Click to close the dialog box without saving the changes. to apply the To delete a record from a file: 1. Click on the File Name list box to select the file that holds the record that needs to be deleted (e.g., <A> FILE). 2. Click on the Mode list box to select the search mode (e.g., Record V_PROD). In order to prevent an excessive number of writes to a single block of flash memory, the Phaser does not support record updates in place. Modification of information previously written to a record is accomplished by a delete-and-append operation in the following way: ! perform a “Files: Read a Record” process, storing to temporary variables any field values that are not being changed, ! perform a “Files: Delete a Record” process to delete the incorrect record, ! perform a “Files: Write a Record” process to create a new record with the correct data. Review File In the Insert A Process dialog box, click on Group Files and then click on Command Review to open the File Review dialog box. This dialog box enables you to view a File. Click on a file on the screen (browse records using the up and down keys). Figure 4-42. File Review Dialog Box 4-54 Designing Programs File Name Selects the file to delete a record from. Options Opens the File Review 2 dialog box. Fields Selection Field Name Shows the fields in the selected file. Length Shows the length of the field in the selected file. View Selects if the field displays on the screen. Field Title Sets the title for the field when it appears on the screen. ! Click or to accept the default setting ! Enter the appropriate information to change the values and click changes. ! Click to close the dialog box without saving the changes. to apply the To review a file on the screen: 1. Click on the File Name list box and select the file to review (e.g., <A>Inventory). 2. Click in the appropriate View check box to select the fields to review 3. In the Field Title text box, enter a title for that field. The default value is Field X, where X is the field number. 4-55 MCL-Designer for Phaser Series User’s Guide 4. Click to open the File Review 2 dialog box. Figure 4-43. File Review 2 Dialog Box 4-56 Start Review On.. Selects the field to start the review on. Click on the appropriate radio button to change the setting. Fields Presentation Sets the number of lines for the display of the file review. The file review can contain a maximum of 20 characters for each line. Therefore select: if the length of the field name is less 1 Line/Field than 20. to arrange the view according to the Auto length of the field name and it’s value. Space Separatorto insert a space to separate fields. Allowed Functions Sets keys to delete and search for a specific record in the file. Click the Delete Current Record check box t allow the user to select the key to delete a record. Click the Search a Record check box to allow the user to select the key to search for a record Designing Programs Hot Keys.. Goto Clear Selects the action to perform or the screen to go to when the CLR key on the scanner is pressed. Enter Selects the action to perform or the screen to go to when the Enter key on the scanner is pressed. Erase File In the Insert A Process dialog box, click on Group Files and then click on Command Erase a on to open the File. Click File Erase dialog box. This dialog box enables you to erase an entire file. Figure 4-44. File Erase Dialog Box File Name Selects the name of the file to erase. Note: Click to go to the Data File Window. For more information, refer to Working With Files on page 4-87 ! Click or to accept the default setting ! Enter the appropriate information to change the values and click changes. ! Click to close the dialog box without saving the changes. to apply the 4-57 MCL-Designer for Phaser Series User’s Guide Seek In the Insert A Process dialog box, click on Grou Files and then click on Command Seek. Click on to open the File Seek dialog box. This dialog box enables you to look at a specific record in a file without reading it. Figure 4-45. File Seek Dialog Box File Name Selects the file to view. If Record Not Found Sets the action to perform or the screen to go to if the record is not found. Goto Search Record Mode Selects the search mode: First: first record Last: last record Next: next record Previous: previous record Current: current record Key: If the file is sorted, you can set a key to search the record Key1/Key2 Selects a variable to search for when Key is selected in the Mode list box. to Store Record number Writes the record number into a variable. Click on open the Variable dialog box to create a new variable, or into Variable select an existing variable. Refer to Working with Variables on page 4-92 for information on variables. 4-58 Designing Programs Note: Click to go to the Data File Window. For more information, refer to Working With Files on page 4-87 ! Click or to accept the default setting ! Enter the appropriate information to change the values and click changes. ! Click to close the dialog box without saving the changes. to apply the To look at a record in a file: 1. Click on the File Name list box to select a file (e.g. <A>FILE). 2. Click on the Mode list box to select the search mode. 3. Click on the Store Record number into Variable list box to store the record number of the selected record into a variable. 4. Click to select the variable. Local File Check In the Insert A Process dialog box, click on Grou Files and then click on Command Local File Check. Click on to open the Local File Check dialog box. This dialog box enables you to check if a local file (in the scanner) exists. Figure 4-46. Local File Check Dialog Box 4-59 MCL-Designer for Phaser Series User’s Guide Local Filename Selects one of eight files to check. If File Empty Goto Selects the action to perform or the screen to go to when the file is empty If File Not Empty Goto Selects the action to perform or the screen to go to when the file is not empty Note: Click to go to the Data File Window. For more information, refer to Working With Files on page 4-87 ! Click or ! Enter the appropriate information to change the values and click changes. ! Click to close the dialog box without saving the changes. 4-60 to accept the default setting to apply the Designing Programs MCL-Link Communications Group Send Packet In the Insert A Process dialog box, click on Grou MCL-Link Comm. and then click on Command Send Packet. Click on to open the Send Packet to Hostdialog box. This dialog box enables you to send a packet of variable values to the host computer. Figure 4-47. Send Packet To Host Dialog Box Send Packet To Host ID Selects the host identifier to send the packet to. Packet Type Selects a name for the packet. Fields Sep. Selects a field separator for the packet. If Communication Erro Goto Packet Fields Selects the action if an error occurs during the sending. Selects the variable or fixed data to send. Click on the list box to select a variable or enter a value into the list box. Use scroll bar to view additional packet fields. 4-61 MCL-Designer for Phaser Series User’s Guide ! Click or to accept the default setting ! Enter the appropriate information to change the values and click changes. ! Click to close the dialog box without saving the changes. to apply the Receive Packet In the Insert A Process dialog box, click on Grou MCL-Link Comm. and then click on Command Receive Packet. Click on to open the Receive Packet dialog box. This dialog box enables you to select a packet with variable values to work with. Figure 4-48. Receive Packet Dialog Box Receive Packet Fro Host ID Selects the host identifier to receive the packet from. Packet Type Selects a name for the packet. Fields Sep. Selects a field separator for the packet. If Communication Erro Goto 4-62 Selects the action to perform or the screen to go to if an error occurs while receiving the packet. Designing Programs Packet Fields to Variables Assigns a variable to each received field. Click on to open the Variable dialog box to create a new variable or select an existing variable. Refer to Working with Variables on page 4-92 for information on variables. Use scroll bar to view additional packet fields. ! Click or to accept the default setting ! Enter the appropriate information to change the values and click changes. ! Click to close the dialog box without saving the changes. to apply the Send File In the Insert A Process dialog box, click on Grou MCL-Link Comm. and then click on Command Send File. Click on to open the Send File dialog box. This dialog box enables you to send an entire file to a scanner. Figure 4-49. Send File Dialog Box 4-63 MCL-Designer for Phaser Series User’s Guide Send File To Host ID Selects the host identifier to send the file to. Local File Name Selects the local file to send to the host. Remote File Name Accepts a new file name for the host application (e.g., FILESEND or C:\DATA\FILESEND). Options Check Cradle Sets the scanner to check for a connection to a cradle. Delete After Send Sets the scanner to delete the file after it is sent t the host. Toolbar On Bottom Line Sets a toolbar to appear on the bottom of the screen when reviewing the file. Not supported on Phaser. If Communication Erro Goto Selects the action to perform or the screen to go to if an error occurs while sending a file. Note: Click to go to the Data File Window. For more information, refer to Working With Files on page 4-87 ! Click or ! Enter the appropriate information to change the values and click changes. ! Click to close the dialog box without saving the changes. 4-64 to accept the default setting to apply the Designing Programs Receive File In the Insert A Process dialog box, click on Grou MCL-Link Comm. and then click on Command Receive File. Click on to open the Receive File dialog box. This dialog box enables you to ask the host to send an entire file to the scanner. Figure 4-50. Receive File Dialog Box Receive File From Host ID Selects the host identifier to receive the file from. Remote File Name Accepts the file name for the host application (e.g., FILESEND or C:\USER\FILERCV). Local File Name Selects the local file name. Options Check Cradle Sets the scanner to check for a connection to a cradle. Toolbar On Bottom Line Sets a toolbar to appear on the bottom of the screen when reviewing the file. Not supported on Phaser. If Communication Erro Goto Selects the action to perform or the screen to go to if an error occurs while receiving the file. 4-65 MCL-Designer for Phaser Series User’s Guide Note: Click to go to the Data File Window. For more information, refer to Working With Files on page 4-87 ! Click or to accept the default setting ! Enter the appropriate information to change the values and click changes. ! Click to close the dialog box without saving the changes. to apply the Host Look-up In the Insert A Process dialog box, click on Grou MCL-Link Comm. then click on Command Host Look-Up. Click to open theHost Look-Up dialog box. This dialog box enables you to look at a remote file on the host. (This file must be “text” file in ASCII format.) Figure 4-51. Host Look-Up Window Host Look-Up Host ID 4-66 Selects the host identifier to look up the file. Designing Programs File Name Accepts the file name for the host application (e.g., FILESEND or C:\USER\FILERCV). Search With Selects a variable containing the search key. If Key Not Found Goto Selects the action to perform or the screen to go to if the key is not found. If Communication Error Goto Selects the action to perform or the screen to go to if an error occurs during the communication. Received Fields Assigns the variables to store the fields from the remote file. Click on to open the Variable dialog box to create a new variable or select an existing variable. Refer to Working with Variables on page 4-92 for information on variables. Fields Sep. Selects a separator between the fields. ! Click or to accept the default setting ! Enter the appropriate information to change the values and click changes. ! Click to close the dialog box without saving the changes. to apply the Note: On the host side, the file must have a structure similar to: “123456789,abcdef,hello world ” as one record with a comma (,) as a separator. The key to search must be the first field:”123456789”. The returned fields are abcdef and hello world. MCL-Link Start In the Insert A Process dialog box, click on Grou MCL-Link Comm. and then click on Command MCL-Link Start. This command runs the communication program on the scanner in Wait mode. The scanner waits for a command from the host. To exit this mode and continue the program, click on the Cancel key. 4-67 MCL-Designer for Phaser Series User’s Guide Remote File Check In the Insert A Process dialog box, click on Grou MCL-Link Comm. and then click on Command Remote File Check. Click on to open Remote the File Check dialog box. This dialog box enables you to check if a file exists on a remote host and get the file size and file date. Figure 4-52. Remote File Check Dialog Box 4-68 Host ID Selects the host identifier to look up the file. File Name Accepts the file name for the host application (e.g., FILESEND or C:\USER\FILERCV). If File Exists Goto Selects the action to perform or the screen to go to if the file is found. If File Does Not Exist Goto Selects the action to perform or the screen to go to if the file is not found. Designing Programs Store Remote File Info File Size (Bytes) File Date+Time If Communication Erro Goto Selects the variable to store the file size information in. Click on to open the Variable dialog box to create a new variable or select an existing variable. Refer to Working with Variables on page 4-92 fo information on variables. Selects a variable to store the “make” date and time of the file. Click on to open the Variable dialog box to create a new variable or select an existing variable. Refer to Working with Variables on page 4-92 for information on variables. Selects the action to perform or the screen to go to if an error occurs during the communication. ! Click or to accept the default setting ! Enter the appropriate information to change the values and click changes. ! Click to close the dialog box without saving the changes. to apply the Start EXE Program on Host In the Insert A Process dialog box, click on Grou MCL-Link Comm. and then click on Command Start EXE Program On Host. Click on to open the Start EXE Program On Host dialog box. This dialog box enables you to start a program (with extension EXE) on the host. 4-69 MCL-Designer for Phaser Series User’s Guide Figure 4-53. Start EXE Program On Host Dialog Box Host ID Selects the host identifier to run the executable. Remote Program Name Accepts the program name to run Argument Sep. Selects a separator to use between the arguments. Example: INVENTORY.EXE 123123123 050 where the arguments are: 123123123 and 050 and the separator is a blank. If Communication Erro Goto Selects the action to perform or the screen to go to if an error occurs during the communication. Program Arguments Selects the arguments (or variables) to give to the program. ! Click or ! Enter the appropriate information to change the values and click changes. ! Click to close the dialog box without saving the changes. 4-70 to accept the default setting to apply the Designing Programs Modem Command In the Insert A Process dialog box, click on Grou MCL-Link Comm. and then click on Command Modem Command. Click on to open the Modem Command dialog box. This dialog box enables you to send a command to modem. Figure 4-54. Modem Command Dialog Box Select Command Init. Enter the initialization command for the modem. Dial Enter the telephone number to dial. Disconnect Enter the disconnect command. Auto Answer Enter the Auto Answer Hayes Command to put the modem in auto answer mode. Other Enter any other modem command. 4-71 MCL-Designer for Phaser Series User’s Guide If Error Goto Selects the action to perform or the screen to go to if an error occurs. Possible errors are: no answer from modem or no connection with the remote site. Options Check Cradle Sets the scanner to check for a connection to a cradle. Toolbar On Bottom Line Sets a toolbar to appear on the bottom of the screen when reviewing the file. Not supported on Phaser. ! Click or ! Enter the appropriate information to change the values and click changes. ! Click to close the dialog box without saving the changes. 4-72 to accept the default setting to apply the Designing Programs Serial Communications Group String Serial Output In the Insert A Process dialog box, click on Group Serial Comm. and then click on Command Sting Serial Output. Click on to open the String Serial Output dialog box. This dialog box enables you to select a variable to send through the serial port to a serial output device. Figure 4-55. String Serial Output Dialog Box Header Sets the STX or SOH character to the beginning of a variable. STX: Start of Text (02 ASCII). SOH: Start Output Header Data/Variable to Send Selects the variable or data to send. Click on the list box to select a variable or enter a value in the list box. Footer Sets the ETX, CR or CR/LF character to the end of the variable. ETX (End of Text) - 03 ASCII. CR (Carriage Return) - hard return. LF (Line Feed) - a new line (13 and 10 ASCII). If Communication Error Goto Selects the action to perform or screen to go to if an error occurs. 4-73 MCL-Designer for Phaser Series User’s Guide ! Click or to accept the default setting ! Enter the appropriate information to change the values and click changes. ! Click to close the dialog box without saving the changes. to apply the Scanner Serial Output In the Insert A Process dialog box, click on Group Serial Comm. and then click on Command Scanner Serial Output. Click on to open the Scanner Serial Output dialog box. This dialog box enables you to select a variable to send through the serial port to a scanner output device. Figure 4-56. Scanner Serial Output Dialog Box 4-74 Designing Programs Add Barcode Descriptor Sets the default or specific descriptor to be added to the barcode. Click on the list box to select a descriptor or enter a value in the list box. Data/Variable to Send Selects the variable or data to send. Click on the list box to select a variable or enter a value in the list box. Add Key Code Sets the key code to be sent. Click on the list box to select a code or enter a value in the list box. If Communication Error Goto Selects the action to perform or screen to go to if an error occurs. ! Click or to accept the default setting ! Enter the appropriate information to change the values and click changes. ! Click to close the dialog box without saving the changes. to apply the Receive Data In the Insert A Process dialog box, click on Group Serial Comm. and then click on Command Receive Data. Click on to open the Serial Input dialog box. This dialog box enables you to receive data from the auxiliary port when specific characters are received. Figure 4-57. Serial Input Dialog Box 4-75 MCL-Designer for Phaser Series User’s Guide Start Character Selects the start character. Click on the appropriate radio button to select the start character. None: Do not wait for start character. STX: Start of Text (02 ASCII). Other: Enter any character in the text box provided. Stop Char. Selects stop character. Click on the appropriate radio button to select the stop character. Data input will stop when the selecte character is received. ETX: End of Text. CR: Carriage Return. Other: Enter any character in the text box provided. Length: Ends data input when a selected number of character is reached. to Result Variable Selects the variable that the value is assigned to. Click on open the Variable dialog box to create a new variable or select a existing variable. Refer to Working with Variables on page 4-92 for information on variables. Time Out/ Clear Key Selects an action to be performed or a screen to go to if the set time interval (seconds) is exceeded. ! Click or ! Enter the appropriate information to change the values and click changes. ! Click to close the dialog box without saving the changes. 4-76 to accept the default setting to apply the Designing Programs Print File In the Insert A Process dialog box, click on Group Serial Comm. and then click on Command on to open the Print File. Click Print File dialog box. This dialog box enables you to print a file. Figure 4-58. Print File Dialog Box Print File File Selects the file to print. Replace Variables Replaces all the variable codes found in file with the actual values of these variables. If Error Goto Selects the action to perform or the screen to go to if an error occurs. Note: Click to go to the Data File Window. For more information, refer to Working With Files on page 4-87 ! Click or to accept the default setting ! Enter the appropriate information to change the values and click changes. ! Click to close the dialog box without saving the changes. to apply the 4-77 MCL-Designer for Phaser Series User’s Guide Others Group Pause In the Insert A Process dialog box, click on Group Other and then click on Command Pause. Click on to open the Pause dialog box. This dialog box enables you to add a pause interval. Figure 4-59. Pause Dialog Box Seconds Sets the pause interval. Use the up and down arrow keys to select the pause interval. ShortCut Delay Sets the shortcut delay interval. Click on the check box to enable shortcut delay. ! Click or ! Enter the appropriate information to change the values and click changes. ! Click to close the dialog box without saving the changes. 4-78 to accept the default setting to apply the Designing Programs Beep In the Insert A Process dialog box, click on Group Other and then click on Comman Beep. Click on to open the Beep dialog box. This dialog box enables you to insert a beep. Figure 4-60. Beep Dialog Box Beep Type Selects the type of beep tone to be inserted. Click on the arrow box to select the combination of beeps desired. Click to test the beep option selected. ! Click or to accept the default setting ! Enter the appropriate information to change the values and click changes. ! Click to close the dialog box without saving the changes. to apply the 4-79 MCL-Designer for Phaser Series User’s Guide Display Data In the Insert A Process dialog box, click on Grou Other and then click on Command Display Data. Click on to open the Display Data dialog box. This dialog box enables you to display data on the scanner. Figure 4-61. Display Data Dialog Box 4-80 Line Sets the display data to appear on 1 or 2 lines. Click on the up or down arrow to change the number of lines. Column Sets the display data column width (number of characters per line - maximum 20). Click on the up or down arro to change the number of columns. Video Mode Sets the text and background colors. Click on the Normal radio button to display the variable in black on a white background or click on the Reverse radio button to display the variable in white on a black background. Data Sets the type of data to appear.Click on the arrow box to select the data type. Designing Programs Warning Message In the Insert A Process dialog box, click on Grou Other and then click on Command Warning Message. Click on to open the Warning Message dialog box. This dialog box enables you to insert a 2-line message without using a full screen. Figure 4-62. Warning Message Dialog Box Warning Message Line 1/2 Enter the text that displays as a warning. Beep Sets a beep to sound when the warning screen displays. Click on the arrow box to select the combination of beeps desired. Click to test the beep option selected. Pause Sets a pause to occur when the warning screen display.Set Enter to Continue check box to enable to operator t continue after the Enter key is pressed. Note: The current screen is cleared before displaying the message. ! Click or to accept the default setting ! Enter the appropriate information to change the values and click changes. ! Click to close the dialog box without saving the changes. to apply the 4-81 MCL-Designer for Phaser Series User’s Guide Clear Screen In the Insert A Process dialog box, click on Group Other and then click on Command Clear Screen. Click on to open the Clear Screen dialog box. This dialog box enables you to clear the whole screen or just selected lines of the screen. Figure 4-63. Clear Screen Dialog Box Line(s) To Clear Line 1 Line 2 Sets the specific line to clear. ! Click or ! Enter the appropriate information to change the values and click changes. ! Click to close the dialog box without saving the changes. 4-82 to accept the default setting to apply the Designing Programs MCL-Code In the Insert A Process dialog box, click on Group Other and then click on Command MCL to open the MCL Code dialog box. This dialog box enables you to insert Code. Click on a process line directly coded in MCL code. Refer to Chapter 7 for more information on MCLCode. Figure 4-64. MCL-Code Dialog Box Note:Click to go to the Variables window. For more information, refer to Global View of Variables on page 4-93. Comment In the Insert A Process dialog box, click on Grou Other and then click on Command Comment. Click on to open the Comment dialog box. This dialog box enables you to insert a comment. Figure 4-65. Comment Dialog Box 4-83 MCL-Designer for Phaser Series User’s Guide Printing Reports Changing the Printer Setup To change the printer setup: 1. Choose Print Setu from the File menu in the MCL Designer window to display the standard Windows printer setup window. 2. Change the settings. 3. Click to accept the changes. Printing a Screen To print the design: 1. Choose Print from the File menu. 2. The current screen is sent to a printer connected to your computer. Printing Options To specify the parts of a project to print, click to open the Print dialog box. Figure 4-66. Print Dialog Box 4-84 Designing Programs Project Info Sets the print report to print the current project. Project Description Enables the print report to contain a description of the project. Phaser Setup Enables the print report to contain the Phaser setup information. Programs Info Sets the print report to print program information. Programs Enables all of the programs or one of the programs to be included in the print report. Screen Pictures Enables pictures of each screen to be included in the print report. Program Details Enables program details to be included in the print report. Variables List Enables the variable list to be included in the print report. MCL Code Enables the MCL Code to be included in the print report. Print To Selects where to print to. Click on the Screen radio button to print the project to the screen. A window appears and the project display on the computer’s screen. Click the Printer radio button to print to a printer connected to the computer. The Printer button opens the standard Windows printer setup dialog box for changing the printer or setting for the printer Data Files Info Sets the print report to print data file information. Data Files Enables all of the data files or one of the data files of the project to be printed. File Structure Enables the print report to contain the structure of the data file. File Content Enables the print report to contain the contents of the data file. 4-85 MCL-Designer for Phaser Series User’s Guide ! Click or ! Enter the appropriate information to change the values and click changes. ! Click to close the dialog box without saving the changes. 4-86 to accept the default setting to apply the Designing Programs Working With Files Files store the input data on a permanent basis in the scanner. Due to the interaction between the files and programs through processes, MCL-Designer enables you to read, write, update and delete the data in a file. You can define a maximum of 8 files in the scanner. Each program of the project can access any of these data files. Data files are fixed record lengths except for the Print file. Up to 16 fields can be stored in a record. The maximum record length is 255 bytes, the maximum field length is 128 bytes and the maximum file size depends on the memory of the scanner (up t 3.2 MB). The default field separator is the pipe (|) (124 decimal). Refer to System Setup on page 1-7. Files Window In the MCL Designer window, click on the Files tab. Figure 4-67. MCL Designer Files Tab 1. Click next to the file number. Up to eight files can be created for a project. 2. If this is a new file, the Create Data File dialog box appears. 3. Enter a file name in the Data File Name field. 4. Click to accept the file name. The Data File Description dialog box appears. 4-87 MCL-Designer for Phaser Series User’s Guide Figure 4-68. Data File Description Dialog Box File Name Shows the name of the current file. Type of File Selects the type of file. Capture: Creates the file and fills it by the scanner using the Write a Record command. Refer to Write a Record on page 4-49. This file is used to store data captured on the scanner. Look up: Use the file for search and verification. It is normally a read-only file coming from the host, but it ca also be created locally on the scanner. Print: This is typical a read-only file with no specific field organization. It is a variable record length file. Sort on Selects the type of sort. None: Each record is opened at the end of the file (typical capture file). Field 1: The file will be sorted on the first field in ascending order. This option is used for a fast search on field1. 4-88 Designing Programs Fields 1+2: This option makes it possible to sort on the first field and the second field in ascending order. Thi option is used for a fast search on both fields. Note: The search function is not allowed on field 2. Allocated Memory Shows the amount of memory allocated to the data files and how many records exist. Fields Description Field Name Shows and accepts the name of the field. Length Shows and accepts the length of the field. ! Click or to accept the default setting ! Enter the appropriate information to change the values and click changes. ! Click to close the dialog box without saving the changes. to apply the to go to the Memory Mapping dialog box. For more Note: Click information, refer to Memory Mapping on page 1-8. The Look up file with sorting on field 1 or field 1+2 is used for a fast read-only search operation. The Capture file, sorted or non-sorted, is used to store input data and usually consists of small files (<1000 records). A search function in a sorted file is faster, but a write function is slower. A write function in a non-sorted file is faster, but a search function is slower. Note: A look up file defined as “sorted” must be sorted on the host prior to being sent to the scanner. 4-89 MCL-Designer for Phaser Series User’s Guide 1. Click to open the File View dialog box. Figure 4-69. File View Dialog Box This window shows the contents of the file on the hard disk. In this case, Field 1, Field 2, and Field 3 are the 3 field names of the records, and the numbers i parenthesis are the lengths. Table 4-5. Button Descriptions Button 4-90 Name Description Add Adds a new record. Cut Deletes a record. Copy Copies a record. Paste Pastes a copied record. Duplicate Duplicates a selected record. Sort Sorts the records Designing Programs ! Click or to accept the default setting ! Enter the appropriate information to change the values and click changes. ! Click to close the dialog box without saving the changes. to apply the 4-91 MCL-Designer for Phaser Series User’s Guide Working with Variables A variable is a memory area in the scanner, where data is stored temporarily. There can be up to 100 variables of 64 bytes each, plus three 512 byte variables. All variables are global fo one project. All 8 programs can access (read/write) the variables. The content of a variable is an ASCII character string that can be displayed on the scanner screen at any moment. A variable is never empty if no data is stored in that variable. The content will be the “?” character. Internally, the variables are named A0 to A3,...Y0 to Y3, Z0 to Z2. A comprehensive name can be entered in the MCL-Designer variable table. Note: All the variables are initialized to “?” after a scanner boot. It is possible to specify a variable content using “&” and the variable code in any data fields. Figure 4-70. Variable Content Using “&” 123&A0: will display 123ABC if ABC is the content of the variable A0. 4-92 Designing Programs Global View of Variables The Variable List icon in the Program Designer window displays a list of all the variable that were created in the current project. Figure 4-71. Variables List Window ! The Var. column list the variable number. (A0 through Z3). ! Columns 1 through 8 represent the 8 programs in the project. If a variable is used in the program, an “X” appears in that column. ! The Variable Name column lists the name given to the particular variable. 4-93 MCL-Designer for Phaser Series User’s Guide 4-94 Chapter 5 Simulating the Designed Project Testing and Simulating MCL-Designer features an integrated simulator that can test and simulate the newly designed project. The simulator offers all the functionalities of the scanner, so downloading the project is not necessary. Click to open the simulation window. Figure 5-1. Simulator QTOUR Window 5-1 MCL-Designer for Phaser Series User’s Guide The Simulator window displays the menu design. To start one of the programs, click the key that corresponds to the program, as defined in the Menu options. Refer to Chapter 3, Designing a Main Menu, where the function or numeric menu key was selected. After selecting the program to work with, test the program by entering the required data. For use of the simulator keyboard, refer to the scanner’s Quick Reference Guide. Note: You can use the mouse to click on the scanner keyboard or type on the keyboard of your PC. Working Items of the Simulator Table 5-1 lists the buttons available on the Simulator window that control the simulation process. Table 5-1. Simulator Buttons Button Name Description Run Processes to the next step in the program. If the button i green, you must click it for the program to run until the next step. This button works with the Break button. Break Sets a break condition, when you can only go to the next step by clicking on the Run button. Barcode Simulates the scanner input. Variable Displays the list of the different variables in the project. Every time a variable is updated, it appears on this list. A new input overwrites the old value. Entries Shows the field in the data files. MCL Code Displays the MCL code of the current program. Once the project has been successfully tested, download it to the scanner. Refer to Chapter 6, Downloading A Project on how to download the project. 5-2 Simulating the Designed Project Break Click on the Break button to display the Break dialog box (Figure 5-2). You can set a break on: ! each MCL-Code line or program line ! each variable update or each variable that is read ! one specific variable update. The traffic light icon on the Simulator window switches to red if a break is defined. If desired, you can also click on the Succeed/Fail Dialog Box check box to display a dialog box indicating successful simulation or a failure. Figure 5-2. Break Dialog Box Bar Code Input To simulate a bar code input, click on . TheBarcode Input dialog box appears (Figure 5-3). Select the type of bar code that will be simulated. Then type the required input in the Scanned Data window. Note: Only select the bar codes that were previously selected in the Barcode Input Window. Refer to Chapter 4, Designing Programs. 5-3 MCL-Designer for Phaser Series User’s Guide Figure 5-3. Input Dialog Box Variable List Displays the variables used during the simulation. Click on the to display the Variable List dialog box (Figure 5-4). This window can remain open while the simulator is running. The Search field allows for a quick search of a variable. Enter the first character of the variable and the first variable matching that character displays. Figure 5-4. Variable List Dialog Box 5-4 Simulating the Designed Project File Viewer Displays the data files used during the simulation. Click on the to display the File Viewer dialog box (Figure 5-5). This window can remain open while the simulator is running. Select the data files to view using the File Name list box. Figure 5-5. File Viewer Dialog Box MCL-Code Display The MCL-Code of the project can be displayed in the MCL-Code Viewe dialog box (Figure 5-6). The viewer displays each line that is performed. Figure 5-6. MCL Code Viewer Dialog Box The dialog box displays: ! project file name ! current program name ! MCL-Code line number and command line. 5-5 MCL-Designer for Phaser Series User’s Guide 5-6 Chapter 6 Downloading A Project Downloading to a Scanner To download the project design to a Version 2.XX scanner, select Host Mode on the scanner (system menu option 1, suboption 0), then click on . To download the project design to a Version 1.XX scanner, select Load New System on the scanner (system menu option 1, suboption 2), then click on . The Send Project dialog box appears. Figure 6-1. Send Project Dialog Box Project Displays the name of the current project. Comm Port Selects the host’s communication port. 6-1 MCL-Designer for Phaser Series User’s Guide ! Click or ! Enter the appropriate information to change the values and click changes. ! Click to close the dialog box without saving the changes. 6-2 to accept the default setting to apply the Chapter 7 MCL-Code Reference Guide About MCL-Code The Macro Command Language (MCL-Code) is a collection of simple, high-level commands used to quickly program Symbol scanners. An MCL-Code program is a standard ASCII file containing easy-to-read macro command lines. The program is loaded into the scanner’s memory and is interpreted by the MCL-Code run-time kernel (also loaded in the scanner). Programs and File Size on page 7-95 explains how memory is organized and what limitations there are on programs and file size. MCL-Code Program The user may design up to nine MCL-Code programs (0.MCL to 8.MCL). Each MCL-Code program can contain up to 512 lines; however, the physical restraint on a program is 4KB. Each MCL program can call subroutines, which may be defined in the same file, or in a different file. In this way, applications which exceed the 4 KB limit may still be implemented. 7-1 MCL-Designer for Phaser Series User’s Guide Typographic Conventions The following typographic conventions are used in this chapter: Table 7-1.Typographic Conventions Convention Used for bold Commands and switches that follow them. You must type the commands and their switches exactly as they appear. italics Place-holders that represent information you must provide. For example, if you are asked to type filename, you should type the actual name of a file instead of the word shown in italics. | Argument field separator within the command line or file. This is a reserved character and should not be used for any other purpose. < Key > Keyboard key symbols. Examples: < Enter >, < F9 >, < Spacebar > [ arg ] Optional arguments in a command line. & A variable quantity or expression. Example: &V0 = contents of variable V0 7-2 MCL-Code Reference Guide Introduction Overview of the MCL-Code An MCL-Code program is a sequence of command lines. All MCL command lines consist of a number of tokens, separated by a vertical bar (‘|’). The first token in a command line is the 2 character command name, and the remaining tokens are parameters for that command. MCL-Code commands can be divided into nine logical groups: ! display ! keyboard & scanner input + special input ! files ! variable operations (add, subtract,...) ! serial communication ! input/output ! labels and branch ! parameterization ! miscellaneous. Variables Using Variables A variable: ! exists in a memory zone (typically 64 bytes except Z0 to Z2 = 512 bytes) ! has a name (A0 to Z0, A1 to Z1,....., A3 to Y3) ! can be written and rea ! is global for all programs in the scanner. When a variable is written, the user has to specify the name of the variable. ex: VM | A1 | HELLO WORLD The command writes HELLO WORLD into variable A1. 7-3 MCL-Designer for Phaser Series User’s Guide When a variable is read, the user specifies the contents of the variable. ex: DM | 1 | 1 | N | &A1 This command displays HELLO WORLD. &A1 represents the contents of A1. Any argument of a command can be a variable. Types Of Variables The MCL-Code recognizes three types of variables: ! system variables ! small variables ! large variables. System Variables Numbered from 00 – 99, these are parameters and function return codes. The length of the variable depends on the data represented by the variable. In general, these variables do not represent actual memory locations, but require an underlying process to read or set. This underlying process is transparent to the user. System Setup Variables on page 7-98 lists the value represented by each System Variable. Small Variables Labeled A0, A1, A2, A3; B0-B3; …; Y0-Y3; for a total of 100 variables, each capable of storing 64 bytes of data. Small Variables store strings only; any integer data to be manipulated is converted to a string prior to storage, and back to an integer prior to processing. User variables are global variables. They can be accessed from any program in the scanner. Large Variables Labeled Z0 – Z2, for a total of 3 variables, each capable of storing 512 bytes of data. Like Small Variables, Large Variables store only strings. 7-4 MCL-Code Reference Guide Files and Records General Within an MCL-Code program, you can use local files. Note: The P370/P470 RF scanners do not support files. Scanned data may be manipulated using any of the functions available in MCL. However, the resultant data must be transmitted to the host, since there is no facility for storing data long-term in the scanner. The files are named A to H. These files can be downloaded from the host computer to the scanner. MCL file commands allow the user to write, read, update, delete, or search into these files. Files can be unformatted ASCII text. Refer to Programs and File Sizes on page 7-95 for instructions on sizing the files you will use in your application. On the scanner, a file is simply an area of the FLASH reserved to hold a specific set of data. A file allocation table (FAT) will be maintained, which specifies for each file, the start and end locations, as well as the number of fields, and the size of each field. Table 7-2. Sample FAT Name A Start 1100 End 10FF B 1100 Keys 0 # Fields 10 7FFF 0 Len 1 7 Len 2 6 ... ... Len 20 0 3 80 7 ... 0 0 C 8000 FFFF 0 0 0 0 ... D 0 0 0 0 0 0 ... 0 ... ... ... ... ... ... ... ... ... H 0 0 0 0 0 0 ... 0 Files are declared using a File Size command (FZ). This command specifies the name of the file to allocate, and its start and end addresses. The following commands would be used t allocate the above described files: FZ|A|1000|10F FZ|B|1100|7FFF FZ|C|8000|FFFF 7-5 MCL-Designer for Phaser Series User’s Guide See File Size (FZ) on page 7-34 for a complete description of the FZ command. The File Open (FO) command specifies the field structure of a file. If zero (0) fields are defined, the file is treated as a sequential ASCII file. See File Open (FO) on page 7-24 for the full specification of the FO command. Structure Of The Files The files can have two different structures: variable or fixed length records. Fixed length records can have a key (a sort field). Sequential Files Sequential files are defined as having 0 fields. The file is simply interpreted as a string of unformatted ASCII data. Sequential files may be used for writing activity logs and such. They CANNOT be searched by field. Sequential file records are delimited by a Carriage Return (0x0D) or Carriage Return/Line Feed (0x0D/0x0A) pair. Direct Files Files containing fixed length records are called direct files, and may or may not have keys. These files are opened using command FO | filename | Keys | Field1… (refer toFile Open (FO) on page 7-24). Maximum values for direct file: Record length = 255 characters. Number of keys = 9. Number of fields = 20. Field length = 255 characters. Key fields refer to the fields on which the file is sorted, and on which fields searches may be performed. If no key fields are defined, the file is considered to be unsorted, and any search for data in the file is performed in a linear fashion. If 1 or more key fields are defined, then the file is considered to be sorted on the concatenation of all the key fields. Any keyed search on key n must specify a value for all keys from 1 to n. Keyed files cannot be appended to, as no sorting of written records is possible. The file MUST be presorted on the host prior to downloading to the scanner; the scanner has no capability to sort files. If an unsorted file is declared with keys, unexpected results may occur. When one or more keys are defined, the file is maintained in ascending order on the defined key(s); every record can be accessed directly by the use of its key(s). 7-6 MCL-Code Reference Guide MCL Commands Table 7-3 lists the available MCL code commands. These commands are described on the pages following as referenced in the table. Table 7-3. Logical Group, Command, and Descript i o Logical group Display Command Description Page BL Backlight Sets Backlight On/Off. 7-10 DC Display Clear Clears line(s) on the scanner display. 7-19 DM Display Message Displays a message on the scanner display. 7-20 IC Input Cash Waits for input with cash register format. 7-36 ID Input Date Waits for input with selected date format. 7-38 IH Input Time Waits for input with selected time format. 7-40 IK Input Key Waits for key input. 7-41 IL Input List Sets a variable based on a selection from a scrolling 7-43 list of options. IX Extended Input Waits for specific input from keyboard or scanner. 7-45 ML Menu List Branches based on a selection from a scrolling list 7-50 of options. Modem MD MoDem Outputs a string of characters to the modem 7-49 and waits for a response from the modem. Files FD File Delete Deletes current record. 7-21 FE File Erase Delete complete file. 7-22 FK File Check File Check. 7-23 FO File Open Opens file and defines the data structure. 7-28 FP File Print Print a file to serial port. 7-26 FR File Read Reads the current record. 7-28 FS File Seek Positions the file pointer on the requested record. 7-30 FU File Update Reads a record at the current pointer position of 7-32 the file, updates the fields with the passed parameters, writes the record at the end of the file and deletes the current record FW File Write Writes a new record in the file. 7-33 FZ File SiZe Declare storage for a file. 7-34 Keyboard and Scanner Input 7-7 MCL-Designer for Phaser Series User’s Guide Table 7-3. Logical Group, Command, and Description (Continued) Logical group Variable Operations Serial Communication Labels and Branch Command Description Page VC Variable Compare Compares text with pattern. 7-78 VE Variable Extract Extracts characters from defined record. 7-80 VF Variable Format Formats data as characters or a number. 7-81 VJ Variable Justify Justifies data in variable to left or right. 7-84 VL Variable Length Computes the size of text. 7-86 VM Variable Move Replaces current contents of variable with new value. 7-87 VO (% + - * /) Variable Operation Variable Operations: arithmetic. 7-88 VS Variable Substring Extracts from a string. 7-90 VX Variable op eXtended Variable operations (+ - * / %) with numeric formatting. 7-92 SI Serial Input Waits for characters coming from the serial port 7-69 SO Serial Output (P360/ Sends characters to the serial port. P460 Memory Scanner) 7-73 SO Serial Output (P370/ Sends characters to the serial port. P470 RF Scanner) 7-75 LB LaBel definition Assigns a label to the current program address. 7-48 SK SKip Jumps to a label. 7-72 IF Condit. Branch Compares data and jumps to labels. 7-39 RM Run MCL Program Calls a program and begins executing that program. 7-67 SR Skip and Return Jumps to a label and returns after QX | 1. 7-77 Terminates program execution. 7-66 QX Quit or eXit Network NI Network Input Protocol Support NO Network Output (P360/P460 Memory Scanner) Waits for a command from the network and stores 7-52 it in a variable. Sends a frame to the host via RS-232 using MCL- 7-55 Link protocol. NO Network Output Sends a frame to the host via RS-232 using MCL- 7-57 (P370/P470 RF Scanner) Link protocol. NS MCL-Link Start 7-8 Calls MCL-Link communication program. 7-59 MCL-Code Reference Guide Table 7-3. Logical Group, Command, and Description (Continued) Logical group Parameters Miscellaneous Compute Commands Command Description Page PI Parameterize Input Sets the input time-out value and exit keys for all 7-60 subsequent input operations. PT Parameterize Time Sets the date and time. 7-62 PX Change Syst. Var Changes System variable. 7-63 PY Change Parameter Changes scanner parameter based on parameter number and value. 7-64 BP Beep Emits a “beep” tone during a user-defined time interval. 7-11 WT Wait Suspends program execution for a pre-defined delay time. 7-94 CP CRC ComPute CRC Compute various CRCs of the given string as a 5 7-13 digit integer from 00000 to 65535. CP XOR ComPute XOR Compute XOR checksum of given string as a five 7-15 digit integer. CP CVT ComPute ConVerT This function provides useful conversions. 7-16 7-9 MCL-Designer for Phaser Series User’s Guide Backlight (BL) Function Controls the backlight on the scanner screen. Syntax BL | parameter where: Parameter = backlight setting. ON = backlight ON. OFF = backlight OFF. time = backlight on for specified number of seconds (1 to 255 seconds). Affected System Variables None Note This command is reserved for future use; the present Phaser design does not incorporate a backlight. Examples BL | 5 Sets backlight ON for 5 seconds. BL | ON Sets backlight ON. BL | OFF Sets backlight OFF. 7-10 MCL-Code Reference Guide Beep (BP) Function Emits a specified beep sequence. Syntax BP | index where: Index = index into the predefined table. Affected System Variables None Parameters index: Index into the predefined table. Notes The beep table is defined as follows: Table 7-4. Beep Sequen c e Beep Description Beep Index 1 Short High Beep 0 2 Short High Beeps 1 3 Short High Beeps 2 4 Short High Beeps 3 5 Short High Beeps 4 1 Short Low Beep 5 2 Short Low Beeps 6 3 Short Low Beeps 7 4 Short Low Beeps 8 5 Short Low Beeps 9 7-11 MCL-Designer for Phaser Series User’s Guide Table 7-4. Beep Sequences (Continued) Beep Description Beep Index 1 Long High Beep 10 2 Long High Beeps 11 3 Long High Beeps 12 4 Long High Beeps 13 5 Long High Beeps 14 1 Long Low Beep 15 2 Long Low Beeps 16 3 Long Low Beeps 17 4 Long Low Beeps 18 5 Long Low Beeps 19 4 Short Beeps ---- High – Low – High – Low 20 4 Long Beeps ---- High – Low – High – Low 21 2 Short Beeps ---- High – Low 22 2 Short Beeps ---- Low – High 23 3 Short Beeps ---- High – Low – High 24 3 Short Beeps ---- Low – High – Low 25 4 Long Beeps ---- High – High – Low – Low 26 4 Long Beeps ---- Low – High – Low – High 27 3 Long Beeps ---- Low – High – Low 28 3 Long Beeps ---- High – Low – Low 29 3 Long Beeps ---- Low – High – High 30 4 Long Beeps ---- High – High – High – Low 31 Decode Beep 32 Examples BP | 32 7-12 Generate a decode beep. MCL-Code Reference Guide ComPute CRC (CP CRC) Function Compute various CRCs of the given string as a 5 digit integer from 00000 to 65535. Syntax CP | CRC | variable| string | optio where: Variable = variable receiving value String = input character string Option = specific CRC algorithm 0: MCL-CRC1 1: CCITT 2: CRC1 3: Alternative CRC-16 (with sum initialized to 0x0000) *default: MCL-CRC1 (If no option is selected, the terminal defaults to the MCL-CRC16 algorithm.) Affected System Variables None Note Use the command CP|CVT to convert the result of this operation in the desired format. Examples CP | CRC | A0 | Mouse House | 0 After this operation, the variable A0 will contain 59010 CP | CRC | A0 | Mouse House 7-13 MCL-Designer for Phaser Series User’s Guide After this operation, the variable A0 will contain 59010 CP | CRC | A0 | The hazy sky | 1 After this operation, the variable A0 will contain 59802 CP | CRC | A0 | 02343499 | 2 After this operation, the variable A0 will contain 64622 CP | CRC | A0 | Mouse House | 3 After this operation, the variable A0 will contain 64891 7-14 MCL-Code Reference Guide ComPute XOR (CP XOR) Function Compute XOR checksum of given string as a five digit integer. (Use CP | CVT to convert in another format.) Syntax CP | XOR | variable | string where: Variable = variable receiving value String = input character string Affected System Variables None Note Use the command CP | CVT to convert the result of this operation in the desired format. Examples CP | XOR | A0 | Mouse House After this operation, the variable A0 will contain 00218 CP | XOR | A0 | 900345 After this operation, the variable A0 will contain 00244 7-15 MCL-Designer for Phaser Series User’s Guide ComPute ConVert (CP CVT) Function This function provides useful conversions. Syntax CP | CVT | variable | type | string where: Variable = variable receiving value Type = type of conversion 0 = convert a char to this ASCII value or convert a string to the sum of ASCII values of each character 1 = get a number as an ASCII code and convert it to a character 2 = convert a number to a string of 2 hexadecimal digit 3 = convert a number to a string of 4 hexadecimal digit 4 = converts a number to a string of 2 characters as used by MCLNet protocol for checksums 5 = converts a number to a string of 4 characters as used by MCLNet protocol for checksums 6 = convert a string of hexadecimal digits to a decimal number (of 5 digits) 7 = convert a string of MCL-Net checksum digits to a decimal number String = input character string or numbe 7-16 MCL-Code Reference Guide Affected System Variables &99 = 0, if conversion is OK. Variable = returns value of conversion. 1, if the number or string cannot be converted. Variable = "?" Examples CP | CVT | A0 | 0 | X Convert char to an ASCII code. A0 will contain the ASCII code of X = 0008 CP | CVT | A0 | 0 | ABCDE Convert a string to the sum of ASCII codes. A0 will contain the ASCII code of X = 00335 CP | CVT | A0 | 1 | 88 Convert an ASCII code to a character. A0 will contain the character CP | CVT | A0 | 2 | 186 Convert to 2 hexadecimal digits. A0 will contain BA CP | CVT | A0 | 3 | 186 Convert to 4 hexadecimal digits. A0 will contain 00BA CP | CVT | A0 | 2 | 2576 Var 99 = 1 because 25761 cannot be converted to 2 hexadecimal digits. A0 = "?" CP | CVT | A0 | 4 | 186 Convert to 2 MCL-Net checksum characters. A0 will contain ;: CP | CVT | A0 | 5 | 186 Convert to 4 MCL-Net checksum characters. A0 will contain 00;: 7-17 MCL-Designer for Phaser Series User’s Guide CP | CVT | A0 | 4 | 2576 Var 99 = 1 because 25761 cannot be converted to 2 hexadecimal digits. A0 = "?" CP | CVT | A0 | 5 | 2576 Convert to 4 MCL-Net checksum characters. A0 will contain 64: CP | CVT | A0 | 6 | 64A1 Convert from hexadecimal to integer. A0 will contain 25761 CP | CVT | A0 | 7 | ;; Convert from MCL-Net checksum characters to integer. A0 will contain 00187 7-18 MCL-Code Reference Guide Display Clear (DC) Function Clears the display, or a single line of the display. Syntax DC | line where: Line = number of the line to be cleared. (0 clears the whole screen, else the specified line is cleared). Affected System Variables None Examples DC | 0 Clears all lines on the scanner display DC | 1 Clears the first line only. 7-19 MCL-Designer for Phaser Series User’s Guide Display Message (DM) Function Displays a message on the scanner screen. Syntax DM | line | column | style | message where: Line = the line number on which to display the message (1 or 2). Column = the column position (1 to 20). Style = the display attribute: N = Normal Video. R = Reverse Video. Message = the text or variable to be displayed. Affected System Variables None Note 1. If the line number or column number is outside the display range, nothing is displayed. 2. An alternate way to display characters is the use of the hexadecimal conversion, ex: \41 = “A”. 3. If the first character to be displayed is a “#”, then it must be encoded as \23 so that it is not misinterpreted as a carriage return during the download process. Examples DM | 1 | 5 | N | MENU Displays the word “MENU” on line 1, column 5. DM | 1 | 7 | R | &A1 Displays the contents of variable A1 on line 1, column 7 in reverse video. 7-20 MCL-Code Reference Guide File Delete (delete record) (FD) Function Deletes the current record in a file. Syntax FD | filename where: Filename = the name of the selected file (range: A - H). Affected System Variables &99 = 0, if no error occurs or 1 in case of error. Notes 1. This command does not delete a file, it deletes a record in a file. (Use File Erase to delete a file). 2. The file pointer is placed on the next record of the file, except when the last record is being deleted. In this case, the pointer is set to the end of the file. 3. Command is supported on DIRECT files only. 4. Records are deleted by replacing them with a special string. 5. If filename is unknown, System Error “2” is displayed. Examples FD | A Deletes the current record in file “A”. 7-21 MCL-Designer for Phaser Series User’s Guide File Erase (delete file) (FE) Function Erases a file. Syntax FE | filename where: Filename = the name of the selected file (range: A - H). Affected System Variables &99 = 0, if no error occurs or 1 in case of error. Notes 1. After a file erase command, the file cannot be recovered. 2. A file is erased by replacing its FAT entry with all zeros (0). 3. If filename is unknown, System Error “2” is displayed. Examples FE | A 7-22 Erases file “A”. MCL-Code Reference Guide File checK (FK) Function Checks if a file is present and returns its size. Syntax FK | filename where: Filename = file to be checked (range: A-H). Affected System Variables &99 = 0, if no error occurs or 1 in case of error. &97 = file size (free format). Example FK | A Checks if file “A” exists. 7-23 MCL-Designer for Phaser Series User’s Guide File Open (FO) Function Opens a file and defines the structure of the data. Syntax FO | filename | keys | fieldlength1 [ | fieldlength 2 ].....[ | fieldlength n] where: Filename = the name of the file (range: A - H). Keys = the number of key fields in the record. (range: 0 - 9; if no key, enter 0). Fieldlength 1 = the length of the first field (range: 0 -255). Fieldlength n = the length of the last field (range: 1 -255). Up to 20 fields may be declared. Affected System Variables &99 = 0 if no error occurs, or 1 in case of error. &98 = If &99!=0 (if an error occurred), &98 will contain the error code: F001: Illegal File Name F002: File not empty - the record structure being defined does not match the existing record structure, and the existing file is not empty. This is not allowed, as it could cause a loss of collected data. F003: File Allocation Table could not be updated. This could result from an excessive number of file redefinitions, causing FLASH memory wear. Notes 1. To declare a sequential file, set keys and fieldlength1 to 0 (zero), and do not declare any more fields. (Sequential files cannot have keys). 2. All fields in the record are text fields (numeric values are converted to ASCII representations). Size fields accordingly 3. If filename is unknown or any I/O error, System Error “2” is displayed. 4. If the number of key fields is greater than 9, System Error “2” is displayed. 7-24 MCL-Code Reference Guide 5. If the file does not exist (has not been allocated using an FZ command), System Error “2” is displayed. 6. If a file is opened with the same specification that previously existed, then any existing data remains intact. If it is opened with a new specification, and the file is not empty, an error occurs. 7. A file must be opened before any operation can take place. 8. The keys represent the number of fields to use as key. They define how the file is organized as the file is sorted following these keys. 9. Keyed files are read-only. The scanner is not able to write or update records in a sorted manner. The files MUST be sorted according to the defined keys prior to downloading to the scanner. 10. The maximum record size is 255 characters with a maximum of 20 fields. Examples FO | A | 2 | 6 | 4 | 20 | 8 Opens a file with name “A”. The file consists of records with 4 fields, with field lengths of 6, 4, 20 and 8 characters, respectively.The two first fields (6 and 4 characters) are defined as key fields. The file is created and maintained, in ascending order, on the two access keys. The primary sort is on the 1st access key, and the secondary sort is on the 2nd access key. View of the file: 000001 | 1234 | ABCDEFGHIJKLMNOPQRST | 00020.17 CRLF 000001 | 1235 | UVWXYZABCDEFGHIJKLMN | 12000.15 CRLF 000074 | 7012 | HELLO WORLD | 00000.00 CRLF FO | A | 1 | 4 | 20 Opens a file with name “A”. The file consists of records with 2 fields, with field lengths of 4 and 20 characters, respectively.The first field (4 characters) is defined as a key field. View of the file: CR 0001 | BARBARA HENDRICKX LF CR 0001 | THOMAS EDISON LF 1205 | WOLFGANG AMADEUS MZTCRLF FO | D | 0 | 0 Open a file with name “D” with no structure. View of the file: BARBARA HENDRICKXCR LFTHOMAS EDISON CR LFWOLFGANG AMADEUS MZTCRLF 7-25 MCL-Designer for Phaser Series User’s Guide File Print (FP) Function Output a file to a serial port, with no formatting and no protocol. (Dump file). Syntax FP | com | filename | replace where: Com = Ignored (only one com port available). Filename = the name of the file (range: A - H). Replace = N: Transmit contents of the file as is. Y: All variables (ex: &A0) are replaced with the contents of the referenced variable. Affected System Variables &99 = 0 if no error occurs, or 1 in case of error. Notes 1. The FP command makes use of the existing host interface software to communicate a file with a host using either serial or Synapse communications. The file will be transferred according to the file type: Direct file (files with defined record structures) will be transferred one record at a time. If a record is too big to be transmitted by the installed host, the operatio fails; therefore it is incumbent on the designer to create a record structure which can be handled by the intended host interface. Sequential files (files with no defined record structures) will be transferred in packets which are sized to the capabilities of the host interface. In either case, the global communication parameters (including data formatting for appending CR/LF to the data) will be applied. 7-26 MCL-Code Reference Guide 2. The position of the file pointer after an FP command is indeterminable, so an FS command should be used to reposition the file at a known position prior to any subsequent accesses. 3. The file to be printed must be opened with the FO command prior to printing. 4. In order to send formatted data during an upload, a loop of SO commands shoul be used instead of FP.Note, however, that if this method is used during daisychaining, the bus arbitration will occur per record, not per file upload. Example FP | 1 | A | Y Dumps file “A” to serial port, replacing variables. 7-27 MCL-Designer for Phaser Series User’s Guide File Read (FR) Function Reads the record located at the current pointer position of the file. Syntax FR | filename | length | variable where: Filename = the name of the sequential file (range: A - H). Length = the number of bytes to read from the current pointer position. Variable = the variable in which data is stored. FR | filename | variable [ | variable 2] ... [ | variable n ] where: Filename = the name of the DIRECT file (range: A - H). Variable 1 = the variable in which data for the first field of the record is stored. (Can be replaced by ?? to skip this field). Variable n = the variable in which data for the last field of the record is stored. (Can be replaced by ?? to skip this field). Affected System Variables &99 = 0 if no error occurs, or 1 in case of error. Notes 1. The number of variables must be less than or equal to the number of fields contained in the record. 2. To ignore a field of a record, enter “??” instead of the variable name. For DIRECT file read only. 3. If filename is unknown, System Error “2” is displayed. 4. After reading, the pointer remains unchanged. 7-28 MCL-Code Reference Guide 5. Each field is stored in variable 1, variable2,.... Last variable in command contains all remaining fields. If a variable is replaced by ??, the field is not rea 6. If a sequential read is attempted on a direct file, or a direct read is attempted on a sequential file, System Error “2” is displayed. Examples FR | A | C1 | ?? | F1 | G0 Reads a record from the current pointer position of file “A” and stores the contents of field 1 into C1, field 3 into F1, and field 4 into G0 (field 2 is ignored). FR | A | 30 | C1 Reads 30 bytes from the current pointer position of file “A” into variable C1. (File A must be declared as a sequential file.) 7-29 MCL-Designer for Phaser Series User’s Guide File Seek (FS) Function Positions the file pointer to a specific record or byte, or searches a file for a specified pattern or key value. Syntax FS | filename | position [ | pattern] OR FS | filename | position [ | key1val ] ...[ | keynval ] where: Filename = the file to be positioned (range = A-H).. Position = the position at which the file pointer is to be set (if pattern and keyval are omitted, or at which the search begins. Values can be: F = First record. L = Last record. P = Previous record. N = Next record. C = Current record. n = An arbitrary record number. Pattern = A pattern to find beginning at the specified position. Patterns can contain a string of characters. This string will be matched to the first n characters in each record, until a match is found. Keynval = The value of the key fields. The number of specified keys can be any number up to the total number of keys defined for the file. The search begins at the position specified, and locates the first record whose first n keys match the specified values. 7-30 MCL-Code Reference Guide Affected System Variables &96 = Current record number &99 = 0, if the requested record is found. 1, if not found, pointer remains unchanged. Notes 1. The number of keys must be less than or equal to the number of keys defined in the File Open command of the related file. 2. If the filename is unknown, System Error “2” is displayed. 3. If the file is defined by FO | filename | 0 | 0 (sequential file), no key or pattern can be defined. 4. System Variable 96 returns the current record number after FS command. This can be used to determine the total number of records in a file using the Last position parameter. 5. If the requested record is not found, the current file pointer is not updated. Examples FS | A | F | 00001 | 1130 | &A0 Positions the pointer of file “A” on the first record with: key 1 = 00001. key 2 = 1130. key 3 = variable &A0. FS | D | 18 Positions the pointer on the 18th record of file “D”. 7-31 MCL-Designer for Phaser Series User’s Guide File Update (FU) Function Reads a record at the current pointer position of the file updates the fields with the passed parameters, writes the record at the end of the file and deletes the current record. Syntax FU | filename | var1 [| var2]…[|varn} where: filename = name of the file to update (A-H). var1 = the variable in which data for the first field of the record to update will be stored. (Can be replaced by “??” to skip this field.) varn the variable in which data for the last field of the record to update will be stored. (Can be replaced by “??” to skip this field.) Affected System Variables &99 = “0” if no error occurs. “1” if error is detected. Notes 1. The number of variables must be less than or equal to the number of fields contained in the record. To ignore a field without using a variable, enter “??” signs instead of the variable name. 2. If the length of the specified fields exceeds the corresponding field length of the file, the variable will be truncated to fit within the field. 3. If filename is unknown, System Error “2” is displayed. 4. The updated record is appended to the end of the file. 5. After updating, the file pointer is moved to the updated record which is at the end of the file. 6. Only applies to DIRECT files. Example FU | A | ?? | &A1 Update the second field of file “A” with the contents of variable A1 leaving the first field unchanged. 7-32 MCL-Code Reference Guide File Write (FW) Function Writes a new record in the file. Syntax FW | filename | field1 [ | field2 ] ... [ | field n ] where: Filename = the name of the file (range: A - H). Field1,…n. = the text or variable for fields 1 to n. Affected System Variables &99 = 0 if no error occurs, or 1 in case of error. Notes 1. The number of field(s) must be equal to the number of field(s) defined within the File Open command. 2. If filename is unknown, System Error “2” is displayed. 3. Records are appended to the end of the file, regardless of the current file pointer position. The current pointer position is not changed. 4. All fields are truncated or left justified (filled with blanks on right) to the correct length. 5. It is recommended that \od (carriage return) or \od\oa (carriage return/line feed) terminate each sequential file record to facilitate later retrieval of these records Example FW | A | &C1 | &D0 | &F1 | 123 Writes a new record into file “A”. Stores the content of the variables C1, D0, F1 and 123 in the record. 7-33 MCL-Designer for Phaser Series User’s Guide File Size (FZ) Function To allocate storage for a file. Syntax FZ | filename | start | end where: Filename = the name of the file to allocate storage for (range 'A' –'H'). Start = the first block number to allocate for this file. Values are hexadecimal. End = the last block number to allocate for this file; if 0xFFFF is specified, the entire available memory is allocated. Values are hexadecimal. Affected System Variables &99 = 0 if no error occurs, or 1 in case of error. &98 = If an error occurs, contains the error code: FZ01 Bad block allocation: The start and end block numbers do not represent a legal file (start > end; or end too big). FZ02 = File being reallocated (allocated with different parameters than pre-existing file) is not empty. This is not allowed as data loss would occur. FZ03 File allocation would cause loss of data in another file FZ04 = File Allocation Table could not be updated. This could be due to excessive wear on the FLASH memory part. 7-34 MCL-Code Reference Guide Notes 1. Files are allocated using block numbers. A block represents 256 bytes of FLASH memory. Block numbers are referenced to an artificial zero point which represents the first FLASH memory block available for data storage. Therefore, if the system code occupies 140 Kbytes (0x023000) of space, followed by 32 KB (0x008000) of MCL application storage, then “Block 0” starts at address 0x02B000. 2. MCL Designer can be set up for 512 KB, 1 MB, 4 MB or 8 MB scanners on the System Setup screen. 256 KB are reserved for system use (512 KB are reserved on the Extended Memory Phaser). Designer keeps track of the remaining space as files are allocated. 3. Minimum file size supported is 2 blocks. 4. On Extended Memory Phaser, file allocation requests are rounded up to the nearest whole 64 KB segment. Example FZ|A|1000|125 Allocates file 'A' to begin at block 1000, and to occupy 256 blocks (64K). 7-35 MCL-Designer for Phaser Series User’s Guide Input Cash (IC) Function Inputs a number with selected format in cash register input mode (digits are scrolled from right to left) a short beep is emitted after input. Syntax IC | line | column | variable | integer | fraction where: Line = line of the input field on the display (range: 1 - 2). Column = left most column of the input field. Variable = name of the variable to receive the input. Integer = size of integer (0 to 7 digits). Fraction = size of fractional part (0 to 4 digits). Affected System Variables None Notes 1. Integer set to 0 means that it is not possible to enter a number greater than 0.9999. In that case, the decimal point is placed at the most left place. 2. Fraction set to 0 means that the entered number is an integer. In that case, the decimal point is not displayed. 3. Integer and fraction both set to 0 is not allowed. 4. Integer entry ends and fractional entry begins when either the maximum specified number of integers has been entered or ‘.’ or ‘,’ is pressed. 7-36 MCL-Code Reference Guide Active keys are: <Enter> Accept Input. ‘.’ or ‘,’ switches to fractional input. <Bksp> removes last entered character. <0> to <9> digits. All keys defined in the last PI command Example IC | 2 | 6 | A0 | 4 | 2 Lets user enter a number with format 0000.00 in variable A0 at screen position (2,6). 7-37 MCL-Designer for Phaser Series User’s Guide Input Date (ID) Function Displays an input mask at a screen position and waits for a date input with selected format. Syntax ID | line | column | variable where: Line = line of the input field on the display (range: 1 - 2). Column = left most column of the input field. Variable = name of the variable to receive the input. Affected System Variables None Notes 1. The default date format is MM/DD/YYYY. The date format and date separator can be changed using the PY command. 2. Date is checked during input. All invalid dates are rejected. Examples PY | F013 | 01 PY | F00E | 00 ID | 2 | 1 | A0 Sets format and separator. PY | F013 | 00 PY | F00E | 02 ID | 2 | 1 | A0 Sets format and separator. 7-38 Lets user enter a date with format DD/MM/YYYY in variable A0 at screen position (2,1). Lets user enter a date with format MM:DD:YYYY in variable A0 at screen position (2,1). MCL-Code Reference Guide IF (IF) Function Compares a variable with text and jumps to one of two routines, depending on the outcome of the comparison. Syntax IF | text1 | test | text2 | true | false where: Text1 = the first operand to compare. Test = the condition for the comparison. values for test: = equal to. > greater than. < less than. Text2 = the second operand to compare. True = address or label of the next instruction if result is true. False = address or label of the next instruction if result is false. Affected System Variables None Note All comparisons are lexicographic, except when operand 1 and operand 2 are both integers. Examples IF | &A0 | > | 999 | OVFLW | +1 Execute the OVFLW routine if the value in A0 is greater than 999. Execute the next instruction if the value in A0 is less than or equal to 999. IF | &C0 | = | STOP | END | +1 Execute the END routine if the value in C0 is equal to “STOP”. Execute the next instruction if the value in C0 is not equal to “STOP”. 7-39 MCL-Designer for Phaser Series User’s Guide Input Hour (IH) Function Displays an input mask and waits for a time input with selected format. Syntax IH | line | column | variable where: Line = line of the input field on the display (range: 1 - 2 = screen line). Column = left most column of the input field. Variable = name of the variable to receive the input. Affected System Variables None Note Invalid time entry is rejected. Example IH | 1 | 6 | A0 7-40 Lets user enter a hour with format HH: MM: SS in variable A0 at screen position (1,6). MCL-Code Reference Guide Input Key (IK) Function Jumps to the associated label when one of the keys defined in the command argument list is pressed. (Defines HOT-KEYS). Syntax IK | key1 | label [ | key2 | label ] .....[ | key n | label ] where: Key 1 = name of the first key or time out value. Key n = name of the last key Label = destination address, if the key is pressed. Key Code Values Actual Keys Used F0 to F9 = Function keys (F0 = <F10>, F1 = <F1>, F2 = <F2>, etc.). UP or DW = <Up> or <Down> arrow keys. PU or PD = <FN+UP> or <FN+DOWN> keys. Ax = Any alpha character on the keypad (AK = <K> key). Only uppercase is supported. Nx = Any character on the numeric keypad (N9 = <9> key). EN = <Enter> key. CL = <Fn+Bksp> key. SP = Special <*> key. ** = Any key (must be the last key of the list). BS = Backspace key 7-41 MCL-Designer for Phaser Series User’s Guide Affected System Variables 98 = Set to KeyName of key pressed. Notes 1. Key 1 can be a TIMEOUT, with a maximum value of 9999. (see the PI command for an explanation of TIMEOUT values). 2. Maximum 20 entries (including TO) 3. If ** is used, it must be placed at the end of the list because keys defined after ** are ignored. Examples IK | F1 | HELP | F8 | END | CL | +1 Jump to the HELP label if the <F1> key is pressed. Jump to the END label if the <F8> key is pressed. Jump to current line +1 if the <FN+BKSP> key is pressed. IK | F1 | HELP | ** | OUT Jump to the HELP label if the <F1> key is pressed. Jump to the OUT label if any other key is pressed. 7-42 MCL-Code Reference Guide Input List (IL) Function Define a list input field, where several options may be accessed using a single field, scrolling through the available options. The index of the selection is returned in a variable. Syntax IL | line | column | height | width | default | mode | speedkey | variable | sel1 [ | sel2 ]…[ | seln ] where: line = line on which to begin field. column = column in which to begin field height = number of lines to be used (ignored by Phaser). width = number of columns to be used. default = Index of default selection. mode = Scrolling Mode. S = Scrolling: if user attempts to scroll beyond the start or end of the list, the scanner ignores the keypress and beeps. R = Rolling: if the user scrolls past the end of the list, the list rolls over back to the beginning. speedkey = Enable speed key processing. Note that the speedkey feature only works with numerics (0-9). 1 = Pressing the key corresponding to the first character of a list item moves directly to that selection (most useful if list items are numbered). 0 = Disable the speedkey feature. variable = Variable to receive the selection. sel1 = Text of first available selection. seln = Text of last available selection. 7-43 MCL-Designer for Phaser Series User’s Guide Affected System Variables &98 = The text of the selected entry or “TO” if time-out occurs. &97 = The index number of the selected entry. Notes 1. The PI command is active in the IL command, so all defined hot-keys are still available. 2. The selected index will be returned in the variable. 3. If <UP> (UP Arrow) or <DW> (Down arrow) are used in PI before IL command, they will perform the action defined in PI only on <UP> on first item and <DW> on last item, and then only if mode is set to S. Otherwise, <UP> and <DW> switch the current selected item in the list. Examples IL | 2 | 2 | 1 | 18 | 1 | S | 0 | A0 | 1. Inventory | 2. POS | 3. Shipping Define, at line 2, column 2, for 18 characters, an input list field which will scroll through the following selections, starting with selection 1: 1. Inventory 2. POS 3. Shipping If the user hits the UP key when selection 1 is displayed, the program will take whatever action is currently defined in the PI command for an up key. If the user hits the DOWN key when selection 1 is displayed, selection 2 will be displayed. The chosen selection number will be stored in A0. Speedkey processing is disabled. 7-44 MCL-Code Reference Guide Input eXtended (IX) Function Accepts any input from the keyboard or scanner. Syntax IX | line | column | variable | minlength | maxlength | kb | scan | autoval | data | reset-var | scanret where: Line = line of the input field on the display (range: 1 - 2 = screen line). Column = left most column of the input field. Variable = name of the variable to receive the input. Minlength = minimum length of the input field (min. = 0 char.). Maxlength = maximum length of the input field (max.= 55 char.). Kb = keyboard entry allowed (Y or N). Scan = scanning entry allowed (Y or N). Autoval = auto-validation (Y or N). If Y, scanner input is accepted without having to press <ENTER>, and keypad input of maxlength characters is accepted without having to press <ENTER>. If N, <ENTER> must be pressed to accept either scanner or keypad input. Data = type of data. Valid entries are: A = alphanumeric. N = numeric. D = decimal (accept “.” or “,”). S = secret. “*” displayed in input field for every character entered. Reset-var = reset variable? (Y or N). IfY, the destination variable is cleared before the input operation, and no default value is displayed on the screen; if N, then the current value of the variable is used as the default value, and displayed in the input field prior to accepting user input. Scanret = scan-return-scan (Y or N). If Y, and scan is N, then scanning data on this field will cause the default value to be entered, and the next field to be accessed. 7-45 MCL-Designer for Phaser Series User’s Guide Affected System Variables Normal mode &91 = Barcode Descriptor &97 = “?” &98 = type of code: C39, I25, C128, E08, E13, C49, UPCE0, UPCE1, UPCA, MSI, CODABAR, D25, C11, C93, E128, Unknown or KB if keyboard input. variable = Contains the input data. After TIMEOUT (if one has been defined in the previous PI command) &91 = “?” &97 = “?” &98 = “TO” variable = “?” After EXIT KEY (defined in the previous PI command) &91 = “?” &97 = name of the pressed key (see PI command for keynames). &98 = “KB” variable = “?” Notes 1. If <CL> (Clear key) is used in PI before IX command, it performs the action defined in PI only on the first input position. Otherwise, <CL> clears the current input field. 2. The Barcode Descriptor is a string describing the barcode length and the barcode symbol type. Some host interface software requires this data to properly format the output string for the host device (Synapse hosts, and some RS232 host variants, for example). If your data will be transmitted to one of these hosts, you must save the Barcode Descriptor in your data file along with the barcode data, so that the proper formatting may be performed by the interface software. (See Serial Output (SO) P360/P460 Memory Scanner on page 7-73 and Serial Output (SO) - P370/P470 RF 7-46 MCL-Code Reference Guide Scanner on page 7-75 for a description of how to use this data in formatting you output.) 3. Setting SCAN-RET to Y overrides KB disable. Example IX | 2 | 10 | A3 | 5 | 10 | Y | Y | Y | A | Y | N Accepts input data on line 2, column 10 (minimum 5 characters, maximum 10 characters), and stores it in variable A3. The input can be entered from the keyboard or a scanner. The entry is automatically validated (if 10 characters long). The input is alphanumeric. Variable A3 is reset before executing the command. 7-47 MCL-Designer for Phaser Series User’s Guide LaBel (LB) Function Assigns a label to the current program address. Syntax LB | label where: Label = the name of the address (maximum 10 characters). Affected System Variables None Notes 1. Label can be alphanumeric, but the first character must be alpha or underscore (“_”) character 2. Label name must be unique for each program. 3. Maximum length = 10 characters. Example LB | MAIN 7-48 Assigns the label “MAIN” to the current program address. MCL-Code Reference Guide MoDem (MD) Function Outputs a string of characters to the modem and waits for a response from the modem. Syntax MD | text where: Text = the string of characters to send. Affected System Variables &99 = “0” if no error occurs “1” if error is detected &98 = last modem answer, if modem response received; “NO CRADLE” if the user does not connect the scanner to a cable or cradle within 30 seconds of executing this command; “TIMEOUT” if the modem did not respond in the time specified in the last PI command (not including the 30 second period waiting for the user to cradle the scanner); “SER. ERROR” if an error occurs during the transmission to the mode (such as a handshaking error if handshaking is enabled). Notes 1. 2. 3. 4. 5. 6. 7. A <CR> character (ASCII 13) is added automatically at the end of the string. The RS232 communication parameters (baud rate, parity, etc.) are used. The RS232 communications must be set to use NO software handshaking. Unless the Host Override Enable barcode is scanned, the user has 30 seconds after this command is encountered to place the scanner into the cradle or connect to the cable. If the user does not do so, the MD command will return an error status (&99 = 1). Once the commanded string has been sent to the modem, the scanner will wait a period of time determined by the most recent PI command for the response from the modem. If no response is received, the MD command will return an error status (&99 = 1). Only the first 10 characters of a response message are placed in system variable 98. A valid response code (&99 = 0) does NOT indicate that the modem successfully executed the command, only that the modem received the command and responded to it. In order to determine the modem result, the user should examine &98 as well. Example MD | ATDT555121 Dial the phone number 555-1212. 7-49 MCL-Designer for Phaser Series User’s Guide Menu List (ML) Function Defines a list input field, where several options may be accessed using a single field, scrolling through the available options. The label associated with the selected text is taken as a jump address. Syntax ML | line | column | height | width | default | mode | speedkey | sel1 | skip1 ... [ | seln | skipn ] where: line = row on which to begin field. column = column in which to begin field. height = number of lines to be used (ignored by Phaser). width = number of columns to be used. default = index of default selection. mode = rollover mode R = Roll from last to first. S = Scroll from first to last. speedkey = enable speed key processing. Note that the speedkey feature only works with numerics (0-9). 1: Pressing the key corresponding to the first character of a menu item moves directly to that selection. 0: Disable the speedkey feature. sel1 = text of first available selection. skip1 label to jump to if the associated menu item is selected. seln = text of last available selection. skipn label to jump to if the associated menu item is selected. 7-50 MCL-Code Reference Guide Affected System Variables &98 = The code of the exit key or “TO” if time-out occurs. Notes 1. The PI command is active in the ML command, so all defined hot-keys are still available. 2. If <UP> (UP Arrow) or <DW> (Down arrow) are used in PI before ML command, they will perform the action defined in PI only on <UP> on first item and <DW> on last item, and then only if mode is set to S. Otherwise, <UP> and <DW> switch the current selected item in the list. Example ML | 2 | 2 | 1 | 18 | 1 | S | 0 | 1. Inventory | INVEN | 2. POS | POS | 3. Shipping | SHIP Define, at row 2, column 2, for 18 characters, an input list field which will scroll through the following selections, starting with menu item 1: 1. Inventory 2. POS 3. Shipping If the user hits the UP key when option 1 is displayed, the program will take whatever action is currently defined in the PI command for an up key. If the user hits the DOWN key when option 1 is displayed, option 2 will be displayed. The selected label associated with the selection will be jumped to. Speedkey processing is disabled. 7-51 MCL-Designer for Phaser Series User’s Guide Network Input (NI) Function Waits for a command from the network and stores it in a variable. Syntax NI | source | command | variable | variable | variable where: source = the source unit identification (3 characters; usually “099”). command = the expected command variable = the variable receiving the command arguments. Affected System Variables Normal Mode: &97 = Source Identifier. &98 = Received Command. &99 = “0” variable = Received Data. After TIMEOUT (if one has been defined in the previous PI command): &97 = “TO” &98 = “?” &99 = “1” variable = “?” 7-52 MCL-Code Reference Guide After KEY (defined in previous PI command) is pressed: &97 = “KB” &98 = Name of the pressed key (see PI command for key names). &99 = “0” variable = “?” After an error (on the P370/P470 RF scanner): &97 = “?” &98 = Error number &99 = “1” variable = “?” Notes 1. If source is equal to “??”, command is accepted from any source. 2. If command is equal to “??”, any command received will be accepted. 3. Source and destination address are represented in either decimal digits or hex digits, depending on the setting of the MCL-Net Hex Addressing parameter (System Variable 29). 4. Commands supported via the MCL-Net protocol are defined in the MCL-Link User’s Guide (part number 70-33346-XX). The following commands documented in the MCL-Link User’s Guide are NOT supported by the P460: FA: File Append FC: File Copy FD: File Delete FN: File Rename 5. Unsupported commands (commands not listed in the MCL-Link User’s Guide) can be input if specified explicitly in the command field. This allows extensions to the MCL-Net command language without upgrades to the runtime code. 7-53 MCL-Designer for Phaser Series User’s Guide 6. Error numbers reported in &98 (on the P370/P470 RF scanner) are defined a follows: 14 RF Transmission error. Previous RF transmission not yet complete. 15 RF Transmission error. Scanner is not paired properly to base or scanner is out of range. 16 RF Address error. Base to which scanner is paired has been paired with another scanner. 17 RF Transmission error. Scanner out of range. 18 MCL-Link Host unavailable. The base is connected to a Synapse cable, which cannot be used to communicate to MCL-Link. 20 Transaction error. The scanner is already busy communicating with the base. 21 Memory allocation failure. The scanner has run out of buffers necessary to manage communication. Repeated occurrence of this error should be reported to customer service. 24 RF Transmission error. The base is not responding. Repeated occurrence of this error should be reported to customer service. Other error numbers should not occur during an NI operation, and any occurrence of other error numbers should be reported to customer service. Example NI | 04 | CT | A1 Wait for a CT command from address 04 and store the arguments in variable A1. 7-54 MCL-Code Reference Guide Network Output (NO) - P360/P460 Memory Scanner Function Sends a frame to the host via RS-232 using MCL-Link protocol. Syntax NO | destination | command | arg1 | ... | argn where: destination the destination unit identificatio . command = the command to send to the destination argument = the command argument(s) to send. Affected System Variables Normal Mode: &99 = “0” After connection failure (maximum retries reached): &98 = retry count &99 = “1” After Host Error (Host rejects message, or user fails to place scanner in cradle within 30 seconds): &98 = retry count &99 = “1” 7-55 MCL-Designer for Phaser Series User’s Guide After KEY (defined in the most recent PI command) is pressed: &97 = “KB” &98 = Name of the pressed key (see PI command for key names). &99 = “0” variable = “?” Notes Source and destination addresses are represented in decimal or hex digits, depending on the setting of the MCL-Net Hex Addressing parameter. Example NO | 099 | D1 | &A0 Send the D1 command to station 99 with the value of variable A0 as an argument. 7-56 MCL-Code Reference Guide Network Output (NO) - P370/P470 RF Scanner Function Sends a frame to the host via RS-232 using MCL-Link protocol. Syntax NO | destination | command | arg1 | ... | argn where: destination the destination unit identificatio . command = the command to send to the destination argument = the command argument(s) to send. Affected System Variables Normal Mode: &97 = “?” &98 = “?” &99 = “0” After a CLEAR KEY (<FN><BS>) is pressed: &97 = “KB” &98 = “CL &99 = “1” After an error: &97 = “?” &98 = error number &99 = “1” 7-57 MCL-Designer for Phaser Series User’s Guide Notes 1. Source and destination address are represented in either decimal digits or hex digits, depending on the setting of the MCL-Net Hex Addressing parameter (System Variable 29). 2. Commands supported via the MCL-Net protocol are defined in the MCL-Link User’s Guide (part number 70-33346-XX). 3. Unsupported commands (commands not listed in the MCL-Link User’s Guide can be input if specified explicitly in the command field. This allows extensions to the MCL-Net command language without upgrades to the runtime code. 4. Error numbers reported in &98 are defined as follows: 15 RF Transmission error. Scanner is not paired properly to base or scanner is out of range. 16 RF Address error. Base to which scanner is paired has been paired with another scanner. 17 RF Transmission error. Scanner out of range. 18 MCL-Link Host unavailable. The base is connected to a Synapse cable, which cannot be used to communicate to MCL-Link. 20 Transaction error. The scanner is already busy communicating with the base. 21 Memory allocation failure. The scanner has run out of buffers necessary to manage communication. Repeated occurrence of this error should be reported to customer service. 24 RF Transmission error. The base is not responding. Repeated occurrence of this error should be reported to customer service. 247 MCL-Net Protocol error. MCL-Link responded with Busy message. 249 MCL-Net Protocol error. MCL-Link rejected the command. 253 MCL-Net Protocol error. MCL-Link did not respond. Base may not be properly connected to MCL-Link host. Example NO | 099 | D1 | &A0 Send the D1 command to station 99 with the value of variable A0 as an argument. 7-58 MCL-Code Reference Guide MCL-Link Start (NS) Function Calls MCL-Link communication program. Syntax NS Affected System Variables &97 = “?” &98 = “?” &99 = “0” Notes This command puts the scanner in MCL-Link “slave” mode. The scanner then waits for commands coming in on the serial line from the host computer. and executes them as if they had been encountered in a local MCL program. A specific command from the host causes the MCL-Link program to terminate and retur control to the calling MCL program. 7-59 MCL-Designer for Phaser Series User’s Guide Parameterize Input (PI) Function Sets the input time-out value and exit keys for all subsequent input operations (until anothe PI command is received). Syntax PI | code | label [ | code | label ] [ | code | label ] ... where: Label = routine to execute when the defined key is used. (or when the time-out occurs) Code = represent a key value (see list of codes below). If numeric, represents a timeout in 15 msec increments. Key code values Actual keys used F0 to F9 = Function keys (F0 = <F10>, F1 = <F1>, F2 = <F2> , etc.). UP or DW = <Up> or <Down> arrow keys. PU or PD = <FN+UP> or <FN+DOWN> keys. Ax = Any alpha character on the keypad (AK = <K> key), uppercase only. Nx = Any character on the numeric keypad (N9 = <9> key). EN = <Enter> key. CL = <FN+BKSP> key SP = special <*> key BS = Backspace key. PW = Power mode switch Affected System Variables None 7-60 MCL-Code Reference Guide Notes 1. The PI command is active during IL, IX, NI, SI and ML input commands, and the NO output command. Maximum 20 entries (including TO). Examples PI | 1000 | TO | F1 | HELP | F8 | NTPAY Calls the TO (time-out) routine if no input is detected during 15 seconds (1000 x .015 sec). Jumps to the HELP routine if the <F1> key is pressed. Jumps to the NTPAY routine if the <F8> key is pressed. PI | 0 | TO | F1 | HELP | F2 | 127 | F3 | +1 Disable timeout (note “TO” label must be included anyway); jump to “HELP” if the F1 key is pressed; line 127 if the F2 key is pressed, and continue with next line if the F3 key is pressed. 7-61 MCL-Designer for Phaser Series User’s Guide Parameterize Time (PT) Function Sets the date and time. Syntax PT | date_time where: date_time = the new time and date with format: YYYYMMDDHHMMSS. Affected System Variables All date/time system variables (&40 - &46, &72 - &76) are implicitly updated. Notes 1. Valid dates are in the range January 1, 1997 to December 31, 2096. 2. The PT command is not supported on the RF scanner, since the RF scanner has no internal clock. The command does not cause a syntax error, but is simply ignored. Example PT | 19980526131500 7-62 Sets the time and date to 13:15:00; 26 May 1998. MCL-Code Reference Guide Parameter eXchange (PX) Function Changes the contents of a System Setup Variable. (Refer to System Setup Variables on page 7-98). Syntax PX | parameter | value where: Parameter = the System Setup Variable name. Value = the new contents of the System Setup Variable. Affected System Variables The addressed system variable is updated. Notes None. Examples PX | 20 | 10 Writes the value “10” into System Setup Variable 20. PX | 25 | &A0 Writes the contents of variable A0 into System Setup Variable 25. 7-63 MCL-Designer for Phaser Series User’s Guide Parameterize Scanner (PY) Function Control scanner parameters using parameter number/parameter value pairs. Syntax PY | P | [pp]nn | vv [ | [pp]nn | vv ] [ | [pp]nn | vv] … where: P = the “permanent change” flag. Y = Make these changes permanent (write to FLASH parameter buffer). N =Make these changes temporary (write only to RAM buffer). The previous value will be restored the next time the scanner is powered up. nn = a single byte parameter number (value 0x00 – 0xEF). vv = a single byte parameter value (legal values determined by the associated parameter number). pp = an optional single byte prefix number. If a parameter number greater than 239 (0xEF) is required, then a prefix number is used as follows: 0xF0 = Add 256 to the next parameter number value 0xF1 = Add 512 to the next parameter number value 0xF2 = Add 768 to the next parameter number value Affected System Variables None. Notes 1. The parameter numbers and the parameters they correspond to, along with the allowed and default values for those parameters, is shown i PY Parameter Numbers on page 7-103. 2. The reason for the prefix character is so that the vast majority of parameters may be specified in 2 bytes, thus compacting the command size, and reducing the communication time necessary to communicate these parameters over a serial interface (the historical basis of this protocol). 3. The PY command may contain up to 24 parameter number/parameter value pairs. 7-64 MCL-Code Reference Guide 4. Changing the Power Down Time (Parameter Number 0x0C) does not affect the initial power down time. After a reset, the scanner will remain powered for 1 minute in order to charge the real-time clock backup capacitor. Subsequent to this 1 minute period, the Power Down Time will be in effect. Examples PY | N | 01 | 00 | 12 | 04 | F001 | 01 | F101 | 00 Parameter number 1 is assigned value 0; Parameter number 12 is assigned value 04; Parameter number 257 is assigned value 1; Parameter number 513 is assigned value 0. 7-65 MCL-Designer for Phaser Series User’s Guide Quit or eXit (QX) Function Terminates execution of the program and gives control to the calling program, or to the operating system, depending on the type of return defined in the command. Syntax QX | type where: Type = the type of return control procedure: 1 = return control to the calling program. 2 = abort the MCl program (return to system startup). Affected System Variables None Note A QX command is mandatory to exit any program called by the RM command. If Q is omitted after execution of the RM command, System Error “9” is displayed. The QX command can also be used to return from a SR (Skip and Return) command. Examples DC | 0 Clears all the lines on the scanner display DM | 2 | 4 | N | HELL Displays the message “HELLO” on the second line column 4. IX | 2 | 10 | A1 | 1 | 1 | Y | N | Y | A | Y | N Accepts a “one character” entry on the keyboard and stores it in A1. QX | 2 Abort the MCL program and start over. 7-66 MCL-Code Reference Guide Run PrograM (RM) Function Calls a program and starts the execution at the beginning of the called program or from a given label. Syntax RM | progname [| Label] where: Progname = name of the called program. Label = label within the called program to execute at. If a label is omitted, execution begins at line 1 of the called program. Affected System Variables &99 = “0” if no error, “1” if the program is not found, or the execution failed. Notes 1. After execution, control is returned either to the calling program (at the next instruction after the call), or to the OS, depending on how the called program terminates: 2. A maximum of 6 nested program calls can be used. 3. A QX command is mandatory to exit any program called by the RM command. If QX is omitted after execution of the RM command, System Error “9” is displayed. 4. An SK can be used to jump directly to a label in the same or another program. 7-67 MCL-Designer for Phaser Series User’s Guide Examples DC | 0 Clears all the lines on the scanner display RM | 2 Calls and executes the program in file 2. DC | 0 After execution of program 2, clears all the lines on the scanner display. In this example, it is assumed that program 2 terminates with a QX | 1 command. 7-68 MCL-Code Reference Guide Serial Input (SI) Function Accepts input from a serial port and stores the data in variable. Syntax SI | port | variable | beginchar | endchar | maxchar | trailingchar where: Port = communication port (ignored for Phaser). Variable = the variable receiving the input characters. Beginchar = the starting character or string of the data string. Endchar = the last character or string of the data string. Maxchar = maximum number of characters to receive. Trailingchar = number of trailing character(s) to accept after “endchar” or “maxchar” (max. 9). Affected System Variables If a TIMEOUT occurs (if one has been defined in the previous PI command): &97 = “TO” &98 = “?” &99 = “0” If a KEY (defined in the previous PI command) is pressed: &97 = “KB” &98 = name of the pressed key (see PI command for key names). &99 = “0” 7-69 MCL-Designer for Phaser Series User’s Guide If a CLEAR KEY (not defined in the previous PI command) is pressed: &97 = “KB” &98 = “CL” &99 = “1” If an error occurs on the P370/P470 RF scanner: &97 = “?” &98 = error number. &99 = “1” Notes 1. Only the data included between the begin and the end characters are stored in the variable (beginchar and endchar characters excluded). 2. Serial Input terminates when a timeout occurs. 3. You can use “??” to ignore a parameter. 4. The maximum length of input data is 128 bytes. 5. Error numbers reported in &98 (in the P370/P470 RF scanner) are defined as follows: 5 Serial protocol error. Bad characters received. 15 RF Transmission error. Scanner is not paired properly to base or scanner is out of range. 16 RF Address error. Base to which scanner is paired has been paired with another scanner. 17 RF Transmission error. Scanner out of range. 18 MCL-Link Host unavailable. The base is connected to a Synapse cable, which cannot be used to communicate to MCL-Link. 20 Transaction error. The scanner is already busy communicating with the base. 21 Memory allocation failure. The scanner has run out of buffers necessary to manage communication. Repeated occurrence of this error should be reported to customer service. 24 RF Transmission error. The base is not responding. Repeated occurrence of this error should be reported to customer service. 7-70 MCL-Code Reference Guide Examples SI | 1 | B1 | \02 | \03 | 127 | 1 Accepts all data on serial port, starting with the character STX (hex. 02) and ending with the character ETX (hex. 03). When ETX is received, accepts the LRC character into the variable. Stops the input if 128 characters are received (127 + 1 trailing char.). 7-71 MCL-Designer for Phaser Series User’s Guide SKip (SK) Function Performs an unconditional program jump to a label. Syntax SK | label where: Label = address of the routine to execute. If label is unsigned numeric: label indicates an absolute line number within the current program to jump to. If label is signed numeric: label indicates a relative jump (referenced from the current line number). “+1” indicates no jump (execute the next physical line next). If label is alphanumeric: label indicates a named label as defined in an LB command line. Affected System Variables None Note The scanner displays “System Error 3” if the label does not exist. Examples SK | +1 Jumps forward one line. SK | -5 Jumps backward 5 lines. SK | MAIN Jumps to the “MAIN” routine. SK | 127 Jumps to line 127. 7-72 MCL-Code Reference Guide Serial Output (SO) - P360/P460 Memory Scanner Function Sends a string of characters to the serial communication port. Syntax SO | descriptor | text where: Descriptor = descriptor string for the barcode to be transmitted (see command Input eXtended (IX) on page 7-45 for a discussion of the barcode descriptor ??: Use default barcode descriptor (data transmits as Code 39). T: User default barcode descriptor and transparent mode (keycat/keycode values are ignored – see notes below). Other: Data transmitted using barcode descriptor provided. Value provided should be the contents of system variable 91 after the associated data was scanned. Text = the string of characters to send. Affected System Variables &99 = “0” if no error, “1” if transmission fails (handshaking failure). Notes 1. The text to be sent may include ~xyyy embedded within it. This is interpreted as KEYCAT x/KEYCODE yyy, used to insert special characters into the data stream. 2. If the text to be transmitted represents a single barcode, then the descriptor shoul be the descriptor which was returned in &91 when the code was scanned. If the text represents non-barcode data, or barcode data supplemented with other data, o anything other than a single barcode, the descriptor should be supplied as “??”. I this case, the host interface software will generate the necessary descriptor data. 7-73 MCL-Designer for Phaser Series User’s Guide 3. If the text to be transmitted does not contain any KEYCAT/KEYCODE data, but does include the “~” character, then the descriptor must be set to 'T' to allow for “transparent” (non-translated) mode transmission. 4. To send a “~” character embedded in the barcode, the String Serial Output command must be used, or select transparent mode. 5. Unless the Host Override Enable barcode has been scanned, once the SO command is encountered, the user has 30 seconds to place the scanner in the cradle or to connect power. After 30 seconds, an error will be reported (&99 = 1). 6. If the RS232 interface is set up to user an ACK/NAK, ENQ, or ENQ/ACK/NAK handshaking protocol, and the interface times out waiting for data from the host, a host error will be reported (&99 = 1). Processing will proceed with the next MCL program statement, regardless of any Timeout branches specified in the most recent PI command. Examples SO | ?? | HELLO WORL Sends the characters HELLO WORLD to serial port using default descriptor SO | &91 | &A1~7013 Sends the contents of variable A1 followed by a carriage return (Category 7, value 013), using formatting defined by descriptor in system variable 91. 7-74 MCL-Code Reference Guide Serial Output (SO) - P370/P470 RF Scanner Function Sends a string of characters to the serial communication port. Syntax SO | port | text where: Port = communication port (ignored for Phaser). Text = the string of characters to send. Affected System Variables If a CLEAR KEY is pressed: &97 = “KB” &98 = “CL” &99 = “1” If an error occurs: &97 = “?” &98 = error number. &99 = “1” 7-75 MCL-Designer for Phaser Series User’s Guide Notes 1. The maximum length of output data is 506 bytes. 2. Error numbers reported in &98 are defined as follows: 2 Serial protocol error. Configured host does not recognize transmitted characters. 3 Serial protocol error. Handshaking failure. 5 Serial protocol error. Bad characters received. 8 SYNAPSE error. Configured host does not recognize transmitted characters. 9 SYNAPSE error. SYNAPSE transmission failed. SYNAPSE cable may not be properly installed. 15 RF Transmission error. Scanner is not paired properly to base or scanner is out of range. 16 RF Address error. Base to which scanner is paired has been paired with another scanner. 17 RF Transmission error. Scanner out of range. 18 MCL-Link Host unavailable. The base is connected to a Synapse cable, which cannot be used to communicate to MCL-Link. 20 Transaction error. The scanner is already busy communicating with the base. 21 Memory allocation failure. The scanner has run out of buffers necessary to manage communication. Repeated occurrence of this error should be reported to customer service. 24 RF Transmission error. The base is not responding. Repeated occurrence of this error should be reported to customer service. Examples SO | 1 | HELLO WORLD Sends the characters HELLO WORLD to serial port. SO | 1 | &A1 WORLD \ 0D \ 0A Sends the contents of variable A1 followed by “WORLD” and a carriage return/line feed pair to the serial port. 7-76 MCL-Code Reference Guide Skip and Return (SR) Function Performs an unconditional program jump to a sub-routine pointed to by a label. Syntax SR | label [| Progname] where: Label = address of the routine to execute. If label is unsigned numeric: label indicates an absolute line number within the current program to jump to. If label is signed numeric: label indicates a relative jump (referenced from the current line number). “+1” indicates no jump (execute the next physical line next). If label is alphanumeric: label indicates a named label as defined in an LB command. Progname = (Optional) MCL Program Name Affected System Variables None Notes 1. QX command will return program control to the statement immediately following the SR command. 2. The terminal will display “ERROR 3” if the label does not exist. Examples SR | +1 Jump to sub-routine starting one line forward. SR | -5 Jump to sub-routine starting five lines backwards. SR | SUBR Jump to the “SUBR” sub-routine. SR | TEST | 2 Jump to sub-routine starting at label TEST in MCL program 2. 7-77 MCL-Designer for Phaser Series User’s Guide Variable Compare (VC) Function Compares the content of a variable with a pattern of characters. Syntax VC | source | pattern | Skip True | Skip False where: Source = the text to be tested. Pattern = the test returns TRUE if the first characters of Source match Pattern, FALSE otherwise. If Pattern is longer than Source, the test fails. A to Z or a to z - specific character 0 to 9 - specific digit. “ - Any alphabetic character. $ - Any numeric character. ? - ignore test on this character. True = Skip address if comparison is true. False = Skip address if comparison is false. Affected System Variables None Notes 1. This command compares all the characters in the variable with a pattern described in the command. The variable must match all the characters of the pattern, so the variable must have at least as many characters as the pattern. 2. When an alphabetic or numeric character is placed in the pattern, the variable must perfectly match the letter or number in the pattern. Otherwise, to test if a character is alphabetic or numeric, ” mask must be used, or $ for a digit. 7-78 MCL-Code Reference Guide Examples VC | &A1 | A 1 ” $ ? | +1 | VCERR Compares variable A1 with following pattern: first character must be ‘A’. second character must be ‘1’. third character must be Alphabetic (A-Z, a-z ). fourth character must be numeric ( 1-9 ). fifth character is not tested. If matched, go to next line ( +1) else go to label VCERR. 7-79 MCL-Designer for Phaser Series User’s Guide Variable Extract (VE) Function Extracts all characters of the defined field and stores them in variable. (Fields are delimited by the separator defined in the command). Syntax VE | variable | text | fieldnr | separator where: Variable = the name of the receiving variable. Text = the text to store in variable. Fieldnr = field number to be extracted. Separator = character defining the beginning and end of each field. If no separator is used, all text is stored in the variable. Affected System Variables &99 = “0” if no error, “1” if field not found (or field does not exist). Note If “ | ” is the separator, use “\7C” to specify the “ | ” character. Example VE | A1 | JOHN + ANDREW + PETER | 2 | + Extracts the second field from the text. Fields are separated by “+” (After execution: A1 = “ANDREW”). VE | A0 | &A1 | 2 | \7C 7-80 Extract the second field from the text in variable A1, using '|' as the separator character,and place the result in variable A0. MCL-Code Reference Guide Variable Format (VF) Function Formats the data in a variable as a string of characters or numbers. Syntax VF | type | destination | origin [| sign | zero | int | dec] where: Type = type of format. C =characters. D = numbers. I = Integer. N = Numeric. Destination = the name of the receiving variable. Origin = the original string to be formatted (may be a variable reference). Only with numeric format: Sign = add sign to the number S = add ‘+’ or ‘-’ before number. B = add space or ‘-’ before number. N = no sign. Zero = fill the number with a specified character. Z = fill with ‘0” before number. B = fill with space before number N = remove all “0” and space before number. Anything else = fill with specified character before number Int = number of digits of integer part. Dec = number of digits of decimal part. 7-81 MCL-Designer for Phaser Series User’s Guide Affected System Variables &99 = “0” if no error, 1 otherwise. &98 = “+” if result >= 0 ( only with numeric formatting ). “-” if result < 0 ( only with numeric formatting ). Notes 1. When data is defined as characters (C), all non significant zeroes and spaces on the left and right of the variable are deleted. 2. If the data contains decimal numbers, the zero just before the decimal point is not deleted. 3. When the data is defined as a number (D), the integer part is 7 digits in length and the decimal part is 4 digits in length. 4. When the data is defined as a number (I), the return value is coded in 5 characters. Examples Format C (characters) VF | C | A1 | &B0 Format the data in variable B0 as characters and store the result in variable A1. Example: Before execution: B0 = “0000125.3500” After execution: A1 = “125.35” Example: Before execution : B0 = “0000000.3500” After execution : A1 = “0.35” Example: Before execution : B0 = “0000100.0000” After execution : A1 = “100” Example: Before execution : B0 = “0000000.0000” After execution : A1 = “0” Example: Before execution : B0 = “00100” After execution : A1 = “100” 7-82 MCL-Code Reference Guide Format D (numbers) VF | D | A1 | &F1 Formats the data in F1 as numbers with decimals, and stores the result in variable A1. Example: Before execution : F1 = “100” After execution : A1 = “0000100.0000” VF | D | G1 | &A0 Formats the data in A0 as numbers with decimals, and stores the result in variable G1. Example: Before execution : A0 = “122.57” After execution : G1 = “0000122.5700” Format I (Integers) VF | I | A1 | 4 A1 returns 00004. Format N (numeric) VF | N | A0 | +123747.7489 | S | B | 9 | 6 A0 returns +. . .123747.748900 where the ‘.’ represents a space. VF | N | A0 | +123747.7489 | S | B | 4 | 6 A0 returns +9999.999999 (an overflow condition). VF | N | A0 | +123747.7489 | S | Z | 9 | 6 A0 returns +000123747.748900 VF | N | A0 | +123747.7489 | S | N | 9 | 6 A0 returns +123747.748900 VF | N | A0 | +123747.7489 | S | B | 9 | 6 A0 returns +. . .123747.748900 VF | N | A0 | +123747.7489 | B | B | 9 | 6 A0 returns . . .123747.748900 VF | N | A0 | +123747.7489 | B | Z | 9 | 6 A0 returns 000123747.748900 7-83 MCL-Designer for Phaser Series User’s Guide Variable Justify (VJ) Function Justifies the data in a variable to the left or to the right, and fills gaps with characters. Syntax VJ | type | destination | origin | length | character where: Type = type of justification. L = left. R = right. Destination = the name of the receiving variable. Origin = the original string to be formatted (may be a variable reference). Length = the total length of the justified data. Character = the character with which to fill the field (any ASCII character may be used). Affected System Variables &99 = “0” if no error occurs, 1 otherwise. Notes 1. If a space is used as an ASCII character, it must be coded as “\20”. 2. If the length parameter is less than the length of the origin string, the origin will be copied to destination unchanged. 7-84 MCL-Code Reference Guide Examples VJ | L | A1 | &A0 | 10 | * Left -justifies variable A0 for a length of 10 characters and fill with asterisks (*) Example: Before execution : A0 = “HELLO” After execution : A1 = “HELLO*****” VJ | R | A1 | &A0 | 6 | $ Right-justifies variable A0 for a length of 6 characters and fill with “$” Example: Before execution : A0 = “100” After execution : A1 = “$$$100” 7-85 MCL-Designer for Phaser Series User’s Guide Variable Length (VL) Function Computes the size of a text string and stores it in a variable. Syntax VL | variable | text where: Variable = the variable receiving the computed length. Text = the text to evaluate. Affected System Variables None Notes None Examples VL | A1 | HELLO_WORLD Computes the size of “HELLO_WORLD and stores it in variable A1 (after execution: A1 = “11”). VL | A1 | &B0 7-86 Computes the size of the text in variable B0 and stores the result in variable A1. Example: Before execution: B0 = “GOODBYE” After execution: A1 = “7”. MCL-Code Reference Guide Variable Move (VM) Function Replaces the current contents of a variable with text. Syntax VM | variable | text where: Variable = the name of the receiving variable. Text = the text to store in variable. Affected System Variables &99 = 0, if no error occurs, 1 otherwise. Examples VM | A1 | HELLO Stores the word “HELLO” in variable A1. After execution : A1 = “HELLO” VM | A0 | &A1 WORLD Concatenates the contents of variable A1 with the word “WORLD”, and stores the result in variable A0. Example: Before execution: A1 = “HELLO”. After execution: A0 = “HELLO WORLD” 7-87 MCL-Designer for Phaser Series User’s Guide Variable Operation - Arithmetic (VO) Function Executes arithmetic operation on number1 and number2, and stores the result in variable. Syntax VO | type | variable | number1 | number2 where: Variable = the name of the receiving variable. Number1 = the first operand. Number2 = the second operand. Type = Operation to perform: + to add. - to subtract. * to multiply. / to divide. % to compute Modulo. Affected System Variables &98 = the sign of the result. &97 = remainder of divide operation. &96 = the sign of the remainder Notes 1. When arithmetic operations with decimal positions are needed, the formatting of the result may be required. 2. Addition, Subtraction, Multiplication and Division operations work on integer (0 to 65535) and decimal numbers. 3. Modulo operation only works on integers (0 to 65535). 4. The remainder of the divide command is stored in variable &97. You can use the modulo operation to get this result directly. 5. In case of overflow, the output is equal to 99999 and the system variable 99 = 1. 7-88 MCL-Code Reference Guide 6. The output format is always on 11 digits : 0000000.0000 to 9999999.9999. Examples VO | + | A1 | &A1 | 1 Increments A1 by 1. VO | - | A1 | &B1 | &D1 Subtracts contents of variable D1 from variable B1 and stores the result in A1. 7-89 MCL-Designer for Phaser Series User’s Guide Variable Substring (VS) Function Extracts the number of characters defined by size from a text string, starting at the position defined by begin, and stores these extracted characters in a variable. Syntax VS | variable | text | begin | size where: Variable = name of the variable receiving the characters. Text = text string from which the data must be extracted. Begin = starting position of the string to extract. Size = number of character to extract. Affected System Variables &99 = 0, if no error occurs, 1 otherwise. Notes 1. If the starting position (begin) lies outside of text string, or if the number of characters to extract (size) is too large, variable will contain an empty string (empty string = “?”). 2. Use VE command if the variable contains “ | ” characters. 3. If the Size is 0 (zero), then the string will be extracted from Begin to the end of the Text. 7-90 MCL-Code Reference Guide Examples VS | A1 | HELLO_WORLD | 7 | 5 Extracts “WORLD” from the text and store it in A1. Beginning position = 7, size = 5 characters. After execution : A1 = “WORLD” VS | A0 | &A1 | 2 | 3 Extracts text from A1, store it in A0. Beginning position = 2 , size = 3 characters. Example: Before execution: A1 = WORLD. After execution : A0 = “ORL”. 7-91 MCL-Designer for Phaser Series User’s Guide Variable operation - Arithmetic- eXtended (VX) Function Executes arithmetic operation on number1 and number2, and stores the result in a variable with a specified numeric format (see VF | N command). Syntax VX | type | variable | number1 | number2 | sign | zero | int | dec where: Variable = the name of the receiving variable. Number1 = the first operand. Number2 = the second operand. Type = the operation to perform: + to add. - to subtract. * to multiply. / to divide. % to compute Modulo. Sign = add sign to the number. S = add ‘+’ or ‘-‘ before number. B = add space or ‘-’ before number. N = no sign. Zero = fill the number with a specified character Z = fill with ‘0” before number. B= fill with space before number. N = remove all ‘0’ and space before number. Int = number of digits of integer part. Dec = number of digits of decimal part. 7-92 MCL-Code Reference Guide Affected System Variables &99 = 0, if no error occurs. &98 = the sign of the variable. &97 remainder of divide operation. &96 the sign of the remainder. Notes 1. If the size of the decimal part is set to 0, the decimal point will be omitted. 2. If the size of the integer part is set to zero, the first character of the result will be a decimal point. 3. If both int and dec are set to 0, a syntax error (Error 4) will be declared. Examples VX | + | A1 | 123747.7489 | 1 | S | B | 9 | 6 result A1 = +. . . 123748.748900. VX | - A1 | 123747.7489 | 1 | S | Z | 9 | 6 result A1 = +000123746.748900. 7-93 MCL-Designer for Phaser Series User’s Guide WaiT (WT) Function Suspends execution of the current program for a defined delay period. Syntax WT | length [ | abort ] where: Length = length of delay (in 15-millisecond increments). Abort = Allow wait to be aborted by user intervention: Y = Keyboard or trigger will cause wait period to be aborted. N or absent = Keyboard and trigger will have no effect. Affected System Variables None. Notes The maximum allowed wait is 60 seconds. Anything entered above 60 seconds will default to 60 seconds. Examples WT | 20 Current program will wait 300 milliseconds (20 x 15 ms), then continue. WT | &A1 | Y Current program will wait “n” times 15 milliseconds, then continue. (“n” is the value contained in variable A1). Pressing any key will abort the wait and move on to the next program step. 7-94 MCL-Code Reference Guide Programs and File Sizes Programs ! maximum 9 programs ! maximum 512 lines per program ! maximum program size 4 KB (4095 bytes) Files ! ! size of a data file is limited by the scanner’s available memory. size of a record is limited to 255 characters (including field separator and CR LF characters). ! a file may not contain more than 9998 records regardless of the record size. ! total user file space = 256 KB on a 512 KB unit 768 KB on a 1 MB unit 3584 KB on a 4 MB unit 7680 KB on an 8 MB unit 7-95 MCL-Designer for Phaser Series User’s Guide MCL-Code Error Messages After the execution of a MCL-Code command, variable &99 generally reports the result of the command execution. Table 7-5 lists the standard error messages used by the MCL-Code commands. The error messages are displayed on the scanner display and the program is suspended. After pressing the ENTER key, the program returns to the operating system. Any previously stored data is retained intact, although the record entry on which the error occurs will be lost. Table 7-5. Error Code Messages Error Code 7-96 Description 2 error on File operation - File name is invalid - number of fields per records too big - not enough free space on scanner: check system var. 32 3 branch error - jump out the scope of the current program - label not found, too long 4 syntax error in a MCL command - command code invalid - mandatory argument missing or invalid - bad number of arguments: check command syntax check if any variable contains “ | ” characters, if yes, use VE command to extract desired field check line length (max. 512 characters) after variable substitution (variables are replaced by their contents) 5 variable error - variable too big (in write command) - variable name invalid 6 key error - in PI or IK command, invalid key definition - too many entries in PI or IK commands MCL-Code Reference Guide Table 7-5. Error Code Messages (Continued) Error Code Description 7 serial error - attempt to execute SI or SO command on the Network communication port. 9 run program error - too many RM command without the associated QX command (max. 6 nested programs). 7-97 MCL-Designer for Phaser Series User’s Guide System Setup Variables Table 7-6 lists the available system variables. Table 7-6. System Setup Variabl e Variable Default Value 02 4 Country page code: 1 = French. 2 = Dutch. 3 = British English. 4 = American English. 14 6 Baud rate: 2 = 600 BPS. 3 = 1200 BPS. 4 = 2400 BPS. 5 = 4800 BPS. 6 = 9600 BPS. 7 = 19200 BPS. 8 = 38400 BPS. 15 0 Default Error Beep Override: 0: Disabled 1: Enabled If the default Error Beeps are overridden, communications errors do not cause error beeps. Error detection must be coded into your application. You can then use whatever notification method (including display messages and beeps from the BP command table) is appropriate. Note, however, that if Default Beep Override is enabled, you MUST be diligent in coding error detection, or data loss may go unnoticed. * : Read Only variable 7-98 Description MCL-Code Reference Guide Table 7-6. System Setup Variables (Continued) Variable Default Value 20 Y Y N Y Y N Y Y N Y N N N N N Y 24 0070137013 Description Bar-code type mask: Y = enable, N = disable. Contains a 16 characters mask (one character per symbology). char. 1 = UPC A (leftmost character). char. 2 = UPC E0. char. 3 = UPC E1. char. 4 = EAN13. char. 5 = EAN 8. char. 6 = Standard 2/5. char. 7 = Interleave 2/5. char. 8 = Code 39. char. 9 = CODABAR. char. 10 = Code 128. char. 11 = Code 93. char. 12 = Code 11. char. 13 = MSI. char. 14 = Code 49. char. 15 = PDF417. char. 16 = EAN128 (rightmost character). Scan Options Control: Variable which controls the format of data as transmitted from the default application. Note that unless the user specifically writes code to utilize this variable, the scan options control affects ONLYthe default application. The format of this variable is: wxyyyyzzzz where: w x is the enable code for data prefix (0 is disabled, 1 is enabled) is the enable code for data suffix (0 is disabled, 1 is enabled) is the keycat/keycode of the data prefix is the keycat/keycode of the data suffix yyyy zzzz For example: 0170137013 Specifies that data will be transmitted with a suffix of CR/LF (as specified by keycat/keycode 7013). * : Read Only variable 7-99 MCL-Designer for Phaser Series User’s Guide Table 7-6. System Setup Variables (Continued) Variable Default Value Description 25 1 Keyboard Click: 0 = Off. 1 = On. 27 4 Display Contrast 0 = Least Contrast (lightest). 7 = Most Contrast (darkest). 28 512 29 0 Address format used by MCL-Net: 0 = decimal addresses. 1 = Hexadecimal addresses. 30 10 Power off delay in seconds. 33 0 Power source:* 0 = batteries. 1 = cradle. 2 = cable. System Memory size, in KB*. 512 = 512 KB 1024 = 1024 KB (1 MB). 4096 = 4096 KB (4 MB). 8192 = 8192 KB (8 MB). Note that 256KB of the memory is allocated for system code and user scripts on the 512 KB and 1 MB scanners, while 512 KB of the memory is allocated on the 4 MB and 8 MB scanners. So, on a 512 KB scanner, only 256 KB is available for data storage. 35 Batteries status: * 0 = good. 1 = low. 2 = dead. 40 Hours from internal clock system: format 00 to 23 *. 41 Minutes from internal clock system: format 00 to 59 *. 42 Seconds from internal clock system: format 00 to 59 *. * : Read Only variable 7-100 MCL-Code Reference Guide Table 7-6. System Setup Variables (Continued) Variable Default Value Description 43 Day from internal clock system: format 01 to 31 *. 44 Month from internal clock system: format 01 to 12 *. 45 Year from internal clock system: format 1980 to 2079 *. 46 Julian day: format 001 to 365 *. 52 Date Format: 1 = Not Used. 2 = Not Used. 3 = MM DD YYYY 4 = DD MM YYYY 53 1 Date Separator: 1=/ 2=3=: 4 = no separator. 54 1 Hour format: 1 = 24 2 = 12 55 0 Decimal separator: 0=. 1=, 56 4* 59 ’ | ‘(ASCII 124) 68 None 70 TF_type = Supported TF (file transfer) format (scanner to host). 0= TF Extended (Binary format support). 3= TF Counter size in 3 digits. 4= TF Counter size in 4 digits (Default value). Field separator. Program number of currently active program (0 - 8). Version information:* NBRVSMxx, where xx is AA, AB, AC, ... BA, BB, ... to indicate revision level of scanner code. * : Read Only variable 7-101 MCL-Designer for Phaser Series User’s Guide Table 7-6. System Setup Variables (Continued) Variable Default Value Description 71 Scanner Identification number (001 to 254). 72 Date and time in format CCYYMMDDHHMMSS. 73 Date MM/DD/YY (depending on code page). 74 Time HH:MM:SS. 75 Day of week (0 = Sunday, 1 = Monday, .....). 76 AM/PM *. 78 None Week number for the current date (1 - 53) 85 MCL Interpreter version x.x *. 86 Not supported. 89 Version date * format: formatted according to the Date Format and Date Separator parameters 90-99 * : Read Only variable 7-102 Various return codes from MCL commands. MCL-Code Reference Guide PY Parameter Numbers The following table (Table 7-7) lists the PY Parameter Numbers. Table 7-7. PY Parameter Number Parameter Parameter Number Options Default Value Code 39 Code 39 0x00 0 Disable 1 Enable Enable Code 39 Length 1 0x12 2 Code 39 Length 2 0x13 Any length (len1 = len2 = 0) Range (len2 > len1) Discrete lengths (len1 > len2) Verify Code 39 Check Digit 0x30 0 Disable 1 Enable Disable Transmit Code 39 Check Digit 0x2B 0 Do Not Transmit 1 Transmit Do Not Transmit Code 39 Full ASCII 0x11 0 Disable 1 Enable Disable Convert Code 39 to Code 32 0x56 0 Disable 1 Enable Disable Code 32 Prefix 0xe7 0 Disable 1 Enable Disable Trioptic Code 39 0x0 0 Disable 1 Enable Disable 55 UPC/EAN UPC-A 0x01 0 Disable 1 Enable Enable UPC-E 0x02 0 Disable 1 Enable Enable EAN-13 0x03 0 Disable 1 Enable Enable 7-103 MCL-Designer for Phaser Series User’s Guide Table 7-7. PY Parameter Numbers (Continued) Parameter Parameter Number Options Default Value UPC/EAN - Continued EAN-8 0x04 0 Disable 1 Enable Enable UPC-E1 0x0C 0 Disable 1 Enable Disable Bookland EA 0x53 0 Disable 1 Enable Disable Coupon 0x55 0 Disable 1 Enable Disable Decode UPC/EAN Supplementals 0x10 0 Ignore Supps 1 Decode Supps only 2 Auto-discriminate Supps Ignore Supps Supplementals Redundancy 0x50 2-20 7 Transmit UPC-A Check Digit 0x28 0 Disable 1 Enable Enable Transmit UPC-E Check Digit 0x29 0 Disable 1 Enable Enable Transmit UPC-E1 Check Digit 0x2A 0 Disable 1 Enable Enable UPC-A Preamble 0x22 0 None 1 System Character 2 System Character and Country Code System Character UPC-E Preamble 0x23 0 None 1 System Character 2 System Character and Country Code System Character 7-104 MCL-Code Reference Guide Table 7-7. PY Parameter Numbers (Continued) Parameter Parameter Number Options Default Value UPC/EAN - Continued UPC-E1 Preamble 0x24 0 None 1 System Character 2 System Character and Country Code System Character Convert UPC-E to UPC-A 0x25 0 Disable 1 Enable Disable Convert UPC-E1 to UPC-A 0x26 0 Disable 1 Enable Disable EAN-8 Zero Extend 0x27 0 Disable 1 Enable Disable EAN-8 to EAN-13 Type 0xE0 0 Type is EAN-13 1 Type is EAN-8 Type is EAN-13 UPC/EAN Security Level 0x4 0-3 0 Discrete 2 of 5 Discrete 2 of 5 0x05 0 Disable 1 Enable Disable Discrete 2 of 5 Length 1 0x14 12 Discrete 2 of 5 Length 2 0x15 Any length (len1 = len2 = 0) Range (len2 > len1) Discrete lengths (len2 < len1) 0 Interleaved 2 of 5 Interleaved 2 of 5 0x06 0 Disable 1 Enable Enable Interleaved 2 of 5 Length 1 0x16 14 Interleaved 2 of 5 Length 2 0x17 Any length (len1 = len2 = 0) Range (len2 > len1) Discrete lengths (len2 < len1) Verify I 2 of 5 Check Digit 0x31 0 None 1 USS Check Digit 2 OPCC Check Digit 0 None 7-105 MCL-Designer for Phaser Series User’s Guide Table 7-7. PY Parameter Numbers (Continued) Parameter Parameter Number Options Default Value Interleaved 2 of 5 - Continued Transmit I 2 of 5 Check Digit 0x2C 0 Do not transmit 1 Transmit Do not transmit Convert I 2of 5 to EAN-13 0x52 0 Disable 1 Enable Disable Codabar Codabar 0x07 0 Disable 1 Enable Disable Codabar Length 1 0x18 5 Codabar Length 2 0x19 Any length (len1 = len2 = 0) Range of lengths (len2 > len1) Discrete Lengths (len2 < len1) CLSI 0x36 0 Disable 1 Enable Disable Notis 0x37 0 Disable 1 Enable Disable 55 Code 128 Code 128 0x08 0 Disable 1 Enable Enable EAN-128 0x0E 0 Disable 1 Enable Enable Code 93 Code 93 0x09 0 Disable 1 Enable Disable Code 93 Length 1 0x1A 4 Code 93 Length 2 0x1B Any length (len1 = len2 = 0) Range of lengths (len2 > len1) Discrete Lengths (len2 < len1) 7-106 55 MCL-Code Reference Guide Table 7-7. PY Parameter Numbers (Continued) Parameter Parameter Number Options Default Value Code 11 Code 11 0x0A 0 Disable 1 Enable Disable Code 11 Length 1 0x1C 4 Code 11 Length 2 0x1 Any length (len1 = len2 = 0) Range of lengths (len2 > len1) Discrete Lengths (len2 < len1) Verify Code 11 Check Digit 0x34 0 Disable 1 Enable Disable 0 Do not transmit 1 Transmit Do not transmit Transmit Code 11 Check Digit 0x2F 55 MSI MSI 0x0B 0 Disable 1 Enable Disable MSI Length 1 0x1E 1 MSI Length 2 0x1F Any length (len1 = len2 = 0) Range of lengths (len2 > len1) Discrete Lengths (len2 < len1) MSI Check Digits 0x32 0 One check digit 1 Two check digits One check digit MSI Check Digit Scheme 0x33 0 Mod-11, Mod-10 1 Mod-10, Mod-10 Mod-10, Mod-10 Transmit MSI Check Digit 0x2E 1 Transmit 0 Do not transmit Do not transmit 55 General Transmit Options Transmit Code ID 0x2 0 None 1 AIM ID’s 2 Symbol ID’s None Transmit “No Read” Characters 0x5E 0 Disable 1 Enable Disable 7-107 MCL-Designer for Phaser Series User’s Guide Table 7-7. PY Parameter Numbers (Continued) Parameter Parameter Number Options Default Value General Laser On Timeout 0x88 5 – 99 (1/10 second units) 30 (3 seconds) General Decode Parameters Bi-directional Redundancy 0x43 0 Disable 1 Enable Disable Linear Security Level 0x4E 1-3 1 Beeper/User Interface Parameters Beep on Good Decode (for use 0x38 by default application) 0 Disable 1 Enable Enable Beeper Volume 0x8C 0 High 1 Medium 2 Low High Beeper Frequency 0x91 0 High 1 Medium 2 Low High Primary Serial Port Parameters Response Timeout 0x9B 5 – 99 (1/10 second units) 20 (2 seconds) Baud Rate 0x9C 2 3 4 5 6 7 8 9600 Stop Bits 0x9 1 = 1 stop bit 2 = 2 stop bits 7-108 = 600 = 1200 = 2400 = 4800 = 9600 = 19200 = 38400 1 stop bit MCL-Code Reference Guide Table 7-7. PY Parameter Numbers (Continued) Parameter Parameter Number Options Default Value Primary Serial Port Parameters - Continued Parity Type 0x9E 0 Odd Parity 1 Even Parity 2 Mark Parity 3 Space Parity 4 No Parity None Software Handshaking 0x9F 0 1 2 3 4 None ACK/NAK ENQ with ACK/NAK ENQ only XON/XOFF None Hardware Handshaking 0xA0 0 1 2 3 4 None RTS/CTS RTS/CTS RTS/CTS RTS/CTS None Standard Option 1 Option 2 Option 3 Number Data Bits 0xA2 7 7 bits 8 8 bits 8 bits RS-232 Host 0xA3 55 Standard 137 ICL 139 Fujitsu 140 Nixdorf Mode A 142 Nixdorf Mode B Standard Intercharacter Delay 0x6E 0 – 99 (1/1000 second units) 0 Beep on Bell 0x96 0 Disable 1 Enable Disable Check Receive Errors 0x97 0 Disable 1 Enable Disable RTS State 0x9A 0 Low 1 High Low 7-109 MCL-Designer for Phaser Series User’s Guide Table 7-7. PY Parameter Numbers (Continued) Parameter Parameter Number Options Default Value MCL Parameters Key Click 0xF00A 0 Disable 1 Enable Enable Scanner Address 0xF00B 1 – 254 1 Sleep Time 0xF00C 5 – 30 10 secs Date Separator 0xF00E 0 1 2 3 / Hour Type 0xF00F 0 24 hour 1 12 hour 12 hour Decimal Separator 0xF010 0. 1, . File Separator 0xF011 Any ASCII character (ASCII 32 - ASCII 127) | (ASCII 124) Date Format 0xF013 0 MMDDYYYY 1 DDMMYYYY MMDDYYYY / : (None) MCL-Net Parameters MCL-Net Baud Rate 0xF01B 2=600 3=1200 4=2400 5=4800 6=9600 7=19200 8=38400 8 (38400 baud) MCL-Net Hex Addressing Mode 0xF012 0 Disabled 1 Enabled 0 (Disabled) MCL-Net Max Retries 0x0F01C 1-10 3 MCL-Net Frame Timeout 0x0F01D 100-3000 ms, in 100 ms increments 500 ms (5) 7-110 MCL-Code Reference Guide Table 7-7. PY Parameter Numbers (Continued) Parameter Parameter Number Options Default Value MCL-Net Parameters - Continued MCL POS Host 0xF01E 0 MCL-Net 1 Other (RS-232 or Synapse, depending on installation) 1 (Other) MCL Batch Host 0xF01F 0 MCL-Net 1 Other (RS-232 or Synapse, depending on installation) 0 (MCL-Net) Power Detection Beep 0xF020 0 Disabled 1 Enabled 1 (Enabled) Host Override Flag 0xF021 0 Disabled 1 Enabled 0 (Disabled) RF Parameters RF Retries 0xF042 3-8 Scanner Decode Beep Type 0x95 0 1 2 3 4 Beep Beep Beep Beep Beep 4 Type Type Type Type Type 1 2 3 4 5 0 7-111 MCL-Designer for Phaser Series User’s Guide 7-112 Index A Adding a Process . . . . . . . . . . . . . . . . . . . . 2-17 adding a process . . . . . . . . . . . . . . . . . . . . 4-28 adding text to the menu . . . . . . . . . . . . . . . . 3-1 adding variables to the menu . . . . . . . . . . . . 3-4 ampersand (&) . . . . . . . . . . . . . . . . . . . . . . 7-2 use of . . . . . . . . . . . . . . . . . . . . . . . . . . 7-3 argument separator . . . . . . . . . . . . . . . . . . . 7-2 arguments optional . . . . . . . . . . . . . . . . . . . . . . . . 7-2 arithmetic . . . . . . . . . . . . . . . . . . . . . . . . . 4-38 assign variable . . . . . . . . . . . . . . . . . . . . . . 4-30 B Backlight command . . . . . . . . . . . . . . . . . . 7-10 bar code input . . . . . . . . . . . . . . . . . . . . . . . 5-3 Barcode Input . . . . . . . . . . . . . . . . . . . . . . 2-13 Barcode Input - Branch Tab . . . . . . . . . . . . 4-17 barcode input dialog box . . . . . . . . . . . . . . 4-13 beep . . . . . . . . . . . . . . . . . . . . . . . . . . . . . . 4-79 Beep command . . . . . . . . . . . . . . . . . . . . . 7-11 branch group . . . . . . . . . . . . . . . . . . . . . . . 4-40 break . . . . . . . . . . . . . . . . . . . . . . . . . . . . . . 5-3 C case & branch . . . . . . . . . . . . . . . . . . . . . . 4-43 changing the printer setup . . . . . . . . . . . . . 4-84 clear screen . . . . . . . . . . . . . . . . . . . . . . . . 4-82 Code 39 Tab . . . . . . . . . . . . . . . . . . . . . . . 1-14 combine . . . . . . . . . . . . . . . . . . . . . . . . . . . 4-31 commands . . . . . . . . . . . . . . . . . . . . . . . . . . 7-7 Backlight . . . . . . . . . . . . . . . . . . . . . . 7-10 Beep . . . . . . . . . . . . . . . . . . . . . . . . . . 7-11 Display Clear . . . . . . . . . . . . . . . . . . . 7-19 Display Message . . . . . . . . . . . . . . . . 7-20 File Check . . . . . . . . . . . . . . . . . . . . . 7-23 File Delete . . . . . . . . . . . . . . . . . . . . . 7-21 File Erase . . . . . . . . . . . . . . . . . . . . . . 7-22 File Open . . . . . . . . . . . . . . . . . . . . . . 7-24 File Read . . . . . . . . . . . . . . . . . . . . . . 7-28 File Seek . . . . . . . . . . . . . . . . . . . . . . 7-30 file size . . . . . . . . . . . . . . . . . . . . . . . 7-34 File Update . . . . . . . . . . . . . . . . . . . . 7-32 File Write . . . . . . . . . . . . . . . . . . . . . 7-33 If . . . . . . . . . . . . . . . . . . . . . . . . . . . . 7-39 input cash . . . . . . . . . . . . . . . . . . . . . 7-36 Input Date . . . . . . . . . . . . . . . . . . . . . 7-38 Input Extended . . . . . . . . . . . . . . . . . 7-45 Input Hour . . . . . . . . . . . . . . . . . . . . 7-40 Input Key . . . . . . . . . . . . . . . . . . . . . 7-41 Input List . . . . . . . . . . . . . . . . . . . . . . 7-43 Label . . . . . . . . . . . . . . . . . . . . . . . . . 7-48 MCL-Link Start . . . . . . . . . . . . . . . . . 7-59 menu list . . . . . . . . . . . . . . . . . . . . . . 7-50 Modem . . . . . . . . . . . . . . . . . . . . . . . 7-49 Network Input . . . . . . . . . . . . . . . . . 7-52 Network Output . . . . . . . . . . . . 7-55, 7-57 Parameterize Exchange . . . . . . . . . . . 7-63 Parameterize Input . . . . . . . . . . . . . . 7-60 parameterize scanner . . . . . . . . . . . . . 7-64 Parameterize Time . . . . . . . . . . . . . . . 7-62 Quit or Exit . . . . . . . . . . . . . . . . . . . . 7-66 Run Program . . . . . . . . . . . . . . . . . . . 7-67 Serial Input . . . . . . . . . . . . . . . . . . . . 7-69 Serial Output . . . . . . . . . . . . . . . 7-73, 7-75 Skip . . . . . . . . . . . . . . . . . . . . . . . . . . 7-72 Skip and Return . . . . . . . . . . . . . . . . 7-77 Index-1 MCL-Designer for Phaser Series User’s Guide Variable Compare . . . . . . . . . . . . . . . 7-78 Variable Extract . . . . . . . . . . . . . . . . 7-80 Variable Format . . . . . . . . . . . . . . . . 7-81 Variable Justify . . . . . . . . . . . . . . . . . 7-84 Variable Length . . . . . . . . . . . . . . . . . 7-86 Variable Move . . . . . . . . . . . . . . . . . . 7-87 Variable Operation - Arithmetic . . . . 7-88 Variable Operation - Arithmetic - Extended 7-92 Variable Substring . . . . . . . . . . . . . . . 7-90 Wait . . . . . . . . . . . . . . . . . . . . . . . . . 7-94 comment . . . . . . . . . . . . . . . . . . . . . . . . . . 4-83 control & branch . . . . . . . . . . . . . . . . . . . 4-44 copying a screen . . . . . . . . . . . . . . . . . . . . 4-23 copying fields . . . . . . . . . . . . . . . . . . . . . . 4-21 CP CRC . . . . . . . . . . . . . . . . . . . . . . . . . . 7-13 CP CVT . . . . . . . . . . . . . . . . . . . . . . . . . . 7-16 CP XOR . . . . . . . . . . . . . . . . . . . . . . . . . . 7-15 File Check command . . . . . . . . . . . . . . . . . 7-23 File Delete command . . . . . . . . . . . . . . . . . 7-21 File Erase command . . . . . . . . . . . . . . . . . . 7-22 File Open command . . . . . . . . . . . . . . . . . . 7-24 File Read command . . . . . . . . . . . . . . . . . . 7-28 file seek . . . . . . . . . . . . . . . . . . . . . . . . . . . 4-58 File Seek command . . . . . . . . . . . . . . . . . . 7-30 File Size . . . . . . . . . . . . . . . . . . . . . . . . . . . 7-34 File Size command . . . . . . . . . . . . . . . . . . . 7-34 file structure . . . . . . . . . . . . . . . . . . . . . . . . . 7-6 File Update command . . . . . . . . . . . . . . . . 7-32 file viewer . . . . . . . . . . . . . . . . . . . . . . . . . . 5-5 File Write command . . . . . . . . . . . . . . . . . 7-33 files and records . . . . . . . . . . . . . . . . . . . . . . 7-5 files group . . . . . . . . . . . . . . . . . . . . . . . . . 4-49 files window . . . . . . . . . . . . . . . . . . . . . . . 4-87 format . . . . . . . . . . . . . . . . . . . . . . . . . . . . 4-33 G D delete a record . . . . . . . . . . . . . . . . . . . . . 4-53 deleting a screen . . . . . . . . . . . . . . . . . . . . 4-24 deleting all screens . . . . . . . . . . . . . . . . . . 4-25 designing a program . . . . . . . . . . . . . . . . . 2-10 designing with quick tour . . . . . . . . . . . . . . 2-1 direct files . . . . . . . . . . . . . . . . . . . . . . . . . . 7-6 Display Clear command . . . . . . . . . . . . . . 7-19 Display Message command . . . . . . . . . . . . 7-20 display text . . . . . . . . . . . . . . . . . . . . . . . . . 4-6 display variable . . . . . . . . . . . . . . . . . . . . . . 4-7 downloading a project . . . . . . . . . . . . . . . . 6-1 E editing fields on a screen . . . . . . . . . . . . . . editing your design . . . . . . . . . . . . . . . . . . erase file . . . . . . . . . . . . . . . . . . . . . . . . . . Error Code Messages . . . . . . . . . . . . . . . . error messages . . . . . . . . . . . . . . . . . . . . . extract . . . . . . . . . . . . . . . . . . . . . . . . . . . 4-20 2-23 4-57 7-96 7-96 4-35 F features . . . . . . . . . . . . . . . . . . . . . . . . . . . . 1-2 Index-2 global view of variables . . . . . . . . . . . . . . . 4-93 gosub windo . . . . . . . . . . . . . . . . . . . . . . 4-47 Goto . . . . . . . . . . . . . . . . . . . . . . . . . . . . . 4-40 H host look-up . . . . . . . . . . . . . . . . . . . . . . . 4-66 how to create a main menu . . . . . . . . . . . . . 3-1 I IC . . . . . . . . . . . . . . . . . . . . . . . . . . . . . . . 7-36 If command . . . . . . . . . . . . . . . . . . . . . . . . 7-39 information, service . . . . . . . . . . . . . . . . . . . . ix Input Cash command . . . . . . . . . . . . . . . . . 7-36 Input Date command . . . . . . . . . . . . . . . . . 7-38 Input Extended command . . . . . . . . . . . . . 7-45 Input Hour command . . . . . . . . . . . . . . . . 7-40 Input Key command . . . . . . . . . . . . . . . . . 7-41 Input List command . . . . . . . . . . . . . . . . . . 7-43 inserting a blank screen . . . . . . . . . . . . . . . 4-22 Installation . . . . . . . . . . . . . . . . . . . . . . . . . . 1-1 installation . . . . . . . . . . . . . . . . . . . . . . . . . . 1-1 Index K key & branch . . . . . . . . . . . . . . . . . . . . . . 4-41 Keyboard Input . . . . . . . . . . . . . . . . . . . . . 2-16 keyboard input . . . . . . . . . . . . . . . . . . . . . . 4-8 keyboard key symbols . . . . . . . . . . . . . . . . . 7-2 L Label command . . . . . . . . . . . . . . . . . . . . . 7-48 Large Variables . . . . . . . . . . . . . . . . . . . . . . 7-4 length . . . . . . . . . . . . . . . . . . . . . . . . . . . . 4-37 local file check . . . . . . . . . . . . . . . . . . . . . . 4-59 M Macro Command Language . . . . . . . . 7-1, 7-3 main program window . . . . . . . . . . . . . . . . 4-1 MCL Collection . . . . . . . . . . . . . . . . . . . . . . 1-1 MCL commands 9 logical groups . . . . . . . . . . . . . . . . . . 7-3 MCL Designer - main tab . . . . . . . . . . . . . . 3-2 MCL Designer - menu tab . . . . . . . . . . . . . . 3-2 MCL kernel . . . . . . . . . . . . . . . . . . . . . . . . . 7-1 MCL-Code . . . . . . . . . . . . . . . . . . . . . . . . 4-83 MCL-Code display . . . . . . . . . . . . . . . . . . . 5-5 MCL-Code viewer . . . . . . . . . . . . . . . . . . . . 5-5 MCL-Designer . . . . . . . . . . . . . . . . . . 1-21, 2-1 MCL-Designer setup . . . . . . . . . . . . . . . . . 1-21 MCL-Link communications group . . . . . . 4-61 MCL-Link start . . . . . . . . . . . . . . . . . . . . . 4-67 MCL-Link Start command . . . . . . . . . . . . 7-59 Memory Mapping . . . . . . . . . . . . . . . . . . . . 1-8 Menu List command . . . . . . . . . . . . . . . . . 7-50 Menu Options . . . . . . . . . . . . . . . . . . . . . . . 2-9 menu setup . . . . . . . . . . . . . . . . . . . . . . . . . 2-4 message . . . . . . . . . . . . . . . . . . . . . . . . . . . 4-81 Modem command . . . . . . . . . . . . . . . . . . . 7-49 modem command . . . . . . . . . . . . . . . . . . . 4-71 moving a screen . . . . . . . . . . . . . . . . . . . . . 4-24 moving fields . . . . . . . . . . . . . . . . . . . . . . . 4-20 N Network Input command . . . . . . . . . . . . . 7-52 Network Output command . . . . . . . 7-55, 7-57 NO - P360/P460 Memory Scanner . . . . . . 7-55 NO - P370/P470 RF Scanner . . . . . . . . . . 7-57 notational conventions . . . . . . . . . . . . . . . . .viii O others group . . . . . . . . . . . . . . . . . . . . . . . 4-78 Others Tab . . . . . . . . . . . . . . . . . . . . . . . . 1-15 P Parameter Numbers . . . . . . . . . . . . . . . . 7-103 Parameterize Exchange command . . . . . . . 7-63 Parameterize Input command . . . . . . . . . . 7-60 parameterize scanner command . . . . . . . . 7-64 Parameterize Time command . . . . . . . . . . 7-62 pause . . . . . . . . . . . . . . . . . . . . . . . . . . . . 4-78 Phaser RS-232 Setup . . . . . . . . . . . . . . . . . 1-17 Phaser RS-232 setup . . . . . . . . . . . . . . . . . 1-17 Phaser system setup . . . . . . . . . . . . . . . . . . 1-7 placing fields on a screen . . . . . . . . . . . . . 4-19 print file . . . . . . . . . . . . . . . . . . . . . . . . . . 4-77 printing a screen . . . . . . . . . . . . . . . . . . . . 4-84 printing options . . . . . . . . . . . . . . . . . . . . 4-84 printing reports . . . . . . . . . . . . . . . . . . . . . 4-84 process beep . . . . . . . . . . . . . . . . . . . . . . . . . . 4-79 comment . . . . . . . . . . . . . . . . . . . . . . 4-83 file delete . . . . . . . . . . . . . . . . . . . . . . 4-53 file erase . . . . . . . . . . . . . . . . . . . . . . 4-57 file read . . . . . . . . . . . . . . . . . . . . . . . 4-51 file seek . . . . . . . . . . . . . . . . . . . . . . . 4-58 file write . . . . . . . . . . . . . . . . . . . . . . 4-49 host look-up . . . . . . . . . . . . . . . . . . . 4-66 key & branch . . . . . . . . . . . . . . . . . . 4-41 local file check . . . . . . . . . . . . . . . . . . 4-59 MCL-Code . . . . . . . . . . . . . . . . . . . . 4-83 modem command . . . . . . . . . . . . . . . 4-71 pause . . . . . . . . . . . . . . . . . . . . . . . . . 4-78 print file . . . . . . . . . . . . . . . . . . . . . . 4-77 receive data . . . . . . . . . . . . . . . . . . . . 4-75 receive file . . . . . . . . . . . . . . . . . . . . . 4-65 receive packet . . . . . . . . . . . . . . . . . . 4-62 remote file check . . . . . . . . . . . . . . . . 4-68 scanner serial output . . . . . . . . . . . . . 4-74 Index-3 MCL-Designer for Phaser Series User’s Guide send file . . . . . . . . . . . . . . . . . . . . . . . 4-63 send packet to host . . . . . . . . . . . . . . 4-61 serial input . . . . . . . . . . . . . . . . . . . . 4-75 start EXE program on host . . . . . . . . 4-69 string serial output . . . . . . . . . . . . . . . 4-73 variable arithmetic . . . . . . . . . . . . . . . 4-38 variable assign . . . . . . . . . . . . . . . . . . 4-30 variable extract . . . . . . . . . . . . . . . . . 4-35 variable format . . . . . . . . . . . . . . . . . 4-33 variable length . . . . . . . . . . . . . . . . . . 4-37 variable substring . . . . . . . . . . . . . . . 4-34 process list . . . . . . . . . . . . . . . . . . . . . . . . 4-28 Programs and File Sizes . . . . . . . . . . . . . . . 7-95 project downloading . . . . . . . . . . . . . . . . . . . . 6-1 Project Setup . . . . . . . . . . . . . . . . . . . . . . . . 2-1 Q quick view of all screens . . . . . . . . . . . . . . 4-25 Quit or Exit command . . . . . . . . . . . . . . . 7-66 R read a record . . . . . . . . . . . . . . . . . . . . . . . receive data . . . . . . . . . . . . . . . . . . . . . . . . receive file . . . . . . . . . . . . . . . . . . . . . . . . . receive packet . . . . . . . . . . . . . . . . . . . . . . remote file check . . . . . . . . . . . . . . . . . . . . review File . . . . . . . . . . . . . . . . . . . . . . . . Run Program command . . . . . . . . . . . . . . 4-51 4-75 4-65 4-62 4-68 4-54 7-67 S saving your design . . . . . . . . . . . . . . . . . . 2-20 Scanner Setup . . . . . . . . . . . . . . . . . . . . . . 1-10 scanner setup . . . . . . . . . . . . . . . . . . . 1-5, 1-10 screen description . . . . . . . . . . . . . . . . . . . . 4-5 send file . . . . . . . . . . . . . . . . . . . . . . . . . . 4-63 send packet . . . . . . . . . . . . . . . . . . . . . . . . 4-61 sequential files . . . . . . . . . . . . . . . . . . . . . . 7-6 Serial Input command . . . . . . . . . . . . . . . . 7-69 Serial Output command . . . . . . . . . . 7-73, 7-75 service information . . . . . . . . . . . . . . . . . . . . .ix set label . . . . . . . . . . . . . . . . . . . . . . . . . . . 4-46 Index-4 Set up the System . . . . . . . . . . . . . . . . . . . . . 1-7 setting menu options . . . . . . . . . . . . . . . . . . 3-6 setting up a new project . . . . . . . . . . . . . . . . 1-3 SI . . . . . . . . . . . . . . . . . . . . . . . . . . . . . . . . 7-69 simulating and testing your design . . . . . . . 2-20 simulation . . . . . . . . . . . . . . . . . . . . . . . . . . 5-1 Skip and Return command . . . . . . . . . . . . 7-77 Skip command . . . . . . . . . . . . . . . . . . . . . . 7-72 SO - P360/P460 Memory Scanner . . . . . . . 7-73 SO - P370/P470 RF Scanner . . . . . . . . . . . 7-75 start EXE program on host . . . . . . . . . . . . 4-69 Starting MCL Designer . . . . . . . . . . . . . . . . 1-3 starting MCL-Designer . . . . . . . . . . . . . . . . 1-3 string serial output . . . . . . . . . . . . . . . . . . . 4-73 substring . . . . . . . . . . . . . . . . . . . . . . . . . . 4-34 symbol support center . . . . . . . . . . . . . . . . . . ix system setup variables . . . . . . . . . . . . . . . . 7-98 System Variables . . . . . . . . . . . . . . . . . . . . . 7-4 T test & branch . . . . . . . . . . . . . . . . . . . . . . . 4-42 testing and simulating . . . . . . . . . . . . . . . . . 5-1 typographic conventions . . . . . . . . . . . . . . . 7-2 U UPC/EAN Tab . . . . . . . . . . . . . . . . . . . . . . 1-12 User-Defined Variables . . . . . . . . . . . . . . . . 7-4 V Variable Compare command . . . . . . . . . . . 7-78 Variable Extract command . . . . . . . . . . . . 7-80 Variable Format command . . . . . . . . . . . . 7-81 variable group . . . . . . . . . . . . . . . . . . . . . . 4-30 Variable Justify command . . . . . . . . . . . . . 7-84 Variable Length command . . . . . . . . . . . . . 7-86 variable list . . . . . . . . . . . . . . . . . . . . . . . . . 5-4 Variable Move command . . . . . . . . . . . . . . 7-87 Variable Operation - Arithmetic - Extended command . . . . . . . . . . . . . . . . . . 7-92 Variable Operation - Arithmetic command 7-88 Variable Substring command . . . . . . . . . . . 7-90 variables . . . . . . . . . . . . . . . . . . . . . . . . . . . 7-3 Index types of . . . . . . . . . . . . . . . . . . . . . . . . 7-4 W Wait command . . . . . . . . . . . . . . . . . . . . . 7-94 warning message . . . . . . . . . . . . . . . . . . . . 4-81 working items of the simulator . . . . . . . . . . 5-2 working with fields . . . . . . . . . . . . . . . . . . working with files . . . . . . . . . . . . . . . . . . . working with processes . . . . . . . . . . . . . . . working with screens . . . . . . . . . . . . . . . . working with variables . . . . . . . . . . . . . . . write a record . . . . . . . . . . . . . . . . . . . . . . 4-19 4-87 4-26 4-22 4-92 4-49 Index-5 MCL-Designer for Phaser Series User’s Guide Index-6 Feedback Tell Us What You Think... We’d like to know what you think about this Manual. Please take a moment to fill out this questionnaire and fax this form to: (631) 738-3318, or mail to: Symbol Technologies, Inc. One Symbol Plaza M/S B-4 Holtsville, NY 11742-1300 Attn: Technical Publications Manager IMPORTANT: If you need product support, please call the appropriate customer support number provided. Unfortunately, we cannot provide customer support at the fax number above. User’s Manual Title: (please include revision level How familiar were you with this product before using this manual Very familiar Slightly familiar Not at all familia Did this manual meet your needs? If not, please explain. What topics need to be added to the index, if applicable What topics do you feel need to be better discussed? Please be specific. What can we do to further improve our manuals? Thank you for your input—We value your comments.