1
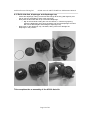
Ambient Pressure Diving Ltd.
AP100 Auto Air and EV50 MP hose Maintenance Manual
AP100 Auto Air and
EV50 MP Hose
Maintenance Manual
Version 1.0
September 2014
Written by Tino de Rijk
Page 1 of 42
Ambient Pressure Diving Ltd.
AP100 Auto Air and EV50 MP hose Maintenance Manual
Table of Contents
1. Introduction........................................................................................... 4!
2.
3.
4.
5.
6.
1.1 Functional description .................................................................................... 4!
1.2 Servicing ......................................................................................................... 4!
1.3 Warranty ......................................................................................................... 4!
1.4 Copyright and Applicable Law ........................................................................ 4!
AP100 Auto Air Exploded Diagram and Parts List ............................... 6!
2.1 AP100 Auto Air Main Assembly ..................................................................... 6!
2.2 AP100 Auto Air Demand Valve Assembly ...................................................... 7!
2.3 AP100 Auto Air Breathing Module Assembly ................................................. 8!
2.4 AP100 Auto Air EV50 Hose Assembly ........................................................... 9!
Service Kit Contents and Tools .......................................................... 10!
3.1 Service Kit Contents ..................................................................................... 10!
3.2 Special Tools needed ................................................................................... 12!
3.3 Standard Tools needed ................................................................................ 12!
Disassembly Instructions.................................................................... 14!
4.1 Remove the EV50 medium pressure hose from the AP100 Auto Air ........... 14!
4.2 Unscrew diaphragm cap from main body ..................................................... 14!
4.3 Remove skid disk and diaphragm ................................................................ 14!
4.4 Unscrew dump guard from main body ......................................................... 15!
4.5 Remove breathing module assembly from main body ................................. 15!
4.6 Remove back end washer and back end rubber from breathing module ..... 16!
4.7 Remove cap retainer, direct feed button cover and plunger ........................ 16!
4.8 Unscrew feed insert from body using wide screwdriver ............................... 17!
4.9 Unscrew Schraeder valve from feed insert using AP50E tool ...................... 17!
4.10 Remove lever from poppet ......................................................................... 17!
4.11 Unscrew demand valve retainer ................................................................. 18!
4.12 Pull out demand valve assembly ................................................................ 18!
4.13 Unscrew valve chamber with poppet and spring from valve body ............. 19!
4.14 Remove washer, poppet and spring from valve chamber .......................... 19!
4.15 Remove poppet seal from poppet .............................................................. 19!
4.16 Unscrew valve seat using APTOOL4 tool .................................................. 20!
4.17 Optionally remove mouthpiece from main body ......................................... 20!
EV50 Medium Pressure (MP) hose disassembly ............................................... 22!
4.18 Unscrew valve sleeve from coupling body ................................................. 22!
4.19 Remove moulded washer from coupling body ........................................... 22!
4.20 Remove spring, sliding collar and 4 ball bearings from valve sleeve ......... 23!
4.21 Remove valve float assembly from valve sleeve........................................ 23!
4.22 Remove guide washer and O-ring from valve sleeve................................. 24!
4.23 Remove O-ring from valve float .................................................................. 24!
Clean and Replace Service Parts ...................................................... 25!
5.1 Various service kits contents ........................................................................ 25!
5.2 Ultrasonically clean deposits from all metal parts ........................................ 26!
5.3 Replace all O-rings with new ones from the Service Kit ............................... 26!
Assembly Instructions ........................................................................ 27!
6.1 Optionally fit new mouthpiece ...................................................................... 27!
6.2 Screw valve seat into valve body using APTOOL4 tool ............................... 27!
6.3 Fit new poppet seal ...................................................................................... 28!
Page 2 of 42
Ambient Pressure Diving Ltd.
AP100 Auto Air and EV50 MP hose Maintenance Manual
6.4 Refit poppet and spring into valve chamber ................................................. 28!
6.5 Screw valve chamber with poppet and spring inside onto valve body ......... 28!
6.6 Push demand valve assembly into main Auto Air body ............................... 29!
6.7 Screw demand valve retainer onto Auto Air body ........................................ 30!
6.8 Refit and tighten lever .................................................................................. 30!
6.9 Screw Schraeder valve into feed insert using AP50E tool ........................... 31!
6.10 Screw feed insert into Auto Air body using a wide screwdriver .................. 31!
6.11 Refit direct feed plunger, button cover and screw cap retainer .................. 32!
6.12 Refit new back end rubber and back end washer onto breathing module . 32!
6.13 Refit breathing module assembly into Auto Air body.................................. 34!
6.14 Screw dump guard onto Auto Air body ....................................................... 35!
6.15 Refit skid disk, diaphragm and diaphragm cap .......................................... 36!
EV50 hose assembly .......................................................................................... 37!
6.16 Fit new moulded washer into coupling body .............................................. 37!
6.17 Fit new O-ring onto valve float .................................................................... 37!
6.18 Fit guide washer and new O-ring into valve sleeve .................................... 38!
6.19 Fit valve float assembly into valve sleeve .................................................. 38!
6.20 Put the 4 ball bearings back into valve sleeve ........................................... 39!
6.21 Put sliding collar onto valve sleeve ............................................................ 39!
6.22 Put spring back into sliding collar onto valve sleeve .................................. 40!
6.23 Screw valve sleeve back onto coupling body ............................................. 40!
6.24 Test spring operation and hose sealing by pushing complete hose on and
off the Auto Air unit ............................................................................................. 41!
7. Testing Instructions ............................................................................ 42!
7.1 Test for leaks and proper operation ............................................................. 42!
7.2 Adjust lever to avoid gas leaking and free-flowing. ...................................... 42!
Page 3 of 42
Ambient Pressure Diving Ltd.
AP100 Auto Air and EV50 MP hose Maintenance Manual
1. Introduction
1.1 Functional description
The AP Diving AP100 Auto Air combines in one compact unit the AP Valve emergency jacket
breathing facility, a direct feed power inflator and an alternate air source Octopus bailout offering EN250 (European breathing regulator standard) breathing performance.
In an emergency the AP100 is simplicity itself - just put it in your mouth and breathe!
Unlike other make octoinflators you do not have to find and press any buttons. The Auto Air
will draw air from wherever it can: either from your main cylinder if there is gas remaining (in
octopus mode) or from the bladder of the BCD itself (in jacket-breathing mode).
In the jacket-breathing mode the procedure is exactly the same as for the original AP200
inflator.
In octopus mode the Auto Air is a high-performance bailout regulator with the advantage that
it sits on your chest area, visible and always within reach when you need it in an emergency.
All AP inflators operate on medium pressure (14 bar maximum).
The EV50 medium pressure hose as shown on the cover is included.
The AP100 carries European Patent No. 0318157.
1.2 Servicing
Before servicing this AP100 Auto Air, you must receive instruction and certification in the
maintenance of this gas isolator by Ambient Pressure Diving Ltd.
Without the correct training it is possible to configure the AP100 Auto Air incorrectly in an
unsafe manner. Factory or Dealer prescribed service for this gas isolator is recommended at
least once annually.
The Inspiration, Evolution and Evolution+ closed circuit rebreathers’ CE certification to
EN14143 is unaffected by the fitting of the AP100 Auto Air.
The AP100 Auto Air meets the requirements of the Personal Protective Equipment Directive
89/686/EEC – CE certification when fitted to an Ambient Pressure Diving rebreather.
WARNING: when servicing the AP100 Auto Air it is VERY important that all parts that
may suffer wear and tear get replaced. It is also very important that the correct tools are used
to avoid damaging any part of the gas isolator in the disassembly and assembly process.
Please don’t try to save money by re-using parts that really should be replaced during a
proper servicing action.
!
The numbers between brackets after the part names in the disassembly and assembly
chapters correspond to the sequence numbers in the diagrams in chapter 2.
1.3 Warranty
This AP100 Auto Air is covered by APD’s 2 year warranty against defects in materials or
workmanship. This warranty is only extended to the original purchaser, and is not
transferable. For more information, be sure to read the warranty section of the user manual,
and the purchaser should save the sales receipt.
A copy of the receipt must be presented whenever obtaining warranty service.
1.4 Copyright and Applicable Law
This Maintenance Manual is copyrighted, all rights reserved. It may not, in whole or in part,
be copied, photocopied, reproduced, translated, or reduced to any electronic medium
Page 4 of 42
Ambient Pressure Diving Ltd.
AP100 Auto Air and EV50 MP hose Maintenance Manual
(including the Internet) or machine-readable form without prior consent in writing from
Ambient Pressure Diving Ltd.
All products are sold on the strict understanding that only English Law applies in cases of
warranty claims and product liability, regardless of where the equipment is purchased or
used. Should a claim be made then the venue for this would be in Truro, England.
© 2014 Ambient Pressure Diving Ltd.
AP100 Auto Air Maintenance Manual
Page 5 of 42
Ambient Pressure Diving Ltd.
AP100 Auto Air and EV50 MP hose Maintenance Manual
2. AP100 Auto Air Exploded Diagram and Parts List
2.1 AP100 Auto Air Main Assembly
NUMBER
DESCRIPTION
PART NUMBER
QUANTITY
M1
Mouthpiece
AP-16
1
M2
Ty-rap
AP-21
1
M3
Buddy sticker
AP-100-11
1
M4
Demand valve
AP-100-2
1
M5
Valve retainer
APV-100-12
1
M6
Auto Air body
AP-100-1
1
M7
10 mm mesh filter
AP-100-41
1
M8
O-ring
BS-011-N70
1
M9
Feed insert
AP-100-19N
1
M10
Schraeder valve
AP-100-44
1
Page 6 of 42
Ambient Pressure Diving Ltd.
NUMBER
AP100 Auto Air and EV50 MP hose Maintenance Manual
DESCRIPTION
PART NUMBER
QUANTITY
AP-100-15N
1
M11
Plunger
M12
Direct feed button cover
AP-100-14
1
M13
Cap retainer
AP-100-13
1
M14
Breathing module assembly
AP-100-3
1
M15
Dump guard
AP-100-10
1
M16
Diaphragm
AP-100-5
1
M17
Skid disk
AP-100-6
1
M18
Diaphragm cap
AP-100-7
1
M19
Diaphragm spring
AP-100-8
1
M20
Purge button
AP-100-9
1
M21
Auto Air sticker
AP-100-11A
1
PART NUMBER
QUANTITY
AP-100-21
1
BS.9.5+1 N70
1
2.2 AP100 Auto Air Demand Valve Assembly
NUMBER
DESCRIPTION
D1
Valve body
D2
O-ring
D3
Valve seat
AP-100-21A
1
D4
O-ring
BS-016-N70
2
D5
Poppet seal
AP-100-23
1
D6
Poppet
AP-100-24
1
D7
Spring
AP-100-25
1
Page 7 of 42
Ambient Pressure Diving Ltd.
AP100 Auto Air and EV50 MP hose Maintenance Manual
NUMBER
DESCRIPTION
PART NUMBER
QUANTITY
D8
Valve chamber
AP-100-26
1
D9
Lever
AP-100-27
1
D10
Washer
AP-100-28
1
D11
M3 nyloc locking nut
AP-100-28A
1
2.3 AP100 Auto Air Breathing Module Assembly
NUMBER
DESCRIPTION
PART NUMBER
QUANTITY
B1
Button
AP-100-31
11
B2
Diaphragm washer
AP-100-32
1
B3
Diaphragm
AP-100-33
1
B4
Washer
AP-100-34
1
B5
Stem
AP-100-35
1
B6
Spring
AP-100-36
1
B7
Body
AP-100-37
1
B8
BS018 16 O-ring
BS0181-16
1
B9
Back end rubber
AP-100-38
1
B10
Back end washer
AP-100-39
1
Page 8 of 42
Ambient Pressure Diving Ltd.
AP100 Auto Air and EV50 MP hose Maintenance Manual
2.4 AP100 Auto Air EV50 Hose Assembly
NUMBER
DESCRIPTION
PART NUMBER
QUANTITY
BS-903-N70
1
H1
O-ring
H2
3/8” UNF end
AP-150-P4
1
H3
Hose collar
AP-150-P3
2
H4
LP hose
AP-150-C
1
H5
Coupling body
RB-70-30
1
H6
Moulded pebax washer
AP-150-18
1
H7
Spring
AP-150-11
1
H8
Sliding collar
AP-150-12
1
H9
O-ring
BS-5.6x2.4-N70
1
H10
Funnel seat
AP-150-05
1
H11
Spring
AP-150-08
1
H12
Valve float
AP-150-6B
1
H13
O-ring
BS-109-N70
1
H14
Guide washer
AP-150-10
1
H15
Valve sleeve
AP-150-14
1
H16
Ball bearing
AP-150-13
4
Page 9 of 42
Ambient Pressure Diving Ltd.
AP100 Auto Air and EV50 MP hose Maintenance Manual
3. Service Kit Contents and Tools
3.1 Service Kit Contents
WARNING: When replacing O-rings, next to the size, the hardness of the O-rings
(declared in degrees Shore, and indicated by the suffixes N70 and N90) is ESSENTIAL for
proper operation. The N70 hardness of the O-rings for the Auto Air is deliberately chosen by
Ambient Pressure Diving.
If, against our recommendation, you choose to select your O-rings to come from another
source than Ambient Pressure Diving Ltd., make sure you select the right type in size AND
hardness AND material (composition).
There are multiple service kits available, depending on the parts that need to be serviced:
SERVICE KIT DESCRIPTION
PART NUMBER
Auto Air & Auto Air Hose service kit
This is the primary service kit with all parts that
should be replaced during regular service
AP100A
Auto Air purge diaphragm (AP-100-5) & skid disc (AP-100-6) kit
AP100B
Auto Air main diaphragm cap (AP-100-7) kit
AP100C
Auto Air Mouthpiece (AP-16) and cable tie kit
AP100D
Auto Air Exhaust Diaphragm (AP-100-33 & 34) assembly kit
AP100E
EV50 medium pressure hose - female connector service kit
EV50BKIT
Page 10 of 42
Ambient Pressure Diving Ltd.
AP100 Auto Air and EV50 MP hose Maintenance Manual
Page 11 of 42
Ambient Pressure Diving Ltd.
AP100 Auto Air and EV50 MP hose Maintenance Manual
3.2 Special Tools needed
When servicing the AP100 Auto Air, the following special tools are needed:
DESCRIPTION
PART NUMBER
Tool for removing/replacing the AP100-21A valve seat (D3)
Tool for removing/replacing the AP-100-44 Schraeder valve (M10)
APTOOL4
AP50E
APTOOL4
AP50E
3.3 Standard Tools needed
Besides the special tools mentioned above, the following standard tools are needed:
There are no special tools needed for servicing the AP100 Auto Air gas isolator.
Normal tools needed are:
- 5.5 mm socket for removing/replacing the AP-100-28A M3 nut
- 17, 20 and 22 mm wrenches
- O-ring picking tools
- Wide screwdriver for unscrewing feed insert
- Oxygen-compatible grease
o see chapter 5 for remarks about when you need to keep this device in oxygen
service
- (Access to) an ultrasonic bath for cleaning the metal parts.
Page 12 of 42
Ambient Pressure Diving Ltd.
AP100 Auto Air and EV50 MP hose Maintenance Manual
WARNING: Do NOT use aggressive chemicals. They might damage the metal plating of
the AP100 Auto Air. Use an ultrasonic cleaning bath with a suitable cleaning fluid. A very
good cleaning fluid is Biox “O2” immersion fluid. See WWW.BIOXINT.COM for further
information and distributors.
The use of rubber gloves while re-assembling the AP100 Auto Air is recommended to avoid
rendering the AP100 Auto Air oxygen unclean due to human touch.
Page 13 of 42
Ambient Pressure Diving Ltd.
AP100 Auto Air and EV50 MP hose Maintenance Manual
4. Disassembly Instructions
4.1 Remove the EV50 medium pressure hose from the AP100 Auto Air
4.2 Unscrew diaphragm cap from main body
-
Unscrew anti-clockwise.
4.3 Remove skid disk and diaphragm
Page 14 of 42
Ambient Pressure Diving Ltd.
AP100 Auto Air and EV50 MP hose Maintenance Manual
4.4 Unscrew dump guard from main body
-
Unscrew anti-clockwise.
4.5 Remove breathing module assembly from main body
-
Gently push the complete breathing module out of the main Auto Air body.
Remove O-ring from the breathing module assembly.
Page 15 of 42
Ambient Pressure Diving Ltd.
AP100 Auto Air and EV50 MP hose Maintenance Manual
4.6 Remove back end washer and back end rubber from breathing
module
-
Squeeze the end of the stem together and pull off the back end washer.
Pull the white back end rubber from the stem.
4.7 Remove cap retainer, direct feed button cover and plunger
-
Unscrew cap retainer anti-clockwise.
Inspect direct feed button cover for damage (holes, tears). Replace if damaged.
Page 16 of 42
Ambient Pressure Diving Ltd.
AP100 Auto Air and EV50 MP hose Maintenance Manual
4.8 Unscrew feed insert from body using wide screwdriver
-
Unscrew anti-clockwise.
After unscrewing remove mesh filter and O-ring from the base of the feed insert.
4.9 Unscrew Schraeder valve from feed insert using AP50E tool
-
Unscrew anti-clockwise.
4.10 Remove lever from poppet
-
Using a 5.5 mm wrench, unscrew M3 nyloc locking nut, anti-clockwise.
o Do NOT unscrew fully: just enough to make room to remove the lever.
Next wiggle the lever free from beneath the washer and M3 locking nut.
After removal of the lever, screw the M3 locking nut back in again.
o This is to release tension on the poppet seal while unscrewing the valve
chamber in one of the next steps.
Page 17 of 42
Ambient Pressure Diving Ltd.
AP100 Auto Air and EV50 MP hose Maintenance Manual
4.11 Unscrew demand valve retainer
-
Unscrew anti-clockwise.
4.12 Pull out demand valve assembly
Page 18 of 42
Ambient Pressure Diving Ltd.
AP100 Auto Air and EV50 MP hose Maintenance Manual
4.13 Unscrew valve chamber with poppet and spring from valve body
-
Unscrew anti-clockwise.
4.14 Remove washer, poppet and spring from valve chamber
-
Unscrew M3 nyloc locking nut anti-clockwise.
Make sure the washer and spring do not jump away.
4.15 Remove poppet seal from poppet
Page 19 of 42
Ambient Pressure Diving Ltd.
AP100 Auto Air and EV50 MP hose Maintenance Manual
4.16 Unscrew valve seat using APTOOL4 tool
-
Unscrew anti-clockwise.
Remove two O-rings from valve body and one from valve seat.
4.17 Optionally remove mouthpiece from main body
-
When cutting the retaining ty-rap, make sure not to damage the mouthpiece.
Carefully inspect mouthpiece for wear and tear, especially the bite blocks.
Page 20 of 42
Ambient Pressure Diving Ltd.
AP100 Auto Air and EV50 MP hose Maintenance Manual
This completes the disassembly of the AP100 Auto Air
-
See below for an overview of all disassembled parts.
Page 21 of 42
Ambient Pressure Diving Ltd.
AP100 Auto Air and EV50 MP hose Maintenance Manual
EV50 Medium Pressure (MP) hose disassembly
4.18 Unscrew valve sleeve from coupling body
-
Use a 20 mm (on the valve sleeve) and 22 mm wrench (on the coupling body).
4.19 Remove moulded washer from coupling body
Page 22 of 42
Ambient Pressure Diving Ltd.
AP100 Auto Air and EV50 MP hose Maintenance Manual
4.20 Remove spring, sliding collar and 4 ball bearings from valve sleeve
-
Take special care not to lose the 4 ball bearings during this action.
Tip: perform this action above a plastic tray to catch dropping ball bearings.
4.21 Remove valve float assembly from valve sleeve
Page 23 of 42
Ambient Pressure Diving Ltd.
AP100 Auto Air and EV50 MP hose Maintenance Manual
4.22 Remove guide washer and O-ring from valve sleeve
4.23 Remove O-ring from valve float
-
Press down on funnel seat to expose O-ring.
Make sure the spring doesn’t jump away.
NOTE: if you are using the EV50BKIT snap connector service kit, there is no need to
disassemble the valve float, as a complete pre-assembled new valve float assembly
is already in the service kit.
This completes the disassembly of the EV50 Medium Pressure hose.
Page 24 of 42
Ambient Pressure Diving Ltd.
AP100 Auto Air and EV50 MP hose Maintenance Manual
5. Clean and Replace Service Parts
The servicing of the AP100 Auto Air contains 4 “action groups”:
1. Removing and binning all parts that should be replaced. These are all O-rings.
2. Depending on the gas content the AP100 Auto Air is exposed to, keep it in oxygen
service. Following the recommendations of the CGA (Compressed Gas Association), US
Navy, HSE of the UK and the EIGA (European Industrial Gas Association), breathing
gasses with an oxygen content of 23.5% or higher should be treated as 100% oxygen.
So only if you are absolutely sure that the GC3 will never be exposed to an oxygen
percentage of more than 23.5% you can disregard the rules of keeping equipment in
oxygen service.
If in doubt: keep it in oxygen service, as that only takes a little bit more effort.
3. Ultrasonic-cleaning of all disassembled metal parts. This is mandatory if the AP100 Auto
Air is to be kept in oxygen service, but recommended anyway in all other servicing
situations.
4. Lightly grease new parts, fit them, and re-assemble the AP100 Auto Air with the correct
tools. Use oxygen-compatible grease, and avoiding contaminating the metal parts after
cleaning. Use the smallest amount of grease possible.
The use of rubber gloves while re-assembling the AP100 Auto Air is mandatory if the GC3 is
to be kept in oxygen service. This is to avoid rendering the AP100 Auto Air unclean due to
human touch (skin oils, sweat).
5.1 Various service kits contents
As described in chapter 3.1, the parts included in the AP100A Auto Air & Auto Air Hose
service kit always need to be replaced when servicing the AP100 Auto Air.
There are other optional service kits available, depending on damage or wear and tear found
during servicing. The available service kits and their contents are:
AP100A - Auto Air & Auto Air Hose Service Kit contents:
Direct Feed Button Cover
AP-100-14
Poppet Seal
AP-100-23
M3 Locking Nut
AP-100-28A
Washer
AP-100-28
Back End Rubber
AP-100-38
10 mm Mesh Filter
AP-100-41
Core Schraeder Valve
AP-100-44
Main Valve O-Ring
BS-016-N70
Direct Feed Insert O-Ring
BS-011-N70
Breathing Module O-Ring
BS-18.1X1.6-N70
Moulded Pebax Washer
AP-150-18
O-Ring
BS-109-N70
O-Ring
BS-903-N70
O-Ring
BS-5.6X2.4-N70
Quantity
1
1
1
1
1
1
1
2
1
1
1
1
1
1
AP100B - Auto Air Purge Diaphragm Kit contents:
Diaphragm
AP-100-5
Skid Disc
AP-100-6
Quantity
1
1
AP100C - Auto Air Main Diaphragm Cap Assembly contents:
Purge Button
AP-100-9
Diaphragm Spring
AP-100-8
Main Diaphragm Cap
AP-100-7
Quantity
1
1
1
Page 25 of 42
Ambient Pressure Diving Ltd.
AP100 Auto Air and EV50 MP hose Maintenance Manual
AP100D - Auto Air Mouthpiece and Cable Tie Assembly contents:
Silicon Mouthpiece
AP-16
Ty-rap
AP-21
Quantity
1
1
AP100E - Auto Air Exhaust Diaphragm Kit contents:
Button
AP-100-31
Diaphragm washer
AP-100-32
Diaphragm
AP-100-33
Washer
AP-100-34
Quantity
1
1
1
1
EV50BKIT – MP Hose – Female Connector service kit contents:
Moulded Pebax Washer
AP-150-18
Valve float/spring/seat/O-ring assembly
AP-150-6B
Guide washer
AP-150-10
Spring
AP-150-11
Spring
AP-150-08
O-ring
BS-109-N70
Ball bearings
AP-150-13
Quantity
1
1
1
1
1
1
4
5.2 Ultrasonically clean deposits from all metal parts
Clean deposits from all metal parts, like chalk and salt.
WARNING: Do NOT use aggressive chemicals. They might damage the metal plating.
Use an ultrasonic cleaning bath with a suitable cleaning fluid instead. A good cleaning fluid is
Biox “O2” immersion fluid. See WWW.BIOXINT.COM for further information and distributors.
5.3 Replace all O-rings with new ones from the Service Kit
-
-
WARNING:
Replace all O-rings: do NOT re-use old ones
ONLY use original parts from APD, to make sure the O-rings:
o Are the exact size
o Are of the correct material (especially important in a high oxygen content and
overpressure environment)
o Are of the correct stiffness (degrees Shore).
Make sure you use only oxygen-compatible grease.
Also make sure you only use oxygen-clean and oxygen-compatible replacement parts.
All APD-supplied O-rings in the service kit are made from Nitrile and as such are oxygen
compatible. However, they still need to stay or be made oxygen-clean.
Last but not least: avoid touching oxygen-clean parts after cleaning with your bare
hands. Human body sweat and grease are not oxygen-compatible. So use rubber gloves
(e.g. surgical) when re-assembling the AP100 Auto Air.
For photographic clarity no rubber gloves are worn on the photos in this manual.
Page 26 of 42
Ambient Pressure Diving Ltd.
AP100 Auto Air and EV50 MP hose Maintenance Manual
6. Assembly Instructions
WARNING: When assembling the AP100 Auto Air, use rubber gloves to avoid polluting
it while assembling, rendering it not oxygen-clean anymore.
6.1 Optionally fit new mouthpiece
-
If the mouthpiece was damaged or worn out in any way, replace it.
Slide mouthpiece all the way onto the breathing tube so that it touches the curved
main body.
Make sure mouthpiece sits properly in the groove on the main body.
Tighten ty-rap properly to avoid mouthpiece coming off.
Make sure after cutting tightened ty-rap end that no sharp ends remain.
6.2 Screw valve seat into valve body using APTOOL4 tool
-
Fit three new O-rings onto valve body and valve seat.
Screw valve seat clockwise into valve body using APTOOL4 tool. Do not over-tighten.
Page 27 of 42
Ambient Pressure Diving Ltd.
AP100 Auto Air and EV50 MP hose Maintenance Manual
6.3 Fit new poppet seal
6.4 Refit poppet and spring into valve chamber
-
-
Put the spring on the poppet and push the poppet through the opening of the white
valve chamber.
Put washer back onto protruding poppet.
o Make sure the rounded, chamfered side of the washer is facing towards the
valve chamber.
Next screw the M3 nyloc locking nut back onto poppet, clockwise.
6.5 Screw valve chamber with poppet and spring inside onto valve body
Page 28 of 42
Ambient Pressure Diving Ltd.
AP100 Auto Air and EV50 MP hose Maintenance Manual
-
Make sure that the flat side of the plastic valve chamber aligns with one of the flat
sides of the valve body:
o If not properly aligned, in the next step the assembly will not slide into the
main Auto Air body, which also has an internal flat side.
o If the flat sides do not align, first screw the valve chamber all the way in onto
the valve body (without force), and then back out (i.e. screw it a bit out again,
counter-clockwise), just enough until the flat side of the valve chamber aligns
with one of the four flat sides of the valve body.
-
WRONG: flat sides do not align.
-
CORRECT: flat sides align.
6.6 Push demand valve assembly into main Auto Air body
Page 29 of 42
Ambient Pressure Diving Ltd.
AP100 Auto Air and EV50 MP hose Maintenance Manual
Notice the flat part on the inside of the tube: this should match the flat side of the valve
assembly.
6.7 Screw demand valve retainer onto Auto Air body
6.8 Refit and tighten lever
-
Loosen the M3 nyloc nut enough to make room to wiggle the lever underneath the
washer and nut, i.e. directly on top of the white plastic valve chamber.
Using the 5.5 mm wrench, tighten the M3 nyloc locking nut back up, just so far that
the lever is just tight, i.e. just cannot freely wiggle any more.
Page 30 of 42
Ambient Pressure Diving Ltd.
AP100 Auto Air and EV50 MP hose Maintenance Manual
6.9 Screw Schraeder valve into feed insert using AP50E tool
-
Screw clockwise, all the way in.
6.10 Screw feed insert into Auto Air body using a wide screwdriver
-
Fit new mesh filter and O-ring onto feed insert and screw it into the main body.
Page 31 of 42
Ambient Pressure Diving Ltd.
AP100 Auto Air and EV50 MP hose Maintenance Manual
6.11 Refit direct feed plunger, button cover and screw cap retainer
6.12 Refit new back end rubber and back end washer onto breathing
module
Page 32 of 42
Ambient Pressure Diving Ltd.
-
AP100 Auto Air and EV50 MP hose Maintenance Manual
Fit spring onto stem assembly.
Push stem assembly through breathing module body.
Fit a new white back end rubber onto the stem, chamfered side facing towards the
module body.
Push end washer onto the prong-like end of the stem, with its non-flat, ribbed side
facing towards the module body.
o Make sure the washer has firmly passed the prong-like part and is locked.
Test it by rotating it a bit while keeping the blue pushbutton depressed.
It should be able to rotate freely.
Page 33 of 42
Ambient Pressure Diving Ltd.
AP100 Auto Air and EV50 MP hose Maintenance Manual
6.13 Refit breathing module assembly into Auto Air body
-
-
Fit a new O-ring onto the breathing module body.
Carefully and slowly insert the breathing module into the main Auto Air body.
o Do not wiggle it in to avoid trapping O-ring: use a straight movement.
" TIP: use the palm of your hand to apply gentle equal pressure on all
sides.
o The top of the breathing module should sit flush with the rim of the main Auto
Air body, i.e. it should not stick out.
o If it does, pull it out and try again, as most likely the O-ring got stuck.
The two legs of the breathing module should points towards the diaphragm and the
EV50 MP hose inlet.
Page 34 of 42
Ambient Pressure Diving Ltd.
AP100 Auto Air and EV50 MP hose Maintenance Manual
WRONG: Legs of breathing module
are NOT facing diaphragm and hose
CORRECT: Legs of breathing module
are pointing towards diaphragm and hose
6.14 Screw dump guard onto Auto Air body
-
Screw dump guard clockwise only main body.
Take care not to cross-thread.
o After screwing it on, there should be no room (slit) between the main body
and the dump guard.
Page 35 of 42
Ambient Pressure Diving Ltd.
AP100 Auto Air and EV50 MP hose Maintenance Manual
6.15 Refit skid disk, diaphragm and diaphragm cap
-
-
First fit the diaphragm, taking care that its skirt hangs all the way (360 degrees) over
the rim (the non-threaded top part) of the main body.
Next place the blue skid disk on top of the fitted diaphragm.
o Tip: do this all while holding the Auto Air vertical, i.e. with the big opening
where the diaphragm goes, facing upwards. This way the diaphragm and skid
disk cannot fall off again while fitting the diaphragm cap.
Next screw on the diaphragm cap, clockwise, taking care not to dislodge the
diaphragm in the process.
This completes the re-assembly of the AP100 Auto Air
Page 36 of 42
Ambient Pressure Diving Ltd.
AP100 Auto Air and EV50 MP hose Maintenance Manual
EV50 hose assembly
6.16 Fit new moulded washer into coupling body
-
Make sure the new washer sits in its proper groove on the bottom of the coupling
body, under the threads.
6.17 Fit new O-ring onto valve float
-
Fit spring onto the valve float.
Fit funnel seat onto the valve float, with its rim facing up.
While pressing down on the funnel seat and spring, fit a new O-ring onto the valve
float.
o NOTE: if you are using the EV50BKIT snap connector service kit, there is no
need to assemble the valve float, as a complete pre-assembled new valve
float assembly is already in the service kit.
Page 37 of 42
Ambient Pressure Diving Ltd.
AP100 Auto Air and EV50 MP hose Maintenance Manual
6.18 Fit guide washer and new O-ring into valve sleeve
-
Make sure the guide washer is inserted with its curved side facing the hose inlet, i.e.
in the direction of the ball bearing holes.
6.19 Fit valve float assembly into valve sleeve
-
Insert the valve float assembly with its flat side facing the hose inlet, i.e. in the
direction of the ball bearing holes.
o This way the O-ring is “locked up” between the flat sides of the guide washer
(previous step) and the valve float assemble, ensuring proper sealing.
Page 38 of 42
Ambient Pressure Diving Ltd.
AP100 Auto Air and EV50 MP hose Maintenance Manual
6.20 Put the 4 ball bearings back into valve sleeve
-
Take special care not to lose the 4 ball bearings during this action.
Tip: perform this action above a plastic tray to catch dropping ball bearings.
6.21 Put sliding collar onto valve sleeve
-
Make sure you slide the collar on with its chamfered inside facing towards the ball
bearings.
Again take special care not to lose one of the ball bearings during this delicate action.
Page 39 of 42
Ambient Pressure Diving Ltd.
AP100 Auto Air and EV50 MP hose Maintenance Manual
6.22 Put spring back into sliding collar onto valve sleeve
-
If the spring does not slide in well, you probably put the sliding collar the wrong way
up in the previous step.
6.23 Screw valve sleeve back onto coupling body
-
Using a 20 and 22 mm wrench, tighten the valve sleeve onto the coupling body.
Page 40 of 42
Ambient Pressure Diving Ltd.
AP100 Auto Air and EV50 MP hose Maintenance Manual
6.24 Test spring operation and hose sealing by pushing complete hose
on and off the Auto Air unit
-
If assembled correctly, the sliding collar should jump forward while pushing / sliding it
onto the attaching it to the demand valve stem of the Auto Air.
If assembled correctly, pulling back the sliding collar will release the hose from the
Auto Air.
This completes the re-assembly of the EV50 Medium Pressure hose.
Page 41 of 42
Ambient Pressure Diving Ltd.
AP100 Auto Air and EV50 MP hose Maintenance Manual
7. Testing Instructions
7.1 Test for leaks and proper operation
1. With the MP hose unconnected, close up both the MP inlet and big BCD/wing inlet with
your fingers and try to breath in through the mouthpiece: no air should come in.
2. Exhale: that should go easy.
3. Release only the finger that blocks the BCD/wing inlet and breath in again through the
mouthpiece: you should be able to breath in with air coming through the breathing
module and the blue button pulling down.
4. Block the BCD/wing inlet again, and now release the finger that blocks the MP hose
inlet, and breath in again. Air should now come (with considerable resistance) through
the MP hose inlet.
5. Connect the EV50 MP hose to an MP air source (around 9 bar). Submerge it in water.
No bubbles should come out.
6. Connect the EV50 MP hose a few times to the Auto Air and disconnect. This should go
smooth, and no leaks should be present. Check by submerging in water.
7.2 Adjust lever to avoid gas leaking and free-flowing.
1. Use the following procedure to “tune” the Auto Air by adjusting the lever to avoid freeflowing and general air leakage:
a) Connect the Auto Air with its EV50 MP hose to an air source of 9.5-10 bar.
b) Remove diaphragm cap, skid disk and diaphragm in order to expose the M3
nyloc licking nut on top of the lever.
c) Screw the M3 nut in (clockwise) so far that the unit just starts leaking / freeflowing.
d) Now screw M3 nut out again (anti-clockwise) so far that the unit stops leaking
again. Check this by pressing the lever a few times.
e) Now re-assemble the Auto Air, i.e. fit diaphragm, skid disk and diaphragm cap
again as described in paragraph 6.16 above.
f) Submerge the Auto Air in water, check for leaks, and operate the purge button
on the diaphragm cap a few times.
g) Breath from the Auto Air, making sure breathing is smooth and light.
h) If unit leaks, repeat steps b. and d. above again, unscrewing (anti-clockwise)
the M3 nut, 1/8 of a turn at the time. Repeat this until unit stops leaking.
2. If you fitted a new poppet seal, this new seal will settle itself over the course of the first
few weeks. This may cause the unit to start slightly leaking again, as this “settling”
increases the pressure on the lever. Be prepared for that. If that happens, repeat steps
a. through h. again until leaking ceases. Usually backing the M3 nut off another 1/8 turn
should suffice.
Page 42 of 42