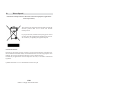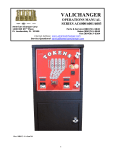
1
CDR
Cybernetic system for telematics medical and food analysis
OXITESTER
OXITESTER K270
Innovative analysis system for the quality control
of vegetable oils
USER MANUAL compiled by:
CDR Srl
Via degli Artigiani, 6
50020 Ginestra Fiorentina, Firenze - Italia
Tel.: (+39) 055.871431 – Fax: (+39) 055.8714322
Mail: [email protected]
INDEX OF INSTRUCTION REVISIONS
Revision
Date
01.02
Author
Subject
26/05/04
G. Casini,
F.Curradi
01.03
03/09/04
F. Curradi
Minor changes to layout
Minor changes on document
layout
01.04
04/09/2006
C.Bruni
Added references to waste
disposal
01.05
19/09/2007
C.Bruni
Added instructions for
connecting the temperature’s
probes
01.06
17/10/2008
C.Bruni
Added section K270
Conformity
The following norms and technical specifications have been consulted with regards to the
compilation of these instructions:
Norm
Edition
Title
Reference
paragraphs
UNI EN
10653
11.1997
Technical documentation. Quality of 5.5.1, 5.5.2 e 5.5.3.
the product technical documentation.
UNI 10893
07.2000
Product technical documentation –
instructions for use – explanatory
references and order of the contents.
Page 2
Document code: MAN020_ing_01.06.DOC
Document code: MAN020_ing_01.06
CDR
CDR
Cybernetic system for telematics medical and food analysis
Cybernetic system for telematics medical and food analysis
Index
Advice for the operator
The descriptions and illustrations attached to this document are only advisory. The CDR
S.r.l. company reserves the right to make any change and any modification of components,
essential parts and suppliers that it thinks fit without prior notice and also the updating of
this publication.
The reproduction of this document in whole or in part and by any means is not permitted
without prior written authorisation of the author.
2
Any eventual infraction will be followed according to the law.
All names and logos present in this manual are property of the respective manufacturers.
Printed:17/02/2009
3
4
5
6
1.1
Who will use the manual......................................................................................... 6
1.2
The compiling and conformity of the instructions .................................................. 6
1.3
How to read this manual ......................................................................................... 7
1.4
Symbols legend....................................................................................................... 8
1.5
Note legend............................................................................................................. 8
Safety ............................................................................................................................ 11
2.1
Safety of the product............................................................................................. 11
2.1.1
European Directives consulted during the design stage ................................ 11
2.1.2
Norms and standards used for the design and testing.................................... 12
2.1.3
Conformity of the product............................................................................. 12
2.2
Who will use this manual...................................................................................... 13
2.2.1
Permitted use................................................................................................. 13
2.2.2
Use not permitted .......................................................................................... 13
2.2.3
Personnel qualified to use the instrument...................................................... 13
2.2.4
Personal protection devices........................................................................... 13
2.2.5
Training of the personnel .............................................................................. 13
2.3
Advice about residual risks ................................................................................... 13
General description of the instrument ........................................................................... 15
3.1
Characteristics....................................................................................................... 15
3.2
Identification nameplate........................................................................................ 15
3.3
Technical data ....................................................................................................... 16
3.4
Environmental conditions ..................................................................................... 16
Transportation, storage and installation ........................................................................ 17
4.1
Transportation and storage.................................................................................... 17
4.1.1
Packaging, movement and transportation...................................................... 17
4.1.2
Storage conditions......................................................................................... 17
4.1.3
Conservation and/or disposal of the packaging............................................. 17
4.2
Installation ............................................................................................................ 18
4.2.1
Safe receipt of the instrument: visual check.................................................. 18
4.2.2
Positioning and connection to the power supply ........................................... 18
Controls description...................................................................................................... 21
5.1
Keyboard layout.................................................................................................... 21
5.2
Controls description .............................................................................................. 21
Functioning ................................................................................................................... 23
6.1
Operating procedure.............................................................................................. 23
6.2
Switching on the instrument ................................................................................. 24
6.2.1
Auto-calibration ............................................................................................ 24
6.3
Condition of the wells/analysis ............................................................................. 24
Page 3
Document code: MAN020_ing_01.06
Page 4
Document code: MAN020_ing_01.06
CDR
CDR
Cybernetic system for telematics medical and food analysis
Cybernetic system for telematics medical and food analysis
6.4
Selection and execution of the analysis................................................................. 25
6.5
Printing of the results ............................................................................................ 25
6.6
Standard ................................................................................................................ 27
6.7
Menu ..................................................................................................................... 27
6.7.1
Edit................................................................................................................ 27
6.7.2
Setup ............................................................................................................. 28
6.7.3
Tlogger.......................................................................................................... 29
6.7.4
Autostart........................................................................................................ 30
6.7.5
Printer ........................................................................................................... 30
6.7.6
Info................................................................................................................ 30
7 Protocol......................................................................................................................... 31
8
Maintenance.................................................................................................................. 33
8.1
Diagnostics and instrument control....................................................................... 33
9 Spare parts and consumables ........................................................................................ 35
10
Waste disposal .......................................................................................................... 37
Illustrations
Figura 1.1 Oxitester, front view ............................................................................................. 7
Figure 3.1 Nameplate............................................................................................................ 15
Figure 3.2 Oxitester instrument ............................................................................................ 16
Figure 4.1 Rear connection................................................................................................... 18
Figura 4.2 Feed polarity........................................................................................................ 19
Figure 4.3 Protective cover ................................................................................................... 19
Figure 4.4 Paper roll insertion .............................................................................................. 19
Figure 4.5 Paper roll insertion .............................................................................................. 19
Figure 5.1 Keyboard layout .................................................................................................. 21
Table
Table 1::European Directives consulted during the design stage.......................................... 11
Table 2: Dimensions ............................................................................................................. 16
1
1.1
General information on the instructions for use
Who will use the manual
This manual presents a detailed information regarding the safety, characteristics, installation,
, use, maintenance and disposal of the instrument manufactured by the CDR S.r.l. company.
The manual is oriented on training for the following categories of persons:
•
Persons employed in the utilisation of the instrument (installation, use and storage).
•
Persons employed in the maintenance, if different from the persons employed in the
utilisation.
The instrument must be useused according to the instructions specified in this manual. It is
highly recommended that these instructions are read very carefully before doing any
operation. Everything written and illustrated must be carefully noted. Respecting the norms
and recommendations written will allow the operator to useuse the instrument in the correct
way and using the correct methods as agreed by the manufacturer.
If the operator finds a disagreement between anything described in this manual and the
instrument he must advise the manufacturer immediately without using the instrument. Any
erroneous or inconsiderate use could provoke anomalies or malfunctions of the instrument.
The USER MANUAL constitutes an integral part of the instrument and it is therefore
necessary to conserve them in good condition in a safe place and at the disposition of the
operator (or whoever is authorised to use the instrument) for the whole productive life of the
instrument.
The instructions must be provided with the instrument in the case of sale, hire, concessional
use or financial lease of the instrument.
1.2
The compiling and conformity of the instructions
Originally, this document was printed in the Italian language. This manual is a copy that
conforms to that original document and is an integral part of the technical booklet of the
apparatus that is conserved in the files of CDR S.r.l.
CDR S.r.l. does not confirm formal or implicit guarantees for anything that is included in
this manual, its quality level, its correctness or its correct utilisation in any type of particular
application.
In the eventuality of controversies with regards to the translation, even if effectuated by
CDR S.r.l., the only reference text is the Italian version.
Page 5
Document code: MAN020_ing_01.06
Page 6
Document code: MAN020_ing_01.06
1.3
CDR
CDR
Cybernetic system for telematics medical and food analysis
Cybernetic system for telematics medical and food analysis
How to read this manual
1.4
Symbols legend
This manual is identified by a code (MAN020_ing_01.06.DOC) and divided into numbered
chapters and paragraphs in progressive order.
In addition to the information written, the manual contains symbols, photographic images
and designs.
The photographic images and the designs (defined as
figures) are numbered in progressive order and after the
number follows a brief description of the illustration.
In the example shown here, we have the “Figure. 1.1”
where the first one indicates the chapter and the second 1
indicates the progressive number of the figure within the
chapter (the successive will be “Figure 1.2” and so on).
The figures always refer to the paragraph in which they
are inserted and their recall is reported in the description
of the paragraph (in this case, figure 1.1 refers to the
Figura 2.1 Oxitester, front view
description of paragraph 1.3 because it explains the
reading).
It is of fundamental importance for the operator to understand the significance of the
icons.iconThe icons, according to their form and colour represent:
•
DANGER
(triangular icon, with a black border and yellow background, with black
graphic symbol)
•
FORBIDDEN (circular icon, with red border and white background, with black graphic
symbol)
•
OBLIGATORY (circular icon, with blue background and white graphic symbol)
•
GRAPHIC SIGN (defined as a perceptable visual figure to transmit information
independent from the language)
With regards to this, in the successive paragraphs are explanations about the icons that are in
use in this manual.
DANGER SYMBOLS
ELECTRIC SHOCK!
ATTENTION!
TOXIC
SUBSTANCES!
FORBIDDEN SYMBOLS
NO SMOKING
HALT!
AUTHORISED
PERSONS
ALLOWED
NONNOT
GENERIC SYMBOLS
GENERIC NOTE
FOR THE
OPERATOR
READ THE
INSTRUCTIONS
FOR USE
1.5
Note legend
To attract the attention of the operator about important information there is a table divided in
two columns which is composed as follows:
1
1.
2.
•
•
2
Position of the icon:
Description of the note:
When the note has a grey background indicates danger for the operator.
When the note has a white background indicates danger for the instrument.
Examples:
DANGER FOR THE OPERATOR
DANGER OF ……….
Page 7
Document code: MAN020_ing_01.06
Page 8
Document code: MAN020_ing_01.06
CDR
Cybernetic system for telematics medical and food analysis
DANGER TO THE INSTRUMENT
ATTENTION! …………
NOTE
NOTE
Important generic note for the operator.
Page 9
Document code: MAN020_ing_01.06
2
CDR
CDR
Cybernetic system for telematics medical and food analysis
Cybernetic system for telematics medical and food analysis
Safety
2.1.2
Norms and standards used for the design and testing
The OXITESTER instrument corresponds to the essential requisites of the norms:
2.1
Safety of the product
2.1.1
European Directives consulted during the design stage
The instrument has been designed and constructed following the health and safety
requirements of the Directive:
Table 1::European Directives consulted during the design stage
Directive
Number
Title and implementation into Italian legislation
89/336/CEE
and successive
amendments
89/336/CEE: Council Directive of the 03/05/89 for the legislative
alignment of the member states relative to electromagnetic compatibility
Italian legislation implementation:
D. Lgs. of the 4th December 1992, n. 476 "Activation ot the Council
Directive 89/336/CEE of the 3rd May 1989 about the legislative
alignment of the member states relative to electromagnetic
compatibility, modified by the Council Directive 92/31/CEE of the 28th
April 1992”. On the basis of art. 6 of the D. Lgs the Ministerial Decree
of the 30/12/93 was issued “List of harmonised norms on
electromagnetic compatibility”.
EN 50081/1
EN 55022.A
EN 50082/2
ENV 50140
2.1.3
Electromagnetic compatibility: emission – residential environment – light
industry.
Radio disturbance measures on equipment for computer technology.
Irradiated and induced electromagnetic sensitivity.
Electromagnetic compatibility: immunity test to radio frequency
irradiated electromagnetic fields and their attraction.
Conformity of the product
The instrument has the CE mark in accordance with the Directive 89/336/CEE and
successive modifications and integrations.
Each modification that alters the design and construction characteristics of the instrument
and not expressly authorised by CDR S.r.l. will cancel the conformity and consequently the
right of use.
Use of the instrument that is not described by this document is considered. CDR S.r.l. will
not be held responsible for damage caused by not respecting the technical specifications
described herein and by the improper use of the instrument or biological products.
D.Lgs. of the 12th November 1996, n. 615: “Activation of the Council
Directive 89/336/CEE of the 3rd May 1989 about the legislative
alignment of the member states relative to electromagnetic
compatibility, modified and integrated by the Council Directive
92/31/CEE of the 28th April 1992, by the Council Directive 93/68/CEE
of the 22nd July 1993 and by the Council Directive 93/97/CEE of the
29th October 1993”.
Page 11
Document code: MAN020_ing_01.06
Page 12
Document code: MAN020_ing_01.06
CDR
Cybernetic system for telematics medical and food analysis
2.2
Who will use this manual
2.2.1
Permitted use
Oxitester instrument effectuates the determination of the analysis of foodstuffs only using
patented test tubes, code CDR 230012
2.2.2
Use not permitted
The instrument cannot be used for making tests on biological matrixes different from those
indicated in the methodologies. The instrument is specifically calibrated during construction
to test the biological matrixes indicated in the methodologies.
The instrument cannot be used for diagnostic testing that has not been approved of by CDR.
The instrument does not operate with diagnostic flow tests.
2.2.3
Personnel qualified to use the instrument
The persons authorised to use the instrument must be qualified to operate in a biological
environment and therefore have expert knowledge about the products to be handled.
2.2.4
Personal protection devices
It is recommended that latex examination gloves be used if the operator must use biological
products that are dangerous to the health if touched. Latex gloves will not damage the
instrument.
2.2.5
Training of the personnel
Before using the instrument it is mandatory to read and understand the contents of these
manual.
2.3
Advice about residual risks
There are no residual risks realted to this instrument.
ATTENTION!
Each biological liquid must be considered as potentially infective. Protective
gloves must be worn during the handling of biological products or contaminated
material. Qualified laboratory personnel must use habitual precautions against
infective agents.
Page 13
Document code: MAN020_ing_01.06
CDR
CDR
Cybernetic system for telematics medical and food analysis
Cybernetic system for telematics medical and food analysis
3
General description of the instrument
3.1
Characteristics
3.3
•
Central processing unit: MC 68331 microprocessor..
•
Possibility of updating the firmware via the serial line RS232.
•
Reading group composed of three cells at 630 nm , 505 nm,( 405 nm) , 366 nm. Each
one can effectuate determinations on two different wavelengths.
•
Incubation group made of twelve wells.
•
Incubation and reading groups useuses thermostats at 37°C.
•
Reading via solid state devices with interferential filters.
•
Analysis method: End Point.
Technical data
Figure 3.2 Oxitester instrument
Total weight: 2.5 kg.
3.2
Identification nameplate
Maximum dimensions:
The instrument has a nameplate that displays the CE mark and identification data (see
example in Figure 3.1).
Table 2: Dimensions
315 mm + 60 mm for the connector
190 mm
165 mm
Length
Width
Height
Electrical power supply: 12V dc.
CDR S.r.l. Via degli Artigiani, 6
50055 Ginestra Fiorentina (FI)
Tel. 055.871431
TIPO
N. MATRICOLA
ANNO COSTRUZIONE
Absorption: 1,4 A max.
METALAB OXITESTER-K270
225001 / 1001
2008
3.4
Environmental conditions
The instrument ratus and its equipment can operate in environmental conditions +15°C. to
35°C. and relative non-condensed humidity from 20% to 90%.
Figure 3.1 Nameplate
IMPORTANT:
9 Never remove the nameplate from the original position chosen by the manufacturer.
9 Do not modify or falsify the data displayed on the nameplate.
9 Do not clean the nameplate with abrasive products.
Page 15
Document code: MAN020_ing_01.06
Page 16
Document code: MAN020_ing_01.06
CDR
CDR
Cybernetic system for telematics medical and food analysis
Cybernetic system for telematics medical and food analysis
4
Transportation, storage and installation
4.1
Transportation and storage
4.1.1
Packaging, movement and transportation
CDR packs the Foodlab instrument inside a cardboard carton.
Each single carton with the instrument inside can be carried out manually. To transport the
instrument in the carton, use a covered vehicle so that the instrument is not exposed to
atmospheric conditions. Please note that the carton does not provide sufficient protection
against rain, sun, snow and wind.
4.1.2
Installation
4.2.1
Safe receipt of the instrument: visual check
Each apparatus is checked following specific procedures and instruments by CDR before
being shipped. However, damage could occur during transport and will not be the
responsibility of CDR. Effectuate a visual control of the packaging and the apparatus to
check that there is no visual damage due to knocks and bangs. If damage can be seen, send
back the apparatus to the Service Maintenance Department for a functional check.
4.2.2
Storage conditions
The instrument in its carton must be stored in a closed environment within the temperature
range –20°C. to +70°C. and a relative non-condensed humidity of 20% to 90%.
The storage place must not be exposed to contaminating agents such as humidity, dust, acids,
corrosive gases, salt, smoke etc.
Do not stack the cartons more than five high.
4.1.3
4.2
Conservation and/or disposal of the packaging
The manufacturer recommends conserving the carton in case of future transport after the first
installation.
The disposal of the packaging, does not present any particular dangerous aspects to persons,
animals or materials. Before disposal of the carton, consult the Council Directive 94/62/CE
on packaging and the disposal of packaging.
Positioning and connection to the power supply
NO SMOKING
It is recommended to not smoke near to the instrument to avoid any damage to
the instrument during positioning, connection and use.
Installation of theOxitester instrument must be done by following instructions:
A. Extract the instrument from the carton and put it on the work surface in such a position
that it is not exposed to brusque variations of temperature or excessive light.
B.
Connect the external voltage adapter to the
connection at the rear of the instrument (Figure
4.1) utilising the appropriate jack and the other
end of the adapter lead to an electrical socket
outlet of 110 Vac to 220 Vac
Figure 4.1 Rear connection
Page 17
Document code: MAN020_ing_01.06
Page 18
Document code: MAN020_ing_01.06
C.
CDR
CDR
Cybernetic system for telematics medical and food analysis
Cybernetic system for telematics medical and food analysis
In case the adapter is different from the one
included with the instrument, check that the
electrical and safety characteristics (12 Vdc 1,4A) are equivalent (CE mark) and that the
polarity of the connectors is respected Figure
4.2).
+
Connection of the data connection leads
+ 12 Vdc 1,4 A
To connect the OXITESTER instrument to a host computer to download analytical data, use
the lead (code CDR 220804) connected to the (RS232) DCE connector.
Figura 4.2 Feed polarity
D.
To connect the OXITESTER Instrument to a host computer to update the programme, use
the lead (code CDR 220805) connected to the (RS232) DTE connector.
Replacement of a printer paper rol:
Open MENU/Printer and press Line Feed
function several times to remove to old one out
of the module entirely.
Insert the new paper into the printer module as
indicated in Figure 4.4 and 4.5.
Press Line Feed function several times to lead
the paper through the module.
Figure 4.3 Protective cover
Figure 4.4 Paper roll insertion
Figure 4.5 Paper roll insertion
Page 19
Document code: MAN020_ing_01.06
Page 20
Document code: MAN020_ing_01.06
CDR
Cybernetic system for telematics medical and food analysis
5
Controls description
5.1
Keyboard layout
Figure 5.1 Keyboard layout
5.2
Controls description
CONTROL
Menù selection
Left arrow
Switching on/switching off
Numerical data immission
Display
Up arrow
Right arrow
Down arrow
Confirm
DESCRIPTION
9 - Operating mode/editing mode selection
8 - Place the cursor to the left of the display
7 - Switching on and switching off of the instrument
6 - numerical keyboard
1 - visualise operative/data procedures
2 – Move the cursor upwards on the display/stop
number of samples
3 - Place the cursor to the right of the display
4 - Move the cursor downwards on the display
5 - Confirm data/advancement of the test
Page 21
Document code: MAN020_ing_01.06
6
CDR
CDR
Cybernetic system for telematics medical and food analysis
Cybernetic system for telematics medical and food analysis
Functioning
6.1
6.2
Operating procedure
•
The Oxitester is an instrument equipped with a dedicated software for the quantitative
determination of parameters on vegetable oils.
•
The instrument receives electrical current by inserting the power supply lead. At this
point:
•
On the display for one second appears the version of the installed programme and it
carries out a first level auto-test.
•
It checks the personalisation of the parameters of the analysis .
•
It goes on Stand-by mode (the thermostats of the instrument are not switched on in this
mode).
ATTENTION!
Certain problems could be highlighted during the auto-test and are showned by
an acoustic alarm and a code formed by LEDs associated to the reading cells.
These signals do not allow the continuation of the analysis and the Technical
Service Assistance Department must be advised in order to check the problem..
These signals are coded with a brief description about their significance. The RRG
(red,red,green) indication, for example, means that the LED associated to the reading cell is
green whilst the other two are red.
Code
GRG
RRG
RGR
RGG
GRR
Description
Corrupted Eeprom analysis
Modificiation to the version of the data trace
Memory error of the personilisation analysis
Hardware error on the display
Non-identifiable error of another type
NOTE!
A specific case can occur when a particular sequence RRR occurs during the
normal use of the instrument and not only during the start up. This sequence
indicates overheating of the instrument and therefore a temperature of more than
41°C. In this case it is necessary to switch off the instrument, let it cool down
and then switch it on again. If the problem persits, <please contact the Technical
Assistance Department for reparation.
Switching on the instrument
If the Autostart functionality has not been set up the instrument has to be switched on using
the ON/OFF key on the keyboard. After having switched on the instrument:
9 The thermostats start to heat up.
9 The following lines areprinted:
Oxitester
designed by
CDR srl - Firenze
When the reading cell group has reached the temperature requested for correct functioning
the reading cells are automatically checked for efficiency. They must be empty; if the check
does not give positive results the operator is invited via a message on the display to proceed
with the calibration of the instrument
6.2.1
Auto-calibration
It could be necessary to re-calibrate the reading, if requested by the instrument. After having
covered the wells with the cover (included with the instrument) that keeps the light out, press
the <enter> key and the procedure of auto-calibration starts. Information on the efficiency of
each reading channel is displayed on the screen at the end of the auto-calibration procedure.
The instrument is ready to start analysing by pressing the <enter> key.
6.3
Condition of the wells/analysis
When the switching on phase has terminated, the instrument displays the condition of the
wells or the analysis list by pressing the <0> key.
In the first modality, information is visualised on the complessive condition of the wells. In
particular, the name of the undergoing analysis and the operating phase is indicated for each
well.
The information about the condition of the corresponding well is shown when the numerical
keys <1>, <2> and <3> are pressed. If the chosen well is not used for any analysis, the
available wells are shown. (an asterisk positioned on the right of the name is used to
indicatethe unavailability). If there is an analysis on going on the well, there is an indication
of the type of analysis in progress and the messages for the operator are displayed in order
to proceed with the test.
The status of the wells is shown by pressing the numerical <0> key,. Pressing it again , all
analysis are shown.
In the second modality the list of all the available analysis is displayed for the instrument (an
asterisk positioned on the right of the name highlights the unavailability). Pressing the
numerical <0> key the visualisation of the condition of the wells is effectuated.
Page 23
Document code: MAN020_ing_01.06
Page 24
Document code: MAN020_ing_01.06
6.4
CDR
CDR
Cybernetic system for telematics medical and food analysis
Cybernetic system for telematics medical and food analysis
Selection and execution of the analysis
Sarting from the screen that showsthe list of all the analysis press the <enter> key or <right
arrow> key after having positioned the cursor on the analysis to be effectuated using the <up
arrow> key and the <down arrow> key.
With regards to the chosen analysis, the instrument requests the intervention of the operator
to insert the test tubes and to start the reading. The reading well is indicated by the green
LED and the reading is switched on by pressing the <enter> key. Whilst the reading is on
going, the LED changes to red and then to green again at the end of the analysis.
Each anlysis proceeds with a succession of readings described by the related method, at the
end of which the results are shown on the display and also printed. Pressing the <enter> key
to view the results of an analysis gives the possibility of reprinting them or making the well
available again by pressing the <down arrow> key.
Certain typologies of analysis, to stabilise the chemical reaction, need to wait a preprogrammed time before reading the test tube, either in the reading phase of the neutral
substances or in the reading of the sample, according to the indications indicated on the
method.
DANGEROUS SUBSTANCES
The substances contained in the test tube must not be inhaled, swallowed or
disposed of in the environment.
6.5
Printing of the results
The results of the analysisare shown on the display and printed out on paper.
The print-out format useis the following one:
<Date>
<Well>
K factor
q offset
norm.
<Hour>
<Name analysis>
<Value>
<Value>
<Value>
Code
<U.M.>
Sample 1
Sample 2
<Result>
<Result>
For reprint press the <enter> key and successively the <up arrow> key.
After the print of the results , if the temperature’s probes are enabled , pressing the <enter>
key and successively the <up arrow> key, we can print out the records of the detected
temperatures :
T1 :
T2:
T3:
T4:
olive press
malaxing
disabled
disabled
Last sample at 12:45
Max T in every 10 min
T1
T2
T3
T4
--.27.4
27.2
--.27.3
26.9
--.--.--.-
--.--.--.-
The last row in the ticket means the max value of the temperature detected from probes T1
and T2 in the ten minutes previous the 12:45 hours , the second last row means the max
value of the temperature detected from probes T1 and T2 in the ten minutes previous the
12:35 hours.
The symbol --.- means temperature not detected.
The paper roll is marked to signify that the roll is finishing
NOTE
The printer is not equipped with a device that signals the end of the paper roll.
Therefore, in the case of the paper roll being exhausted, the results are
visualised only on the display. It is possible though to reprint the last result
carried out in each reading cell by the option “REPRINT” (see “Execution of
the analysis”, paragraph 6.4).
Page 25
Document code: MAN020_ing_01.06
Page 26
Document code: MAN020_ing_01.06
6.6
CDR
CDR
Cybernetic system for telematics medical and food analysis
Cybernetic system for telematics medical and food analysis
•
Standardization
Each analysis can be aligned with standard concentration samples. Normally the reading of
at least three samples is requested to define the regressional linear coefficients that correlate
the instrument to the reference method.
To effectuate an alignment, modify the ANL-STD parameter from the “Edit” menu item of
the corresponding analysis (see paragraph 6.7.1).
Then choosing the analysis to be aligned, there it will be requested to edit the concentration
values of the standard sample and then analysis is necessary. The results are then shown on
the screen:K,Q values and the regression coefficient R. These values can be stored in
memory and printed by pressing the <up arrow> key. After the print-out, the instrument is
ready for a new analysis.
6.7
Menu
In order to be able to access the configuration functionality of the instrument it is necessary
to press in rapid sequence the following keys:
ENTER + 1 + 2 + 3 + ENTER
Pressing the <menu> key it will be then listed the configuration menus. Pressing the <up
arrow> and <down arrow> keys and then the <enter> key or the <right arrow> key, it is
possible to access to:
•
Edit
•
Autostart
•
Setup
•
Printer
•
Info
6.7.1
•
•
Decimals: it is possible to choose the number of decimals (from 0 to 3) with which the
results can be visualised. To alter this number, press the <enter> key and successively
the <up arrow> key and the <down arrow> key. Press the <enter> key to confirm or the
<menu> key to return to the original value.
BLK Timer: it is possible to insert the incubation time (TIME OUT) from 0 to 15
minutes for the neutral substances reading phase. To change this time, press the <enter>
key and successively the <up arrow> key and the <down arrow> key. Press the <enter>
key to confirm or the <menu> key to return to the original value.
SMP Timer: it is possible to insert the incubation time (TIME OUT) from 0 to 15
minutes prior to the reading phase of the sample. To change this time, press the <enter>
key and successively the <up arrow> key and the <down arrow> key. Press the <enter>
key to confirm or the <menu> key to return to the original value.
6.7.2
The following sub-menu can be accessed from this mode:
•
Language
•
Contrast
•
Time
6.7.2.1
Language
It is possible to select the languege pressing the correspondent number. The language in use
is highlighted with an asterisk.
To exit the menu it is necessary to press the <enter> key or the <menu> key.
6.7.2.2
Edit
Setup
Contrast
For each analysis it is possible to configure the following functional parameters:
•
Multiplicative Correlation coefficient K: to modify this value it is necessary to position
the cursor on it and then press the <enter> key. Digit the requested value and then press
the <enter> key to confirm or the <menu> key to return to the original value. The <left
arrow> key changes the sign.
•
Additive Correlation coefficient Q: to modify this value it is necessary to position the
cursor on it and then press the <enter> key. Digit the requested value and then press the
<enter> key to confirm or the <menu> key to return to the original value. The <left
arrow> key changes the sign.
•
ANL-STD: configures the instrument to effectuate the reading
of standard
concentration samples or normal anlaysis samples. To change from one mode to
another, press the <enter> key and successively the <arrow up> and <arrow down> key.
Press <enter> to confirm or the <menu> key to return to the original mode.
It is used to set up the screen contrast.
As indicated on the first line of the display pressing the <left arrow> key the contrast is
decreased, pressing the <right arrow> key is increased
An indicator shows during the adjustment of the contrast that assumes a proportional length
to the intensity of the contrast.
Press the <enter> key or the <menu> key to return to the menu mode.
Both keys confirm the new value of contrast inserted.
Page 27
Page 28
Document code: MAN020_ing_01.06
6.7.2.3
Time
It is used to adjust the time settings.
In this mode, the date or the hour that must be changed flashes and it is possible to use the
<up arrow> key to increase the time and the <down arrow> key to diminish the time.
To make adjustments move the <left arrow> and the <right arrow> keys..
Document code: MAN020_ing_01.06
CDR
CDR
Cybernetic system for telematics medical and food analysis
Cybernetic system for telematics medical and food analysis
Press the <enter> key or the <menu> key to return to the menu mode.
Both keys confirm the new time.
If the operator does not press any key within 30 seconds, the instrument returns
automatically to the menu mode.
•
Name
Use the <enter> key for editing the name of the probe.
•
Qualif.
Use the<enter> key and <up arrow> key (or the <down arrow> key) for turn ON or turn
OFF the probe.
The probe disabled is marked by symbol * .
6.7.3
Tlogger
The following sub-menu can be accessed from this mode:
• Setup
• Probes
6.7.3.1
6.7.4
In this mode it is possible to insert the hour of automatic switching on of the FoodLab
instrument so that it is already at the correct temperature at the moment of effectuating the
analysis .
On the screen are displayed the initials of the day of the week, the hour and the minutes of
the last configuration done. Using the <right arrow> key and the <left arrow> key select the
field to be modified; it will start blinking; using the <up arrow> key and the <down arrow>
key it is possible to select the day and to increase or diminish the hourly values of automatic
switching on. The minimum is 15 minutes.
Once having concluded the editing, press the <enter> key or <menu> key to return to the
menu mode.
Setup
The following sub-menu can be accessed from this mode:
•
LOG time
•
Logging
6.7.3.2
LOG time
It is used to set up the lenght of the record’s time (in hour) .
In this mode is possible using the <up arrow> key to increase the time and the <down
arrow> key to diminish the time.
Press the <enter> key or the <menu> key to return to the menu mode.
6.7.3.3
6.7.5
Printer
The following sub-menu can be accessed from this mode:
• Line Feed
• Header
6.7.4.1 Line Feed
Logging
It is used to insert a blank line on the printed paper.
It is used for verify the link with the temperature’s data acquisition system.
Si – means converter and probes connected
No- means converter and probes not connected
6.7.4.2 Header
In this mode it is possible to insert 80 alpha numeric characters (20 characters x 4 rows) ,
for the name of laboratory, who are printed out with every test result.
6.7.6
6.7.3.4
Autostart
Probes
Info
Selecting this menu the following information is shown:
¾ Registration: represents the registration of the instrument.
¾ Firmware: represents the version of programme installed.
¾ Operator: operator code
In questa modalità appare la lista :
Probe 1
Probe 2
Probe 3
Probe 4
Use the <enter> key and the following sub-menu can be accessed :
Page 29
Document code: MAN020_ing_01.06
Page 30
Document code: MAN020_ing_01.06
7
CDR
CDR
Cybernetic system for telematics medical and food analysis
Cybernetic system for telematics medical and food analysis
<CODE> sample code
<ABS> absorbance
Protocol
During normal functioning, the Oxitester instrument transmits a series of information on the
DCE serial channel configured as follws:
Baud Rate
Data Bits
Parity
Stop Bits
9600
8
None
1
Such information are formatted according to an xml protocol and its description is repeated
every time the instrument is switched on. The data transmitted, collected and saved by a
terminal, can be interpreted by any xml browser.
The principal elelments of the protocol are:
<OXITESTER> principal element
reading
<READ_SMP
poz=n>
sample
n=[1,2,3,4,5,6]
<DATE> date in the days/months/years format
<TIME> time in the hours/minutes format
<CODE> sample code
<ABS> absorbance
reading
<DROP_SMP
poz=n>
cancellation
sample
n=[1,2,3,4,5,6]
<DATE> date in the days/months/years format
<TIME> time in the hours/minutes format
reading
<END_SESS
poz=n>
end
of
analysis
session
n=[1,2,3,4,5,6]
<DATE> date in the days/months/years format
<TIME> time in the hours/minutes format
<ANL> analysis name
<K> muliplicative factor
<Q> additive factor
<NORM> normality values
<SMP_NO> number of samples analysed
<UM> unit of measure
<SMP>
<COD> sample code
<CONC> concentration (if outside linearity it appears
as lin=N)
<SWITCH_ON> switching on the instrument
<DATE> date in the days/months/years format
<TIME> time in the hours/minutes format
<NAME> name of the instrument
<MATR> registration number of the instrument
<FW> version of firmware
<READ_CHECK chk=cc> check reading cells
cc=[OK,KO]
<DATE> date in the days/month/years format
<TIME> time in the hours/minutes format
<CALIBRATION> calibration
<DATE> date in the days/months/years format
<TIME> time in the hours/minutes format
<CAL
ch=n>
calibration
n=[1,2,3,4,5,6]
<DROP_BLK poz=n> cancellation neutral substances
n=[1,2,3,4,5,6]
<DATE> date in the days/months/years format
<TIME> time in the hours/minutes format
outcome
<NEW_SESS
poz=n>
start
analysis
n=[1,2,3,4,5,6]
<DATE> date in the days/month/years format
<TIME> time in the hours/minutes format
<ANL> analysis name
session
<READ_BLK
poz=n>
neutral
substances
n=[1,2,3,4,5,6]
<DATE> date in the days/months/years format
<TIME> time in the hours/minutes format
reading
<DROP_SESS
poz=n>
cancellation
analysis
n=[1,2,3,4,5,6]
<DATE> date in the days/months/years format
<TIME> time in the hours/minutes format
<ANL> analysis name
<SWITCH_OFF> switching off of the instrument
<DATE> date in the days/months/years format
<TIME> date in the hours/minutes format
Page 31
Document code: MAN020_ing_01.06
session
Page 32
Document code: MAN020_ing_01.06
CDR
Cybernetic system for telematics medical and food analysis
8
Maintenance
8.1
Diagnostics and instrument control
The OXTESTER instrument is extremely easy to use and it is not necessary to effectuate
calibrations or take particular precautions to use it correctly.
In the following page are summarized the instructions to be followed in case spefic
problems occur. For any other problem it is possible to contact the CDR Technical
Assistance Service Department.
PROBLEM
CHECK
The instrument does not switch on – the display After having checked the connection ofthe power
does not show any information
plug, check if that there is a power supply at the
input entry of the adapter (220 Vac) and also at the
instrument (12Vdc). If necessary, substitute the
external adapter with a similar one that has the
same characteristics and check the polarity.
The instrument does not print
Check if the roll of thermal paper is present and
correctly inserted.
It is not possible to enter into the analysis key 3 The instrument has not reached the operating
and into the absorption key 5
temperature. 20 minutes are necessary for the
instrument to reach the temperature from switching
on to being in an operational mode.
The readings are not aligned to historical data
Attention! The calibration procedure of the
instrument is very simple but must be carried out
correctly. Ensure that during the calibration the
reading cells are not occupied by test tubes and
that they are not exposed todirect light.
The readings are not aligned to historical data
The analytic parameters inserted (if different from
those selected in Default) remain in the memory as
long as the <Default> key is not pressed. Check in
the programme that the parameters memorised are
those requested.
It is not possible to manually insert the K factor
This parameter must be inserted manually in the
programme only for KINETIC analysis. For the
other modalities of analysis it is necessary to
calculate them analytically.
The instrument does not print the reference values Ensure that the reference with the appropriate <2:
Rif.> key has been selected.
Page 33
Document code: MAN020_ing_01.06
CDR
Cybernetic system for telematics medical and food analysis
9
Spare parts and consumables
Paper:
code CDR AEP119: heat sensitive type in rolls
Tipo TP50KS-A JUJO PAPER
Tipo TF50KS-2 JUJO PAPER
Tipo F-200U7N5 MITSUBISHI PAPER
Or equivalent:width 57mm, diameter 45 mm.
Adapter:
code CDR ALC004: 12V dc - 1,4A
PC dialogue lead
code CDR 220804
Page 35
Document code: MAN020_ing_01.06
10
Waste disposal
Information on Disposal of Waste Electrical & Electronic Equipment (Applicable in
the European Union)
This symbol on the equipment means that used electrical and
electronic products shall not be mixed with unsorted
municipal waste.
For proper collection, treatment and recycling, please contact
our office when the equipment has reached the end of its life.
We will advise you regarding the equipment disposal.
General informations
Disposing of this product correctly will help to prevent potential negative consequences for
the environment and human health, which could otherwise arise from inappropriate waste
handling. The recycling of materials will help to conserve natural resources.
Penalties may be applicable for incorrect disposal of this waste, in accordance with national
legislation.
Updated information on www.cdr-mediared.com/docs/weee.pdf
CDR
Analisi e sviluppo sistemi cibernetici