1
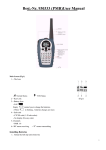
TALKIE-WALKIE
Ref.: TALK10
- USER’S MANUAL Congratulations
You have just purchased a qualified 2 Way Radio. Please read this operation instruction
carefully before use. Please keep this operation instruction with care for future reference.
Safety Precautions
When using this unit, basic Safety Precautions should always be followed to reduce the risk
of fire, electric shock, or personal injury.
1. Read and understand all instructions.
2. Follow all warnings and instructions marked on this unit or mentioned in this operation
instruction.
3. Do not use liquid or aerosol cleaners. Use a damp cloth for cleaning.
4. Do not use this unit near water such as bathtub, shower or pool. Immersion of this unit in
water could cause an electrical shock.
5. Place the unit securely on a stable surface. Serious damage and/or injury may result if
the unit falls.
6. Do not cover slots and openings on the unit. They are provided for ventilation and
protection against overheating.
7. Install the unit where no one can step or trip on the cord.
8. Never push any objects through slots in this unit. This may result in the risk of fire or
electric shock. Never spill any liquid on the unit.
9. To reduce the risk of electric shock, do not disassemble this unit. Take the unit to
authorized service center or qualified technician when service or repair work is required.
Opening or removing covers may expose you to dangerous voltages or other risks.
Incorrect reassembly can cause electric shock when the unit is subsequently used.
10. Do not expose the unit to extreme temperatures such as areas near a hot radiator or
stove or in a hot car.
11. Do not place lighted objects such as candles, cigarettes on the unit.
12. Do not use this unit to report a gas leak in the vicinity of the leak.
WARNING:
To prevent the risk of fire or electrical shock, do not expose this unit to rain or any type of
moisture.
Control Buttons
Display Screen Guide
1.Normal Walkie Talkie Mode
2. Channel Number
3. Key Lock Indicator
4. Battery Level Indicator
-- Full Battery: No battery Icon
-- Low Battery:
Blinks, need to change or recharge
the batteries
-- In Charging:
Shows but not blinks
5. Sub-code
6. VOX
7. Channel Scan
8.Transmitting Mode (TX)
9.Receiving Mode (RX)
Remarks:
When you turn on the unit, all above display icons would appear at the screen to ensure the
operation. The display icons would disappear after 1 second.
Other features of various symbols shown on the LCD.
Symbol
Major feature
Channel Selection
Subcode Selection
VOX
Auto-scan of Channel
PTT Auto
Monitor Function
Call Tone Selection
Key Beep
Roger Beep
Mosquito Repelling Function
Lighting Function
Battery Instruction
A. Safety Instructions
To reduce the risk of fire or injury to persons while using battery(ies), read and follow these
instructions.
1. Use only the type and size battery(ies) specified in the operation instructions.
2. Do not dispose of the battery(ies) in fire. They may explode. Check with local codes for
possible special disposal instructions.
3. Do not open or mutilate the battery(ies). Released electrolyte is corrosive an may cause
damage to the eyes or skin. It may be toxic if swallowed.
4. Exercise care in handling battery(ies) in order no to short out the battery(ies) with
conducting materials such as rings, bracelets, and keys. The battery(ies) or conductor
may overheat and cause burns.
5. Do not attempt to recharge the battery(ies) provided with or identified for use with this
product that are not intended to be charged. The battery(ies) may leak corrosive
electrolyte or explode.
6. Do not attempt to rejuvenate the battery(ies) provided with or identified for use with this
product by heating them. Sudden release of the battery(ies) electrolyte may occur
causing burns or irritation to eyes or skin.
7. When replacing battery(ies), all batteries should be replaced at the same time. Mixing
fresh and discharged batteries could increase internal cell pressure and rupture the
discharged battery(ies). (Applies to products employing more than on separately
replaceable primary battery)
8. When inserting battery(ies) into this product, the proper polarity or direction must be
observed. Reverse insertion of battery(ies) can cause charging, and that may result in
leakage or explosion.
9. Remove battery(ies) from this product if storing over 30 days because the battery(ies)
could leak and damage the product.
10. Discard “dead” battery(ies) as soon as possible since “dead” batteries are more likely to
leak in a product.
11. Do not store this product, or the battery(ies) provided with or identified for use with this
product, in high-temperature areas. Batteries that are stored in a freezer or refrigerator
for the purpose of extending shelf life should be protected from condensation during
storage and defrosting. Batteries should be stabilized at room temperature prior to use
after cold storage.
12. If your product uses rechargeable battery(ies), charge the battery(ies) only in
accordance with the instructions and limitation specified in the User Manual.
B.
1.
2.
3.
Battery Installation
Switch off the radio and remove the belt clip.
Open the battery door.
Insert 4 x AAA alkaline batteries according to the
anode-cathode signs shown in the battery door.
4. Close the battery compartment door.
C. Low Battery Alert
1. When the battery level becomes low, the battery icon
blinks twice in every second.
2. When the battery is too low, the unit will power off automatically.
D. Recharging Function (Optional)
The battery icon shows while charging no matter the unit is on or off until the batteries are
fully charged. While charging, PTT key is not available for use.
1. Please charge the rechargeable batteries before first time usage.
2. Use the supplied AC/DC Charger or Desktop charger.
3. Charging time is not over 8 hours.
Recharging by AC/DC charger :
Battery icon appears when the unit is in charging.
(Unit is turned on.)
(Unit is turned off.)
Battery icon disappears when the unit is fully charged.
Recharging by desktop charger (Optional) :
Battery icon appears and red light at desktop charger lights on when the unit is in
charging.
Light on
(Unit is turned off.)
Light on
(Unit is turned on.)
Battery icon disappears and red light at desktop charger lights off when the unit is fully
charged.
E. Battery Disposal
Batteries bearing one of the symbols shown opposite must not be disposed in normal
domestic waste. Check with local waste management codes for possible special disposal
instructions.
Quick Start
A. Power On / Off
1. Press and hold key for 2 seconds to power on the radio;
2. Meanwhile there is a “Beep” sound to indicate the unit is power on
3.
Press again during standby operation to turn off the radio. A “Bi” sound will also
be heard, indicating the radio is going to be switched off.
B.
1.
2.
3.
key Lock / Unlock Keypad
Press and hold MENU key for 2 seconds to lock the key.
Only PTT, CALL, Vol + & Vol - buttons can be activated during key locked operation.
Press the MENU key again to unlock the keypad.
C.
1.
2.
3.
4.
Channel Selection
Press MENU key once to select channel selection menu.
Press key to confirm and channel number flashes.
Press + / - key to alter the channel.
Press
key to confirm the channel and return to main screen.
D.
1.
2.
Subcode Selection
Press MENU key to enter menu setting.
Press + / - key until SCod appears on LCD, then press
key to confirm and
sub-code number flashes.
Press + / - key to alter the sub-code from 00-38.
Press
key to confirm the sub-code and return to main screen.
3.
4.
E.
1.
2.
Make a Call
Press CALL key once to make a calling tone.
There are short calling melodies indicate the starting and ending of transmitting call
tone.
F.
Transmitting message
Press and hold PTT key to talk to other user. TX shows to indicate message
transmission.
G.
To Receive a Call
Release PTT or CALL key and wait for signal. RX indicating radio is in receiving
mode.
H.
Talk Over Earphone (Optional)
Simply plug the earphone into the Earphone Jack, press PTT key of the earphone
and speak.
Radio Setting
A. Volume Level Adjustment
1. Press + / - key to adjust the volume level from 01 to 07.
2. Press
key to confirm and return to main screen.
You may not press key to confirm the volume setting and return to main screen after 2
seconds automatically.
B. Activate / Close the VOX
VOX is the voice activating transmission function. Users can talk and communicate with
each other without pressing and holding the PTT button.
1. Press MENU key to enter menu setting.
2. Press + / - key until Voc appears on LCD, then press key to confirm and the current
VOX status(“OF “/ “ON VOX”) flashes.
3. Press + / - key to change ON or OF to activate or close this function.
4. Press key to confirm the setting and return to main screen.
Remarks:
- The default setting of VOX function is OFF.
- When setting VOX ON, “VOX” shown on the LCD.
- When setting VOX ON and activating the mosquito repelling function, the unit
will transmit the sound of mosquito repelling
C.
1.
2.
3.
4.
5.
Activate / Close the Auto-scan of Channel
Press MENU key to enter menu setting.
Press + / - key until Scan appears on LCD, then press
key to start channel
scanning.
Start channel scanning from the present channel. Press +/- key to change the channel
scan direction.
Scanning process will stop for 10 seconds when it finds the same channel
& sub-code where transmission is taking place.
Press key to stop scanning or channel scan will start again after 10 seconds.
D. Activate / Close the PTT Auto Function
By activating PTT Auto Function, user can talk and communicate with each
other without pressing and holding PTT button at maximum 3 minutes.
D1. Activate the PTT Auto function
1. Press MENU key to enter menu setting.
2. Press + / - key until PA appears on LCD, then press key to confirm and the current PA
status “ON” or “OF” flashes.
3. Press + / - key to select ON to activate this function.
4. Press
key to confirm and return to the main screen.
D2. PTT Auto operation ( “PA on” selected) :
1. Press PTT key to start talking.
2. Press over 5 seconds, the backlight of units is on and "TX" flashes on the LCD. Release
PTT key to talk to your friends automatically.
3. Press PTT key again to end the talk and exit PTT Auto mode.
Remarks: In PTT Auto mode:
If no press PTT key within 3 minutes, then the unit will automatically exit PTT Auto
mode and return to standby status.
In PTT Auto mode, VOX function is not available for use.
D3. Close the PTT Auto function
1. Press MENU key to enter menu setting.
2. Press + / - key until PA appears on LCD, then press key to confirm and the current PA
status “ON” or “OF” flashes.
3. Press + / - key to select OF to close this function.
4. Press
key to confirm and return to the main screen.
E. Activate / Close the Monitor Function
Monitor function is used during weak transmission, by activating it, all signal in the same
channel will be received.
1. Press MENU key to enter menu setting.
2. Press + / - key until Mon appears on LCD, then press key to activate Monitor
Function.
3. Press MENU key again to close Monitor Function and return to the menu
setting.
Remarks: Under MON function, press PTT, CALL, + / - key, the MON status will not be
changed.
F.
1.
2.
3.
Selecting the Call Tone
Press MENU key to enter menu setting.
Press + / - key until CALL appears on LCD, then press key to confirm
and call tone number flashes.
Press + / - key to select Call Tone(01-05), Call tone demonstration will be
heard in each selection.
4.
Press
key to confirm the setting and return to main screen.
Remarks: The default setting of Call Tone is 01.
G. Selecting the Key Beep
Activate / Inactive the key beep according to your own preference.
1. Press MENU key to enter menu setting.
2. Press + / - key until KB appears on LCD, then press key to confirm.
3. Press + / - key to change ON or OF to activate or close this function.
4. Press
key to confirm and return to the main screen.
Remarks: The default setting of key beep is ON.
H. Selecting the Roger Beep
When the another party has activated the Roger Beep Function, the user can hear an
ending tone (roger beep) when ending the talk.
1. Press MENU key to enter menu setting.
2. Press + / - key until R appears on LCD, then press key to confirm.
3. Press + / - key to change ON or OF to activate or close this function.
4. Press key to confirm and return to the main screen.
Remarks: The default setting of roger beep is ON.
I.
Activate / Close the Mosquito Repelling function
Under Mosquito Repelling function, the unit will emit a frequency continually to repel
mosquito. “RMON” will flash on LCD together with the sound of repelling mosquito indicate
the function is operating.
1. Press MENU key to enter menu setting.
2. Press + / - key until RM appears on LCD, then press key to confirm.
3. Press + / - key to change ON or OF to activate or close this function,
4. Press
key to confirm and return to the main screen.
Remarks:
Activate the Mosquito Repelling function :
Under standby mode, if there is no operation in 3 seconds, the radio will
automatically return to RM0N flashes screen with mosquito repelling sound.
The sound of mosquito repelling will still be heard while selecting the menu setting.
During channel scanning, the sound will pause ; the sound will be heard again when the
scanning stops
While transmitting or receiving signal, mosquito repelling sound will pause ; while signal
transmitting or receiving stops, the sound will resume automatically.
When setting VOX ON , the sound of mosquito repelling will be transmitted.
J.
Lighting Function
1.
2.
3.
4.
Press MENU key to enter menu setting.
Press + / - key until LG appears on LCD, then press key to confirm.
Press + / - key to switch OF / ON / SO.
OF means the light is turned off.
ON means the light is turned on.
SO means flashing light, you may regard it as SOS light.
Press key to confirm and return to the main screen.
Remarks:
Flashing light mode :
Quick flash (3 times) Long flash (3 times) Quick flash (3 times)
Quick switch to activate Flashing Light
1. In standby status, press and hold + / - key until up to volume level max. 07 or min 01, the
flashing light will be automatically activated after 1 second.
2. You must enter into menu to close flashing lighting.
3. User cannot power off the unit if the flashing light is turned on.
Other Functions
Auto Squelch (SQ)
Auto Squelch Control eliminates unwanted interference during communication.
LCD Backlight
LCD Backlight would be on for 10 seconds once any key is pressed.
Auto-resume of The Menu
When the menu is opened, if there is no operation in 15 seconds, it will return to the main
screen automatically.
Setting Memory
All setting set before the radio is off are memorized and will automatically resume to it when
turning on the radio again. All the setting is not memorized when the unit is powered off and
changed with the battery.
Fast Changing Of Channels
Use + or - key to select the menu or adjust channels, sub-code, volume, etc., it will change
the number sequentially if you press the + / - key for more than 1 second.
TECHNICAL SPECIFICATIONS
Description
Specifications
Power Output
500mW
Operating Frequency
446.00625 ~ 446.09375MHz
Channels
8
Sub-code
38
Modulation
FM
Communication Range
Un-obstructed conditions: Up to 10 km
VOX Trigger
+/- 65 dB
Power Source
4 AAA Alkaline battery (600mAh, 1.2V) X2 (NO included)
Battery Life
15 hours (5% Transmission, 5% Reception, 90% Standby)
Fully Charging Time
< 8 hours.
PMR446 Transmit-Receive Frequencies (MHz)
Channel
Frequency
Channel
Frequency
Channel
Frequency
1
446.00625
4
446.04375
7
446.08125
2
446.01875
5
446.05625
8
446.09375
3
446.03125
6
446.06875
Interference Eliminator Code Chart (Hz)
Code
1
2
3
4
5
6
7
8
9
10
11
12
13
Frequency
67.0
71.9
74.4
77.0
79.7
82.5
85.4
88.5
91.5
94.8
97.4
100
103.5
Code
14
15
16
17
18
19
20
21
22
23
24
25
26
Frequency
107.2
110.9
114.8
118.8
123.0
127.3
131.8
136.5
141.3
146.2
151.4
156.7
162.2
Code
27
28
29
30
31
32
33
34
35
36
37
38
Frequency
167.9
173.8
179.9
186.2
192.8
203.5
210.7
218.1
225.7
233.6
241.8
250.3
Communication Environment
1. General communication environment
a. Within the communication range, there is no equipment produces the interference
signal which power is more than or equal to output power of WT-552, for example high
voltage power cable, radio station & etc.
b. Within the communication range and under open area, there is no large-scale buildings
with metal act as the block.
2. Perfect communication environment
Based on above 2 general communication environment and under open area,
communication range can be over 10 km when 2 communicators are positioned at
horizontal straight sight.
3. Poor communication environment
There is solid block between 2 communicators, it is suggested not to communicate under
this environment.
1. General Communication
Environment
2. Perfect Communication
Environment
TROUBLE SHOOTING
Problem
No Power
Solution
- Reposition or replace batteries
Message Not Transmitted
Message Not Received
Hearing Other Conversation /
Noise / Sound of Mosquito
Repelling
3. Poor Communication
Environment
- Make sure the PTT button is completely pressed as you
transmit.
- Reposition or replace batteries
- Confirm radios have the same channel setting.
- Make sure PTT is not inadvertently being pressed.
- Obstructions operating indoors or in vehicles may
interfere with communication.
- Change your location.
- Check to make sure volume is loud enough to be heard.
- Reposition or replace batteries
- Shared channel may be in use, try another.
- VOX function and Mosquito Repelling Function is
activated, turn off mosquito repelling function.
Limited Talk Range
Heavy Static or Interference
- Steel/concrete structures between each other, heavy
foliage will decrease communication range, check for
clear line of sight to improve transmission.
- Wearing radio close to body such as in a pocket or on a
belt will decrease range, change location of radio.
- Radio are too close to each other. Radio must be at
least 15 feet apart, increase your distance.
- Radio are too far apart. Obstacles interfere with
transmission.
- Talk range is up to 10 km in clear and unobstructed
conditions.
Caution:
- Please avoid charging non-rechargeable batteries in the product as charging operation
can only be performed with suitable rechargeable batteries.
- Please use only supplied accessories or optional accessories produce by our company
or it might cause defect or damage to the unit.
- Please refer our distributor for optional accessories produce by our company.
- Danger of explosion if battery is incorrectly replaced. Replace only with the same or
equivalent type. (TSUEN SHING, BT-101-AC )
- Do not hold the antenna while the radio is in use, or transmissions quality affected.
- Attention should be drawn to the environmental aspects of battery disposal.(e.g. Before
scrapping the appliance, remove the batteries and place them in the appropriate battery
connect station. )