Download User`s Manual for Janome 1600P
Transcript
®
User
’s Manual for Janome 1600P
User’s
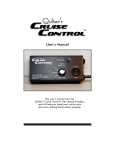
This user’s manual is for the
Quilter’s Cruise Control® with Optical Encoders
and will help you install your unit on your
short-arm quilting frame system properly.
Installing the Quilter
’s Cruise Control®
Quilter’s
The Quilter’s Cruise Control® with optical encoders consists
of the following:
1. The Cruise Control Brain with wiring harness
2. The Optical Encoders
3. Hardware applicable to your specific quilting frame
I. Set up your short-arm quilting frame in accordance with
the manufacturer’s instructions. If you purchased a Stylus Assembly, place it on top of your machine carriage following the
instructions on page 4.
II. Using the hardware provided and following the framespecific instructions, included with your unit, install your optical
encoders on your quilting frame.
III. With the sewing machine on top of the carriage, you may
now plug the Quilter’s Cruise Control® into the foot control port
on the end of the sewing machine.
IV. Plug the small white connectors into the optical encoders
as outlined in your hardware instructions.
V. Plug the connector for the remote hand switch into the
side of the Quilter’s Cruise Control®
VI. Plug in the 6VDC power adaptor plug into the bottom of
the Quilter’s Cruise Control®
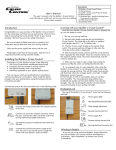
VII. Adjust the maximum stitching speed on the front of your
sewing machine to just above half way as shown in the picture.
Cruising with the Quilter
’s Cruise Control®
Quilter’s
I. Turn on your sewing machine.
II. Flip the switch on the remote to the ‘on’ position. The
‘on’ position is with the white dot on the switch depressed.
III. Start moving the sewing machine. The Cruise Control
Brain regulates the stitch length. Move the machine slowly, and
the machine stitches slowly. Move the machine fast, and the
machine stitches fast. You can adjust the stitch length by turning
the stitch length adjustment knob on the Quilter’s Cruise Control®
IV. When you are ready to stop, simply stop moving the
machine and turn off the Quilter’s Cruise Control by flipping the
switch on the remote hand control.
VII. When you need to wind a bobbin, simply follow your
sewing machine manufacturer’s instructions for threading the
machine/bobbin, then push the “Wind Bobbin” button on the
front panel of your sewing machine. There is no need to unplug
anything!
VIII. As a general rule, it is very important when using the
Quilter’s Cruise Control® not to abruptly start and stop when
moving the sewing machine.
For best results, as with an automobile, start out and slow
down smoothly. You may experience long stitches if you accelerate too quickly and very short stitches if you stop too abruptly.
This will not damage the Quilter’s Cruise Control® unit, but the
quality of your quilting will suffer.
®
WARRANTY
12 Months Parts/12 Months Labor
LiT
en Up, Inc. warrants this product (the Quilter’s Cruise Control)
LiTen
to be free of defects in material and workmanship for a period of 12
months covering parts and labor from the date of original purchase.
To obtain repair or replacement within the terms of this warranty,
please return the product with proof of warranty coverage (this card),
proof of purchase, description of defect, and funds for return shipping
prepaid (request shipping cost information at time of return), to:
LiT
en Up, Inc.
LiTen
Quilter’s Cruise Control
43301 N. Division Street, Suite 303
Lancaster, CA 93535
www.quilterscruisecontrol.com
[email protected]
This warranty does not apply to any product that has been
damaged through alteration, mishandling, misuse or neglect. The
en Up, Inc.’s
Inc. liability under this warranty is limited to the
extent of LiT
LiTen
repair or replacement provided above and in no event shall the
company’s liability exceed the purchase price paid by the purchaser for
the product.
This Warranty gives you specific legal rights, and you may also
have other rights, which vary from state to state.


