1
callas pdfChip Reference Manual
1
Table of contents
01
02
03
04
05
06
07
08
09
10
11
12
Install and run
callas pdfChip – the Foundation
Single pass processing
Multiple pass processing
pdfChip specific HTML aspects
Using pdfChip to add barcodes
pdfChip specific CSS3 aspects
pdfChip specific JavaScript aspects
pdfChip specific SVG aspects
callas pdfChip specific MathML aspects
In CSS 3 but not (well) supported in pdfChip
In MathML 3 but not (well) supported in pdfChip
2
13
Annex
3
01
How to install and run
pdfChip does not have a user-interface, but is used by a command-line interface (CLI). The
application needs a valid activation to run. This activation is bound to the hardware from which
the activation was performed.
Installing pdfChip
Available platforms for pdfChip are Windows, Mac OS X and Linux.
To install pdfChip just download the latest version from http://www.callassoftware.com
(section "Download"), unpack the archive and install the software to the predefined
destination (or a folder of your choice).
The package for Linux does not use installer software, it simply has to be unpacked within the
designated folder. For example using the following command:
gtar zxvpf <callas pdfChip package>.tar.gz
Activating pdfChip
Before pdfChip can be used, the software has to be activated in 3 steps:
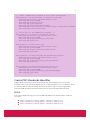
1. Request an activation code:
Open a terminal window, change into the installation directory and type:
pdfChip --keycode
<name>
<company>
<keycode>
name: name of licensee (e.g. "Registered user")
company: name of company (e.g. "User's company")
license code: license key obtained from the registration card
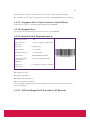
2. The result from pdfChip will be a number of lines of text. This text content needs to be
sent to the callas activation server; the email address to be used is included in the text
output. After sending the email, the callas activation server sends a return email with
the activation information attached (in a text file called "License.txt"). You can send
the email to the callas activation server from a different system, but the return
4
activation information will only be valid on the system where you ran the keycode
command in pdfChip.
3. After receiving the automatic email reply, the attached license file has to be saved and
pdfChip has to be activated. To do this, open a terminal window, change into the
installation directory and type the following command: Open a terminal window,
change into the installation directory and type:
pdfChip --activate
<Path to License.txt>
The License.txt will then be stored in the user-preferences-folder of the actual user.
Using pdfChip
The command-line interface of pdfChip converts an HTML file into a PDF. Referenced images,
CSS and JavaScripts will be included in the created PDF.
pdfChip <Path to HTML file> <Path to PDF file>
On Mac OS X and Linux, the command in the terminal window should look like:
./pdfChip index.html result.pdf
Using Windows, the command would be:
pdfChip.exe index.html result.pdf
The names of the input HTML file and the output PDF are totally free, you can use whatever
works in your environment.
5
02
callas pdfChip – the
Foundation
For various reasons development at callas software were looking for technology that could
create PDF files on the fly but did not require programming to express exactly what type of PDF
was to be created (there are a number of mature, high quality libraries in the market that can
already do that). An obvious approach was to use a language that is good at expressing twodimensional static visual content. Inventing our own language was not an option (there are too
many already), and some of the existing languages were not to our liking. Ultimately we found
ourselves thinking about HTML 5, including CSS 3, MathML, and SVG (and possibly also
JavaScript, and be it just to remain flexible in situations where something was needed that
wasn’t covered by HTML 5 as such). While there do exist some technologies in the market to
convert HTML to PDF, each of them had some limitations we could not accept.
Because of this, development decided to create their own HTML to PDF technology - a major,
non-trivial challenge! Some design decision helped us to not get lost in a sea of requirements
and usage scenarios:
callas pdfChip only creates static two-dimensional PDF content; while a future version
of callas pdfChip might support video or audio streams by embedding them as video
or audio annotations in PDF, callas pdfChip will never aim to replicate interactive
aspects, whether encountered in the form of HTML 5 features like JavaScript, or
through technologies like Flash, Silverlight on so on.
callas pdfChip is not positioned as a technology, that out of the box converts web
pages or web sites to decent PDF (though it might work well in numerous cases).
for optimal use of callas pdfChip certain rules have to be followed (which are
explained in the various chapters of this documentation).
So if it’s not for converting web sites to PDF – what is
it for?
callas pdfChip makes it possible to use HTML – and all the powerful features that come with it –
6
to describe a high quality PDF file. Obviously there are a couple of aspects that can’t be done
well, or not at all, in HTML when it comes to defining what a PDF shall look like. We decided to
work on these aspects in the following ways:
colour: add colour related features like spot colours, and support flexible handling of
colour resources, most notably ICC profiles
advanced graphics PDF features: fully support transparency, overprint, smooth shades
and so forth
support for XMP metadata
support for ISO standards, most notably PDF/A-1, PDF/A-2 and PDF/A-3, as well as
PDF/X-1a and PDF/X-4
pagination: as CSS 3 for Paged Media never worked out, a dual pass mode is
supported allowing for limitless flexibility to include content that can only be fully
known once all the page breaks have been determined
aggregation:
overlay PDF pages onto pages use PDF pages as background for any object
overlay PDF pages onto pages
import PDF pages (like images), including extensive support for clipping
combine several HTML files into one PDF
barcodes: callas pdfChip supports all 1D and 2D barcodes we are aware of (ca. 130
different symbologies)
print loop: based on a custom JavaScript function provided by callas pdfChip, and in
combination with suitable JavaScript scripting, enables creation of any number of PDF
pages in a dynamic fashion, each with partially or completely different content
The above implies that HTML has to be written with the intended purpose of creating decent
PDF from it in mind. Unless callas pdfChip is told in some fashion that a certain object is to use
a spot colour, and is to be set to overprint, it won’t happen. At the same time this does not
preclude to write HTML that can also be used … for a web page. So while callas pdfChip is not a
general purpose web page to PDF converter, it can be immensely powerful when it comes to
deriving a high quality PDF from a web page, or from a collection of web pages. In most cases
callas pdfChip specific features that extend HTML 5, CSS 3 or JavaScript do not cause issues
when the same HTML is served through a browser. In some cases, for example when specifying
a spot colour or importing PDF pages, a fallback may have to be provided (which is a common
pratice anyway in modern web programming, e.g. when following the principles of progressive
enhancement).
Overall architecture of callas pdfChip
When developing callas pdfChip we did not start from scratch. There are some technologies
readily available that do a great job at processing HTML 5. So we decided to pick one, and we
chose WebKit as one of the two building blocks. WebKit is the engine on which the Apple Safari
browser is based. As WebKit is dveloped further, callas pdfChip will be updated to inherit the
WebKit enhancements.
Web browsers, and by implication WebKit, are optimised for rendering visual content on
screen. Taking screen quality visual content to create PDF would leave a lot of thing to be
desired if high quality PDFs are needed. Thus the part of WebKit that prepares HTML for output
on a screen was replaced by a component developed by the callas software development
team, internally named “cchip” (shorthand for “callas convert HTML into PDF”). cchip
translates each piece of HTML content into the most suitable representation in PDF, and takes
care of all the house keeping chores when writing a PDF.
7
Some other areas in WebKit had to be customised as well, to support callas pdfChip specific
functionality, mostly to access or pass through information that is needed to write high quality
PDF but might not be readily available otherwise at the time an object is to be encoded in PDF.
Performance
WebKit is an impressive technology when it comes to performance, and there is probably not
much we could do to improve its performance substantially. The PDF creating module cchip
though is fully under our own control. The following top design goals have been and are at the
core of the callas pdfChip development:
create the smallest possible PDF files
support very long / big PDF files
create PDF files that are most efficicient when processed (for example by a PDF viewer
or printer)
do not require a lot of memory
do not require substantially more memory for long / big documents that for short /
small documents
do not add substantial processing time on top of the time WebKit needs to process the
HTML
support current versions of Mac OS X, Microsoft Windows, and Linux
and last but not least: it is ready when it is ready
The technology behind callas pdfChip has already been put to work before callas pdfChip was
published. Since late 2013 callas pdfToolbox allows to create several types of reports based on
HTML templates. Since March 2014, callas pdfaPilot can convert HTML based emails to PDF and
PDF/A. All in all callas pdfChip has undergone one and half year of extensive testing before it
has been shipped.
A word on…
HTML 5 comes as a pack of technologies – CSS 3, MathML, SVG, and JavaScript. All of these are
supported by WebKit and thus by callas pdfChip. While it's easy to see in which ways CSS 3 is
relevant, it might be less obvious for the other components.
… CSS 3
There are some very important aspects about CSS 3 that one must understand when relying on
it:
CSS 3 is not one specification; instead it is a group of related specifications.
CSS 3 is not “frozen”; instead, new modules can be added at any time.
CSS 3 is not necessarily fully supported by any existing implementation; some
modules are possibly not supported at all (because they are still too new), others are
only supported to a very limited degree (because it is either “not so important” to
developers or their market, or maybe to “costly” to implement fully.
All this applies to callas pdfChip as well. An excellent source to find out whether a given CSS 3
feature can be used in callas pdfChip – have a look at the “Can I Use” website at
http://caniuse.com/ and check the information about support of a given feature in Apple Safari.
8
… MathML
Anybody looking at the creation of text books or scientific publications, will be happy to know
that MathML can be used in callas pdfChip. Some limitations do apply though:
MathML (currently at version 3) comes in two flavors: content MathML and
presentation MathML. There is hardly any support for content MathML in today’s
browsers, and everybody – users of MathML in general as much as developers of
MathML supporting technology – seem to focus on just presentation MathML.
Support for presentation MathML in WebKit is not perfect, certain more complex
aspects of MathML are just not working in WebKit – unless one adds MathJAX to the
equation (pun intended): MathJAX is an open source, free of charge JavaScript library
that turbo charges WebKit (or other browsers/web engines), and achieves almost
perfect support for presentation MathML (and on the side also allows for use of
ASCIIMath, TeX, or LaTeX based representations of mathematical expressions).
… SVG
SVG and PDF share the same imaging concepts, and most of the SVG syntax has direct
equivalents with syntax in PDF. This is very handy when one wishes to have maximum control
over how content is encoded into a PDF page. SVG does not paginate well – in this regard it is
similar to an image.
Note: Where a single page PDF is to be created, SVG files can also be processed directly by
callas pdfChip.
… JavaScript
In its early days JavaScript inside HTML content has mostly been used for creation of effects.
Over time it became a full fledged programming language, even supporting object oriented
programming. Todays rich interactive websites are not thinkable without JavaScript. And
driven by the interest in making websites more interesting and interactive, the developers
behind the JavaScript engine in WebKit have invested a lot of effort in making it highly
performant.
This can be taken advantage of in callas pdfChip. Whether information is to be retrieved from
whatever web service, or whether decision about the content to be encoded is to be made on
the basis of whatever source of data – it can be done, and it can be done very efficiently. In
addition, callas pdfChip can be extended, by using a suitable JavaScript library. For example,
the hyphenation support in WebKit is not very good. This can be remedied by using a
JavaScript library like the Hunspell based “hyphenator.js” library. Also, in a number of cases
where WebKit does not support a recently introduced CSS 3 feature yet, in many cases a so
called “polyfill” is available that just fills such a gap and makes WebKit – and thus callas
pdfChip – behave as if it supported that feature.
9
03
Single pass processing
Unless advanced pagination requirements are to be addressed, the default operating mode,
Single Pass, will be fully sufficient. The underlying concept is simple: callas pdfChip processes
the incoming HTML file (which implies execution of JavaScript used by the file obviously) and
converts all visual content, as well as applicable metadata, to PDF syntax. This resulting PDF
syntax is wrapped up in a compact PDF file.
callas pdfChip in many regards behaves like a web browser, thus it is absolutely adequate to
use URLs the same way as they are used on HTML pages, It is not a prerequisite that all of the
referenced resources exist locally on the machine where callas pdfChip is running. That said –
as resolving links can fail in a browser if the respective web server or web services is not
reachable or not available, so it can fail in callas pdfChip. In addition, accessing a resource on
the local machine or in the local area network tends to work faster than doing the same over
the internet.
When making use of JavaScript, it is important to understand that in principle callas pdfChip
works in synchronous mode. Where JavaScript is used in an asynchronous fashion. Special
precautions have to be taken into account – make sure to read and understand the section on
“pdfChip specific JavaScript aspects”.
10
04
Multiple pass
processing
Everyone looking at pagination functionality in HTML 5 will end up looking at the CSS 3 Paged
Media module. Some will already by disappointed by the limitations in the Paged Media
module, like lack of internal styling inside running headers or footers. Disappointment will
grow substantially once one finds out that most non-trivial features in the Paged Media module
are hardly implemented in any of the leading browsers or web engines.
We felt the same disappointment, and decided to give up on CSS 3 Paged Media and instead
choose a different, conceptually pretty simple approach: process the HTML file more than once,
remember relevant information from the first processing round and make use of it in following
processing rounds. Obvious candidates for this technique are total number of pages (adding
text such as “Page 5 out of 12”), or the text of the current (for a given page) section headings for
use in running headers and footers.
callas pdfChip collects and then makes available such information between passes. In addition,
based on custom JavaScript calls, additional information can be collected during a pass and
provided for processing by a subsequent pass. This can become suitable for the creation of fully
dynamic table of contents (even for several HTML files converted to a single aggregated PDF
file), including correct page numbers and links. The same applies to cross references, lists of
figures or indexes.
11
05
pdfChip specific HTML
aspects
In pdfChip most valid HTML tags can be used. Due to the big amount of available tags and and
even bigger number of possible combinations, some of them might result in an unexpected
result. Due to the different needs for formatting content on a page with a fixed size than for a
website (which shall be properly displayed on every output device) some formatting tags
doesn't make sense.
This chapter contains some details of some special HTML features which has been added to
achieve some special needs to be able to use PDFs (an not only images) as well as adding XMP
Metadata, including PDF Standards identifier, adding an OutputIntent or attaching
(embedding) files to the created PDF document. Please refer to the CSS chapter for details
regarding layout.
Use PDF as image format
pdfChip allows the usage of PDF pages as source for image tags. Since PDFs can contain more
than one page a syntax for selecting the page to be placed has been added to the HTML syntax.
The PDF that is positioned will not become rasterized, but rather the original PDF content is
merged with the generated PDF document.
URL syntax for PDF pages
The URL for PDF supports the following franctions:
<URL>#page=<PAGE-NUM>&box=<BOXNAME>&boxadj=<LEFT>,<TOP>,<RIGHT>,
<BOTTOM>
<URL>: the url to a PDF file
<PAGE-NUM>: the page number (one based)
<BOXNAME>: specify the page box used for placement: trim, crop, media, bleed, art.
values can be specified in 'mm', 'pt', 'cm', 'pc', 'in' units. Default unit is 'pt. Default:
CropBox
12
<LEFT>,<TOP>,<RIGHT>,<BOTTOM>: adjustment for the page box. Positive
values will extend the selected page box. Default: 0
If the page=<PAGE-NUM> part is missing the first page from the PDF referenced by
URL is used for placement.
Example
Place the first page of "sample.pdf"
<img src="sample.pdf">
Places the second page of sample.pdf
<img src="sample.pdf#page=2">
Supported tags
HTML Tags:
<img src=“sample.pdf#page=2”>
CSS properties
background:url(“sample.pdf#page=2”)
background-image:url(“sample.pdf#page=2”)
Create File Attachment annotations
File attachments can be created by using <a> link tags with pdfChip custom attributes.
A file attachment annotation is created if the <a> tag contains the following attributes:
href (not used)
data-cchip-embed: Path to file to embed
Optional attributes:
data-cchip-mimetype: MIME type of attachment
data-cchip-desc: Desription for attachment
data-cchip-relationship: the AFRelationShip entry (“Source”, “Data”,
“Alternative”, “Supplement”)
data-cchip-bookmark: Title of optional bookmark entry
data-cchip-bm-path: Optional path into bookmark tree
Add XMP Metadata
pdfChip allows the creation of XMP Metadata by using custom properties in <meta> tags inside
<head>.
A <meta> tag is used for XMP metadata creation only if it contains all of the following
attributes:
property
content
data-cchip-xmp-ns
data-cchip-xmp-prefix
data-cchip-xmp-property
data-cchip-xmp-type
13
The 'property' attribute
The contents of this attribute is actually not used for XMP creation, but according to the HTML
specification it has to be present.
The 'content' attribute
The contents of this attribute will be used as XMP property value.
The 'data-cchip-xmp-ns' attribute
The cchip_xmp_ns attribute specifies the XMP namespace URI for the property.
The 'data-cchip-xmp-prefix' attribute
The cchip_xmp_prefix attribute specifies the preferred prefix for the XMP namespace URI of the
property.
The 'data-cchip-xmp-property' attribute
The cchip_xmp_property attribute specifies the XMP property name.
The 'data-cchip-xmp-type' attribute
The cchip_xmp_type attribute specifies the XMP property value type.
Supported values (case insensitive):
langAlt: Creates a language alternative. Currently only the creation of the x-default
entry is supported.
seq: Ordered list of simple types
bag: Unordered list of simple types
seqstruct: Ordered list of structured types
bagstruct: Unordered list of structured types
All other types are treated as simple XMP value types (e.g. Text, Date, …).
Arrays of simple types
The seq and bag property types create a new array if not already present and add the value to
this array.
Arrays of structs
The seqstruct and bagstruct property types create a new array if not already present and add
the struct value to this array. For specifying the namespace URI and prefix for the struct
additional properties must be present in the <meta> tag:
data-cchip-xmp-struct-ns
data-cchip-xmp-struct-prefix
Struct members can be specified by the XMP Toolkit subpath syntax:
"History[1]/stEvt:when"
Examples
Adding the "dc:title" property
This example adds a language alternative for the dc:title property.
14
<html>
<head>
<meta
property="Subject"
content="ccmip test (Iñtërnâtiônàlizætiøn)"
data-cchip-xmp-ns="http://purl.org/dc/elements/1.1/"
data-cchip-xmp-prefix="dc"
data-cchip-xmp-property="title"
data-cchip-xmp-type="langAlt"
>
</head>
</html>
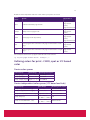
Adding a "xmpMM::History" property
This example adds a sequence of struct 'ResourceEvent'
15
<!-- Create a xmpMM:History Sequence of struct stEvt::ResourceEvent -->
<meta property="" content="Thursday, 06 August 2015 09:45 PM"
data-cchip-xmp-ns="http://ns.adobe.com/xap/1.0/mm/"
data-cchip-xmp-prefix="xmpMM"
data-cchip-xmp-property="History"
data-cchip-xmp-type="SeqStruct"
data-cchip-xmp-struct-name="ResourceEvent"
data-cchip-xmp-struct-ns="http://ns.adobe.com/xap/1.0/sType/ResourceEvent#"
data-cchip-xmp-struct-prefix="stEvt"
>
<!-- Add an entry to the xmpMM:History sequence -->
<meta property="" content="2013-09-06T16:01:13.000Z"
data-cchip-xmp-ns="http://ns.adobe.com/xap/1.0/mm/"
data-cchip-xmp-prefix="xmpMM"
data-cchip-xmp-property="History[1]/stEvt:when"
data-cchip-xmp-type="Date"
>
<meta property="" content="email_sent"
data-cchip-xmp-ns="http://ns.adobe.com/xap/1.0/mm/"
data-cchip-xmp-prefix="xmpMM"
data-cchip-xmp-property="History[1]/stEvt:action"
data-cchip-xmp-type="Text"
>
<meta property="" content="Zeitpunkt des Versands des Originals"
data-cchip-xmp-ns="http://ns.adobe.com/xap/1.0/mm/"
data-cchip-xmp-prefix="xmpMM"
data-cchip-xmp-property="History[1]/stEvt:parameters"
data-cchip-xmp-type="Text"
>
<meta property="" content="Microsoft Office Outlook 12.0"
data-cchip-xmp-ns="http://ns.adobe.com/xap/1.0/mm/"
data-cchip-xmp-prefix="xmpMM"
data-cchip-xmp-property="History[1]/stEvt:softwareAgent"
data-cchip-xmp-type="Text"
>
Create PDF Standards Identifier
pdfChip allows the creation of PDF documents that pretend compliancy to several PDF
standards. There is no guarantee that the files are really compliant since no compliancy check
is performed after creation of the PDF document. A <meta> tag is used for triggering the
insertion of XMP metadata and Document Info entries for the following PDF standards:
PDF/A
If one of the PDF/A meta tags is present an XMP PDF/A Extension Schema will be created if
necessary.
<meta property="cchip_pdfa" content="PDF/A-1a">
<meta property="cchip-pdfa" content="PDF/A-1b">
<meta property="cchip-pdfa" content="PDF/A-2a">
16
<meta
<meta
<meta
<meta
<meta
property="cchip-pdfa"
property="cchip-pdfa"
property="cchip-pdfa"
property="cchip-pdfa"
property="cchip-pdfa"
content="PDF/A-2u">
content="PDF/A-2b">
content="PDF/A-3a">
content="PDF/A-3u">
content="PDF/A-3b">
PDF/X
<meta property="cchip-pdfx" content="PDF/X-1A">
<meta property="cchip-pdfx" content="PDF/X-3">
<meta property="cchip-pdfx" content="PDF/X-4">
PDF/E
<meta property="cchip-pdfe" content="PDF/E-1">
PDF/VT
PDF/VT also sets PDF/X-4
<meta property="cchip-pdfvt" content="PDF/VT-1">
<meta property="cchip-pdfvt" content="PDF/VT-2">
PDF/UA
<meta property="cchip-pdfua" content="PDF/UA-1">
Add Output Intents
Output Intents can be included by specifying an <link> tag with rel attribute with value
"cchip_outputintent". The href attribute of the link tag must point to a PDF file that
contains at least one Output Intent. pdfChip will parse the PDF file and extract the first Output
Intent.
<link rel="cchip_outputintent"
href="./templates/outputintent.pdf"/>
It will insert one Output Intent for every standard requested as described in "Create PDF
Standards Identifier" if needed as well. All Output Intents will point the same ICC profile.
<meta property="cchip-pdfx" ... > will result in /GTS_PDFX
<meta property="cchip-pdfa" ... > will result in /GTS_PDFA1
<meta property="cchip-pdfe" ... > will result in /GTS_PDFE
How to handle parts in separate HTML files
In practice, different parts of a planned document may be contained in a number of HTML files,
which are using links between each other to jump between them. As a result pdfChip has to
differ between external and internal cross references. It has to include and to adjust the links of
those documents, which shall become part of the generated document and leave external links
unchanged.
17
To achieve this, all (references) HTML files, which shall be included in the document has to be
added to the CLI call:
pdfChip {path to cover/cover.html} {path to first
chapter/first.html} {path to second chapter/second.html} ...
If an HTML contains a link (<a href="..."> and this link points to one of the input HTML
files, this link will become a link annotation, otherwise it will stay and URI action for an external
source. The HTML input files can even be named identically.
If a HTML-link has a href attribute and does not contains a #, the first page of the
linked document will be addressed
If a HTML-link has a href attribute and cotains a #, the substring (behind the # will be
addressed and used as the ID
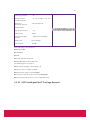
Defining transparency blend modes
Setting the blend space in transparency group form XObjects that might get created because of
soft masks (e.g. in SVG) can be important to get the expected result.
Definition of "cchip-transparency-blendspace" 'rel' entry must be done in the head
section of HTML document
rel="cchip-transparency-blendspace" Defines that this rel belongs to
pdfChip, and determines blend space to be used
data-param Required; can have one of the following values:
DeviceCMYK
DeviceRGB
DeviceGray
ICC
href Either contains path to an ICC profile (only Gray, RGB and CMYK allowed) or is an
empty string; only gets used if data-param = "ICC"
Examples
With referenced ICC profile:
<html>
<head>
...
<link
rel="cchip-transparency-blendspace"
data-param = "ICC"
href="./path/to/some/icc-profile.icc"
/>
...
</head>
<body>
...
</body>
Without referenced ICC profile
18
<html>
<head>
...
<link
rel="cchip-transparency-blendspace"
data-param = "DeviceCMYK"
href=""
/>
...
</head>
<body>
...
</body>
Whenever a transparency groups gets created, the following rules apply:
When a "cchip-transparency-blendspace" 'rel' entry in head exists:
Colorspace defined in data-param = ... (i.e. DeviceCMYK, DeviceRGB,
DeviceGray or an ICC profile) will be used.
If no such entry exists:
If an OutputIntent is defined (e.g. per <meta name="cchip_pdfx"
content="PDF/X-1a">), and the colorspace defined as destination is
CMYK, DeviceCMYK will be used as transparency blendspace.
If the OutputIntent defines a RGB or Gray colorspace as destination, the
respective destination ICC profile will be used.
If no OutputIntent is defined, the transparency blendspace will be set to
DeviceCMYK
19
06
Using pdfChip to add
barcodes
Although HTML doesn't support barcode generation beyond the usage of barcode fonts,
pdfChip offers the possibility to add barcodes directly. The barcode functionality in callas
pdfChip is based on the barcode generator TBarCode from TEC-IT Datenverarbeitung GmbH
(www.tec-it.com).
Portions of this chapter are Copyright TEC-IT Datenverarbeitung GmbH, Steyr/Austria,
www.tec-it.com.
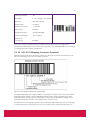
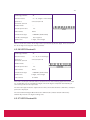
How to specify barcodes
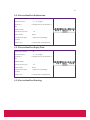
Embedding happens using an <object> tag that has to be properly formatted:
<object type="application/barcode">
<param name="type" value="None">
<param name="data" value="">
</object>
No barcode validation takes place, so a wrong value (e.g. checksum) for the data will result in
an invalid barcode. Size and layout of the barcode can be adjusted using the usual HTML or CSS
parameters.
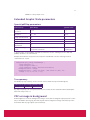
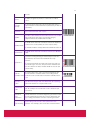
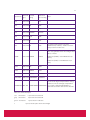
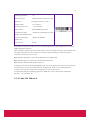
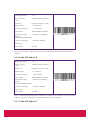
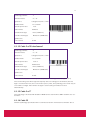
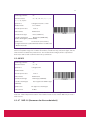
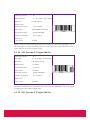
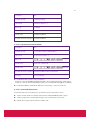
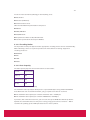
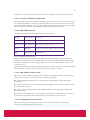
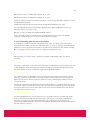
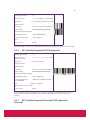
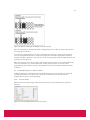
Supported formats of barcodes
ID TYPE
Data
1
Code 11
123456
2
Code 2 of 5 Standard
123456
3
Code 2 of 5 Interleaved
123456
4
Code 2 of 5 IATA
123456
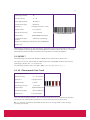
20
5
Code 2 of 5 Matrix
123456
6
Code 2 of 5 DataLogic
123456
7
Code 2 of 5 Industry
123456
8
Code 39
ABCDEF
9
Code 39 Full ASCII
ABCabc
10 EAN 8
12345670
11 EAN 8 + 2 Digits
1234567012
12 EAN 8 + 5 Digits
1234567012345
13 EAN 13
1234567890128
14 EAN 13 + 2 Digits
123456789012812
15 EAN 13 + 5 Digits
123456789012812345
16 EAN/UCC 128
ABCabc
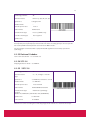
17 UPC 12
123456789012
18 Codabar 2 Widths
A123456A
20 Code 128
ABCabc
21 DP Leitcode
012345678
22 DP Identcode
012345678
23 ISBN 13 + 5 Digits
978-1-23456-789-712345
24 ISMN
979-0-1234-5678-5
25 Code 93
ABCDEF
26 ISSN
9771234567898
27 ISSN + 2 Digits
977123456789812
28 Flattermarken
123456
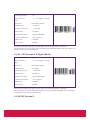
29 GS1 DataBar (RSS-14)
00614141999996
30 GS1 DataBar Limited (RSS)
00614141999996
31 GS1 DataBar Expanded (RSS)
0100614141999996
32 Telepen Alpha
ABCabc
33 UCC 128
ABCabc
34 UPC A
123456789012
35 UPC A + 2 Digits
12345678901212
36 UPC A + 5 Digits
12345678901212345
37 UPC E
12345670
38 UPC E + 2 Digits
1234567012
39 UPC E + 5 Digits
1234567012345
40 USPS PostNet 5 (ZIP)
12345
41 USPS PostNet 6 (ZIP+cd)
123455
42 USPS PostNet 9 (ZIP+4)
123456789
43 USPS PostNet 10 (ZIP+4+cd)
1234567895
44 USPS PostNet 11 (ZIP+4+2)
12345678901
45 USPS PostNet 12 (ZIP+4+2+cd)
123456789014
46 Plessey
123456
47 MSI
123456
21
48 SSCC 18
012345678901234560
50 LOGMARS
ABCDEF
51 Pharmacode One-Track
123456
52 PZN7
1234562
53 Pharmacode Two-Track
123456
54 Brazilian CEPNet
12345678
55 PDF417
ABCabc
56 PDF417 Truncated
ABCabc
57 MaxiCode
ABCabc
58 QR-Code
ABCabc
59 Code 128 Subset A
ABCabc
60 Code 128 Subset B
ABCabc
61 Code 128 Subset C
ABCabc
62 Code 93 Full ASCII
ABCabc
63 Australian Post Custom
12345678
64 Australian Post Custom2
12345678ABab
65 Australian Post Custom3
12345678ABCabc
66 Australian Post Reply Paid
12345678
67 Australian Post Routing
12345678
68 Australian Post Redirect
12345678
69 ISBN 13
978-1-23456-789-7
70 Royal Mail 4 State (RM4SCC)
ABCDEF1234
71 Data Matrix
ABCabc
72 EAN 14 (GTIN 14)
00614141999996
73 VIN / FIN
VB1YYY1JX3M386752
74 Codablock-F
ABCabc
75 NVE 18
012345678901234560
76 Japanese Postal
1234567
77 Korean Postal Authority
123456
78 GS1 DataBar Truncated (RSS)
00614141999996
79 GS1 DataBar Stacked (RSS)
00614141999996
80 GS1 DataBar Stacked Omnidir (RSS)
00614141999996
81 GS1 DataBar Expanded Stacked (RSS) 0100614141999996
82 PLANET 12 digit
123456789014
83 PLANET 14 digit
12345678901239
84 Micro PDF417
ABCabc
85 USPS Intelligent Mail Barcode (IM)
12345678901234567890
86 Plessey Bidirectional
123456
87 Telepen
123456
88 GS1 128 (EAN/UCC 128)
01090999995432171512052110Abc123
89 ITF 14 (GTIN 14)
00614141999996
22
90 KIX
AaBbCcDdEe
91 Code 32
012345676
92 Aztec Code
ABCabc
93 DAFT Code
DAFT
94 Italian Postal 2 of 5
123456789012
96 DPD
0007110601632532948375179276
97 Micro QR-Code
ABCDEF
98 HIBC LIC 128
+A99912345/9901510X3
99 HIBC LIC 39
+A99912345/9901510X3
100 HIBC PAS 128
+/EAH783/Z34H159
101 HIBC PAS 39
+/EAH783/Z34H159
102 HIBC LIC Data Matrix
+A99912345/9901510X3
103 HIBC PAS Data Matrix
+/EAH783/Z34H159
104 HIBC LIC QR-Code
+A99912345/9901510X3
105 HIBC PAS QR-Code
+/EAH783/Z34H159
106 HIBC LIC PDF417
+A99912345/9901510X3
107 HIBC PAS PDF417
+/EAH783/Z34H159
108 HIBC LIC Micro PDF417
+A99912345/9901510X3
109 HIBC PAS Micro PDF417
+/EAH783/Z34H159
110 HIBC LIC Codablock-F
+A99912345/9901510X3
111 HIBC PAS Codablock-F
+/EAH783/Z34H159
112 QR-Code 2005
ABCabc
113 PZN8
12345678
115 DotCode
ABCabc
116 Han Xin Code
ABCabc
117 USPS Intelligent Mail Package (IMpb) 9102805213683062522920
118 Swedish Postal Shipment Item ID
EM100027995SE"
23
07
pdfChip specific CSS3
aspects
In pdfChip (almost) all valid CSS3 properties can be used. On top of that pdfChip implements a
range of additional CSS properties, mainly in order to address certain requirements of the
graphic arts industry. This chapter describes these custom CSS properties.
Page geometry boxes
PDF page geometry boxes can be specified inside the CSS @page{} rule. The following custom
CSS properties are available:
-cchip-trimbox
-cchip-bleedbox
-cchip-cropbox
-cchip-artbox
Page geometry boxes are defined in PDF coordinates: 0/0 is left bottom of the page Y goes up
(rather than in screen coordinates where center is left top and Y goes down). Each of the page
geometry box properties takes four values: The fist two define the coordinates of the lower left
corner, the third the width and the forth the height of the box. The MediaBox is defined via the
CSS size property.
Example for a typical A4 page:
@page {
size: 230mm 317mm;
-cchip-trimbox: 10mm 10mm 210mm 297mm;
-cchip-bleedbox: 7mm 7mm 216mm 303mm;
-cchip-cropbox: 0mm 0mm 230mm 317mm;
}
If a pdfChip-page geometry box property is set then:
24
the appropriate page geometry box is present in the output PDF
the appropriate value is available is JavaScript 'page' object
In order to use page geometry boxes in JavaScript the syntax is
cchip.pages[i].artbox
cchip.pages[i].bleedbox
cchip.pages[i].trimbox
cchip.pages[i].cropbox
E.g. in order to check if the BleedBox is set on the first page:
if (cchip.pages[1].bleedbox) {
...do something with bleedbox...
}
Rotating page content
In pdfChip you can use all CSS positioning properties. This includes properties for rotating page
content which are not supported by all web browsers and are therefore not commonly used.
For this reason they are listed here.
-webkit-transform
Sets the rotation factor
-webkit-transform-origin
Defines the origin for rotation
It is usefull to combine these properties with other positioning properties in order to set the
origin accordingly.
Example for rotating content 45 degrees counterclockwise with an origin at 20mm / 100 mm
(from top of the page).
.rotated-45 {
position: absolute;
left: 20mm; bottom: 100mm;
-webkit-transform: rotate(-45deg);
-webkit-transform-origin: left bottom;
}
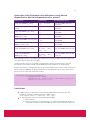
Page breaks
Another type of CSS properties that are espacially usefull in pdfChip are related to setting or
avoiding page breaks, because page breaks naturally play a much more important role in PDF
creation than in the desing of web pages.
page-break-after
page-break-before
page-break-inside
25
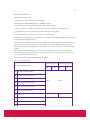
Below the most important values for each of these properties are listed
Value
name
Result
Applicable in
auto
Default. Automatic page breaks
page-break-after,
page-breakbefore,
page-break-inside
always
Always insert a page break
page-break-after,
page-breakbefore
avoid
Avoid page break (if possible)
page-break-after,
page-breakbefore,
page-break-inside
left
Insert page breaks so that the next page is formatted as a left
page
page-break-after,
page-breakbefore
right
page-break-after,
Insert page breaks so that the next page is formatted as a right
page-breakpage
before
The example below inserts a page break before the next element.
<p style="page-break-after: always" />
Defining colors for print - CMYK, spot or ICC based
color
Device color spaces
CSS Property
Value Range
Resulting Color Space
-cchip-gray(g)
g: 0.0 … 1.0
DeviceGray
-cchip-rgb(r,g,b)
rgb: 0.0 … 1.0
DeviceRGB
-cchip-cmyk(c,m,y,k) cmyk: 0.0 … 1.0 DeviceCMYK
Device independent color spaces (ICC based and Lab)
CSS Property
Value Range
Resulting Color Space
-cchip-icc-gray('ICCPATH', g)
g: 0.0 … 1.0
ICC based Gray
-cchip-icc-rgb('ICCPATH', r,g,b)
rgb: 0.0 ... 1.0
ICC based RGB
-cchip-icc-cmyk('ICCPATH', c,m,y,k) cmyk: 0.0 … 1.0
ICC based CMYK
-cchip-lab(l,a,b)
l: 0.0 … 100.0
Lab
ab: -128.0 … +127.0
-cchip-icc-lab('ICCPATH', l,a,b)
"l: 0.0 … 100.0
ICC based Lab
ab: -128.0 … +127.0"
With 'ICCPATH' path to a local ICC profile.
26
Spot color (with Alternate color defintions using device
dependent or device independent color spaces)
CSS Property
Value Range
Resulting Color Space
-cchip-gray('NAME',g [, tint])
g: 0.0 … 1.0, tint 0 …
1.0
Spot color NAME, Alternate
DeviceGray
-cchip-icc-gray('ICCPATH', 'NAME',g g: 0.0 … 1.0, tint 0 …
[, tint])
1.0
Spot color NAME, Alternate ICC
based Gray
-cchip-rgb('NAME',r,g,b [, tint])
rgb: 0.0 … 1.0, tint 0 … Spot color NAME, Alternate
1.0
DeviceRGB
-cchip-icc-rgb('ICCPATH',
'NAME',r,g,b [, tint])
rgb: 0.0 … 1.0, tint 0 … Spot color NAME, Alternate ICC
1.0
based RGB
-cchip-cmyk('NAME',c,m,y,k [, tint])
cmyk: 0.0 … 1.0, tint 0
… 1.0
Spot color NAME, Alternate
DeviceCMYK
-cchip-icc-cmyk('ICCPATH',
'NAME',c,m,y,k [, tint])
cmyk: 0.0 … 1.0, tint 0
… 1.0
Spot color NAME, Alternate ICC
based CMYK
-cchip-lab('NAME',l,a,b [, tint])
l: 0.0 … 100.0
ab: -128.0 … +127.0,
tint 0 … 1.0
Spot color NAME, Alternate Lab
-cchip-icc-lab('ICCPATH',
'NAME',l,a,b [, tint])
l: 0.0 … 100.0
ab: -128.0 … +127.0,
tint 0 … 1.0
Spot color NAME, Alternate ICC
based Lab
With 'ICCPATH' path to a local ICC profile. Profiles have to be accessible in the file system, it is
e.g. not possible to derive them via http.
In order to define colors in a way that a regular Browser will be able to display a color the
definitions can be combined with regular HTML/CSS color definitions as shown below.
Example that defines a background color as spot color with the name "Spot" using an alternate
color in ICC based CMYK C=0% M=80% Y=80% K=0% and ISO Coated v2 as source color space.
The spot color is used with a tint value of 75%.
.background-spot_orange-ICCbasedcmyk {
background-color: orange;
background-color: -cchip-icc-cmyk('./ISO Coated v2 (ECI).icc',
'Orange',0.0,0.8,0.8,0.0, 0.75)
}
Limitations
pdfChip colors are implemented only for CSS/HTML but not for JavaScript. The
following JavaScript is NOT possible for pdfChip colors:
note.style.color = "rgb(155, 102, 102)"
In some situations colors are converted to Device RGB:
Rasterization.
Colors are acсessed via JavaScript. E.g. if “mydiv.style.backgroundColor” in
JavaScript it would be output as RGB even if it has accurately been defined as
27
CMYK via '-cchip-cmyk' in css.
Extended Graphic State parameters
Special pdfChip parameters
CSS Property
Value Range
Default value
-cchip-flatnesstolerance
>= 0.0
1.0
-cchip-smoothnesstolerance
0.0 … 1.0
-1.0 *)
-cchip-text-knockout
0, 1
0
-cchip-overprint
0, 1
0
-cchip-overprint-mode 0, 1
0
-cchip-strokeadjustment
0, 1
0
-cchip-renderingintent
absolute-colorimetric, relative-colorimetric,
perceptual, saturation
relativecolorimetric
*) Special value -1.0 for pdfChip-smoothness-tolerance means “nothing was set in CSS and
pdfChip should use it's own default
Example that switches overprint and overprint mode ON and sets the rendering intent to
"saturation" for a color.
.background-spot_orange-ICCbasedcmyk {
-cchip-overprint: 1;
-cchip-overprint-mode: 1;
-cchip-rendering-intent: absolute-colorimetric;
background-color: orange;
background-color: -cchip-icc-cmyk('./ISO Coated v2 (ECI).icc',
'Orange',0.0,0.8,0.8,0.0, 0.75);
}
Transparency
The CSS3 property "opacity" can be used in order to define transparent PDF objects.
CSS Property Value Range Default value
opacity
0.0 ... 1.0
1.0
E.g. style="opacity: 0.5" sets opacity to 50%, the ca value in the result PDF's Extended Graphic
State is thereby set to 0.5.
PDF as image in background
A PDF might be used as the background "image" inside of the background property in the same
way as in HTML in the img tag. The PDF objects of the background "image" will show up in the
destination PDF as page objects (not rasterized).
28
Please go to the chapter "pdfChip specific HTML aspects" for further information about
selecting a PDF page or clipping a PDF page.
29
08
pdfChip specific
JavaScript
In its early days JavaScript inside HTML content has mostly been used for creation of effects.
Over time it became a full fledged programming language, even supporting object oriented
programming. Todays rich interactive websites are not thinkable without JavaScript. And
driven by the interest in making websites more interesting and interactive, the developers
behind the JavaScript engine in WebKit have invested a lot of effort to make it very performant.
This can be taken advantage of in callas pdfChip. Whether information is to be retrieved from
whatever web service, or whether decision about the content to be encoded is to be made on
the basis of whatever source of data – it can be done, and it can be done very efficiently. This
chapter contains full information on the specific JavaScript functionality added by pdfChip and
how you can take advantage of it.
"Normal" HTML JavaScript
Because pdfChip is based on the WebKit engine, it fully supports - even advanced - JavaScript.
Anything that works in a normal browser will also work during a conversion with pdfChip. Of
course there are features that are offered by the browser itself (such as the "Window" object)
that won't work in pdfChip because there is no such object during the conversion pdfChip does.
The following are a few popular JavaScript libraries that have been tested using pdfKit. This
doesn't mean that you are limited to those; it simply shows off some of the possibilities
available to you.
jQuery: a small, lightweight and versatile JavaScript library that is mainly interesting
in a pdfChip context for its HTML dom traversal and manipulation API.
MathJax: a very complete and easy to use JavaScript library to render formulas in
MathML.
Hypenathor: a hyphenation library that can supplement the lack of (good)
hyphenation in standard CSS.
Polyfill libraries: are JavaScript libraries used to implement specific CSS features not
30
or not very well implemented by browsers. Many such polyfill libraries exist to plug
holes that exist in WebKit for specific advanced CSS features.
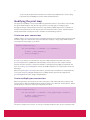
Modifying the print loop
The purpose of pdfChip is to convert HTML into good PDF; often use cases will need to modify
the given HTML template and alter the appearance of a single page or multiple pages
throughout the generated PDF document. To support this pdfChip implements a number of
custom Javascript functions and objects that are introduced in this section. Full information
about the functions and objects used is available in the following sections.
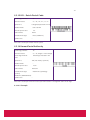
Use in one-pass conversions
pdfChip defines a printLoop and printPages function to let you take full control over how
and when pages are output. This lets you modify (for example) a single-page HTML template
and output as many pages as you want:
function cchipPrintLoop() {
for (var theIndex = 0; theIndex < 10; theIndex++) {
$('#test').text('penguins');
cchip.printPages();
}
}
As soon as you include a JavaScript file into your HTML template that defines the above
printLoop function, pdfChip will automatically execute it for you. This simple example
function interates 10 times; each time it modifies a paragraph using a jQuery statement and
then uses cchip.printPages to convert the HTML template as it is at that point in time to
PDF pages.
When using cchipPrintLoop in this fashion, you still only end up with one output PDF file,
even if you call printPages multiple times. pdfChip always appends the output from
printPages to the same (single) output PDF file.
Use in multiple-pass conversions
When using overlays or underlays, the same technique is still usable. Of course uderlays and
overlays have a different HTML template and thus will also use different JavaScript files, which
allows giving an overlay or underlay an adjusted print loop:
function cchipPrintLoop() {
for (var theIndex = 0; theIndex < cchip.pages.length; theIndex++) {
$('#test').text('penguins');
cchip.printPages();
}
}
The above example for an under- or overlay is virtually identical to the one-pass example with
31
one important change. The number of iterations is now determined by
cchip.pages.length. This cchip object is added by pdfChip to give you access to
information from the main HTML template. In this example it's used to generate an under- or
overlay with the same number of pages as what was generated by the conversion of the
original HTML template.
Reference
This section contains reference information for all pdfChip specific JavaScript functions and
objects.
cchipPrintLoop
function cchipPrintLoop()
If the HTML document contains a printLoop function (either embedded in the HTML file or in
a separately included JavaScript file), this modifies how pdfChip generates its output PDF file.
No PDF creation is done automatically, instead pdfChip relies on the printPages function to
be used to output any PDF pages as necessary.
This means that the body of the printLoop function should be used to alter the HTML
template as necessary and that the modified HTML DOM should be output by invoking the
printPages function. Note that printPages can be invoked multiple times and if so that
the result of these multiple invokations will be merged into one output PDF file.
Example:
function cchipPrintLoop() {
for (var theIndex = 0; theIndex < 10; theIndex++) {
$('#test').text('penguins');
cchip.printPages();
}
}
cchip
During conversion of the main HTML file the cchip object is extended by properties that hold
information about the converted document. This information can be used from within the
HTML template for an overlay or underlay.
cchip.printPages
function cchip.printPages()
Outputs the current HTML DOM to the PDF output file. Can be invoked multiple times, but can
only be invoked from the body of the printLoop function.
Example:
32
function cchipPrintLoop() {
cchip.printPages();
}
cchip.log
function cchip.log( inTextToLog )
This function logs any string pass to it to stderr during conversion of the HTML template.
Example:
function printLoop() {
for (var theIndex = 0; theIndex < cchip.pages.length; theIndex++) {
cchip.log("Printing page " + (theIndex+1));
printPages();
}
}
In the example above the printLoop and printPages functions are used to loop over all
pages in the output PDF file. For each page the overlay or underlay template is output
unmodified and printing of the page is confirmed by using cchip.log to write the page
number to the console.
cchip.urls
An array containing the URLs of all HTML files being converted. Overlays and underlays are not
included here. If pdfChip is called with a single HTML file, this list will contain only one element;
if pdfChip receives multiple HTML files on its command-line, all of the main HTML files will be
available in this list.
cchip.overlays
An array containing the URLs for all overlay HTML files used during the conversion.
cchip.underlays
An array containing the URLs for all underlay HTML files used during the conversion.
cchip.pages
An array containing information about the individual pages resulting from the conversion of
the main HTML template into a PDF document. The different properties of the page elements
in this array contain information about the pages. Specifically the following properties can be
used:
number
The (zero-based) page number of the page.
33
mediabox
Information on the mediabox for the page using a height, width, bottom> and
left property. All properties are expressed in points.
cropbox
Information on the cropbox for the page using a bottom, left, top> and right
property. All properties are expressed in points.
trimbox
Information on the trimbox for the page using a bottom, left, top> and right
property. All properties are expressed in points.
bleedbox
Information on the bleedbox for the page using a bottom, left, top> and right
property. All properties are expressed in points.
margins
Information on the margins for the page using a bottom, left, top> and right
property. All properties are expressed in points.
h
An array with information for the content (text) of the currently active headers for this
page. Because the array is zero based, cchip.pages[theIndex].h[0] returns
the content of the current h1 header level.
34
09
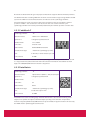
pdfChip specific SVG
aspects
In pdfChip SVG objects are supported in the same way as they work in Webkit as well.
For using pdfChip specific colors, "fill" and "stroke" SVG attributes as well via corresponding
"fill" and "stroke" CSS properties can be used.
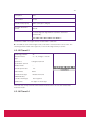
Example
pdfChip adds some custom fuctionality to the HTML syntax like placing PDFs in image tags or
adding XML Metadata to the resulting PDF.
<div>
<svg height=100 width=100>
<ellipse cx="35" cy="25" rx="27" ry="20"
fill="cchip-cmyk('yellow',0,0,1,0,0.9)"
stroke="cchip-cmyk(1,0,0,0)">
</svg>
</div>
35
10
callas pdfChip specific
MathML aspects
As mentioned already, MathML support in WebKit leaves a few things to be desired. While
simple equations will work fine, anything non-trivial will often show anomalies in the rendered
presentation – whether in a WebKit based browser like Apple’s Safari or in the PDF output of
callas pdfChip. There is an easy solution though, and it is known by the name of MathJax. The
great people behind MathJax describe it as follows: “MathJax is an open-source JavaScript
display engine for LaTeX, MathML, and AsciiMath notation that works in all modern browsers.”
It is not only the most powerful such engine – it is also free of charge (if MathML is dear to your
heart you may decide to sponsor further development of MathJax).
When used in the context of callas pdfChip it is highly recommended to download MathJax and
install it locally on the machne where callas pdfChip is running. This has the following
advantages:
callas pdfChip will create PDF with mathematical from a known version of MathJax,
giving the very same results each time the same source MathML is processed. While
newer versions of MathJax will most probably be better in a relevant way, better still
could mean different, as in different size, leading to reflow, and so forth. When
replacing the currently used version of MathJax a newer version, make sure to check
whether its behavior still meets your needs.
Depending on online access, even when provided via a professionally maintained,
globally distributed content delivery network architecture, always comes with a risk –
even major players like Twitter or Facebook had their outages.
Retrieving resources through an internet connection will almost always be slower than
retrieving the same resources from the local hard disk, and the time needed to load
such resources can be deternined and willl remain a stable and known quantity.
All the details around downloading and installling a local version of MathJax are very well
explained on the “Installing and testing MathJax” page. Make sure you understand that
together with the actual MathJax JavaScript library, a number of essential math fonts will also
(have to) be installed.
36
The basics of including the MathJax library in your HTML code are explained in the “Learning
pdfChip - the Tutorial” section on “Including formulas”.
If you do not know how to get a MathML encoded version of a formula you care about – there
are a number of interactive tools that will let you create mathematical formulas and will also
let you copy them as MathML. A good online resource, besides the MathML pages on the W3C
website and the MathJax Resources section listing is MathML Central by Wolfram Research.
Those in need of an interactive, installable program for mathematical equations will want to
have a look at MathType from Design Science.
For any advanced type setting of mathematical formulas in callas pdfChip it will be necessary
to study the MathJax documentation, which is very clearly organised and well written. Special
attention needs to be paid to how MathJax is configured as otherwise the way MathJax works
might not meet your specific needs.
37
11
In CSS 3 but not (well)
supported in pdfChip
While in pdfChip almost all valid CSS3 properties can be used, it does not make sense for some
of them. It is obvious that this applies to all dynamic page content like animations.
CSS 3 properties for dynamic page content will have
not effect in pdfChip
Transitions
Animations
User-Interface properties
Aural Style Sheets (text to speech, sound synthesis)
Columns
The CSS 3 properties for columns: column-count, column-gap and column-rule are currenty not
supported.
The much more powerfull CSS Regions module should be used instead. The CSS Regions
module allows content from one or more elements to flow through one or more boxes.
The CSS 3 Paged Media Module
The Paged Media Module is currently not supported by pdfChip (except for defining page sizes
usign the “@page Rule”), nor would that be the case for most of the current browser versions.
The Paged Media Module specifies how pages are generated. It has functionality for page size,
margins, orientation, headers and footers, enables page numbering and running headers or
footers.
Although the Paged Media Module is not supported it is possible with pdfChip to achieve
38
whatever (in theory) would be possible with this module:
To define page sizes use the @page rule (the only Paged Media Module feature
supported in pdfChip).
Advanced functionality for adding page numbers, running headers and footers the
pdfChip overlays should be used, possibly in combination with the pdfChip Dual Pass
operating mode.
It is even possible to define page paramters that are specific to the print process (page
geometry boxes) using special pdfChip custom CSS properties.
39
12
In MathML 3 but not
(well) supported in
pdfChip
callas pdfChip is based on WebKit, and WebKit’s support for MathML 3 is seriously limited.
Unless extra steps are taken, callas pdfChip will not do a good job when converting non-trivial
MathML to PDF.
To overcome this limitation, use MathJax, a JavaScript library that extends WebKit (as much as
most other web engines and browsers) such that presentation MathML is supported almost
completely (see “Supported MathML commands” for information about the limitations of
MathJax when processing MathML).
Please also keep in mind, that support for “Content MathML” is in essence seriously limited (or
“experimental”). While Content MathML is semantically richer than presentation it – going back
to its nature – provides much less control over how a formula is presented than Presentation
MathML. Thus it comes at no surprise that whenever specifics of how a formula is presented are
important, anybody is turning to Presentation MathML anyway, so lack of support for Content
MathML usually is not an issue for when creating PDF from HTML 5 and MathML 3.
40
13
1
Disclaimer
The reference material in this "Barcode Reference" chapter is copyrighted by TEC-IT
Datenverarbeitung GmbH, Austria (TEC-IT), and is included by permission of TEC-IT.
TEC-IT reserves all rights to this reference material and the information contained
therein. Reproduction without express authority is strictly forbidden.
Für diese "Barcode Reference"-Dokumentation und den darin dargestellten Gegenstand
behält sich TEC-IT alle Rechte vor. Vervielfältigung und Verwendung außerhalb des
vereinbarten Zweckes sind nicht gestattet.
© 1998-2015 by TEC-IT Datenverarbeitung GmbH, Hans-Wagner-Str. 6, A-4400 Austria, t.: +43
(0)7252 72720, f.: +43 (0)7252 72720 77, http://www.tec-it.com
2
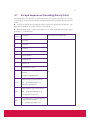
Index
1 Disclaimer
2 Index
2.1 Table of Figures
2.2 List of Tables
3 Introduction
3.1 Scope of this Document
3.2 Barcode Types
3.2.1.1 Linear 1D Barcodes
41
3.2.1.2 2D Barcodes (Stacked)
3.2.1.3 2D Barcodes (Matrix Codes)
3.2.1.4 Composite Codes
3.3 Barcode Glossary
4 Important Barcode Parameters
4.1 Barcode Symbology
4.2 Module Width
4.2.1 Introduction
4.2.2 Optimize the Module Width
4.2.3 Module Width and Reading Distance
4.3 Bar Width Reduction (Pixel Shaving)
4.4 Quiet Zone
4.5 Print Ratio and Ratio Format
4.6 Format
4.6.1 Format Examples
4.7 Escape Sequences (Encoding Binary Data)
4.8 Check Digits
5 Application Identifiers (AI)
5.1 Introduction
5.2 Examples
5.2.1 Batch Number
5.2.2 Multiple AIs within one Barcode
5.2.3 GS1-128 with embedded Check Digit
5.3 GS1 DataBar Expanded / GS1 DataBar Expanded Stacked
5.3.1 AIs with a Fixed Length
5.3.1.1 AI(01) and Weight
5.3.1.2 AI(01), Weight and Date
5.3.2 AIs with Variable Lengths
5.3.2.1 AI (01) and Price
5.3.2.2 AI (01)
5.4 GS1 Composite Symbology
5.4.1 Compressed Sequences of AIs
5.4.2 AI (90)
42
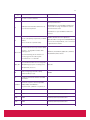
6 Barcode Symbologies
6.1 Linear Symbologies(1D Codes)
6.1.1 Bookland
6.1.2 Codabar (Rationalized Version)
6.1.3 Code 11
6.1.4 Code 128
6.1.5 Code 128 Subset A
6.1.6 Code 128 Subset B
6.1.7 Code 128 Subset C
6.1.8 Code 2 of 5 Standard (Code 2 of 5 Matrix)
6.1.9 Code 2 of 5 Data Logic
6.1.10 Code 2 of 5 IATA
6.1.11 Code 2 of 5 Industrial
6.1.12 Code 2 of 5 Interleaved
6.1.13 Code 2 of 7
6.1.14 Code 25
6.1.15 Code 39 (3of9)
6.1.16 Code 32
6.1.17 Code 39 Extended
6.1.18 Code 93
6.1.19 Code 93 Extended
6.1.20 DAFT Code
6.1.21 DOD Logmars
6.1.22 DUN-14
6.1.23 DUNS
6.1.24 EAN-128 (GS1-128)
6.1.25 EAN-13
6.1.26 EAN-13 with 2 Digits Add-On
6.1.27 EAN-13 with 5 Digits Add-On
6.1.28 EAN-14
6.1.29 EAN-18
6.1.30 EAN-8
6.1.31 EAN-8 with 2 Digits Add-On
43
6.1.32 EAN-8 with 5 Digits Add-On
6.1.33 FIN Code (Fahrzeug-Identifizierungsnummer)
6.1.34 Flattermarken
6.1.35 GS1-128
6.1.36 GTIN
6.1.37 HIBC
6.1.38 I-2/5
6.1.39 ISBN Code (ISBN 13)
6.1.39.1 Example
6.1.39.2 ISBN Additional Data
6.1.40 ISBT-128
6.1.41 ISMN
6.1.42 ISSN
6.1.43 ITF-14
6.1.44 JAN
6.1.45 LOGMARS
6.1.46 MSI
6.1.47 NVE-18 (Nummer der Versandeinheit)
6.1.48 NW-7
6.1.49 Pharmacode One-Track
6.1.50 Pharmacode Two-Track
6.1.51 Pharma Zentralnummer (PZN)
6.1.51.1 PZN7: 6 Digits + 1 Check Digit (valid until 2012/12/31)
6.1.51.2 PZN8: 7 Digits + 1 Check Digit (valid from 2013/01/01)
6.1.52 Plessey Code
6.1.53 Rational Codabar
6.1.54 SCC-14
6.1.55 SSCC-18
6.1.56 Telepen Alpha
6.1.57 Telepen
6.1.58 UCC-128
6.1.59 UPC 12 Digits
6.1.60 UPC Version A
44
6.1.61 UPC Version A, 2 Digits Add-On
6.1.62 UPC Version A, 5 Digits Add-On
6.1.63 UPC Version E
6.1.64 UPC Version E, 2 Digits Add-On
6.1.65 UPC Version E, 5 Digits Add-On
6.1.66 UPC SCS (Shipping Container Symbols)
6.1.67 USD-4
6.1.68 USS ITF 2-5
6.1.69 USS Code 128
6.1.70 USS Code 39
6.1.71 VIN Code (Vehicle Identification Number)
6.2 Postal Codes (Linear/1D)
6.2.1 Australian Post Customer
6.2.2 Australian Post Customer 2
6.2.3 Australian Post Customer 3
6.2.4 Australian Post Redirection
6.2.5 Australian Post Reply Paid
6.2.6 Australian Post Routing
6.2.7 Brazilian CEPNet / Brazilian Postal Code
6.2.8 Deutsche Post Identcode
6.2.9 Deutsche Post Leitcode
6.2.10 DPD Code
6.2.11 Italian Postal Code 2 of 5
6.2.12 Japanese Postal Code
6.2.12.1 Direct Encoding Mode
6.2.12.2 Japanese Extraction Mode
6.2.12.3 Standard Dimensions
6.2.13 KIX – Dutch Postal Code
6.2.14 Korean Postal Authority
6.2.14.1 Example
6.2.15 Planet 12
6.2.16 Planet 14
6.2.17 Royal Mail 4 State (RM4SCC)
45
6.2.18 Royal Mail Complex Mail Data Mark (CMDM) Mailmark® Barcode
6.2.18.1 Data Structure
6.2.18.2 Customer Content
6.2.18.3 Encoding
6.2.19 Singapure Post 4-State Customer Code (SinPost)
6.2.20 Singapore Post
6.2.21 Swedish Postal Shipment Item ID
6.2.22 USPS Intelligent Mail® Barcode or IM® Barcode
6.2.23 USPS Intelligent Mail® Package Barcode
6.2.24 USPS Postnet 5
6.2.25 USPS Postnet 6
6.2.26 USPS Postnet 9
6.2.27 USPS Postnet 10
6.2.28 USPS Postnet 11
6.2.29 USPS Postnet 12
6.3 2D Symbologies
6.3.1 Aztec Code
6.3.1.1 Character Set
6.3.1.2 Layers and Core Type
6.3.1.3 The Maximum Data Capacity of Aztec Code
6.3.1.4 Format
6.3.2 Codablock F
6.3.3 Data Matrix
6.3.3.1 Encoding Modes
6.3.3.2 Data Capacity
6.3.3.3 Code Format
6.3.3.4 DP Postmatrix (see 6.3.3.6 GS1 Data Matrix
6.3.3.5 Compatibility Options
6.3.3.6 GS1 Data Matrix
6.3.3.7 Deutsche Post Premiumadress Data Matrix
6.3.3.8 Deutsche Post Werbeantwort Postmatrix
6.3.4 DotCode
46
6.3.4.1 Code Format
6.3.5 Han Xin Code
6.3.5.1 Data Capacity
6.3.6 MaxiCode
6.3.6.1 Data Capacity
6.3.6.2 Modes
6.3.6.3 MaxiCode & UPS®
6.3.7 MicroPDF417
6.3.8 Micro QR-Code
6.3.9 PDF417
6.3.9.1 Data Capacity
6.3.9.2 How to optimize PDF417 for FAX?
6.3.10 PDF417 Truncated
6.3.11 QR-Code (Model 2)
6.3.11.1 Kanji and Chinese Compaction
6.3.11.2 QR–Code Capacity
6.3.11.3 QR–Code Creation Speed
6.3.11.4 Codepages (Character Set)
6.3.11.5 Encoding Special Latin-1 Characters
6.3.12 QR-Code 2005
6.4 HIBC – Health Industry Bar Code
6.4.1 Supplier Labeling Standard Formats
6.4.2 Provider Application Standard Formats
6.4.3 HIBC LIC 128
6.4.4 HIBC LIC 39
6.4.5 HIBC LIC Data Matrix
6.4.6 HIBC LIC QR-Code
6.4.7 HIBC LIC PDF417
6.4.8 HIBC LIC MicroPDF417
6.4.9 HIBC LIC Codablock F
6.4.10 HIBC PAS 128
6.4.11 HIBC PAS 39
47
6.4.12 HIBC PAS Data Matrix
6.4.13 HIBC PAS QR-Code
6.4.14 HIBC PAS PDF417
6.4.15 HIBC PAS MicroPDF417
6.4.16 HIBC PAS Codablock F
6.5 GS1 DataBar Symbologies (RSS Codes)
6.5.1 GS1 DataBar (RSS-14)
6.5.2 GS1 DataBar Truncated (RSS-14 Truncated)
6.5.3 GS1 DataBar Limited (RSS Limited)
6.5.4 GS1 DataBar Stacked (RSS-14 Stacked)
6.5.5 GS1 DataBar Stacked Omni directional (RSS-14 Stacked Omni directional)
6.5.6 GS1 DataBar Expanded (RSS Expanded)
6.5.7 GS1 DataBar Expanded Stacked (RSS Expanded Stacked)
6.6 GS1 Composite Symbologies
6.6.1 Data Input
6.6.2 Data Capacity of GS1 Composite Symbols
6.6.2.1 Linear Component
6.6.2.2 2D Component
6.6.3 GS1 DataBar Composite Symbology
6.6.4 GS1 DataBar Truncated Composite Symbology
6.6.5 GS1 DataBar Limited Composite Symbology
6.6.6 GS1 DataBar Stacked Composite Symbology
6.6.7 GS1 DataBar Stacked Omni directional Composite Symbology
6.6.8 GS1 DataBar Expanded Composite Symbology
6.6.9 GS1 DataBar Expanded Stacked Composite Symbology
6.6.10 GS1-128 Composite Symbology
6.6.11 EAN-8 Composite Symbology
6.6.12 EAN-13 Composite Symbology
6.6.13 UPC-A Composite Symbology
6.6.14 UPC-E Composite Symbology
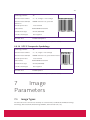
7 Image Parameters
7.1 Image Types
7.1.1 Image Formats
48
7.1.2 Compression Modes
8 Character Encoding
8.1 UNICODE ßà Code Pages
8.2 Default Code Pages
8.3 Code Page Switching
9 Frequently Asked Questions
9.1 How to add the Leading and Trailing ‘*’ for Code 39?
9.2 How to add the Check Digit to Code 39?
9.3 How to add the Leading and Trailing ‘A’ (or B, C, D) for CODABAR?
9.4 How to use a Specific Subset in Code 128?
9.5 How to use the Compressed Mode of Code 128?
9.6 How to generate a PDF417 symbol with an Aspect Ratio of 3:2?
9.6.1 Set a Row:Col Ratio of 11:1
9.6.2 Maintain a constant Ratio of Row Height / Module Width
9.7 How to set a Specific Module Width?
9.8 More FAQ
10 Contact and Support Information
Appendix A : Creating Optimal Barcodes
A.1 General
A.2 Barcode Size
A.3 Quiet Zone
A.4 Optimize Barcode for the Output Device Resolution
A.5 Enable Optimization in TEC-IT Software
A.5.1 Barcode Studio
A.5.2 TFORMer
A.5.3 TBarCode
A.5.4 Application Notes for “Optimal Resolution”
A.6 Printing Barcodes Directly
A.7 Barcode Images
A.7.1 Embedding Barcode Images
A.7.2 Barcode Images in HTML
A.7.3 Optimizing Barcode Images with Respect to the Printer Resolution
A.8 Barcode Vector Graphics
49
A.9 Code Examples for Barcode Optimization
A.9.1 Linear Barcodes
A.9.2 2D Barcodes
A.9.3 Prepare a Barcode with a specific Module Width for a Web Page
A.9.4 Create a 2D Barcode Image with the Module Width specified in Pixels
A.9.5 Optimize an Image using BCGetOptimalBitmapSize
Appendix B : Barcode Quiet Zones
B.1 Linear Symbologies
B.2 2D Symbologies
Appendix C : Extended Channel Interpretation (ECI)
C.1 ECI Overview
2.1Table of Figures
Figure 1: Linear Barcode Sample
Figure 2: 2D-Stacked Barcode Sample
Figure 3: 2D Barcode Sample
Figure 4: Composite Barcode Sample
Figure 5: Module Width
Figure 6: Raster Optimization
Figure 7: Quiet Zone
Figure 8: Print Ratio
Figure 9: Flattermarken Coding Sample
Figure 10: UPC Shipping Container Symbol (SCS)
Figure 11: Data Matrix Properties
Figure 12: Data Matrix Properties
Figure 13: Data Matrix Properties
Figure 14: MaxiCode UPS Encoding
Figure 15: Quiet Zone for Linear Barcode
Figure 16: Optimize Barcode for Output Device Resolution
Figure 17: Barcode Optimization in Barcode Studio
Figure 18: Barcode Optimization in TFORMer Designer
Figure 19: Barcode Optimization in TBarCode OCX (Version 1)
Figure 20: Barcode Optimization in TBarCode OCX (Version 2)
50
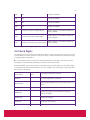
2.2List of Tables
Table 1: Barcode Glossary
Table 2: Example for Scanner Specification
Table 3: Print Ratio Adjustment
Table 4: Format Placeholders
Table 5: Format Examples
Table 6: Implemented Escape Sequences
Table 7: Check Digit Methods and Enumerators
Table 8: Fixed length AIs in RSS Expanded / Expanded Stacked Codes
Table 9: AIs in GS1 DataBar Expanded / Expanded Stacked Codes
Table 10: Variable length AIs in RSS Expanded / Expanded Stacked Codes
Table 11: AIs in Composite Codes
Table 12: ISBN Sample
Table 13: ISBN Encoding – Country and Currency
Table 14: ISBN Encoding – Price Samples
Table 15: Shipping Container Symbol Packaging Indicator
Table 16: DPD Format
Table 17: Aztec Code Symbol Sizes
Table 18: Data Matrix Data Capacity
Table 19: Han Xin Code Data Capacity
Table 20: Maxi Code Data Capacity
Table 21: PDF417 Data Capacity
Table 22: QR Code Data Capacity
Table 23: HIBC LIC - Primary Format
Table 24: HIBC LIC - Secondary Format
Table 25: HIBC PAS – Single/First Data Structure
Table 26: HIBC PAS – Second Data Structure
Table 27: HIBC PAS – Combined Data Structure
Table 28: Supported Image Types
Table 29: Supported Image Compression Modes
Table 30: Default Code Pages
Table 31: Quiet Zones (Linear Symbologies)
51
Table 32: Quiet Zones (2D Symbologies)
Table 33: ECI Numbers
3
3.1
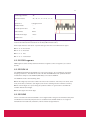
Introduction
Scope of this Document
This document describes barcode symbologies supported by TEC-IT software in a non-productspecific way. Please use this document as add-on or in-depth reference when dealing with
barcode related questions in the following TEC-IT products:
▶ TBarCode OCX
A Microsoft™ ActiveX™ compliant barcode control
► TBarCode .NET
A .NET barcode library
▶ TBarCode Library
Barcode DLL for Microsoft™ Windows™ (and UNIX®)
▶ Barcode Studio
A stand-alone barcode designer for Microsoft™ Windows™
▶ TBarCode/X
Barcode generators (SDK) for Linux™ and UNIX™
▶ TFORMer Designer
Full-featured label and report design
▶ TFORMer Runtime
Label and reporting engine for various operating systems
▶ TFORMer Server
▶ TBarCode/Embedded
Industrial output management
Barcode-enabled print and spool appliance
▶ TBarCode/SAPwin
Barcode DLL for SAP™ R/3™
▶ TBarCode/Direct
Smart PostScript™ compatible bar-coding for SAP™ R/3™
3.2 Barcode Types
The reason for the many different types of barcodes is that barcodes are used in many different
operational areas. Thus it is possible to select the most suitable barcode type to meet the
requirements of a particular industry.
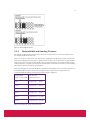
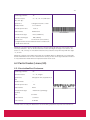
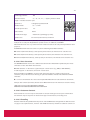
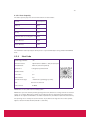
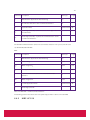
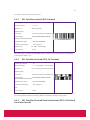
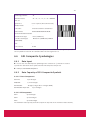
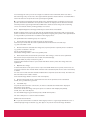
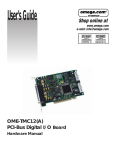
3.2.1.1 Linear 1D Barcodes
Figure 1: Linear Barcode Sample
Linear barcodes are known under names like Code 39, Code 128, UPC, EAN, 2of5...
52
Linear barcodes encode the information in one way (=one dimension), so they are also called
one-dimensional barcodes (1D). The information is stored in the relationship of the widths of
the bars (spaces) to each other.
In most of these symbologies the height of the bars is not relevant, except for some heightmodulated Postal Codes (e.g. Australian Post 4-State or USPS Intelligent Mail® Barcode / IM®
Barcode).
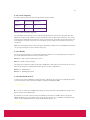
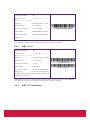
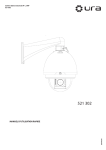
3.2.1.2 2D Barcodes (Stacked)
Figure 2: 2D-Stacked Barcode Sample
Two-dimensional barcodes are known under names like PDF417, or Codablock F.
Such stacked or multi-row barcodes store information in two dimensions. Several stacked
linear barcodes are used to encode the information.
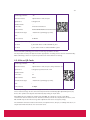
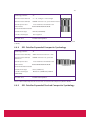
3.2.1.3 2D Barcodes (Matrix Codes)
Figure 3: 2D Barcode Sample
Two-dimensional barcodes like MaxiCode, Data Matrix or QR-Code encode information in two
dimensions. Compared to stacked symbologies the information is not stored by using different
bar (space) widths. Instead the position of black (or white) dots is relevant.
3.2.1.4 Composite Codes
Figure 4: Composite Barcode Sample
Composite codes like GS1 DataBar Composite Symbology are combining linear with 2D
(stacked) symbologies. The advantage of such codes is that the linear code component
encodes the most important information. The 2D component is used for additional data. This
separation ensures better migration (e.g. with respect to scanning hardware) between linear
and 2D technology.
3.3
Barcode Glossary
As follows you will find a short explanation about technical terms which are used in the
barcode technology.
Bar
A bar is represented by the dark or black elements in a
53
barcode.
Space
The white or lighter elements in a barcode are called
spaces.
Barcode
density
The density of the barcode refers to how much space is
required for the needed characters (characters per Inch or
centimeter)
Element
Represents both a bar and a space.
Module
A module is the smallest element of a barcode. The width
of the single bars and spaces is a (mostly integer)
multiples of the basic width of the module.
The width of the barcode’s smallest element in millimeter,
Module width in inches or in so-called mils (one mil = 1/1000 inch).
The module width is usually abbreviated with the letter X.
X Dimension
The width of the barcode’s smallest element (see Module
width).
An area free of any printing or marks that precedes the
start character of a barcode and follows the stop
character.
Quiet zone
The required minimal size of the quiet zone depends on
the barcode type. As a rule, the quiet zone should be ten
times the dimension of the module width or at least 1/4
inch (6.5 mm).
This term refers to the entire encoded information of a
Human
barcode shown in readable form. It is usually printed
Readable Text below the code. For 2D codes no human readable text is
used.
Discrete
Codes
Each character begins and ends with a bar. The spacing
between characters is not part of the code.
Continuous
Code
The spaces between the characters are also part of the
code. An example of a continuous code is the Code 2/5
Interleaved.
Start and
Stop
Characters
Distinct characters used at the beginning and end of each
barcode symbol that provide the scanner with start and
stop reading instructions as well as scanning direction.
Self-checking code uses the same pattern for each
Self-checking character. For example, this can be five elements where
54
Code
two of these elements are wide and three are narrow. Any
deviation from this pattern would result in an error.
Check Digit
One or more characters included within the barcode
which are used to perform a mathematical check to
ensure the accuracy of the scanned data. Check digits are
mandatory with certain codes or are even built into the
symbology (as for Code-128)
Bearer Bars
These are bars printed above and below the symbol. The
bearer bars are eliminating partial reads (as drawn in the
example on the right). Sometimes the complete symbol is
surrounded by bearer bars (e.g. ITF-14).
Substitution
Error
Due to reading errors a character is replaced by another
during scanning. Substitution errors can be excluded by
adding a check digit.
These bars are synchronizing the barcode reader. E.g.
Synchronizing
UPC-A and EAN-13 have synchronizing bars at the
Bars
beginning, in the middle and at the end of the symbol.
No-Read
A failure to decode, resulting in no output.
Misread
The data output of a reader/decoder does not agree with
the data encoded in the barcode field. This yields to
substitution errors.
Table 1: Barcode Glossary
4
Important
Barcode Parameters
In this chapter you will find an explanation about the most important barcode parameters.
4.1
Barcode Symbology
The symbology determines the format and the capabilities of the barcode. Check out chapter 6
for a list of supported barcode symbologies. It depends on your application which symbology
you should use. For help, deciding the right symbology, you can contact TEC-IT Support.
55
4.2
4.2.1
Module Width
Introduction
Figure 5: Module Width
The module width (or X dimension) is the width of the smallest bar (or space) in the barcode.
The minimal module width depends on the used symbology. In most specifications the
recommended module width is at least 0.19 mms.
The default setting in TEC-IT software adapts the module width according to the bounding
rectangle of the barcode. The module width is computed automatically by dividing the width of
the object by the number of required modules. This depends on the number of data characters
to be encoded. The module width decreases as the data content increases.
When adjusting the module width to a fixed value, the resulting barcode can be wider than the
bounding rectangle. To avoid clipping, ensure that the entire barcode can be displayed with
the maximum data content and enlarge the barcode object if required.
4.2.2
Optimize the Module Width
Printing tolerances can lead to problems when decoding a barcode. A remedy for this problem
is to optimize the module width with respect to available printing resolutions.
Assume you want to print a barcode with a resolution of 300 dpi then one pixel equals 0.003333
inch (or 0.08466 mm) in such a case. To avoid raster errors, you should select a module width
that is an integer multiple of the pixel width (e.g. for 300 dpi a multiple of 0.08466 mm).
▶ 200 dpi: 2 modules á one pixel (0.127 mm) = 0.254 mm
▶ 202 dpi: 2 modules á one pixel (0.1257 mm) = 0.251 mm
▶ 300 dpi: 3 modules á one pixel (0.08467 mm) = 0,254 mm
▶ 600 dpi: 5 modules á one pixel (0.04233 mm) = 0,212 mm
▶ For printer solutions over 300 dpi normally the optimizing of the module width isn’t
necessary.
56
Figure 6: Raster Optimization
4.2.3
Module Width and Reading Distance
The actual reading distance for barcodes depends on two factors: the scanner hardware and
the module width of the barcode.
There is no scanner, which can read all barcodes (ranging from high density codes to barcodes
with wide tracking) from all distances. Each barcode scanner has an optimum reading distance
for barcodes with a certain module width. The correlation between the module width and the
reading distance is usually specified by the manufacturer of the barcode scanner. The following
table shows such an exemplary specification.
Thus, depending on the module width the optimum reading distance for a specific scanner can
be identified. On the other hand, if the reading distance is given by the application, the
required module width for printing the barcodes may be adjusted.
Module Width
Depth of Field
(1 mil = 1/1000 mm) (Reading Distance)
5 mil
7.6 to 15.2 cm / 3 to 6”
7.5 mil
5.1 to 40.6 cm / 2 to 16“
10 mil
3.8 to 55.9 cm / 1.5 to 22”
13 mil
2.5 to 76.2 cm / 1 to 30”
20 mil
2.5 to 106.7 cm / 1 to 42”
55 mil
5.1 to 203.2 cm / 2 to 80”
Table 2: Example for Scanner Specification
57
4.3
Bar Width Reduction (Pixel Shaving)
Another word for bar width reduction (BWR) is “bar width correction” (BWC) or “pixel shaving”.
Bar width reduction is a common issue with printing bar codes. So called “dot gain” is part of
every printing process and leads to enlargement of bars (while the gaps are reduced).
Depending on the printing process these aberrations must be compensated with the
appropriate bar width reduction.
Sample values for dot gain (to be compensated) are approximately 100µm with flexographic
printing, 50µm with intaglio printing and 30µm with offset printing. The smaller the bar codes,
the more precise must be worked. Depending on the bar code orientation to the printing
direction, the printing accuracy and printing process may change.
Bar width reduction may be applied also for laser printers (e.g. with too high toner saturation)
or inkjet printers.
TEC-IT Software allows fine-tuning of the bar width reduction in percent, mm (µm), mils and
inch.
4.4
Quiet Zone
A quiet zone (an area free of any printing or marks) should be maintained directly before and
after the barcode symbol. The quiet zone helps the scanner to determine the barcode correctly.
As a rule, the quiet zone should be ten times the dimension of the module width or at least 1/4
inch (6.5 mm); the exact value depends on the barcode symbology.
Figure 7: Quiet Zone
4.5
Print Ratio and Ratio Format
The print ratio (the bar/width ratio) is the width relationship of all elements of a barcode – with
respect to the smallest element. TEC-IT Software allows fine-tuning of the print ratio by
supporting three parameters:
◼ Print ratio
The read/write property Ratio is used to adjust the print ratio. The value of this property has to
comply with the ratio format.
◼ Format of ratio
The read-only property RatioHint shows the format (syntax) of the print ratio setting. It is
intended as a hint for the programmer or user.
◼ Default print ratio
The read-only property RatioDefault contains the default print ratio for the selected barcode
symbology. It most cases the default ratio is the best choice for printing the barcode.
58
Figure 8: Print Ratio
Example:
The picture above shows a barcode with 4 different bar widths and 4 different space widths.
Because TEC-IT software maintains the print ratio of bars and spaces separately, the ratio
format is composed as follows: 1B:2B:3B:4B:1S:2S:3S:4S.
The first four values (1B:2B:3B:4B) refer to the 4 different widths of the Bars, the second four
values (1S:2S:3S:4S) refer to the 4 different widths of the Spaces. The numbers in the ratio hint
(e.g. 1B stands for the smallest bar, 2B for the bar with the next larger width and so on) are only
used to denote the order – they have no meaning with respect to the ratio itself.
Now set a new print ratio value. This string must be formatted according to the ratio format,
but without the letters: A value of “1:3:5:7.3:1:3:5:7.3” for the Ratio indicates that the width of
the widest bar (4B) is 7.3 times the width of the smallest bar (7.3:1).
Ratio Format
Description
Specifier
nB
The ratio of bar-width n with respect to the width of the smallest bar (bar-width
1)
nS
The ratio of space-width n with respect to space-width 1 (smallest space)
1T
This is specific to the symbology “Plessey Bidirectional”. It denotes the ratio of
the width of the terminator bar 1 to bar-width 1
nC
This is specific to the symbology “Pharmacode”. It denotes the ratio of the
width of color-bar n to the width of the smallest bar
Table 3: Print Ratio Adjustment
4.6 Format
Format acts like a ”mask” for formatting the barcode data prior to encoding it. Placeholders in
the format string can be mixed with constant data characters to build a final data string. With
this feature it’s possible to:
◼ Select subsets in Code 128, GS1-128 (even within the code!)
◼ Insert control characters into the barcode
◼ Select the required start/stop character for CODABAR
◼ Change the position of the check digit
59
◼ Set the MaxiCode values “date”, “preamble”, “service class”, “postal code” and “country
code” directly in the barcode data (with special escape sequences).
Placeholder
character
Description
#
Stands for the next data character of the input data (property Text)
&
Stands for all remaining data characters in the input data (property Text)
Stands for the next check digit (use only if check digits will be computed!)
^
◼ TBarCode 6 (or earlier) computes the check digit for all characters in the input
data.
◼ TBarCode 7 (or later) only uses input data left of the check digit placeholder for
check digit computation (see examples below!).
A
Switch to Subset A (used in: Code 128, GS1-128)
Start- or stop character A (only in: CODABAR)
B
Switch to Subset B (used in: Code 128, GS1-128)
Start- or stop character B (only in: CODABAR)
C
Switch to Subset C (used in: Code 128, GS1-128)
Start- or stop character C (only in: CODABAR)
C
Enable compatibility mode for CAPTIVA/IBML document scanning software (used
in Data Matrix only)
Start- or stop character D (only in: CODABAR),
D
Only for Pharmacode: encode the Pharmacode directly (bar by bar)
Only for Data Matrix: use an alternative error correction algorithm for symbols of
size 144x144.
E
Translate the Escape Sequences that the input data contains.
J
Only for Japanese Postal codes: the Address B data field can be automatically
compressed, i.e. Japanese characters are converted into ASCII characters by a
defined rule.
S
Only for MaxiCode: enables setting the values of Date, Preamble, Service Class,
Postal- and Country- Code directly in the barcode data (only in conjunction with
escape sequences).
<
Adds quiet zone markers at the left (“<”) and/or at the right (“>”) side of the
barcode. These markers are supported by the following barcode types:
◼ EAN 8 and add-on variants (both sides)
60
◼ EAN 13 and add-on variants (only right side)
>
◼ UPC-A with 2 and 5 digit add-on (only right side)
◼ UPC-E with 2 and 5 digit add-on (only right side)
◼ ISBN (only right side)
Table 4: Format Placeholders
4.6.1
Format Examples
61
Input data
Barcode Format
type
string
Data used
Notes
for encoding
123
Irrelevant
123
123
Irrelevant 5&
5123
123
Irrelevant &6
1236
123
Irrelevant q#w#e#
q1w2e3
123
Irrelevant #q&
1q23
123
Irrelevant &^
123c
123
Irrelevant ^&
c123
This format string may be used for
TBarCode 6 (or earlier). – Newer versions
always return 0 in this case.
When using Modulo 10 for check digit calculation, c will be
12345
Irrelevant ####^#
1234c5
◼ Mod-10 (12345) = 5 for TBarCode 6 (or
earlier).
◼ Mod-10 (1234) = 0 for TBarCode 7 (or
later).
Hello
Code 128 A&
Hello
Hello
Code 128 A##B&
Hello
Hello4711
Code 128 A##B&
Hello4711
Hello4711
Code 128 A##B###C& Hello4711
7 is the check digit computed when using
Modulo 10. The check digit computation
1234567890 GS1-128 #####^##### 12345767890 uses only the digits 12345 (67890 are
ignored because this data comes after the
^)
Table 5: Format Examples
red
characters
represented in subset A
gray
characters
represented in subset B
green characters
represented in subset C
c
represents the place of the check digit
62
4.7
Escape Sequences (Encoding Binary Data)
If you want to use non-printable or special characters in a barcode, you have to use escape
sequences. An escape sequence always start with a backslash (‘\’) followed by the sequence
itself.
▶ You have to activate the decoding of escape sequences in the barcode properties – per
default the translation of escape sequences is turned off.
▶ With activated escape sequences you must use “\\” in the input data to encode a single
backslash „\“ in the barcode.
Escape
Description
sequence
\a
Bell (alert)
\b
Backspace
\f
Form feed
\n
New Line
\r
Carriage Return
\t
Horizontal Tab
\v
Vertical Tab
\\
The backslash \ itself
\0
Zero Byte (if subsequent char is nonnumeric)
Available in TBarCode V10+
ASCII-character in octal notation:
\0ooo
ooo… up to 3octal digits (0..7)
First digit is always zero.
ASCII-character in decimal notation:
\ddd
ddd … up to decimal digits (0..9)
First digit must not be zero.
\xhh
For encoding bytes or ASCII-characters
in hexadecimal notation
hh … hexadecimal digits (0..F)
Valid for Barcode Symbology
All
63
\Crrggbb Color selection
\Ce
See Pharmacode
Reset the color to default
GS-128, Codablock-F
\F
FNC1 (Function Number Character 1)
used as field separator
MicroPDF417: a special FNC1 codeword is
inserted when using emulation mode for
GS1-128 or Code-128
Data Matrix: a special FNC1 codeword is
inserted
\F
PDF417, MaxiCode and in QR-Code
Inserts a Gs (Group Separator) or ASCII
QR-Code: When using format UCC/EAN/GS1
1DHex.
Gs is inserted in Byte Mode, a % is inserted
Don’t encode the \x1d directly!
in alphanumeric mode.
Extended Channel Interpretation (ECI).
\Ennnnnn
nnnnnn … 6 digit ECI number with
leading zeros
Used for defining the character set
(code page) for the subsequent
encoded data – see C.1 ECI
MaxiCode, Data Matrix, QR-Code, PDF417,
MicroPDF417, Aztec Code
Special ECI identifiers for nesting ECIs.
\EB, \EE
\EB (ECI Begin) opens a nesting level,
QR-Code
\EE (ECI End) closes it.
\G
Global Language Identifier (GLI),
similar to ECI (see \E).
\S
Symbol separator character for C128
emulation
PDF417
Function sequence. Currently FNC1,
\<FNCx> FNC2, FNC3, and FNC4 are
implemented. \<FNC1> is equal to \F.
\210
FNC1
Code128, GS1-128, Codablock-F
\211
FNC2
Code128, GS1-128, Codablock-F
\212
FNC3
Code128, GS1-128, Codablock-F
\213
FNC4
Code128, GS1-128, Codablock-F
64
\x11
DC1
Code93, Code93Ext
\x12
DC2
Code93, Code93Ext
\x13
DC3
Code93, Code93Ext
\x14
DC4
Code93, Code93Ext
\x1e
Rs (Record Separator), ASCII 1EHex
PDF417, QR-Code, Data Matrix, MaxiCode
(Mode 3,4 SCM)
\x1d
Gs (Group Separator), ASCII 1DHex
PDF417, QR-Code, Data Matrix, MaxiCode
(Mode 3,4 SCM)
\x04
Eot (End of Transmission), ASCII 04Hex
PDF417, QR-Code, Data Matrix, MaxiCode
(Mode 3,4 SCM)
Table 6: Implemented Escape Sequences
4.8 Check Digits
The method for the check digit(s) calculation depends on the respective barcode type. In order
to make TEC-IT products as user-friendly as possible, a standard method for each barcode type
is supplied (where applicable).
▶ Per default the input can take place with and without a check digit. In the latter case the
check digit is calculated automatically and added to the barcode data.
Example (EAN13): If you enter 12 digits (= utilizable data), the 13th digit (= the checksum digit)
is computed and added automatically. If you enter 13 digits, the check digit is replaced by your
data and isn’t calculated.
Check digit
enumeration
Enumeration
value
Check digit calculation methods
eCDNone
0
No check digit will be computed
eCDStandard
1
Standard check digit of the selected barcode type is
used
eCDMod10
2
Modulo 10 (usually used with Interleaved 2of5)
eCDMod43
3
Modulo 43 (suggested for Code39 and Logmars,
consist of 1 digit)
eCD2Mod47
4
Modulo 47 (2 digits)
eCDDPLeit
5
Method for DP Leitcode
65
eCDDPIdent
6
Method for DP Identcode
eCD1Code11
7
Method for Code11 (1 digit)
eCD2Code11
8
Method for Code11 (2 digits)
eCDPostnet
9
Method for USPS Postnet
eCDMSI1
10
Method for MSI (1 digit)
eCDMSI2
11
Method for MSI (2 digits)
eCDPlessey
12
Method for Plessey
eCDEAN8
13
Method for EAN 8
eCDEAN13
14
Method for EAN 13
eCDUPCA
15
Method for UPC A
eCDUPCE
16
Method for UPC E
eCDEAN128
17
EAN 128 internal method (Modulo 103)
eCDCode128
18
Code 128 internal method (Modulo 103)
eCDRM4SCC
19
Method for Royal Mail 4 State
eCDPZN
20
Modulo 11 method for PZN
eCDMod11W7
21
Modulo 11 (weighting = 7)
eCDEAN14
22
Method for EAN 14
eCDMod10Kor
23
Method for Korean Postal Authority - Modulo 10
eCDMod10Pla
24
Method for Planet - Modulo 10
eCDMod10ItlPst25
25
Method for Italian Postal 2/5 (Modulo 10 based)
eCDMod36
26
Modulo 36 (ISO/IES 7064) for DPD Barcode
eCDMod16
27
Modulo 16 for Codabar Barcode
eCDMod10Luhn
28
Modulo 10 with Luhn Algorithm
eCDVIN
29
Method for VIN (North America)
66
eCDMod10LuhnRev
30
Modulo 10 with Reverse Luhn Algorithm
eCDMod23PPSN
31
Modulo 23 for PPSN
eCDMod10IMPackage
32
Modulo 10 for Intelligent Mail Package Barcode
eCDMod11W10
33
Modulo 11 (using maximum weight 10)
eCDUPU/
eCDSwedishPostal
34
Modulo 11 method for UPU (Universal Postal Union)
Method for Swedish Postal Shipment Item ID
Table 7: Check Digit Methods and Enumerators
5
Application
Identifiers(AI)
5.1Introduction
Some barcode symbologies (e.g. GS1-128) use Application Identifiers (AIs) in order to provide
information about the structure of the encoded data. Application Identifiers are mostly used in
industry-specific barcode symbologies.
An Application Identifier (AI) is a prefix (built from 2 to 4 characters) used to identify the
meaning and the format of the data that follows. AIs have been defined by GS1 (formerly
UCC/EAN) for identification, traceability data, dates, quantity, measurements, locations, and
many other types of information.
The data presented can be alphanumeric or numeric and with fixed or variable data lengths.
The symbology character FNC1 is used as field separator in connection with variable length
data fields.
▶ Use FNC1 only with variable length data fields
▶ Don’t use FNC1 after the last data field.
Depending on the barcode symbology you are able to concatenate multiple AIs and encode
more data fields into one symbol. If an AI is of variable length type, you have to separate the
next data field with FNC1. FNC1 is specified in the barcode data with the escape sequence “\F”
(see section 4.7).
▶ For encoding the FNC1 you have to activate Translate Escape Sequences.
▶ Do not encode the brackets which are usually used to denote an Application Identifier.
TEC-IT software generates the brackets automatically for the human readable text. The
67
brackets are not encoded in the barcode itself.
For more information (e.g. a list of all available AIs) please follow the links below:
http://www.gs1uk.org/what-we-do/GS1-standards/Pages/default.aspx
http://www.gs1.org/productssolutions/barcodes/technical/genspecs/index.html
http://en.wikipedia.org/wiki/GS1-128
Additional links can be found in our support area as well:
http://www.tec-it.com/support/links/barcode.aspx
5.2Examples
5.2.1 Batch Number
A batch number is encoded with AI 10. The format of AI 10 is “n2 + an..20”. This means the AI
has two digits (10) followed by variable length data with maximum 20 characters.
Description
Value
Data (Text property) 10 + Production Number = 1012345678
Human readable text (10)12345678
Encoded data
5.2.2
1012345678
Multiple AIs within one Barcode
Two data fields should be encoded in one barcode. Following fields are used:
Description
Value
Batch number AI (10) –
format
n2 + an..20
Item number AI (01) –
format
n14
Data (Text property)
10+Batch Number+\F+01+Item Number =
1012345678\F0112345678901234
Human readable text
(10)12345678(01)12345678901234
Encoded data
1012345678FNC10112345678901234
▶ The field separator FNC1 (encoded by the sequence „\F“) has to be used because the batch
number is a variable length data field.
68
5.2.3
GS1-128 with embedded Check Digit
Sometimes it is required to calculate a check digit only for a partial content of a barcode. A
good example is the AI 01 (GTIN) in combination with other data fields within an GS1-128
symbol.
Description
Value
AI for GTIN
01
AI for Date
11
GTIN without check digit 1234567890123
Production Date
060606
In our example, the GTIN contains no check digit (e.g. when created based on the EAN-13
number). The check digit has to be generated only for the first 13 digits of the supplied data
and not for the full data content.
Since TBarCode Version 7+ you can use the format property to solve this problem:
Description
Value
Format property:
01#############^11######
Input Data (Text property): 1234567890123060606
Check Digit Method:
EAN-14 (Mod-10)
Calculated Check Digit:
CD = Mod-10 of (1234567890123) = 1
Result:
01 + 1234567890123 + CD + 11 + 060606
Data used for encoding:
011234567890123111060606
5.3 GS1 DataBar Expanded / GS1 DataBar
Expanded Stacked
The mentioned symbologies use an internal data compression algorithm for specific
Application Identifiers. Compression means that the barcode can encode more data or can be
made smaller. This optimization takes effect if the AIs are applied in the following predefined
order.
5.3.1
AIs with a Fixed Length
5.3.1.1 AI(01) and Weight
69
AI (01) must begin with an indicator digit of 9 for variable units
Combinations
Description
Max. Weight
AI (01) + AI (3103) Weight in kg with 3 decimal places (n.nnn kg)
32.767
AI (01) + AI (3202) Weight in pound with 2 decimal places (n.nn lbs) 999.99
AI (01) + AI (3203) Weight in pound with 3 decimal places (n.nnn lbs) 22.767
Table 8: Fixed length AIs in RSS Expanded / Expanded Stacked Codes
5.3.1.2 AI(01), Weight and Date
Two or three data elements will be used for the barcode:
Combinations
Description
Addition
AI (01)
Must start with 9 for variable units
+ AI (310n) or AI (320n)
For declaration of the Weight
n = 0..9
+ AI (11), AI (13), AI (15), AI (17) For the Date
Table 9: AIs in GS1 DataBar Expanded / Expanded Stacked Codes
If the date is not required this order of AIs still leads to a better barcode representation.
5.3.2 AIs with Variable Lengths
5.3.2.1 AI (01) and Price
Combinations Description
AI (01)
Must start with 9 for variable units
+ AI (392x)
For the price
Addition
x = 0..3
or + AI (393x) For the price in the ISO currency format x = 0..3
Table 10: Variable length AIs in RSS Expanded / Expanded Stacked Codes
5.3.2.2 AI (01)
▶ If AI(01) is needed in the barcode, please ensure it is the first AI encoded (for optimal data
representation).
5.4
GS1 Composite Symbology
70
The GS1 (EAN.UCC) Composite Symbology was designed to hold primary data (like the GTIN or
Shipping Container Code) in the linear symbol and additional data in the 2D Composite
Component. For specific AI combinations in the 2D add-on symbol it is possible to perform a
data compression (as shown below). This leads to a higher data density (= smaller barcode or
more encode able characters).
5.4.1
Compressed Sequences of AIs
The following AI-sequences can be compressed for higher data efficiency:
Combinations Description
AI (11) + AI (10) Date and Lot-Number
AI (17) + AI (10) Expiration Date und Lot-Number
Table11 : AIs in Composite Codes
5.4.2 AI (90)
AI (90) and the following data (which starts with an upper-case letter or a digit) may be used for
encoding of FACT IDs. Compression takes place only if AI(90) is the first data element of the
sequence.
6
Barcode
Symbologies
This chapter describes all supported barcode types. For each barcode the following values are
specified:
◼ Symbology Number
This number is used in some TEC-IT products to specify the barcode symbology. Developers are
usually specifying the barcode type via an enumeration which is documented in the respective
developer documentation.
◼ Valid characters
Lists the available characters or character sets which can be encoded with the symbology.
◼ Quiet zone
This is the recommended quiet zone for the barcode symbology in question. Please note that
the quiet zone often depends on your individual application.
◼ Module width
71
The recommended minimal module width of the barcode. This value may be adapted to your
special requirements.
◼ Standard print ratio
This setting describes the print ratio used by TEC-IT software if no custom ratios are adjusted.
For most applications you can use this default value.
◼ Ratio format
This value serves as a hint for specifying user defined print ratios.
◼ Default check digit
Describes which check digit method is used by default for the barcode symbology in question.
For 2D codes check digits are not applicable, these codes are using an error correction scheme.
◼ Possible check digits
Provides information whether additional or user defined check digits methods may be adjusted
◼ Size
Describes the requirements with respect to the symbol size (if available)
◼ Print control[1]
Control character sequence used by TBarCode/SAPwin (Barcode DLL for SAP®).
6.1 Linear Symbologies (1D Codes)
6.1.1 Bookland
The Bookland barcode encodes the ISBN number inEAN-13format followed by a 5 digit
supplemental code. The barcode data alwaysconsists of the digits ‘978’ (the EAN article
identifier), followed by a 9 digit number and one check digit.You can use the EAN-13 with 5
digits add-onfor encoding. The 5 digit add-on barcode is used to encode the book price. For
more information refer to section6.1.39
6.1.2 Codabar(RationalizedVersion)
Symbology number:
18
Valid characters:
“B”, “C”, “D”
“0”..”9”, “-“, “$”, “:”, “/”, ”.”, ”+”, “A”,
Quiet zone:
Module width:
Standard print ratio:
Ratio format:
left/right: 10X
X = 0.19 mm
1:3:1:3
1B:2B:1S:2S
Default check digit:
None (eCDNone)
Possible check digits:
User supplied (e.g. Modulo 16)
Symbol size:
Print control:
+/- 0.066mm Module width Deviation
C=CODA
72
This code was invented 1972 by Monarch Marking Systems for retail purposes. 1977 the
American Blood Commission defined Codabar 2 as standard symbology for blood banks (=ABC
Codabar).
The characters “A”, “B”, “C”, and “D” are useable as start or stop characters only. The barcode
uses 2 element-widths and 4 different start/stop-characters (A, B, C, and D). These start/stop
characters can be utilized for additional information – e.g. "B1234B". The print ratio should be
in the following range: 1:2 -1:3 (Pr >= 2.25:1). Since the symbology is “self-checking” there is no
established check sum method.
The symbology is also known as Code 2 of 7, NW-7, ABC Codabar, USD-4, Monarch, Code-27,
Ames code, or Rationalized Codabar.
The “rationalized version” uses 2 different element widths in spite of the original symbology,
which used 18 different element widths (Standard Codabar).
▶ Use the format property to determine the Start and Stop characters (see section 9.3).
▶ FedEx is using a special variant of the Codabar barcode. The format of the encoded number
is as follows: XXXX-XXXX-XXXY with a 4-digit ID at the end. The first 12 digits contain the tracking
number. The barcode starts with „C“ (start-character) and ends with „D“ (stop-character).
6.1.3 Code 11
Symbology number:
1
Valid characters:
“0”..”9”, “-“
Quiet zone:
Module width:
left/right: 10X
X= 0.191 mm
Standard print ratio:
Ratio format:
1:2.24:3.48:1:2.24
1B:2B:3B:1S:2S
Default check digit:
None (eCDNone)
Possible check digits:
1 check digit (eCD1Code11) – or
2 check digits (eCD2Code11)
Symbol size:
--
This symbology is mainly used in telecommunications for marking equipment and
components. It was invented in 1977 by INTERMEC. It is similar to Code 2 of 5 Matrix. The
symbology is not self-checking therefore 2 check digits are recommended. Code 11 is a highdensity code, but requires also a high-density output device (mainly because of the print ratio
utilized).
6.1.4 Code 128
73
Symbology number:
20
Valid characters:
ASCII-characters between 0..127
Quiet zone:
Module width:
left/right: 10X, min. ¼ inch
X >= 0.19 mm
Standard print ratio:
Ratio format:
1:2:3:4:1:2:3:4
1B:2B:3B:4B:1S:2S:3S:4S
Default check digit:
Automatic (symbology specific).
Modulo 103 (eCDCode128)
Possible check digits:
Symbol size:
Print control:
Modulo 10, EAN-14
-C=128
Code 128 is heavily used in all areas. It is a modern high-density symbology and was invented
1981 by Computer Identics.
TEC-IT software analyzes input data and chooses the best suitable barcode representation with
the highest data density. This is done by so-called “subset switching”. 3 different internal
characters (=subsets) sets are used:
◼ Code128A = Upper Case + Non-Printable Characters (ASCII 0-31)
◼ Code128B = Upper / Lower Case + All Printable Characters
◼ Code128C = Numeric with doubled density
Code128 uses a built-in check digit (Modulo 103). This check digit is part of the code and cannot
be omitted. It is never printed in the human readable text. Scanners are checking it when
reading a code but do not deliver the check digit to connected systems.
In conjunction with the symbology character "FNC1" this code is also known as GS1-128
barcode – see section 6.1.24.
6.1.5 Code 128 Subset A
74
Symbology number:
59
Valid characters:
0..127
ASCII-characters between
Quiet zone:
Module width:
left/right: 10X, min. ¼ inch
X >= 0.19 mm
Standard print ratio:
Ratio format:
1:2:3:4:1:2:3:4
1B:2B:3B:4B:1S:2S:3S:4S
Default check digit:
Automatic (symbology
specific).
Modulo 103 (eCDCode128)
Possible check digits:
Symbol size:
Print control:
Modulo 10, EAN-14
-C=128A
This is a variant of Code128 which uses character set (subset) A. It is suitable for encoding
upper case characters + ASCII control sequences. It switches to other Code128 subsets when
required.
6.1.6 Code 128 Subset B
Symbology number:
60
Valid characters:
0..127
ASCII-characters between
Quiet zone:
Module width:
left/right: 10X, min. ¼ inch
X >= 0.19 mm
Standard print ratio:
Ratio format:
1:2:3:4:1:2:3:4
1B:2B:3B:4B:1S:2S:3S:4S
Default check digit:
Automatic (symbology
specific).
Modulo 103 (eCDCode128)
Possible check digits:
Symbol size:
Print control:
Modulo 10, EAN-14
-C=128B
This is a variant of Code128 which uses character set (subset) B. It is suitable for encoding lower
& upper case letters. It switches to other Code128 subsets when required.
6.1.7 Code 128 Subset C
75
Symbology number:
61
Valid characters:
0..127
ASCII-characters between
Quiet zone:
Module width:
left/right: 10X, min. ¼ inch
X >= 0.19 mm
Standard print ratio:
Ratio format:
1:2:3:4:1:2:3:4
1B:2B:3B:4B:1S:2S:3S:4S
Default check digit:
Automatic (symbology
specific).
Modulo 103 (eCDCode128)
Possible check digits:
Symbol size:
Print control:
Modulo 10, EAN-14
-C=128C
This is a variant of Code128 which uses character set (subset) C. It is suitable for encoding
digits. It switches to other Code128 subsets when required.
6.1.8
Code 2 of 5 Standard (Code 2 of 5 Matrix)
Symbology number:
2
Valid characters:
“0”..”9”
Quiet zone:
Module width:
left/right: 10X, min. ¼ inch
X>= 0.19 mm
Standard print ratio:
Ratio format:
1:3:4.5:1:3
1B:2B:3B:1S:2S
Default check digit:
None (eCDNone)
Possible check digits:
Modulo 10 (eCDMod10)
Symbol size:
Print control:
-C=25M
This is a self-checking code. It is used for industrial applications, article numbering, photo
development, ticketing.
6.1.9 Code 2 of 5 Data Logic
76
Symbology number:
6
Valid characters:
“0”..”9”
Quiet zone:
Module width:
left/right: 10X, min. ¼ inch
--
Standard print ratio:
Ratio format:
1:3:1:3
1B:2B:1S:2S
Default check digit:
None (eCDNone)
Possible check digits:
Modulo 10 (eCDMod10)
Symbol size:
--
This symbology is proprietary variant of Code 2 of 5 Standard.
6.1.10 Code 2 of 5 IATA
Symbology number:
4
Valid characters:
“0”..”9”
Quiet zone:
Module width:
left/right: 10X, min. ¼ inch
X>= 0.19 mm
Standard print ratio:
Ratio format:
1:3:1
1B:2B:1S
Default check digit:
None (eCDNone)
Possible check digits:
Modulo 10 (eCDMod10)
Symbol size:
Print control:
-C=25A
This is a self-checking code. Start/stop-characters are identical to Code 2 of 5 Industry. It
supports distance reading (> 1m) and can be printed with very simple printing techniques.
It is used for baggage handling in air-transport applications (International Air Transport Agency
= IATA).
6.1.11 Code 2 of 5 Industrial
77
Symbology number:
7
Valid characters:
“0”..”9”
Quiet zone:
Module width:
left/right: 10X, min. ¼ inch
X>= 0.19 mm
Standard print ratio:
Ratio format:
1:3:1
1B:2B:1S
Default check digit:
None (eCDNone)
Possible check digits:
Modulo 10 (eCDMod10)
Symbol size:
Print control:
-C=25I
6.1.12 Code 2 of 5 Interleaved
Symbology number:
3
Valid characters:
“0”..”9”
Quiet zone:
Module width:
left/right: 10X, min. ¼ inch
X>= 0.19 mm
Standard print ratio:
Ratio format:
1:3:1:3
1B:2B:1S:2S
Default check digit:
None (eCDNone)
Possible check digits:
Modulo 10 (eCDMod10)
Symbol size:
Print control:
-C=25L
Code 2 of 5 Interleaved is in wide-spread use (article-numbering, industrial applications).
This self-checking code offers high data capacity due to encoding pairs of numbers (the first
digit is encoded in the bars, the second in the spaces). Thus, this symbology can encode only an
even number of digits. If the number of digits is odd a leading zero will be inserted
automatically.
6.1.13 Code 2 of 7
This symbology is identical with Codabar 2 Widthsand is also known as NW-7 or USD-4. See section 6.1.2
6.1.14 Code 25
Uniform Symbology Specification ITF 2-5. Identical to Code 2 of 5 Interleaved. Another alias is
78
USS ITF 2-5.
6.1.15 Code 39 (3of9)
Symbology number:
8
Valid characters:
“$”, “/”, “+”, “%”
“0”..”9”, “A”..”Z”, “-“, “.”, Space, “*”,
Quiet zone:
Module width:
Standard print ratio:
Ratio format:
left/right: 10X, min. ¼ inch
X >= 0.19 mm
1:3:1:3
1B:2B:1S:2S
Default check digit:
None (eCDNone)
Possible check digits:
Weight 7 (eCDMod11W7)
Modulo 43 (eCDMod43), Modulo 11
Symbol size:
H>=15% of L (H>=6.3 mm!)
H: Height of the barcode without human readable text
L: width of the barcode
Print control:
C=39
Code 39 is in heavy use in industry, organizations and commerce. It was developed 1974 by
INTERMEC and got standardized by ANSI MH 10.8 M-1983 and MIL-STD-1189.
▶ The start- and stop characters “*” (asterisk) are created automatically and must not be
included in the input data. They are not displayed in the human readable text.
Code 39 is a self-checking code. Code concatenation is possible (if the first encoded character is
a space subsequent barcodes are concatenated by the scanner). Distance-reading is possible (>
1m).
6.1.16 Code 32
79
Symbology number:
93
Valid characters:
“0” - “9”
Quiet zone:
Module width:
left/right: 10X, min. ¼ inch
0,25 <= X <= 0.254 mm
Standard print ratio:
Ratio format:
1:2.5:1:2.5
1B:2B:1S:2S
Default check digit:
(eCDMod10LuhnRev)
Module 10 Luhn Reversed
Possible check digits:
(eCDMod10LuhnRev)
Module 10 Luhn Reversed
Symbol size:
--
It is used by the Italian Pharma Industry. The code is also called Italian Pharmacode.
The Code 32 number, consisting of 9 digits, is converted to an equivalent Code 39 Barcode of 6
characters. The letter the human readable text is prepended by “A” which is not encoded.
6.1.17 Code 39 Extended
Symbology number:
9
Valid characters:
ASCII-characters between 0..127
Quiet zone:
Module width:
Standard print ratio:
Ratio format:
left/right: 10X, min. ¼ inch
X >= 0.19 mm
1:3:1:3
1B:2B:1S:2S
Default check digit:
None (eCDNone)
Possible check digits:
Weight 7 (eCDMod11W7)
Modulo 43 (eCDMod43), Modulo 11
Symbol size:
H>=15% of L (H>=6.3 mm!)
H: Height of the barcode without human readable text
L: width of the barcode
Print control:
C=39E
Code 39 Extended is rarely used because Code 128 offers much better compression. Code 39
Extended uses the same symbology as Code 39 but encodes also lower-case letters and special
characters („+A“ results in a lower case „a“ when scanned). Scanner must be configured
correctly for decoding Code39 Extended.
▶ The start- and stop characters “*” (asterisk) are created automatically and must not be
included in the input data. They are not displayed in the human readable text.
80
6.1.18 Code 93
Symbology number:
25
Valid characters:
Space, “$”, “/”, “+”, “%”
“0”..”9”, “A”..”Z”, “-“, “.”,
Quiet zone:
Module width:
left/right: 10X, min. ¼ inch
X >= 0.19 mm
Standard print ratio:
Ratio format:
1:2:3:4:1:2:3:4
1B:2B:3B:4B:1S:2S:3S:4S
Default check digit:
specific).
Modulo 47 (eCD2Mod47)
Symbol size:
Print control:
Automatic (symbology
-C=93
Code 93 was invented 1982 by INTERMEC to achieve better information densities (compared to
Code 39). Code concatenation is possible (if the first encoded character is a space subsequent
barcodes are concatenated by the scanner).
6.1.19 Code 93 Extended
Symbology number:
62
Valid characters:
0..127
ASCII-characters between
Quiet zone:
Module width:
left/right: 10X, min. ¼ inch
X >= 0.19 mm
Standard print ratio:
Ratio format:
1:2:3:4:1:2:3:4
1B:2B:3B:4B:1S:2S:3S:4S
Default check digit:
specific).
Modulo 47 (eCD2Mod47)
Symbol size:
Print control:
Automatic (symbology
-C=93E
Based upon Code 93 but encodes the complete ASCII character set. One of the four available
control characters is used to shift into the ASCII-character table.
6.1.20 DAFT Code
81
Symbology number:
93
Valid characters:
“t”
“D”, “A”, “F”, “T” or “d”, “a”, “f”,
Quiet zone:
Module width:
left/right: 2 mm
--
Standard print ratio:
Ratio format:
1:1
1B:1S
Default check digit:
Symbol size:
None
--
DAFT Code is no symbology. It is a technique to generate arbitrary postal codes (like for
instance the Australian Postal Codes or the Royal Mail 4 State code).
Each input character stands for a specific bar type and there are 4 different bar types:
◼ “D” or “d”: Descender
◼ “A” or “a”: Acsender
◼ “F” or “f’: Full
◼ “T” or “t”: Transmitter
6.1.21 DOD Logmars
DOD Logmars stands for Department of Defense Logmars. Same as Logmars (see section
6.1.45).
6.1.22 DUN-14
The DUN-14 (Distribution Unit Number) is not a barcode type. It's a numbering system for
shipping containers. The DUN-14 uses the ITF-14or the EAN-14barcode symbols. Modern
installations always use the EAN-14 (EAN-128) to encode the DUN-14.
The DUN-14 encodes the following data:
◼ The first digit represents the number of units in the container: 1=6 units, 2=10 units, 3=12
units, 4=20 units, 5=24 units. (The digits 6,7 and 8 are standing for other numbers of units.)
◼ The next 12 digits are representing the product number. In general this is the EAN-13
number without check digit.
◼ The last digit is the check digit.
6.1.23 DUNS
This is not a barcode standard. DUNS is a nine-digit number assigned and maintained by Dun
and Bradstreet to identify unique business establishments. DUNS numbers are assigned
worldwide and include US, Canadian, and international organizations.
82
6.1.24 EAN-128(GS1-128)
The EAN-128 code was renamed to GS1-128. It is the same as the UCC-128 andsometimes
referenced as UCC/EAN-128 in this document.
Symbology number:
16
Valid characters:
ASCII-characters between 0..127
(maximum: 48 characters)
Quiet zone:
Module width:
Standard print ratio:
Ratio format:
left/right: 10X, min. ¼ in
see Code128
see Code128
see Code128
Default check digit:
Modulo 103 (eCDEAN128)
Automatic (symbology specific).
Possible check digits:
Modulo 10, EAN-14
Symbol size:
Print control:
the maximum physical width is 165 mm
C=G128 / C=E128
The GS1-128 code is based upon Code-128. It has an FNC1 character at the 1st position (after
the start code). This allows scanners and data processing software to differentiate GS1-128
from other symbologies.
The GS1-128 code is in wide spread use (retail, logistics, food and beverage, etc.). It is used for
marking transport-units in supply chains. Besides the article-number it encodes quantities,
weights, prices, dates, and other information in a structured way. This is supported by the use
of so-called Application Identifiers (AIs) – see chapter 5. Within the GS1 system these
Application Identifiers (AIs) prefix the encoded data.
▶ Please note: The TEC-IT barcode software automatically inserts the FNC1 character at the
beginning and computes the internal check digit (Modulo 103).
6.1.25 EAN-13
83
Symbology number:
13
Valid characters:
“0”..”9”, 12 digits + 1 check digit
Quiet zone:
Module width:
Standard print ratio:
Ratio format:
left: 11X, right: 7X
X=0.33mm
1:2:3:4:1:2:3:4
1B:2B:3B:4B:1S:2S:3S:4S
Default check digit:
EAN-13 (eCDEAN13)
Possible check digits:
User supplied
Symbol size:
Print control:
Standardized symbol sizes (see EAN).
C=E13
This code is reserved for the International Article Number[2] administered by the standards
organization GS1. The numbers encoded into EAN bar codes are known as Global Trade Item
Numbers, for EAN-13 they are called GTIN-13.
EAN 13 is used for identifying articles or products uniquely (often sold at retail point of sale).
Encoded are a 2-digit country code, 5-digits manufacturer code and a 5 digits products code.
JAN and IAN are identical to EAN-13.
The check digit is calculated automatically if it not specified in the input data (that is when only
12 digits are used for creating the code).
6.1.26 EAN-13 with 2 Digits Add-On
Symbology number:
14
Valid characters:
“0”..”9”, 14 digits + 1 check digit
Quiet zone:
Module width:
Standard print ratio:
Ratio format:
left: 7-10X, right: 5X
X=0.33mm
1:2:3:4:1:2:3:4
1B:2B:3B:4B:1S:2S:3S:4S
Default check digit:
EAN-13 (eCDEAN13)
Possible check digits:
User supplied
Symbol size:
Standardized symbol sizes (see EAN).
This symbology extends EAN-13 with 2 add-on digits (see also EAN-8 with 2 Digits Add-On). The
check digit will be calculated automatically if not specified in the input data (e.g.
978020137968612).
6.1.27 EAN-13 with5 Digits Add-On
84
Symbology number:
15
Valid characters:
“0”..”9”, 17 digits + 1 check digit
Quiet zone:
Module width:
Standard print ratio:
Ratio format:
left: 7-10X, right: 5X
X=0.33mm
1:2:3:4:1:2:3:4
1B:2B:3B:4B:1S:2S:3S:4S
Default check digit:
EAN-13 (eCDEAN13)
Possible check digits:
User supplied
Symbol size:
Standardized symbol sizes (see EAN).
This symbology extends EAN-13 with 5 add-on digits (see also EAN-8 with 5 Digits Add-On). The
check digit will be calculated automatically if not specified in the input data (e.g.
978020137968612345).
6.1.28 EAN-14
Symbology number:
72
Valid characters:
13 digits + 1 check digit
ASCII-characters between 0..127,
Quiet zone:
Module width:
Standard print ratio:
Ratio format:
see GS1-128, ITF-14
see GS1-128, ITF-14
see GS1-128, ITF-14
see GS1-128, ITF-14
Default check digit:
EAN-14 (eCDEAN14)
Possible check digits:
User supplied
Symbol size:
see GS1-128, ITF-14
EAN-14 is used to encode the GTIN (Global Trade Item Number) for numbering trade items.
Within the GS1 system you can use 2 symbologies for encoding the GTIN:
◼ GS1-128 (UCC/EAN-128)
◼ ITF-14.
EAN-14 uses GS1-128 with Application identifier (AI) 01. The AI is prefixed automatically; it must
not be part of the input data. The check digit is calculated automatically if not specified in the
input data (that is when only 13 digits are used).
6.1.29 EAN-18
Same as SSCC-18(see section 6.1.55).
85
6.1.30 EAN-8
Symbology number:
10
Valid characters:
“0”..”9”, 7 digits + 1 check digit
Quiet zone:
Module width:
Standard print ratio:
Ratio format:
left/right: 7X
X=0.33mm
1:2:3:4:1:2:3:4
1B:2B:3B:4B:1S:2S:3S:4S
Default check digit:
EAN-8 (eCDEAN8)
Possible check digits:
User supplied
Symbol size:
Print control:
Standardized symbol sizes. See EAN.
C=E8
This symbology is derived from the longer EAN-13 bar code and encodes the GTIN-8, which is
another set of product identifiers from the GS1 system.
EAN 8 is used for marking small articles with restricted space. It encodes a unique article
number, which consists of a GS1 prefix, an item reference (no company prefix) and a checksum
digit.
The check digit is calculated automatically if not specified in the input data (that is when only 7
digits are used for creating the code).
6.1.31 EAN-8 with2 Digits Add-On
Symbology number:
11
Valid characters:
“0”..”9”, 9 digits + 1 check digit
Quiet zone:
Module width:
Standard print ratio:
Ratio format:
left: 7-10X, right: 5X
X=0.33mm
1:2:3:4:1:2:3:4
1B:2B:3B:4B:1S:2S:3S:4S
Default check digit:
EAN-8 (eCDEAN8)
Possible check digits:
User supplied
Symbol size:
Print control:
Standardized symbol sizes. See EAN.
C=E8+2
This symbology extends EAN-8 with 2 add-on digits which are mainly used for encoding the
price or the weight. The check digit will be calculated automatically if it not specified in the
input data (e.g. 9031101712).
This symbology is also used for bar-coding paperbacks or newspapers. In this case a 2(3) digits
86
country code and a 4(5) article code are encoded.
6.1.32 EAN-8 with5 Digits Add-On
Symbology number:
12
Valid characters:
“0”..”9”, 12 digits + 1 check digit
Quiet zone:
Module width:
Standard print ratio:
Ratio format:
left: 7-10X, right: 5X
X=0.33mm
1:2:3:4:1:2:3:4
1B:2B:3B:4B:1S:2S:3S:4S
Default check digit:
EAN-8 (eCDEAN8)
Possible check digits:
User supplied
Symbol size:
Print control:
Standardized symbol sizes. See EAN.
C=E8+5
This symbology extends EAN-8 with 5 add-on digits which are mainly used for encoding the
price or the weight. The check digit will be calculated automatically if it not specified in the
input data (e.g. 072527272077).
6.1.33 FIN Code (Fahrzeug-Identifizierungsnummer)
This code is identical to the VIN Code (Vehicle Identification Number).
6.1.34 Flattermarken
Symbology number:
28
Valid characters:
“0”..”9”
Quiet zone:
Module width:
Standard print ratio:
Ratio format:
Default check digit:
Symbol size:
Print control:
Application dependent
2-3 mm
1:1
1B:1S
None (eCDNone)
Symbol height between 5 and 10mm
C=FLM
This is a special “barcode” used for recognizing the correct sequence of pages in print-shops.
87
Figure 9: Flattermarken Coding Sample
6.1.35 GS1-128
The GS1-128 is simply another name for the existing EAN-128 (or UCC-128) barcode. The EAN
and UCC standardization organizations founded GS1 in order to globalize (and harmonize)
their different standards. See section 6.1.24.
6.1.36 GTIN
GTIN stands for Global Trade Item Number and is not a barcode symbology.
A GTIN is used for the unique identification of trade items worldwide within the GS1 (EAN.UCC)
system. The GTIN may be encoded in UPC-A, EAN-8, EAN-13, EAN-14, ITF-14 and GS1-128
symbologies.
Depending on the number of digits available in the bar code, the GTIN is divided into GTIN-8,
GTIN-12, GTIN-13 and GTIN-14.
6.1.37 HIBC
HIBC is an abbreviation for Health Industry Bar Code. The HIBC is a numbering system – and
not a specific barcode symbology. It is used for product identification codes as well as for
worldwide identification of shipping units.
The primary code contains the manufacturer id, the article number, the package number and a
check digit. The secondary code contains the serial number, the expiration date and the units
per package.
The following symbologies are commonly used for encoding: Code 39, Code 128, Codablock
F.For more information, please refer to section 6.4 and to http://www.hibcc.org.
6.1.38 I-2/5
Short for Code 2 of 5 Interleaved (see section6.1.12). It is also known as Code 25.
6.1.39 ISBN Code(ISBN 13)
88
Symbology number:
(with add-on)
69 (without add-on) or 23
Valid characters:
“0”..”9”, 12 digits + 1 check
digit + optionally 5 add-on digits
Quiet zone:
Module width:
Standard print ratio:
Ratio format:
See EAN13 / EAN13 + 5 Digits
See EAN13 / EAN13 + 5 Digits
See EAN13 / EAN13 + 5 Digits
See EAN13 / EAN13 + 5 Digits
Default check digit:
EAN-13 (eCDEAN13)
Possible check digits:
User supplied
Symbol size:
Print control:
See EAN13 / EAN13 + 5 Digits
C=ISBN
ISBN is the abbreviation of International Standard Book Number. It uses the symbology EAN-13
and can be optionally extended with 5 Add-On Digits. The add-on is used for additional pricing
information. For more information, please refer to http://www.isbn.org.
The EAN-13 barcode for a book is generated from the ISBN number assigned to it. When
encoding ISBN in an EAN-13 barcode, the ISBN number is preceded by the number 978 and the
ISBN check digit is not used (the rightmost digit of the ISBN). When the ISBN number is encoded
in the EAN-13 barcode in this way it is often called Bookland. A 5 digit add-on barcode is
optional and can contain the price of the book.
▶ ISBN codes with 10 digits are automatically converted to the newer ISBN with 13 digits!
6.1.39.1 Example
You got the ISBN Number 1-56592-843-1 and a value for the second small barcode (as for the
price) of 90000.
Therefore choose the symbology EAN 13 + 5 Digits encode the following data:
97815659284390000. The check digit is calculated automatically (5).
6.1.39.2 ISBN Additional Data
The smaller barcode which is on the right side of the ISBN code is a 5-digit additional code and
can be used for additional information (e.g. like pricing).
Example:
89
Price
Encoded
$10.95 51095
$3.00
50300
$99.99 + 59999
Table 12: ISBN Sample
The preceding digit ”5” (therefore also called EAN-5) marks the price encoded in US Dollar.
Bookstores recommend EAN-5. If there is no price, the value 90000 will be encoded instead
(EAN-9). This value is used when no additional information is available.
▶ For scanner in US bookstores ISBN, EAN codes are not readable without the 5 digit add-on
(which is called EAN-5 or EAN-9, depending on the first number encoded in the add-on).
First Digit Description
5
$ US
6
$ Canada
4
$ New Zealand
3
$ Australia
0&1
British pounds
Table 13: ISBN Encoding – Country and Currency
Values
Description
59999
Price for $100 and more
90000-98999 For internal purposes (BISG recommend 90000 if no price is given)
99000-99999 Reserved for the industry market
99990-99999 Reserved for Nat’l Ass’n College Stores (NACS)
99990
NACS used books
99991
NACS copies
Table 14: ISBN Encoding – Price Samples
6.1.40 ISBT-128
90
This is the International Standard for the transfer of information associated with tissue
transplantation and Blood Transfusion. It provides a globally unique donation numbering
system, internationally standardized product definitions, and standard data structures for barcoding and electronic data interchange.
It uses (but is not limited to) Code128B. For more information, please refer to http://iccbba.org.
6.1.41 ISMN
Symbology number:
24
Valid characters:
digit
“0”..”9”, 12 digits + 1 check
Quiet zone:
Module width:
Standard print ratio:
Ratio format:
See EAN13
See EAN13
See EAN13
See EAN13
Default check digit:
EAN-13 (eCDEAN13)
Possible check digits:
User supplied
Symbol size:
See EAN13
ISMN stands for International Standard Music Number. The ISMN is a standardized
international code, which identifies printed music.
The ISMN is preceded by the digits 9790. The ISMN (=EAN-13) check digit is calculated and
appended automatically!
For more information, please refer http://www.ismn-international.org/.
6.1.42 ISSN
Symbology number:
(with add-on)
26 (without add-on) or 27
Valid characters:
“0”..”9”, 12 digits + 1 check
digit + optionally 2 add-on digits
Quiet zone:
Module width:
Standard print ratio:
Ratio format:
See EAN13 / EAN13 + 2 Digits
See EAN13 / EAN13 + 2 Digits
See EAN13 / EAN13 + 2 Digits
See EAN13 / EAN13 + 2 Digits
Default check digit:
EAN-13 (eCDEAN13)
Possible check digits:
User supplied
Symbol size:
See EAN13 / EAN13 + 2 Digits
91
ISSN stands for International Standard Serial Number. The ISSN is a standardized international
code, which identifies any serial publication independently of its country of origin, its language
or alphabet, or its frequency, medium, etc.
The ISSN is preceded by the digits 977. The check digit of an 8-digit ISSN code (the last of the 8
digits) must be omitted! A two digit price code, almost always "00", is added to the end. Finally
the EAN-13 check digit (calculated automatically by TEC-IT software) is added.
Optionally the issue number can be appended as 2-digit add-on.
For more information, please refer to http://www.issn.org.
6.1.43 ITF-14
Symbology number:
89
Valid characters:
13 digits + 1 check digit
Quiet zone:
Module width:
size)
Standard print ratio:
Ratio format:
Default check digit:
left/right: 10X
0.051 – 1.02 mm (nominal
1:2.5:1:2.5
1B:2B:1S:2S
Mod-10 (eCDMod10)
Symbol size:
152.43 x 41.60 mm at
nominal size (including Quiet Zone and Bearer Bars)
Print control:
C=I14
ITF-14 encodes the GTIN-14, this is a 14-digit number used to identify trade items at various
packaging levels (also referred as GTIN).
ITF-14 is based on the Code 2 of 5 Interleaved symbology. It encodes 14 digits (13 usable digits +
1 modulo 10 check digit). The check digit method complies with the EAN-14 method.
ITF-14 uses “Bearer Bars”, these are horizontal or surrounding bars, to prevent misreads.
▶ Symbol size and Bearer Bars are depending on printing method and scanning environment
– for details please follow the GS1 specification.
▶ When using vertical Bearer Bars, they must have at least a distance of 10 modules to the
bar code. This is why you have to adjust a minimum of 12 modules for the quiet zone to see a
vertical Bearer Bar in TEC-IT Software.
6.1.44 JAN
JAN is the abbreviation for Japanese Article Number. This code uses EAN-13symbology. The
first two digits have to be either 45 or 49 for identifying Japan.
6.1.45 LOGMARS
92
Symbology number:
50
Valid characters:
“/”, ”.”, ”$”, Space
“0”..”9”, “A”..”Z”, “+“, “-”, “*”,
Quiet zone:
Module width:
Standard print ratio:
Ratio format:
Default check digit:
left/right: 10X, min. ¼ inch
X>=0.19 mm
1:3:1:3
1B:2B:1S:2S
None (eCDNone)
Possible check digits:
Modulo 43 (eCDMod43),
Modulo 11 Weight 7 (eCDMod11W7)
Symbol size:
H>=15% of L (H>=6.3 mm!)
H: Height of barcode symbol without human readable text
L: Width of barcode
This is a special variant of Code 39used by the U.S. Department of Defense. This standard
defines acceptable ranges for a number of variables, include density, ratio, bar height, and size
of the human-readable interpretation line. The modulo-43 check digit, which is optional for
Code 39, is defined and recommended in the specification.
6.1.46 MSI
Symbology number:
47
Valid characters:
“0”..”9”
Quiet zone:
Module width:
Standard print ratio:
Ratio format:
left/right: 12X
-1:2:1:2
1B:2B:1S:2S
Default check Digit:
MSI 1 digit (eCDMSI1)
Possible check digits:
(eCDMSI2)
User supplied and MSI 2 digit
Symbol size:
Print control:
14 digits incl. check digits
C=MSI
The MSI-Code is a variant of the Plessey-Code. MSI uses various check digit calculation
methods - TEC-IT implemented the 2 most common used. Please contact TEC-IT if you need a
different one.
6.1.47 NVE-18 (Nummer der Versandeinheit)
93
Symbology number:
75
Valid characters:
“0”..”9”
Check digit method:
Modulo10
Default check digit:
Modulo10
Quiet zone:
Module width:
left/right: 10X, min. ¼ inch
X >= 0.19 mm
Standard print ratio:
Ratio format:
1:2:3:4:1:2:3:4
1B:2B:3B:4B:1S:2S:3S:4S
Default check digit:
Automatic (symbology
specific).
Modulo 10 (eCDMod10) and Modulo 103 (eCDEAN128)
Symbol size:
--
NVE stands for “Nummer der Versandeinheit” (a German term for tracking number). This code
uses an EAN-128 symbology with a prefixed Application Identifier (AI) 00. The AI “00” is inserted
automatically and must not be included in the input data. It is similar to SSCC-18.
6.1.48 NW-7
This symbology is identical with Codabar 2 Widthsand is also known as Code 2 of 7.
The Japanese version of the Codabar 2 Widths barcode is called NW7. Another name for this
symbology is Code 2 of 7 – see section 6.1.2
The following symbols can be encoded in NW7: 0, 1, 2, 3, 4, 5, 6, 7, 8, 9, -, $, /, ., +
6.1.49 Pharmacode One-Track
Symbology number:
51
Valid characters:
“0”..”9” or binary
Quiet zone:
Module width:
Standard print ratio:
Ratio format:
Default check digit:
Symbol size:
left/right: 6 mm
2-3 mm
1:3:2:4:2:3
1B:2B:1C:2C:1S:2S
None (eCDNone)
5-10 mm height
This code was invented by Laetus®. It is used in pharmaceutical areas. Pharmacode supports
colored bars. The data for the bars/spaces is encoded directly in the property Text:
◼ “0” is used for a narrow bar (the width of these bars are enlarged after a color change,
according to ratio 1C)
94
◼ “1” is used for a wide bar (the width of these bars are enlarged after a color change,
according to ratio 2C)
◼ “b” is used for a narrow bar
◼ “c” is used for a wide bar
When using colored bars, the color is specified by the escape sequence \Crrggbb (where rrggbb
is an RGB value; each letter stands for a hexadecimal digit (0-f); rr stands for the red, gg for the
green, and bb for the blue value part). The sequence \Cx resets the color to default. The
barcode Format must be set to D and EscapeSequences must be activated.
The data for the barcode in the example above is as follows (the color escape sequence is not
displayed in the human readable text): 111\C2a3282111.
6.1.50 Pharmacode Two-Track
Symbology number:
53
Valid characters:
numeric [0..9] and generic;
Quiet zone:
Module width:
Standard print ratio:
Ratio format:
Default check digit:
Symbol size:
left/right: 6 mm
-1:1
1B:1S
None (eCDNone)
see Notes
This code was invented and specified by Laetus®. Pharmacode assigns numeric values to the
bars. It is used for medicine packing in pharmaceutically area; for small labels. Usually
Pharmacode is printed without a human readable text.
The dimensions are:
◼ 2-track bar width: 1 mm
◼ space bars: 1 mm
◼ bar height above/below: 4-6 mm
◼ height of the long bar: 8-12 mm
It offers a high printing tolerance and is readable very fast (200 readings per second).
6.1.51 Pharma Zentralnummer (PZN)
6.1.51.1PZN7: 6 Digits + 1 Check Digit (valid until 2012/12/31)
95
Symbology number:
52
Valid characters:
“0”..”9”, 6 digits + 1 check digit
Quiet zone:
Module width:
see Code 39
see Code 39
Standard print ratio:
Ratio format:
see Code 39
see Code 39
Default check digit:
PZN check digit (eCDPZN)
Possible check digits:
User supplied
Symbol size:
see Code 39
6.1.51.2PZN8: 7 Digits + 1 Check Digit (valid from 2013/01/01)
Symbology number:
113
Valid characters:
digit
“0”..”9”, 7 digits + 1 check
Quiet zone:
Module width:
see Code 39
see Code 39
Standard print ratio:
Ratio format:
see Code 39
see Code 39
Default check digit:
PZN check digit (eCDPZN)
Possible check digits:
User supplied
Symbol size:
see Code 39
PZN uses Code 39 as the base symbology. It uses a special check digit and the human readable
text always contains the prefix “PZN-“ (which is not encoded in the barcode data).
PZN7 is valid until the end of 2012 and will be replaced by PZN8with the beginning of year 2013.
PZN7 numbers will stay valid but are going to be extended to 8 digits by a leading “0”.
6.1.52 PlesseyCode
96
Symbology number:
46
Valid characters:
numeric [0..9] A, B, C, D, E, F
Quiet zone:
Module width:
left/right: 12X
--
Standard print ratio:
Ratio format:
1:2:1:2
1B:2B:1S:2S
Default check digit:
Plessey (eCDPlessey)
Possible check digits:
User supplied
Symbol size:
--
Plessey code is in use primarily in libraries. It is a pulse-width modulated code and was
developed by Plessey Company Limited in UK. The basic encoding principle in Plessey Code
was used by MSE Data Corporation to construct its MSI barcode.
The check digit is calculated with a polynomial CRC algorithm and is always part of the
symbology.
6.1.53 Rational Codabar
Is the same as Codabar – see section6.1.2.
6.1.54 SCC-14
Shipping Container Code – see DUN-14.
6.1.55 SSCC-18
Symbology number:
48
Valid characters:
digit
“0”..”9”, 17 digits + 1 check
Quiet zone:
Module width:
Standard print ratio:
Ratio format:
see EAN 128, sometimes ¼ inch
see EAN 128
1:2:3:4:1:2:3:4
1B:2B:3B:4B:1S:2S:3S:4S
Default check digit:
Automatic (symbology
specific).
Modulo 10 (eCDMod10) and Modulo 103 (eCDEAN128)
Symbol size:
see GS1-128
Print control:
C=SSCC18
SSCC-18 is used for encoding the Serial Shipping Container Code. It is used for the unique
97
identification of trade items world-wide. SSCC-18 is based on the GS1-128 symbology with
Application Identifier (AI) 00. The check digit is encoded automatically if 17 digits are used for
the input data.
The structure of the SSCC-18 is as follows:
◼ The first two digits represent the Application Identifier (AI). The AI is always ‘00’.
◼ The next digit is the Packaging Identifier.
◼ The Packaging Identifier is followed by the ILN (the International Location Number) of the
manufacturer (7 digits).
◼ The next 9 digits represent the Carton Serial Number.
◼ The last digit is the check digit.
6.1.56 Telepen Alpha
Symbology number:
32
Valid characters:
0..127
ASCII characters between
Quiet zone:
n/a
Standard print ratio:
Ratio format:
1:3:1:3
1B:2B:1S:2S
Default check digit:
Symbol size:
None (eCDNone)
--
Telepen Alpha is the alphanumeric variant of Telepen.
6.1.57 Telepen
Symbology number:
87
Valid characters:
with an ‘X’
pairs of digits, pairs of one digit
Quiet zone:
n/a
Standard print ratio:
Ratio format:
1:3:1:3
1B:2B:1S:2S
Default check digit:
Symbol size:
None (eCDNone)
--
Telepen can encode pairs of characters only. A pair must consist of 2 digits or of one digit and
the letter ‘X’.
6.1.58 UCC-128
98
Same as the EAN-128 (see section 6.1.24).
6.1.59 UPC 12 Digits
Same as the UPC-A (see section 6.1.60).
6.1.60 UPC Version A
Symbology number:
34
Valid characters:
“0”..”9”, 11 digits + 1 check digit
Quiet zone:
Module width:
Standard print ratio:
Ratio format:
9X
0,33 mm
1:2:3:4:1:2:3:4
1B:2B:3B:4B:1S:2S:3S:4S
Default check digit:
UPC-A (eCDUPCA)
Possible check digits:
User supplied
Symbol size:
H=26.26mm; B=37.29mm; variations
allowed (see UPC-A spec).
Print control:
C=UA
UPC A is used in the United States for marking of products in retail applications (similar to
EAN).
The numbers encoded into UPC bar codes are known as Global Trade Item Numbers, for UPC-A
they are called GTIN-12.
UPC-A is mainly used for scanning of trade items at the point of sale. The article number is
maintained by GS1 US and identifies manufacturer and product uniquely.
The code (11 digits + 1 check digit) is built from one system-digit, 5 digits manufacturer code
and 5 digits product code. The check digit is calculated automatically if not specified in the
input data (that is when only 11 digits are used for the code).
6.1.61 UPC Version A, 2 Digits Add-On
99
Symbology number:
35
Valid characters:
digit
“0”..”9”, 13 digits + 1 check
Quiet zone:
Module width:
Standard print ratio:
Ratio format:
left: 9-12X, right: 5X
see UPC-A
see UPC-A
see UPC-A
Default check digit:
UPC-A (eCDUPCA)
Possible check digits:
User supplied
Symbol size:
see UPC-A
Print control:
C=UA+2
It is identical to UPC-A, but with 2 add-on digits. The check digit will be calculated
automatically if it is not specified in the input data (e.g. 72527272070712). The check digit is not
displayed in the human readable text.
6.1.62 UPC Version A, 5 Digits Add-On
Symbology number:
36
Valid characters:
digit
“0”..”9”, 16 digits + 1 check
Quiet zone:
Module width:
Standard print ratio:
Ratio format:
left: 9-12X, right: 5X
see UPC-A
see UPC-A
see UPC-A
Default check digit:
UPC-A (eCDUPCA)
Possible check digits:
User supplied
Symbol size:
see UPC-A
Print control:
C=UA+5
It is identical to UPC-A, but with 2 add-on digits. The check digit will be calculated
automatically if it is not specified in the input data (e.g. 72527272070712345). The check digit is
not displayed in the human readable text.
6.1.63 UPC Version E
100
Symbology number:
37
Valid characters:
“0”..”9”, 7 digits + 1 check digit
Quiet zone:
Module width:
left: 9X, right: 7X
--
Standard print ratio:
Ratio format:
1:2:3:4:1:2:3:4
1B:2B:3B:4B:1S:2S:3S:4S
Default check digit:
UPC-E (eCDUPCE)
Possible check digits:
User supplied
Symbol size:
Print control:
-C=UCE
UPC-E is used for product marking and article bar-coding. The code must begin with “0” or “1”.
The check digit is computed automatically if it is not specified in the input data (that is when
only 7 digits are used for creating the code).
6.1.64 UPC Version E, 2 Digits Add-On
Symbology number:
38
Valid Digits:
“0”..”9”, 9 digits + 1 check digit
Quiet zone:
left: 9-12X, right: 5X
Module width:
see UPC-E
Default check digit:
see UPC-E
Ratio format:
see UPC-E
Check digit method:
UPC-E (eCDUPCE)
Possible check digits:
User supplied
Symbol size:
Print control:
-C=UCE+2
This code is identical to UPC Version E, but with 2 add-on digits. The check digit will be
calculated automatically if not specified in the input data (e.g. 0123456512). The check digit is
not displayed in the human readable text.
6.1.65 UPC Version E, 5 Digits Add-On
101
Symbology number:
39
Valid Digits:
“0”..”9”, 12 digits + 1 check digit
Quiet zone:
left: 9-12X, right: 5X
Module width:
see UPC-E
Standard print ratio:
Ratio format:
see UPC-E
see UPC-E
Default check digit:
UPC-E (eCDUPCE)
Possible check digits:
User supplied
Symbol size:
Print control:
-C=UCE+5
This code is identical to UPC Version E, but with 2 add-on digits. The check digit will be
calculated automatically if not specified in the input data (e.g. 0123456512345). The check digit
is not displayed in the human readable text.
6.1.66 UPC SCS (Shipping Container Symbols)
UPC SCS stands for Shipping Container Symbol. ITF-14 is based on Code 2of 5 interleaved as
barcode symbology, but is rendered with bearer bars.
Figure 10: UPC Shipping Container Symbol (SCS)
The UPC Shipping Container Symbol (SCS) is very similar in structure to the Universal Product
Code (UPC). Both employ a unique GS1/UCC company prefix (assigned by GS1) and a 1 to 5digit item number (assigned by the manufacturer, depending on the number of digits in the
company-prefix). Each employs a check digit at the end of the code.
The SCS also has a packaging indicator field preceding the UCC company prefix. Its symbology
is called Interleaved 2 of 5 (I-2/5) and uses a series of wide and narrow bands and spaces to
102
represent digits and is surrounded on two or four sides by a frame called a bearer.
The packaging indicator (historically called an assortment indicator) can be any single digit
(except 8 which is reserved for future use):
Packaging
Description
Indicator
0
Is always used when the UPC code on the case and on the individual items inside
the case are different or when both a UPC Version A symbol and a UPC Shipping
Container Symbol (I-2/5) must appear on the same carton (for products where the
shipping container also acts as the package for the consumer product).
1
Is used traditionally when the UPC code on the case and on the individual items
inside the case are the same.
1-7
Can be used to signify a range of packaging levels
8
Reserved for future use
9
Is used only to signify a variable content shipment. The 9 indicates to the scanner
that a mandatory variable content add-on symbol follows the primary symbol.
Table 15: Shipping Container Symbol Packaging Indicator
6.1.67 USD-4
This symbology is identical with Codabar 2 Widthsand is also known as Code 2 of 7 and as NW7.
6.1.68 USS ITF 2-5
Uniform Symbology Specification ITF 2-5. Identical to Code 2 of 5 Interleaved. Another alias is
Code 25.
6.1.69 USS Code 128
USS Code 128 stands for Uniform Symbology Specification Code 128. It is identical to Code 128.
6.1.70 USS Code 39
USS Code 39 stands for Uniform Symbology Specification Code 39. It is identical to Code 39.
6.1.71 VIN Code (Vehicle Identification Number)
103
Symbology number:
73
Valid characters:
“O”, and “Q”)
“0”..”9”, “A”..”Z” (without “I”,
Quiet zone:
Module width:
Standard print ratio:
Ratio format:
left/right: 10X, min. ¼ inch
X >= 0.19 mm
1:3:1:3
1B:2B:1S:2S
Default check digit:
None (eCDNone)
Possible check digits:
VIN (eCDVin)
Symbol size:
H>=15% of L (H>=6.3 mm!)
H: Height of the barcode without human readable text
L: width of the barcode
VIN Code is used for vehicle identification. It is based on Code 39, but does not contain start
and stop characters. The set of valid characters consists of digits and upper case letters. The
letters “I”, “O”, and “Q” are not allowed because they could be easily mixed up with the digits
“0”, and “1”.
VIN Code is implemented differently in Europe and North America. Both kinds are compatible
but the North American version is defined more strictly. So the check digit calculation method
is only valid for the North American implementation of the code.
6.2 Postal Codes (Linear/1D)
6.2.1 AustralianPost Customer
Symbology number:
63
Valid characters:
“0”..”9”, 8 digits
Quiet-zone:
mm
left/right: 6 mm, top/bottom: 2
Module width:
Standard print ratio:
Ratio format:
Default check digit:
specific).
Size:
-1:1
1B:1S
Automatic (symbology
see Notes
Print control:
see Notes
Print control:
C=APC37
This barcode is used by the Australian Post for marking shipments. Special code variants are
104
available for redirections, replies and so on. The barcode height is between 4.2mm and 5.8mm.
The module width should be adjusted to 0.47 mms. Usual no readable text is displayed. The
length will depend on the use of additional bars (code variants Customer 2 and Customer 3).
Due to its number of bars (37) Australian Post Customer is also called Australia Post 37-CUST.
6.2.2 AustralianPost Customer 2
Symbology number:
64
Valid characters:
Space, “#”
“0”..”9”, “A”..”Z”, “a”..”z”,
Quiet zone:
mm
Module width:
Standard print ratio:
Ratio format:
Default check digit:
specific).
Symbol size:
left/right: 6 mm, top/bottom: 2
-1:1
1B:1S
Automatic (symbology
see Australian Post Customer
This is the same barcode as the Australian Post Standard Customer, but with additional 5
characters for customer specific data. The first 8 characters must be digits. This symbology is
also called Australia Post 52-CUST (Due to its 52 bars).
6.2.3 AustralianPost Customer 3
Symbology number:
65
Valid characters:
Space, “#”
“0”..”9”, “A”..”Z”, “a”..”z”,
Quiet zone:
mm
Module width:
Standard print ratio:
Ratio format:
Default check digit:
specific).
Symbol size:
left/right: 6 mm, top/bottom: 2
-1:1
1B:1S
Automatic (symbology
see Australian Post Customer
This is the same barcode as the Australian Post Standard Customer, but with additional 10
characters for customer specific data. The first 8 characters must be digits. This symbology is
also called Australia Post 67-CUST (Due to its 67 bars).
105
6.2.4 AustralianPost Redirection
Symbology number:
68
Valid characters:
“0”..”9”, 8 digits
Quiet zone:
mm
Module width:
Standard print ratio:
Ratio format:
Default check digit:
specific).
Symbol size:
left/right: 6 mm, top/bottom: 2
-1:1
1B:1S
Automatic (symbology
see Australian Post Customer
6.2.5 AustralianPost Reply Paid
Symbology number:
66
Valid characters:
“0”..”9”, 8 digits
Quiet zone:
mm
Module width:
Standard print ratio:
Ratio format:
Default check digit:
specific).
Symbol size:
left/right: 6 mm, top/bottom: 2
-1:1
1B:1S
Automatic (symbology
see Australian Post Customer
6.2.6 AustralianPost Routing
106
Symbology number:
67
Valid characters:
“0”..”9”, 8 digits
Quiet zone:
mm
Module width:
Standard print ratio:
Ratio format:
Default check digit:
specific).
Symbol size:
6.2.7
left/right: 6 mm, top/bottom: 2
-1:1
1B:1S
Automatic (symbology
see Australian Post Customer
Brazilian CEPNet / Brazilian Postal Code
Symbology number:
54
Valid characters:
digit
“0”..”9”, 8 digits + 1 check
Quiet zone:
horizontal: 1/8 inch
Module width:
Standard print ratio:
Ratio format:
Default check digit:
Symbol size:
vertical: 1/25 inch
-1:1
1B:1S
POSTNET (eCDPostNet)
8 digits, 1 check digit
This code is used by the Brazilian Postal Services. An 8 digit ZIP-code is encoded.The check
digit is calculated automatically. It cannot be specified in the input data.
The barcode height should be adjusted to 3.2 mms; the module width to 0.423 mms; usually no
plain text is displayed. The encoding is based on US Postal codes.
6.2.8 Deutsche Post Identcode
107
Symbology number:
22
Valid characters:
digit
“0”..”9”, 11 digits + 1 check
Quiet zone:
Module width:
left/right: 10X, min. ¼ inch
--
Standard print ratio:
Ratio format:
1:3:1:3
1B:2B:1S:2S
Default check digit:
Automatic (symbology
specific).
DP Identcode (eCDDPIdent)
Symbol size:
--
This symbology is used by Deutsche Post. The code is basically a Code 2 of 5 interleaved
enhanced with a special check digit calculation.
6.2.9 Deutsche Post Leitcode
Symbology number:
21
Valid characters:
digit
“0”..”9”, 13 digits + 1 check
Quiet zone:
Module width:
left/right: 10X, min. ¼ inch
--
Standard print ratio:
Ratio format:
1:3:1:3
1B:2B:1S:2S
Default check digit:
specific).
DP Leitcode (eCDDPLeit)
Symbol size:
Automatic (symbology
--
This symbology is used by Deutsche Post. The code is basically a Code 2 of 5 Interleaved
enhanced with a special check digit calculation. It is used for encoding the ZIP-Code, Street and
number of the shipment.
6.2.10 DPD Code
108
Symbology number:
96
Valid characters:
32..127
ASCII-characters between
Quiet zone:
Module width:
left/right: 10X, min. ¼ inch
X >= 0.19 mm
Standard print ratio:
Ratio format:
1:2:3:4:1:2:3:4
1B:2B:3B:4B:1S:2S:3S:4S
Default check digit:
Automatic (symbology
specific).
Modulo 103 (eCDCode128)
Symbol size:
--
DPD Code is used by DPD (Deutscher Paket Dienst). It is based on Code 128 and is limited to 28
encoded characters. The encoded data and the human readable text differ slightly.
The barcode data is specified as follows
IPPPPPPPTTTTTTTTTTTTTTSSSCCC
Whereas the human readable text is defined as:
PPPPPPPTTTTTTTTTTTTTTSSSCCCD
With:
Character Description
Data Type
I
Identifier (in barcode data only)
Alphanumeric 1
P
Destination postal code
Alphanumeric 7
X
Depot number (first part of the tracking number)
Alphanumeric 4
L
Serial number (second part of the tracking number) Numeric
10
S
Service Code
Numeric
3
C
Destination Country Code
Numeric
3
D
Check digit modulo 36 (in human readable text only) Alphanumeric 1
Table 16: DPD Format
6.2.11 ItalianPostal Code 2 of 5
Length
109
Symbology number:
94
Valid characters:
“0”..”9”
Quiet zone:
Module width:
left/right: 10X, min. ¼ inch
X>= 0.19 mm
Standard print ratio:
Ratio format:
1:3:1:3
1B:2B:1S:2S
Default check digit:
Symbol size:
None (eCDMod10ItlPst25)
--
Italian Postal Code 2 of 5 is based upon Code 2 of 5 Interleaved, but it is limited to 12 digits (11
usable digits + 1 modulo 10 check digit).
6.2.12 JapanesePostal Code
Symbology number:
76
Valid characters:
“0”..”9”, “A”..”Z”, “-“,
7 digits (ZIP code) + additional data
Quiet zone:
Module width:
left/right/top/bottom: 2 mm
--
Standard print ratio:
Ratio format:
1:1
1B:1S
Default check digit:
specific).
Symbol size:
Automatic (symbology
--
This code is used by the Japanese Postal system. You can encode 7 digits followed by block and
street number (uppercase alphanumeric). The special compaction mode of Japanese
characters can be enabled on demand (Format parameter “J”) – see below.
This barcode symbology supports two methods to provide the barcode data (with and without
data–extraction from the Japanese Address B Field).
6.2.12.1 Direct Encoding Mode
110
Description
Value
Format Property
“” (default=empty)
Postal code
2730102 (no hyphen ‘-‘)
Address B
3-20-5B604
Barcode text
Postal code + Address B (no space between)
Barcode text
27301023-20-5B604
Encoded data in the symbol 27301023-20-5B604
6.2.12.2 Japanese Extraction Mode
Description
Value
Format Property
”J” (= Enable Japanese Compaction)
Postal code
273-0102 (can contain ‘-‘)
Address B
Barcode text
Postal code + Address B
Barcode text
273-0102
Encoded data in the symbol 27301023-20-5B604 (after compaction)
Encoding
SHIFT JIS (CP932)
▶ In TBarCode DLL you have two possibilities:
- Provide the data in UNICODE with BCSetTextW(..) and use BCSetCodepage (Shift JIS)[3].
- Provide the data in Shift JIS with BCSetTextA(..) and use BCSetEncodingMode (LowByte).
▶ In TBarCode OCX and TBarCode .NET you set CodePage = Japanese Shift JIS.
6.2.12.3 Standard Dimensions
To draw the barcode according to the specification please follow these steps:
▶ Set the module width to 0.577mm (DLL-function: BCSetModWidth (pBC, "577"))
▶ Set the height of the „Bounding Rectangle“ in the draw function to 3.5 mm
▶ Switch off the display of the human readable text
111
6.2.13 KIX – Dutch Postal Code
Symbology number:
90
Valid characters:
“0”..”9”, “A”..”Z”, “a”..”z”
Quiet zone:
Module width:
left/right/top/bottom: 2 mm
0.38-0.63 mm
Standard print ratio:
Ratio format:
1:1
1B:1S
Default check digit:
Symbol size:
None (eCDNone)
--
This code is used by the Dutch Postal system.
6.2.14 KoreanPostal Authority
Symbology number:
77
Valid characters:
“0”..”9”, 6 digits + 1 check digit
Check digit method:
code
Quiet zone:
Module width:
Check digit included in the
10X (not exactly specified)
--
Standard print ratio:
Ratio format:
1:3:4
1B:1S:2S
Default check digit:
Automatic (symbology
specific).
Modulo10 (eCDMod10Kor)
Symbol size:
--
This code is used by the Korean Postal system. Encoded are a 6-digit ZIP and 1 check digit.
6.2.14.1 Example
112
Description
Value
Post number
305-600
Barcode Text property
305600 (no hyphen, 6 digits)
Encoded data in the
symbol
0065036
The check digit (7th digit marked red) will be calculated
automatically.
Parameters: width = 70, height = 4 mm, module width = 0.417 mm
▶ Hint: Will be scanned from right to left, so the data is encoded in the reverse order. The
check digit will be added at the right side, so it is the first digit read by a scanner.
6.2.15 Planet 12
Symbology number:
82
Valid characters:
digit
“0”..”9”, 11 digits + 1 check
Quiet zone:
top/bottom: 1/8 inch
Module width:
Standard print ratio:
Ratio format:
left/right: 1/25 inch
-1:1
1B:1S
Default check digit:
(eCDMod10Pla)
Modulo 10 Planet
Possible check digits:
User supplied
Symbol size:
11 digits + 1 check digit
This code was developed for the United States Postal Services. It is a 3-of-5 variant of the
Postnet barcode.
6.2.16 Planet 14
113
Symbology number:
83
Valid characters:
digit
“0”..”9”, 13 digits + 1 check
Quiet zone:
top/bottom: 1/8 inch
Module width:
Standard print ratio:
Ratio format:
left/right: 1/25 inch
-1:1
1B:1S
Default check digit:
(eCDMod10Pla)
Modulo 10 Planet
Possible check digits:
User supplied
Symbol size:
13 digits + 1 check digit
This code was developed for the United States Postal Services. It is a 3-of-5 variant of the
Postnet barcode.
6.2.17 Royal Mail 4 State (RM4SCC)
Symbology number:
70
Valid characters:
“0”..”9”, “A”..”Z”
Quiet zone:
Module width:
Standard print ratio:
Ratio format:
left/right: 2 mm
-1:1
1B:1S
Default check digit:
Automatic (symbology specific).
Possible check digits:
User supplied
Symbol size:
Print control:
max. 9 digits without check digits
C=RM
This code is a height modulated code using 4 different vertical bars. It is used in mass-mailing
applications (Cleanmail, Mailsort) of the Royal Mail, United Kingdom and Singapore (also called
SinPost barcode). Encoded are ZIPs.
6.2.18 Royal Mail Complex Mail Data Mark (CMDM) Mailmark®
Barcode
114
Symbology number:
119
Valid characters:
“0”..”9”, “A”..”Z”, “ “ (Space), 45 chars fixed
length + variable customer part
Quiet zone:
left/right/ top/bottom: 4X
Module width:
0.5 – 0.7 mm
Standard print ratio:
Ratio format:
1:1
1B:1S
Default check digit:
Symbol size:
Automatic (symbology specific).
12 x 12 mm, 16 x 16 mm, 8 x 24 mm
TheComplex Mail Data Mark (CMDM) is based upon Data Matrix ECC200 (ISO/IEC 16022, version
2006) and is used by the Royal Mail for postal services. In addition, the CMDM
Mailmark™barcode uses a specific format and data structure defined by the Royal Mail for their
purposes.
A CMDM Mailmark™ barcode can be any of the following Data Matrix formats:
◼ Format 7 (24 x 24 modules), total capacity 51 characters, 6 characters for customer use.
◼ Format 9 (32 x 32 modules), total capacity 90 characters, 45 characters for customer use.
◼ Format 29 (16 x 48 modules), total capacity 70 characters, 25 characters for customer use.
6.2.18.1 Data Structure
The CMDM Mailmark™ barcode is differentiated from other Data Matrix symbols by the first 6
characters of the data within the barcode:
◼ UPU identifier – 1 Characters (J), Country ID – 3 Characters (e.g. GBA, or GB<SPACE>),
Product type ID – 1 Character, Version ID – 1 Character
Each field within any CMDM is of a fixed and defined length. The length in total (except
customer part) is 45 characters. Missing or optional attributes must be filled with the SPACE
character.
▶ For more information we refer to the Royal Mail Mailmark® barcode definition document.
Sample data content (Format 9, 45 characters Mailmark™ data + 41 characters customer data):
JGB 010100000700009001B707RH1A 0SN35XX
ABCDEFGHIJ1234567890ABCDEFGHIJ1234567890A
6.2.18.2 Customer Content
Each format has a reserved space forcustomers and/or mailing houses to place information.
The amount of space depends on the barcode type and characters/encoding used.
6.2.18.3 Encoding
All data within the Royal Mail defined portion of the CMDM shall comply with the C40 character
set (upper case alphanumeric, numeric and SPACE characters) and C40 encodation scheme of
115
Data Matrix. The customer content field does not need to comply with this encoding.
▶ TBarCode uses the proper encoding if you select the “eBC_CMDM_Mailmark” symbology.
6.2.19 Singapure Post 4-State Customer Code (SinPost)
Singaporean Postcode – identical with Royal Mail 4 State (RM4SCC).
6.2.20 Singapore Post
The Singapore Post 4 State Customer Code is the same as the RM4SCC.
6.2.21 Swedish Postal Shipment Item ID
Symbology number:
118
Valid characters:
digit + ”SE”.
2 letters + 8 digits + 1 digit check
Quiet zone:
Module width:
Standard print ratio:
Ratio format:
Default check digit:
Postal Union)
(eCDUPU)
Symbol size:
Postal spec).
left/right: 10X
X >= 0.28mm
1:2:3:4:1:2:3:4
1B:2B:3B:4B:1S:2S:3S:4S
UPU check digit (Universal
H >= 9mm (for details see Swedish
This Code is based upon Code 128 and is used on Swedish Postal labels. The code consists of:
◼ 2-digit letter prefix
◼ 8-digit serial number
◼ 1-digit check digit (mod 11)
◼ "SE" as application identifier
The check digit is calculated according to weighted modulo 11 method for Universal Postal
Union (for 8 digits).
6.2.22 USPS Intelligent Mail® Barcode or IM® Barcode
116
Symbology number:
85
Valid characters:
11-digit ZIP Code.
“0”..”9”, 20 digits + 0, 5, 9, or
Quiet zone:
horizontal: 1/8 inch
Module width:
vertical: 1/25 inch
--
Standard print ratio:
Ratio format:
Default check digit:
specific).
Symbol size:
Print control:
1:1
1B:1S
Automatic (symbology
Up to 31 digits
C=IMB
This symbology is also known as
◼ OneCode 4CB
◼ USPS 4CB
◼ 4-CB
◼ 4-State Customer Barcode
◼ USPS OneCode Solution Barcode.
The following data is encoded:
◼ Barcode ID (1st digit: 0-9; 2nd digit: 0-4)
◼ Special services (range: 000-999)
◼ Customer ID (range: 000000-999999)
◼ Sequence number (range: 000000000-999999999)
◼ Delivery point ZIP code (0, 5, 9, or 11-digit ZIP code)
6.2.23 USPS Intelligent Mail® Package Barcode
117
Symbology number:
117
Valid characters:
“0”..”9” + FNC1, Routing Information:
0, 8, or 12 digits + Tracking Information: 22 to 26 digits.
Quiet zone:
horizontal: 1/8 inch
vertical: 1/25 inch
Module width:
--
Standard print ratio:
1:1
Ratio format:
1B:1S
Default check digit:
(eCDMod10IMPackage)
Modulo 10 (USPS IM Package)
Possible check digits:
User supplied
Symbol size:
22 to 34 digits
The barcode data consists of Routing Information and Tracking Information. The Routing
Information is optional. It is not printed in the human visible text and consists of:
◼ Postal Code Application Identifier (AI): always 420
◼ Destination ZIP Code (5 or 9 digits)
The tracking information is mandatory. It is printed in the human readable text 3 types of
tracking information exist: commercial mailer constructs, online constructs, and retail
constructs.
◼ Commercial Mailer Constructs:
≠ Channel Application Identifier (92 or 93)
≠ Service Type Code (3 digits)
≠ Mailer Identifier (6 or 9 digits)
≠ Serial Number (if Mailer Identifier has 9 digits: 7 or 11 digits, otherwise: 10 or 14 digits)
≠ Check Digit
◼ Online Constructs:
≠ Channel Application Identifier (94)
≠ Service Type Code (3 digits)
≠ Source Identifier (2 digits)
≠ Mailer Identifier (6 or 9 digits)
≠ Serial Number (5 or 8 digits)
≠ Check Digit
◼ Retail Constructs:
≠ Channel Application Identifier (95)
118
≠ Service Type Code (3 digits)
≠ Channel Identifier (1 digit)
≠ Device ID (6 digits)
≠ Julian Date (4 digits)
≠ Serial Number (5 digits)
≠ Check Digit
6.2.24 USPS Postnet 5
Symbology number:
40
Valid characters:
“0”..”9”, 5 digits + 1 check digit
Quiet zone:
horizontal: 1/8 inch
Module width:
Standard print ratio:
Ratio format:
Default check digit:
Symbol size:
Print control:
vertical: 1/25 inch
-1:1
1B:1S
POSTNET (eCDPostNet)
5 digits, 1 check digit
C=PSN5
This code is used by the United States Postal Services for mass-mailing applications. Encoded
are a 5 digit ZIP-code. The check digit is calculated automatically. It cannot be specified in the
input data.
The barcode height should be adjusted to 3.2 mms; the module width to 0.423 mms; usually no
plain text is displayed.
The newer USPS Intelligent Mail® Barcode or IM® Barcode (4-State Customer Barcode)
additionally includes a 20 digits tracking code.
6.2.25 USPS Postnet 6
119
Symbology number:
41
Valid characters:
“0”..”9”, 5 digits + 1 check digit
Quiet zone:
horizontal: 1/8 inch
Module width:
Standard print ratio:
Ratio format:
vertical: 1/25 inch
-1:1
1B:1S
Default check digit:
POSTNET (eCDPostNet)
Possible check digits:
User supplied
Symbol size:
5 digits, 1 check digit
Same as Postnet 5, but the check digit can be specified freely (the 6th digit). To be used only if
the check digit is already part of the input data.
6.2.26 USPS Postnet 9
Symbology number:
42
Valid characters:
“0”..”9”, 9 + 1 check digit
Quiet zone:
horizontal: 1/8 inch
Module width:
Standard print ratio:
Ratio format:
Default check digit:
Symbol size:
Print control:
vertical: 1/25 inch
-1:1
1B:1S
POSTNET (eCDPostNet)
9 digits, 1 check digit
C=PSN9
This code is used by the United States Postal Services for mass-mailing applications. Encoded
are a 5 digit ZIP-code and 4 additional digits. The check digit is computed automatically, it
cannot be specified in the input data.
The barcode height should be adjusted to 3.2 mms; the module width to 0.423 mms; usually no
plain text is displayed.
The newer USPS Intelligent Mail® Barcode or IM® Barcode (4-State Customer Barcode)
additionally includes a 20 digits tracking code.
6.2.27 USPS Postnet 10
120
Symbology number:
43
Valid characters:
“0”..”9”, 9 digits + 1 check digit
Quiet zone:
horizontal: 1/8 inch
Module width:
Standard print ratio:
Ratio format:
vertical: 1/25 inch
-1:1
1B:1S
Default check digit:
POSTNET (eCDPostNet)
Possible check digits:
User supplied
Symbol size:
9 digits, 1 check digit
Same as Postnet 9, but the check digit can be specified freely (the 10th digit). To be used only if
the check digit is already part of the input data.
6.2.28 USPS Postnet 11
Symbology number:
44
Valid characters:
digit
“0”..”9”, 11 digits + 1 check
Quiet zone:
horizontal: 1/8 inch
Module width:
Standard print ratio:
Ratio format:
Default check digit:
Symbol size:
Print control:
vertical: 1/25 inch
-1:1
1B:1S
POSTNET (eCDPostNet)
11 digits, 1 check digit
C=PSN11
This code is used by the United States Postal Services for mass-mailing applications. Encoded
are a 5 digit ZIP-code and 4 to 9 additional digits. The check digit is calculated automatically. It
cannot be specified in the input data.
The barcode height should be adjusted to 3.2 mms; the module width to 0.423 mms; usually no
plain text is displayed.
The newer USPS Intelligent Mail® Barcode or IM® Barcode (4-State Customer Barcode)
additionally includes a 20 digits tracking code.
6.2.29 USPS Postnet 12
121
Symbology number:
45
Valid characters:
digit
“0”..”9”, 11 digits + 1 check
Quiet zone:
horizontal: 1/8 inch
vertical: 1/25 inch
Module width:
--
Standard print ratio:
1:1
Ratio format:
1B:1S
Default check digit:
POSTNET (eCDPostNet)
Possible check digits:
User supplied
Symbol size:
1 digits, 1 check digit
Same as Postnet 11, but the check digit can be specified freely (the 12th digit). To be used only
if the check digit is already part of the input data.
6.3 2D Symbologies
6.3.1 Aztec Code
Symbology number:
92
Valid characters:
ASCII 0-127 + ISO 8859-1
Quiet zone:
left/right/ top/bottom: 0X
Module width:
--
Print ratio:
1:1
Ratio format:
1B:1S
Default check digit:
Size:
Print control:
Automatic (symbology specific).
-C=AZT
Aztec Code can encode from small to large amounts of data with user-selected percentages of
error correction. The symbol size adjusts automatically depending on the amount of input
data.
The input data is always analyzed and the appropriate encoding mode is chosen automatically.
Mode switching is done as required to produce the most efficient encoding.
6.3.1.1 Character Set
The default interpretation is ISO-8859-1 (Latin-1), which corresponds to ECI 000003.
The special FNC1 character is supported.
122
6.3.1.2 Layers and Core Type
The compact Aztec code core may be surrounded by 1 to 4 layers, producing symbols from
15×15 through 27×27 pixels. The full core version supports up to 32 layers (that are up to
151×151 pixels).
The core type and the number of layers are controlled by the size parameter.
Size Enumeration Size Pixel
Core Type
Layers
0
Automatically selected Automatically selected Automatically selected
1
15x15
Compact
1
2
19x19
Compact
2
3
23x23
Compact
3
4
27x27
Compact
4
5
31x31
Full
4
6
37x37
Full
5
7
41x41
Full
6
…
…
Full
…
33
151x151
Full
32
Table17 : Aztec Code Symbol Sizes
The full core 1-3 layer versions are not supported; instead the compact version is used.
6.3.1.3
The Maximum Data Capacity of Aztec Code
The Aztec Code specification defines the following:
Numerical data only: 3832
Bytes:
Text characters:
1914
3067 (only uppercase letters used [A..Z])
If you mix the character types the maximum data capacity cannot be predicted exactly (due to
internal compression and character set switching - this is by design).
If you use a combination of digits and text (lower & uppercase letters) the maximum data
capacity would be about 2500 characters - but this can vary due to your input data. If you want
to encode large data amounts we recommend using only capital letters or multiple symbols
(structured append).
6.3.1.4 Format
123
Beside the default format for general purposes Aztec Code supports GS1 and Industry formats.
The GS1 format adds a leading FNC1 in front of the encoded data to signal usage within the GS1
system. The FNC1 is not transmitted but has an influence to the symbology identifier.
If industry format is used, the internal data representation in the bar code will be <format
specifier> + FNC1 + <bar code data>. In that case the bar code reader transmits “]z2”
(symbology identifier for industry standards) followed by the<format specifier> and the data.
6.3.2 Codablock F
Symbology number:
74
Valid characters:
ASCII 0-127 + ISO 8859-1
Quiet zone:
left/right/ top/bottom: 10X
Module width:
X>=0.19mm
Print ratio:
1:2:3:4:1:2:3:4
Ratio format:
1B:2B:3B:4B:1S:2S:3S:4S
Default check digit:
Size:
Print control:
Automatic (symbology specific).
2 - 44 rows; 4 - 62 characters per row
C=CBF
Codablock F is de facto a “stacked” Code128 symbology. It is based upon Code 128 - each row
is a single Code 128 symbol extended with row indicator information and additional check
digits. The UCC/EAN/GS1 format indicator is supported.
6.3.3 Data Matrix
Symbology number:
71
Valid characters:
Alphanumeric (ASCII 0.. 255) and/or bytes
Quiet zone:
left/right/ top/bottom: 1X
Module width:
--
Print ratio:
1:1
Ratio format:
1B:1S
Default check digit:
Size:
Print control:
Automatic (symbology specific).
.001 till 14.0 square inch
C=DMX
Data Matrix is used for encoding large amounts of data and is also ideal for marking small
objects. The symbol size adjusts automatically depending on the amount of input data.
It was developed by RVSI Acuity CiMatrix for the Space Shuttle Program and then enhanced by
the NASA and the Symbology Research Center.
124
It is the de-facto standard symbology in the following areas:
◼ Automotive
◼ Aviation (SPEC2000)
◼ Pharmaceutical areas
TEC-IT’s Data Matrix implementation complies to
◼ ECC200
◼ ANSI/AIM BC11
◼ ISO/IEC 16022
◼ Department of Defense UID, MIL-STD-130L
◼ all other specifications that require ECC200.
6.3.3.1 Encoding Modes
The input data is always analyzed and the appropriate encoding mode is chosen automatically.
Mode switching is done as required to produce the most efficient encoding. Supported
encoding modes are
◼ BASE256
◼ C40
◼ TEXT
◼ ASCII.
6.3.3.2 Data Capacity
The data capacity depends on the format of the encoded data:
Format
Data Capacity
Numeric
3116
Alphanumeric 2355
Binary
1556
Table 18: Data Matrix Data Capacity
The maximum data capacity for binary data is equal to 1556 bytes using a Matrix of 144x144
dots. With a dot size of 0.35 mm minimum, you get a symbol size of 50.4 * 50.4 mm.
◼ The maximum data capacity for a matrix of 120x120 dots = 1048 Bytes.
◼ The maximum data capacity for a matrix of 96x96 dots = 694 Bytes.
In practice, with a hand-held scanner, you can scan sizes up to 96x96 dots without problems.
Symbol sizes of 120x120 dots are ok if you are using (very) good scanners. However – TEC-IT
recommends splitting up the 1 KB input data into 2 or more symbols.
125
6.3.3.3 Code Format
The following code formats are supported by TEC-IT software:
◼ Default/Standard
◼ UCC/EAN/GS1 (the internal data is prefixed with an FNC1; this format is used for the “GS1
Data Matrix”)
◼ Industry (a peculiar industry format, which adds FNC1 at 2nd position)
◼ Macro 05 (the data is prefixed with “[)>” + RS + “05” + GS and suffixed with RS + EOT)
◼ Macro 06 (the data is prefixed with “[)>” + RS + “06” + GS and suffixed with RS + EOT)
◼ Reader Programming (the barcode data is used to program the barcode reader)
6.3.3.4 DP Postmatrix (see6.3.3.6 GS1 Data Matrix
In order to generate a Data Matrix for GS1 applications you have to turn on theUCC/EAN/GS1
code format.
Figure 11: Data Matrix Properties
More information: GS1 Data Matrix Introduction and Technical Overview
◼Deutsche Post Premiumadress Data Matrixand 6.3.3.8 Deutsche Post Werbeantwort
Postmatrix)
The following unprintable characters are used with the Macro 05/06 modes:
◼ RS (Record Separator): 0x1e
◼ GS (Group Separator): 0x1d
◼ EOT (End of Transmission): 0x04.
6.3.3.5
Compatibility Options
The internal encoding mode switching is highly optimized and should be supported by all bar
code readers on the market. If you have problems with your image decoding solution, try the
following:
To provide compatibility with CAPTIVA, IBML (and maybe other) document scanning solutions
we introduced a compatible mode for these scanners (available from TBarCode V10.0.2).
▶ To turn on this compatibility mode, enter "C" into the format property (Data Matrix only).
6.3.3.6 GS1 Data Matrix
126
In order to generate a Data Matrix for GS1 applications you have to turn on theUCC/EAN/GS1
code format.
Figure 11: Data Matrix Properties
More information: GS1 Data Matrix Introduction and Technical Overview
6.3.3.7 Deutsche Post Premiumadress Data Matrix
In order to generate a Data Matrix for Deutsche Post Premiumadress use the property settings
below and follow the example.
◼ Enforce binary encoding (BASE256 mode)
◼ Data Matrix Size 22x22 (standard)
◼ Data Matrix Size 26x26 (enlarged)
◼ Module width 0.423 mm
▶ Make sure that the property "Translate Escape Sequences" is activated!
▶ The hexadecimal data must be converted in a TBarCode escape format. Before each
hexadecimal digit pair you have to set a “\x”!
▶ By using TBarCode select the Encoding mode “No conversion (Lower bytes only)” - see
“Advanced settings”.
The following example refers to the product TBarCode. If you want to generate a Data Matrix
with TFORMer or Barcode Studio the workflow is just the same.
Example:
Original data:
444541080D02540BE3FF0052232D242D000065000000010100015A31
Encoded data:
\x44\x45\x41\x08\x0D\x02\x54\x0B\xE3\xFF\x00\x52\x23\x2D\x24\x2D\x00\x00\x65\x00\x00\x00\x01\x01\x00\x01\x5A\x
Tab Barcode
127
Description Value
Barcode
type:
Data Matrix. The standard symbol size is 22x22 (see Figure 12). To adjust the symbol size, please click on t
Adjustbutton.
Barcode
data (112 \x44\x45\x41\x08\x0D\x02\x54\x0B\xE3\xFF\x00\x52\x23\x2D\x24\x2D\x00\x00\x65\x00\x00\x00\x01\x01\
characters):
Translate
escape
Make sure that this checkbox is activated.
sequences
Figure 12: Data Matrix Properties
Tab Appearance
Description
Value
Barcode size and module
width.
Use the entry Custom – Specify module with from the drop
down menu.
Module width [1/1000 mm]
Use the value 423.
Display error if barcode is
clipped.
Make sure that you have activated this checkbox.
6.3.3.8 Deutsche Post Werbeantwort Postmatrix
In order to generate a Postmatrix code for Deutsche Post Werbeantwort use the property
settings below and follow the example.
◼ Code format DP Postmatrix
◼ Postmatrix Size 22x22 (standard)
◼ Postmatrix Size 26x26 (enlarged)
◼ No Binary encoding mode (!)
◼ Module width 0.423 mm
The following example refers to the product TBarCode. If you want to generate a Data Matrix
with TFORMer or Barcode Studio the workflow is just the same.
128
Example:
Original data:
DEAW00A01Z690WA52345678000010205001099~JOB4711~850
Barcode Properties
Common
Value
Barcode type: Data Matrix
Data Matrix
Value
Code format:
DP Postmatrix
Symbol size:
26x26
Enforce binary encoding: Disabled (!)
Figure 13: Data Matrix Properties
6.3.4
DotCode
Symbology number:
115
Valid characters:
and/or bytes
Alphanumeric (ASCII 0.. 255)
Quiet zone:
left/right/ top/bottom: 3X
Module width:
--
Print ratio:
1:1
Ratio format:
1B:1S
Default check digit:
Size:
Automatic (symbology specific).
--
DotCode is 2D dot code symbology designed to be reliably readable when printed by highspeed inkjet or laser dot technologies.
The encoding modes of DotCode are based on the Code128 data encoding (with modes A, B,
and C) extended by a so called Binary Mode.
129
The default interpretation for DotCode data is ECI 000003 representing the Latin-I character set.
The DotCode symbology does not have absolute capacity limits, but a maximum symbol size of
124x124 dots is recommended.
6.3.4.1 Code Format
The following code format is supported by TEC-IT software:
◼ Auto Discriminate (If the data starts with 2 digits, barcode has GS1 format, otherwise generic
format is used)
◼ Generic Format (barcode data does not fulfill any special format, if it starts with 2 digits,
FNC1 is inserted)
◼ UCC/EAN/GS1 (the internal data must start with 2 digits and has to apply to a format of an
so-called application identifier)
◼ Industry (a peculiar industry format, which adds FNC1 at 2nd position)
◼ Macro 05 (the data is prefixed with “[)>” + RS + “05” + GS and suffixed with RS + EOT)
◼ Macro 06 (the data is prefixed with “[)>” + RS + “06” + GS and suffixed with RS + EOT)
◼ Macro 12 (the data is prefixed with “[)>” + RS + “12” + GS and suffixed with RS + EOT)
◼ Custom Macro (the data is prefixed with “[)>” + RS and suffixed with RS + EOT; the rest of the
format specifier has to be encoded by the user)
◼ Reader Programming (the barcode data is used to program the barcode reader)
The following unprintable characters are used with the Macro 05/06 modes:
◼ RS (Record Separator): 0x1e
◼ GS (Group Separator): 0x1d
◼ EOT (End of Transmission): 0x04.
6.3.5
Han Xin Code
Symbology number:
116
Valid characters:
Alphanumeric (ASCII 0.. 255) and/or bytes,
Chinese Characters (GB18030)
Quiet zone:
left/right/ top/bottom: 3X
Module width:
--
Print ratio:
1:1
Ratio format:
1B:1S
Default check digit:
Size:
Automatic (symbology specific).
--
Han Xin Code is a 2D matrix symbology which is used for encoding large amounts of data and
provides a special support for encoding Chinese characters (character set GB18030).
130
6.3.5.1 Data Capacity
The data capacity depends on the format of the encoded data:
Format
Data Capacity
Numeric
7827
Alphanumeric
4350
Binary
3261
Common Chinese in Region 1 or 2 2174
2-byte Chinese
1739
4-byte Chinese
1044
Table 19: Han Xin Code Data Capacity
The maximum data capacity for binary data is equal to 3261 bytes using a Matrix of 189x189
dots.
6.3.6
MaxiCode
Symbology number:
57
Valid characters:
Alphanumeric (ASCII 0.. 255) and/or bytes
Default Mode:
Mode-4 (standard symbol)
Quiet zone:
left/right/ top/bottom: 1X
Module width:
--
Print ratio:
n/a
Ratio format:
n/a
Default check digit:
Size:
Print control:
Automatic (symbology specific).
Fix: 1.11 x 1.054 inch
C=MXC
MaxiCode is in use (and was invented) by UPS®.
MaxiCode represents data by drawing hexagonal items, which are arranged around a circular
center (a so called "Bull's Eye"). Different encoding modes for including postal information
(SCM) can be adjusted: UPS Modes are Mode 2 (US Carrier) and Mode 3 (International Carrier).
The printing size is usually set to a fixed value. If you want to change the size of the symbol,
adjust a custom module width (default is 0.870 mm).
131
6.3.6.1 Data Capacity
The data capacity depends on the format of the encoded data:
Format
Data Capacity Characters
Numeric
138
Alphanumeric 93
0-9
0-9 A-Z (uppercase)
Table 20: Maxi Code Data Capacity
The maximum data capacity of one symbol is 93 alphanumeric characters. By using the UPS®
MaxiCode compression software you can extend this value to about 100 characters. The actual
quantity of the utilizable data depends on the selected mode, how often special characters are
used, whether numeric sequences are used (which can be compressed) and the level of error
correction.
With Structured Append you can divide larger quantities of data into several MaxiCode symbols
– they are joined by the scanner when being read.
6.3.6.2 Modes
The internal data structure is regulated by different "modes". For standard purposes, data can
be encoded with two different error correction levels:
◼ Mode 4 - SEC / Standard Error Correction
◼ Mode 5 - EEC = Enhanced E.C.).
The modes for "Structured Carrier Message" (SCM) were defined by the parcel transport service
UPS®. If you want to use MaxiCode for UPS, please use these SCM modes.
◼ Mode 2 - SCM numeric
◼ Mode 3 - SCM alphanumeric
6.3.6.3 MaxiCode & UPS®
In order to generate a MaxiCode symbol for UPS®, follow the steps below. The following sample
uses the properties of the barcode software component TBarCode OCX.
Select MaxiCode Mode
▶ Please use mode 2 or 3 (SCM) depending on your postal code. UPS MaxiCode compression
works only for these SCM modes.
If you want to encode a numeric Postcode (USA) set the mode to "SCM numeric" (Property
MaxiCode.Mode = 2). If you want to use letters in the Postcode (e.g. “D12345” for German PLZ)
choose mode SCM alphanumeric (Property MaxiCode.Mode = 3).
AdjustSCM Fields
132
◼ Check "Use preamble" (property MaxiCode.Preamble)
◼ Enter the date into the field preamble date (property MaxiCode.Date, refer to “Message
Header / Transportation Data” in the UPSâ manual)
◼ Enter Service Class (property MaxiCode.ServiceClass), Country Code (property
MaxiCode.CountryCode) and Postal Code (property MaxiCode.PostalCode) into the according
text boxes. (refer to Postal Code, Country Code, Class of Service in the UPSâ manual)
Alternatively you can pass the values for the SCM fields as shown in following section "Setting
SCM Parameters in the Barcode Data itself"
Adjust Data String
◼ All other UPSâ fields must be entered in 'Encoded data' (property Text) separated by Gs. At
the end of the text Rs and Eot must be added.
Example: the text could look like this:
1Z12345677GsUSPNGs123556Gs089GsGs1/1\Gs0GsYGsGsSALT LAKE CITYGsUTRsEot
◼ Then replace all control characters (Gs, Rs, Eot) with their hexadecimal encoding (\xnn):
Gs à \x1d
Rs à\x1e
Eot à \x04.
◼ Please refer to Escape Sequences for an overview of available escape sequences.
The text should now look like:
1Z12345677\x1dUSPN\x1d123556\x1d089\x1d\x1d1/1\x1d10\x1dY\x1d\x1dSALT LAKE
CITY\x1dUT\x1e\x04
◼ This corresponds to the UPSâ Data fields: à Tracking Number, SCAC, UPS Account Number,
Julian Day of Collection, place holder for Shipment ID Number, Package n/x, Package Weight,
Address Validation, Place Holder for Ship To Street Address, Ship To City, Ship To State, End Of
Transmission.
◼ At last check Translate escape sequences (property EscapeSequences). This is necessary to
translate the hexadecimal codes (e.g. \x1d) into the special characters “Rs”, “Gs” and “Eot”.
Setting SCM Parameters in the Barcode Data itself
The parameters for SCM (Structured Carrier Message - used for UPSâ) can be set directly in the
barcode data string. This allows complete control of all necessary parameters in one step.
Enable extracting of SCM data:
◼ Set the Format property of TBarCode to "S"
◼ Set the EscapeSequences property to True.
The values for the properties postal code, country code, service class, preamble and date are
then extracted from the barcode data (Text property). Values from the text string overdrive the
133
belonging properties in the barcode component.
The Text property should contain the whole data string according to UPS standard (see
following picture) including preamble, date, postal code, country code, and service class.
Special characters and separators must be replaced by escape sequences (also refer to Escape
Sequences).
Gs à\x1d
Rs à\x1e
Eot à\x04.
Figure 14: MaxiCode UPS Encoding
6.3.7 MicroPDF417
134
Symbology number:
84
Valid characters:
Alphanumeric and/or bytes
Quiet zone:
left/right: 1X
Module width:
--
Print ratio:
1:2:3:4:5:6:1:2:3:4:5:6
Ratio format:
1B:2B:3B:4B:5B:6B:1S:2S:3S:4S:5S:6S
Default check digit:
Size:
Automatic (symbology specific).
--
Print control:
C=MPDF
TBarCode/X control sequence
For V1.x:
$_tbcs b84 dThis is a MicroPDF417$_tbce
For V2.x:
$_tbcs -b84 –d"This is a MicroPDF417"$_tbce
This stacked 2D symbology is used to encode large quantities of data.
The input data is always analyzed and the appropriate encoding mode is chosen automatically.
Mode switching is done as required to produce the most efficient encoding.
6.3.8 Micro QR-Code
Symbology number:
97
Valid characters:
Alphanumeric and/or bytes, Kanji character set
Quiet zone:
left/right/ top/bottom: 2X or 4X
Module width:
--
Print ratio:
1:1
Ratio format:
1B:1S
Default check digit:
Size:
Print control:
Automatic (symbology specific).
-C=MQR
This 2D symbology is a small variant of QR-Code with a reduced number of overhead modules
and a restricted range of sizes. It was developed for fast readability (QR = Quick Response) by
Denso. The symbol size adjusts automatically depending on input data.
Micro QR-Code has 4 different symbol sizes (M1-M4). The smallest version (=size) M1 is
restricted to numeric data and error detection, M2 may contain also alphanumeric values, and
M3 and M4 may use the whole range of the QR-Code character sets (bytes, Kanji).
The maximum amount of data is 35 numeric, 21 alphanumeric, 15 byte, or 9 Kanji characters, in
conjunction with the lowest error correction level.
135
6.3.9 PDF417
Symbology number:
55
Valid characters:
Alphanumeric (ASCII 0.. 255)
Quiet zone:
left/right: 2X
Module width:
--
Print ratio:
1:2:3:4:5:6:7:8:1:2:3:4:5:6
Ratio format:
1S:2S:3S:4S:5S:6S
1B:2B:3B:4B:5B:6B:7B:8B:
Default check digit:
Size:
Automatic (symbology specific).
X >= 0.19 mm
Print control:
C=PDF
This (stacked) 2D symbology was invented by Symbol Technologies. It is used to encode large
quantities of data. It is the de-facto 2D standard symbology in the automotive industry.
The symbol is divided into rows and columns. TEC-IT software adjusts the size automatically
depending on the amount of input data. A data density of up to 900 characters per square inch
is possible.
The input data is always analyzed and the appropriate encoding mode is chosen automatically.
Mode switching is done as required to produce the most efficient encoding.
6.3.9.1 Data Capacity
The data capacity depends on the format of the encoded data. The following limits can only be
reached with error correction level 0.
Format
Data Capacity
Characters
Numeric
2710 characters 0-9
Alphanumeric 1850 characters 0-9 A-Z (uppercase)
Binary
1108 bytes
Default encoding: CP437
Table 21: PDF417 Data Capacity
If you mix the character types the maximum data capacity cannot be predicted exactly (due to
internal compression and character set switching - this is by design).
If you use a combination of digits and text (lower & uppercase letters) the maximum data
capacity would be about 1100 to 1200 characters - but this can vary due to your input data. If
you want to encode large data amounts we recommend using only capital letters or multiple
symbols (structured append).
6.3.9.2How to optimize PDF417 for FAX?
136
Adjust the resolution of the generated barcode to 200 dpi (FAX devices are usually using 200
dpi). Follow the instructions in chapter A.4Optimize Barcode for the Output Device Resolution.
Make sure the row-height of the PDF417 is at least 3 times the module width.
6.3.10 PDF417 Truncated
Symbology number:
56
Valid characters:
bytes
Alphanumeric (ASCII 0.. 255) and/or
Quiet zone:
left/right: 2X
Module width:
--
Print ratio:
1:2:3:4:5:6:7:8:1:2:3:4:5:6
Ratio format:
1S:2S:3S:4S:5S:6S
1B:2B:3B:4B:5B:6B:7B:8B:
Default check digit:
Size:
Automatic (symbology specific).
--
This (stacked) 2D symbology is used to encode large quantities of data.
The symbol is divided into rows and columns. TEC-IT software adjusts the size automatically
depending on the amount of input data. A data-density of up to 900 characters per square inch
is possible.
6.3.11 QR-Code (Model 2)
Symbology number:
58
Valid characters:
Alphanumeric and/or bytes, Kanji character set
Quiet zone:
left/right/ top/bottom: 4X
Module width:
--
Print ratio:
1:1
Ratio format:
1B:1S
Default check digit:
Size:
Print control:
Automatic (symbology specific).
-C=QRC
Based upon standard: AIM International ITS/97-001 and ISO/IEC 18004:2000
This 2D symbology is used to encode large quantities of data and was developed for fast
readability (QR = Quick Response Code) by Denso. The symbol size adjusts automatically
depending on input data. Special industry formats are supported.
The default interpretation for QR-Code is ECI 000020 representing the JIS8 and Shift JIS
137
character sets. For Latin-1 based character sets refer to QR-Code 2005 (see section 6.3.11.4).
6.3.11.1 Kanji and Chinese Compaction
This symbology supports the compaction of Kanji characters and (in newer specifications) also
the compaction of Chinese characters. The compaction of Kanji or Chinese characters can be
activated in TEC-IT software – when used, it must be ensured that the input data complies with
the Shift JIS X 02 (Japanese) or the GB 2312 (Simplified Chinese) character set.
6.3.11.2 QR–Code Capacity
The data capacity depends on the format of the encoded data:
Format
Data Capacity
Characters
Numeric
7089 characters 0-9
Alphanumeric 4296 characters 0–9 A–Z (upper-case) space $ % * + - , . / :
Binary
2953 bytes
Default encoding: ISO 8859-1 (QR Code 2005)
Kanji
1817 characters Shift JIS X 0208
Table 22: QR Code Data Capacity
Maximum data capacity for binary data is 2953 bytes using a matrix of 177x177 dots. As an
example the symbol version 22 (104x104 dots) can encode approximately 1 KB of data using a
low error correction level. The resulting symbol size is about = 37x37 mm when a dot-size of
0.35 mm is used.
The input data is always analyzed and the appropriate encoding mode is chosen automatically.
Mode switching is done as required to produce the most efficient encoding.
6.3.11.3 QR–Code Creation Speed
QR-Code is a quite complex symbology and may take a lot of CPU-time when encoding a very
large amount of data. You could speed up the encoding process by
▶ Set the QR-Code mask pattern to a constant value. Changing this setting could affect
readability.
▶ Set the symbol size to a constant value (property “QRCode.Version”) if the symbol should
have always the same size.
▶ Set the error correction level to "low" (“QRCode.ECLevel”). Changing this setting could
affect readability.
▶ Minimize computing steps: set the configuration properties of TBarCode only one time at
startup of your program, and do only change the text property for each barcode.
6.3.11.4 Codepages (Character Set)
QR Code was originally developed for Japanese bar code applications. The supported
character set of QR Code Model 2 consists of:
138
◼ JIS X 0208 - http://en.wikipedia.org/wiki/JIS_X_0208
◼ JIS X 0201 - http://en.wikipedia.org/wiki/JIS_X_0201
SHIFT JIS / CP932 contains both of these character sets and is the Multi Byte character set used
by TBarCodefor QR-Code.
CP932 table: http://msdn.microsoft.com/de-at/goglobal/cc305152(en-us).aspx
The new ISO/IEC 18004:2006 standard for “QR-Code 2005” defines ISO-8859-1 (Latin-1) as
default character set in Byte mode!
◼ Latin-1 - http://en.wikipedia.org/wiki/ISO/IEC_8859-1
So the “old” QR-Code uses Shift-JIS and the new QR-Code 2005 uses Latin-1 as default
character set. QR-Code 2005 is available in TBarCode V10 and later.
6.3.11.5 Encoding Special Latin-1 Characters
If you want to encode special Latin-1 characters such as the “ß” (sharp s) you come to the
problem that the SHIFT JIS table does not contain the “ß” (sharp s) character. So with QR Code
1997/2000 version you cannot encode these special Latin-1 characters in the default encoding.
▶ Encoding the full Latin-1 character set is supported in QR-Code 2005.
Using UTF-8 or ISO-8859-1
One possibility to encode “sharp s” would be to switch to ISO-8859-1 (Latin-1) or UTF-8
encoding.
Disadvantage
Using other code pages or other character sets as the default character set of a 2D bar code can
lead to problems on the decoding stage. Barcode readers try to decode the QR Code data by
using the default character set (which is SHIFT JIS for QR-Code 97/2000).
Workarounds
You could use UTF-8 or ISO-8859-1 in closed applications. If the data is transmitted in binary
form (e.g. a serial bar code reader or an image scanner will transmit the data as sequence of
Bytes) you can decode the bar code data as UTF-8 or Latin-1 format by the software, which
receives the data.
You may also have luck with intelligent image decoding software (e.g. ZXing) which tries to find
out if Latin-1, UTF-8 or Shift JIS is used by auto detection (also SmartPhone reader apps will do
that). If you don’t have a closed application or don’t have control about the bar code decoder,
this workaround cannot be used.
Note about ECI sequences
Theoretically QR Code can encode data in an user selectable character set. By design of QR
Code so called “Extended Channel Interpretation” code words can be used to indicate the
character set used for the subsequent data. ECI is part of QR-Code specification and is
supported by TBarCode Escape Sequences. The problem is that bar code decoders often ignore
ECI and so they are useless.
139
If you want to use UTF-8 without ECI’s you could try to indicate UTF-8 format by prefixing the
data with an UTF-8 byte order mark at the start (EF BB BF). But there is no standard for this and
you have to verify if your bar code reader / decoding software recognizes this marker.
More information in our FAQ
http://www.tec-it.com/en/support/faq/tbarcode/barcode-dll.aspx
6.3.12 QR-Code 2005
Symbology number:
58
Valid characters:
Alphanumeric and/or bytes, Kanji character set
Quiet zone:
left/right/ top/bottom: 4X
Module width:
--
Print ratio:
1:1
Ratio format:
1B:1S
Default check digit:
Size:
Automatic (symbology specific).
--
Print control:
C=QR2
Based upon standard: ISO/IEC 18004:2006
QR-Code 2005 is closely similar to QR Code Model 2 and, in its QR Code format, differs only in
the addition of the facility for symbols to appear in a mirror image orientation, for reflectance
reversal (light symbols on dark backgrounds) and the option for specifying alternative
character sets to the default.
The default interpretation for QR-Code 2005 is ECI 000003 representing the ISO/IEC 8859-1
character set.
QR-Code 2005 is the form of the symbology recommended for new and open systems
applications.
6.4
HIBC – Health Industry Bar Code
HIBC bar codes are commonly used by the health industry. HIBC standards do not really
describe unique symbologies, but a family of data structures. These data structures may be
represented by several symbologies.
There are two categories of HIBC:
◼ Label Identification Code (LIC) – specified by the Supplier Labeling Standard
◼ Provider Applications Standard (PAS)
6.4.1
Supplier Labeling Standard Formats
The Supplier Labeling Standard is used for all HIBC LIC bar codes. For a full specification please
140
refer to the document Health Industry Bar Code: Supplier Labeling Standard (HIBC SLS)
ANSI/HIBC 2.2 – 2006. It consists of a Primary and a Secondary data structure which may be
encoded together in bar code or split into 2 single symbols.
The Primary Data Structure is specified as follows
+IIIIP*UL
With:
Character Description
Data Type
Length
+
HIBC Supplier Labeling Flag '+'
“+”
1
I
Label Identification Code (LIC)
Alphanumeric, first
character is a letter
4
P*
PCN (Labelers Product or Catalog)
Alphanumeric
1 - 13
U
Unit of Measure ID
Numeric
1
C
Check Digit (mod 43) – also used as Link Character
in the Secondary Data Structure.
1
Table 23: HIBC LIC - Primary Format
The Secondary Data Structure is defined as
+R*Q*D*B*LC
With:
Character Description
Data Type
Length
+
HIBC Supplier Labeling Flag '+'
“+”
1
R*
Quantity/Date Reference Identifier
“$”, ”$$”, or 5
digits
1, 2, or
5
Q*
Quantity Field
Numeric
0, 3, or
6
D*
Date Field
Numeric
0, or 59
B*
Lot/Batch/Serial Number
Alphanumeric 0-13
L
Link Character – conforms to the check digit in the Primary
Data Structure
1
C
Check Digit (mod 43)
1
141
Table 24: HIBC LIC - Secondary Format
The Combined Data Structure (Primary and Secondary data structure in one piece) is defined
as
+IIIIP*U/R*Q*D*B*C
When the fields are as described above and a separator character (“/”) is inserted between the
Primary and the Secondary data structure.
6.4.2
Provider Application Standard Formats
The Provider Applications Standard is used for all HIBC PAS bar codes. For a full specification
please refer to the document Health Industry Bar Code: Provider Applications Standard
ANSI/HIBC 1.2 – 2006. It may consist of a Single or Split Data Field Format. The split format may
be encoded together in one bar code or split into 2 single symbols.
The Single Data Structure is specified as follows
+/F*G*DDDDDC1
With:
Character Description
Data Type
Length
+/
HIBC Provider Applications Standard Flag
“+/”
2
F*
„Where“ Flag
Alpha
1 or 3
G*
„What“ Flag
Alpha
1 or 3
D
Application Data
Alphanumeric 1-15
C1
Check Digit (mod 43) - equal to the "Link Character" of the
Second Data Structure.
Table 25: HIBC PAS – Single/First Data Structure
The First Data Structure is specified as follows
+/1F*G*DDDDC1
It is much the same as the Single Data Structure but has “1” as prefix.
The Second Data Structure is defined as
+/2DDDDC1C2
With:
1
142
Character Description
Data Type
Length
+/
HIBC Provider Applications Standard Flag
“+/”
2
2
"2" indicates that this is the second data structure
“2”
1
D
Application Data
Alphanumeric 1-15
C1
Check Digit (mod 43) - conforms to the check digit in the First
Data Structure.
1
C2
Check Digit (mod 43) - equal to the "Link Character" of the
Second Data Structure.
1
Table 26: HIBC PAS – Second Data Structure
The Combined Data Structure (First and second data structure in one piece) is defined as
+/F*G1*D1D1D1/G2*D2D2D2C
With:
Character Description
Data Type
Length
+/
HIBC Provider Applications Standard Flag
“+/”
2
F*
„Where“ Flag
Alpha
1 or 3
G1*
„What“ Flag for D1
Alpha
1 or 3
D1
First Application Data
Alphanumeric 1-15
/
Separator Character between First and Second Data
Structure
“/”
1
G2*
„What“ Flag for D2
Alpha
1 or 3
D2
Second Application Data
Alphanumeric 1-15
C
Check Digit (mod 43
Table 27: HIBC PAS – Combined Data Structure
In following you find a list of the bar code symbologies that are able to encode HIBC.
6.4.3
HIBC LIC 128
1
143
Symbology number:
98
Valid characters:
“0”..”9”, “A”..”Z”, “-“, “.”,
Space, “*”, “$”, “/”, “+”, “%”
Quiet zone:
Module width:
left/right: 10X, min. ¼ inch
X >= 0.19 mm
Standard print ratio:
Ratio format:
1:2:3:4:1:2:3:4
1B:2B:3B:4B:1S:2S:3S:4S
Default check digit:
Symbol size:
Modulo 43 (eCDMod43)
--
HIBC LIC 128 is based on the symbology Code 128. The data format corresponds to the HIBC LIC
Format described above. An additional modulo 43 check digit is required.
6.4.4
HIBC LIC 39
Symbology number:
99
Valid characters:
“0”..”9”, “A”..”Z”, “-“, “.”,
Space, “*”, “$”, “/”, “+”, “%”
Quiet zone:
Module width:
Standard print ratio:
Ratio format:
Default check digit:
left/right: 10X, min. ¼ inch
X >= 0.19 mm
1:3:1:3
1B:2B:1S:2S
Modulo 43 (eCDMod43)
Symbol size:
H>=15% of L (H>=6.3 mm!)
H: Height of the barcode without human readable text
L: width of the barcode
HIBC LIC 39 is based on the symbology Code 39. The data format corresponds to the HIBC LIC
Format described above. An additional modulo 43 check digit is required.
6.4.5
HIBC LIC Data Matrix
144
Symbology number:
102
Valid characters:
“%”
“0”..”9”, “A”..”Z”, “-“, “.”, Space, “*”, “$”, “/”, “+”,
Quiet zone:
left/right/ top/bottom: 1X
Module width:
--
Print ratio:
1:1
Ratio format:
1B:1S
Default check digit:
Size:
Modulo 43 (eCDMod43)
.001 till 14.0 square inch
HIBC LIC Data Matrix is based on the 2D symbology Data Matrix. The data format corresponds
to the HIBC LIC Format described above. An additional modulo 43 check digit is required.
6.4.6
HIBC LIC QR-Code
Symbology number:
104
Valid characters:
“%”
“0”..”9”, “A”..”Z”, “-“, “.”, Space, “*”, “$”, “/”, “+”,
Quiet zone:
left/right/ top/bottom: 4X
Module width:
--
Print ratio:
1:1
Ratio format:
1B:1S
Default check digit:
Size:
Modulo 43 (eCDMod43)
--
HIBC LIC QR-Code is based on the 2D symbology QR-Code. The data format corresponds to the
HIBC LIC Format described above. An additional modulo 43 check digit is required.
6.4.7
HIBC LIC PDF417
145
Symbology number:
106
Valid characters:
“+”, “%”
“0”..”9”, “A”..”Z”, “-“, “.”, Space, “*”, “$”, “/”,
Quiet zone:
left/right: 2X
Module width:
--
Print ratio:
1:2:3:4:5:6:7:8:1:2:3:4:5:6
Ratio format:
1S:2S:3S:4S:5S:6S
1B:2B:3B:4B:5B:6B:7B:8B:
Default check digit:
Size:
Modulo 43 (eCDMod43)
X >= 0.19 mm
HIBC LIC PDF417 is based on the 2D symbology PDF417. The data format corresponds to the
HIBC LIC Format described above. An additional modulo 43 check digit is required.
6.4.8
HIBC LIC MicroPDF417
Symbology number:
108
Valid characters:
“+”, “%”
“0”..”9”, “A”..”Z”, “-“, “.”, Space, “*”, “$”, “/”,
Quiet zone:
left/right: 1X
Module width:
--
Print ratio:
1:2:3:4:5:6:1:2:3:4:5:6
Ratio format:
1B:2B:3B:4B:5B:6B:1S:2S:3S:4S:5S:6S
Default check digit:
Size:
Modulo 43 (eCDMod43)
--
HIBC LIC MicroPDF417 is based on the 2D symbology MicroPDF417. The data format
corresponds to the HIBC LIC Format described above. An additional modulo 43 check digit is
required.
6.4.9
HIBC LIC Codablock F
146
Symbology number:
110
Valid characters:
“+”, “%”
“0”..”9”, “A”..”Z”, “-“, “.”, Space, “*”, “$”, “/”,
Quiet zone:
left/right/ top/bottom: 10X
Module width:
X>=0.19mm
Print ratio:
1:2:3:4:1:2:3:4
Ratio format:
1B:2B:3B:4B:1S:2S:3S:4S
Default check digit:
Size:
Modulo 43 (eCDMod43)
2 - 44 rows; 4 - 62 characters per row
HIBC LIC Codablock F is based on the stacked symbology Codablock F. The data format
corresponds to the HIBC LIC Format described above. An additional modulo 43 check digit is
required.
6.4.10 HIBC PAS 128
Symbology number:
100
Valid characters:
“0”..”9”, “A”..”Z”, “-“, “.”,
Space, “*”, “$”, “/”, “+”, “%”
Quiet zone:
Module width:
left/right: 10X, min. ¼ inch
X >= 0.19 mm
Standard print ratio:
Ratio format:
1:2:3:4:1:2:3:4
1B:2B:3B:4B:1S:2S:3S:4S
Default check digit:
Symbol size:
Modulo 43 (eCDMod43)
--
HIBC PAS 128 is based on the symbology Code 128. The data format corresponds to the HIBC
PAS Format described above. An additional modulo 43 check digit is required.
6.4.11 HIBC PAS 39
147
Symbology number:
101
Valid characters:
“*”, “$”, “/”, “+”, “%”
“0”..”9”, “A”..”Z”, “-“, “.”, Space,
Quiet zone:
Module width:
Standard print ratio:
Ratio format:
Default check digit:
left/right: 10X, min. ¼ inch
X >= 0.19 mm
1:3:1:3
1B:2B:1S:2S
Modulo 43 (eCDMod43)
Symbol size:
H>=15% of L (H>=6.3 mm!)
H: Height of the barcode without human readable text
L: width of the barcode
HIBC PAS 39 is based on the symbology Code 39. The data format corresponds to the HIBC PAS
Format described above. An additional modulo 43 check digit is required.
6.4.12 HIBC PAS Data Matrix
Symbology number:
103
Valid characters:
“%”
“0”..”9”, “A”..”Z”, “-“, “.”, Space, “*”, “$”, “/”, “+”,
Quiet zone:
left/right/ top/bottom: 1X
Module width:
--
Print ratio:
1:1
Ratio format:
1B:1S
Default check digit:
Size:
Modulo 43 (eCDMod43)
.001 till 14.0 square inch
HIBC PAS Data Matrix is based on the 2D symbology Data Matrix. The data format corresponds
to the HIBC PAS Format described above. An additional modulo 43 check digit is required.
6.4.13 HIBC PAS QR-Code
148
Symbology number:
105
Valid characters:
“%”
“0”..”9”, “A”..”Z”, “-“, “.”, Space, “*”, “$”, “/”, “+”,
Quiet zone:
left/right/ top/bottom: 4X
Module width:
--
Print ratio:
1:1
Ratio format:
1B:1S
Default check digit:
Size:
Modulo 43 (eCDMod43)
--
HIBC PAS QR-Code is based on the 2D symbology QR-Code. The data format corresponds to the
HIBC PAS Format described above. An additional modulo 43 check digit is required.
6.4.14 HIBC PAS PDF417
Symbology number:
107
Valid characters:
“+”, “%”
“0”..”9”, “A”..”Z”, “-“, “.”, Space, “*”, “$”, “/”,
Quiet zone:
left/right: 2X
Module width:
--
Print ratio:
1:2:3:4:5:6:7:8:1:2:3:4:5:6
Ratio format:
1S:2S:3S:4S:5S:6S
1B:2B:3B:4B:5B:6B:7B:8B:
Default check digit:
Size:
Modulo 43 (eCDMod43)
X >= 0.19 mm
HIBC PAS PDF417 is based on the 2D symbology PDF417. The data format corresponds to the
HIBC PAS Format described above. An additional modulo 43 check digit is required.
6.4.15 HIBC PAS MicroPDF417
149
Symbology number:
109
Valid characters:
“+”, “%”
“0”..”9”, “A”..”Z”, “-“, “.”, Space, “*”, “$”, “/”,
Quiet zone:
left/right: 1X
Module width:
--
Print ratio:
1:2:3:4:5:6:1:2:3:4:5:6
Ratio format:
1B:2B:3B:4B:5B:6B:1S:2S:3S:4S:5S:6S
Default check digit:
Size:
Modulo 43 (eCDMod43)
--
HIBC PAS MicroPDF417 is based on the 2D symbology MicroPDF417. The data format
corresponds to the HIBC PAS Format described above. An additional modulo 43 check digit is
required.
6.4.16 HIBC PAS Codablock F
Symbology number:
111
Valid characters:
“+”, “%”
“0”..”9”, “A”..”Z”, “-“, “.”, Space, “*”, “$”, “/”,
Quiet zone:
left/right/ top/bottom: 10X
Module width:
X>=0.19mm
Print ratio:
1:2:3:4:1:2:3:4
Ratio format:
1B:2B:3B:4B:1S:2S:3S:4S
Default check digit:
Size:
Modulo 43 (eCDMod43)
2 - 44 rows; 4 - 62 characters per row
HIBC PAS Codablock F is based on the stacked symbology Codablock F. The data format
corresponds to the HIBC PAS Format described above. An additional modulo 43 check digit is
required.
6.5 GS1 DataBar Symbologies (RSS Codes)
The sample control sequences refer to the following TEC-IT products only: TBarCode/X and
TBarCode Embedded (SEH ISD 300).
6.5.1
GS1 DataBar (RSS-14)
150
Symbology number (:
Valid characters:
Quiet zone:
recommended)
29
“0”..”9”
none required (1X
Module width:
--
Print ratio:
1:2:3:4:5:6:7:8:9:1:2:3:4:5:6:7:8:9
Ratio format:
1B:2B:3B:4B:5B:6B:7B:8B:9B:
1S:2S:3S:4S:5S:6S:7S:8S:9S
Default check digit:
EAN 14 (eCDEAN14)
Possible check digits:
User supplied
Symbol size:
encoded automatically
Print control:
13 digits, 1 check digit, AI 01 is
C=R
GS1 DataBar is used to encode the GTIN (Global Trade Item Number) with Application identifier
(AI) “01“. The GTIN consists of a packaging indicator (0..9) followed by a 12 digit number (taken
from the EAN-13 article number system) followed by a check digit. The check digit on the 14th
position is computed automatically if not provided in the input data.
The height of the symbol should be at least 33X in order to support omnidirectional scanning (X
= module width). TEC-IT software prefixes the barcode data with the AI “01” automatically - do
not provide the AI 01 with your input data.
6.5.2
GS1 DataBar Truncated (RSS-14 Truncated)
Symbology number:
78
Valid characters:
“0”..”9”
Quiet zone:
recommended)
none required (1X
Module width:
--
Print ratio:
1:2:3:4:5:6:7:8:9:1:2:3:4:5:6:7:8:9
Ratio format:
1B:2B:3B:4B:5B:6B:7B:8B:9B:
1S:2S:3S:4S:5S:6S:7S:8S:9S
Default check digit:
EAN 14 (eCDEAN14)
Possible check digits:
User supplied
Symbol size:
encoded automatically
Print control:
13 digits, 1 check digit, AI 01 is
C=RT
This symbology is similar to GS1 DataBar but the height should be at least 13X. Omni-
151
directional scanning may not be possible.
6.5.3
GS1 DataBar Limited (RSS Limited)
Symbology number:
30
Valid characters:
“0”..”9”
Quiet zone:
1X left, 5X right
Module width:
--
Print ratio:
1:2:3:4:5:6:7:8:9:1:2:3:4:5:6:7:8:9
Ratio format:
1B:2B:3B:4B:5B:6B:7B:8B:9B:
1S:2S:3S:4S:5S:6S:7S:8S:9S
Default check digit:
EAN 14 (eCDEAN14)
Possible check digits:
User supplied
Symbol size:
13 digits, 1 check digit
Print control:
C=RL
This symbology is similar to GS1 DataBar, but it is smaller in size and limited to a packaging
indicator (first digit) 0 or 1.
6.5.4
GS1 DataBar Stacked (RSS-14 Stacked)
Symbology number:
79
Valid characters:
“0”..”9”, 13 digits + 1 check digit
Quiet zone:
none required (1X recommended)
Module width:
--
Print ratio:
1:2:3:4:5:6:7:8:9:1:2:3:4:5:6:7:8:9
Ratio format:
1B:2B:3B:4B:5B:6B:7B:8B:9B:
1S:2S:3S:4S:5S:6S:7S:8S:9S
Default check digit:
EAN 14 (eCDEAN14)
Possible check digits:
User supplied
Size:
Print control:
-C=RS
This symbology is similar to GS1 DataBar, but it is split into 2 rows to make the symbol smaller.
It is used for pharmaceutical packaging. Omni-directional scanning is not possible.
6.5.5 GS1 DataBar Stacked Omni directional (RSS-14 Stacked
Omni directional)
152
Symbology number:
80
Valid characters:
“0”..”9”, 13 digits + 1 check digit
Quiet zone:
none required (1X recommended)
Module width:
--
Print ratio:
1:2:3:4:5:6:7:8:9:1:2:3:4:5:6:7:8:9
Ratio format:
1B:2B:3B:4B:5B:6B:7B:8B:9B:
1S:2S:3S:4S:5S:6S:7S:8S:9S
Default check digit:
EAN 14 (eCDEAN14)
Possible check digits:
User supplied
Size:
--
Print control:
C=RO
This symbology is similar to the GS1 DataBar Stacked and supports omnidirectional scanning.
6.5.6
GS1 DataBar Expanded (RSS Expanded)
Symbology number:
31
Valid characters:
646 character set
“A”..”Z”, “a”..”z”, “0”..”9” + ISO
Quiet zone:
recommended)
none required (1X
Module width:
--
Print ratio:
1:2:3:4:5:6:7:8:9:1:2:3:4:5:6:7:8:9
Ratio format:
1B:2B:3B:4B:5B:6B:7B:8B:9B:
1S:2S:3S:4S:5S:6S:7S:8S:9S
Default check digit:
None (eCDNone).
Possible check digits:
14 (eCDEAN14)
Modulo 10 (eCDMod10). EAN-
Size:
Numeric: 74 digits
Alphanumeric: 41 characters
Print control:
C=RE
This is a variable length symbology. It encodes up to 74 numeric or 41 alphabetic characters.
Data should be encoded with Application Identifiers (AIs). Omni-directional scanning is
possible.
6.5.7 GS1 DataBar Expanded Stacked (RSS Expanded
Stacked)
153
Symbology number:
81
Valid characters:
char set
“A”..”Z”, “a”..”z”, “0”..”9” + ISO 646
Quiet zone:
none required (1X recommended)
Module width:
--
Print ratio:
1:2:3:4:5:6:7:8:9:1:2:3:4:5:6:7:8:9
Ratio format:
1B:2B:3B:4B:5B:6B:7B:8B:9B:
1S:2S:3S:4S:5S:6S:7S:8S:9S
Default check digit:
None (eCDNone).
Possible check digits:
(eCDEAN14)
Modulo 10 (eCDMod10). EAN-14
Size:
--
Print control:
C=RX
This is the stacked version of GS1 DataBar Expanded. The number of data segments per row
can vary between 4 and 22. The default number of data segments is 4.
6.6
6.6.1
GS1 Composite Symbologies
Data Input
▶ Please note: For all Composite Symbologies the vertical bar “|” character is used to
separate the data of the linear symbol and the 2D composite component.
▶ Example: 1234567890123|TEC-IT
6.6.2
Data Capacity of GS1 Composite Symbols
6.6.2.1 Linear Component
GS1-128:
up to 48 digits
EAN/UPC:
8, 12 or 13 digits
GS1 DataBar
16 digits (2 digit s AI01 + 14 digits GTIN)
GS1 DataBar Expanded:
up to 74 digits
6.6.2.2 2D Component
CC-A
up to 56 digits
CC-B
up to 338 digits
CC-C
up to 2361 digits
The maximum data capacity of the 2D component depends on the number of data columns,
154
which also depends on the type of the linear component.
For instance, GS1 DataBar Stacked allows a 2D component with 2-data columns (CC-A or CC-B).
In this case the maximum capacity of a CC-A would be 52 digits with special AI combination at
the beginning of the data (AI 11/17 + 10), otherwise the capacity would be 48 digits.
With the other variants having 4 data columns (GS1 DataBar, GS1 DataBar Expanded,...) the
maximum data capacity is a little bit higher = 56 digits.
6.6.3
GS1 DataBar Composite Symbology
Symbology number:
29
Valid characters RSS-14:
“0”..”9”, 13 digits + 1 check digit
Valid characters CC-A/B:
characters
ISO 646 character set, up to 338
Standard print ratio:
1:2:3:4:5:6:7:8:9:1:2:3:4:5:6:7:8:9
Ratio format:
1B:2B:3B:4B:5B:6B:7B:8B:9B:
1S:2S:3S:4S:5S:6S:7S:8S:9S
Default check digit:
EAN 14 (eCDEAN14)
Possible check digits:
User supplied
Encoded data:
1234567890123|TEC-IT
This is a GS1 DataBar barcode with an attached 2D component (CC-A or CC-B). The leading
Application Identifier (AI) 01 (for the GTIN) is prefixed automatically by TEC-IT software and
must not occur in the input data. The 2D component can encode additional information like lot
number, quantity, expiration date …
6.6.4
GS1 DataBar Truncated Composite Symbology
Symbology number:
78
Valid characters RSS-14:
“0”..”9”, 13 digits + 1 check digit
Valid characters CC-A/B:
characters
ISO 646 character set, up to 338
Standard print ratio:
1:2:3:4:5:6:7:8:9:1:2:3:4:5:6:7:8:9
Ratio format:
1B:2B:3B:4B:5B:6B:7B:8B:9B:
1S:2S:3S:4S:5S:6S:7S:8S:9S
Default check digit:
EAN 14 (eCDEAN14)
Possible check digits:
User supplied
Encoded data:
1234567890123|TEC-IT
This is a GS1 DataBar Truncated barcode with an attached 2D component (CC-A or CC-B).
155
6.6.5
GS1 DataBar Limited Composite Symbology
Symbology number:
30
Valid characters RSS Lim.:
“0”..”9”, 13 digits + 1 check digit
Valid characters CC-A/B:
characters
ISO 646 character set, up to 338
Standard print ratio:
1:2:3:4:5:6:7:8:9:1:2:3:4:5:6:7:8:9
Ratio format:
1B:2B:3B:4B:5B:6B:7B:8B:9B:
1S:2S:3S:4S:5S:6S:7S:8S:9S
Default check digit:
EAN 14 (eCDEAN14)
Possible check digits:
User supplied
Encoded data:
1234567890123|TEC-IT
This is a GS1 DataBar Limited barcode with an attached 2D component (CC-A or CC-B).
6.6.6
GS1 DataBar Stacked Composite Symbology
Symbology number:
79
Valid characters RSS-14:
“0”..”9”, 13 digits + 1 check digit
Valid characters CC-A/B:
ISO 646 character set, up to 338 characters
Standard print ratio:
1:2:3:4:5:6:7:8:9:1:2:3:4:5:6:7:8:9
Ratio format:
1B:2B:3B:4B:5B:6B:7B:8B:9B:
1S:2S:3S:4S:5S:6S:7S:8S:9S
Default check digit:
EAN 14 (eCDEAN14)
Possible check digits:
User supplied
Encoded data:
1234567890123|TEC-IT
This is a GS1 DataBar Stacked barcode with an attached 2D component (CC-A or CC-B).
6.6.7 GS1 DataBar Stacked Omni directional Composite
Symbology
156
Symbology number:
80
Valid characters RSS-14:
“0”..”9”, 13 digits + 1 check digit
Valid characters CC-A/B:
ISO 646 character set, up to 338 characters
Standard print ratio:
1:2:3:4:5:6:7:8:9:1:2:3:4:5:6:7:8:9
Ratio format:
1B:2B:3B:4B:5B:6B:7B:8B:9B:
1S:2S:3S:4S:5S:6S:7S:8S:9S
Default check digit:
EAN 14 (eCDEAN14)
Possible check digits:
User supplied
Encoded data:
1234567890123|TEC-IT
This is a GS1 DataBar Stacked Omni directional barcode with an attached 2D component (CC-A
or CC-B).
6.6.8
GS1 DataBar Expanded Composite Symbology
Symbology number:
31
Valid characters RSS Exp.:
ASCII characters between 0..127
Valid characters CC-A/B:
characters
ISO 646 character set, up to 338
Standard print ratio:
1:2:3:4:5:6:7:8:9:1:2:3:4:5:6:7:8:9
Ratio format:
1B:2B:3B:4B:5B:6B:7B:8B:9B:
1S:2S:3S:4S:5S:6S:7S:8S:9S
Default check digit:
None (eCDNone).
Possible check digits:
(eCDEAN14)
Modulo 10 (eCDMod10). EAN-14
Encoded data:
1234567890123|TEC-IT
This is a GS1 DataBar Expanded barcode with an attached 2D component (CC-A or CC-B).
6.6.9
GS1 DataBar Expanded Stacked Composite Symbology
157
Symbology number:
81
Valid characters RSS ES:
ASCII characters between 0..127
Valid characters CC-A/B:
ISO 646 character set, up to 338 characters
Standard print ratio:
1:2:3:4:5:6:7:8:9:1:2:3:4:5:6:7:8:9
Ratio format:
1B:2B:3B:4B:5B:6B:7B:8B:9B:
1S:2S:3S:4S:5S:6S:7S:8S:9S
Default check digit:
None (eCDNone).
Possible check digits:
(eCDEAN14)
Modulo 10 (eCDMod10). EAN-14
Encoded data:
ABCabc123+|TEC-IT
This is a GS1 DataBar Expanded Stacked barcode with an attached 2D component (CC-A or CCB).
6.6.10 GS1-128 Composite Symbology
Symbology number:
16
Valid characters EAN 128:
ASCII-characters between 0..127
Valid characters CC-A/B/C: ISO 646 character set, up to 2361
characters
Standard print ratio:
Ratio format:
1:2:3:4:1:2:3:4
1B:2B:3B:4B1S:2S:3S:4S
Default check digit:
None (eCDNone).
Possible check digits:
(eCDEAN14)
Modulo 10 (eCDMod10). EAN-14
Encoded data:
1234567890|TEC-IT
This is a GS1-128 barcode with an attached 2D component (CC-A, CC-B or CC-C).
6.6.11 EAN-8 Composite Symbology
158
Symbology number:
10
Valid characters EAN 8:
“0”..”9”, 7 digits + 1 check digit
Valid characters CC-A/B:
ISO 646 character set, up to 338 characters
Standard print ratio:
Ratio format:
1:2:3:4:1:2:3:4
1B:2B:3B:4B:1S:2S:3S:4S
Default check digit:
EAN-8 (eCDEAN8)
Possible check digits:
User supplied
Encoded data:
1234567|TEC-IT
This is an EAN-8 barcode with an attached 2D component (CC-A or CC-B).
6.6.12 EAN-13 Composite Symbology
Symbology number:
13
Valid characters EAN 13:
“0”..”9”, 12 digits + 1 check digit
Valid characters CC-A/B:
characters
ISO 646 character set, up to 338
Standard print ratio:
Ratio format:
1:2:3:4:1:2:3:4
1B:2B:3B:4B:1S:2S:3S:4S
Default check digit:
EAN-13 (eCDEAN13)
Possible check digits:
User supplied
Encoded data:
123456789012|TEC-IT
This is an EAN-13 barcode with an attached 2D component (CC-A or CC-B).
6.6.13 UPC-A Composite Symbology
159
Symbology number:
34
Valid characters UPC-A:
“0”..”9”, 11 digits + 1 check digit
Valid characters CC-A/B:
characters
ISO 646 character set, up to 338
Standard print ratio:
Ratio format:
1:2:3:4:1:2:3:4
1B:2B:3B:4B:1S:2S:3S:4S
Default check digit:
UPC-A (eCDUPCA)
Possible check digits:
User supplied
Encoded data:
12345678901|TEC-IT
This is an UPC-A barcode with an attached 2D component (CC-A or CC-B).
6.6.14 UPC-E Composite Symbology
Symbology number:
37
Valid characters UPC-A:
“0”..”9”, 7 digits + 1 check digit
Valid characters CC-A/B:
ISO 646 character set, up to 338 characters
Standard print ratio:
Ratio format:
1:2:3:4:1:2:3:4
1B:2B:3B:4B:1S:2S:3S:4S
Default check digit:
UPC-E (eCDUPCE)
Possible check digits:
User supplied
Encoded data:
1234567|TEC-IT
This is an UPC-E barcode with an attached 2D component (CC-A or CC-B).
7
Image
Parameters
7.1
Image Types
The barcode can be converted to a bitmap or vector format (see TBarCode API BCSaveImage,
SaveImage, Barcode.Draw, BCSaveImageToBuffer, ConvertToStream, etc).
160
The following image types with the corresponding compression options (parameter nQuality)
are available[4].
Please keep in mind that unreadable barcodes may be produced when creating a bitmap with
low resolution (see section A.4Optimize Barcode for the Output Device Resolution).
7.1.1
Image Formats
Image
Format
Enumeration (def.
value)
Note
BMP
eIMBmp (0)
BMP bitmap format
EMF
eIMEmf
Enhancd Metafile vector format (Windows only)
EPS
(Bitmap)
eIMEpsDeprecated
(2)
EPS with low resolution bitmap (no longer available).
GIF
eIMGif
(3)
GIF bitmap format, supported since TBarCode 7
JPG
eIMJpg
(4)
JPG bitmap format
PCX
eIMPcx
(5)
PCX bitmap format
PNG
eIMPng
(6)
PNG bitmap format
TIF
eIMTif
(7)
TIF bitmap format
EPS (Vector)
(1)
eIMEps (8)
eIMPEpsVector (8)
(9)
EPS / PostScript vector based format
PCL
eIMPcl
SVG
eIMSvg (10)
SVG vector based format, supported since TBarCode SDK
11.2
AI
eIMAi
Adobe Illustrator® V7 format, supported since TBarCode
SDK 11.2
(11)
PCL 5 (vector based format)
Table 28: Supported Image Types
7.1.2
Compression Modes
Image
Compression / nQuality
format
BMP
0..1, 0 = uncompressed, 1 =
compressed
Remark
161
EMF
No compression is used.
Bitmap EPS: unused
EPS
Vector EPS: adjust font
substitution.
With vector EPS files you can choose between
using Windows fonts (0) and only PostScript
compatible fonts (1).
JPG
0..100, 0=highest compression,
worst quality, 100 =lowest
compression, best quality
Value of 100 suggested, especially for high data
density
PCX
Not used
In ConvertToStream and ConvertToStreamEx not
supported
PNG
PNGALLFILTERS
(0)
Use best filter
for each row
(highest
compression)
PNGINTERLACE
(1)
Interlace filter
No filter will be
To save an image in compressed mode and
PNGNOFILTER (2) used (fastest
additional as interlaced file, you have to make a
runtime)
bit wise or operation with the defined constants
(or simple adding the numbers).
Difference filter
PNGSUBFILTER
with adjacent Example: to save a file with maximum
(4)
pixel
compression and interlaced, the quality
parameter is calculated as follows:
Difference filter
PNGALLFILTERS | PNGINTERLACE
with pixel from
PNGUPFILTER (6)
the previous
row
PNGAVGFILTER
(8)
Average filter
PNGPAETHFILTER
Path filter
(10)
0.. No compression
1.. LZW *
2.. Pack Bits compression
TIF
3.. Group 3 1D compression (CCITT
* is supported with TBarCode 7 and higher
Modified Huffman RLE)
162
4.. Group 4 2D compression (CCITT
Group 4 FAX) *
5.. CCITT Group 3 compression (=
CCITT Group 4 FAX) *
7.. JPEG *
EPS
No compression is used.
PCL
No compression is used.
SVG
No compression is used.
AI
No compression is used.
Table 29: Supported Image Compression Modes
8
Character
Encoding
8.1
UNICODEßà Code Pages
Due to internationalization and localization, strings are often encoded in the UNICODE
character set, because it makes it possible to represent characters from many different
languages and scripts. However, barcode symbologies are usually able to process only a
relatively small set of characters. Whereas most of them are only capable of encoding a fix
character set with a fix character encoding – these symbologies are not affected by the
encoding topic, some others (particularly 2D symbologies) are able to switch between several
code pages.
Because even these barcodes types cannot display all character sets at the same time (unlike
UNICODE), TBarCode offers the possibility to let the user decide how the input data should be
interpreted (see the properties EncodingMode and CodePage).
8.2
Default Code Pages
Different barcode symbologies use different default character encodings (=code pages).
163
Symbology
PDF417
MicroPDF417
Default Encoding / Default Code Page
ASCII Extended (Code Page 437)
QR-Code
Micro QR-Code
Shift-JIS (Code Page 932)
Japanese Postal
Aztec Code
CODABLOCK-F Data Matrix
DotCode
Latin-1 / ISO 8859-1 / Windows 28591
Han Xin Code
TBarCode V8 and earlier: ANSI / Windows-1251 (Code Page 1252)
MaxiCode
QR-Code 2005
Table 30: Default Code Pages
TBarCode Inform always uses UTF-8 as default code page.
8.3
Code Page Switching
If a code page unlike the default code page shall be used, there must also be a way to tell the
barcode reader how the data should be interpreted. That means that you have to tell the
reader, which encoding, which code page has been used for encoding. This is usually done with
ECI codes (Extended Character Interpretation) which have to be added to the barcode data (see
also section 4.7Escape Sequences (Encoding Binary Data)).
▶ Be aware that not all readers are able to handle ECI codes and decode the barcode data in
a correct manner. Many of the scanners just ignore the ECIs; others pass them un-translated to
the addressee and let it do the work.
9
Frequently Asked
Questions
9.1
How to add the Leading and Trailing ‘*’ for
164
Code 39?
No action is required. The asterisks ‘*’ are added automatically to the barcode.
9.2
How to add the Check Digit to Code 39?
Simply select Modulo 43 (or another method) as check digit Method. The automatically
computed check digit is appended at the end of the barcode.
9.3 How to add the Leading and Trailing ‘A’ (or B, C,
D) for CODABAR?
Enter A&A in the format string (property “Format” – see section 4.6).
9.4
How to use a Specific Subset in Code 128?
Use the corresponding barcode types Code128A, 128B or 128C. The whole code will then be
generated in the corresponding subset. If this is not possible with the current data, the
software will change subsets as required. If you want to change the subset within the barcode
enter A or B or C in the “Format” (see section 4.6).
9.5
How to use the Compressed Mode of Code 128?
Use the barcode type Code128 and make sure “Format” is empty.
9.6 How to generate a PDF417 symbol with an
Aspect Ratio of 3:2?
In order to generate a PDF417 which utilizes the standard aspect ratio of 3:2 there are two
possible methods:
9.6.1
Set a Row:Col Ratio of 11:1
Set Cols = 2
Set Rows = Cols * 11
9.6.2
Maintain a constant Ratio of Row Height / Module Width
Set a row height: module width ratio of 3:1 (default) by setting the module width
mm constant value) and PDF417 row height to 1500 (1.5 mm).
9.7
to 500 (0.5
How to set a Specific Module Width?
You can adjust the module width (or X Dimension) by setting the property ModuleWidth to the
desired value.
Per default the barcode adapts automatically to the object width (= to the dimension of the
bounding rectangle). After adjusting module width the resulting barcode width depends on the
165
amount of the encoded data characters and no longer on the width of the bounding rectangle.
▶ Keep in mind to choose a suitable size of the bounding rectangle to ensure that the
barcode is not clipped.
▶ The dimension of the bounding rectangle must be wide enough to hold the largest data
content possible. Use the property MustFit to check whether a barcode does not fit into the
bounding rectangle.
▶ The SizeMode property (available since TBarCode V7) must be set to Custom Module Width
if you want your settings to take effect.
9.8
More FAQ
http://www.tec-it.com/support/faq/barcode/printing-decoding.aspx
http://www.tec-it.com/support/faq/tbarcode/barcode-ocx.aspx
10 Contact and
Support Information
TEC-IT Datenverarbeitung GmbH
Hans-Wagnerstr. 6
Address: AT-4400 Steyr
Austria/Europe
Phone: +43 / (0)7252 / 72 72 0
Fax:
+43 / (0)7252 / 72 72 0 – 77
Email:
mailto:[email protected]
Web:
http://www.tec-it.com/support
AIX is a registered trademark of IBM Corporation.
HTML, DHTML, XML, XHTML are trademarks or registered trademarks of W3C, World Wide Web
Consortium, Laboratory for Computer Science NE43-358, Massachusetts Institute of
Technology, 545 Technology Square, Cambridge, MA 02139.
JAVA® is a registered trademark of Sun Microsystems, Inc., 901 San Antonio Road, Palo Alto, CA
166
94303 USA.
JAVASCRIPT® is a registered trademark of Sun Microsystems, Inc., used under license for
technology invented and implemented by Netscape.
Microsoft®, Windows®, Microsoft Word®, Microsoft Excel® are registered trademarks of Microsoft
Corporation.
Navision is a registered trademark of Microsoft Business Solutions ApS in the United States
and/or other countries.
Oracle® is a registered trademark of Oracle Corporation.
PCL® is a registered trademark of the Hewlett-Packard Company.
PostScript is a registered trademark of Adobe Systems Inc.
SAP, SAP Logo, R/2, R/3, ABAP, and SAPscript are trademarks or registered trademarks of SAP
AG in Germany (and in several other countries).
All other products mentioned are trademarks or registered trademarks of their respective
companies. If any trademark on our web site or in this document is not marked as trademark
(or registered trademark), we ask you to send us a short message (mailto:[email protected]).
Appendix A: Creating Optimal Barcodes
A.1
General
Generating optimal barcodes means to
1.
Determine the optimal barcode size required by the application (see section A.2)
2.
Maintain a minimal quiet zone to guarantee the readability of the barcode (see section A.3)
3.
Produce the best possible output on the target device (see sections A.4)
The last and most important step, the optimization for the output device, is described in detail
in sections A.5 and following. It is described how the optimization is supported by TEC-IT
barcode software. Furthermore it is described what you should consider when printing
barcodes directly or when using barcode images. In the last section the approach for
optimizing barcodes is illustrated with some code examples.
A.2
Barcode Size
Primarily the barcode size is determined by the application where the barcode is used. The
scanner hardware and the projected reading distance define an upper and lower limit for the
barcode size (see also Barcode Reference, section 4.2.3).
In addition, some barcode specifications provide guidelines for the barcode size. This is either:
◼ An obligatory size with only little tolerance
(most postal barcodes like USPS Postnet, Australian Post Codes, …)
◼ A list of recommended sizes or module widths,
e.g. a standard size and a number of magnification factors to choose from
(GS1-128, UPC, ITF-14, …)
◼ A recommended minimum module width
(Code 128, …)
167
When using the barcode in an industry or transportation label the required barcode size is
usually exactly specified. The label specification provides the required information.
A.3
Quiet Zone
To guarantee the readability of the barcode a certain quiet zone around the barcode should be
maintained. The quiet zone depends on the type of the barcode:
◼ Linear Barcodes
As a rule of thumb for linear barcodes the quiet zone should be ten times the module width. For
some barcode types a recommended minimum is explicitly given by the specification.
◼ 2D Barcodes
The quiet zone depends on the actual barcode type. A rule of thumb cannot be given but using
10 times the module width could fix possible problems.
◼ GS1 DataBar Codes
Due to the technical nature of these barcodes no quiet zones are required. Only for symbologies with an added composite component you have to maintain a certain quiet zone.
Figure 15: Quiet Zone for Linear Barcode
For more information about quiet zones, please refer to the Barcode Reference, section 4.4.
A.4
Optimize Barcode for the Output Device Resolution
When printing the barcode (or when creating a barcode image) the most important step is to
optimize the module width with respect to the output device resolution. A printer can only
print whole dots. Therefore the bar and the space widths have to be adjusted, so that they
exactly fit the printing raster. If this adjustment is skipped, the resulting output may be
inaccurate and the readability of the barcode may suffer. Especially for low output resolutions
(e.g. screen output or thermo transfer printing) the optimization is essential. For printers with
high resolution the optimization may be negligible. However it is recommended to optimize the
barcode in any case.
As a result of the optimization the size of the barcode symbol will be modified very slightly.
Optimization
168
Figure 16: Optimize Barcode for Output Device Resolution
After the optimization the module width is exactly N times the width of a device pixel (for N is
an integer greater than 0).
In practice the optimization can be done using different methods. Section A.5 describes all
necessary adjustments which are required to enable the automatic optimization in TEC-IT
software products. Alternative you can also choose an appropriate module width which fits the
printing raster by yourself.
Whenever printing a barcode directly or when using barcode images, you should additionally
consider a few rules (see sections A.6 to A.7). Finally, for developers, in section A.9 all
programming steps which are required to optimize a barcode are explained with a few code
examples.
A.5
Enable Optimization in TEC-IT Software
In TEC-IT software per default the barcode optimization for a given resolution is turned off.
Instead all barcodes are created in the exact size as specified. If you want to turn the
optimization on, please do the following:
A.5.1
Barcode Studio
With the barcode image designer Barcode Studio you have two possibilities to optimize a
barcode:
Figure 17: Barcode Optimization in Barcode Studio
169
The easiest method is to set the check mark in (4). This will automatically optimize the barcode
for the given output resolution (see (3)).
As an alternative you can also set the scaling unit to “Pixel” (see (1)) and then adjust the
module width in (2). Since you can only adjust integer values for the unit “pixel” the barcode
must necessarily fit the raster and you will get an optimal barcode for the specified resolution.
A.5.2
TFORMer
In the barcode label software TFORMer Designer you can set Optimal Resolution to “True” (see
(5)). This will optimize the barcode for the printer on which the document is actually printed.
Figure 18: Barcode Optimization in TFORMer Designer
A.5.3
TBarCode
In the barcode generator SDK TBarCode you have two different adjustments for optimization:
Either you can generate the smallest possible barcode optimized for the selected decoder type
and for the specified resolution (see Figure 19).
Or, for any custom sized barcodes, you can turn on the optimization by setting the
OptResolutionproperty to “true” (see Figure 20).
Figure 19: Barcode Optimization in TBarCode OCX (Version 1)
The settings shown in the figure above are available in the properties dialog of the barcode
control. The “Minimal” mode (6) creates all barcodes with the recommended minimum module
widths. For the decoder type “Hardware decoder” (e.g. suitable for barcode scanners) this
would produce linear and stacked barcodes with a module width of approximately 0.254 mm (=
10 mils) and 2D barcodes like QR-Code or Data Matrix with a module width of about 0.5 mm (@
20 mils).
170
Figure 20: Barcode Optimization in TBarCode OCX (Version 2)
In the application specific property window (and not in the properties page as shown in Figure
19) you will find the property OptResolution(7). When set to “true” the barcode will be
optimized for its predefined size.
A.5.4
Application Notes for “Optimal Resolution”
Please note: When enabling the switch “optimal resolution” (see (5), (5) and (7)) the barcode
will always be reduced to the next smaller size, in which it can be printed in optimal quality.
Under unfortunate circumstances this size reduction might cause the module width to drop below a given minimal module width. Therefore it is recommended to enlarge the bounding rectangle of the barcode to the maximum available area whenever possible. This way you will get
the largest possible optimized barcodes on the printout.
However, instead of using OptResolution the following approach may sometimes be even more
suitable:
◼ Experienced users can adjust the module width of the barcode manually. E.g. in TFORMer
you can specify the module width in mm. When doing this you have to take care that the adjusted module width is suitable for the printer resolution.
Example: printer resolution = 600 dpi
à One dot has 1/600 inch @ 0.0016 inches @ 0.0024 mm
à For this printer you could use N * 0.0024 mm (for N is an integer greater than 0) as module
width
(Hint: You can also use Barcode Studio to do the necessary module width calculations!)
◼ For creating images software developers should use BCGetOptimalBitmapSize() instead of
OptResolution. Using this function you have more control over the output.
A.6
Printing Barcodes Directly
By default TEC-IT software uses the whole available space (the bounding rectangle) to render a
barcode. This means that the software computes the module width based on the available
space and on the data to be encoded.
For printing with high resolutions such as 600 dpi this approach is OK. Even if the resulting
quality of the barcode is not optimal with respect to the printer resolution, the inaccuracies are
usually so small, that they do not lead to a noticeable loss in the barcode quality. To get a
sense for the occurring deviations you could check the output quality for your settings with
Barcode Studio.
On the other hand, if the printer resolution is low (equal or smaller to 300 dpi) or the data
density is very high – or to be more precisely if the module width in device pixels is very small,
the loss of quality may be noticeable. Therefore you should always optimize the barcode
171
quality in such circumstances. In order to do so, you can either adjust the module width so that
it exactly fits the printing raster, or you can set the OptResolutionflag to “true”.
A.7
Barcode Images
When using barcode images you should always generate them in optimal quality, meaning that
all spaces and all bars should be represented with a whole number of image pixels. Images are
(in principle) device independent. So this should always be possible.
Therefore consider the following:
▶ Whenever possible use the property OptResolution to adapt the module width to the
resolution (pixel raster) of the image. Developers also have the possibility to use the function
BCGetOptimalBitmapSize().Given the requested size of the barcode (in device pixels) it will
optimize the width and the height of the barcode.
▶ Use lossless image formats (like PNG instead of JPG). Don’t use any compression reducing
the picture quality.
▶ Avoid any post processing like scaling/resizing with image editing software! Each post
processing step means a potential loss of the barcode quality.
However, when using the images (e.g. when embedding them in a layout) and, in a further
consequence, when printing them you have to be aware that
◼ depending on the size of your source image and
◼ depending on the required size on your printout and
◼ depending on the resolution of the printer
the original barcode image will be scaled with a particular scaling factor.
This scaling occurs when the image is rastered for the printer resolution. It may negatively
influence the barcode quality of the printout. Therefore, you should ideally always create the
barcode image in the same resolution in which it will be printed. As a consequence any scaling
between the image and the printout is avoided. If scaling is inevitable for any reason, you
should take care that after the scaling the barcode can be rendered with whole device pixels on
the target printer.
In section A.7.3 a general approach how to optimize a barcode image for a specific printer
resolution is described. But before going into detail we want to explain a few general principles
for using barcode images.
A.7.1
Embedding Barcode Images
In general, barcode images are used in order to embed a barcode into arbitrary layouts (e.g. on
a HTML page, in a desktop publishing program, in a report generator, etc.).
Therefore you usually specify a rectangular region on the layout in which the image will be
inserted. This rectangular region defines the size (in device independent units like mm) in
which the barcode will be printed. (Only exception: In HTML you specify the actual printout size
indirectly via screen pixels. Nonetheless this pixel size can be translated to a specific target size
on your printout – for details see section A.7.2.)
Now, the basic principle is that the printout will always have exactly the same size as specified
in the layout. The size of the embedded source image actually does not have any influence on
the printout size. However, the quality of the printout will vary depending on different source
172
image dimensions!
Therefore you should ideally always
▶ Create the image exactly in the same resolution as used for printing (printer resolution).
▶ If you do not know in which resolution the barcode image will be printed, use a sufficiently
high resolution, so that the image is likely to printed in an aspect ratio of 1:1 or that it is being
down-scaled for printing (down-scaling a large image usually produces better results on the
printout than up-scaling a smaller image).
A.7.2
Barcode Images in HTML
As already stated above, the basic idea for generating high quality barcode printouts is to
generate detailed barcode images which are optimized for a specific printer resolution. This
approach can also be used for HTML. The high resolution images are only scaled down for
display in the browser window. Internally the images keep their high resolution. Thus the
browser can generate more accurate printouts compared to using source images in a low
screen resolution.
To specify the dimension in which the barcode will be displayed on the HTML page you can use
the image attributes “width” and “height”. These attributes specify the display size of images
on the screen. Within the HTML code this would look like:
<img src="/images/barcode.png" width="250" height="60">
The screen size of the barcode image does not only specify the size in which the barcode is displayed in the browser window, it also specifies the size in which the barcode will be drawn on
the printout. For translation you need to know:
▶ All images which are displayed in the web browser are assumed to have a resolution of 96
dpi. Based on that resolution the size on the printout is calculated. This calculation is independent of the printer resolution.
Example:
If a barcode image is displayed with 200 pixels it will appear on your printout with a size of
about 53 mm (200 pixels / 96 dpi @ 2.083 inches @ 52.91 mm).
This means: In order to make sure that the barcode has the correct size on the printout you
have to calculate the pixel size that is required for 96 dpi. Therefore divide the size (of the high
resolution image) by the printer resolution and then multiply it by 96 dpi. This value must be
used as “width” (or as “height”) attribute for the image.
Example:
Image width = 900 pixel
Printer resolution = 600 dpi
900 / 600 * 96 = 144 pixel
<img src="/images/barcode.png" width="144" height="60">
Please note:
▶ When using such high resolution images you have to increase the font size for the barcode
to make the text look normal.
▶ Linear barcodes:
173
To avoid large file sizes you can use a higher resolution in the horizontal dimension of the
barcode image only. Please note: This approach will produce distorted fonts. So switch off the
font in the barcode and print the text separately using HTML.
▶ Instead of generating the barcode image for a dedicated printer resolution you can also
produce the barcode with twice or triple the resolution as displayed in the browser window.
This will produce a good approximation. With more detailed source images the rasterizing
errors are reduced and the printing quality is increased.
A.7.3
Optimizing Barcode Images with Respect to the Printer Resolution
Below we will describe a general approach for optimizing barcode images with respect to the
printer resolution. It can be used for all images which are going to be printed. This optimization
is only possible if you know the resolution of the target printer.
For optimization the following steps are required:
1. Specify the intended size of the barcode on the printout.
Please keep in mind that due to the optimization the final barcode size will vary!
e.g.: barcode width = 5 cm
2. Based on that size calculate the image size (in pixels) for the required printer resolution.
e.g.: printer resolution = 600 dpi
à 5 cm / 2.54 @ 1.97 inches
à Calculated image width = 1.97 * 600 @ 1181 pixels
3. Now check if the barcode fits the pixel raster of the image, or if it has to be optimized.
We assume our (linear) barcode uses a total of 101 modules[5].
à Module width (in pixel) = 1181 / 101 @ 11.7
à This module width cannot be represented with whole device pixels! The image has to be
optimized!
4. Optimize the image.
In order that all bars and spaces can be represented with whole device pixels, we have to use
an integer value for the module width. Therefore the calculated pixel size has to be rounded up
or down.
à In our case we will round the module width down to 11 pixels (instead of 11.7). Therefore the
barcode will become a little smaller.
à The actual image width is now 11 * 101 = 1111 pixels.
5. Based on that pixel size the actual barcode size on the printout can be calculated.
à 1111 / 600 @ 1.85 inches @ 4.7 cm
6. For HTML only:
To print the barcode in the correct size, we have to calculate the width of the displayed
barcode in screen pixels:
à Therefore divide the image size by the printer resolution and multiply it by 96 dpi.
à 1111 / 600 * 96 = 177.76 pixel
à In the HTML image tag you would specify a width of 178 pixels!
For code examples see sections A.9.1 and A.9.2!
Additional considerations:
▶ If you do not know the resolution of the target printer it is a good approximation to use a
sufficiently high image resolution (e.g. 600 dpi). In any case the barcode image should be
174
optimized with respect to the image pixels (see step 4!).
▶ If you want to save space and therefore intend to create smaller images (e.g. for web
applications) you can do that. In this case you should take care, that after up-scaling to the
printer resolution, the barcode can be printed with whole printer dots (see also the example in
section A.9.3).
Remark:
Another method to get optimal printouts would be to generate all barcode images with exactly
1 pixel module width. Such images have an optimal barcode quality and can be up-scaled to
any required size. Since you do not know if the printer driver uses anti-aliasing (and produces
half-tones) when up-scaling an image, or if you want to get a readable barcode text, the
optimization as described above is recommended.
A.8
Barcode Vector Graphics
In TEC-IT software you do not only have the possibility to use bitmap images, but also vector
graphics images. Vector graphics have the advantage, that they do not contain any rastered
data, but only structural information about the barcode (positions and sizes of all bars).
Therefore:
▶ All vector graphics can be arbitrarily scaled without gaining any loss of quality.
▶ The file size is usually rather small (it is independent of the barcode dimensions).
▶ However, during printing also vector graphics will eventually be rastered. Therefore the
module width of the barcode should ideally always be a whole multiple of the dot size of your
printer. If the module width does not fit the printing raster, there will be inaccuracies on the
printout.
As a vector based file format TEC-IT supports the Encapsulated PostScript™ format (or short
EPS format). Considering the advantages as stated above it is usually a good idea to use the
EPS format instead of bitmap files wherever possible. However, please note that this format is
only supported by a few applications!
A.9
Code Examples for Barcode Optimization
For your understanding the following examples show the barcode optimization by code. The
first four examples do the optimization by programmatic adaption of the module width. The
last sample shows the usage of the function BCGetOptimalBitmapSize.
A.9.1
Linear Barcodes
In this example a linear barcode will be optimized for output. We assume the following
specification:
Barcode width = 60 mm
Barcode height = 30 mm
Resolution of the output device = 200 dpi (dots per inch)
Based on this specification we first calculate the projected barcode size in target device pixels.
This size (actually only the width) is then adjusted so that each bar and each space of the
barcode exactly matches the output raster. This is achieved by making sure that the width of
one module is a multiple of one device pixel. A similar height adjustment is not necessary
because the scanning process is usually not affected by the height of the barcode.
First we calculate the barcode width in device pixels:
175
Therefore we convert the width (which is given in mm) to inches. Then we multiply the result by
the resolution (dots per inch) of the output device.
60 / 25.4 * 200 @ 472.44 dots (or pixels)
Then we calculate the module width and adopt it, so that all bars and spaces can be displayed
with whole pixels:
// 1) Specify the barcode type, the barcode data, etc.
//
// Do your barcode adjustments here!
// 2) Specify the favored barcode size.
// To optimize the output quality we will do all calculations in device pixels.
// Therefore the given size (in this case in mm) must be converted to device pixels
// with respect to the resolution of the output device.
LONG ldpi
= 200;
LONG lBarcodeWidth = (LONG)ConvertMMToPixel (60.0f, ldpi); // 60 mm --> 472.44 pix
LONG lBarcodeHeight = (LONG)ConvertMMToPixel (30.0f, ldpi); // 30 mm --> 236.22 pix
// 3) Get the horizontal module count.
// This function returns the number of modules that was calculated for the given
// barcode. This is usually an integer! For non-integer values the optimization
// will not work!
DOUBLE dCountModules = ::BCGetCountModules ( pBC );
DOUBLE dModuleWidth;
// avoid division by zero
if( dCountModules > 0.0)
{
// 4) Calculate the current module width:
// --> Divide the barcode width by the horizontal module count.
dModuleWidth = (DOUBLE)lBarcodeWidth/dCountModules;
// 5) Optimize the module width:
// For an optimal barcode the module width must be a multiple of one device pixel!
// Thus all decimal places have to be eliminated.
// In this case the value is rounded up with the ceil-function.
dModuleWidth = ceil ( dModuleWidth );
// 6) Now that you have found the optimal module width
176
// calculate the width of the complete barcode in target device pixels.
lBarcodeWidth = (LONG)(dCountModules * dModuleWidth);
}
// 7) The optimized barcode width can now be used to draw the barcode or to save
// the barcode as an image. In this sample the barcode will be saved as an image.
::BCSaveImage ( pBC, "C:\\ MyBarcode.BMP", eIMBmp,
lBarcodeWidth, lBarcodeHeight, ldpi, ldpi );
A.9.2
2D Barcodes
For 2D barcodes we have to do both a vertical and a horizontal size adjustment.
Barcode width = 60 mm
Barcode height = 30 mm (assuming a rectangular 2D barcode like PDF417)
Resolution of the output device = 200 dpi
The following code example shows the complete calculation which is necessary for optimizing
a 2D barcode for the given output device resolution:
// 1) Specify the barcode type, the barcode data, etc.
//
// Do your barcode adjustments here!
// 2) Specify the favored barcode size.
// For optimizing the output quality we will do all calculations in device pixels.
// Therefore the given size (in this case in mm) must be converted to device pixels
// with respect to the resolution of the output device.
LONG ldpi
= 200;
LONG lBarcodeWidth = (LONG)ConvertMMToPixel (60.0f, ldpi); // 60 mm --> 472.44 pix
LONG lBarcodeHeight = (LONG)ConvertMMToPixel (30.0f, ldpi); // 30 mm --> 236.22 pix
// 3) Get the horizontal and vertical module count[6].
// This function returns the number of modules that was calculated for the given
// barcode. This is usually an integer! For non-integer values the optimization
// will not work!
LONG lCols = ::BCGet2D_XCols ( pBC );
LONG lRows = ::BCGet2D_XRows ( pBC );
// avoid division by zero
if( lCols > 0 && lRows > 0 )
{
// 4) Optimize the barcode width and height:
177
// For an optimal barcode the module width must be a multiple of one device pixel!
// Thus all decimal places have to be eliminated.
// In this case the value is rounded up with the ceil-function.
// Then the module width/height is again multiplied by the module count.
lBarcodeWidth = (LONG)ceil((DOUBLE)lBarcodeWidth /(DOUBLE)lCols) * lCols;
lBarcodeHeight = (LONG)ceil((DOUBLE)lBarcodeHeight/(DOUBLE)lRows) * lRows;
}
// 5) The optimized barcode width and height can now be used to draw the barcode or to
// save the barcode as an image. In this sample the barcode will be saved as an image.
::BCSaveImage ( pBC, "C:\\MyBarcode.BMP", eIMBmp,
lBarcodeWidth, lBarcodeHeight, ldpi, ldpi );
A.9.3
Prepare a Barcode with a specific Module Width for a Web Page
In the following example we want to create a barcode image with a module width of 15 mils.
The printer resolution is assumed to be 600 dpi.
So the module width is 0.015 * 600 = 9 device pixels.
Furthermore we want to generate a rather small image. Therefore we will use just 3 (instead of
9) pixels as module width. This means the barcode image is actually optimized for a resolution
of 200 dpi. For printing with 600 dpi the image will be scaled by 3 (3 * 3 = 9 device pixels). That’s
perfect.
In order to prepare the image, we have to do the following steps:
Step 1: Create the Image
First we calculate the horizontal size of the barcode image in pixels. Therefore we multiply the
number of barcode modules width the intended module width (in pixel):
' the number of modules in the barcode
CntModules = tbc.CountModules[7]
' one module will be 3 pixels in the generated image
BitmapWidth = 3 * CntModules
' the height of the barcode image is half an inch
BitmapHeight = 100
' convert to bitmap stream
ImgByteArray = ConvertToStream (eIMPng, BitmapWidth, BitmapHeight, ...)
Step 2: Scale the Image
Now we calculate the desired display size in the browser, so that the barcode will finally be
printed in the correct size on the printout. HTML assumes a screen resolution of 96 dpi. The
image was optimized for 200 dpi. Thus we have to scale the image for display in the browser by
178
96 / 200.
DispWidth = BitmapWidth * 96 / 200
DispHeight = BitmapHeight * 96 / 200
<img src="<%="Barcode.asp?" & URLPARAM%>" width="<%=DispWidth%>" height="
<%=DispHeight%>”
This procedure works for web applications (ConvertToStream method) as well as for storing
image files (SaveImage method).
A.9.4
Create a 2D Barcode Image with the Module Width specified in Pixels
To get a precise image you can adjust the size of the image in pixels according to the required
horizontal and vertical size of the barcode. By using the properties 2DXCols (number of
columns in modules) and 2DXRows (number of rows in modules) the size of the image can be
optimized:
Dim nScale As Long
Dim nXSize As Long
Dim nYSize As Long
' 1) Initialize the barcode
TBarCode111.Text = "Somedata"
TBarCode111.BarCode = TBarCode11Lib.eBC_MicroPDF417
' 2) Use 5 pixels per module
nScale = 5
nXSize = TBarCode111.Get2DXCols * nScale
nYSize = TBarCode111.Get2DXRows * nScale
' 3) Save the barcode using the optimized size
' (Please note: The resolution specified by the last two parameters is only stored as
' information in the image attributes (if supported by the image type).
' It has no influence on the pixel size of the generated image.)
TBarCode111.SaveImage "C:/MyBarcode.bmp", TBarCode11Lib.eIMBmp, nXSize, nYSize, 72, 72
A.9.5
Optimize an Image using BCGetOptimalBitmapSize
The following code snippet shows you how to use the function GetOptimalBitmapSize().
Dim lWidth As Long
Dim lHeight As Long
' 1) Initialize the barcode
TBarCode111.Text = "Somedata"
TBarCode111.BarCode = TBarCode11Lib.eBC_Code128
179
TBarCode111.Width = 200
TBarCode111.Height = 70
' 2) Optimize the pixel size of the barcode image
TBarCode111.GetOptimalBitmapSize 1, 1, lWidth, lHeight
' 3) Save the barcode using the optimized image width and height
' (Please note: The resolution specified by the last two parameters is only stored as
' information in the image attributes (if supported by the image type).
' It has no influence on the pixel size of the generated image.)
TBarCode111.SaveImage "C:\temp\Doc1.bmp", TBarCode11Lib.eIMBmp, lWidth, lHeight, 72, 72
Appendix B: Barcode Quiet Zones
The information contained in this chapter is subject to be changed without notification. We are
sorry, but we cannot guarantee that all information is error-free. TEC-IT Datenverarbeitung
GmbH is not liable for any damages or lost profits if somebody relies on the information in this
chapter.
We recommend the following quiet zones to be used with the listed bar code symbologies.
Please consider that quiet zones often depend on a specific label format, so please hold on to
your specification (if you have one).
The “X” stands for module width (narrow bar width).
B.1
Linear Symbologies
Vertical quiet zone Horizontal quiet zone
No. Barcode Symbology
top
bottom
left
63 Australian Post Customer
64 Australian Post Customer 2
65 Australian Post Customer 3
2 mm
6 mm
–
10X
68 Australian Post Redirection
66 Australian Post Reply Paid
67 Australian Post Routing
18 Codabar
2
Code 2 of 5 Standard / Code 2 of 5 Matrix
6
Code 2 of 5 Data Logic
right
180
4
Code 2 of 5 IATA
7
Code 2 of 5 Industrial
3
Code 2 of 5 Interleaved
1
Code 11
8
Code 39
9
Code 39 Extended
–
10X, min. ¼ inch
–
10X
–
10X, min. ¼ inch
–
10X, min. ¼ inch
–
10X, min. ¼ inch
25 Code 93
62 Code 93 Extended
20 Code 128
59 Code 128 Subset A
60 Code 128 Subset B
61 Code 128 Subset C
22 Deutsche Post Identcode
see Code 39
21 Deutsche Post Leitcode
10 EAN-8[8]
11 EAN-8 with 2 digits add-on8
7X
–
12 EAN-8 with 5 digits add-on8
13 EAN-138
14 EAN-13 with 2 digits add-on8
–
15 EAN-13 with 5 digits add-on8
add-on:
7-10X
add-on:
5X
11X
7X
add-on:
7-10X
add-on:
5X
72 EAN-14
see EAN-128
16 GS1-128 (EAN-128)
–
28 Flattermarken
depends on the application
69 ISBN Code
see EAN-13 P5
10X, min. ¼ inch
181
89 ITF-14
10X
76 Japanese Postal
2 mm
2 mm
77 Korean Post Authority
–
50 LOGMARS
see Code 39
47 MSI
see Plessey
75 NVE-18
see EAN-128
2 mm
2 mm
not exactly specified,
but use 10X
51 Pharmacode One-Track
–
6 mm
53 Pharmacode Two-Track
82 Planet 12
see USPS Postnet
83 Planet 14
46 Plessey Code
–
12X
52 PZN (Pharma Zentralnummer)
see Code 39
70 Royal Mail 4 State (RM4SCC)
–
2 mm
–
no quiet zone
required
29 GS1 DataBar (RSS-14)
78 GS1 DataBar Truncated (RSS-14 Truncated)
31 GS1 DataBar Expanded (RSS Expanded)
30 GS1 DataBar Limited (RSS Limited)
48 SSCC-18
see EAN-128
(for some label specs it says ¼ inch)
118 Swedish Postal Shipment ID
–
10X
32 Telepen Alpha
–
–
33 UCC / EAN-128 (GS1-128)
–
10X, min. ¼ inch
17 UPC 12
–
9X
182
34 UPC version A[9]
35 UPC version A, 2 digits add-on9
9X
–
36 UPC version A, 5 digits add-on9
37 UPC version E9
38 UPC version E, 2 digits add-on9
–
39 UPC version E, 5 digits add-on9
add-on:
9-12X
add-on:
5X
9X
7X
add-on:
9-12X
add-on:
5X
40 USPS Postnet 5
41 USPS Postnet 6
42 USPS Postnet 9
1/25 inch
43 USPS Postnet 10
44 USPS Postnet 11
45 USPS Postnet 12
Table31 : Quiet Zones (Linear Symbologies)
B.2
2D Symbologies
1/8 inch
183
Vertical quiet zone Horizontal quiet zone
No. Barcode Symbology
top
bottom
left
right
92 Aztec Code
–
–
74 Codablock F
10X
10x
71 Data Matrix
1 cell (1X)
1 cell (1X)
115 DotCode
3 cells (3X)
3 cells (3X)
116 Han Xin Code
3 cells (3X)
3 cells (3X)
57 MaxiCode
1 cell (1X)
1 cell (1X)
84 MicroPDF417
–
1X
97 Micro QR-Code
4 cells (4X)
4 cells (4X)
2X
2X
4 cells (4X)
4 cells (4X)
–
–
55 PDF417
56 PDF417 Truncated
58 QR-Code
79
GS1 DataBar Stacked
(RSS-14 Stacked)
80
GS1 DataBar Stacked Omni directional
(RSS-14 Stacked Omni directional)
81
GS1 DataBar Expanded Stacked
(RSS Expanded Stacked)
Table32 : Quiet Zones (2D Symbologies)
Appendix C: Extended Channel Interpretation (ECI)
C.1
ECI Overview
Here a short overview about the available ECI specifiers for defining the encoding of
subsequent bar code data (see also section 4.7.)
ECI Number
Description
ECI 000000
(equates to
The lower half of the character set (decimal value 0 to 127) equates to
ISO/IEC 646: 1991 IRV (equivalent to ANSI X3.4), the upper half (decimal value
128 to 255) equates to Code Page PC437.
184
original GLI 0): ISO/IEC 15438 Bar code symbology specification-PDF417: Default character
set to 1994 specification with GLI rules.
The lower half of the character set (decimal value 0 to 127) equates to
ECI
ISO/IEC 646: 1991 IRV (equivalent to ANSI X3.4) and characters 128 to 255
000001(equates being identical to those values of ISO 8859-1.
to original GLI
ISO/IEC 15438 Bar code symbology specification-PDF417: Latin 1 character
1):
set to 1994 specification with GLI rules.
ECI 000002
PC437 (code table equivalent to ECI 000000, without the reset-to-GLI 0 logic).
ECI 000003
ISO 8859-1 (code table equivalent to ECI 000001, without the reset-to-GLI 0
logic).
ECI 000004
ISO 8859-2 Latin-2 Central European
ECI 000005
ISO 8859-3 Latin-3 South European
ECI 000006
ISO 8859-4 Latin-4 North European
ECI 000007
ISO 8859-5 Latin/Cyrillic
ECI 000008
ISO 8859-6 Latin/Arabic
ECI 000009
ISO 8859-7 Latin/Greek
ECI 000010
ISO 8859-8 Latin/Hebrew
ECI 000011
ISO 8859-9 Latin-5 Turkish
ECI 000012
ISO 8859-10 Latin-6 Nordic
ECI 000013
ISO 8859-11 Latin/Thai
ECI 000015
ISO 8859-13 Latin-7 Baltic Rim
ECI 000016
ISO 8859-14 Latin-8 Celtic
ECI 000017
ISO 8859-15 Latin-9
ECI 000018
ISO 8859-16 Latin-10 South-Eastern European
ECI 000020
Shift JIS (JIS X 0208 Annex 1 + JIS X 0201)
ECI 000021
Windows 1250 Latin 2 (Central Europe) 2001-02-12
ECI 000022
Windows 1251 Cyrillic 2001-02-12
185
ECI 000023
Windows 1252 Latin 1 2001-02-12
ECI 000024
Windows 1256 Arabic
ECI 000025
ISO/IEC 10646 UCS-2 (High order octet first)
ECI 000026
ISO/IEC 10646 UTF-8
Table 33: ECI Numbers
▶ Character set overview: http://www.unicodecharacter.com/charsets/iso8859.html
[1] Listed for the most common bar code types. See user manual for the complete list of print
controls.
[2] Formerly European Article Number (EAN)
[3] Shift JIS will be the default code page for Japanese Postal in TBarCode SDK 10.2.6 and later.
[4] Depending on the API not all image types are available for streaming – see API reference for
more information.
[5] The module count is the number of modules which is required for drawing the barcode.
Example: If the barcode consists of a bar, followed by a space and then followed by two bars
(making one big bar) we would count 4 modules.
The module count can be retrieved using CountModules for linear barcodes and 2DXCols for 2D
barcodes.
[6] In TBarCode SDK V10 you can use DLL function BCGetOptimalBitmapSize()
[7] In TBarCode SDK V10 you can use COM method GetOptimalBitmapSize()
[8] In TEC-IT software the quiet zones for this symbology are included in the barcode
generation algorithm. You need no extra adjustments.
[9] In TEC-IT software the quiet zones for this symbology are included in the barcode
generation algorithm. You need no extra adjustments.