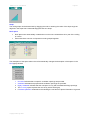
1
BERS Pro V4.1 Users Manual Copyright Solar Logic 2007 Page 1 BERS Pro V4.1 Users Manual Page 2 Table of Contents Introduction .............................................................................................................................................4 What The Program Is Used For ...........................................................................................................4 User Interface......................................................................................................................................4 Features..............................................................................................................................................4 Analysis of Data ..................................................................................................................................4 Simulation Engine ...............................................................................................................................4 Software Details ......................................................................................................................................5 BERS Pro V4.1....................................................................................................................................5 Use of Software...................................................................................................................................5 Contact ...............................................................................................................................................5 System requirements...............................................................................................................................5 Processor speed .................................................................................................................................5 Memory...............................................................................................................................................5 Display ................................................................................................................................................5 Installing BERS Pro from a CD ................................................................................................................6 Directory Structure...................................................................................................................................6 Licence....................................................................................................................................................7 Licence Details....................................................................................................................................7 Buttons................................................................................................................................................7 Licence Has Expired............................................................................................................................7 To Renew Your Licence ......................................................................................................................7 Licence File Not Found........................................................................................................................8 Main Screen ............................................................................................................................................9 Project Bar ..........................................................................................................................................9 Orientation ..........................................................................................................................................9 Buttons.............................................................................................................................................. 10 Star Panel ......................................................................................................................................... 11 Status Bar ......................................................................................................................................... 11 Starting a Project from Scratch .............................................................................................................. 12 Project Details ....................................................................................................................................... 14 File name .......................................................................................................................................... 14 Opening and saving files ................................................................................................................... 14 Location ................................................................................................................................................ 16 Location From Town Name................................................................................................................ 18 Climate Data ..................................................................................................................................... 18 Defaults................................................................................................................................................. 19 Change to the Default Value.............................................................................................................. 20 Levels ............................................................................................................................................... 20 Properties.......................................................................................................................................... 20 Elements........................................................................................................................................... 20 Importing a background image............................................................................................................... 21 Scanned image ................................................................................................................................. 21 Paste from clipboard.......................................................................................................................... 21 Change colour................................................................................................................................... 22 Adjusting image size and position...................................................................................................... 22 Hiding and restoring the image .......................................................................................................... 23 Editing ................................................................................................................................................... 24 Selecting a node................................................................................................................................ 24 Moving nodes.................................................................................................................................... 25 Add a node........................................................................................................................................ 25 Delete a node or element .................................................................................................................. 25 Creating a New Zone............................................................................................................................. 26 Zone Characteristics.......................................................................................................................... 26 Air Flow............................................................................................................................................. 27 Drawing the Zone .............................................................................................................................. 27 Editing the Zone ................................................................................................................................ 27 Modelling zones extending over two levels ........................................................................................ 28 Modelling a zone with a mix of slab on ground and elevated floor ...................................................... 28 Eaves Plan........................................................................................................................................ 28 Windows................................................................................................................................................ 29 Modelling windows ............................................................................................................................ 29 Adding a new window........................................................................................................................ 29 Window properties............................................................................................................................. 29 Copyright Solar Logic 2007 BERS Pro V4.1 Users Manual Page 3 Editing Windows................................................................................................................................ 34 Custom Windows .............................................................................................................................. 34 Window Selection .................................................................................................................................. 37 Door ...................................................................................................................................................... 38 Adding a new door............................................................................................................................. 38 Editing............................................................................................................................................... 38 Modelling a zone with a mix of slab on ground and elevated floor ...................................................... 38 External Wall ......................................................................................................................................... 39 Colour ............................................................................................................................................... 39 Wall type and insulation..................................................................................................................... 40 Wall contact....................................................................................................................................... 41 Height ............................................................................................................................................... 41 Internal Wall .......................................................................................................................................... 42 Partition wall between zones ............................................................................................................. 42 External Floor ........................................................................................................................................ 44 Under floor space .............................................................................................................................. 44 Floor type, floor covering and insulation............................................................................................. 45 Ceiling Between Levels.......................................................................................................................... 46 Ceiling type, floor covering and insulation .......................................................................................... 46 Internal Floor Covering .......................................................................................................................... 47 Ceiling to Roof ....................................................................................................................................... 48 Ceiling type and insulation................................................................................................................. 48 Slope................................................................................................................................................. 49 Roof space........................................................................................................................................ 49 Roof ...................................................................................................................................................... 50 Roof type and insulation .................................................................................................................... 50 Slope................................................................................................................................................. 50 Shape ............................................................................................................................................... 51 Roof space ventilation ....................................................................................................................... 51 Glazing and Frame............................................................................................................................ 53 Stair Well............................................................................................................................................... 56 Modelling zones extending over two levels ........................................................................................ 56 Air Flow ................................................................................................................................................. 57 Natural Ventilation ............................................................................................................................. 57 Infiltration .......................................................................................................................................... 57 Forced Air Movement Using Ceiling Fans .......................................................................................... 57 Mechanical Ventilation....................................................................................................................... 57 Overshadowing by Obstacles ................................................................................................................ 59 Simulation Mode.................................................................................................................................... 60 Mathematical Basis of BERS ............................................................................................................. 60 Heating ............................................................................................................................................. 61 Cooling.............................................................................................................................................. 61 Climate file comfort settings............................................................................................................... 61 Detailed Description of Building Elements .............................................................................................. 63 SCRATCH File ...................................................................................................................................... 63 Simulate ................................................................................................................................................ 64 Star Panel ............................................................................................................................................. 64 Analysis................................................................................................................................................. 65 Temperature Display ......................................................................................................................... 67 Select the zone to be displayed. ........................................................................................................ 68 Time period to be displayed............................................................................................................... 68 Changing scale.................................................................................................................................. 68 Temperature Bins.............................................................................................................................. 69 Temperature Histograms ................................................................................................................... 70 Short Simulation Report......................................................................................................................... 71 Common Buttons................................................................................................................................... 72 Thermal and Optical Definitions ............................................................................................................. 73 R value.............................................................................................................................................. 73 U value or Thermal Transmittance ..................................................................................................... 73 SHGC ............................................................................................................................................... 73 Material capacitance and resistance properties. ..................................................................................... 74 Problems and Improvements ................................................................................................................. 76 Intellectual property ............................................................................................................................... 76 Licence and Legal Information ............................................................................................................... 76 Copyright Solar Logic 2007 BERS Pro V4.1 Users Manual Page 4 Introduction What The Program Is Used For The BERS (Building Energy Rating Scheme) computer program is a powerful tool that is used to simulate the thermal performance of Australian houses in climates ranging from Alpine to tropical. The star rating that is calculated can be used to show compliance with the thermal regulatory requirements of the Building Code of Australia (BCA). User Interface The graphics based data entry interface has been designed to make the process of thermally modelling buildings fast and accurate. Plan images can be imported and displayed in the background. Building elements are automatically dimensioned when drawn by the user with a mouse. Drawing image scales can be varied as well as the "snap to" grid distance. Information about the building and its environment is selected from graphics screens. Properties and dimensions can be easily checked or changed with a mouse click on the plan. The position of building elements can be easily changed. Help screens are available to guide the inexperienced user. Calculated data is displayed in graphic form as well as being saved as files or documents. Features Multi-storey buildings comprised of many zones can be modelled. Roof lines are drawn by the user enabling eaves widths for walls, doors and windows to be automatically calculated . Shading of windows and walls by adjacent walls is automatically calculated. Overshadowing by neighbouring buildings, vegetation, mountains etc requires the dimensions and location of the obstacle to be entered only once relative to the building. The dimensions of walls, doors and windows are displayed as elevations that are scaled to the plan dimensions. Properties can be copied and then pasted to other elements of the same type. User constructed information such as window shading schedules, user and client profiles, default building properties etc can be saved, and then later opened and used for future projects. Ventilation is automatically calculated from the dimensions and location on the plan of windows, doors and other openings in combination with the wind data in the climate file. Analysis of Data The thermal performance of a building can be analysed in terms of heating and cooling energy per floor area. This is converted to a STAR rating for regulatory compliance. A star rating is also assigned to each zone in the building to allow the user to easily identify which zones are working well and which ones need changes to improve performance. A record of the last 10 simulations is saved and can be easily accessed to assess progress in increasing the performance of a building. The thermal performance of "free running" buildings can also be assessed. Hourly temperatures of any zone for up to 4 projects can be displayed graphically. The starting date and duration of a period of interest can be selected for display. Hourly temperatures can be automatically selected for the display of extreme periods such as "a hot week in summer", "a cold week in winter" etc. Any of the 69 climate files can be displayed as hourly temperature graphs as described above. Building element properties such as the R-Values, U-Values, Solar Heat Gain Factors, graphs of window transmittance and absorptance curves etc are displayed as building elements are selected. Simulation Engine Themat hemat i cal“ engi ne”att hehear toft heBERSpr ogr am i st hes ameCSI RO t her mals i mul at i on engine used by ACCURATE, the benchmark software for the NatHERS scheme. ACCURATE is text based and does not have a graphics user interface. Copyright Solar Logic 2007 BERS Pro V4.1 Users Manual Page 5 Software Details BERS Pro V4.1 This software is copyright protected. It remains the intellectual property of Dr Holger Willrath. The CSIRO owns the copyright to the thermal simulation engine. No copies of this software may be distributed by the licencee under any conditions. Use of Software This software may only be used for the purpose of assessing the thermal performance of buildings. It expressly forbidden to use this software to provide training in the operation of BERS. Contact Solar Logic for information about the BERS trainer program for those wishing to train assessors in the use of BERS. Contact For further information visit the Solar Logic Website at www.solarlogic.com.au Email Solar Logic at [email protected] System requirements Processor speed BERS uses a simulation program which does a lot of numeric processing. The time taken to do a simulation depends on the number of zones in the building which is being modelled and the clock speed and type of CPU. A speed equivalent to a 1GHz Pentium is probably a minimum for reasonable simulation times. Memory Whent hepr ogr am i ss i mul at i ngabout1. 2GBofmemor yi sr equi r ed.Mos tcomput er swon’ thavet hi ss o virtual memory must be used as well. This is where the hard drive is used temporarily in place of RAM. The correct sequence for allocating virtual memory in XP professional and for XP home is: Start>Control panel > Performance and maintenance > System > Advanced > Performance > Settings > Advanced > Virtual memory > Change > Custom size Set the virtual memory at (1.2 GB –RAM). Display The minimum screen resolution required is 1024 x 768. Copyright Solar Logic 2007 BERS Pro V4.1 Users Manual Installing BERS Pro from a CD You will need about 500 MB free hard drive space. Shut down all other programs. Run SETUP.EXE from the CD drive. Directory Structure When BERS is installed the directory structure is as shown below. Contains data used by the BERS Program. This should never be edited or the program will cease to function correctly. Contains files of saved default settings Contains the BERS Project files. These should be archived from time to time. Contains the results of the simulations. Contains the shading schedules. Contains the hourly temperature output files. This should be cleared out regularly as the files created during each simulation are quite large. Various BERS utility programs will be added to in this directory. Bitmaps of plans are stored here. Copyright Solar Logic 2007 Page 6 BERS Pro V4.1 Users Manual Page 7 Licence Licence Details Each copy of BERS is licenced to a specific licencee. Details are given in the pop up screen when the software is first opened. If the licence file is missing or if the licence has expired a pop up message to this affect will be displayed. Buttons When the help button is pressed the message will relate to any of the problems mentioned above or will show this Help Screen. Pressing the Esc key will close the program. The button or the Enter key will close the licence screen. The licence expiry date appears in the top window. Today's date is displayed in black below. The number of days left on the licence is to the right. The licencee's name appears in the middle window. The licence number appears in the lower window. Licence Has Expired The licence to use this software has expired. To Renew Your Licence Email Solar Logic at [email protected] Copyright Solar Logic 2007 BERS Pro V4.1 Users Manual Licence File Not Found Your Licence File, BERSPro.LIC is missing from the BERS41 directory. Even if your licence has expired it should still be in this directory. Copyright Solar Logic 2007 Page 8 BERS Pro V4.1 Users Manual Page 9 Main Screen The Main Screen provides the links to all other windows where data is entered or information is displayed. The building is drawn to scale and may have an image of the plan displayed in the background. Project Bar This bar contains the project identifiers. Clicking on the yellow letters opens windows where changes can be made. Project Name Run Number Location Name Post Code The climate file name can only be changed by changing the location Name or the location Post Code. Orientation The orientation of the site plan can be changed by clicking in the circle and dragging the North arrow to a new position or by entering the "page up" orientation into the edit box. Copyright Solar Logic 2007 BERS Pro V4.1 Users Manual Page 10 Buttons New File A new BERS project will be created. Open File This opens a previously saved project. Save File BERS projects are saved in the HOUSE subdirectory. Save File As BERS projects are saved in the nominated location. Project Details can be entered as well as the project file name. The location selection determines the climate file used for the simulation. Import a Plan Hides background plan. Same as in the background image screen. Help and Information Tools Program "add ons" that facilitate design or calculations. Print the Screen Simulation Mode Each zone can be simulated as conditioned or free running. Simulate Edit Mode allows changes to be made to the zones and building elements. The nodes are displayed. These nodes can be dragged with the mouse. The scale of the drawing can be changed from 1m represented by 20 to 80 pixels . Drawing of rooms and roofline can be made to snap to a virtual grid of 100, 250, 500 or 1000mm spacing. The scale and snap settings are displayed to the right of the buttons. The nodes defining the eaves outline can be nudged one pixel with the direction arrows. The movement of the cursor can be constrained to move up and down or across, or it can be unconstrained and move in any direction. Occasionally there may be some information left in the drawing area when a pop-up appears or another screen passes over the top. The refresh button will clear this. Display the SCRATCH File Display a Detailed Description of building Elements Short Simulation Report Analysis Defaults Create a New Zone Copyright Solar Logic 2007 BERS Pro V4.1 Users Manual Page 11 Delete a Zone Draw Eaves Delete Eaves Add a Node Delete a Node or Element Add a Window Add a Door Add an Internal Wall Add a Skylight Add a Stair Well Overshadowing by Obstacles Buildings with up to 6 levels can be modelled. Clicking on the level button will cause that level to be displayed. Add a new level above the currently selected level. Add a new level below the currently selected level. Delete the level currently selected. Display the level above the currently selected level in dotted outline. Display the level below the currently selected level in dotted outline. Star Panel The results from the current as well as previous simulations are displayed. Status Bar The status bar at the bottom of the screen will display information such as the name of the file just opened, the zone name and area and curser position, and identify the object selected. Copyright Solar Logic 2007 BERS Pro V4.1 Users Manual Page 12 Starting a Project from Scratch The following sequence should be followed when starting a new project. Press the New File button. This will delete all currently entered information and restore the defaults. Press the Project Details button. Enter the Project Name and Run Number, and any other information you may require on output files. Press the Location button. Select a location by Name or Post Code and and nominate the wind shielding of the site. Starting with the bottom level information about the building should now be entered. Default properties for all building elements are selected so that only exceptions to these properties for any particular building element need be changed. The default properties can be set to be different for each level. Plans can be imported and scaled so that zones can be drawn on top of the drawing. Sel ec tanappr opr i at es cal eand“ s napt o”s et t i ng. Each room of the building should be drawn as a separate zone. Ensuite bathrooms can be included in the bedrooms. Draw the eaves in a similar way to zones. These should be drawn for each level. To add windows click the window button and then click on an external wall where the centre of the window is to be located. To add doors click the door button and then click on an external wall or a partition where the centre of the door is to be located. To add internal walls click the internal wall button and click again inside the target zone where one end of the internal wall is to be anchored. Move the cursor and click the mouse button to finish the wall at the other end. To add a skylight click on the skylight button and click again inside the target zone where the skylight is to be placed. Alternatively right click inside the target zone where a skylight is to be modelled and select the skylight button. Stairwells can only be modelled in the zone where the top of the stairs are located. Stairwells can not be added to level 1. To add a stairwell click on the stairwell button and click again inside the target zone. Save the job and simulate The Analysis screen gives additional information to what is displayed on the star panel. Make changes one at a time until the required performance level is attained. Copyright Solar Logic 2007 BERS Pro V4.1 Users Manual Page 13 Project File Management A new BERS project will be created. Opens a previously saved project. The saved project files all have a BER extension. They are contained in the HOUSE subdirectory. Projects can be saved in any directory. The default directory is the HOUSE subdirectory. File names are determined by the project name and run number and can not be changed here. To change the file name first change the project name in the Project Details screen. Projects can be quickly saved in the HOUSE subdirectory without having to negotiate the Save dialog screen. However there is no checking to see if the user wants to replace any existing file with the same name. Copyright Solar Logic 2007 BERS Pro V4.1 Users Manual Page 14 Project Details Project house keeping information can be entered as well as the project file name. File name The Project Name and the Run Number determine the file name. The combination above produces a file name Bribie2.BER. Information describing the building or simulation can be entered as text in the comment box. The run number should be incremented and a note made in the comment box every time a change is made. The file with this new file name should be saved before the simulation is run. Opening and saving files Assessor and client details can be saved and reused. Copyright Solar Logic 2007 BERS Pro V4.1 Users Manual Assessor details can be saved as *.ASS files also located in the SCHEDULE directory. The assessor name can not be changed but other details can be updated. Client details are saved as *.CLI files that are located in the SCHEDULE directory. Copyright Solar Logic 2007 Page 15 BERS Pro V4.1 Users Manual Page 16 Location Selecting a location allocates the hourly annual climate data file used by the simulation engine. Wind shielding around the site is described. The simulation process uses one of 69 annual climate data files. The climate data is in the form of hourly values of temperature, humidity, solar irradiation (beam and diffuse), cloud cover, wind speed and wind direction. The majority of this data has been collected by the Australian Bureau of Meteorology. Each Australian Post Code has been assigned the data set that most closely approximates its climate. Some post codes have more than one possible climate file. The location is displayed as a red dot on the map when sufficient information to determine latitude and longitude has been entered. Display All Climate Zones All postcode latitude and longitudes are displayed as a colour coded dot. The legend associates the colour to the climate file. The climate file is displayed in the status bar as the cursor passes over. Copyright Solar Logic 2007 BERS Pro V4.1 Users Manual Page 17 Display All Other Locations in the Same Climate Zone Each location sharing the selected climate file is displayed as a colour coded dot. Display Cities and Latitude, Longitude Lines Major cities and lines of latitude and longitude are superimposed onto the map. The Wind Shielding combo box is used to modify the outdoor wind speed data (usually measured at an airport) to something closer to what would actually exist around the building. Climate file selection is based on Location name. Climate file selection is based on Post Code Display the average monthly climatic data as histograms Location From Postcode The Post Code can be entered using this screen or by entering the name of the location. There will be more than one location with this Post Code so the correct name must be selected. This will produce a red dot on the location map. In some cases the area covered by the Post Code is quite large and more than one climate type exists within its boundaries. In this case the most suitable climate file may be selected with the radio buttons. The location from which the climatic data was obtained is displayed at the bottom of the window. Copyright Solar Logic 2007 BERS Pro V4.1 Users Manual Page 18 Location From Town Name Climate file selection is based on location name. Where more than one location with this name is available, the correct Post code must be selected. Clicking on the Post Code will display a red dot on the location map. In some cases the area covered by the Post Code is quite large and more than one climate type exists within its boundaries. In this case the most suitable climate file may be selected with the radio buttons. The location from which the climatic data was obtained is displayed at the bottom of the window. Climate Data Mean monthly maximum temperature, minimum temperature, solar radiation and humidity for the current climate file can be calculated and displayed. Display Data in Tabular Form Print the Graphs Copyright Solar Logic 2007 BERS Pro V4.1 Users Manual Page 19 Defaults Default properties are used when modelling zones so that only exceptions to these properties need be selected and changed. Defaults can be made to apply to the whole building or can be set for each level. Properties of the building elements can be assigned the current default values. The defaults can be saved and reused in new projects. External Wall Internal Wall External Floor Ceiling Between Levels Internal Floor Cover Ceiling to Roof Roof Door Window Skylight The building elements whose properties are to be affected by the changes are selected by ticking the box under the button. The default values and properties of the selected elements of all levels are changed to the default values of this level. This will not affect the properties of any elements already modelled but all future modelling will adopt these new values The properties of the selected elements on this level will be assigned the current default values. This does not include dimensions which will remain as they are. Copyright Solar Logic 2007 BERS Pro V4.1 Users Manual Page 20 Change to the Default Value Default screens allow the properties of elements that have already been modelled to be changed to the current default setting. Properties of all building elements of the same type can be assigned all or some of the properties selected in the default window. The selection of levels, properties and elements are clarified using the door example above. Levels The top option applies the default door properties to the whole building. If the properties are to apply to more than one but not all levels then it is better to use the Copy button in the default door screen, change to a new level default values and Paste the information into the new default screen then press level only. to be assigned the same and apply the settings to that Properties In the case of the door example the top selection would change all the doors to Solid timber but retain the original dimensions. The second option would turn all the doors into Solid timber doors that are 2100 mm high and 750 mm wide. Elements The top selection applies the changes to all doors. The second selection changes only those elements that had the properties displayed in the default element screen before the last changes were made. For example if the default door screen showed Hollow core doors and this is changed to Solid timber doors then the second selection would only change the properties of Hollow core doors to Solid timber doors. Copyright Solar Logic 2007 BERS Pro V4.1 Users Manual Page 21 Importing a background image An image of the plan can be displayed in the background. This image can be scaled and positioned enabling zones to be traced. Different plan images can be displayed for each level of the building. The appropriate plan image will be displayed when levels are changed. Plan images, and the display magnification and positioning are automatically saved and retrieved next time the project is opened. The image colour can be changed to provide a more subdued background Scanned image A plan can be easily scanned and saved as a bitmap (BMP). Plans that have been saved as black and white bitmaps can be imported but they can not have the black changed to another colour. To allow colour change import the black and white bitmap into WINDOWS PAINTBRUSH and save it as a 24 bit colour bitmap. TIF files should also be imported into Paintbrush first and then saved as 24 bit colour bitmaps. If the image is distorted or rotated then it should be imported into a program such as PHOTOSHOP, adjusted and saved. PHOTOSHOP won't allow black and white bitmaps to be rotated so the image should first be changed into a 24 bit colour bitmap. Open the BERS41\PLANS directory and display the *.BMP files. Paste from clipboard Paste the contents of the clipboard as a background image. Bitmaps can also be copied onto the clipboard and then pasted into the background. For example an AUTOCAD drawing being displayed can be captured onto the clipboard by pressing the Prt Sc keyboard key. PDF files can be copied onto the clipboard by displaying in ADOBE ACROBAT and pressing the Prt Sc keyboard key. Alternatively they can be imported into a program such as PHOTOSHOP and saved as bitmaps. Copyright Solar Logic 2007 BERS Pro V4.1 Users Manual Page 22 Change colour The bitmaps can be displayed in a more subdued manner. Changing the colour may take several seconds. Adjusting image size and position The bitmap image will be imported at a scale of 1:1. The scale of the bitmap usually exceeds that of the program drawing resolution of between 20 to 80 pixels/m. Selecting a a picture scale magnification using the radio buttons can save time if the scaling is known to be one of those listed. If the scale is unknown then move the red arrow to a section of the plan where a dimension is included. Copyright Solar Logic 2007 BERS Pro V4.1 Users Manual Page 23 Make this dimension as large as possible for the best accuracy. Check the scale on a different part of the plan to make sure the scan was not distorted. It can be useful to align the positioning of the picture with the grid to which the zone shapes will conform before tracing zones. The picture position can be adjusted using the X and Y sliders. These position offsets as well as the magnification can be saved using the Save button and later Restored. The picture can be returned to the top left hand corner with the Zero button. Hiding and restoring the image The background bitmap can be hidden. This has the same function as on the main screen. The background bitmap can be restored. Copyright Solar Logic 2007 BERS Pro V4.1 Users Manual Page 24 Editing Edit mode is used to allow changes to be made to the zones and building elements. Clicking this button hides or displays the nodes which define the position of the walls, doors and windows. Selecting nodes can display information about the object. The position of the nodes can be changed by clicking and dragging as described below. Selecting a node Eaves, window or door nodes are selected by Moving the cursor to the node Click on the node with the left hand mouse button. Zone nodes can be selected with the cursor by first clicking with the left hand mouse button anywhere within the zone containing the node and then clicking on the node. The selected node will change colour. Information about the object selected is displayed on the status bar at the bottom of the screen. Holding down the Shift button allows more than one node to be selected. Holding down the Ctrl button allows the whole zone to be selected. Holding down the Alt button allows all zones on that level to be selected. Highlighted nodes can be dragged to a new position. If several wall nodes are superimposed such as when 2, 3 or 4 rooms meet in a corner, clicking in the Zone A first determines that the node from Zone A is selected. If an eave node and zone node are superimposed, the eave node will be selected if the zone has not been clicked. When the nodes in the centre of doors or windows or at the ends of the internal walls are selected with the right hand mouse button, a new window will open allowing the properties of these elements to be edited. Right hand mouse clicking anywhere on a wall will allow the wall properties to be edited. Right hand mouse clicking anywhere in a zone will allow other zone properties to be edited. Copyright Solar Logic 2007 BERS Pro V4.1 Users Manual Page 25 Moving nodes The selected node/s can be dragged by holding down the left hand mouse button and moving the mouse. Windows and doors can't be dragged beyond the wall limit. If moving a node causes an overlap of zones the program won't let go of the node until there is no overlap. If an internal wall node is dragged outside of its host zone the program won't let go of the node until it is returned to the zone. If a complete zone is to be moved for the first time, select a node in the zone, select a second node with the control key down and drag. Add a node To add a node to a wall or eaves outline click where the new node is to be located. If walls have nodes where there is no change in wall direction or property they will be eliminated after a button click. Delete a node or element Nodes, internal wall, windows and doors can be deleted by highlighting the node and clicking on the delete button. Copyright Solar Logic 2007 BERS Pro V4.1 Users Manual Page 26 Creating a New Zone Each room of the building should be drawn as a separate zone. Ensuite bathrooms can be included in with a bedroom zone. Zoning affects the calculation of air flows from natural ventilation. Rooms separated by walls should not be combined into one zone if, by doing so, the cross-ventilation potential is artificially enhanced. Zone Characteristics When a new zone is first drawn it is automatically given a new name and representational colour based on its type. The zone name can be edited at this stage or later in the Zone Elements screen. The colour can be changed by clicking on the tile. The type of zone determines how heating, cooling and internal heating loads are calculated. Each zone can be simulated in one of two modes, conditioned or free running. This can be changed later with the button. In Rating Mode the heating and cooling calculation modes should not be changed from the defaults assigned by the program. Copyright Solar Logic 2007 BERS Pro V4.1 Users Manual Page 27 Air Flow Clicking the arrow will open the Air Flow window. The air flow data can be edited at this stage or later in the Zone Elements screen. Drawing the Zone After clicking the New Zone button click the Left Hand mouse button on the drawing grid to create the first node. Drag the line to the next point where it changes directions and click again. Continue this until the last node is created on top of the first when the zone becomes complete and assumes a colour similar to the tile. When the zone is complete, the elements of that zone, ie the walls, floor and ceiling are assigned the default values If the drawing is unsatisfactory and you wish to stop before the zone is completed, click on the delete zone button. Editing the Zone To add a node to a wall or eaves outline click where the new node is to be located. If walls have nodes where there is no change in wall direction or property they will be eliminated after a button click. Copyright Solar Logic 2007 BERS Pro V4.1 Users Manual Page 28 Nodes, internal wall, windows and doors can be deleted by highlighting the node and clicking on the delete button. To delete the zone select a node in the zone and click the delete zone button. Modelling zones extending over two levels Draw the zone. Draw another free running zone of the same floor area directly above the zone. Model a stair well in the top level having the same area as the floor between the levels. Modelling a zone with a mix of slab on ground and elevated floor Divide the room where the floor changes from on ground to elevated. Draw the room as two zones with different floor types Add an opening between the zones having the same area as the partition between them. Eaves Plan The eaves plan allows the program to calculate the eaves width for each door, window and wall. This determines the amount of shading. Deck roofs and opaque pergolas should be modelled as part of the eaves plan. After clicking the Draw Eaves button click the Left Hand mouse button on the drawing grid to create the first node. Drag the line to the next point where it changes directions and click again. Continue this until the last node is created on top of the first when the eaves outline becomes complete. These nodes can be selected with the cursor by clicking with the left hand mouse button. The selected node will be highlighted by changing colour. Holding down the Shift button allows more than one node to be selected. Highlighted nodes can be dragged to a new position. To delete the eaves highlight one of its nodes and clicking on the delete eves button. Copyright Solar Logic 2007 BERS Pro V4.1 Users Manual Page 29 Windows Windows and how they are shaded largely determine the amount of solar radiation entering the building and contributing to its heating. Windows also allow heat flow in and out of the building by virtue of their relatively high conductance and their ability to provide ventilation when open. Modelling windows Windows can be selected as a combination of a generic glass and a generic frame, or alternatively Custom Windows with known characteristics can be selected from a database of proprietary windows. Each window can be shaded by eaves and shading devices operating under variable monthly schedules. Internal furnishings can be selected to vary the effect of sunlight penetration and heat flow through the glazing. Vertical fins that attached to either side of a window can be modelled Adding a new window Click the window button and then click on an external wall where the centre of the window is to be located. Window properties The generic window screen requires a glass and frame combination to be selected. Copyright Solar Logic 2007 BERS Pro V4.1 Users Manual Page 30 The amount of tinting in the glass determines the amount of sunlight heating up the room. This is displayed in 3 columns, Clear, Light Tint, Heavy Tint. The number of layers of glass and any low emittance coatings determine the heat conductance through the glass. This is displayed in 5 rows, Single Glazed, Single Glazed Low E, Double Glazed Low E and Opaque. The opaque elements in the bottom row can be used to provide ventilation without incurring solar gains. The conductance of the frame is determined by the properties of the composite frame materials. Custom Windows can be selected by brand name and product. The thermal properties of the selected window are displayed. Copyright Solar Logic 2007 BERS Pro V4.1 Users Manual Page 31 The Window Style determines the maximum opening possible for ventilation. When window furnishings are drawn across the window they reduce heat conductance through the window system. This is displayed as the added R value. Window furnishings can also reduce overheating when drawn across sunlit windows. Copyright Solar Logic 2007 BERS Pro V4.1 Users Manual Page 32 Shading devices that are attached above or in front of windows reduce overheating when installed on sunlit windows. Some devices have a fixed amount of shading. Other shading changes from month to month. A monthly shading schedule can be applied to shading devices and obstructions. This can be used to model semi transparent pergolas. The percentage shading per month can be changed by clicking on a node at the top of the bar and dragging it to the required percentage. This value is shown in the display box. Make all months the same as January. 75% shade cloth can be modelled by dragging the January node to 75 then select this button. Semi transparent roof sheeting can also be modelled in this way. Save the current monthly shading values. Open a file with a saved monthly shading schedule. Reset shading back to 100% throughout the year. Each window can be modelled as having vertical fins which provide shading. Copyright Solar Logic 2007 BERS Pro V4.1 Users Manual Page 33 The drawing shows the fins on either side of the window shown in plan. The dimensions can be entered next to the fins in the diagram or below the diagram. Reset all dimensions to zero. The head height is the distance between the floor and the top of the window. This dimension is used for the ventilation calculations. Dimensions can be selected with the radio buttons entered into the edit boxes. These dimensions are shown at the same scale as the plan. The offset is the vertical distance from the top of the window to the horizontal projection of the lowest part of the eaves (usually the gutter) onto the wall. The diagram shows an offset of 150mm where the lowest part of the eaves is 150 mm above the top of the window. If the lowest point is below the top of the window (as in a window hood), the offset is given a negative value. The eaves plan drawn by the user allows the program to calculate the eaves width for each door, window and wall. The 2nd Eaves edit box allows the automatically calculated eaves width to be overridden when the value entered is greater than 0. This is useful if 2 windows above each other in the same wall having different overhangs are to be modelled. Copyright Solar Logic 2007 BERS Pro V4.1 Users Manual Page 34 Hint. When windows are placed exactly on top of each other their images on the plan will cancel making them impossible to see. This can be overcome to some extent by offsetting the nodes. Nodes have been horizontally offset Editing Windows Moving Windows Window nodes can be selected with the cursor by clicking with the left hand mouse button. The selected node will be highlighted by changing colour. Highlighted nodes can be dragged to a new position. Changing Properties A window whose properties are to be edited must have its node be selected with the cursor by clicking with the right hand mouse button. Deleting Windows Click on the window node and press the Delete a Node or Element button. Custom Windows Commercially available windows with known characteristics can be selected from a database. Copyright Solar Logic 2007 BERS Pro V4.1 Users Manual Selecting a window Open the Brand drop down list. Selecting a brand will open the Product listing for that company. Data relating to glass, frame and the total window is displayed. Copyright Solar Logic 2007 Page 35 BERS Pro V4.1 Users Manual Page 36 Solar Transmittance and Absorptance curves are displayed. The Search button finds all products with similar properties either from the entire data base or from a particular Brand. The U-Value ranges are automatically set at +/- 0.1(about 2%) and the Solar Heat Gain Coefficient (SHGC) is set to +/- 0.1 (10%). The U-Value and SHGC ranges can also be set manually. The product list automatically updates as changes are made. Reset the Maximum and Minimum to encompass all options. Copyright Solar Logic 2007 BERS Pro V4.1 Users Manual Page 37 Window Selection There are thousands of commercially available windows that can be selected for simulation. The important properties that determine how windows perform in different climates are the total window conductance or U value and the solar heat gain coefficient, SHGC. To make the selection process easier proceed in the following way. Make a selection from the generic window combination of glass and frame. Simulate using these combinations until a satisfactory result is obtained. Change to the Custom Windows mode. Custom Windows can be selected by brand name and product. The Search button finds all products with similar properties either from the entire data base or from a particular Manufacturer. The U-Value ranges are automatically set at +/- 0.1(about 2%) and the Solar Heat Gain Coefficient (SHGC) is set to +/- 0.1 (10%). This gives you a selection of windows from different (or the same) manufacturer which have similar optical and thermal properties to the generic window in the simulation. Simulate again with the selected proprietary window product. Copyright Solar Logic 2007 BERS Pro V4.1 Users Manual Page 38 Door Doors allow heat flow in and out of the building by virtue of their conductance and their ability to provide ventilation when open. Doors are defined by their type which determines the thermal resistance and capacitance, and their dimensions. Shading is determined automatically using eaves plan information. Adding a new door Click the door button and then click on an external wall or a partition where the centre of the door is to be located. Doors connecting zones have the respective zone colour tiles displayed at the top. Editing A door whose properties are to be edited must have its node selected with the cursor by clicking with the right hand mouse button. Door nodes can be selected with the cursor by clicking with the left hand mouse button. The selected node will be highlighted by changing colour. Highlighted nodes can be dragged to a new position. To delete a door click on the door node and press the Delete a Node or Element button. Modelling a zone with a mix of slab on ground and elevated floor Divide the room where the floor changes from on ground to elevated. Draw the room as two zones with different floor types Add an opening between the zones having the same area as the partition between them. Copyright Solar Logic 2007 BERS Pro V4.1 Users Manual Page 39 External Wall External walls are created when a zone is drawn. To inspect or edit the properties of a wall right click on the wall. To move a node left click the node and drag it to its new position. To move a wall or several sections of wall first use the Shift Key to select each node to be moved. Drag the wall sections to the new position. To delete a wall click on a node at that is on the anticlockwise end of the wall to be eliminated and press the Delete a Node or Element button. Colour Colour determines how much of the incident solar radiation is absorbed. Copyright Solar Logic 2007 BERS Pro V4.1 Users Manual Page 40 Dark, medium and light are often as close as the designer gets to knowing external colours. If the colours are known, clicking on the colour panel will open up a large choice of colours. The colour value is converted to absorptance, the fraction of incident sunlight absorbed and turned into heat. The door, wall and window dimensions are shown in elevation at the same scale as the plan. The same wall is shown below when the scale is halved. If the tops of the walls are truncated, switch to a smaller scale. Wall type and insulation The wall type and insulation databases will be added to as new products become available. Copyright Solar Logic 2007 BERS Pro V4.1 Users Manual Page 41 The R values displayed in the Type panel is for the material of the wall without any airspaces . The R value of air spaces and insulation is displayed in the Insulation panel. Length, Area, Orientation, Total wall R value and Total wall transmittance values are also displayed. The thickness of the main part of the wall can be changed by entering a value in mm. In a brick veneer wall or a cavity brick wall this dimension would apply to the width of the brick. For a log wall this would be the width of the logs. Wall contact Air - normal external wall Shaded Air - wall is in shade at all times Neighbour - this is a party wall to a neighbouring unit. Earth - the wall is in contact with the earth such as a cellar wall Height The height of the wall can be changed by entering a value in the box or selecting the appropriate radio button. This is the height of the external wall as seen from inside the zone. Copyright Solar Logic 2007 BERS Pro V4.1 Users Manual Page 42 Internal Wall Internal walls may be a partition wall between two zones, (interzone wall), or a wall within a zone, (intrazone wall). Partition wall between zones Interzone partition walls are created when a new zone is first drawn or when zone boundaries are moved. All walls forming boundaries around zones are given 2 sets of properties. Which properties are used depends on whether the wall forms an external boundary or joins to another zone. To inspect or edit the properties of a wall right click on the wall. To move a node left click the node and drag it to its new position. To move a wall or several sections of wall first use the Shift Key to select each node to be moved. Drag the wall sections to the new position. To delete a wall click on the node that is on the anticlockwise end of the wall to be eliminated and press the Delete a Node or Element button. Wall within a zone This type of wall can be used to provide thermal mass to a light weight area. To draw a wall within a zone first click the Insert Internal Wall button. Click inside the target zone where one end of the wall is to be anchored. Move the cursor and click the mouse button to finish the wall at the other end. To inspect or edit the properties of a wall within a zone right click a node at either end. To move a node left click the node and drag it to its new position The wall can not be dragged out of its zone. To delete the wall click on a node at either end of an intrazone internal wall and press the Delete a Node or Element button Copyright Solar Logic 2007 BERS Pro V4.1 Users Manual Page 43 The door and wall dimensions are shown in elevation at the same scale as the plan. If the tops of the walls are truncated, switch to a smaller scale. Wall type and insulation The wall type and insulation databases will be added to as new products become available. The R values displayed in the Type panel is for the material of the wall without any airspaces . The R value of air spaces and insulation is displayed in the Insulation panel. Length, Area, Orientation, Total wall R value and Total wall transmittance values are displayed. The thickness of the main part of the wall, (in this case the plasterboard), can be changed by entering a value in mm. Height Wall height can be changed by entering a value in the box or selecting the appropriate radio button. Copyright Solar Logic 2007 BERS Pro V4.1 Users Manual Page 44 External Floor The floor to the outside potentially provides a thermal link to the ground as well as useful thermal mass to stabilise air temperatures within the building. In warm climates the cooler ground below the floor can serve as a useful heat sink in summer if no carpet or insulation reduces heat flow. In cold climates it is useful to insulate the floor to reduce this heat loss from the building. Under floor space Floor spaces are automatically created when no other zone exists below all or part of the floor of a zone. Zones that share common floor spaces must be grouped together. This includes slab on ground floors. Elevated floors require input of the average under-floor height to determine the volume required for the ventilation calculation. Copyright Solar Logic 2007 BERS Pro V4.1 Users Manual Page 45 Enclosed indicates that the only ventilation openings are those required for compliance with building codes (see below). Open indicates that additional openings are provided for ventilation. Very Open indicates that the sub-floor space is very well ventilated with large openings. If the ventilation type is Enclosed then the vent area must be entered as square millimetres per linear metre of the perimeter. Floor type, floor covering and insulation The R value displayed in the Type panel is for the floor and covering without any airspaces The R value of air spaces and insulation is displayed in the Insulation panel. The thermal resistance, transmittance and area of the floor is also displayed. Copyright Solar Logic 2007 BERS Pro V4.1 Users Manual Page 46 Ceiling Between Levels Internal floors or ceilings between levels do not exchange heat directly with the outside. Uninsulated and uncarpeted floors with high thermal mass can stabilize the extremes in internal air t emper at ur e.Li ghtwei ghtt i mberf l oor sdon’ tof f ert hi spot ent i al . Ceiling type, floor covering and insulation The floor cover properties are those of the floor above. The R value displayed in the Type panel is for the ceiling without any airspaces or floor covering. The R value of air spaces and insulation is displayed in the Insulation panel. The thermal resistance, transmittance and area of the internal ceiling is also displayed. Copyright Solar Logic 2007 BERS Pro V4.1 Users Manual Page 47 Internal Floor Covering Floor coverings reduce heat flow into and through floors. Internal floor coverings reduce the ability of mass floors to stabilise internal temperature fluctuations. The internal floor gets its general properties from the ceiling below, but the floor coverings are selected from this screen. Copyright Solar Logic 2007 BERS Pro V4.1 Users Manual Page 48 Ceiling to Roof Heat flow between the building and the outside air through the ceiling, roof space and roof is potentially larger than through any other building elements other than windows and skylights. Insulating the ceiling has an enormous potential to reduce this heat flow. Ceiling type and insulation The R value displayed in the Type panel is for the ceiling without any airspaces. The R value of air spaces and insulation is displayed in the Insulation panel. The thermal resistance, transmittance and area of the ceiling is also displayed. Copyright Solar Logic 2007 BERS Pro V4.1 Users Manual Page 49 Slope The ceiling slope can be determined by dragging the node or entering the value of the slope angle as degrees in the slope field. Horizontal skylights have zero slope. Roof space Roof spaces are automatically created when no other zone exists above all or part of the ceiling of a zone. Zones that share common roof spaces must be grouped together. The description of the space above the roof automatically changes the description of this space in the Roof popup window. Unvented indicates that no specific ventilation openings are provided. Ventilated indicates that purpose-built ventilation openings are provided. Highly Ventilated indicates that the roof space is very well ventilated with large openings. The no cavity option replaces the roof cavity with a still air gap. If another apartment exists above this dwelling the roof and roof space information is ignored. Copyright Solar Logic 2007 BERS Pro V4.1 Users Manual Page 50 Roof Roof spaces are automatically created when no other zone exists above the ceiling of a zone. Zones that share common roof spaces can be selected in the Ceiling screen. Roof type and insulation Slope The roof slope can be determined by dragging the node or entering the value of the slope angle as degrees in the slope field. This determines the area of the roof and the volume of the roof space. Copyright Solar Logic 2007 BERS Pro V4.1 Users Manual Page 51 Shape The roof shape determines the area of the roof and the volume of the roof space. Hip Roof Hip roofs minimize roof area and roof space volume. Gable Roof The triangular ends are assumed to have similar thermal properties to the roof. Hip/Gable Roof The triangular end is assumed to have similar thermal properties to the roof. Skillion Roof The triangular ends and the rectangle above the ceiling line are assumed to have similar thermal properties to the roof. Roof space ventilation Unvented indicates that no specific ventilation openings are provided. Ventilated indicates that purpose-built ventilation openings are provided. Highly Ventilated indicates that the roof space is very well ventilated with large openings. The no cavity option replaces the roof cavity with a still air gap. If another apartment exists above this dwelling the roof and roof space information is ignored. Copyright Solar Logic 2007 BERS Pro V4.1 Users Manual Page 52 Colour Colour determines how much of the incident solar radiation is absorbed. Dark, medium and light are often as close as the designer gets to knowing external colours. If the colours are known, clicking on the colour panel will open up a large choice of colours. The colour is converted to absorptance, the fraction of incident sunlight absorbed and turned into heat. Copyright Solar Logic 2007 BERS Pro V4.1 Users Manual Page 53 Skylights and Clerestory Windows Skylights contribute to the amount of solar radiation entering the building. They also allow heat flow in and out of the building by virtue of their relatively high conductance. To Add a skylight or clerestory window left click on the skylight button and then left click in the zone that is to have the skylight. If the zone already contains a skylight then addition skylights can be added when editing. To edit the properties of a Skylight or Clerestory Window (high set vertical windows) right click in the zone containing the skylight. To model a true Skylight and not a Clerestory Window box is unchecked. Glazing and Frame The thermal properties are displayed as different combinations of glass and frame are selected. Copyright Solar Logic 2007 BERS Pro V4.1 Users Manual Page 54 Slope The slope can be determined by dragging the node or entering the value of the slope angle as degrees in the slope field. Horizontal skylights have zero slope. Orientation One of 8 orientations is selected by clicking on the appropriate button. The position of the button is given relative to the drawing The drawing shows the UP direction of the screen as 37° East of North. The actual orientation is displayed on the button. Skylight Shaft Enter the length and reflectance of the shaft. If insulated enter the R value. If a diffuser exists at the bottom of the skylight shaft check the box. Skylight characteristics can be copied and pasted . Clerestory Windows These are high set vertical windows. The Clerestory Window option allows windows to be modelled in internal walls which become external walls towards the top, or where no wall exists below the window. The extra bit of wall containing the glazing is also modelled. Copyright Solar Logic 2007 BERS Pro V4.1 Users Manual Page 55 There are some limitation to the properties assigned to clerestory windows compared to normal windows. The eave information is not derived from the eaves plan so it must be entered by the user. External shading devices can not be modelled. The net wall area is the total area of this external wall minus the clerestory window area. Wall properties are considered to be the same as the default wall properties. See the window section for an explanation of the other properties. The Custom Window selection is the same as for normal windows. Copyright Solar Logic 2007 BERS Pro V4.1 Users Manual Page 56 Stair Well Stair wells provide ventilation between different levels of the building. Stairs can only be added if there is a zone below where the target zone is clicked. The available area is the common area between the 2 zones minus any area already containing a stairwell. Modelling zones extending over two levels Draw the zone on the first floor. Draw another free running zone of the same floor area directly above the zone. Model a stair well in the top level having the same area as the floor between the levels. Copyright Solar Logic 2007 BERS Pro V4.1 Users Manual Page 57 Air Flow This screen allows some changes to be made to the air flow characteristics of each zone. Natural Ventilation The location and dimensions of doors, windows and other ventilation devices determines the air flow through the building. The Window Style determines the maximum opening possible for ventilation. Insect screens reduce the air flow. Infiltration This is the uncontrolled ventilation. Draught seals should be provided to all windows and external doors of the zone. The air speed is calculated on an hourly basis by the engine. Forced Air Movement Using Ceiling Fans Fans move air which doesn't change ambient temperature but increases comfort in hot conditions by producing lower skin temperatures by increasing the evaporation of sweat. The maximum cooling benefit of these fans is as follows: 900 mm: 0.50 m/s. Cooling benefit = 1.6 degrees 1200 mm: 0.66 m/s. Cooling benefit = 2.4 degrees 1400 mm: 0.77 m/s. Cooling benefit = 2.8 degrees This cooling benefit may be reduced according to the floor area and number of fans "Rules of thumb" : Bedrooms Other Zones 7.5 - 10m² 10 - 30m² 30 - 60m² 60 - 90m² 1 x 1200 mm fan in each 1x 1x 2x 3x 900 mm fan 1200 mm fan 1200 mm fan 1200 mm fan Mechanical Ventilation This is the movement of air through the room with a blower or extractor. When implemented, the Air Changes per Hour must be calculated from the manufacturer's data sheets. Copyright Solar Logic 2007 BERS Pro V4.1 Users Manual Page 58 Editing a zone Clicking in a zone with the Right Hand mouse button will allow information about the zone to be displayed and edited. Only the relevant element buttons are displayed. The Roof button may not be needed for lower floors, and the Skylight and Stair Well buttons are not displayed if none have been modelled. A down stairs room has been selected. Part of the ceiling has a roof above and the other part has room above. An upstairs room has been selected. When a New Zone is first drawn it is automatically given a new name based on its type. This name can be edited then or at this stage. Calling this as sleeping zone automatically assumes the default condition that heating and cooling will be assessed. This can be changed here or at the Simulation Mode screen. Air Flow External Floor Ceiling Between Levels Floor Covering Between Levels Ceiling to the Roof Space Roof Skylight Stair Well Copyright Solar Logic 2007 BERS Pro V4.1 Users Manual Page 59 Overshadowing by Obstacles Obstructions to sunlight, such as neighbouring buildings, trees or mountains can have their shading impact modelled. Up to 3 obstructions in each of 4 directions can be selected. Below is the data entry screen for obstruction to the North and another for obstructions to the East. The dimensions L1 and L2 are measured from the axis on the screen. D is measured from the other axis. In many cases the dimensions will be negative. A monthly shading schedule can be applied to any obstacle such as a deciduous tree or vertical shade cloth. This will reset all the dimensions of the selected obstruction including the shading schedule. Copy dimensions and shading schedule. Paste previously copied dimensions and shading schedule. Copyright Solar Logic 2007 BERS Pro V4.1 Users Manual Page 60 Simulation Mode Mathematical Basis of BERS The mathematical thermal simulation program at the heart of the BERS program is the ACCURATE engine. This much enhanced version of the engine used in all previous versions of BERS was developed with AGO funding by the CSIRO. The climate data is in the form of hourly values of temperature, humidity, solar irradiation (beam and diffuse), wind speed and direction, and cloud cover. The majority of this data has been collected by the Australian Bureau of Meteorology. It has been converted into a useable format under contract to the AGO. Each Australian Post Code has been assigned the data set that most closely approximates its climate. Thermal simulation can be undertaken in one of two modes, conditioned or free running. In Rating Mode the heating and cooling calculation modes should not be changed from the defaults assigned by the program. Conditioned In a "conditioned" zone, heating and cooling is available to maintain comfort. In rating mode all zones of type Living, Living/Kitchen and Sleeping are heated and cooled to maintain comfort while zones of type Garage, Wet Area and Corridor are not. Ticking the Heat and/or Cool check boxes changes the type of simulation. Free running Zones which are not ticked are "free running"where the zone just reaches a temperature which is in dynamic equilibrium with its environment. No heating or cooling is available to maintain comfort in these zone. Copyright Solar Logic 2007 BERS Pro V4.1 Users Manual Page 61 In zones of type Living, Living/Kitchen, heating and cooling are available when needed from 7 am to 12 pm. In zones of type Sleeping, heating and cooling are available from 4 pm to 9 am. Although heating and cooling are available between these times, they are not invoked unless required, as described below. Heating Heating is applied if the zone temperature at the end of the hour without heating is below the heating thermostat setting. Enough heat is supplied so that the zone temperature at the end of the hour is equal to the thermostat setting. Cooling Cooling is invoked in a more complicated way. 1. If at the end of the hour the zone condition (i.e. temperature and moisture content) without cooling or ventilation is within the comfort region on the psychrometric chart, cooling is not invoked. The comfort region is a parallelepiped, the boundaries of which are: Top: Absolute moisture content = 12 g/kg Bottom: Absolute moisture content = 0 g/kg (normally it is 4 g/kg but AccuRate will not invoke cooling merely because the air is too dry) Right: ET* line based on (Cooling Thermostat + 2.5) degrees Left: Not relevant 2. If at the end of the hour the zone condition without cooling or ventilation is outside the comfort region, ventilation is switched on (i.e. windows and other openings in this zone are opened) if the zone temperature is above the outdoor air temperature. The new zone temperature is calculated and an indoor air speed is estimated. If the indoor air speed is above 0.2 m/s, the comfort region described above is extended in two ways: the top boundary becomes the 90%RH line, and the right boundary becomes an ET* line based on (Cooling Thermostat + 2.5 + dT), where dT = 6*(v - 0.2) - 1.6*(v - 0.2)², where v is the indoor air speed (m/s). 3. If the zone condition is still outside the extended comfort region, the zone openings are closed and sufficient cooling is applied so that the zone temperature at the end of the hour is the cooling thermostat setting. Note that the cooling calculations include a model of a residential air conditioner cooling coil, so that dehumidification occurs when cooling is invoked. The dehumidification energy is reported as the latent cooling energy Climate file comfort settings The lower value for the heating of sleeping zones (15°C) applies between midnight and 7.00 am and the higher (18°C) between 8.00 am and 4.00 pm. Copyright Solar Logic 2007 BERS Pro V4.1 Users Manual Page 62 Climate Number 1 2 3 4 5 6 7 8 9 10 11 12 13 14 15 16 17 18 19 20 21 22 23 24 25 26 27 28 29 30 31 32 33 34 35 36 37 38 39 40 41 42 43 44 45 46 47 48 49 50 51 52 53 54 55 56 57 58 59 60 61 62 63 64 65 66 67 68 69 Copyright Solar Logic 2007 Name State Heating °C Heating °C Cooling °C Sleeping Living Darwin NT 15 or18 20 26.5 Pt Hedland WA 15 or18 20 27.0 Longreach QLD 15 or18 20 27.0 Carnarvon WA 15 or18 20 26.0 Townsville QLD 15 or18 20 26.5 Alice Springs NT 15 or18 20 26.5 Rockhampton QLD 15 or18 20 26.0 Moree NSW 15 or18 20 26.0 Amberley QLD 15 or18 20 26.0 Brisbane QLD 15 or18 20 25.5 Coffs Harbour NSW 15 or18 20 25.0 Geraldton WA 15 or18 20 25.0 Perth WA 15 or18 20 25.0 Armidale NSW 15 or18 20 24.0 Williamtown NSW 15 or18 20 25.0 Adelaide SA 15 or18 20 25.0 Sydney NSW 15 or18 20 25.5 Nowra NSW 15 or18 20 24.5 Charleville QLD 15 or18 20 27.0 Wagga NSW 15 or18 20 25.0 Melbourne VIC 15 or18 20 24.0 East Sale VIC 15 or18 20 23.0 Launceston TAS 15 or18 20 22.5 Canberra ACT 15 or18 20 24.0 Cabramurra NSW 15 or18 20 23.0 Hobart TAS 15 or18 20 23.0 Mildura VIC 15 or18 20 25.0 Richmond NSW 15 or18 20 24.5 Weipa QLD 15 or18 20 26.0 Wyndham WA 15 or18 20 27.5 Willis Is QLD 15 or18 20 26.5 Cairns QLD 15 or18 20 26.5 Broome WA 15 or18 20 27.0 Learmouth WA 15 or18 20 26.5 Mackay QLD 15 or18 20 26.0 Gladstone QLD 15 or18 20 26.0 Halls Creek WA 15 or18 20 27.0 Tennant Creek NT 15 or18 20 27.0 Mt Isa QLD 15 or18 20 27.0 Newman WA 15 or18 20 28.0 Giles WA 15 or18 20 27.5 Meekatharra WA 15 or18 20 28.0 Oodnadatta SA 15 or18 20 27.0 Kalgoorlie WA 15 or18 20 26.0 Woomera SA 15 or18 20 26.0 Cobar NSW 15 or18 20 26.5 Bickley WA 15 or18 20 24.5 Dubbo NSW 15 or18 20 25.0 Katanning WA 15 or18 20 24.5 Oakey QLD 15 or18 20 25.0 Forrest WA 15 or18 20 25.5 Swanbourne WA 15 or18 20 25.0 Ceduna SA 15 or18 20 24.5 Mandurah WA 15 or18 20 25.0 Esperance WA 15 or18 20 24.0 Mascot NSW 15 or18 20 24.5 Manjimup WA 15 or18 20 23.5 Albany WA 15 or18 20 23.5 Mt Lofty SA 15 or18 20 23.0 Tullamarine VIC 15 or18 20 24.0 Mt Gambier SA 15 or18 20 23.5 Moorabbin VIC 15 or18 20 24.0 Warrnambool VIC 15 or18 20 23.0 Cape Otway VIC 15 or18 20 23.0 Orange NSW 15 or18 20 23.0 Ballarat VIC 15 or18 20 23.5 Low Head TAS 15 or18 20 23.0 Launceston TAS 15 or18 20 23.5 Thredbo NSW 15 or18 20 23.5 BERS Pro V4.1 Users Manual Page 63 Detailed Description of Building Elements This screen can be used to check what has been modelled in the building. Most building elements are described in detail. Refresh the screen if changes have been made. This report can be printed. SCRATCH File This is the file that the BERS front end writes to the simulation engine. It will not mean anything to most users and is only used for diagnostic purposes. The column and row give the location of the cursor. Copyright Solar Logic 2007 BERS Pro V4.1 Users Manual Page 64 Simulate This runs the thermal simulation engine. The speed depends on the computer and the complexity of the building design. The results are displayed in the Analysis window. Star Panel This panel contains the Simulate and Analysis buttons as well displaying results from previous simulations. Open the Analysis window. The history of the last 10 simulations can be examined. The last simulation is 1, second last is 2 etc. The project name and climate file name corresponding to the simulation results are displayed when the history focus is changed. The simulation results are displayed as stars. Up to 10 stars may be displayed in half star increments. A lemon means zero stars. Results are also displayed in MJ/m². The record of the last 10 simulations can be erased. Copyright Solar Logic 2007 BERS Pro V4.1 Users Manual Page 65 Analysis Simulated projects can have the energy performance of the whole building or of each zone within the building analysed. The house button gives information about the whole building. The history of the last 10 simulations can be examined. The last simulation is 1, second last is 2 etc. The project name and climate file name corresponding to the simulation results are displayed when the history focus is changed. The simulation results are displayed as stars. Up to 10 stars may be displayed in half star increments. Copyright Solar Logic 2007 BERS Pro V4.1 Users Manual Page 66 A lemon means zero stars. Results are also displayed in MJ/m². The record of the last 10 simulations can be erased. The zone button gives information about each zone in the building. The up/down buttons allow different zones to be selected. The Analysis form can be printed. Hourly temperatures can be Displayed. Copyright Solar Logic 2007 BERS Pro V4.1 Users Manual Page 67 Temperature Display Hourly temperatures of any zone can be displayed. This temperature profile can be compared with temperature profiles from other zones of the building temperature profiles of similar zones from other projects hourly temperatures from climate files can also be displayed. The climate files contain hourly climatic data. The temperature data from any of these files can be displayed by pressing and select from the files. The display of this file can be toggled on or off by clicking in the check box next to the file name. Copyright Solar Logic 2007 BERS Pro V4.1 Users Manual Page 68 Select the zone to be displayed. To compare temperature profiles of different zones open the temperature output files in the Temperature subdirectory. Up to 4 projects can be compared at any one time. As each zone is selected the temperature profile will be displayed in a unique colour. Any curve can be temporarily hidden or displayed using the check box. will delete the curve completely. To display it again the zone must be reselected. Time period to be displayed. The starting date and the number of days to be displayed can be selected. Extreme periods can be automatically selected from the drop down list. Changing scale The scale of the graph can be changed with the up/down scroll arrows. Dragging with the Right Hand mouse button can be used to change the position of the graph. Copyright Solar Logic 2007 BERS Pro V4.1 Users Manual Page 69 Temperature Bins The hourly zone temperatures can be displayed in bins of one degree increment that give the frequency of a particular temperature occurring in a zone. . These temperature bins range from <10 to >36°C. The window can be scrolled horizontally to display the complete data set. The zones that have been selected for each project can have their temperature distribution compared. Alternatively any temperature data output file can be opened and have the temperatures binned. The name of the file that has been selected will be displayed. Copyright Solar Logic 2007 BERS Pro V4.1 Users Manual Page 70 The data can be printed. Landscape mode should be selected. Temperature Histograms Temperature data can be displayed as a series of histograms. The height of each bar is proportional to the number of hours the zone spends at the temperature given at its base. The zone of interest can be selected from a drop down list. The scale of the graph can be changed by using the scale arrows. The graph can be printed. Copyright Solar Logic 2007 BERS Pro V4.1 Users Manual Page 71 Short Simulation Report The simulation results are displayed together with details of the location of the dwelling, the client and the assessor. Project Details are summarised together with the heating and cooling energy load. This report can be printed. Copyright Solar Logic 2007 BERS Pro V4.1 Users Manual Common Buttons Information and help. Gets you to the BERS help file. New. Start anew. Will destroy current information. Open a file which will overwrite current information. Save the information in a file. colour of the zone or zones containing the element. Reset parameters to what they were before changes were made. Change all elements of that type to the current default. Copy parameters. Paste previously copied information. Delete whatever the focus is on. Print screen or file. Refresh the screen. Accept all changes and close the window. Close the window without making any changes. Copyright Solar Logic 2007 Page 72 BERS Pro V4.1 Users Manual Page 73 Thermal and Optical Definitions R value This is the resistance to heat flow between two surfaces at different temperatures. Units are m2K/W. Bulk materials have R values proportional to their thickness, R=d/k where k is conductivity d is thickness The R value for air gaps varies in a non linear way with distance. U value or Thermal Transmittance This is calculated as the reciprocal of the total resistance. Transmittance has the same units as conductance but conductance is calculated surface to surface while transmittance is calculated from internal air film to external air film. SHGC The Solar Heat Gain Coefficient is the fraction of solar energy incident on a window that is ultimately converted to heat entering into the room. Solar radiation passing through the glass is absorbed by the room and converted to heat. Some of the radiation absorbed by the glass is transferred as heat into the room. sun reflection conduction convection radiation Copyright Solar Logic 2007 absorption transmission conduction convection radiation BERS Pro V4.1 Users Manual Page 74 Material capacitance and resistance properties. The following thermal capacitance and resistance values are used by the CSIRO thermal simulation engine. Resistances and capacitances listed are for a material thickness of 1.0 m. The actual resistance and capacitance of the material used in a construction is the product of its thickness and the value in the table. Index 1 72 2 3 4 5 71 6 7 8 9 10 11 12 13 52 53 14 15 54 55 56 57 16 58 17 18 66 19 20 21 63 22 23 24 25 26 59 60 27 28 29 30 31 32 33 34 Name Aerated autoclaved concrete block Air-Cell Retroshield or Glareshield - not including air gaps Aluminium Bituminous roof membrane Brickwork: generic extruded clay brick (typical density) Brickwork: generic pressed clay brick (typical density) BST lightweight concrete Carpet Carpet underlay (felt) Carpet underlay (rubber) Carpet 10 + felt underlay 10 Carpet 10 + rubber underlay 8 Ceramic tile Concrete block 190 denseweight (not core-filled) Concrete block 190 denseweight (core-filled at 1500 centres) Concrete block 190 lightweight (not core-filled) Concrete block 190 lightweight (core-filled at 1500 centres) Concrete block 140 denseweight (not core-filled) Concrete block 140 denseweight (core-filled at 1500 centres) Concrete block 140 lightweight (not core-filled) Concrete block 140 lightweight (core-filled at 1500 centres) Concrete block 110 denseweight (not core-filled) Concrete block 110 lightweight (not core-filled) Concrete block 90 denseweight (not core-filled) Concrete block 90 lightweight (not core-filled) Concrete block 90 denseweight (core-filled) Concrete: standard (2400 kg/m³) Conpolcrete Copper Cork tile Felt (undercarpet) Fibre-cement sheet Fibre-cement sheet (compressed) Generic resistance (k = 0.1) Generic resistance (k = 0.3) Glass Granite Hollowcore precast concrete panel 200 Hollowcore precast concrete panel 150 Lead Linoleum Marble Masonite Mud brick Particleboard Plaster (cement:sand 1:4) Plasterboard Copyright Solar Logic 2007 Capacitance Resistance 525.0 7.70 0.1 0.14 2358.4 0.01 1646.4 6.25 1453.6 1.64 1929.2 1.11 1128.0 3.33 147.7 17.60 147.7 25.00 470.9 12.50 147.7 21.30 279.2 15.33 1600.0 0.88 972.4 0.97 1177.4 0.97 802.6 1.22 1008.5 1.22 1001.4 1.14 1200.3 1.14 827.2 1.44 1026.1 1.44 1140.5 1.28 941.6 1.69 1237.3 1.36 1060.4 1.87 2112.0 0.69 2112.0 0.69 329.0 12.80 3516.0 0.00 900.0 12.50 165.6 21.70 1251.6 3.13 1680.0 2.00 8.8 10.00 8.8 3.33 2108.4 0.95 2385.0 0.35 1478.4 0.85 1478.4 0.89 1436.4 0.03 1092.0 4.55 2393.6 0.67 1716.9 4.55 1500.0 1.30 832.0 8.30 1590.0 0.91 924.0 5.90 BERS Pro V4.1 Users Manual 35 36 37 69 38 39 40 41 42 43 44 45 46 47 70 64 65 61 62 48 49 50 51 67 68 201 209 210 218 219 220 228 236 244 252 253 261 262 263 Plywood (softwood) Polycarbonate Rammed earth Reflective blind Roof tiles (clay) Roof tiles (concrete) Sand (building) Sandstone Slate Softboard Soil (average) Steel Straw board Straw bale rendered Styrocon Timbercrete (solid) Timbercrete (hollow) Timber (softwood) Timber (hardwood) Timber (Jarrah) Timber (Mountain ash) Timber (Radiata pine) Vinyl (floor tiles) Water Window film Cellulose fibre: loose fill (k = 0.04) Glass fibre batt (k = 0.057 density = 7 kg/m3) Glass fibre batt (k = 0.044 density = 12 kg/m3) Polyethylene foam (k = 0.04) Polyester or polyester/wool blanket (k = 0.063 density = 8 kg/m3) Polyester or polyester/wool blanket (k = 0.045 density = 16 kg/m3) Polystyrene expanded (k = 0.039) Polystyrene extruded (k = 0.028) Polyurethane rigid foamed aged (k = 0.028) Rockwool loose fill (k = 0.04) Rockwool batt (k = 0.033) Wool loose fill (k = 0.08) Wool/polyester batt 80/20 (k = 0.059 density = 8 kg/m3) Wool/polyester batt 80/20 (k = 0.045 density = 16 kg/m3) Copyright Solar Logic 2007 Page 75 795.0 1380.0 1940.0 0.0 1770.2 2112.0 1200.0 1840.0 1987.5 400.0 1613.0 3900.0 336.0 125.0 500.0 1171.0 834.0 1057.5 1414.9 1801.6 1414.9 1057.5 1722.0 4192.0 0.0 50.2 6.2 10.6 10.8 8.0 16.0 5.4 10.9 10.8 58.9 29.4 14.4 9.6 19.2 7.14 4.40 0.80 0.00 1.19 0.69 3.33 0.77 0.67 16.70 0.83 0.02 12.35 10.10 4.27 3.21 3.21 10.00 6.25 5.00 6.25 10.00 1.27 1.67 0.00 25.00 17.54 22.73 25.00 15.87 22.22 25.64 35.71 35.71 25.00 30.30 12.50 16.95 22.22 BERS Pro V4.1 Users Manual Page 76 Problems and Improvements If the software does not appear to be operating as expected, please contact your distributor or Solar Logic. Solar Logic is committed to the continual improvement of this product. If you have any suggestions of changes or additions you would like see, please contact: Solar Logic 162 Blackwood St. Mitchelton Queensland 4053 Tel 07 3355 2608 email [email protected] web solarlogic.com.au Intellectual property This manual and the BERS software is the intellectual property of Dr Holger Willrath of Solar Logic, Queensland Copyright 2007. This manual may not be copied without the written permission from the copyright holder. Licence and Legal Information The CSIRO owns the copyright to the thermal simulation engine used in BERS Pro. The BERS Software is owned by Solar Logic. Solar Logic grants to the user a nonexclusive licence to use this BERS Software solely for the rating of dwellings and only for the period during which the licence is valid. The user may not commercially distribute, sublicence, resell, or otherwise transfer for any cons i der at i on,orr epr oducef oranys uchpur pos es ,t heBERSs of t war eorUs er ’ sManual ,oranyot her printed or digital material, or any modification or derivation thereof, either alone or in conjunction with any other product or program. THIS BERS SOFTWARE IS PROVIDED TO THE USER ''AS IS.'' SOLAR LOGIC MAKES NO WARRANTIES, EITHER EXPRESS OR IMPLIED, WITH RESPECT TO THIS BERS SOFTWARE AND/OR ASSOCIATED MATERIALS PROVIDED TO THE USER, INCLUDING BUT NOT LIMITED TO ANY WARRANTY OF MERCHANTABILITY, FITNESS FOR A PARTICULAR PURPOSE OR AGAINST INFRINGEMENT OTHER THAN TO REPLACE ANY DEFECTIVE DISKS. SOLAR LOGIC DOES NOT WARRANT THAT THE FUNCTIONS CONTAINED IN THE SOFTWARE WILL MEET YOUR REQUIREMENTS, OR THAT THE OPERATION OF THE SOFTWARE WILL BE UNINTERRUPTED OR ERROR-FREE, OR THAT DEFECTS IN THE SOFTWARE WILL BE CORRECTED. FURTHERMORE, SOLAR LOGIC DOES NOT WARRANT OR MAKE ANY REPRESENTATIONS REGARDING THE USE OR THE RESULTS OF THE USE OF THE SOFTWARE OR ANY DOCUMENTATION PROVIDED HEREWITH IN TERMS OF THEIR CORRECTNESS, ACCURACY, RELIABILITY, OR OTHERWISE. NO ORAL OR WRITTEN INFORMATION OR ADVICE GIVEN BY SOLAR LOGIC OR A SOLAR LOGIC AUTHORIZED REPRESENTATIVE SHALL CREATE A WARRANTY OR IN ANY WAY INCREASE THE SCOPE OF THIS WARRANTY. LIMITATION OF LIABILITY - SOLAR LOGIC AND ITS LICENSORS ARE NOT LIABLE FOR ANY CLAIMS OR DAMAGES WHATSOEVER, INCLUDING PROPERTY DAMAGE, PERSONAL INJURY, INTELLECTUAL PROPERTY INFRINGEMENT, LOSS OF PROFITS, OR INTERRUPTION OF BUSINESS, OR FOR ANY SPECIAL, CONSEQUENTIAL OR INCIDENTAL DAMAGES, HOWEVER CAUSED, WHETHER ARISING OUT OF BREACH OF WARRANTY, CONTRACT, TORT (INCLUDING NEGLIGENCE), STRICT LIABILITY, OR OTHERWISE. Copyright Solar Logic 2007