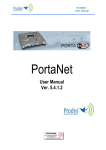
1
interstage Phistersvej 31, 2900 Hellerup, Danmark Telefon 3946 0000, fax 3946 0040 www.interstage.dk - pro audio with a smile Dec 09 Rev 1.4 Index Index ................................................................................ 2 CE Declaration of Compliance.................................................. 8 Introduction....................................................................... 9 I.1 The set of Manuals .................................................................10 I.2 Application Notes ..................................................................11 I.3 Hardware and Reference Manuals ...............................................11 Installation Guide ...............................................................13 II.1 Initial checks .......................................................................13 II.2 Control Panel.......................................................................14 II.2.1 Level controls for MIC/LINE inputs...........................................14 II.2.2 Headphone level control ...................................................... 15 II.2.2.1. Headphone L & R independent control .................................16 II.2.2.2. Headphone panoramic control ...........................................18 II.2.3 Menu Navigator and Info Key ................................................. 20 II.2.4 Numeric-Dial Keypad...........................................................21 II.2.5 Mic control keypad. ............................................................21 II.3 Led Information Panel ............................................................22 II.3.1 Line 1 & 2 status LEDS .........................................................23 II.3.2 Power and battery status...................................................... 24 II.3.3 Vu-meter indication ............................................................25 II.3.4 MIC1 & MIC2 status .............................................................25 II.3.5 HP1 & HP2 control feedback..................................................25 II.4 The front panel and its connectors .............................................26 II.4.1 MIC/LINE Audio inputs .........................................................26 II.4.2 Headphone outputs.............................................................27 II.5 Rear Panel ..........................................................................27 II.5.1 Line level balanced auxiliary audio output (Aux Out)....................27 II.5.2 Second auxiliary line level output (Rec Out) ............................... 27 II.5.3 Third audio input (In 3) ........................................................27 Prodys S.L. Tel: +34 91 6896880 Θ Fax: +34 91 6943777 Θ Email: [email protected] Θ Web: www.prodys.com Page 2 II.5.4 Auxiliary data: GPIO and RS232 ports. ......................................28 II.5.4.1. RS232 port ..................................................................28 II.5.4.2. GPIO port ................................................................... 29 II.5.5 Ethernet port – the LAN Connector ..........................................30 II.5.6 USB Port and 3G modem.......................................................30 II.5.7 ISDN Port.........................................................................31 II.5.8 Power supply ....................................................................31 Nomada IP audio inputs........................................................33 III.1 Location ............................................................................33 III.2 Technical specifications .........................................................33 III.2.1 MIC/LINE level inputs..........................................................33 III.2.2 Third audio input (In 3) .......................................................34 III.3 Nomada in stereo mode .........................................................35 III.4 Audio Level Controls for MIC/Line level inputs............................... 35 III.5 Adjusting the gain resolution of the audio level controls...................37 III.6 Audio input configuration for MIC/Line level inputs.........................37 III.6.1 ON keys ..........................................................................37 III.6.2 TB Keys ..........................................................................38 III.7 Adjusting the gain resolution of the audio level controls...................39 Nomada IP audio outputs......................................................40 IV.1 Location ............................................................................40 IV.2 Headphone outputs............................................................... 40 IV.2.1 Technical specifications ...................................................... 40 IV.2.2 Operation mode – Headphones Matrix ......................................41 IV.2.2.1. Attenuation when the MIC/LINE level input goes to Talkback or Program................................................................................42 IV.2.2.2. Enable from TB Key.......................................................43 IV.3 Line level balanced audio output: REC ........................................ 43 IV.3.1 Technical specifications ...................................................... 43 IV.3.2 Operation Modes ............................................................... 43 IV.3.2.1. Codec Mode ................................................................44 IV.3.2.2. RECORDING operation mode ............................................45 IV.4 ‘AUX’ output. .....................................................................45 IV.4.1 Technical specifications ...................................................... 46 IV.4.2 Operation modes............................................................... 46 Prodys S.L. Tel: +34 91 6896880 Θ Fax: +34 91 6943777 Θ Email: [email protected] Θ Web: www.prodys.com Page 3 IV.4.2.1. CODEC mode ............................................................... 46 IV.4.2.2. INTERCOM mode ..........................................................47 IV.4.2.3. Other configurations for the Intercom mode .........................47 IV.5 Adjusting the gain resolution of the audio level controls ..................48 Audio presets ....................................................................50 V.1 What is an audio preset? .........................................................51 V.2 Creating a preset ..................................................................51 V.3 Modifying a preset.................................................................53 V.4 Loading a preset ................................................................... 53 An introduction to the Front Panel .........................................54 VI.1 Numeric-Dial keypad. ............................................................54 VI.2 Display..............................................................................55 VI.2.1 STATUS SCREEN ................................................................55 VI.3 Control Keys .......................................................................61 VI.3.1 The CALL 1 and CALL 2 keys ................................................. 61 VI.3.1.1. Establishing a call when Nomada IP is configured as an IP Unicast/Multicast codec.............................................................62 VI.3.1.2. Establishing a call when Nomada IP is configured as an IP MultiUnicast codec (NET = IP) ............................................................64 VI.3.1.3. Establishing a call when Nomada IP is configured as an ISDN codec (NET = ISDN)...........................................................................64 VI.3.1.4. Establishing a call when Nomada IP is configured as a PSTN codec (NET = PSTN) ..........................................................................65 VI.3.2 The INF key .....................................................................65 VI.3.2.1. Screen 1: Battery information ..........................................66 VI.3.2.2. Screen 2: Audio input VU meters .......................................66 VI.3.2.3. Screen 3: Audio output VU meters .....................................66 VI.3.2.4. Screen 4: Decoding algorithm ...........................................67 VI.3.2.5. Screen 5: Encoding algorithm ...........................................68 VI.3.2.6. Screen 6: System name ................................................. 68 VI.3.2.7. Screen 6: LAN port configuration parameters .......................69 VI.3.2.8. Screen 7: Net configuration .............................................69 VI.3.2.9. Screen 9: GPIO and Serial Port bit rate................................70 VI.3.3 The BOOK Key ..................................................................70 The Front Panel Menu .........................................................72 Prodys S.L. Tel: +34 91 6896880 Θ Fax: +34 91 6943777 Θ Email: [email protected] Θ Web: www.prodys.com Page 4 VII.1 The Controls: Navigation keys ................................................. 72 VII.2 Main Menu.........................................................................73 VII.3 NET: Selecting a communications port .......................................73 VII.3.1 IP CODEC.......................................................................74 VII.4 ENC: Encoder algorithm selection menu .....................................75 VII.4.1 Configuration of Encoder 1 ..................................................76 VII.4.2 PCM..............................................................................77 VII.4.3 G711 ............................................................................77 VII.4.4 G722............................................................................77 VII.4.5 MPEG Layer II ..................................................................78 VII.4.6 MPEG Layer III .................................................................78 VII.4.7 AAC 2,4 LC .....................................................................79 VII.4.8 AAC LD ..........................................................................79 VII.4.9 AAC HE..........................................................................80 VII.4.10 aptX ............................................................................80 VII.4.10.1. STD APTX.................................................................81 VII.4.10.2. ENH APTX ................................................................81 VII.5 Configuration of Encoder 2 .....................................................83 VII.6 CONF: General configuration Menu ...........................................85 VII.6.1 CONF – AUD ....................................................................85 VII.6.1.1. AUDIO INPUTS.............................................................85 VII.6.1.2. PRESETS....................................................................86 VII.6.1.3. AUDIO INPUT 3............................................................86 VII.6.1.4. AUDIO OUTPUT ...........................................................87 VII.6.2 CONF-PORTS ................................................................... 88 VII.6.2.1. LAN .........................................................................89 VII.6.2.2. ISDN ........................................................................ 91 VII.6.2.3. Configuration of the RS232 port .......................................94 VII.6.3 CONF-SYS .......................................................................94 VII.6.3.1. LOOP .......................................................................95 VII.6.3.2. BACKUP ....................................................................95 VII.6.3.3. AUXDATA ..................................................................98 VII.6.3.4. KEYPAD ....................................................................98 VII.6.3.5. BUZZER ....................................................................99 VII.6.3.6. RESET .................................................................... 100 VII.6.4 CONF-BOOK .................................................................. 100 VII.6.5 CONF-STREAMING ........................................................... 102 VII.6.6 CONF-PRESETS ............................................................... 102 VII.7 INF ............................................................................... 103 Prodys S.L. Tel: +34 91 6896880 Θ Fax: +34 91 6943777 Θ Email: [email protected] Θ Web: www.prodys.com Page 5 VII.7.1 VERSIONS ..................................................................... 103 VII.7.2 TA ............................................................................. 103 VII.7.3 AUX DATA .................................................................... 104 PSTN opertaion mode ........................................................ 105 VIII.1 Compression modes ........................................................... 105 VIII.2 Communications lines ........................................................ 105 VIII.3 Making a call from the front panel ......................................... 105 VIII.4 Receiving calls ................................................................. 106 VIII.5 Availlable signals on the audio outputs .................................... 107 VIII.6 The audio inputs .............................................................. 108 VIII.7 The audio input controls ..................................................... 109 3G operation mode ........................................................... 110 IX.1 Setting the 3G network. ....................................................... 111 IX.2 Warning indication.............................................................. 114 IX.3 IP address for the 3G network. ............................................... 115 IX.4 3G Networks ..................................................................... 116 Technical Specifications..................................................... 118 X.1 Audio Interfaces ................................................................. 118 X.1.1 IN1 & IN2 inputs .............................................................. 118 X.1.2 IN3 input ....................................................................... 118 X.2 Headphone 1 & 2 outputs ...................................................... 118 X.3 AUX & REC outputs .............................................................. 119 X.4 Compression ...................................................................... 119 X.5 Comunication ports ............................................................. X.5.1 ISDN ............................................................................ X.5.2 LAN port ....................................................................... X.5.3 GPIO port ...................................................................... X.5.4 RS232 port ..................................................................... 119 119 119 120 120 X.6 Power supply. .................................................................... 120 X.7 Weight and dimensions ......................................................... 120 Prodys S.L. Tel: +34 91 6896880 Θ Fax: +34 91 6943777 Θ Email: [email protected] Θ Web: www.prodys.com Page 6 DIP Switches and battery installation .................................... 121 XI.1 Restore factory default setting (microswitches) ........................... 121 XI.2 Optional battery installation.................................................. 122 Prodys S.L. Tel: +34 91 6896880 Θ Fax: +34 91 6943777 Θ Email: [email protected] Θ Web: www.prodys.com Page 7 CE Declaration of Compliance Procesamiento Digital y Sistemas S.L., hereby declares that Nomada IP bearing the CE168X parking are in compliance with Electromagnetic Compatibility Directive (89/336/EEC), and the Low Voltage Directive (72/23/EEC) of the European Union. A “Declaration of conformity” for Nomada IP is available on file at Prodys offices in Spain. To obtain this information, contact with [email protected]. CAUTION Nomada IP uses a Lithium battery. Danger of explosion if battery is incorrectly replaced. Replace only with the same or equivalent type recommended by the manufacturer. Dispose of used batteries according to the manufacturers instructions. Your product is designed and manufactured with high quality materials and components, which can be recycled and reused. When this crossed-out wheeled bin symbol with black bar underneath is attached to a product it means that product is covered by the European Directive 2002/96/EC. Please, inform yourself about the local separate collection system for electrical and electronic products. Please act according to your local rules and do not dispose of your old products with your normal household waste. The correct disposal of your old product will help prevent potential negative consequences for the environment and human health. Prodys S.L. Tel: +34 91 6896880 Θ Fax: +34 91 6943777 Θ Email: [email protected] Θ Web: www.prodys.com Page 8 Chapter I INTRODUCTION Nomada IP is a new full-duplex, dual (Program &Talkback) audio codec. With its all new design - robust, compact and a flat control surface that prevents damage to the knobs & controls also makes it very easy to use. Nomada IP is a portable audio codec with all ProntoNet functionality built-in. It comes fitted with an inbuilt channel mixer to route and mix both input sources and output destinations. All audio and communication parameters, including input/output signal routing and levels that can be remotely configured & controlled. These can be stored in different presets to make setup and use by non technical stuff very easy. These are the Nomada IP most important features: 1 Analog Audio: Nomada IP incorporates a mixer with two MIC/LINE level configurable audio inputs and a third line level input. It also includes two headphone outputs and two line level analog balanced audio outputs. All the outputs can be configured by the user to suit the audio signal to be carried, to adapt to the needs of different applications. Compression algorithms1: Nomada IP is equipped with the widest range of compression algorithms: G711, G722, PCM, MPEG1,2 Layer II, Mpeg 1,2 Layer III, MPEG 2,4 AAC LC, MPEG4 AAC LD & HE, and Standard/Enhanced apt-X. Some compression modes might be offered as optional. Please contact us at [email protected] for further information in this regard. Prodys S.L. Tel: +34 91 6896880 Θ Fax: +34 91 6943777 Θ Email: [email protected] Θ Web: www.prodys.com Page 9 Communications2: IP, ISDN, 3G/3.5G and PSTN connectivity. With Nomada IP it is possible to establish two independent connections, one for program and the other for coordination3. Power supply: Desk Top AC/DC Power Converter and an optional battery which provides about 2,5 hours autonomy. The battery can be charged on the system and its status can be monitored on the screen. Auxiliary data: Nomada IP includes a serial port (RS232) and a GPIO port with 2 inputs and 2 outputs. The auxiliary data can be sent/received along with the audio for remote control/signalling. Control and monitoring: The unit can be configured from its front panel and from its embedded web page. All the controls are configurable remotely. The keypad can be controlled and also blocked from the web page for security reasons. Small and lightweight: Dimensions are width 212mm, height 75mm and depth 205mm. Weight is about 1.8Kg. I.1 The set of Manuals The Prodys IP Family User Manual is applicable to most of the common features provided by the Prodys IP Family of codecs. For some specific features or restrictions, the user is referred to the proper Hardware and Reference Manual applicable to the codec in use. Installation requirements, physical and electrical parameters are also included in this document. If several Prodys IP Family codecs are managed by means of the ProdysControl application please refer to the ProdysControl Manual as well. Prodys IP codecs provide the user with a control protocol which allows the user to develop customized management software. The control interface for this 2 Some interfaces, such as ISDN, might be offered as optional. 3 On PSTN communications only one connection/line is available. Prodys S.L. Tel: +34 91 6896880 Θ Fax: +34 91 6943777 Θ Email: [email protected] Θ Web: www.prodys.com Page 10 protocol is either the RS232 serial port or the Ethernet port. For detailed description please refer to the Prodys IP Family codec SDK User’s Manual. I.2 Application Notes For specific subjects, Applications Notes and release update (What is new, ChangeLog …) the user is kindly referred to check our download area at www.prodys.net or contact [email protected] I.3 Hardware and Reference Manuals The information is arranged as follows: Chapter II – Installation Guide. This chapter provides hardware requirements and instructions for installing the Nomada IP unit. Chapter III – Nomada IP Audio Inputs. This chapter describes the different Nomada IP audio outputs and help the user understand the different configurations and applications. Chapter IV – Nomada IP Audio Outputs. This chapter describes the different Nomada IP audio outputs and help the user understand the different configurations and applications. Chapter V – Audio Presets. This chapter offers an overview about the Audio Presets on Nomada IP. The Audio Presets allow the user to save different configurations for the audio inptut and output parameters and restore them with a single click. Chapter VI – An introduction to the Front Panel. Nomada IP can be configured and controlled from the controls located on its frontal panel. This chapter describes an introduction to this user interface. Chapter VII – The Front Panel Menu. This chapter describes the front panel menu path, the associated options and parameters. Prodys S.L. Tel: +34 91 6896880 Θ Fax: +34 91 6943777 Θ Email: [email protected] Θ Web: www.prodys.com Page 11 Chapter VIII – PSTN operation mode. Whe the unit is configured to work over the PSTN interface, there are some restrictions to take into account when operating with the unit. Chapter IX – 3G operation mode. Whe the unit is configured to work over the PSTN interface, there are some restrictions to take into account when operating with the unit. Appendix A – Technical Specifications. Technical details are described in this chapter. Appendix B – DIP Switches and Battery installation. Access to the microswitches and battery installation is explained. Prodys S.L. Tel: +34 91 6896880 Θ Fax: +34 91 6943777 Θ Email: [email protected] Θ Web: www.prodys.com Page 12 Chapter II INSTALLATION GUIDE This chapter describes the Nomada IP hardware and user installation. The Nomada IP offers a low profile control surface. No knobs are standing up. This design approach emphasizes the hardening mechanical design of this product; damage by rude handling is hardly possible. II.1 Initial checks Before unpacking the unit, please check its packaging for any signs of damage or mishandling during transportation. Report any damage to the shipping company immediately. Unpack the unit carefully, if you find any damage or the unit does Prodys S.L. Tel: +34 91 6896880 Θ Fax: +34 91 6943777 Θ Email: [email protected] Θ Web: www.prodys.com Page 13 not work correctly, you should contact Prodys or its distributor as soon as possible. II.2 Control Panel II.2.1 Level controls for MIC/LINE inputs Each audio input can be adjusted independently. The MIC level controls are locked to prevent from unwanted changes. To unlock it, press the button in the middle and the current level gain will be displayed on the screen. In addition, the central button will be illuminated by a blue LED to indicate that the control is unlocked. Press once and move gently the rotary control and turn it counter clockwise or clockwise to decrease or increase the input gain. This level control will be locked again automatically after 3 seconds of no intervention, or after pressing again the mid button. Then, the round led will be turned off. The audio level control can be made locally or remotely by using the Nomada IP web browser. Once the audio input gain setting has been selected to be controlled by remote control, the Nomada IP reminds this effect on its display upon any attempt to increase or decrease the audio gains locally by means of the audio control knobs. Prodys S.L. Tel: +34 91 6896880 Θ Fax: +34 91 6943777 Θ Email: [email protected] Θ Web: www.prodys.com Page 14 II.2.2 Headphone level control In order to prevent pain due excessive sound pressure on the ears it is strongly advised to handle with care the headphone level configuration. It is save to manage any new streaming connection or new signal matrix with the headphone off the head, but around the neck. Adjust with gentle turns the correct sound level for each headphone (left and right side). Once the average sound level is set, the user might use the headphones in a safe way. According to the user preference two different headphone level adjustments are set as default control via the keypad. The toggle is provided at the <HP Configuration> menu according the figure. Each headphone has got its own toggle. 4 L & R independent control Panoramic control (Tx /Rx balance)4 This monitoring mode for the headphones was introduced in version 6.1.1. Prodys S.L. Tel: +34 91 6896880 Θ Fax: +34 91 6943777 Θ Email: [email protected] Θ Web: www.prodys.com Page 15 II.2.2.1. Headphone L & R independent control The headphone audio level can be adjusted independently for each ear. This mode is especially useful when L and R signals on the headphones are not related (binaural monitoring). The Headphone level controls are locked to prevent from unwanted changes. To unlock it, press the button in the middle and the current level gain for both the left ear and the right ear will be displayed on the screen. In addition, the central button will be illuminated by a blue LED to indicate that the rotary control is Prodys S.L. Tel: +34 91 6896880 Θ Fax: +34 91 6943777 Θ Email: [email protected] Θ Web: www.prodys.com Page 16 unlocked. The ‘L’ and ‘R’ LEDs on the LED information panel will give indication of control target. Press once and move gently the rotary control and turn it counter clockwise or clockwise to decrease or increase the gain of the left headphone side. Press again and trim the right headphone side. Prodys S.L. Tel: +34 91 6896880 Θ Fax: +34 91 6943777 Θ Email: [email protected] Θ Web: www.prodys.com Page 17 This level control will be locked again automatically after 3 seconds without touching the controls, or after pressing the button until the blue light switches off. II.2.2.2. Headphone panoramic control5 This control mode is useful if the user wishes to balance the relative sound level at the headphones between the local versus remotely provided signal. This control is possible for the Program versus Cue balance, as well as for the Talkback TX versus Talkback RX balance. This control is preferred for users uncomfortable with binaural monitoring, this prefers to hear the same signal on the left and right side. 5 This monitoring mode for the headphones was introduced in version 6.1.1 Prodys S.L. Tel: +34 91 6896880 Θ Fax: +34 91 6943777 Θ Email: [email protected] Θ Web: www.prodys.com Page 18 The Headphone level controls are locked to prevent from unwanted changes. To unlock it, press the button in the middle and the current level gain for both the left ear and the right ear will be displayed on the screen. In addition, a round led around the button will light on blue to indicate that the control is unlocked, and the L and R’ leds on the led information panel will light. Press softly on the round control and turn it to the left or to the right to decrease or increase the gain. To balance the relative level of the Tx and Rx audio signals press again the middle button, the L and R’ leds will start blinking, indicating that the current audio level configuration is to balance the relative levels of Tx and Rx signals. The display will show the relative level as in the examples bellow: Prodys S.L. Tel: +34 91 6896880 Θ Fax: +34 91 6943777 Θ Email: [email protected] Θ Web: www.prodys.com Page 19 Relative level indication on the display II.2.3 Menu Navigator and Info Key Navigation Keys: The keys ⇐ , ⇑ , ⇒ , are used for moving around the menus and the OK is for selecting/accepting the desired action or parameter. Inf key (i): This key allows the user a simple and quick way to display detailed information on the status and configuration of the Nomada IP. Prodys S.L. Tel: +34 91 6896880 Θ Fax: +34 91 6943777 Θ Email: [email protected] Θ Web: www.prodys.com Page 20 II.2.4 Numeric-Dial Keypad. The Dial Keypad is used for establishing/terminating audio connections: BOOK for establishing communications using a configuration saved in the Address Book. CALL1 and CALL2 are for establishing and terminating connections, and also to monitor the called/calling number. The numeric keypad is for entering information such as the IP address or ISDN number that you wish to connect to. II.2.5 Mic control keypad. 6 ON Key Each MIC/LINE audio input has a key to enable/disable it6. When an audio input is enabled, it is connected to the program line (line 1). TB Key Nomada IP allows the user to establish two independent communications, using either IP or ISDN. Each input can be configured to be sent through the program line (line 1) or through the coordination or TalkBack line (line 2). Pressing the Tb key for one input causes this input to be mixed with those signals assigned to the coordination or TalkBack line (line 2). The third input is only a LINE level input and does not have any ON key associated as it is always enabled. Prodys S.L. Tel: +34 91 6896880 Θ Fax: +34 91 6943777 Θ Email: [email protected] Θ Web: www.prodys.com Page 21 LED´s There is a led related to the status of each input: Led ON: Input enabled (green)/disabled(off). Led Tb: Input enabled and connected to the TalkBack line (line 2). Ph: The phantom power (48 VDC) of the input is enabled. II.3 Led Information Panel The portable codec provides the most significant status information with LEDs on the right hand of the alfa-numeric display. The Led Information Panel provides information of the power feeding, network connection, input mixer, headphone selection, etc. Description of the LEDs is provided from the status panel top to down, left to right: Prodys S.L. Tel: +34 91 6896880 Θ Fax: +34 91 6943777 Θ Email: [email protected] Θ Web: www.prodys.com Page 22 II.3.1 Line 1 & 2 status LEDS Two green LEDs provides indication about the current Line status (Line 1 and Line 2). Blinking: outgoing call. Off: The Line is idle; ready for accepting incoming calls or dialling any destination if the network interface is available. On: The Line is in use. An audio stream is in progress. An incoming call is in progress or the codec is dialling an Prodys S.L. Tel: +34 91 6896880 Θ Fax: +34 91 6943777 Θ Email: [email protected] Θ Web: www.prodys.com Page 23 II.3.2 Power and battery status Following table describes the power supply and battery status LEDs. Status Description LED Label Colour Appearance A The Nomada IP is starting. The service is not yet possible up to the next status indication. Power Blue blinking Batt low - off B The external power converter is powering the unit. The battery is not connected. Power Batt low Blue - steady off C The external power converter is powering the unit. The battery is connected and is charging. Power Blue blinking Batt low Red blinking Power Blue steady Batt low Red steady Power - off Batt low Red blinking D E The external power converter is not powering the unit. The battery is connected and powering the unit. The external power converter is not powering the unit. The battery is connected and powering the unit, but is about to run out (about 20 minutes / 10% of battery capacity). When the unit is starting, the Power LED will be blink green. Prodys S.L. Tel: +34 91 6896880 Θ Fax: +34 91 6943777 Θ Email: [email protected] Θ Web: www.prodys.com Page 24 II.3.3 Vu-meter indication Instant Vu-meter indication is provided on a vertical LED bar. This indications light green while the input signal matches the proper dynamic range. A red indication on the top indicates that the maximum dynamic range has been exceeded. It is remarked that the Vu-meter indication applies only to the signal fed to mixer1, this is the Program channel or Line 1 channel. II.3.4 MIC1 & MIC2 status This area indicates the current audio matrix configuration for the input signals and the phantom voltage configuration (‘PH’ leds). II.3.5 HP1 & HP2 control feedback The meaning of the LEDS of the HP1-4 led information panels will depend on the operation mode configured for the headphone controls. Please, read chapter II.2.2 for more information. Prodys S.L. Tel: +34 91 6896880 Θ Fax: +34 91 6943777 Θ Email: [email protected] Θ Web: www.prodys.com Page 25 II.4 The front panel and its connectors In the front panel there are two areas: Audio inputs and Headphone outputs. II.4.1 MIC/LINE Audio inputs There are two MIC/LINE audio inputs. Each audio input includes a switch to select MIC or LINE level, and another one for selecting whether to supply 48 volt phantom power to the MIC. line/mic switch: When this switch is in the UP position, the line level input is selected. When this switch is in the DOWN position, this input is configured to work as a MIC level input. ph swtich(48 volt Phantom powered): When this switch is in the UP position (OFF), this option is disabled. When this switch is in the down position (ON), this option is enabled. Prodys S.L. Tel: +34 91 6896880 Θ Fax: +34 91 6943777 Θ Email: [email protected] Θ Web: www.prodys.com Page 26 II.4.2 Headphone outputs There are two headphone outputs, each one related to its corresponding audio input. Signals present on the headphone audio outputs will be dependent on the configuration of the audio headphone matrix available in the Nomada IP web browser. There are independent audio level controls for each output and for each ear. II.5 Rear Panel The rest of connections are located on the rear panel: II.5.1 Line level balanced auxiliary audio output (Aux Out) This output is a balanced line level output, with a maximum level of +20 dBu. This output is user configurable; that means that it is possible to define which audio signals will be present in this output. II.5.2 Second auxiliary line level output (Rec Out) This output can carry the program line signal, the return from the program line or the sum of both signals. This is a balanced XLR connector. II.5.3 Third audio input (In 3) This input is a line level input in Mini-jack female connector, with a maximum level of 20dBu, which is enabled by default to be routed on line 1 or Program. Prodys S.L. Tel: +34 91 6896880 Θ Fax: +34 91 6943777 Θ Email: [email protected] Θ Web: www.prodys.com Page 27 II.5.4 Auxiliary data: GPIO and RS232 ports. The GPIO port on a DB9 connector allows remote control/signalling by means of remote contact closures. There are two ground contact inputs and two relay outputs. A RJ45 connector at the rear panel provides a serial port (RS232 port) for sending/receiving auxiliary data along with the encoded audio for IP and ISDN communications. II.5.4.1. RS232 port The RS232 port is for use as auxiliary data port. This port allows the transmission and reception of data along with encoded audio. Note that this socket is RJ45 connector, as opposed to the typical Sub-D 9 ways connector. To make the conversion between RJ45 and RS232 Sub-D connector there are modular connectors available that should be wired as follows: Nereus RJ45 Connector 1 (NC) 2 (Rx) 3 (GND) 4 (NC) 5 (NC) 6 (GND) 7 (Tx) 8 (NC) 9-pin female D-sub Connector 1 3 5 4 6 7 2 8 1,4,5,8 must be unconnected The port is always set to 8 DATA bits, NO parity, 1 START bit and 1 STOP bit. The bit rate can be adjusted to between 300 and 9600 bps via software. Prodys S.L. Tel: +34 91 6896880 Θ Fax: +34 91 6943777 Θ Email: [email protected] Θ Web: www.prodys.com Page 28 Each Nomada IP acts as a DCE device, therefore the connection to each of the RS232 ports is wired in the following way: Nomada IP – Pin 7 connector RJ45.........................Pin 2 PC Nomada IP – Pin 2 connector RJ45.........................Pin 3 PC Nomada IP – Pin 3,6 connector RJ45......................Pin 5 PC Hardware handshaking signals are ignored. II.5.4.2. GPIO port There are two ground contact inputs and two relay outputs mounted on a DB9 female connector. Pin 1 Input 1 Pin 2 GND Pin 3 Common Relay 1 Pin 4 Normally Closed Relay 2 Pin 5 Pin 6 Input 2 Pin 7 Normally Closed Relay 1 Pin 8 Normally Open Relay 1 Pin 9 Common Relay 2 Normally Open Relay 2 Prodys S.L. Tel: +34 91 6896880 Θ Fax: +34 91 6943777 Θ Email: [email protected] Θ Web: www.prodys.com Page 29 II.5.5 Ethernet port – the LAN Connector The LAN socket is a standard 100Base-Tx (10/100 Mbps) Ethernet connection that takes a RJ45 plug. Through this Ethernet port it is possible to transmit and receive audio, as well as manage the equipment. In the socket there are two leds to indicate different states for the connection and these are very useful in problem-solving situations. LAN LED’s: Green LED LINK STATUS: ON = Connected Orange LED RECEIVE STATUS: On = Receiving Data. From the web interface and the front panel menu it is possible to set the speed and duplex configuration to the following values: AUTO, 10HD, 10FD, 100HD, 100FD. II.5.6 USB Port and 3G modem The portable codec rear side includes two USB slots for attaching external devices. Currently Prodys approved the SIERRA WIRELESS COMPASS 888 MODEM for 3G streaming applications. Further details about streaming over 3G are provided at the chapter IX of this manual. Further details about the SIERRA WIRELESS COMPASS 888 MODEM can be retrieved from www.sierrawireless.com Prodys S.L. Tel: +34 91 6896880 Θ Fax: +34 91 6943777 Θ Email: [email protected] Θ Web: www.prodys.com Page 30 II.5.7 ISDN Port7 The Nomada IP incorporates an ISDN terminal adapter that allows the connection to a basic rate ISDN line (2B+D). It supports different ISDN protocols (EURO_ISDN, DMS100, AT&T 5ESS and NAT1). There are two RJ45 connectors for connecting to an S/T interface S/T (S0) and to a U interface, depending on the type of connection offered by the ISDN service provider. II.5.8 Power supply Nomada IP comes supplied with a desk top AC/DC converter (16 volts. output) to be connected to the power connector located at the rear panel. The power converter works with an AC input range of 100 to 240 VAC, 50 to 60 Hz. The power switch is located just below the power connector. In addition, there is also available an optional battery pack. Whenever the external power converter is connected, the power is supplied from it, and the battery will be charged when necessary. When the external power converter is unplugged from the unit, the battery will take over. The ‘Power’ and ‘Batt Low’ leds on the LED information panel will show the connection status of the battery. By pressing the ‘INF’ key (i) on the meny navigator keypad, the screen will show whether the battery is connected and the charge status. 7 This interface might be offered as optional. Please contact [email protected] for further information. Prodys S.L. Tel: +34 91 6896880 Θ Fax: +34 91 6943777 Θ Email: [email protected] Θ Web: www.prodys.com Page 31 BATTERY NOT PRESENT BATTERY: 60% █████████▌ The Nomada provides on the web page status information if charging or the current capacity before the battery exhaust. Prodys S.L. Tel: +34 91 6896880 Θ Fax: +34 91 6943777 Θ Email: [email protected] Θ Web: www.prodys.com Page 32 Chapter III NOMADA IP AUDIO INPUTS III.1 Location There are TWO MIC/LINE level inputs, switchable between LINE and MIC level, located on the front panel. III.2 Technical specifications III.2.1 MIC/LINE level inputs All MIC/LINE level inputs are electronically balanced on a XLR female connector. These inputs are switchable between MIC and LINE levels by means of a switch placed on the right side of the input connector. It is possible to supply phantom power (48 volts.) to each input. There is a switch on the left side of the input connector for this purpose. When the Phantom Power is enabled, the ‘PH’ led on the LED information panel will light on RED. Prodys S.L. Tel: +34 91 6896880 Θ Fax: +34 91 6943777 Θ Email: [email protected] Θ Web: www.prodys.com Page 33 When the audio inputs are configured as MIC level inputs, sensibility range is –60 to –25dBu. When phantom power is enabled, the whole gain is decreased by 15 dB to compensate for the the higher output of condenser MICs. Thus, the gain range will go from –45 to –10dBu. When the inputs are configured as LINE level inputs, the maximum input level will be +20dBu. Each input level can be adjusted independently. III.2.2 Third audio input (In 3) This input is a line level input in a Mini-jack female connector located on the rear panel and labeled as ‘In 3’. It supports a maximum level of 20dBu, and it is enabled by default to be routed on line 1 or Program. The gain control (ranging from 0 to -40dB) is possible from either the keypad or the <input> menu of the web control. Prodys S.L. Tel: +34 91 6896880 Θ Fax: +34 91 6943777 Θ Email: [email protected] Θ Web: www.prodys.com Page 34 III.3 Nomada in stereo mode By factory default the Nomada is set for independent mono signal communication. Usually the first mono stream is assigned as program channel, while the second mono stream is assigned as talkback stream or coordination. Since the program channel has got enabled by default the compressor /limiter at the input mixer, this circuit has to be by-passed for stereo applications. The Nomada switches automatically this control if any stereo compression mode is selected at the encoder bar. It is possible to enable or disable manually the stereo mode at the <Misc> menu also. III.4 Audio Level Controls for MIC/Line level inputs Each audio input can be adjusted independently. The MIC level controls are locked to prevent from unwanted changes. To unlock it, press the button in the middle and the current level gain will be displayed on the screen. In addition, a round led around the button will light on blue to indicate that the control is unlocked. Prodys S.L. Tel: +34 91 6896880 Θ Fax: +34 91 6943777 Θ Email: [email protected] Θ Web: www.prodys.com Page 35 Press softly on the round control and turn it to the left or to the right to decrease or increase the gain on the corresponding input. This level control will be locked again automatically after 3 seconds of no intervention. Then, the round led will be turned off. The audio level control can be made locally from the optical encoders or remotely by using the Nomada IP web browser. Prodys S.L. Tel: +34 91 6896880 Θ Fax: +34 91 6943777 Θ Email: [email protected] Θ Web: www.prodys.com Page 36 Once the audio input gain setting has been selected to be controlled by remote control, the Nomada IP reminds this effect on its display upon any attempt to increase or decrease the audio gains locally by means of the audio level controls. The user can change this configuration to ‘Local’ again by entering the front panel menu, under CONF-AUDIO-INPUTS, or from the window above. III.5 Adjusting the gain resolution of the audio level controls It is possible to adjust gain resolution of the audio level controls for the MIC/Linen level inputs and for the headphone outputs from the Nomada IP web page as it can be seen on the picture bellow: III.6 Audio input configuration for MIC/Line level inputs III.6.1 ON keys Each audio input has a key to enable/disable it. When an input is enabled, it will contribute to the audio sent through the program line (line 1). The corresponding LED on the LED Informatio Panel for that input will light on GREEN, indicating that the input is enabled and going through the line 1. Prodys S.L. Tel: +34 91 6896880 Θ Fax: +34 91 6943777 Θ Email: [email protected] Θ Web: www.prodys.com Page 37 Take into account that the third line level input located on the rear panel does not have any control key on this keypad, given that this input is always enabled and routed to the first line or Program. III.6.2 TB Keys Nomada IP supports two independent communications via IP or ISDN. Thus, we can establish one connection for the main program, and another one for coordination, or TalkBack program. Each input can be configured to be added to the audio contribution on line 1 or line 2 by means of the ‘TB’ keys located on the top surface. Likewise, each input can be enabled/disabled, regardless of the status of the ‘TB’ switch, by means of the ‘ON’ keys. When the TB switch is disabled for a given input, that input will be disabled automatically for security reasons. This way, this input cannot enter the program line unintentionally. Take into account that there are two different operation modes for the TB keys: ‘Latching’ and ‘non-lathing mode’. This mode can be configured from the web control page. With ‘non-laching’ mode, the user has to keep pressing the TB key for the input to be assigned to line 2 or coordination line. As soon as this key is released, the input will be disabled. This mode does not apply from the control on the web control page. TB controls on the web will be disabled in this operation mode. With ‘laching’ mode, the TB key acts as a switch, so it is not necessary to keep pressing the TB key for the the corresponding input to be assigned to line 2. Another click, once the input is assigned to line 2, will disable that input. Prodys S.L. Tel: +34 91 6896880 Θ Fax: +34 91 6943777 Θ Email: [email protected] Θ Web: www.prodys.com Page 38 III.7 Adjusting the gain resolution of the audio level controls It is possible to adjust gain resolution of the audio level controls for the MIc/Line level inputs and for the headphone outputs from the Nomada IP web page as it can be seen on the picture bellow: Prodys S.L. Tel: +34 91 6896880 Θ Fax: +34 91 6943777 Θ Email: [email protected] Θ Web: www.prodys.com Page 39 Chapter IV NOMADA IP AUDIO OUTPUTS There are two headphone outputs and two general purpose balanced audio outputs (line level). IV.1 Location The two headphone outputs are located together on the front panel. The two balanced audio outputs are located on the rear panel. They are called ‘AUX’ and ‘REC’ outputs. IV.2 Headphone outputs IV.2.1 Technical specifications 6.3mm Jack connector Headphone impedance range: 300 – 2K ohms. Output Impedance < 25 ohms. Bandwidth 20Hz-20kHz (1dB). Maximum output level: 6dBu (8 mW) on 300 ohms. THD+N < 0.01% @ 1kHz. SNR < 95 dB. Independent audio sources (local o return) for left and right. Independent level adjustment for each output. Prodys S.L. Tel: +34 91 6896880 Θ Fax: +34 91 6943777 Θ Email: [email protected] Θ Web: www.prodys.com Page 40 IV.2.2 Operation mode – Headphones Matrix The audio sources for the headphone outputs can be selected from the Nomada IP web browser. At the same time, it is possible to define if some of them will be attenuated depending on which line (program or talkback) its corresponding input t is connected to. The audio sources that can be selected are: Program, Cue, Talkback Tx and Talkback Rx. Following is showed the dialog to select the headphones configuration in the web page. The HP1 or HP2 output matrix configuration depends on the out level control mode in use (either <L & R independent> or <panoramic> i.e. Tx /Rx balance); see section II.2.2 for details on level configuration modes. By right clicking on each cross point a new dialog appears that allows to define the behaviour of the selected output depending on where the corresponding Prodys S.L. Tel: +34 91 6896880 Θ Fax: +34 91 6943777 Θ Email: [email protected] Θ Web: www.prodys.com Page 41 input is connected, that is, depending on if the MIC/LINE level input is connected to the program line or to the talkback line. Also, it allows the user to select whether the signal will be controlled from the audio input keypad. IV.2.2.1. Attenuation when the MIC/LINE level input goes to Talkback or Program It is possible to define an automatic attenuation on signals that feed the headphone outputs when the corresponding inputs go from Program to Talkback or vice versa. The attenuation will be carried out according to the following critera: Program or Cue can be attenuated when the corresponding input is connected to the Talkback channel. It is possible to define an independent attenuation level for each of them. The same thing can be done regarding Talkback Tx and Talkback Rx, that is, each signal can be attenuated when the corresponding input goes to program. Prodys S.L. Tel: +34 91 6896880 Θ Fax: +34 91 6943777 Θ Email: [email protected] Θ Web: www.prodys.com Page 42 NOTE: When talking about ‘the corresponding input’, we mean the Mic/level input with the same number as the headphone output we are configuring. Take into account that there is one input, the third one which does not have counterpart, so they cannot affect to the operation of the headphone outputs. IV.2.2.2. Enable from TB Key “Enable from Tb Key” is an additional option that only is available for Talback Tx and Talkback Rx. When it is enabled, the corresponding signal will be sent to the headphone outputs only when the corresponding input has been connected to the Talkback channel, that is when its corresponding ‘Tb’ key has been pressed. When this option is disabled, this signal will be always available on the headphone outputs regardless of whether the corresponding input is connected to the Talkback channel or not. IV.3 Line level balanced audio output: REC The audio sources for the REC output can be selected from the Nomada IP web browser. IV.3.1 Technical specifications Bandwidth 20Hz-20kHz (0.3dB). Maximum audio level: +20dBu. THD+N < 0.005% @ 1kHz. SNR < 100 dB. XLR male connector fitted to the rear panel. In normal operation, this output carries the audio coming from the program line (line 1). This audio signal is called CUE. Output impedance < 50 ohms. IV.3.2 Operation Modes The REC output supports different configurations depending on the selected audio sources in the auxiliary output configuration matrix of the web browser: Prodys S.L. Tel: +34 91 6896880 Θ Fax: +34 91 6943777 Θ Email: [email protected] Θ Web: www.prodys.com Page 43 IV.3.2.1. Codec Mode In this mode the REC output carries the audio signal coming from the line 1 or CUE. This mode is selected by clicking Cue signal in the configuration auxiliary output matrix. When the REC output is configured in codec mode, it is also possible to work in stereo. In In that case, the REC output carries the left channel audio of the received stereo signal. This operation mode requires to be enabled from the web browser in order to disable the compressor/limiter. compressor/limiter. Prodys S.L. Tel: +34 91 6896880 Θ Fax: +34 91 6943777 Θ Email: [email protected] Θ Web: www.prodys.com Page 44 IV.3.2.2. RECORDING operation mode In this mode, it is possible to add the audio contribution signals on the program line to the return signal from the same line (CUE signal). One application might be to record an interview or a retransmission. This mode is selected by clicking Cue and Program signals in the auxiliary output configuration matrix. IV.4 ‘AUX’ output. This output supports many different configurations depending on the selected audio sources in the auxiliary output configuration matrix of the web browser: Prodys S.L. Tel: +34 91 6896880 Θ Fax: +34 91 6943777 Θ Email: [email protected] Θ Web: www.prodys.com Page 45 IV.4.1 Technical specifications XLR male connector (REC output). Bandwidth 20Hz-20kHz (0.3dB). Maximum output level: +20dBu. THD+N < 0.005% @ 1kHz. SNR < 100 dB. Output impedance < 50 ohms. IV.4.2 Operation modes Depending on which signals are selected from the auxiliary output configuration, the AUX output supports different configurations. IV.4.2.1. CODEC mode In this operation mode, this output contains the signal coming from the second line (Talkback Rx). Prodys S.L. Tel: +34 91 6896880 Θ Fax: +34 91 6943777 Θ Email: [email protected] Θ Web: www.prodys.com Page 46 IV.4.2.2. INTERCOM mode In this mode the audio signal going through line 2 (Talkback Tx) is added to the AUX output. IV.4.2.3. Other configurations for the Intercom mode This diagram shows all the signals which can be routed to the ‘aux’ output: Prodys S.L. Tel: +34 91 6896880 Θ Fax: +34 91 6943777 Θ Email: [email protected] Θ Web: www.prodys.com Page 47 IV.5 Adjusting the gain resolution of the audio level controls It is possible to adjust gain resolution of the audio level controls for the inputs and for the headphone outputs from the Nomada IP web page as it can be seen on the picture bellow: Prodys S.L. Tel: +34 91 6896880 Θ Fax: +34 91 6943777 Θ Email: [email protected] Θ Web: www.prodys.com Page 48 Prodys S.L. Tel: +34 91 6896880 Θ Fax: +34 91 6943777 Θ Email: [email protected] Θ Web: www.prodys.com Page 49 Chapter V AUDIO PRESETS Due to the amount of different audio configuration parameters of Nomada IP, a specific tool has been created for it: Audio Presets. Nomada IP Audio presets allow the user to save audio settings and reapply them in a single step. Audio presets are available in the Audio configuration menu of the Nomada IP web browser: Prodys S.L. Tel: +34 91 6896880 Θ Fax: +34 91 6943777 Θ Email: [email protected] Θ Web: www.prodys.com Page 50 V.1 What is an audio preset? An audio preset contains all the configuration of the following items: Audio inputs: It includes whether the audio input levels are remotely controlled or not and, if so, the audio input level configuration. Audio Auxiliary output: the configuration for each audio Auxiliary output (REC and AUX outputs). Headphone outputs: the configuration of the headphone outputs according to the headphone audio matrix configuration. Miscellaneous options: the configuration of the different options available in the Misc Configuration menu. V.2 Creating a preset To create an audio preset, open the Presets window in the Configuration menu: Prodys S.L. Tel: +34 91 6896880 Θ Fax: +34 91 6943777 Θ Email: [email protected] Θ Web: www.prodys.com Page 51 Click on the “New” button. A dialog appears asking you for a name the new preset: By clicking on the different tabs of left side menu, the user can go through all the different audio configuration parameters: Audio Inputs, Outputs and Miscellaneous configuration. Once those parameters have been configured, and a name has been entered for the new preset, press Ok in order for the audio preset to be stored. Prodys S.L. Tel: +34 91 6896880 Θ Fax: +34 91 6943777 Θ Email: [email protected] Θ Web: www.prodys.com Page 52 V.3 Modifying a preset To modify an audio preset, just select one entry of the Audio Presets table and click on modify. The configuration window for that preset will appear with the current values for that Preset. Edit or modify the values as required and press the “OK” button for the changes to take effect. V.4 Loading a preset Once a preset has been selected, its configuration can be applied by clicking on the “Load” button. The new configuration can be checked by moving through the different audio configuration menus. Until the “Apply” or “Ok” buttons are not pressed, the new audio configuration won’t take effect. Prodys S.L. Tel: +34 91 6896880 Θ Fax: +34 91 6943777 Θ Email: [email protected] Θ Web: www.prodys.com Page 53 Chapter VI AN INTRODUCTION TO THE FRONT PANEL Navigation Keys: The keys ⇐ , ⇑ , ⇒ , are used for moving around the menus and the OK is for selecting/accepting the desired action or parameter. Inf key (i): This key allows the user a simple and quick way to display detailed information on the status and configuration of the Nomada IP. VI.1 Numeric-Dial keypad. The Dial Keypad is used for establishing/terminating audio connections: BOOK for establishing communications using a configuration saved in the Address Book. CALL1 and CALL2 are for establishing and terminating connections, and also to monitor the called/calling number. Prodys S.L. Tel: +34 91 6896880 Θ Fax: +34 91 6943777 Θ Email: [email protected] Θ Web: www.prodys.com Page 54 The numeric keypad is for entering information such as the IP address or ISDN number that you wish to connect to: To enter the ‘.’ (dot) character when specifying IP addresses, use the star (‘*’) key. The front panel of the Nomada IP has a display that allows you to control and configure the unit: VI.2 Display To help explain the Nomada IP DISPLAY we should distinguish between the status screen and the menu screen: The status screen shows information about the communication lines and the status of the Decoder. The Menu screen shows the different configuration menu options and is only displayed when you press OK on the navigation menu keys. VI.2.1 STATUS SCREEN This is the default screen that you will see when the Nomada IP is ‘at rest’, that is, when you are not navigating or using the front panel keys. It reports the status of the communication lines and the Decoder. More information about this in the following sections. Prodys S.L. Tel: +34 91 6896880 Θ Fax: +34 91 6943777 Θ Email: [email protected] Θ Web: www.prodys.com Page 55 The display will show information in the following way: L 1 C O N N E C T E D Status Line 1 F R A M E D Status L2:IDLE Decoder 1 L1:IDLE (0) ISDN L2:IDLE (0) BKUP ON Backup status The first line shows information about the status of communication Line 1, followed by status information of the audio Decoder. The second line shows information about the status of communication Line 2. (This line will only be enabled when working as a DUAL codec8) . The communication lines will be in one of the following states: DOWN9: The communication line is not physically detected. Most likely the interface is not plugged in. The Display shows “DOWN”: L1:DOWN L2:DOWN IDLE: The line is detected physically but no connection is being made. The display shows IDLE and the disconnection code: L1:IDLE (0) L2:IDLE (0) ISDN ISDN CONNECTED: The line is connected. The display shows “Connected” and the Decoder status: L1:CONNECTED FRAMED L2:DOWN 8 DUAL codec: Nomada IP is able to operate as a DUAL codec over ISDN and over IP (when configured in ‘DOUBLE’ mode). 9 This line status cannot be detected when working on PSTN mode. Prodys S.L. Tel: +34 91 6896880 Θ Fax: +34 91 6943777 Θ Email: [email protected] Θ Web: www.prodys.com Page 56 CALLING: In the process of making a connection. The display shows an arrow indicating outgoing calling and the PSTN/ISDN10 number or IP address: L1: 1234567890 L2:DOWN RING4: Receiving a call on the line. The display shows an arrow indicating incoming calling and the PSTN/ISDN number or IP address: L1: 1234567890 L2:DOWN The Decoder can be in one of the following states: FRAMED: Audio Synchronised. The displays shows the word “FRAMED”: L1:CONNECTED FRAMED L2:DOWN SEARCH Searching for synchronisation. The displays shows the word “SEARCH”: L1:CONNECTED SEARCH L2:DOWN The Decoder status information only appears if the line is connected If the line is showing an IDLE status, an indicator code will show the cause of the last disconnection. L 1 : I D L E ( 0 ) L 2 : N O T A V A I L A B L E When the lines are not connected the selected NET will be shown. L 1 : I D L E ( 0 ) L 2 : N O T A V A I L A B L E 10 I P I S D N ISDN is available as an option. Prodys S.L. Tel: +34 91 6896880 Θ Fax: +34 91 6943777 Θ Email: [email protected] Θ Web: www.prodys.com Page 57 When the Nomada IP is operating as a DUAL codec, there will be two independent Decoders, one for each line. In all other cases information will only show on the first line of the display as there will be only one Decoder working (even if there are two communication lines connected). L 1 : I D L E ( 0 ) L 2 : N O T A V A I L A B L E I P When the lines are connected the direction of the arrow will indicate if the unit made or received the connection. L 1 C O N N E C T E D F R A M E D L 2 : N O T A V A I L A B L E The backup operation mode can be in one of the following states: DISABLED: The display doesn’t show any information about it. BKUP OFF: The backup is enabled but not activated, that is, the main line is working appropriately. L1:CONNECTED L2:--- TDWN: The main line is dropped and the display shows the countdown timer. L1:CONNECTED L2:--- FRAMED BKUP OFF SEARCH TDWN=20 BKUP ON: The Nomada IP is working in backup mode, that is, transmitting and receiving through the ISDN. L1:CONNECTED L2:IDLE (10) FRAMED BKUP ON Prodys S.L. Tel: +34 91 6896880 Θ Fax: +34 91 6943777 Θ Email: [email protected] Θ Web: www.prodys.com Page 58 TUP: The main line is working again and the display is showing the countdown timer before leaving the backup mode. L1:CONNECTED L2:IDLE (10) FRAMED TUP=10 When the unit is working as an IP codec it is possible to handle both parts of the connection independently. When the unit is configured in ‘SIMPLE’ mode, the first line will show information about the status of the transmission part of the communication Line 1. The second line will show information about the status of the reception part of the communication on Line 1, followed by status information of the audio Decoder. TX1:IDLE(0) RX1:IDLE (0) >> If the user presses the right arrow key on the front panel, the display will show the information related to the second line. TX2:IDLE(0) RX2:IDLE (0) << If the user presses the left arrow key on the front panel, the display will show the information related to the first line again. TX2:IDLE(0) RX2:IDLE (0) << The communication lines will be in one of the following states: DOWN: The communication line is not physically detected. Most likely the interface is not plugged in. The Display shows “DOWN”: TX:DOWN RX:DOWN IDLE: The line is detected physically but no connection is being made. The display shows IDLE and the disconnection code: TX:IDLE(0) RX:IDLE (0) Prodys S.L. Tel: +34 91 6896880 Θ Fax: +34 91 6943777 Θ Email: [email protected] Θ Web: www.prodys.com Page 59 Tx CONNECTED: The Tx part of the line is connected. The display shows “Connected. TX->CONNECTED RX:CONNECTED Rx CONNECTED: The Rx part of the line is connected. The display shows “Connected” and the Decoder status: TX:IDLE(0) RX:CONNECTED FRAMED FRAMED CALLING: In the process of making a connection. The display shows an arrow indicating outgoing calling and the ISDN number or IP address: TX 1234567890 RX:IDLE(4) When Nomada IP is configured to IP Multi-Unicast11, the format of the messages will be the following: DOWN: The communication line is not physically detected. Most likely the interface is not plugged in. The Display shows “DOWN”: TX:_ _ _ _ _ _ _ _ _ _ _ RX:DOWN IDLE: The line is detected physically but no connection is being made. The display shows IDLE and the disconnection code: TX:_ _ _ _ _ _ _ _ _ _ _ RX:IDLE (4) Tx CONNECTED: One or more of the different Unicast connections which are available is connected. TX:_ _ □ _ _ _ _ □_ _ _ _ RX:IDLE (4) Each connection is represented by a small square. 11 Multi-Unicast is available as an option. Prodys S.L. Tel: +34 91 6896880 Θ Fax: +34 91 6943777 Θ Email: [email protected] Θ Web: www.prodys.com Page 60 Rx CONNECTED: The Rx part of the line is connected. The display shows “Connected” and the Decoder status: TX: _ _ □ _ _ _ _ □_ _ _ _ RX:CONNECTED FRAMED Line 2 is not available when the init is configured in IP Multi-Unicast. VI.3 Control Keys VI.3.1 The CALL 1 and CALL 2 keys The fundamental role of these keys is the initiation and termination of a connection. Note that the keys have different functions depending on the communication line status at any given moment. Additionally, the display will also show different information depending on the type of NET selected – IP or ISDN. Depending on the line’s status, CALL1 and CALL2 will function in the following way: With the line disconnected: a) Initiation of a communication: Pressing CALL1 or CALL2 will access the call initiation menu. Depending on the type of NET selected (IP, ISDN12, PSTN) the dialog that you will see will vary. (Note that, CALL 2 only works when Nomada IP works as a DUAL codec13). b) Connecting to an incoming call: if the Nomada IP is preconfigured to manual answering, the CALL1 or CALL2 keys will connect the line when an incoming call is detected on the correponding lines. With a line connected: There are two different functions: a) A short press will display on-screen the number or IP address of the current connection. b) A long press (over 1 second) will disconnect the associated line. 12 ISDN is available as an option. 13 DUAL codec: Nomada IP is able to operate as a DUAL codec over ISDN and over IP (when configured in ‘DOUBLE’ mode). Prodys S.L. Tel: +34 91 6896880 Θ Fax: +34 91 6943777 Θ Email: [email protected] Θ Web: www.prodys.com Page 61 It is posible to program a number of call retries from the Nomada IP web page. With either the Tx or Rx part connected: There are two different functions: a) A short press will display on-screen the following message: LAN L1 MODE STATUS {MULTICAST} UNICAST By selecting the Status option, the user can get information about the IP address of the existing connection. By selecting Multicast or Unicast, the user can make a connection to receive or to send audio, depending of what direction, Tx or Rx, is free. b) A long press (over 1 second) will disconnect the associated line. VI.3.1.1. Establishing a call when Nomada IP is configured as an IP Unicast/Multicast codec Pressing CALL1 the screen will display the following: LAN L1 MODE {MULTICAST} UNICAST The user must select beforehand if the IP communication type is MULTICAST mode (point to multi-point) or UNICAST mode (point to point). Next, depending on the selected option will show: MULTICAST LAN L1 MODE {MULTICAST} UNICAST O K Prodys S.L. Tel: +34 91 6896880 Θ Fax: +34 91 6943777 Θ Email: [email protected] Θ Web: www.prodys.com Page 62 LAN L1 MODE {Tx} Rx O K LAN L1 DIAL 224.0.0.1 To make the connection press OK. “Period” is selected with the # key. UNICAST LAN L1 MODE MULTICAST {UNICAST} O K LAN L1 MODE {UNIDIR} BIDIR O K LAN L1 MODE {Tx} Rx O K LAN L1 DIAL 10.0.0.0 To make the connection press OK. “Period” is selected with the # key. Prodys S.L. Tel: +34 91 6896880 Θ Fax: +34 91 6943777 Θ Email: [email protected] Θ Web: www.prodys.com Page 63 VI.3.1.2. Establishing a call when Nomada IP is configured as an IP Multi-Unicast codec (NET = IP) Pressing CALL1 the screen will display the following: MULTIUNICAST {Group Redial} CALL Group Redial is the only option available when calling from the front panel. This option will try to re-establish all previous connections, both Tx and Rx. CALL2 key is not available under Multi-Unicast mode. VI.3.1.3. Establishing a call when Nomada IP is configured as an ISDN codec (NET = ISDN) Pressing the CALL1 key will display the page where you can enter the number to be called on Line 1. The CALL2 key does the same for Line 2. ISDN L1 DIAL 123456789012345 ISDN L2 DIAL 123456789012345 Once the destination number or IP address has been entered, press the OK key to establish the connection. Prodys S.L. Tel: +34 91 6896880 Θ Fax: +34 91 6943777 Θ Email: [email protected] Θ Web: www.prodys.com Page 64 VI.3.1.4. Establishing a call when Nomada IP is configured as a PSTN codec (NET = PSTN) Pressing the CALL1 key will display the page where you can enter the number to be called on Line 1. The CALL2 key is not enabled, given that Line 2 is not available when working on PSTN mode. PSTN L1 DIAL 123456789012345 Once the destination number or IP address has been entered, press the OK key to establish the connection. VI.3.2 The INF key This key allows the user a simple and quick way to display detailed information on the status and configuration of the Nomada IP. Given that the screen is not able to display all the information at once, you can cycle through the different information screens by repeatedly pressing the INF button, or by using the left and right directional arrows. These screens are: 1. Battery Information. 2. Audio input VU meters. 3. Audio output VU meters. 4. Decoding algorithm. 5. Encoding algorithm. 6. System name. 7. IP configuration parameters. 8. Net configuration: NET type selected (IP, ISDN o X21), protocol... 9. Audio Input Configuration. 10. GPIO status and Serial Port bit rate. Prodys S.L. Tel: +34 91 6896880 Θ Fax: +34 91 6943777 Θ Email: [email protected] Θ Web: www.prodys.com Page 65 VI.3.2.1. Screen 1: Battery information This information will vary depending on the connection status of the battery. If the battery is not connected to the unit, this screen will show the following text: BATTERY NOT PRESENT If the battery is connected, this screen will show information about the charge of the battery: BATTERY: 60% █████████▌ VI.3.2.2. Screen 2: Audio input VU meters The audio input levels are represented on-screen horizontally over 18 characters. Each character represents 3dB. All characters showing will represent 0 dBFs. When only one character is showing it therefore represents a value between –96 and –56 dBFs. The dBFs value is indicated on the right of the LCD screen. The input is indicated by a < symbol following the L and R characters. L:>>>>>> R:>>>>> VI.3.2.3. Screen 3: Audio output VU meters The audio input levels are represented on-screen horizontally over 18 characters. Each character represents 3dB. All characters showing will represent 0 dBFs. When only one character is showing it therefore represents a value between –96 and –56 dBFs. The dBFs value is indicated on the right of the LCD screen. The output is indicated by a > symbol following the L and R characters. Prodys S.L. Tel: +34 91 6896880 Θ Fax: +34 91 6943777 Θ Email: [email protected] Θ Web: www.prodys.com Page 66 L:>>>>>>> 41 R:>>>>>> 44 VI.3.2.4. Screen 4: Decoding algorithm14 This window shows the algorithm that is selected and synchronised for Decoder 1 and 2 (number 2 is only relevant when Nomada IP is working as a DUAL codec). Here are some examples: D1:MPL2-064-MN-48 D2:G722 D1:MPL2-64-ST-48 D2:NOT AVAILABLE If the Decoder is not synchronised it will show the text “SEARCHING” The different algorithms are written in the following way: 14 PCM – Mode - Sample Rate – number of bits. G711 – Law. G722. MPEG Layer II – Bit rate – Mode – Sample Rate – CRC. MPEG Layer III – Bit rate – Mode – Sample Rate – CRC. AAC MPEG2 LC – Mode – Sample Rate – CRC. AAC MPEG4 LC/LD/HE – Mode – Sample Rate – CRC. AptX – Mode. Take into account that some compression modes might be available as an option. Prodys S.L. Tel: +34 91 6896880 Θ Fax: +34 91 6943777 Θ Email: [email protected] Θ Web: www.prodys.com Page 67 VI.3.2.5. Screen 5: Encoding algorithm15 This is similar to the Decoder described above, but will describe the encoding algorithm instead. E1:MPL2-64-MN-48-CR E2:G722 The different algorithms are displayed in the same way as the Decoder outlined above, except for the following modes: AAC MPEG2 LC – Bit rate – Mode – Sample Rate – CRC. AAC MPEG4 LC/LD/HE – Bit rate – Mode – Sample Rate – CRC. If the Encoder is configured to automatic mode or if the Decoder is not synchronised you will see the following: E 1 : A U T O E 2 : N O T A V A I L A B L E VI.3.2.6. Screen 6: System name The name configured for the device will appear in this information window: Name:NOMADA IP 15 Bear in mind that some compression modes might be available as an option. Prodys S.L. Tel: +34 91 6896880 Θ Fax: +34 91 6943777 Θ Email: [email protected] Θ Web: www.prodys.com Page 68 VI.3.2.7. Screen 6: LAN port configuration parameters IP address, mask, gateway and DHCP configuration IP address and mask: ADDR:192.168.100.100 MASK:255.255.255.000 GW:192.168.100.1 DHCP:DISABLED VI.3.2.8. Screen 7: Net configuration This section shows the NET type and the audio input selected. Here follows two examples: a) NET = IP and protocol = V3: CODEC IP Proprietary V3 b) NET = ISDN: CODEC ISDN Prodys S.L. Tel: +34 91 6896880 Θ Fax: +34 91 6943777 Θ Email: [email protected] Θ Web: www.prodys.com Page 69 VI.3.2.9. Screen 9: GPIO and Serial Port bit rate This represents the GPIO status and serial ports bitrate: GPI:00 PA:9600 GPO:10 VI.3.3 The BOOK Key This key directly accesses the internal Address Book. By pressing this key we can view and connect to entries in the Address Book. (Note that to edit or modify entries the user has to go into the BOOK option in the main menu). Pressing BOOK the user can enter the Address Book index: << BOOK[01] >> Using the left and right navigation keys the user can go through the different entries in the Address Book. By pressing OK we select the item that is onscreen. Now the screen shows the number/numbers to call, or the IP address, depending on which has been saved. L1:1234567890 L2:1234567890 Pressing OK again will process this information, that is, Nomada IP will configure the Encoder according to the BOOK entry and make the connection over ISDN, PSTN or IP. However, if you press the right arrow instead you can simply display the encoding mode saved. E1:MPL3-128-MN-48 Prodys S.L. Tel: +34 91 6896880 Θ Fax: +34 91 6943777 Θ Email: [email protected] Θ Web: www.prodys.com Page 70 When you press the BOOK key only those stored entries which are relevant to the NET that is currently activated will be shown. So when NET = ISDN, the user will only be able to browse previously stored ISDN entries, just as when NET = IP you will only be able to select from relevant IP addresses. Prodys S.L. Tel: +34 91 6896880 Θ Fax: +34 91 6943777 Θ Email: [email protected] Θ Web: www.prodys.com Page 71 Chapter VI THE FRONT PANEL MENU By pressing OK on the navigation keys you enter the system’s main menu from the default STATUS screen. We shall take a close look at the different options available in the system menu. All menus, submenus and options described in this section meet a counterpart at the Web Control interface. For new users we recommend to get familiar with the codec essentials by means of the Prodys IP Family User Manual, since this reading usually is more comprehensive the first time. VII.1 The Controls: Navigation keys Using the on-screen menus the user can control all the functions of the Nomada IP. Using the ⇐, ⇑ and ⇒ keys it is possible to move around the system menus and with the OK key select the desired options. Here is some more detail on each of these keys: ⇒ : Moves to the menu option on the right. When we reach the last option, a further press of this right arrow will cycle us round again to the first option, i.e. we go to the left-most end of the list. The option that is available for selection will appear on the display inside brackets ( {} ). ⇐ : Moves to the menu option on the left. When we reach the first option, a further press of this left arrow will cycle us round again to the last option, i.e. we go to the right-most end of the list. The option that is available for selection will appear on the display inside brackets ( {} ). ⇑ : Returns to the previous level of the menu. If we keep pressing this key we will leave the system menu completely and return to the STATUS screen. OK : This selects or confirms the option that is selected (between the brackets) and where relevant activates the subroutine associated with this option. Prodys S.L. Tel: +34 91 6896880 Θ Fax: +34 91 6943777 Θ Email: [email protected] Θ Web: www.prodys.com Page 72 VII.2 Main Menu The main menu has the following options: MAIN MENU {NET}ENC CONF INF NET: This allows us to select the communications port required. ENC: Here you can configure Encoders 1 and 2. CONF: from here the user can configure various general parameters of the unit, for instance selecting the audio input or setting up the LAN port. INF: From here you can obtain information on the software version and various configuration parameters of the ISDN port. VII.3 NET: Selecting a communications port The Nomada IP has three different communication ports that allow the unit to operate over three distinct types of network: IP, ISDN and PSTN (Public Switch Telephone Network). NET SELECTION {IP}ISDN PSTN The NET option is only available if the lines are not already connected. If they are busy, the display will show the following text: N O T L I N E A V A I L A B L E W I T H C O N N E C T E D Each NET type selection will of course have their own set of configuration parameters, as will be seen next. When selecting IP, a new screen will prompt the user for the type of codec, single or double. Prodys S.L. Tel: +34 91 6896880 Θ Fax: +34 91 6943777 Θ Email: [email protected] Θ Web: www.prodys.com Page 73 VII.3.1 IP CODEC By default the IP streaming is provided over the Ethernet interface, but optionally the IP streaming can be performed over 3G networks. For further details about 3G streaming please refer to chapter IX. IP NET {ETHERNET} 3G IP NET ETHERNET {3G} A Prodys IP Family codec is a stereo signal capable codec. However the codec provides a mean to split one stereo codec into two independent mono codecs. This option is enabled at the NET menu.16 Single Codec: Stereo audio signals and any compression algorithm might be enabled. Double Codec: This setting enables two independent mono codecs. Following restrictions must be remarked: a) Only mono signals can be encoded and decoded. b) PCM and AAC HE compression modes not supported. c) Apt-X and enhanced Apt-X are supported only at 16kHz sampling frequency SET CODEC SINGLE {DOUBLE} 16 New menu dialog available from version 6.0 onwards. Prodys S.L. Tel: +34 91 6896880 Θ Fax: +34 91 6943777 Θ Email: [email protected] Θ Web: www.prodys.com Page 74 When selecting the mode of operation over IP, single or double, a new screen will prompt the user for the type of IP communication: Unicast/Multicast or MultiUnicast, and for the type of protocol to use: Prodys VX, SIP/SAP, RTP. MultiUnicast mode is only supported by Prodys proprietary protocols, whilst Unicast/Multicast mode is supported by all protocols, proprietary and standard protocols (SIP, SAP, RTP). For more information about protocols and type of IP communications, please refer to the Prodys IP Family User Manual. VII.4 ENC: Encoder algorithm selection menu17 From this option the user can select the audio Encoder algorithms. Note that the Nomada IP can operate as a DUAL codec18. In this case, it is possible to have two simultaneous communications that are totally independent and so it is possible to configure the second Encoder. However, there are operational restrictions in the configuration of Encoder 2 that depend on the algorithm and mode already selected for Encoder 1. If we select ENC from the main menu the following is displayed: SET ENCODING MODE {ENCODER1}ENCODER2 ENCODER 2 is only available if the unit is configured as a DUAL codec. PSTN does not support double mode, so ENCODER2 is not available on PSTN. No compression modes are available if NET = PSTN, so both ENCODER1 and ENCODER2 menus are disabled. 17 Some compression modes might be available as an option. 18 DUAL codec: Nomada IP is able to operate as a DUAL codec over ISDN and over IP (when configured in ‘DOUBLE’ mode). Prodys S.L. Tel: +34 91 6896880 Θ Fax: +34 91 6943777 Θ Email: [email protected] Θ Web: www.prodys.com Page 75 VII.4.1 Configuration of Encoder 1 The configuration of Encoder 1 (and Encoder 2 where available) is done in steps, starting with the selection of an algorithm and following on with the different parameters that relate to that particular algorithm. The Nomada IP menu will always only display the options and parameters that are relevant to each algorithm’s configuration. Additionally there are certain restrictions associated with the communication interface selected. For example, uncompressed audio can only be selected when the NET is set to IP. In the following description these restrictions are outlined for each algorithm. Selecting the algorithm For Encoder 1 the following options are available: AUT: Automatic Mode. The Encoder adopts the same mode as the Decoder. PCM : Linear audio with no compression. G711 : Compatible with the telephone standard. G722 : Low delay ADPCM compression, appropriate for voice. MPL2 : MPEG 1,2 Layer II. MPL3 : MPEG 1,2 Layer III. AAC2LC: AAC MPEG 2 Low Complexity. AAC4LC: AAC MPEG 4 Low Complexity. AAC4LD: AAC MPEG 4 Low Delay. AAC4HE: AAC MPEG 4 High Efficiency. aptXTM : Proprietary algorithm based on ADPCM, with very low delay. NOTICE – RESTRICTIONS ON THE DIFFERENT NETWORKS PCM is only available if NET = IP. G711 is only available if NET = ISDN or IP. Only G711 is available if NET = PSTN, so this menu is not available SET ENCODER 1 >> {AUT}PCM G711 G722 Prodys S.L. Tel: +34 91 6896880 Θ Fax: +34 91 6943777 Θ Email: [email protected] Θ Web: www.prodys.com Page 76 <<SET ENCODER1 >> MPL2 MPL3 AAC2LC <<SET ENCODER 1 >> AAC4LC AAC4LD APTX Next are the parameters and restrictions associated with each algorithm. Take into aacount that no compression modes are available if NET = PSTN, so both ENCODER1 and ENCODER2 menus are disabled. VII.4.2 PCM The configuration steps are: 1. Mode: MONO or STEREO. 2. Number of bits: 16,20 or 24. 3. Sample rate: 3219, 48 KHz. VII.4.3 G711 If we select G711, we can choose between A law or Mu Law. VII.4.4 G722 No parameters to configure. 19 32 Khz sampling rate on PCM will be only available with SIP/SAP as streaming IP protocol Prodys S.L. Tel: +34 91 6896880 Θ Fax: +34 91 6943777 Θ Email: [email protected] Θ Web: www.prodys.com Page 77 VII.4.5 MPEG Layer II The configuration steps are: 1. Bit rate. 2. Mode: MONO, JOINT STEREO, STEREO or DUAL. 3. Sample rate: 48, 32,24 or 16 KHz20. 4. CRC validation on/off. 5. Auxiliary data on/off. NOTICE – MPEG Layer II RESTRICTIONS If NET = ISDN Bit Rate > 128 Kbps If NET = ISND Bit Rate < 64kbps is not possible. If NET = ISDN & Bit Rate = 128 Kbps, J52, CCS & Telos bonding algorithms are available. If the Bit rate > 128 Kbps a 24 Khz sample rate is not possible. If the Bit Rate > 192 Kbps MONO mode is not possible. VII.4.6 MPEG Layer III The configuration steps are: 1. Bit rate. 2. Mode: MONO, JOINT STEREO, STEREO or DUAL. 3. Sample rate: 48, 32,24 or 16 KHz21. 4. CRC validation on/off. 5. Auxilliary data on/off. NOTICE - MPEG Layer III RESTRICTIONS 384 Kbps is not an option with MPEG Layer III. 20 16 Khz sampling rate on Mpeg Layer II will be only available with SIP/SAP as streaming IP protocol. 21 16 Khz sampling rate on Mpeg Layer III will be only available with SIP/SAP as streaming IP protocol. Prodys S.L. Tel: +34 91 6896880 Θ Fax: +34 91 6943777 Θ Email: [email protected] Θ Web: www.prodys.com Page 78 If NET = ISDN & Bit Rate = 128 Kbps, Telos Layer III bonding algorithm is available. If NET = ISDN Bit Rate > 128 Kbps is not possible. If NET = ISND Bit Rate < 64kbps is not possible. If the Bit rate > 128 Kbps a 24 Khz sample rate is not possible. VII.4.7 AAC 2,4 LC The configuration steps are: 1. Bit rate. 2. Mode: MONO, JOINT STEREO, STEREO or DUAL. 3. Sample rate: 48, 32 or 24 KHz. 4. CRC validation on/off. 5. Auxiliary data on/off. NOTICE: AAC LC RESTRICTIONS If NET = ISDN Bit Rate > 128 Kbps is not possible. If NET = ISND Bit Rate < 64kbps is not possible. If the Bit rate > 128 Kbps the combination MONO - Fs= 24 KHz is not possible. If the Bit Rate > 192 Kbps the combination MONO - Fs= 32 KHz is not possible. If the Bit Rate > 256 Kbps the combination MONO is not possible. If the Bit Rate > 256 Kbps the combination STEREO – Fs = 24 KHz is not possible. If NET = ISDN & Bit Rate = 64 or 128 Kbps, J52 protocol is available. VII.4.8 AAC LD The configuration steps are: 1. Bit rate. 2. Mode: MONO, JOINT STEREO, STEREO or DUAL. 3. Sample rate: 48, 32 or 24 KHz. 4. CRC validation on/off. 5. Auxiliary data on/off. Prodys S.L. Tel: +34 91 6896880 Θ Fax: +34 91 6943777 Θ Email: [email protected] Θ Web: www.prodys.com Page 79 NOTICE - AAC LD RESTRICTIONS If NET = ISDN Bit Rate > 128 Kbps is not possible. If the Bit Rate >256 Kbps, a 24 KHz sample rate is not possible. If NET = ISND or X21 Bit Rate < 64kbps is not possible. VII.4.9 AAC HE The configuration steps are: 1. Bit rate. 6. Mode: MONO, JOINT STEREO, STEREO or DUAL. 7. Sample rate: 16 or 24 KHz. 8. CRC validation on/off. 9. Auxiliary data on/off. NOTICE - AAC HE RESTRICTIONS If NET = ISDN Bit Rate > 128 Kbps is not possible. If NET = ISND Bit Rate < 64kbps is not possible. VII.4.10 aptX The aptX menu allows the selection of Standard aptX or Enhanced aptX. << SET ENCODER 1 >> AC4LC AAC4LD{APTX} O K SET ENCODER APT-X {STD APTX} ENH APTX Prodys S.L. Tel: +34 91 6896880 Θ Fax: +34 91 6943777 Θ Email: [email protected] Θ Web: www.prodys.com Page 80 VII.4.10.1. STD APTX The configuration steps are: 1. Bit rate: 64,128,192,256, 384kbps. 2. Audio mode: Mono, Stereo. 3. Auxiliary data: On/Off. These are the available options: a) b) c) d) e) 64 Kbps Mono 7.5 KHz. 128 Kbps Stereo 7.5 KHz o Mono 15 KHz. 192 Kbps Mono 20 KHz. 256 Kbps Stereo 15 KHz. 384/576 KHz Stereo 20 KHz. VII.4.10.2. ENH APTX The configuration steps are: 1. Bit rate: 64,128,192,256, 384kbps. 2. Audio mode: Mono, Stereo. 3. Auxiliary data: On/Off. The bit rates will be different depending on the selected number of bits and the NET configuration Prodys S.L. Tel: +34 91 6896880 Θ Fax: +34 91 6943777 Θ Email: [email protected] Θ Web: www.prodys.com Page 81 NET = IP: Fs Mode 16 kHz 7.5 mono 16 kHz 7.5 stereo 32 kHz 15 mono 32 kHz 15 stereo 48 kHz 20 mono 48 kHz 20 stereo NET = ISDN: Fs 16 bits 64 kbps 128 kbps 128 kbps 256 kbps 192 kbps 384 kbps Mode 16 kHz 7.5 mono 16 kHz 7.5 stereo 32 KHz 15 mono 16 bits 64 kbps 128 Kbps 128 Kbps apt-X Enhanced 20 bits 160 Kbps 320 kbps 240 Kbps 480 Kbps 24 bits 192 kbps 384 kbps 288 Kbps 576 kbps apt-X Enhanced 20 bits - 24 bits - Prodys S.L. Tel: +34 91 6896880 Θ Fax: +34 91 6943777 Θ Email: [email protected] Θ Web: www.prodys.com Page 82 VII.5 Configuration of Encoder 2 NOTICE – ENCODER2 RESTRICTIONS Only available in ISDN mode (NET = ISDN) or if NET = IP and Double Mode is set. The Encoder 2 is only available if Encoder 1 is set to a MONO Encoder, and the bit rate is set to 64 Kbps. Only a bit rate of 64 Kbps is available if ISDN. No restriction for IP networks. Only the MONO mode is available. PCM and AAC HE compression modes are not supported in Double mode. Only 16 kHz sampling is supported for Apt-X compression modes. Therefore in Double mode the following options are available: AUT : Automatic Mode. This means that the Encoder adopts the same mode as the Decoder. (This is equivalent to the automatic dependent mode of the Pronto 3). G711 : Compatible with the telephone standard. G722 : Low delay ADPCM Algorithm appropriate for voice. MPL2 : MPEG 1,2 Layer II. MPL3 : MPEG 1,2 Layer III. AAC2LC: AAC MPEG 2 Low Complexity. AAC4LC: AAC MPEG 4 Low Complexity. AAC4LD: AAC MPEG 4 Low Delay. AptXTM @ 16kHz sampling: Proprietary algorithm based on ADPCM, with very low delay. Prodys S.L. Tel: +34 91 6896880 Θ Fax: +34 91 6943777 Θ Email: [email protected] Θ Web: www.prodys.com Page 83 Defined restrictions of the MPEG standard: MPEG LAYER II Fs = 24/16 KHz MPEG LAYER II Fs = 48/32 KHz B R A T E 64 128 192 256 320 384 Stereo X X X X X X MODE Joint Stereo X X X X X X Dual X X X X X X Mono X X X B R A T E 64 128 192 256 320 384 MPEG LAYER III Fs = 48/32 KHz B R A T E 64 128 192 256 320 384 Stereo X X X X X MODE Joint Stereo X X X X X Dual X X X X X Stereo X X MODE Joint Stereo X X Dual X X Mono X X MPEG LAYER III Fs = 24/16 KHz Mono X X X X X B R A T E 64 128 192 256 320 384 Stereo X X MODE Joint Stereo X X Dual X X Mono X X MPEG2,4 AACLC Fs= 48/32/24 KHz B R A T 64 128 192 256 E 320 384 MPEG4 AAC LD Fs = 24 KHz Stereo X X X MODE Joint Stereo X X X Dual X X X X X X X X X X X X Mono X X X Only 48 Khz B R A T E 64 128 192 256 320 384 Stereo X X X X X MODE Joint Stereo X X X X X Dual X X X X X AAC HE @ 128kbps Mono is the a defined standard restriction of the MPEG standard. Prodys S.L. Tel: +34 91 6896880 Θ Fax: +34 91 6943777 Θ Email: [email protected] Θ Web: www.prodys.com Page 84 Mono X X X X X VII.6 CONF: General configuration Menu Grouped here are all the general parameters. These are usually configured during installation and it is not usually necessary to reconfigure them afterwards. They are grouped in the following way: CONF MENU {AUD}PORTS SYS BOOK AUD: This selects between the analog and digital audio inputs. PORTS: From here you can configure the LAN, ISDN, X21 and RS232 ports. SYS: General configuration options. BOOK: For editing and saving entries in the Address Book. STREAMING: To configure some IP streaming parameters such as the Jitter Buffer and the Packet Size. PRESETS: To load configuration presets. VII.6.1 CONF – AUD There are three different options: Audio input source and audio levels. AUDIO CONF {INPUTS} PRESETS IN3 VII.6.1.1. AUDIO INPUTS From here select the audio input control type: local from the front panel, or remote from the web page. AUDIO INPUTS CONF {LOCAL} REMOTE Prodys S.L. Tel: +34 91 6896880 Θ Fax: +34 91 6943777 Θ Email: [email protected] Θ Web: www.prodys.com Page 85 VII.6.1.2. PRESETS From here select the audio preset to load into the unit. PRESET [#X] >> NAME_OF_PRESET_#1 When more than one preset have been stored in the unit, the user can go through all the presets by clicking on the left or right arrow keys. By clicking on ‘OK’, the preset being displayed will be loaded into the unit. VII.6.1.3. AUDIO INPUT 3 This section allows the user to enable/disable the third input and to control the level. AUDIO INPUT 3 ENABLE LEVEL AUDIO INPUT 3 LEVEL -4.5 dB By pressing the right and left arrow keys on the navigation keypad the user can configure the gain for the third input in steps of 0.5dBs. Prodys S.L. Tel: +34 91 6896880 Θ Fax: +34 91 6943777 Θ Email: [email protected] Θ Web: www.prodys.com Page 86 VII.6.1.4. AUDIO OUTPUT22 In this section of the menu, the user defines the monitoring mode on the headphones, as well as the different signals to be mixed and monitored both on the headphone outputs and the auxiliary outputs. Please take a look at the diagram bellow defining the menu tree structure for the configuration of the audio outputs. Menu tree structure 22 Take into account that the new monitoring mode for the headphones (Panoramic mode) was introduced in version 6.1.1, so this menu structure is valid from version 6.1.1 onwards. Prodys S.L. Tel: +34 91 6896880 Θ Fax: +34 91 6943777 Θ Email: [email protected] Θ Web: www.prodys.com Page 87 HEADPHONES CONFIGURATION There are three different options within this menu: MODE, LEVEL and MATRIX. The option MODE defines the monitoring operation mode on the headphones. There are two different modes: IND (Independent) and PAN (Panoramic). For more information about these two modes of operation please read chapter II.2.2. The menu structure of the third option, MATRIX, depends on the mode of operation selected for the headphones: PAN or IND. If PAN mode is selected, only the options TX and RX will be available under the MATRIX menu, given that with this operation mode (PAN mode) the user has to configure what signals take part of the transmission and reception paths. On the contrary, when selecting IND operation mode, the only options available under the MATRIX option will be ‘L’ and ‘R’. In this operation mode (IND mode), the user has to select what signals will be mixed and monitored on the left and on the right ears. In addition, under the LEVEL option, another menu will allow the user to define a different audio level for each signal in 1dB steps. AUXILIARY OUTPUTS The menu structure for the configuration of the auxiliary outputs is simpler than the headphone one. The user just has to enable or disable the different signals available to take part of the audio mix on the corresponding auxiliary audio output. These signals are: PROG, CUE, TALKBACK TX and TALKBACK RX. VII.6.2 CONF-PORTS This is for configuring the communication ports of the unit. CONF PORTS MENU {LAN}ISDN PSTN RS232 LAN: for configuring the LAN port. Prodys S.L. Tel: +34 91 6896880 Θ Fax: +34 91 6943777 Θ Email: [email protected] Θ Web: www.prodys.com Page 88 ISDN: for configuring the ISDN port. PSTN: PSTN configuration. RS232: for configuring the speed of each of the two RS232 ports VII.6.2.1. LAN LAN PORT CONF {IP}DHCP ETH PORTS IP: Manually setting of IP parameters. DHCP: Automatic IP configuration from a DHCP server. ETH: Ethernet port speed and duplex configuration. PORTS: Default TCP/UDP ports for audio, data and control. IP PARAMETERS CONFIGURATION ADDRESS: the IP address that is assigned to the Nomada IP unit. SUBMASK: IP address mask. GATEWAY: Gateway IP address. The different screens for the configuration of these parameters are as follows: LAN PORT CONF LAN CONFIG O K SET ADDRESS LAN . . . . O K SET SUBMASK LAN . . . . Prodys S.L. Tel: +34 91 6896880 Θ Fax: +34 91 6943777 Θ Email: [email protected] Θ Web: www.prodys.com Page 89 O K SET GATEWAY LAN . . . . DHCP By setting DHCP, the unit will receive its IP parameters when starting. These IP settings might be different from time to time, that is why Nomada IP supports RIP2 protocol. This protocol allows the user to set an ‘internal’ IP address, in order that the unit can be identified regardless of the IP settings provided by the DHCP server. LAN PORT CONF {IP}DHCP O K SET INT . . ADDRESS . . ETHERNET PORT This option allows the user to set the speed and duplex settings for the ethernet port. ETH CONF {auto} 10HD 10FD 100HD 100FD NOTE: When the unit is connected to a device which does not support autonegotiation, and it is set to work in a fixed mode, the Ethernet interface must be configured to match the configuration of that device, so ‘Auto’ should not be selected in this case. Prodys S.L. Tel: +34 91 6896880 Θ Fax: +34 91 6943777 Θ Email: [email protected] Θ Web: www.prodys.com Page 90 PORTS This option allows the user to set the web server port, and the base port of the TCP/UDP port group used for audio, data and control. PORTS CONF {WEB} BASE O K SET BASE PORT 50011_ VII.6.2.2. ISDN SET ISDN PORT {NET}LINE1 LINE2 NET: From here we select the ISDN protocol. LINE1: For configuring the ISDN parameters for communication Line 1 (one of the two B channels of the ISDN interface). LINE2: For configuring the ISDN parameters for communication Line 2 NET: SELECTING THE ISDN PROTOCOL You can choose between the following protocols: Euro ISDN, 5ESS, DMS100 and NAT1. SET ISDN NET {EURO}5ESS D100 NAT Prodys S.L. Tel: +34 91 6896880 Θ Fax: +34 91 6943777 Θ Email: [email protected] Θ Web: www.prodys.com Page 91 Configuration of the ISDN parameters for each B channel (Line 1 and Line 2) The parameters that we can configure for each communication line are as follows: SET ISDN LINE 1 {LNUM}CNUM SPID ANS LOOP LNUM: An abbreviation for ‘Local Number’. With this option it is possible to assign a different number to each of the lines available on the basic rate ISDN. In this way we can automatically map incoming calls to each line, as each line will only respond to calls made to this local number. When the local number is programmed the unit only detects as an incoming call those calls that are made to the local number - all other calls are not recognised. CNUM: An abbreviation for ‘Calling Number’. This option allows you to program up to a maximum of three numbers that will work as incoming call filters. When the CNUM option is activated, the Nomada IP will respond automatically only to calls made from these CNUM numbers. It is possible to program each line separately. SPID: When you are using NAT1 or DMS100 you must enter the correct Service Profile ID (SPID) numbers for the ISDN BRI circuit. Automatic or manual response: When automatic response is selected, the unit will connect automatically to an incoming call, always doing so when there is no restriction imposed by the local number or other such call filters. In manual mode, the incoming calls are indicated on-screen and the user simply presses the corresponding CALL key to go ahead and connect that line. LOOP23: It is possible to enable an external loop on any of the two B channels of the ISDN interface. By enabling this external loop, all the incoming data on that channel will be sent back without any processing. 23 This option is available from version 5.2.1 onwards. Prodys S.L. Tel: +34 91 6896880 Θ Fax: +34 91 6943777 Θ Email: [email protected] Θ Web: www.prodys.com Page 92 The ISDN parameter configuration screens are as follows: LNUM: LINE1 LOCAL NUMBER CNUM: LINE1 CNUM MODE {ON}OFF O K LINE1 CNUMS {N1}N2 N3 O K LINE1 CALLING NUM1 - SPID: LINE1 SPID NUMBER ANS: LINE1 ANSWER MODE MANUAL{AUTO} Prodys S.L. Tel: +34 91 6896880 Θ Fax: +34 91 6943777 Θ Email: [email protected] Θ Web: www.prodys.com Page 93 LOOP: LINE1 EXT.LOOP ON {OFF} For Line 2 the options are laid out in the same way. VII.6.2.3. Configuration of the RS232 port The RS232 port is used for the transmission/reception of auxiliary data. Here the operational speed is set up. SET RS232 PORT {PORTA} SET RS232 PORTA >> {300}1200 2400 4800 << SET RS232 PORTA 1200 2400 4800 9600 VII.6.3 CONF-SYS Grouped here are functions that affect the general operation of the unit. SYS MENU » {LOOP}BACKUP « SYS MENU » AUXDATA KEYPAD Prodys S.L. Tel: +34 91 6896880 Θ Fax: +34 91 6943777 Θ Email: [email protected] Θ Web: www.prodys.com Page 94 « SYS MENU BUZZER RESET VII.6.3.1. LOOP This sets up an Encoder-Decoder loop. Its purpose is to help the user when there are installation problems. The loop takes place in accordance with the configuration available at that moment: SET LOOP {CODEC1}CODEC2 VII.6.3.2. BACKUP Backup configuration menu: BACKUP MENU {MODE}ENABLE TIMER DROPOUTS This option is only available if NET=IP The MODE option is to select if the unit will work as a MASTER or as a SLAVE. BACKUP MODE {MASTER}SLAVE Prodys S.L. Tel: +34 91 6896880 Θ Fax: +34 91 6943777 Θ Email: [email protected] Θ Web: www.prodys.com Page 95 When configured as SLAVE: BACKUP MENU {MODE}ENABLE ENCODER ENABLE: This option activates or deactivates the backup functionality. Also, there is an option to force backup operation. BACKUP ENABLE {ON}OFF FORCED ENCODER: The ENCODER option allows the user to set the compression mode to be used when the ISDN line takes over. When configured as MASTER: BACKUP ENABLE {ON}OFF FORCED ENABLE: This option activates or deactivates the backup functionality. Also, there is an option to force backup operation. TIMER: This option is only available when configured as MASTER. This option allows the user to program the timers to decide when the unit goes to backup mode or when the unit switches back to the main link again. BACKUP TIMER {DOWN}UP Prodys S.L. Tel: +34 91 6896880 Θ Fax: +34 91 6943777 Θ Email: [email protected] Θ Web: www.prodys.com Page 96 In the Down timer, the user programs the time the unit will need to decide that the main line is dropped. The Up timer is the main line recovering time. The minimum time can be programmed is 1 sc and the maximum 255sc. This option is only available if the unit is working as MASTER. BACKUP TIMER DOWN (1 - 255):10_ BACKUP TIMER UP (1 - 255):10_ DROPOUTS: From here, the user can define how many drop-outs (loss of framing) within a time period will cause the unit to switch from IP/X21 to ISDN. DROPOUTS CONF NUMBER {WINDOW TIME} DROPOUTS NUMBER (1 - 255):10_ WINDOW TIME (1 - 255):10_ Prodys S.L. Tel: +34 91 6896880 Θ Fax: +34 91 6943777 Θ Email: [email protected] Θ Web: www.prodys.com Page 97 VII.6.3.3. AUXDATA This option allows the user to configure whether the decoder will be able to receive ancillary data or not. AUX.DATA MENU {RS232}GPIO It is possible to enable independently the RS232 port and the GPIO port. There are two decoders DEC1 and DEC 2 in case the Nomada IP works as dual codec so, it is possible to have auxiliary data on both or either of them. RS232 DATA MENU {OFF}DEC1 There is only one GPIO interface for two decoders (if the second is available) so the user has to configure which decoder will carry the GPIO information. GPIO DATA MENU {OFF}DEC1 DEC2 VII.6.3.4. KEYPAD This option allows the user to enable/disable automatic keypad locking and password protection. When enabled, the unit will automatically lock keys from the front panel, one minute after last key was pressed. To unlock, just press <OK> and * keys, and enter the password, if the password was enabled. KEYPAD MENU {AUTOLOCK} PASSWORD Prodys S.L. Tel: +34 91 6896880 Θ Fax: +34 91 6943777 Θ Email: [email protected] Θ Web: www.prodys.com Page 98 The INF key won’t be disabled. CALL1 and CALL2 keys will be available to answer any incoming call. When the keypad is locked, and any key is pressed, the following message appears: KEYS LOCKED PRESS OK AND THEN * If password protection was enabled, the user will be prompted to enter the password, and the following message appears: ENTER PASSWORD If the password is entered successfully, the following message appears: ALL KEAYPAD UNLOCKLED VII.6.3.5. BUZZER It is possible to enable/disable the buzzer from this screen. The buzzer warns the user about incoming calls when the unit is configured as an ISDN codec and the answer mode is set to manual. BUZZER ENABLE {DISABLE} Prodys S.L. Tel: +34 91 6896880 Θ Fax: +34 91 6943777 Θ Email: [email protected] Θ Web: www.prodys.com Page 99 VII.6.3.6. RESET It is possible to reset the device by selecting this option. The system will ask the user to confirm this selection before rebooting the unit. RESET SYSTEM? RESET {CANCEL} VII.6.4 CONF-BOOK This is where the user can edit Address Book entries. There are three fields for each entry – number/numbers (max 2) to call over ISDN/PSTN, IP address for connecting to, and the Encoder modes for Encoder 1 and/or 2. There are a total of 6424 entry slots available. Once you have selected BOOK from the menu you program entries in the following way: Firstly, you must select one of the entry positions with the right/left keys: <<BOOK INDEX[01] >> Pressing <OK> you enter the selected entry slot, and from there you can add or modify data using EDIT, or delete data using DELETE. BOOK INDEX[01] {EDIT} DELETE On pressing EDIT the different fields appear for editing: 24 Before version 5.2.1, the number of available entries was 32. Prodys S.L. Tel: +34 91 6896880 Θ Fax: +34 91 6943777 Θ Email: [email protected] Θ Web: www.prodys.com Page 100 BOOK EDITOR [01] {ISDN/PSTN} IP ENC1 ENC2 ISDN/PSTN: This option allows you to enter the number/numbers to be called over ISDN/PSTN for this Address Book entry. The call will be made on the communications line corresponding to where the number has been saved. L1:L2: IP: This is where you add the IP address you wish to call when this entry is chosen from the Address Book. IP1:IP2:You can only enter ISDN numbers OR an IP address for each entry in the Address Book. You cannot have an entry that has both ISDN numbers and IP addresses at the same time. ENC1 and ENC2: Here you can select the algorithm that will be set up for Encoder 1 (or Encoders 1 and 2) when an entry is selected from the Address Book. By selecting, the algorithm currently configured the display will show the options available to change it (CHANGE). E1:MPL3-128-MN-48 {CHANGE} Prodys S.L. Tel: +34 91 6896880 Θ Fax: +34 91 6943777 Θ Email: [email protected] Θ Web: www.prodys.com Page 101 VII.6.5 CONF-STREAMING This section allows the user to configure some key parameters for the audio streaming such as the jitter buffer and the packer size: STREAMING TBP LINEDELAY The TBP option let us define the packet size of the audio frames. This packet size is configured per compression mode and per codec. Take into account that some compression modes do not allow the user to change the packet size, as this packet size is fixed. Those compression modes will not appear on the menu. SET TBP (2-24msc) 2 The LINEDELAY option allows the user to configure the jitter buffer. The range of possible values goes from 0 to 10000 miliseconds. SET DELAY (0-10000msc) 0 VII.6.6 CONF-PRESETS From here select the audio preset to load into the unit. PRESET [#X] >> NAME_OF_PRESET_#1 Prodys S.L. Tel: +34 91 6896880 Θ Fax: +34 91 6943777 Θ Email: [email protected] Θ Web: www.prodys.com Page 102 When more than one preset have been stored in the unit, the user can go through all the presets by clicking on the left or right arrow keys. By clicking on ‘OK’, the preset being displayed will be loaded into the unit. VII.7 INF This option is used to display useful information about the unit. The following fields will be shown: INFORMATION {VER}TA AUXDATA VII.7.1 VERSIONS SN:SERIAL NUMBER VERSION:05.2.1 >> BACO :02.9.2 TA :00.3.4 >> PANEL :03.0.1 << VII.7.2 TA This option shows the following information about the ISDN terminal adapter configuration: − Answering mode: manual (MAN) or automatic (AUT). − CN: Calling Number option activated or not: CN: ON / OFF. − ISDN Protocol: EISDN, 5ESS, DMS100 or NAT1 Prodys S.L. Tel: +34 91 6896880 Θ Fax: +34 91 6943777 Θ Email: [email protected] Θ Web: www.prodys.com Page 103 − LN: Local number if it has been entered. L1:MAN-CN:OFF-EISDN LN: -> L2:MAN-CN:OFF-EISDN LN: <- VII.7.3 AUX DATA This option shows information about the auxiliary data configuration: D1-RS232:ON GPI:ON D2-RS232:ON GPI:OFF Prodys S.L. Tel: +34 91 6896880 Θ Fax: +34 91 6943777 Θ Email: [email protected] Θ Web: www.prodys.com Page 104 Chapter VIII PSTN OPERTAION MODE Whe the unit is configured to work over the PSTN interface there are some restrictions to take into account when operating with the unit. In this operation mode, the unit will be able to make and receive calls on any plain analog telephone line (Public Switched Telephone Networks). VIII.1 Compression modes When working on PSTN mode, there is no compression, so the encoder configuration is not available. The encoder information on the web and on the front panel display will remain, showing G711 as compression mode, but only to maintain the design, and to make it easier to understand. VIII.2 Communications lines Only the first line will be available when working over PSTN networks. In addition, it is not possible to detect whether the interface has been connected to the PSTN network till the user tries to establish a connection or when receiving a call, so some line status like ‘Not physical line’ cannot be detected. VIII.3 Making a call from the front panel When the user tries to make a call from the front panel by pressing the CALL1 key (CALL2 key is disabled), a tone on the CUE signal path will indicate the user that the unit is ready to enter the destination to call. If the CUE signal is routed to the headphones, the user will be able to hear this tone. In addition, every number being entered from the numeric keypad will generate a DTMF tone on that signal (CUE). Prodys S.L. Tel: +34 91 6896880 Θ Fax: +34 91 6943777 Θ Email: [email protected] Θ Web: www.prodys.com Page 105 VIII.4 Receiving calls When Nomada IP receives a call on the PSTN interface, this call can be manually answered or not depending on the configuration of the following option on the web configuration page: When this option is set to ‘Automatic’, the unit will answer the incoming calls automatically. When this option is set to ‘Manual’, the display will show that an incoming call is in progress, and the user will have to manually pick up the call by pressing the CALL1 key. Till the call is picked up, a warning tone will be generated on the CUE signal, so that it can be heard on headphones (in case this signal has been configured to be routed to the headphones). This tone consists of two short tones followed by a silence period of about twice the tone period. The buzzer can also be enabled to warn the user in the event of an incoming call, in the same way as it works when receiving a call over ISDN or IP. Prodys S.L. Tel: +34 91 6896880 Θ Fax: +34 91 6943777 Θ Email: [email protected] Θ Web: www.prodys.com Page 106 VIII.5 Availlable signals on the audio outputs Given that only line 1 is available, not all audio signals are available on the audio output mixer. Thus, only the ‘Program’ (audio transmitted on line 1) and ‘CUE’ (audio received on line 1) signals will be available, given that line 2 is disabled in this mode. The headphone audio matrix on the web will be as follows: Only the CUE and Program signals (signals related to line 1) are available to be monitored on the headphones. And the audio matrix to configure the auxiliary audio outputs will be the following: Prodys S.L. Tel: +34 91 6896880 Θ Fax: +34 91 6943777 Θ Email: [email protected] Θ Web: www.prodys.com Page 107 Similary, only the CUE and PROGRAM signals are available to be monitored on the auxiliary outputs when working over PSTN networks. VIII.6 The audio inputs When the unit is configured to work as a PSTN codec (Net = PSTN), the third audio input will be disabled, and the level of the audio received on line 1 (this signal is called CUE or PSTN Rx when working on PSTN mode) can be adjusted independently as well as for the two MIC/line level inputs, as can be seen in the picture bellow: Prodys S.L. Tel: +34 91 6896880 Θ Fax: +34 91 6943777 Θ Email: [email protected] Θ Web: www.prodys.com Page 108 VIII.7 The audio input controls It is not possible to assign any input to the second line, given that this second line is not available when working on PSTN networks. Thus, the ‘TB’ keys on the front panel are not available. Prodys S.L. Tel: +34 91 6896880 Θ Fax: +34 91 6943777 Θ Email: [email protected] Θ Web: www.prodys.com Page 109 Chapter IX 3G OPERATION MODE The SIERRA WIRELESS COMPASS 888 modem for 3G has been approved for operation with the Nomada IP XL. Streaming over 3G requires that the portable codec is licensed for this purpose. Please check the actual <license> according the picture. The 3G option includes the SIERRA WIRELESS COMPASS 888 modem. The user does also require a SIM card which enables access to his 3G provider’s network. The SIM card is inserted in the holder according the picture. Either of both rear USB slots admits the 3G modem. The modem manufacturer recommends keeping free 1cm around the modem. It is also possible to extend the USB link by means of a short USB cable. This could make easier to place the antenna for the best radio performance. Prodys S.L. Tel: +34 91 6896880 Θ Fax: +34 91 6943777 Θ Email: [email protected] Θ Web: www.prodys.com Page 110 Please contact [email protected] about license details. IX.1 Setting the 3G network. First time the user enables the 3G network it is required to specify at the Web Control the APN, user and password of his 3G provider. This information should be provided by the 3G operator. In any case, this information is accesible on the internet. Some examples are: Prodys S.L. Tel: +34 91 6896880 Θ Fax: +34 91 6943777 Θ Email: [email protected] Θ Web: www.prodys.com Page 111 3G Provider APN Movistar APN movistar.es APN Vodafone ac.vodafone.es APN Orange internet User Password movistar movistar vodafone vodafone orange orange The user has to configure what DNS server the 3G interface will use to convert from IP to names and vice versa. Usually this field will be left with the default configuration: ‘Obtain DNS server address automatically’. After attaching the 3G modem, the user might enable the 3G network by means NET menu (either Web control or front panel). Other choices like <Single> or <Double> mode, as well as the streaming protocol have to be specified. Prodys S.L. Tel: +34 91 6896880 Θ Fax: +34 91 6943777 Θ Email: [email protected] Θ Web: www.prodys.com Page 112 IP NET ETHERNET {3G} After setting all parameters applicable for the NET menu, the 3G activation progress is shown on the display and the Web Control page: 1. <Not Detected !> The 3G modem is not detected by the system. 2. <Initializing> this is the next quick prompt. 3. <PIN> this is the next quick prompt; the user must enter the PIN and strike <OK>. The PIN code can be introduced both from the web and from the front panel. 4. <Registering> this is the next quick prompt. 5. <Connecting> this is the next quick prompt. 6. <Connected>. This is the final prompt and the confirmation that the codec is enabled to stream over 3G network. Prodys S.L. Tel: +34 91 6896880 Θ Fax: +34 91 6943777 Θ Email: [email protected] Θ Web: www.prodys.com Page 113 3G DEVICE 3G NOT DETECTED! ENTER PIN _ 3G DEVICE 3G INITIALIZING 3G DEVICE 3G REGISTERING 3G DEVICE 3G CONNECTING Tx1:IDLE 3G Tx2:IDLE IX.2 Warning indication. In some cases, the 3G modem is able to register and connect to the network, but if the APN/user/password parameters are not correct or for some reason the data access of the SIM card is not working and/or enabled, a message like the following will appear on the web page: Prodys S.L. Tel: +34 91 6896880 Θ Fax: +34 91 6943777 Θ Email: [email protected] Θ Web: www.prodys.com Page 114 In addition to this, on the menu screen, an exclamation mark will be shown by the 3G indication. Tx1:IDLE !3G Tx2:IDLE This indication will also appear if the DNS Server or the 3G interface was configured manually and the Server is not working. IX.3 IP address for the 3G network. Once the portable codec is enabled for streaming over 3G, the Ethernet interface is applicable only for control and monitoring purposes, while the 3G interfaces is used for audio streaming. The IP setting for the 3G interface is provided automatically by the wireless network. Striking several times the <INF> key the user can retrieve the IP addresses of the codec. 3G IP address is displayed as: ADR1: xx.xx.xx.xx MSK1: 255.255.255.255 The portable codec accepts streaming only over the <ADR1:> address. Codec managing IP address is: ADR2: xx.xx.xx.xx MSK2: yy.yy.yy.yy Prodys S.L. Tel: +34 91 6896880 Θ Fax: +34 91 6943777 Θ Email: [email protected] Θ Web: www.prodys.com Page 115 The portable codec managing user accesses over the <ADR2:> . The 3G IP address can be retrieved also at the Web Control page. IX.4 3G Networks Prodys portable codecs do not apply any restriction for streaming over 3G networks. Different protocols are available, as well as <Single> and <Double> mode. Streaming connections could be initiated by the portable codec or the far end codec. Neither are applicable restrictions about the streaming IP bandwidth. However the user should check the best configuration profile suited to his 3G provider and application. Check a valid 3G field strength at the current position. Usually static position offer better streaming performance than moving applications. It is allowed to use short extension cables between the 3G modem and the portable codec. Streaming over 3G networks should take into account that those network jitters are far worse than ADSL networks. Prodys recommends trying initially <RXbuffer> values about [200ms .. 500ms]. Streaming with very short Time Between Packets could imply a higher packet loss rate. Prodys recommends trying initially for low delay algorithms like G722 or Apt-X a TBP setting about [10ms .. 24ms]. If frequent streaming interruptions are observed, then it is worth to make trials with a smaller encoding IP bandwidth, increasing also the <RXbuffer> value. Prodys S.L. Tel: +34 91 6896880 Θ Fax: +34 91 6943777 Θ Email: [email protected] Θ Web: www.prodys.com Page 116 3G IP addresses are usually dynamically provided and changes frequently if the wireless link fades. Prodys recommends to initiate the streaming connection from the portable codec, thus automatic redialing could be provided from the portable codec. It is advised to check any provider’s restriction about the maximum “downloaded volume per month”. Given is the example that a 128kbps streaming connections accounts for 1G of data each 2.4 hours. Prodys S.L. Tel: +34 91 6896880 Θ Fax: +34 91 6943777 Θ Email: [email protected] Θ Web: www.prodys.com Page 117 Appendix A TECHNICAL SPECIFICATIONS X.1 Audio Interfaces X.1.1 IN1 & IN2 inputs XLR connectors. Maximum levels: o LINE levels: +20dBu. o MIC levels: -46dBu (without compressor). o MIC levels: -33dBu (with compressor). Input impedance: o LINE mode = 40Kohm. o MIC mode = 40Kohm. Mic input sensitivity adjustable from -25 to -65 dBu. THD+N < 0.015% (MIC mode), 0.01% (LINE mode). @ 1kHz. SNR > 80dB (MIC mode), 95dB (LINE mode). Phantom power (48 Volts). X.1.2 IN3 input Mini-jack female connector. Maximum level: +20dBu. Input impedance: 40Kohm. THD+N < 0.01% @ 1kHz. SNR < 100 dB. X.2 Headphone 1 & 2 outputs 6.3mm Jack stereo connectors. Bandwidth 20Hz-20kHz (1dB). Maximum output level: 6dBu (8 mW) over 300 ohm. Prodys S.L. Tel: +34 91 6896880 Θ Fax: +34 91 6943777 Θ Email: [email protected] Θ Web: www.prodys.com Page 118 THD+N < 0.01% @ 1kHz. SNR < 95 dB. X.3 AUX & REC outputs XLR male connector. Bandwidth 20Hz-20kHz (0.3dB). Maximum output level: +20dBu. THD+N < 0.005% @ 1kHz. SNR < 100 dB. X.4 Compression25 G722. G711 A/µ Law. MPEG 1,2 layer II (ISO/IEC 11172-3 /13818-3). MPEG 1,2 Layer III (ISO/IEC 11172-3 /13818-3). MPEG 2 AAC LC (ISO/IEC 13818-7). MPEG 4 AAC LC, LD & HE (ISO/IEC 14496-3). Standard and Enhanced aptXTM. X.5 Comunication ports X.5.1 ISDN Protocols: EISDN, AT5ESS, DMS100 and NAT. 1 BRI connection. S/T and U interfaces. RJ45 connectors. X.5.2 LAN port 25 10/100Base-TX Ethernet with auto-negotiation. RJ-45 connector. Apt-X and AAC compression modes are available as an option. Prodys S.L. Tel: +34 91 6896880 Θ Fax: +34 91 6943777 Θ Email: [email protected] Θ Web: www.prodys.com Page 119 X.5.3 GPIO port DB9F connector. 2 ground contact inputs. 2 NA/NC relay outputs. -Max voltage: 125VAC (0.5A), 110VDC (0.3A), 30VDC (1A). -Max. current: 2A. X.5.4 RS232 port RJ45 connector. X.6 Power supply. Universal Input Range. AC input range: 100-240 V. Frequency range: 50-60 Hz. Output Power: 30W (with battery in charge status). Li-Pol battery pack (optional). Autonomy: 2.5 hours. X.7 Weight and dimensions Height: 70 mm; Width: 212mm, height 75mm and depth 205mm. Weight: 1.8 Kg. Prodys S.L. Tel: +34 91 6896880 Θ Fax: +34 91 6943777 Θ Email: [email protected] Θ Web: www.prodys.com Page 120 Appendix B DIP SWITCHES AND BATTERY INSTALLATION XI.1 Restore factory default setting (microswitches) There are 8 microswitches on the bottom side of Nomada IP which are reserved for special functions. The microswitches are protected with a removable cover. The cover must be removed with a Torx-10 tool if access to the switches is required or the optional battery is fixed on the bottom side. Picture 1 By default all the switches must be in OFF position according the picture. The inverted view is according the codec position on the previous picture. Prodys S.L. Tel: +34 91 6896880 Θ Fax: +34 91 6943777 Θ Email: [email protected] Θ Web: www.prodys.com Page 121 ON OFF Switch number 7 will restore the default factory configuration if set ON before a power cycle. The IP address is changed to a DHCP IP configuration. In case a DHCP server is not available on the network the address is set to 192.168.100.100 and the netmask to 255.255.255.0. After the factory default setting the switch number 7 must return to the OFF position for usual operation. XI.2 Optional battery installation An optional battery can be attached to the Nomada IP. The battery not only allows independence for portable applications, but also redundancy if the main power can not avoid large voltage dips; since the codec operates continuously without care of those impairments. The battery is attached on the bottom side of the Nomada. Following procedure is indicated for installation: 1. Switch OFF the Nomada. 2. Remove the cover plate of the microswitches located on the bottom side – rear edge. (Keep the cover plate for future use) 3. Remove the cover plate of the connector for the battery located on the bottom side – left hand (bottom view according the picture 2 below) (Keep the cover plate for future use) 4. Place the battery, checking that no room is between codec and battery surfaces. The battery has to dock on the proper bottom conector. (Picture 3) 5. Fix the battery on each corner with the screws supplied with the battery. 6. Switch ON the Nomada. The Nomada should be able to boot without the main power cord connected. After 1 minute of booting the (i) key can supply information about the battery status. Prodys S.L. Tel: +34 91 6896880 Θ Fax: +34 91 6943777 Θ Email: [email protected] Θ Web: www.prodys.com Page 122 Picture 2 Picture 3 Prodys S.L. Tel: +34 91 6896880 Θ Fax: +34 91 6943777 Θ Email: [email protected] Θ Web: www.prodys.com interstage Phistersvej 31, 2900 Hellerup, Danmark Telefon 3946 0000, fax 3946 0040 www.interstage.dk - pro audio with a smile Page 123