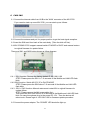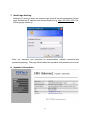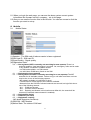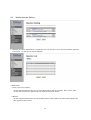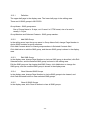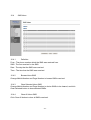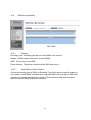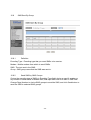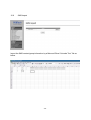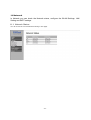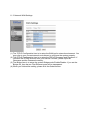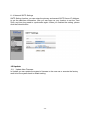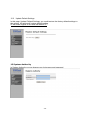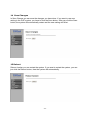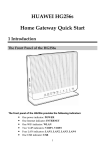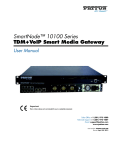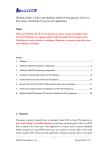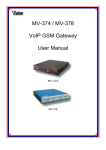
1
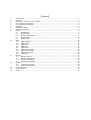
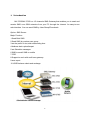
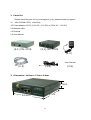
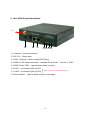
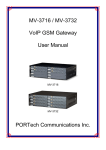
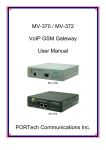
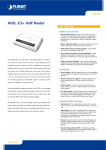
MV-370S/MV-372S 1/2 Ports SMS Gateway User Manual 【Content】 1 2 3 4 5 6 7 8 9 10 11 12 13 14 15 Introduction ............................................................................................................. 1 Parts list.................................................................................................................. 2 Dimension: 14.5cm x 17cm x 3.9cm ............................................................................ 2 MV-370S Panel description ......................................................................................... 3 MV-372S Panel description ......................................................................................... 4 CABLING ................................................................................................................. 5 Web Page Setting ..................................................................................................... 6 System Information................................................................................................... 6 Mobile..................................................................................................................... 7 9.1 Mobile Status .................................................................................................. 7 9.2 Mobile Setting.................................................................................................. 8 9.3 Mobile Operator Setting ...................................................................................... 9 9.4 Mobile Cell Info ...............................................................................................10 9.5 Mobile USSD..................................................................................................13 SMS ......................................................................................................................16 10.1 SMS Log Server ..............................................................................................16 10.2 SMS Contact ..................................................................................................17 10.3 SMS Group....................................................................................................19 10.4 SMS Inbox.....................................................................................................21 10.5 SMS Outbox ..................................................................................................22 10.6 SMS Sent By Number .......................................................................................23 10.7 SMS Sent By Contact........................................................................................24 10.8 SMS Sent By Group..........................................................................................25 10.9 SMS Import....................................................................................................26 Network .................................................................................................................31 11.1 Network Status:............................................................................................31 11.2 Network WAN Settings ......................................................................................32 11.3 Network LAN Settings .......................................................................................33 11.4 Network SNTP Settings......................................................................................34 Update ...................................................................................................................34 12.1 Update New Firmware .......................................................................................34 12.2 Update Default Settings .....................................................................................36 System Authority .....................................................................................................36 Save Changes .........................................................................................................37 Reboot ...................................................................................................................37 1 Introduction MV-370S/MV-372S is a 1/2 channels SMS Gateway that enables you to send and receive SMS over GSM networks from your PC through the internet. An easy-to-use web interface. You can send SMS by User/Group/Phonebook Option: SMS Server: Major Function 1.Send Bulk SMS 2.Send SMS by number,user,group 3.set the prefix of sim,total sms/sending time 4.Address book upload/export 5.set Schedule messages 6.SMS to email/ SMS to mobile 7.CDR 8.Support to work with muliti sms gateway 9.sms report 10.USSD balance check and recharge -1- 2 Parts list Please check the parts for any missing parts. If do, please contact our agents: 2.1 「MV-370S/MV-372S」main body 2.2 Power adaptor AC-DC (110V AC – 12V DC) or (220V AC – 12V DC) 2.3 Network cable 2.4 Antenna 2.5 User Manual (2.1) MV-370S (2.1) MV-372S (2.2) User Manual (2.3) 3 (2.4) (2.5) Dimension: 14.5cm x 17cm x 3.9cm 3.9cm 17cm 14.5cm -2- 4 MV-370S Panel description 14.5cm 3.9cm 17cm (4.1) (4.2) (4.3) (4.4) (4.6) (4.5) (4.7) 4.1 Antenna:Antenna connector. 4.2 DC 12V:Power socket. 4.3 LAN: Standard RJ-45 socket, connecting to Hub circuit. 4.4 PWR: Power indicator light, red light. Light is on when system’s power supply is normal. 4.5 Mobile: GSM indicator light, green light. Light flashes when GSM status is normal; light turns on constantly when GSM is called. 4.6 Lan: Lan indicator light, green light. Light flashes when Lan is called; light turns off when GSM answered. 4.7 Link: Link indicator light, green light. Light is on when network is connected correctly. -3- 5 MV-372S Panel description 5.1 5.2 5.3 5.4 5.5 5.6 5.7 5.8 5.1 Antenna:Antenna connector. 5.2 DC 12V:Power input. 5.3 LAN:LAN port. It also can be DHCP Server. 5.4 WAN: RJ-45 internet connector,standard RJ-45 socket,connect to HUB. 5.5 PWR (Power LED):Light up when power is normal. 5.6 VoIP1:an indicator light of VoIP1 5.7 VoIP2:an indicator light of VoIP2 When used as a VoIP GSM Gateway 5.8 Link Indicator :Light up when network is connected. -4- 6 CABLING 6.1 Connect the internet cable from HUB to the ‘WAN’ connector of the MV-372S. *If you need to stack up more MV-372S, you can stack up as follows. 6.2 Connect the antenna and put it in proper position to get the best signal reception. 6.3 Insert the SIM card from back of the main body. (Take the slide off first). 6.4 MV-370S/MV-372S support manual switch IP MODE to DHCP and manual restore to original firmware for update failure. There are SW1 and SW2 button shows as follow diagram: 6.4.1 SW1 function: Restore the factory default IP 192.168.0.100 STEP: Please press the SW1 in 7~8 seconds till the Mobile and LAN LED flash blink. 6.4.2 SW2 function: Switch MV-37X IP to DHCP MODE STEP: Please press the SW2 about 7~8 seconds till the Mobile and LAN LED flash blink. 6.4.3 SW1 + SW2 function: Manual restore and restart MV to original firmware for update failure. STEP: Please remove the MV power cable first. Then press the SW1 and SW2 in 4~5 seconds till the Mobile and LAN LED flash blink. At same time,please plug in the power DC 12V . Then the device will reboot auto. Please login to 192.168.0.100 for firmware update procedure. 6.5 Connect the power adaptor. The ‘POWER’ LED should be light up. -5- 7 Web Page Setting When the IP setting is done, the operator may setup all the rest parameters via web page. Browse the IP address from Internet Explorer (e.g. http://192.168.0.100). The following page shows up: Enter the username and password for authentication. (default username=sms, password=gateway). The page follows when the username and password are correct. 8 System Information -6- 8.1 When you login the web page, you can see the demo system current system information like firmware version, company… etc in this page. 8.2 Also you can see the function lists in the left side. You can use mouse to click the function you want to set up. 9 Mobile 9.1 Mobile Status (1)Operator:The SIM card of telecom carrier is been registered (2)SIM Card ID:SIM card ID. (3)Signal Quality:Signal quality. (4)Registration State: 0,0 --->Not registered, ME is currently not searching for new operator There is a technical problem. User intervention is required. Yet, emergency calls can be made if any network is available. Probable causes: • no SIM card available • no PIN entered • no valid Home PLMN entry found on the SIM 0,1 --->Registered to home network 0,2 --->Not registered, but ME is currently searching for a new operator The ME searches for an available network. Failure to log in until after more than a minute may be due to one of the following reasons: • No network available or insufficient Rx level. • The ME has no access rights to the networks available. • Networks from the SIM list of allowed networks are around, but login fails due to one of the following reasons: - #11 ... PLMN not allowed - #12 ... Location area not allowed - #13 ... Roaming not allowed in this location area After this, the search will be resumed (if automatic network search is enabled). 0,3 --->Registration denied 0,4 --->Unknown (not used) 0,5 --->Registered, roaming *ME: Mobile Equipment Phonebook (5)GSM S/N : IMEI Number (6)Motion State: The status of SIM card -7- 9.2 Mobile Setting (1) ON/Off: If you use this channel, please click on. Otherwise, please click off. (2) Mobile PIN Code: If you need to unlock pin code via MV-370S/MV-372S, you can click “On” and enter pin code. (3) Init AT Cmd: User can fill the AT Command for GSM module -8- 9.3 Mobile Operator Setting 1. Operator ID: When GSM module is registered, user can click the List to show all available operators in that area. You will see like follows diagram. 2.Work Mode: a. Every time reset module: Fill the assigned Operator ID, then press Submit bottom and save change. After reboot, GSM module will research the operator ID and registered the base station. b.Manual: Fill the assigned Operator ID, then press Now bottom. GSM module will search that Operator ID and registered after reboot. -9- 9.4 Mobile Cell Info It shows BTS (BCCH) cells of the cellular network and register to new BCCH selection. Support Quad band-BG2W, Quad band-M10 and firmware V10.185 above only. *Model no,please view P.5 System Information) Please work with this feature when the mobile status is “Stand by/Active”. It detects the surrounding active cell, up to 7 cells and shows Cell ID, signal and best signal (RXlev). The No.0 shows the data of current registered cell. Follow by No.1 to No.6 cell is based on cell signal (best to low). MCC : Mobile Country Code LAC : Location Area Code Cell : Cell Identifier BSIC: Base Station Identity Code BCCH: Broadcast Control Channel RxLev: Received Signal level in dbm -10- How to Configure 1. You can choose a BCCH channel by clicking on the cell. The module will automatically register in the new BCCH. E.g. If you would like to register BCCH channel on No.4 cell, please click no4 select like below. -11- 2. System will show the cell number information once you select on Preferred this Cell form. Please click the submit button and Save Change on left to restart the module. After system restart and turn to Standby, please check on No.0 cell and confirm the current registered cell you selected. At the point, the Gateway won’t provide the data of surrounding cell signal, but shows -110dbm on No.1 to No.6 RxLev, which means GSM signal 0. -12- 3. If you would like to research all the surrounding BCCH cells again, please cancel Preferred this Cell selection first and send Submit, Save Change to restart the gateway. That, System can detect the surrounding active cell, up to 6 cells and display Cell ID, signal and best signal (RXlev). 9.5 Mobile USSD You can check USSD screen for SIM balance remaining and SIM recharge (add value) automatically. Please work with this feature when the mobile status is “Stand by/Active”. And ensure your Service provider has given you a USSD string(Command) for checking SIM Balance and Recharge the SIM Card. -13- 1. Balance (SIM balance remaining) Step1: Enter Balance checking USSD command in column Step 2: Click Send button When selected, system will check the balance of SIM and display the reply of receive message as below 2. Recharge (add value) Step1: Enter the Recharging USSD command in column Step 2: Click Send button When selected, system will display the reply of receive message as below 3. Checking (If above ways are failed, please select this) Step 1: Enter the complete AT command in Cm3 column Ex. AT+CUSD=1,*145*11#,15 Step 2: Click Send button When selected, system will display the reply of receive message as below -14- 4. Rx Decoder a. None: GSM Format (Default) b. ASC7: ASCII 7bit c.UCS2: Unicode 16bit When user select default GSM Format(None), it may not receive correct GSM code due to the different operator or GSM module/chipset. Please check below example, -15- In this case, user need to select other RX Decoder (ASCII or UCS2) to receive correct message. For Example, None format: When user send command, “*145*11#”, the return message show on system, “C1F1B80CA797C9” ASC7 Format: In this format, the return message is “Accepted” 10 SMS 10.1 SMS Log Server -16- 10.1.1 Definition SMS log server is FTP server. URL : SMS log sever URL. Size of URL is 128-byte, not 128-word. In UTF8 format, size of a word is usually 1~3 byte. Username : User name to login the SMS log server. Size of Username is 64-byte, not 64-word. In UTF8 format, size of a word is usually 1~3 byte. Password : Password to login the SMS log server. Size of Password is 64-byte, not 64-word. In UTF8 format, size of a word is usually 1~3 byte. 10.2 SMS Contact -17- 10.2.1 Definition The upper half page is the display area. The lower half page is the editing area. There are 200 SMS contacts in MV-370S/MV-372S. Name : SMS contact name. Size of Name is 50-byte, not 50-word. In UTF8 format, size of a word is usually 1~3 byte. Phone Number : SMS contact phone number. Size of Phone Number is 50-byte, not 50-word. In UTF8 format, size of a word is usually 1~3 byte. 10.2.2 Add SMS Contact In the editing area, input the contact name and contact phone number in Name and Phone Number field respectively, choice SMS groups that the contact belong to. Click Add button to add the SMS contact, and the new SMS contact is shown in the display area. 10.2.3 Edit SMS Contact In the display area, change Page Number to choice a SMS contact to be edited, click Edit Selected button, and the selected SMS contact is shown in the edit area. Edit the SMS contact as the chapter Add SMS contact, click Add button to change the SMS contact, and the modified SMS contact is shown in the display area. 10.2.4 Clear Selected SMS Contacts In the display area, change Page Number to choice SMS contacts to be cleared, and click Clear Selected button to clear selected SMS contacts. 10.2.5 Clear All SMS Contacts In the display area, click Clear All button to clear all SMS contacts. -18- 10.3 SMS Group -19- 10.3.1 Definition The upper half page is the display area. The lower half page is the editing area. There are 64 SMS groups in MV370/2S. Group Name : SMS group name. Size of Group Name is 10-byte, not 10-word. In UTF8 format, size of a word is usually 1~3 byte. Group Member and Selected Contacts : SMS group member. 10.3.2 Add SMS Group In the editing area, input the group name in Group Name field, change Page Number to choice SMS contacts as group members. Click Add Contacts button to check group members in Selected Contacts field. Click Add button to add the SMS group, and the new SMS group is shown in the display area. 10.3.3 Edit SMS Group In the display area, change Page Number to choice a SMS group to be edited, click Edit Selected button, and the selected SMS group is shown in the editing area. Edit the SMS group as the chapter Add SMS Group, click Add button to change the SMS group, and the modified SMS group is shown in the display area. 10.3.4 Clear Selected SMS Groups In the display area, change Page Number to choice SMS groups to be cleared, and click Clear Selected button to clear selected SMS groups. 10.3.5 Clear All SMS Groups In the display area, click Clear All button to clear all SMS groups. -20- 10.4 10.4.1 SMS Inbox Definition From : The phone number which the SMS was received from. SMS : The text received in the SMS. Date : The day that the SMS was received. Time : The time that the SMS was received. 10.4.2 Browse Inbox SMS Change Mobile Number and Page Number to browse SMSs received. 10.4.3 Clear Selected Inbox SMS Change Mobile Number and Page Number to choice SMSs to be cleared, and click Clear Selected button to clear selected SMSs. 10.4.4 Clear All Inbox SMS Click Clear All button to clear all SMSs received. -21- 10.5 10.5.1 SMS Outbox Definition Mobile : The mobile modem that SMS was sent to. To : The phone number that the SMS was sent to. SMS : The text sent in the SMS. Date : The day that the SMS was sent. Time : The time that the SMS was sent. 10.5.2 Browse Outbox SMS Change Page Number to browse SMSs sent. 10.5.3 Clear Selected Outbox SMS Change Page Number to choice SMSs to be cleared, and click Clear Selected button to clear selected SMSs. 10.5.4 Clear All Outbox SMS Click Clear All button to clear all SMSs sent. -22- 10.6 10.6.1 SMS Sent By Number Definition Encoding Type : Encoding type that you want SMSs to be sent as. Modem : Mobile modem from which to send SMSs. SMS : The text sent in the SMS. Phone Number : The phone number that the SMS was sent to. 10.6.2 Send SMS by Phone Number Choice the encoding type of SMSs in Encoding Type field, choice a specific modem or any modem to send SMSs in Modem field, and input SMS text to be sent in SMS field. Input phone numbers separated by a blank in Phone Number field, and click Send button to send the SMS to all phone numbers. -23- 10.7 10.7.1 SMS Sent By Contact Definition Encoding Type : Encoding type that you want SMSs to be sent as. Modem : Mobile modem from which to send SMSs. SMS : The text sent in the SMS. Contact : SMS contact name that the SMS was sent to. Selected Contacts : All SMS contact names that the SMS was sent to. 10.7.2 Send SMS by SMS Contacts Choice the encoding type of SMSs in Encoding Type field, choice a specific modem or any modem to send SMSs in Modem field, and input SMS text to be sent in SMS field. Change Page Number to choice SMS contacts to send the SMS, and click Send button to send the SMS to selected SMS contacts. -24- 10.8 10.8.1 SMS Sent By Group Definition Encoding Type : Encoding type that you want SMSs to be sent as. Modem : Mobile modem from which to send SMSs. SMS : The text sent in the SMS. Group : SMS group name that the SMS was sent to. 10.8.2 Send SMS by SMS Groups Choice the encoding type of SMSs in Encoding Type field, choice a specific modem or any modem to send SMSs in Modem field, and input SMS text to be sent in SMS field. Change Page Number to choice SMS groups to send the SMS, and click Send button to send the SMS to selected SMS groups. -25- 10.9 SMS Import Import the SMS contact/group information by a Microsoft Excel “Unicode Text” file as below. -26- 10.9.1 Import File Format Column A : SMS contact/group type. For the SMS contact, the value is 0. For the SMS group, the value is 1. Column B : index of the SMS contact/group. For the SMS contact, value is 0 ~ 199. For the SMS group, value is 0 ~ 63. Column C : SMS contact/group name. Size of the SMS contact name is 50-byte, not 50-word. In UTF8 format, size of a word is usually 1~3 byte. Size of the SMS group name is 10-byte, not 10-word. In UTF8 format, size of a word is usually 1~3 byte. Column D : SMS contact phone number. Size of the SMS contact phone number is 50-byte, not 50-word. In UTF8 format, size of a word is usually 1~3 byte. Column E to L : Bit mapping of SMS contact groups. Bit value 0 is not in the SMS group. Bit value 1 is in the SMS group. Column E : bit mapping for the group 7 to 0. Column F : bit mapping for the group 15 to 8. Column G : bit mapping for the group 23 to 16. Column H : bit mapping for the group 31 to 24. Column I : bit mapping for the group 39 to 32. Column J : bit mapping for the group 47 to 40. Column K : bit mapping for the group 55 to 48. Column L : bit mapping for the group 63 to 56. -27- Example : SMS contact 0 : The SMS contact name is “user1”. The SMS contact phone number is “1”. The SMS contact is in the SMS group 0. SMS contact 1 : The SMS contact name is “user2”. The SMS contact phone number is “2”. The SMS contact is in the SMS group 1. SMS group 0 : The SMS group name is “group1”. SMS group 1 : The SMS group name is “group2”. -28- 10.9.2 Microsoft Excel Editing Step 1 : Format Cells Select the column A to L. Click the mouse right key, and choice Format Cells. In Number sub-window, choice Text, and click OK. -29- Step 2 : Save the file. Save as type Unicode Text. -30- 11 Network In Network you can check the Network status, configure the WLAN Settings, LAN Setting and SNTP settings. 11.1 Network Status: You can check the current Network setting in this page. -31- 11.2 Network WAN Settings (1) The TCP/IP Configuration item is to setup the WAN port’s network environment. You may refer to your current network environment to configure the system properly. (2) The PPPoE Configuration item is to setup the PPPoE Username and Password. If you have the PPPoE account from your Service Provider, please input the Username and the Password correctly. (3) The Bridge Item is to setup the system Bridge mode Enable/Disable. If you set the Bridge On, then the two Fast Ethernet ports will be transparent. (4) When you finished the setting, please click the Submit button. -32- 11.3 Network LAN Settings (1) The TCP/IP Configuration item is to setup the WAN port’s network environment. You may refer to your current network environment to configure the system properly. (2)DHCP Server: You may refer to your current network environment to configure the system properly -33- 11.4 Network SNTP Settings SNTP Setting function: you can setup the primary and second SNTP Server IP Address, to get the date/time information. Also you can base on your location to set the Time Zone, and how long need to synchronize again. When you finished the setting, please click the Submit button. 12 Update 12.1 Update New Firmware In Update you can update the system’s firmware to the new one or execute the factory reset to let the system back to default setting. -34- (1) Select the firmware code type, Risc code only. (2)Click the “Browse” button in the right side of the File Location or you can type the correct path and the filename in File Location blank. (3)Select the correct file you want to download to the system then click the Update button. (4) Please click update/default setting after update firmware NOTE: Please open the webpage from Internet Explorer, not compatible with FF or Google Chrome -35- 12.2 Update Default Settings In this page: Update/ Default Settings, you could restore the factory default settings to the system. All setting will restore default setting. IP will retain original IP as usual not default IP. 13 System Authority In System Authority you can change your login name and password. -36- 14 Save Changes In Save Change you can save the changes you have done. If you want to use new setting in the VoIP system, you have to click the Save button. After you click the Save button, the system will automatically restart and the new setting will effect. 15 Reboot Reboot function you can restart the system. If you want to restart the system, you can just click the Reboot button, then the system will automatically. -37-