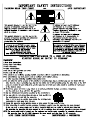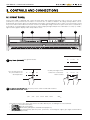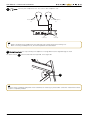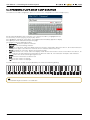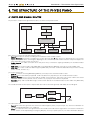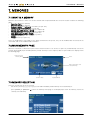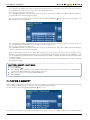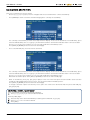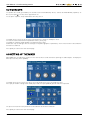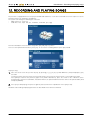
1
V100
User Manual - EN
Ver. 1.3
User Manual - Index
INDEX
1. Important notes ..................................................................................................................................................... 2
1.1 Looking after the product ............................................................................................................................................... 2
1.2 Notes about the manual.................................................................................................................................................. 2
2. Introduction ........................................................................................................................................................... 3
3. Controls and connections ...................................................................................................................................... 4
3.1 Front panel ...................................................................................................................................................................... 4
3.2 Under the keyboard ........................................................................................................................................................ 6
3.3 Rear panel ...................................................................................................................................................................... 9
3.4 Pedals ........................................................................................................................................................................... 12
4. Playing demo songs ............................................................................................................................................ 13
5. Customizing the multitouch panel ........................................................................................................................ 14
5.1 Manual settings ............................................................................................................................................................ 14
5.2 Selecting a configuration .............................................................................................................................................. 15
5.3 Saving a user-made configuration ................................................................................................................................ 15
5.4 Renaming a user-made configuration .......................................................................................................................... 16
6. The structure of the Physis Piano......................................................................................................................... 17
6.1 Data and signal routes.................................................................................................................................................. 17
6.2 Memory structure .......................................................................................................................................................... 18
7. Memories ............................................................................................................................................................ 19
7.1 What is a Memory ......................................................................................................................................................... 19
7.2 Main Memory page ....................................................................................................................................................... 19
7.3 Memory selection.......................................................................................................................................................... 19
7.4 Saving a Memory .......................................................................................................................................................... 20
7.5 Renaming a Memory..................................................................................................................................................... 21
8. Sounds ............................................................................................................................................................... 23
8.1 What is a Sound ............................................................................................................................................................ 23
8.2 Main Sound page ......................................................................................................................................................... 23
8.3 Sound selection ............................................................................................................................................................ 24
8.4 Keyboard mode ............................................................................................................................................................ 25
8.5 Transposer .................................................................................................................................................................... 27
8.6 Selecting the velocity curve .......................................................................................................................................... 28
8.7 Creating a user-made velocity curve ............................................................................................................................ 29
8.8 Activating the metronome ............................................................................................................................................. 30
9. Post-processing section ...................................................................................................................................... 31
9.1 Setting and applying an effect ...................................................................................................................................... 31
9.2 Equalizer ....................................................................................................................................................................... 32
9.3 Setting up the Mixer ...................................................................................................................................................... 32
10. Modifying a Sound ............................................................................................................................................ 33
10.1 Blocks function ........................................................................................................................................................... 33
10.2 Saving a Sound........................................................................................................................................................... 34
10.3 Renaming a Sound ..................................................................................................................................................... 35
11. Instrument general settings ............................................................................................................................... 36
11.1 Recalling factory settings (Factory Reset) .................................................................................................................. 36
11.2 Selecting the language of the on-line guide ............................................................................................................... 37
11.3 Options ....................................................................................................................................................................... 37
11.4 Checking and updating the operating system release ............................................................................................... 38
11.5 Setting time and date.................................................................................................................................................. 39
11.6 Pedal settings ............................................................................................................................................................. 39
11.7 Fine tuning .................................................................................................................................................................. 40
11.8 MIDI settings ............................................................................................................................................................... 40
11.9 Moving files or folders................................................................................................................................................. 41
11.10 Deleting files or folders ............................................................................................................................................. 47
11.11 Rename files and folders .......................................................................................................................................... 48
12. Recording and playing songs ............................................................................................................................ 49
EN - 1
User Manual – Important notes
1. IMPORTANT NOTES
1.1 LOOKING AFTER THE PRODUCT
•
•
•
•
•
•
•
•
•
•
•
•
•
•
•
Do not apply excessive force to the instrument’s structures or the controls (buttons, connectors, etc.).
When possible, do not place the instrument close to units which generate strong interference, such as radios, TVs,
computer videos, etc.
Do not place the instrument close to heat sources, in damp or dusty places or in the vicinity of strong magnetic fields.
Do not expose the instrument to direct sunlight.
Never insert foreign bodies inside the instrument or pour liquids of any kind into it.
To clean the case, use only a soft brush or compressed air. To clean the tempered glass of the front panel, use
common glass detergents (for windows etc.).
Always use good quality screened cables for connection to amplification or diffusion systems. When disconnecting
cables from sockets, always take hold of the connector and not the cable itself; when winding cables, do not knot or
twist them.
Before making the connections ensure that the other units (especially amplification and diffusion systems) you are
about to connect are switched off. This will prevent noisy or even dangerous signal peaks.
If the instrument is to be out of use for lengthy periods, disconnect the plug from the power socket.
Connect the power cable to an earthed socket.
Check that the voltage corresponds to the voltage shown on the serial number plate of the device.
Clean periodically the power cable.
Only use the power cable provided with the instrument.
Do not place the power cable close to heat sources Do not damage the cable or bend it overmuch.
Do not place heavy objects on the cable. Do not place the cable where it could be trampled.
1.2 NOTES ABOUT THE MANUAL
•
•
•
•
•
•
•
•
•
•
The Physis Piano documents include
This User Manual, describing all the instrument controls and connections, together with the basic functions
required to play it;
A Reference Manual, describing all the advanced functions, such as sound editing parameters, song recording
and MIDI interface. This manual can be found at the website http://www.physispiano.com.
Take good care of this manual.
This manual is an integral part of the instrument. The descriptions and illustrations in this publication are not binding.
While the instrument’s essential characteristics remain the same, the manufacturer reserves the right to make any
modifications to parts, details or accessories considered appropriate to improve the product or for requirements of a
constructional or commercial nature, at any time and without undertaking to update this publication immediately.
All rights reserved; the reproduction of any part of this manual, in any form, without the manufacturer’s specific written
permission is forbidden.
All the trademarks referred to in this manual are the property of the respective manufacturers.
Read all the information carefully in order to obtain the best performances from your product and waste no time.
The codes or numbers in square brackets ([ ]) indicate the names of the controls and connectors of the device. For
exampe, [ENTER] refers to the ENTER button.
The illustrations and display pages are purely guideline and may differ from those actually shown on the display.
The instructions provided in this manual only concern the instrument's operating system version that was up to date
when the document was released. Therefore, such instructions might not describe faithfully your current operating
system release. Please, visit the website http://www.physispiano.com to check for the newest operating system release
and manual.
EN - 2
User Manual – Introduction
2. INTRODUCTION
Thank you for choosing Physis Piano.
The core of Physis Piano is a new technology, based on complex mathematical algorithms that faithfully simulate the
mechanical and acoustic phenomena which generate the sound of real instruments. This is called a "physical model" and it
is the heart of Physis technology.
This revolutionary sound technique does not require recording real instruments - a technique used by all others digital
instruments today. Physis technology “calculates” in real time the waveform that each sound generates, through an
accurate mathematical model. Such a model is based on a thorough and careful study of the way sound is produced in a
given instrument. All parameters are taken into account by these physical models: for example, the materials of the
instrument, the size and position of the components, of the instrument etc...
This means that Physis instruments do not simply “reproduce” a recorded sound, and can therefore reach a level of realism
and detail that were unachievable before; the realism of real instruments.
The model replicates the original instrument, generating a different sound for each key, as in an acoustic piano. It is also
able to produce a different sound at each subsequent pressure of the same key, keeping in mind the previous conditions.
Physis Piano can replicate the following sounds through the physical modeling technique: upright and Grand piano (APMAcoustic Piano Model); electric piano, in its versions from different periods (EPM- Electric Piano Model, WPM- Wurly Piano
Model, CPM- Clavy Piano Model); idiophones (AMM - Acoustic Mallet Model).
The other sounds featured in the sound library are generated through the HDSE technology (High Definition Sound
Engine). These sounds are: electronic piano, pipe organ, electromagnetic organs, synthesizer, string instruments, choirs,
guitar, bass guitar and more.
The sound generated by a Physis Piano can be modified and customized to the smallest detail.
Musicians can adjust their own Physis Piano according to their needs and taste. Size, resonance, mallets, strings: all these
can be customised, affecting the harmonics produced by the strings, the reflection of the sound inside the case and many
other sound features.
Many parameters of the electric piano can be customized, such as the transductors' position, tone bar size, hammer and
damper size.
Xylophone, vibraphone and marimba can be customized by setting the bar material, the striking point, the mallet's material
and much more.
Physis piano V100 is equipped with an 88-keys weighted keyboard PGK Physis Grand Keyboard, with "Ivory feel" keys,
which faithfully replicates the feeling of the greatest acoustic pianos.
Physis piano's elegant design features a new ergonomic user interface, embedded in a special black tempered glass, with
multi-touch functions. A high-resolution display (480x72 pixels, 4,7") enables to visually edit all parameters with ease. The
graphic interface can be completely customized, according to the user's needs.
EN - 3
User Manual – Controls and connections
3. CONTROLS AND CONNECTIONS
3.1 FRONT PANEL
Physis Piano V100 is equipped with a panel of black glass with multitouch properties; that is, there are several areas
(named Key Touch) that are touch-sensitive. In fact there are no sliders or buttons: all settings and operations can be
performed by touching the glass area identified by a back light, corresponding to a given control. Such areas will be called
“Key Touch” from now on. When the function is active, the back light changes colour. The panel itself can be customized: it
is possible to set the backlights' mode and colour, and the display background (for more information see chap. 5). A wide,
high-resolution graphic display makes all operations easier.
1
1
3
4
MIN
V O L U M E
5
MIN
Key Touch [VOLUME]: the general volume.
You can also touch the
Key Touch bar on the
desired position
2
2
or slide your finger on the
surface for a continuous
volume control
MAX
MIN
V O L U M E
MAX
V O L U M E
MAX
Sound selection Key Touch: these Key Touch control sounds and memories.
j PIANO
j E.PIANO
j MALLET
KEYBOARD
ENSEMBLE
BASS/GUIT.
MEMORY
Pressing one of these Key Touch will show the Sound or Memory list, according to the selected mode:
- [φ PIANO]: Acoustic Piano family.
- [φ E.PIANO]: Electric Piano family.
- [φ MALLET]: Mallet family (Vibraphone, Marimba and Xylophone).
- [KEYBOARD]: Keyboard family (Electric piano, synthesizer, electromagnetic organ, pipe organ, bellows-driven
aerophones, harpsichord).
EN - 4
User Manual – Controls and connections
-
[ENSEMBLE]: Ensemble family (strings, brasses, choirs and pads).
[BASS/GUIT.]: Bass and Guitar family.
[MEMORY ]: Memory selection.
For more information on Sound and Memory consult the par. 7 and 8.
NB:
As with Key Touch [MEMORY ], all Key Touch that end with the
symbol have a secondary function. To recall
these functions, press and hold the Key Touch for a short while.
For example, press [MEMORY ] to activate/deactivate the "memory" function. Holding the same Key Touch for a
while recalls the memory saving process. The secondary function of a Key Touch is described in its dedicated
manual section.
3
Display and navigation section: this section contains the graphic display and all the controls to navigate menus and
pages.
F1
F3
EXIT
F2
F4
ENTER
The Key Touch in this section are:
- [F1], [F2], [F3] and F4]: These controls change function according to the current video page. The function
assigned to each Key Touch is shown on the display, beside each Key Touch.
- [+ ııı -]: this slider can be used to adjust the selected parameter. Place the cursor on a parameter to adjust it.
Press the [+] or [-] Key Touch to increase/decrease the value by 1.
Use the slider bar between + and - to increase/decrease the
value in a continuous manner.
-
-
[EXIT]: Press this Key Touch to leave the current video page and return to the previous one, or to refuse a request
by the system.
[ENTER]: Press this Key Touch to access a highlighted function, or to accept a request by the system
[U]: moves the cursor one field up.
[V]: moves the cursor one field down.
[Y]: moves the cursor one field left.
[Z]: moves the cursor one field right.
EN - 5
User Manual – Controls and connections
4
Post-processing and Setup section: here you can find the controls to process the signal and the Setup options.
The Key Touch in this section are:
- [EFFECT ]: Activates/deactivates (press) or set up (press
and hold) chorus and delay effects (see par.9.1).
- [REVERB ]: activates/deactivates (press) or set up (press
and hold) the master reverberation effect (see par.9.1).
- [EQ ]: Activates/deactivates (press) or set up (press and
hold) the master equalizer.
- [MIXER]: Adjust sound volume and effects sends.
- [SOUND EDIT]: Set up and adjust the sound generation
block chains (see chap. 10).
- [FUNCTION]: General setup and file management. (see
chap. 11).
- [SONG/DEMO]: songs player and recorder (see chap. 12).
- [VIEW]: Multi touch panel and display setup (see chap. 5).
5
Key Touch [ ]: activates/deactivates stand-by mode. Deactivating the standby
function, that is, switching on the instrument, will restore the
configurations (volume, sounds, levels etc.) to their previous condition (i.e.before
the instrument was set in stand-by mode).
To put the instrument on stand-by, press the [ ] Key Touch twice.
Press the Key Touch again to turn it on.
NB
Keep in mind that in Stand-By mode, the instrument still consumes a small amount of electricity; therefore it is best to
use this function only for short periods of time.
3.2 UNDER THE KEYBOARD
Under the keyboard, on the left hand side, there is a Led and a connection panel, displayed below:
1
2
3
4
5
6
1
Power LED: this light turns on when the power switch (see point 7) is set as ON ( I ) and the power cable is properly
connected.
2
[LINE IN] connectors: RCA input connectors. Musical instruments or CD players can be connected to this port in
order to play through the Physis Piano speakers. When the input signal is monophonic, only use the [L/MONO]
connector.
EN - 6
User Manual – Controls and connections
3
[USB TO HOST] Connector: USB port; connect to a computer to send and receive MIDI data..
TO HOST
[USB TO HOST]
connector
USB
connector
Computer
NOTE IMPORTANTI
• Use with an USB A/B type cable.
• Always connect the USB cable while the instrument is switched off.
• Exit the power saving mode on your computer before connecting the cable.
• After connecting the [USB TO HOST] cable for the first time, Physis Piano will install its drivers on the computer.
When the process has been completed, a pop-up message will appear, to confirm that the new hardware is
ready for use.
• When connecting a USB cable or when switching on the instrument with a connected device, always wait 5
seconds before starting any MIDI application.
4
[USB TO DEVICE] port: Connect here a USB device.
[USB TO DEVICE]
connector
USB device
INFORMATION ON USB PENS
•
Always use USB pens formatted with FAT or FAT32 file system (no NTFS).
•
It is recommended to format USB pens with dedicated utilities, provided by the manufacturer (usually on CDROM or web site).
•
If no USB pen is available when required, the following message will appear:
To access a USB pen, plug it into the [USB TO DEVICE] connector on the front panel. Then wait a short while
before trying to access it. If the pen is already connected, try disconnecting and reconnecting. Then, check that
the USB device is working and properly formatted.
EN - 7
User Manual – Controls and connections
5
[
] ports: Connect your headphones here. You can use two headphone sets.
Second headphone
set
First headphone
set
[1]
connector
[2]
connector
NB
•
•
6
Keep in mind that using headphones at a sufficiently high volume might cause hearing loss.
When connecting a headphone set, the internal speakers are deactivated.
Headphones hook: use only to hold your headphones. Placing different items might damage the hook.
The power switch
7
can be found under the keyboard, on the right side:
7
NB
Because of the complexity and power of the instrument, the switching on phase takes some time. Please wait until the
system is completely loaded.
EN - 8
User Manual – Controls and connections
3.3 REAR PANEL
More connections to and from Physis Piano can be found on the rear panel.
3
2
5
6
4
1
1
1
Handles: use these handles to carry the instrument.
2
[AC-IN]: power cable connector.
AC-IN
WARNING!
•
Always make sure to use earthed sockets.
•
Only use the power cable provided with the instrument.
•
If the instrument is to be out of use for lengthy periods, disconnect the plug from the power socket.
3
MIDI
[MIDI] Ports: MIDI connectors for external devices.
[OUT]: this connector sends out the MIDI data generated by Physis Piano. Connect this port
to the MIDI input of the receiving device (e.g. an expander module).
[IN]: Physis Piano receives MIDI data from an external unit through this connector. Connect
this port to the MIDI OUT port of a transmitting device (e.g. a sequencer).
[MIDI IN]
connector
[MIDI OUT]
connector
MIDI OUT
MIDI IN
MIDI
interface
Expander or digital drum
Computer
EN - 9
IN
OUT
User Manual – Controls and connections
DIGITAL
4
OUT
[DIGITAL OUT] Connector: this port sends out the digital S/PDIF audio signal generated by Physis
Piano. Connect this port to a recording system (computer sound card, recorder, mixer) or an
amplification/diffusion system with a digital input.
[DIGITAL OUT]
connector
Digital audio input
Soundboard
Digital audio input
Left
speaker
Right
speaker
Computer
NB
The [VOLUME] Key Touch does not affect the output signal of the [DIGITAL OUT] connector.
FOOT CONTROLLER
6
[FOOT CONTROLLER] connectors: jack connectors for two pedals.
[1]: plug in here the jack connector from a pedal (either foot-switch or potentiometer) to
control the assigned function.
[2]: plug in here the jack connector from a second pedal (either foot-switch or potentiometer)
to control the assigned function.
[1]
connector
1
2
[2]
connector
Any time a pedal is connected, a pop-up message will appear on the display. The message contains information on
the connector used and the kind of pedal connected.
EN - 10
User Manual – Controls and connections
How to read the message:
Pedal: the rear-panel connector in which the pedal has been plugged.
Type: the pedal type. Switch stands for foot-switch, Potent. stands for potentiometer (expression pedal).
Polarity: pedal reading polarity. Can be Direct or Reverse. Polarity can be set through the "Pedals" function under
the FUNCTION menu.
Press [EXIT] or wait a short while to quit the pop-up window.
NB:
•
Pedals can be connected also while the instrument is switched on. However, do not press the pedals while
inserting the jack into the connector.
With all sounds not belonging to the φPIANO family, the SOFT and SOSTENUTO pedals perform instrumentrelated functions, that might therefore differ from Soft and Sostenuto. To check or modify the pedals' functions,
first select the desired Sound, then recall the Pedals function under the FUNCTION menu. The Pedals function is
described in par. 11.6.
To check or modify the function assigned to the pedals connected to the [FOOT CONTROLLER] connectors,
recall the Pedals function under the FUNCTION menu (described in par. 11.6).
•
•
OUTPUT
7
[OUTPUT] connectors: audio output connectors. Jack connectors send out a unbalanced
signal, that should be used for amplifiers or amplified speakers. If a monophonic output is
necessary, use the [L/MONO] output.
[R]
connector
Left
speaker/diffusor
R
L/MONO
[L/MONO]
connector
Right
speaker/diffusor
NB
•
•
Physis Piano generates stereophonic sounds, that is, containing spatial information, for a complete listening
experience. Using a mono connection, this information will be lost, affecting negatively the resulting sound.
Therefore, we advise against mono connections.
Always keep in mind to connect the devices before switching them on.
EN - 11
User Manual – Controls and connections
3.4 PEDALS
Usually, three pedals are used with the piano to enhance its expressivity. Physis Piano replicates the effect of these pedals
as accurately as possible, so as to simulate a real acoustic piano.
SOFT
pedal
SOSTENUTO
pedal
SUSTAIN
pedal
When using a different pedal set, its function depends on the [PEDAL] connector used.
-
-
-
SUSTAIN pedal: when pressing this pedal, Physis Piano simulates the lifting of the dampers as in an acoustic piano;
the sound will therefore persist until its natural decay, even when releasing the corresponding key. Releasing the pedal
(lowering the dampers) will suppress the sound of struck strings whose keys had been released. In addition to that,
when the pedal is pressed, Physis Piano replicates the sound of all other strings reverberating by sympathetic
resonance, the resonance of the sound board, and the sound of dampers.
Moreover, the pedal allows continuous control. This means that the pedal can be pressed only partially to achieve the
half-damper effect. In fact, in acoustic pianos, by lightly pressing the Sustain pedal, the dampers are lifted only
partially, dampening only partially the strings.
SOSTENUTO pedal: similar to the sustain pedal, except that it only lifts the dampers of the keys pressed when the
pedal is activated. Keys played after that will sound normally. When releasing the pedal, the strings that are still
vibrating thanks to the pedal's action will be suppressed.
SOFT Pedal: this pedal reduces the piano volume and softens the notes.
NB:
With all sounds not belonging to the φPIANO family, the SOFT and SOSTENUTO pedals perform instrument-related
functions, that might therefore differ from Soft and Sostenuto. To check or modify the pedals' functions, first select the
desired Sound, then recall the "Pedals" function under the FUNCTION menu. The Pedals function is described in par.
11.6.
EN - 12
User Manual – Playing demo songs
4. PLAYING DEMO SONGS
Physis Piano comes with a set of demo songs, so as to evaluate the sound capabilites of the instrument.
It is possible to play short song fragments for each Sound or complete songs, in which several instruments play. For more
information on Sounds, see chapter 8.
To play demo songs, press the [SONG/DEMO] Key Touch. The following page will appear:
To play demo songs, press [F3]:
Press [+], [-], [U] or [V] to place the cursor (the bright rectangle) on a song, then press [F1] to play it.
To stop the song, press [F2].
To play all songs in sequence, press [F3]. Press [F3] again to return to the previous mode and select a song.
To play a demo sequence for each Sound, access the SONG/DEMO page. Press [F4]: a Sound list for the Acoustic Piano
family (PIANO) will appear, then after the last selected:
Press [+], [-], [U] or [V] to select the Sound you wish to test by playing a demo sequence. Select a different Sound family
by pressing the dedicated Key Touch to test a different Sound.
Press [F1] to start playing the sequence.
Press [F2] to stop.
Press [EXIT] to return to the previous page.
EN - 13
User Manual – Customizing the multitouch panel
5. CUSTOMIZING THE MULTITOUCH PANEL
5.1 MANUAL SETTINGS
To ensure the best comfort, convenience and aesthetic appeal, the multi-touch panel can be configured. The colours of the
Key Touch can be changed, the lights turned on or off, and the display background and colours can be selected.
To access these options press the [VIEW] Key Touch. The display will show the configuration panel:
First select a field by placing the cursor on it using the [U] or [V] Key Touch, then select an option using [+] and [-].
To set Skin, Back Colour and Active Colour, use the Key Touch [Y] or [Z].
The parameters set:
ZONE 1: the [VOLUME] leds mode.
ZONE 2: the [φPIANO], [φE.PIANO] and [φMALLET] leds mode.
ZONE 3: the [KEYBOARD], [ENSEMBLE], [BASS GUIT.] and [MEMORY ] leds mode.
ZONE 4: the [F1], [F2], [F3], [F4], [+ ı ı ı -], [EXIT], [ENTER] and display leds mode.
ZONE 5: the [EFFECT ], [REVERB ], [EQ ] and [MIXER] led mode.
ZONE 6: the [SOUND EDIT], [FUNCTION,[SONG/DEMO] and [VIEW] leds mode.
To place the cursor on a ZONE, use the [Y] o [Z] Key Touch.
The Key Touch can be set in the following modes:
on: the Key Touch is active and the led light is on.
off: the Key Touch is inactive and the led light is off.
auto: the Key Touch is active but the led light is off. When first pressed, the light turns on. Pressing the Key Touch
a second time will activate the corresponding function. After 5 seconds, the led light is turned off again.
NB.
•
•
-
While in the VIEW function, the Key Touch belonging to ZONEs set as “off” will blink.
To allow the user to change settings, the [VIEW] Key Touch always remains in "auto" mode when ZONE 6 is set as
"off".
Skin: the display background.
Back Colour: the colour of a deactivated/not pressed Key Touch. (for example, sound families which have not been
selected)
Active Colour: the colour of a pressed/activated Key Touch (for example, the currently selected Sound family).
Panel Bright: Key Touch brightness.
Display Bright: display brightness.
Press [EXIT] to return to the main Sound page and save the current settings.
EN - 14
User Manual – Customizing the multitouch panel
5.2 SELECTING A CONFIGURATION
While in the VIEW video page, Press [F3]. A list of already made settings will appear:
The first 10 configurations of this list are presets, included in each instrument. They can be modified but not overwritten.
The following 10 configurations are user-made and can be modified and saved (see next paragraph).
To select a new configuration, use the [U], [V], [+] or [-] Key Touch. The new configuration will be immediately active, to
test it. If you wish to keep the selected configuration, press [ENTER].
Press [EXIT] instead to return to the main video page.
5.3 SAVING A USER-MADE CONFIGURATION
When a parameter is modified, two asterisks will appear on the top of the VIEW page, beside the configuration's name. These
asterisks mean that the configuration has been modified but not saved yet. Nonetheless, these settings will remain, even if the
instrument is switched off. However, loading a different configuration will delete these settings.
You can save a user-made panel configuration, so as to recall it quickly when needed. To do so, press the [F3] Key Touch.
Ten overwritable user configuration will appear on screen.
Use the [U], [V], [+] or [-] Key Touch to select which configuration to overwrite.
Press [F3] to confirm saving or [EXIT] to abort. In both cases, the display will show the previous page.
EN - 15
User Manual – Customizing the multitouch panel
5.4 RENAMING A USER-MADE CONFIGURATION
To rename a user-made configuration, place the cursor on the configuration to rename and press [F1].
Use the virtual keyboard to enter a new name. The currently selected key is highlighted in red.
To select a key, use the [Y], [Z], [U] or [V] Key Touch.
Press [ENTER] to activate the selected key. The modified name immediately appears on display.
Press [EXIT] to cancel and return to the previous page.
The virtual keys have the following functions:
Backspace: deletes the previous character.
Cancel: deletes the following character.
Caps: The “Caps Lock” led on the display shows the function's actual state. When the led is on, all inserted characters
will appear as upper case. When the led is off, all new characters will be lower-case.
Return: confirms the new name. Returns to the previous page.
Ins: Insert function. The “Insert” led on the display shows whether the function is active or not. When the led is on, all
new characters are placed between old characters. When the led is off, new characters will replace old characters.
Home: places the cursor at the beginning of the text.
End: places the cursor at the end of the text.
<--: moves the cursor one step left.
-->: moves the cursor one step right.
6
7
9
;
=
φ B C E G
K
I
J
M
L
P
R
T
W
N O Q S U V
Y
X Z
c
&
[
]
NB.
The maximum length of a name is 19 characters.
EN - 16
a
b
e
d
h
f
g
j
i
l
k m n
q
o
p
t
r
s
v
u
x
w y
z
BACKSPACE
H
BACKSPACE
F
BACKSPACE
4
D
BACKSPACE
2
A
BACKSPACE
1
8
BACKSPACE
5
3
BACKSPACE
SPACE
0
BACKSPACE
To enter characters you can also use the keyboard keys as shown in the following drawing:
User Manual – The structure of the Physis Piano
6. THE STRUCTURE OF THE PHYSIS PIANO
6.1 DATA AND SIGNAL ROUTES
Physis Piano is composed of eight linked sections, as shown on the picture below.
PHYSIS PIANO
MIDI Thru
Audio Outputs
MIDI Out
Master Equalizer
Sound Generator
MIDI In
Keyboard
Panel & Pedals
Sequencer
Each of these sections has a definite function, that is:
Sound: generates the sound, according to the instructions of the control sections.
Master Equalizer: to activate or configure this section, press the [EQ ] Key Touch (see point 4 par. 3.1). The section
applies an equalizer to the sound signal, adapting it to the environment, and sends it out to the rear panel outputs. For
more information on this section see par. 9.2.
Audio Outputs: the audio connectors of the rear panel. They send out the signal generated by the Sound Generator
function.
MIDI Thru: this section sends out the MIDI data received through the [MIDI IN] connector, to create a MIDI chain.
MIDI Out: this section sends out data through the [MIDI OUT] connector. It transmits data about Physis Piano's activity
(notes, sounds, volumes etc.).
The control sections are:
MIDI In: sends the incoming MIDI data ([MIDI IN] connector) to the Sound Generator section.
Keyboard: the Piano's 88-keys keyboard. Sends out data on the played keys to the Sound Generator section.
Panel & Pedals: the Key Touch panel and the pedals connected to the rear panel. This section informs the Sound
Generator section on how (sounds, effects, volumes etc.) to play the notes from the keyboard.
Recorder: plays and records MIDI songs. Sends out this data to the Sound Generator section and to the [MIDI OUT]
port.
The Sound Generator section itself is composed of other sub-sections that generate and modify the sound signal.
SOUND GENERATOR
Master
Effect
Sound
Mixer
Master
Reverb
Master
Equalizer
The subsections are:
Sound: this subsection generates the Sound selected through the panel (see point 2 par. 3.1). For more information on
Sounds and Keyboard modes, see chapter 8.
Mixer: this subsection mixes the signal from the two Sounds and sends out this signal to the next sections. Parameters
for this section can be adjusted by pressing the [MIX] Key Touch (see point 4 par. 3.1). For more information about this
EN - 17
User Manual – The structure of the Physis Piano
-
section, see par. 9.3.
Master Effect: this section can be activated and adjusted by pressing the [EFFECTS ] Key Touch (see point 4
par.3.1). It adds an effect (chorus or delay) to the sound signal. For further information on this section see par. 9.1.
Master Reverb: To activate or configure this section, press the [REVERB ] key Touch (see point 4 par. 3.1). The
section adds an ambient effect to the sound signal. For more information, see par. 9.1.
To sum up, the Sound section generates the sound and sends it out to the Master effects and Master equalizer. This
section too is made of subsections, called "blocks". All blocks can be completely customized.
The Sound section contains the following blocks:
SOUND
Sound
Engine
Compr
Amp
Efx
Eq
Mixer
-
-
Sound Engine: this block can be programmed by pressing the [SOUND EDIT] Key Touch. It generates the sound
(APM, EPM, WPM, CPM, AMM, HDSE) of the selected instrument. To select a Sound, see point 2 par. 3.1).
Compr: this block can be activated and programmed by pressing the [SOUND EDIT] Key Touch. It applies a
compression effect to the original sound signal.
Amp: this block can be activated and programmed by pressing the [SOUND EDIT] Key Touch. It applies an
amplification effect to the sound signal.
Efx: this block cna be activated and programmed by pressing the [SOUND EDIT] Key Touch. It applies the following
effects to the original sound signal: modulation (Chorus), delay or other effects simulating common diffusion devices
(wah-wah, rotary).
Eq: this block can be activated and programmed by pressing the [SOUND EDIT] Key Touch. It applies a parametric
equalizer to the original audio signal.
For further information on the SOUND EDIT and MIXER functions, see chapter 10 and par. 9.3.
6.2 MEMORY STRUCTURE
Physis Piano's internal memory is divided into three main areas:
Sound: contains all the information saved with a Sound, related to the Sound Generator section and to the "Pedal"
function (under the FUNCTION menu).
The Sound is divided in locations for each family, 32 Presets and 32 User-defined.
Memory: contains all the information saved with a memory, related to the Sound Generator section, to the transposer,
to the keyboard mode, and the Pedals function (under the FUNCTION menu)
The Memory area contains 64 locations for each family, of which 32 are Presets, factory settings which cannot be
overwritten. The remaining 32 areas are called User because they can be programmed by the user.
System: contains the information of the FUNCTION (except for the Pedals function) and VIEW menus, about the
velocity curve, songs and files saved into the internal memory (no USB pens).
NB
For further information on Sounds and memories see chapters 7 and 8.
EN - 18
User Manual – Memories
7. MEMORIES
7.1 WHAT IS A MEMORY
Memories are locations in which one or two Sounds and a keyboard mode are saved. A location contains the following
data:
Sound for Part 1 (see par.8.3).
Sound for Part 2 (see par.8.3).
Keyboard mode and split point, if need be (see par. 8.4).
Transpose for Part1 and Part2 (see par. 8.5)
SOUND EDIT data for Part 1 Sound (see chapter 10).
SOUND EDIT data for Part 2 Sound (see chapter 10).
MASTER EFFECT for part 1 Sound (see par.9.1).
MASTER REVERB for Part 1 Sound (see par.9.1).
MIXER (see par.9.3)
Pedals function (see par.11.6).
There are 64 Memories associated to each family. 32 Memories are preset, they can be modified but not saved, 32 are
user-made, and can be modified and overwritten.
7.2 MAIN MEMORY PAGE
When the instrument is switched on (if the Last Selection function is set as Off, see par.11.3) it automatically selects the
acoustic piano (APM physical model) Memory and its Sound (see also chapt. 8). After the presentation, the display shows
the following page:
Current selected
Memory family
Clock
Name and location of the
selected Memory
Sounds in Parts
Keyboard Mode
7.3 MEMORY SELECTION
There are several ways to select a Sound:
Use the Key Touch [+], [-], [U] or [V] to scroll and immediately load a Memory of selected family or:
-
press [ENTER] or [MEMORY
currently selected family.
] (when the Memory main page is not displayed) to show the Memory list for the
EN - 19
User Manual – Memories
The currently selected Memory family is shown on the top left. Press a family Key Touch or [Y] o [Z] to access the
corresponding list of Memories. Preset locations are indicated by a lock.
Press [+], [-], [U] or [V] to scroll the list.
Press [ENTER] to load the selected Memory and return to the main Memory page. Press [EXIT] instead to abort the
selection and return to the main Memory page.
-
You can also press a Sound family Key Touch (after you press [MEMORY
displayed) to show its memory list.
] when the Memory main page is not
The current Memory family will appear on the top left of the screen. Press a family Key Touch or [Y] o [Z] to access
the corresponding list of Memories. Preset locations are indicated by a lock.
Press [+], [-], [U] or [V] to scroll the list.
Press [ENTER] to load the selected memory and return to the main Memory page. Press [EXIT] instead to abort the
selection and return to the main Memory page.
-
While on the Memory list, press [F1], [F2], [F3] or [F4] to select one of the four quick selection memories. These
Memories are shown beside their Key Touch. The selected Memory will be loaded immediately. Press [ENTER] to load
the selected Memory and return to the main Memory page. Press [EXIT] instead to abort the selection and return to the
main Memory page.
To assign a Memory to the quick selection Key Touch, place the cursor on the desired Memory; then press and hold
[F1], [F2], [F3] or [F4].
SELECTING A MEMORY: A QUICK GUIDE
While on any page:
1. Press [MEMORY ].
2. If the Memory does not belong to the currently selected family, press either the Key Touch for the Sound family
cointaining the desired Memory or the Key Touch [Y] o [Z].
3. Press [+], [-], [U] or [V] to select the desired Memory
4. Press [ENTER]
7.4 SAVING A MEMORY
Physis Piano's configurations can be saved in any User location of any memory family. However, for your convenience and
easy recalling, we advise you save a memory in its corresponding Sound family.
To save a Memory, press and hold the [MEMORY ] Key Touch:
The memory list will appear, showing the family's 32 user locations. To save in a different family, press its dedicated Key
EN - 20
User Manual – Memories
Touch. The current Sound family is written on the top left of the screen.
Use the [+], [-], [U] or [V] Key Touch to move the cursor on the memory to overwrite.
Now press [F3] to save the current configuration on the selected location. When the process is complete, a pop-up
message appears:
In this page you can also modify the Memories order in a given family. To do so, select a Memory and then press [F2] to
move it one step up, or [F4] to move it one step down.
NB
•
•
•
Preset memories cannot be overwritten. Therefore, they do not appear among overwritable memories.
Keep in mind that the data from the SOUND EDIT section and Pedals function (FUNCTION menu) are saved to
memories and not to Sounds. Hence, to use a modified Sound you need to recall the memory. Alternatively, you
need to save these functions manually to a Sound (see per. 10.2).
Overwriting a memory, will irreparably delete its data.
SAVING A MEMORY: A QUICK GUIDE
While on any video page:
1. Press and hold the [MEMORY ] Key Touch.
2. To save the memory to a different family, select that family by pressing the corresponding Key Touch.
3. Press [+], [-], [U] o [V] to select the memory to overwrite.
4. Press [F2].
7.5 RENAMING A MEMORY
To rename the Memory pointed to by the cursor, press [F1]:
Use the virtual keyboard to enter a new name. The currently selected key is highlighted in red.
To select a key, use the [Y], [Z], [U] or [V]Key Touch.
Press [ENTER] to activate the selected key. The modified name immediately appears on display.
Press [EXIT] to cancel and return to the previous page.
The virtual keys have the following functions:
Backspace: deletes the previous character.
Cancel: deletes the following character.
Caps: The “Caps Lock” led on the display shows the function's actual state. When the led is on, all inserted characters
will appear as upper case. When the led is off, all new characters will be lower-case.
Return: confirms the new name. Returns to the previous page.
EN - 21
User Manual – Memories
-
Ins: Insert function. The “Insert” led on the display shows whether the function is active or not. When the led is on, all
new characters are placed between old characters. When the led is off, new characters will replace old characters.
Home: places the cursor at the beginning of the text.
End: places the cursor at the end of the text.
<--: moves the cursor one step left.
-->: moves the cursor one step right.
-
6
7
9
;
=
φ B C E G
K
I
J
M
L
P
R
N O Q S
T
W
U V
Y
X
c
&
Z
[
]
NB.
The maximum length of a name is 19 characters.
EN - 22
a
b
e
d
h
f
g
j
i
l
k m n
q
o
p
t
r
s
v
u
x
w y
z
BACKSPACE
H
BACKSPACE
F
BACKSPACE
4
D
BACKSPACE
2
A
BACKSPACE
1
8
BACKSPACE
5
3
BACKSPACE
SPACE
0
BACKSPACE
To enter characters you can also use the keyboard keys as shown in the following drawing:
User Manual – Sounds
8. SOUNDS
8.1 WHAT IS A SOUND
The Sound section is the main section of the sound generation process. However, as seen in chap. 6, the section does not
simply contain the current sound. Sounds should be seen more as memory locations containing the settings of these
functions:
SOUND EDIT (see chap. 10).
MASTER EFFECT (see par.9.1).
MASTER REVERB (vedi par. 9.1)
MASTER EQ (see par.9.2)
MIXER (see par.9.3)
Pedals (FUNCTION menu, see par.11.6)
These functions can be adjusted. Therefore, a Sound can be customized and saved in one of the 32 User sound locations.
To modify and save a Sound, see chapter 10.
8.2 MAIN SOUND PAGE
While on the main Memory video page, press [EXIT] or [MEMORY
]:
Keyboard mode
(see par. 8.4)
Current selected
Sound family
Clock
Key Touch [F1]
function
Key Touch [F3]
function
Key Touch [F2]
function
Key Touch [F4]
function
Name and picture of the
currently selected Sound
This is the main Sound page.
In this video page, the Key Touch [F ] perform the following functions:
[F1]: plays songs saved in internal memory or USB pen (see chapter 12)
[F2]: shows the transposition page (see par. 8.5).
[F3]: selects the velocity curve (see par. 8.6).
[F4]: show the metronome page (see par. 8.7).
EN - 23
User Manual – Sounds
8.3 SOUND SELECTION
There are several ways to select a Sound:
Use the [+], [-], [U] or [V] Key Touch to navigate and select Sounds from the current Sound family.
-
Press [ENTER] to show a list of the Sounds belonging to the currently selected family:
The currently selected family is shown on the top left of the display. To access the Sound list of a Sound family, press
either its dedicated Key Touch or [Y] o [Z]. A small lock beside the Sound name indicates that it is a Preset location.
Press [+], [-], [U] or [V] to scroll the list. The selected sound will be immediately active.
Press [EXIT] or [ENTER] to return to the main Sound page.
-
Press a Sound family Key Touch to show its sound list.
The currently selected family is shown on the top left of the display. To access the Sound list of a Sound family, press
either its dedicated Key Touch or [Y] o [Z]. A small lock beside the Sound name indicates that it is a Preset location.
Press [+], [-], [U] or [V] to scroll the list. The selected sound will be immediately active.
Wait a few seconds or press either [EXIT] or [ENTER] to return to the main Sound page.
-
While on Sound lists, press [F1], [F2], [F3] or [F4] to select one of the four quick selection Sounds. Quick selection
sounds are indicated beside these Key Touch. The selected sound is immediately active.
Press [EXIT] or [ENTER] to return to the main Sound page.
To assign a Sound to a quick selection Key Touch, place the cursor to the desired Sound, then press and hold [F1],
[F2], [F3] or [F4].
SELECTING A SOUND: A QUICK GUIDE
If you have already selected the desired Sound family:
1. Press [+], [-], [U] or [V] to select the desired Sound.
From any video page:
1. Press the Key Touch for the Sound family containing the new Sound, or [Y] o [Z].
2. Press [+], [-], [ ] or [ ] to select a Sound.
3. Press [EXIT]
EN - 24
User Manual – Sounds
8.4 KEYBOARD MODE
Physis Piano can be played with one or two Sounds at the same time. The term “keyboard mode” indicates how one or two
sounds can be used on different areas of the same keyboard. These areas are called “Parts”.
The currently selected keyboard mode is showed on the top left of the display while on the main Sound page or on Sound
family lists. There are three Keyboard modes:
-
Single: plays only one Sound. The Sound assigned to Part 1 works on the whole keyboard.
-
Dual: two Sounds play at the same time on the whole keyboard. One is assigned to Part 1 and the other to Part 2.
-
Split: two Sounds play on two different Parts of the Keyboard. The key that divides the two areas is called "Split Point".
Part 1 is to the right of the split point, part 2 to the left.
The previous paragraph explains how to select a single Sound. This is how to select two:
From any video page press and hold a Sound family Key Touch, and at the same time a second Sound family Key Touch.
The first Key Touch will determine the Sound family assigned to Part 1, the second to Part 2.
The display will split up in two areas, upper and lower, showing Sounds from the selected families. The Sound selected
from the top list will be assigned to Part 1, the Sound selected from the lower list will be assigned to Part 2.
The keyboard mode, either Dual or Split appears on the top of the screen .
Press [+] or [-] to scroll the list. The selected sound will be immediately active.
To access the Sound list of a different Sound family, press either its dedicated Key Touch or [Y] o [Z].
To change the selection of the Sound of the other Part, use the Key Touch [U] or [V].
Press [F1] or [F3] to select one of the two quick selection Sounds for the Part 1. Quick selection sounds are indicated
beside these Key Touch. [F2] and [F4] select the Sound for the Part 2. The selected sound is immediately active.
To assign a Sound to a quick selection Key Touch, place the cursor to the desired Sound, then press and hold [F1], [F2],
EN - 25
User Manual – Sounds
[F3] or [F4].
Press [EXIT] or [ENTER] to return to the main Sound page:
The keyboard mode always appears on the top left of the display. To shift between Dual and Split mode, press [F3].
[F1] and [F2] still perform the Play Song and Transpose function.
Press [F4] to set the split point:
Then press the key to assign as split point or use the [+] or [-] to select it.
Press [EXIT] to return to the main Sound page and save the settings.
NB.
The two Sound used in Dual and Split mode cannot belong to the same PIANO sound family.
SELECTING TWO SOUNDS: A QUICK GUIDE
From any video page:
1. Press and hold a Sound family Key Touch. Part 1 will be assigned one of the family's Sounds.
2. Press a Sound family Key Touch. Part 2 will be assigned one of the family's Sounds.
3. Press [+], [-], [U] or [V] to select the Sound for Part1.
4. Press [V].
5. Press [+], [-], [U] or [V] to select the Sound for Part2.
6. Press [EXIT].
7. Press [F3] to select a keyboard mode.
SETTING THE SPLIT POINT: A QUICK GUIDE
On the main Sound page, while on Dual or Split mode:
1. Press [F4].
2. Press the key that will be set as split point. Alternatively, select it with the [+] and [-] Key Touch.
3. Press [EXIT].
EN - 26
User Manual – Sounds
8.5 TRANSPOSER
To set up and activate the Transposer, press the [F2] Key Touch under the main Sound page. Alternatively, access the
FUNCTION menu by pressing the [FUNCTION] Key Touch and selecting the Transpose function.
The following video page will appear:
The parameters are:
Master: master transposer. Ranges from -11 to +11 semitones.
Song: song transposer. Ranges from -11 to +11 semitones.
Part1: Part 1 transposer. Ranges from -24 to +24 semitones.
Part2: Part2 transposer. Ranges from -24 to +24 semitones.
To move the cursor, use the [U] or [V] Key Touch.
To adjust the transposition value use the [+] and [-] Key Touch.
Press [F3] to reset the value.
Press [EXIT] to return to the main Sound page and save all settings.
When the transposer is active and the transposition value is not 0, the characters “T=On” will appear on the top right of the
screen.
NOTA
When a Sound belonging to the φPIANO or φMALLET families is transposed, notes below A0 and above C8 (that is,
the real keyboard range) will not be played.
TRANSPOSITION: A QUICK GUIDE
From the main Sound page:
1.
2.
3.
4.
5.
Press [F2]
Press [ ] or [ ] to place the cursor on the Part you wish to transpose.
Press [+] or [-] to set the transposition value.
Press [F4] to activate the transposer.
Press [EXIT]
EN - 27
User Manual – Sounds
8.6 SELECTING THE VELOCITY CURVE
Physis Piano offers a wide range of velocity curves, affecting the sound generator's response to the player's touch on the
keyboard. Velocity is usually associated to volume and timbre, however in some Sounds and Effects, the touch intensity will
affect other sound features, such as the guitar's wah-wah.
There are 5 preset curves, and users can create their own curves and save them in one of the 4 user locations.
Press the [F3] Key Touch under the main Sound page, or access the FUNCTION menu by pressing the [FUNCTION] Key
Touch, then select the Touch function.
The following page will appear:
Use the [+], [-], [U] or [V] Key Touch to select a curve. The selected curve will be immediately active.
The first 5 curve are presets and cannot be modified. They are:
Resultant
velocity
-
Light Plus: A very light curve, reaches the highest values very quickly. This curve
allows little expression.
Key
velocity
Resultant
velocity
-
Light: A light velocity curve. It reaches the highest values fairly quickly, but still offers
a considerable velocity resolution.
Key
velocity
Resultant
velocity
-
Normal: A linear curve (standard). The intensity of the player's touch on the keyboard
is directly converted to velocity.
Key
velocity
EN - 28
User Manual – Sounds
Resultant
velocity
-
Hard: A hard curve, still linear with medium pressure levels. Recommended to avoid
highlighting too much the sound while still achieving good expression.
Key
velocity
Resultant
velocity
-
Hard Plus: A very hard curve. It can reach the maximum velocity level but only with
effort.
Key
velocity
SELECTING A VELOCITY CURVE: A QUICK GUIDE
From the main Sound page, with any keyboard mode:
1. Press [F3].
2. Press [+], [-], [U] or [V] to place a cursor on a velocity curve.
3. Press [EXIT].
8.7 CREATING A USER-MADE VELOCITY CURVE
In addition to the five preset curves, there are 4 user locations, where 4 user-defined velocity curves can be saved.
To do so, place the cursor on one of these User fields, then press [F3].
The vertical Gain axis stands for the output velocity, that is, the final velocity calculated according to the conversion table
(the curve). The horizontal Velocity axis stands for the input velocity (force) applied on the keyboard.
Use [F1], [F2], [F3] and [F4] to load a preset curve to start editing your own curve. Options are:
Flat: a flat, fixed velocity
Linear: a linear velocity
Softer: each time you press the Key touch, the keyboard response becomes increasingly soft
Harder: each time you press the Key touch, the keyboard response becomes increasingly hard
The curve is composed of 16 points. Use the [Y] and [Z] Key Touch to select a point and then [+] or [-] to set the Gain
value. Points and their resulting curve are shown on a graph.
To program a "Flat" velocity, set a Gain value for a random velocity value and then press [F1] to set the same Gain value for
all Velocity values.
When you are finished programming, press [EXIT] to leave the page and save the curve on the already selected "User"
location (shown on the top left).
EN - 29
User Manual – Sounds
PROGRAMMING A VELOCITY CURVE: A QUICK GUIDE
Acces the velocity curve page, then:
1.
2.
3.
4.
5.
6.
Select a User curve.
Press [F3].
Press [F1], [F2], [F3] or [F4] to select a starting curve.
Press [ ] or [ ] to select the point of which you wish to set the Gain value.
Press [+] or [-] to set the Gain value.
Press [EXIT].
8.8 ACTIVATING THE METRONOME
Physis Piano offers a metronome function, useful when practicing. To set up and activate the metronome, press [F4] under
the main Sound page, or press [FUNCTION] and select the Metronome function. The following page will appear:
To move the cursor, use [U] or [V]. Press [+] or [-] to adjust the values. Parameters are:
Tempo: metronome's tempo.
Time Signature: set time signature
Upbeat: upbeat presence
Volume click: metronome's tick volume
Sync from: selezione della sorgente di sincronizzazione,
• Int.: internal tempo
• USB: tempo is derived from the Midi Clock received from the [USB to HOST] port
• MIDI: tempo is derived from the Midi Clock received from the [MIDI IN] port
NB.
•
•
To synchronise the metronome to the MIDI clock, first you need to disable the MIDI Real Time filter. To do so,
access the Midi page under the FUNCTIONS menu (for further information see par. 11.8)
When “Sync to MIDI” is active, the tempo cannot be adjusted from the video page. The screen will only show the
tempo value of the MIDI Clock.
Press [F4] to activate the metronome. Press again to deactivate.
When the metronome is active, an icon will appear on the top right of the screen.
EN - 30
User Manual – Post-Processing section
9. POST-PROCESSING SECTION
As already mentioned under the panel section, Physis Piano is equipped with a signal post-processing section. Under this
section are:
MASTER EFFECT: adds a modulation or delay effect.
MASTER REVERB: applies a reverberation effect
MASTER EQ: applies equalization filters to the general sound.
MIXER: sets the volume, stereophonic options and effects send for each Sound.
NB
MASTER EFFECT and MASTER REVERB parameters are saved to both Sounds and Memories. Recalling a Sound or
Memory will also recall these parameters. When using the keyboard in Split or Layer mode, the effective MASTER
EFFECT, MASTER REVERB parameters are the ones relate to the Sound assigned to Part 1.
MASTER EQ is a general equalizer. It can be used to adapt the sound to the environment, and it is independent from
the current Sound and/or memory.
9.1 SETTING AND APPLYING AN EFFECT
The first two Key Touch left from the POST-PROCESSING section set up and activate a chorus or delay effect (MASTER
EFFECT) or a reverb (MASTER REVERB).
To activate a chorus or delay effect, press the [EFFECT ] Key Touch.
To activate a reverberating effect, press the [REVERB ] Key Touch
In both cases, the Key Touch light will turn on.
NB
Keep in mind that the MIXER sub-section contains parameters that regulate the effect sends (EFX Send) and reverb
sends (REV Send). If these parameters are set as 0 or very low, effects will not be heard.
To set up an effect, press and hold its dedicated Key Touch. Press [EFFECT
page; press [REVERB ]. To visualize the reverb effect page.
Here you can see the delay effect video page.
] to visualize the chorus and delay setup
To modify values, press the Key Touch [Y], [Z], [U] or [V] to select the field, and then [+] and [-] to modify that value.
To select an effect or reverb, place the cursor on the Efx (for effects) or Type field (for reverb), then press [+] or [-].
Parameters shown will vary according to the selected effect. The precise function for each parameter is explained on the
Reference Manual.
Press [EXIT] to return to the main Sound page.
Pressing the [F3] Key Touch activates the parameter lock for the reverb. When active, parameters will not be altered even
when different Memories or Sounds are selected. The current state of the lock appears on the top left of the screen:
• Lock: parameters are locked
• Unlock: parameters are unlocked
EN - 31
User Manual – Post-Processing section
9.2 EQUALIZER
To equalize the sound, generated by the Sound section and modified by effects, activate the MASTER EQ (equalizer). To
do so, press [EQ ]. The Key Touch light will turn on.
To set up the equalizer, keep and hold the same Key Touch.
To modify values, [Y] or [Z] to select the field, and then [+] and [-] to modify the value.
To reset the values and cancel all equalization effects, press [F1].
To modify the equalizer mode (graphic or parametric) press [F2].
Parameters vary according to the selected type of equalizer (graphic or parametric). Their exact function is described on
the Reference Manual.
Press [EXIT] to return to the main Sound page.
9.3 SETTING UP THE MIXER
With MIXER you can adjust the volume of each sound, effects sends and stereo panning on audio outputs. To display the
Mixer press the Key Touch [MIXER]:
To modify values, press Touch [Y] o [Z] to select the field, then [+] or [-] to modify the value.
Press [F3] to visualize settings of the audio player and the inputs [LINE IN] placed under the keyboard:
The precise function for each parameter is described on the Reference Manual.
Press [EXIT] to return to the main Sound page.
EN - 32
User Manual – Modifying a Sound
10. MODIFYING A SOUND
One of the main functions of Physis Piano is the SOUND EDIT function. It allows the user to configure the signal chain and
modify a wide range of sound generation parameters. Settings for these parameters can be saved to sounds (User
locations, see par. 10.2) or to memories (see par. 7.4). To access this section, press the [SOUND EDIT] Key Touch.
On this video page you will find the sound generation blocks and the signal's path. (see par. 5.1).
The brightest block, surrounded by a white rectangle is the one which is currently selected. The white line indicates the
signal's path. Therefore, a block is active when the white line enter the block and exits from its other side. If the line lies
above a block, such block does not affect the audio signal.
To select a different block use the Key Touch [Y] o [Z].
To move the signal through a block, select that block and then press [V]. To deactivate that block, press [U] instead.
Blocks are:
SOUND ENGINE: Sound generation
COMPR: compressor
AMP: amplifier
EFX: effects
EQ: equalizer
To access the parameters for each block, select the block and then press [ENTER]. Press [ENTER] again to access the
specific settings or [EXIT] to quit and return to the previous page.
Press [F1] to play a Demo song, so as to evaluate the tonal character of the selected Sound. While playing the song,
blocks can be activated/deactivated, and parameters adjusted, so as to appreciate the effect of each on the final sound.
Press [F1] again to stop the Demo song.
The precise function for each parameter is described on the Reference Manual.
10.1 BLOCKS FUNCTION
SOUND ENGINE block
This block generates the initial sound. Inside you will find all the sound generation parameters to modify the sound.
Each Physis Piano Sound is generated through different physical models, as explained before. Therefore, each model has
its own parameters.
Inside each page you will find pictures to illustrate the parameter's function. φPIANO, φE.PIANO and φMALLET Sounds
also feature an extensive “inside the instrument” guide, explaining how sound is generated in these acoustic instruments,
and how parameters affect the final sound.
COMPR. Block
This Block adds a compression effect, that further modifies the sound features. The compressor "activation point"
(threshold) can be regulated; all signal below this threshold will be compressed in dynamic; all signal above the threshold
will be softened. The result is an emphasized sound with a strong sustain. It is also possible to set how much to compress
the signal, after its beginning, its end, how much to amplify the signal when it leaves the block.
AMP. block
This block simulates an amplifier. It modifies the signal level and also affects the sound character by simulating the effect
of a wide range of valve or transistor amplifiers. In addition, you can also choose the cabinet type, the number of diffusors,
adjust the frequency response, gain and distortion.
EN - 33
User Manual – Modifying a Sound
EFX block
This block applies effects to the sound. Physis PIano effects are: delay (echo), chorus, flanger, vibrato, tremolo, phaser,
wah-wah and rotary. As with other blocks, each effect contains parameters that can be modified, to obtain any possible
sound nuance.
EQ block
This block applies a parameter equalizer to the sound. It further modifies the sound, highlighting or suppressing a given
sound frequency. You can adjust high and low frequencies, the intervention frequency, the bandwidth and gain or
damping of middle frequencies.
ACTIVATING AND SETTING UP BLOCKS: A QUICK GUIDE
1. Press [SOUND EDIT].
2. Press [Y] o [Z] to select a block (the white rectangle is the cursor).
3. To activate the block, press [V]; alternatively:
3. Press [ENTER] to activate the block and access its programming page.
4. When finished setting up the parameters, press [EXIT].
10.2 SAVING A SOUND
When customizing a Sound's blocks, you might want to save these new settings, to use it later on. To do so, access the
main SOUND EDIT page and press [F2] to recall the Utility function.
A list will appear, with 32 user locations of the current Sound family. The family is shown on the top left of the screen.
Use the [+], [-], [U] o [V] Key Touch to move the cursor on the Sound to overwrite. Now press [F3] to save the current
configuration on the location highlighted by the cursor. When the process is complete, a pop-up message appears:
In this page you can also modify the Sounds order in a given family. To do so, select a Sound and then press [F2] to move
it one step up, or [F4] to move it one step down. Press [EXIT] instead to return to the previous video page.
NB
•
•
•
Preset Sounds cannot be overwritten and will not appear on the list above.
The data of an overwritten User Sound will be irreparably lost.
When using the keyboard in Split or Layer mode, saving the Sound assigned to Part2 will also save the MASTER
EFFECT and MASTER REVERB parameters related to Part1 (as these are active at the moment).
EN - 34
User Manual – Modifying a Sound
10.3 RENAMING A SOUND
To rename a Sound, select it with the cursor and press [F1]:
Use the virtual keyboard to enter a new name. The currently selected key is highlighted in red.
To select a key, use [Y], [Z], [U] o [V].
Press [ENTER] to activate the selected key. The modified name immediately appears on screen.
Press [EXIT] to cancel and return to the previous page.
The virtual keys have the following functions:
Backspace: deletes the previous character.
Cancel: deletes the following character.
Caps: The "Caps Lock" led on the display shows the function's actual state. When the led is on, all inserted characters
will appear as upper case. When the led is off, all new characters will be lower-case.
Return: confirms the new name. Returns to the previous page.
Ins: Insert function. The "Insert" led on the display shows whether the function is active or not. When the led is on, all
new characters are placed between old characters. When the led is off, new characters will replace old characters.
Home: places the cursor at the beginning of the text.
End: places the cursor at the end of the text.
<--: moves the cursor one step left.
-->: moves the cursor one step right.
6
7
9
;
=
φ B C E G
K
I
J
M
L
P
R
N O Q S
T
W
U V
Y
X
c
&
Z
[
]
NB.
The maximum length of a name is 19 characters.
EN - 35
a
b
e
d
h
f
g
j
i
l
k m n
q
o
p
t
r
s
v
u
x
w y
z
BACKSPACE
H
BACKSPACE
F
BACKSPACE
4
D
BACKSPACE
2
A
BACKSPACE
1
8
BACKSPACE
5
3
BACKSPACE
SPACE
0
BACKSPACE
To enter characters you can also use the keyboard keys as shown in the following drawing:
Manuale Utente – Instrument general settings
11. INSTRUMENT GENERAL SETTINGS
The FUNCTION menu contains all settings that do not belong to single Sounds (except for pedals settings) or memories,
but to the whole Physis Piano. To access this menu, press [FUNCTION].
You can recall the following functions:
Touch: select the keyboard's velocity curve. For further information about this function see par 8.6.
Setup: recall factory settings, check or update the operating system, options, modify time and date.
Pedals: assign functions to pedals.
Tuning: fine tuning of the instrument, and choose among several temperaments.
Midi: MIDI interface settings.
Transpose: adjust the transposer. For further information on this function see par 8.5.
File Manager: move files between the internal memory and a USB drive.
Metronome: set up and activate the metronome. For further information on this function see par 8.7.
To access a function and its corresponding video page, use the arrows Key Touch [Y], [Z], [U] o [V] to select it, then
press [ENTER]. The cursor is the brighter icon surrounded by a white rectangle.
To leave this page and return to the previous one press [EXIT] or [FUNCTION].
11.1 RECALLING FACTORY SETTINGS (FACTORY RESET)
To undo all modifications made to Sounds, memories and system functions and recall the standard factory settings, use
the Factory Reset function. To do so, access the FUNCTION menu and place the cursor on the Setup icon. Press [ENTER].
Place the cursor on the Factory Reset field and press [ENTER]. A pop-up message appears:
EN - 36
User Manual – Instrument general settings
Press [ENTER] to start the process or [EXIT] to abort.
To visualize other functions of the Setup menu, press [U] or [V].
Press [EXIT] to recall the FUNCTION menu.
NB
When starting a Factory Reset, all changes made by the user will be irreparably lost. To prevent that, first save your
own Sounds, memories and/or settings to a USB pen (see procedure in par. 11.9)
11.2 SELECTING THE LANGUAGE OF THE ON-LINE GUIDE
To select the language of the SOUND ENGINE guide related to the φPIANO, φE.PIANO and φMALLET, families, place the
cursor on the Language (Help) field.
Now press the [Z] Key Touch and then [U] or [V] to select the desired language.
To access a different function of the Setup menu press [Y] then [U] or [V].
To return to the FUNCTION menu press [EXIT].
IMPORTANT NOTE
The Language (Help) field appears translated into the selected language.
11.3 OPTIONS
Selecting the Options field, three general options can be set:
Press [Y] or [Z] to move the cursor. To modify the selected function, press [+] and [-]. Changes will be immediately saved.
These functios allow to:
: Outputs Mute: if this function is set as On, plugging the headphone jack into the [
] connector will mute all
the audio outputs on the rear panel. This will not happen if the function is set as Off.
Digital Out Level: the digital output signal of the [DIGITAL OUT] connector on the rear panel.
Last Selection: this function sets what Memory is recalled each time the instrument is switched on. When the function
is Off the system automatically selects Memory 01 of the φPIANO family. If the function is set as On, the system recalls
the last selected Sound or Memory.
Automatic Loudness: Automatic Loudness: enable (select Soft or Hard to have a less or more effect) or disable (Off)
the automatic control of the sound so that, if enabled, even at low volume [MASTER] you can perfectly hear both bass
and treble. This control acts only on the amplification of the internal speakers and not on the external outputs
[OUTPUT] and [DIGITAL OUT], nor on the headset
To access a different function of the Setup menu press [Y] then [U] or [V].
To return to the FUNCTION menu press [EXIT].
EN - 37
Manuale Utente – Instrument general settings
11.4 CHECKING AND UPDATING THE OPERATING SYSTEM RELEASE
When a new operating system update is released (.vpu file) it will be available on the website http://www.physispiano.com.
Download the file and the copy it to a USB pen.
To check the current operating system release of your Physis Piano, access the FUNCTION menu. Then select the Setup
function; place the cursor on the Software Update field and press [ENTER].
On the bottom right of the screen you will find the Current Release field. It indicates the release that is currently installed
on your instrument.
To update the operating system, connect a USB pen with the .vpu file within and press [ENTER].
After a few seconds, the contents of the USB pen appear on screen.
Use [U] or [V] to move the cursor, and [ENTER] to show the folders content. Press [EXIT] to return to the previous (upper
level) folder. Place the cursor on the .vpu file to update.
To visualize other functions under the SETUP menu, press [Y], then [U] or [V].
Select the .vpu file and press [ENTER] to start the update. After a short while a pop-up message will appear, showing
information on the currently installed release and the one being loaded.
When the procedure is over, the "Upgrade done" message will appear. Reboot the instrument.
NB
•
•
Should the system detect errors in the update file, the “Corrupted upgrade file” error message will appear.
Therefore, replace the file with one that is valid.
All the error messages that might appear during the upgrade are described in chapter 6.1 of the Reference
Manual.
EN - 38
User Manual – Instrument general settings
11.5 SETTING TIME AND DATE
To set time and date, select the Setup function. Place the cursor on the Time & Date field and press [ENTER].
To move the cursor, use [Y] or [Z].
Press [+] and [-] to modify the values. New values are immediately saved.
Press [U] or [V] to visualize other functions of the Setup menu.
Press [EXIT] to return to the FUNCTION menu.
11.6 PEDAL SETTINGS
The SOFT and SOSTENUTO pedals and the two [FOOT CONTROLLER] connected to the rear panel can be assigned
different functions. Each function can be configured. To configure one or more pedals, select the Pedals function under
the FUNCTION menu:
On the left are the rear panel connectors. To move the cursor and see the information on each connector, use [U] or [V].
Press [Z], to place the cursor on a connector, then [U] or [V] to select a parameter.
To place a cursor on a connector field, press [Y].
To modify the parameters press [+] and [-].
Parameters are:
Presence: cannot be modified. Shows whether a jack is plugged into a connector or not. In brackets you will find the
current position of the pedal. Check if the reading polarity is correctly set and if the pedal works properly.
Values range between 0 and 127. Potentiometer pedals can assume any value between the two, while foot-switch
pedals only have Off and Off as values.
To check if your pedal works properly, press it. The value on screen should change.
Type: Set the pedal type. Set Switch for foot-switch pedals, or Potent. for potentiometer (expression) pedals.
Physis Piano automatically detects the type of pedal connected to the [FOOT CONTROLLER] connector. However, you
can set manually a different pedal type. This manual setting will remain until a new pedal is connected.
Polarity: set the reading polarity of the pedal. To set the polarity correctly, check that if the pedal is at its minimum (or
off), the value is 0; likewise, when the pedal is at its maximum (or on), the reported value must be 127. In any case, if
you prefer, you can set polarity in the opposite manner.
Mode: Set the pedal mode. Pedals can be used as system pedals, therefore performing general instrument functions,
that is, not Sound-related functions. In this case, select the System option.
Pedals can also be assigned to sound-related functions, controlling parameters that affect the sound generation
regardless of the selected Sound. To do so, select the Fixed option.
Pedals can also perform specific functions, related to the selected Sound or Memory. To do so, select the Subject to
Sound option.
EN - 39
Manuale Utente – Instrument general settings
-
Part 1 and Part 2: you can assign the pedal functions to either of these options. Part 1 is the selected Sound while the
keyboard is in Single mode, or the Sound assigned to Part 1 when the keyboard is in Dual or Split mode. Part 2 is the
Sound currently assigned to Part2 when the keyboard is in Dual or Split mode.
A detailed description of each function can be found on the Reference Manual.
The new settings of the Type, Polarity and Mode parameters are immediately saved.
If Mode is set as System or Fixed, also the functions assigned to Part1 and Part2 are immediately saved. If Mode is set as
Subject to Sound, you need to save manually the current Sound or Memory.
Press [EXIT] to leave the page and return to the FUNCTION menu.
NB
The Sustain pedal of the pedal set, and any pedal connected to the [SUSTAIN] connector can be only assigned the
Sustain function.
11.7 FINE TUNING
Physis Piano can be fine tuned by setting the exact frequency (in Hertz). Furthermore, the user can choose from a wide
range of historical temperaments from different ages and countries.
To do so, access the FUNCTION menu and select the Tuning function.
Use [+] and [-] to fine tune the instrument. Frequency is in Hertz.
To use a different temperament, first press [Z], then [+] or [-] to select it. For a short description of each temperament, see
the Reference Manual.
Press [F3] to reset the Equal temperament and the standard tuning (440Hz).
Press [EXIT] to save the settings and return to the FUNCTIONS menu.
11.8 MIDI SETTINGS
To access the configuration parameters of the MIDI interface, select the Midi function under the FUNCTION menu.
To move the cursor, press [Y], [Z], [U] o [V]. Press [+] and [-] to adjust the values.
For each Part you can set:
IN Channel: MIDI input channel.
EN - 40
User Manual – Instrument general settings
-
OUT Channel: MIDI output channel.
FILTERS Program Ch.: filters Program Change, Pitch Bend Channel Pressure and Polyphonic Key Pressure
messages, input (In on the display) and output (Out).
FILTERS Track Controls: filters Control Change messages, input (In on the display) and output (Out).
FILTER Local Off: set the Part as Local Off. When a Part is set as Local Off, it does not generate sound through Physis
Piano anymore, it only sends out MIDI data. That Part will therefore work as a Master Keyboard.
There are two Part-independent filters, because the controlled messages do not belong to a channel.
FILTERS Sys Ex: filters Exclusive System messages, input (In on the display) and output (Out).
FILTERS Real Time: a filter for Real Time messages input (In) and output (Out).
Press [EXIT] to recall the FUNCTION menu.
When one or both the Part are in Local Off Mode, the Main screen shows the icon:
with the number of the Part that is in Local Off or any number if they are both.
11.9 MOVING FILES OR FOLDERS
Thanks to the File Manager functions, Sounds, memories and songs (MIDI sequences) can be transferred from the
internal memory to an external (USB pen) memory. (see point 4 in par. 3.2). Also, files from a USB drive can be copied into
the instrument's internal memory. This is especially useful to create backup version of your own settings, or to transfer
these settings to another Physis Piano. To access this function, select the File Manager field under the FUNCTION menu.
When accessing this function for the first time after switching on, this page will appear. It shows the three folders of the
instrument's internal memory. They are:
Memories: contains all Physis Piano memories. They are further divided into sub-folders for each family.
Songs: contains the recorded songs.
Sounds: contains all Physis Piano Sounds. They are further divided into sub-folders for each family.
The sub-folders of Sounds and Memories are:
01_Piano: Acousitc piano family (Key Touch[φ PIANO])
02_EPiano: Electric piano family (Key Touch[φ EPIANO])
03_Mallet: Mallet family (Key Touch[φ MALLET])
04_Keyboard: Keyboard family (Key Touch[KEYBOARD])
05_Ensemble: Ensemble family (Key Touch [ENSEMBLE])
06_BassGuitar: Bass and Guitar family (Key Touch [BASS/GUIT])
EN - 41
Manuale Utente – Instrument general settings
To access a folder and see its content, select it by pressing [+], [-], [U] o [V] then press [ENTER]. For example, in the
next page is the content of the Memories folder.
Path and folder name are always shown on the top of the screen. “Root” (see previous picture) is the first-level folder (root
folder) of the memory unit. “INT” stands for internal memory, “USB” stands for external memory (USB pen).
Physis Piano works with these file types.
.mem: Memory
.snd: Sound
.mid: MIDI songs
.pls: Playlist
- .wav, .mp3, .aiff, .aac, .m4a, .ape, .ogg: audio files
To switch memory unit, press [F4]. An icon beside the Key Touch shows which memory is selected by pressing it.
Press [EXIT] to return to the previous (upper level) folder. Alternatively, place the cursor on the “<ROOT>” (when
visualizing the content of a sub-folder, instead of “ROOT”, the parent field will show the name of the parent folder) field and
press [ENTER].
In order to play a sound or a memory pointed to by the cursor, press [F1].
NB
•
•
•
•
The system can show a maximum of 256 elements (files and/or folders) in a folder, root included.
Files with extensions other than those listed above are not displayed when the internal memory is selected.
Key Touch Icons appear darker when their functions are not active.
Attempting to access the USB drive when it is not inserted, this error message appears:
However, if the pen is inserted, refer to the Reference Manual par. 6.1. The same message is displayed by
accessing USB drive not formatted with the FAT32 file system.
EN - 42
User Manual – Instrument general settings
COPYING FILES FROM INTERNAL MEMORY TO USB DRIVE
1.
Open the internal memory. The characters “INT” will appear on the top of the screen. Beside the [F4] Key Touch
appears a “USB Pen” icon.
2.
Press [+], [-], [U] or [V] to move the cursor on the file or folder you wish to move to the USB pen.
Pressing the Key Touch [Z] you can change the display order of files,
Name: sort by name
Physis: only files managed by the instrument
Type: sort by extension
Dates: sort by date
Size: sort by size
Press the Key Touch [Y] to return to the previous mode.
Pressing the Key Touch [F1] you can play Sound, Memory, Audio and MIDI files in order to evaluate their
characteristics.
3.
Press [F3]. The following page will appear:
4.
Press [F2] to copy a single file or folder. Press [F4] to select all the files and folders that you are viewing. Press again
the same key Touch to deselect or [F2] to start copying; in the latter case the screen changes to:
5.
6.
Press [F4] to access the USB pen.
Press [+], [-], [U] or [V] to move the cursor, or [ENTER] to enter a folder. Enter the folder in which you wish to copy
the selected file.
EN - 43
Manuale Utente – Instrument general settings
As described in step 2, you can change the display order of the files.
Press [F3] if you want to create a new folder within the folder you are viewing (this is only possible in the Songs folder
and its related sub-folders). The procedure to form the name is the same as described in par. 5.4.
7.
Press [F2] to copy the file, or [F1] to abort.
NB
•
The Memories folder cannot be saved to the Sounds folder (internal memory), or the other way around. .mem
files cannot be copied to the Sounds folder; likewise, .snd files cannot be copied to the Memories folder (internal
memory). snd files cannot be copied to folders of different Sound families. When attempting to do so, the
following message will appear:
•
•
Preset Sounds and Memories cannot be copied to a USB stick.
You cannot select the function CopyAll when the cursor is positioned on the field <ROOT> (when you are
viewing the contents of other sub-folders, it displays the name of the top-level folder instead of "ROOT").
When pasting files (Paste function), all files with the same name are automatically overwritten. If the folder of the
USB drive contains a folder with the same name as the one that is being copied, the copy is aborted.
You cannot create new folders within Memories and Sounds folders and its sub-folders of internal memory.
When listening to Audio or MIDI files, if you leave the File Manager, playback is automatically stopped.
•
•
•
COPYING FROM USB STICK TO INTERNAL MEMORY
1.
Open the internal memory. The characters “USB” will appear on the top of the screen. The “internal” icon appears
beside the [F4] Key Touch.
2.
Press [+], [-], [U] o [V] to move the cursor on the file or folder you wish to move to the internal memory.
Pressing the Key Touch [Z] you can change the display order of files,
Name: sort by name
Physis: only files managed by the instrument
Type: sort by extension
Dates: sort by date
Size: sort by size
Press the Key Touch [Y] to return to the previous mode.
Pressing the Key Touch [F1] you can play Sound, Memory, Audio and MIDI files in order to evaluate their
characteristics.
EN - 44
User Manual – Instrument general settings
3.
Press [F3]. The following page will appear:
4.
Press [F2] to copy a single file or folder. Press [F4] to select all the files and folders that you are viewing. Press again
the same key Touch to deselect or [F2] to start copying; in the latter case the screen changes to:
5.
6.
Press [F4] to access the internal memory.
7.
Press [+], [-], [U] o [V] to move the cursor, or [ENTER] to enter a folder. Enter the folder in which you wish to copy the
selected file.
As described in step 2, you can change the display order of the files.
Press [F3] if you want to create a new folder within the folder you are viewing (this is only possible in the Songs folder
and its related sub-folders). The procedure to form the name is the same as described in par. 5.4.
When copying a .mem or .snd file, you need to overwrite a location, since there is a maximum of 32 user locations. To
overwrite a location, place the cursor on the corresponding file.
Moreover, when copying snd files, you will need to select the right Sound family. For example, an acoustic piano
(φPIANO) sound must be saved to the path: Sounds\01_Piano.
Press [F2] to copy the file, or [F1] to abort.
EN - 45
Manuale Utente – Instrument general settings
NB
•
•
•
•
•
•
•
•
•
•
In the internal memory, only .mem files can be copied to the Memories folder. Likewise, only .snd files can be
copied to the Sounds folder. Furthermore, only single .mem and .snd files can be copied, not entire folders.
Attempting to copy other kinds of files will result in the following error message:
“This is not the right position”.
When attempting to copy .snd files to the wrong Sound family, the same message will appear. In this case,
however, pressing [EXIT] will show the right path for that file.
It is advised not to keep the files in order, according to sound family, also on your PC or USB stick, so as to avoid
errors.
Preset Sounds and memories cannot be overwritten.
When you Paste a file with the same name (including case) it is automatically overwritten.
You can copy within the internal memory only file types handled by the instrument (see list at the beginning of the
paragraph). Otherwise, you receive the error message:
You cannot select the function CopyAll when the cursor is positioned on the field <ROOT> (when you are
viewing the contents of other sub-folders, it displays the name of the top-level folder instead of "ROOT").
You cannot create new folders within Memories and Sounds folders and its sub-folders of internal memory.
When listening to Audio or MIDI files, if you leave the File Manager, playback is automatically stopped.
snd and mem files created with newer operating system versions cannot be copied in a Physis Piano running an
older version. When attempting to do so, the following message will appear:
EN - 46
User Manual – Instrument general settings
11.10 DELETING FILES OR FOLDERS
To delete files or folders, either from the internal memory or USB pen, enter the FUNCTION menu. Select the File Manager
function, then use [+], [-], [U] o [V] and [ENTER] to navigate the folders. Select a file or folder with the cursor.
Press [F1] to delete the single file or folder. Press [F4] to select all the files and folders displayed.
Press again the same key Touch to deselect or [F1] to start deleting, in the latter case the system requests a confirmation
to proceed:
Press [ENTER] to confirm, or [EXIT] to abort.
NB
•
The “Memories”, “Sounds” and “Songs” folders, together with their sub-folders and files cannot be deleted from
the internal memory. When placing the cursor on one of these locations, the Erase icon (beside [F1]) will appear
as inactive. When pressing [F1], the following message will appear:
•
•
Deleting a folder will also delete all its file and sub-folders.
You cannot select the function EraseAll when the cursor is positioned on the field <ROOT> (when you are
viewing the contents of other sub-folders, it displays the name of the top-level folder instead of "ROOT").
EN - 47
Manuale Utente – Instrument general settings
11.11 RENAME FILES AND FOLDERS
To rename files or folders stored in the internal memory or USB memory stick, either from the internal memory or USB pen,
enter the FUNCTION menu.
Select the File Manager function, then use [+], [-], [U] o [V] and [ENTER] to navigate the folders. Select a file or folder
with the cursor and press [F2].
The renaming procedure is the same as described in par. 5.4.
IMPORTANT NOTE
During the renaming it is not possible to change only lowercase with uppercase and vice versa. In this case,
confirming the rename, the following message will appear:
Therefore compose a name changing letters and/or numbers.
EN - 48
User Manual – Recording and playing songs
12. RECORDING AND PLAYING SONGS
Physis Piano is equipped with a music player for MIDI and audio files; it can also record and save music sequences to the
internal memory or to a USB pen as MIDI files.
The system can manage the following file extension:
MIDI sequences: .mid, .kar
audio files: .wav, .mp3, .aiff, .aac, .m4a-AAC, .m4a-ALA, .ape, .ogg
For more information on the functions assigned to [F3] and [F4] see par.3.5.
To access the reproduction functions, press [F1]. To access the recording funtions press [F2] instead.
To play a song:
1.
Place the cursor on the file you wish to play, by pressing [+], [-], [U] or [V]. Both MIDI files (.mid) and playlists (.pls)
are valid.
To switch memory unit, press [F4]. An icon beside the Key Touch shows which memory is selected by pressing it.
Press [EXIT] to return to the previous (upper level) folder. Alternatively, place the cursor on the “<ROOT>” (when
visualizing the content of a sub-folder, instead of "ROOT", the parent field will show the name of the parent folder) field
and press [ENTER].
2.
Press [F1] to start playing, then press it again to pause/continue the reproduction. Press [F2] to stop.
All advanced recording and playing functions are described on the Reference Manual.
EN - 49
Disposal of old Electrical & Electronic Equipment (Applìcable throughout the European Union
and other European countries with separate collection programs)
Dir. 2002/95/CE, 2002/96/CE e 2003/108/CE
This syrnbol, found on your product or on its packaging, indicates that this product should not be
treated as household waste when you wish to dispose of it. Instead, it should be handed overt to an
applicable collection point for the recycling of electrical and electronic equipment. By ensuring this
product is disposed of correctly, you will help prevent potential negative consequences to the
environment
and human health, which could otherwise be caused by inappropriate disposal of this product. The
recycling of materials will help to conserve natural resources. For more detailed information about the
recycling of this product, please contact your local city offi ce, waste disposal service or the retail store
where you purchased this product.
This product complies with the requirements of EMCD 2004/108/EC and LVD 2006/95/EC.
FCC RULES
NOTE: This equipment has been tested and found to comply with the limits for a Class B digital Device, persuant to Part 15 if the FCC
Rules. These limits are designed to provide reasonable protection against harmful interference in a residential installation. This
equipment generates, uses and can radiate radio frequency energy and, if not installed and used in accordance with the instruction,
may cause harmful interference to radio comunications. However, there is no guarantee that the interference will not occur in a
particular installation. If this equipment does cause harmful interference to radio or television reception, which can be determinated by
turning the equipment off and on, the user is encuraged to try to correct the interference by one or more of the following measures:
-
Reorient or relocate the receiving antenna.
Increase the separation between the equipment and receiver.
Connect the equipment into an outlet on a circuit different from that to which the receiver is connected.
Consult the dealer or an experienced Radio/Tv technician for help.
The user is cautioned that any changes or modification not expressly approved by the party responsable for compliance could void the
user’s authority opearate the equipment.
INFORMATIONS FCC
NOTE : Cet instrument a été controlé et il est garanti pour etre en conformité avec les spécifications techniques établies pour les
dispositifs numériques de la « Classe B » selon les normes de protection contre les interférences avec d’autres dispositifs électroniques
environnants. Cet appareil produit et utilise des fréquences radio. S’il n’est pas installé et utilisé selon les instructions contenues dans le
mode d’emploi, il peut générer des interférences. L’observation des normes FCC ne garanti pas qu’il y aura aucune interférence. Si cet
appareil est la cause d’ interférences avec une réception Radio ou TV, il est possible
de le vérifier en éteignant puis en allumant l’instrument : Vous pouvez alors résoudre le problème en suivant les procédures suivantes :
-
déplacer ou orienter l’antenne de l’appareil avec lequel se manifeste l’interférence.
déplacer cet instrument ou l’appareil avec lequel se produit l’interférence
connecter cet instrument à une prise de courant différente afin de mettre les deux appareils sur deux circuits différents.
consulter le revendeur ou un technicien radio/tv pour d’autres renseignements.
D’éventuelles modifications non approuvées par le constructeur peuvent annuler votre garantie de l’appareil.
WWW.PHYSISPIANO.COM
© 2012 – PHYSIS PIANO® is a registered trade mark – Viscount International SpA
Via Borgo 68/70 – 47836 Mondaino (Rimini) Italy – Tel +39 0541 981700 – Fax +39 0541 981052