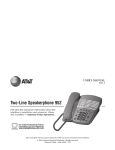
1
Table of Contents
1Overview
3
What is SchuyLab Billing?......................................................................3
Entering the Billing Module....................................................................4
Billing Types............................................................................................6
Recommended Checklist.........................................................................9
Chapter 1 - 2Billing Setup
10
Introduction............................................................................................10
Setting the Laboratory Options..............................................................11
Defining Billing Schedule......................................................................13
Setting Bill Types...................................................................................17
Defining Codes and Prices for Procedures............................................19
Schedules and procedures......................................................................23
Defining Panels and Rules.....................................................................28
Setting up Custom Paper Claims...........................................................44
Setting up Insurance, Clients and Doctors.............................................46
Setting up Electronic Billing and Remittance........................................56
Setting up ICD-9 Codes.........................................................................59
Chapter 2 - 3Claims
62
Creating Claims ....................................................................................62
Editing Claims ......................................................................................63
Transactions...........................................................................................75
Rebilling Claims....................................................................................80
Printing Reports.....................................................................................82
Troubleshooting Claims.........................................................................94
Chapter 3 - 4Client Billing
96
Overview of Client Billing.....................................................................96
Generating Invoices...............................................................................97
Account Maintenance..........................................................................101
Chapter 4 - 5Patient Invoicing
108
Claim Based Invoicing.........................................................................108
Account Based Invoicing.....................................................................110
Chapter 5 - 6Paper Billing
113
Printing HCFA 1500 Forms.................................................................113
Printing Non-HCFA Claims................................................................114
Chapter 6 - 7Electronic Claims
116
Using Electronic Claims......................................................................117
Medicare..............................................................................................118
Medicaid..............................................................................................124
Chapter 7 - Electronic Remittance
129
Setting Up The Medicare BBS Connection.........................................129
Retrieving 835 Files.............................................................................132
Setting up Remittance..........................................................................135
Processing the Remittance Claim........................................................141
The Report...........................................................................................144
Notes and Write Offs...........................................................................148
Troubleshooting Remittance Issues.....................................................151
Index
154
1Overview
What is SchuyLab Billing?
The SchuyLab Billing Module is an optional feature of the SchuyLab system. It
won’t make you into a billing professional overnight; there’s no substitute for
education and experience. But in the hands of a medical biller, the Billing Module
is a powerful tool.
What makes the Billing Module special? It permits the user to bill the procedures
ordered for the patients -- without having to enter the patients’ names and tests a
second time. The information entered on the patient during the course of laboratory
analysis automatically becomes part of the billing record: name, patient ID,
doctor’s name, and of course the tests and procedures performed. Yet at the same
time, the Billing Module is sufficiently independent from the laboratory setup that
special pricing or billing protocols can be inserted painlessly, without interfering
with the lab tests themselves.
It helps to think of the overall SchuyLab system as containing two sides, rather like
the two hemispheres of a brain. There’s the ‘lab’ side, where the patient and
specimen information is entered, where tests are ordered, where results are printed.
And there’s the ‘billing’ side, where the orders are compiled, where costs are
summed, where bills are printed. The two sides talk to one another minimally: the
‘lab’ side tells the ‘billing’ side the patient's demographics and the tests ordered -while the ‘billing’ side can update the ‘lab’ side's patient records. Not much more
is sent, or needed.
In particular, while tests ordered individually are automatically sent from the ‘lab’
side to the ‘billing’ side, panels can be recognized by the Billing Module in one of
two ways. The panels can be considered indivisible units for billing purposes: if,
say, a Thyroid panel were ordered on the ‘lab’ side, then the ‘billing’ side would
register and charge for a Thyroid panel, and the individual tests of the panel would
be ignored by the Billing Module. Or the panels can be considered simply a
convenient way to order a number of other procedures: in that case, were a Thyroid
panel ordered on the ‘lab’ side, the ‘billing’ side would register and charge for a T3
Uptake, a T4, and a TSH -- the panel qua panel would be ignored by the Billing
Module. You can do some of your panels one way, and some panels the other way;
the choice is wholly configurable by the user.
The SchuyLab Billing Module will ignore any test or panel which is not a
3
procedure, that is, does not have a procedure code (most labs use CPT codes for
this, but there are other coding systems). On the other hand, the Billing Module
allows you to define procedures that are neither tests nor panels -- venipuncture, for
instance -- and charge for them on your invoices.
Finally, the tests and panels are entered into the invoice, according to predetermined
rules (“Bill this panel first, then this other one, then....”). Everything follows a
protocol as determined by the user. Thus, the Billing Module provides a flexible
billing environment to work alongside SchuyLab’s laboratory system.
Entering the Billing Module
Select F7. Features.
Select Billing.
SchuyLab displays the Billing Module screen.
Let’s do a quick run-through of how the Billing Module is organized. SchuyLab
bases its billing on a claim: a set of procedures (tests and/or panels) that have been
done on a single patient specimen. The claim is assigned a claim number; we
currently define it to be the specimen ID number for that specimen.
The tests ordered on that specimen may each have prices set for them; this can be
done on the ‘lab’ side of the system, at the same time as the tests’ ranges and values
are defined, or it can be done through the Billing Module Setup screen. Either way,
if a procedure code has been assigned to a test, it becomes a billing procedure. If no
procedure code has been assigned to a test, the Billing Module ignores it; such tests
4
are transparent, and do not appear on the claim.
Panels are likewise defined as procedures, and prices set for them. This can be
done on the ‘lab’ side, by the same function where the panels’ constituent tests are
defined, or it can be done through the Billing Module Setup screen. As with tests, if
no procedure code is assigned to a panel, the Billing Module ignores it as a panel;
however, the individual items in the panel (if they have procedure codes) are sent to
the ‘billing’ side to be included in the claim. If the panel is assigned a procedure
code, then in normal use, when the panel is ordered, it’s included in the claim. The
panel can also be set to be a “CPT panel”, which means that it obeys the bundling
rules followed by Medicare for that panel; in that case, the panel is included in the
claim if all the tests in the panel are ordered, no matter how. (Nobody ever said
medical billing would be easy!)
The manner in which panels are included in the claim is called the rule. This, too,
is done through the Billing Module. There are basically two rules:
•
The “CPT rule”, for use with Medicare and related payors, which bills
panels only if defined as “CPT” panels;
•
The “default” rule (i.e., not the CPT rule), where panels are billed exactly
as they’re ordered.
In general, the CPT rule gives precedence to larger panels over smaller ones. If two
panels have tests in common, SchuyLab will bill for the larger panel -- and the
remainder of the smaller panel’s tests, as separate items on the claim. As a concrete
example: The Comprehensive Metabolic panel and the Electrolytes panel have
three tests in common (Sodium, Potassium, and Chloride). If both panels are
ordered, and we’re following the CPT rule, SchuyLab won’t let you double-bill
those three tests. Instead, the CPT rule will try to include those tests in one panel
only. It will choose the largest panel that it can build from the tests that were done.
So, in this case, we’d end up billing for a Comprehensive Metabolic panel, plus a
CO2 test (the only test in Electrolytes that isn’t in Comprehensive) as a separate
item. (That is, if all the tests defining a Comprehensive Metabolic panel are present
in the claim. If one of those tests were missing, then we’d bill for an Electrolytes
panel, plus the extra tests that would have gone into the Comprehensive.)
NOTE: While the CPT rule does normally give precedence to larger panels over
smaller panels, an exception is made if you’re still billing for the General Chemistry
panels (80002-80019). Medicare doesn’t pay for those panels any more, but as of
this writing, some states’ Medicaid programs insist on using them. In those cases,
SchuyLab will try to build all the CPT panels it can, from the tests that were done;
if any chemistry tests are left over, they’re bundled into the appropriate General
Chemistry panel.
Since statistics are accumulated by SchuyLab on a daily basis, and may be printed
in any increment of time the user selects, a month-end closing is not necessary,
desirable, or possible.
5
Bill Accessions
Claims are imported from Lab to Billing by specimen number range.
The Bill Accessions icon begins the billing process. By selecting this icon, you can
enter the range of specimen numbers you wish to be imported from the ‘lab’ side to
the Billing Module. Take into consideration your typical turn-around time for a
final report; if you bill-as-run rather than bill-as-ordered, you’ll want to wait until
most of your specimens are complete before billing them. (We recommend 48
hours as a reasonable waiting period.)
Edit Claims
Claims are individually edited; individual line items can be manipulated.
In order to assure that each claim has been properly prepared and contains all the
information necessary for a successful posting, SchuyLab permits each claim to be
individually checked. When the claim has been checked by the biller, its status is
set from Open to Ready. The Ready claims are available to the system for billing
on paper or export to other systems for electronic billing.
Billing Types
SchuyLab currently has four types of billing available:
Billing on the HCFA-1500:
Medicaid (MediCal), Medicare, & Private Insurance claims can be
printed on the HCFA-1500 form.
Billing electronically:
Claims are transmitted to a diskette file. A commercially available
modem program is then used to transmit the file to the insurance
provider.
Patient Billing
When an individual patient is to be billed, SchuyLab can generate
an invoice for that patient’s lab work.
Client Billing
When an invoice is created for a Client, all the patient claims that
belong on that invoice are set to Closed, and an invoice number and
date are appended to each individual patient claim. From that point
6
on, those patient claims are dealt with on the invoice. Client
invoices accumulate from all eligible claims in the system which
have been set to Ready.
Billing Analysis:
You have many tools to analyze your billing statistics in the Billing
Analysis section. Including
Monthly Sales
Tracks the activity on a given Client account in a (user defined)
period of time: claims made, payments received, and write-offs
entered in that time.
12 Month Revenue
Lists all the revenue received per Client per bill type over the last
12 months. Which 12 months is user selected.
Sales by Rep
Lists all of the revenue received from all the Clients assigned to
each sales representative, in a user-selected interval of time.
There are also tools you will use often enough that you can find them in the main
Billing Section. Including
Claim Aging
Lists all claims per bill type, per Client, per aging category
(30,60,90,120+ days). All of the above mentioned parameters are
user selected.
Open Claims
Lists all of the claims within a user-defined range which are still
Open (e.g. they have never been set to Ready or Billed).
Batch Payments
Lists the total of a given day’s payments entered into the system,
for accounts receiving purposes.
There are also a number of reports that are not, strictly speaking, financial reports,
yet are useful to the Billing department. These are the Patient Demographics,
Client Demographics, and Billing Demographics reports, accessed through
F6.Printing. For more information on these reports, consult the SchuyLab User
7
Manual.
8
Recommended Checklist
The Billing Process:
• Bill Accessions
• Print the Open Claims report
• Edit Claims (set to Ready as necessary)
For claims
processing:
Print HCFA-1500
forms
or
For client invoicing:
Use Electronic
Billing
Create Client Invoices
Edit Account (add fees,
payments, discounts,
&c, as necessary)
For patient
invoicing:
Use Patient
Claims to
generate patient
invoice
Once Billing is done:
• Leave SchuyLab and run the Billdata program to generate the billing statistics
• Back in SchuyLab, print the Monthly Sales and other reports as desired
9
Chapter 1 - 2Billing Setup
Introduction
Before any bills can be generated, the schedules, prices, codes and bundling rules
need to be defined. This is done through the Billing Setup screen in the Billing
Module.
The Billing setup procedure is as follows:
1. Set Laboratory Options.
2. Define Schedules.
3. Set Bill Types.
4. Define codes and prices for procedures.
5. Define panels and rules.
6. Set up Insurance, Clients and Doctors.
7. If you intend to use them, set up Electronic Billing and ICD-9 codes.
10
To access the Billing Setup functions
From the Billing Module menu screen, select Setup.
SchuyLab displays the Define Billing menu screen.
Setting the Laboratory Options
Laboratory Options
This icon is used to set your lab’s name and address, so that it can be printed on
forms, transmitted with claims, and so forth.
From the Define Billing screen, select Laboratory Options.
11
SchuyLab displays the Laboratory Billing Options box.
In the Laboratory Name field, enter your name as you wish it to appear on billing
reports and electronic transmissions. Under Address, City, St, and Zip, enter your
lab’s mailing address, again as it should appear on reports and transmissions. Your
telephone number should be entered in the Telephone field.
In the Printed Form pull-down field, select the paper form your lab will use by
default. Right now, your only defined form is the HCFA-1500 form, so select that
form from the list.
In the Electronic pull-down field, select the type of electronic billing your lab will
use by default. If no electronic billing formats have been defined yet, the field will
say “N/A” (Not Applicable). Leave it that way for now.
In the Tax ID entry field, enter your Federal Tax Number. Your CLIA ID,
Medicaid (MediCal) ID, and Medicare ID numbers should be entered in the
appropriate fields. These numbers will be printed on your HCFA-1500 forms (the
Tax ID field in space #25 on the form, the CLIA ID field in space #23) and utilized
in Electronic Billing as appropriate. If your lab has an NPI number you can enter it
in the appropriate box. (If you don’t and you bill Medicare or Medicaid you really
need to get one, check the CMS website for more info.) SchuyLab will start
utilizing it for both HCFA and Electronic Billing shortly.
The Bill Tests and Panels buttons, on the bottom left determine when the bills are to
be generated: when the tests are ordered, or when all tests are complete.
Next to the Bill Tests and Panels buttons, you have buttons to determine whether
12
you wish to Bill Patients via Claims or Accounts. If you leave this set at Claims,
when you directly invoice Patients it is for a specific claim. Changing this to
Accounts will put all outstanding bills for a patient on one invoice. Changing this
setting will have a number of effects on the billing section, and if you change
this setting you should exit completely out of billing before doing anything else
with billing.
If your billing address differs from your lab’s address -- that is, if you receive mail
in a different place than you actually perform the tests -- select the Billing
Address? button. SchuyLab displays the Laboratory Billing Address box.
In the Billing Name field, type your lab’s name. In the Address, City, St, and Zip
fields, enter the address as it should appear on your invoices (“where to send the
money...”). The Telephone field is optional. When done, select OK. SchuyLab
returns to the Laboratory Billing Options box.
When all the fields are complete, select OK.
Defining Billing Schedule
Schedules
The Schedules icon defines the different billing schedules. These allow you to
assign different sets of prices for different clients, bill types, &c. The SchuyLab
Billing Module uses schedules as a common factor: we associate a particular
schedule with a specific client, patient bill type (e.g., Medicare), and insurance
carrier. You can have as many fee schedules as you have bill types, clients, and
insurance carriers. In general, though, you’ll want to simplify your life by using as
few schedules as you need.
13
To define the billing schedules:
From the Define Billing menu screen, select Schedules.
SchuyLab displays the Billing Schedules box, listing all the schedules currently
defined in the system.
entry.
14
Select one of the entries in the scroll box, or select New to create a new
SchuyLab displays the Add/Update Schedule box.
In the Code field, enter the name (up to eight characters) of the schedule you wish
to create. In the Description field, type in a longer (non-abbreviated) description of
the schedule -- for instance, the client for whom it’s intended.
If this schedule represents a flat percentage of your base (standard) fees, enter that
percentage in the Pct field. For instance, if you enter “80” in the Pct field, the
schedule will charge at 80% of your base price. (It’s not just for discounts. If you
enter “120”, the schedule will charge at 120% of your base price.)
If you intend for this fee schedule to follow the CPT pricing rules (for use with
Medicare, Medicaid, and other carriers), check the “CPT Rules” box at the upper
right. If this box is left unchecked, claims on this fee schedule will bill as ordered.
Often, two different tests will have the same procedure code. Such tests will
normally be combined into a single line of the claim. If you don’t want this to be
done for claims on this fee schedule, check the “Do Not Combine” box at the upper
right. (For instance, Chlamydia DNA Probe and GC DNA Probe share the same
code, 87797. If both are ordered on a patient, the claim will normally read “DNA
Probe x2”. If you don’t want that done -- if you want both probes separately listed
on the claim -- make sure the “Do Not Combine” check box is checked.)
Special prices for individual procedures may be added to this schedule, directly, by
using the Add new Procedures button; but that must wait until we’ve defined all
the procedures. We’ll come back to it, trust me.
15
If you click on the Discounts? Button, you can set volume discounts into your
schedule. Clicking on it brings up the following box.
If we then click on the Add… button, we get the Add Discount screen.
Here we can set a volume and a discount to automatically apply when an invoiced
amount exceeds this figure. You can setup multiple discount levels, of course,
which will show up on the Volume Discounts page like so.
Press OK when you are finished entering in discounts and return to the Add
Schedule screen.
When all the fields on the Add Schedule screen are complete, select OK.
SchuyLab returns to the Billing Schedules box. Select New to define the next fee
schedule.
16
NOTE: If you plan to bill to Medicare (or to an agency that bills in a Medicare
fashion, following the CPT panel definitions), you must have at least one
schedule with the “CPT Rules” check box marked. Even if your prices to
Medicare are the same as your base prices, the schedule has to be there, so that
the CPT rules can be activated.
When all the schedules have been defined, select OK. SchuyLab returns to the
Define Billing screen.
Setting Bill Types
Bill Type
The Bill Type icon defines the types of bills that will be used in the system. Each
bill type has payors defined for it, as well as the method of billing -- by claim, by
invoice, or straight to the patient -- as well as a list of the information the billing
department (i.e., you) would need for a complete claim.
To define the Bill Types:
From the Define Billing screen, select Bill Type.
SchuyLab displays the Update Bill Types scroll box, listing all the currently defined
bill types.
Select one of the entries in the scroll box, or select New Type to create a new entry.
17
SchuyLab displays the Add/Update Bill Type box.
In the entry field labeled Code, enter the code (up to eight characters long) for the
bill type you wish to create: MEDICAL, MEDICARE, PHYSICN, CASH, &c. For
certain bill types (notably MediCal), you can enter your lab’s ID number in the Id
entry field. (It doesn’t show up anywhere; this is just for your records.)
In the entry field labeled Name, enter a more complete description of this billing
type, for your own records.
The Fee Schedule field is optional. Leaving this field unchanged will assign the
new bill type to your system’s standard (base price) schedule. If you wish to assign
a specific pricing schedule to this bill type, select that schedule from the pull-down
list. The Fee Schedule field determines how all patients of this bill type will be
charged -- with exceptions. If the payor on a claim is “Client” or “Insurance”, and
the Fee Schedule field on the bill type is left blank, then the prices charged to the
claim are determined by the schedules assigned to the client record or insurance
group.
The five check boxes labeled “Payors for this Billtype” determine the payors for
claims of this Bill Type. Select the payors appropriate for these claims. More than
one payor may be selected: for instance, when you bill to Medicare, and receive a
partial payment, you may want to bill the remainder to the patient’s insurance. In
that case, select both Medicare and Insurance as payors for the Medicare Bill Type.
(When billing a claim, SchuyLab will roll down the list of selected payors, in
order.)
If you have bought the optional Medical Necessity module you can turn checking on
and off for a particular pay type with the Medical Necessity check box.
18
The Required button allows you to set conditions for accepting a given claim as
Ready to be billed. Select Required to display the [Bill Type] Requirements box.
Select the items you want to be in place before a claim can be ready for billing (do
we have the patient’s date of birth? their gender? the name of their insurance
carrier? &c). If Manual Review is selected, then every claim must be reviewed in
the Edit Claims icon of the Billing Module before it can be set to Ready (i.e., ready
to be billed). If Manual Review is not selected, then the claim is automatically set
to Ready when it’s brought over to the Billing Module, so long as the other
requirements (address, gender....) have been met.
The ID Format list field checks whatever number is in the Other ID field (in Patient
Demographics), and makes sure it’s in a specific format: MediCal, Medicare, or
non-blank (i.e., some ID number required). Choose the one appropriate for the bill
type. (Remember, SchuyLab checks the format of the Other ID field, not the
Medicare, Medicaid, or Insurance ID fields!)
When all the requirements are set, select OK. When the fields in the Add Bill Type
box are complete, select OK again.
Defining Codes and Prices for Procedures
Pricing Rules
When a claim is brought over from the ‘lab’ side of SchuyLab to the ‘billing’ side,
any test or panel without a procedure code will be ignored. But that leaves the
procedures that are brought over: how are they billed? As individual tests? As
panels? If the claim includes, say, a Sodium test, is it billed as a separate Sodium
test, or as part of an Electrolytes panel, or as part of a Comprehensive Metabolic
panel? (Or all of the above!?)
As mentioned earlier, in the section on Panels, exactly how a procedure is billed
19
depends on three things: how it’s defined, how it was ordered, and the kind of
schedule to which it’s being charged. Most bill types will use a ‘standard’
schedule; in those cases, if you order an Electrolytes panel, the Billing Module
charges for an Electrolytes panel; if you only order a Sodium test, it charges for a
Sodium test; &c.
But if the schedule is intended for Medicare (and agencies that follow Medicare’s
protocols, such as Medicaid), SchuyLab starts to build panels for you. If you were
to order Sodium, Potassium, Chloride, and CO2 as separate tests, for such a
schedule the Billing Module would automatically combine the four tests into an
Electrolytes panel, and charge for that panel -- even though it wasn’t explicitly
ordered!
Moreover, if the schedule is intended for Medicare, then SchuyLab has to guarantee
that a test isn’t double-billed. If you were foolish enough to order an Electrolytes
panel and a Basic Metabolic panel (which includes all the tests of the Electrolytes
panel), SchuyLab will bill only for the Basic Metabolic panel. If you were to order
an Electrolytes panel and a Comprehensive Metabolic panel (which includes some
of the tests of the Electrolytes panel), you’d be less foolish, but still, SchuyLab
would bill for the Comp. Metabolic panel -- plus the one test from Electrolytes
(CO2) that isn’t part of Comp. Metabolic. It won’t let you double-bill for the tests
the two panels have in common. (And how does it know which panel to bill, and
which to dissect? SchuyLab will bill for the larger of the two panels.)
How, then, does SchuyLab know which course to take? SchuyLab looks for two
things: the “CPT Rules” check box on the Schedule definition, and the “CPT”
check box that’s part of the Panel definition (either through the Panel Definition
icon itself, or through the Panels icon in Billing Setup).
Any patient who obeys a CPT rule (as determined by the fee schedule, which is
dictated by his bill type) will follow Medicare’s fee structures. Any patient who
obeys a ‘standard’ pricing rule (again, as determined by the fee schedule attached to
his bill type) will be billed the procedures exactly as they were ordered.
Tests
Before the Billing Module can be used to its full potential, the different procedures
(that is, the tests and panels) must have prices and procedure codes assigned to
them. Recall that a test or panel becomes a procedure, for billing purposes, when
it’s given a procedure code. Any test or panel without a procedure code will be
ignored by the Billing Module. Sometimes, you may decide you want Billing to
ignore a test: for instance, you don’t really want to bill for each individual Urine
Cast result -- you want to bill for a Urinalysis panel, which includes a Urine Casts
test (which happens to include the individual Urine Cast results). But the grand
majority of tests and panels should all have codes assigned to them.
The prices and codes for the individual tests may be defined when the tests
20
themselves are defined. This is done through SchuyLab’s Test Definition function
(via F8. Tools, Set-Up, Test & Panel Definition, and thence to Test Definition).
The procedure is described quite completely in the full SchuyLab User’s Manual,
and need not be repeated here.
However, the prices and codes for the tests can also be defined through Billing
Setup. This allows you to keep the billing department’s tasks separate from the lab
tech’s tasks. You can even, through Billing Setup, update the codes and prices that
were entered through Test Definition.
To enter or change procedure codes and prices for individual tests:
From the Define Billing screen, select Tests.
SchuyLab displays the Test to Procedure Translation box.
The Test to Procedure Translation box lists all the tests currently defined in the
SchuyLab system -- regardless of whether they have prices or codes assigned yet.
The buttons on the bottom of the box allow you to organize the list either by “Code”
(the eight-character code that SchuyLab uses internally) or by “Name” (the
complete test name that's actually printed on the patient report). In either case, the
ordering will be alphabetical. Select the button that arranges the list most
conveniently for you.
21
To add or change the procedure code for a test, select that test from the list.
SchuyLab displays the Add/Update Procedure box.
SchuyLab shows the code and name of the test in the Code and Description fields.
The Code is unique to each test, and cannot be changed from Billing Setup. The
Description field shows the test name, as it prints on the patients’ reports and
invoices. If you change the Description field, it will affect only how the test’s name
is printed on your invoices.
NOTE: Two procedures can be given the same description on your bill. For
instance, both a GC probe and a Chlamydia probe -- separate tests, with different
prices -- may be given the description “DNA probe” for your invoice.
In the Charge entry field, type in the price of that individual test. This will be the
default or base price, to be used when no other price is specified on a schedule.
In the Bill Code entry field, type the procedure code (CPT code, HCPCS code, or
your in-house equivalent) you wish to assign to that specific test.
NOTE: Two tests can be given the same Bill Code (procedure code). There are a
number of tests that may be separate and distinct when ordered and run in the
lab, but that are essentially the same procedure and are charged to the same Bill
Code. (For instance, your lab may have defined tests for Vancomycin Peak
values and Vancomycin Trough values -- the high and low levels of that drug in
the patient’s blood. But they’ll each be billed using the same CPT code, 80202;
if they’re both done on a patient, the invoice will simply say “80202 x2”. You
22
can also change their billing Descriptions, as described above, so they both bill
simply as “Vancomycin”.)
The POS field is for entering the code denoting Place Of Service. When SchuyLab
prints a bill on the HCFA-1500 form, it automatically uses the POS code that means
“done in house”. Only those procedures done elsewhere -- say, in the patient’s
home -- require the POS field to be filled. (This is moot for your lab tests, but may
be useful when defining procedures that aren’t tests: phlebotomies, for instance.)
The Note icon and the Result Code field allow you to annotate this procedure for
your own records. (They don’t print out on invoices.) The Note icon is a free-text
format; the Result Code is a pre-recorded comment. Result Codes are defined as
part of your system setup; see the User’s Manual, Section VI, for a full description.
The check box labeled “No discounts allowed” will prevent this procedure from
being reduced in price. Many fee schedules, for instance, are simply defined to be a
percentage of the base price. If this box is checked, it cannot be charged as a
percentage, but always at the full base price. (Sendout tests, for instance, may need
to have this box checked.)
The check box labeled “Add Handling charge” is not functional at this time.
When you’ve entered the billing code, price, and all other options, select OK.
SchuyLab returns to the Test to Procedure Translation box. Select the next test you
wish to edit.
When done, select Done. SchuyLab returns to the Define Billing menu screen.
Schedules and procedures
Eventually, you’ll have to set up fee schedules for your clientele, with a price for
each procedure. Most labs define their prices in one of two ways: they may have a
separate list of tests and prices for each client (“Prices for Dr. Smith: Lipid Panel,
$15.00, Thyroid Panel, $50.00, &c.”). Or they may have a list of tests, with all the
clients’ prices (“Lipid Panel: Dr. Smith, $15.00; Dr. Jones, $13.25; Dr. Khan,
$16.50; &c.”). If your prices are defined the first way, you may want to enter the
prices via the Schedules icon (which we’ll discuss in a minute). But most labs
define their prices the second way, which makes it easier to enter the prices along
with the billing codes.
To implement differential pricing for an individual procedure:
1) From the Define Billing menu screen, select Tests. SchuyLab displays the Test
to Procedure Translation box.
2) Select the test you wish to edit. SchuyLab displays the Update Procedure box.
23
3) Select the Add a new Schedule button. SchuyLab displays the Add Schedule
box.
4) From the pull-down list box labeled Schedule, select one of the schedules
defined in the system. In the Charge field, type the price that you wish that
procedure to be billed at for that particular schedule. This specific price will
override the default flat percentage that you set when defining the schedule.
NOTE: On some schedules, you may not want to charge for a procedure. There
are two ways of doing this. If you simply enter a zero (0) in the Charge, the
procedure will appear on the invoice with a charge of $0.00. If you don’t want it
to appear on the invoice at all, enter a negative one (-1) or a negative two (-2) in
the Charge field. This will cause the test to be either NC (No Charge) if you
enter the -1, or NA (Not Applicable) if you enter -2. (The distinction doesn’t
mean anything for a test, but it does for a panel; more on that under the
discussion on Panels.) Either way, the procedure will not be billed -- it won’t
even show up on the invoice.
5) (optional) In the Bill Code field, type the procedure code to be used on this
schedule for this procedure (Medicaid may have different codes for some tests,
for instance). In the POS field, type the code for this procedure if it’s done
elsewhere than in your lab. The Expected field is not functional at this time.
6) When all the fields are correct, select OK. SchuyLab returns to the Update
Procedure box.
7) Select Add a new Schedule to add another schedule to the procedure. Repeat
the above steps.
8) When all the desired schedules have been added to this test, select OK.
SchuyLab returns to the Test to Procedure Translation box. Select the next
procedure you wish to edit, and proceed as above.
9) When all the procedures have schedules attached, select Done.
To implement differential pricing as part of a complete schedule.
1) From the Define Billing menu screen, select Schedules. SchuyLab displays the
Billing Schedules box.
24
2) Select the schedule to which you wish to add prices. SchuyLab displays the
Update Schedule box.
3) Select the button marked Add new Procedures. SchuyLab displays the Add
Billing Procedures box, listing all the billing procedures currently defined in the
SchuyLab system. (Remember, a test or panel will not become a billing
procedure until it has a procedure code assigned to it!)
25
4) Highlight the procedures to be added to the schedule. Select only those
procedures that will have specific prices assigned to them, overriding the
Percentage field defined for this schedule. (Any procedures not selected will be
assigned that schedule’s defined percentage of the base price.) When you’ve
selected all the procedures you want, select OK. SchuyLab returns to the
Update Schedule box, with all the chosen procedures listed.
5) Once the procedures are part of the schedule, select each one in turn to bring up
the Update Schedule’s Procedure box.
6) The Code and Description fields will already be filled, since this is already a
defined billing procedure. In the Charge field, type the price that you wish that
procedure to be billed at for that particular schedule. This specific price will
override the default flat percentage that you set when defining the schedule.
NOTE: On some schedules, you may not want to charge for a procedure. There are
two ways of doing this. If you simply enter a zero (0) in the Charge, the
procedure will appear on the invoice with a charge of $0.00. If you don’t want it
to appear on the invoice at all, enter a negative one (-1) or a negative two (-2) in
the Charge field. This will cause the test to be either NC (No Charge) or NA
26
(Not Applicable). (The distinction doesn’t mean anything for a test, but it does
for a panel; more on that under the discussion on Panels.) Either way, the
procedure will not be billed -- it won’t even show up on the invoice.
7) (optional) If the procedure code for this procedure on this schedule differs from
the default, type the procedure code to be used in the Bill Code field.
(Medicare may have different codes for some tests, for instance.) In the POS
field, if the procedure is done elsewhere than in your lab, type the appropriate
two-digit code in the POS field. The Expected field is not functional at this
time.
8) When all the fields are correct, select OK. SchuyLab returns to the Update
Schedule box. Go to the next procedure and repeat the above steps.
9) A procedure that was mistakenly added to the schedule can be deleted by
selecting it -- thus bringing up the Update Schedule’s Procedure box -- and
selecting Delete. SchuyLab removes that procedure from the schedule.
10) When all the procedures on the schedule have prices entered for them, select
OK. SchuyLab returns to the Update Schedule box, listing all the procedures
and their prices. (In the example below, some of the panels are listed as “NA”
-- Not Applicable -- and would never be billed to patients on this schedule.
Remember, this is done by entering “-2” as the price.)
11) Select OK. SchuyLab returns to the Billing Schedules list box.
12) Repeat the process for the next schedule. When all the schedules have their
prices defined, select OK. SchuyLab returns to the Define Billing menu screen.
27
Defining Panels and Rules
Panels
Some confusion arises as a result of the use of the word “panel” by both the lab and
the billing department. When the lab says “panel”, they mean “a set of tests
grouped together for convenience in ordering”. When the billing department says
“panel”, they mean “a set of procedures which must be billed together”. Very often,
the two meanings are the same: after all, when you order all the tests that make up a
Urinalysis panel, you expect to bill for a Urinalysis panel.
However, there are two situations in which the lab’s meaning of “panel” doesn’t
match the billing department’s meaning of “panel”:
When you’ve defined a panel for a customer (to make it easier for him to order
tests), but will charge him by each constituent in the panel -- say, you’ve made
BUR_COMP to be a comprehensive panel for Dr. Burton, but intend to bill him
separately for the CBC, Comp Metabolic, &c, that went into the panel;
or,
When you’re billing Medicare (or an agency following Medicare pricing rules, such
as Medicaid), and have to charge for a panel as defined by Medicare, regardless of
how the tests within that panel were ordered -- and without duplicating the tests in
other panels. For instance, if you’ve ordered a Comprehensive Metabolic panel
(CPT code 80054) and a Hepatic panel (CPT 80058), you may not be able to charge
for the Hepatic panel: there are tests found in both panels, and you aren’t allowed
to double-bill for those tests. (You would, instead, charge for a Comp Metabolic
panel plus SGPT and Direct Bilirubin -- the remaining tests in the Hepatic panel.)
Or, as another example, if you’ve ordered Uric Acid, Sedimentation Rate, RA
Factor, and an Antibody Screen on a patient, by Medicare’s rules you must charge
those tests as an Arthritis panel (CPT 80072), even if your lab doesn’t explicitly
offer an Arthritis panel to its customers.
No, Billing is not for the faint of heart. Fortunately, SchuyLab is able to deal with
both situations. It all hinges on the definitions of the panels, and that’s done outside
Billing Setup. The only panels currently defined in Billing Setup are the general
chemistry panels (80002-80019) still used by some Medicaid providers and
insurance companies. We’ll discuss these in order.
To define panels for billing purposes
Select F8. Tools.
Select Set-Up.
Select Test & Panel Definition.
Select Panel Definition.
SchuyLab displays the Define Panels box, listing all the panels currently defined in
28
your system.
29
Select the panel you wish to examine. SchuyLab displays the Update Panel [Panel
Name] box, showing the individual components of the panel, and the billing code
and price, if any.
Unless you, the biller, are authorized to make changes in the ‘lab’ side of the
SchuyLab system, you should leave the panels’ components alone. On the other
hand, as the lab’s biller, you’ll need to have some say in how the panels are defined,
particularly if the panels are to be billed to Medicare (or a Medicare-style agency,
like Medicaid). There are two important points of each panel’s definition that
concern Billing:
1) If the panel is to be billed to Medicare, is the panel defined as Medicare
defines it?
In the above example, we have an Arthritis panel (CPT 80072) with four
components -- Uric Acid, Sedimentation Rate, Antibody Screen, and RA Factor -just as defined in the CPT manual. You must have these four items, at least, in your
Arthritis panel, or else it may not be billed to Medicare as a panel (although the
components could be billed).
Conversely, while you can have more than those four minimum items in your
Arthritis panel, you’d be foolish to do so. Many labs offer an “Arthritis Profile”
that includes a CBC, Calcium, Urinalysis, and other items. If you define your
Arthritis panel that way, you’re just giving the additional components to Medicare
30
gratis, because they won’t pay for them as part of Arthritis!
2) Is the panel constructed from smaller panels whenever possible?
SchuyLab’s Billing Module assumes that larger panels, when possible, should use
smaller panels as their components, not the individual tests. For instance, the Basic
Metabolic panel, CPT 80048, consists of eight chemistry tests (BUN, Creatinine,
Calcium, Glucose, Sodium, Potassium, Chloride, and CO2). The last four are also
the Electrolytes panel, CPT 80051. In SchuyLab, then, we should define the Basic
Metabolic panel as the Electrolytes panel plus three tests, not as seven tests. (See
the illustration below, as an example.)
Once the panels are correctly defined, we can add the prices and procedure codes to
them for billing purposes. As with tests, any panel that does not have a procedure
code (CPT code, HCPCS code, or your in-house equivalent) will be ignored by the
Billing Module. In some cases, that may be exactly what you want. For example,
you may want to define a special panel for a doctor, to make it easier to order tests
(a CBC, UA, TSH, Hepatitis screen, and Rubella). But you may want to bill the
doctor for each individual component of the panel -- the CBC, UA, TSH &c -instead of for the special panel. If the panel is given no procedure code,
SchuyLab’s Billing Module will ignore it; however, it will bill for all the
components of the panel, if they have procedure codes.
As with tests, there are two ways that prices and codes can be added to the panels.
31
One way is through SchuyLab’s Panel Definition function (via F8. Tools, Set-Up,
Test & Panel Definition, and thence to Panel Definition). The procedure is
described quite completely in the full SchuyLab User’s Manual, and need not be
repeated here.
However, the prices and codes for the panels can also be defined through Billing
Setup. This allows you to keep the billing department’s tasks separate from the lab
tech’s tasks. You can even, through Billing Setup, update the codes and prices that
were entered through Test Definition.
To add procedure codes and prices to panels:
From the Define Billing screen, select Panels.
SchuyLab displays the Panel to Procedure Translation box.
The Panel to Procedure lists all the panels currently defined on your SchuyLab
system, including their procedure codes (if any). You can tell at a glance which
panels can be billed. Some of the procedure codes have an asterisk (*) in front:
these mark the panels that follow the CPT Rule, and thus can be billed to Medicare
and similar agencies. More on that in a minute.
32
To define or update the prices and codes on a panel, select that panel from the list.
SchuyLab displays the Add/Update Procedure box. (It looks remarkably like the
one for tests, doesn’t it?)
As with the individual tests, enter the charge, procedure code, &c, in the appropriate
fields. Because this is a panel, you have a bit of leeway with the Bill Code field: If
this is not a panel to be billed to Medicare, but only to a private physician (probably
on a monthly invoice), then the procedure code needn’t be a CPT code. You can
use an in-house code instead. (Remember, even to private payors, a panel cannot
be billed unless it has some procedure code. But if this were a panel you devised
for this one client, then you can invent your own procedure code for it.)
33
To charge different prices on the various fee schedules, select the Add a new
Schedule button. SchuyLab displays the Add Schedule box. Select the appropriate
schedule from the Schedule pull-down field, and enter the appropriate charge for
that schedule in the Charge field.
NOTE: If this panel is not applicable to one of the schedules -- say, Basic
Metabolic to a Medicaid schedule, or a client’s private panel to a Medicare
schedule -- in the Charge field, type “-2”. SchuyLab will ignore that panel for
billing purposes, and will bill for the components of the panel instead.
When done, select OK, and then repeat for the other schedules.
When you’re done, return to the Add/Update Procedure box. You should have a
screen that looks something like the one below, with the procedure code and base
price displayed (along with the schedules):
34
The final step in the billing setup for this panel involves the check box labeled
“CPT”. For panels being billed to Medicare, or to an agency that bills in a
Medicare fashion (e.g., Medicaid), you’ll almost certainly want to check this box.
The CPT check box determines whether the panel can be billed to Medicare, and
how it does so:
If the panel is to be If the panel is to be
billed to a Medicare- billed to anyone else:
like agency:
If the “CPT” box is The panel will be
not checked:
ignored. The
individual
components of the
panel will be billed
separately.
The panel is billed as
ordered. The
components of the
panel will not be
separately billed.
(I.e. if the panel
contains other panels
as components, the
smaller panels won’t
be billed.)
If the “CPT” box is The panel will be As above. The panel
checked:
billed if all the is billed the same
components of the way, whether the
panel are ordered, by “CPT” box is
any means.
The checked or not.
components of the
panel will not be
separately billed.
To make this work -- particularly if you’ve checked the “CPT” box -- I remind you
again that the definition of the panel is all-important. If the panel is to be billed to
Medicare, it must be defined as Medicare and the CPT codes define it, at a
minimum. (You could, of course, add more tests to this minimum, but then you’d
be giving away money.)
And if the panel can be defined in terms of a smaller panel, you should do so. (For
instance, your large Thyroid panel, CPT 80092, should have as its components your
small Thyroid panel, CPT 80091, plus TSH. Do not define it as T3, T4, and TSH,
or you’ll end up double-billing Medicare every time you order it!) It’s not always
possible, because some panels’ definitions don’t completely overlap; but it must be
done when possible.
35
General (Multi-Channel) Chemistry Panels
(Obsolete)
The only exception to the above setup would be for the General Chemistry panels:
the ones done automatically by most modern chemistry analyzers. (They’re
sometimes called “multi-channel” chemistry panels, because all the tests are coming
from the analyzer at more-or-less the same time.) These multi-test chemistry panels
are defined, not by which tests they include, but by how many tests they include.
Until 1998, Medicare recognized these multi-channel chemistry panels; as of this
writing, Medicare no longer pays for them. SchuyLab has special programs to
accommodate chemistry panels for any agency that still recognizes them, while still
using the “disease-oriented” chemistry panels for Medicare. This is done through
the Multi-Channels icon.
To set up the multi-channel chemistry panels for Medicare:
Select F7. Features.
Select Billing.
Select Setup. SchuyLab displays the Define Billing Menu Screen.
Select Multi-Channel.
SchuyLab displays the Multi-Channel Tests box.
This is the special program that generates the multi-channel chemistry procedures
(i.e., those with procedure codes between 80002 and 80019, or G0058-G0060) that
can be billed to Medicaid (MediCal) and similar agencies. The Multi-Channel
Tests box will look at a claim and find the chemistry procedures that aren’t part of
another panel (it won’t, for instance, look at a Cholesterol procedure on a claim, if
it’s already being billed as part of a Lipids panel). It then counts the number of
chemistry procedures, and generates a claim for an automated multi-channel
36
chemistry panel of that many tests. If it finds seven, it bills for a Chem 7, with a
procedure code of 80007; if it finds twelve, it bills for a Chem 12, 80012; and so on.
On the left side of the Multi-Channel Tests box is a list of the procedures to be
incorporated in a multi-channel chemistry panel. (Note that the list is of chemistry
procedures: tests that have procedure codes assigned to them. If the individual
tests don’t have procedure codes, they can’t be included in this list.)
Check the list to ensure that all the elements of a general chemistry panel, as
defined by Medicaid, are included on this list. If any are missing, select the Add
Tests button; select the procedures to be included, then select Done. In like
manner, if there are too many procedures (that is, if there are any procedures that
aren’t on Medicaid’s list of multi-channel chemistry tests), select them from the
list. SchuyLab will ask if you want to remove that procedure from the list. Say
Yes.
These are the tests that may be included in a multi-channel automated chemistry
panel:
Albumin
BUN
Cholesterol
Phosphorus
Sodium
Alk.
Phosphatase
Calcium
Creatinine
Potassium
Total Protein
Bilirubin, direct Bilirubin, total
Carbon Dioxide Chloride
Glucose
LDH
SGPT (ALT)
SGOT (AST)
Uric Acid
Your Medicaid or insurance provider may include additional tests, as well.
37
On the right side of the Multi-Channel Tests box is a list of the possible chemistry
panels, with procedure codes. Each of these needs to be assigned a price. To do
this, select a procedure from the list. SchuyLab displays the Add/Update Procedure
box.
The Code and Description fields should already have entries. (You can overwrite
the Description field if you’d prefer to call it something else.) In the Charge field,
enter the price for that particular panel.
If you intend to implement differential pricing for these panels, select the Add a
new Schedule button. SchuyLab displays the Add Schedule box.
From the pull-down list box labeled Schedule, select one of the schedules defined in
the system. In the Charge field, type the price that you wish that procedure to be
billed at for that particular schedule. This specific price will override the default
38
flat percentage that you set when defining the schedule.
NOTE: It is very important that you prevent these multi-channel chemistry panels
from being charged to Medicare! To do this, select the Medicare schedule. In
the Charge field, instead of entering a price, enter negative two (“-2”), as shown
in the illustration above. This tells SchuyLab that this panel is NA -- Not
Applicable. It won’t charge Medicare for this procedure; it won’t show up on
the invoice; it won’t even be built for this claim! Medicare claims will now
ignore this panel, and will be charged for the individual components instead.
When done, select OK. SchuyLab returns to the Add/Update Procedure box.
(Notice that the Medicare schedule now says “NA”, as it should.)
Select Add a new Schedule again, and proceed as above. When all the schedules
have prices, select OK. SchuyLab returns to the Multi-Channel Tests box. Select
the next multi-channel chemistry panel and repeat the above steps.
When all the chemistry panels have prices, select OK. SchuyLab returns to the
Define Billing menu screen.
Procedures
Once the tests from the ‘lab’ side of SchuyLab are assigned their CPT codes and
prices, they are considered procedures within the Billing Module’s use of the term.
39
However, there are other procedures, not directly related to the lab, for which you
may want to charge: venipuncture, phlebotomy, handling fees, &c. This is done
through the Procedures icon.
To define new procedures for billing:
From the Define Billing screen, select Procedures.
SchuyLab displays the Billing Procedures box.
The Procedures box will already contain the multi-channel chemistry panels,
defined through the Multi-Channel icon. Selecting one of these procedures from
the list will bring up the Update Procedure box (as seen in the discussion on the
Tests icon), with all the fields filled.
The buttons near the bottom permit you to sort the procedures either by CPT code
or by name.
40
To define a new, non-lab procedure, select the New procedure button. SchuyLab
displays the Add Procedure box.
In the Code entry field, type the code you wish to assign to that specific procedure.
In the Description entry field, type in the name of the procedure, as you wish it to
appear on the bill or invoice. In the Charge field, type your base price for the
procedure. Finally, in the Bill Code entry field, type the procedure code (CPT code
or your in-house equivalent).
To implement differential pricing for the procedure, select the Add a new Schedule
button. SchuyLab displays the Add Schedule box.
From the Schedule pull-down list field, select one of the previously defined
schedules. In the Charge field, type the price that you wish that procedure to be
billed at for that particular schedule. This specific price will override the general
41
percentage that you may have set under Schedule.
NOTE: Entering a negative number in the Charge field will cause the Billing
Module to not charge for this procedure on this schedule. It won’t even show up
on the invoice. If you want it to appear on the invoice, but don’t want to charge
for it -- or rather, charge $0.00 for it -- enter zero (0) in the Charge field.
When complete, select OK. When all the schedules are added to the procedure,
select OK again.
Printing your fee schedule
Once you’ve defined the prices for all the procedures, setting different prices for
each schedule, it's a good idea to print out the fee schedules as a permanent hard
copy. (Some people find it easier to review hard copy than numbers on a computer
screen. De gustibus non est disputandem.) If you want to print out your fee
schedules:
1) From the Billing Setup screen, select Schedules. SchuyLab displays the Billing
Schedules scroll box, listing all the schedules currently defined in the system.
42
2) Select the Print button at the bottom of the Billing Schedules box. SchuyLab
displays a very similar box, the Print Fee Schedules box.
3) The first item on the list is “Standard Pricing”, which is your base fee schedule.
This isn’t an explicitly defined schedule -- that is, you never have to enter
“Standard” or “Base Price” as the name of a schedule. Rather, this fee schedule
is compiled by SchuyLab from the base prices defined for all the procedures.
Although the Billing Schedules function will not display this schedule on the
screen, it will print out for you. The Standard Pricing schedule is followed by
the schedules you've defined for your system.
4) To print all the fee schedules, select the Print All button.
43
5) To print one or some of the fee schedules, select them from the list. SchuyLab
highlights in grey the schedules you select. In the process, the Print All button
changes to become the Print Selected button.
When you’ve chosen all the fee schedules you wish to print, select Print Selected.
SchuyLab prints the fee schedules.
Setting up Custom Paper Claims
For the majority of our customers, their paper claims will use HCFA-1500 forms,
and no special setup will be required. Some of our customers however, and
particularly those who are not in the United States, may need to print out insurance
claims with different requirements. In particular, our reports system which allows
you to have tremendous control over your report’s layouts, can also be used to print
claims customized to your needs.
So how would you setup one of these claim reports? First you need to create a new
report type.
44
Select F8. Tools.
Select Set-Up.
Select RePort Setup.
Select Reports.
SchuyLab displays the Report List Box.
From here click on New Report to bring up the Create New Report box
From here there are two ways you can go depending on what kind of form you need
45
to fill out. If you are writing one form for one claim, you should choose the type
Claim from the Type dropdown list. This will make the claim information available
for this report. If the form covers is a cumulative report covering multiple claims,
then you should choose Invoice as the type. In either case, you should, of course,
give it a descriptive name and description in the name and description boxes, so you
don’t confuse it with one of your other reports.
For the moment, assume that you’ve chosen Claim and that you are creating a form
for Duckworth Insurance.
After you click OK here, you will be taken to the Configure Claim Form Screen.
Here is where you can setup the format to fit your form, but the actual process for
doing so is beyond the scope of this document. Section 7 of the SchuyLab User
Manual: Reports and Printing should give you the information you need to modify
the report to fit your claim form.
So what do you do after you’ve created and formatted your new claim form? You
need to tell SchuyLab which claims you want to use it on. You do this in the
Insurance setup which you can find in the next section.
Setting up Insurance, Clients and Doctors
Insurance
The Insurance icon is used to record information on the insurance carriers who will
receive bills from you. Note that SchuyLab treats Medicare and Medicaid
(MediCal) as insurance carriers, so they need to be defined here.
To enter information on insurance carriers:
From the Define Billing screen, select Insurance.
46
SchuyLab displays the Update Insurance Carriers scroll box, listing all the currently
defined insurance carriers.
From here, you can print a list of all your current insurance carriers by selecting
Print. But we assume you want to create an entry for a new carrier.
Select one of the entries in the scroll box to update that insurance carrier;
OR
Select New Carrier to create a new entry.
47
SchuyLab displays the Add/Update Insurance Carrier box.
Enter the insurance company’s pertinent information in this box. Most of the fields
are self-explanatory. For billing purposes, the most important fields are:
ID:
SchuyLab will automatically assign an ID number to
each new insurance company. You can override this
if you wish.
NOTE, however, that since Medicare and MediCal
are treated as insurance for billing purposes, they
need to have specific ID numbers. More on that
below.
PIN:
Enter your lab’s identification number with this
insurance carrier. On the HCFA-1500 form, this will
be printed in space #33, right under your lab’s name.
Fee
Schedule:
Pull down the scroll list and select the schedule to be
assigned to this insurance carrier. (The base fee
schedule is the default.)
48
Name,
SchuyLab will print these at the top of the HCFAAddress,
1500 form.
City,
St., NOTE, that if you have many insurance carriers with
Zip:
the same name, use the Name field to distinguish
them in some way (e.g., “Blue Cross of Oxnard”,
“Blue Cross of Visalia”, “Blue Cross of Altadena” -don’t just use “Blue Cross” for all of them!).
In Care of:
Enter the name of the contact person at the insurance
company who will deal with claims from your lab.
Plan Name:
Enter the name of the insurance plan that covers your
patients through this carrier.
Write Off:
Enter the dollar amount (if any) you will
automatically write off from all claims paid by this
carrier.
For setting up Medicare and MediCal ‘insurance carriers’, there are some special
requirements to note:
49
ID:
For Medicare and the various states’ Medicaid
programs, the SchuyLab ID number must start with
the letter X:
For Medicare, enter “X040” as the ID.
For MediCal, enter “X005” as the ID.
PIN:
This number is for whatever ID number the
insurance company has given you to personally
identify your laboratory.
GRP:
Other ID:
These fields are used for different purposes for
various billing setups, particularly with electronic
billing. Schuyler House will inform you if values
need to go in these fields when your billing gets
setup.
Fee
Schedule:
Pull down the scroll list and select the appropriate
fee schedule. Fee Schedules are defined in the
Schedules area of Billing Setup as described earlier
in this chapter. (For Medicare or Medicaid you must
choose a “CPT Rule” schedule.)
Printed
Form:
This will be the HCFA-1500 form by default. Most
paper billing in the USA can use this form. For
some carriers you may want to use a different form
that has been defined for Paper Billing. See Setting
up Custom Paper Claims.
Electronic:
If you don’t plan to do any electronic billing, set this
to “N/A” (Not Applicable). If you plan to do
electronic billing, you’ll need to set up your
electronic billing formats. (See the section on
Electronic Billing setup, below.) Once you’ve done
that, come back to this screen and select the
appropriate electronic format here.
Modifier:
If you want all CPT codes to be followed by a twocharacter suffix for this carrier, enter it here.
Clients
The Clients icon in Billing Setup is identical in use to the Update Group icon found
in the Medical Records screen, accessed through F8. Tools. Client groups are
assumed to be financial entities (as opposed to doctors, which are medical in nature
-- we distinguish between Dr. Shipley, who ordered the CBC, and Wm. Shipley,
50
M.D., Inc., a California corporation). If you have not yet defined your list of
clients, you should do so as part of Billing Setup.
To add or update your list of client groups:
From the Define Billing menu screen, select Clients.
SchuyLab displays the Update Clients box, listing the currently defined client
groups in alphabetical order.
Type in the name, or ID number, of the client group you wish to update, and select
OK;
OR
Type in the first letter(s) of the client group you wish to update, and select Find,
then choose from the list;
OR
Type in the name of the new client group you wish to create, and select OK;
OR
Select Add Client without typing anything.
51
SchuyLab displays the Add/Update Client Record box.
The ID field will automatically be filled by SchuyLab, but if you prefer another
number for this client, you can enter it here. Complete the remainder of the fields,
as shown. For billing purposes, the most important fields are:
Fee
Schedule:
Pull down the scroll list and select the schedule to
be assigned to this client. The default will be your
base schedule.
Sales:
Enter the initials (or other identifying symbol) of
the sales representative for this client. Sales to this
client will thereafter be credited to this sales rep, in
your Sales by Rep reports.
Active:
Check this box if the client is still active and
should still appear in reports and as an accession
possibility. If the Client is no longer with your lab,
but you still need to keep legacy information you
should uncheck this box rather than deleting the
client.
52
Individual:
Checked if the client is a single individual,
unchecked if the client is a group or organization.
Provider:
Enter the client’s Medicaid (or MediCal) provider
number in this field.
Tax ID#:
Enter the client's tax ID number in this field.
NPI:
The National Provider Identifier is a new number
that will be used by both Medicare and Medicaid
to uniquely identify healthcare providers rather
than using separate Medicare and Medicaid
numbers. They are currently usable and starting in
May of 2007 they will be required for all Medicare
transactions.
Responsible
Physician:
This field is optional and is used when all
accessions from a client will normally use the
same doctor record, such as when the client is an
independently practicing physician. The doctor
should be part of the Doctors records and you can
pull them up by name or by number.
Do not bill This should be pretty self-explanatory. If this is
this client:
checked off this client will not be included in
client billing.
Print ‘New Checked if the client’s patients should be included
Patient’
in ‘New Patient’ reports. (For those labs that make
Reports:
use of ‘New Patient’ reports functions.)
The Special Panels area is used for entering in client-specific panels associated with
client being viewed. It is used in the test ordering screens if you choose to define a
button as having multiple meanings depending on what client an accession is for,
and is not currently used for billing.
When all the fields are complete, select OK. SchuyLab returns to the Define
Billing menu screen.
Doctors
Many payors require more than just the client’s information on the claim; they
require the ordering doctor’s information as well. (For instance, space #17a of the
HCFA-1500 form.) This has to be setup outside the Billing Module altogether, but
don’t worry, it’ll only take a moment.
53
To update your list of doctors:
Select F8.Tools.
Select Doctor Records.
Select Update Doctor.
SchuyLab displays the Select Doctor box, allowing you to search for a doctor by
name.
Type in the name, part of the name, or ID number, of the doctor you wish to update,
and select OK;
If there are multiple matches you will have the option to select a doctor from a list.
If there is only one match, that doctor’s information will be brought up. If there are
no matches, you will have the option of entering in a new doctor.
54
SchuyLab displays the Add/Update Doctor Record box.
The ID field will automatically be filled by SchuyLab, but if you prefer another
number for this doctor, you can enter it here. Complete the remainder of the fields,
as shown. For billing purposes, the most important fields are:
Provider:
Enter the doctor’s MediCal provider number in
this field. On the HCFA-1500 form, this will print
in space #17a.
License:
Enter the doctor’s medical license ID in this field.
UPIN:
Enter the doctor’s UPIN (Universal Personal
Identification Number) in this field. On the
HCFA-1500 form, for Medicare claims, this will
print in space #17a.
SSAN:
Enter the doctor’s Social Security number in this
field. On the HCFA-1500 form, for insurance
claims, this will print in space #17a.
55
NPI:
The National Provider Identifier is a new number
that will be used by both Medicare and Medicaid
to uniquely identify healthcare providers rather
than using separate Medicare and Medicaid
numbers. They are currently usable and starting in
May of 2007 they will be required for all Medicare
transactions.
When all the fields are complete, select OK.
Setting up Electronic Billing and Remittance
Electronic Billing
SchuyLab is able to write billing data -- patients’ names, tests performed, charges,
&c -- to a file, which can then be transmitted to Medicare, Medicaid or an Insurance
Clearinghouse. SchuyLab prepares the data and writes it in a format designed for
the receiver.
To set up SchuyLab for electronic transmission:
From the Define Billing menu screen, select Electronic Billing.
SchuyLab displays the Update Electronic Payors box, listing the electronic payors
currently defined in the system.
Select one of the payors from the list to update its information. These accounts are
added to this list when you purchase Electronic Claims processing or Electronic
Remittance modules from us. Note that these are categorized as Claim or Remit,
56
depending on which features have been installed and licensed.
If you click on a claim, SchuyLab displays the Update Electronic Claims box.
In the Code field, type the code name (up to eight characters) for the site to which
you’re transmitting. (When setup is done, you’ll have an icon that looks like a little
terminal, with the code name underneath.) Type a more complete description of the
site in the Description field.
In the Telephone field, type in the phone number of the site to which you’re
transmitting. If they require you to have a password before you can transmit billing
data, type your password in the Password field. (SchuyLab does not transmit these.
They are for your records, and can be omitted if you wish.)
The Format field displays the electronic format in which the billing data must be
written. ANSI is the standard for both Medicare and Medicaid now.
The format must still be configured for your lab. Select the Setup button.
SchuyLab displays the Configure [format] for [code name] box.
The Payor’s Organization field and Receiver ID fields are already entered for you as
you can see. Depending on which organization you are sending to, some or all of
the 3 different Receiver IDs will be listed. When you purchase the ability to submit
claims electronically to an organization, these are part of the installation.
57
In the Submitter ID field, type in the ID number assigned to your lab by the payor.
You will normally have one Submitter ID for each Receiver ID.
In the Name of Contact field, type in the name of your lab’s contact person -- in
other words, when the payor needs to discuss a bill from your lab, who takes the
call? And the phone number to call them at is the Contact Phone on the next line.
You must also specify the Export Pathname – this will be the drive, directory and
filename of the billing file that SchuyLab creates. The sample given has a file
called MEDICARE being created in the A: drive which is normally the floppy disk
drive. Since it will use the same filename in the same place each time, many labs
like to write their billing files to floppies, so they can change it each time and can
keep a copy of their old claim files. Others prefer to write to the C: drive (hard
drive) which is faster, but requires the billing person who wishes to have backups of
their old submissions to copy them to new file names. Also note that some payors
will require that the file have a specific name, so you should check with them before
setting this up. Whichever method you choose you should keep track of where you
are saving the file as you will want to know this when it comes time to submit your
claim.
Click Ok to return to the Update Electronic Claims box, and OK again to return to
the Update Electronic Payors box.
The process for setting up a remittance is much the same as for a claim. You click
on the remit account on the Update Electronic Payors box. And you get the Update
Electronic Remittance box.
58
You have all the same categories as the Update Electronic Claims box, but there is a
difference if you click on the Setup… button. You get the Configure [format]
Remittance for [Code] box.
The only changeable field is the Import Pathname field. This is where you can tell
SchuyLab where to look for 835 files when processing Remittances. This will
normally be on your C: drive rather than your A: drive, as 835 files can be rather
large. See the Electronic Remittance chapter for more information.
When you are finished you can click Ok to return to the Update Electronic
Remittance box and OK again to return to the Update Electronic Payors box. When
you have updated all of your Electronic Payors you can return to the Billing Setup
menu by clicking Done.
Setting up ICD-9 Codes
ICD-9 Codes
Many claims require a diagnosis code before they can be considered ready for
billing. This is done through the use of ICD-9 codes. Once defined, they can be
entered as part of the patient demographics (up to four ICD-9 codes per patient).
They can also be added directly to a specific claim (again, up to four ICD-9 codes
per claim).
59
To define ICD-9 codes for your system:
From the Define Billing menu screen, select ICD-9 Codes.
SchuyLab displays the Update ICD-9 Codes box, listing in numerical order the code
categories.
Select one of the categories from the list to see which codes are on your system.
SchuyLab displays the Update ICD-9 [Code Range] [Category] box.
60
You can click on a code to edit the description, print the list by clicking the Print
button, or click on the Add Code button to add a code to the list. The Add ICD-9
Code box will pop up.
In the Code field, you type in the code number for the new ICD-9 code. In the
Description field, you type in a brief description of the diagnosis.
When complete, select OK. SchuyLab returns to the Update ICD-9 [Code Range]
[Category] box. Select Add Code to insert another code. Click Finished to exit
this Category and return to the Update ICD-9 Codes box.
When you have entered in all the ICD-9 codes in all the categories that you desire,
select Finished. SchuyLab returns to the Define Billing menu screen.
61
Chapter 2 - 3Claims
Creating Claims
To begin billing on a set of claims, they have to be brought from the ‘lab’ side of
the SchuyLab system to the ‘billing’ side (i.e., the Billing Module). This is done
using the Bill Accessions icon.
To import claims to the Billing Module:
From the Billing Module menu screen, select Bill Accessions.
SchuyLab displays the Generate Claims box.
In the Thru Date field, enter the cutoff date for the claims you want to consider. (It
will default to today’s date.)
In the Specimen Number Range, enter the first and last specimen numbers you want
brought over to the ‘lab’ side of SchuyLab. (If your lab doesn’t use date-based
specimen numbers, you might find it hard to remember the specimens for a certain
time period. Print out an Order Log for the appropriate dates and then use the first
and last specimens on the Log.) Leaving the Specimen Number Range fields blank
will cause all the specimens, up to the cutoff date, to be brought over.
When all is ready, select OK. SchuyLab generates claims from the date or
specimen number range that you entered, and makes those claims available to the
Billing Module.
62
Editing Claims
Once the claims have been brought over to the Billing Module, they can be
individually edited if you choose. (You may, for instance, need to prepare them for
billing, or to enter EOB’s; or you might simply want to scan through the Open
claims for those with incomplete information.) This is done through the Edit
Claims icon.
To edit claims that have been generated:
From the Billing Module menu screen, select Edit Claims.
SchuyLab displays the Edit Claims box.
63
In the Search by Status section, select the status of the claims you wish to examine.
This is done by pulling down the status list box.
If no status is selected, SchuyLab defaults to “All” and displays claims from all
statuses. Otherwise, select from one of the following:
64
Closed
Claims whose balances have reached zero ($0.00).
Open
Claims which are available for billing, but have yet to be
examined and set to Ready.
Ready
Claims which are available for printing, electronic
transmission, or invoicing.
Billed
Claims which are awaiting payment, or have been
partially paid and are awaiting future transactions. These
claims have a balance greater than zero.
Similarly, in the Search by Bill Type section, select the bill type of the claims you
wish to examine. (See Billing Setup for how to establish these billing types.) If no
bill type is selected, SchuyLab defaults to “All” and will display claims from all
billing categories.
NOTE: To review the claims that have been entered into SchuyLab without a bill
type, select Open in the Search by Status field and the ‘blank space at the top of
the list’ in the Search by Bill Type field. This will allow you to review all of the
claims that have been entered with ‘blank’ as their bill type. (Presumably you’ll
want to do something about this...)
Once the status and bill type have been selected -- or left blank for “All” -- click on
the First Claim field, and enter the number of the first claim you wish to examine,
and then select OK. SchuyLab displays that claim if it matches the selected status
and bill type; otherwise, it displays the next matching claim.
NOTE: To display the first example in the system that matches the selected status
and bill type, without knowing its specific claim number, simply select OK
without entering a number in the First Claim field. Use the Next button to
progress along the chain of similar claims.
65
You can also bring up the claims for a specific patient by clicking on the By Patient
button. This brings up the Select Patient form.
From this form you can search for a patient’s claims by name, patient ID, date of
birth or client. You also can click on the results for the most recent patient accesses
listed at the bottom of the window (In the example above, Test G. Patient). This
can be up to 5 different patients that SchuyLab has recently brought up. When you
click OK you will bring up the first of any claims that match your criteria.
66
SchuyLab displays the claim information on the Edit Claim screen. The patient’s
information for this claim (e.g., patient name) is displayed in the top panel of the
screen.
There are a number of fields, scroll boxes, check boxes, and buttons to help you edit
this claim as needed. In order, they are:
Claim (the field)
This field shows the Claim number
being displayed; this is synonymous
with the accession (specimen ID)
number. The Claim number cannot be
changed through this field.
Bill Type
Displays the Bill Type assigned to this
patient when entered in the SchuyLab
system. There must always be an entry
in the Bill Type field, or else the claim
can’t be billed. (If there’s no Bill Type,
it can be added through the
Demographics button, as described
below.)
67
68
Payor
Displays the current payor (Medicare,
Medicaid, Insurance, Client, or Patient)
for this claim.
Status
Displays the current status of this
claim. Each claim starts with a status
of Open. When you’ve examined the
claim and made any necessary changes
to the charges or demographics, set the
claim to Ready. This will make this
claim available to the various billing
mechanisms. The claim must be set to
Ready before it can be billed! The
claim cannot be set to Ready until all
the requirements of that particular Bill
Type (e.g., Medicare number, birth
date, &c) have been met.
Paper
Checking this box makes the claim
unavailable for electronic billing; it can
only be printed. (If your SchuyLab
isn’t set up for electronic billing, it
doesn’t matter whether you check this
box. But if you are set up for electronic
billing, then if the Paper box is
checked, the claim can only be printed;
if left unchecked, the claim can only be
sent electronically.)
Employment,
Accident,
Homebound
These three check boxes are for use
when printing on the HCFA-1500 form.
Checking the appropriate box causes
the equivalent area on the form to be
marked.
Diagnosis [ICD-9]
These eight entry fields show the
diagnosis code(s) for this claim. If
ICD-9 codes were entered as part of
Patient Demographics, they will be
displayed here. To change one of those
codes, select that code, and then type in
the code you want. If you want to enter
ICD-9 codes that are specific to this
claim, select a blank entry field and
either type in the code, or (if you don’t
know the code for a particular
diagnosis) select the List button.
SchuyLab displays the Select ICD-9
Codes window, listing the already
entered codes with their corresponding
diagnoses, and allowing you to search
for codes.
In the Search by code or phrase field, type in all or part of the ICD9 Code or
Description. Click on the Search button. Any matches to the search will appear in
the space below. Select the desired codes from the list, and then click on select.
69
When you are finished adding codes, click on the Ok button to save your changes.
SchuyLab returns to the Edit Claims screen, with the selected codes entered in the
Diagnosis fields. You can have up to four ICD-9 codes per claim.
70
Charged, Paid,
Adjusted, Balance
These fields are calculated
automatically by SchuyLab and are
recalculated automatically when items
are added or removed. Charged is the
total of all charges on the claim. Paid
is the total of all payments made.
Adjusted is the total of all adjustments
(such as Write-offs). The Balance is
how much is still owed after Payments
and Adjustments.
Note
Put notes or comments on the claim.
The comments placed here should
apply to the claim as a whole, rather
than to a single line item. (See the
section on Transactions, below, for
printable billing notes that apply to a
single line item.)
Claim (the button)
This option lets you ‘jump’ to
another claim number you want to
view, without having to go one by one
through the claims in sequence.
Prev
Accesses the previous claim
matching the search criteria (if any).
Next
Accesses the next claim matching the
search criteria (if any).
Charge, Payment,
Write Off
These functions will be discussed in
the section on Transactions, below.
Price $
Select this button to reprice the line
items on this claim. If there have been
any changes in prices (e.g., altering the
fee schedule, changing the patient’s
Bill Type, whatever), they’ll be
recalculated and a new value displayed
in the Total field. If a new bundling
has been set up on this claim (after it
was generated), SchuyLab will also
rebundle the tests. The claim status
must be Open or Ready for the Price $
button to work.
Results...
Selecting this button allows you to
view the results of the lab tests
actually run on the patient. Use this
button to insure that all of the tests
performed are being billed as
procedures.
Select F10. Done to leave this screen and return to the Edit Claim screen.
71
Patient...
Selecting this button displays the
Patient Demographics screen. This is
the same screen that’s accessed
through the Patient Processing screen,
on the ‘lab’ side of SchuyLab. Any
changes or additions made to this
screen from Billing will be visible and
accessible to the lab. Likewise,
changes made to this screen through
the lab side will be reflected here.
Notes added to this screen will print out on the patient report, not the claim! Do
not enter printable billing notes on this screen.
The most important things in Patient Demographics, as far as billing is concerned,
are probably the Name and Address, Other ID, Medicare and Medicaid numbers,
the Diagnosis (ICD-9) Codes, the Bill Type, the Doctor and Client names, and the
Insurance. Most of those are self-explanatory, and in any case are discussed more
thoroughly in the SchuyLab User’s Manual. Insurance requires a bit more
explanation, so follow along:
72
Insurance
The Insurance? button on the Patient Demographics
screen lets you enter policy information on the patient.
Selecting that button causes SchuyLab to display the Add
Insurance Policy 1 screen.
Most labs will only have to use four possible Relationships: Self (the default),
Spouse, Child, and Other. If the Relationship field is set to Self, SchuyLab
automatically defaults to the name and address on the Patient Demographics screen.
If any other choice in that scroll box is selected, you have the option of entering
pertinent information into any of the fields. (Note that, if you choose Spouse, the
last name will automatically be set to the Patient’s last name, and the Gender will
automatically be set to the opposite of the Patient. Hey, anything to make your life
easier.) There are also additional relationships labeled Child1, Child2, etc. Unless
the insurance requires that children be numbered (which is currently only in
Curaçao) you should just use Child instead.
73
Complete the fields for the patient’s primary insurance. If the patient has only a
single insurance coverage, select OK. If there’s a second insurance policy, select
Other? SchuyLab displays the Add Insurance Policy 2 box.
This is a duplicate of the Add Insurance 1 box. Simply complete the information
for the patient’s secondary insurance, in the same way you did for the primary
insurance. Then select OK. SchuyLab returns to the Patient Demographics screen.
When you’re done entering or altering data through the Patient Demographics
screen, select F10. Done to save the changes and leave the screen. SchuyLab
returns to the Edit Claim screen.
NOTE: In some cases, you may have to re-generate a claim for the changes in
Patient Demographics to take effect. Simply use the Bill Accession icon, and
bring that single claim across from the ‘lab’ side again.
74
Editing Individual Procedures
The Edit Claim screen displays the procedures for a given claim in its central
window. Date, Type of Transaction, Code, and Description are listed in columns.
(Along with the prices, of course. And if there’s more than one of any given
procedure, SchuyLab will also display the quantity.)
Each of these procedures can be individually edited. To edit a procedure of the
claim, simply point the mouse on that line of the claim and click it. SchuyLab
displays the Edit Charge box.
The Date, Code, Amount, Description, and Qty (quantity) fields are carried over
from the claim itself. You can, if you wish, edit these fields by simply selecting that
field, then typing what you want it to say. Most of the other fields are selfexplanatory, but let me expound on the Diagnosis fields:
The four Diagnosis fields are for apportioning the claim’s ICD-9 codes. If all the
codes on the claim apply to all the procedures on the claim, simply leave these
fields blank. But if some ICD-9 codes only apply to some procedures, use these
fields to specify which codes apply to which procedures. For instance, if the
claim’s first ICD-9 code applies to this procedure, type “1” in the first Diagnosis
field. If the claim’s second and fourth ICD-9 codes apply, type “2” and “4” in two
of the Diagnosis fields. You can enter any combination of “1” through “8” in these
four fields, as appropriate. (These numbers print out in space #24e of the HCFA1500 form.)
When done, select OK. SchuyLab returns to the Edit Claim screen, with the
changes to the procedure reflected in the Total.
Transactions
The Edit Claim screen has four types of transactions which can appear as line items
on a claim: Chg (Charge), Bld (Billed), Pmt (Payment), and W/O (Write Off). Each
of these transactions either creates or modifies a line item on a claim. Chg, Pmt,
75
and W/O are entered by the user through Edit Claims; Bld is inserted on the claim
by SchuyLab after a bill is printed or transferred electronically.
Charge
All procedures on a claim are displayed as Chg. To add
a new charge to the claim, select the Charge button.
SchuyLab displays the Add Charge box.
The Date field will show today’s date by default; this can be overridden if you wish.
In the Code field, enter the CPT code for the procedure being added. In the Amount
field, enter the charge for the procedure (in this above example, $42.00).
In the Description field, enter a brief description of the new charge (i.e., “PSA”). If
you’re entering multiple procedures on this single line, type the number in the Qty
field.
In the Diagnosis fields, enter the numbers (“1” through “8”) of the ICD-9 codes that
apply to this charge. If all the claim’s ICD-9 codes apply, leave these fields blank;
they’ll be filled in automatically.
The Authorization field is optional; if a prior authorization number is required for a
specific charge you can put it in here.
When done, select OK. SchuyLab returns you to Edit Claims, with the new line
appearing as a Chg.
Billed
When a claim is billed electronically or on paper,
SchuyLab creates a Bld entry on the claim noting that this
has occurred. Billed transaction records can be altered
manually.
To take a concrete example: to our previous claim for Mr. Drinkwater, we’ve
added a charge for PSA. We then print the claim on a HCFA-1500 form. When we
76
return to the Edit Claim screen, we see both those actions listed -- a Chg for the
PSA, and a Bld for the bill sent to Medicare -- and the Status of the claim has been
automatically set to Billed.
Payment
A payment on a claim may entered by selecting the
Payment button. SchuyLab displays the Add Payment
box.
The Date field is for the date the payment was received. It shows today’s date by
default, but you can override it by clicking on that field and typing in the correct
date.
The Code field displays the payor from whom the payment was received; the
77
Description field displays “Payment” by default. Both of these fields can be
overridden by the user, if desired. The Entry Date field and By field, on the other
hand, are not changeable; they show today’s date and the operator’s ID,
respectively.
In the Amount field, enter the amount of the payment that was received. In the
Check # field, enter the check number. You can annotate this entry using the Note
and Note Codes fields.
The Batch field is a reference number that allows you to print a report on how much
money was received on a given day. We recommend you leave the Batch field
blank. When that happens, SchuyLab will automatically fill it with a Batch ID
number based on today’s date.
The Invoice # field allows you to associate the payment with the invoice the
payment applies to.
When done, select OK. If the payment is for less than the full amount of the claim,
SchuyLab displays a box showing you the amount remaining on this claim, and
asking you if you wish to write it off.
The full remaining amount is displayed in the Amount to Write Off field by default.
To change this, click on the field, then type in the amount you wish to write off, and
then select Yes. (If you don’t want to write off any amount at this time, you can
either enter $0.00 or select No.)
If the Amount to Write Off is less than the Amount Remaining (or if you selected
No), SchuyLab displays a box, asking if you want to bill the amount remaining to
the next payor on that patient’s Bill Type (in this case, the patient).
78
Select Yes. SchuyLab returns to the Edit Claim screen, showing the payment and
write-off that have been entered, with the Payor field automatically advanced to the
next payor (in this example, from MEDICARE to INSURE1) and the Status
changed to Ready.
The claim is now ready to be billed to the next payor, and the process repeated.
Write Off
In addition to the above method of entering a Write-Off,
you can manually add a Write-Off line to the claim. To
do this, select Write Off. SchuyLab displays the Add
Writeoff box.
The Date field shows today’s date by default; it can be overridden if you wish. The
Code field shows the current payor (in this case, PATIENT).
79
The Description field displays the term “Writeoff”. (For a given claim, you may
wish to use another term, such as “Discount”. In that case, simply select the
Description field and type in the term you wish to use.)
The Reference field, Note, and Note Codes field are optional, and are used to
annotate this transaction.
The Amount field shows the remaining balance for this claim. If you wish to write
off the full amount, simply select OK. If you wish to write off a smaller amount
than the remaining balance, click on the Amount field and type in the amount you
wish to write off, and then select OK.
When the Total reaches zero ($0.00), the Status of the claim is automatically set to
Closed.
Rebilling Claims
Sometimes, after a claim has been billed and sent to the payor, you may need to
rebill it -- send it again. The payor may have disallowed the claim on the first
sending, pending more information (the correct ICD-9 codes, for instance). It may
also happen that, having received payment from your first payor, you wish to bill
only part of the claim to the second payor. Both of these can be done through
SchuyLab.
Rebilling a Claim
The two methods of billing individual claims are Electronic Billing and Paper
Billing (i.e., HCFA-1500 forms). These are discussed more fully in their own
sections of this Billing Manual. But we can give you a sneak preview, so to speak,
and describe a bit of how they work:
80
Before a claim can be billed for its first time, its status must be Ready. Both the
Electronic Billing and HCF1500 icons will ignore the claims whose status isn’t
Ready. Once a claim has been billed (by either method), SchuyLab changes its
status from Ready to Billed. At that point, if you want to rebill it, you must do one
of two things:
Change the status from Billed back to Ready (through Edit Claims);
OR
Check the Rebill Previously Billed box through the HCF1500 (shown below) or
Electronic Billing icons. When this box is checked, these icons look for Billed
claims, instead of Ready claims.
To Rebill Part of a Claim
You may need to rebill only one or two line items on a particular claim -- say, if
Medicare disallowed that test based on the ICD-9 code, and the doctor has since
provided you with a new ICD-9 code to cover it. In that case, you can ‘freeze’ some
of the lines of the claim, so that they aren’t available for rebilling. The other lines
can then be edited as necessary, and rebilled. To do this:
1) Select Edit Claims and go to that claim
2) Choose the first line item you don’t want to appear on the rebill.
81
3) Move the pointer to the place on the line right after the date (as illustrated
below).
4) Click the mouse button and an asterisk * appears at the indicated position. This
means that the selected line item has been paid and will not be rebilled.
5) Repeat the above steps for all the line items that are not to be rebilled.
6) Now you can rebill the claim either electronically or on paper. You can set the
claim status from Billed back to Ready, or you can go straight to the HCF1500
icon and use the Rebill Previously Billed check box. Either way, when you
rebill, only those items without an asterisk will be rebilled.
Printing Reports
SchuyLab’s Billing Module has several report functions for tracking such things as
unmailed claims, past-due claims, or claims for a given client. Three of these are
accessed directly through the main Billing Module menu screen: Open Claims,
Claim Aging, and Batch Payments. The others are accessed through the Billing
Analysis icon.
There are also some reports that, while not billing reports as such, are often of
interest to the billing department of your lab. These are the Patient Demographics,
Client Demographics, and Billing Demographics reports, accessed through the F6.
Print menu screen. The setup and use of these features are described more fully in
82
the SchuyLab User’s Manual.
Open Claims
The Open Claims icon will print a list of all claims within a specified range that are
still Open - that is, that have never been set to Ready or Billed. This is particularly
useful for claims which are automatically be set to Ready when they meet defined
criteria (for instance, that the patient’s date of birth and Medicare number are on
file). Printing the Open Claims report would tell you which claims haven’t yet met
those criteria, and why.
It’s very useful to print the Open Claims report immediately after having brought
the claims to the Billing side via Bill Accessions. That way, you’ll have a list of the
claims that will need to be amended through Edit Claims.
To print the Open Claims report:
From the Billing Module menu screen, select Open Claims.
SchuyLab displays the Print Open Claims box.
Enter the first and last claim numbers (i.e., specimen numbers) of the range to be
included in the report and select the print queue to use. You can also click on
Setup… to assign the default print queue and font for all of your reports. You can
also choose how you want your claims to be grouped together. In the Sequence
drop down box you can choose to group claims by Client or by Bill Type (or leave
blank to not group claims in any special manner). You can also choose to order
your claims by Claim # or by Patient name by clicking the appropriate selection.
When you are done, select OK. SchuyLab prints the report.
83
Claim Aging
The Claim Aging icon will print the claims for a given client, separated by aging
category: 30 days aged, 60 days, 90 days, or 120+ days. (Note that a claim must be
at least 30 days old before it will appear on this report!) The client’s name, the
patient’s bill type (CASH, MEDICARE, &c.), and the aging category can all be
specified.
To print the Claim Aging report:
From the Billing Module menu screen, select Claim Aging.
SchuyLab displays the Print Claim Aging box.
In the Select Billtype pull-down menu you can select a single bill type (CASH,
MEDICAL or MEDICARE for example) or leave it on all to print out all bill types.
In the Select claim age section you can choose all to print all aging categories or
select from any combination of Current, 30, 60, 90 or 120+ days to display in your
aging report.
In the Select for Client field, type in the name of the appropriate client. If you wish
to print a report for all clients, leave the field blank.
You can select the sequence the data will appear from the Sequence pull-down
menu. If you click off the Summary only, the report will display only the summary
information. As before, you can change which queue it will print to with the queue
pull-down menu, or change the default using the Setup button.
When all the fields are ready, select OK. SchuyLab prints the Claim Aging report.
84
Batch Payments
The Batch Payments icon will print a report of the total payments that had been
entered into the individual claims -- a simple form of accounts receivable. Each
payment is assigned a Batch ID number (through the Batch field in the Edit
Payments box). Though you can invent your own system, SchuyLab will assign a
Batch ID number by default, and we recommend that users do this.
To print the Batch Payments report:
From the Billing Module menu screen, select Batch Payments.
SchuyLab displays the Print Batch box.
Enter the Batch ID number for the day you wish to report. By default, the Batch ID
number is set by SchuyLab. It takes the form of a six-digit number: the year, then
the month, then the day. For example, to see the Batch Payments report for June
27, 1998, enter “980627” as the Batch ID number.
When a Batch ID number has been entered, choose a print queue from the pulldown menu and select OK. SchuyLab prints the Batch Payments report.
Billing Analysis
The functions in Billing Analysis are more useful from a managerial viewpoint.
They’re similar in nature, which is why they’ve been grouped onto their own
screen. The six functions -- Monthly Sales, 12 Month Revenue, Sales by Rep,
Client Accounts, Transaction Audit, and Sales Rep Transactions -- track the actual
revenue flow according to date, client, and sales representative.
85
To access the Billing Analysis screen:
From the Billing main menu screen, select Billing Analysis.
SchuyLab displays the Billing Analysis screen.
Each of these reports is accessed by its appropriate icon.
86
Monthly Sales
The Monthly Sales function prints a sales report for a given date range, for any
given client (or for all clients). To access the function, select the Monthly Sales
icon. SchuyLab displays the Sales Report box.
In the Report Date Range fields, enter the beginning and ending dates for the report.
In the Client Name field, type the name of the client you want on the report; if you
leave this field blank, the report will be for all your clients. You can change which
queue it will print to with the queue pull-down menu, or change the default report
settings using the Setup button.
When all the fields are ready, select OK. SchuyLab prints the Monthly Sales
report. Each client’s section of the report will look something like this:
# CLAIMS
Client #1:
INSURE
MEDICARE
MEDICAID
13
45
12
TOTAL
70
%
19
64
17
CHARGES
355.00
1212.95
288.00
1855.95
%
19
65
16
PAYMENTS
ADJUSTMENTS
WRITEOFFS
180.00
635.00
301.78
0.00
0.00
0.00
0.00
0.00
0.00
1116.78
0.00
0.00
At the end of the report will be a summary for all the clients in the report.
Bear in mind that the dollar amounts -- charges, payments, write-offs, &c -- are
those entered during the Report Date Range. They do not necessarily apply to the
same claims. Thus, in the above example, the Medicaid payments for the month of
May don’t equal the Medicaid charges for the same month -- because the payments
apply to charges from previous months, instead. They were the payments entered
in May, not payments for the charges in May.
87
12 Month Revenue
The 12 Month Revenue function prints a sales report for a full year, for any given
client (or for all clients). To access the function, select the 12 Month Revenue
icon. SchuyLab displays the 12 Month Receipts Report box.
Under the heading “Report Date Range”, two fields are shown. Type in the start
and end date that you want the report to cover. In the Client Name field, type the
name of the client you want on the report; leave this field blank if you want a report
on all your clients. You can change which queue it will print to with the queue
pull-down menu, or change the default report settings using the Setup button.
When all the fields are ready, select OK. SchuyLab prints the 12 Month Revenue
report for the twelve-month period ending with the specified date.
88
Sales by Rep
The Sales by Rep function prints a sales report for a given date range, for any given
sales representative (or for all sales representatives). Sales representatives are
initially entered as part of the definition of each client. If you were to select F8.
Tools, Doctor Records, Update Client, and select a client (or create a new client
entry), you’d see the Update Client Record box:
The field labeled Sales is where the sales representative for that client is entered. It
might be the rep’s initials, or a number, but it should be some unique identifier for
that sales rep.
89
Once that’s done, the Sales by Rep function can be used. To access the function,
from the Billing Analysis menu screen, select the Monthly Sales icon. SchuyLab
displays the Sales Report by Rep box.
In the Report Date Range fields, enter the beginning and ending dates for the report
and select a print queue. When all is ready, select OK. SchuyLab prints the Sales
by Sales Rep Report. The headings and layout are the same as the Monthly Sales
Report, above, but all the clients for each sales representative are collected together
under the rep’s name. (There’s even a section for clients with no sales rep entered.)
Transaction Audit
On occasion, you may need to track down exactly when a payment was entered into
SchuyLab, or which claims were billed on the week of 1 April. For those
occasions, the Transaction Audit prints out an audit trail of exactly what, when, and
who, for every billing transaction in a given period.
To access this function, select the Transaction Audit icon. SchuyLab displays the
Sales Audit Report box.
In the Report Date Range fields, enter the beginning and ending dates for the report.
In the Client Name field, type the name of the client you want on the report; if you
leave this field blank, the report will be for all your clients. You can select a print
queue using the print queue pulldown menu.
When all the fields are ready, select OK. SchuyLab prints the Sales Audit by Bill
90
Type report. It will simply list each transaction entered into SchuyLab during the
selected interval: every charge, payment, write-off, or line edit. Each transaction
will also include the date, time, SchuyLab operator ID, client ID#, bill type, and
claim/accession number. Then, at the bottom of the report, it will print the
summary-by-bill type as found in the Monthly Sales report.
Sales Rep Transactions
It is often helpful to separate a transaction audit by sales representative, rather than
client. For this, select the Sales Rep Transactions icon. SchuyLab displays the
Sales Rep Audit Report.
In the Report Date Range fields, enter the beginning and ending dates for the report.
In the Client Name field, type the name of the client you want on the report; if you
leave this field blank, the report will be for all your clients. If you click off the
Summary Only Report checkbox, you will only print the summary information. If
needed, you can change the print queue using the Queue pulldown menu.
When all the fields are ready, select OK. SchuyLab prints the Sales Audit by Sales
Rep report. It will separate out, by sales representative, all the charges, payments,
adjustments and write-offs for each claim, line by line, with totals at the bottom of
the page. (Each sales rep’s numbers are on a separate page, so you can hand one
rep his report without him seeing any other sales rep’s take.) Then, at the bottom of
the report, it will print the summary-by-bill type for all sales reps.
Client Accounts
The Client Accounts function prints a report of the current status of each of your
invoiced clients. This only applies to Client Invoicing, and not to any other type of
claim -- it won’t, for instance, list the HCFA-1500 claims from a given client. (For
that, you should use the Claim Aging report.) To access the function, select the
Client Accounts icon. SchuyLab displays the Client Accounts box.
91
Here you can specify current Queue and Activity level, or go to Setup to specify
default queue and font. In the Activity level box you have a few different choices.
All Accounts
This level will print listings for all
accounts whether they have any
activity or not.
Any Balance
This level will print listings for all
accounts that have a non zero balance.
Past Due 30+, Past Due 60+, Past
Due 90+
These levels will print listings for all
accounts with balances in the
specified range. (i.e. 30 days or older,
60 days or older or 90 days or older)
Note that these settings determine which clients appear and which don’t, not what
information is printed on those clients. In all cases, SchuyLab prints the Client
Account Status report, which looks something like this:
Current
Client #1
10.00
Client #2
0.00
TOTALS
10.00
30 Days
60 Days
90 Days
120+
Days
Balance
Last
Payment
25.00
0.00
0.00
0.00
35.00
3/1/98
17.00
212.56
0.00
0.00
229.56
12/31/97
42.00
212.56
0.00
0.00
264.56
Because the client accounts are cumulative, like your monthly credit card statement,
the totals do add up and can be reconciled.
92
Patient Accounts
Patients Accounts functions almost exactly the same as Client Accounts except
instead of tracking outstanding Client Invoices it tracks outstanding Patient
Invoices. Patient Accounts also starts its options with Any Balance as including
every patient in the database with no outstanding invoice would do nobody any
good except for your lab’s printer paper supplier!
Claim Recap
Claim Recap will print you a report on any specified range of claims regardless of
their current status.
Enter the first and last claim numbers (i.e., specimen numbers) of the range to be
included in the report and select the print queue to use. You can also click on
Setup… to assign the default print queue and font for all of your reports. You can
also choose how you want your claims to be grouped together. In the Sequence
drop down box you can choose to group claims by Client or by Bill Type (or leave
blank to not group claims in any special manner). You can also choose to order
your claims by Claim # or by Patient name by clicking the appropriate selection.
Finally you can click the checkbox next to Print on separate_pages if you want a
page break between every group that you specified in Sequence (This has no effect
if you leave Sequence blank). When you are done, select OK. SchuyLab prints the
report which will have columns for Claim #, Billtype, Date of Service, Patient
Name, Charges, Payments, Writeoff, Adjustments and Balance.
93
Troubleshooting Claims
There will be occasions -- rare, we hope, but it happens to us all -- when you will
have problems with some of your claims. Medical Billing is a complex topic, and
we can’t cover all possibilities here, but some problems crop up more frequently
than others, and there are remedies you can try. All of these examples assume that
the problem is with the claim itself, before we even get to forms and invoices.
There are no procedures on my claim.
Presumably, you’ve gone to Edit Claims, and while the patient’s name and
demographics were in the panel at the top of the screen -- and the claim number
(aka the accession number) was displayed -- there were no procedures to be seen.
The most probable cause is that the procedure codes (CPT codes and such) haven’t
been entered yet. Go to Billing Setup, select Tests or Panels or Procedures (as
appropriate), and enter the procedure codes and prices. Then go back to Billing,
and use Bill Accessions to bring the claim across a second time.
I ordered an Arthritis Panel on a specimen, but the claim doesn’t show an Arthritis
Panel; it shows individual tests.
Two errors might have caused this. First, were all the tests on the Arthritis Panel
actually done? (If you’re not sure, go to Edit Claims, and select the Results
button. SchuyLab will display all the test results that were done on this specimen.)
If all the tests of the Arthritis Panel weren’t done -- say, they cancelled the Uric
Acid -- then SchuyLab couldn’t build an Arthritis Panel for billing. In that case, it
would bill for the tests that were done, as separate line items.
If all the tests on the Arthritis Panel were done is the Arthritis Panel itself set up for
billing? If the Arthritis Panel doesn’t have a procedure code, the Billing Module
will ignore it (and bill its component tests as separate line items). Additionally, if
the claim is a Medicare-style claim, the Arthritis Panel has to have its “CPT” check
box checked. Both of these can be verified through Billing Setup, then Panels.
Select the Arthritis Panel and make sure it’s got its procedure code, and that its
“CPT” box is checked. Then go back to Edit Claims and hit the Price $ button.
If that still doesn’t work, there’s one more thing to try. I know it sounds crazy, but
are you sure you only have one Arthritis Panel? I’ve seen labs that went through
several lab managers, each of whom defined new panels to suit their own personal
tastes. It may be that the Arthritis Panel you’ve set up for Billing isn’t the same as
the Arthritis Panel the lab staff has been ordering. If you can, go to F8.Tools,
Setup, Test & Panel Definition, and finally Panel Definition. See how many
Arthritis Panels are defined in your system. (Then go to Screen Definition to see
which one’s able to be ordered.)
I set up one fee schedule for my doctors, another for Medicare. When I look at the
claim, the wrong prices are displayed for the procedures.
First, make sure that the patient’s demographics are correctly entered. To do this,
from the Edit Claim screen, select the Demographics button. Is the patient’s Client
correct? (Remember, the Client field determines who gets billed, not the Doctor
field!) Is the patient’s Bill Type correct? If not, change them here, and then select
F10. Done, exit the Edit Claim screen, and use Bill Accessions to bring the claim
across again.
If the patient’s demographics are accurate, then go to Billing Setup. Make sure the
fee schedules you’ve defined are attached to the appropriate Bill Types, Insurance
carriers, and Clients. (For instance, the “Medicare” fee schedule should be attached
to the MEDICARE bill type, through the Bill Types icon. The schedule for Client
Billing should be attached to the client record, through the Clients icon. Insurance
schedules should be attached to carriers via the Insurance icon. And so on.)
If the schedules are correctly attached, we have one more place to look. In Billing
Setup, select the Schedules icon. Make sure each schedule is correctly defined. In
particular, make sure that the Medicare-style fee schedules have the “CPT Rules”
box checked. Also, make sure that the “Pct” field has an entry other than zero. I
know one user who had entered a Pct (which is the percentage of the standard price)
of zero, and naturally, all the claims based on that schedule had prices of $0.00.
I ordered a Basic Metabolic panel on a Medicare patient. But the claim shows a
Basic Metabolic panel and an Electrolytes panel! I didn’t order ’Lytes. What
gives?
What gives is that the Basic Metabolic panel wasn’t defined correctly on the ‘lab’
side of SchuyLab. Remember, whenever possible, a large panel should be built
from smaller panels; otherwise, SchuyLab Billing will build both panels. In this
particular case, the Basic Metabolic panel has seven tests: Glucose, BUN,
Creatinine, Sodium, Potassium, Chloride, and CO2. The Electrolytes panel has four
tests: Sodium, Potassium, Chloride, and CO2, matching four of the tests on the
Basic Metabolic panel. So Basic Metabolic needs to be defined, not as seven tests,
but as Electrolytes plus three tests.
To fix this, go to F8.Tools, Setup, Test & Panel Definition, and finally Panel
Definition. Select the Basic Metabolic panel, and change its definition to Glucose,
BUN, Creatinine, and the Electrolytes panel. Select OK, go back to Billing and
Edit Claims, look up the claim in question, and hit the Price $ button.
Chapter 3 - 4Client Billing
Overview of Client Billing
Client Billing creates an invoice for any of the Clients in your database. The
invoice lists the patients’ names and specimen numbers, the procedures and prices
for each patient, and the total amount due. The invoice also displays any past due
amounts from previous invoices, and any new payments made to that Client’s
account. Each invoice has a unique invoice number, automatically assigned to it by
SchuyLab.
An account is the record kept for each Client showing all the financial activity:
invoices billed, payments received, adjustments made. The account number for a
Client is the same as his client ID number, but must be preceded by a “number sign”
(#). Payments and adjustments made to an account are entered through the Edit
Account icon, not through the Edit Invoice icon.
Bill types are the key to Client Invoicing. When defining bill types, you have a
choice of payors to be billed through that bill type: Medicare, Medicaid, Insurance,
Patient, and Client. (Review Section II, Billing Setup, for more information.) Any
bill type with “Client” chosen as a payor is available for Client Invoicing. For bill
types with multiple payors, you must wait until the payor has rolled over to “Client”
before using Client Invoicing; some bill types have only “Client” as a payor, and are
intended solely for Client Invoicing (these are often given names like PHYSICN or
DOCTOR).
Obviously, in order to be billed to a Client, a patient’s claim must specify the
Client’s name -- either as part of the patient entry process (on the ‘lab’ side of the
system), or through the Patient Demographics function of the Edit Claims icon (on
the ‘billing’ side). When claims are written to an invoice, a transaction entry
“Invoice” (and the invoice number) is automatically made on each claim, the claim
is zero-balanced, and the status of that claim is set to Closed. Thereafter, the
balance due is handled as part of the invoice, rather than as individual claims.
There are four icons in the Billing module, specifically designed for use in Client
Billing and invoices: Create Client Invoices, Edit Account, Edit Invoice, and
Print Invoices.
96
Create Client Invoices
Select this icon to generate your client invoices -- usually monthly, but they could
be at any other regular interval. Once this function generates the invoices, they will
automatically be printed. You can generate invoices for all your clients at once, or
choose which clients to invoice at this time.
Edit Account
Use this icon to manage your invoices (deleting or repricing), enter payments, or
make adjustments. To view the contents of a particular invoice, point and click at
the invoice entry in the list box and SchuyLab displays that invoice. Once you’ve
done that, and are looking at a particular invoice, you may view a claim on that
invoice in the same manner: Point and click on the line item representing that
claim, and SchuyLab displays the individual claim information. To ‘back out’ from
the claim level and go back to the invoice, select F9. Cancel. SchuyLab returns you
to the invoice. Do likewise to return again to the account level of processing.
Edit Invoice
The title here is a misnomer. This is intended as a view-only screen; do all of your
processing of client accounts on either the account level or the claim level.
Nonetheless, to view an invoice, select this icon and input the invoice number.
Print Invoices
Use this icon to reprint a range of invoices. It’s also used to define the printer
queue on which invoices are printed.
Generating Invoices
As with any other Billing function, the first step is to bring the
claims from the ‘lab’ side to the billing side of SchuyLab. This is done using the
Bill Accessions icon, as described in Section III of the Billing Manual. Once that’s
done, you can edit any claims that need your attention (via Edit Claims) -- or, since
PHYSICN bill types are usually defined to automatically set claims to Ready, you
can generate your invoices immediately.
97
Note that, once a claim is put on an invoice, its status changes from Ready to
Closed. This guarantees it won’t show up on the next invoice for that Client.
To Generate and Print an Invoice:
1) Select the Create Client Invoices icon. SchuyLab displays the Select Clients to
Bill box, listing all the Clients currently defined in your system.
2) In the “Bill thru” entry field, type the end date of the time period covered by the
invoices. This is usually the end of a month, but can be any other time period
you select.
3) To generate invoices for all your clients, select the Bill All button.
Otherwise....
4) To generate invoices for only certain of your clients, select them from the list.
They’ll be highlighted in dark grey, and the Bill All button will now say Bill
Selected. Push it.
5) SchuyLab will begin printing the invoices.
To Reprint an Invoice:
98
1) Select Print Invoices. SchuyLab displays the Print Invoices box.
2) In the Invoice Range fields, enter the range of invoices to be printed (e.g., 316318). If you only want to print a single invoice, enter its number as both the
start and end of the range (e.g., 316-316).
3) Use the Queue dropdown box to select which print queue to send the invoices
to.
4) To find out which printing options are defined for invoices, select the Setup
button. SchuyLab displays the Configure Invoices box.
Choose the appropriate Queue and Font from their list boxes. If you want a
claim aging summary (current, 30 days past due, 60 days, &c) to print at the
bottom of your invoices, select the “Print Ageing at the End” check box. Select
OK.
5) Select OK. SchuyLab prints the invoices.
99
To View (NOT Edit!) an Invoice:
There may be times when you want to look at an invoice without printing it (other
than the initial invoice generation, which automatically prints the invoice). This is
done through the Edit Invoice icon. The name is misleading: You should not try to
edit any invoice through this function. But it’s useful for viewing purposes.
1) Select Edit Invoice. SchuyLab displays the Select Invoice box.
2) In the “Invoice” field, enter the number of the invoice you wish to view.
3) Select OK. SchuyLab displays the Edit Invoice screen.
4) This function is currently intended ONLY to view invoices. Attempts to
actually edit invoices through this function will result in major problems for the
Billing Module. LOOK, but DON'T TOUCH!
100
5) The items listed are as they appear on the invoice itself: the previous balance
(if any), followed by the individual claims. To look at an individual claim,
select it from the list. (In this example, we’ve selected claim #4010057.)
SchuyLab displays the Edit Claim screen.
Note that the invoice is a line entry on the claim; the Balance is now zero
($0.00) and the Status is now Closed.
Once your review is complete, select F9. Cancel to return to the Edit Invoice
screen, showing the full invoice.
6) To print the invoice, select Print.
7) To leave the Edit Invoice screen, select F9. Cancel. SchuyLab returns to the
Billing Module main menu screen.
Account Maintenance
Once you’ve sent out your invoices, you probably expect payment. Or you
may need to make other adjustments in a Client’s account. Payments, charges and
write-offs can be entered through the Edit Account icon.
Please note that, in some cases, you may want to edit the Client’s account before
101
generating the invoices -- to guarantee that last month’s payments are reflected in
this month’s invoice, for instance.
To enter a payment:
1) Select Edit Account. SchuyLab displays the Select Account box.
2) In the Account entry field, type a number sign (#) and then the number of the
account you wish to see. (The account number is the same as the Client ID
number.) Thus, if you wanted to see the account for Client ID 2, you’d type
“#2”. Without the number sign, SchuyLab looks for a patient account and tries
to find a matching Patient ID number. If you don’t have the Client ID number
handy, you can click on the Client… button, and type in the Client name to find
the account. (The Patient… button is there for patient account management,
see the Patient Invoicing chapter for more details.)
102
3) Select OK. SchuyLab displays the Edit Account screen, listing the account
(Client) information in the nameplate at the top of the screen, and listing the
current activity.
In the above example, we only have a single invoice. Generally, an account
will display several invoices. You can look at any specific invoice by selecting
it from the list. SchuyLab displays the Edit Invoice screen. (And from there,
you can select a specific claim from the list, and get the Edit Claim screen.)
4) Select the Payment button. SchuyLab displays the Add Payment box.
5) In the “Amount” field, enter the dollar amount of the payment. In the “Check
#” field, enter the check number, for future reference.
103
6) In the “Invoice #” field, enter the number of the invoice for which this payment
applies. This makes sure that this transaction is applied to that invoice in
particular, not to the account in general.
7) Select OK. SchuyLab returns to the Edit Account screen, with the payment
entered, and the Total adjusted.
8) When finished, select F10. Done. SchuyLab returns to the Billing module main
menu screen.
To make an adjustment:
1) Select Edit Account. SchuyLab displays the Select Account box.
2) Enter the account number: # _______ . Be sure to precede the account number
with # (the number sign). Select OK.
3) To enter a write-off (the most common form of adjustment), select the Writeoff button. SchuyLab displays the Add Writeoff box.
4) In the “Amount” field, enter the dollar amount of the adjustment.
5) (optional) If you wish to call the adjustment something other than “Writeoff”,
select the “Description” field and enter the name here. (You might want to call
it “Discount”, or “Rebate”, for instance.) You can also annotate the adjustment
using the Note and Result Codes features.
6) In the “Reference” field, enter the number of the invoice for which this
adjustment applies. This makes sure that this transaction is applied to that
invoice in particular, not to the account in general.
7) Select OK. SchuyLab returns to the Edit Account screen, with the new
Writeoff listed, and the Total adjusted.
104
8) To enter a new charge, select the Add Charge button. SchuyLab displays the
Add Charge box.
9) In the “Amount” field, enter the dollar amount of the new charge.
10) In the “Description” field, enter a brief description of the new charge. You can
also annotate the new charge using the Note and Result Codes features.
11) In the “Reference” field, enter the number of the invoice for which this charge
applies. This makes sure that this transaction is applied to that invoice in
particular, not to the account in general.
12) Select OK. SchuyLab returns to the Edit Account screen, with the new charge
displayed, and the Total adjusted.
Altering an Invoice
On occasion, you may need to alter or adjust the contents of an invoice.
Circumstances which can cause this to occur include:
•
•
You find out that several of the patients on an invoice don’t
actually belong to that Client, but to a different one (or to Medicare
or some other bill type).
The Client calls back and points out that you charged the standard
price for a special panel for which you had contracted a special
price. You now need to reprice and reprint that invoice.
In such cases, you want to revise either the contents of an invoice, or the manner in
which it’s billed. We’ve made it deliberately difficult to alter your invoices -- if we
made it too easy, your Accounts Receivable department would get upset at you.
(And us.) But it is possible. Here are the rules to remember:
•
You can make changes to the most recently generated invoice of
any Client. All previous invoices are immutable -- they can’t be
changed. If you want to alter an invoice other than the most recent,
105
you have to delete the most recent one. Then the prior invoice
becomes the most recent invoice (on record, at least), and you can
begin altering it.
•
Invoices that have already been sent to the Client must be treated
differently than those that are still in-house. SchuyLab has no way
of enforcing this, of course -- we can’t tell whether you’ve stuck a
stamp on an envelope -- but it’s the standard accounting practice,
and you should make it part of your Billing Department SOP. If an
invoice is still in-house, you can revise and regenerate it with
relative impunity; if you’ve sent it out to a Client, you need to post
changes as adjustments on the Account, rather than just alter the
invoice. Such adjustments would then appear on the next invoice.
(Think of your monthly credit card bill. If you spot an error, they
don’t send you a new bill: the adjustment shows up on next
month’s bill, right?)
To rebundle and/or reprice the most recent invoice:
1) Leave all the claims set to their current status (Closed).
2) Select Setup Billing. Create whatever changes to the prices, panels, rules,
schedules, etc, that need to be reflected in the new invoice.
3) Select the Client icon. Apply the new Schedule to your Client, if necessary.
4) Select F10. Done to return to the main Billing menu screen, then select Edit
Account.
5) Enter the account number: # _______ . Be sure to precede the account number
with # (the number sign). Select OK.
6) Point and click on the most recent invoice.
7) Select the Price $ button. SchuyLab asks if you wish to reprice the invoice.
Say Yes. SchuyLab reprices that invoice.
8) Select Print to print the newly priced invoice.
To rebundle and/or reprice an invoice other than the most recent:
1) Select Edit Account.
2) Enter the account number: # _______ . Be sure to precede the account number
with # (the number sign). Select OK.
3) Point and click on the bottommost invoice.
4) Select Delete. SchuyLab asks “Are you sure?” Say Yes.
5) Continue repeating points (3) and (4) until you have deleted the oldest invoice
to be repriced.
106
6) Select F10. Done. Now you have deleted the incorrect invoices and are ready to
begin regenerating them.
7) Select Bill. SchuyLab displays a date entry box. Enter the end date of the
oldest invoice to be repriced. SchuyLab regenerates that invoice. (It will
reprint automatically. Throw the printout away.)
8) Point and click on the invoice you have just regenerated and select the Price $
button. SchuyLab now reprices that invoice. Select Print.
9) Continue until you have regenerated and repriced all of the invoices.
To reassign patient claims to another client or bill type:
1) Select Edit Account.
2) Enter the account number: # _______ . Be sure to precede the account number
with # (the number sign). Select OK. SchuyLab displays all of the invoices for
that account. Select the invoice containing the patients whose client or bill type
is to be changed. Ask yourself this question: Am I about to alter an invoice
which has already been sent to a client?
•
If the answer is “Yes”, note down all the claims on the invoice
which are going to be changed. Write down the dollar amount
for each claim. Add the dollar amounts together, and enter that
number as an adjustment on the account. (Remember to enter
the invoice number in the Reference field!) Now go into the
individual claims, and reassign their clients or bill types. Set
them to Ready. They will now rebill automatically.
•
If the answer is “No” (i.e., you caught the problem before the
invoice got out of your hands), then you don’t have to post an
adjustment. Delete the invoice in question, reassign the
patients, and then regenerate the invoice.
107
Chapter 4 - 5Patient Invoicing
Some laboratories will bill the patient directly, instead of through their insurance
companies or clinics. In those cases, SchuyLab provides patient invoicing. There
are two types of patient invoicing, claim based or account based. This can be
designated in Laboratory Options, see the Setup chapter.
Claim Based Invoicing
Claim based patient invoicing is the default setting. In this setting, you will invoice
a patient separately for each claim billed to that patient.
To print patient invoices:
From the Billing Module main menu, select Patient Claims.
SchuyLab displays the Bill Patient Claims box.
From here, the Patient Invoicing functions are accessed. Bill types are the key to
Patient Invoicing. When defining bill types, you have a choice of payors to be
billed through that bill type: Medicare, Medicaid, Insurance, Patient, and Client.
(Review Section II, Billing Setup, for more information.) Any bill type with
“Patient” chosen as a payor is available for Patient Invoicing. For bill types with
multiple payors, you must wait until the payor has rolled over to “Patient” before
using Patient Invoicing; some bill types have only “Patient” as a payor, and are
intended solely for Patient Invoicing (these are often given names like PATIENT or
CASH).
108
The first step is Setup, to insure that the patient claims print to the desired printer
queue. To do this, select Setup. SchuyLab displays the Configure Patient Claims
box.
From the Queue list field, select the printer queue you wish to use for patient
invoices. From the Font list field, select the font you wish to use (this should
probably match the font used in the other reports in your system). When complete,
select OK.
The Patient Claims is now ready for use. At this point, you have two choices. You
can print a test case, to make sure your printer is properly aligned, and so forth.
(We recommend this.) Or you can print your patient claims.
To test the Patient Claims feature:
1) From the Billing Module main menu, select Patient Claims.
displays the Bill Patient Claims box.
SchuyLab
2) Select the Test Billing option (that is, put a check mark on that box).
3) In the Claim Number Range field, enter a single claim number (twice). The
claim should have PATIENT as the payor, and its status should be Ready.
4) Select Bill. SchuyLab prints the designated invoice to let you check for paper
type and alignment. The status of the test claim does not change from Ready,
and the invoice does not appear on the claim.
To bill patient claims:
Once you’ve tested your printer, you’re ready to print patient invoices.
1) From the Billing Module main menu, select Patient Claims.
displays the Bill Patient Claims box.
SchuyLab
109
2) In the Claim Number Range field, enter the range of claim numbers (i.e.,
specimen numbers) to be printed.
3) Select Bill. SchuyLab creates patient claim invoices for all Ready claims whose
payor is “Patient”, within that range of numbers. SchuyLab prints the invoices
on the queue defined in Setup. It then sets the status of each claim to Billed,
and creates a line item of the date billed on each claim.
To rebill patient claims:
Let’s say you’ve printed out your patient invoices, and now you need to print them
again. (Maybe somebody spilled creatinine reagent all over them.) To do this:
1) From the Billing Module main menu, select Patient Claims.
displays the Bill Patient Claims box.
SchuyLab
2) Select the Rebill Previously Billed Claims option (that is, put a check mark on
that box).
3) In the Claim Number Range field, enter the range of claim numbers (i.e.,
specimen numbers) to be printed.
4) Select Bill. SchuyLab prints the invoices, on the queue defined in Setup, for all
Billed claims whose payor is “Patient”, and adds another line item to each
claim, with the date billed.
Account Based Invoicing
The second way to do patient invoicing in SchuyLab is to use account based patient
invoicing. Using this type of patient billing, patients are treated like clients, with
account numbers and multiple unpaid claims combined on one invoice.
When you are setup to do account based patient invoicing and enter billing you get
a different icon than you do with claims based patient invoicing. Patient Claims is
replaced with Create Patient Invoices.
To create patient invoices:
From the Billing Module main menu, select Create Patient Invoices.
110
This is where you will generate patient invoices for your accounts. You get the
following screen.
If you click on List… at this point you will be taken to a listing of all the possible
patients to bill where you can check them on or off.
Clicking on Setup brings up the Setup Patient Invoicing window.
Placing a number in the days before rebilling box will set the minimum amount of
time between a patient getting billed and being eligible to be billed again. So if you
send out patient invoices every Friday, but set the days before rebilling to 14, then
even though you are creating invoices once a week, an individual patient will still
have 2 weeks to pay you before they are invoiced again. If you check off “Paid
accounts may be billed immediately for new services” you allow exactly that. If
that is not checked off, SchuyLab will wait the number of days specified in the
number of days before rebilling box before sending out a new invoice. If you check
off “do not print zero balance invoices”, invoices won’t be printed if their balance is
111
zero. What a surprise!
The notes area allows you to customize the notes that will be printed with the
invoices for past due and current accounts. These will only apply to patient
invoices, there are a separate set of notes for client invoices (Accessible from the
Create Client Invoices process, of course). A note on the patient account itself will
override these default notes if you need to send a patient a specific message.
With account based patient invoicing the Edit Account and Edit InVoice buttons
on the billing menu do double duty. Edit InVoice will bring up whatever invoice
matches the number you put in, which can be either a client or a patient invoice.
Edit Account will continue to bring up client accounts when you put in the client’s
account number preceded by the # character. However, if you put in a number with
no #, it will look up patient account numbers, instead. So type in #56 to get client
account 56 and type in 56 to get patient account 56.
You can also look up a patient account by clicking on the Patient… button. This
gives you the following screen.
You can look up the patient by name, ID, date of birth or patient’s client here. If
you have recently looked at a patient’s information they will also be listed below
the OK and Cancel buttons, and you can just click on their name to go to that
account.
112
Chapter 5 - 6Paper Billing
While Electronic Billing is becoming more and more common, there is still a need
for paper claim forms. The most common claim form you will want to generate in
the United States is the HCFA 1500.
Printing HCFA 1500 Forms
Any claim in the SchuyLab Billing Module can be printed on a HCFA 1500 form,
regardless of its default method of printing or transmission.
To print a HCFA 1500 form:
1) Load your HCFA 1500 forms into the billing printer. (That is to say, a printer
set on the billing queue. If you’re not sure whether a printer is set to the billing
queue, sign onto the station controlling that printer, go to F8. Tools, and select
Printer Setup. It will give the current queue for that station’s printer; if it’s not
“Billing”, set it to Billing and select OK.)
2) Select the HCF 1500 icon. SchuyLab displays the Generate HCF1500 Claims
box.
3) Set a single number in the “Claim Number Range” entry fields (i.e. 10011001).
4) Point and click on one of the entries in the “Payors” list box.
5) Check the box labeled “Test Billing”, and select the Generate button.
SchuyLab will print out that one HCF 1500 form (without setting that claim to
Billed). Now go over to the printer and check your paper for alignment.
113
Continue this process until the HCF 1500 forms are properly aligned.
6) Now enter the complete number range for the claims you wish to print in the
“Claim Number Range” fields and select a “Payor”. Uncheck Test Billing
(Now that it is aligned and you are printing actual forms).
7) If you are re-generating HCF 1500 forms for claims which are already set to
status Billed, click the check mark on the “Rebill previously billed” box.
8) Select Generate. SchuyLab prints out all the status Ready claims of the
selected bill type (“Payor”) between that pair of numbers (inclusive). If you
select the “Rebill previously billed” option, all of the Billed status claims of the
selected bill type are printed.
Printing Non-HCFA Claims
While most claims printing for US labs can be handled with the HCFA 1500 form,
if you need to fill out other claims forms whether for specific insurers, or for
processing by non-US insurers, SchuyLab can handle that as well.
In the Setup chapter you’ve seen how to create reports to print paper claims, and
how to link them to the insurance they will be used with. Here we will show you
how to generate those claims, once they have been setup.
If you setup a report or reports of type Claim in the reports section, and associated
insurance companies with that report you can print claims for those companies.
114
Select F7.Features.
Select Billing.
Select Paper Claims.
This takes you to the Print Paper Claims window.
Any claims that you have setup will appear in the Paper Claim Format drop down
menu. CHDP appears by default, but any others will need to be setup as described
in the Billing Setup section. Choose the paper claims format that you wish to bill
from the pull down menu, enter in a starting and an ending claim number in the
claim number range and check off any options you choose to use. SchuyLab will
print your claim forms to the Billing Queue.
The Test Billing option will print the claims without actually updating your claims
in SchuyNet. This is useful for verifying that your claim matches up with your form
when you print it out without having to regenerate claims for each test.
The Rebill previously billed claims option determines whether the printout will
include claims in the given range that have already been billed in some capacity, or
it will only include claims that have never been billed before. This is useful in
regenerating claim forms that you have accidentally lost, shredded, dropped in
hydrochloric acid, etc.
115
Chapter 6 - 7Electronic Claims
SchuyLab has electronic claims billing utilities available for separate purchase with
the billing module. (Contact your SchuyLab Rep for pricing). You can buy as
many as your laboratory needs, and purchase additional interfaces as your needs
grow. Currently there are electronic billing interfaces designed for Medicare,
Medicaid and several insurance clearinghouses. Each of these utilities takes the
claims for its payor that have been set to Ready status, and creates an electronic file
of them. The files can then be transmitted in the ANSI 4010 protocol. Any
commercially available modem software can be used to transmit the files, we find
that HyperTerminal works fine and is included with standard Microsoft Windows
installations. The exact procedures will vary from state to state and which
clearinghouses
you
use.
(Update:
Windows Vista no longer includes HyperTerminal by default, if you need to use a
Vista machine to dial into your insurance carrier’s site, you will need to purchase
separate software to do so.) We use Southern California Medicare and Medicaid in
our examples, but while the method SchuyLab uses to generate the electronic file
will generally be the same, you will want to check with your local provider and
Schuyler House on the best means of transmission.
Setting up Electronic Claims
Before we begin, we would like to remind you that Electronic Claims needs some
setup before it will work. (We will just review the main points here. Go back to
Section 2: Billing Setup, in this manual, for complete details.) From the Define
Billing menu screen, here’s where you should look:
Go to Electronic Billing. In the Update Electronic Payors box, are Medicare and
your state’s Medicaid listed? Select each one in turn. Is the correct format (ANSI
or NSF) in place? Are the Payor’s Organization, Submitter ID, Receiver ID, Name
of Contact, and Export Pathname all correctly entered?
Go to Insurance. In the Update Insurance Carriers box, are Medicare and your
state’s Medicaid listed? (They’ll be at the very bottom of the list, and their ID
numbers will begin with the letter ‘X’.) Select each one in turn. In the Electronic
field, is the appropriate Electronic Payor entered? If it says “N/A”, Electronic
Billing won’t work.
Go to Laboratory Options. In the Laboratory Billing Options box, is one of your
Electronic Payors entered? It doesn’t matter which one, but one of them has to be
there; if it says “N/A”, Electronic Billing won’t work.
116
In addition, before you can begin Electronic Billing, Medicare and Medicaid require
you to have accounts with their BBS systems; these come with submitter ID
numbers and passwords, which are over and above your provider ID or CLIA
numbers.
Using Electronic Claims
Okay, now that we’ve reviewed our setup, we’re ready to begin using Electronic
Claims. Remember, Electronic Claims works in much the same way as the HCFA1500 forms. In both cases, the claims have to be set to the correct payor, and their
status set to Ready, before they can be billed. The only real difference between
Electronic Claims and HCFA-1500 forms is where the information is sent: to the
printer, or to a diskette.
To use Electronic Claims:
From the Billing menu screen, select Electronic Claims.
SchuyLab displays the Electronic Claims screen.
In this example, there are two icons visible: one for Medicare, one for MediCal
(California’s version of Medicaid).
ER - 117
Medicare
Most labs’ electronic transmissions will be for Medicare claims. The
Medicare age group is the most rapidly growing section of the population, after all.
To prepare the Medicare file:
1) From the Electronic Claims menu screen, select the Medicare icon. SchuyLab
displays the Export ANSI claims to MEDICARE box.
2) Put a formatted diskette in your A: drive.
3) The Select Path field displays the default pathname you defined as part of
Electronic Billing setup. If you wish to override this and type in another path,
select this field, then type it in.
4) In the Claim Number Range fields, enter the first and last claim numbers you
wish to transmit.
5) If this is a test transmission to Medicare (to see if it works), check the “Test
Billing (no status change)” box. This tells SchuyLab to not change the claims’
status from Ready to Billed as they’re exported.
6) SchuyLab will normally look only for Medicare claims whose status is set to
Ready. If you wish to retransmit previously billed claims, check the “Rebill
previously billed claims” box. This tells SchuyLab to look for claims whose
status is Billed, instead of Ready. You can put in a bill date and time for a
118
previous transmission at this point to specify a specific set of claims to rebill.
7) Select Export. SchuyLab writes all of the Medicare claims within that range to
the diskette.
Setting up your modem software for Medicare:
Before you can send files over the phone lines, you’ll need to set up your modem
software with such trifling details as Medicare’s phone number, baud rate, &c. The
exact commands necessary to set up your modem software will, of course, depend
on which software your lab has purchased. There are many different modem
software packages commercially available. HyperTerminal is a program that comes
with all recent Windows installations, and we will be using the Windows XP Pro
version of it for our example. Setup for other programs will require similar
information, but may use different commands.
DISCLAIMER: HyperTerminal is not a product of Schuyler House. Schuyler
House does not program, maintain, train, or support HyperTerminal. Please
refer to your HyperTerminal or Windows documentation for any questions
regarding these products. We have included these instructions here as
examples and for your convenience only.
For HyperTerminal:
1) Go to the computer station with the modem. (If you aren’t sure which computer
that is, check the back of the computer; there should be a telephone line plugged
into the modem.)
2) Log out of SchuyLab.
3) Select HyperTerminal. To access it through the Start Menu the path would be
Start > All Programs > Accessories > Communications > HyperTerminal.) To
establish a new connection click on the icon rather than the HyperTerminal
folder.
4) When you first bring up HyperTerminal, it asks you to create a new connection:
“Enter a name and choose an icon for the connection:”. In the Name field, type
“Medicare BBS” (or whatever label you wish for the new connection). From
the row of icons, select the icon you’d want to click on to call Medicare. Select
OK.
ER - 119
5) HyperTerminal next asks, “Enter details for the phone number that you want to
dial”. Complete the fields as shown here (in this example, we’re using the
Medicare BBS for Southern California):
Country Code
Area Code
Phone number
Connect using
United States of America
213
741 7522
(whatever modem is installed in your computer)
When done, select OK.
6) HyperTerminal now displays the Connect box. If you need to make last-minute
changes to the phone number, &c, select the Modify... button.
7) Your computer modem should already be set up for your laboratory, but it
might need some final entries. The most common will be if your phone system
requires you to dial “9” for an outside line. If that’s the case, select the Dialing
Properties button. In the field labeled “To access an outside line, first dial:”,
type “9”. Select OK to return to the Connect box.
8) Select Dial. If everything has been set up right, HyperTerminal should begin
dialing the Medicare BBS phone line. Select Cancel before it can complete it.
9) From the menu bar, select File > Exit. The Medicare BBS phone number is
now set up in HyperTerminal.
First Transmission to the Medicare BBS:
Before using Electronic Claims with Medicare you will need to enroll in your
region’s Medicare BBS system. They should give you a submitter ID and password
(or the equivalent for their system). Once your Medicare BBS account is ready to
be used, you should transmit a small set of claims, just to be sure that everything is
set up correctly.
1) Have ready a diskette with a file of valid Medicare claims -- between ten and
twenty of them. Be sure you know the file’s name, as defined in SchuyLab’s
Export ANSI Claims to Medicare box. Refer to the above section, “To Prepare
the Medicare File”.
2) Go to the terminal with the modem. Log out of SchuyLab and into your modem
software:
HyperTerminal: From Windows XP, go to the Start Menu. The path
should be Start > All Programs > Accessories > Communications >
HyperTerminal. You can use the HyperTerminal folder to see your
selection of possible connections. Select the Icon you setup in the previous
section.
3) Select OK, and then Select Dial to call up the BBS.
120
4) Once you’ve connected to the Medicare BBS system, you’ll see a screen that
looks like this:
5) Type in your nine-digit submitter number and Enter.
6) You’ll be prompted for your password. Type in your password and Enter.
7) The Medicare BBS will now show you the Main Menu:
Type “3” and Enter.
ER - 121
8) You will get the Claims Submission Menu:
Type “1” and Enter
9) You’re given a list of protocol options:
Type “3” and hit enter.
122
10) The Medicare BBS will give you the following choices.
You will want to start out with test transactions, so we will choose “2” and hit
enter.
11) Medicare is now ready to receive your file. Use your modem software to begin
transmission:
HyperTerminal: From the menu bar, select Transfer > Send File.
HyperTerminal will ask for the name of the file. Type “A:\MEDICARE”
(or whatever the name you exported from SchuyLab) and Enter.
The modem software will keep track of your progress in sending the file
(“50%”, “75%”, &c). When it’s done, you’ll return to the Medicare BBS
screen.
12) Disconnect and Exit from the Program
HyperTerminal: From the menu bar, select Call > Disconnect.
choose File > Exit to close the window.
Then
Subsequent Transmissions to the Medicare BBS:
As soon as your test transmission is validated, you’ll be able to send as many claims
as you want to the Medicare BBS. The steps are exactly the same as they were for
the first transmission, except that the files, being larger, will take longer to transmit
over the phone lines. You may want to time your calls for early in the day, to avoid
busy signals.
Follow the instructions given above. To recap them:
1) Generate claims on SchuyLab and export them to a diskette.
2) Log into your modem software and connect to the Medicare BBS.
3) From the Main Option Menu, select option 3: Claims Submission
Menu.
4) Select Option 1: Setup CABBS to Receive Claims
5) Select ZMODEM.
6) Select Production Mode if you are sending actual claims.
ER - 123
6) Begin transmission of the file.
7) When done, leave the modem software and return to SchuyLab.
Medicaid
Medicaid billing will vary from state to state. The following instructions,
for California Medicaid (MediCal), are typical.
To prepare the MediCal file:
1) From the Electronic Claims menu screen, select the MediCal icon. SchuyLab
displays the Export ANSI claims to MEDICAL box.
2) Put a formatted diskette in your A: drive.
3) The Select Path field displays the default pathname you defined as part of
Electronic Billing setup. For MediCal, the file must be named “MCALTELE”.
4) In the Claim Number Range fields, enter the first and last claim numbers you
wish to transmit.
5) If this is a test transmission to MediCal (to see if it works), check the “Test
Billing (no status change)” box. This tells SchuyLab to not change the claims’
status from Ready to Billed as they’re exported.
6) SchuyLab will normally look only for Medicaid claims whose status is set to
Ready. If you wish to retransmit previously billed claims, check the “Rebill
124
previously billed claims” box. This tells SchuyLab to look for claims whose
status is Billed, instead of Ready. You can put in a bill date and time for a
previous transmission at this point to specify a specific set of claims to rebill.
7) Select Export. SchuyLab writes all of the MediCal claims within that range to
the diskette.
Setting up your modem software for Medicaid:
Before you can send files over the phone lines, you’ll need to set up your modem
software with such trifling details as Medicaid’s phone number, baud rate, &c. The
exact commands necessary to set up your modem software will, of course, depend
on which software your lab has purchased. There are many different modem
software packages commercially available.
HyperTerminal is a program that comes with all recent Windows installations, and
we will be using the Windows XP Pro version of it for our example. Setup for other
programs will require similar information, but may use different commands.
DISCLAIMER: HyperTerminal is not a product of Schuyler House. Schuyler
House does not program, maintain, train, or support HyperTerminal. Please
refer to your HyperTerminal or Windows documentation for any questions
regarding these products. We have included these instructions here as
examples and for your convenience only.
For HyperTerminal:
1) Go to the computer station with the modem. (If you aren’t sure which computer
that is, check the back of the computer; there should be a telephone line plugged
into the modem.)
2) Log out of SchuyLab.
3) Select HyperTerminal. To access it through the Start Menu the path would be
Start > All Programs > Accessories > Communications > HyperTerminal.) To
establish a new connection click on the icon rather than the HyperTerminal
folder.
4) When you first bring up HyperTerminal, it asks you to create a new connection:
“Enter a name and choose an icon for the connection:”. In the Name field, type
“Medicaid BBS” (or whatever label you wish for the new connection). From
the row of icons, select the icon you’d want to click on to call Medicaid. Select
OK.
ER - 125
5) HyperTerminal next asks, “Enter details for the phone number that you want to
dial”. Complete the fields as shown here (in this example, we’re using the
MediCal BBS for California):
Country Code
Area Code
Phone number
Connect using
United States of America
916
638 9838
(whatever modem is installed in your
computer)
When done, select OK.
6) HyperTerminal now displays the Connect box. If you need to make last-minute
changes to the phone number, &c, select the Modify... button.
7) Your computer modem should already be set up for your laboratory, but it
might need some final entries. The most common will be if your phone system
requires you to dial “9” for an outside line. If that’s the case, select the Dialing
Properties button. In the field labeled “To access an outside line, first dial:”,
type “9”. Select OK to return to the Connect box.
8) Select Dial. If everything has been set up right, HyperTerminal should begin
dialing the Medicare BBS phone line. Select Cancel before it can complete it.
9) From the menu bar, select File > Exit. The Medicare BBS phone number is
now set up in HyperTerminal.
10) (For California residents) In addition to the MediCal production line, described
above, there’s a MediCal test line, to allow you to send a test case to MediCal
for them to check. Repeat steps 3-9, above, substituting “MediCal Test” for the
name of the entry, and using the phone number 1 916 638 8127.
First Transmission to the Medicaid BBS:
Once your Medicaid BBS account is ready to be used, you should transmit a small
set of claims, just to be sure that everything is set up correctly. As before, the
examples used here are for California’s MediCal system. Remember, there are two
phone lines for MediCal: one for test transmissions (like this one!), and one for all
transmissions thereafter (the so-called ‘production line’). You will normally need
to get some information ahead of time from your Medicaid agency. In the case of
MediCal you will need to get a submitter ID # and a password.
1) Have ready a diskette with a file of valid MediCal claims -- between ten and
twenty of them. Refer to the above section, “To Prepare the MediCal File”.
2) Go to the terminal with the modem. Log out of SchuyLab and into your modem
software:
From Windows, select Start > Programs > Accessories > HyperTerminal.
126
3) Call the MediCal Test Transmission phone number:
Select the MediCal Test icon. Select Dial.
4) The MediCal BBS will show you the sign-in screen:
5) At the prompt, type “CMCSUB” and then your submitter ID and press Enter.
So if your submitter ID was RJ45 you’d type in CMCSUBRJ45 and then press
Enter.
6) The screen then prompts you for a password.
received from MediCal and press Enter.
Type in the password you
7) Once you’ve logged in successfully, the MediCal BBS will show you any
current messages and ask you to press Enter to continue.
8) The MediCal BBS will next bring up the Main Menu Screen. Type “F” to bring
up the file menu.
9) Type “U” to upload files.
10) You are now given a choice of protocols to upload under.
Zmodem.
Type “Z” for
Hit Enter
11) Use your modem software to begin transmission:
HyperTerminal: From the menu bar, select Transfer > Send File.
HyperTerminal will ask for the name of the file.
Type
“A:\MCALTELE” and Enter.
The modem software will keep track of your progress in sending the file
(“50%”, “75%”, &c). When it’s done, you’ll return to the MediCal BBS
screen.
12) At the end of the transmission, the computer will emit a series of beeps to let
you know it’s done. MediCal then displays the number of files sent, shows any
transmission errors, and gives the dollar amount for that transmission. Write
down that information and keep it until you’ve received your reimbursement.
13) Hit Enter. The MediCal BBS returns to the File Transfer Protocol Selection
Menu. Type “Q” and Enter to leave the BBS.
14) Leave the modem software program and return to SchuyLab.
Subsequent Transmissions to the Medicaid BBS:
As soon as your test transmission is validated, you’ll be able to send as many claims
as you want to the MediCal BBS. There’s a different phone number to use -- that’s
why we set up two different entries in your modem software -- but the steps are
exactly the same as they were for the first transmission. (Except that the files, being
larger, will take longer to transmit over the phone lines.) You may want to time
your calls for early in the day, to avoid busy signals.
ER - 127
Follow the instructions given above. To recap them:
1)
2)
3)
4)
5)
6)
7)
Generate claims on SchuyLab and export them to a diskette.
Log into your modem software and connect to the MediCal BBS.
Type “cmc”, Enter, “cmcMode”, and Enter.
From the File Transfer Protocol Selection Menu, select ZMODEM.
Enter your submitter number and password.
Begin transmission of the file.
When done, leave the modem software and return to SchuyLab.
If you have any questions regarding the MediCal TelePoint system, including the
status of any of your claims transmissions, call their CMC Technical Support at
(916) 636-1100. The most common problem is a ‘freezing’ of the line; that’s
simply the BBS being overloaded, and there’s nothing to do but log out, wait a few
minutes, and try again.
128
Chapter 7 - Electronic
Remittance
Setting Up The Medicare BBS Connection
This document is to show you how to setup a typical HyperTerminal connection to
the Medicare's BBS system. In this document, we make the assumption that you
have Windows XP Pro on your computer and many of the examples we will be
using involve Southern California Medicare. Other regions will normally have
similar but not exactly the same setup.
Start by bringing up HyperTerminal. You do this by going to the Start Menu, then
choose All Programs then Accessories then Communications and choose
HyperTerminal.
At this point, HyperTerminal opens and gives you the New Connection dialog. First
type in your state’s Medicare (i.e. SoCal Medicare) and then choose an icon or just
click OK to use the default icon.
ER - 129
HyperTerminal will then ask you to enter the area code and number you will use to
dial. At the time of writing, the possible numbers for Southern California are (213)
593-5943 or (530) 879-1774. You will also want to make sure that the "Connect
Using:" drop down menu is set to your modem (if your modem is in a computer that
came with your SchuyLab system, it is probably a MultiTech modem. Otherwise, if
you don’t know which device is your modem on the dropdown menu, contact your
IT person or whoever provided your computer to get that information). When this is
done, click OK to continue.
You will now be at the Connection window. At this point, if your modem location
settings are properly setup you can just click OK to dial your connection
immediately. When HyperTerminal asks you if you want to save this connection,
click yes.
130
If you have problems connecting at this point, it may be that your settings are not
setup properly. In that case, you should click on Dialing Properties and then on Edit
to adjust your local settings to conform to your phone system. If you need to dial 9
before getting an outside line, or need a special code to dial long distance you
would set those properties up there.
You are now ready to connect and download your 835 file.
ER - 131
Retrieving 835 Files
Quick Reference Summary
1)
2)
3)
4)
5)
6)
7)
8)
9)
10)
Bring up HyperTerminal or other terminal program.
If menu screen does not come up hit enter key
Login using your submitter ID and password
When the menu screen comes up type 1 to go to the Electronic Mail Menu
Type 1 on the Electronic Mail Menu to go to Display/Send/Receive Mail
Type 6 to Download mail to PC, and choose the files you wish to download
by typing in the corresponding number
When you are prompted about transmission protocol, choose one, Zmodem
is generally a good choice if your terminal supports it.
Press Enter to start downloading files, they will be saved as MAIL.###
When you are finished downloading, quit out of the program.
SchuyLab displays the Billing Module screen.
To start out with you will use HyperTerminal to access the Medicare BBS. Go to
the Start Menu by clicking on the Start button in the lower left of the screen, when
the menu pops up choose All Programs, then Accessories, then Communications. If
you see two choices that say HyperTerminal, one should be a folder icon, the other
one will be the program icon. If you have already setup the Medicare BBS as a
choice, you should click on the HyperTerminal Menu and then choose the Medicare
BBS icon. If you have not yet setup the connection, you should follow the steps in
Setting Up Your Medicare BBS Connection.
HyperTerminal should automatically dial and connect to the Medicare BBS at this
point. In many cases your screen may be blank, with just a blinking curser line. If
this happens hitting the Enter key will bring up the login. Type in your submitter ID
and then when prompted type in your password. You will then get the following
menu.
132
You will then type 1 to go to the Electronic Mail Menu. That menu looks like this.
Type 1 again to go to the Display/Send/Receive Mail Menu
133
At this menu you will type in 6 to Download Mail to your PC. You will then get a
numbered list of possible mails to download.
The one you are looking for will be listed as an 835 file, and normally you will be
looking for the most recent one. If you do not find it on the initial list you will need
to go through the available emails by using the "N" and “P” commands until you
find it. When you find it, type in the corresponding number for that email (in this
case, it’s #4).
134
You will now be given a choice of download protocols. Schuyler House
recommends using number 3, Zmodem. When you type the #3 in, and then hit enter
when prompted, you should begin downloading the file to your default directory.
You should write down the filename that appears at this time, so you can type it in
when processing the remittance. (The file will be named MAIL.###, where ### is a
unique number assigned by the Medicare BBS.)
When the download is finished you can exit the program and disconnect.
Setting up Remittance
Now our section on retrieving the 835 files works fine for what it is, a description of
processes for one carrier, California Medicare. But even so we can see a couple of
problems with it. The first problem is that it is sending the files to a folder with a
rather long pathname that has nothing to do with billing, or 835 files or the like.
The second is that the filename that we are getting, Mail.594, doesn’t tell us much
about this remittance, or even that it is a remittance file (and as it happens, this is
the same format that California Medicare uses if you download 997 files or
anything else from their server).
Now the issue of the pathname is an important one for organizational purposes, and
if the pathname is too long it can make it difficult to actually process the 835 file!
Schuylerhouse therefore suggests that for best practices you create a special
directory for storing your remittance files, and that you setup HyperTerminal or
whatever your communications program is so that it will download files directly to
that folder.
135
Setting up download folders
The exact process for creating new folders on your hard drive will vary slightly
depending on what operating system you are using, but will be fairly analogous for
most systems that SchuyLab will run on. The majority of our current customers use
Windows XP Professional, so we will use that OS for our example.
In XP, you can accomplish this task in many ways, here is one of them.
1)
2)
3)
4)
5)
6)
7)
8)
Go to the machine that will be downloading your 835 files.
Click on the Start button in the lower right hand corner of your screen.
From the provided menu, choose My Computer.
On the window that pops up, in the area labeled hard drives, double click on
the C: drive.
On the side bar on the left side of the window, under File and Folder Tasks
choose Make a New Folder, this will pop up a new folder in the folder
listings to the right with New Folder highlighted in blue.
Type in 835 and press the Enter Key.
Double-Click on this new folder to bring it up.
Depending on your needs you may want to have process remittances from
Medicare, Medicaid and/or various Insurance Clearinghouses. For each one
you wish to add, follow step 5 above, and then step 6, replacing 835 with
the name of the processor (ie. Medicare).
For the moment, let us assume that you have made one folder in step 8, and named
it Medicare. We have now created the folder where our 835 files will get
downloaded.
Next, we want to adjust HyperTerminal to download files to the correct directory
when we grab them. Following our example from the previous section, we have a
HyperTerminal selection labeled SoCal Medicare.
1) Following the instructions in Retrieving 835 files (immediately following
the numbered list) bring up your HyperTerminal Connection for Medicare.
You will be given a choice to Dial or Cancel.
2) You can choose either for this purpose, but for now we will choose Cancel,
so we aren’t tying up lines. This will bring up an empty terminal window,
with a toolbar and menu bar.
3) On the menu bar choose Transfer and then choose Receive File. This will
bring up the Receive File window.
4) Where it says place received file in the following folder, there will be a
folder pathname listed, highlight this pathname and then press the delete
key on your keyboard.
5) Type in the path of the folder where you want the files to go, in our
example this is “c:\835\Medicare”.
6) Click the close button. Your receive directory has now been changed. You
can exit HyperTerminal at this point by clicking the red X in the upper right
hand corner of this window.
136
7) If you have HyperTerminal connections for any other place that you have
electronic remittance for, follow this same process for them, typing in the
appropriate path in step 5.
So now we move on to the next issue, uninformative file names.
Changing the names of your downloaded files
As we noted, California Medicare sends files that your grab from their mail menu
with names in the form of MAIL.# where # represents a number from their mail
system. While this may be useful for them, it isn’t much help to you if you want to
go back later and find out what 835 file you are dealing with. Other insurance
providers will even send their files to you under the same name every time, which
will overwrite any previous file that you have sitting in that folder. In any case, it is
rare that they will send it with exactly the name that you want, which is why we
recommend changing your file names immediately after you receive a file.
How do you do this? There are many ways once again, but we will try to provide a
simple one.
First we need to go to the folder where the file was downloaded. Often when we
train remittance, Schuyler House will put a shortcut on your desktop to take you
right to the folder you want, but even if this isn’t a case the process is simple.
1)
2)
3)
4)
Go to the machine that will be downloading your 835 files.
Click on the Start button in the lower right hand corner of your screen.
From the provided menu, choose My Computer.
On the window that pops up, in the area labeled hard drives, double
click on the C: drive.
5) Double click on the folder named 835. The 835 folder will be
displayed.
6) Find the name of the provider you just got the 835 file from and
double click on their folder. You should now see a listing of all the
files in that folder.
Now we need to find the file that you just downloaded. If you follow this process
every time that you download a file, this will be easy because it will be the only one
that does not follow your filename format. If you forget to do this or try and grab
multiple files at the same time, this may be more difficult, and you may need to
have either carefully noted the file name of every 835 file you downloaded or go to
the menu bar and choose View and then Details so that you can see the modified
date and time for every file in your directory so you can find the latest file.
Before we go any further let’s talk about file names. At their root each filename
consists of two elements, a name and an extension. In some cases this extension
can be blank, but usually it names a file type, and helps Windows decide how to
deal with that file. In folder options you can choose several ways to sort files in a
folder, but by default, they are sorted in alphanumeric order.
137
What is alphanumeric order? Well it is similar to alphabetic order, but if you have a
numeric digit in place of a letter, it will sort the number ahead of the letter, and it
will also sort the digits in order from 0-9. What does it mean practically? Well it
means that even though 2005 is a bigger number than 21, 2005 will actually be
sorted ahead of 21. This also means that if you use a date in your filename and
want it sorted in order by date, you want to display it in the order of year-monthday, rather than the month-day-year we are more used to seeing in the USA.
So what should you name your files? For simplicity, we suggest a format such as
yyyy-mm-dd.txt, (for example 2007-08-06.txt for an 835 file dated to August 6 th,
2007). The date so that it can be displayed in order by date, and .txt so that you get
rid of any strange extensions (like the .594 in MAIL.594), and to make it easier if
you need to check on something in the file later. What date should you use for the
file? Well, since sometimes remittance files will contain payments or rejections
from multiple claim files, using the claim date could be problematic, so you will
probably want to use one of two values: The post date for the file on the server or
the date that you download the file from the server. The advantage of the latter is
that it is easy to check on using View->Details, the disadvantage is that if you
download multiple files on the same date you will have to name them, 2007-08-06a
and 2007-08-06b, and if they are from multiple weeks they may seem artificially
close together. The advantage of the former is that you don’t have the
disadvantages from using the download date, but you have to look on the
processor’s site to find the information you need to name your files.
So back to our renaming process:
1) Once you have located the file that needs to be renamed, click once on it to
highlight it.
2) On the toolbar on the left hand side of the screen you should now have an
option under File and Folder Tasks to rename the file. Click on Rename
this File.
3) Name the file in the format of your choosing. We suggest the yyyy-mmdd.txt format discussed above.
4) Press the Enter key and you are ready to start processing the file.
Setting up Remittance in SchuyLab
When we have the folders chosen for our remittance downloads there is one other
thing that we may want to do to make our lives easier. We can tell SchuyLab where
we expect to find the files.
138
Select F7. Features.
Select Billing.
139
Select Setup.
Select Electronic Billing. You will see all of your billing interfaces and
your remittance interfaces.
Choose the remittance interface for the insurance you want to modify.
140
At this point you can put in the telephone number you use to call up the BBS, or the
password you use to log into it, but these are only for your own reference,
SchuyLab doesn’t do anything with these values except keep them for you. It
would be a bad idea to click on Delete here, as that would remove the interface
from your system and require Schuyler House to reinstall it for you to use it again.
Instead let us click on Setup… to bring up the Remittance configuration window.
When you have successfully submitted a claim for electronic billing, you have
already given them all the information about who your lab is, so the only
configuration option you need here is to tell SchuyLab where to find your
remittance files normally. So just enter in the pathname as shown, and then repeat
this process for any other Remittance accounts you may have. The pathname will
automatically be put in by SchuyLab when you process your remittance, and you
will only need to enter in the filename.
And this should be all the setup you need to start processing remittances.
Processing the Remittance Claim
You are now sending your claims into Medicare, Medicaid, and / or any of the
insurance companies electronically and they have sent you your payment
information back to you also electronically. Now what? Is there an easy way to
check what claim was paid and how much was paid? Yes, there is.
141
Select F7, Features
Select Billing
142
You will see two electronic icons, select Electronic Remittance. Any remittance
interfaces that are installed will be displayed here.
Select the remit icon for your payor (which in this instance is ANSIBCAL);
Queue
Select Path
Test Posting
Print exceptions only
You can chose to print this report (recommended) to
any of your printers or just to the screen to review it.
Which file are you opening and where is it?
With this box checked, the report will be generated,
but not posted.
Print only those claims with notes
143
Under Select Path, type in the path name for the file (in this case we will be using
“Colbert.2”) and then select OK. If you downloaded the EOB to a floppy disk your
path will something like; A:\name of file. After selecting OK, SchuyLab does the
rest for you, but you will need to check the claims, line item by line item, checking
the payments and any remarks.
The Report
Let’s look at the report that is opened. There are three parts to the report; the
header, the payments and a summary.
The header part is simple; the name and address of the insurance carrier, the process
date of this claim, the check number that has been issued to your lab and the check
amount. The body of the report will contain the following;
Accession Number
Patient’s Name
Svc Date
144
The specimen number that this claim is for. In this case we
are using the YYMMDDn format. You may be using the
same or a different format.
Lists the patient’s name. We have blacked out the names
here and any other proprietary information.
The service date is the date the work was done, or at least
entered into SchuyLab .
Proc
Billed
Modifier
Primary Code
Adjustments
Deduct
Co-Pay
Paid
Remarks
Procedure or CPT code(s) for the test(s) run.
How much you billed for.
There are five basic modifiers to explain what is or is not
being paid.
CO – Contractual obligation
PR – Patient Responsibility
PI – Payor Instigated Reduction
CR – correction
OA – Other Adjustment
The modifier is followed by a code that explains why the
modifier was used. There are too many codes to list here.
You can get a list of the codes from Medicare / Medical.
How much you are NOT being paid
This is the patients deductible amount
This is the patient’s co-pay amount
How much you did get paid
“NOT FOUND”. This means that SchuyLab couldn’t locate
the claim or the procedure code and service date weren’t
matched.
“WRONG $” – this claim may have been re-posted.
“d” – claim is already there. It may have already been
posted or entered manually.
145
The last thing to look at is the summary section;
As you can see, with this remittance, we are being paid for 260 claims, we had
billed for $20,738.15. The billing had adjustments for a total of $13,420.010
(which we write off or bill the patient), there is $418.90 that is the patient
deductibles, $487.24 that is the patient co-pay and the total that Medicare is paying
for, which is $6401.91.
Now, let’s post.
Select F7, Features
Select Billing
Select Electronic Remittance
Select the remit icon for your lab
Put in your path and queue (or leave the queue path to the default printer), and
select OK. Do not mark the box for test posting.
146
There, you’ve posted. But, now let’s check it. If you look at the last page of your
posting, you will see that it not longer says (Test only – no actual posting). Other
than this, the report is what you viewed previously.
Select F10, Done to go to the billing screen.
Select, Edit Claims
Enter your first claim number
Select OK.
147
Here is your claim.
Now, find this claim on the report and compare them.
As you can see, you charged the insurance company $16.50 for this test. Under the
contract they have with you, they paid $14.50 and SchuyLab automatically wrote
off the remaining $2.50.
Notes and Write Offs
The above example was a CO adjustment. Most of these are price adjustments that
you knew were going to happen to begin with. They are normally not rebilled, so
SchuyLab writes them as an adjustment, and if it zeroes out the account, the account
is closed.
However, some adjustments you will get back from your insurance company will be
of a different sort. You may be missing certain patient demographics, or have a
typo in your ICD-9 code, or other correctable issues. Or it may be a test that
Medicare won’t pay for, but the patient has secondary insurance to cover it. In
these cases you may or may not want to rebill certain items. SchuyLab handles
these by adding them to your claim as note codes rather than adjustments. Note
148
codes will show the amount and the reason code the insurance company gives for
the adjustment, but will not be added into the bottom line.
This document has note codes for each charge.
You will generally want to do one of two things with the remittance notes. The first
would be to rebill the charge to another payor. This is done as normal, by setting
the status to Ready, freezing those charges that you don’t want to rebill, and making
sure the payor drop down is set to the one you wish to bill, and then billing.
The second thing you might want to do is to write off that charge. Not every charge
that is denied is worth the effort of re-billing it or has a quick fix. You may find
that write offs are a little different, now that you are doing electronic remittance.
This is because with remittance we match the adjustments with the individual
charges and instead of writing off some or all of an entire claim, you will write off
some or all of an individual charge. You will note on the side bar that the option to
write off is grayed out from the edit claims screen when we have remittance results.
149
What we do is double click on the charge we want to write off, and click on the
write off button on the edit charge screen.
Now there are lots of choices that can be made at this point in time. Here we have
changed the code from Medicare to P9604, to better reflect that it is a writeoff for
that charge specifically, we have made sure that the amount matches the amount in
our note field, and a Note Code has been put in. Potentially, we might want to put
the PR-31 reason code in either the Reference or the Description field as well. You
will want to go with whatever information best fits the needs of your lab.
150
Once we choose OK and the Write Off is entered, we can see that our balance has
been updated, and an asterisk has been put next to our charge so that if we rebill at
this point, our written off amount will not be sent again.
We have a choice at this point to either delete out the Note code or not. We might
want to keep the note code since it contains the remittance processing information
and doesn’t affect the bottom line, or we can delete it out if will just be redundant
and confusing. This may depend on what information you choose to include in your
write off, and the policies of your billing department.
We hope that the clarity of being able to see which charges are written off and
which ones have not been will make up for the inconvenience of putting in three
write offs instead of one to write off the entire claim. While you do have the option
of doing a write off for the full amount of the claim in one entry, we suggest that
you do not do so as this will make things more difficult if you need to check what
you did on this claim later.
Troubleshooting Remittance Issues
Most issues with electronic billing you will encounter will happen with the actual
submission of your electronic claims, as that is where the complicated processes
occur, but there are still a few situations where you may get unexpected results in
remittance processing.
151
Issue: When trying to process the remittance, SchuyLab tells you that it is unable to
find the file.
Solution: This could be for several reasons. First the file may not be going into the
directory where you think it is going. Check that the path that you are putting in to
process the remittance is in the correct folder and with the correct filename. It is
possible if you did not specify an extension when you renamed the file that
Windows has kept a previous extension on the file, and you will need to type that
extension in. (For example, the file that you get from the insurance is named
835.dat, you go to name it 20070815, but don’t give any extension. Windows keeps
the existing extension then, and the file would actually be named 20070815.dat.)
The best way to avoid this is to always rename your files with a specific extension
like the .txt extension we use above.
Another possibility is that the file you have downloaded is not actually an 835 file.
If you have downloaded a 997 file or some other remittance format instead, then
SchuyLab will be unable to process it. Check with the insurance company that you
are setup to do 835 remittances, and that you are looking in the right place to
retrieve them.
Issue: SchuyLab processes the 835 file, but every line in the report has Not Found
on it. But you can find the claims in Edit Claims.
Solution: Usually this happens when you go from submitting your claims in paper
format to doing electronic submission and remittance in one fell swoop. SchuyLab
will only process remittances for claims that have been submitted electronically. If
you receive a remittance with claims from a paper submission, SchuyLab won’t
process it. Wait until you start getting results from your electronic submissions
before using Electronic Remittance.
Issue: When I process the 835 files, all my claim amounts are going negative.
Solution: Once again, this is most likely a transition issue. Often your billing
department will be used to processing as soon as a check comes in, and if you have
payments and write-offs manually entered in, and they combine with the same
payments and adjustments from Remittance processing, this will register as multiple
payments. Since it is this very manual entering in of payment information that
Remittance is designed to free you from, what you want to do is not enter them in
manually in the first place! If you do have double entries though, the only thing you
can do is go in and delete the extraneous lines in your claims. Another thing to note
here is that if you have full claim payments or write-offs on your claim, they won’t
always play well with the charge by charge adjustments that you get from
remittance, and you may need to remove the full claim items before you can writeoff specific charges.
Issue: The claim gives me nothing but zeroes, and there is no data in the remittance
report.
Solution: There is most likely something wrong with the 835 file that you are trying
152
to process. Perhaps you got cut off in the downloading process and only have part
of a file. In certain cases the insurance company may be sending an improperly
formatted file (As of the present time, 835 files from California Medicaid
(MediCal) have extraneous line breaks in them, that prevent them from being
properly processed without some additional steps). You should contact tech
support and be prepared to get them a copy of the 835 file to analyze.
Issue: Hey, I processed this 835 file and there are no payments, just adjustments!
Solution: Was there a check for those claims? There is probably nothing wrong
here. Some companies will put out remittances of the non-paid claims before doing
the full or partially paid claims. Your payments will likely be in the next 835 file.
If you get several 835 files in a row without any payments showing up, you should
contact the insurance company that is processing the claims, as sometimes they may
not be rejecting the 837 files you send them, but there is an issue that doesn’t come
out until the individual transactions are processed.
153
Index
12 Month Revenue.......................7
Accounts...................................101
adjustments...............................104
Batch Payments......................7, 85
Bill Accessions.............................6
Bill Types...................................17
displayed in Edit Claims.........67
setup...............................96, 108
Billing Analysis..........................85
Billing Setup...............................10
Bill Types...............................17
billing address........................13
electronic billing.....................56
Medicare ID............................12
panels......................................28
required information...............19
schedules..........................13, 23
tests.........................................21
charges............................................
adding to account..................105
adding to claims.....................76
Claim Aging...........................7, 84
claims.....................................4, 62
billed.......................................76
editing...............................63, 75
patient demographics..............72
payments.................................77
rebilling..................................80
write-offs..........................78, 79
Client Accounts..........................91
clients.........................................50
creating invoices.....................98
invoicing.............................6, 96
sales representative.................89
CPT rule.........................................
panels......................................35
CPT rules................................5, 20
Create Client Invoices................97
Edit Account...............................97
Edit Claims...................................6
Edit Invoice................................97
electronic billing.............................
format.....................................57
Medicare.........................50, 118
Electronic Billing.....................116
Electronic Claims...........................
Setup.....................................116
Using....................................117
HCF1500......................................6
setup.................................49, 50
ICD-9 Codes...............................60
apportioning to procedures.....75
insurance.....................................46
adding policy..........................73
invoices...........................................
altering..................................105
generating...............................97
patient...................................108
payments...............................103
printing...................................99
reassigning patient claims....107
rebundling or repricing.........106
Invoices..........................................
viewing.................................100
Laboratory Options.....................11
name.......................................12
MediCal billing........................124
MediCal billing..............................
client’s provider ID................53
doctor’s provider ID...............55
Medicare billing.............................
doctor's UPIN.........................55
electronic..................................6
entering Medicare ID..............50
patient’s Medicare ID.............72
setup.......................................17
Monthly Sales...............................7
multi-channel panels..................36
Open Claims.................................7
panels......................................5, 28
defining components..............35
Panels.............................................
CPT rule.................................35
paper billing..............................113
testing...................................113
vs electronic billing................68
Patient Claims......................6, 108
billing...................................109
rebilling................................110
testing...................................109
payments.........................................
adding to account..................102
adding to claim.......................77
payor.........................................113
payor...............................................
displayed in Edit Claims.........68
payors.........................................18
Pricing Rules..........................5, 19
schedules................................20
schedules...............................15
Print Invoices..............................97
printing...........................................
batch payments report.............85
claim aging report...................84
HCFA-1500 forms................113
insurance companies...............47
monthly sales report...............87
open claims report..................83
patient invoices.....................108
sales sorted by rep..................89
schedules................................42
yearly revenue.........................88
procedure codes....................20, 31
adding codes to tests...............21
multi-channel panels..............36
new charges on claims............76
procedures..............................3, 39
procedures......................................
differential pricing......23, 38, 41
new procedures.......................40
reports.........................................82
Sales by Rep.................................7
Sales Rep Transactions...............91
schedules....................................13
adding procedures...................25
attaching to Bill Type.............18
attaching to client...................52
insurance.................................48
tests.............................................20
view results.............................71
Transaction Audit.......................90
transactions.................................75
waiting period...............................6
write-offs........................................
adding to account..................104