1
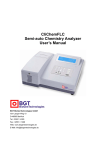
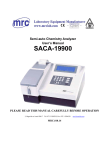
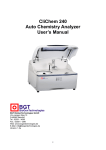
CliChemPlus
Semi-auto Chemistry Analyzer
User’s Manual
BGT BioGenTechnologies GmbH
Von-Langen-Weg 10
D-48565 Steinfurt
Tel.: 02551 / 4090
Fax.: 02551 / 1298
Web: www.biogentechnologies.de
E-Mail: [email protected]
Rev: 1.2e
CliChemPlus User’s Manual
How to use this manual
It’s greatly appreciated you become the user of CliChemPlus Semi-auto Chemistry
Analyzer.
In order to get the best effect, you must be familiar with our instruments and their functions
before performing the clinical diagnostic tests.
This manual is the operating guidance of CliChemPlus Semi-auto Chemistry Analyzer of
BGT BioGenTechnologies Company, which including the contents of instrument installation,
daily test, quality control, and daily maintenance, etc. As to the users who uses external
printer, please refer to the user’s manual of external printer at the same time.
Please reserve all the packing materials for the use of deposit, transportation and
maintenance in the future.
You may contact with your distributor if there is any problem.
As to the instruments of different version or configuration, their functions
are slightly different.
Note:
Indications, advices and suggestions. Italics are used to differ from each
other.
Warning: Warning indications must be obeyed, so as to ensure
the normal operation of instruments and correct and
real test results. Bold-face is used to make the
difference.
2
CliChemPlus User’s Manual
Symbols on the instrument
Symbols on the instrument
This symbol means that the labeled item is hot while the
instrument is in use. Don’t touch the labeled item as you could
be scalded.
The symbol is labeled on the lamp support of optic system.
This means that the labeled item could lead to personal injury
and/or damage to the analyzer.
The symbol is labeled beside the power outlet and some
external interface.
The symbols for “SERIAL NUMBER”, The serial number shall
be after or below the symbol, adjacent to it.
The symbol means the product is in vitro diagnostic medical
device.
The symbol indicates the manufacturer and its address, after
which are shown its name and address.
The symbol indicates EU representatives of the manufacturer
and their addresses, after which are shown their names and
addresses.
The symbol indicates biological pollution, marked in the part
where the instrument contacts the clinical reagent. The symbol
appears in black side and yellow background.
Symbols on the sales packaging
The symbol means that the environment of instruments must be
dampproof in the course of transport, and instrument must be
kept in a dry environment.
This means that instrument should handle with care in the
course of transportation, so as not to damage it.
The symbol means the instrument packaged should not be
upended at any time
The symbol means that the level piled up can't exceed 8 layers,
as not to damage instrument.
The symbol indicates temperature range of the analyzers during
storage and transportation.
3
CliChemPlus User’s Manual
Warning and Safety Indications
This instrument is only used for in vitro diagnosis, please carefully read the following
warnings before the usage, and strictly obeys them.
Warning: Please carefully read the following announcements before using
this instrument.
z Cut off the power source at once if there is abnormal smells or smokes,
and pull out the power plug from the outlet. At the moment, you must
immediately propose test applications to the distributors and the
agents of our company. If it is continuously used under this condition,
it may cause fire, electric shock or personnel casualty.
z Neither blood and reagent nor metal pieces of staple and pin should be
dropped into the instrument; otherwise it would lead to short circuit or
smoke and fire. If there is something abnormal, cut off the power
source at once, and pull out the power plug from the outlet. At the
moment, you must immediately propose test applications to the
distributors and the agents of our company.
z Operators don’t touch the electric circuit inside the instrument,
especially wet hands, which may be easier to get electric shock.
z Rubber gloves must be put on while maintaining and checking the
instrument, and prescriptive tools and spare parts should be used.
After finishing the operation, please use disinfecting liquid soap to
wash hands. Otherwise, the parts of skin that contact with blood may
be infected, electrically injured or burned.
z Extremely be careful while dealing with samples. Rubber gloves must
be put on, or it may cause infection. If the sample enters into eyes or
wounds, use a great amount of water to wash at once, and accept the
checkup of doctors.
Reagent Application
z If the reagent enters into eyes, use a great amount of water to wash at
once, and accept the checkup of doctors.
z If drink the reagent at error, turn to the doctors immediately, and take a
lot of water to vomit the reagent at the same time.
z If hand or skin is stained with the reagent, clear with water at once.
z The used tubes and other instruments should be properly disposed as
the medical wastes or infective wastes. If the person is stained with
blood, there is possibility of being infected by pathogens.
Power voltage, connection and earthing
z Be sure not to insert the plug into the electrical outlet of alternating
4
CliChemPlus User’s Manual
z
z
z
current over 220v. Otherwise, it may cause fire or electrical shock.
When the instrument is installed, three-core power cable accompanied
with the machine must be used, and ensure it is well earthing.
Otherwise, it may cause fire or electrical shock.
Be sure not to damage the isolation protection peel of power line. Don
not pull the power line with exertion or hang heavy things on it.
Otherwise, it may cause broken circuit or short circuit, thus lead to
electrical shock or fire.
Power source must be cut off when connect the peripheral equipments.
Otherwise, it may cause electrical shock or troubles.
Specifications of Pharmaceutical affairs law: It is forbidden to refit the
medical instruments.
5
CliChemPlus User’s Manual
Content
How to use this manual ......................................................................2
Symbols on the instrument .................................................................3
Warning and Safety Indications ..........................................................4
Content...............................................................................................6
1.
Brief introduction of instrument ................................................8
1.1.
Product introduction ................................................................................ 8
1.1.1.
1.1.2.
1.1.3.
1.2.
1.3.
1.4.
1.5.
Product property, structure and composition ........................................... 8
Product applicability ................................................................................ 8
Instrument specifications ......................................................................... 9
Instrument installation.............................................................................. 9
1.5.1.
1.5.2.
1.5.3.
1.5.4.
1.5.5.
1.5.6.
1.6.
Product name
Semi-auto Chemistry Analyzer....................................... 8
Model
CliChemPlus............................................................................... 8
Product features ........................................................................................ 8
Instrument Opening and Sealing ............................................................... 9
Select proper position.............................................................................. 10
Power source requirement ...................................................................... 10
Connect instrument to power source ....................................................... 10
Connect external printer .......................................................................... 11
Install Flow-Cell ....................................................................................... 11
Main structure........................................................................................ 12
1.6.1.
1.6.2.
1.6.3.
1.6.4.
1.6.5.
1.6.6.
1.6.7.
Front view ................................................................................................ 12
Keyboard and mouse .............................................................................. 13
Back view ................................................................................................ 13
Internal printer ......................................................................................... 14
Flow-Cell ................................................................................................. 14
Source light and peristaltic pump............................................................. 15
Principle structure figure (Only for reference) .......................................... 16
2.
Operation ...............................................................................17
2.1.
2.2.
Power on ............................................................................................... 17
Test setting ............................................................................................ 18
2.2.1.
2.2.2.
2.2.3.
2.3.
Edit Biochemical item .............................................................................. 18
Settings of calculated items..................................................................... 22
Non-chemical item editing ....................................................................... 22
Item test.................................................................................................... 23
2.3.1.
2.3.2.
Absorbance test....................................................................................... 24
Endpoint method test............................................................................... 24
6
CliChemPlus User’s Manual
2.3.3.
2.3.4.
2.4.
Two points method test............................................................................ 28
Kinetics test ............................................................................................. 28
Test result searching ............................................................................. 29
2.4.1.
2.4.2.
2.4.3.
Standard searching.................................................................................. 29
Quality control search.............................................................................. 30
Report print.............................................................................................. 31
2.5. System setup .............................................................................................. 35
2.5.1.
2.5.2.
System parameter setup ......................................................................... 35
System maintenance ............................................................................... 37
2.6.
2.7.
2.8.
User identify .......................................................................................... 39
About ..................................................................................................... 40
Power off ............................................................................................... 40
3.
Maintenance ..........................................................................41
3.1.
3.2.
Overview ............................................................................................... 41
Clean instrument ................................................................................... 41
3.2.1.
3.2.2.
3.3.
Instrument maintenance ........................................................................ 42
3.3.1.
3.3.2.
3.3.3.
3.3.4.
3.4.
Clean the surface of instrument............................................................... 41
Clean Flow-Cell ....................................................................................... 41
Change fuse ............................................................................................ 42
Adjustment of peristaltic pump tube......................................................... 42
Change aspiration tube ........................................................................... 42
Change of light source lamp.................................................................... 43
Simple trouble disposal ......................................................................... 43
4. Appendix: Data backup and serial interface data transmission ....45
4.1.
4.2.
4.3.
Data export............................................................................................ 45
Data import............................................................................................ 45
Serial interface transmission ................................................................. 45
7
CliChemPlus User’s Manual
1. Brief introduction of instrument
1.1.
Product introduction
1.1.1.
Product name
1.1.2.
Model
1.1.3.
Product features
z
z
z
z
z
z
Semi-auto Chemistry Analyzer
CliChemPlus
Windows system software platform
It has two test modes of single wavelength and double wavelength.
Rotate plane grating spectroscopic system, and the wavelength can be
continuously adjusted within the test range.
Following test methods can be provided:
endpoint method
(End Point)
Kinetics method
(Kinetics)
Two points method
(Two Points)
Double wavelength determination
(Dichromatic)
Absorbance determination
(Absorbance)
Multi-calibration curve method
(Multi- Calibration)
Reagent open or close selectable, according to the user’s requests.
It can print synthetic report, test parameter, reaction curve, calibration curve
and quality control data figure, etc.
1.2. Product property, structure and composition
It is composed of optical system, pipeline system, computer control system and
software, etc.
1.3. Product applicability
It is for the clinical tests of body blood and the tests of all kinds of routine biochemical
indexes of other body fluids.
8
CliChemPlus User’s Manual
1.4. Instrument specifications
Differentiation rate:
0.001Abs (Display) ,0.0001 Abs (Internal calculation)
Light source:
Halogen tungsten lamp
Wavelength:
330-800nm continuously adjusted
Temperature control:
Ambient temperature,25,30,37
Flow-Cell
Flow-Cell
:
Interface:
RS-232 bidirectional communication and USB interface, etc.
Display:
Liquid crystal display
Print:
Internal printer or external printer
Work environment:
0 -40 ;relative humidity≤85%
Storage environment:
-10 -40 ; relative humidity≤85%
Weight:
10kg
Overall dimensions:
370mm(L)×284mm(W)×318mm(H)
Mains input:
a.c.110V/220V±11V/22V, 50Hz/60Hz
Power input:
80VA
Fuse pattern:
Ф5×20
Fuse rated value:
3.15AL250V
1.5. Instrument installation
1.5.1. Instrument Opening and Sealing
1.
2.
3.
Unpack the instrument package, and remove the materials used in the
transportation. Please preserve the packing box and materials well, and it’s
convenient for you to repack the instrument someday in the future.
Take the instrument out of the plastic package.
According to the packing list, confirm the following stuffs should be included in the
package:
z
CliChemPlus Semi-auto Chemistry Analyzer
z
User’s manual
9
CliChemPlus User’s Manual
z
z
z
z
Note:
Packing list
Warranty certificate
Power line
QC certificate
The product accessories should be in accordance with the
packing list. Please contact with the distributor when the
accessories are found not right.
1.5.2. Select proper position
In order to ensure the normal work of instrument, please select the working places that
meet the following requirements to put CliChemPlus Semi-auto Chemistry Analyzer:
• Working table without direct sunshine;
• The surface of working table is flat, space is enough, and there is no big shake
(e.g. hydro extractor);
• No electromagnetic device that produces magnetic field around;
• Places without extreme changes of temperature;
• Places without lots of dust.
Attention: The work environment of instrument is that temperature is
between 0 -40 and relative humidity is below 85%.
1.5.3. Power source requirement
z
z
z
a.c.110V/220V±11V/22V,
50Hz/60Hz
80VA
1.5.4. Connect instrument to power source
Insert the two ends of power line in the instrument outlet and alternating current
outlet respectively.
Warning : Alternating current power must be well earthed.
Alternating current power must be stable. It is prohibited to use
power source with high-power equipments together, and it’s
better to equip with voltage-regulated power supply.
If there is smoke, abnormal smell or strange sound of instrument,
cut off the power at once, and contact with the distributor.
10
CliChemPlus User’s Manual
When power line is inserted or pulled out, you must hold plug
itself, not the power line.
1.5.5. Connect external printer
1) Ensure both the printer and instrument is power off.
2) Insert one end of USB connecting cable into the USB interface socket of
printer.
3) Insert the other end of USB connecting cable into the USB port of
instrument.
4) Use the power line equipped with the printer to connect the printer and
alternating power supply.
1.5.6. Install Flow-Cell
Figure 1-1 Open the upper cover
1) Just as the above figure, push away the upper cover of the instrument after unscrewing
the hand-rotating screw fixing the upper cover.
2) Take off the adhesive tape used to fix Flow-Cell, and take off the wrapping materials;
3) Put Flow-Cell in the thermostatic bath, pay attention to make the light hole direction the
same with that of the light path.
11
CliChemPlus User’s Manual
4) Make the aspiration tube go through the fixing hole in the instrument, and let it extend
forward;
5) Install the upper cover again, and rotate the screw tightly.
Warning: Don’t touch the light hole of Flow-Cell, so as to avoid the lipid on
the hands affecting the transmittancy of Flow-Cell.
Make sure not to press and bend along the aspiration tube,
otherwise, fluid flow is easy to produce bubbles, and cause
inaccuracy of test result.
1.6. Main structure
1.6.1. Front view
Figure 1-2 Front view
Indicating lamp 1: State indicating lamp.
Indicating lamp 2: State indicating lamp.
Paper feeding button: Internal printer moves paper outward.
Rinse key: Start or stop the rinsing of instrument channels.
Aspiration tube: When the instrument work is in Flow-Cell mode, press aspiration key, and
the sample is aspirated through aspiration tube to the Flow-Cell.
12
CliChemPlus User’s Manual
Aspiration key: Press aspiration key when the figure indicates aspiration, the instrument
will automatically aspirate the sample into Flow-Cell.
Instrument labeling
LCD screen: Display the interfaces.
Printer cover: The installation position of printing paper in internal printer.
1.6.2. Keyboard and mouse
CliChemPlus can connect USB mouse and USB Keyboard.
1.6.3. Back view
Figure 1-3 Back view
Fan
Power switch
③
④
⑤
Ethernet interface
CRT interface
USB interface
SD card socket
COM interface
Peristaltic pump
Adjusting screw of screen brightness
13
CliChemPlus User’s Manual
1.6.4. Internal printer
CliChemPlus Semi-auto Chemistry Analyzer can be equipped with professional internal
temperature sensitive printer.
When internal printer is used, select “Internal printer” in the “System Setting”-“Mode”.
1.6.5. Flow-Cell
Open the upper cover, the internal part of colorimetric system includes:
z
Thermostatic bath
z
Flow-Cell bracket
z
Flow-Cell
Figure 1-4 Colorimetric system
14
CliChemPlus User’s Manual
Figure 1-5 Flow-Cell
1.6.6. Source light and peristaltic pump
• Light source module
Open the upper cover of instrument, light source module is at the back of grating system,
and composed of light source lamp, bracket of light source, light source socket and lens.
Figure 1-6 Light source module
z
Peristaltic pump system
Peristaltic pump system consists peristaltic pump generator, peristaltic pump installation
board, peristaltic pump and pump tube. Peristaltic pump is installed on the outside of the
board behind the instrument, and it’s easy to change the peristaltic pump tube.
15
CliChemPlus User’s Manual
Figure 1-7 Peristaltic pump system
1.6.7. Principle structure figure (Only for reference)
Figure 1-8 Principle structure figure
16
CliChemPlus User’s Manual
2. Operation
2.1. Power on
Open CliChemPlus power switch, indicating light 2 is on, and the system begins to
load. The picture is as following:
Figure 2-1 system loading
After finishing loading and system initialization, enter main menu, as figure 2-2:
17
CliChemPlus User’s Manual
Figure 2-2 main menu
The administration software of CliChemPlus Semi-auto Chemistry Analyzer has five
function modules of test setting, test, result searching, system setting and user identify.
The function of all the modules and the operative methods refer to the following
sections.
Note: In order to ensure the normal startup of instrument, please don’t
switch the power on immediately after turning off the power supply.
The interval between power on and off should be more than 30
seconds.
2.2. Test setting
It includes “Test setting” and “Non-chemistry Setting”. Only administrator can edit item
parameters. (Refer to section 2.6, User identify).
2.2.1. Edit Biochemical item
The test parameters of each item of CliChemPlus can be edited by users.
Select “Test Setting” in the main menu, system will enter item selection window, as
figure 2-3:
18
CliChemPlus User’s Manual
Figure 2-3 Item selection window
After selecting the item to be edited, click “OK” button to enter parameter setting menu,
as figure 2-4:
Figure 2-4 parameter setting menu
z
Test method: Users can select test methods according to reagent instructions
(Endpoint, Two points or Kinetics according to the reagent instructions, as well as
editing the test parameters. When item test method is to be changed, the system
will indicate the following information:
Figure 2-5 Change test mode
19
CliChemPlus User’s Manual
Temperature: Select 25°C, 30°C, 37°C and ambient temperature to test;
Wavelength: Input the needed wavelength within 330-800nm;
Dual wavelength test is only applicable to endpoint method item. If secondary
wavelength is not needed to set, please input “999” in the wavelength 2 column;
z Reagent blank: It can be selected;
z Blank type: It is only for endpoint method item. Sample blank, reagent blank or
none can be selected;
z Factor: It is able to be get by calibration test or input according to the reagent
instructions;
z Sample vol., reagent vol. and aspirate vol.: The unit is uL, and the recommended
aspirate vol. is 500ml;
z Delay time: It needs a period of time for the sample to be stable after being
aspirated into Flow-Cell, and then begin to read. The unit is second;
z Read time: Test time participated in the calculation. The unit is second; (Reading
time of endpoint method is fixed to be 1 second, and no setup is needed.)
Press “Result” button in the parameter setting window, perform setup to the related
parameters of test results. As figure 2-6:
z
z
z
Figure 2-6 Result parameters setting
Unit: There are 10 fixing units to select. In addition, 5 units can be defined by users
in the system setting menu (refer to section 2.5.1);
z Decimal: The number of digitals that the result reserving behind decimals;
z Linearity error: Only for item setting of Kinetics method;
z Linearity limit: Set the linear upper limit of item test results;
z Reference range: Set the normal range of item test results;
There are five functional buttons under the parameter setting window, they are
“Standard”, “Control”, “Save”, “Print” and “Result”.
z If the item needs to set the parameter of calibration standard, click “Standard”
button, perform setup to the corresponding parameter in standard parameter
setting window (Figure 2-7);
z
20
CliChemPlus User’s Manual
Figure 2-7 Standard parameter setting
No. of std. : Input the number of calibration standard. When non-linear fitting
calculation method is used, the number of standard preparations should be 3
at least. Only one standard number of two points method is permitted.
9 Repeat times: As to each standard preparation, all of them can perform
multiple measurement of district mean while doing calibration test, and the
repeating time is allowed to be 1 to 3.
9 Calculation method: When sample concentration and absorbance meet the
linear relation, straight line fitting should be selected. Otherwise, non-linear
fitting is chosen, and a kind of calculation method among poly line fitting, cubic
curve fitting, logarithmic fitting and indexing fitting should be selected.
9 Standard concentration: The inputting of standard preparation concentration
should meet the progressive order from low to high.
If the item needs to set quality control preparation parameters, click “Control”
button. The parameter of item quality control preparation can be set in “quality
control setting” window (Figure 2-8), as well as select the rules of losing control;
9
z
z
z
Figure 2-8 Quality control parameters setting
Click “Save” key to save the revised parameter;
If all the parameters of the selected item needs to be printed, click “print” button;
21
CliChemPlus User’s Manual
z
Click “Back” button, and turn back to item selection window.
2.2.2. Settings of calculated items
At the item select window, click “Calculate” button, it will enter the window of calculated item
settings, as the below figure:
Figure 2-9 Settings of calculated items
Select the item which needs to be calculated, set the parameters of decimals and reference
range, click “Save”.
Note:Only when the calculated items have been selected, it will print out
the test results of these items. Otherwise they will not be printed.
2.2.3.
Non-chemical item editing
CliChemPlus can setup 15 non-chemical items. This function is provided for the users
to add non-chemical item test results to the samples existed in the system, so as to
implement the function of printing synthetic reports. Select “Non-chemistry Setting” in
the main menu, the system will enter Non-chemistry test setting window, as figure 2-10:
22
CliChemPlus User’s Manual
Figure 2-10 Non-chemistry test selecting window
As to the 15 items in the list, users can select any item of them according to the
requirement, click “Edit” button to enter editing window and input the item name, item
result quality (qualitative or quantitative), result, reference value and unit (qualitative
items have no unit). As figure 2-11:
Figure 2-11 Non-chemistry test setting window
2.3.
Item test
After finishing the parameter setup of item test, users can perform item test at once.
Select “Test” in the main menu, system will enter item selection window. After selecting
the item to be tested in the list, click “OK” button to enter the test menu.
The current colorimetric mode (Flow-Cell or Cuvette mode) is indicated on the right
upper corner of the test menu, and it can be revised during the system setup.
z If Flow-Cell test mode is selected, please prepare the sample to be tested
according to the indication column, and press aspiration key to aspirate samples;
z If Cuvette mode is applied, please place the Cuvette according to the indication
column, and then press aspiration key to start reading;
z Under the mode of Cuvette, aspiration key only controls the start of reading, not the
start of peristaltic pump.
23
CliChemPlus User’s Manual
2.3.1. Absorbance test
Select “ABS” in the test item list, system will enter the absorbance test menu. As figure
2-12:
Figure 2-12 Absorbance test
z
z
z
z
It can perform: water blank, reagent blank, sample blank and sample absorbance
test;
The number of tested sample is added automatically, and the sample number can
be changed by user according to the requirements at any time;
Click “Print” button, it can print test result and curve charts;
Click “Back” button, the system will indicate the following information (figure 2-13),
and then turn back to the previous menu.
Figure 2-13 Rinsing indication
2.3.2. Endpoint method test
Test principle: After mixing the reagent and sample, reaction reaches the endpoint after
some time(i.e. color or absorbance of reaction solution do not change any longer),at
this time,measure the absorbance value of reaction solution,concentration of
reaction
solution can be obtained according to Lambert-Beer Law. CliChemPlus provides Dual
24
CliChemPlus User’s Manual
wavelength test method to some of test items,in this way,some interference factor can
be erased. Users can perform Dual wavelength setup according to the requirements of
reagent instructions.
Select an endpoint method item from the test item list, click “OK” button, system will
enter the menu of endpoint method test. As figure 2-14:
Figure2-14 endpoint method test
z
z
z
z
z
z
z
It can perform: water blank, reagent blank, sample blank and sample test;
Items needed reagent blank test, system will automatically save the reagent blank
value of the last test, and inquire the user “whether retest reagent blank” while
entering the test interface. Select “No”, and continue to use the current value of
reagent blank;
During the test procedure, quality control test and standard test can be inserted at
any time;
The number of test sample will be added automatically, and the sample number
can be changed by user at any time;
When the test result exceeds the range of linear test, system can warn and
indicate;
Click “Print” button, test results and curve chart can be printed;
Click “Back” button, after indicating washing system, return to the previous menu.
• Standard test
According to the different parameter settings, standard test of different methods are
performed before the sample test (refer to section 3.2.1).
In the test menu, click “Standard” button, standard selection window will appear, as
figure:
25
CliChemPlus User’s Manual
Figure 2-15 Standard selection window
Select the standard preparation to be tested (according to the standard parameter
setting, 8 standard preparations can be chosen at the most), click “OK”;
Standard test information appears in the indication column of the test menu, as figure
2-16, perform test operation according to the indications;
Figure 2-16 Standard test
Finish calibration test, and the system will display new calibration result, as figure:
Figure 2-17 New calibration result
26
CliChemPlus User’s Manual
If the calibration test results of this time need to be saved, click “Save” button, system
will automatically renew the calibration data of this item. Otherwise, click “Give up”
button, system will continue to use the old calibration data.
Note:
Correct calibration result is the important premise of the accurate
result of sample test. On the precondition of not changing reagent
and no changes of machine environment, calibration test is not
necessary to be performed everyday.
• Quality control test
Quality control test can perform effective monitoring to the current accuracy of the
system. When the results of quality control test are abnormal, users have to check
the current condition of system. Quality control test can be performed at any time.
In the test menu, click “Control” button, quality control selection window will appear,
as figure 2-18:
Figure 2-18 Quality control selection
Select the quality control preparations to be tested (according to the quality control
parameter setting, 3 quality control preparations can be chosen at the most), click
“OK”;
Quality control test information appears in the indication column of test menu
(figure 2-19), perform test operation according to the indications;
Figure 2-19 Quality control test
27
CliChemPlus User’s Manual
2.3.3. Two points method test
Test principle: Two points method test is a special example of kinetics method test. i. e.
when absorbance value begins to change linearly , measure the difference of
absorbance of two points in the linear section,compare with the calibration results, thus
obtains the concentration of reaction solution by calculation.
Select a two points method item from test item list, click “OK” button, and system will
enter the two points method test mode, as figure:
Figure 2-20 Two points method test
z
z
z
z
z
z
This item can test: water blank, reagent blank and sample test;
During the test procedure, quality control test and standard test can be inserted at
any time;
The number of test sample will be added automatically, and the sample number
can be changed by user at any time;
When the test result exceeds the range of linear test, system can warn and
indicate;
Click “Print” button, test results and curve chart can be printed;
Click “Back” button, system returns to the upper menu.
2.3.4. Kinetics test
Test principle: Kinetics method refers to use photometer to continuously detect the
absorbance value of reaction fluid after mixing reagents and sample. When absorbance
value begins linear changes, measure its changing ratio, and the concentration of
reaction solution is obtained by calculation according to Lambert-Beer Law.
Select a Kinetics method item from test item list, click “OK” button, and the system will
enter the mode of Kinetics method test, as figure:
28
CliChemPlus User’s Manual
Figure 2-21 Kinetics method test
z
z
z
z
z
z
z
This item can test: water blank, reagent blank and sample test;
During the test procedure, quality control test can be inserted. Kinetics test dose
not need calibration test;
The number of test sample will be added automatically, and the sample number
can be changed by user at any time;
Any data interval can be selected to calculate again;
The test results are not linear, when it exceeds linear error or linear test range,
system can warn and indicate;
Click “Print” button, test results and curve chart can be printed;
Click “Back” button, after indicating washing system, return to the upper menu.
Note:
z When the test results of Kinetics method occur non-linear,
exceeding linear error range or exceeding linear test range, system
can warn and indicate. At the moment, users can apply
corresponding treatments according to the requirements.
z When Kinetics method appears non-linear test results, users can
calculate again according to the fixed data intervals of reaction
curve.
2.4.
Test result searching
2.4.1. Standard searching
Select “Calibration” in the main menu, system enters item selection window. Select the
needed items from the list, click “OK” button, and system enters “Calibration” menu, as
figure 2-22:
29
CliChemPlus User’s Manual
Figure 2-22 Check calibration data
Figure 2-23
Check calibration curve
Figure 2-22 and figure 2-23 are the calibration data and curve of item TP respectively.
Click “Print” button, calibration data and curve can be printed.
2.4.2. Quality control search
Select “QC result” in the main menu, system enters item selection window. Select the
needed items from the list, click “OK” button, and system enters “QC Result” picture, as
figure 2-24:
Figure 2-24 Data checkup of quality control
30
CliChemPlus User’s Manual
Select quality control preparation and months in the window displayed in the figure above,
corresponding quality control data will be displayed in the list. Click “Curve” to check the
quality control chart, as figure:
Figure 2-25 Quality control chart
Figure 2-23 is the test results of quality control of item ALB in September.
Click “Print” button to perform the print of quality control results.
Click “Clear” button to clear the appointed results of quality control.
2.4.3. Report print
Select “report print” in the main menu, system will enter the following window:
Figure 2-26 Report print
Users can select three kinds of printing methods:
z By patient: print by patient;
z By test: print by test;
z History: print the history records.
z Print order: Specify the print order of items in synthetic report of patient.
Print by patients
31
CliChemPlus User’s Manual
Figure 2-27 Patient report window
Select date, all the patient records of the selected date will be displayed in the list,
and following operations can be performed:
• Click “Edit” button to Edit the basic information of patient;
• Select a patient, click “check” button to enter “patient item editing” menu, and test
items of patient can be edited. (add, revise and delete the biochemical items and
non-biochemical item results of corresponding patients)
• Select one or more patients click “Delete” button, system will delete all the test
results and patient records of the selected patients. (if all the records in the list
need to be chosen, please select “select all” , otherwise, please don’t select)
• Click “Clear history patients” button, it will delete all the patient records and the
test results in the system.
• Select one or more patients click “Print” button, system will print the test report of
corresponding patient. (if all the records in the list need to be chosen, please
select “select all” , otherwise, please don’t select)
Patient information editing
Click “Edit” button in the window of figure 2-27, enter patient information edit window, as
figure 2-28:
Figure 2-28 Patient information edit window
Input sample number and other patient information, and then click “Save”. If the record
32
CliChemPlus User’s Manual
of this patient is existed, renew the patient records, or add a new patient record;
Note:
z Different patients must be marked by different sample number in
the same date.
z In order to ensure the check efficiency of software, please clear the
old patient records in time.
Review and editing of patient test results
Select a piece of patient records in the list of figure 2-26, and then click “View’ to enter
the following menu. The corresponding test records of the current patient will be
displayed in the list as figure.
Figure 2-29 Patient test item Editing
z
z
If the test results need to be revised, select the test records first. Input the results in
the corresponding compiling frame below the list, and then click “Revise”;
If need to add non-chemical item test results to exited patient record, click “Add”
button to enter the menu as the following figure;
Figure
2-30 Add non-biochemical items
Select non-chemical items in the pull-down list, input the corresponding results, and
then click “Save” to add a non-chemical item record to the current patient.
33
CliChemPlus User’s Manual
Note: Only administrator can revise the test result, common users can not
revise!
Print by items
Figure 2-31 Item report window
In “By item” window, select the date, and select the items to be printed, click “Print” key.
Print the result reports of the selected items in the appointed date.
Print history records
Figure 2-32 History record window
z
z
z
z
Select the date in “History record” window, and all the history records of the
corresponding date will be displayed in the list.
Select one or more records in the list, and then click “Delete” or “Print”.
Selecting “Select all” means to select all the records in the list.
Click “Clear all” to delete all the history records in the system.
34
CliChemPlus User’s Manual
Note:
In order to ensure the check efficiency of software, please clear the
old history records in time.
Print order
In the “Printer order” window as figure 2-33, select any item, and then click “Up” or
“Down” keys to change the printing order of items in the report. Click “Initial” key, the
print order will return to the default setting, i.e. arrange by letter order.
Figure 2-33 Print order
2.5. System setup
2.5.1. System parameter setup
Select “System Setting” in the main menu, system will enter system setup window. As
figure 2-34:
Figure 2-34 System setting-1
35
CliChemPlus User’s Manual
Figure 2-35 System setting -2
Figure 2-36 System setting -3
System setup includes the following setup items:
z SN: SN is the serial number of machine, this information setup is not opened to the
users.
z Hospital name: Input the name of the hospital using the instrument, this information will
be printed in the report title as hospital name.
z Date and time: Display the current time of system, users can revise and correct it.
z User-defined unit: CliChemPlus allows users to define 5 units according to the
requirements, besides 10 fixing units. Revise the user-defined units, the unit selections,
during biochemical item parameters editing, will change too.
z Colorimetric mode: When cuvette is needed to perform test, please select “Cuvette”,
otherwise, select “Flow-Cell” mode.
z Printer: CliChemPlus provides internal print and external print modes. When internal
print mode is selected, users have to appoint whether instant print is needed. When
external print mode is chosen, the printer type needs to be selected.
36
CliChemPlus User’s Manual
z
z
System temperature: The left lower corner of the menu displays the real time
temperature of the system.
Touch panel: Perform calibration of touch panel (optional function).
2.5.2. System maintenance
In system setup menu, click “Maintenance” button to enter system maintenance window,
as figure 2-37:
Figure 2-37 System maintenance-1
z
z
z
z
z
z
Temperature: set the system temperature, ambient temperature, 25 , 30 or 37 can
be selected.
Current temperature: Display the current temperature on real time of the system.
Temperature factor: If the real temperature of system is not in accordance with target
temperature, users can perform adjustment.
Adjustment method: If the real temperature is lower than the target temperature,
increase the amount adjustment of temperature. On the contrary, reduce the amount of
adjustment of temperature. The inputting range of temperature adjustment is from -2.0
to 2.0 .
Pump speed: Regulate the rotation speed of peristaltic pump while aspirate fluid. There
are 1 to 8 kinds of methods from slow to quick. The default value is 6.
Empty volume: Regulate the time of system emptying after each sample test. The
bigger the empty amount is, the longer the time is. The default value is 800.
Pump factor: When the aspirate volume of system has deviation, the deviation can be
eliminated by revising the calibration factors of peristaltic pump
Calibration method: When the aspirate volume is smaller than expected, increase the
calibration factors of peristaltic pump. On the contrary, reduce it.
37
CliChemPlus User’s Manual
Figure 2-38 System maintenance-2
z
z
z
Typical 10 wavelengths: Select this item, the system will scan the 10 default
wavelengths (340, 380, 405, 450, 492, 510, 546, 578, 620 and 670nm)
User-defined: Scan according to the appointed scanning wave band and scanning
intervals.
Blank scan: Click “scan” button after selecting the scanning mode, the system will
perform scan to the water blank value of each wavelength automatically, and the
scanning results are to be displayed in the list. Click “print” button, and users can print
the scanning results.
Note: Before the blank scanning, please ensure the Flow-Cell or Cuvette
is full of distilled water or other things to be tested.
Figure 2-39 System maintenance-3
38
CliChemPlus User’s Manual
z
z
Changing date of pump tube: Record the date of changing pump tubes at the last time,
system will judge whether it is needed to indicate users to replace a new one according
to this. The period of changing pump tube is 3 months, and the system will indicate
while it is expired.
Changing date of lamp: Record the date of changing lamps at the last time, system will
judge whether it is needed to indicate users to replace a new one according to this. The
period of changing lamps is 6 months, and the system will indicate while it is expired.
Note:
2.6.
System setup window is only open to the administration user.
After changing the pump tubes or lamps, please renew the
changing date, so as to ensure the indication of system is correct.
User identify
Select “User identify” in the main menu, system will enter identity setup window, as
figure 2-40:
Figure 2-40 User identify
CliChemPlus sets different operation authorization to users with different identities. This
kind of administration mode of competence grading can meet the control of users on the
validity of system test results. The introductions of all the identities and passwords are
as following:
z Common users: Common users can apply instruments to perform routine tests, edit
the basic information of patients, and check and print all the parameters and test
reports. However, they can’t revise the biochemical item test parameters and the
patient test results. The identity of this kind of users do not need passwords,
system approves the user identity as common user in default condition.
z Administrator: Administrator also can change the biochemical item test parameters
and test results besides all the operation competences of common users, and they
can enter “system maintenance” function module. The identity of this user needs
password, the primary password of system is 888888, and administrator can
change the passwords according to their requirement. For the reliability of test
results, it is suggested to keep the password of administrator secret.
39
CliChemPlus User’s Manual
In user identify window, users can select the login identity (administrator or common
user identity). At the same time, the password of administrator can be revised. Both
selecting administrator identity and revising administrator password need to input the
password of administrator.
2.7.
About
Click “BGT” icon in the main menu, the picture of system version information occurs, as
figure 2-41:
Figure 2-41 About
2.8.
Power off
Click “Power off” button in the main menu, the affirmative picture of power off occurs, as
figure:
Figure 2-42 power off ensuring
Click “Yes”, the system will close automatically. Click “No”, it will turn back. It will
indicate users to wash the tubes before power off. As figure 2-43:
Figure 2-43 Rinsing before power off
Prepare the rinse solution (about 4mL) according to the indication of figure 2-40, press
aspiration key. Turn off the power supply after finishing washing according to the
indications.
40
CliChemPlus User’s Manual
3. Maintenance
3.1. Overview
CliChemPlus Semi-auto Chemistry Analyzer is a clinical precise analyzer, and daily
maintenance work must be well done to keep the instrument in good condition.
3.2. Clean instrument
3.2.1. Clean the surface of instrument
● Keep the clean of instrument working environment.
● Neutral cleaner and wet cloth can be used to clean the surface of instruments.
Warning: Please don’t let any solvent, lip and erosive material touch the
instrument.
3.2.2. Clean Flow-Cell
Flow-Cell must be kept clean, so as to ensure the accuracy and reliability of the test results.
1. Clean the outside of Flow-Cell
z
Flow-Cell must be placed according to the requirements. (refer to Chapter 1 ).
z
If the exterior of Flow-Cell is polluted, soft cloth with dehydrated alcohol can be
used to slightly wipe it.
2. Clean the inside of Flow-Cell
z Put the container with distilled water under the aspiration tube, press RINSE key,
and start the continuous washing function. Press RINSE key again, and washing is
finished. It is usually continuously washed for half a minute.
z Glassware cleaning liquid or dilute hydrochloric acid (0.1N), Tween-20 dilution (2-3
drops/L) is used to clean flow Flow-Cell. Press RINSE key, aspirate cleaning liquid,
press RINSE key again to stop the rotation of peristaltic pump, make cleaning liquid
stay in Flow-Cell for 5 minutes, and finally use distilled water to continuously wash
for 1 min. If it is not cleaned after washing once, cleaner can be used to wash
again.
Flow-Cell must be cleaned under the following conditions:
z The deviation of water blank is too big.
z Change test items.
z Before power off.
Warning: Don’t leave the reaction fluid or other pollutants in the Flow-Cell
for a long time.
41
CliChemPlus User’s Manual
3.3. Instrument maintenance
3.3.1. Change fuse
Fuse is installed in the fuse box beside the power switch of the back of the instrument, open
the box cap, and it’s very convenient to change the fuse.
Fuse specification: 250V, 3.15A. Consumers are suggested to use voltage regulated
power supply.
Warning:
Must use the fuse of the specifications above. When fuse is
changed, forbid to operate with electricity!
3.3.2. Adjustment of peristaltic pump tube
After the instrument is used for a long time, the position of peristaltic pump can be adjusted.
The methods are:
z Rotate the lock catch of peristaltic pump tube clockwise, and open the backplate of
pump tube.
z Take off the peristaltic pump tube.
z Loose the fixing steel wire on the connecter of pump tube, rotate the pump tube for 180°,
and then refix the steel wires.
z Install the pump tube well, and lock (rotate the lock catch of peristaltic pump
counterclockwise).
Warning: If the pump tube is not installed well, the instrument will not
aspirate.
3.3.3. Change aspiration tube
If aspiration tube (or flow Flow-Cell) is blocked by miscellaneous objects, syringe can be
used to clean and dredge. If the damage or block of aspiration tube is serious, you can
change an aspiration tube. The methods are:
•
•
Pull flow Flow-Cell out.
Remove the aspiration tube at the entrance, and change a new aspiration tube.
At one end of the new aspiration tube, compass tube (the middle) is sheathed
first, and then fixing tube (the thickest) is sheathed. Pay attention: to leave
1cm outside the compass tube. (As figure 3-1).
•
Fix the fixing tube to the entrance of flow Flow-Cell.
42
CliChemPlus User’s Manual
compass tube
Aspiration tube
Fixing tube
Figure 3-1 Aspiration tube connector at the entrance of flow Flow-Cell
3.3.4. Change of light source lamp
Please cut off the instrument power supply before changing lamp.
z Pull out the connecting line of the light support power supply, and rotate out the screw 1
and 2 on the light source bracket. (refer to figure 1-7 Light source module)
z Take off the light source bracket, change a new one, put as the original way, and rotate
screw 2 tightly.
z Connect the power source connecting line of the light source unit well.
z Make the spiral images in the middle of the seam of monochromator through lens by
slightly regulate the position of light source with screw 1 and 2.
3.4. Simple trouble disposal
Trouble
1)Analyzer can not be started.
Shooting
——Check whether the instrument is switched
on.
2) The lamp is not lighted.
3) Printer can not be started.
4) Printer can not print.
5) There is no fluid in the Flow-Cell.
——Check whether the power plug is loosen.
——Check the fuse.
——Check the power supply.
——Check power supply before changing bulbs.
——If the lamp is damaged, change lamp.
——Check whether the power plug is loosened.
——Check ON/OFF button of printer.
——Check the fuse of printer.
——Check whether it is normally connected.
——Check whether peristaltic pump is normally
running.
——Check the connection of aspiration tube
and flow Flow-Cell, etc.
——Aspiration tube is too long or too short.
——Aspiration tube may be blocked, and it
should be cleared and dredged.
——Flow-Cell is very dirty.
43
CliChemPlus User’s Manual
6) There is no reading on the photometer.
7) The Deviation of water blank is too big.
8) The result reproducibility is low.
9) The aspiration volume of Flow-Cell not
stable.
——Check whether the lamp of photometer is
lighted.
——Try another wavelength to read.
——Flow-Cell is not inserted to the bottom.
——Clean Flow-Cell.
——Change new distilled water.
——Check the lamp of photometer.
——There are bubbles inside the Flow-Cell, and
it should be washed.
——Check the aspiration condition of Flow-Cell.
——The amount of reagent is too little, and the
volume should be increased.
——Change the lamp of photometer.
——Reaction fluid is polluted.
——The aspiration tube has been inserted too
deep into the Flow-Cell, pull it out slightly.
——Check whether aspiration tube is blocked.
——Peristaltic pump tube should be changed.
10) Quality control out of target value range. ——Check the valid date of reagent.
——Check whether the settings are correct,
and whether it need revise parameters.
——Make sure quality control is not polluted.
——Measure again with other methods.
——Check the Flow-Cell, use another reagent
or quality control to test again.
44
CliChemPlus User’s Manual
4. Appendix: Data backup and serial interface data transmission
Data backup function can be used to perform data parameter export and import, and the
data also can be exported from serial interface.
Click “data backup” button in the main menu, enter data backup window, as figure 4-1:
Figure 4-1 Data transmission
4.1. Data export
Select “history data”, “QC data”, “Standard data” or “All data” in data backup module,
and then click “Export” key. The corresponding data can be backuped to SD card.
“All data” includes history data, patient data, standard data, quality control data,
biochemical item parameters and non-biochemical item parameters.
4.2. Data import
Select “History Result”, “quality control data”, “Standard data” or “All data” in data input
module, and then click “Import” key to backup to the corresponding data input system in
SD card. Import can be performed only the data to be imported exists in SD card.
4.3. Serial interface transmission
The current or total sample test data can be transmitted from COM1 to the appointed
receiving devices by serial interface transmission function. Use RS232 serial interface
cable to connect COM1 of CliChemPlus and the devices to receive data, start and set
up the software parameters of the receiving devices. Select the corresponding setup
parameters of serial interface and data to be transmitted in the transmission module of
serial interface, and then click “transmit” to send the selected data to the receiving
devices.
Data format:
R ,Name,Department,Sex,Age,Sample no.,Test,Result,Unit,Checksum,
……
45
CliChemPlus User’s Manual
R,FINISHED
46