1
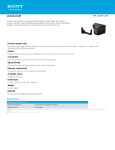
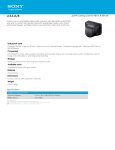
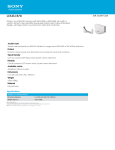
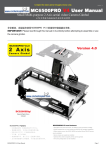
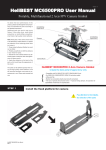
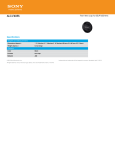
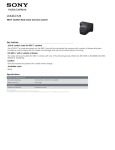
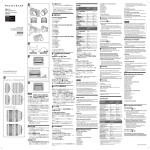
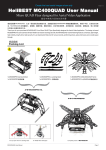
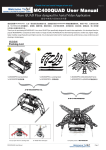
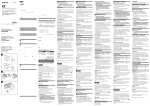
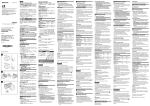
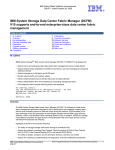
HeliBEST MCX3V5 User Manual
Version 1.0
Small Multi-purpose 2 Axis aerial video Camera Gimbal
This product does not include camera, Camera owned by user.
MCX3V5
IMPORTANT: Please read through the entire manual before
attempting to assemble or use the camera gimbal.
MCX3V5 Camera Gimbal
Page 1
CAUTIONS
To obtain the best performance of this product, please read through the manual carefully and assemble the parts according to the detailed instructions. Additional tools you need to use are as
followed: 2.0mm allen driver, small slotted screwdriver or small phillips screwdriver, small clamp and
high quality instant adhesive.
Note: Most parts of this camera mount need to be adhered by instant adhesive, so please pay
attention to the following points when you use it:
1. Proper instant adhesive (Neither too much nor too little);
2. Protect yourself (Do not drip the adhesive into your mouth or eyes);
3. Absorb the extra undried adhesive with absorbent paper to keep the clean appearance of camera
mount
4. Apply the adhesive on the back of the parts, which could keep the neat appearance of the mount
The parts can be adhered quickly when using the high quality instant adhesive. And the structural
strength could meet the requirements in use. Please rest assured to use.
Dimension
Special for ROLL Axis.
DCS2600Digi
DCS2600Digi
Digital Servo
Special for TILT Axis.
DCS2600Digi
DCS2600Digi
Digital Servo
100mm
Dampers
Dampers
Dampers
Dampers
41mm
133mm
66mm
MCX3V5 Camera Gimbal
Page 2
STEP 1
| Install the ROLL Arm
A
A
A
A
1.
2.
3.
4.
Use moderate force, too tight may break the parts;
Pay attention to the installation direction of the damper as seen above;
Do not apply too much force when rotate or press the damper output shaft, which may break the parts
Do not drip the adhesive into the damper output shaft, it may break the parts
STEP 2
| Install the Camera Mount
Prepare the following parts
MCX3V5 Camera Gimbal
Page 3
STEP 3
| Install the rolling actuating arm
Prepare the above parts
1.
2.
3.
4.
Pay attention to the installation direction of the parts;
Apply the adhesive on the back of the joints could keep the appearance clean;
Do not apply the adhesive onto the fingers, to avoid leaving the finger prints on the parts
Do not loose your hand until the adhesive becomes dry, to make sure that all the parts are adhered perfectly
STEP 4
| Install the digital servo to camera gimbal
1
DCS2600Digi
Digital Servo
2
3
Please connect the servo to receiver ELE Channel (Futaba is CH2) before linking the camera
mount to the servo axis, and confirm the maximum angle and minimum angle (operating range).
MCX3V5 Camera Gimbal
Page 4
1
Prepare the parts
2
3
DCS2600Digi
Digital Servo
Please connect the servo to receiver AIL Channel (Futaba is CH1) before link the camera mount
to the servo axis, and confirm the servo neutrality point, then installation as above picture.
STEP 5
Connect the rolling actuating arm with the rolling control arm
1
3
1. Do not apply too much force when rotate or press
the damper output shaft, which may break the parts
2. Do not drip the adhesive into the damper output
shaft, it may break the parts
3. Using proper adhesive if there is any loose at
damper joints, but the adhesive could not be dripped
into damper output shaft
4. If you find it is difficult to install the parts due to
the size of the hole, you can enlarge it suitably
MCX3V5 Camera Gimbal
2
Page 5
STEP 6
Install the control linker
22.5mm
24mm
MCX3V5 Camera Gimbal
Page 6
Optional Parts
Enhanced Camera Fixed Mount
P/N: ECFM
SIGMA ANTI-Q2000S
P/N: SAQ2000S
MCX3V5 Camera Gimbal
Page 7
MCX3V5 Camera Gimbal
Ideal for SONY NEX 5N/5R/7 and GoPro 1/2/3, Olympus E-M5
Best work with XAircraft X650V4/Pro and SIGMA SS4/SS6
MCX3V5 Camera Gimbal
Page 8
IMPORTANT
ONLY SELP1650, SEL16F28 or SEL16F28+VCL-ECU1
can work best with SONY NEX 5/7 for MCX3V5 system.
3
SONY NEX 5/7
SELP1650
SELP1650 is recommanded
MCX3V5
SEL16F28
VCL-ECU1
Create your own aerial work
MCX3V5 Camera Gimbal
Page 9