1
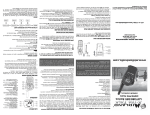
Owner’s Manual G-30 (GMRS)
Owner’s Manual for the G-30 (GMRS)
Check out our accessories at www.midlandradio.com or click on the images
http://www.midlandradio.com
www.midlandradio.com
Page 1 of 11
Owner’s Manual G-30 (GMRS)
Index
UNPACKING ...................................................................................................3
GETTING READY ...........................................................................................3
DESCRIPTION ................................................................................................4
OPERATION....................................................................................................5
FUNCTION MODE ..........................................................................................5
RECHARGING THE BATTERY ......................................................................5
TROUBLESHOOTING ....................................................................................9
SPECIFICATIONS.........................................................................................10
CHANNEL FREQUENCIES in MHz. .............................................................10
SERVICE: ......................................................................................................11
LIMITED WARRANTY...................................................................................11
FCC Licensing Information
This Midland model G-30 radio operates on GMRS frequencies which require a license from the
Federal Communications Commission (FCC) for business, personal, and recreational use. A
GMRS license held by an individual may be shared by immediate family members.
At the date of this publication the application for your FCC license is made on FCC form 605 (with
optional Schedule F). To obtain forms, call the FCC forms hotline at: 1-800-418-3676 or go to
http://www.fcc.gov.
For questions concerning licensing, contact the FCC at 1-888-CALL-FCC (1-888-225-5322), or
go to http://www.fcc.gov.
WARNING
Your wireless hand-held portable transceiver contains a low power transmitter. When
the Push-to-Talk (PTT) button is pressed it sends out radio frequency (RF) signals.
The device is authorized to operate at a duty factor not to exceed 50%. In August
1996, the Federal Communications Commission (FCC) adopted RF exposure
guidelines with safety levels for hand-held wireless devices.
To maintain compliance with the FCC's RF exposure guidelines, this transmitter and
its antenna must maintain a separation distance of least 2 inches (5 centimeters) from
your face. Speak in a normal voice, with the antenna pointed up and away from the
face at the required separation distance. The belt clip is for storage purposes only.
DO NOT TRANSMIT WHILE USING THE BELT CLIP. To transmit, hold the device
away from your body and ensure the antenna is at least 2 inches (5 centimeters) from
your body when transmitting.
www.midlandradio.com
Page 2 of 11
Owner’s Manual G-30 (GMRS)
UNPACKING
Unpack and check that all items have been enclosed.
Packing contents: 1. Radio/Antenna
2. Battery
3. Belt clip
4. Hand strap
5. Fast Charger
6. User’s manual
GETTING READY
1. Belt Clip Installation and Removal
Installation:
Align the belt clip with the plastic slots on backside of the unit. Slide the belt clip
down onto the unit pushing firmly until a click is heard.
The belt-clip is intended for storing the radio when not in use (waiting for calls) To
comply with the FCC RF exposure guidelines do not transmit this radio while
attached to your belt
Removal:
Pull the small tab at the top of the belt clip away from the radio slightly and slide the
belt clip up off the radio.
2. Installation of the Battery Pack
With the radio off, Unscrew the battery pack cover lock screw
located on the bottom of the radio by rotating counter-clockwise
with a coin (or like instrument). With the radio facing up, open the
cover and carefully insert the battery pack with the triangle facing
up and point of the triangle towards the radio. The two contacts will be inserted into
the radio. Close the cover and tighten the lock screw by turning clockwise. Be
careful not to over tighten.
3. Charging the Battery
Before you start using your radio, make sure the battery is fully charged. (Refer to charging
method on page 10)
www.midlandradio.com
Page 3 of 11
Owner’s Manual G-30 (GMRS)
DESCRIPTION
Power on/off button and TX/RX LED
Press and hold the “PWR” button for 0.5 seconds to turn the power on, press and hold
for 0.5 second again to turn the power off.
Indicate LED
Red on
Blinking Red
Green on
Blinking Green
Transmitting
Low battery alert
Receiving
Different sub-tone when
receiving
Up Down Buttons: You can select the audio volume (0~15), the channel and the
function mode on or off with this button.
Function Button (“F”): Press and release to select function mode.
Monitor Button (“M”): Press and release the “M” button to briefly monitor the
channel currently in use. By pressing and holding the “M” button for 2 seconds, you will
hear a beep. The monitor function will be enabled until you press and release the “M”
button again. A static noise will be heard if a signal in not being received. This function
can be used as a reference for setting the volume level. This function is also used for
monitoring the channel when using CTCSS.
Enter button (“E”): Press and release to enable your setting. (Volume, channel, etc.)
PTT (push to talk) button: Press and hold to transmit, release to receive.
Microphone: Talk in a normal voice 3 inches from the front of the radio.
External Audio/Microphone Jack: Used for optional accessories
www.midlandradio.com
Page 4 of 11
Owner’s Manual G-30 (GMRS)
OPERATION
1.On/Off power control
Press and hold the “PWR” button for 0.5 seconds to turn the radio on. Press and hold
the “PWR” button for 0.5 seconds to turn the radio off.
2.Adjusting the Volume
Press and release the up or down button to increase or decrease the volume (00 ~ 15).
Pressing and holding the up or down button changes this setting rapidly. Press the “E”
(enter) button to enable your selection.
If “E” (enter) button is not pressed the volume will go back to the previous
setting.
3. Transmit
Press and hold the “PTT” button and talk into the front of the radio about 3 inches from
the radio. The “PWR” button lights red when transmitting. Release the “PTT” button to
stop transmitting.
3. Receive
The “PWR” button lights green when receiving. In the case when you are using CTCSS
and receiving a signal that the CTCSS tone does not match your radio the “PWR”
button blinks green.
4. Monitor
Press the “M” button to monitor for less than 2 seconds. Pressing and holding the
monitor button for longer than 2 seconds keeps the monitoring function on. Press and
release the monitor button to deactivate the monitor function.
FUNCTION MODE
1. Channel select
Press and release the function button once, the channel numbers on the
right of the LCD blinks. Select the desired channel by pressing and
releasing the up or down button. Press and release the “E” button to
enable your selection or press and release the function button to go the
next function.
www.midlandradio.com
Page 5 of 11
Owner’s Manual G-30 (GMRS)
2. CTCSS selection
Press and release the function button twice. The numbers or dashes on
the left of the display will blink depending on previous setting. Press and
release the up or down button to select the desired CTCSS tone 1-38
desired. Press and release the “E” button to enable your selection or
press and release the “F” button to go the next mode.
The following is a list of frequencies of the CTCSS codes. Different
brands of radios may use a different number code for the frequencies. For
operation with other brands of radios the selected CTCSS frequency must
match.
01=67.0 Hz
11=97.4 Hz
21=136.5 Hz 31=192.8 Hz
02=71.9 Hz
12=100.0 Hz 22=141.3 Hz 32=203.5 Hz
03=74.4 Hz
13=103.5 Hz 23=146.2 Hz 33=210.7 Hz
04=77.0 Hz
14=107.2 Hz 24=151.4 Hz 34=218.1 Hz
05=79.7 Hz
15=110.9 Hz 25=156.7 Hz 35=225.7 Hz
06=82.5 Hz
16=114.8 Hz 26=162.2 Hz 36=233.6 Hz
07=85.4 Hz
17=118.8 Hz 27=167.9 Hz 37=241.8 Hz
08=88.5 Hz
18=123.0 Hz 28=173.8 Hz 38=250.3 Hz
09=91.5 Hz
19=127.3 Hz 29=179.9 Hz 00=OFF
10=94.8 Hz
20=131.8 Hz 30=186.2 Hz
3. Scan
Press and release the function button three times the display will blink.
Press the up button to scan up or press the down button to scan down.
The transceiver stops scanning after detecting a signal and remains on
the channel until the signal drops for 2 seconds. If when the scanning
stops on a channel you do not want to listen to press and release the up
or down button to continue scanning. If the channel is still busy when the
channel is scanned again you will need to press the up or down button
again if you do not want to listen to that channel. Press the “E” button to
stop scanning.
4. Priority Channel Scan
Press and release the “F” button four times. The display will blink ON or - depending on previous setting. Press the up or down button to select
“ON”. Press and release the “E” button or press and release the “F”
button to proceed with the next setting.
www.midlandradio.com
Page 6 of 11
Owner’s Manual G-30 (GMRS)
Continuing from previous step, the channel number will flash. This is your
priority channel. Press and release the up or down button to select your
priority channel. This channel will be checked for activity while you are using
another channel. When traffic is heard on the priority channel, the channel
number on the display will flash and you will hear the priority channel signal.
Setting Priority Channel
5. Button lock
Press and release the "F" button five or six times depending on previous
settings. The ON or - - will be flashing depending on previous setting. Press
and release the up or down button to switch button lock on or off. Lock on =
ON Lock off = - -. This function prevents you from changing the channel by
unintended pressing of the up or down button. The "PTT" button is the only
button active.
6. Key Beep Tone
Press and release the “F” button (usually 7 times) or until you see on the
display bP followed by “ON” or “- -“ flashing. Press and release the UP or
Down buttons to select the mode desired. On is key beep on and - - is key
beep off. Press and release the “E” button to enable your selection.
7. Power Save
Power save is a function of the radio that allows the radio to shut down
circuits for a set time to conserve battery power. This is commonly called
sleep mode. The setting of 00 is Power Save off. A setting of 01 is a normal
Power Save setting. You may choose a Power Save setting of 02 if the use of
the radio will include long periods of no activity. If 02 is set and you
experience the problem of missing calls you may need to set the Power Save
back to 01.
To set Power Save on, press and release the “F” button (usually 4 times). P
followed by `00`, `01`, `02` depending on previous programming. Press and
release up or down button to select the desired Power Save setting. Press
and release the “E” button to enable your selection.
www.midlandradio.com
Page 7 of 11
Owner’s Manual G-30 (GMRS)
8. Channel Spacing
The radio has the ability to change the modulation characteristics for channel
spacing of 12.5KHz (narrow) or 25KHz.(wide). This setting is for all the
channels in the radio.
If you are communicating in the FRS radio channels 1-7 you must set the
radio to 12.5KHz.
To set the Channel Spacing, press and release the “F” button until you see
on the display bd followed by a 12 or 25 depending on previous
programming. Press and release the up or down buttons to switch between
12 or 25 as desired. Press and release the “E” button to enable your
selection.
RECHARGING THE BATTERY
The battery is in need of charging when the power button is blinking red or the
display shows oFF. The battery condition can be monitored by the dots in the
upper left of the display. When the battery is fully charged you will see 4 dots.
As the battery becomes discharged less dots will show on the display. To
charge the battery, follow the instructions below.
Connect the AC adapter to the charger. Plug the adapter into a
120VAC~60Hz.outlet Turn the radio off and place the radio into the front pod
of the charger. The left LED turns on indicating the radio battery is charging.
When the radios battery charging is complete the LED turns off. You can
charge the radio and a spare battery at the same time. In this case, place the
radio in the front pod of the charger and the spare battery in the rear pod of
the charger. Both LED’s will come on. When the batteries are charged the
LED will turn off. The radio battery will always charge first
www.midlandradio.com
Page 8 of 11
Owner’s Manual G-30 (GMRS)
TROUBLESHOOTING
PROBLEM
No Power
Cannot Receive
Messages
Range is Short
Interference/Stati
c
Radio is not
responding to
button presses
Charger not
functioning
SOLUTION
1. Check battery installation and/or replace
batteries
1. Make sure the volume is set high enough.
2. Confirm the radios have the same channel and
or CTCSS code settings.
3. Change your location, you may be out of range.
4. Install batteries properly or replace.
5. Buildings, obstructions, operating indoors or in
vehicles may interfere with communication.
Change your location.
6. Make sure the radio is not transmitting.
7. Accessories not set properly.
1. Operating the radio from a vehicle or from a
metal building will decrease the range. If possible
operate outside of vehicles or buildings.
2. Carrying the radio so that the antenna is very
near the body will decrease the range. Hold the
radio in the open for the best range.
1. Using the CTCSS should stop you from hearing
interference from other users and computers.
2. Radios too close. Radios must be at least 5 feet
apart.
3. Radios too far apart. Obstacles interfere with
transmissions. Talk range is up to 4 miles in
unobstructed, clear areas.
1. Make sure key lock is not on. See Button Lock.
2. Make sure radio is not transmitting.
3. Ensure accessory microphone is set properly.
1. Charger pin is not properly in place. If using the
drop-in charger, check the contacts on the
bottom of the radio they may require cleaning.
If all is correct allow the batteries to charge
for the specified time.
2. Ensure the outlet the charger is plugged into is
functioning properly.
3. Check that the battery pack is installed in the
radio properly.
4. Remove battery pack from the radio and try to
charge separately.
www.midlandradio.com
Page 9 of 11
Owner’s Manual G-30 (GMRS)
SPECIFICATIONS
Dimension
(HxWxD)
Weight (With
Battery)
Operating Voltage
Operating Temp.
Battery Life
(5:5:90)
650mAH Battery
Channels
Privacy Codes
Band Width
Frequency Range
FM Hum & Noise
G30
115x53x28mm (650 mAH
Battery)
138g (215g)
DC 7.5V
-20 ~ 60ºC
8 hrs
15
38 CTCSS
25KHz / 12.5KHz
T 462 / 467MHz
x
R 462 / 467MHz
x
T -40 dB
x
R -40 dB
x
-119 dBm (0.25uV)*
-60 dB*
Rx Sensitivity
Rx Spurious
Response
Rx Selectivity
-60 dB*
Rx Intermodulation
-60 dB*
Tx Power
2W
Tx Spurious
-60 dBc
Rejection
Frequency stability
±5 ppm
* based on 25KHz channel spacing.
Standard items supplied
Desk Rapid & Trickle Charger
With 120VAC Adapter
650 mAH Ni-MH Battery
20-001
1.5 hrs / Rapid charging
20-555
CHANNEL FREQUENCIES in MHz.
01=462.562
5
02=462.587
5
03=462.612
5
04=462.637
5
05=462.662
5
06=462.687
5
07=462.712
5
08=462.575
09=462.625
13=462.650
10=462.675
*
11=462.550
14=462.700
15=462.725
12=462.600
* GMRS emergency channel 462.675MHz.
www.midlandradio.com
Page 10 of 11
Owner’s Manual G-30 (GMRS)
SERVICE:
If you have a problem, which you believe requires service, please call first and speak with a service technician. Many
problems can be remedied over the phone without returning the unit for service.
If it ever becomes necessary to return your unit for service:
1.
2.
3.
4.
5.
6.
7.
8.
Pack the unit in its original box and packing.
Pack the original box in a suitable shipping carton. Improper packing will result in damage during shipment.
Include a photocopy of the bill of sale showing the date of purchase.
Include a brief description of the problem you are having.
Include a DAYTIME telephone number.
Include a money order or Visa or Master Card credit card number for $7.50 to cover shipping and handling. No
personal checks please.
You do not need to return accessory unless they maybe directly related to the problem.
This information must be included before Warranty Service can be considered. Failure to include these items will
delay the repair of the radio until these items are received.
LIMITED WARRANTY
Midland Consumer Radio Inc. will repair or replace, at its option without charge, any Midland GMRS transceiver, which
fails due to a defect in material or workmanship within ONE YEAR following the initial consumer purchase.
This warranty does not include any carrying cases, earphones, or antennas, which may be a part of or included with the
warranted product. Performance of any obligation under this warranty may be obtained by returning the warranted
product, freight prepaid, along with proof of purchase date, to Midland Consumer Radio Inc., Warranty Service
Department, 1120 Clay Street North Kansas City, MO 64116. Warranty information may be obtained by writing Midland
Consumer Radio, Warranty Service Department at the above address.
This warranty gives you specific legal rights, and you may also have other rights, which vary, from state to state.
Note: The above warranty applies only to merchandise purchased in the United States of America or any of the territories
or possessions thereof, or from a U.S. Military exchange.
MIDLAND RADIO CORPORATION
1120 Clay Street
North Kansas City, MO 64116
Phone 816-241-8500. Fax 816-241-5713
E-mail: [email protected]
Or visit us at www.midlandradio.com
www.midlandradio.com
Page 11 of 11